Dewnmoutain
-
Posts
95 -
Joined
-
Last visited
Content Type
Profiles
Forums
Articles
Gallery
Downloads
Events
Everything posted by Dewnmoutain
-
That....thats a really good idea.
-
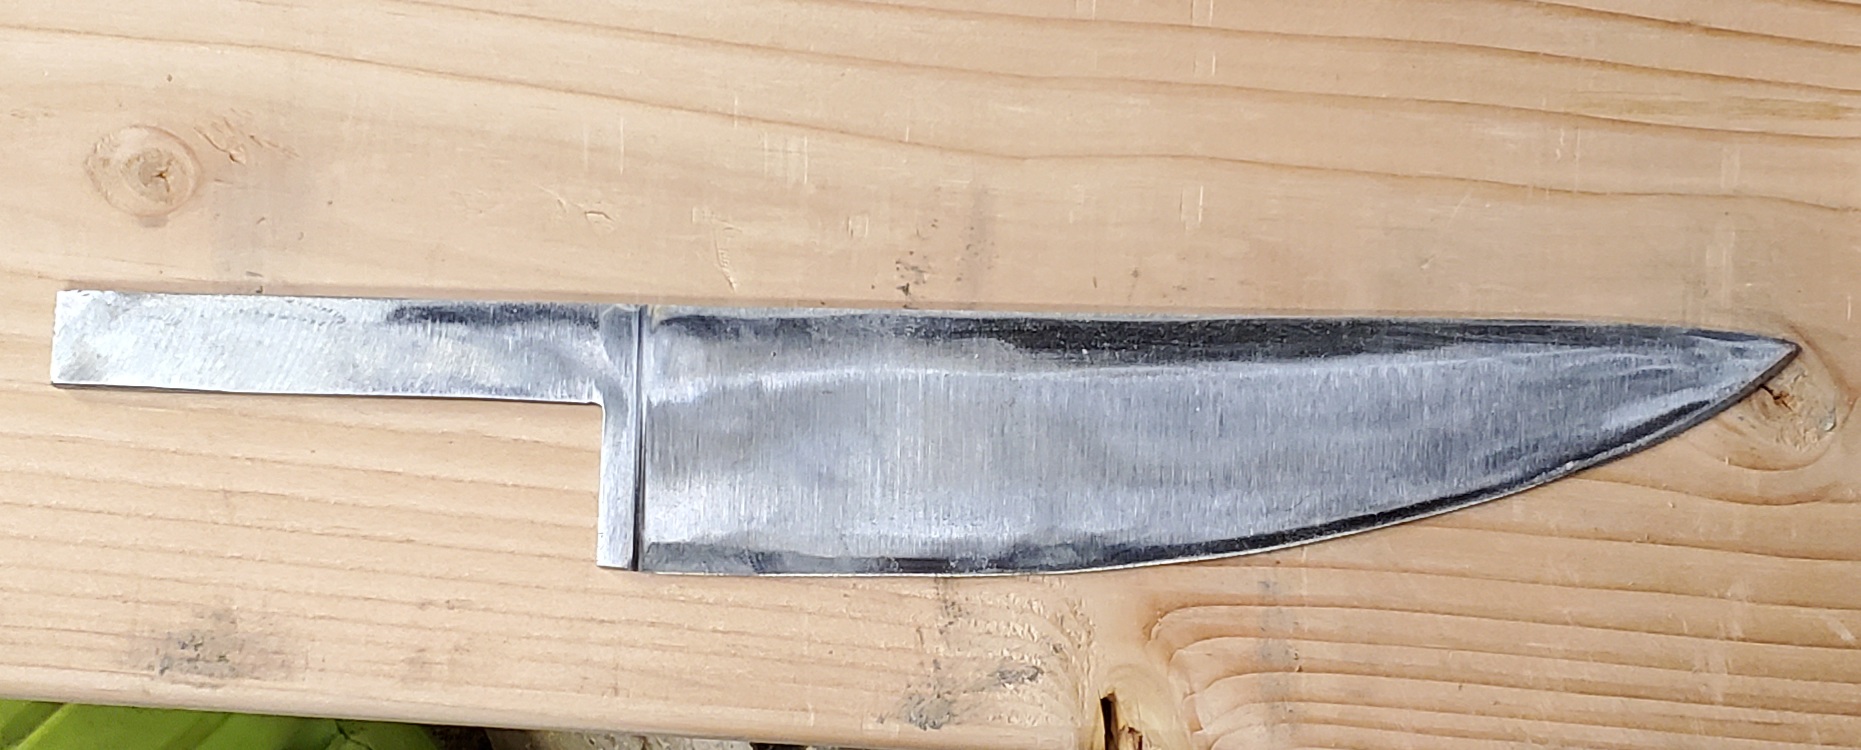
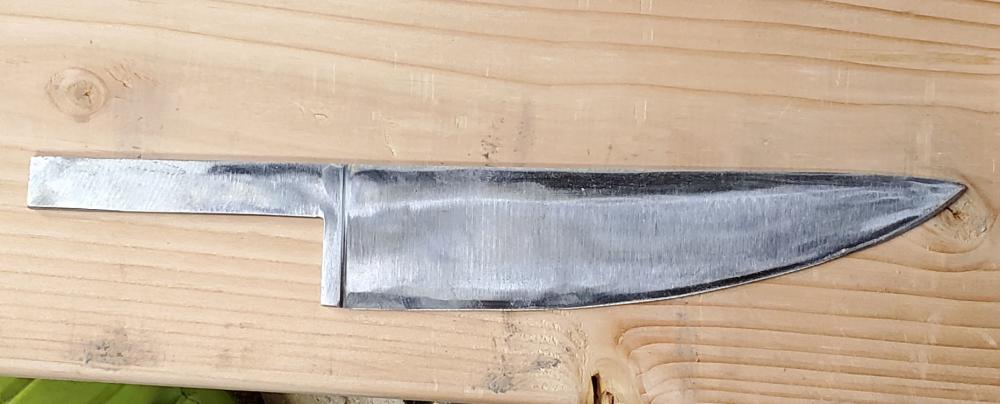
Making a 9" chefs knife. Things are going well. Forged to shape, heat treated, thinned down slightly and bevels ground in. Now im working on attaching the handle, and im second guessing myself here. Ive made knives before, big, small, in between. Full tang, hidden tang, even did a couple burn ins just to see what happens. But for all of these handles, i always drilled and set pins in them. Because in the back of my head, somewhere i read or something like that, that having pins helps reinforce the handle for a thrusting motion. Helps keep the handle on the tang. But now im making this chef's knife,and decided that i didnt want to pin it. I would just do scales, epoxied on and sanded to shape. But today, im getting to the point where im about ready to glue it up, and in the back of my head, that little voice is screaming at me that i need pins in the handle. I know the epoxy im planning to use has some 5kpsi rating or whatever (id have to look at it again),and for a chefs knife, itll work. But that dang voice. I guess i just need someone to tell me "yup, itll work" or "nope cuz of X" or "yes, itll work, but you need to do this as well".
-
Canola oil smells better...
Dewnmoutain replied to Dewnmoutain's topic in Heat Treating, general discussion
Huh...yeah that makes sense -
Canola oil smells better...
Dewnmoutain replied to Dewnmoutain's topic in Heat Treating, general discussion
Im a semantics kind of guy. Especially if the reasoning for something isnt obvious to me or made clear. I ended up putting beeswax/linseed oil mix on the hook. I know the hook wont be outside, but i still wanted to coat it. Ill have to try the trick you mentioned. Never would have thought of it. Thanks! -
Canola oil smells better...
Dewnmoutain replied to Dewnmoutain's topic in Heat Treating, general discussion
But its a general observation, not specifically about heat treating... -
What did you do in the shop today?
Dewnmoutain replied to Mark Ling's topic in Blacksmithing, General Discussion
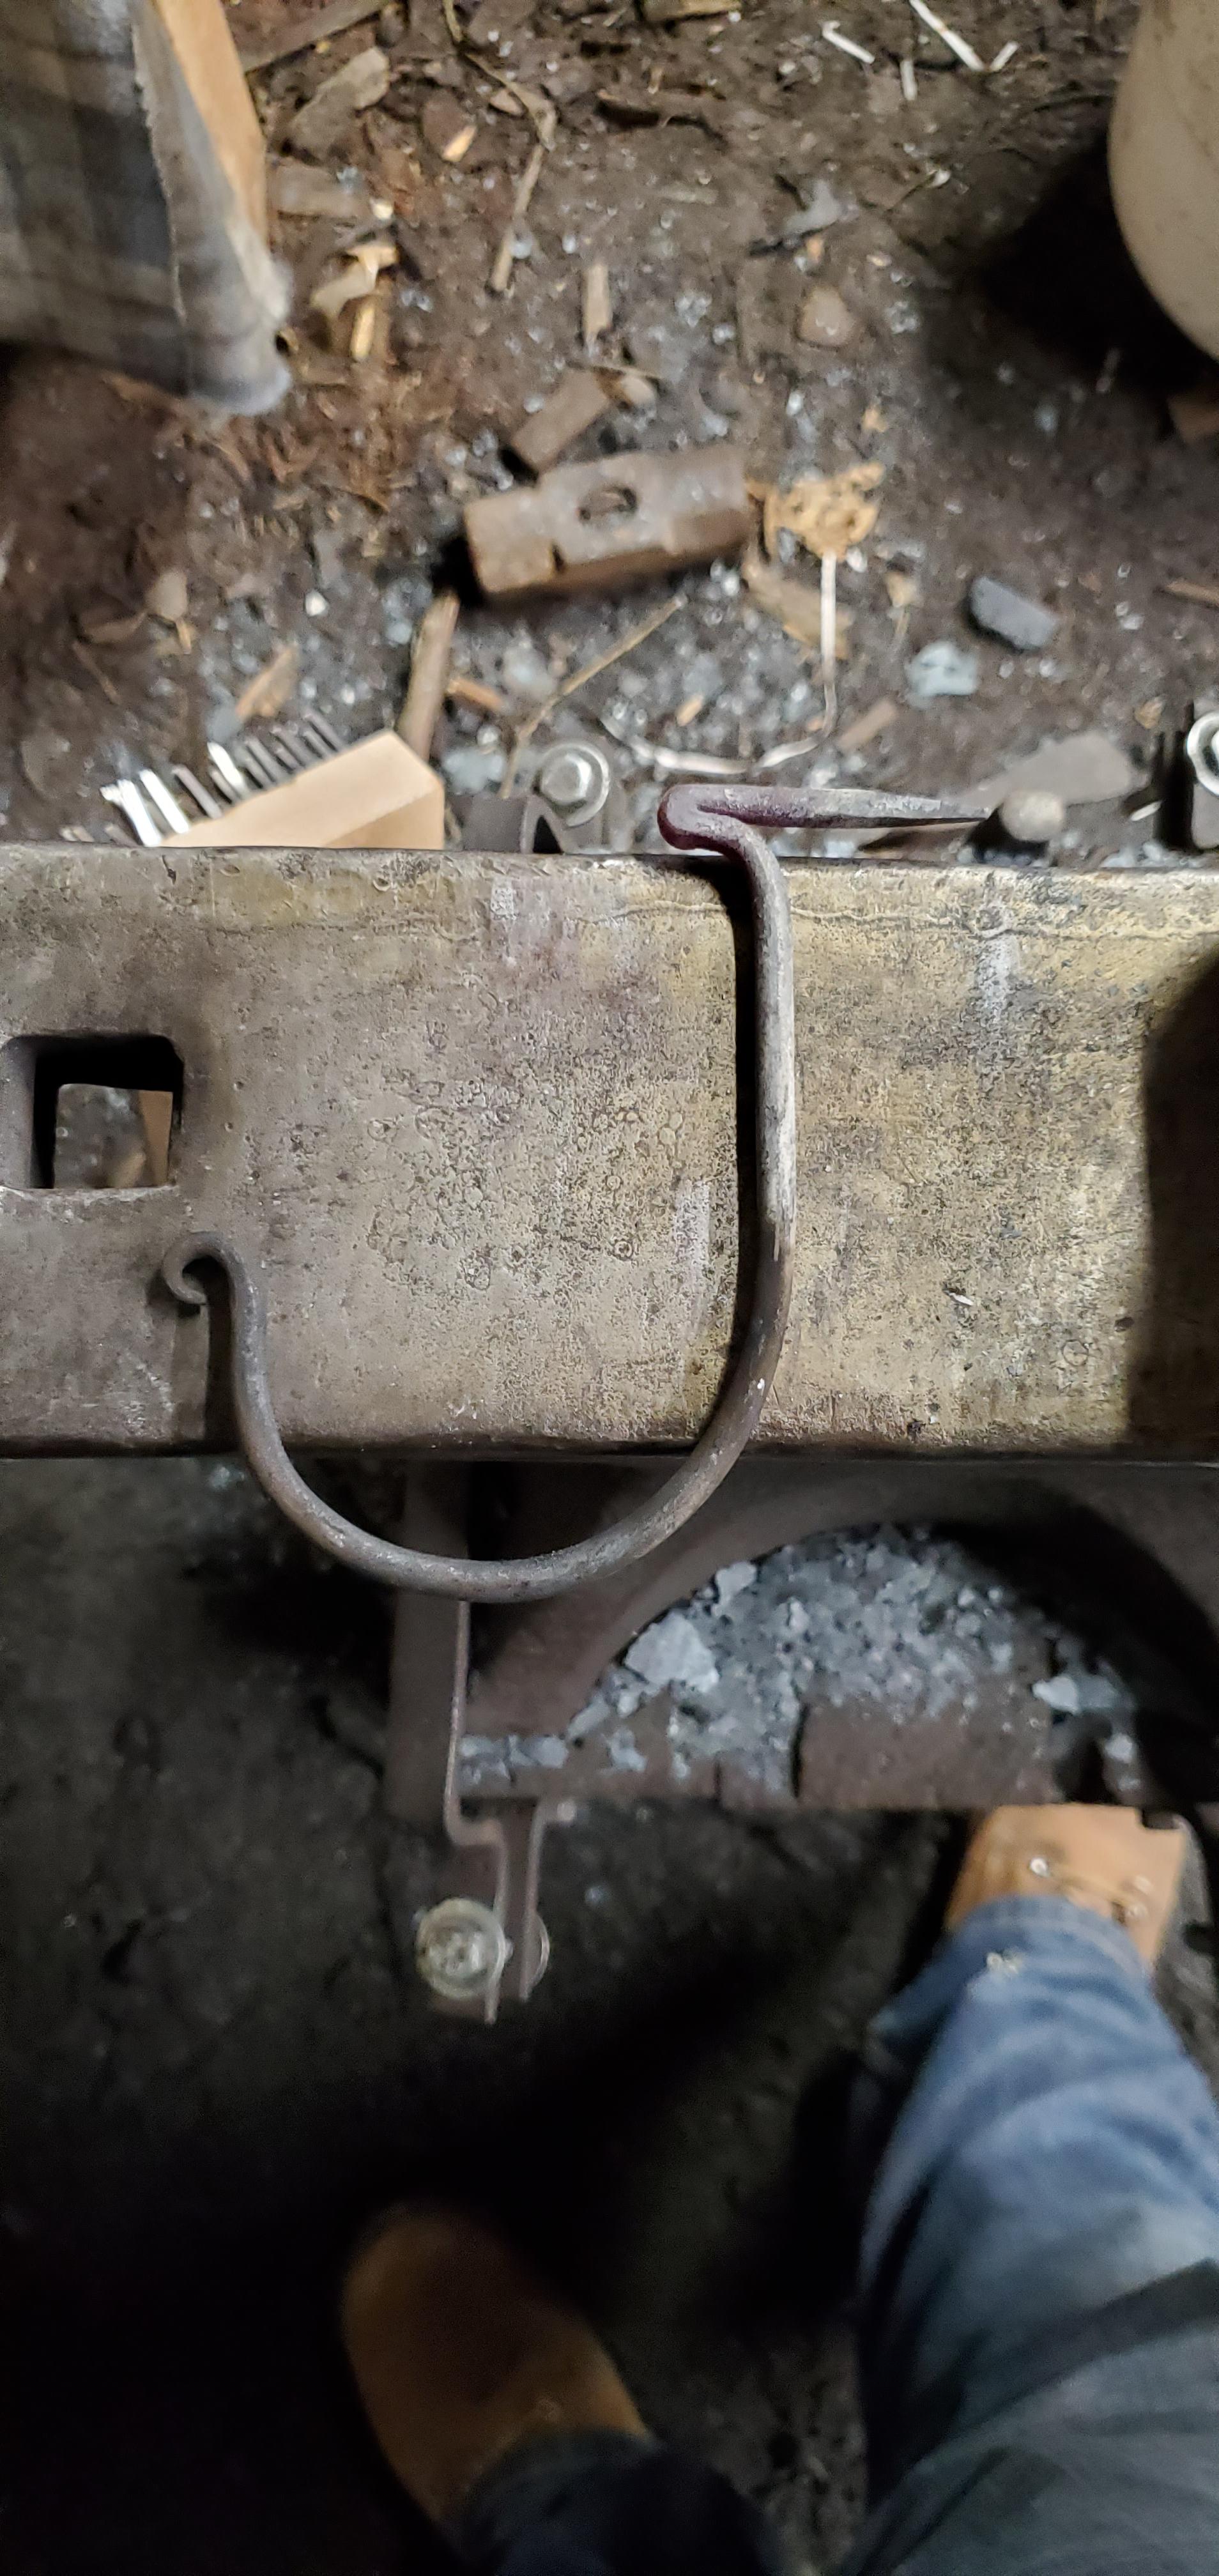
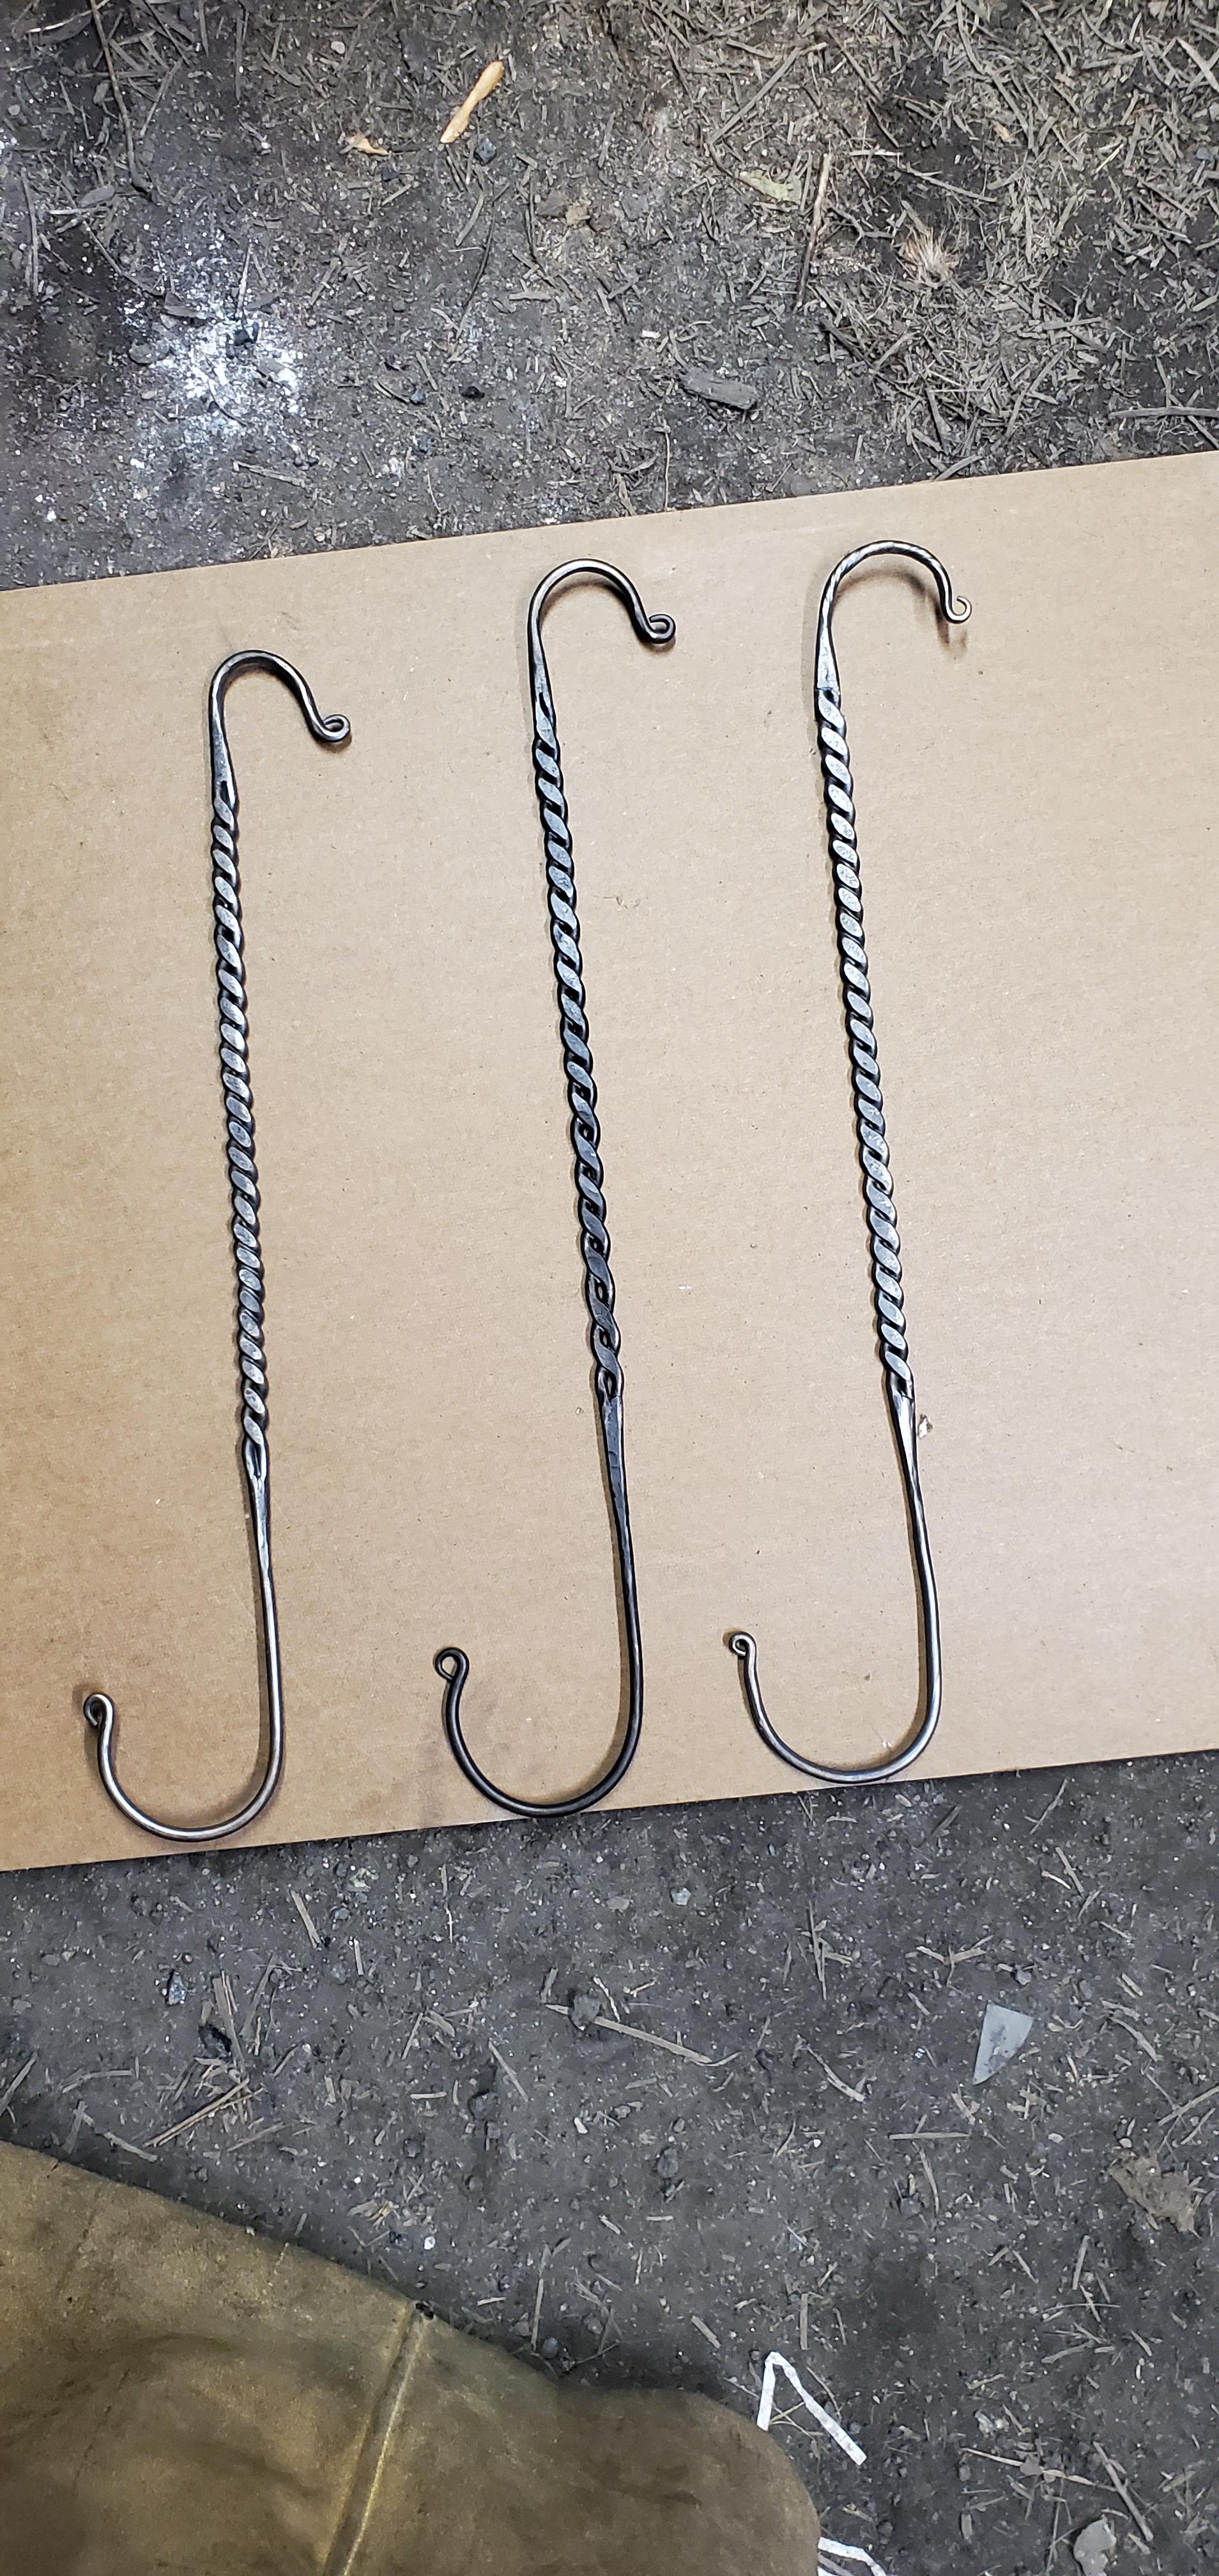
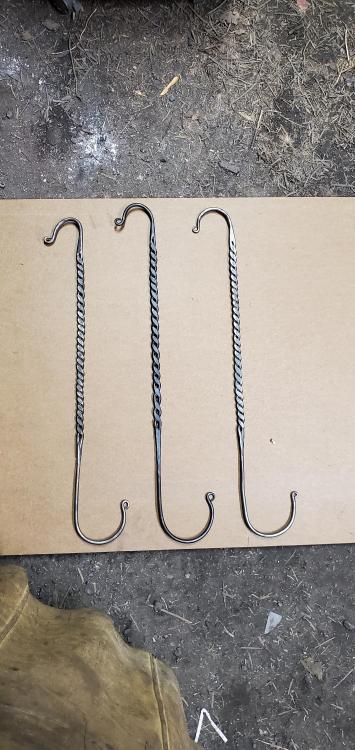
Made a J hook. Needed it so i could hang coiled electrical wire.
-
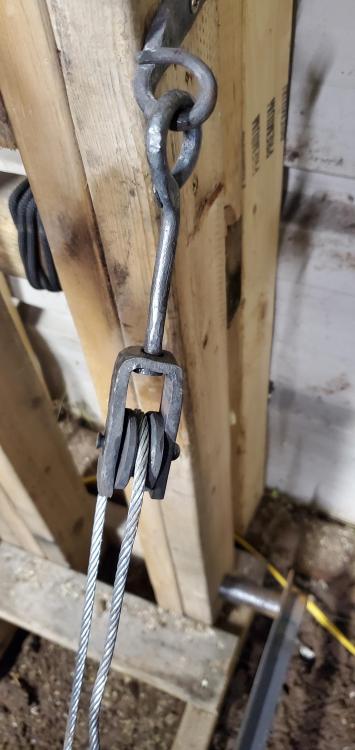
Finally got around to chabging from used motor oil as my quench oil to canola oil. First time i used it today. I have to admit, it smells a whole lot better than used motor oil. And i didnt feel like i had smoked 3 dozen packs of smokes in one breath. Oh, and i made a hook today as well! Since people are gonna think this: no, i didnt quench the hook in the oil. Im making a chefs knife and quenched the blade in the oil.

-
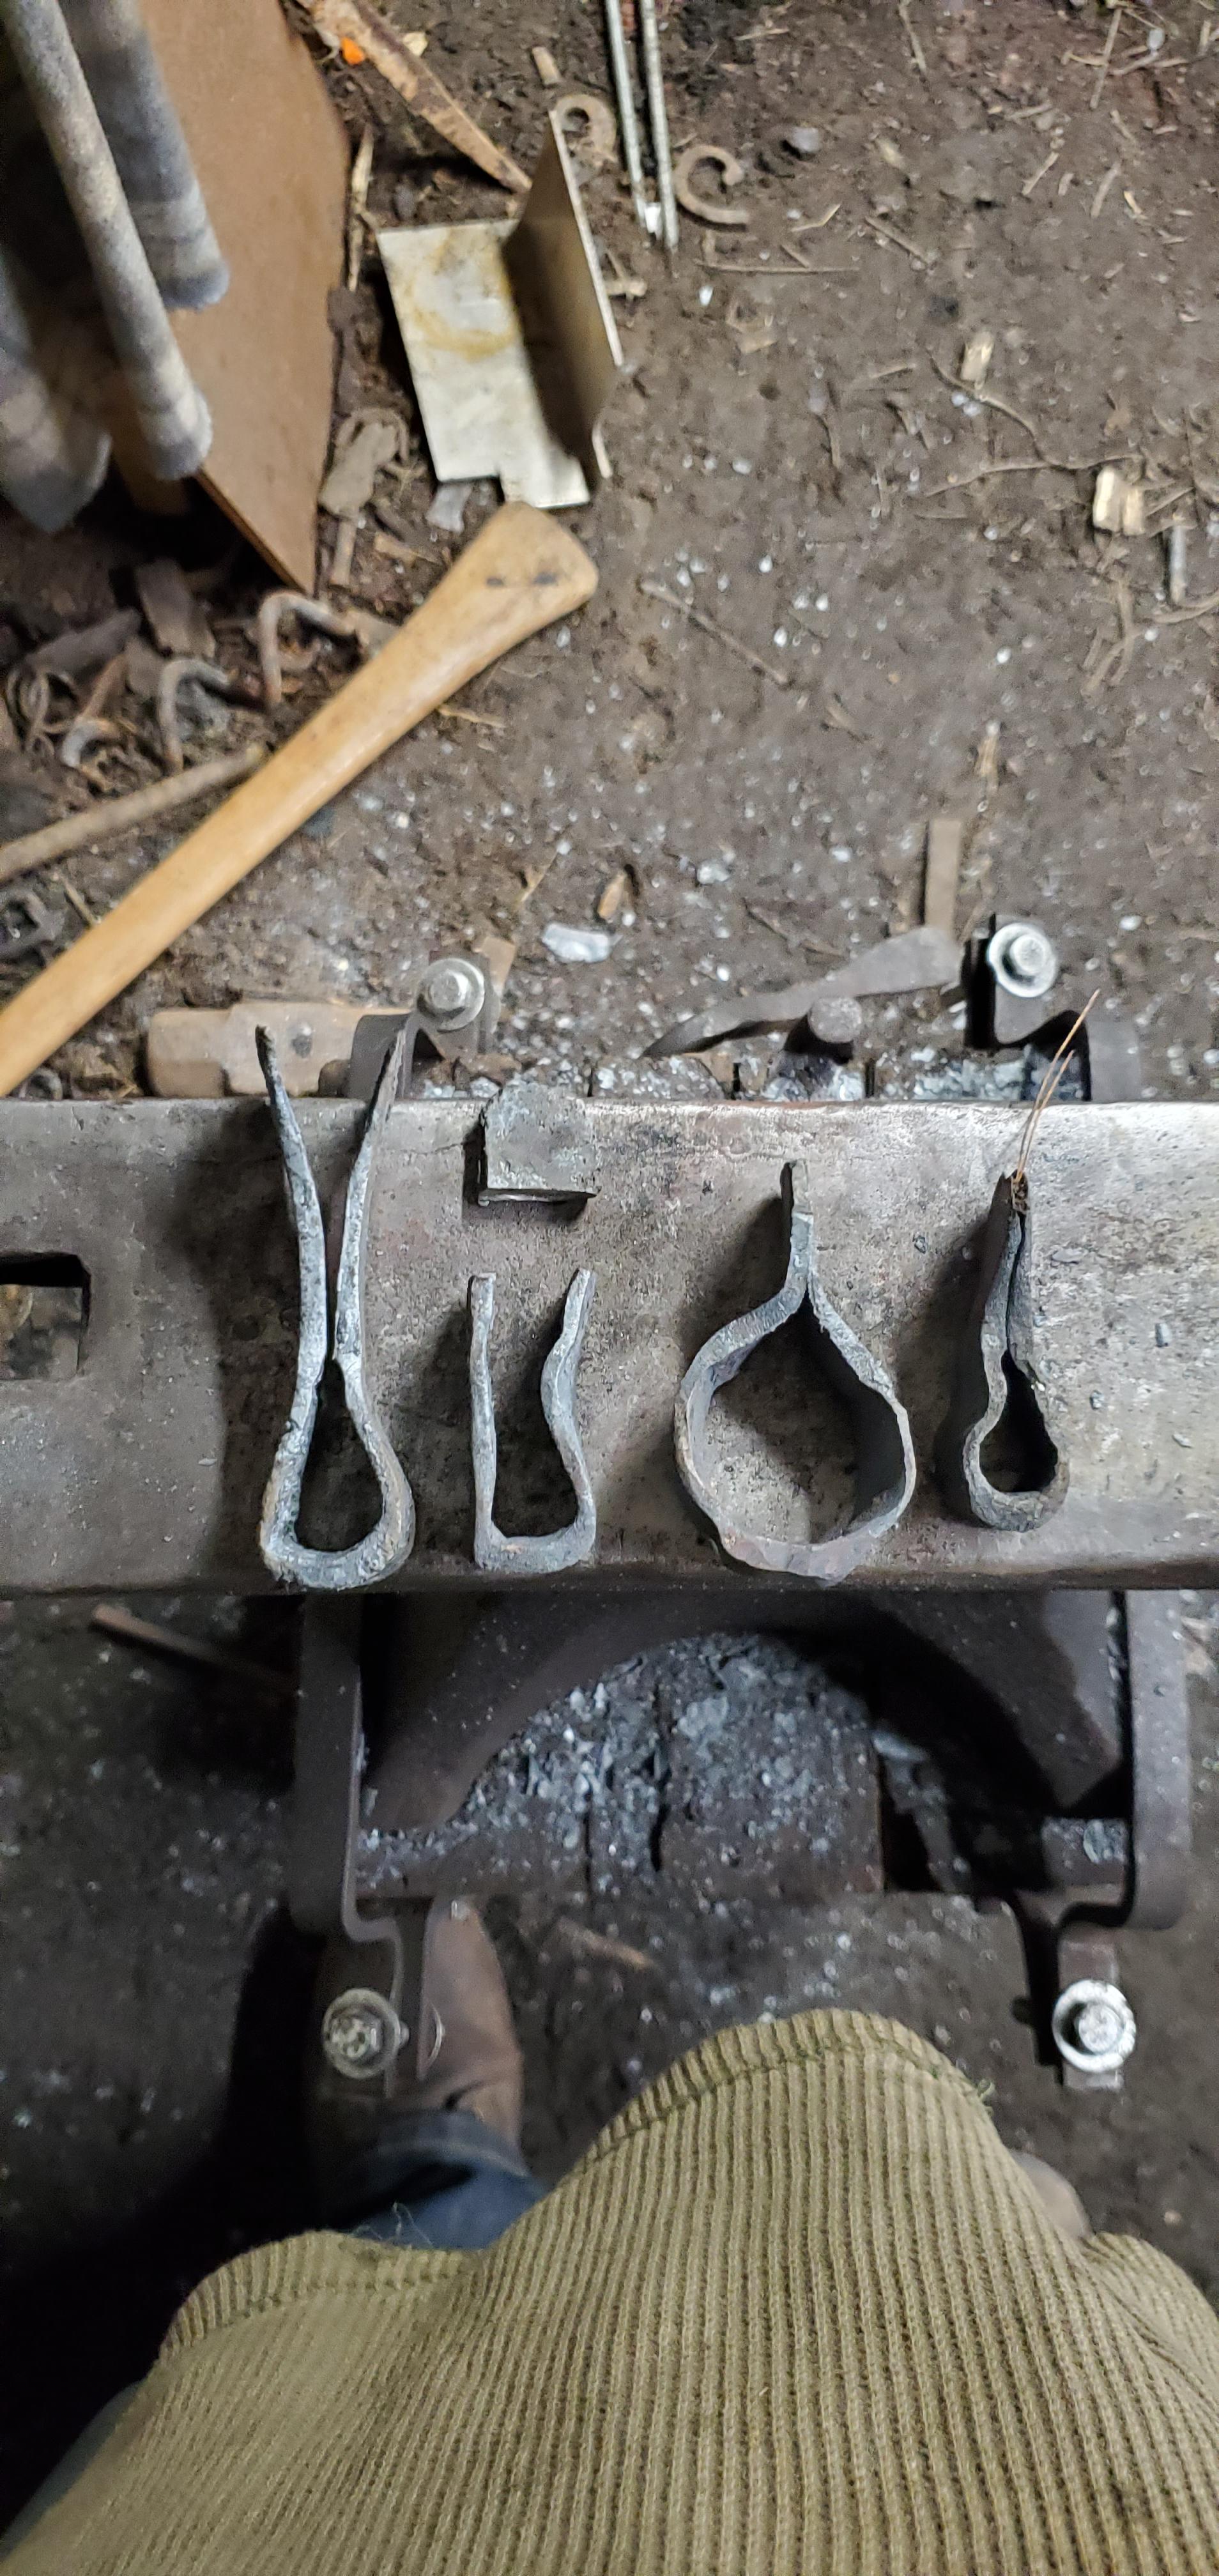
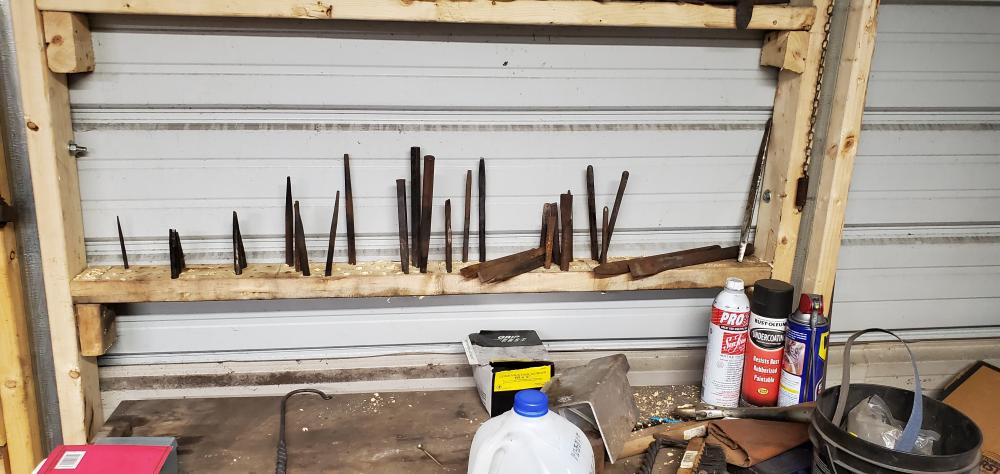
Doing some clean up in the shop, and im trying to organize my slits, drifts, punches, etc. I came up with the shelf unit in the picture, but i dont like it. I made another shelf like this when i built my shop and used it to store a couple chisels and punches that i had purchased, but in the end it ended up contibuting to rusty ends. I know this shelf will work for the time being, but im stumped on how to store these tools in my shop. So i was wondering how my fellow smiths organize their slitters, punches, drifts, chisels, etc?
-
What did you do in the shop today?
Dewnmoutain replied to Mark Ling's topic in Blacksmithing, General Discussion
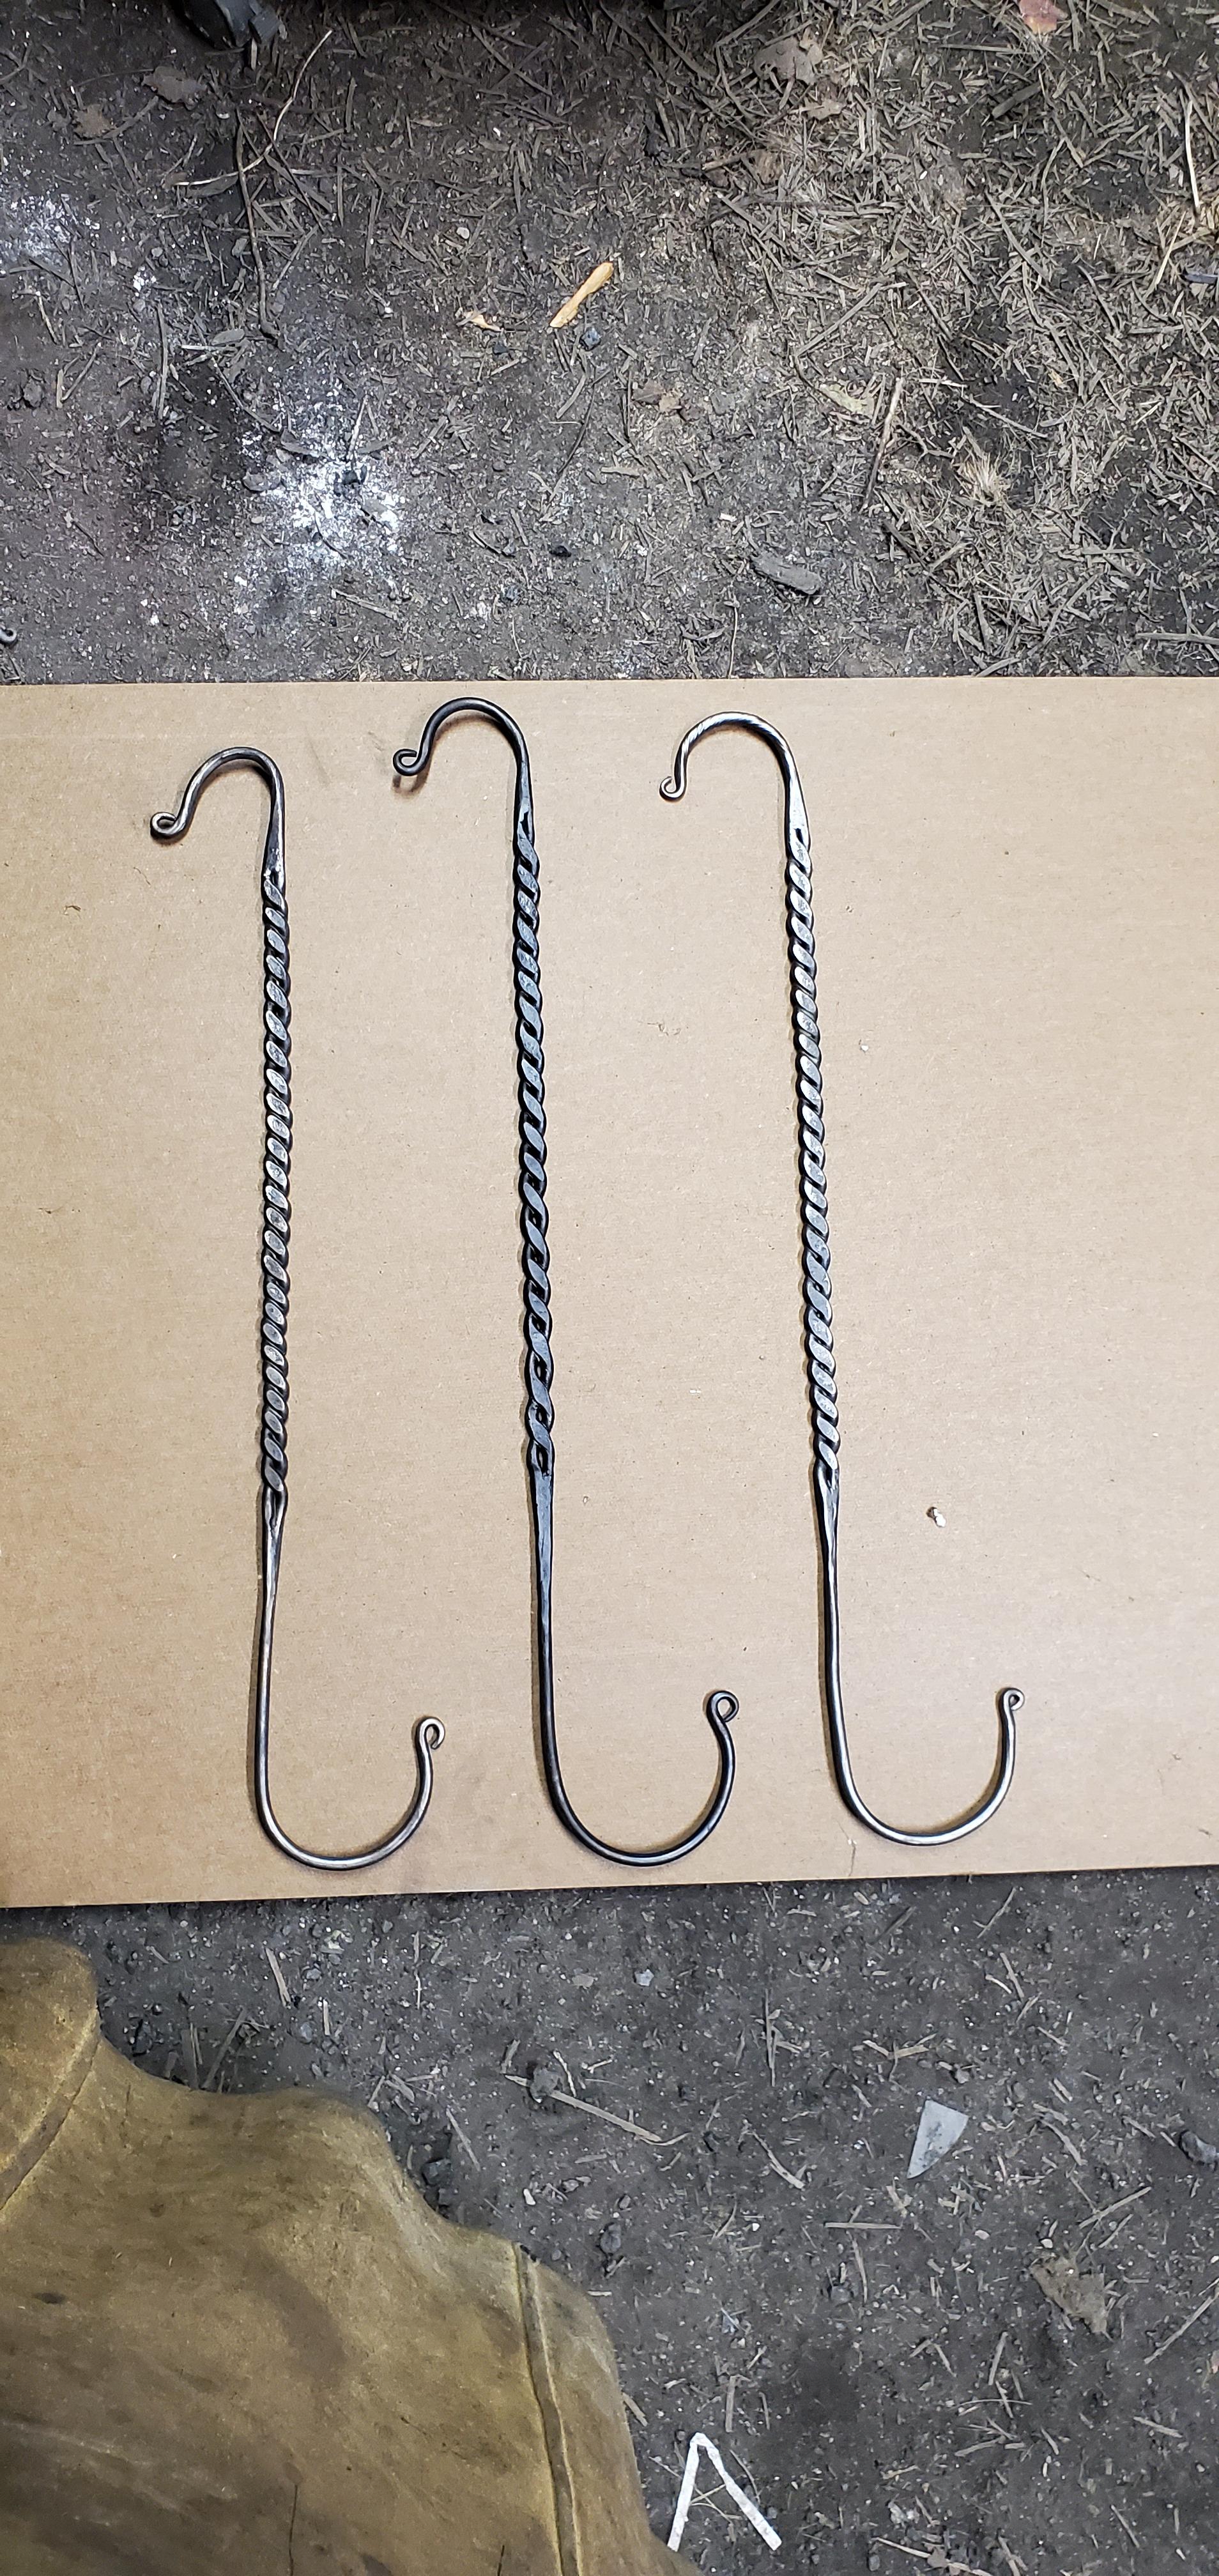
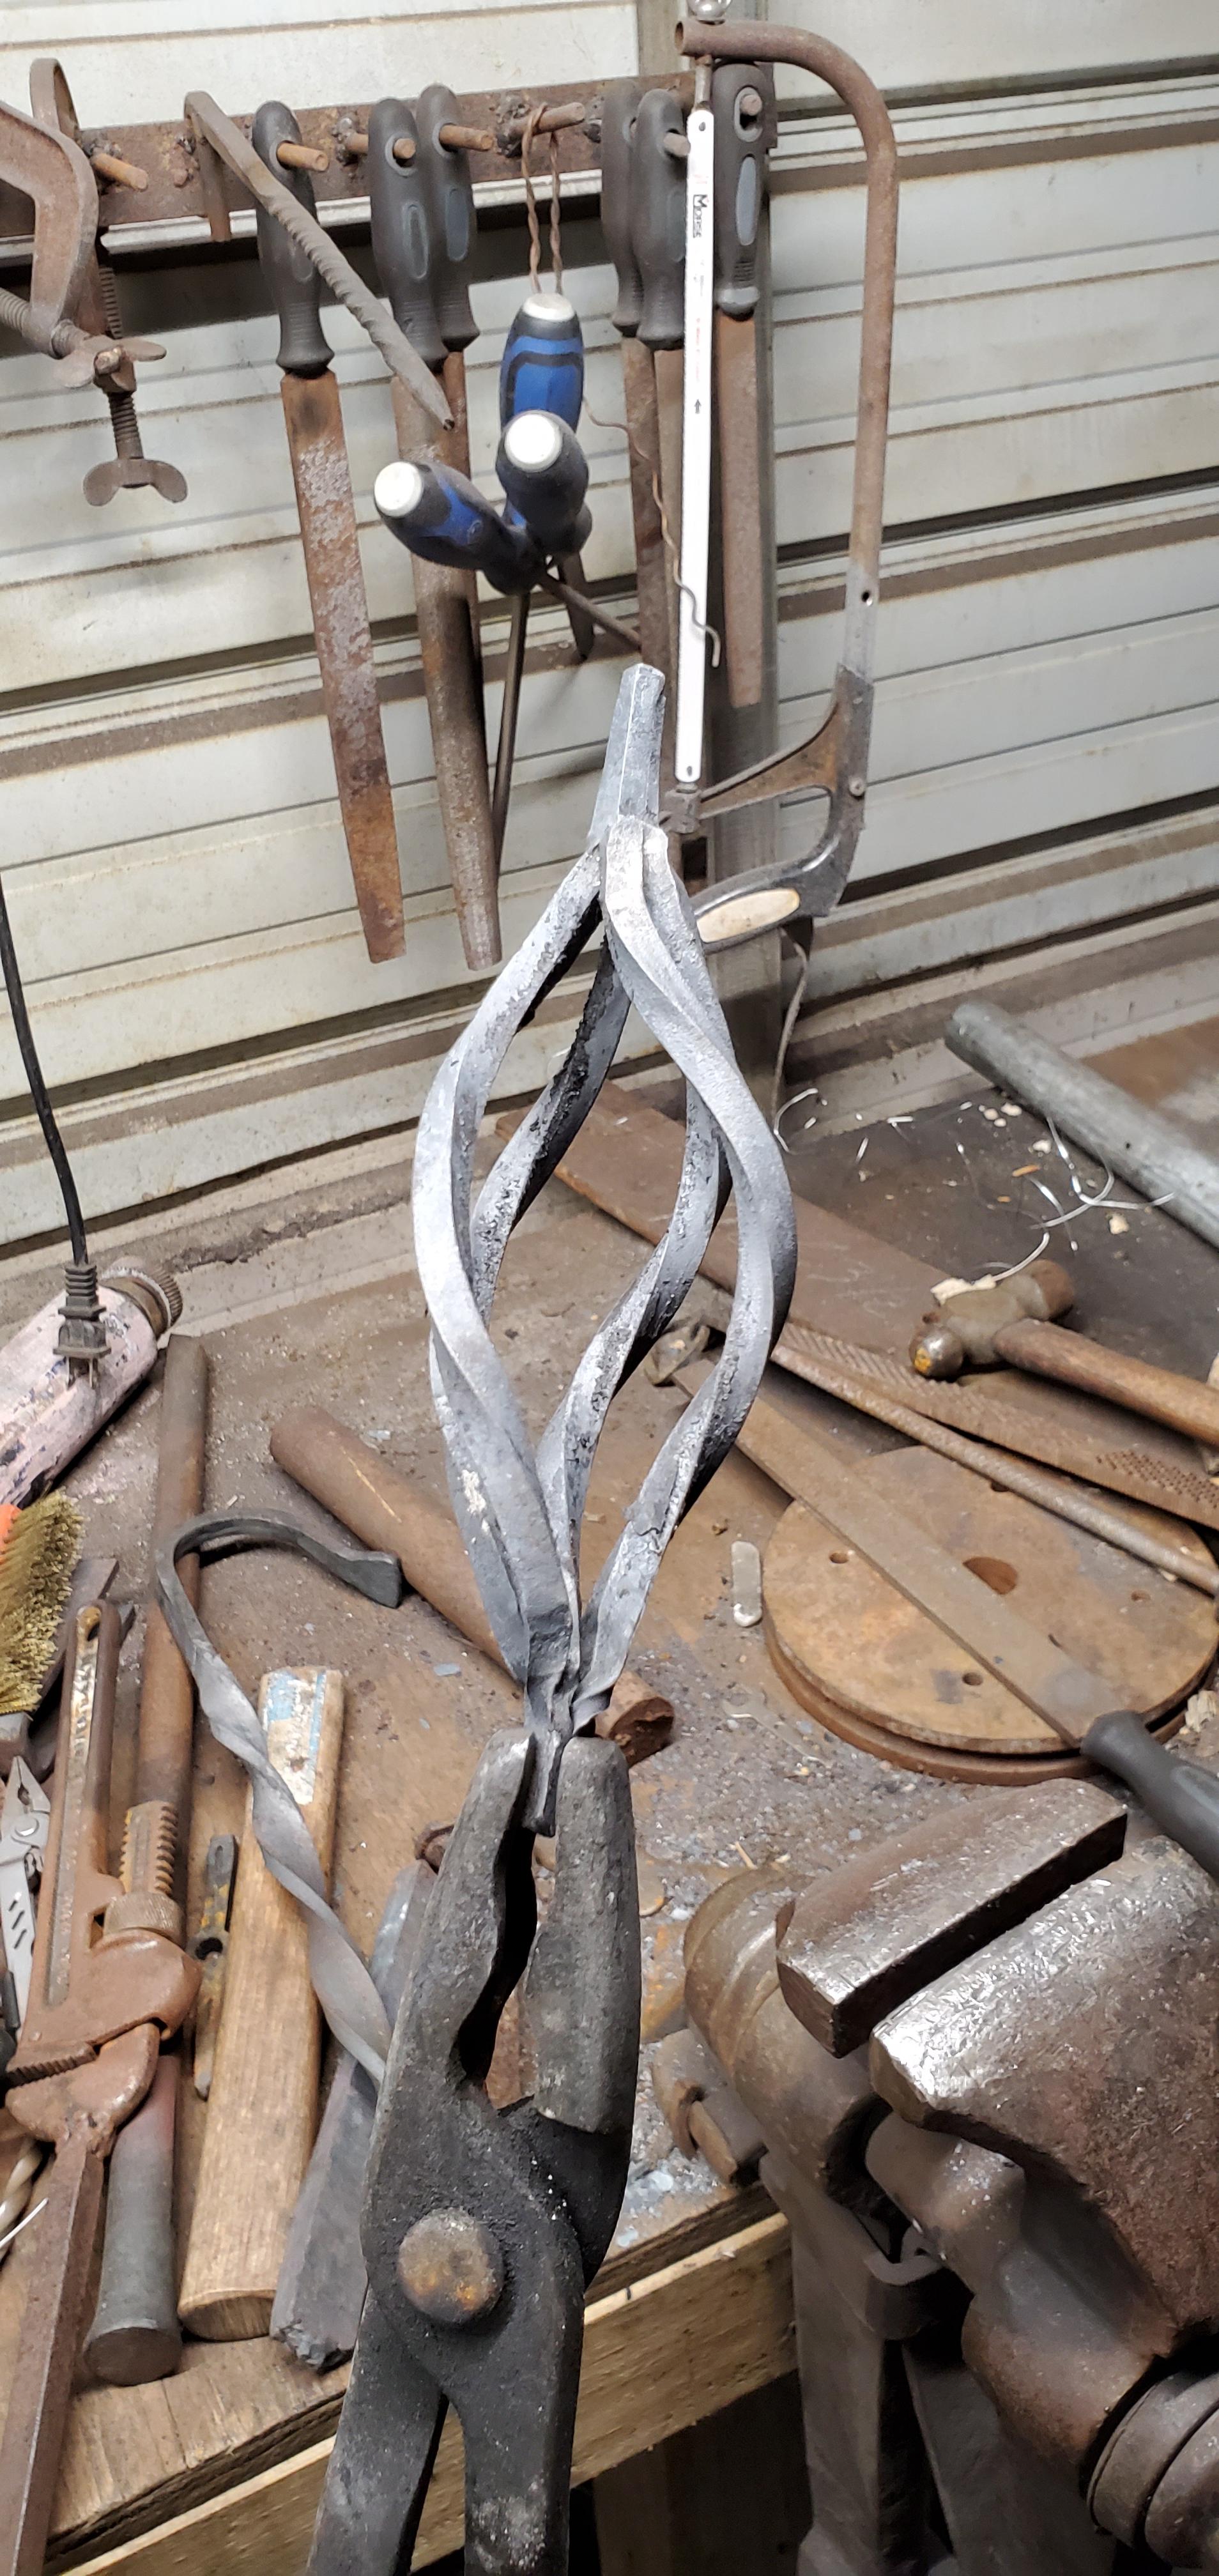
Christmas presents finished. 3 back scratchers. Wish i could have seen how the middle one was going to space apart before i hammered it flat so i could have done a tighter twist. But, it turned out well enough to leave my shop.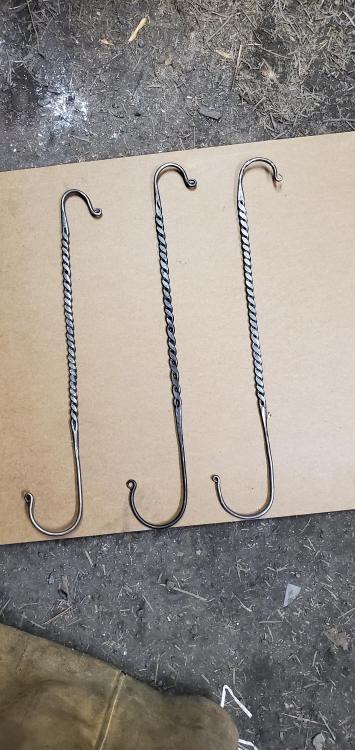
-
What did you do in the shop today?
Dewnmoutain replied to Mark Ling's topic in Blacksmithing, General Discussion
Prototyping backscratcher designs. Successfully forge welded the ends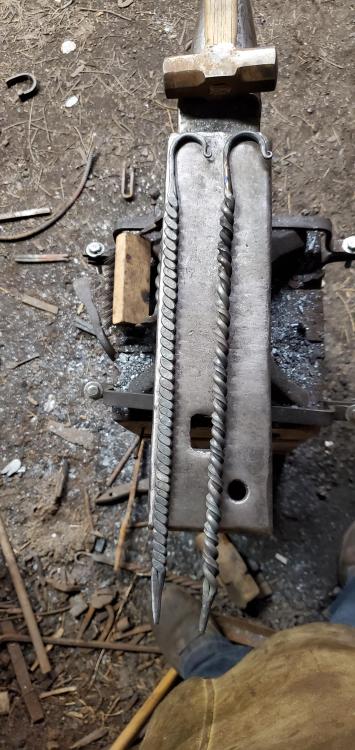
-
Not the usual forge welding question
Dewnmoutain replied to Dewnmoutain's topic in Blacksmithing, General Discussion
Getting better.
-
Not the usual forge welding question
Dewnmoutain replied to Dewnmoutain's topic in Blacksmithing, General Discussion
The thing that was missing for me to fully understand was that bit you talked about in your previous post, about working it down to remove the seam, and loosing height in your material because your having to mold the material. I watched asperys videos several times already, and always felt like there was something missing. Finally Frazers comment got me what i was missing. So tomorrow i should have some good welds completed. -
Not the usual forge welding question
Dewnmoutain replied to Dewnmoutain's topic in Blacksmithing, General Discussion
Ahhhhhhhhhhhhhhhh! I get it now. ...no. i was practicing just getting them to connect first. I probably shouldve been taking the extra minute to set up that scarf on the material -
Not the usual forge welding question
Dewnmoutain replied to Dewnmoutain's topic in Blacksmithing, General Discussion
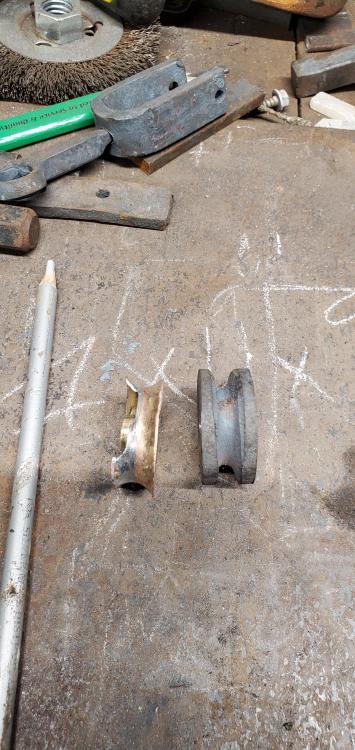
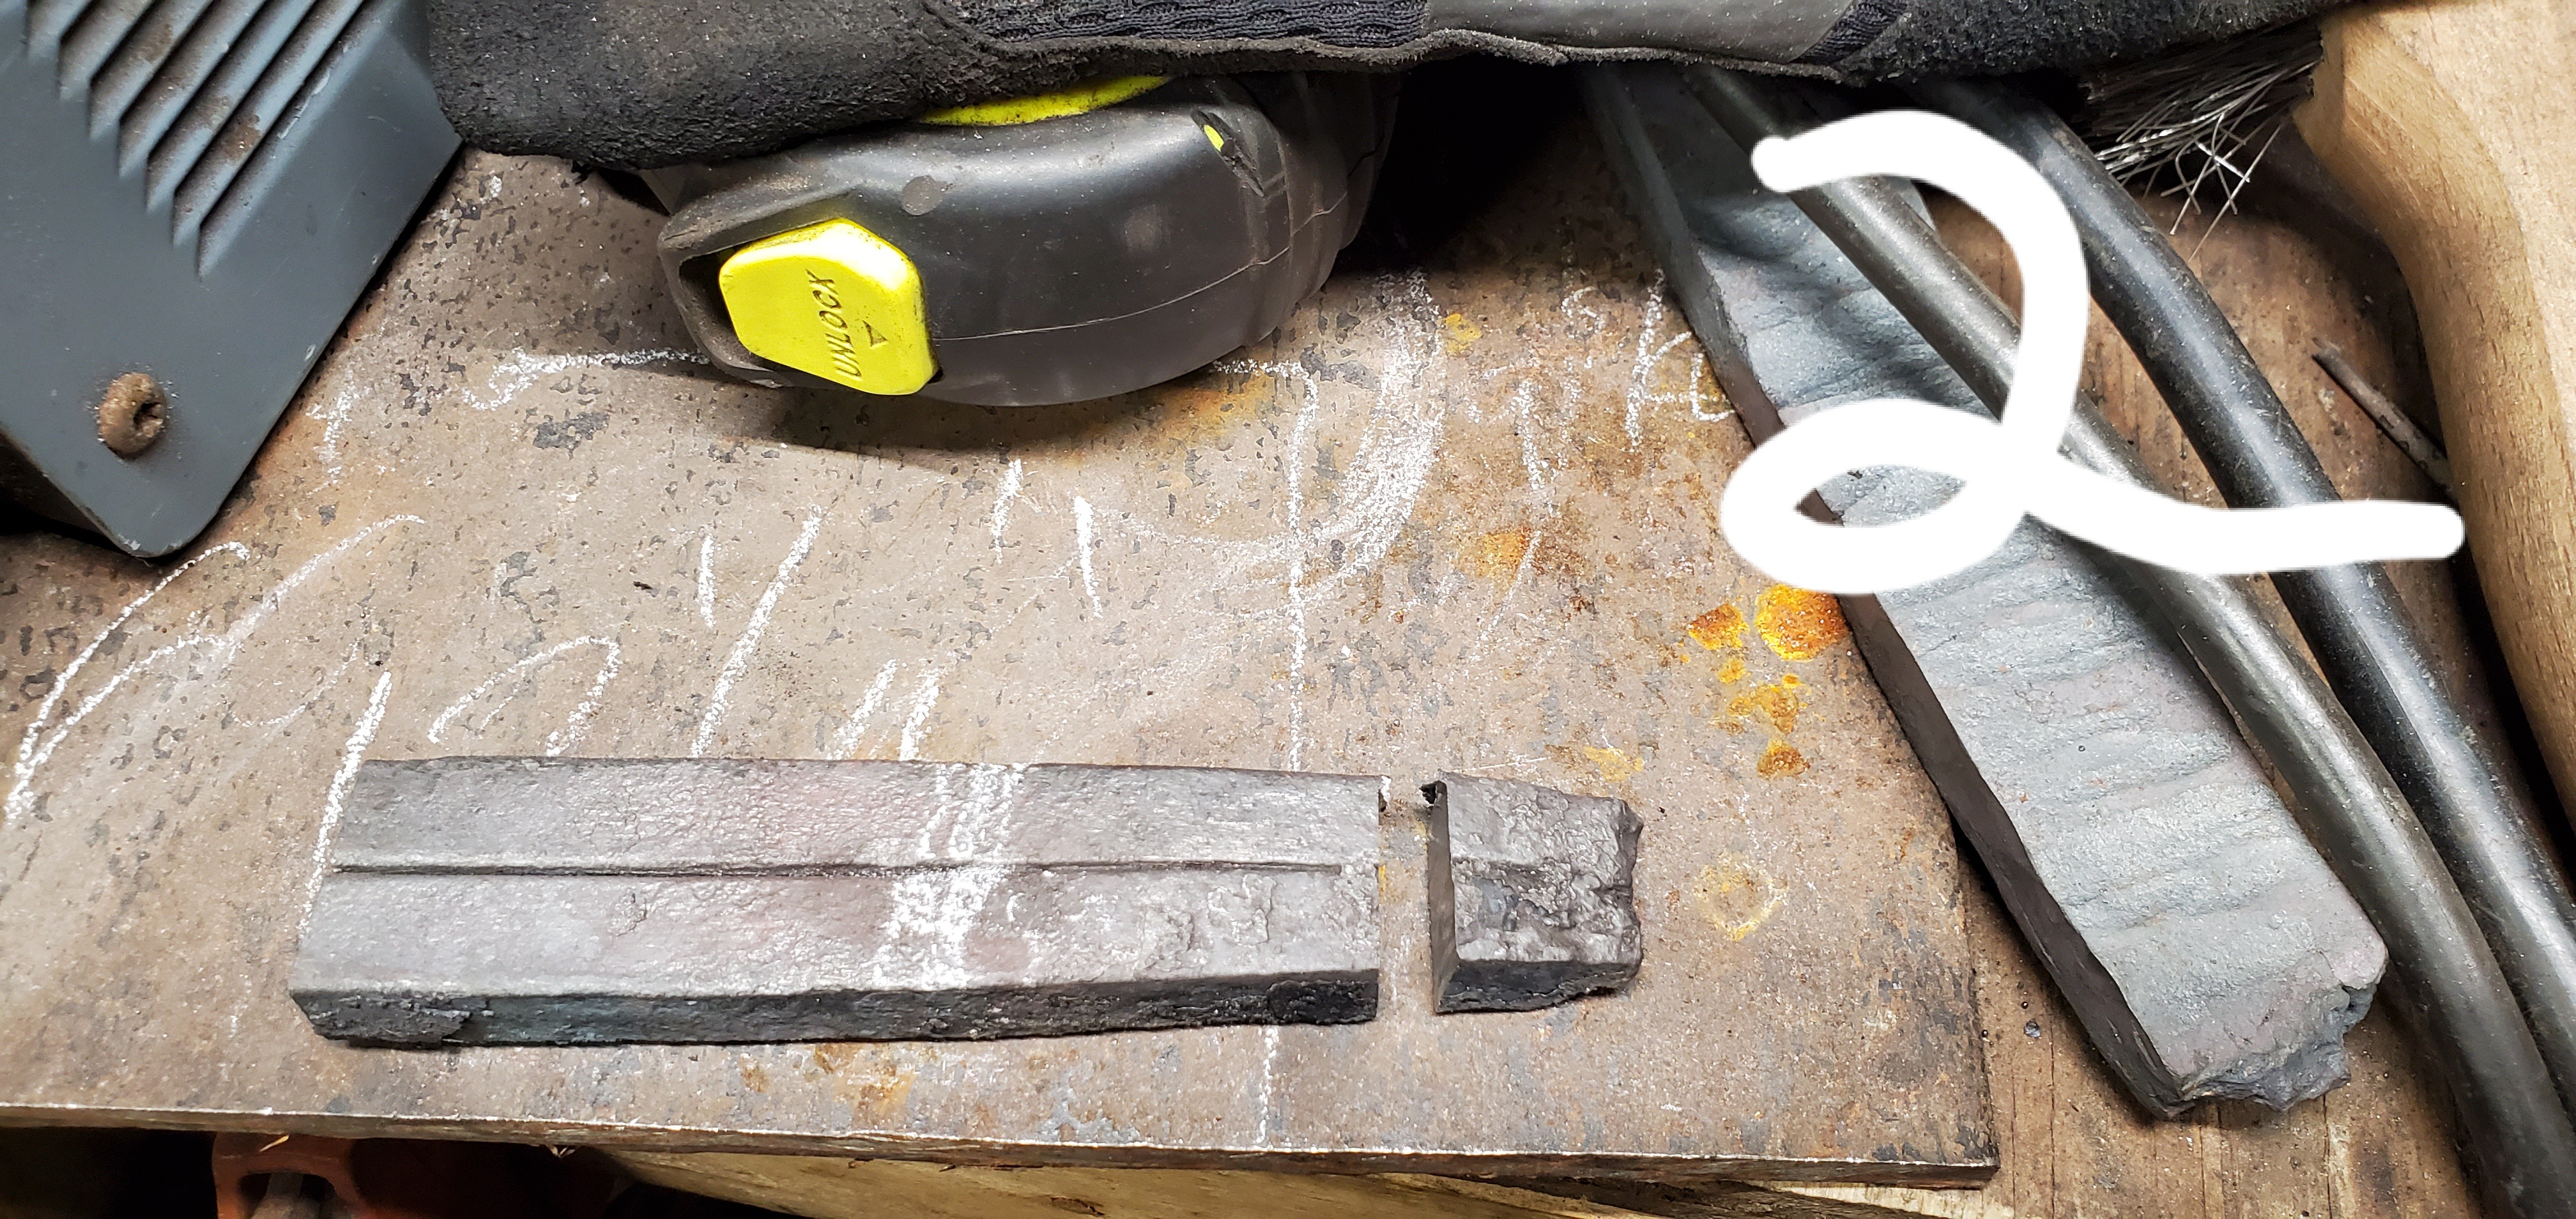
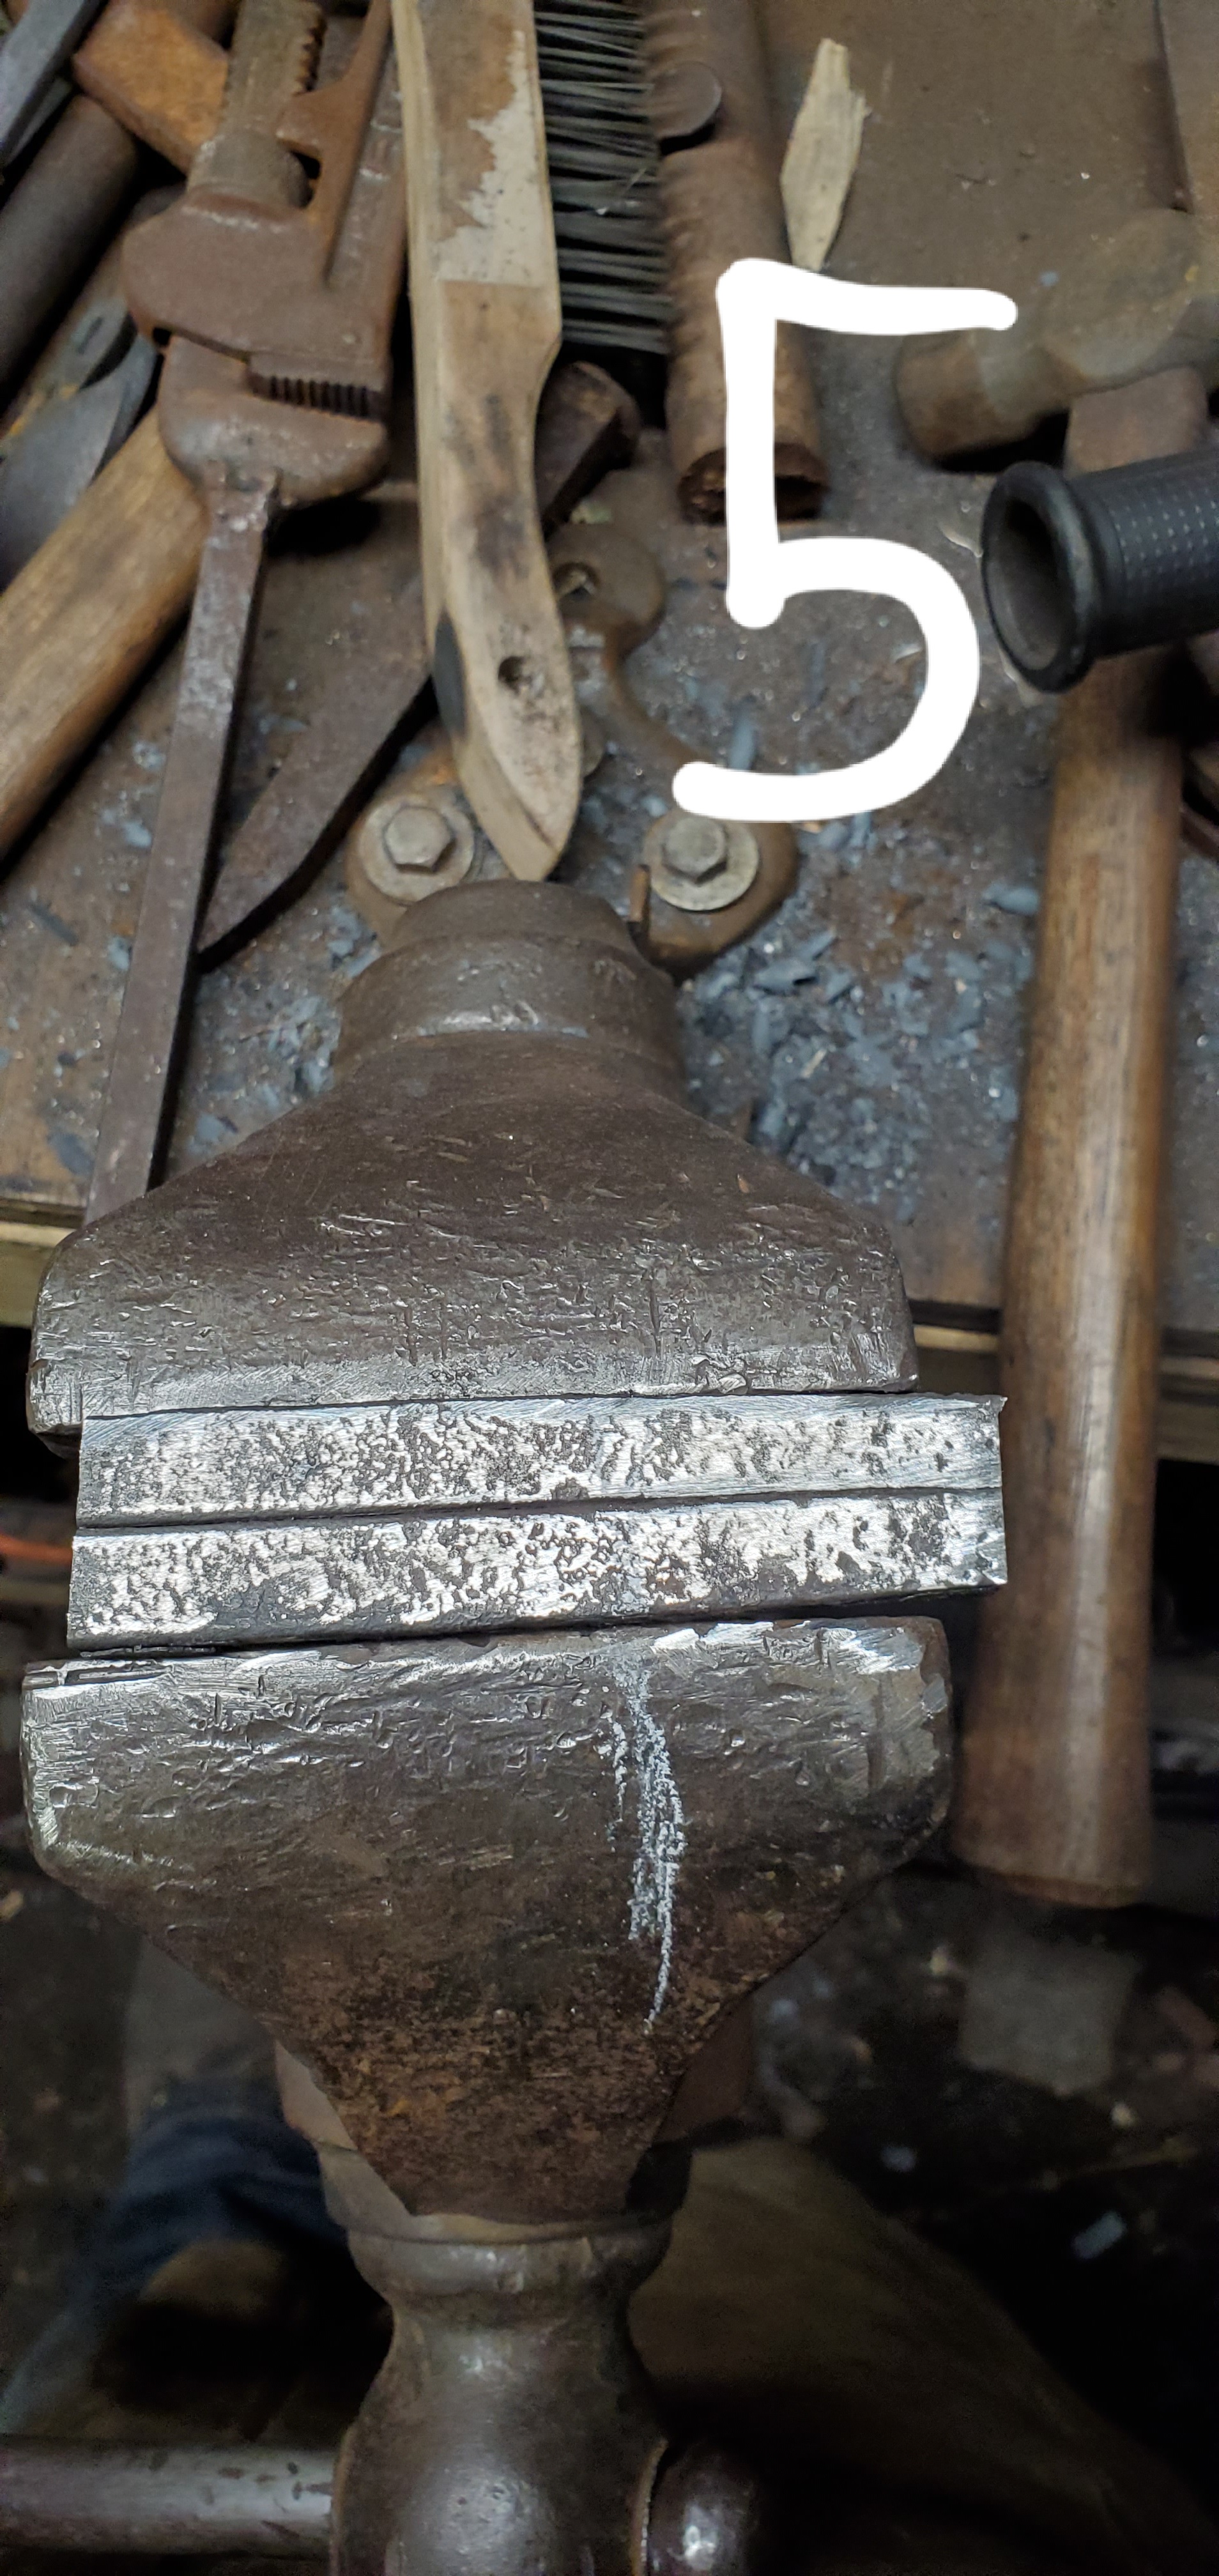
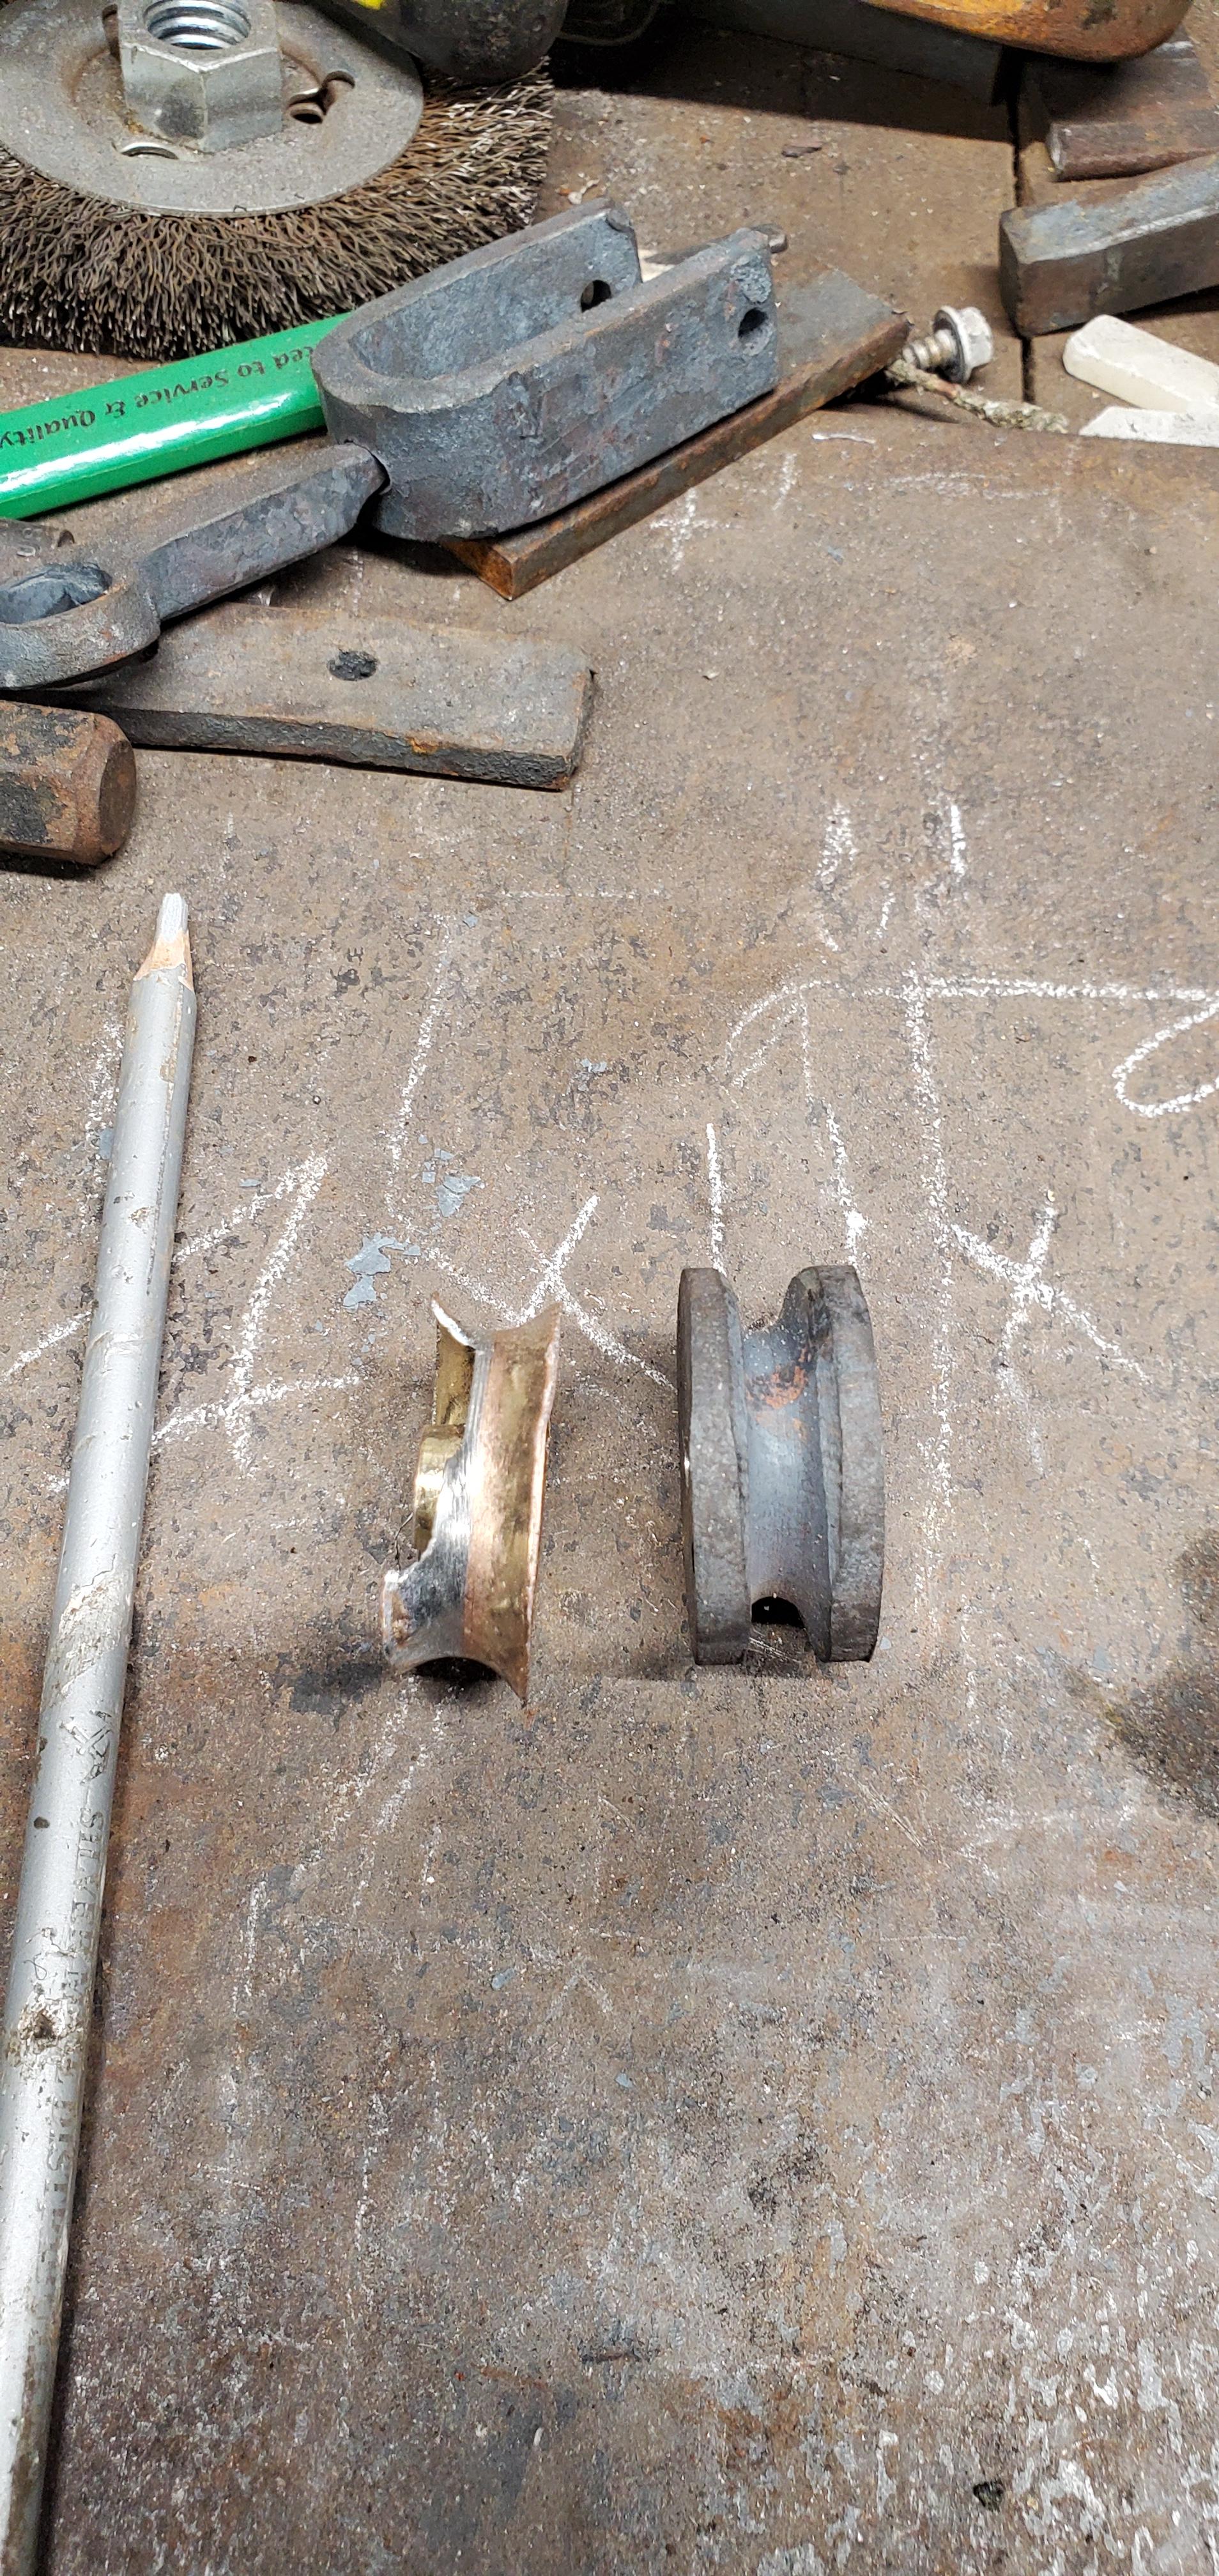
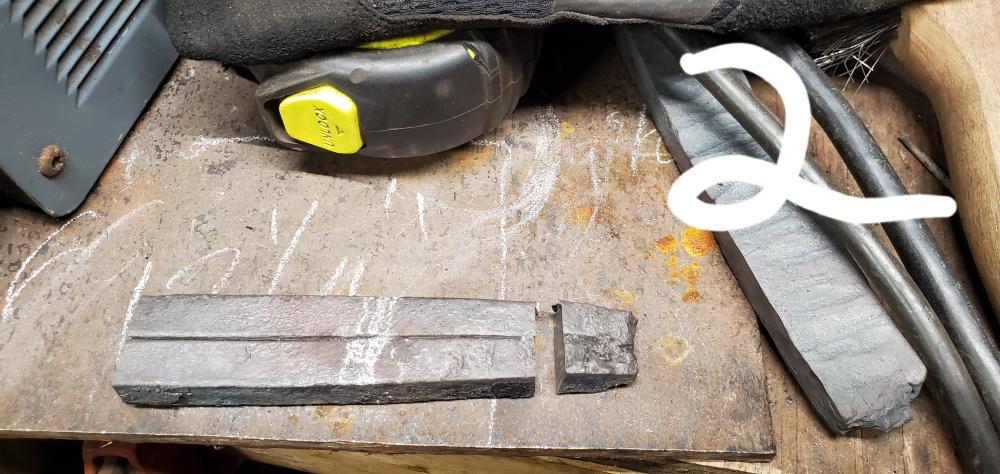
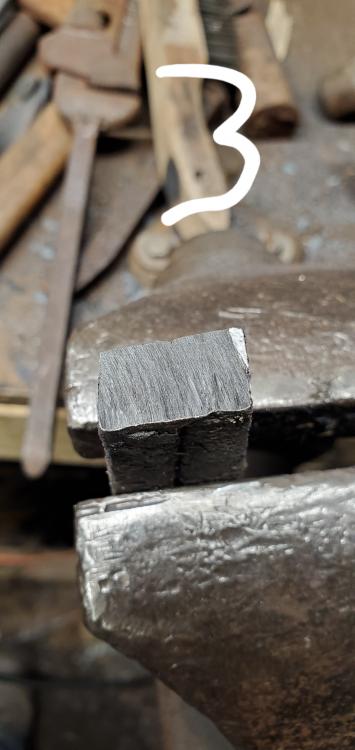
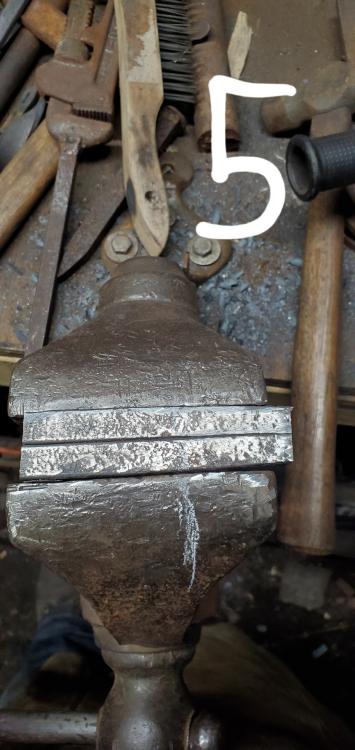
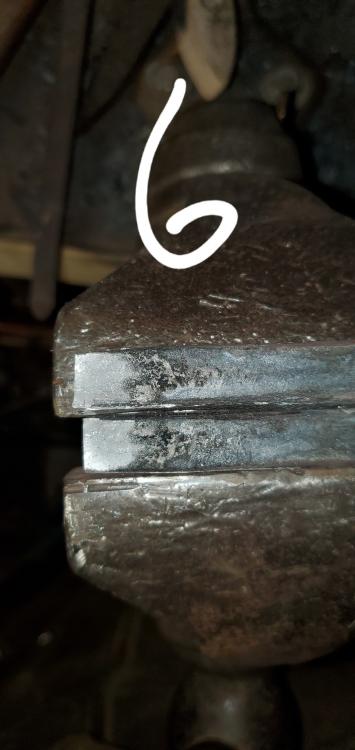
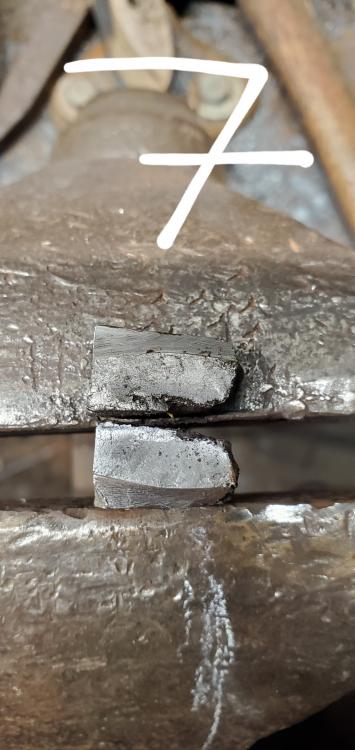
(took too long in writing this up and lost the window to perform an edit for one post.) This is another one of those "im not sure how to ask this, so bear with me please" kind of posts. Working in the shop, practicing some forge welding, and i kept running into this issue where the metal would stick together, but when I'd test it, it would fail, just snap off. And i had seen this happen earlier in my attempts, and at those earlier attempts i thought it was due to my inexperience, i was forgetting something, too much scale, etc, just messing up my weld attempts. Today though, i took my time, i made sure the metal was clean, i fluxed the proper amount, all the necessary steps, and it just failed. I did a test to see if the weld was holding, and it failed. So this made me mad. Like real mad. after i calmed down, I thought id perform a test to see what's up, make an educated guess, and post on here to see if i am correct with my idea, or if one of you knowledgeable smiths could help answer my question. I took 2 pieces of 3/8s square stock, cleaned the ends where the forge weld was going to be, added some light flux, tossed into the fire. I brought them up to the forge weld heat, rubbed them together to see if it was at the weld heat, which it was cuz they stuck together, kept them in the heat for a slow 10 count, pulled out, and did some light hammer blows to set the weld. Back into the fire, brought back to heat, repeat. did this for a total of 3 times. The end result was picture #1. (i dont know why it's ordered 2, 1, 3, 4...) the white line on the steel is the approx end of where i stopped forge welding. i took an angle grinder, and cut off about 3/4" from the tip, as shown in picture #2. picture #3 shows the longer piece of steel as being forge welded. picture #4 shows the same forge weld, from a different angle. picture #5 is showing how much weld, by way of the white line on the vise, was left over for the test i was about to perform. I was a bit off with my guestimation as shown in #6. For picture #6, what i had done is clamped one of the bars in the vise, and i took my tongs, gripped the top bar, and pulled towards me. This caused the metal to shear away from the other piece. It took a bit of effort to snap this piece off, but it did come off. And it parted at the weld junction. Looking at the metal, as shown in the picture, it shows a nub of discolored metal from where the weld was set, and the rest of the bar was unaffected, or had scale built up on it. So, i performed the same test to see what would happen with my fully forge welded piece. Picture #7 shows the full cut off 3/4" piece forge welded piece, but intentionally twisted to failure. I had to cut a shallow groove in the piece at the seam to induce a critical failure, as shown by the ground marks on the metal. Even with that thought, it took some serious grunting and leverage to get that small piece of metal to snap. But, looking at the end result, it also has that same distinct color as shown in picture #6 at the end. So my questions that i am having a hard time answering are "are these pieces actually forge welded together?" "are they not?" "am i doing a wrong test to determine if it's forge welded?" "am i overthinking this?" -
Not the usual forge welding question
Dewnmoutain replied to Dewnmoutain's topic in Blacksmithing, General Discussion


-
Not the usual forge welding question
Dewnmoutain replied to Dewnmoutain's topic in Blacksmithing, General Discussion
So i understand, cuz im practicing with mild steel (im a glutton for punishment, i know), the unit becomes one hemogeneous piece? -
Not the usual forge welding question
Dewnmoutain posted a topic in Blacksmithing, General Discussion
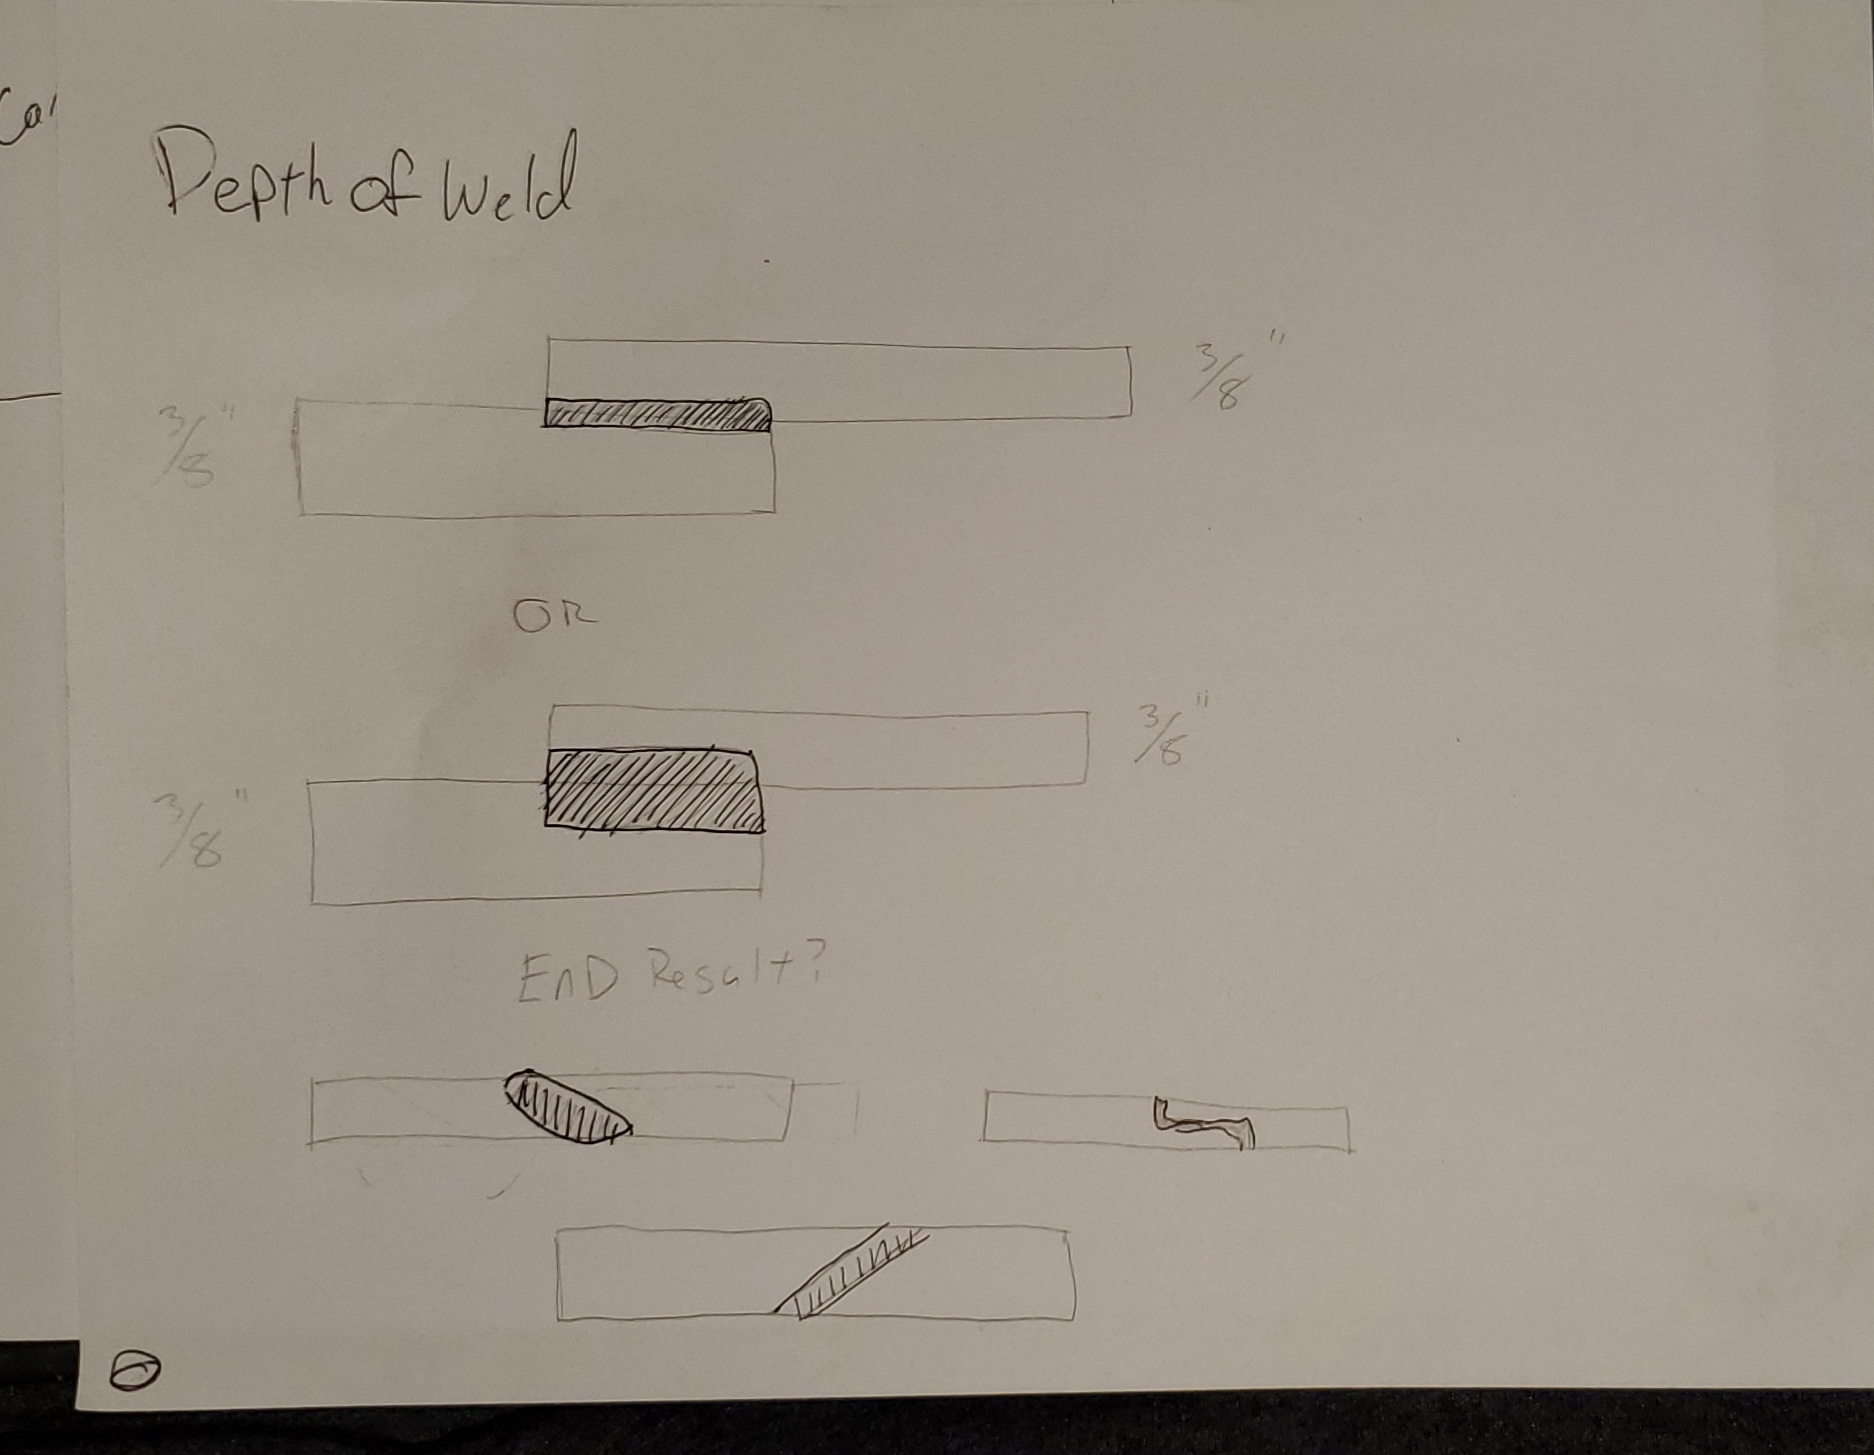
So, how do i forge weld? Hopefully i made you chuckle. But seriously though, i do have a non traditional forge welding question. When you heat up the metal to welding temp, and then hit the metals together to set the weld, how thick is the weld supposed to be? And how thick does the weld get with subsequent heatings? I included a picture to hopefully convey what i am asking about. Theres a third and fourth question im sure i should ask, but cant figure out how to ask it, but it relates to the drawings on the bottom of the picture.
-
What did you do in the shop today?
Dewnmoutain replied to Mark Ling's topic in Blacksmithing, General Discussion
Attempted the infamous basket twist. Didnt have enough round stock on hand to make an attempt, so i used 1/4 square. Forge welded the ends. So, i twisted and then reversed, and it came out with that gap between the two legs on the back side. Im inclined to think that that was caused by lack of even heat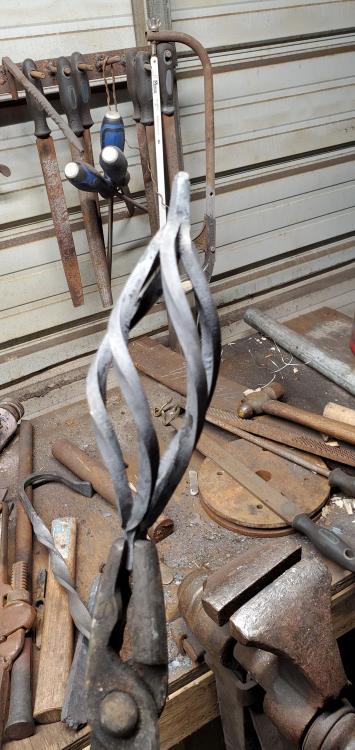

-
What did you do in the shop today?
Dewnmoutain replied to Mark Ling's topic in Blacksmithing, General Discussion
Just to add context, im showcasing my attempts at forge welding. -
What did you do in the shop today?
Dewnmoutain replied to Mark Ling's topic in Blacksmithing, General Discussion
Success!!!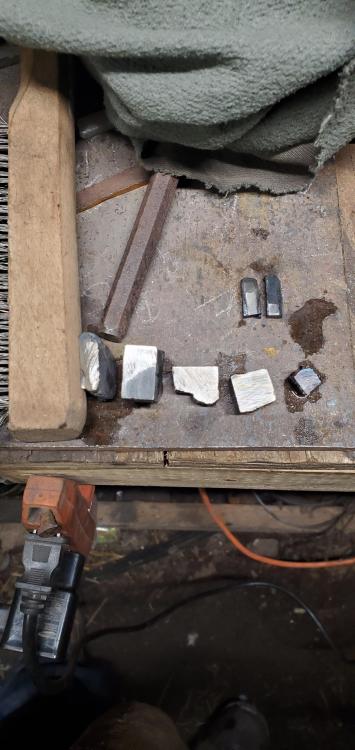
-
What did you do in the shop today?
Dewnmoutain replied to Mark Ling's topic in Blacksmithing, General Discussion
I thought about this. Read on here that some people liked it and others that did not. Decided to not use it...thinking i'll try it tomorrow. With my last attempt at forge welding, i had used just a piece of 1/2" square stock. I cut it 3/4 through and then bent it over onto itself, making a faggot? Is that the right term? I read somewhere that its easier to learn to forge weld mild steel using 3/8ths to 1/2". -
What did you do in the shop today?
Dewnmoutain replied to Mark Ling's topic in Blacksmithing, General Discussion
well, im stumped. Made another attempt at forge welding mild steel today. and i dont know what im doing wrong. started today by looking on here, researching everything about forge welding as described. Even watched a few videos about forge welding. i made sure i had a clean forge. High pile (7") of coal cleaned my steel fresh flux on hand heated the face plate of the anvil because it's cold here in wisconsin. swapped normal hammer for a light hammer to ensure tapping heated steel on one side of the forge, and not over the center rotated steel to get even heat applied flux brought to weld heat, let it soak to ensure that it was heating evenly, looking at both the color and the surface fluidity (I tried it off of color for one attempt, and another attempt for the surface look was without flux just to remember how steel looks when it hits that fluid texture before it burns) quickly moved to the anvil, picking up hammer, and tapping the weld. Even did an attempt where all i did was one single tap and then back into the fire. i get the feeling that this is just something that i need to find a smith who knows how to do it can show me in person. My two regular blacksmiths i talk to and ask for help both admit that they dont forge weld. I can forge weld a billet of high carbon steel steels with ease. No problem. And i know forge welding mild steel is a pain because of its low carbon and high weld temp.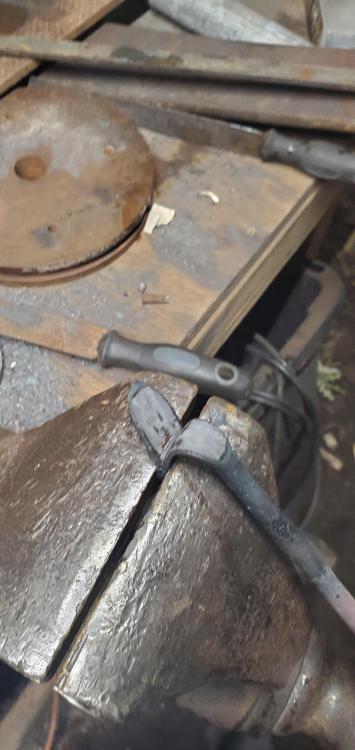
-
What did you do in the shop today?
Dewnmoutain replied to Mark Ling's topic in Blacksmithing, General Discussion
"Ahhh forge welding, you cruel mistress. You tantalize me with your awesomeness, Yet deny me your form." Thought id attempt a wrap eyed axe, because i want to learn how to make an axe. This quickly turned into "why can i not forge weld THAT spot" and "why is THAT burning?!", along with lots of curse words and what what not. Grumble grumble
-
How would you bend this?
Dewnmoutain replied to Dewnmoutain's topic in Blacksmithing, General Discussion
Thanks. Was a pain trying to get that narrow bend on it. Now i just need to fix the foot pedal -
How would you bend this?
Dewnmoutain replied to Dewnmoutain's topic in Blacksmithing, General Discussion
Fixed. Works very well. Wish i had thought of this 3 days ago...