

WoodnMetalGuy
-
Posts
88 -
Joined
-
Last visited
Content Type
Profiles
Forums
Articles
Gallery
Downloads
Events
Posts posted by WoodnMetalGuy
-
-
Like the Dwarves in Discworld; 3 dwarves, 5 opinions!
I love the Terry Pratchett books!
-
No there were no military specs for anvil stands. The used whatever was on hand. I spent an average of two hours a day, for four years building the forge, wheels and tools to build the forge and wheels, and I lost track of how many thousands of dollars I spent on it. The anvil stand is wood, and all that I as an old man can move with difficulty.
That's the same type of anvil stand that came under my Fisher anvil when I bought that. Seems to work fine, and easy to add or remove layers to adjust the height. -- Dave
-
Funny, I've got a drill press like that, too. When I got mine at auction I hadn't seen one like it before, with the ability to tilt the head left and right, rotate it about the vertical post, and slide it closer or further out from the post.
Of course, except for one occasion I've always used it in one fixed position...
-- Dave
-
Check out http://knkusa.com/
My wife got their 'Zing' model several years ago and it has been great. They have newer models now.
Mostly used for cutting paper for scrapbooking, but has been used to make vinyl resist for sandblast etching on glass.
Am amazed at the detail these machines can cut.
-- Dave
-
1 hour ago, littleblacksmith said:
let me know if I missed anything that you would like me to go over
Thanks for the further info! -- Dave
-
22 hours ago, littleblacksmith said:
Yes that is chain Damascus. It was the double height chain
23 hours ago, littleblacksmith said:here's that bowie before heat treating
Very nice looking result. Can you talk a bit about your process?
I'm assuming there is no weld, fold, weld, fold, repeat... iteration for this, as there is for other Damascus? Just start with the lump of chain and weld it all together once?
How many heats does that take? Are you using flux? Is it important to degrease the chain before starting or does it all burn off?
Never having tried this, I have these absolute beginner questions...
Thanks - Dave
-
I like that you're starting to get some more lighting in there. Those two ceiling spots alone looked pretty grim to work by. Seems like your shadow would often be on the work. I'm slowly converting my fluorescent fixtures to use the new 4 foot LED bulbs that look just like fluorescent tubes, but are brighter, and work great even when it's so cold the fluorescent ones fail to light. -- Dave
-
17 hours ago, JHCC said:
Not him. Thanks anyway.
Yes, I messaged him, too, and found that that James Cooper lives in the UK. Would have been a neat coincidence, though. -- Dave
-
I'm guessing that may be the James Cooper who is active on the 'Fly Press Forging' facebook group - with his most recent post about 1 hour ago... -- Dave
-
38 minutes ago, aessinus said:
why not 3"?
That's what I'm doing. 14" diameter with 3" insulation. It's what Ron Reil on one of his pages said he would do for his next one, so I thought I'd give it a try. -- Dave
-
And I have seen it used in the window on an old wood stove.. -- Dave
-
I have heard of adding crushed oyster shells to the corn in a corn-burning furnace to affect the hardness/quality of the clinker developed in those stoves. I believe that depending on the design, some corn stoves/furnaces have a clinker breaker and if the clinker gets too hard they have problems with that. So I think it's probably a real thing, but I don't know any more about it than that... -- Dave
-
I like that! Are the braces and stretchers secured by wrapping only, or is there a weld under there? How did you manage any tweaking needed to keep it from rocking on a slightly longer leg? What kind of power hammer is that? Looks pretty hefty... -- Dave
-
9 minutes ago, Kozzy said:
Remember that a 50% duty cycle means 5 minutes on and 10 minutes OFF
I was thinking that a 50% duty cycle would mean in use half the time, or 5 minutes on, 5 minutes off. And 5 on, 10 off would be 33%. Am I confused about that? -- Dave
-
I'm inexperienced also, but all I can think of is that it must not be mild steel like you thought. Something that air hardened, maybe? -- Dave
-
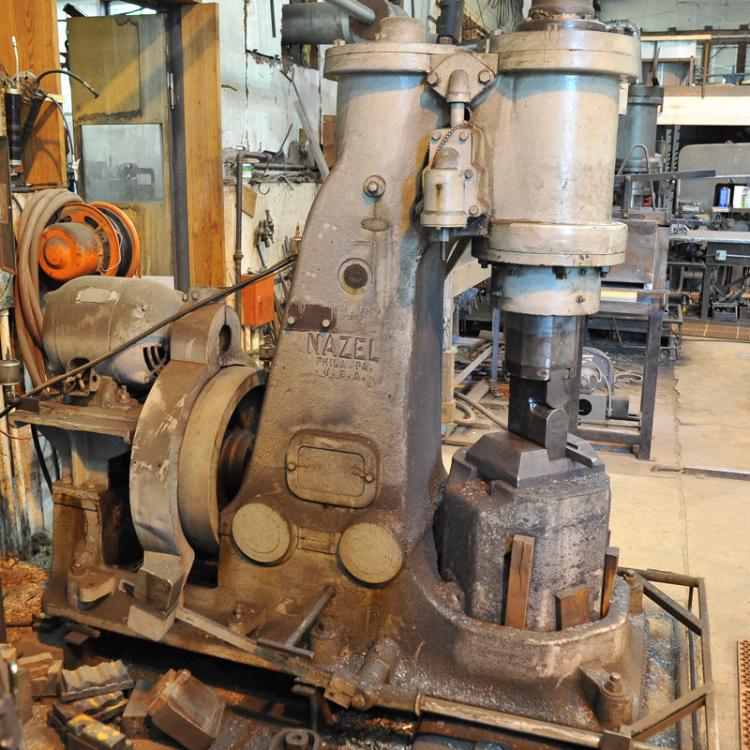
Here's a photo of a Nazel hammer in Bob's shop in WI taken when I was there just over a week ago. He demonstrated a bit on one and it was very controllable. Big machine, though.
-- Dave
-
It's the brand name of a two-part epoxy. -- Dave
-
The other methods I've seen for making charcoal cook the wood in an oxygen deprived environment. I bet your yield could be improved by doing that. Here's an example link I found with a quick search: youtube charcoal retort
-- Dave
-
Nice, Alan, and Brompton bikes!
-
3 hours ago, littleblacksmith said:
and look for WI.
Hey - I can help out with that! It's just to the east from where I live in MN. Not hard to find if you drive in the right direction!
") -- Dave
-- Dave
-
1 hour ago, rhitee93 said:
I built this to save my aging body from the wear and tear of drawing out patter welded billets by hand.
Wow - looks like it works great. As far as controls go, I wonder if you might want to rig up a foot pedal to control it so you can use two hands to manipulate your work? -- Dave
-
On 4/26/2017 at 0:19 AM, David Kailey said:
Bandsaw, hacksaw, sawsall will all work fine. Thereal key is making sure you cutnthe cube lines all the way down to the parallel lines running the length of the steel that is what gives you thenice clean separation,
But now that I look closer, I see that it's more than just cutting the slots between the cubes - looks like you have a long slit along the edges of the cubes up the length of the bar - is that right? Seems like the grinder is the best way to do that.
I wondered how it was that the cube corners stayed vertical vs. spiraling around. Is that lengthwise slit something like 1/8" deep or do you go deeper than that?
-- Dave
-
Very neat handles. Was not at all obvious to me at first glance how you did that. Thanks for the explanation! I like the contrast between the smooth spirals and the staggered stacks of 'cubes'.
I wonder if a bandsaw cut would work as well, or if you need the little bit additional cut out that the curve of the grinder removes?
-- Dave
-
I set up mine to be at belly button height. Just seemed right to me. -- Dave

What did you do in the shop today?
in Blacksmithing, General Discussion
Posted
BillyBones - I experimented with crosses like that a while ago, and I liked the look of making dimples all over with a small ball-pein hammer, then shining them up a little with a cup wire wheel. Also did some where I thinned out and widened the arms towards the ends and then dimpled/shined them and that looked good, too. Gave them a little more organic shape and a little more visual interest, I thought. -- Dave