

Brazer
-
Posts
99 -
Joined
-
Last visited
Content Type
Profiles
Forums
Articles
Gallery
Downloads
Events
Posts posted by Brazer
-
-
Got it guys. I just post a question that comes to mind. Doing a lot of research on the forum using search. A lot of times it comes up page not available.
I will use private message in the future for any gripes. Again, thank you all for setting me straight. I will try to search for an answer before posting a thread for
an answer. You got so much info among all the members, and forum, that is why I enjoy being part of it all.
-
Thanks Frosty. I'm not mad at anyone. I was just saying that it could have been put a different way, saying I post all over. I like to add my 2 cents once in a while.
This is a great forum, and I learned a lot already. I was maybe too excited to show what I had done, and like to hear the comments. If someone says he don't make mistakes, he's a liar. I am wrong many times, but learn not to do it again, unless I forget.
I added a hardy hole to my rail anvil, and picked up some more steel scrap. I got my eye on a large forklift fork, broken at the bend, and it might come in handy for some major
pounding.
-
I am using it. Getting kind of sarcastic aren't we? I was told " Since you have been posting all over, making me clean up after you I honestly got to the point where I didn't care to read every post anymore, I just started scanning, because I have a life also. " I would respond, but that doesn't show any class on my part. Some things best left unsaid, and just to move on.
That kinda says why even bother. I enjoy sharing ideas with you Frosty, and the rest of the one's that helped me so much. The forge going to be used to re -purpose a lot of old plumbing tools, and a pile of used scraper blades from heavy equipment. I got the time, and I worked with metal all my life, an will continue to, for enjoyment.
I will have to post the projects with pics, in another thread, so I won't get them grouped back in this thread, to upset anyone.
-
Finished the new forge. The 3/4" Z burner works great. New pics look like the last ones, so I didn't want to bother anyone or use their time looking at the same thing over again.
Made a couple pair of tongs today.
End of new forge story.
-
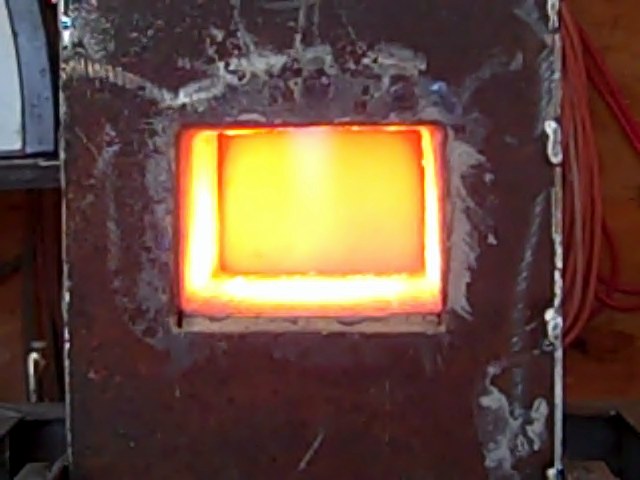
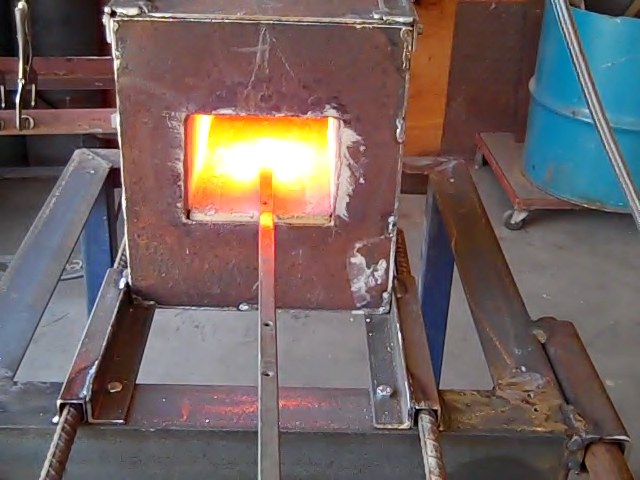
Didn't get the Z burner in yet, but here's some pics during today's full temp to cure satanite. I figured why waste any heat, so I threw in a couple pieces of iron.
Also made the front opening a little smaller. Tomorrow I put on the Metrikote and install the new Z burner.
In these pics, I have the mini sidearm burner in. I took around 10 minutes to get good and hot, then I put some iron in the fire.


-
I would not use pex for anything in my opinion. PE with a copper tracer wire is what the gas co uses on a lot of underground services.
I would only use black iron pipe or brass. You can use a stainless steel flex to connect to appliance, ( forge). They come in BTU ratings and various lengths.
I use these to connect all kinds of gas appliances, stoves, water heaters, Gas Boilers, etc. Some flex connectors come in different colors, some even brass.
All are full flow.

-
Yes in a way. It has been said that the zinc coating in galvanized pipe can flake and plug orifices. Only use black or brass
malleable fittings on gas pipe, and never cast fittings. Malleable fittings have some give or stretch, so to speak, and won't
crack or break easily.
-
Anyone think of using a CO detector for safety in the area of a gas forge?
Something to think about.
-
In better than 50 yrs I have never seen any double flares on tubing for gas piping. I have seen them on stainless steel brake lines.
Single flare is what is on gas flex hookups, brass or stainless steel. Never Ever use copper tubing on natural gas unless it is special with a tin lining.
Copper reacts to the chemical in natural gas that gives it its smell, and corrodes copper over time. Natural gas company will tell you that.
Only LP gas can use copper.
-
This is flared copper tubing: Make sure nut is on tubing and don't flare too big or the flare nut won't fit properly. No ferrules used.
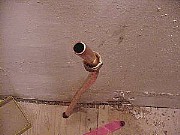


A picture is worth a thousand words. Hope the pics help you
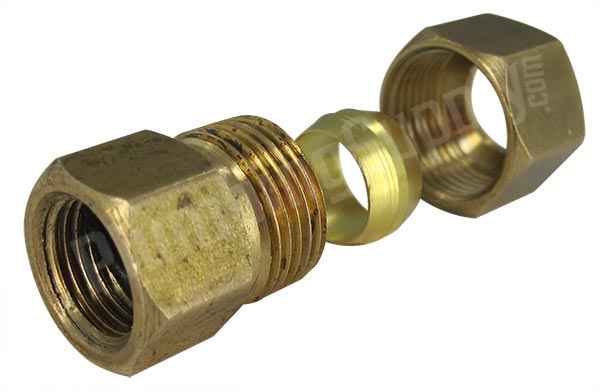
This a compression fitting with brass ferrule
-
These are brass ferrules for copper tubing. A flare would be better for gas fitting. A flare is made with a flaring tool, flaring out the end of tubing. Be sure to place the proper
size flare nut for tubing size. Then the fitting will be a better choice if used on gas line.
I forgot to mention they are compression ferrules used on water pipe in plumbing. Not a good choice for gas.
-
I never discard anything that can be used on something else. I should have the 3/4" Z burner tomorrow, then the 1/2" sidearm burner goes back in the small forge.
That little forge comes up to temp in less than 10min. Its great to have 2 forges. My friend asked if I wanted to sell the little one, I said no.
-
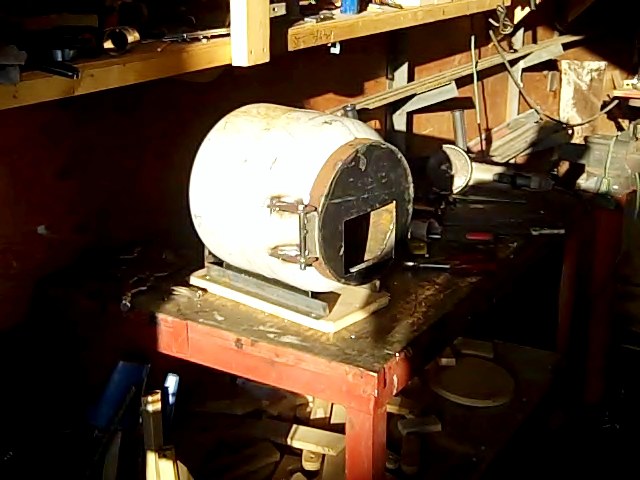
Mikey, I built a shelf across the front that swings away to open full door for maintenance. Using firebrick on shelf to make 5"x 4" opening smaller without too much back pressure.
Did a full temp fire to cherry red, to cure 3rd thin coat of Satanite and shut down, and closed up. Tomorrow, I will do another coat and heat gun dry, then fire
up gradually to full temp again. When I am satisfied with Satanite thickness, I will coat with Metrikote ,dry, then fire up to temp to cure Metrikote.
This is forge being fired now with my 1/2" side burner, that works great with windy conditions here. Still waiting on my 3/4" Z burner from Larry Zoeller, then I will have
the proper burner for this forge. This side burner will go back in my smaller forge for backup.
-
Turning off gas and letting it relight itself is not a safe practice. Years ago a man did the same thing on a gas appliance, and the flame started up and shot out of the appliance and he had no eyebrows for quite some time. I would suggest just turning the burner down if need be, but the keep fire going to conserve fuel, for safety's sake.
Work safe.
-
Wayne Coe has great price on Metrikote , which I purchased from him.
-
I started work on my newest gas forge. The old propane tank seems shorter than most. Outside measurements are 12" x 13 1/2"high. It should make a real nice one burner forge,
with 2-3" insulation, depending on finished interior size. It will have a Z burner offset and angled for off center top to inside wall, hopefully creating a swirling flame,
not straight down like the last small one I made. I'll use one Z burner from Larry Zoeller. The mini T that Frosty help me put together, for the other small forge works great.
I hope to gain interior height and length. It maybe 8" x 10" inside, after ceramic blanket two 1" layers and 1/4" Satanite, topped with Metrikote.
I made a full hinged front door to make it easier to insulate and repair in future. Front door opening is 5" x 4 1/2" high, I will provide, which as Frosty suggested, an angle iron at top of door
outside, with a steel deck outside to block door with firebrick. I still haven't cut in the back door yet. Trying to figure what size it should be. I will make a 1" ceramic covered hinged back
door, like the last one. Stand will be made last, or I might switch it with the stand from the smaller one.


-
Thanks every one for your help. I bled this thread to the ground, and your patience was appreciated.
I'll start on my new propane tank forge. The tank is 12 1/2" x 13 1/2". It's and oddball size, but it will have height inside and some depth,
and I got a Z burner coming from Larry Zoeller.
See you on the next thread.
-
Meant to say 3/4"x 1/2" reducer on the burner end, like I had on the mini sidearm burner I made in the pictures.
Frosty, this is the wrench I was talking about

Frosty, here's some pics of the forge working to temp. I think I got the mini T working, so I put a piece of spring steel 1/2" square to see it heat up.
It was red really soon. I let it heat up completely and put in my tong project. 3/8" thick and it came up to temp, cherry red, so I could twist the jaws to shape
in the vise. Tomorrow I will put the Metrikote on, and fire up to finish the tongs.
Burner has 1/2" black nipple with a 3/4"x1/2" bell reducer for the flare. I covered the burner at the top of the 1 1/2" burner holder, it made a difference. I took your advice and opened up the mig tip to around .025-.026, judging by my oxy/ace tip cleaners.
With the garage door open, it is windy today, I just tuned the whole forge to face away. Not much if any scale on any iron I had in the forge. Should be set right
I hope. No dragons breath blowing out the front. Used with backdoor closed. I didn't want to starve air by blocking the front any, figuring why waste the flames outside the forge.
Thanks, Frosty, you know what you're talking about. I will start on the propane tank forge now, after finishing the tongs.

-
1/2" pipe nipple, 4" long. I changed out the burner holder to sch 40 1 1/2". I will try it out tomorrow. I"ll try it with the reducing bushing 3/4"x1/2", to see if the increase
helps too. It worked on the mini sidearm burner. I just got done making my twisting wrench from a spud wrench. When I was a kid we called it a monkey wrench.
It is simple to do. Just weld a pipe handle on the outside of the adjustable jaw, and being smooth with no teeth it should fit whatever I need to twist.
Thanks Frosty. My friends tell me I need a hobby.
But there's a fine line between a hobby and a mental illness.
-
Should I use a longer 1/2" nipple on the T burner so I can set it up and pack insulation around the holder?
-
Made a mini sidearm burner. Here it is running at 5# and 10# pressure. It's not in the forge yet. Had to change to standard 1 1/2" pipe because the other piece of 1 1/2" pipe was too thick for the for flare on end of burner.


-
Frosty, I got the mini T burner operating. I adjusted in the forge. Since I got 2" of ceramic blanket and 1" ceramic rigid fiber board on ceiling, the 4" nipple and coupling reaches the formed cone in the rigid ceramic board. I just dropped the burner in up to the tee, on my vertical burner holder. I used the 1" rigid fiber board on sides and top to be stiffer. Included pics show burner at 5# and 10# pressure. I only had a .023 mig tip for now. Nozzle is just half the diameter center of the 3/4" tee.
I should get a needle valve to adjust the gas at the final entrance to burner. Sometimes it seems to burn a little better when I close one side of tee momentarily.
Any other pointers you can give me Frosty, would be appreciated. Is it OK, or should I keep playing with the tuning. By the way, instead of keep shortening the mig tip,
I use thin washers for shims were the 1/8" threaded male end is if need be, to shorten the tip in the burner. Cheaper that way.


-
Thanks Frosty. I will proceed with the Mini T burner tomorrow and report back when complete. What mig tip size should I use to start?
I intended to use pipe nipples to get stainless gas supply hose away from top of forge. I should have entered from an angle off the top.
-
For it to burn, all the holes except for the top half holes works somewhat. Increasing the tip to .030 burned best, but the flame blows down on floor inside,
with a circular dark ring. I will try to build a mini burner if that's what it takes.
I was bored
in Everything Else
Posted
Hope this is the place for a little humor. This is what I did waiting for the forge to get hot. Kill flies with a blowgun.