
Scobb
-
Posts
52 -
Joined
-
Last visited
Content Type
Profiles
Forums
Articles
Gallery
Downloads
Events
Posts posted by Scobb
-
-
6 minutes ago, DSW said:
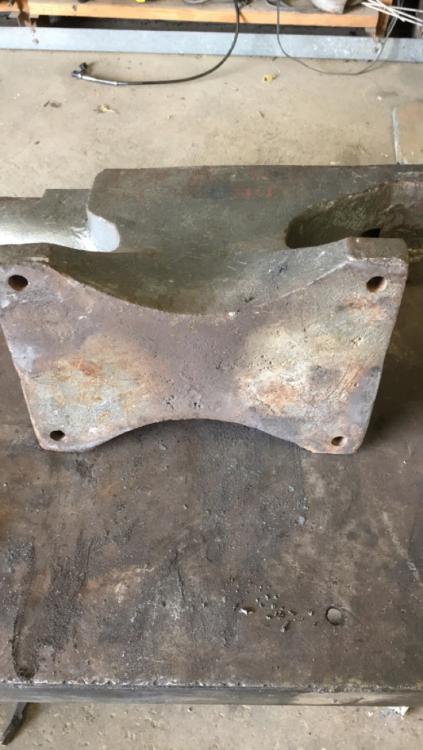
Your fire pot looks deep, maybe 5-6" based on the 2" side angle. That plus the 2" angle may put your steel above the sweet spot in the fire, or cause you to build a larger than needed fire and waste fuel. I cut two "depressions" in mine on opposite sides that roughly correspond to the raised "lip" on my fire pot. That way I can get my steel down where I want it in the fire. Down side is that with long stuff I'm occasionally knocking some coal/coke out when I put stuff in the fire, but it's not much if you pay attention and keep it raked in tight.
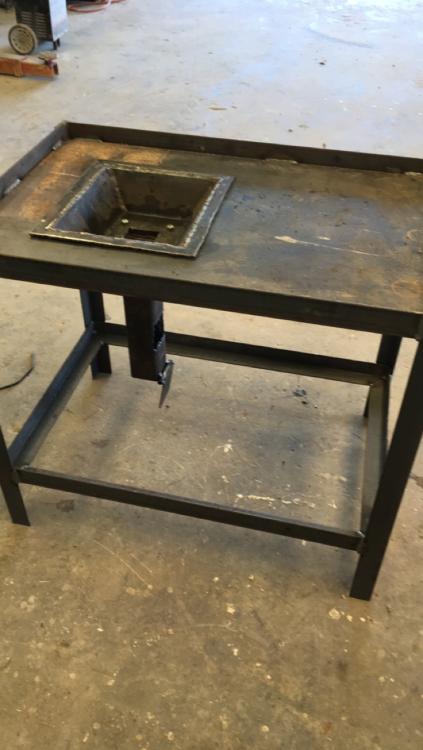
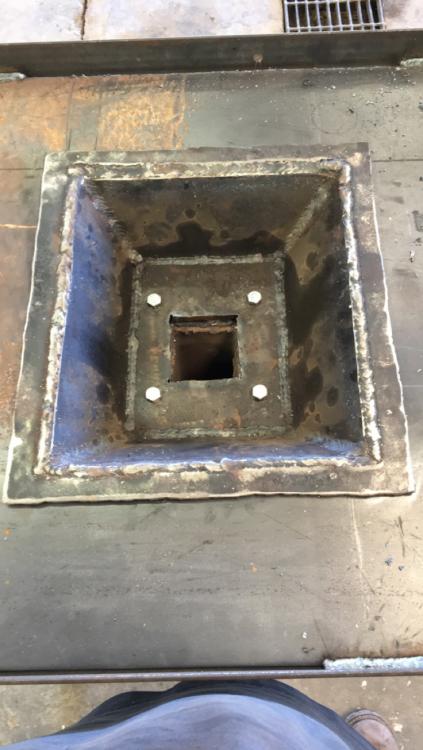
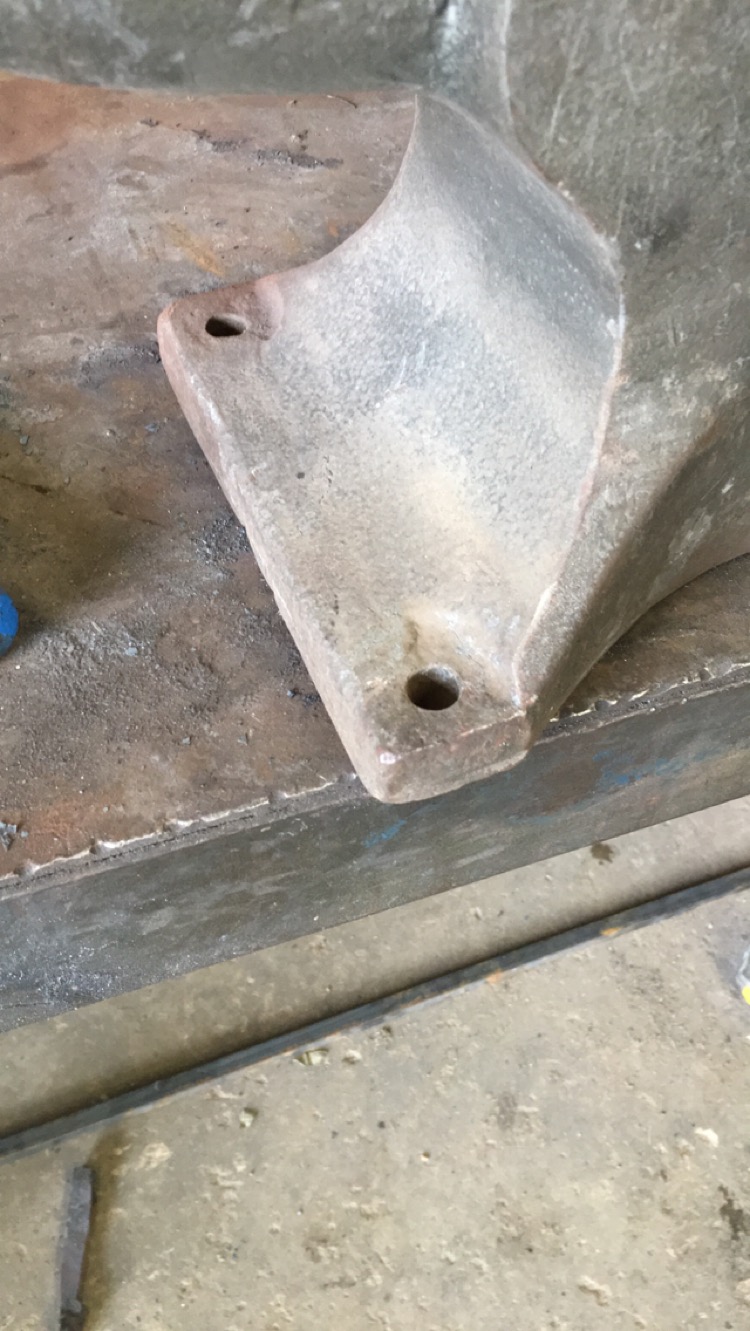
My pot is about 4" deep and the top of the pot is maybe 1/2" below the cutout shown. That seems to put the steel roughly in the sweet spot of my fire on average
.
yeah, it looks a bit odd in the picture, but it is 4" deep i got the plans off of here somewhere lol. the sides are im guessing only about 1 3/4" tall because i laid 1/4" plate on top of the angle. and i do plan on cutting out a pass through with a removable piece on one end to get the metal into the fire ball i also plan on making another fire pot only 2" deep that i can use on smaller stock to save coal.
-
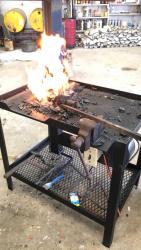
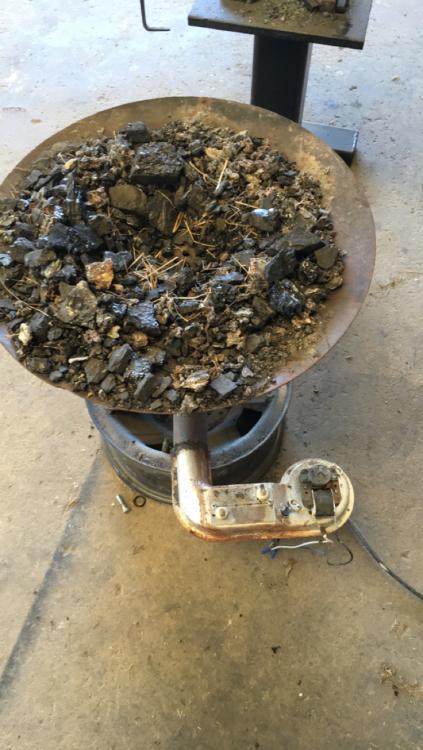
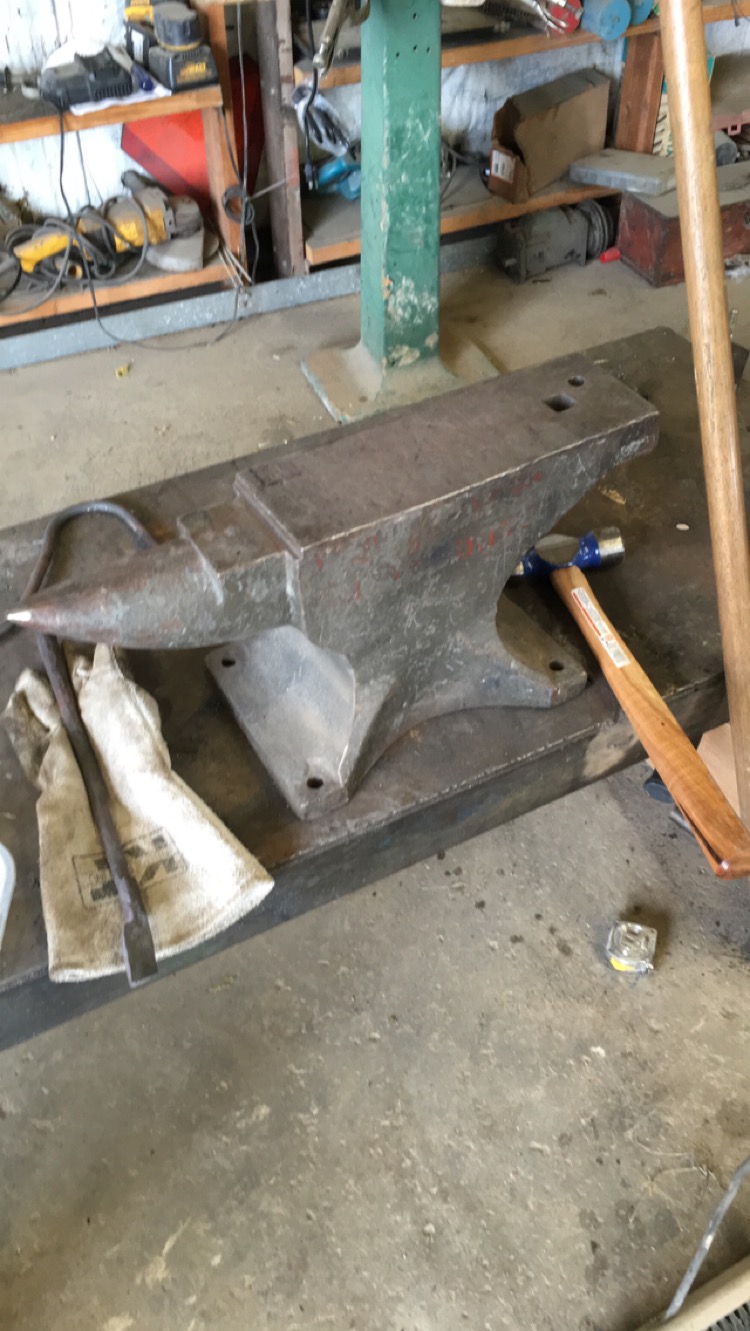
its not done yet, but i just came in from working on it and decided if i didnt get pictures put up now i might never remember. I am upgrading from my forge i through together in an afternoon about 6 months ago? it was made from a disc blade, some tubing, a truck rim, and a blower out of a dishwasher.( i did all of this before doing any research, but the general idea worked, just not great haaha) It got metal hot, but wasnt ideal for me, so i sold that one for a six pack and started this project.
table is made out of 2" angle, and 1/4" plate. at some point im going to notch the sides for a pass through.
fire pot is 9x11x4 i believe out of 1/2" plate, havent decided how im going to do my air grate yet, was thinking about just welding in some 5/8 square stock. and just cutting them out when they get mangled and need replacing.
the bottom will have a expanded steel shelf.
and i cant decide which side im going to be working from the most so my ash dump will have a handle on both sides.
I am thinking about making a fixed hood on the forge itself, but haven't decided yet. still some research to do in that department.
Half way done, lots of touching up to do....really wish i had a plasma table or more skill with a torch
 . so far im pleased cant wait to get it finished. cheers.
total investment so far--150$ luckily for me my work has lots of scrap that just goes in the bin that i get to raid!


-
On 6/26/2016 at 2:52 PM, Frank Turley said:
I brazed a little round butterfly valve inside the 3" intake stovepipe, It has a little handle coming through the side where I'm standing.
thanks frank, ill give that a try!
-
hello,
So i started building my new coal forge and im to the point now where its time to make my tuyere, air supply line, and the ash dump. i've got a pretty good idea of how im going to build it. my question is on air flow adjustment ive seen a couple different setups (via pictures on the internet
 ) 1. the "air gate" and 2. putting a door on the intake of the blower to damper down the air. im going to be using a Fasco B45227 115 Volt 265 CFM Centrifugal Blower.
which one provides the best control while at the same time now over working the blower? I just want to make sure im not going to overheat and blow this blower up like i did the 3 salvaged ones on my other forge. i think my other 3 didn't make it because i was putting more of a load on them than they were meant to handle. the first 2 were squirrel cages out of old microwaves, and the last one was out of an old dishwasher.
pictures of the forge to come later! as soon as my blower shows up haha.
-
18 hours ago, Gergely said:
Hi,
How about filing something with them?
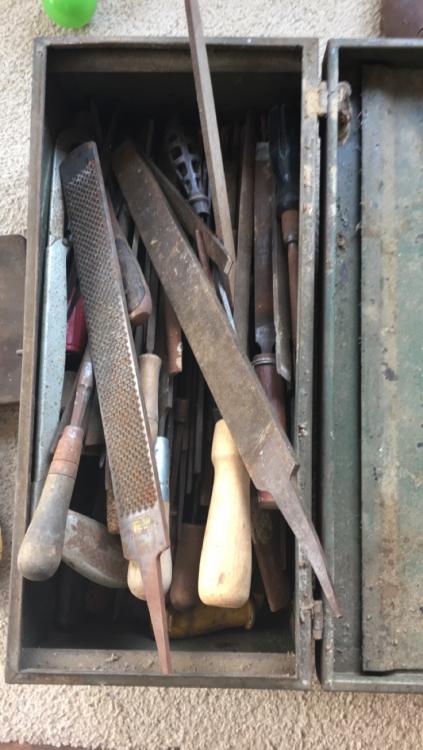
") Those big files are pretty good for shaping. And that rasp on the picture is an excellent hot rasp. Put a handle on it and try some hot filing - that's gonna be fun!
Those big files are pretty good for shaping. And that rasp on the picture is an excellent hot rasp. Put a handle on it and try some hot filing - that's gonna be fun!
Seriously if I were you I'd pick all the files with usable blades first, and put them to use as files. The rest... tools, knives, rasptiles and stuff
7 hours ago, ThomasPowers said:I will sometimes use files as the center layer of a san mai knife if I've been experimenting with a pattern welded pattern but not real happy with it's C content after a lot of folding and welding. (it *DECREASES* the carbon content generally folks!) I really like the OLD black diamonds with their 1.2%C to juice up a billet too.
Thanks fellas,
they will all go in my newly converted "smithy" along side my new forge. pics to come later. wont hurt them to collect a bit more dust while i figure out what im going to do with all of them haha.
I really do like the big ones, now that i think about it i cant see myself turning them into a mangled pile of scrap while i try to make something i know nothing about. ill stick to leaves, hooks, and tongs for now.
-
went to an auction yesterday and scored some goodies. i got about 10 pounds worth of band saw blades for a buck, id guess about 50 lbs of files for 10$ all of them that i can read labels on are either nickelson, johnson, and sunflower? not sure what im going to do with all of them but if figured i couldn't pass up the deal. also, in the box were some huge nickelson bastard files, and ferriers rasps. not sure of the rasp brands.
does anyone have any ideas on some projects i can do with the larger files?
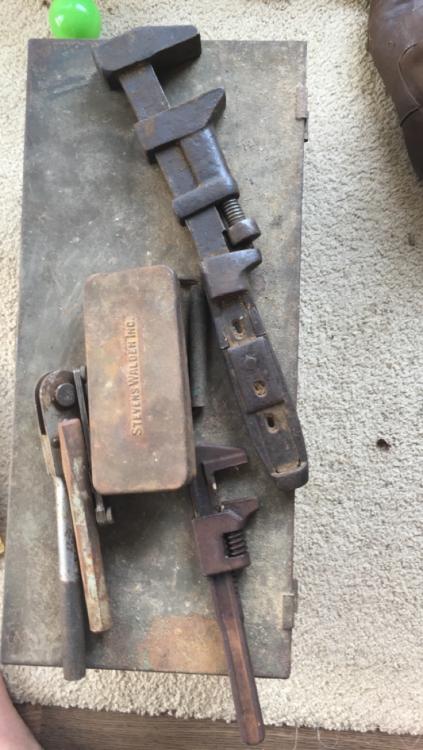
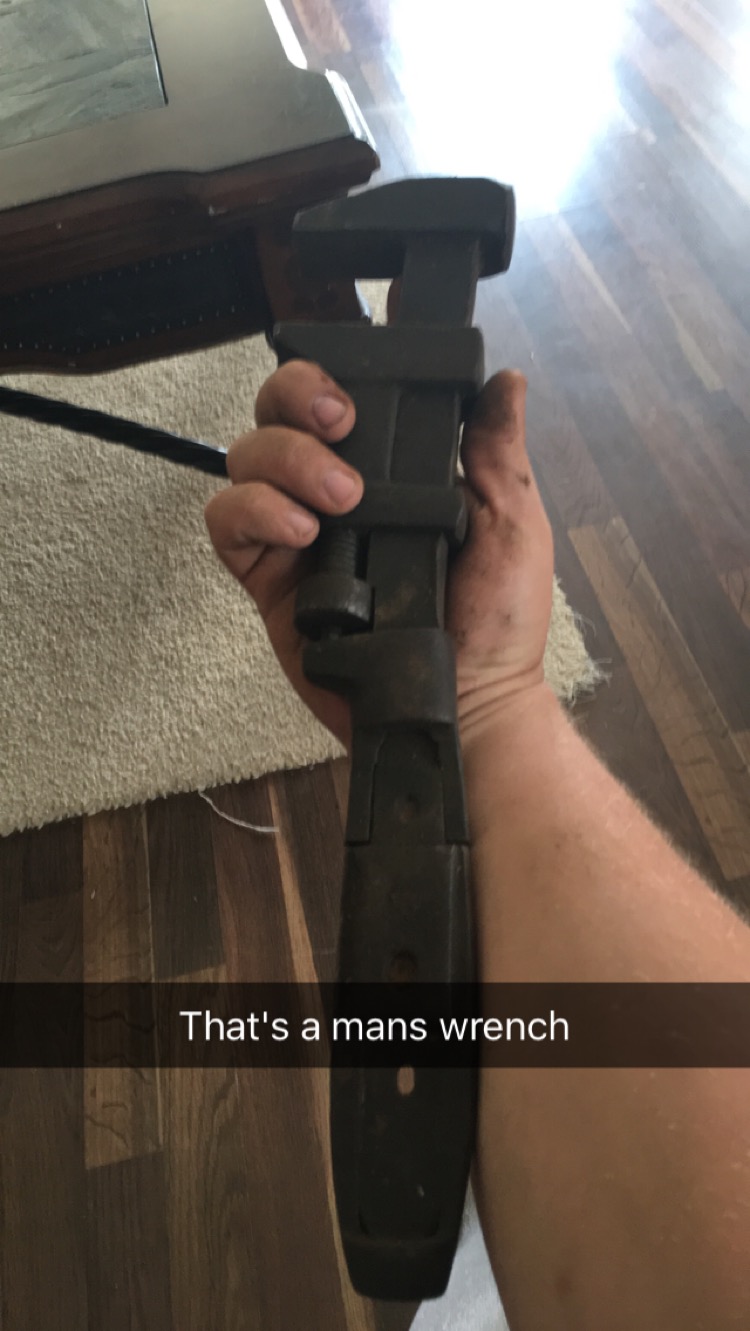
also i found a huge box of old pipe wrenches, all American made including 2- 24" rigid pipe wrenches, and probably the biggest monkey wrench ive ever seen all for 20$
I even scored a snapon 1/4in ratchet for a dollar, some old needle nose pliers i'm going to make into scrolling tongs, and a small machinist vise.

-
haha, well this got got interesting quick. speaking of the RR track i have a piece about 2 feet long, i figured it would make a good upsetting block? im sure its been done before. i wonder if a guy could take tubing and weld it to the rail and make a tool for different sized stock to help keep it straight while upsetting? anyone ever done anything like this?
-
1 hour ago, ThomasPowers said:
Looks like a "Loud" system to me. Probably profit by some quieting methods used. Is the upright hollow? Filling with sand will help keeping it from being as loud. Some sort of pad under the anvil and a clamp to hold it in contact will help too.
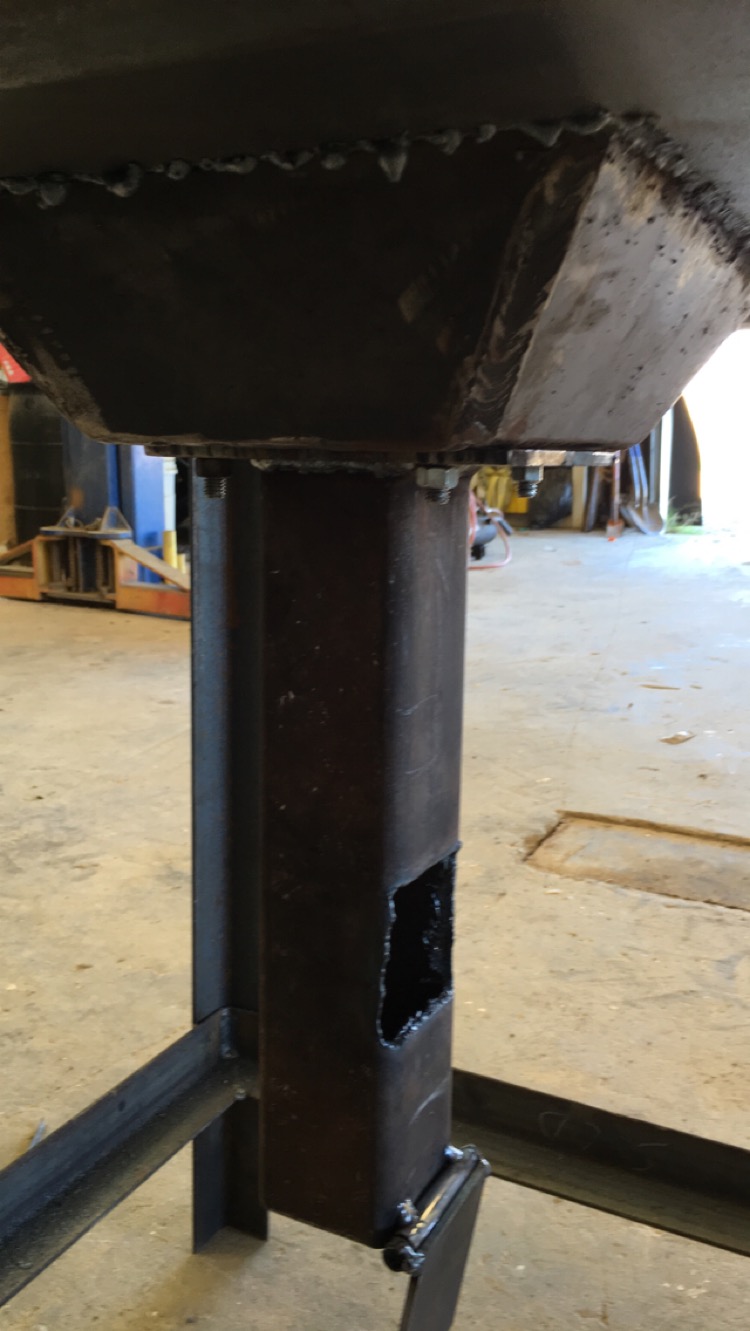
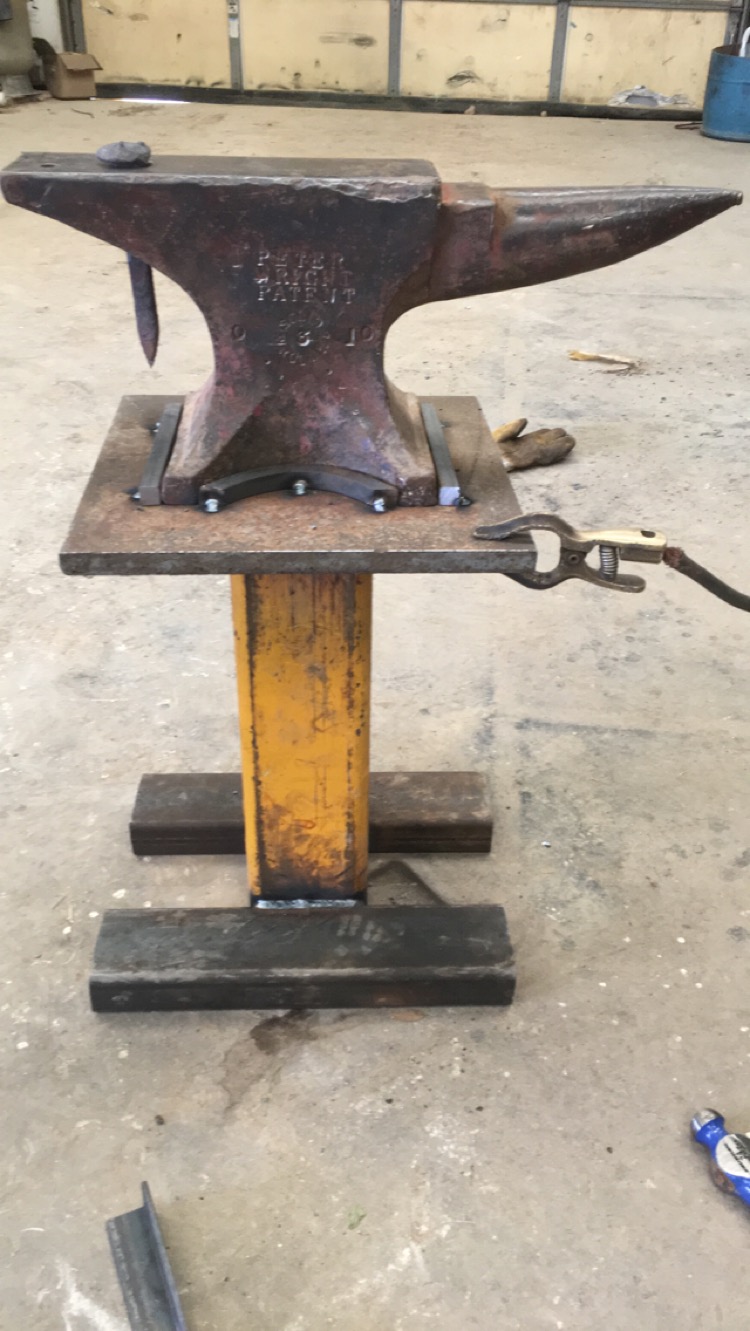
well, the upright is 5"x 1/2" wall and the feet are 2x3x1/4" I did fill them with about 45lbs of sand and capped them off. Its still somewhat loud. i have some baler belting here that ive been thinking of putting under the anvil. I still havent decided on how to clamp it down. (to busy bashing things with hammers haha).

-
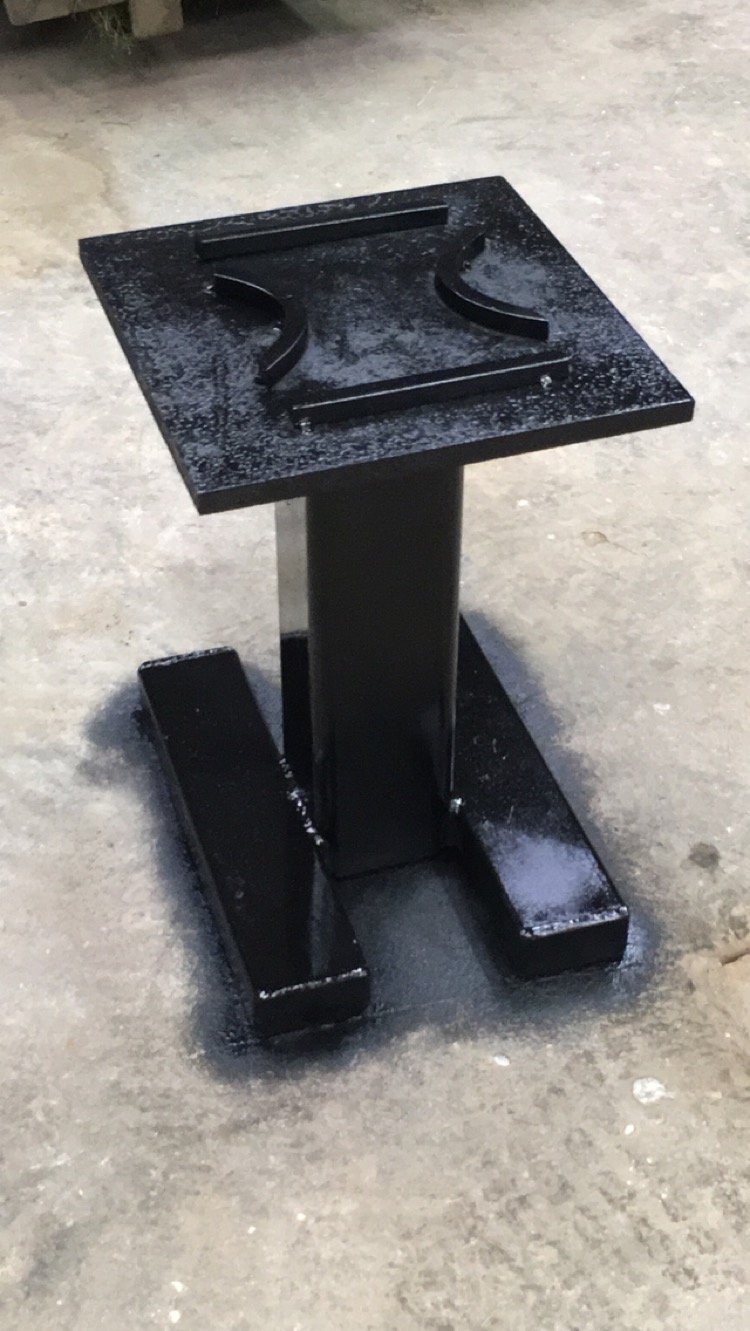
Thank you Glenn,
I did decide to go with the half moon shapes. Only tacked onto place right now. I will use it for a bit, and see how I like it. Thanks for the insight. I never thought about using the "whole anvil" as you said. Great info!
sam

-
hello,
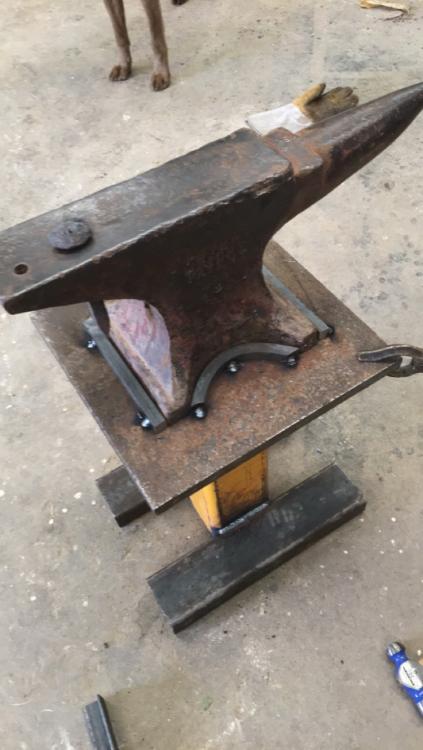
This past Sunday i purchased my first anvil, brought it home, and began building my stand. I decided to build the stand out of metal instead of wood for the simple fact that id rather cut, weld, and grind than start up my chainsaw. Anyway, my question is on mounting the anvil. Is it necessary to fasten down a light anvil (94# PW)? or can i just build up around the outside base? Ive been all over the forums looking for someone asking a similar question, if i missed it i wouldn't be surprised, because of the amazing amount of information on this site. My original idea was just to build up around the base, but i'm concerned the anvil isn't heavy enough and will bounce around too much. Just thought id get some opinions while i sit and have a cold brew.
thanks!
sam
tried to upload some pictures, but for some reason this electronic thing isn't cooperating with me.
-
2 hours ago, EJRailRoadTrack said:
Nice find! I really need to get to that guy next time I'm in St. Louis! 84 pounds isn't HUGE but will get the job done! Have fun it, treat it well and it will go far.
-EJ
its 94 ;P haha. but yeah he has a ton of stuff. a whole building full actually.
-
The guy was located about 40 miles east of St. Louis. I only wish I had more money. He had pallets and pallets of anvils, well over 100 of them. And he had anvils easily 500# or more. Leg vises, machinist vises. Literally a fortune. I will go back when I have more money to blow haha.
-
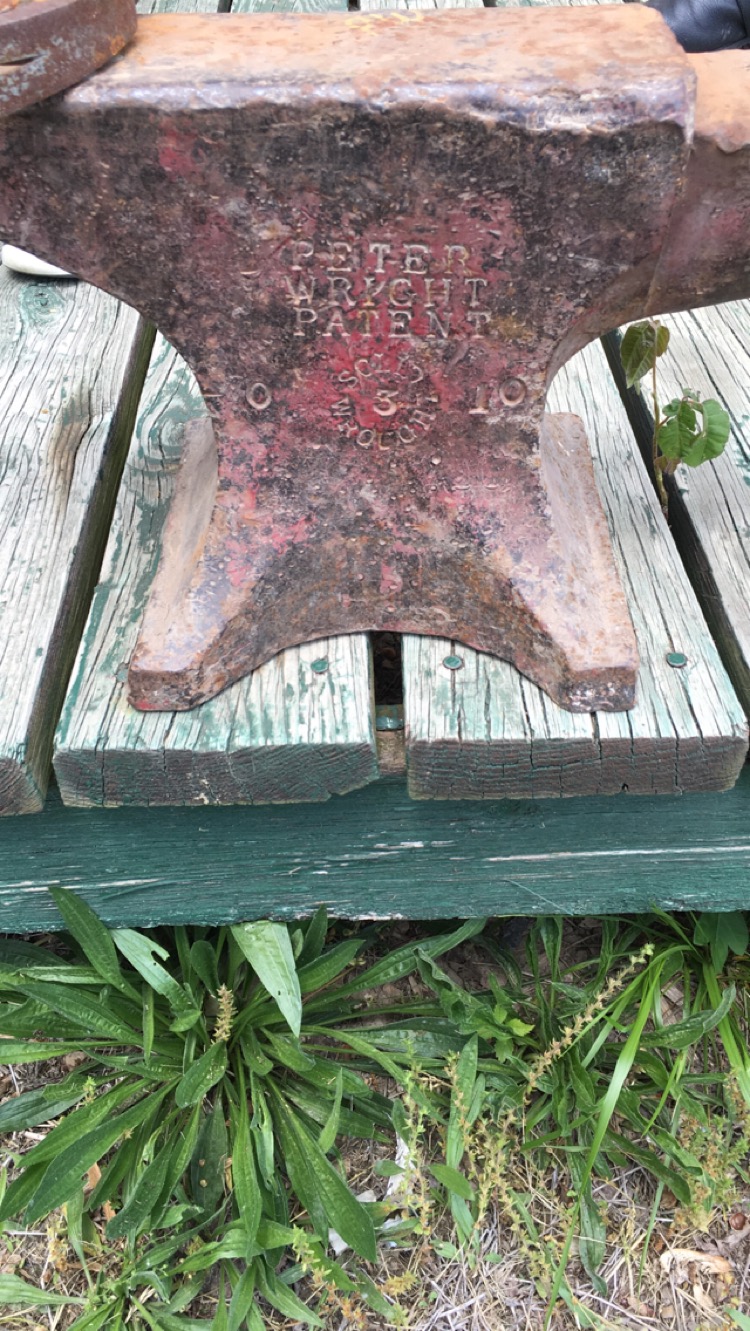
Finally got my first anvil! Just posting because of my excitement. Can't wait to put it to use. It was marked for 350$ I got it for 200$ to the untrained eye the rebound is about 75% and the ring is super loud. Definitely going to require hearing protection when I start using it. Only down side was I had to drive 2 hours one way
 to get it. Not real sure of the age.
-
15 hours ago, ThomasPowers said:
hitting the bottom with the grinder shouldn't do much
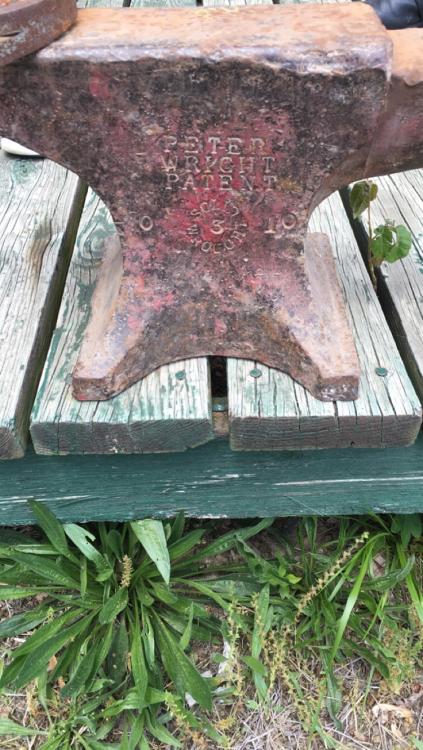
okay, so i did the spark test. im thinking its definitely cast iron. it does however throw quite a bit more sparks than another peice of cast i had laying around. did some research and i think its because it is "white cast". not 100% on this.
14 hours ago, Nobody Special said:There's also the "thunk" test. Hit it with a hammer. If it's rings like a bell, steel, or wrought and steel (although not in this case I think). If it makes a quiet thunk, cast iron.
there is a pretty dead thunk in the center of the face, however the horn and heel have a much more crisp sound. not a ringing, but very sharp.
-
only way i know how to to that would be the spark test. not sure if hitting it with a grinder is a good idea. haha.
-
seems to have decent rebound, 50-60% maybe, but its very quiet no ringing at all.
-
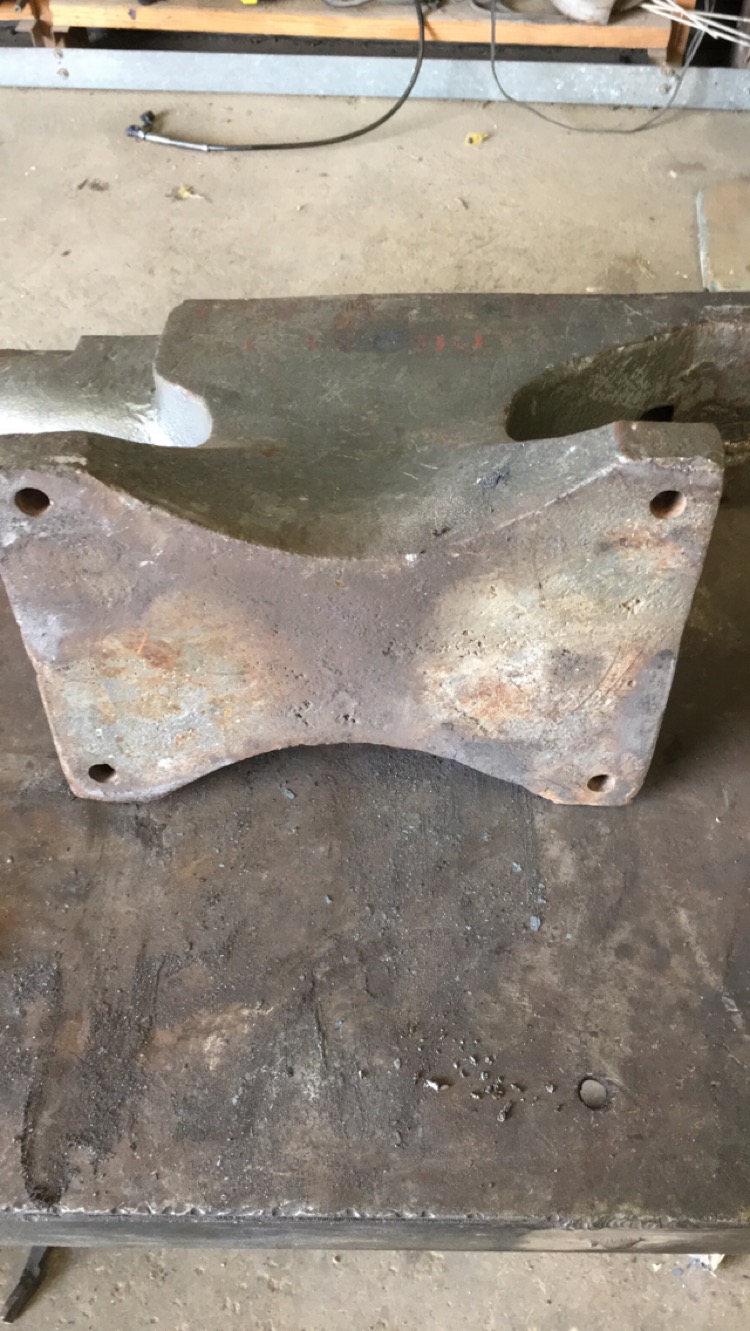
2 minutes ago, ThomasPowers said:
Are those feet retrofitted? Otherwise NOT a trenton. Small hardy and fat heel also un trenton like What does the bottom look like?.
Anybody can drill holes in their anvils feet it's just the location of them do not look like a trenton.

-
10 minutes ago, Yuppiejr said:
First guess is a Trenton (Google image-search-fu) and seems to be in remarkably good condition.
I really have no clue. im a true beginner but ive used this anvil at work for different fab work off and on for the last 5 years and i was just curios. however i just did a google search for trenton, and all the ones im seeing have solid feet, this one has holes in it..?
-
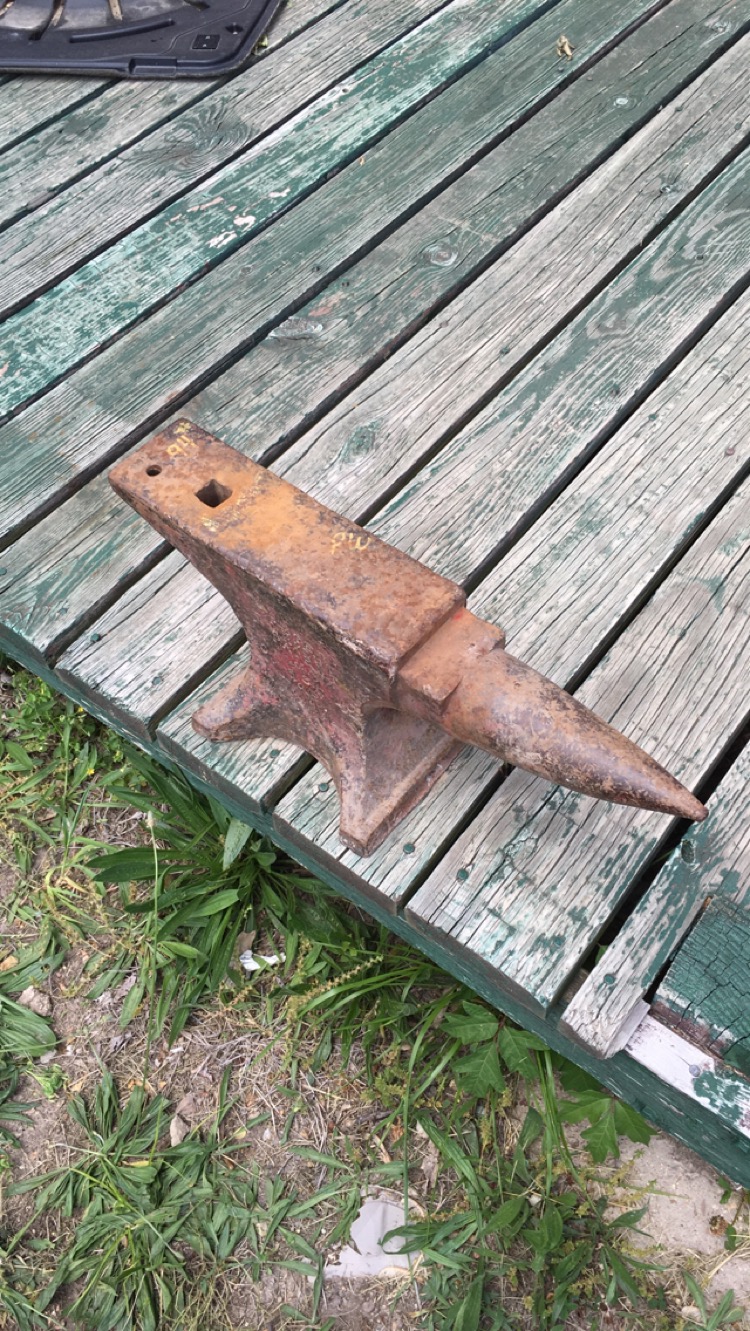
need help identifying this anvil to satisfy my own curiosity. This is the anvil i use at my work, it has been here in this shop since way before my time. there are no markings that i can find anywhere. my best guess its a lower tier cast anvil. any info is appreciated. thanks!


out with the old in with the new
in Solid Fuel Forges
Posted
yeah, i tried to pick a size that would be sort of "all purpose" for now. but, i have a feeling in the future ill be making another more shallow fire pot once i find out how much coal i consume with this one, and what size stock im going to be using more often. obviously the smaller stock wont need such a big fire ball. and since my fire pot just drops in it should be as simple as taking 4 bolts loose (or using the hot ratchet lol) and swapping them out.