scote621
Members
-
Joined
-
Last visited
Everything posted by scote621
-
I hear you, I wear a dust mask at a minimum when I am near the casting furnace. And I hold my breath when I am looking in or pulling the crucible out. I also stand upwind as much as possible. I do not like the idea of inhaling that junk.
-
True, guess most people don't realize its not the direct contact with the liquid per se that is a concern, though don't get me wrong not saying to go out and play with it. The major issue is the toxicity associated with inhalation of mercury vapor (Mad Hatter disease) or ingestion through contaminated food supply. Along with its nasty habit of bio accumulation in the environment. I can't tell you how many waste streams I have reviewed where a high-school or college lab had an instrument break or mercury spill in their sink. They literally rip out the plumbing of the lab, there is no way they can clean it out once it goes into the drain and their discharge would never meet the EPA treatment standards again. I was watching one documentary about gold mining in the amazon; huge chunks out there are completely unregulated and they have dredges looking for gold and using mercury and cyanide in their gold cleaning process and discharging straight into the river. It was horrifying to me that this is still going on, and the people doing it know its bad, they just don't care they said as much to the film-makers. Guess we shouldn't give the benefit of the doubt after all to your point...
-
That is a good point and one I had not considered. I had not heard of this process before so I looked it up on the old google machine and the first line I read said: "Fire-gilding or Wash-gilding is a process by which an amalgam of gold is applied to metallic surfaces, the mercury being subsequently volatilized" Yup, I would hope that people immediately see volatilized mercury and go running for the hills, let alone trying this on their own, without a proper process/set up/ppe etc. I work for a large environmental disposal company reviewing hazardous wastes for safety and regulatory compliance and assigning proper treatment technology methods to them (a desk job on paper but I see anything from oil and water to stuff that could kill you in a breath in horrible ways and have to flag it with appropriate notes for our workers in the field and at our plants). Mercury may not kill you instantly but they do not mess around with it. It has in the last few years become a huge PITA to dispose of, you literally can't buy it or sell it in the U.S when it comes to us for disposal if its in elemental form it gets put into storage indefinitely (sounds a bit like the issues with the nuclear plants and their spent fuel rods...) Another example of it the waste water treatment standards for discharge to public waterways are in the parts per trillion for mercury in fact technically some of the public drinking water within safe limits for drinking has mercury levels higher then our waste water treatment plants have to meet in order to discharge it back into the environment. think about that...
-
I apologize for my over reaction. I should have counted to ten before replying to those previous posts. I agree. I over reacted with the temper of a younger man than that of which I am. I clearly took it too personally. I have been doing more research and am going to be changing how I cast. No more single vent lost foam castings. I am going to get some real green sand and make a casting flask and utilizing a proper sprue/riser venting set up. I also want to reiterate that I am extremely careful when I pour, I am fearful of the crucible and treat it with the utmost respect. I plan out my footwork and clear the area of any unnecessary debris tools etc. I have a real commercially purchased graphite crucible and as soon as I see any signs of wear I spend the cash and order a new one...just wanted to provide some context on the respect I do give this hobby. I am not just doing this half cocked. I have looked but been unable to find any classes in this area unfortunately. This area for the forum is the world of Planet Earth, perhaps if you added a general location/country someone could offer a direction.
-
Ok next time instead of defending myself I will just remain silent...
-
Let me start by saying that I appreciate your concern but that's about where it ends. I have seen many of your other posts and can tell you have an elitist holier than thou attitude towards anyone that is not at an advanced crafting level. I find the tonality of your replies extremely condescending. It is one thing to provide some constructive criticism and advice to take a lesson however It's an entirely different thing to comment that I am going to kill myself and can't pass a metalworking 1 class to summarize your remarks. I have researched lost foam casting and am by no means an ignorant imbecile. Do I have room for growth and accepting constructive criticism absolutely but you sir have crossed the line by a very wide margin. I am a rather intelligent individual and an adult capable of making my own personal reward/risk assessment. I am a chemist so I understand a great deal about the dangers and reactions that can occur when working with molten metals. tone it down, you are on thin ice here
-
What exactly about my setup is so dangerous? I have poured a dozen or so castings without any unexpected results. I am curious to hear your thoughts. I obviously am not looking to get hurt, and understand there is inherent risk in this and try my best to be as safe as possible. I am going to start including vents in future castings if that was what you were referring to being wrong with my diagram, and I am going to use a metal bucket for any lost foam castings as I don't like the idea of aluminum melting through the sides if something overflows or breaks through the sand containment. I have also planned on starting to use the green sand mold process instead of the lost foam casting for most of my projects.
-
I like the idea you had with the charcoal and tongs, I will try that next time I work with copper/bronze. I will also use a vent hole or two in the future. Are you making your own casting sand or buying it?
-
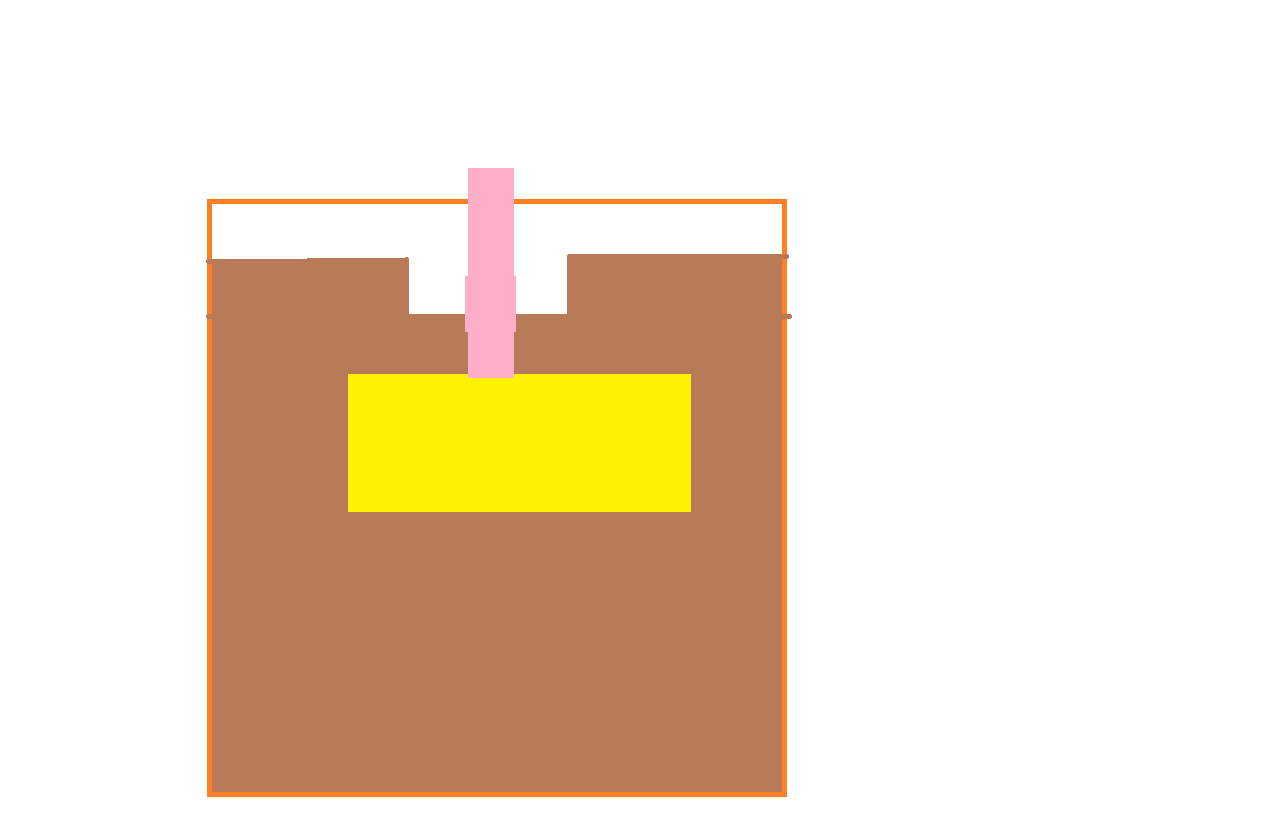
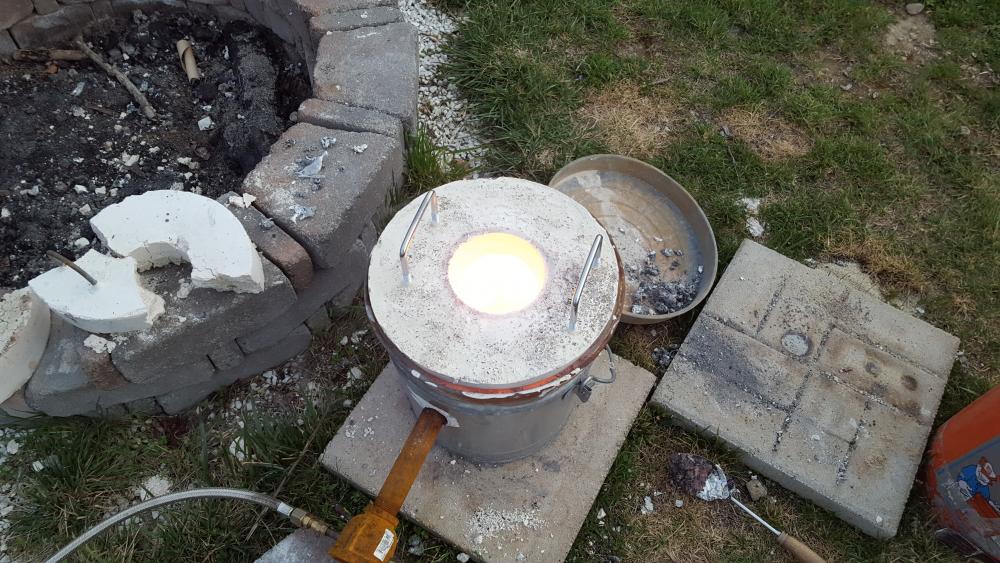
Here is a quick and dirty diagram of my set up, the orange outline is a 5 gallon home depot bucket, the brown is home depot play sand that has some moisture i.e. not 100% dry but not any where close to being wet enough to worry about molten metal contacting to much moisture. The yellow is my axe template, and the pink is my sprue. I tried to estimate the scale as best i could i think i should have buried the axe deeper and had less of the sprue sticking out. I am thinking one mistake is that i did not have a second smaller vent sprue. I also included a representation of the mass of metal that came out before all the cutting/grinding i did with my angle grinder. As far as heating, it takes awhile to get the bronze melted in my foundry I would say at least 30-40 minutes of heating. I started with and aluminum ingot and some copper and once there was a small pool of liquid i would slowing add more of the copper, my thought was that the aluminum already being molten might help cover the copper and prevent copper oxide from forming. The copper ingots though were not melting quickly so i only added a few of them and then since i had a good idea of how much copper i needed i used a roll of scrap 1/2inch diameter copper pipe i had acquired and slowing feed that in, i was actually able to get an idea of the color of the alloy by doing this as when i would pull out the copper piping there was a reside on the end that was showing me the color after it had cooled for a couple minutes. Using that process i filled up the crucible and then waited a couple minutes in order to make sure it was a bit over melting point, then shut off the gas and pulled the crucible out for pouring. I would say that the time from pulling the crucible to pouring took less than 45 seconds.


-
Thanks for the info. Since my last post I did some research and also heard about crushed charcoal, I will try that the next time. I like the idea of finding scrap copper and aluminum for cheap at yard sales etc and using that. I also have a friend who is a commercial electrician and got me some scrap aluminum thick Guage stripped wire that was super clean/pure for free. I got like 20lbs from him and it had almost no dross at all. I may not be using it correctly but maybe the latest pics I showed will allow you to see what I'm referring to. I fully understand I am a complete rookie at this and I am old enough now to know how little I actually know about something and take guidance constructively from those with more experience.
-
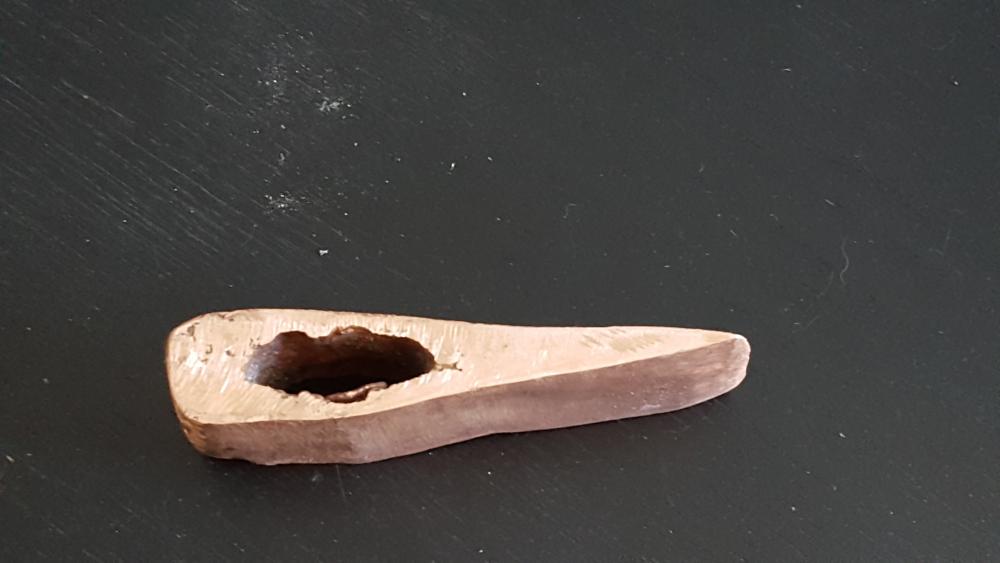
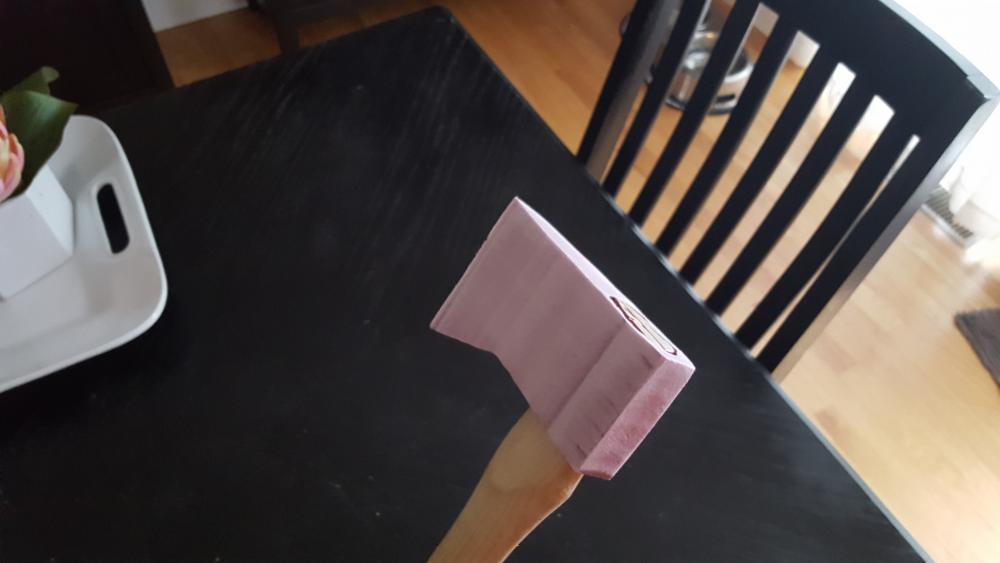
So attempt 2 came out much better but still not exactly what I envisioned. I love the color of the alloy, I measured it around 10%Al 90% Cu before the melt and think I had a successful alloy produced. What I didn't like was the final finis . It had some cracks and porosity issues I think I needed a longer sprue and more finally packed sand. The sprue turned into a huge mass of metal I had to cut and grind down. The axe was sanded down with 60 all the way through to 800grit and is very smooth and shiny but the larger cracks prevented the smooth mirror finish I was after. I will probably keep this for a bit but it may end up getting melted down in the future for another project or attempt on a more refined axe head.


-
I am familiar with the melting points aluminum is around 1200F and copper is around 1980F I believe. I have not done any degassing, I am not familiar with that process. I had one successful pour of molten copper and all I did was melt it from scrap fittings, pipes etc then skim the slag off and pour it. The only issue with that casting was my sand cracked and allowed some of it to leak as i did not pack the sand tightly enough. I have seen some threads that state using charcoal on top of the copper can help prevent oxidation but I have not tried that yet. This is the copper from the mold I was able to pour.

-
So I attempted to pour the axe head last night and it was a spectacular fail (Well it could have been much worse as this isn't the safest hobby haha). I am 99% sure I made a bad batch of speculum. I weighed out my copper and aluminum and had it set for 8.5% aluminum which was in the range of 5-10% I read that is common for aluminum bronzes. BUT I was stupid and against my scientifically educated brain (I have a B.S in biochemistry) decided I could add another aluminum ingot a few more small copper ones and would estimate the ratio in the middle of the melt. I did this because i was not sure i had the required volume in the crucible for my pour. I was also rushing as this was being done on a weekday night and I did not have much time. So I had the melt going well and threw in the last small copper chunk and gave it a couple minutes and then attempted to pour it, little did i know the copper had not melted yet and stuck to the bottom of the crucible and acted as a heat sink to lower the temp and solidify a good amount of the bottom of the melt...so i poured the crucible out into my mold and was surprised to see it was not all melted (shame on me for not checking). I did skim the top slag off but there wasn't that much and I didn't dig down deep like i should have which would have allowed me to discover the problem. Anyways I only had about half the metal i needed in the pour so now the foam mold is destroyed and I know my project will need to go back to square one. I pull out the metal after it solidied expecting to see a half aluminum bronze axe head. BUT all i got was a grainy very fragile grey looking metal that crumbled with force applied to it, the only thing i can think of is the almuminum % was well over 25% and it was a poor alloy. I am taking this a learning experience and now know to not do that, to weigh it and stick with it. I also think using small copper ingots is leading to a ton of slag (copper oxide) I think i will try sanding and filing them down to rid them of the oxide layer for the ones i already have made, and then in the future try to not make ingots unless necessary and just go right from scrap copper to mold pouring. I have attached a pic and youtube link to my furnace set up in action. https://youtu.be/wUagRzIDzyM Preview YouTube video FurnaceFurnace
-
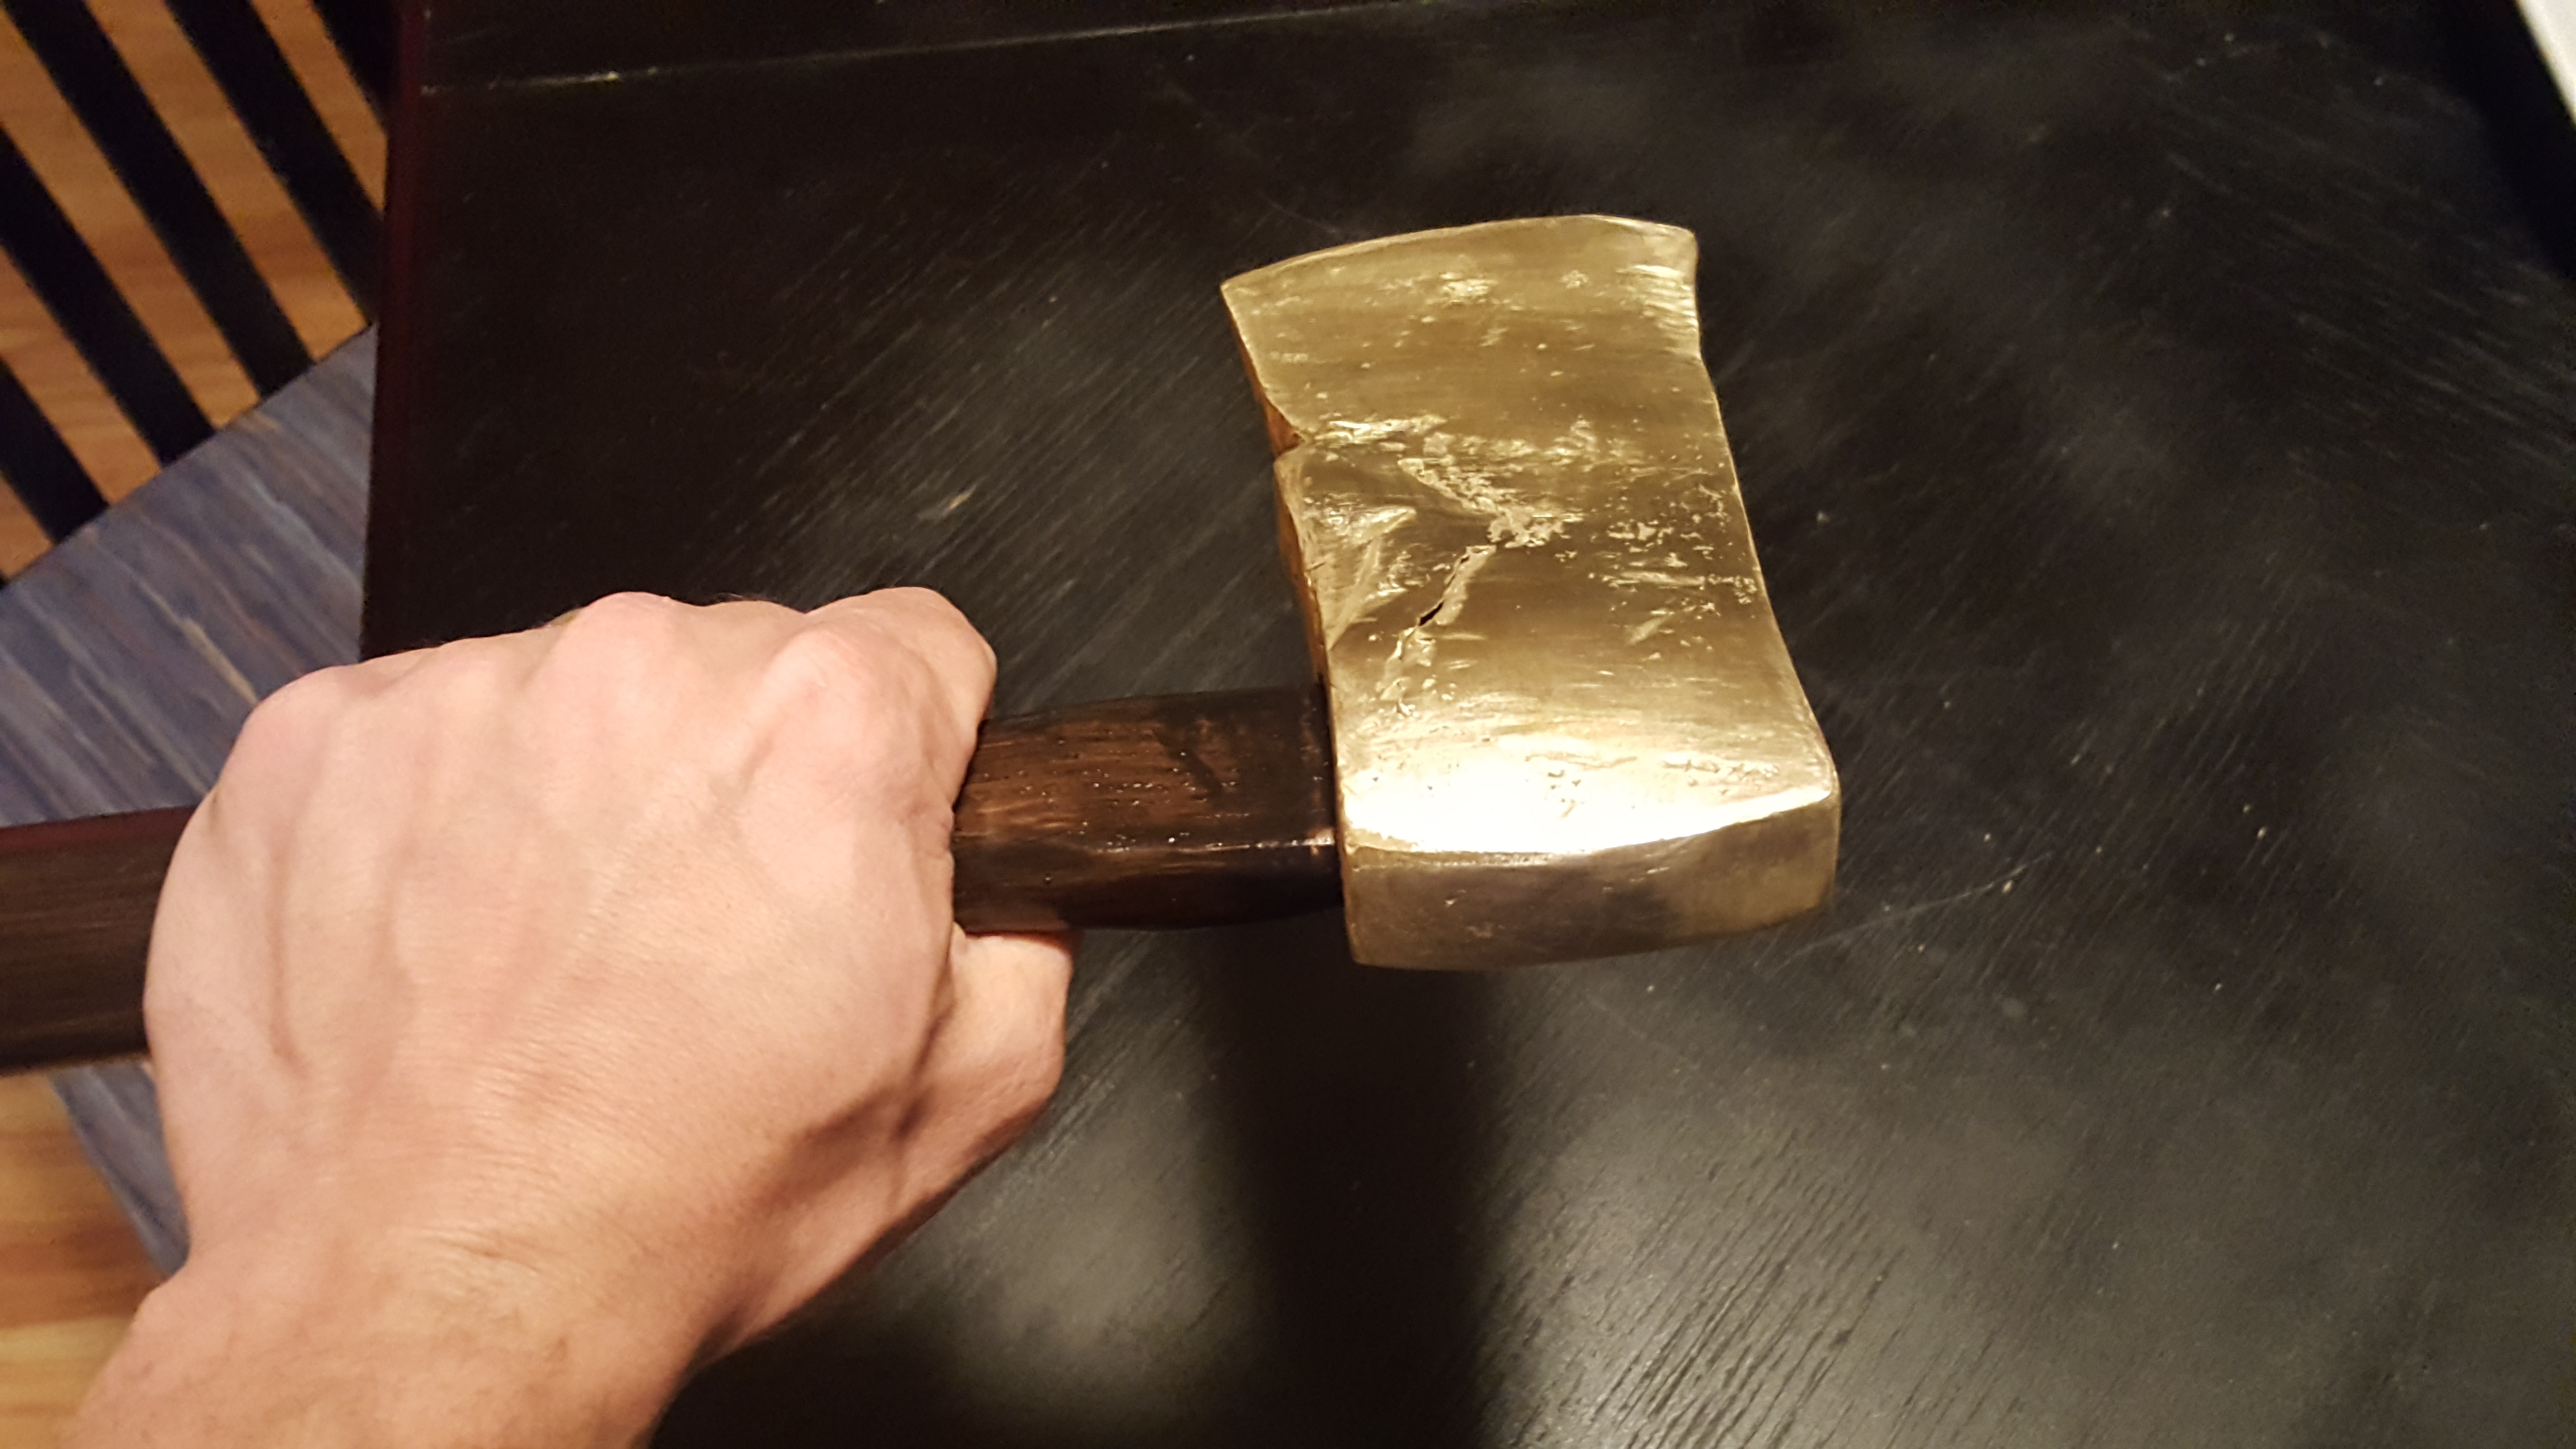
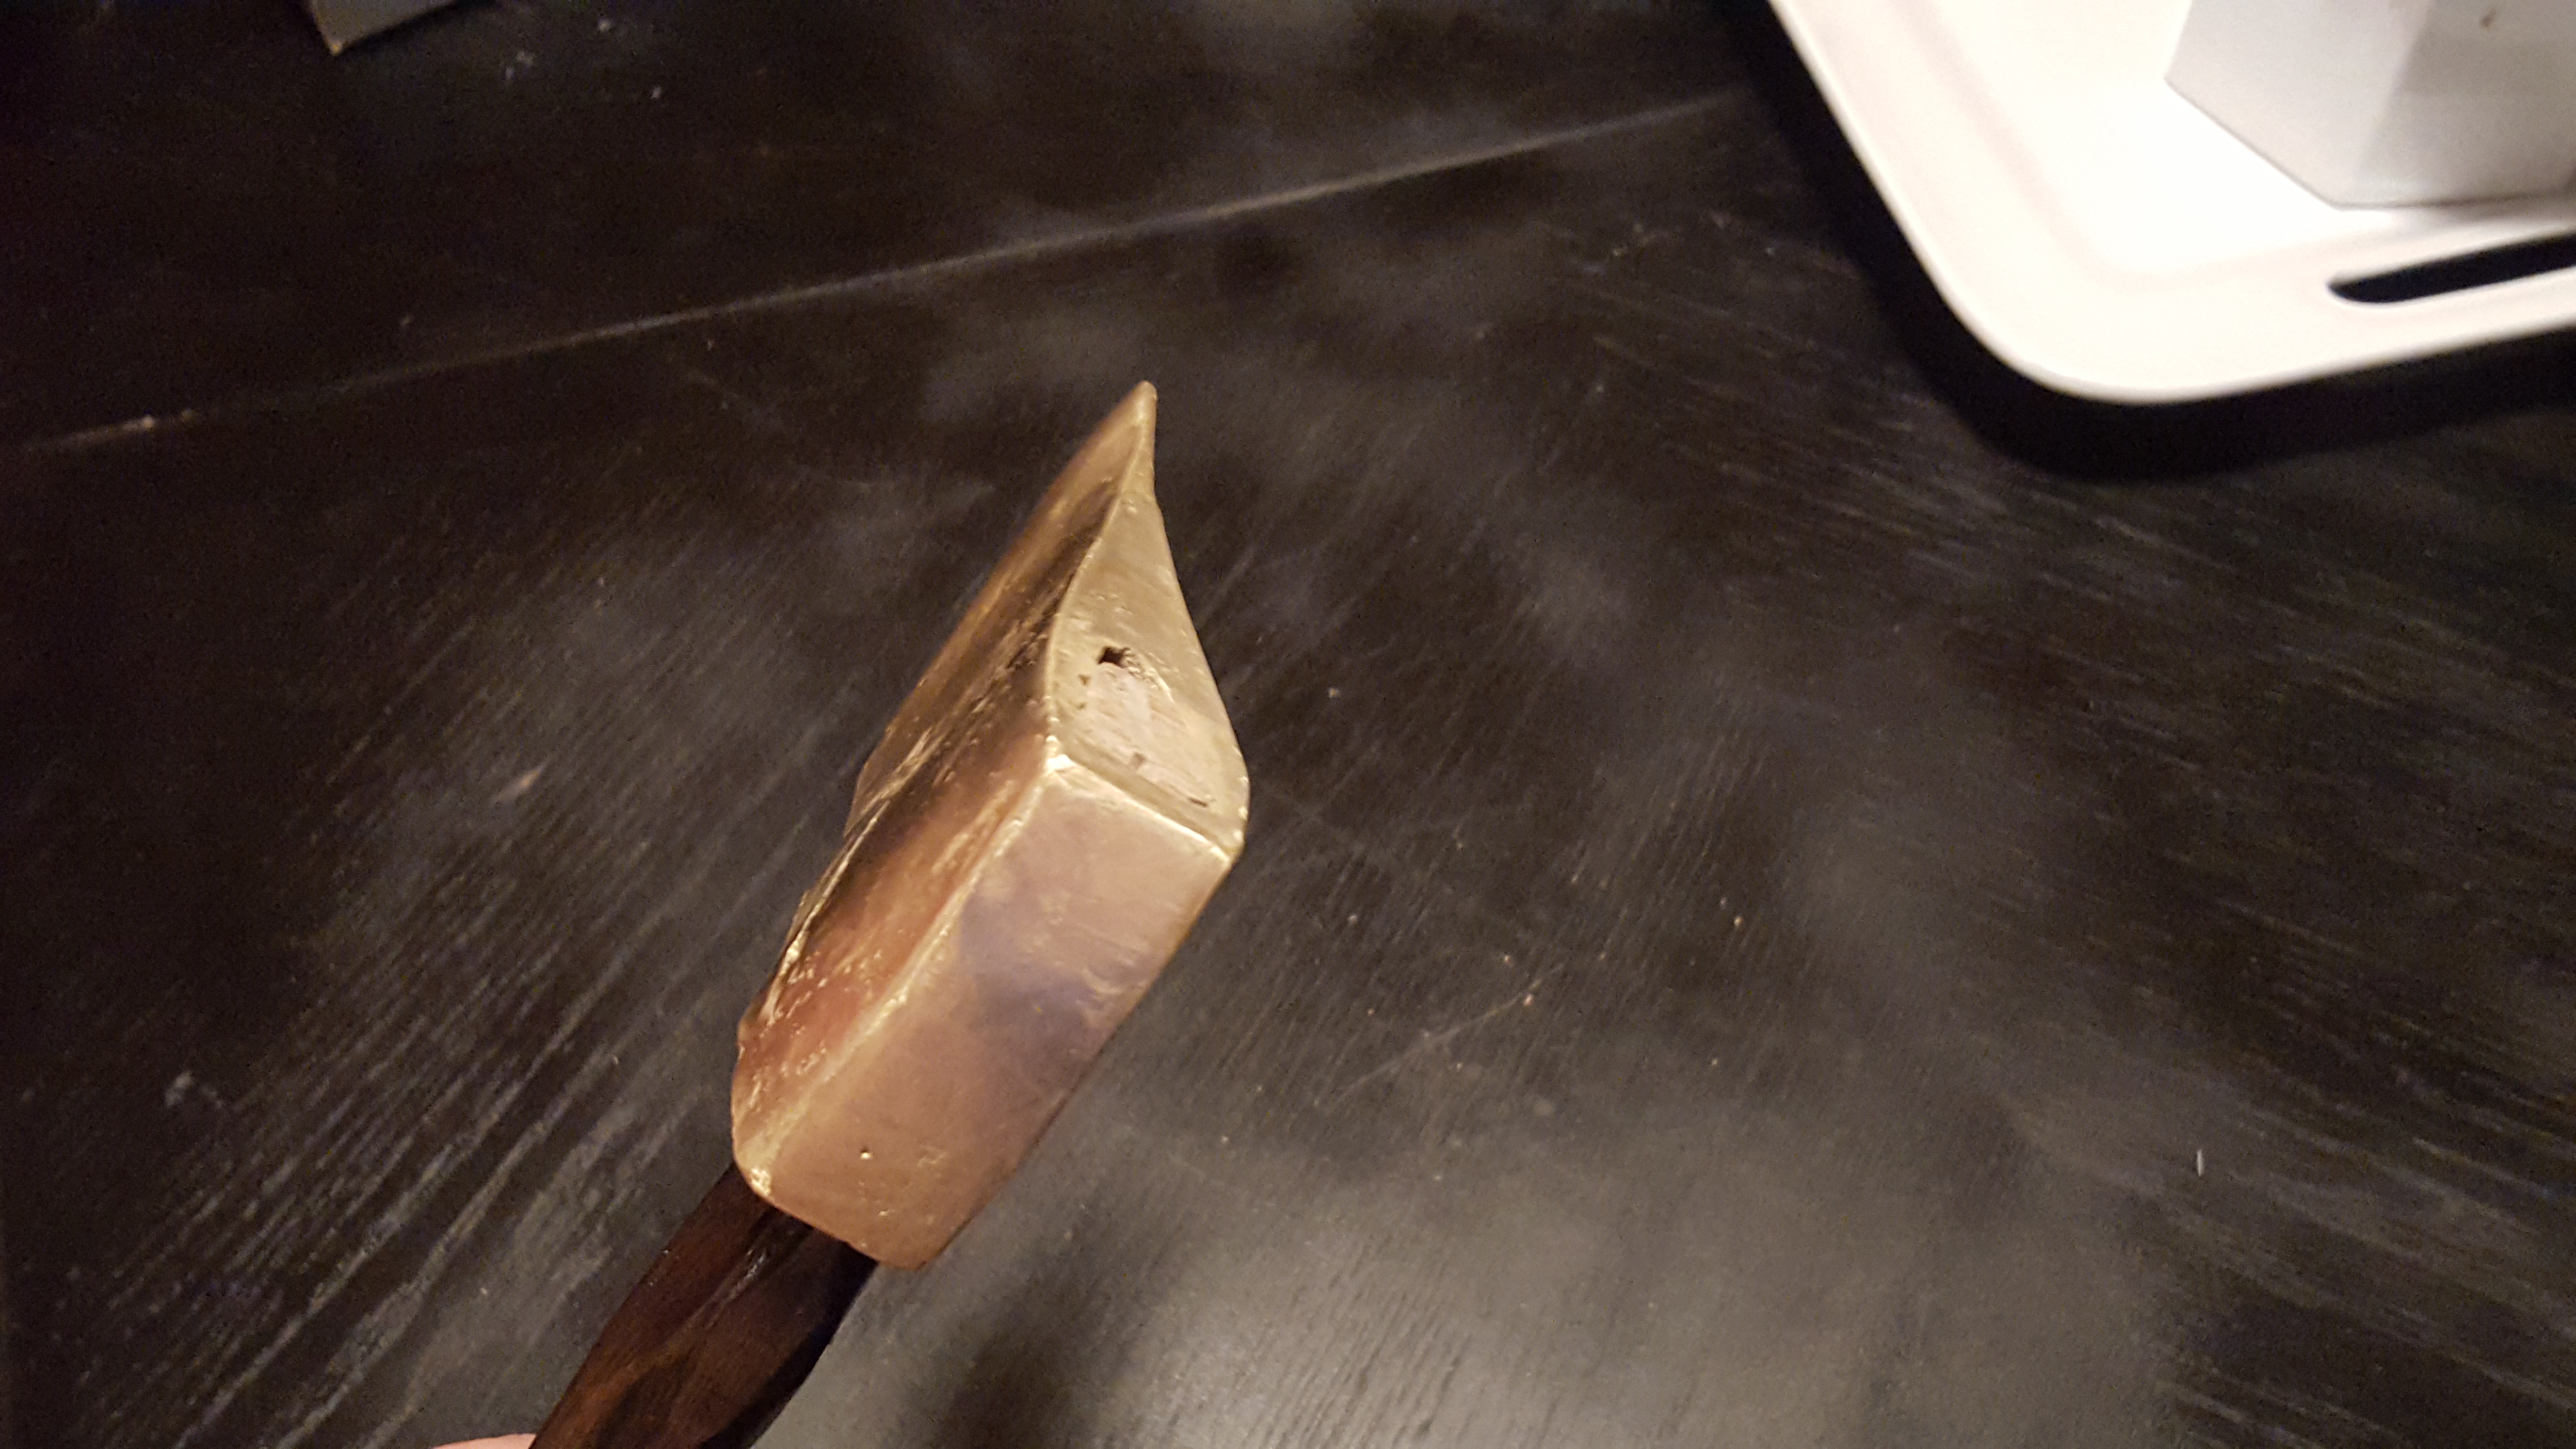
David, That pic sure shows some potential for a nice looking metal. The below pic is an ingot of aluminum bronze (on left) I made by not clearing out my crucible after an aluminum melt and adding copper to it. I have no idea on the ratio of aluminum to copper, but i would say it falls in the 5-10% range that is commonly cited for aluminum bronzes. Do you make your own silicon bronze or are you sourcing it ready for casting?

-
Decided i did not like how the axe head came out and wanted to start anew. Picked up a hatchet handle and mocked up a new foam head, made sure to fit the head prior to pouring the copper. I am waffling between using copper/aluminum bronze or a true 100% copper head. I love the look of the smooth finished copper, and this is soley a decorative piece so I am leaning more on that side of the fence. Planning on a dark wood stain for the handle as well.

-
Thanks, I was happy with how it came out. I should have specified that all of my projects were done with the lost foam technique as well. I am currently using the mini-foundry designed by Grant Thompson (kingofrandom on youtube) heated with a homemade ron reil style burner. I know it is not an ideal refractory material using the plaster and sand but it works for now, I have found that i can get 2-3 days or weekend projecting out of it as long as I am careful not to jostle the foundry too much before the refractory has to be patched (easy enough to do takes about 10 minutes to mix a bit more up and line the sides, lot cheaper than investing in real castable high temp refractory for now). Though I will say I do ultimately plan on buying better material in the future. And copper melting is much more taxing on it due to the longer run times (prob takes 20-30 minutes of full heat with cover on for melting copper pieces). If you try bronze/copper be careful seems to run faster/pours more easily out of the crucible. In fact while making my axe head I think i did not use enough sand around it and the gasses from the foam vaporizing were strong enough to force a seam in the sand open and allowed molten copper to spill out through it. Thankfully i was using a large rectangular rubbermaid container for my casting and it was all contained but that could have been bad if i tried it in a 5 gallon bucket.
-
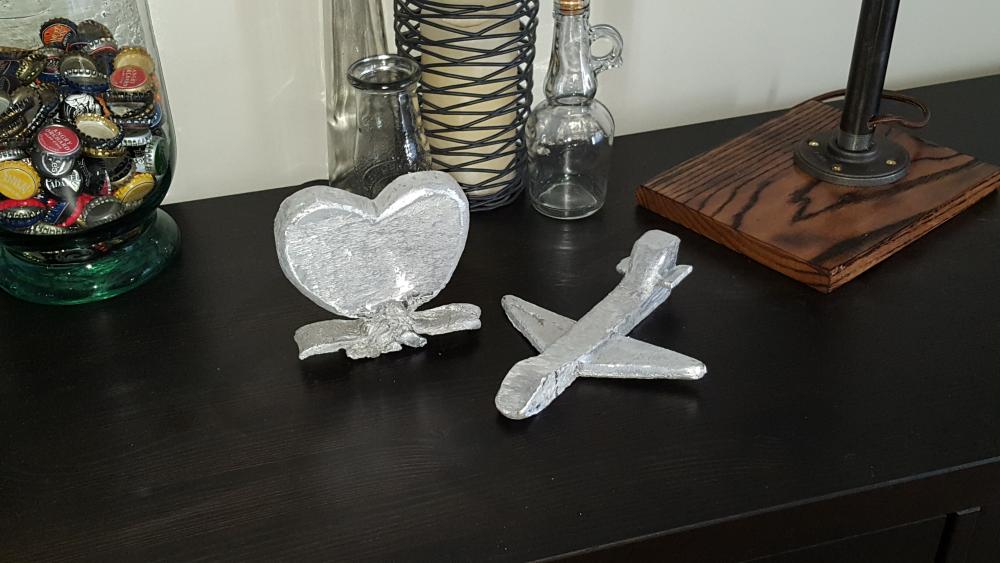
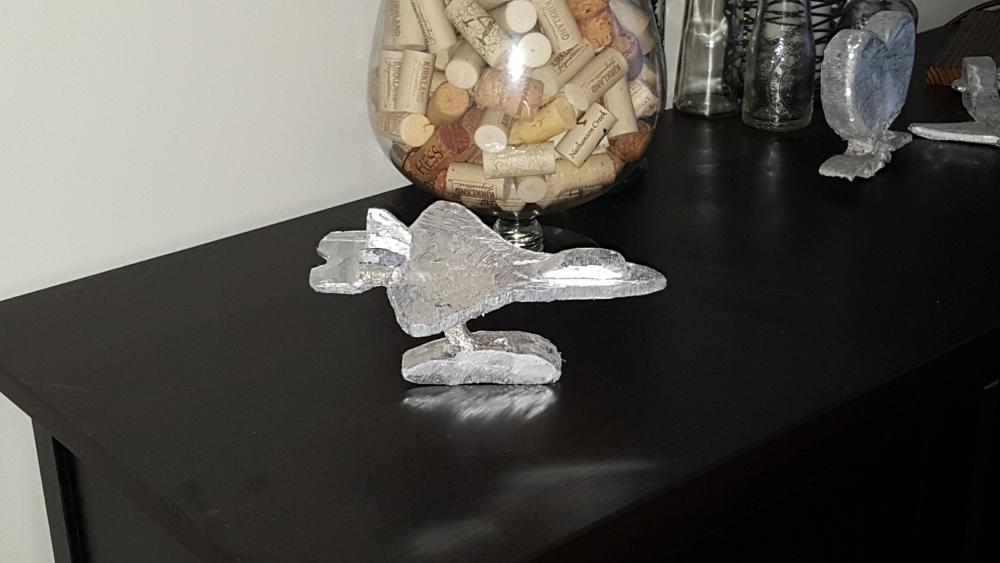
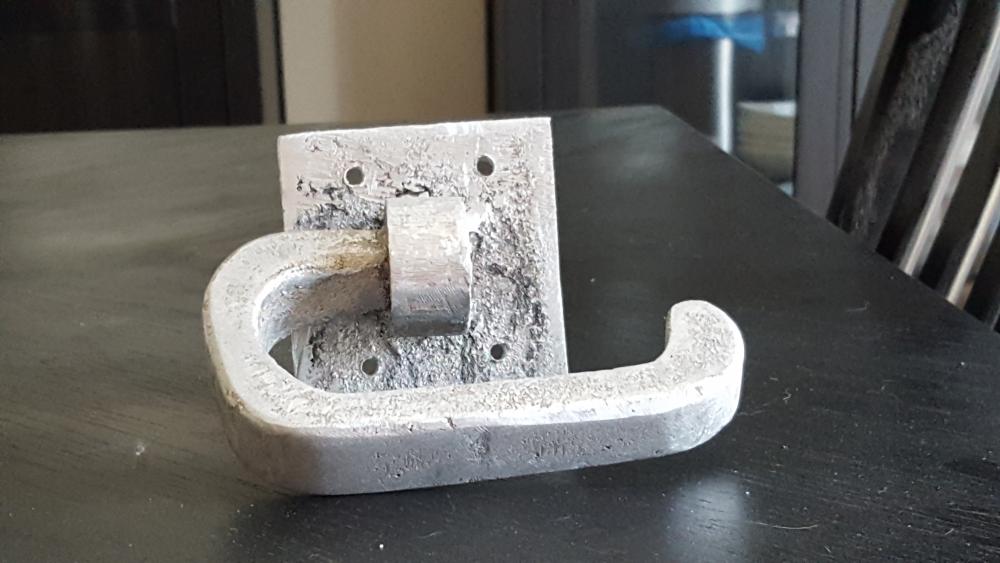
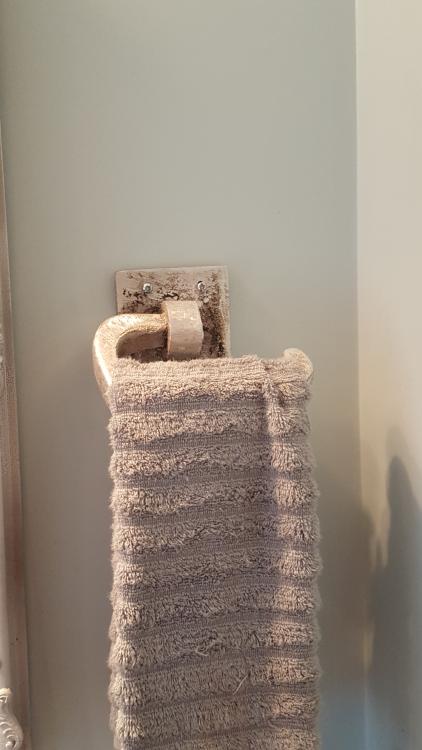
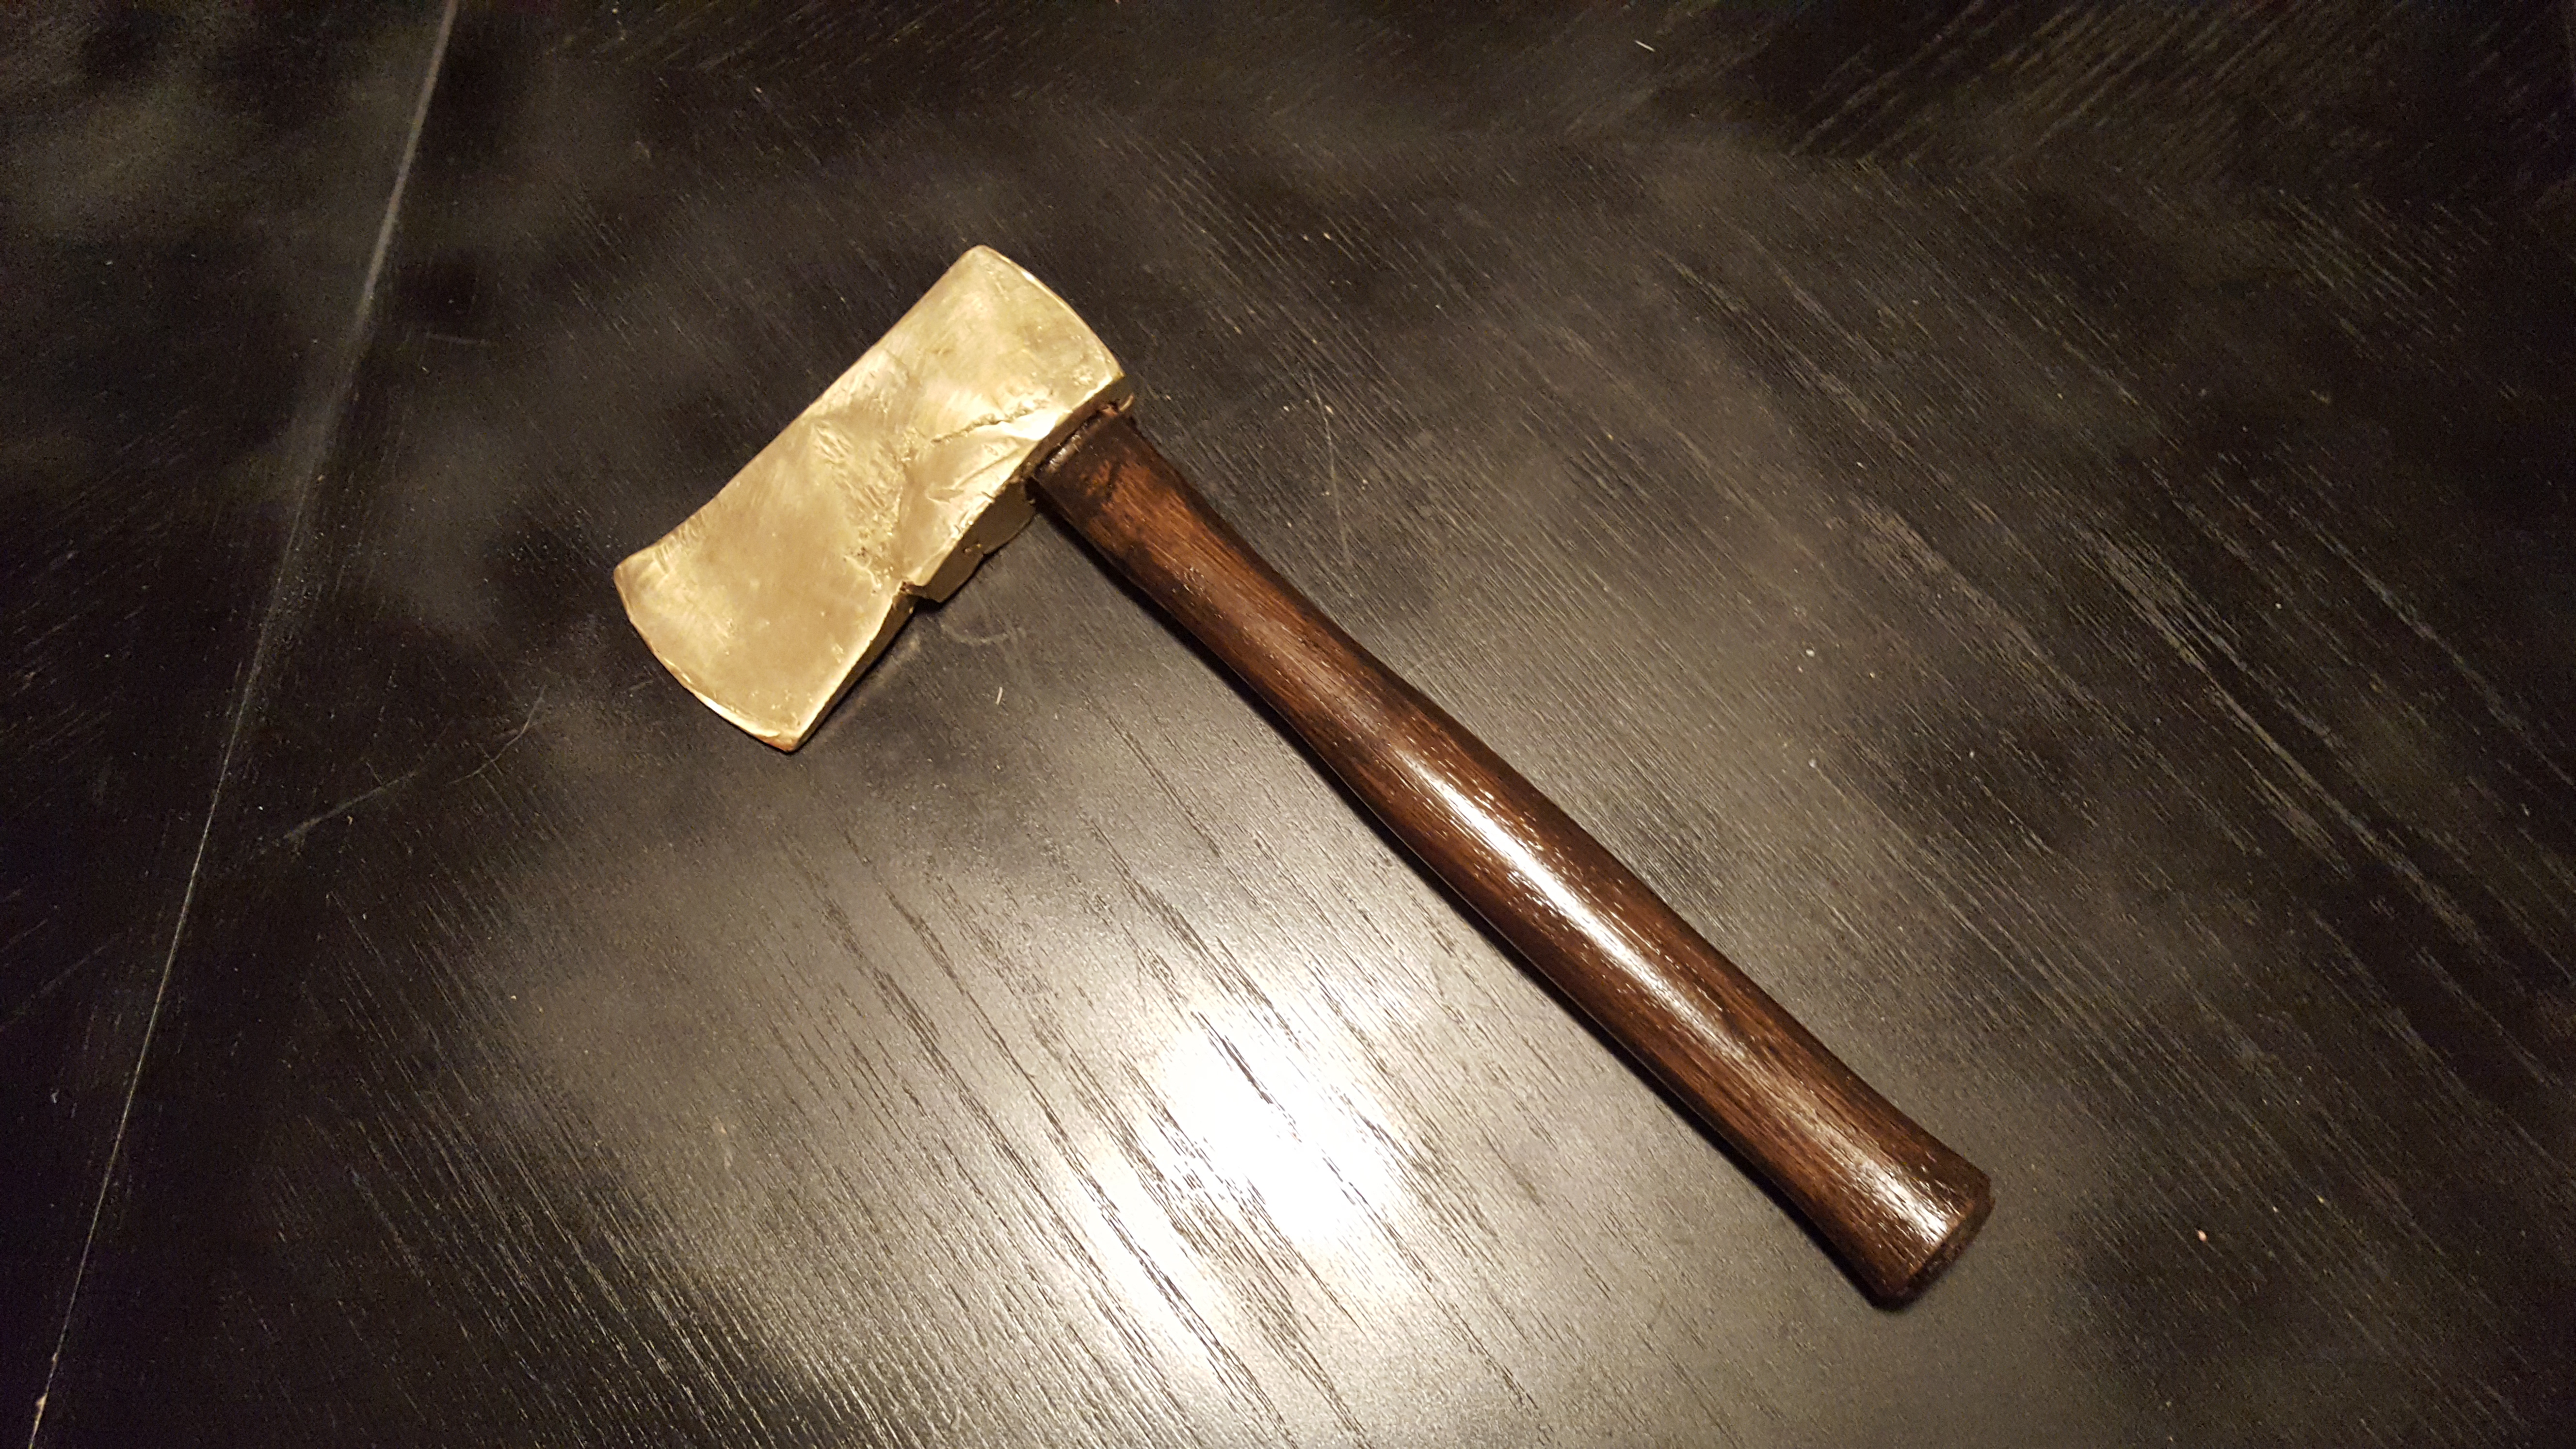
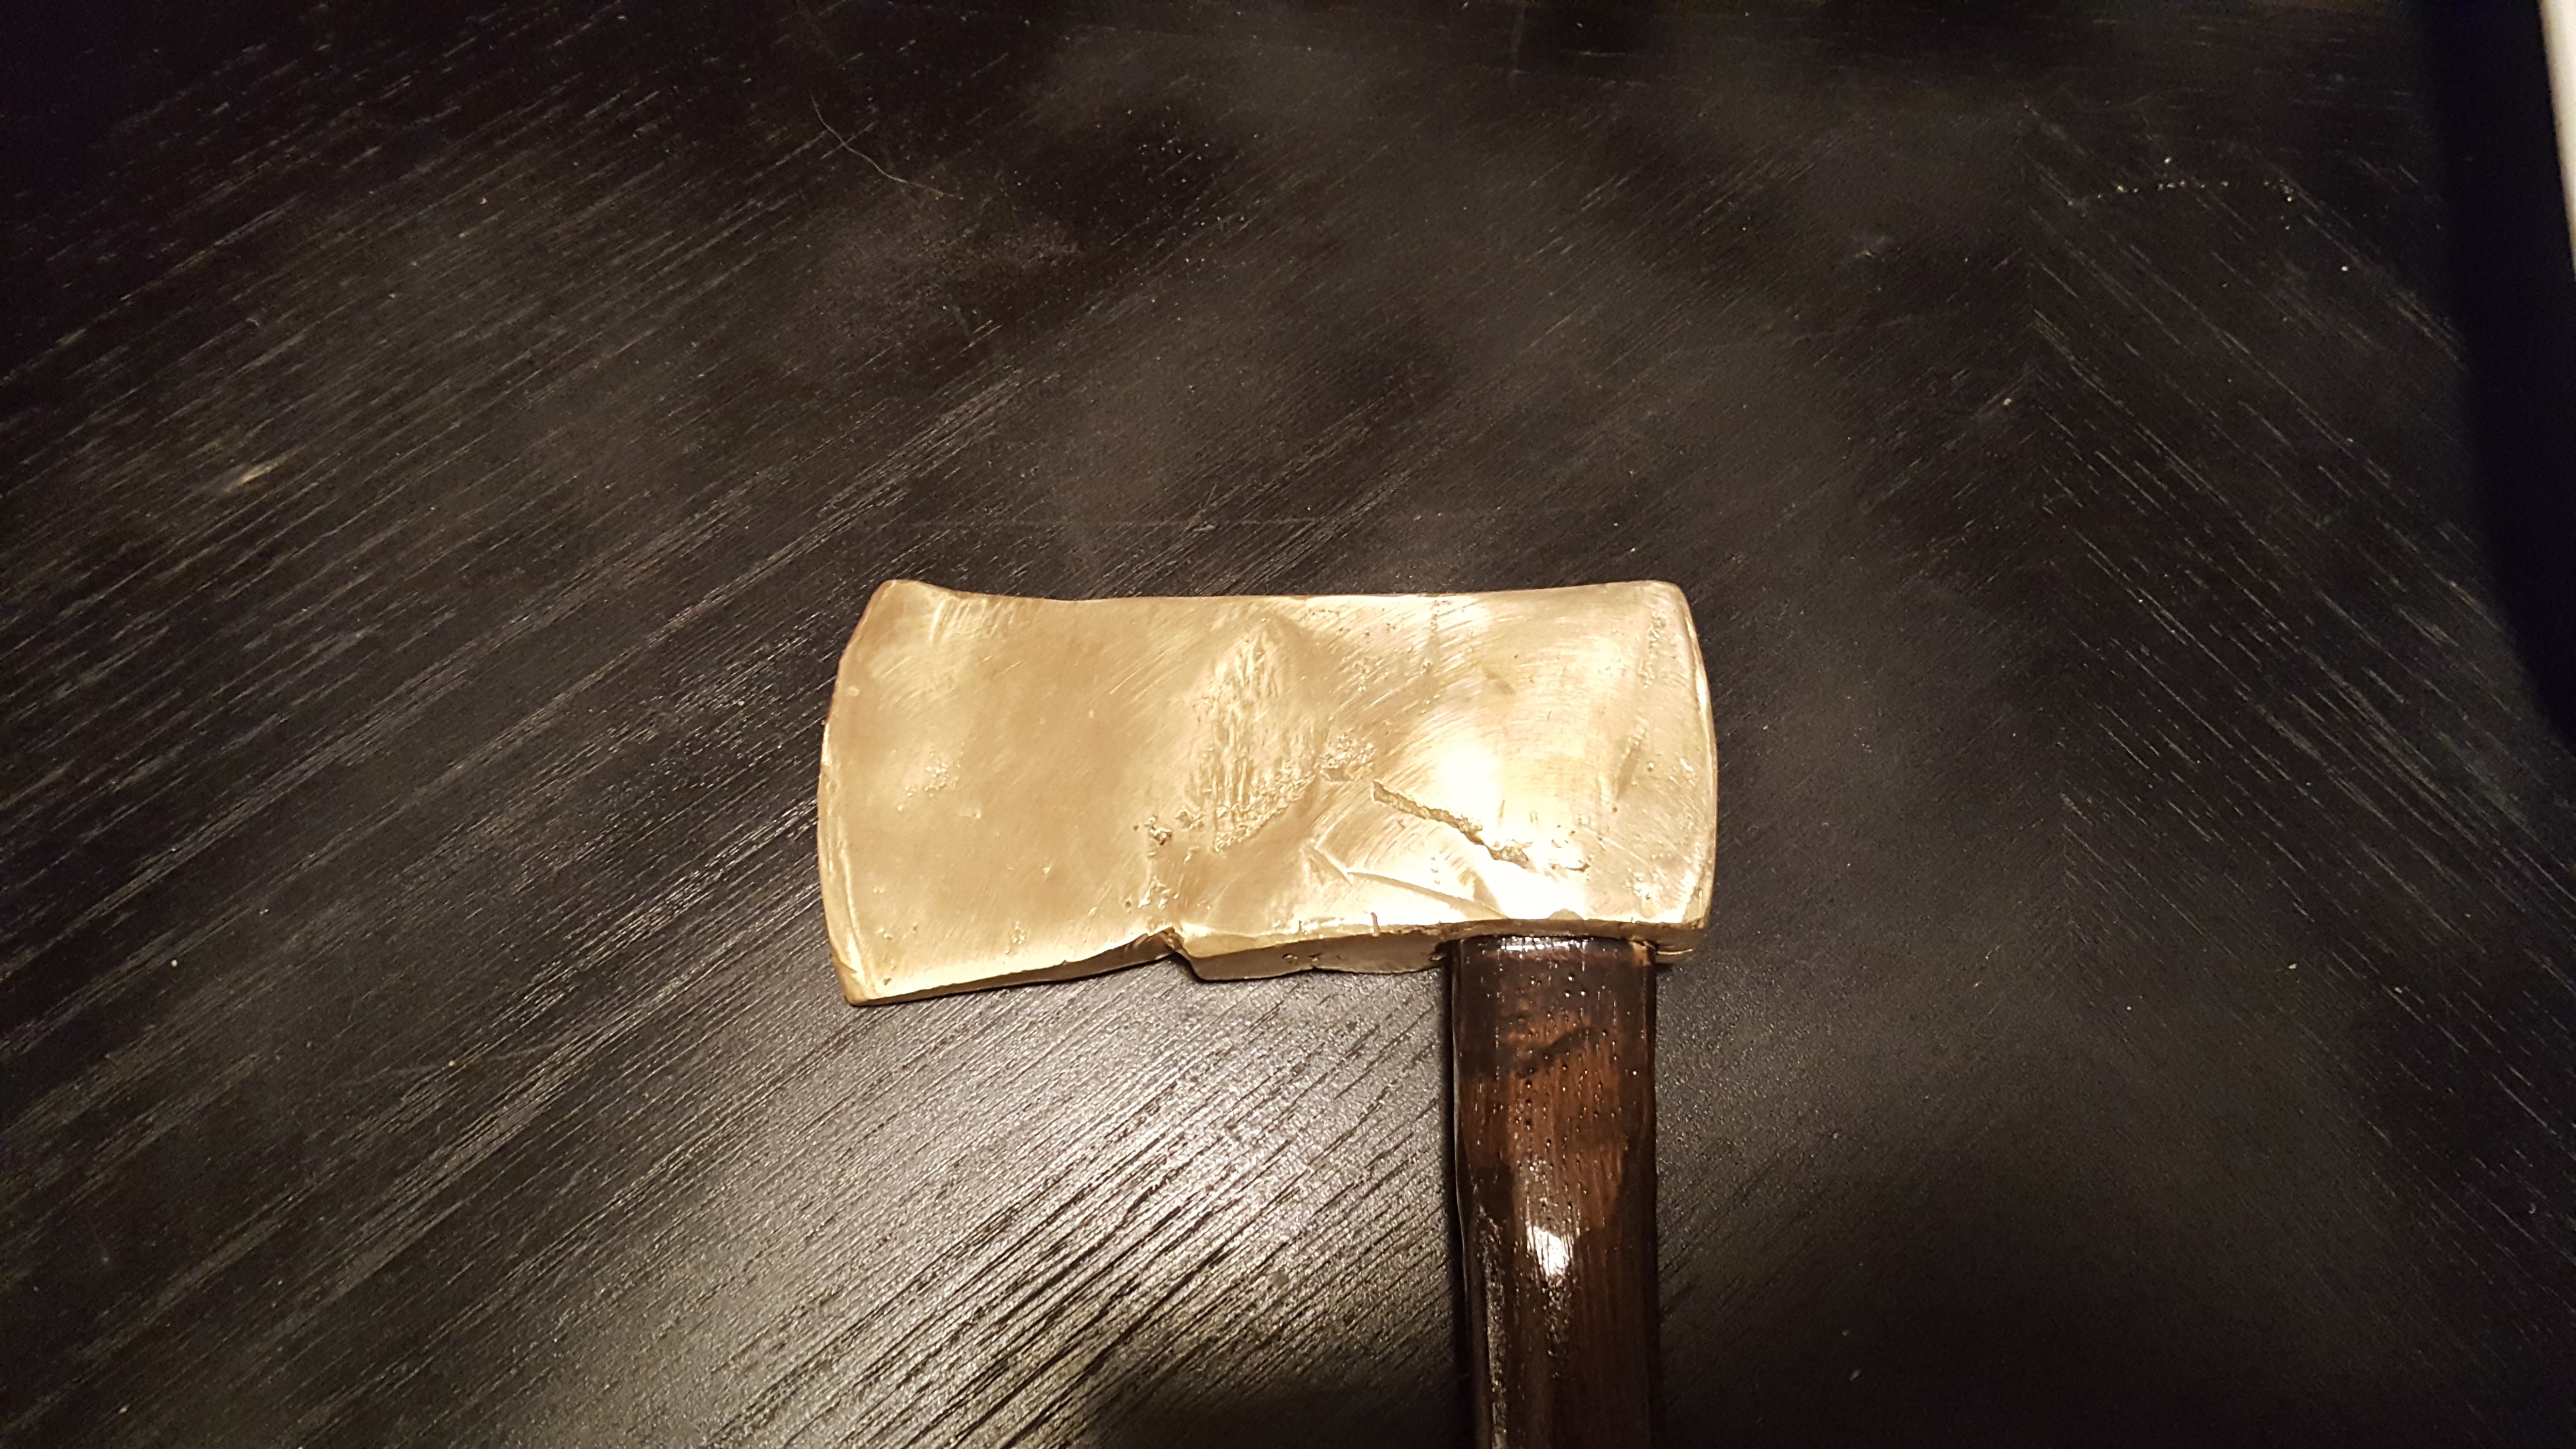
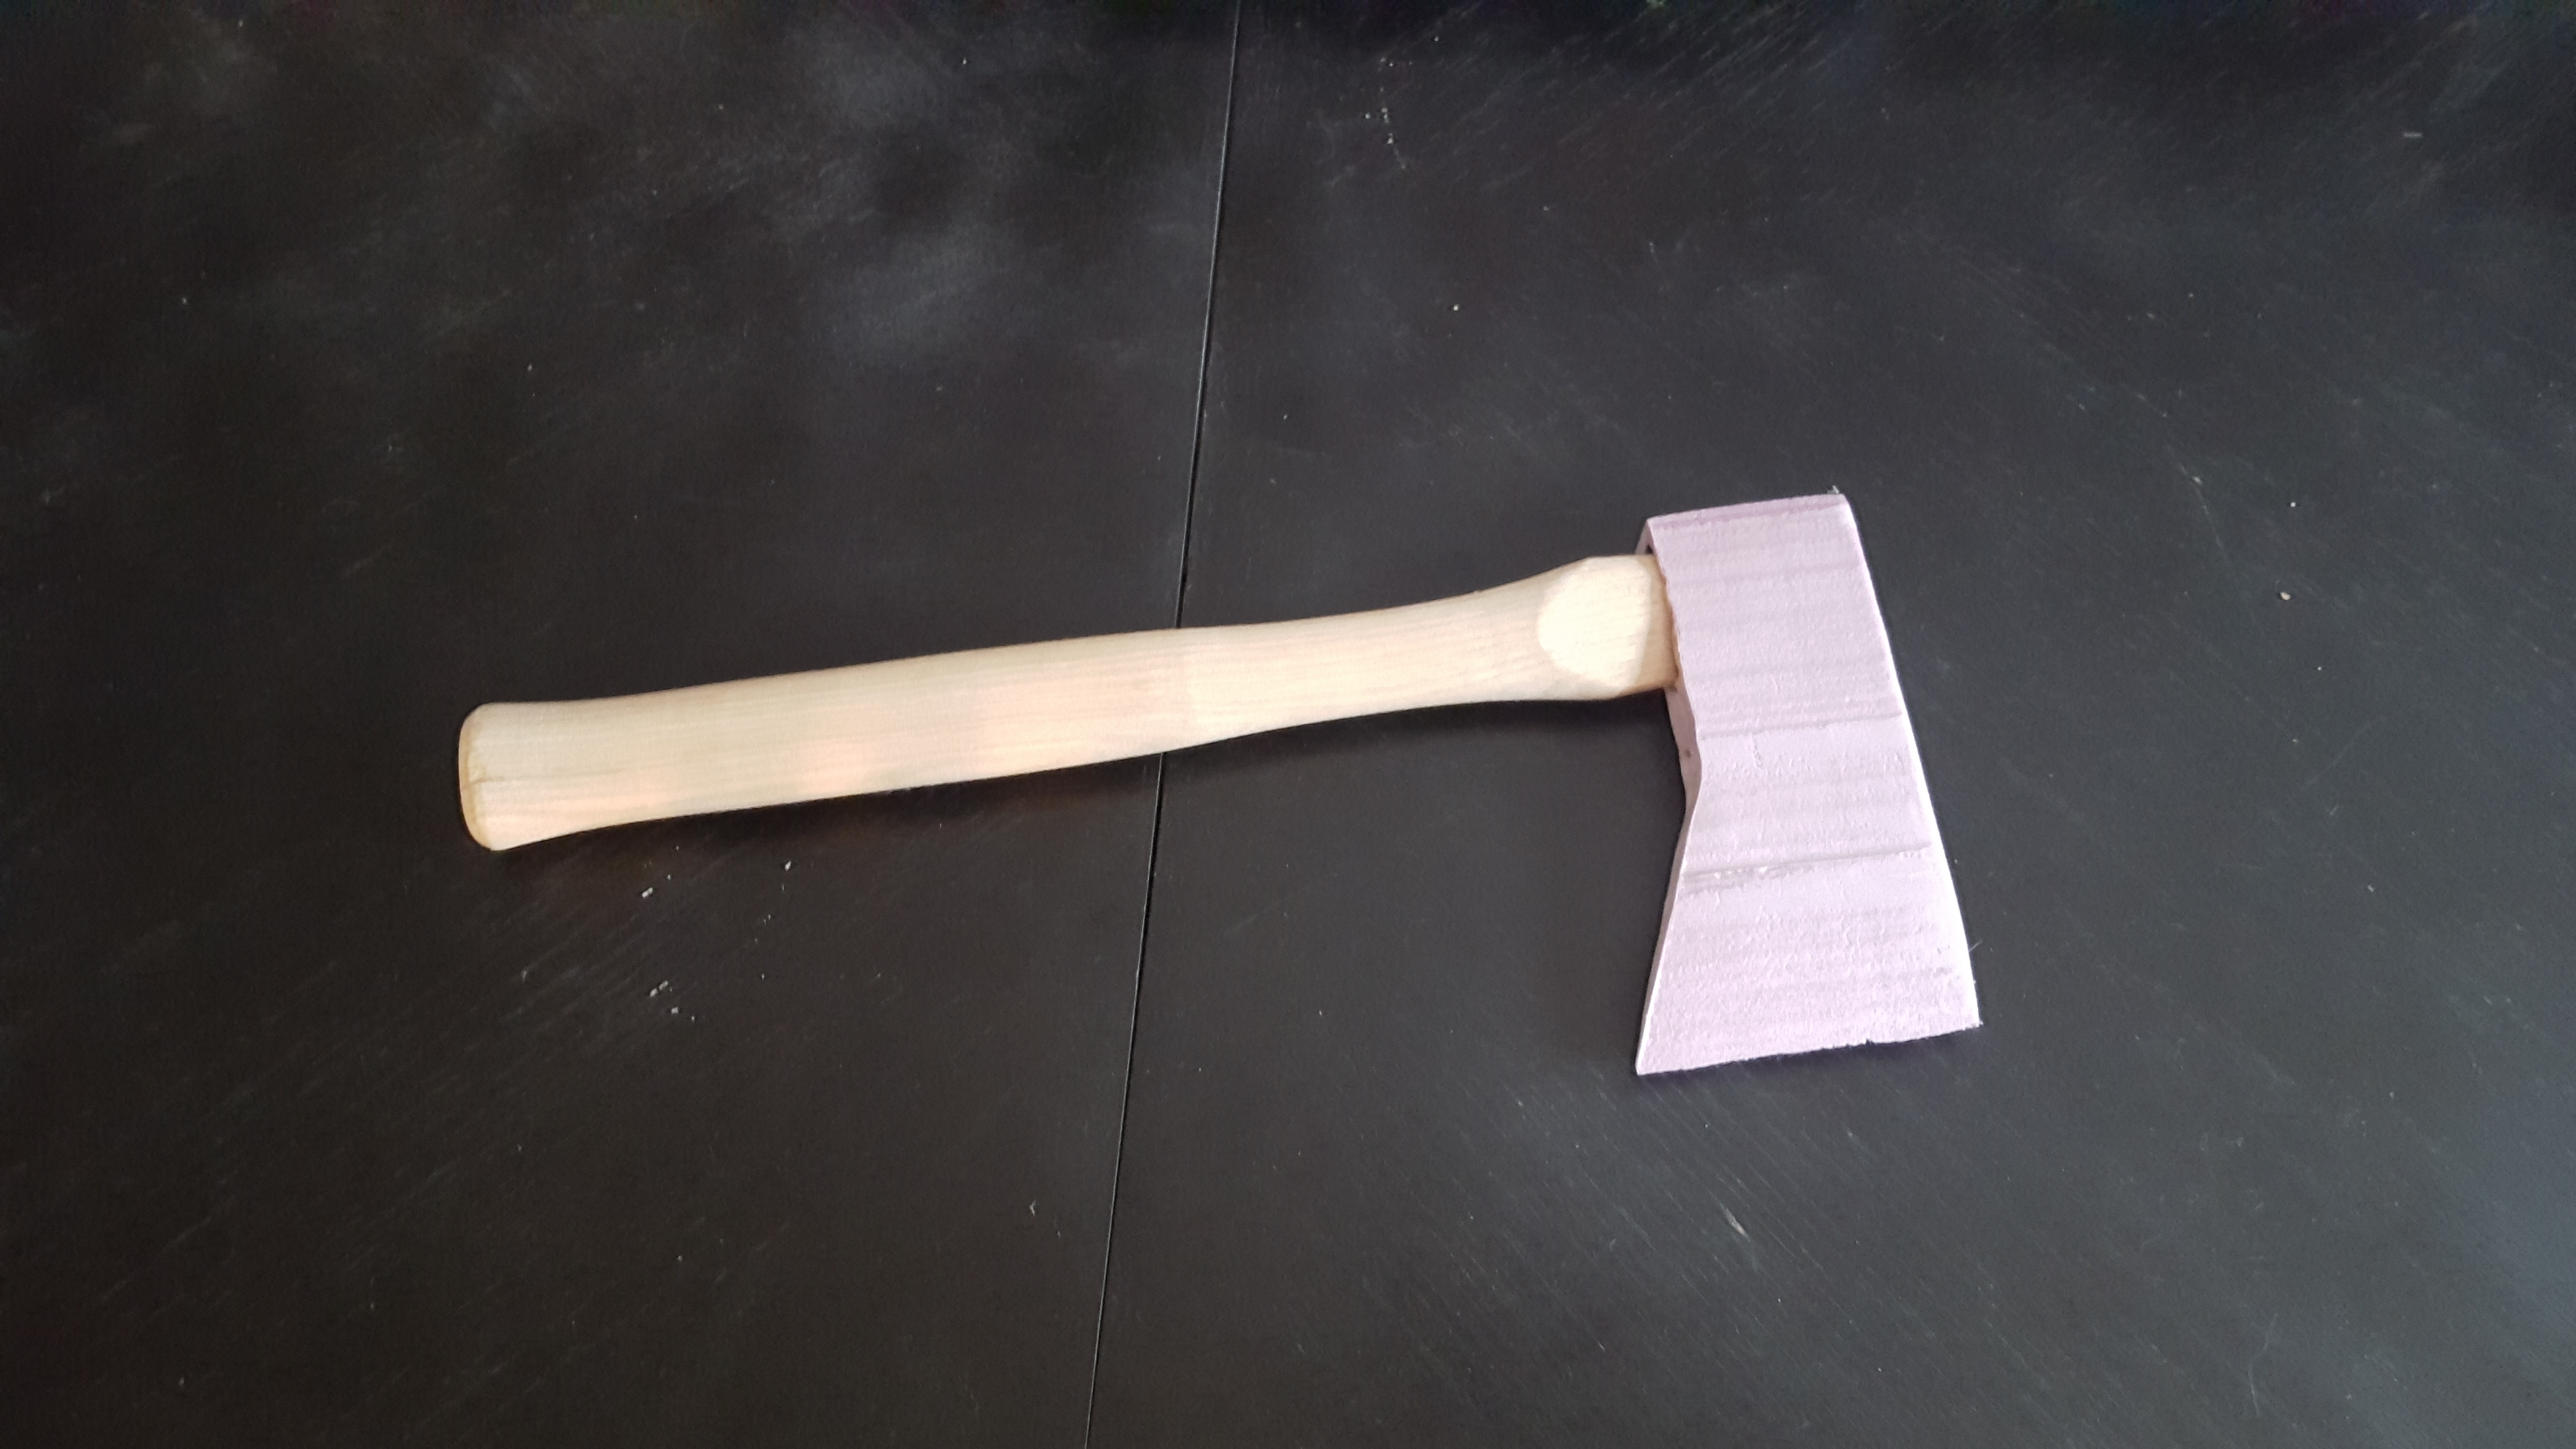
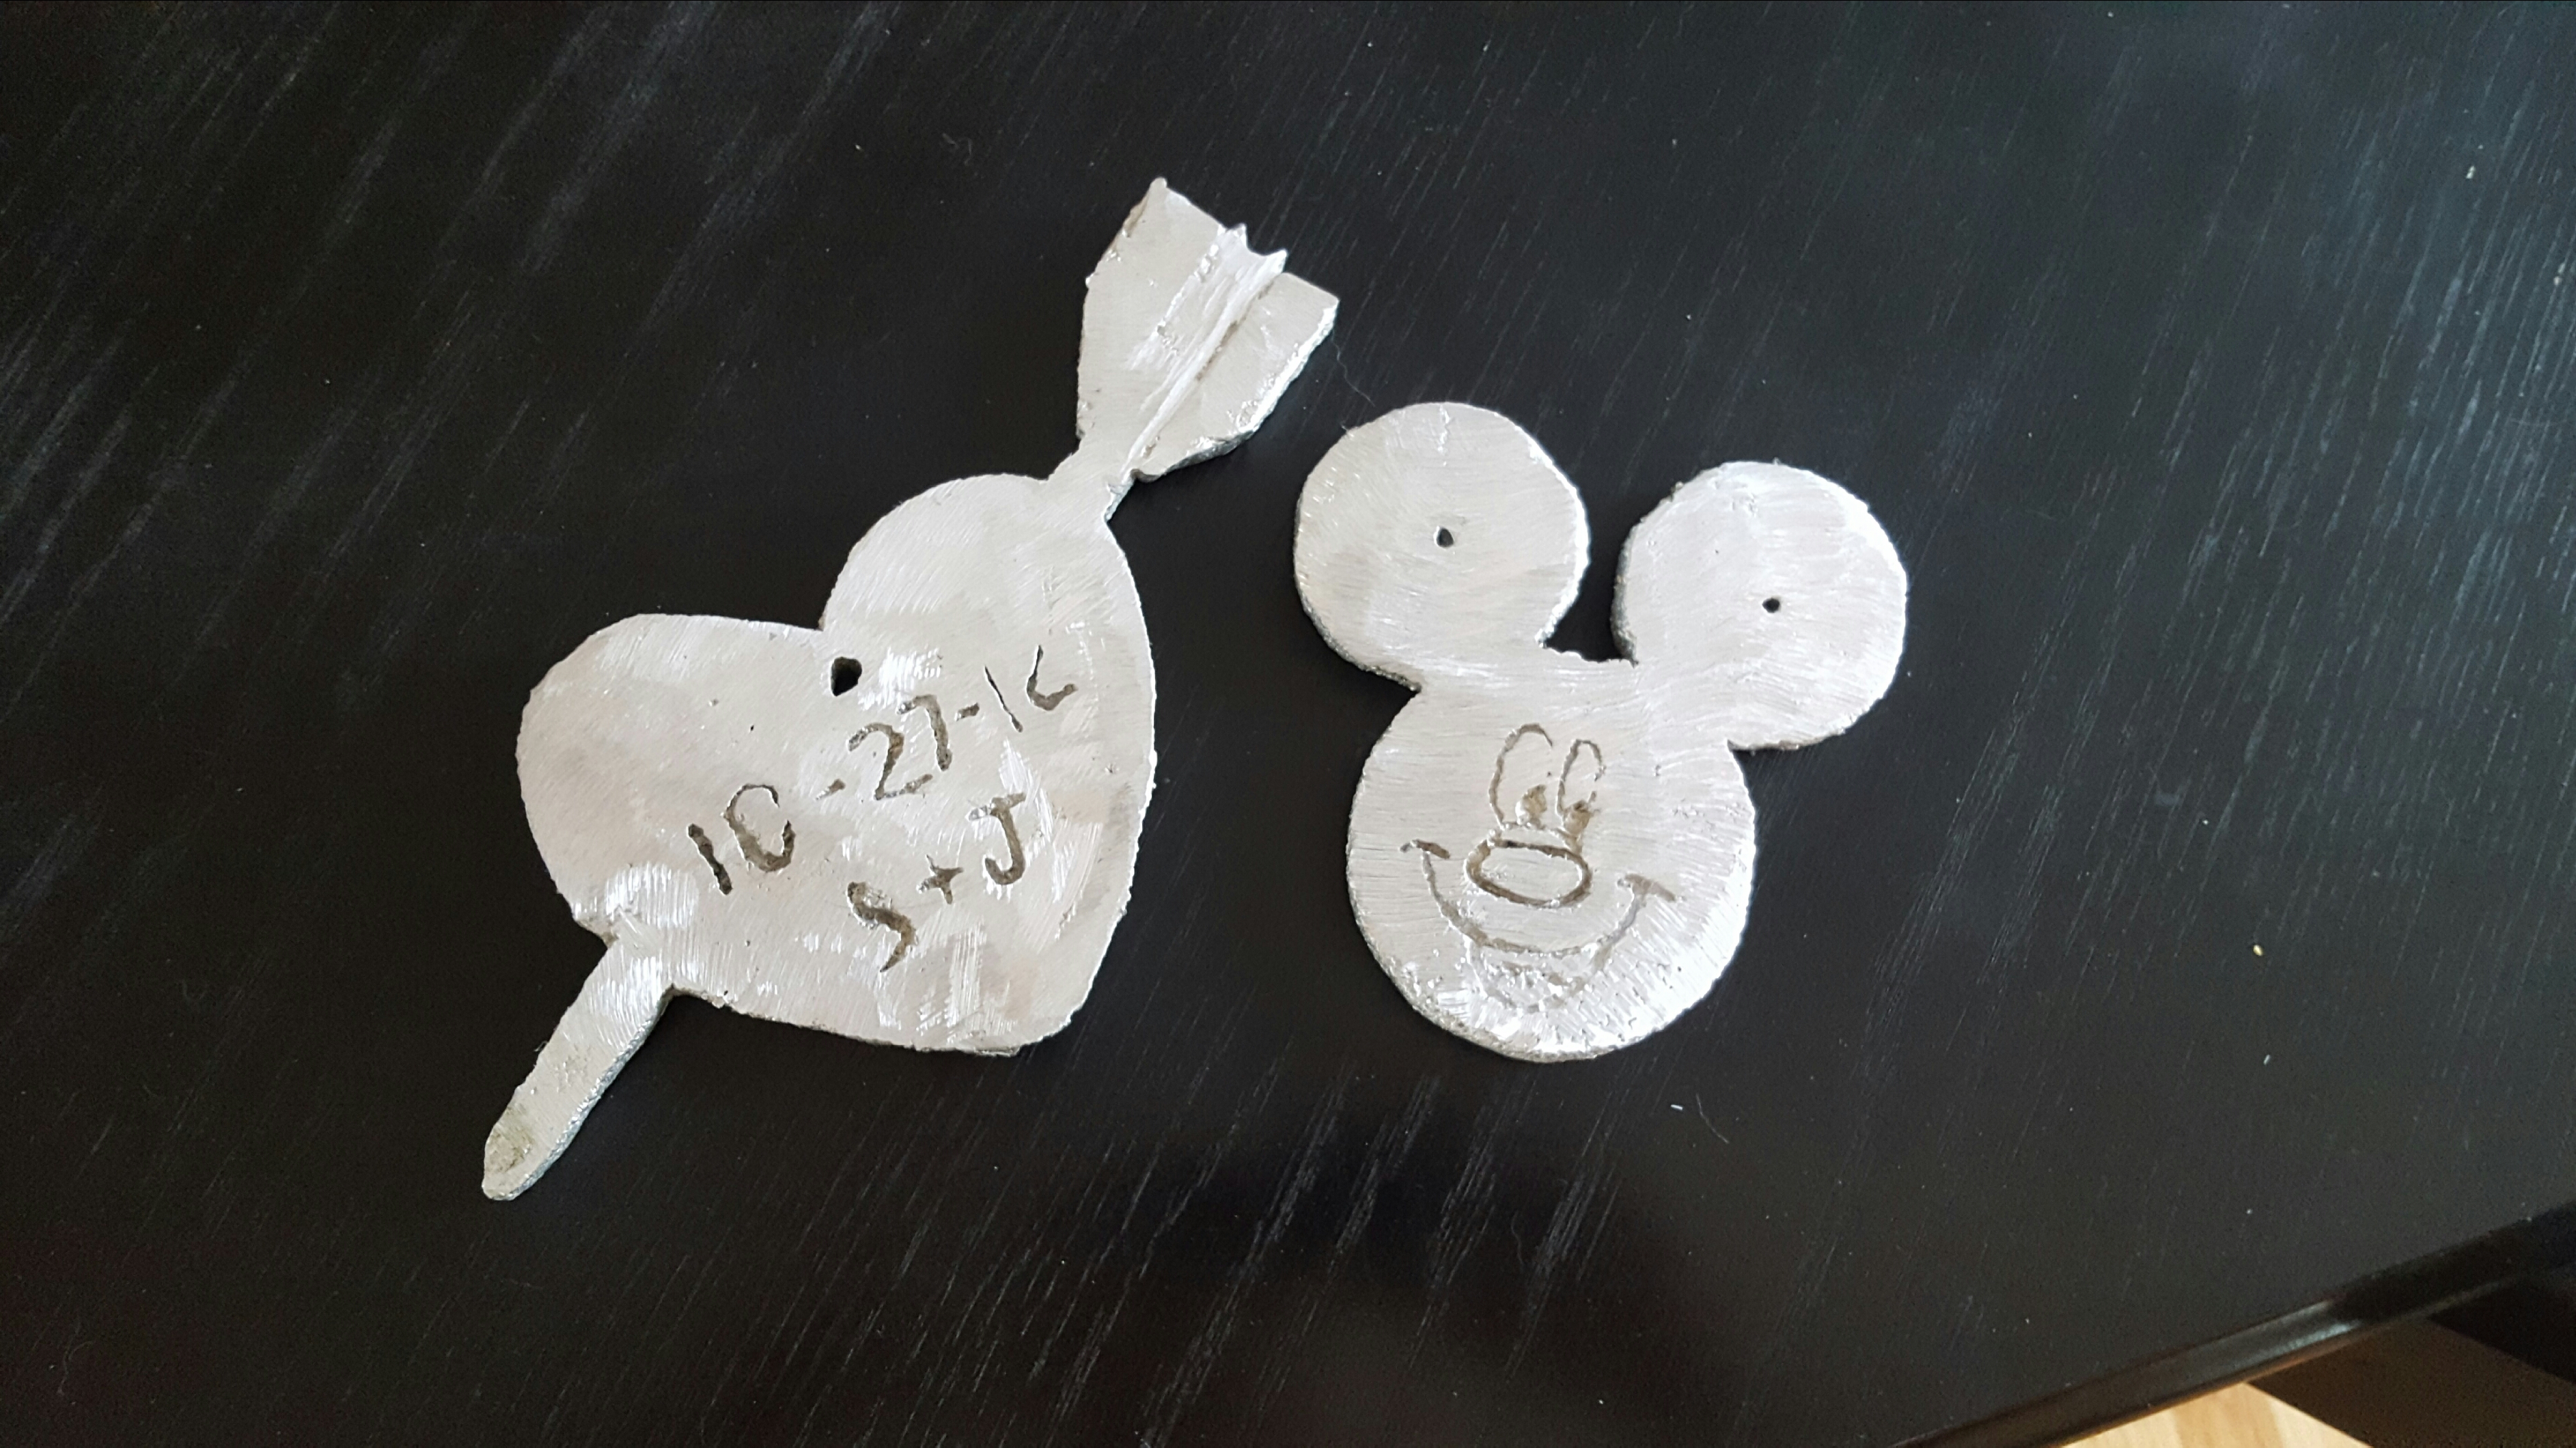
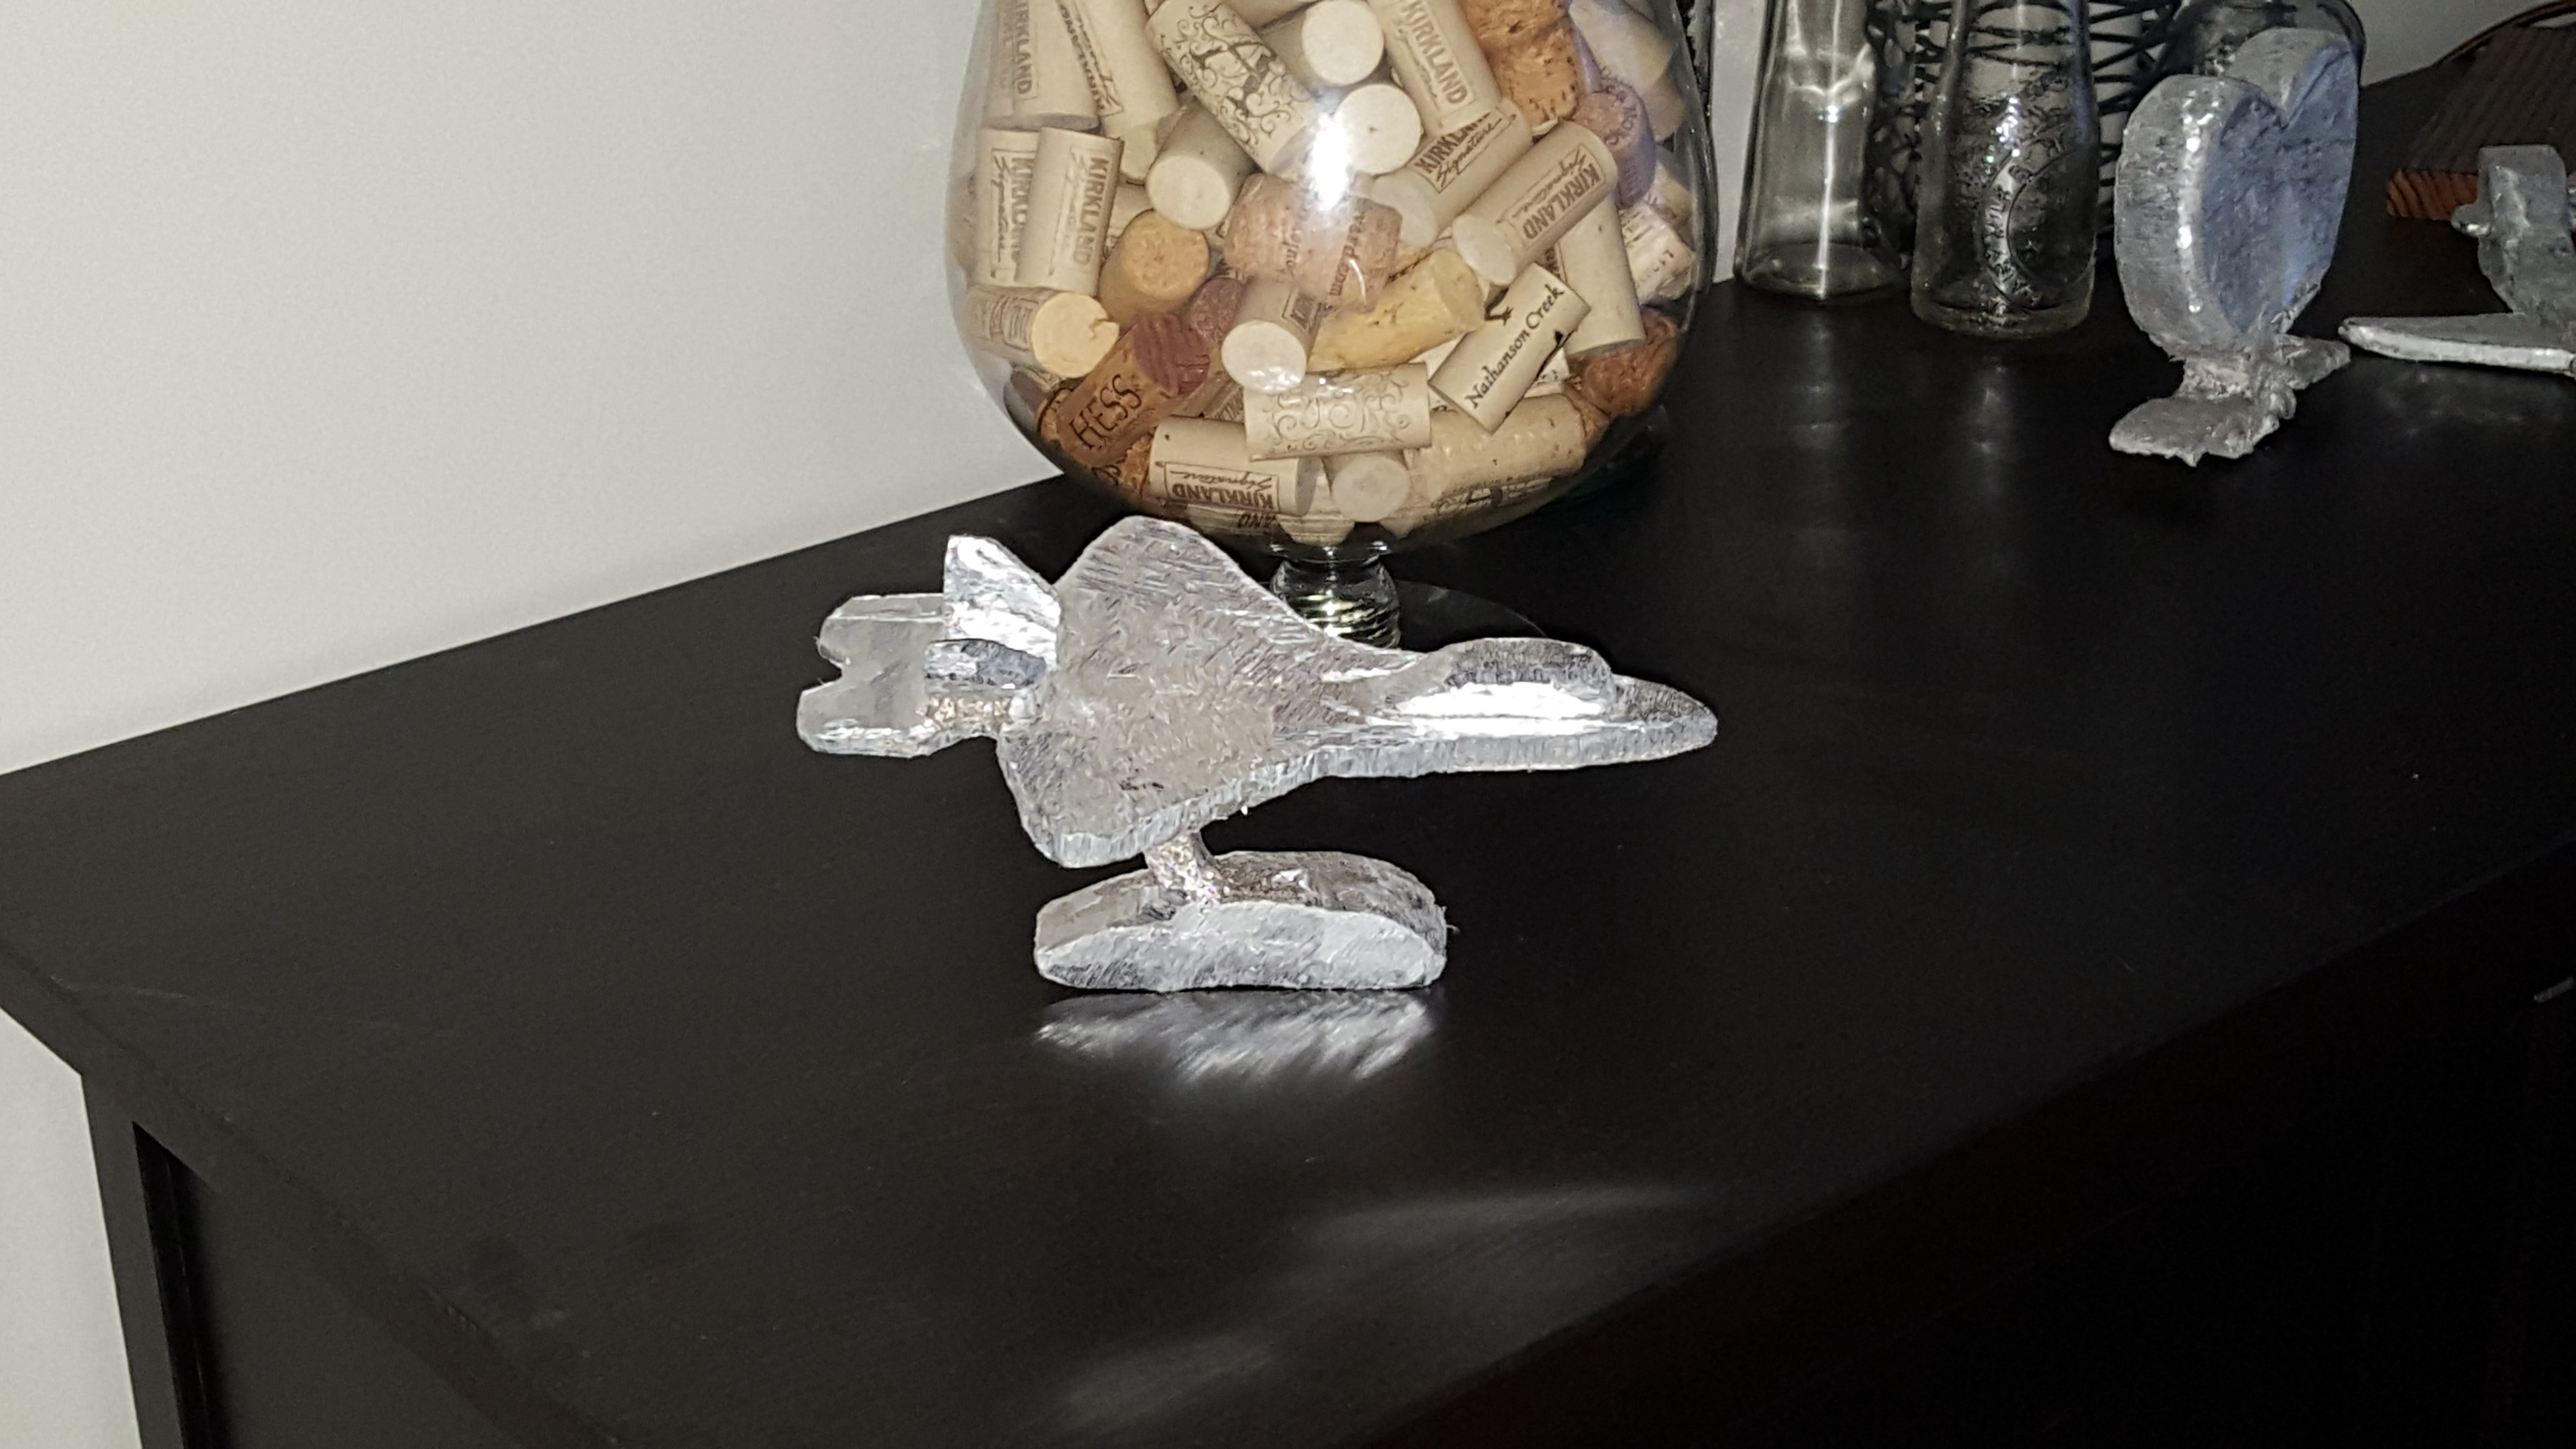
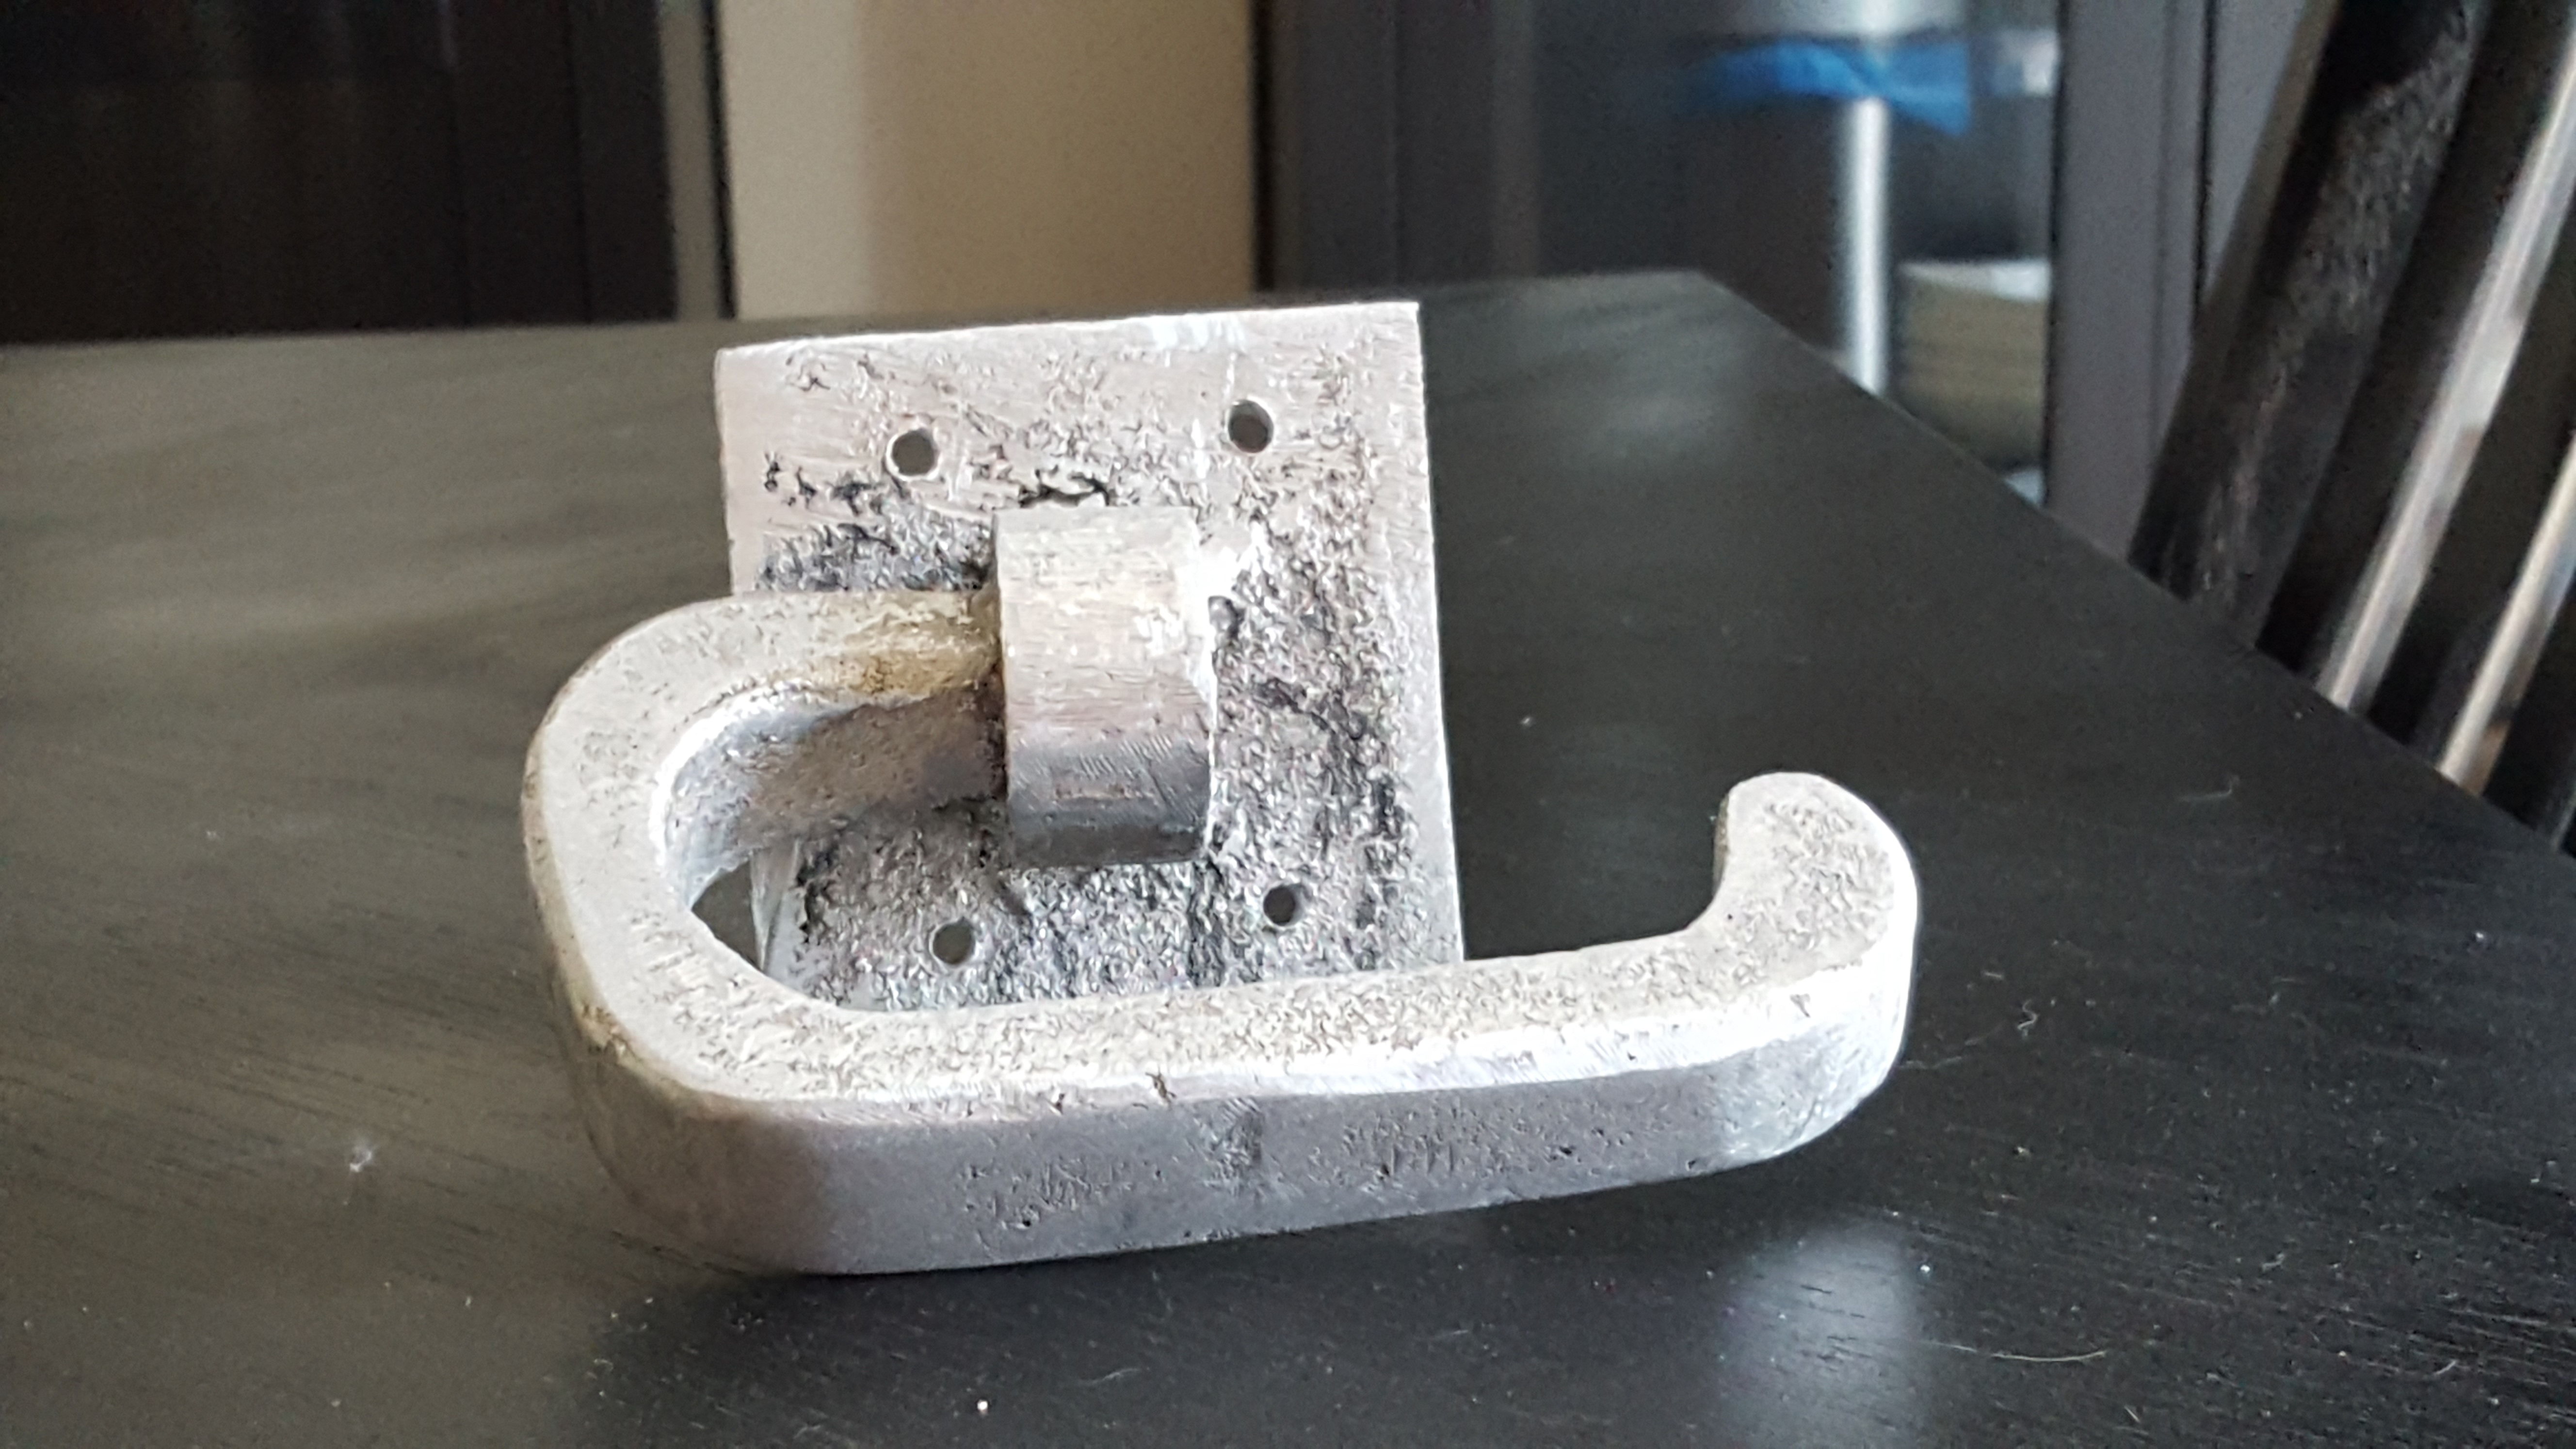
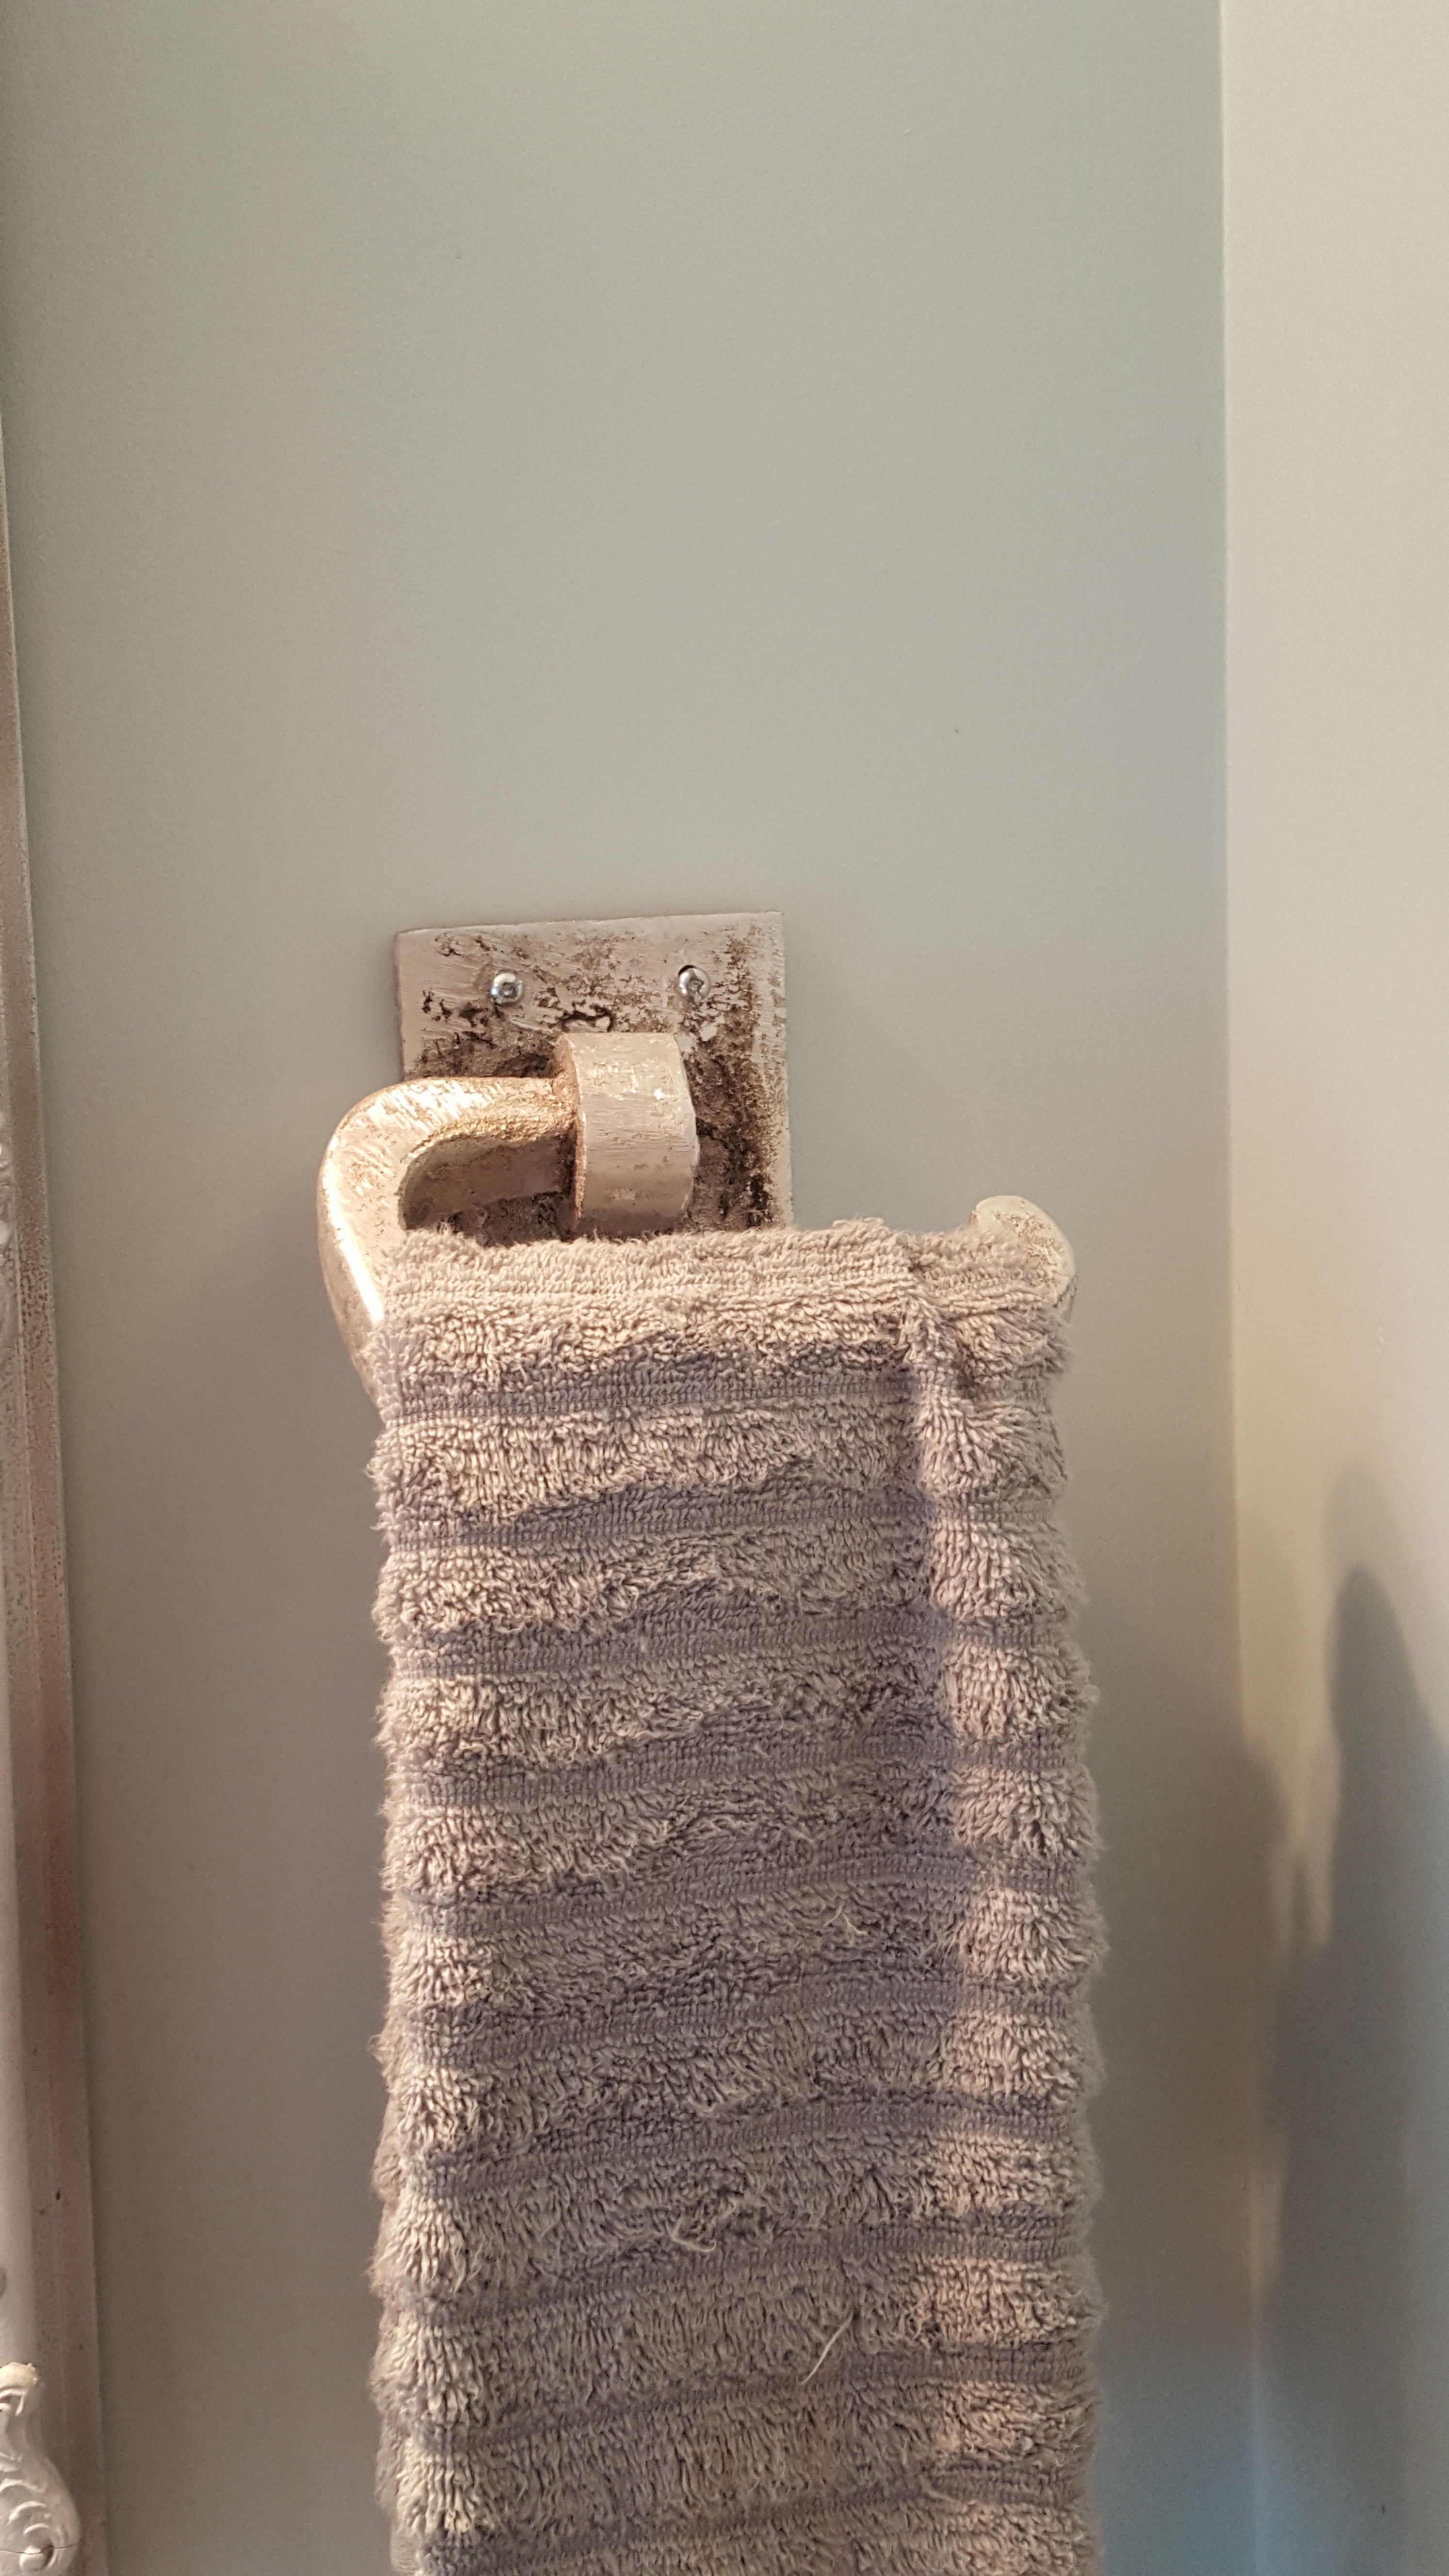
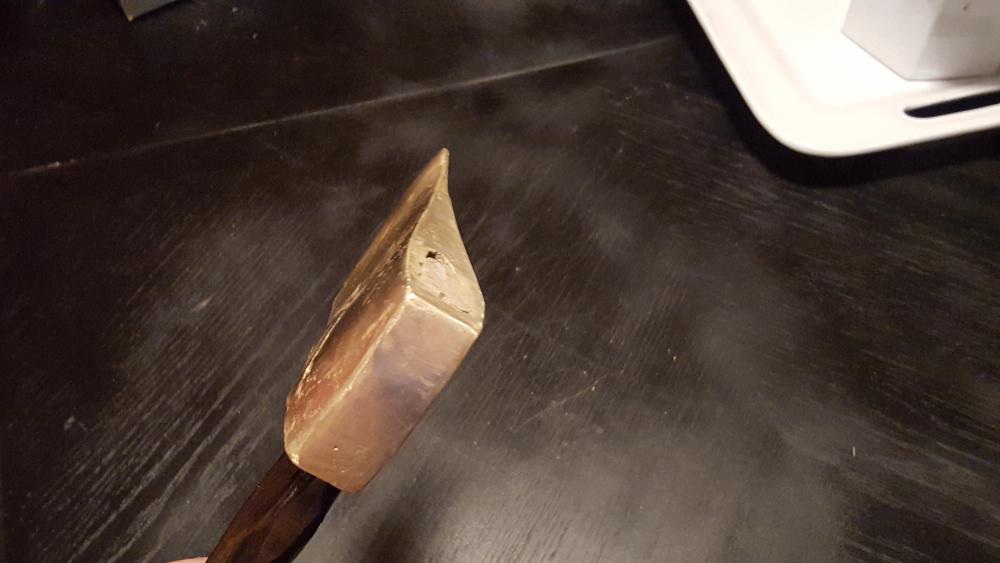
Hello all, I am a new member and this is my first post. I just wanted to share my first few backyard metal casting projects, all of the pics posted are with rough sanding/grinding only, I hope to take some new pictures of the finished products soon. I have found a lot of very helpful information on this site and would like to pass on my thanks to all the experienced members who have taken time to post tutorials for us newbies. So far I have learned that I can do this and that I am more handy than I thought, but that each project comes out a bit different than what is in my head, and that each one has it's own lessons to learn from and take to the next project. 1. very first project, learned to make sure the casting molds are the right size for the amount of metal your crucible can fit, both were intended to have integrated stands but did I not have enough aluminum to cast the stand. 2. couple of ingots, made an aluminum bronze by melting copper into the crucible that still had some aluminum left over from a previous pour (unintentional but I like the result and may make a small bronze decorative knife blade from this ingot) 3. A present for my wife (the heart with our anniversary date) and a mother's day gift for my mom (who is a Disney Fanatic). 4. Rough sand on my F-22 profile desk sculpture (since sanded to a nice smooth finish) 5. Bathroom towel rack (this is a finished product, both my wife and I like an industrial unfinished look for our house's style) 6. towel rack in use 7. first attempt at a copper axed head, rough finish for now. I plan on mounting on a dark stained custom wood handle.