

BryanL
-
Posts
95 -
Joined
-
Last visited
Content Type
Profiles
Forums
Articles
Gallery
Downloads
Events
Posts posted by BryanL
-
-
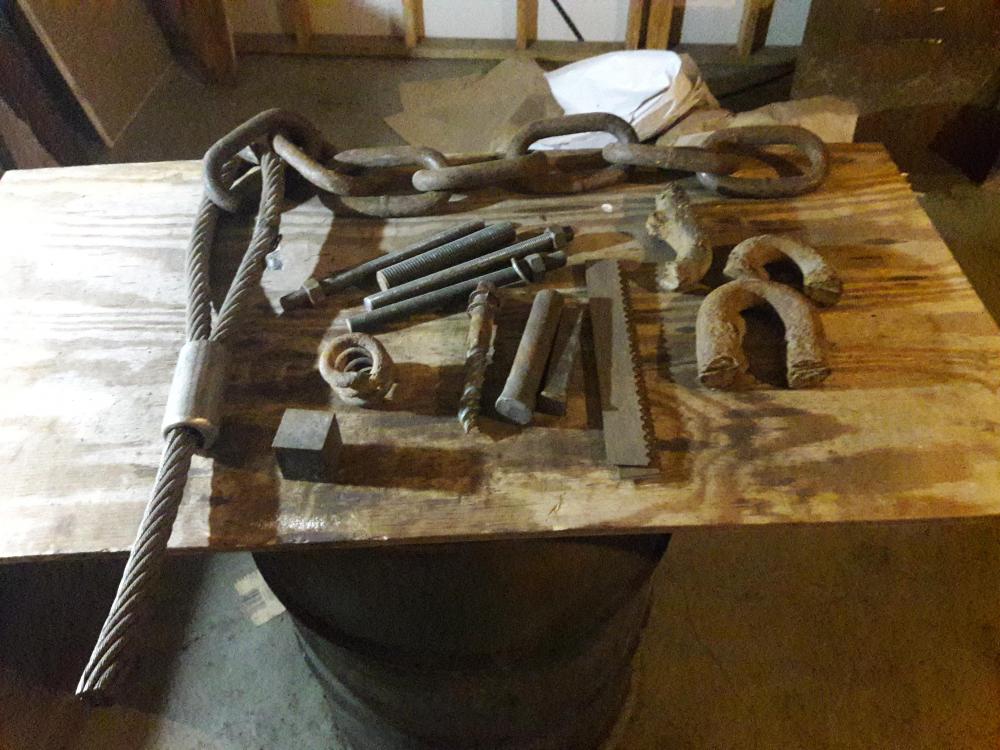
Bear with me for a story. My phone halfway broke a couple weeks ago so I went looking for a T-Mobile store. The map said there was one close by, but when I got there, no store. The next closest was another half hour away so I stopped in the Sprint store across the street even though I'm not their customer. The lady there was super helpful and immediately spotted the anvil on my NEB shirt. Turns out her fiance is a self taught knifemaker. She fixes my phone over the next 2 hours, during which her fiance shows up and we talk shop about forging. Turns out his anvil got stolen along with other tools and stock by a guy on his way back to prison. I am going to sell him the anvil I recently brought home at a good rate in gratitude for his fiance's help. Then he dropped off this interesting stock at my house today just because he knows I'm in a temporary house/shop and don't have much with me. The 2 by 2 square is 4140. Just reinforces my impression that the blacksmithing community has overall been a very good one so far.
-
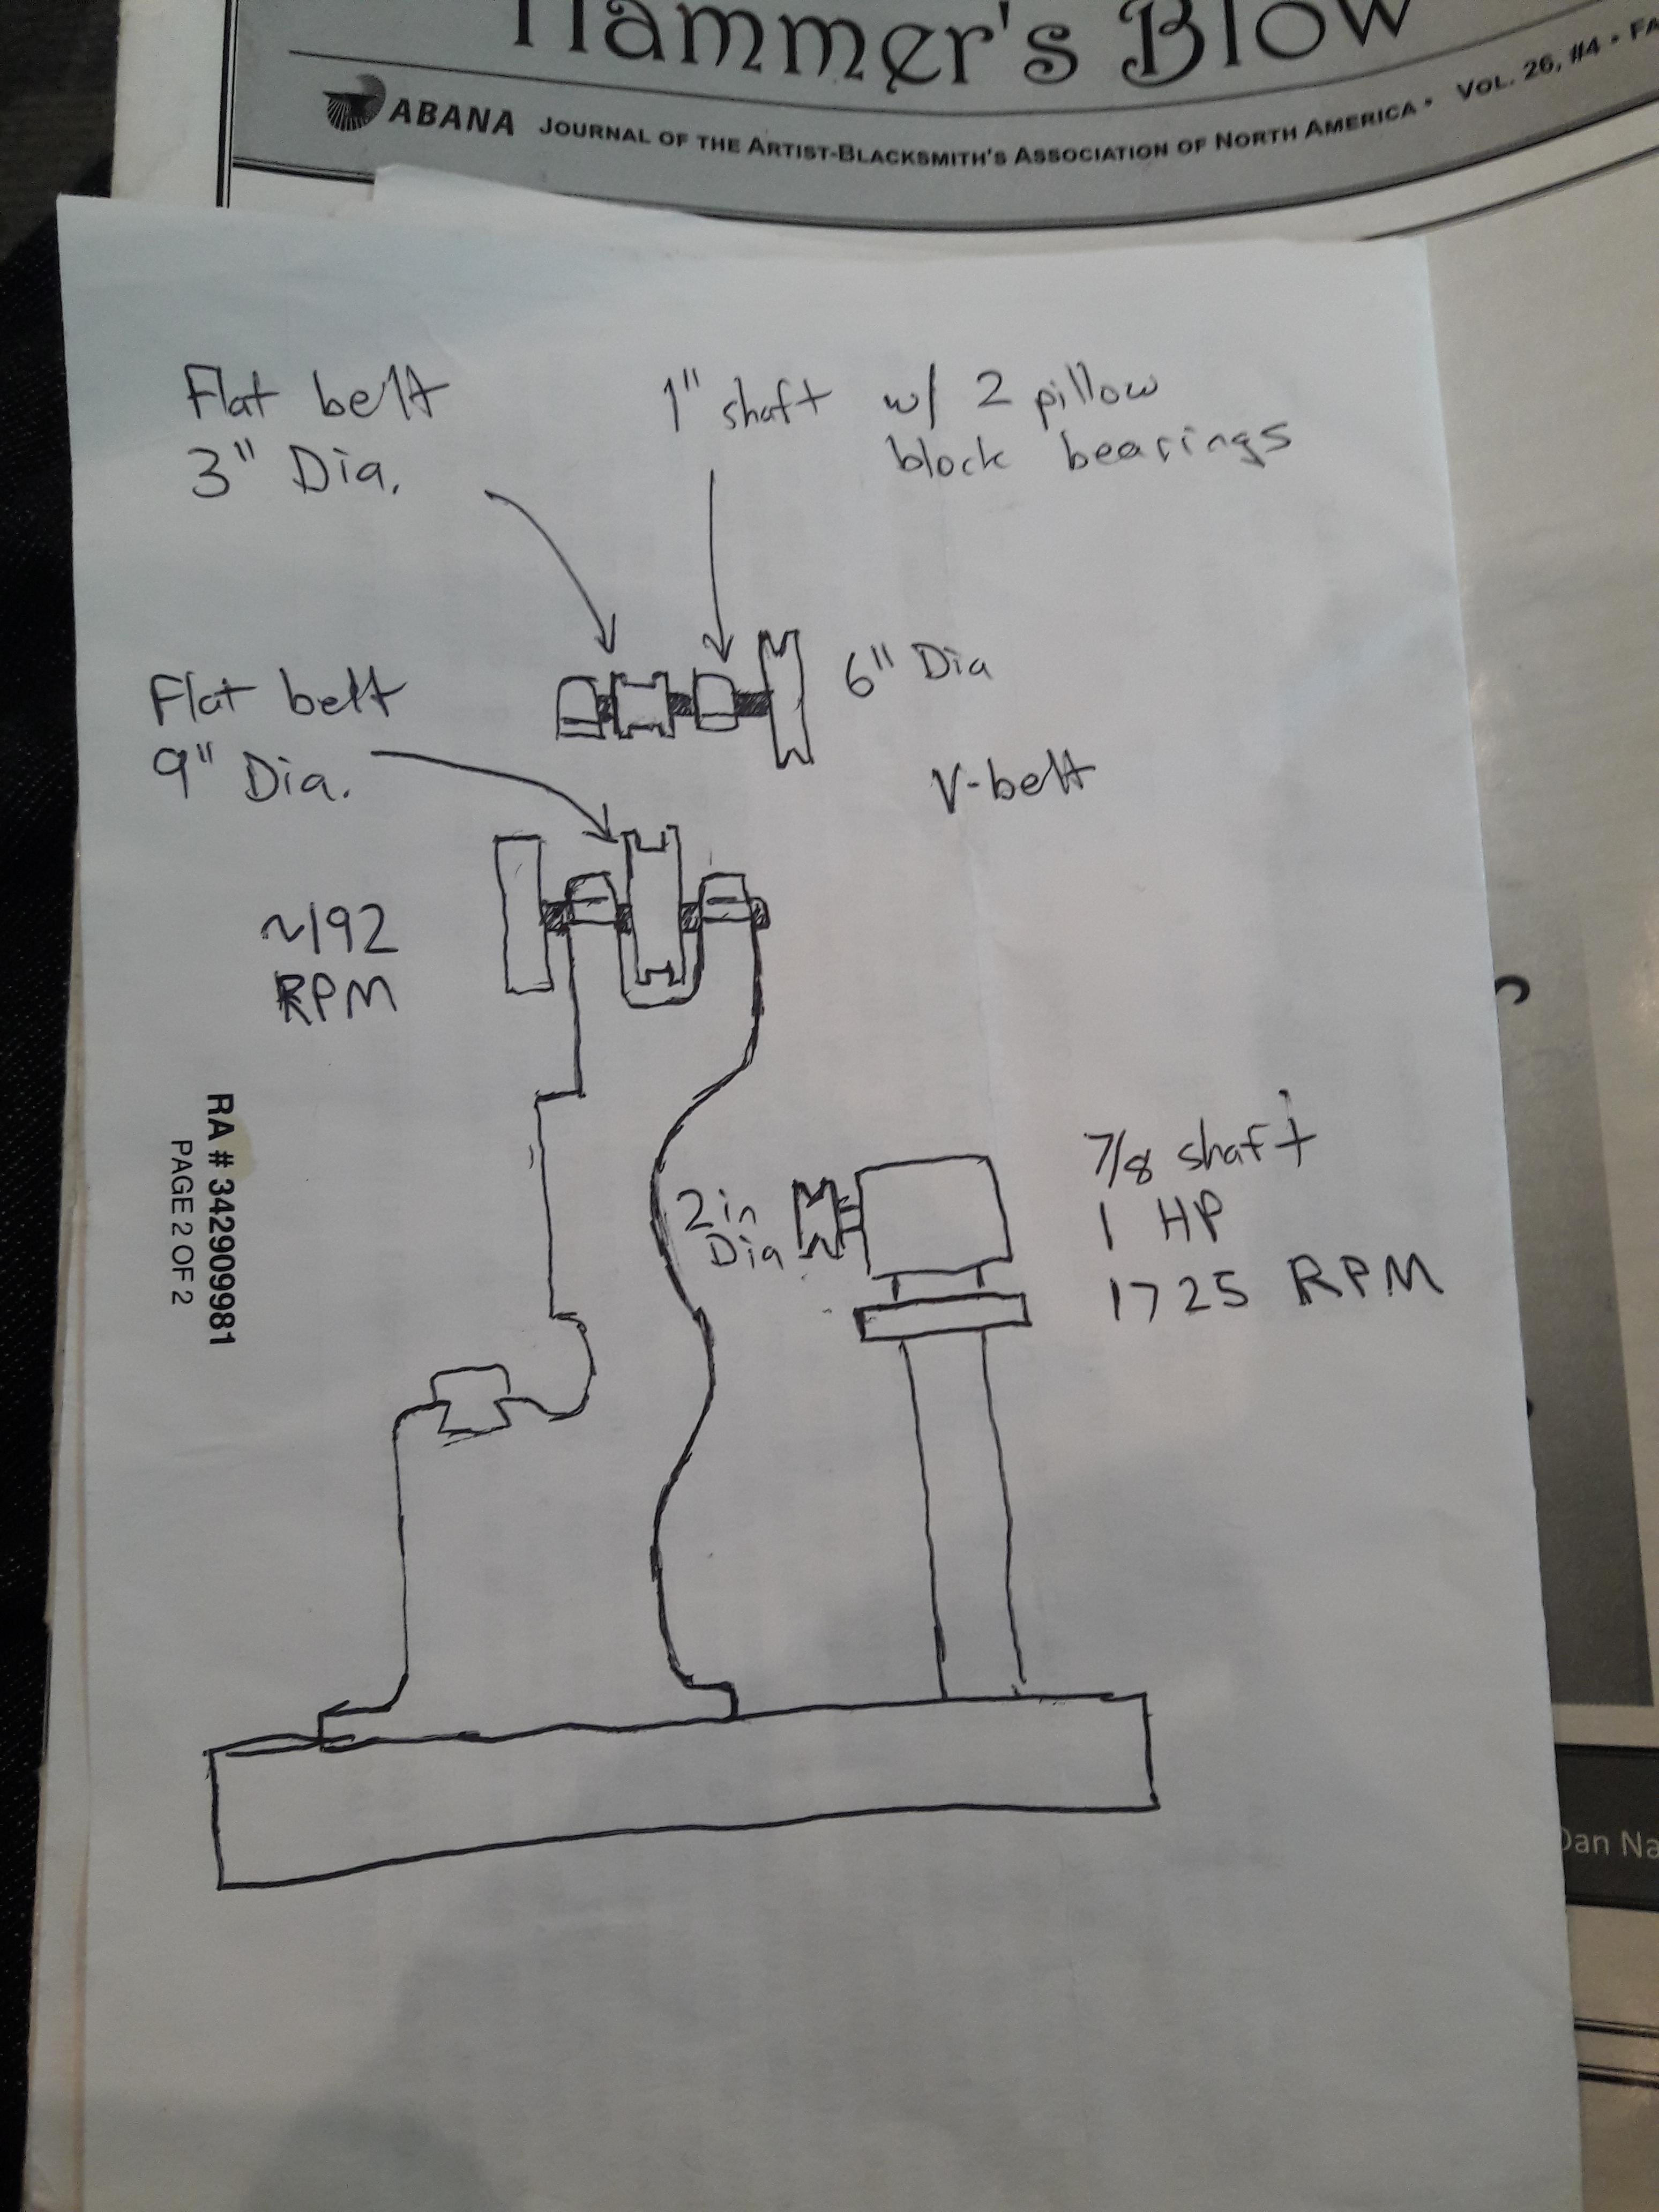
My latest musing on the hammer is all about the power transmission. I am sitting in the airport delayed so I sketched it all out.
I have the motor, secondary shaft and pillow blocks. Now I need to scrounge the V belt pulleys and make the flat belt pulley. Good thing I just acquired an old Dalton metal lathe, now I need to learn to use it by making a flat belt pulley.
Bryan

-
Yeah I think it will be a great addition to the shop, especially for light twisting or filing work.
-
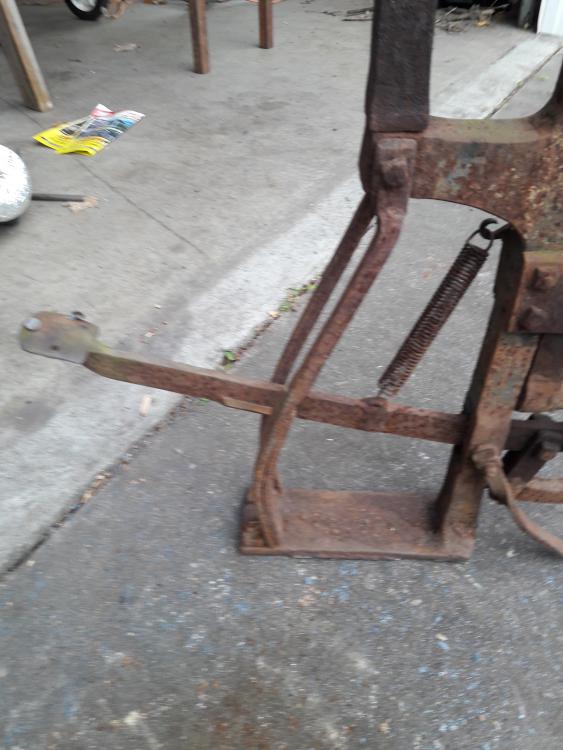
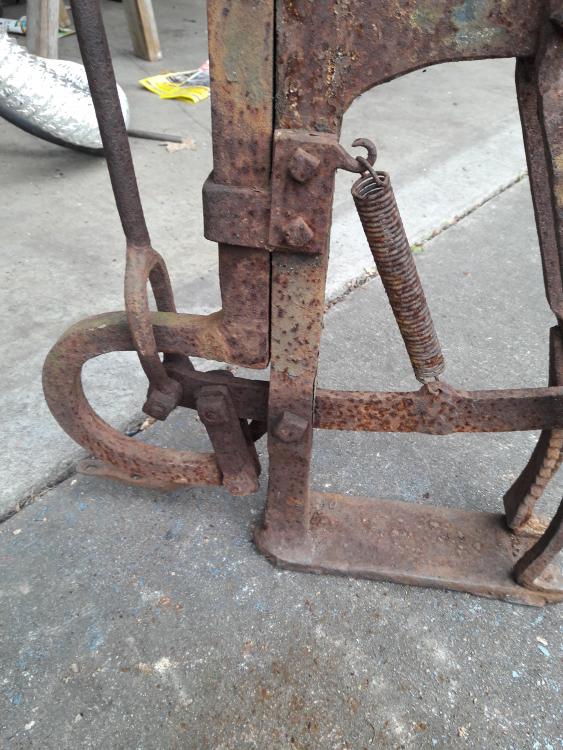
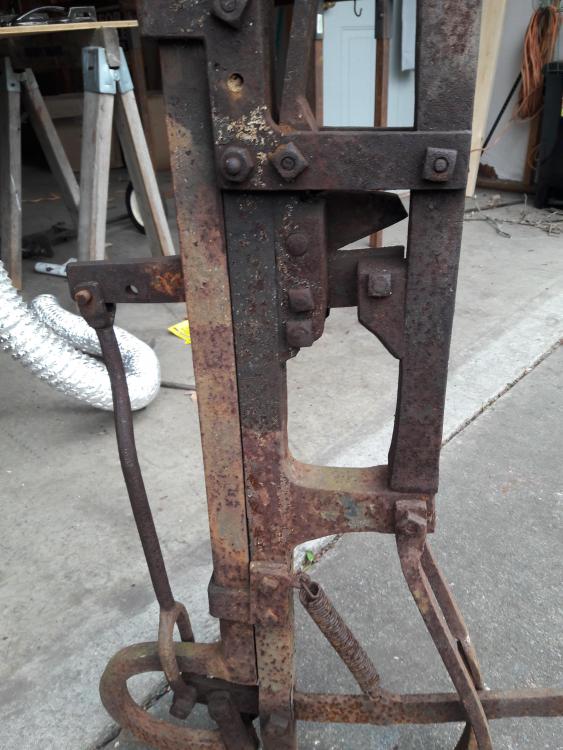
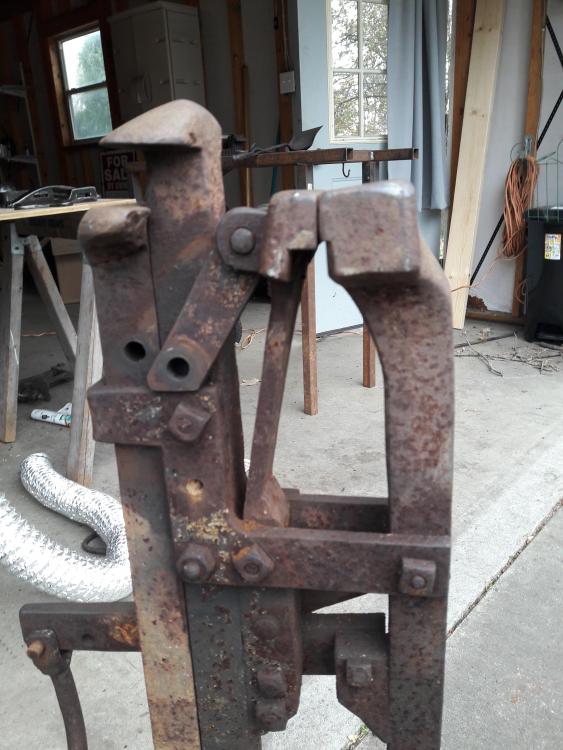
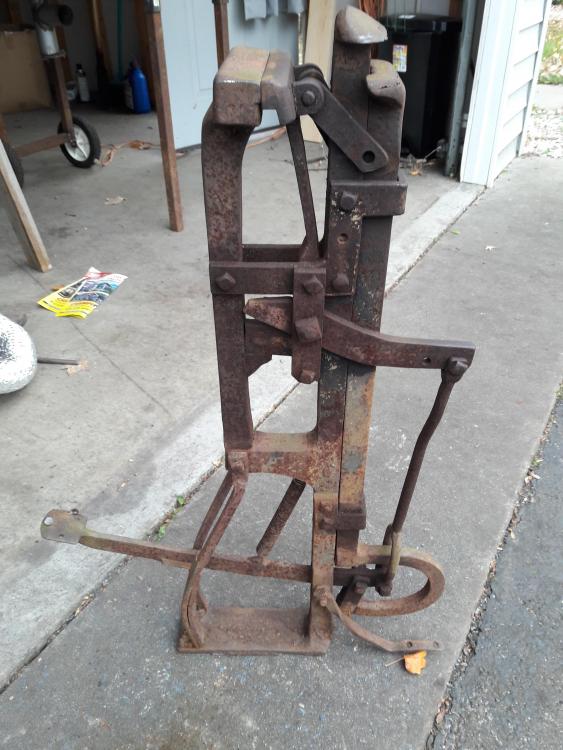
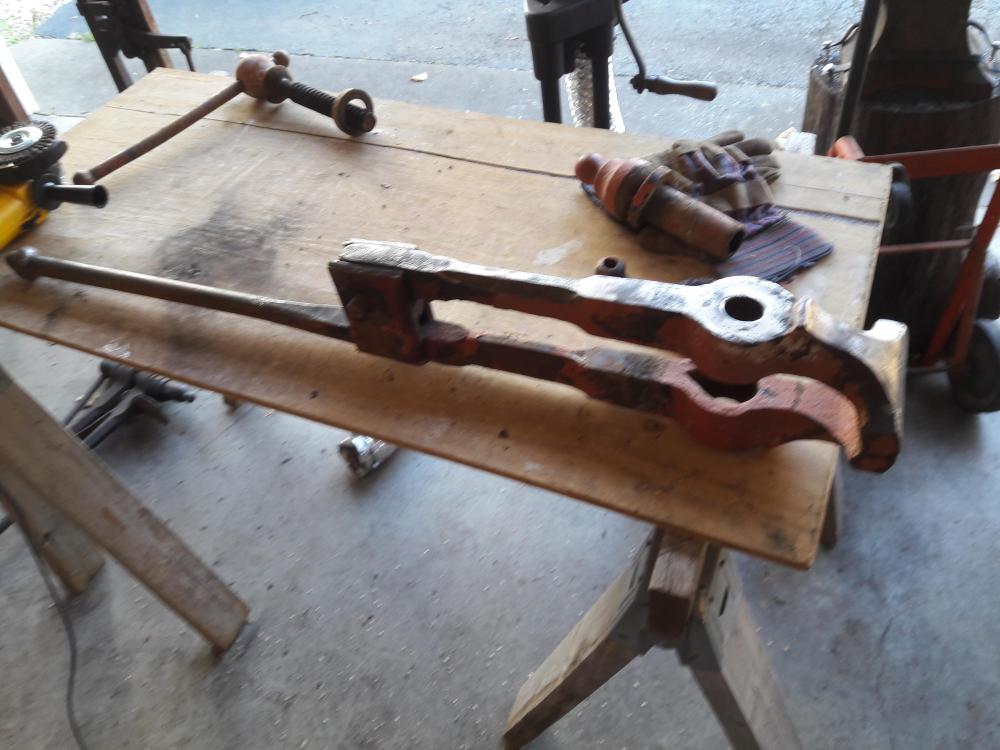
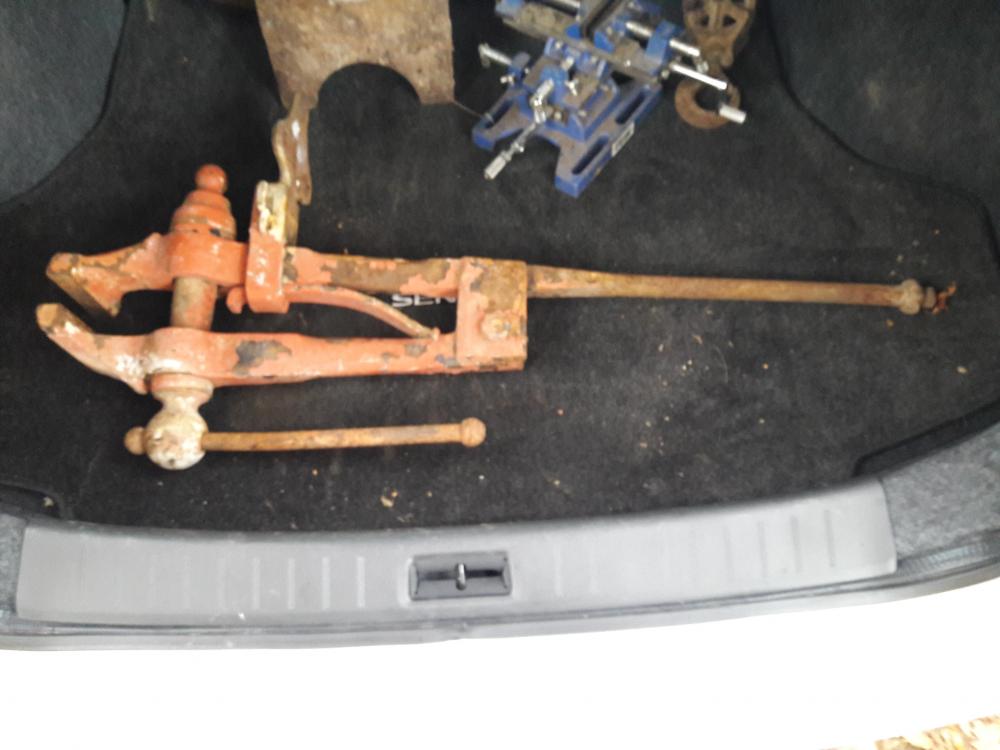
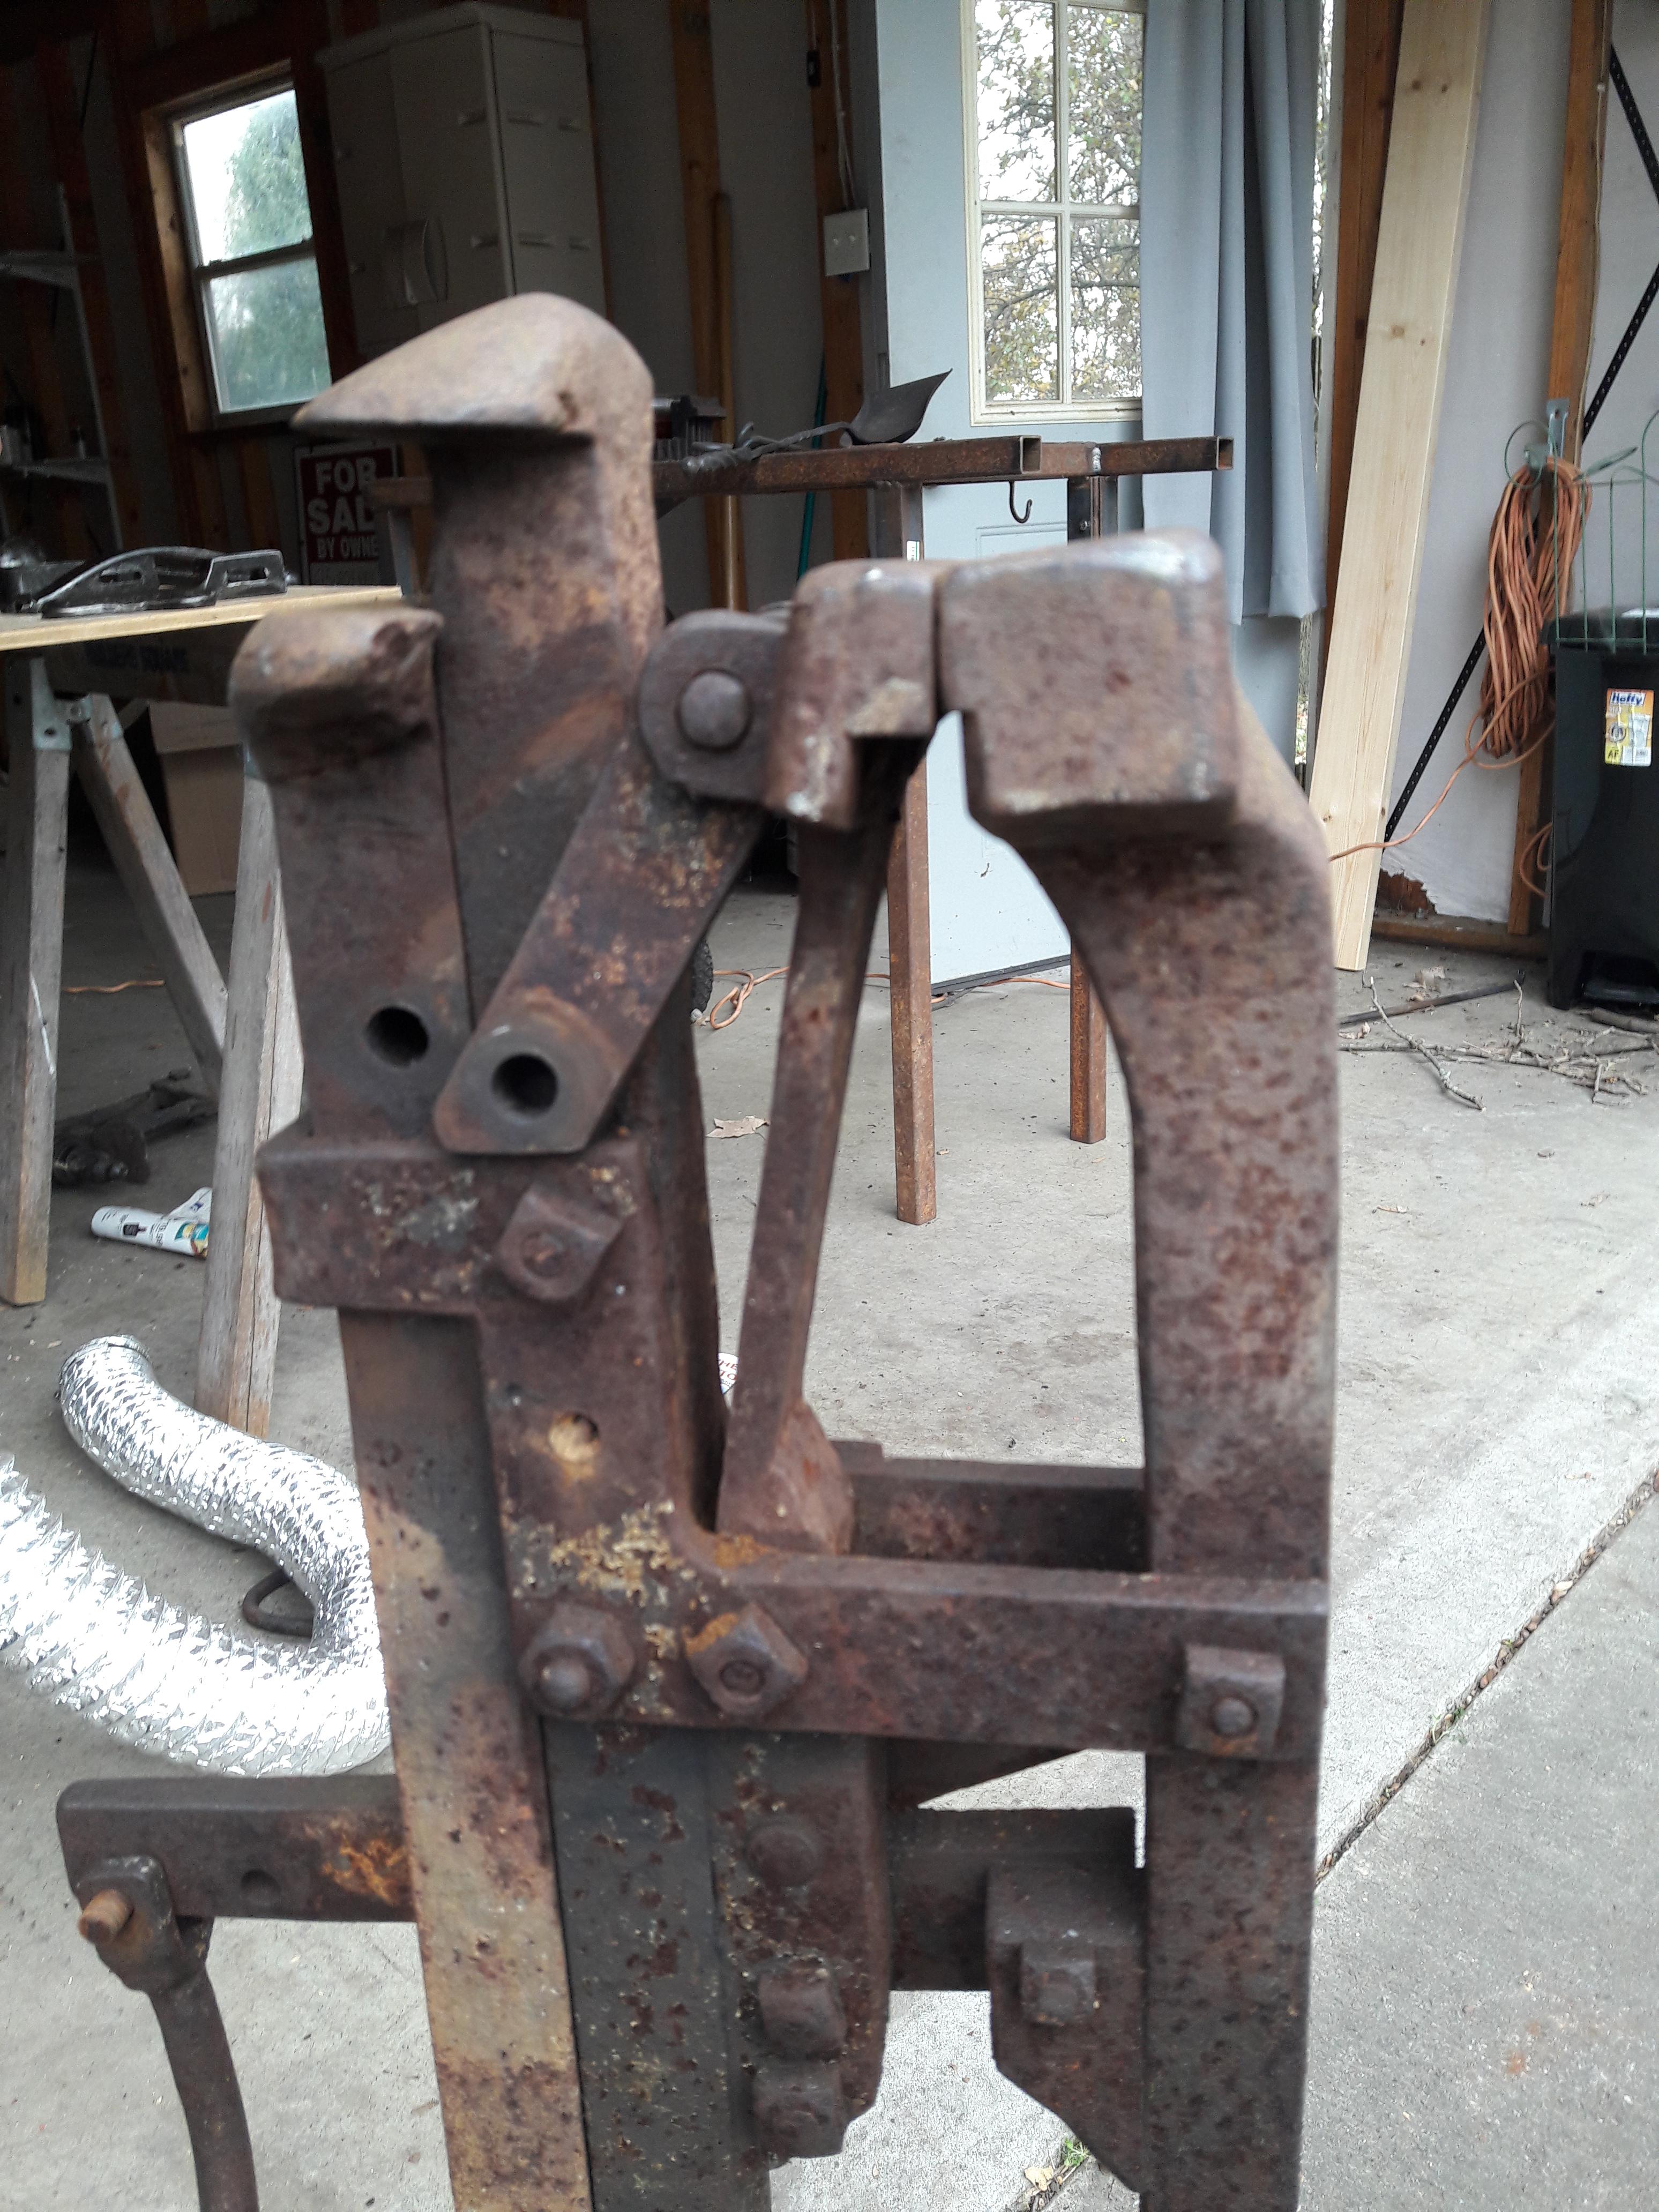
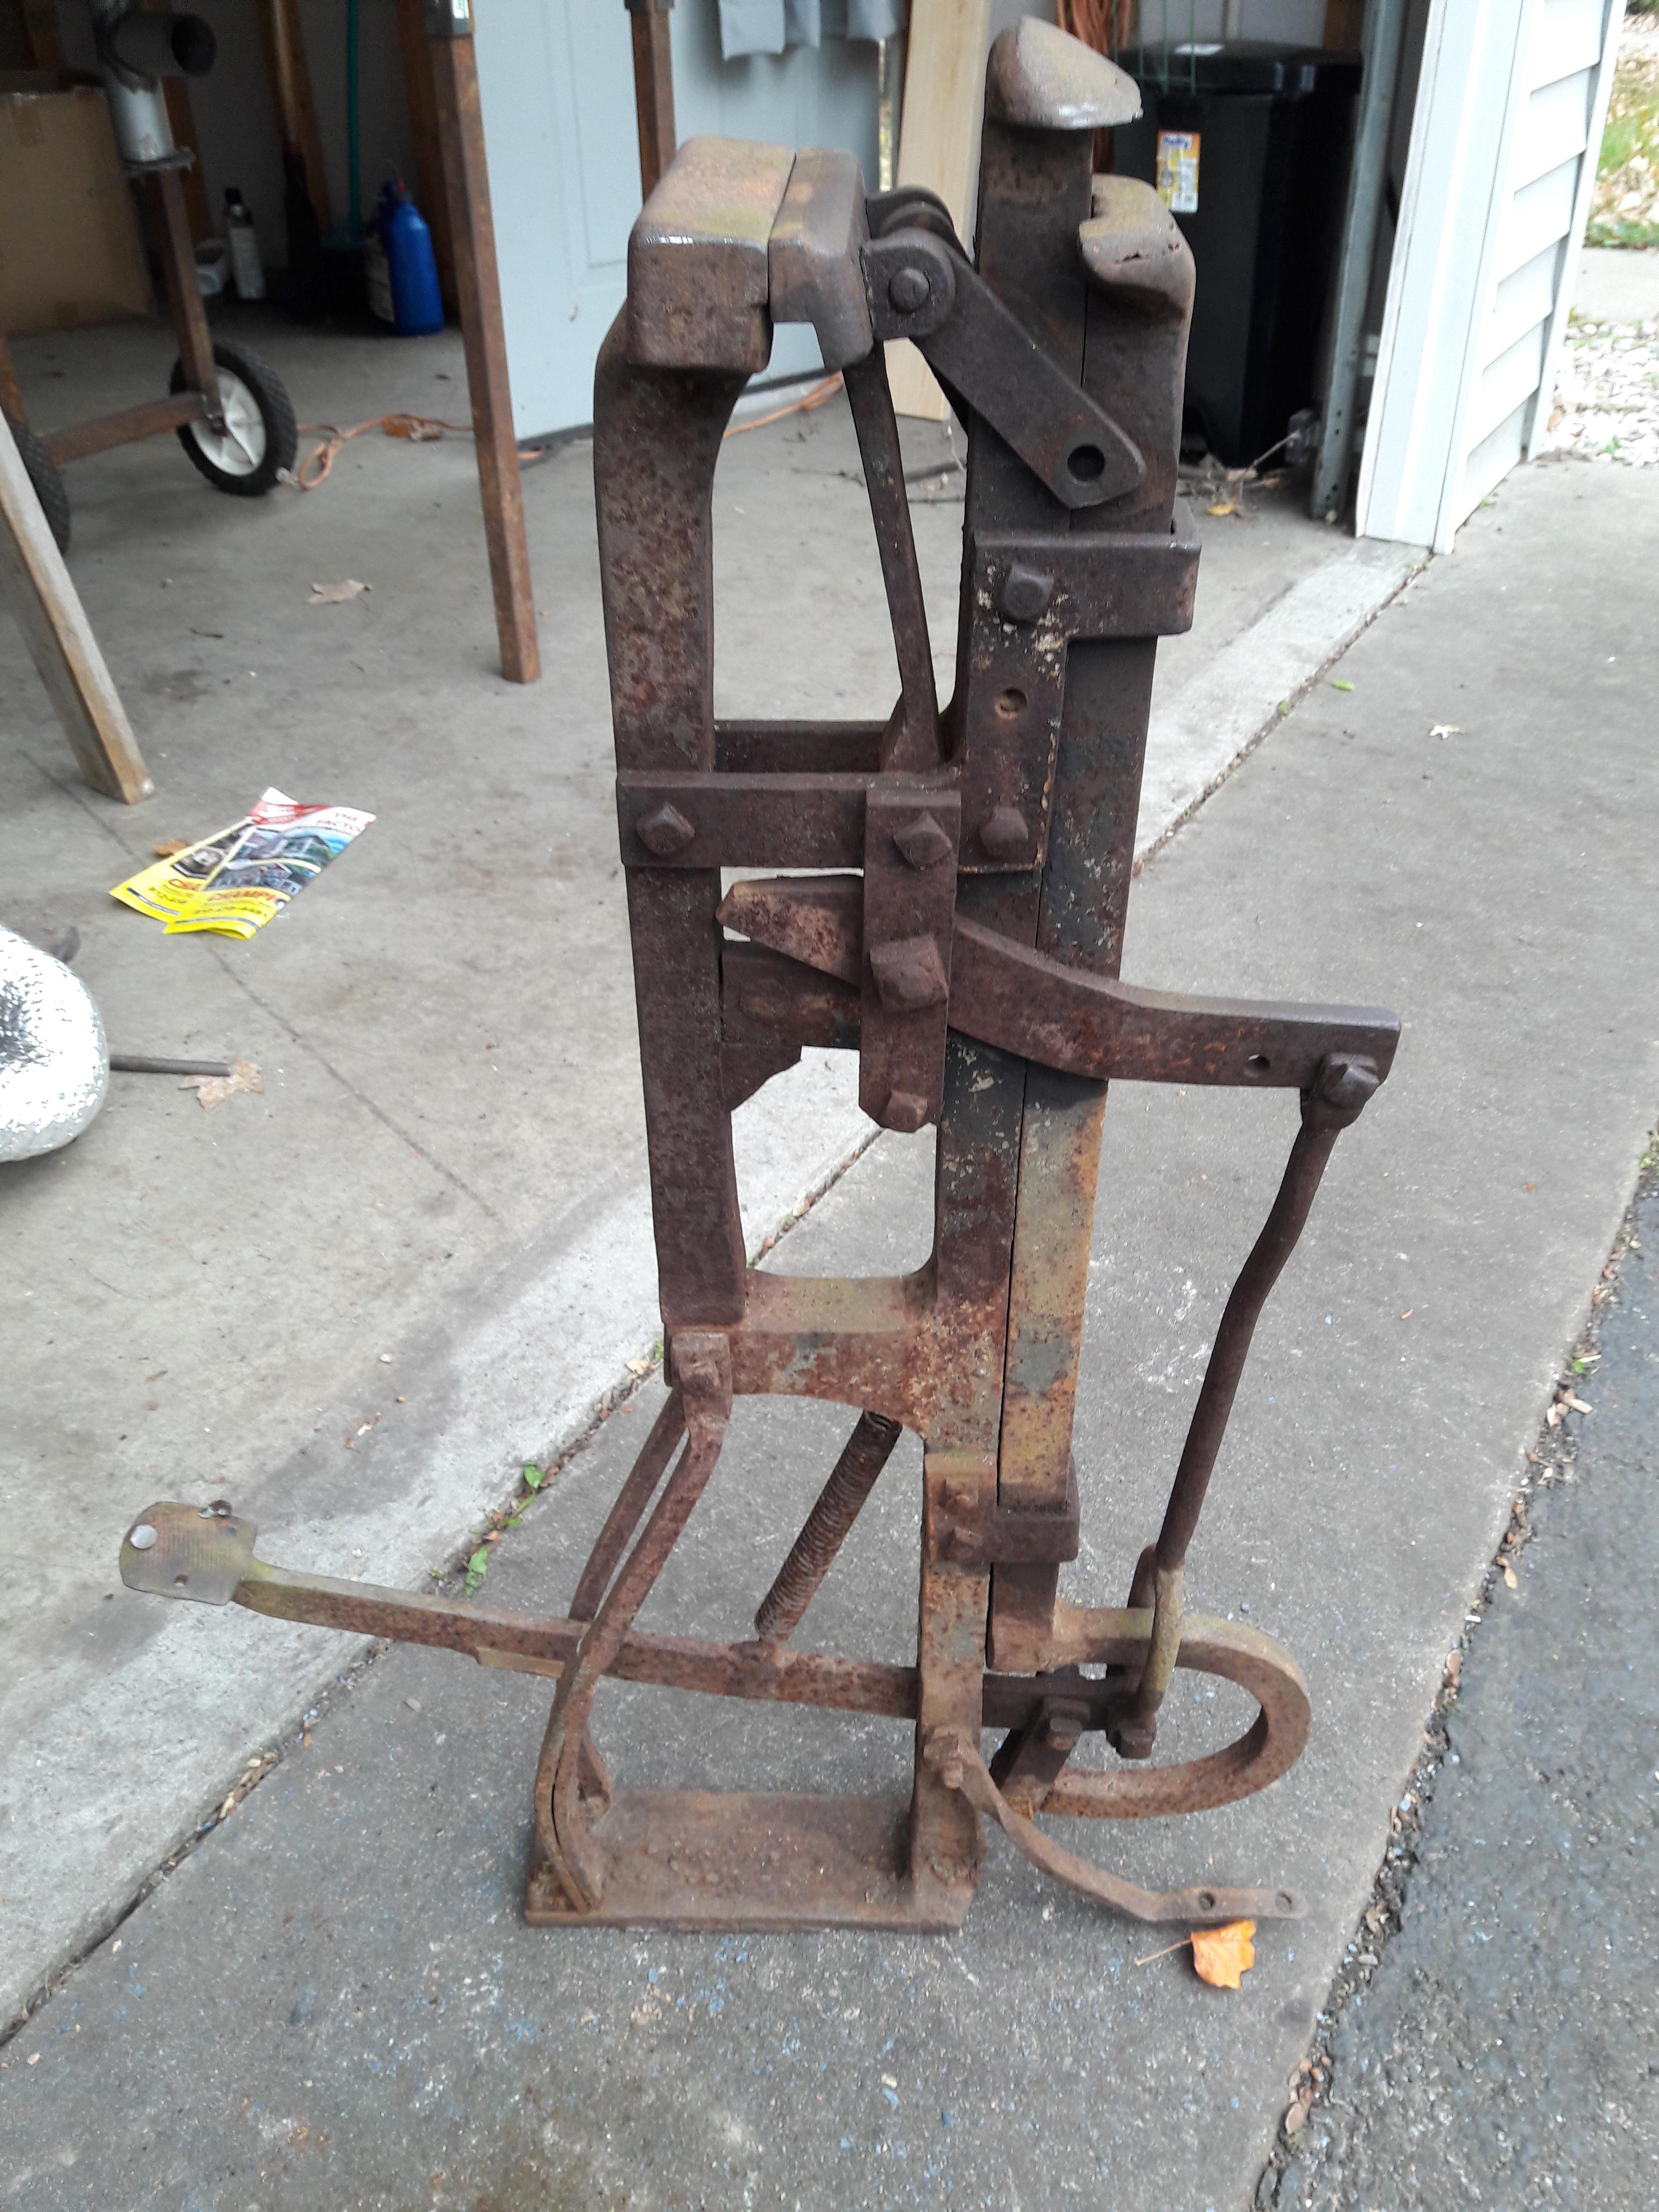
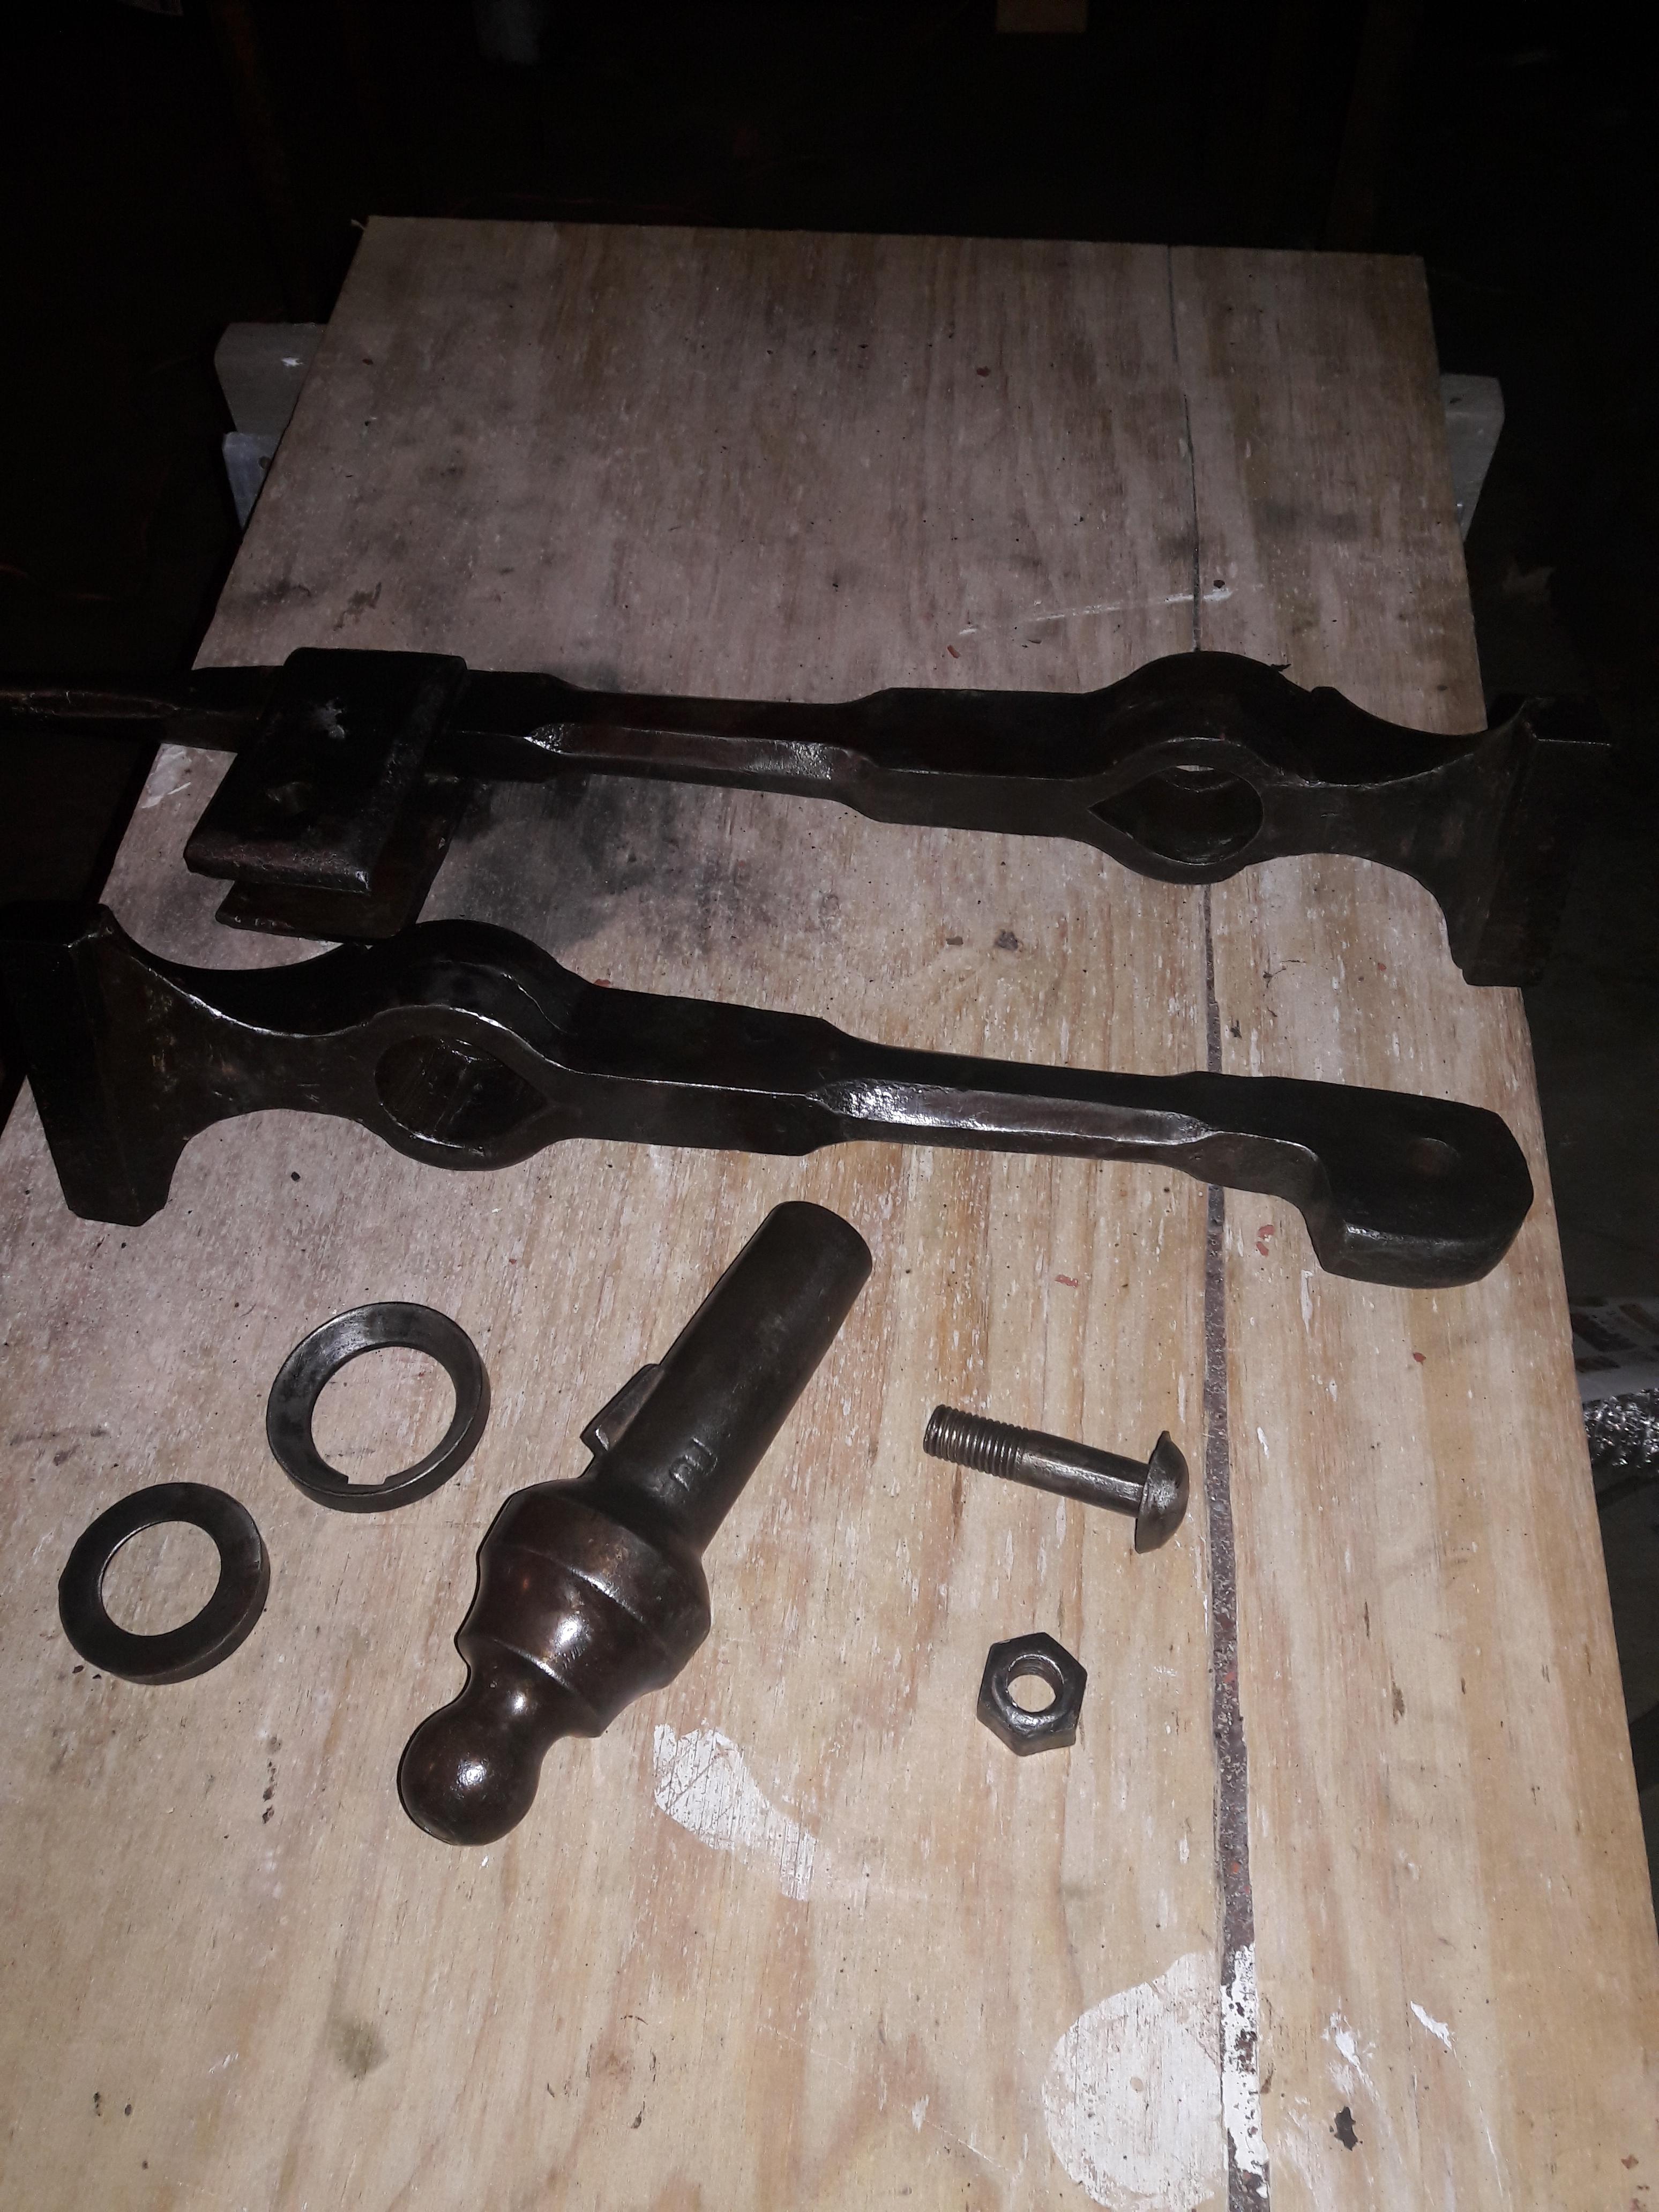
Other pics. The guy I got it from seemed to think it was for leather work, and the shape on the horizontal jaws were used for making the horn on a saddle. That would make sense, the linkages on the shear hardly seem strong enough for metal shearing.
-
Hello All, just scored a very interesting piece that has two pairs of vise jaws and a shear all operated by one treadle. The treadle also locks if you shift it over to the side. It should be very handy in the shop for light work but I've never seen anything like it. Does anyone have any idea who made it?
-
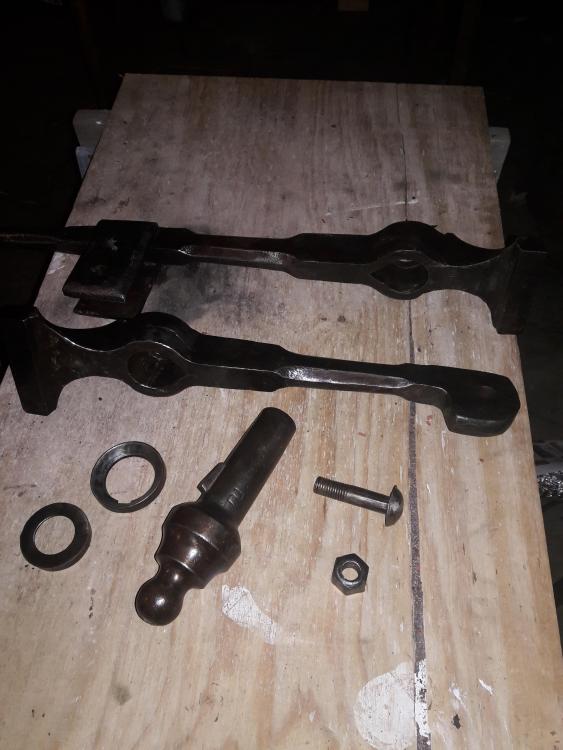
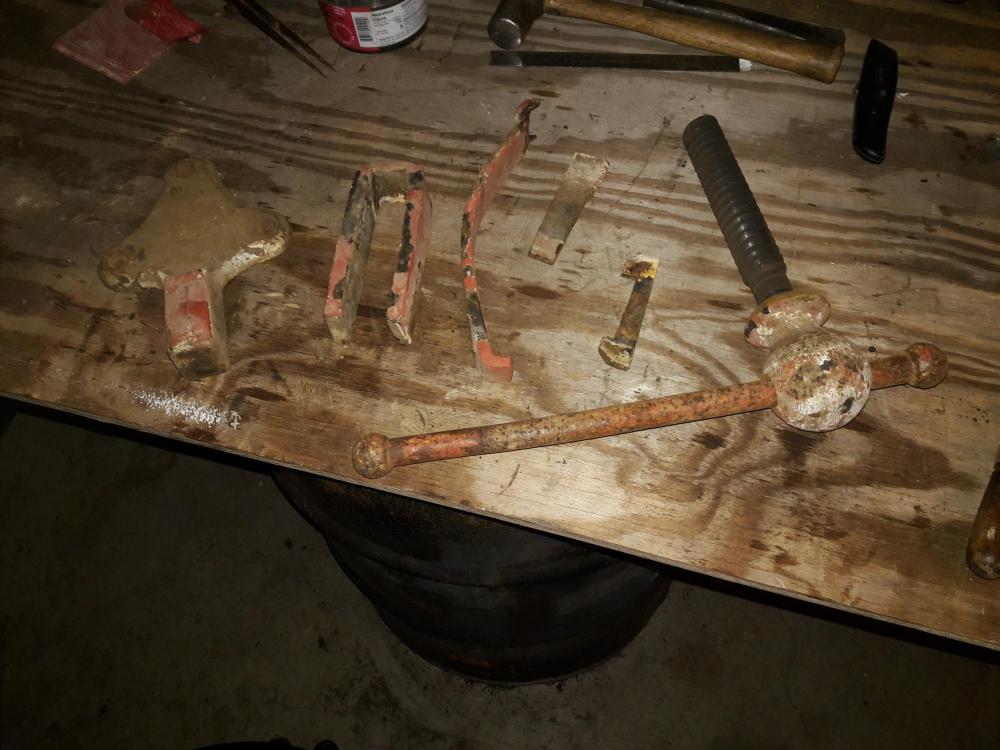
Well I got the bolt out by tapping on it with a chunk of wood to take the hit. Wire brushed most of it and coated with BLO.
Few pieces left to clean up next time.
Bryan
-
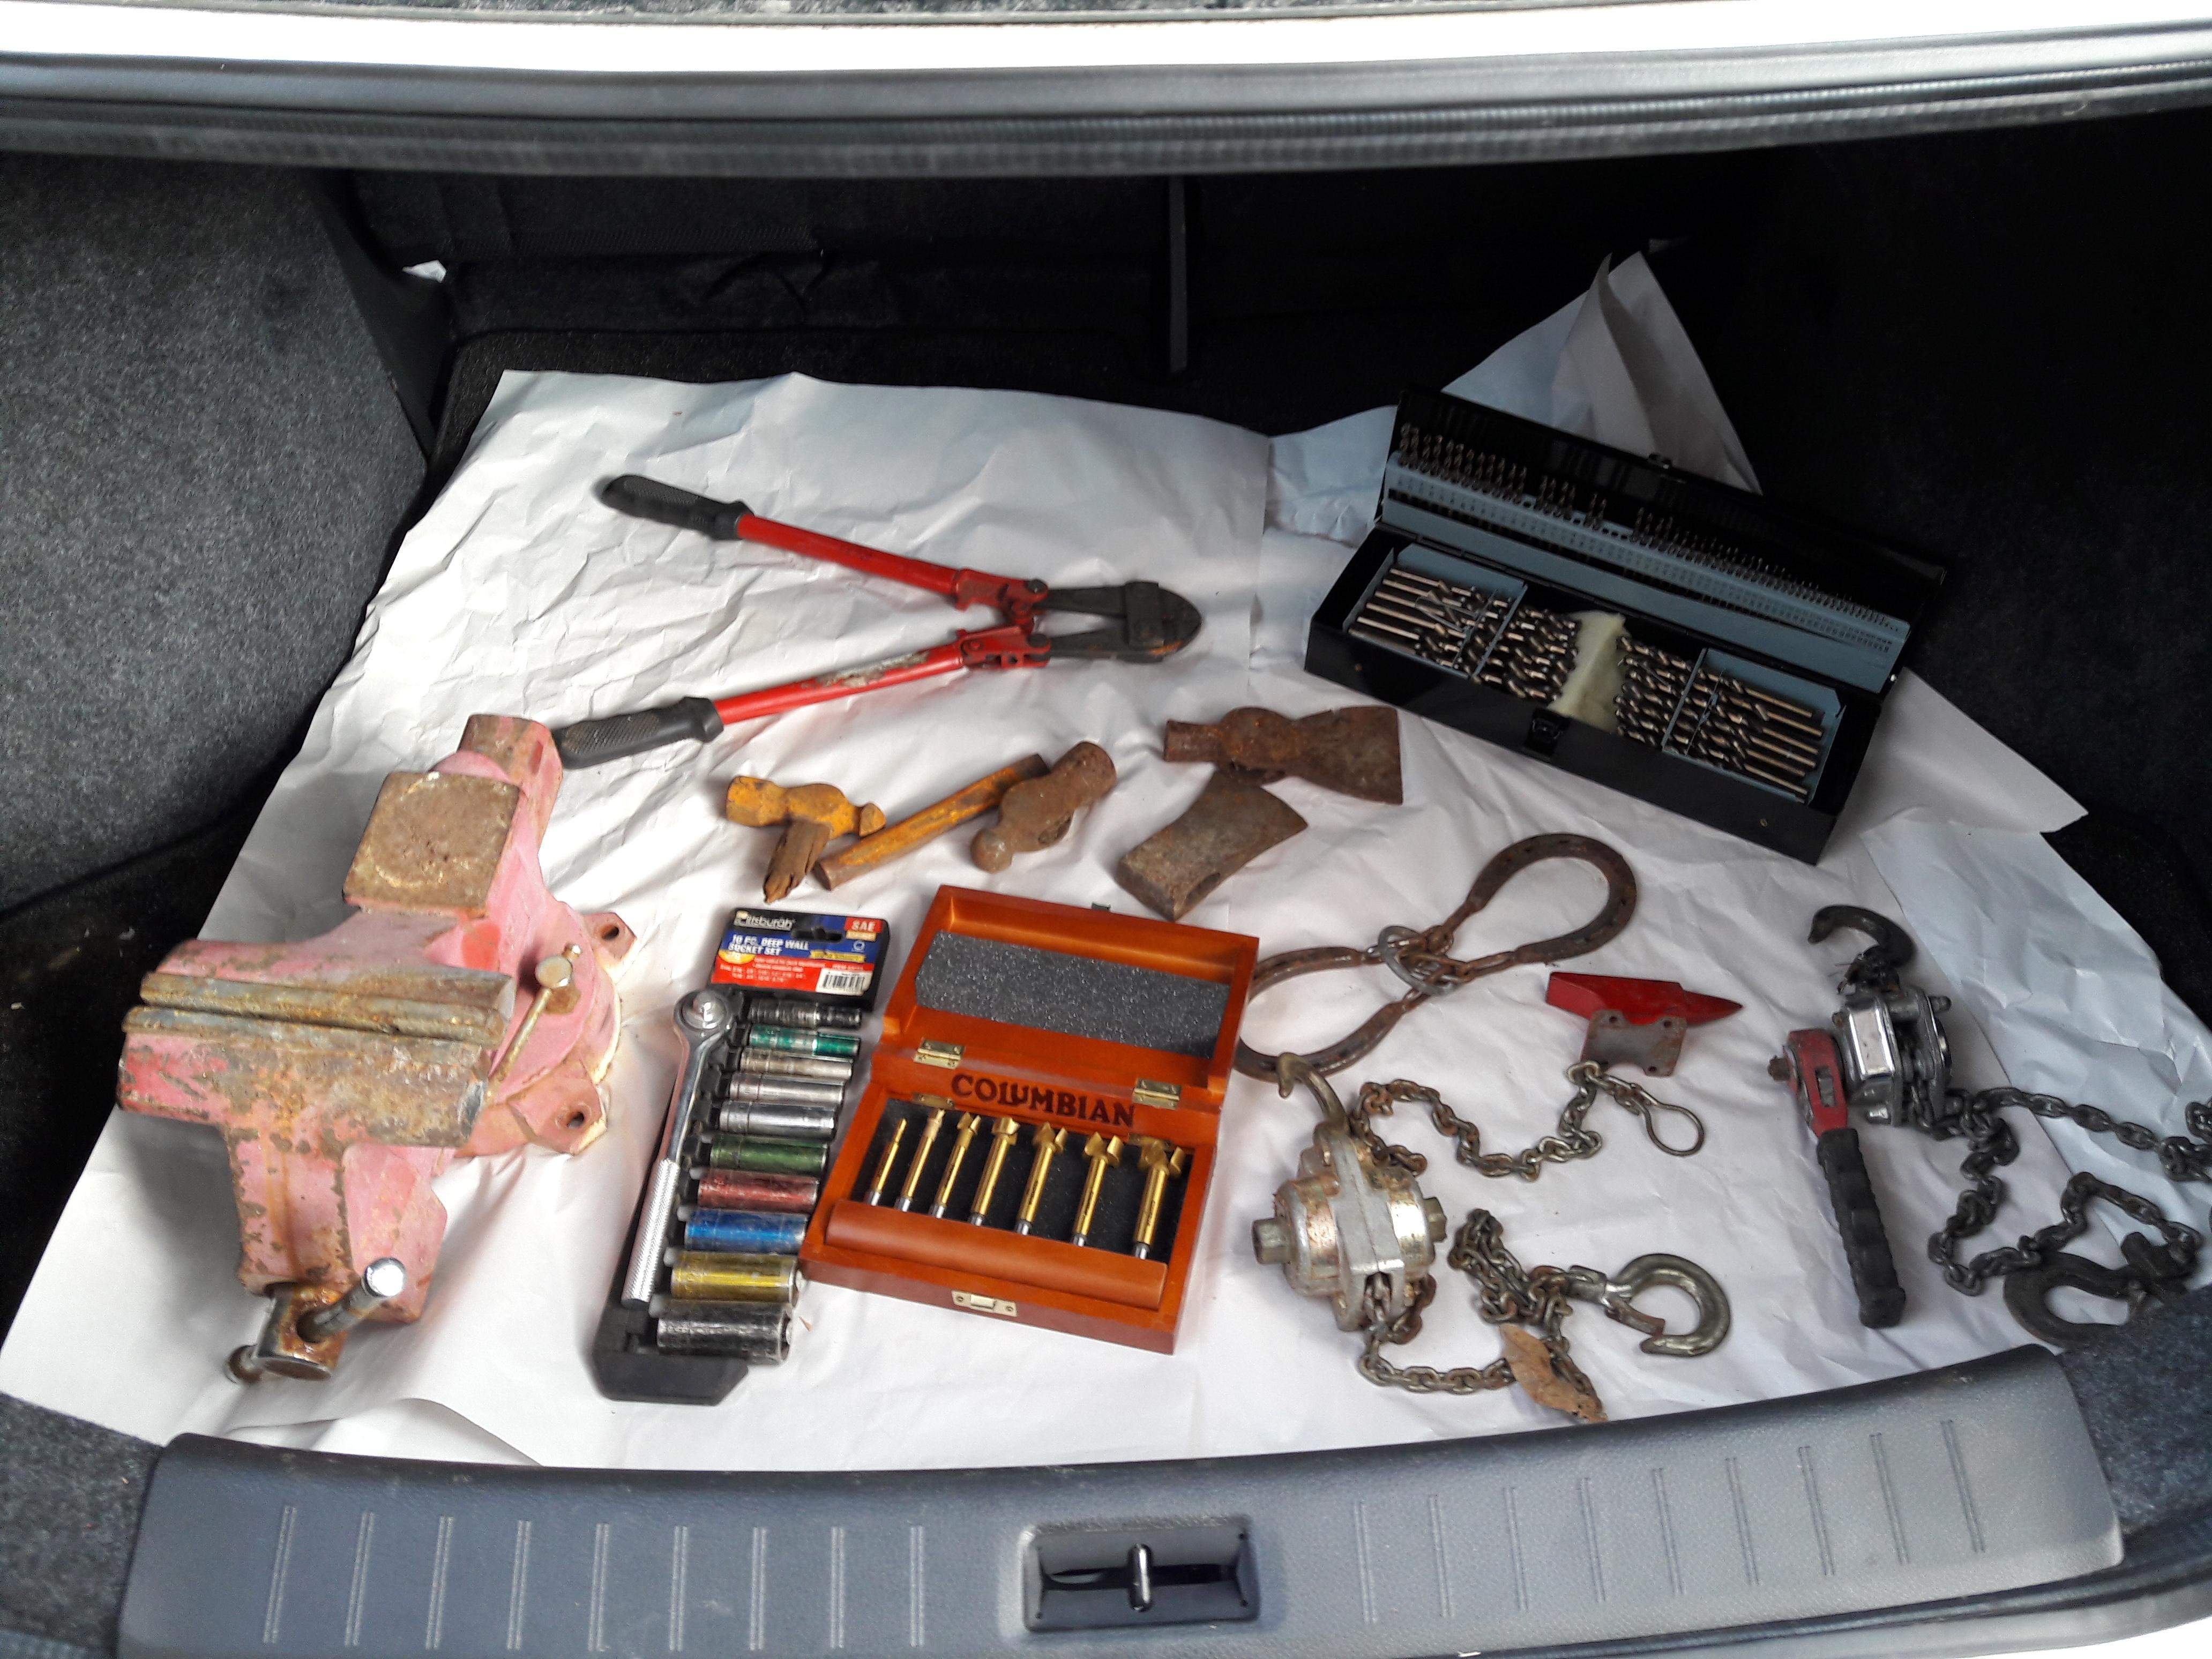
Same guy who I got the post vice and anvil from last weekend had me over to pick through his shop again this weekend. Got a trunk full of goodies. Wilton Vise, bolt cutters, 2 ball peen hammers, 2 Axe Heads, a chisel, set of sockets with socket wrench, Columbian forsner drill bits, complete set of drill bits, blacksmith puzzle, 500 pound hoist, 550 pound come along, and a baby anvil. All for $120.

-
Hello All,
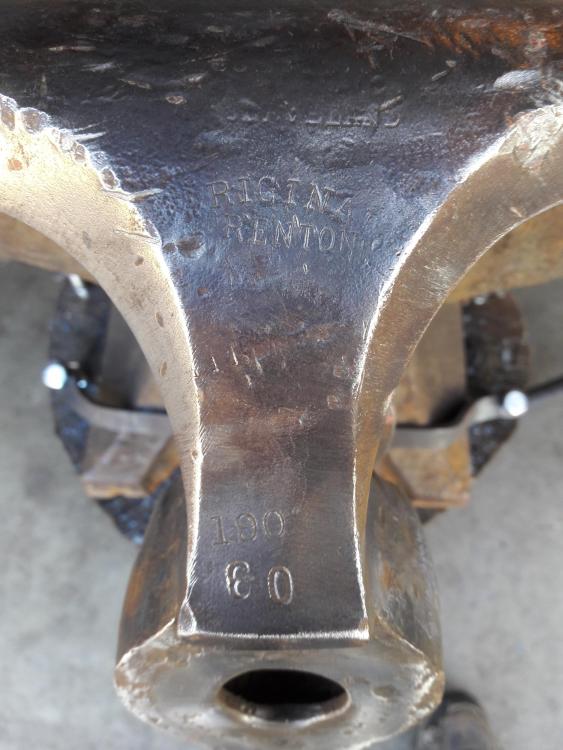
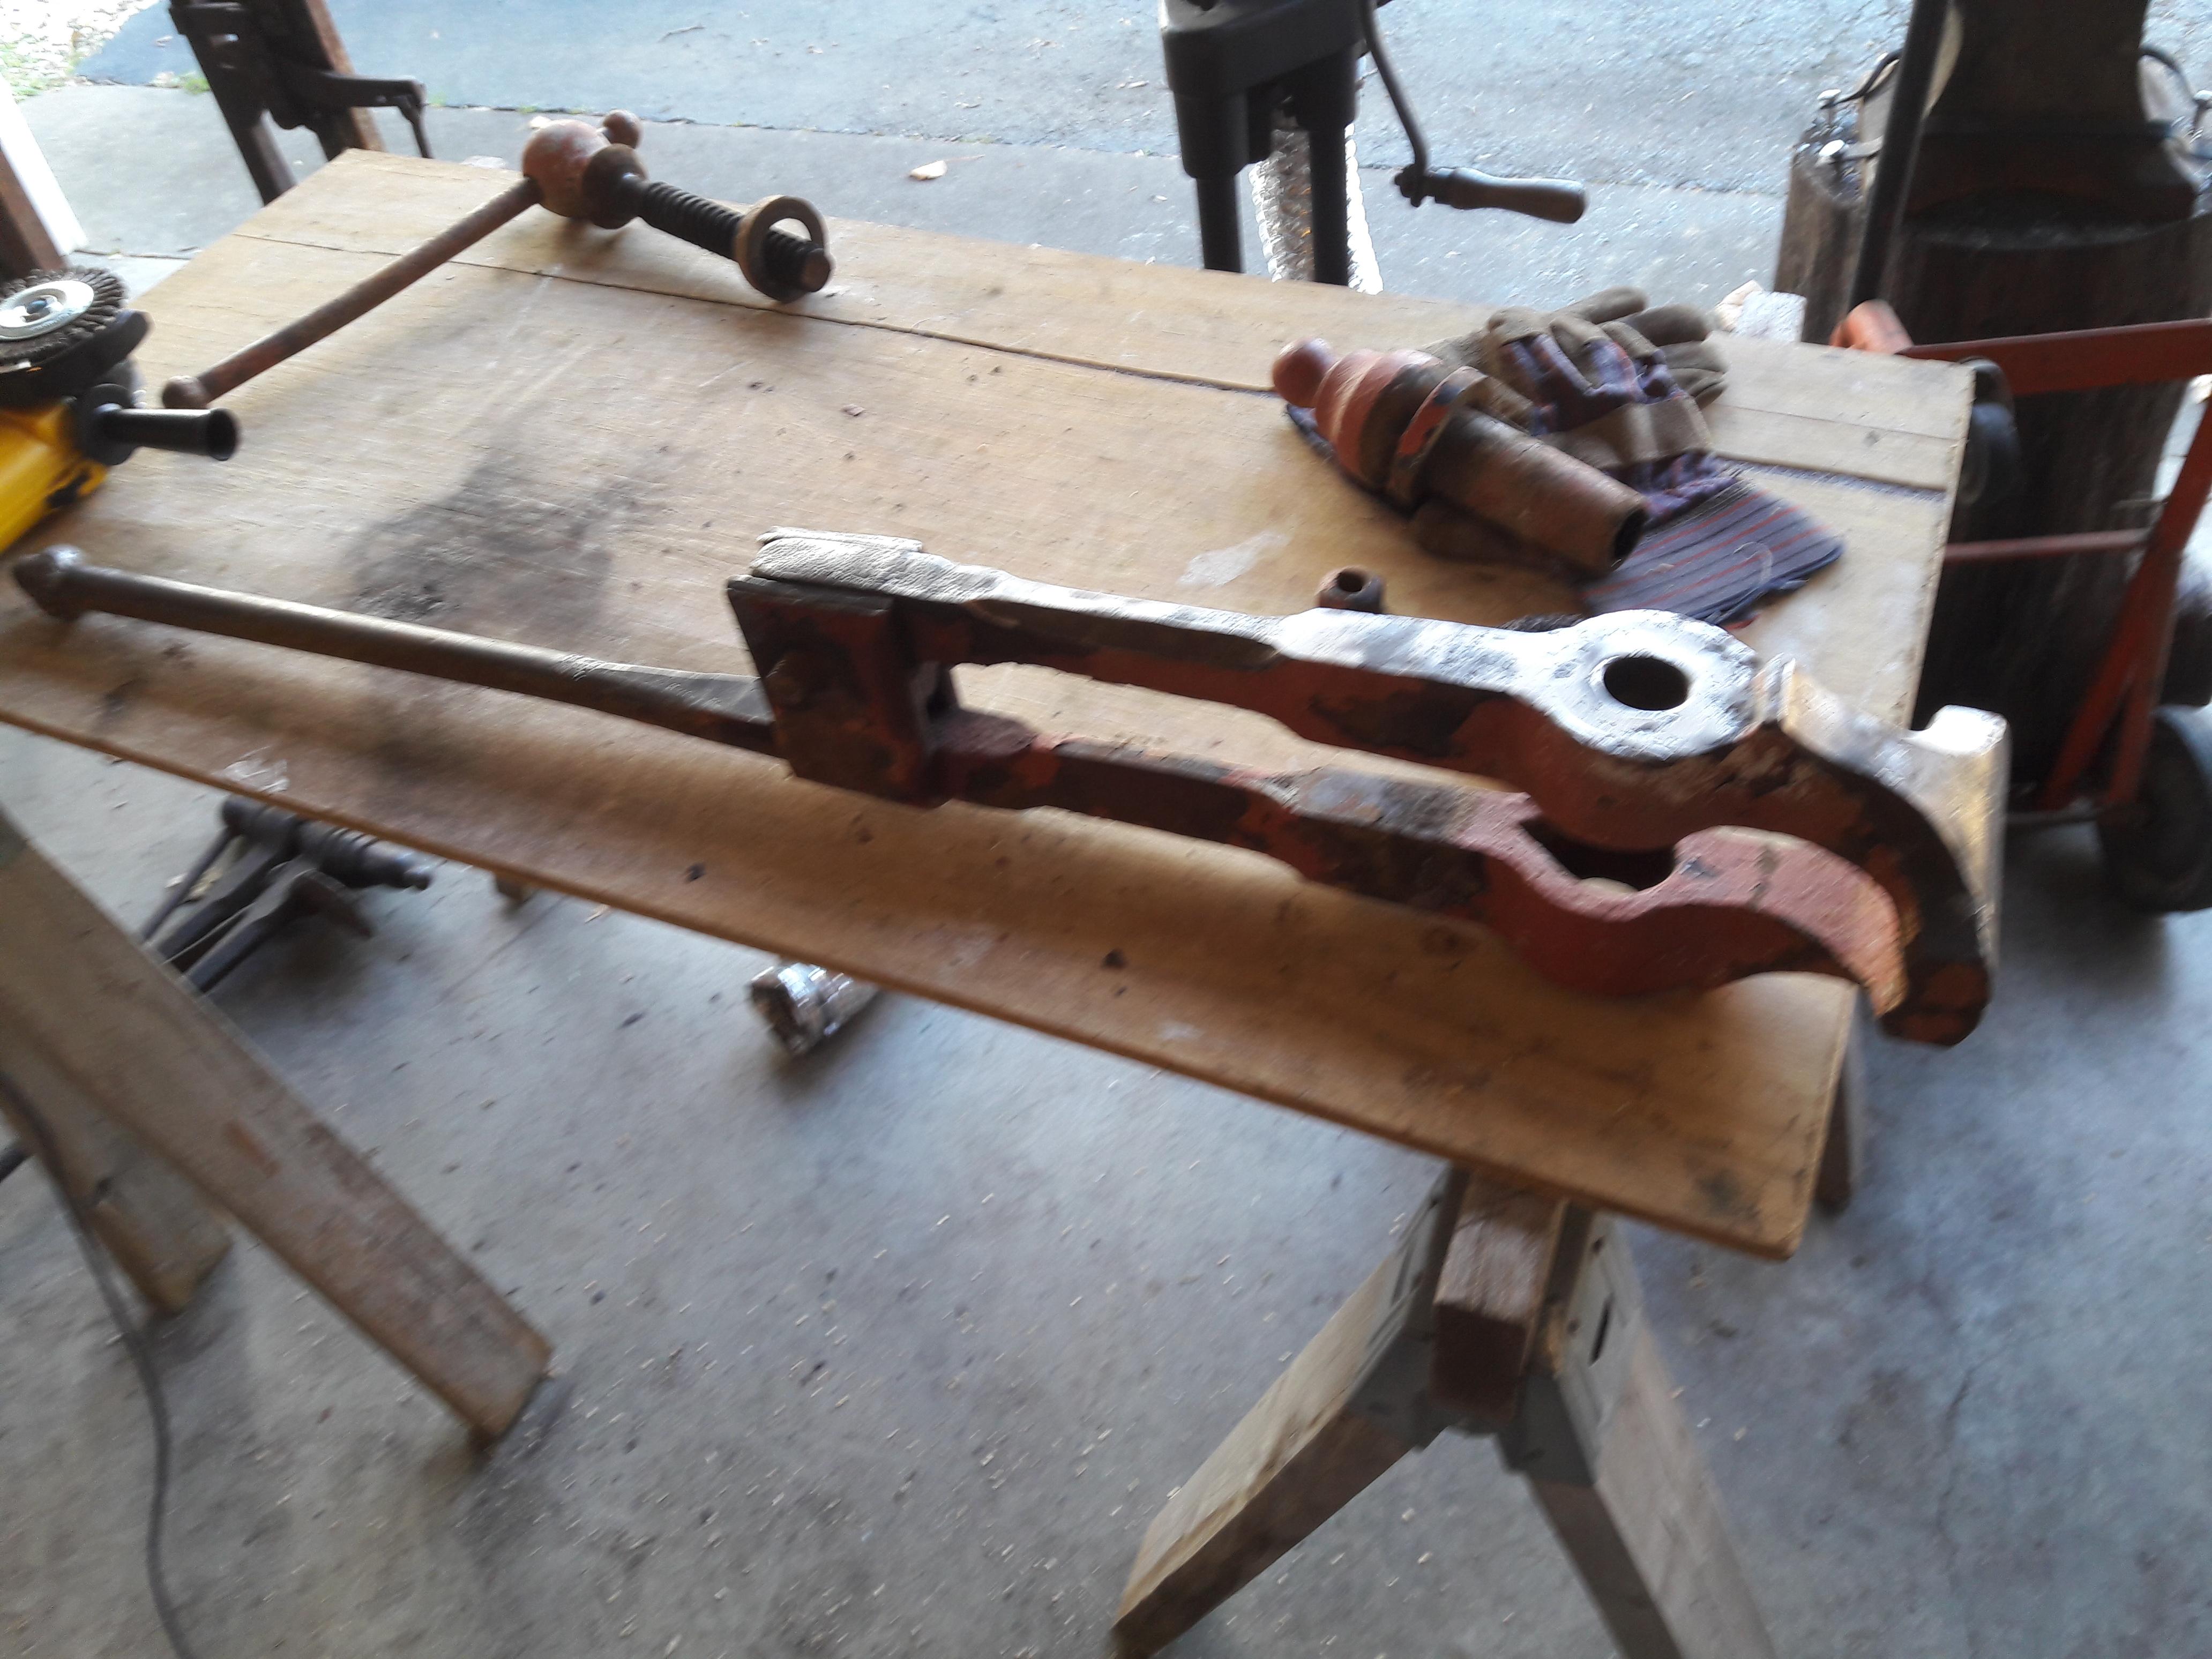
Just picked up a 5 inch jaw post vice last weekend that was frozen but all parts there. Got it moving fairly quickly but it's still very stiff and difficult to open and close. Decided tok break it down, strip the flaking paint and make it look nice while getting better movement.
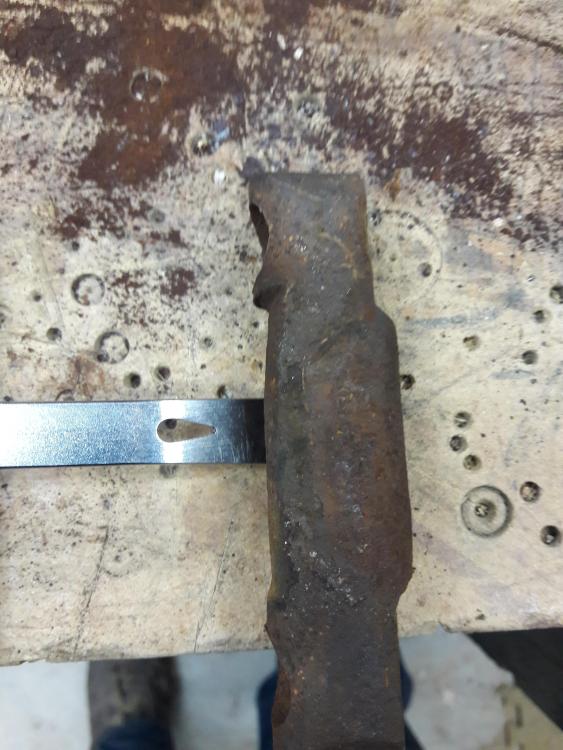
Pic as received and progress on cleanup. One question. The lower pivot bolt is being stubborn about removal. I have never removed one, so am hesitant tok get aggressive on it. Anyone have a thought on It?
Oh! Also I discovered a maker's Mark! I was excited because I have never seen one on a post vice before. Looks like "Original Trenton" maybe...

-
I find after moving back a page, hit reload and it will come up.
-
Elemental metal creations,
What is that squat vice for? Looks like holding pipe or rod maybe? I saw on of those today but wasn't sure if I should get it or not.
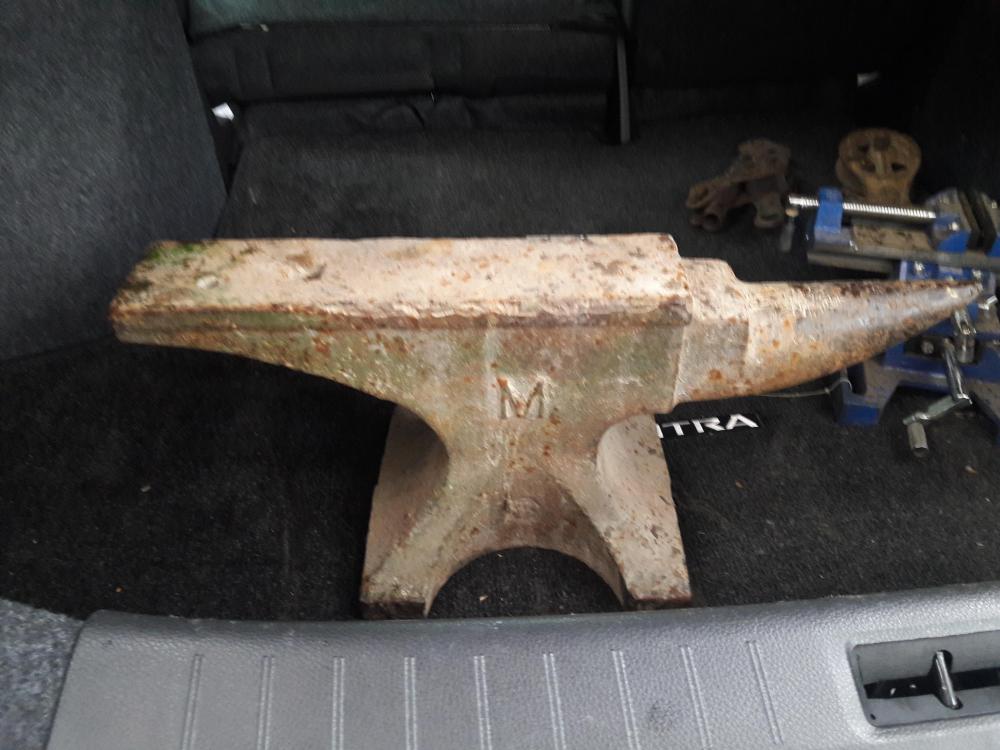
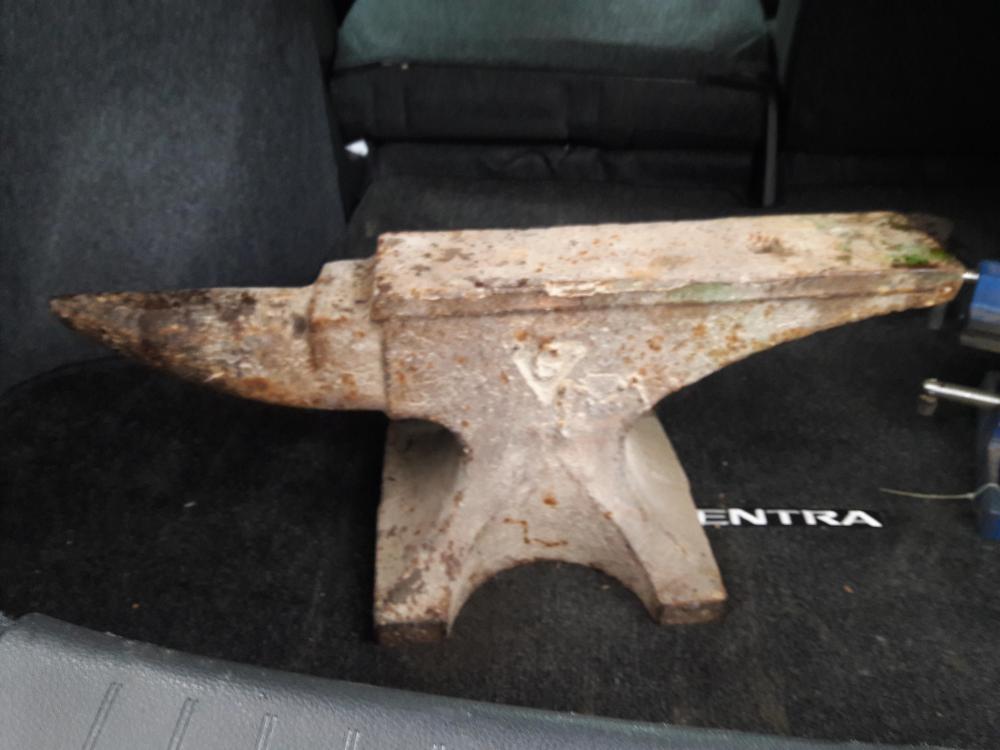
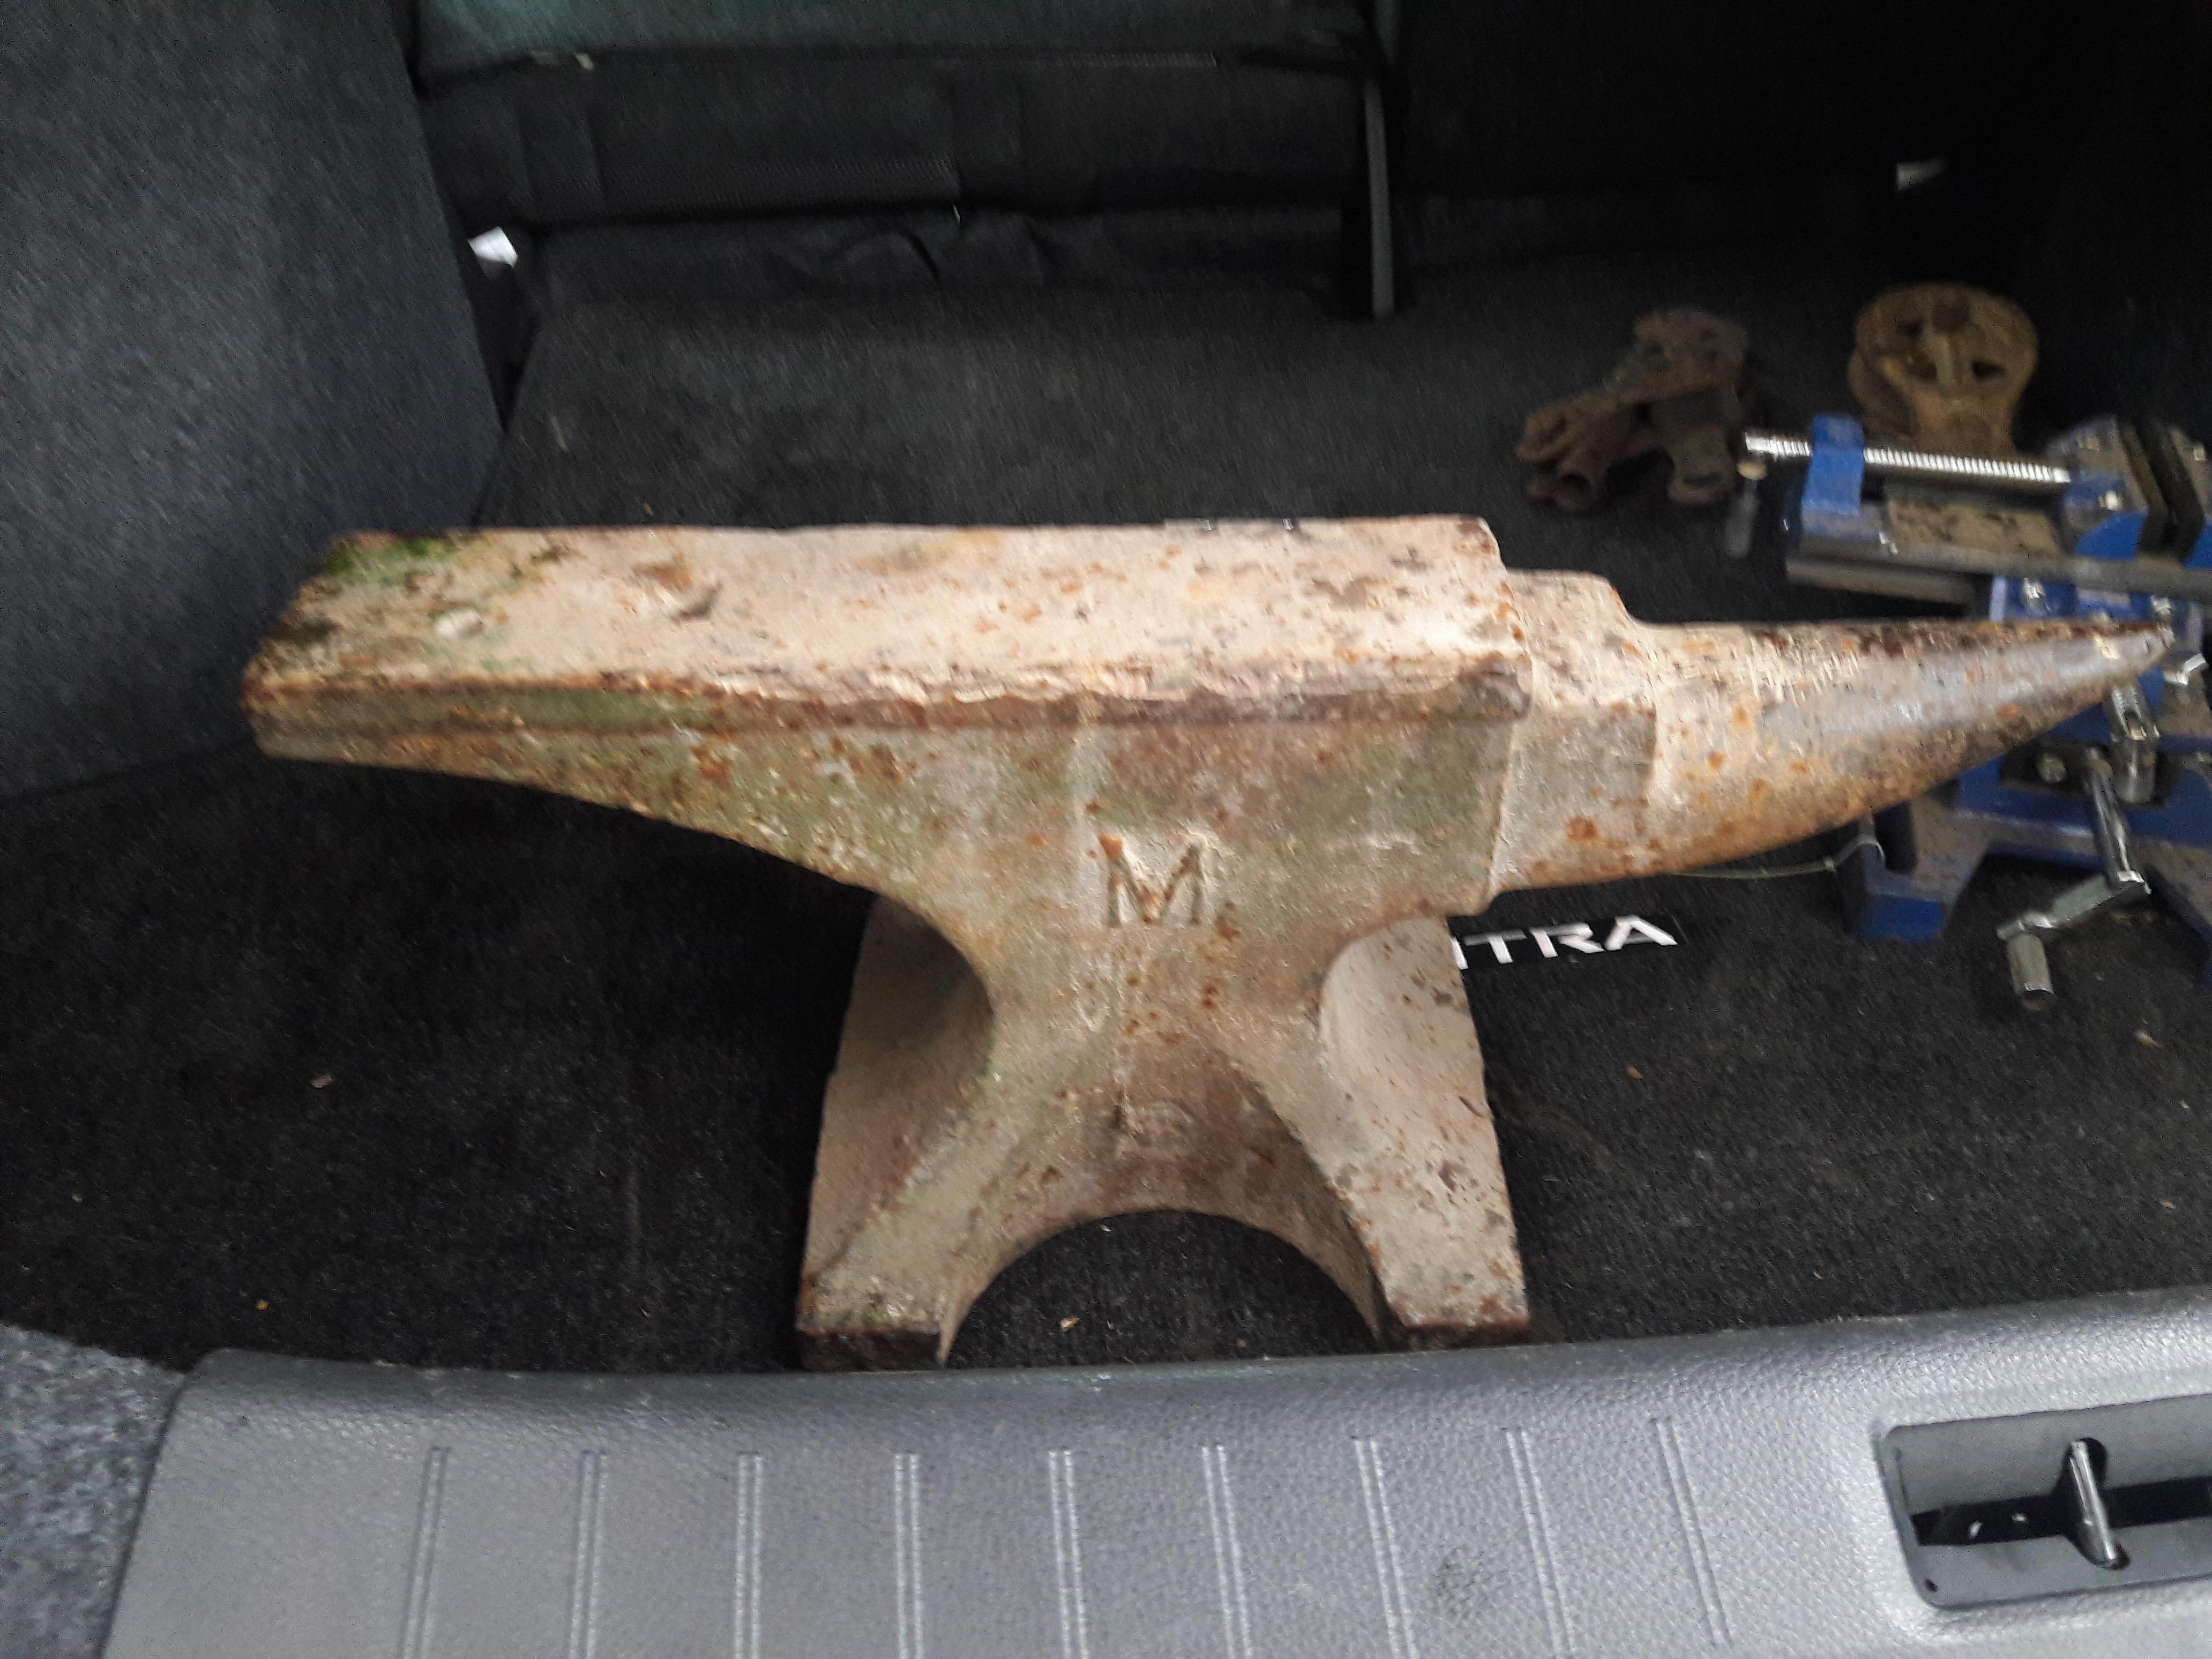
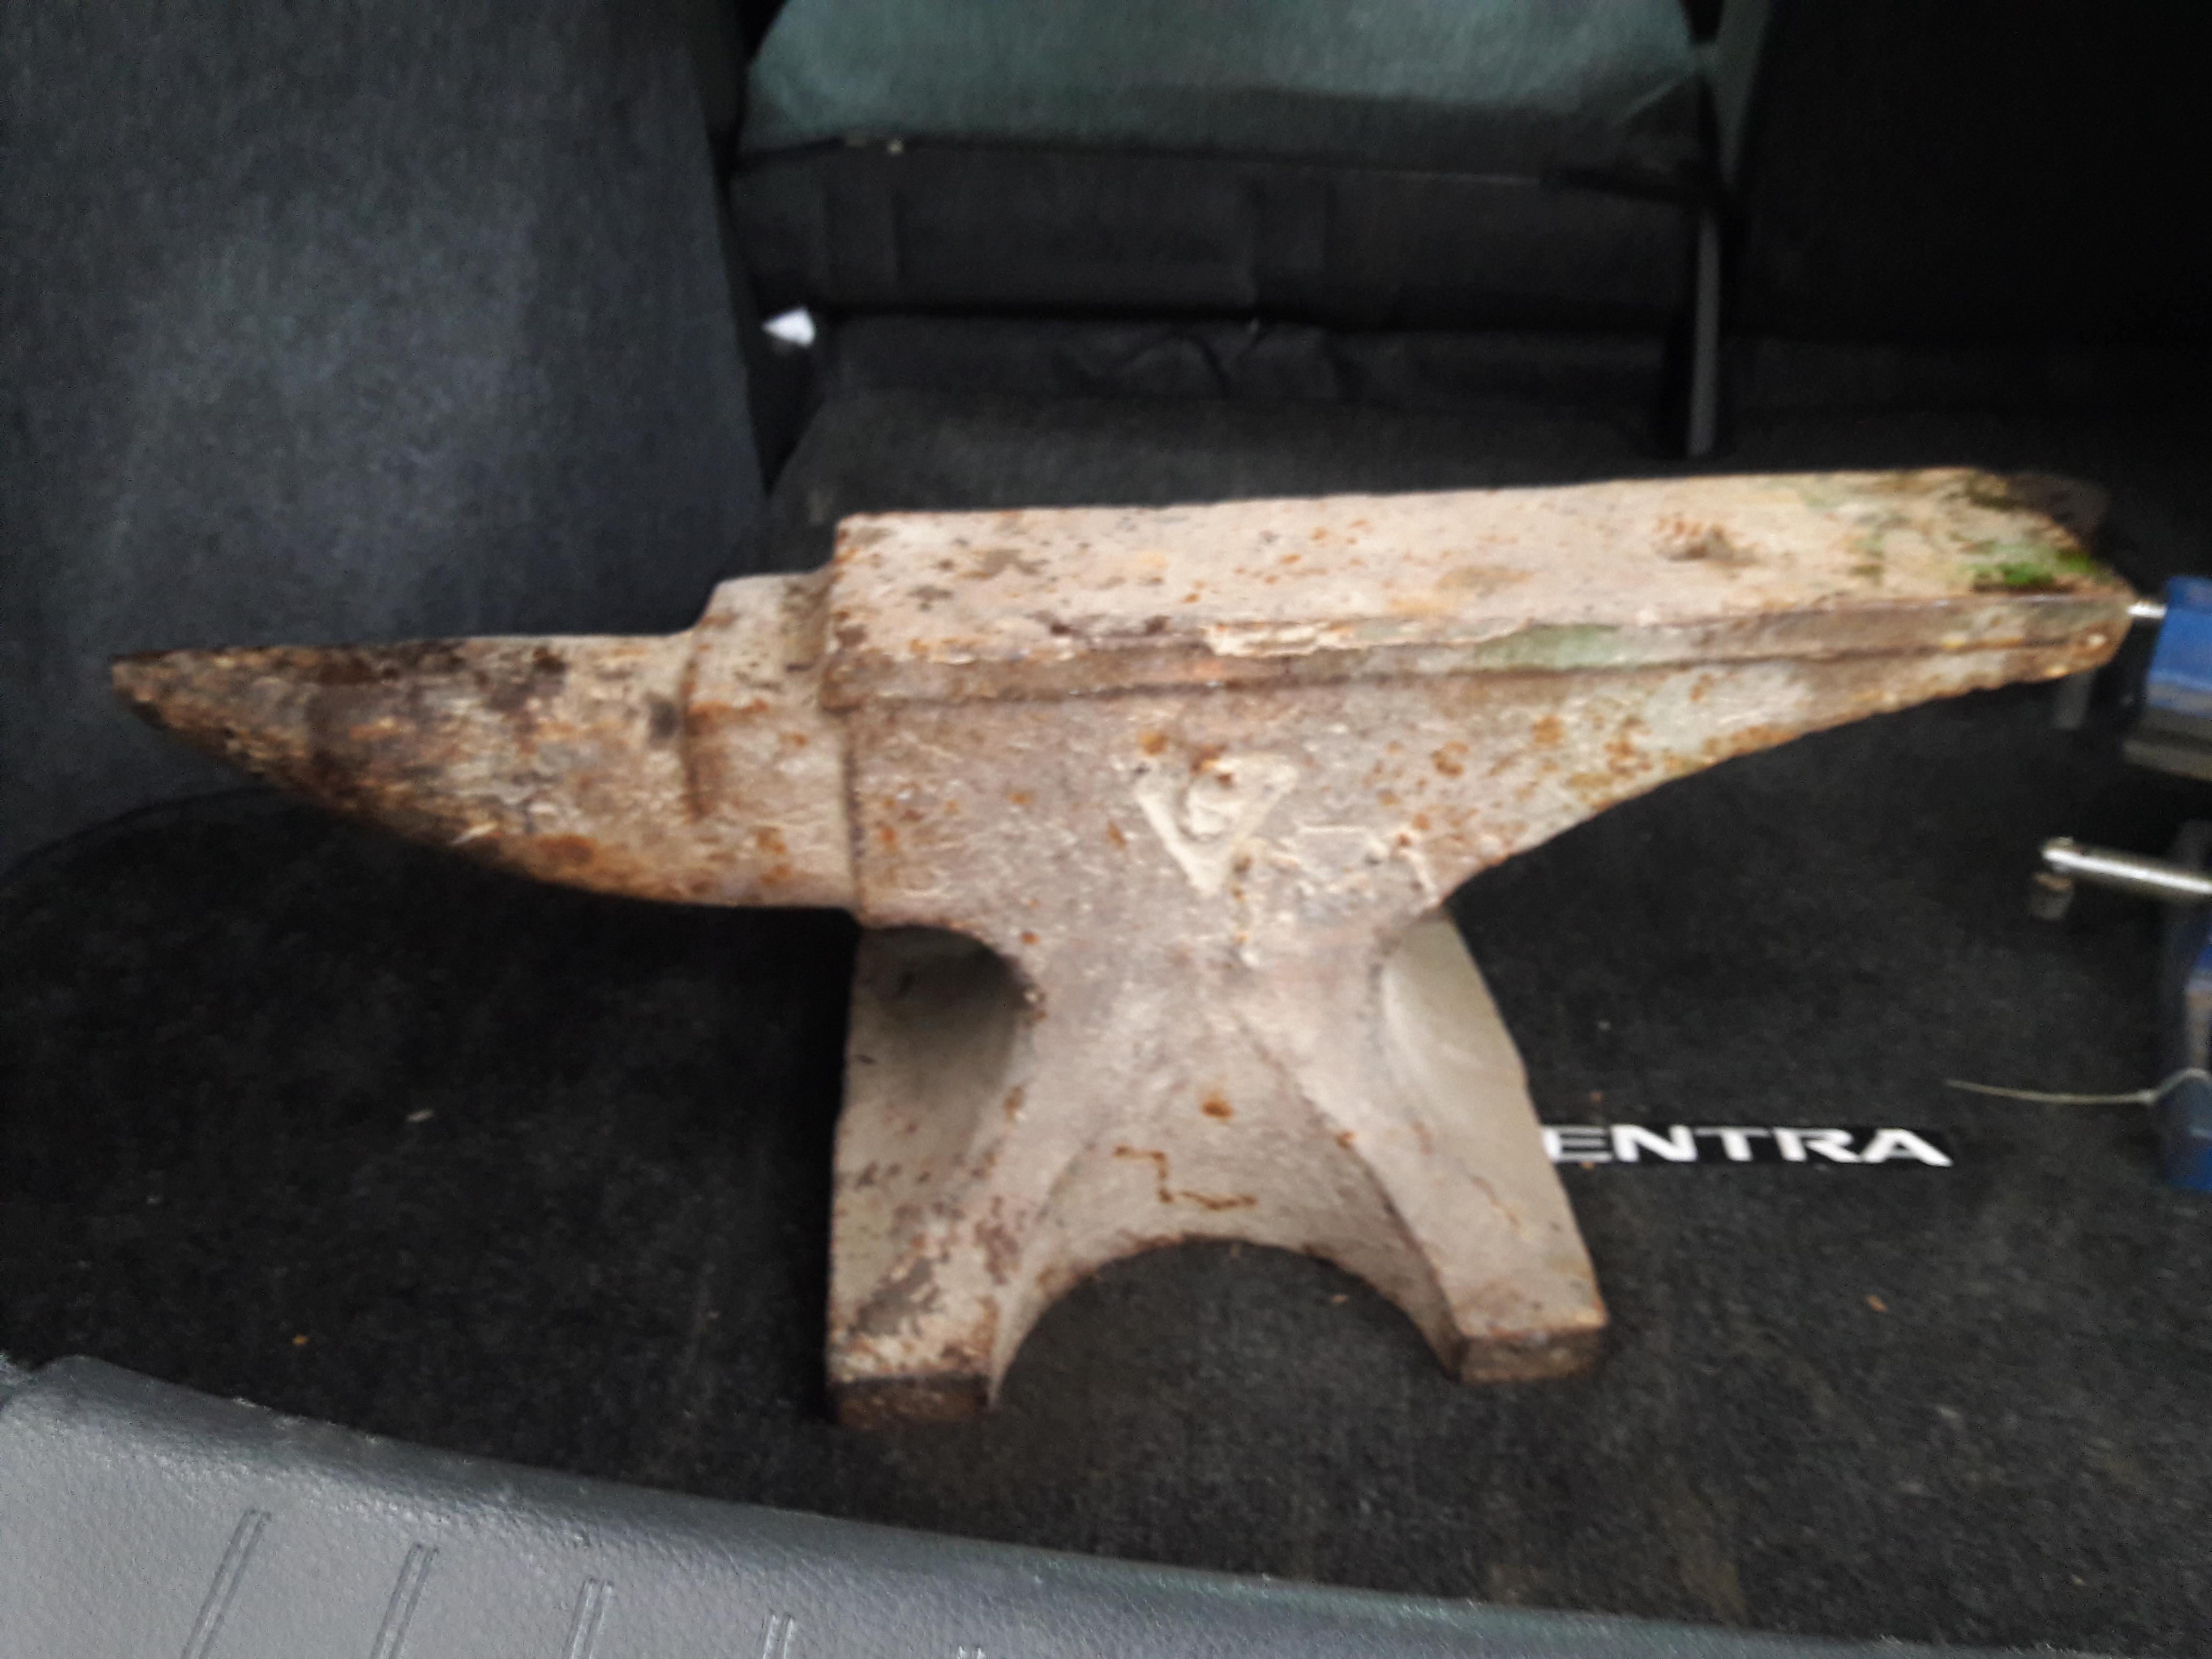
But I did bring home an anvil and post vice. Can anyone ID the anvil? It has a hardened plate on top, a "C" stamped on one side and a "M" stamped on the other side.
-
I made it to a hammer-in last weekend and met a guy who makes hammers. Went to his shop the next day and got to do a lot of firsts for me. I was a striker (to help make me a hammer), while annealing the hammer he showed me how to forge weld a pattern welded billet, and I got to use a power hammer to draw it out after welding. What a great day!
-
What did one snowman say to the other snowman?
Do you smell carrots?
-
Put the hammer back together as far as possible before I leave for 3 months for work. Hopefully I can make progress ordering or getting fabricated components while I'm away.
Any thoughts on what the toggle arms should be made from? Carbon steel or tool steel? I'm leaning towards carbon but have no experience.

-
Yeah I'm in love with the colors. But every time I turn around there is some other piece that needs paint. Somehow I can't get it all at once lol.
-
Got the ram put pack on and somewhat aligned. Was very satisfying to have it move so smoothly.
-
I'd suggest getting connected to your local ABANA affiliate. At a hammer-in or meet, there is usually tailgating and you might find a better deal.
Bryan
-
A good hour of wire wheeling later...
I think this while spring assembly should just be finished with BLO, seems silly to paint it. I think paint would just rub off.
-
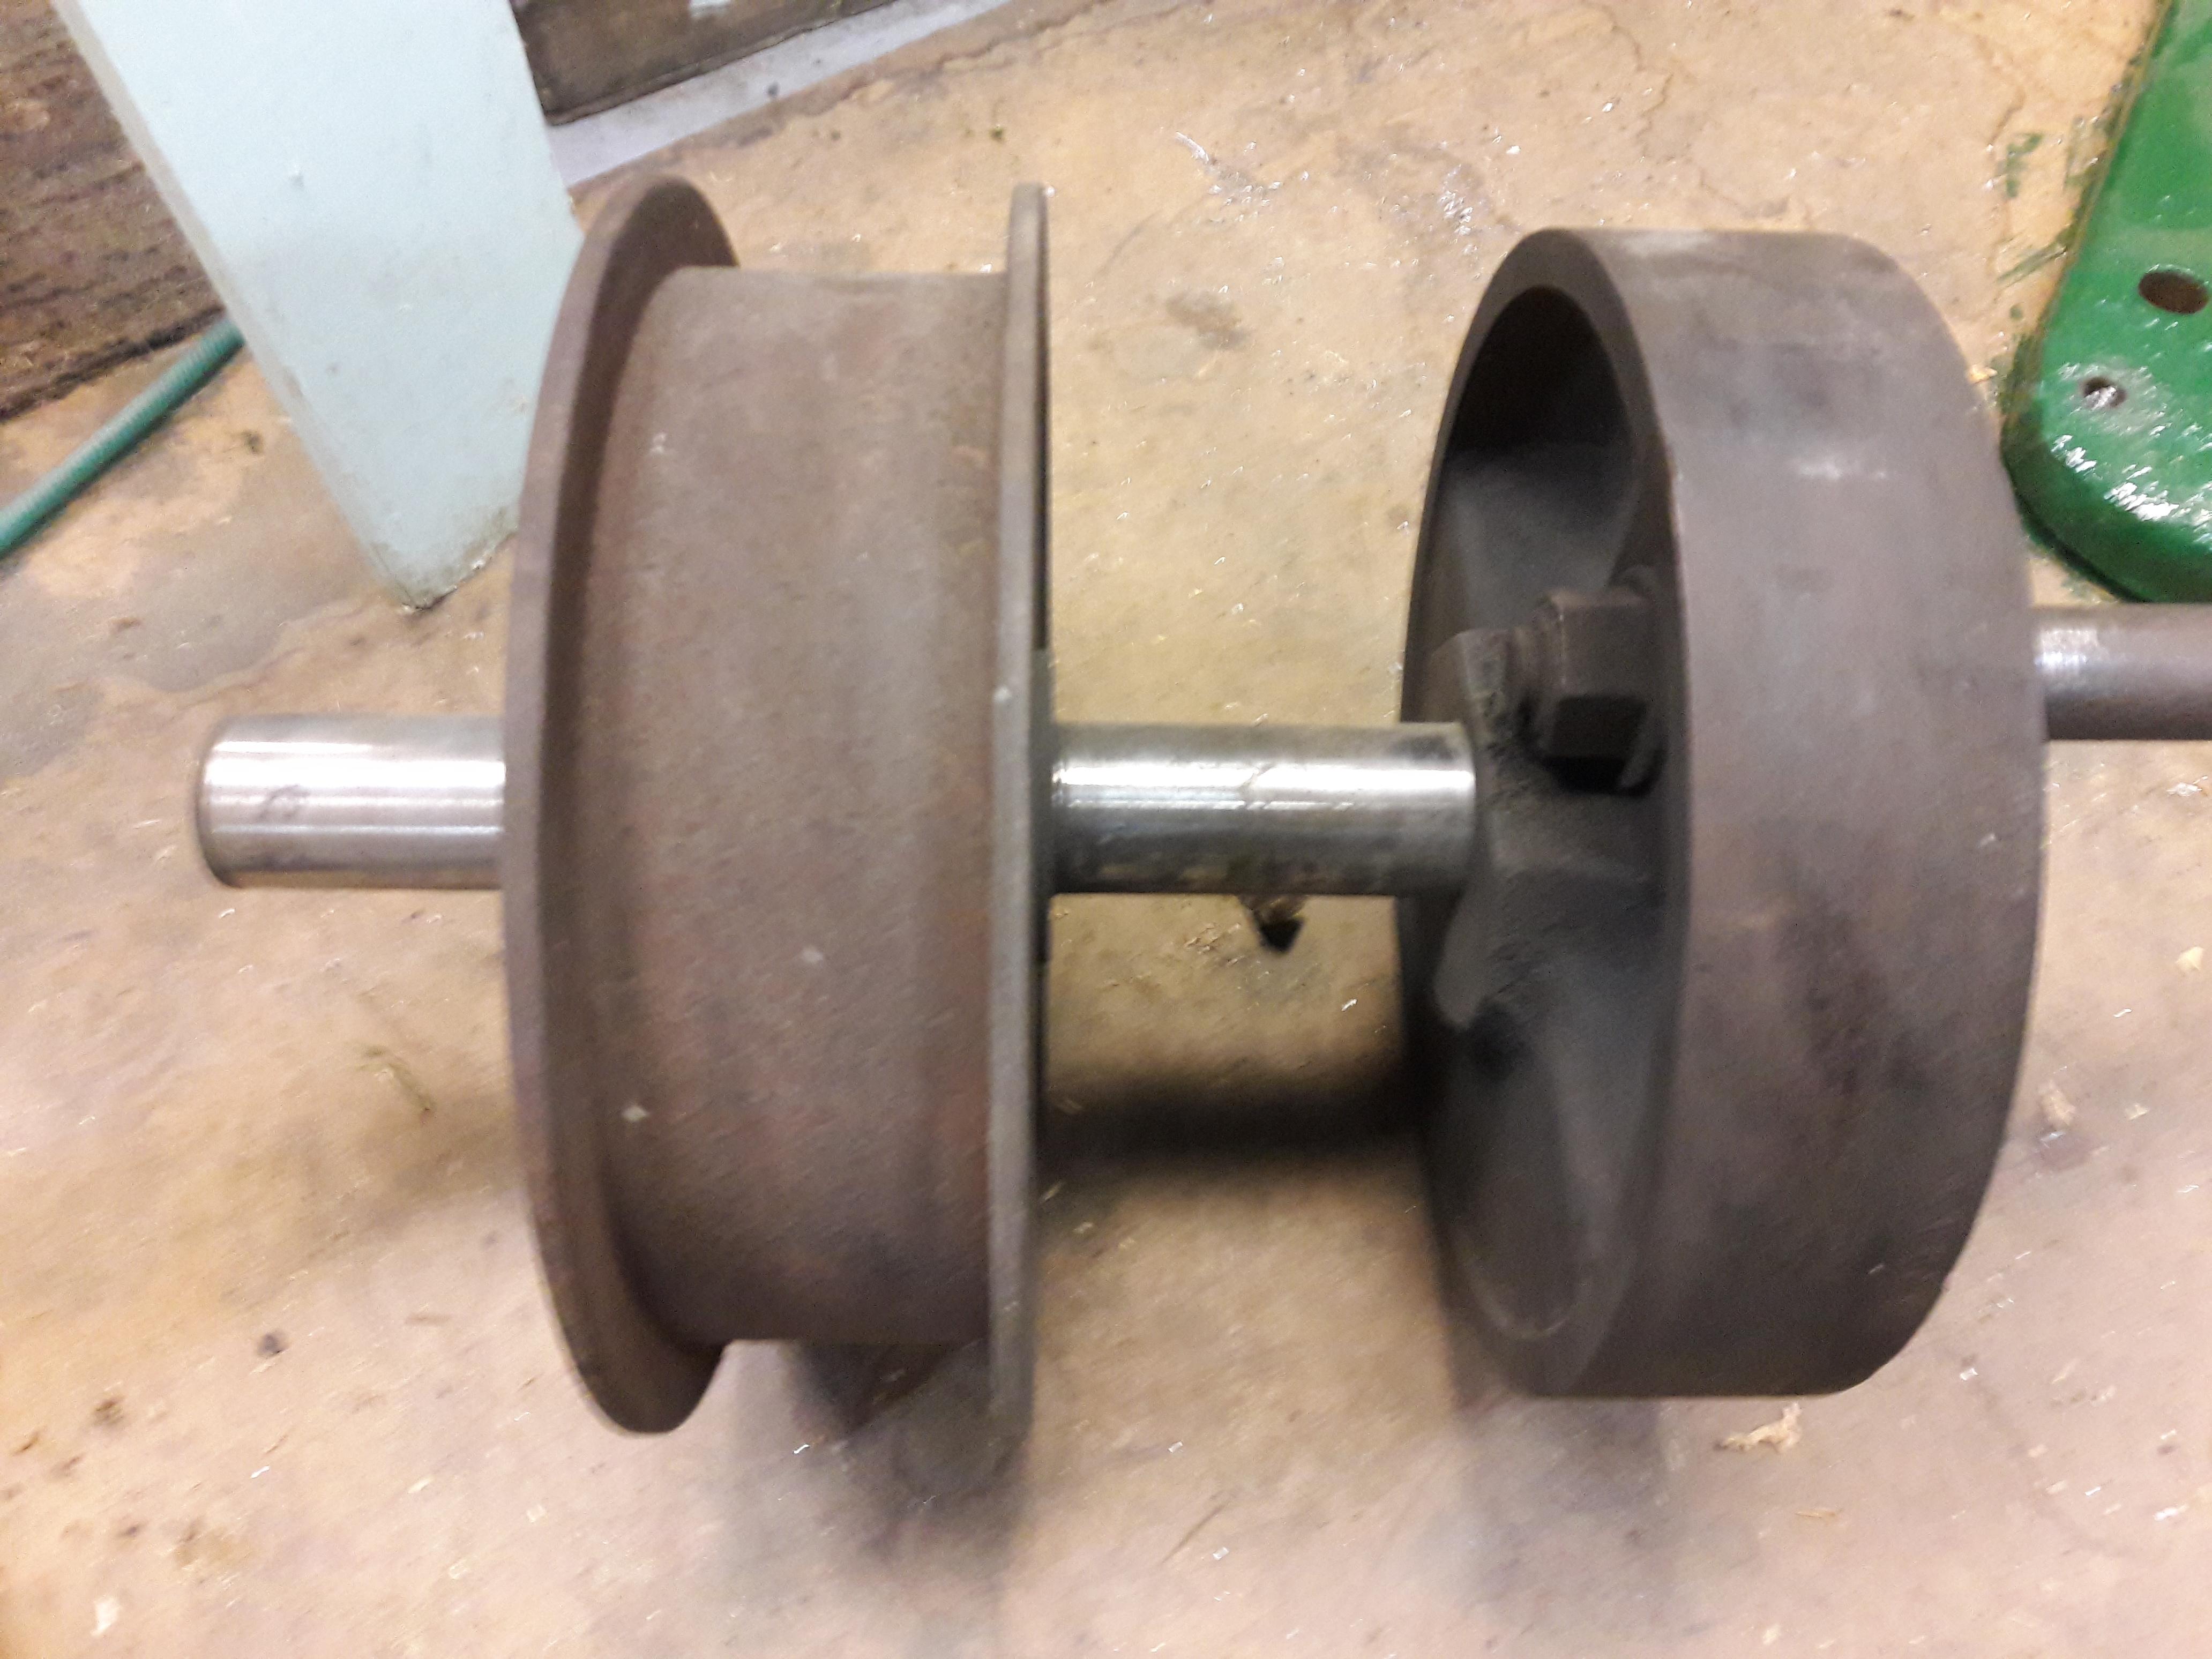
The bar that goes in the spring seems to have less than 1/32 slop. But it's hard to tell with it all apart. The bar to spring seems worse. You can see what appears to be wear on those.
When I got the spring pack apart, a significant amount of rust fell out before even cleaning them. If this is the original spring pack, not so much really for 100 years.

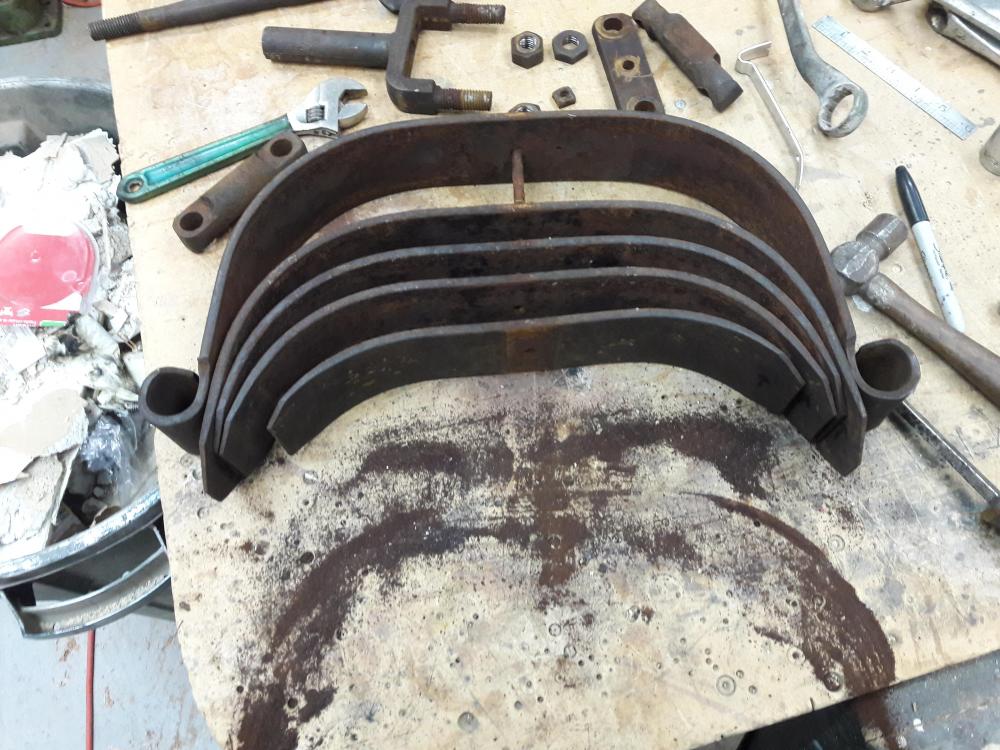
-
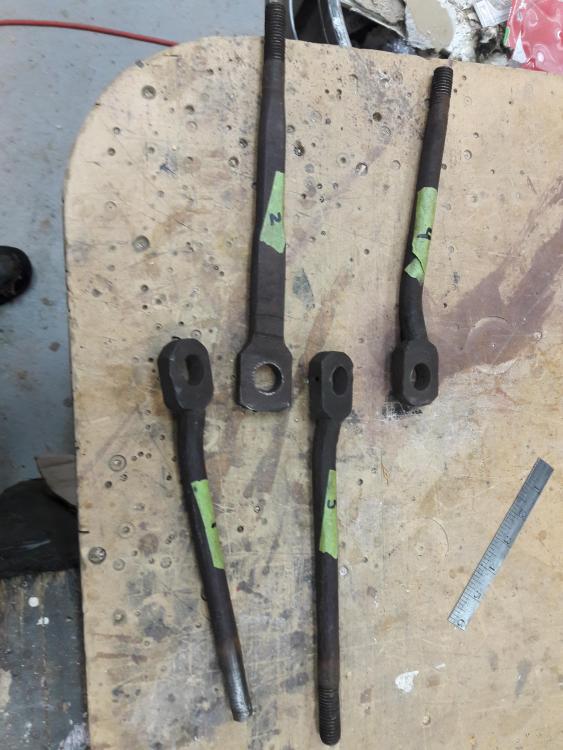
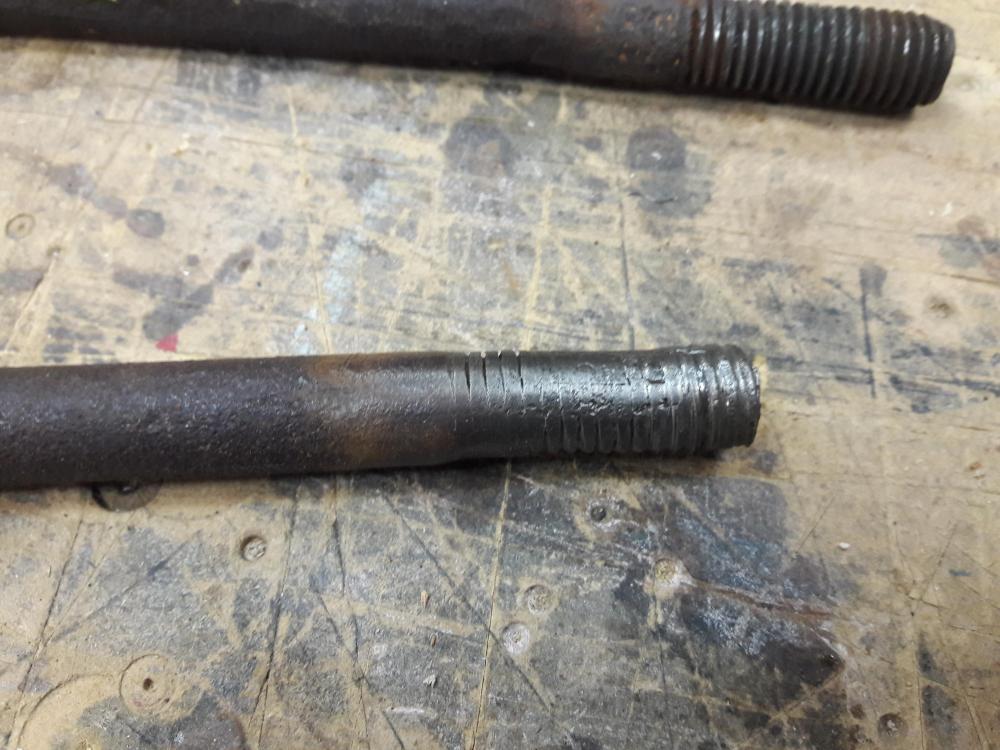
I am still undecided about how to address the toggle links. Whether to replace or not, whether to re-bush (which is something I've never done, I understand it will insert a sleeve to reduce the hole size). They currently measure 13/16, and with the old pin having wear, there was significant slop there. If I just replace it with a 3/4 pin, it would tighten up when compared to the worn pin. What is not clear to me, is what is the appropriate amount of slop between the pin and toggle arms? Is 1/16 total Ok? Or should I think about replacing the toggle arms? Also, one of the toggle arms has a terrible threaded end. I can get a nut on it, but it's pretty bad.
Would be a fun forging project, a bit of a stretch for me which is the best way to grow.
-
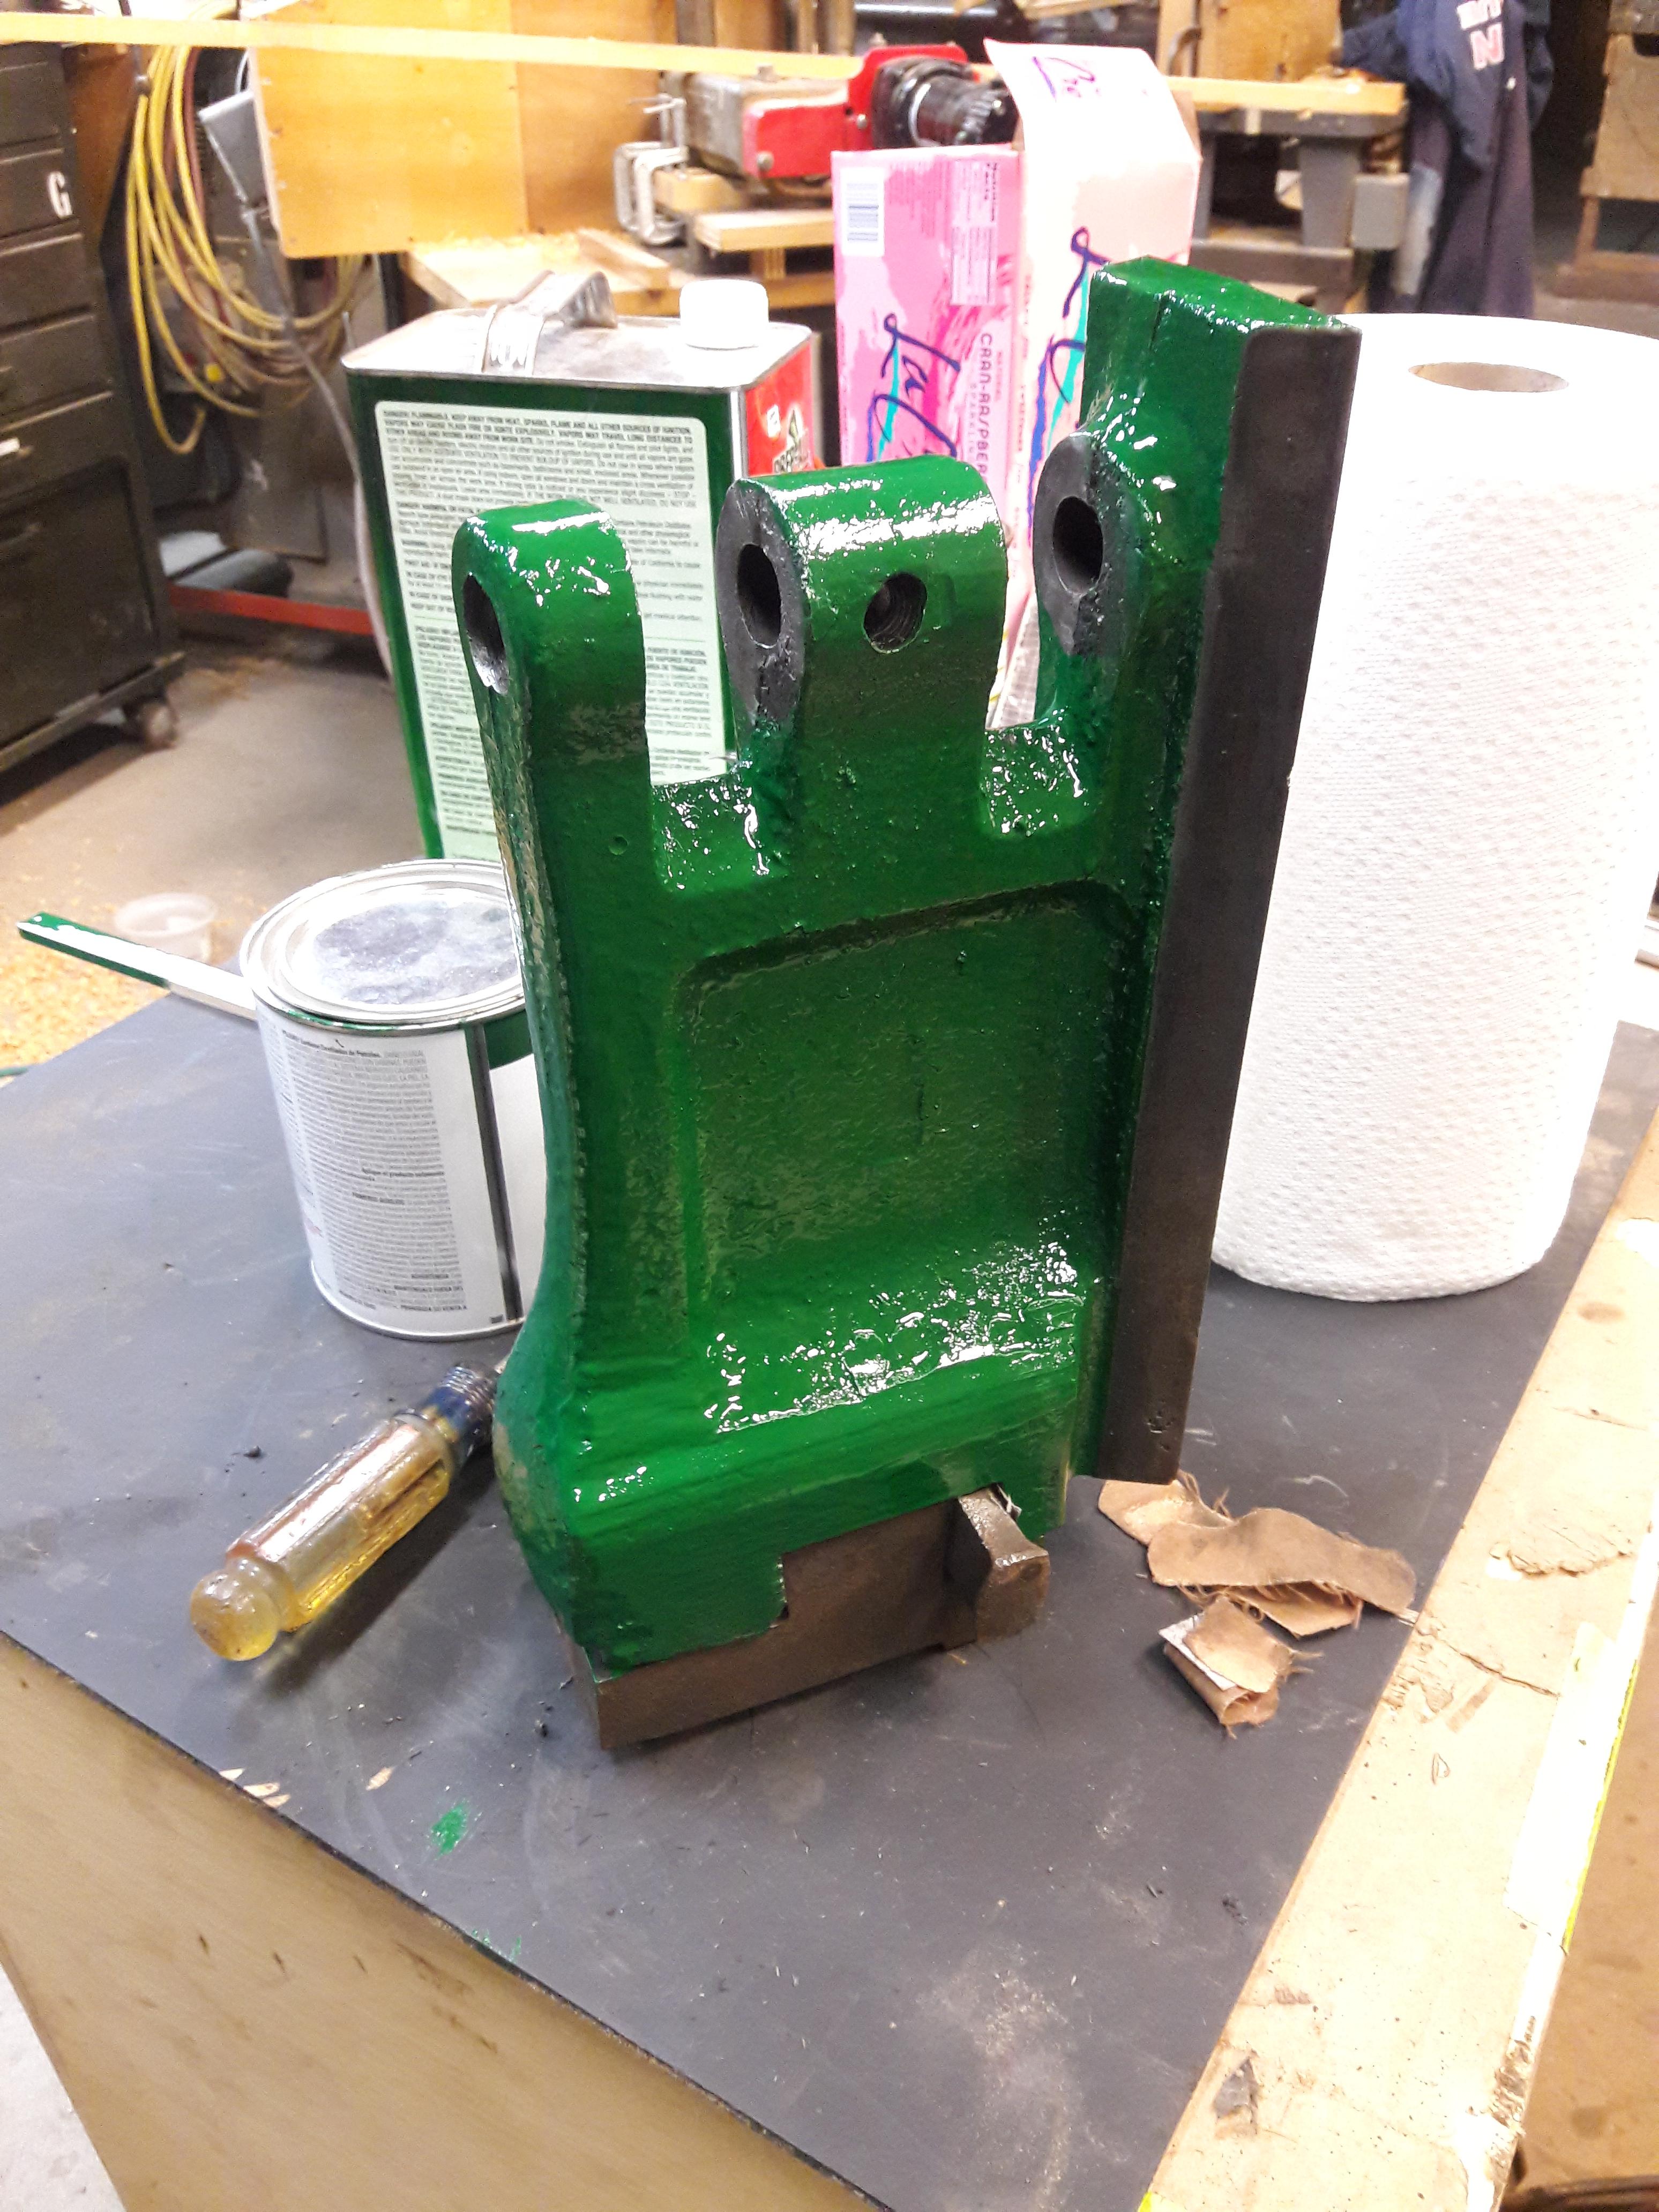
More progress and a question. Painted the ram after cleaning it up.
I am now debating if I should clean the driven pulley. It's got heavy rust on it that I think would provide great friction for the flat belt, but would also probably be abrasive. So I'm thinking about wire wheeling it, which should remove the rust but leave any light pitting for friction. Any have advice?

-
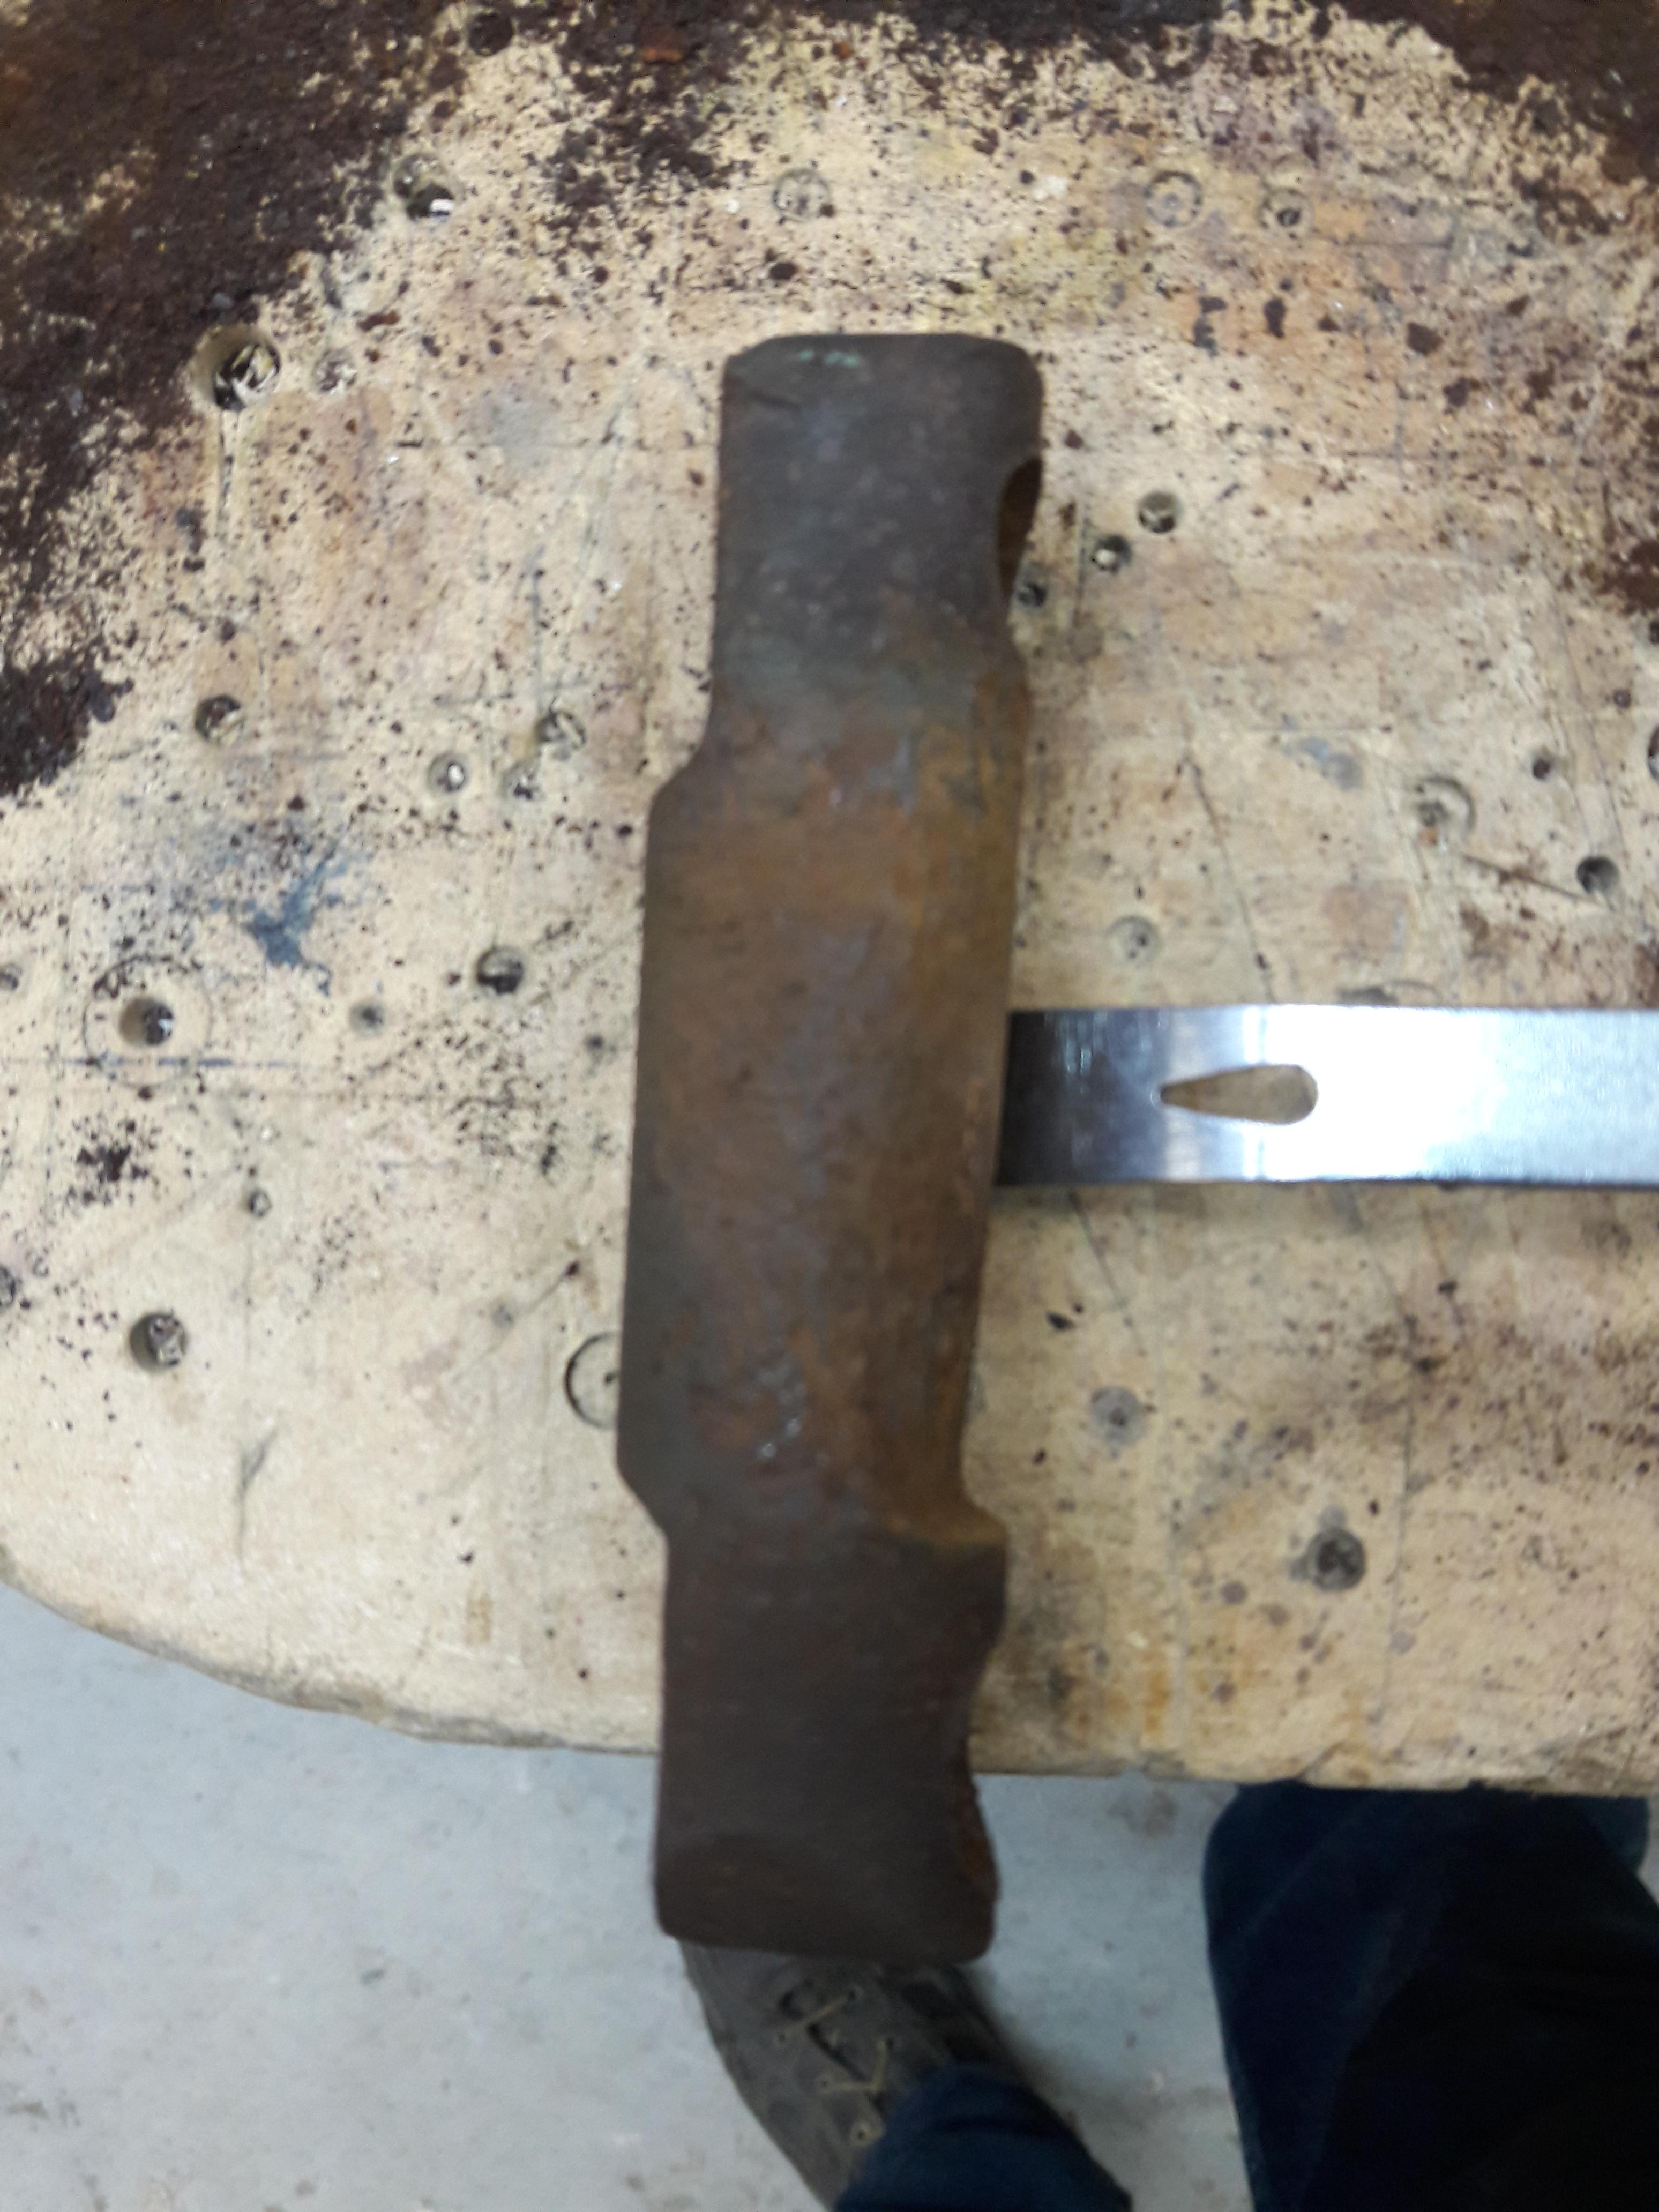
Progress post. Drilled out and re-tapped the screws in the base to hold the treadle (if that is the right word). So far, I'm batting a zero with bolt extractors. I will have to forge 3 new bolts for those holes, mine are all bent up or snapped.
Also made progress on the stuck ram pin. Ended up drilling out the set screw ( again no luck with the bolt extractor) and had to weld a big bar to the bolt to free it up. Much sweat and PB blaster later, it is free. Glad I took the time, there is definitely wear on the pin. I plan to replace it with a 4140 pin. 1 or 2 new set screws. This project will take a real hit since I am headed to Indiana for work, for 3 or 4 months.

-
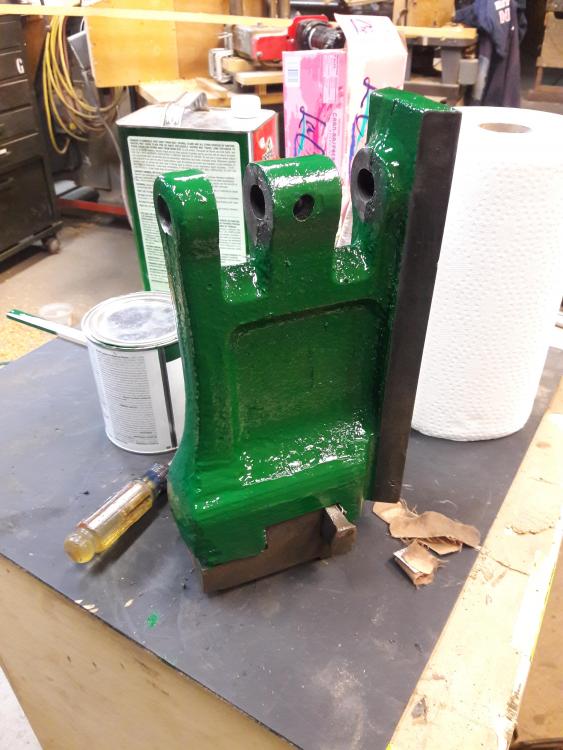
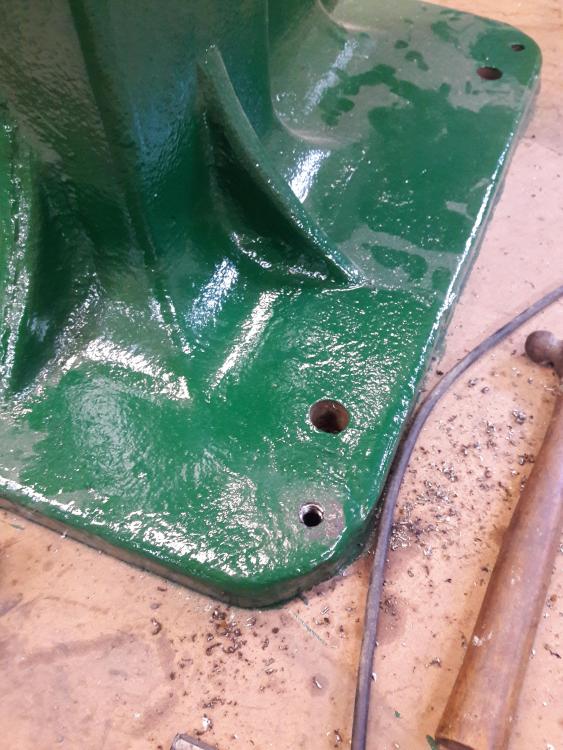
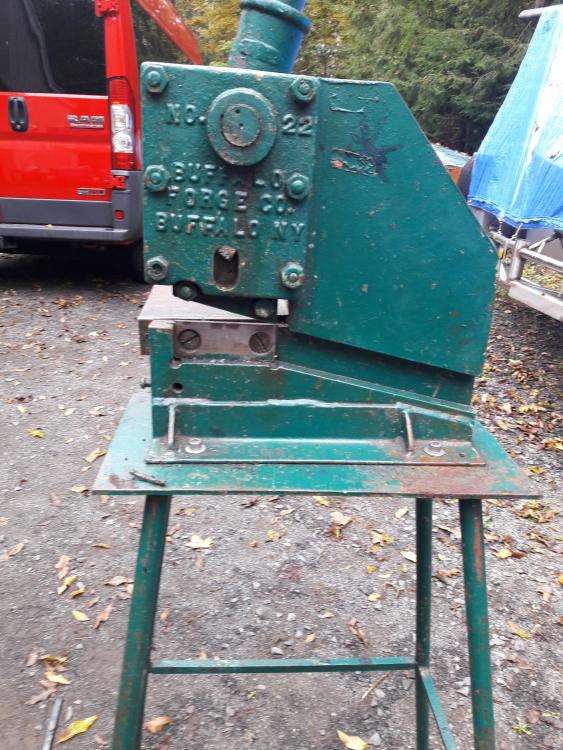
Brought home a Buffalo Forge Co No. 22 Shear. It cut 1/2 square hot no problem. Should be quite handy around the forge. Hopefully cutting hot doesn't wreck the shear blades.
-
This could be bad.
-
I haven't seen Mark forge, but I would hate to compete against you JLP, you forge hard and fast. It's impressive to see.


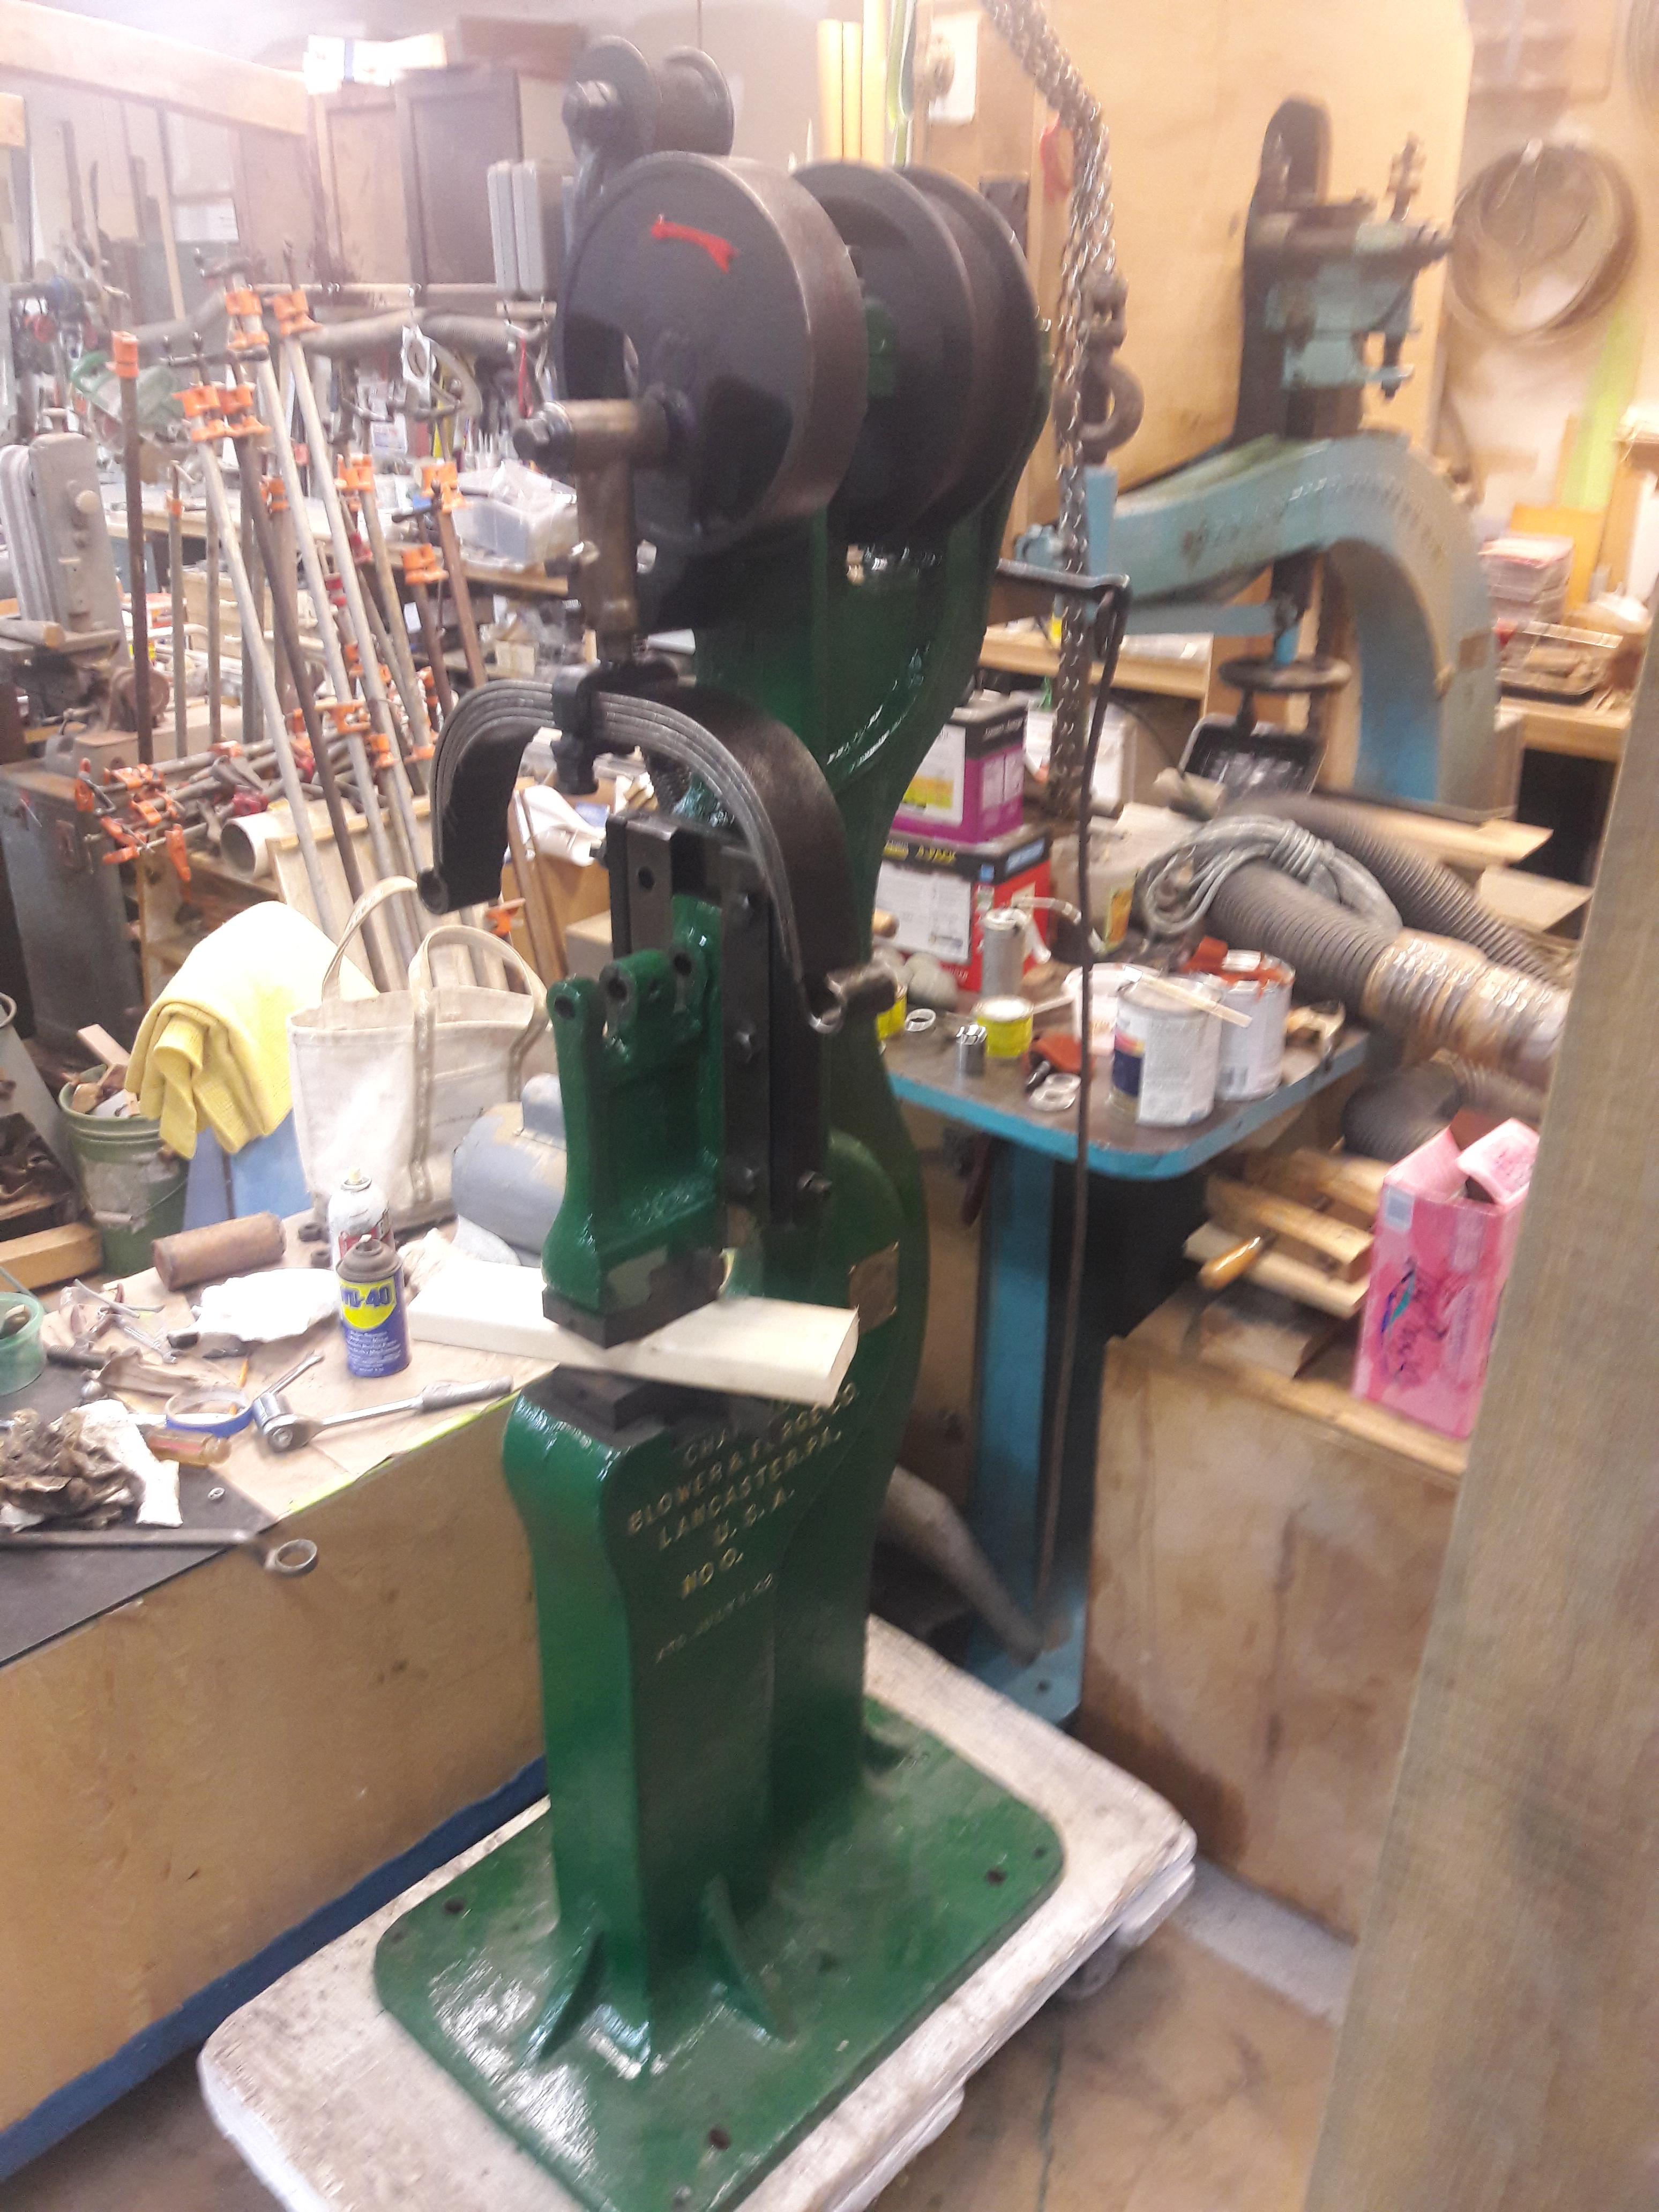
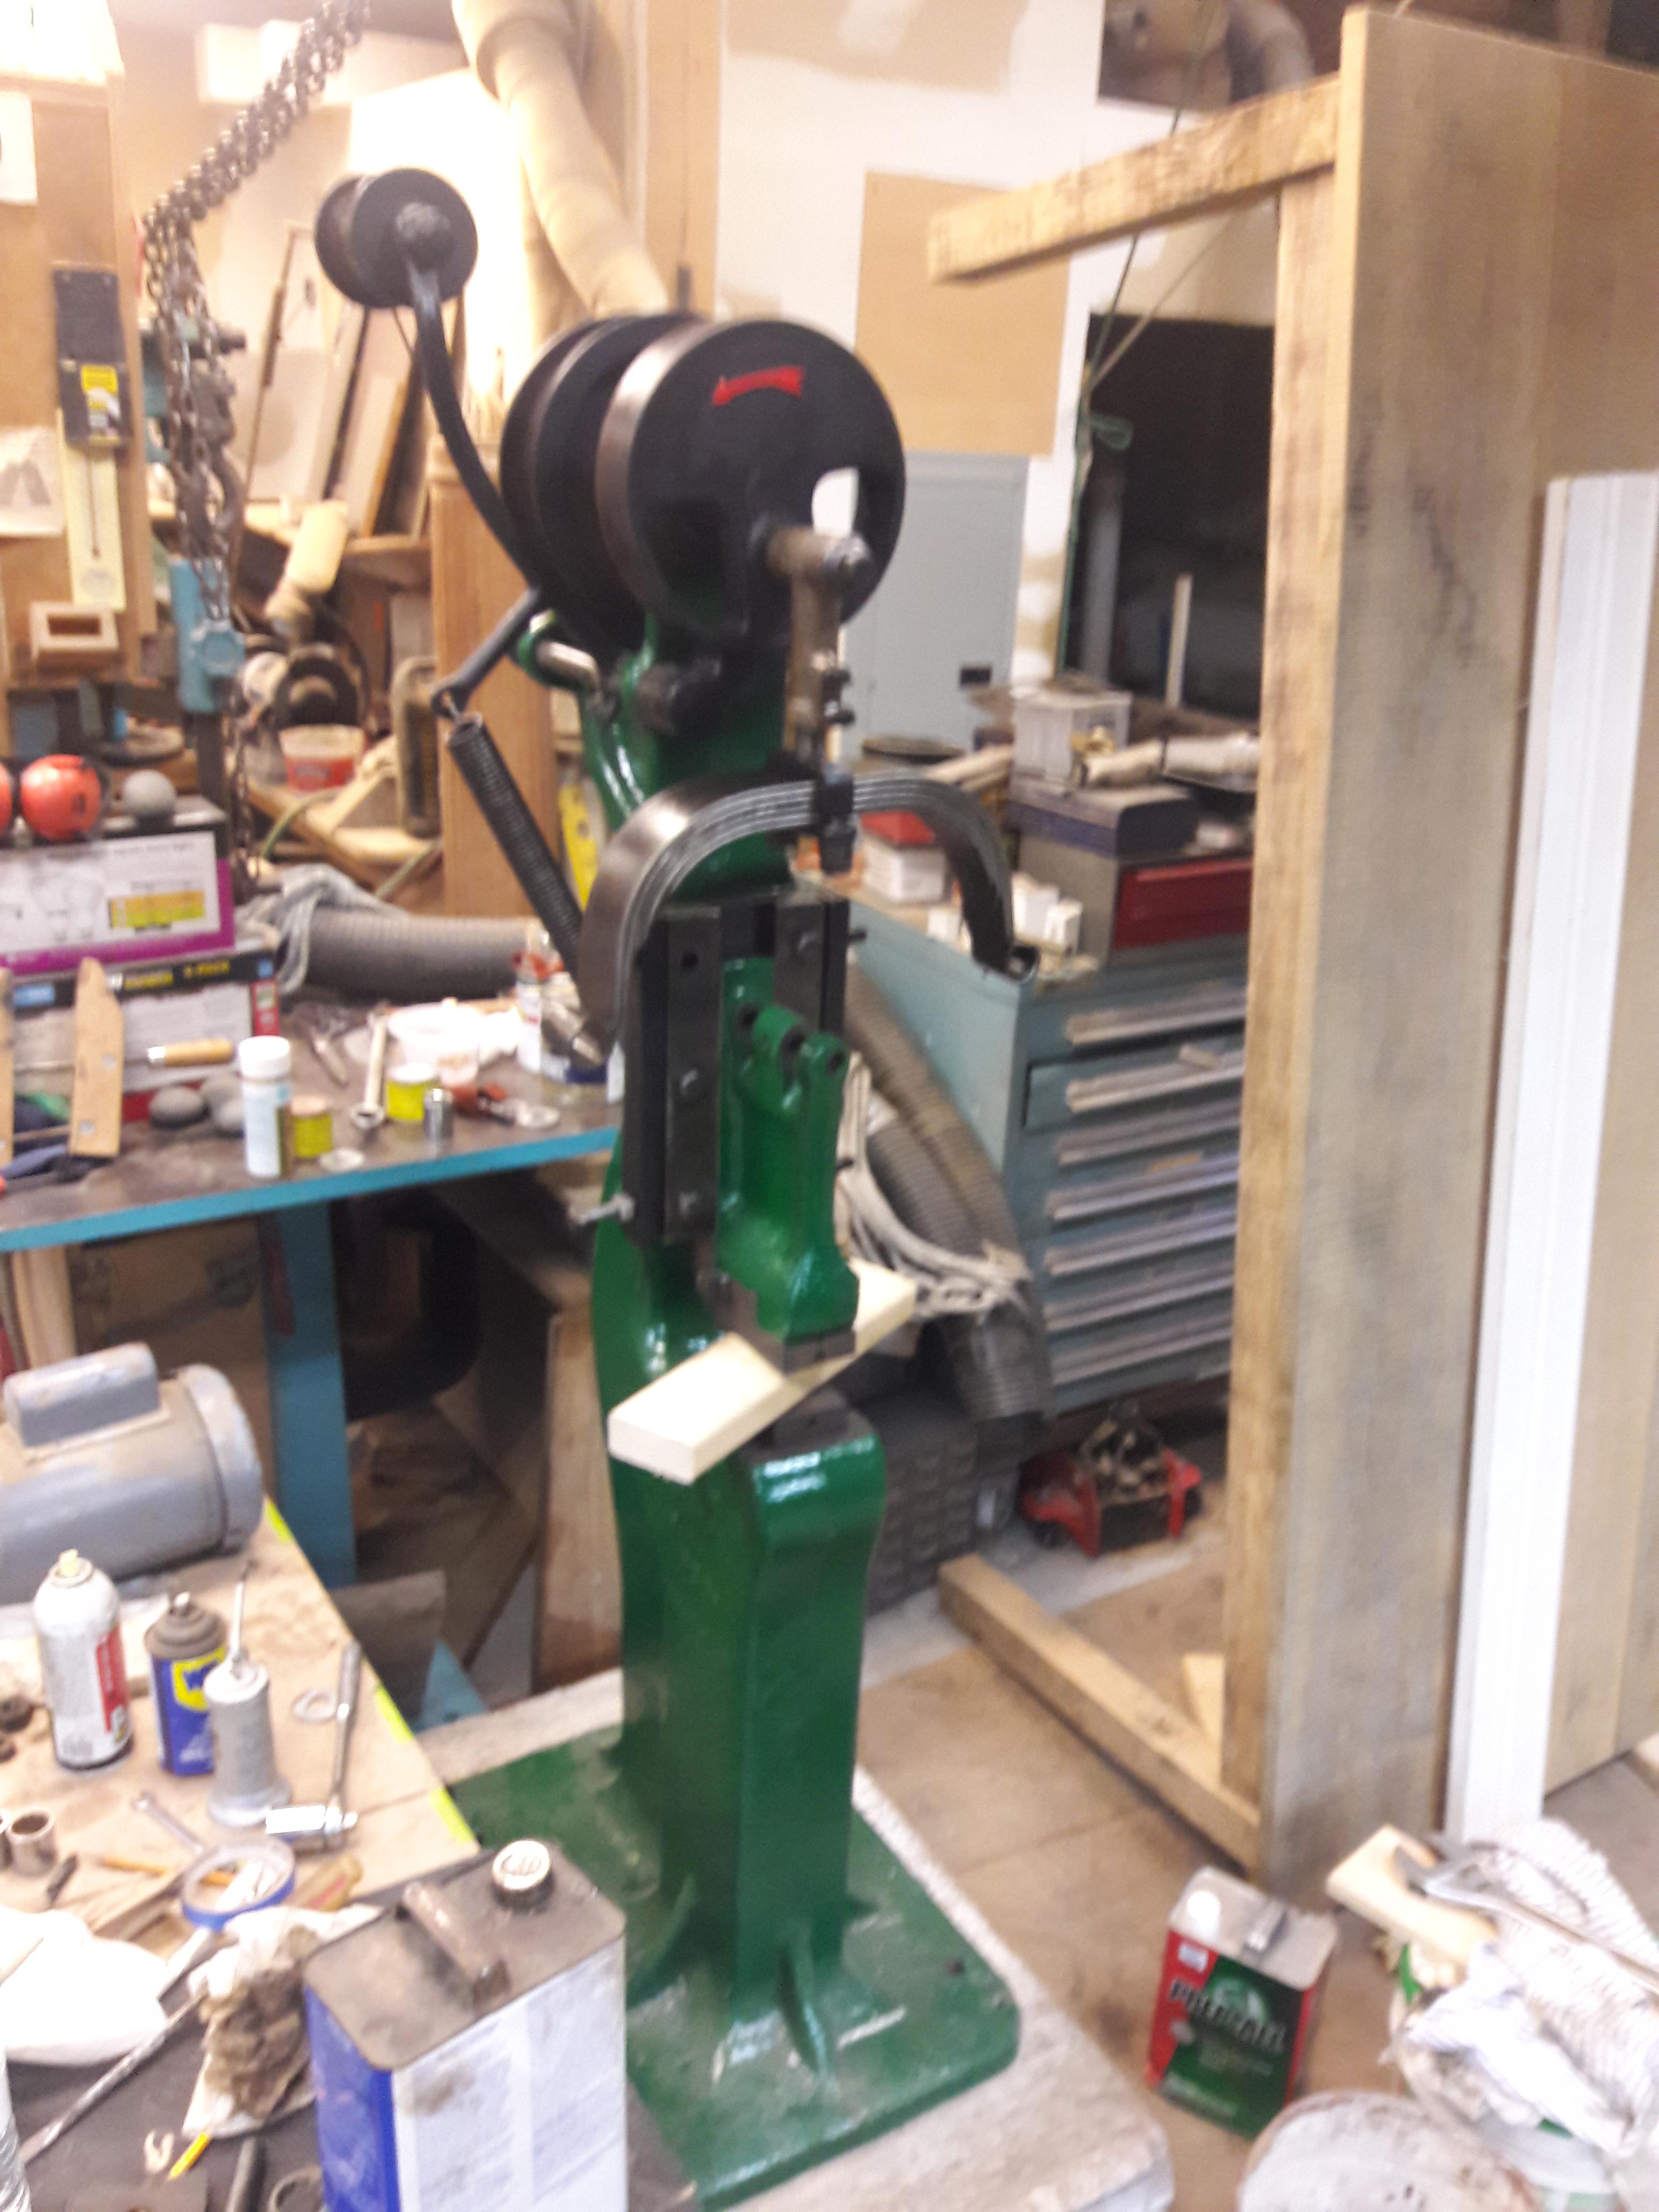


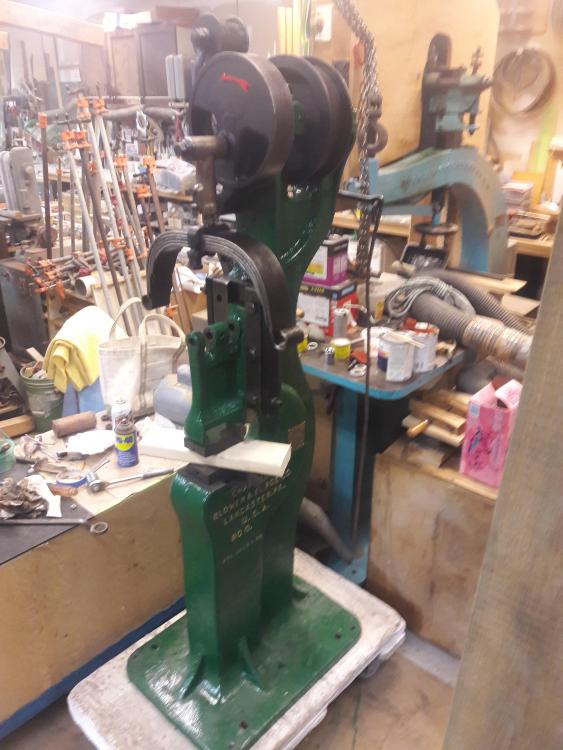
Champion No. 0 back to work
in Power Hammers, Treadle Hammers, Olivers
Posted
Hi Paul,
It was suggested to me recently to try machining the flat belt pulley from wood. Apparently that wasn't uncommon back in line shaft shops. I am now planning to that as it will be quicker and easier as I am more familiar with wood turning.
I have a correction too, the original rpm on the Champion No. 0 was 400 not 200 as I wrote above. I will adjust for that. I should have a chance over the holidays to make strides getting the hammer running.
Bryan