
Dustin Quade
-
Posts
271 -
Joined
-
Last visited
Content Type
Profiles
Forums
Articles
Gallery
Downloads
Events
Posts posted by Dustin Quade
-
-
9 hours ago, BIGGUNDOCTOR said:
For that budget he may be looking at a used table. I picked up a 5'x10' table at a shop auction. It was used for one govt job for about a year then stored for 8 more. It was $27,000 new, and I got it for $2,700. The brand is Koike Aronson.
Thanks! I will definitely suggest this to him as an option because yea that price would be way outside the budget.
-
One of my co workers is looking at retiring and getting into fabricating things like gates and fire place screens that kind of thing and he wants to invest in a 4'x8' plasma cutter. He wants one that does automated cutting based on input CAD plans. His budget is somewhere between 10 to 15 thousand dollars. Any suggestions for this equipment would be greatly appreciated.
-
4 minutes ago, Will W. said:
No problem. I realize you already explained what you did wrong and what not, and you didn't ask for critique, but why not take a file, grinder, etc, and clean up your edge, bevels, spine, and ricasso? Like I said, the design is neat, but your lines are a little wobbly.
Thats totally fair, I only didnt ask ask for critique specifically because its my expierience that just posting on this site pretty much garuntees some critque anyways
 I think I will work on your suggestions in an attempt to salvage the knife, no need to toss it aside just yet.
-
21 hours ago, ThomasPowers said:
You have to be careful with using the raceways as larger bearings often use case hardened lower carbon steel---like 9620; but if yours is taking and holding an edge you've got the good stuff!
Thanks for the heads up, i did not know that but I did do a spark test and a harden/break test as well before working with it. Always better to be safe than to spend hours working on a piece of mild steel
12 hours ago, Will W. said:I like the design of the knife. Looks unique.
Thanks very much for saying so
-
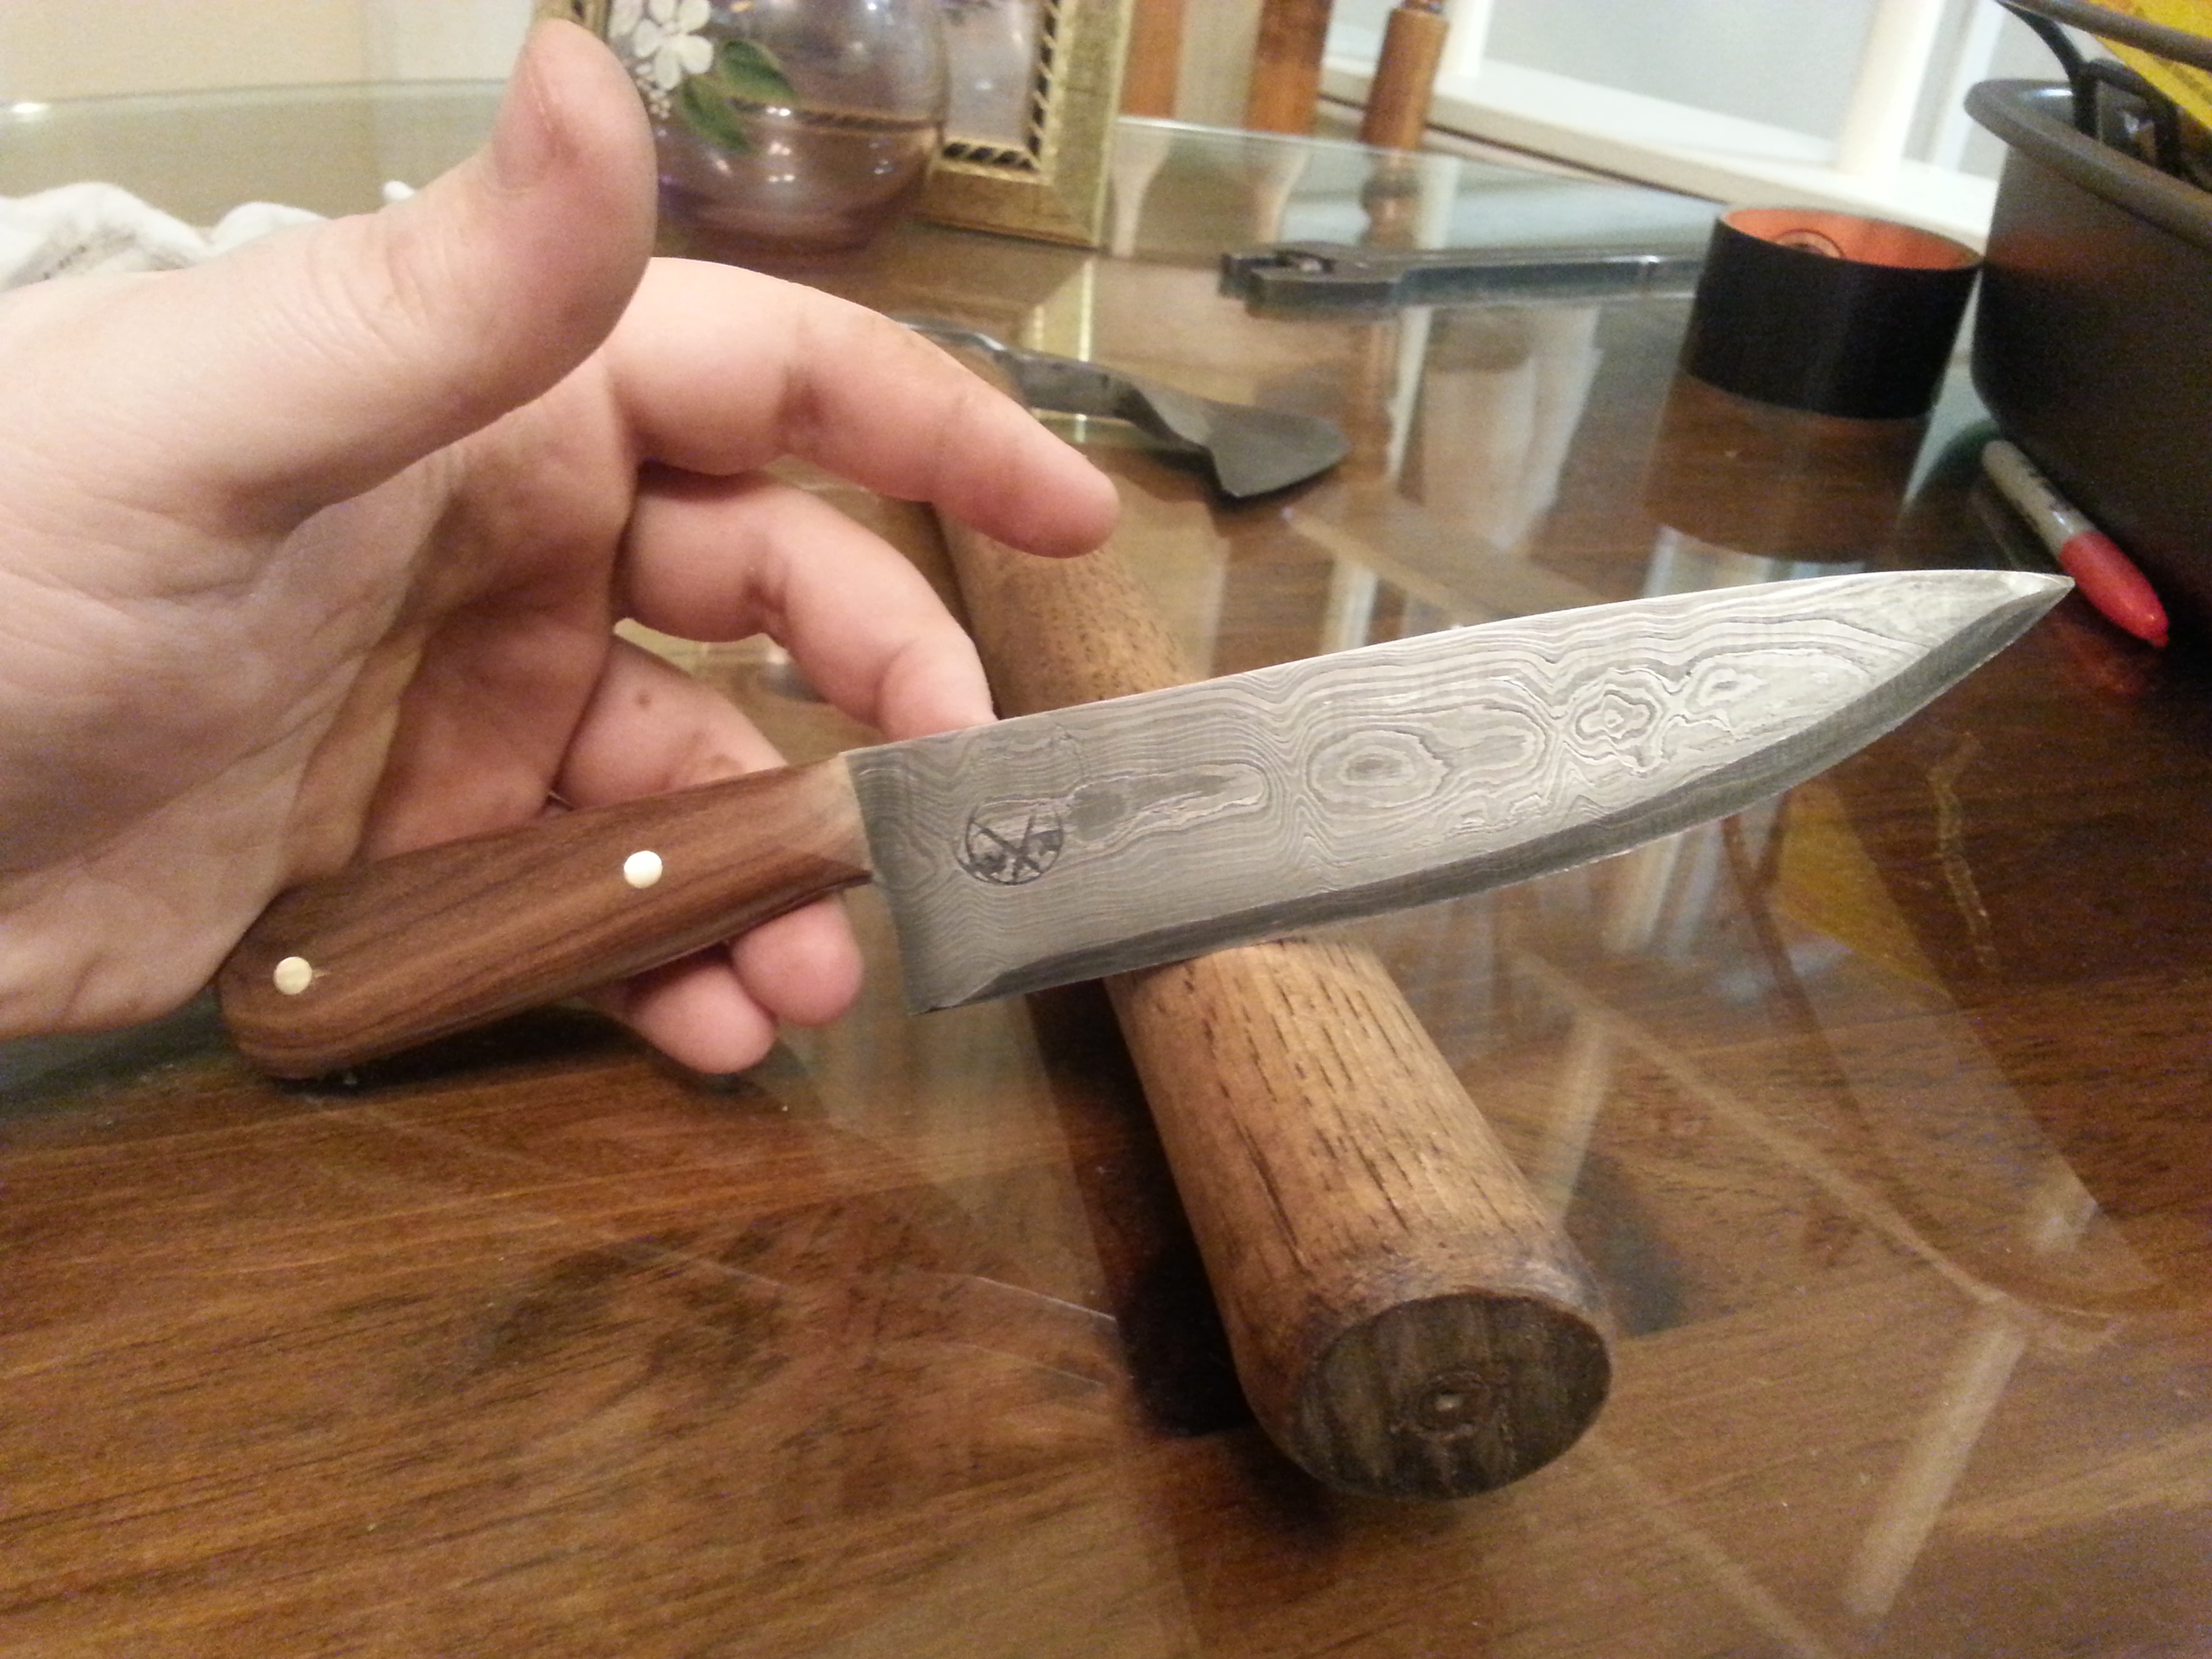
So a friend of mine gave me a whole bunch of truck bearing raceway steel for me to use in my smithing. I had done some research on the steel and was excited to give a proper knife a try. The main issue I had is that I’m used to working from flat stock which making a knife blade out of it is not too bad in terms of hard hammering. This stuff though comes in this weird profile which all needs to be flattened out first before you can really start the knife shaping process. I have also been working damascus mostly lately and don’t usually forge down the bevels on those so I don’t mess up the pattern which meant I was a bit out of practice. So after getting the stock down to about a rectangular section i started forming the blade shape handle and forging in the bevels.
This was the first knife I tried with a handle that has a finger groove for the index finger, my handles are also usually a bit on the small side so I made sure this one would have a nice long handle and to my credit at least I got those parts done.
Then it went to the grinder and made a personal mistake, see I had left the blade pretty rough from all the hammering and so I figured I would use a convex grind to get out all my rough work and knew it would leave me a nice edge for chopping which it did, however I just hate the look of it, can’t really say why but I just can’t stand it. I usually do a flat grind and I wish I had just gone with the norm here. What I had not thought of was that the convex grind basically turns the blade surface into a big arc, that meant putting my mark in was also annoying since there wasn’t a proper flat surface for me to rest it on.
Over all this knife is the worst I have made in a long long time and something I can’t even sell because it’s just an embarrassment but what I will say is that the steel itself held up remarkably well. After it was all made I wanted to test the steel and so I got the edge shave sharp then chopped a 2x4 in half and the edge still shaved so I guess at least that was a win. The blade is also nice and true for straight which is another win.
-
12 hours ago, BlasterJoe said:
Love the pattern on it. Is it just me or is the handle a little short?
It is shorter than the handle of my store bought chefs knife and is about the length of a steak knife handle but the bulge of this handle fits comfortably in the hand without passing through it so it just felt good to me. I guess someone with larger hands would not find it as comfortable though. I could have simply flattened the bulge for more length but i like the way this shape feels.
-
My god man the creativity of your handles never ever ceases to amaze me. What a cool idea!
-
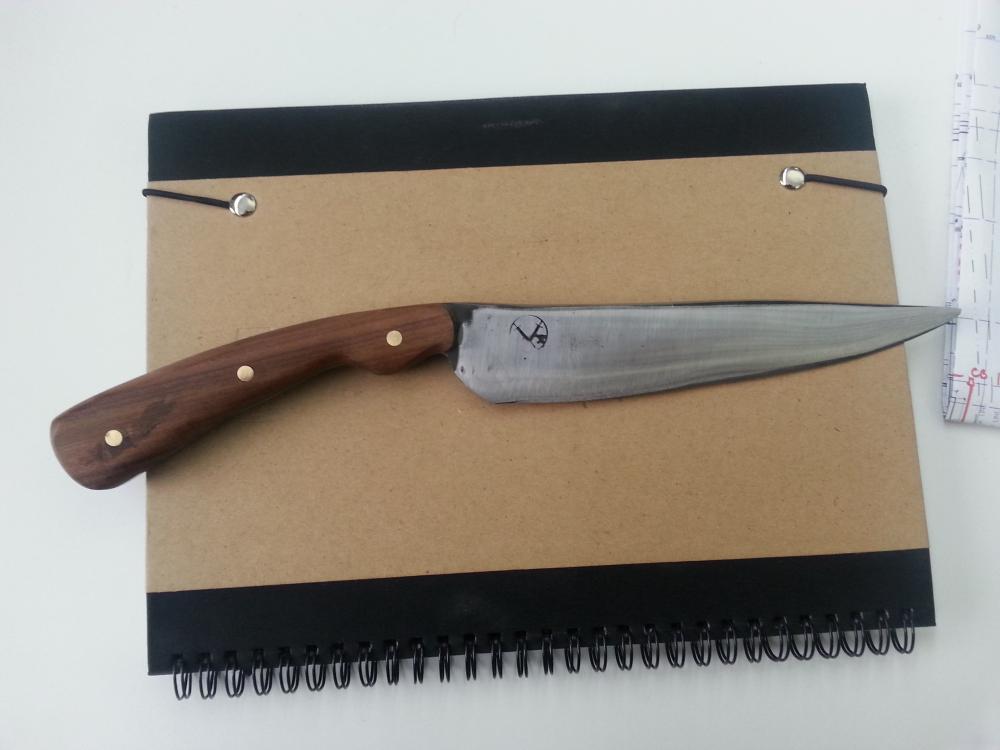
So this weekend i have a meet with my local smithing group and I wanted to try to sell some damascus billets. I figured a good way to drum up the sales would be to bring some example billets but also some samples of things made with them. To that end i am bringing some other projects and this knife. Since it is a blade i will likely sell after the meet i felt it was a good opportunity to use my new makers mark. I still need some practice stamping however, I was afraid of damaging the stamp so i just wasnt hitting it hard enough. I know that is silly but thats the truth of it. I have since put it on 3 other projects (herb chopper, bottle opener and small pocket knife) with much better effect, the top here didnt sink deep enough and dissappeard in the grind and polish. Im still happy with the blade over all though. I find that since i got my 800 grit belt that my patterns are coming out clearer after the etch.

-
I love these sorts of projects! Well done.
-
So my shop is called King's Valley Forge and a good friend of mine made me up a really great logo. So after a couple years of project making i finally set aside enough money to have my own touch mark made. I converted the non text portion of the logo into a shaded image and had that turned into the stamp. Below is a picture of the stamp and of a piece stamped with it. Super excited to put this to work and finally mark the projects i have worked on and am proud of.
.thumb.JPG.0dcfec963effbcca592f18a3c5c6b618.JPG)
.thumb.JPG.a1657c9b34b8e6ef806b71badc0f94c0.JPG)
-
Oh man i actually did not preheat the anvil. My teacher had told me to do that when I work in the winter and i totally spaced on it. I will definitly make sure to do that tonight.
-
17 minutes ago, ThomasPowers said:
Well do you find that you drown to death every time you take a shower; or do you find that there is a a difference between getting wet and getting drowned?
So your saying that if i am running a reducing forge the joint will have some scale because i took it out an exposed it to air but its an ammount that can still allow for a forge weld to take, but if im running an oxydzing forge i will have too much scale in that joint to make the forge weld possible now?
-
12 minutes ago, ThomasPowers said:
Forge welding is easier in a reducing atmosphere. An oxidizing atmosphere may have scaled the joint till where it will be very hard to get a weld and you don't have a lot of stock to do a cleanout and reseat. If you are not familiar with oxidizing and reducing in your forge(s) (its a concern for coal as well) There is a gap in your blacksmithing education that is particularly pernicious when bladesmithing is being done!
Well this is the first time i have had an issue with a forge weld like this. I dont know what forge i have and i would hate to have a part of my knowlege base be pernicious
") I found an old post about these differences between these two forges. And it looks like there is a way to try and figure it out, Frosy posted this
I found an old post about these differences between these two forges. And it looks like there is a way to try and figure it out, Frosy posted this
"It's been discussed repeatedly scale WILL form on hot steel in open air. PERIOD.
A forge with a neutral or reducing atmosphere: gas, coal, charcoal, electric, etc. can NOT form scale there is NO oxygen to oxidize anything. To check, shine up a thin piece of steel and put it in your forge hot and running. If the surface appears clean till it's the same temperature as the forge it is NOT scaling up."
But i do have a question.
In that post Iis is said that no matter what forge you have scale forms on metal when the piece meets oxygen. So if thats the case then there is scale in that joint whether i have an oxydizing or reducing forge since its in the air now and has been since last night, so doesnt that mean that the joint on my project is scaled up making that forge weld much more difficult no matter what type of forge im running and the question about what forge type i have will only come into play in future projects right?
-
35 minutes ago, ThomasPowers said:
Sometimes yes; sometimes no; I'd try it and try to use superb technique. Is your forge running oxidizing?
Lol i always "Try to use superb technique" im just not that good at it sometimes. Is my forge running oxidizing what?
The main thing is that there is at least a shot at getting the weld to work so that is what i will attempt to get done tonight.
-
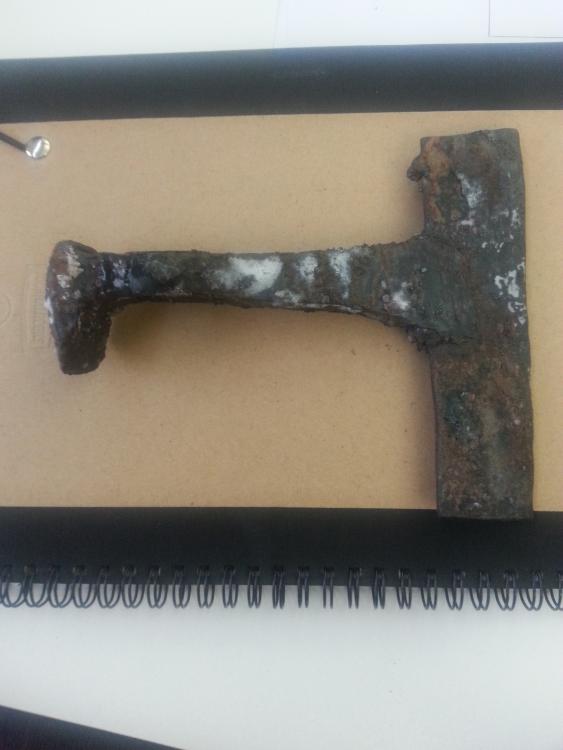
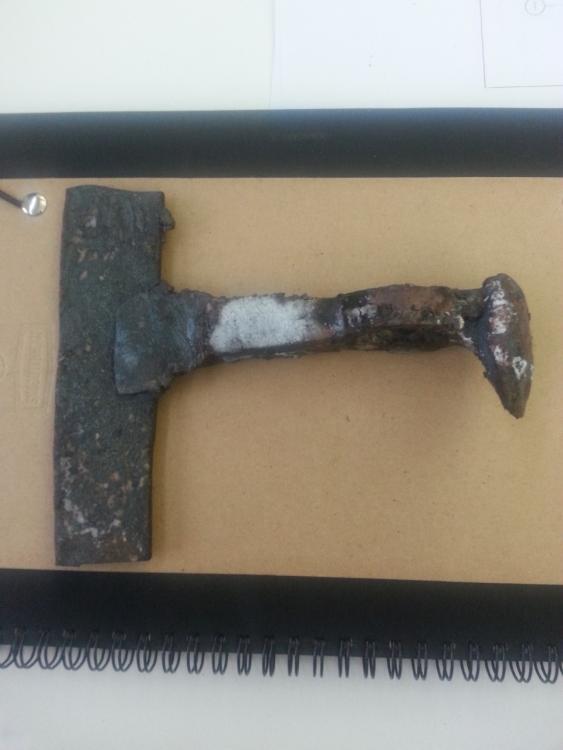
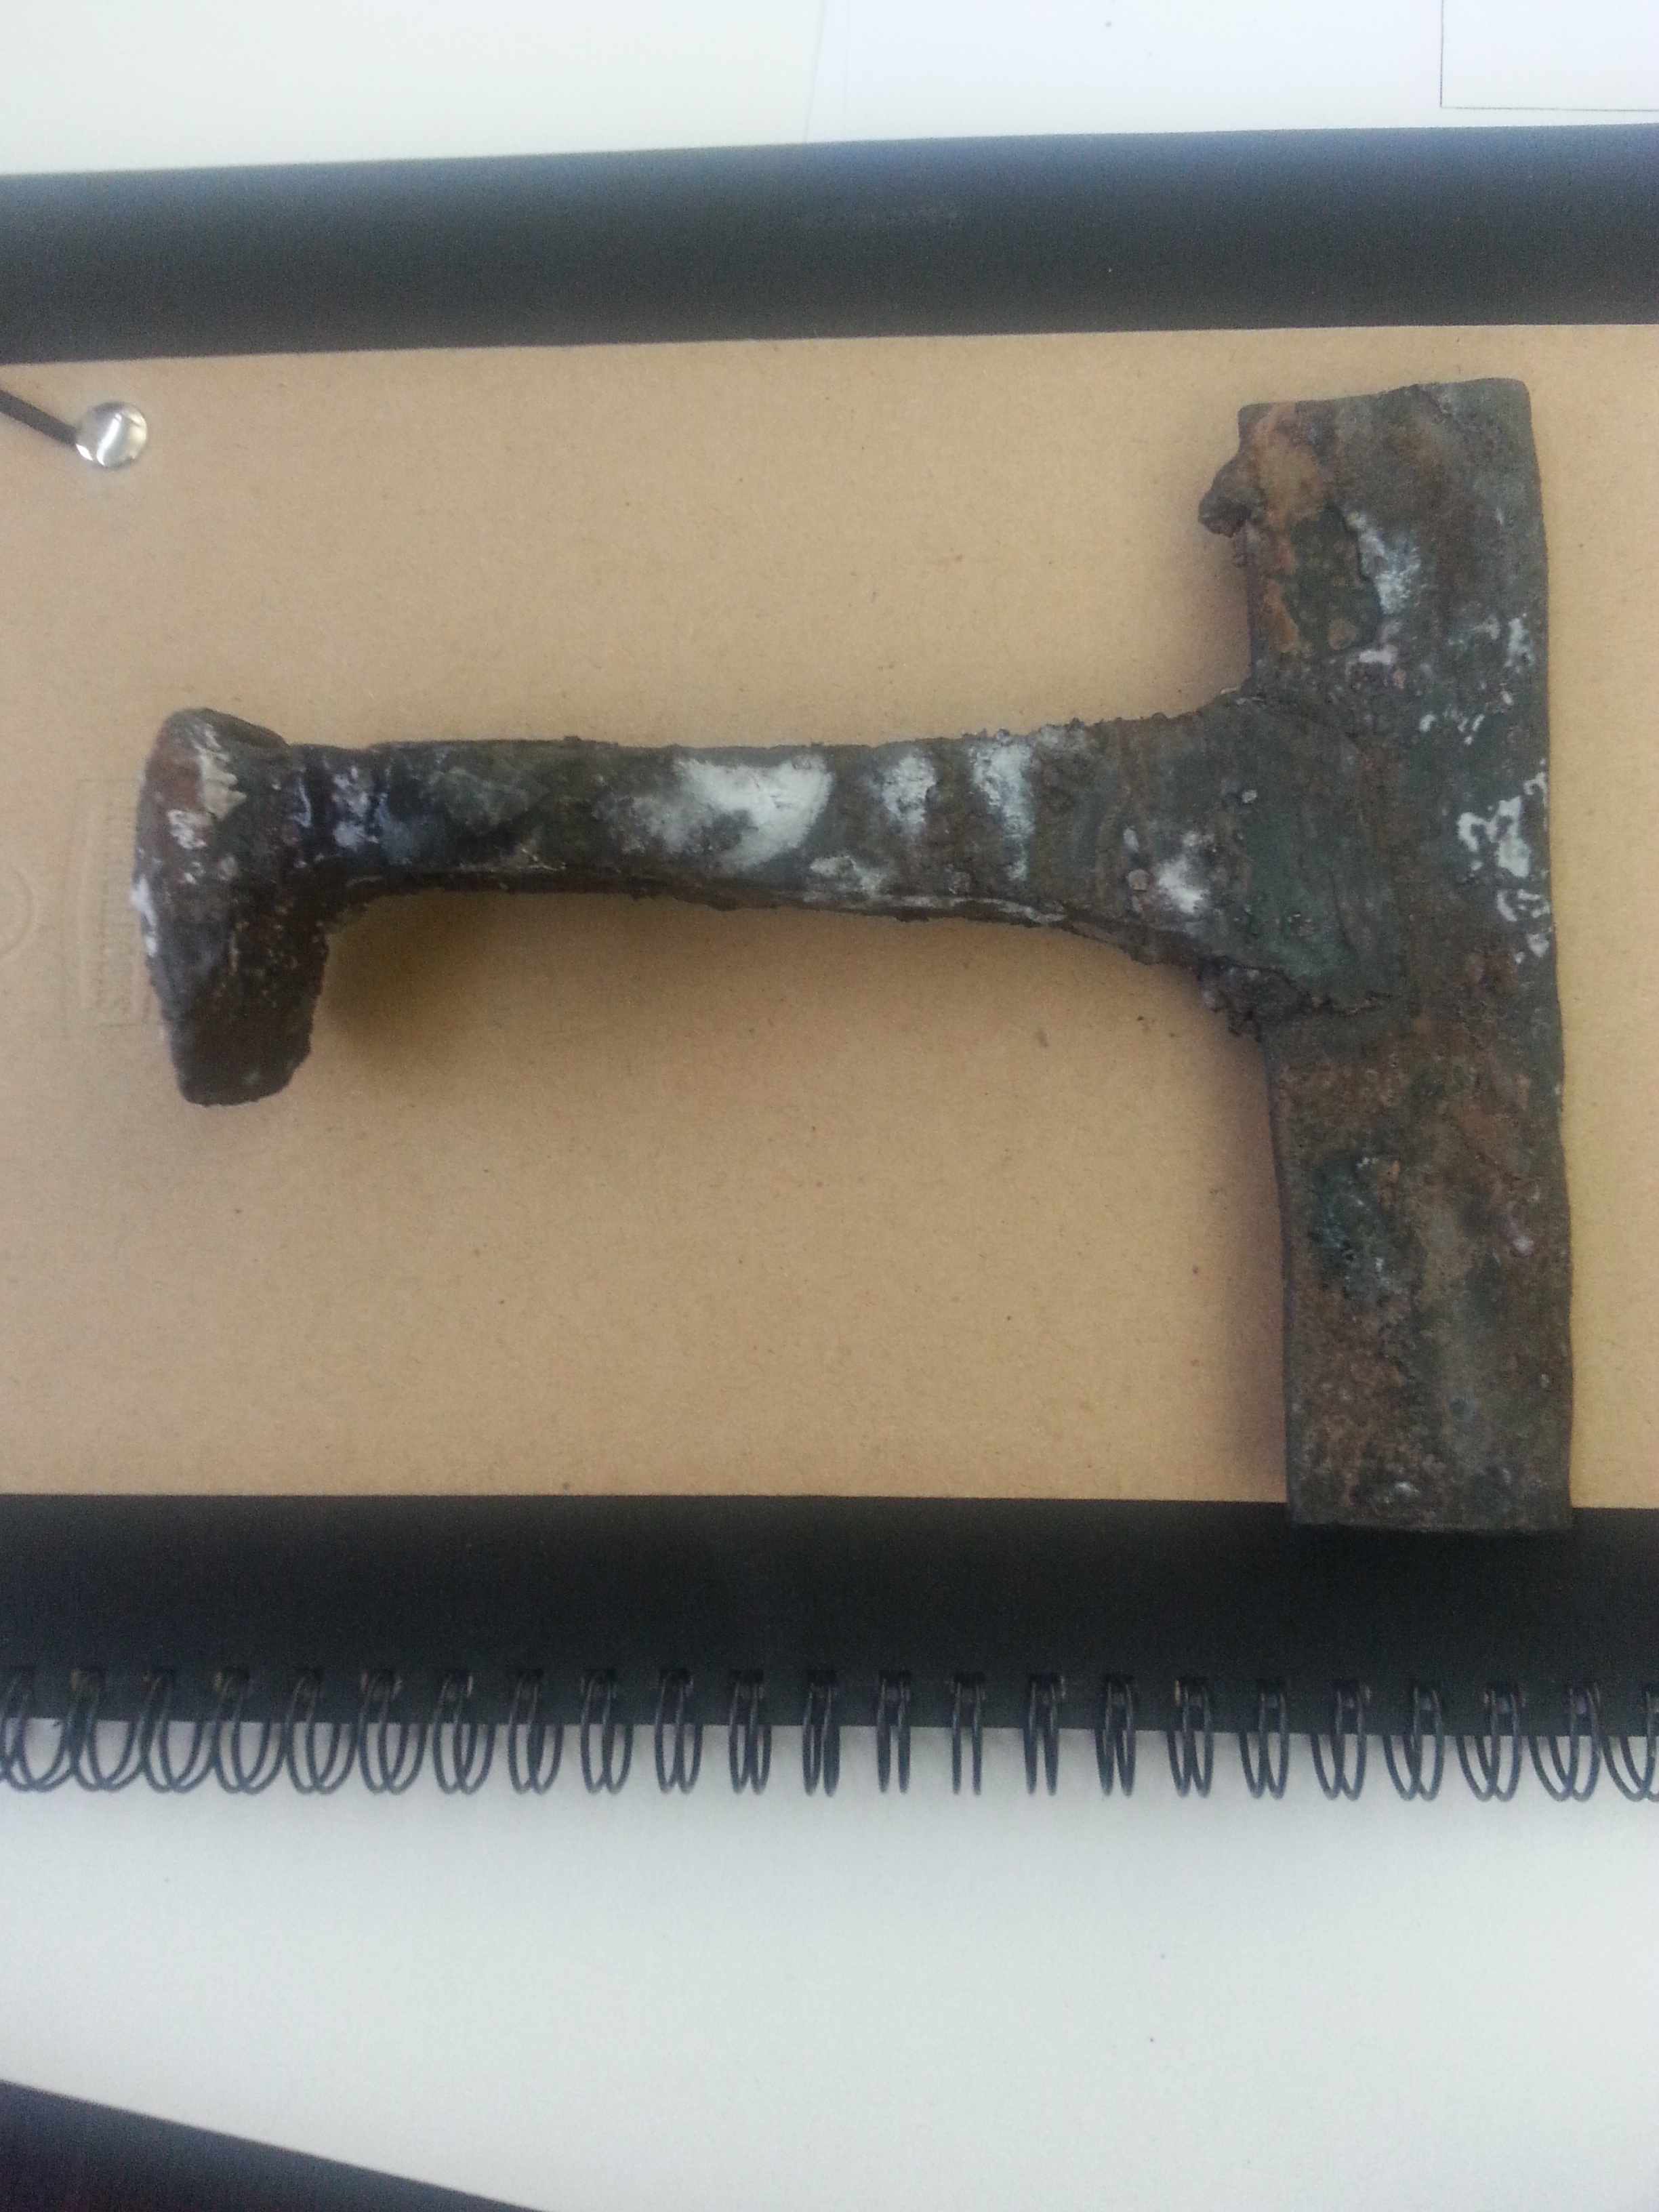
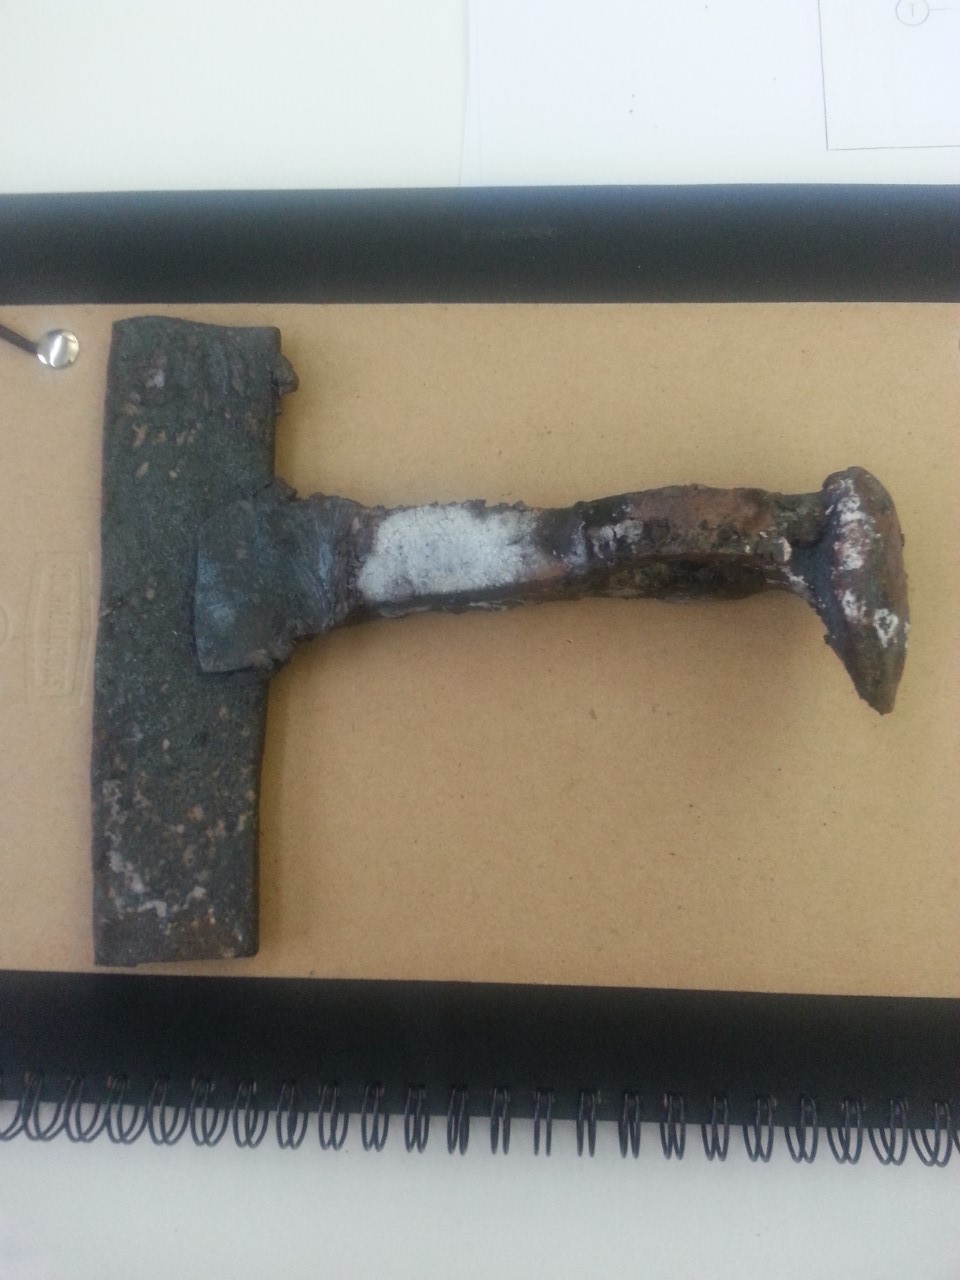
So this is my second attempt at one of these RR Spike axes. I paid attention to the comments from my first one and have gotten to this stage. I upset the spike which gave me a lump of mass to use at the end for joining my 52100 steel bit into the spike. The upsetting also gave me a bit more material around where I wanted the eye. I moved the eye to the back near the head of the spike.
So punching and drifting the eye with this style of axe was much more difficult than my first attempt. Because of its location it was hard to get it over my hardy hole for the punching through. My hardy hole is fairly large so as I punched through the whole piece would buckle into the hole but that meant the head would be mainly bending into the piece and jamming on my punch making the removal of it a bit of a pain. But in the end I got a hole punched and to a size I was somewhat happy with.
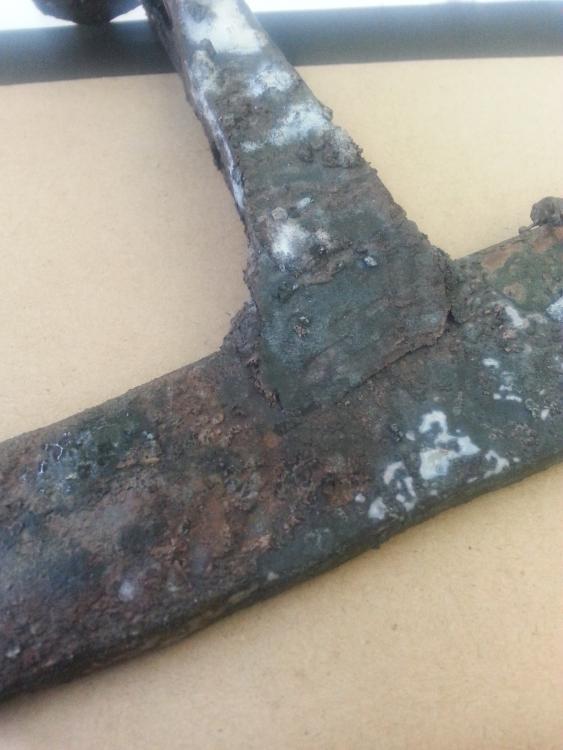
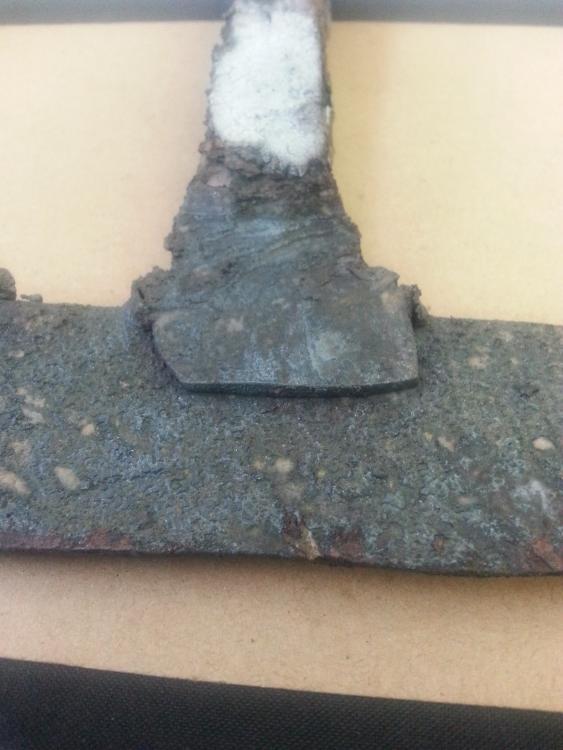
Next I split the end of the spike which had been upset. I then selected my piece of 52100 for the main axe portion. I hammered this into place and then tacked it in place at the top and bottom so it wouldn’t slid around while I got to forge welding. Now here is the part I need advice on. So I got the one side welded up really well (pic 1) nice big pop when the weld set and everything. But as I went in to set the other side (pic 2) my propane started to run out. I did what I could and I heard a small pop when I went to set the weld on this side but I can see that at least the edge is not welded. My question is can I still weld up this other side tonight when I get my propane refilled or is this piece kyboshed now? I'm still really new to forge welding so id appreciate all comers with advice.
Also the piece is obviously nowhere near finished so expect more pictures to come

-
I actually forged one of these out this weekend myself. I used a piece for 52100 bearing steel but i have used files in the past. If you can, try to at least get the part close to the blade edge (maybe the bottom 3/4" of the piece) ground down smooth as this is used food and stuff can get stuck in the nooks and crannys of a rasp and can be annoying to clean. The top part though is awesome to keep the teeth shown for 2 reasons, first people like to see that something came from something else, it makes it a conversation piece and second the little texture there provides a nice grip suface when in use. Over all this looks excellent i must well done!
-
Thats a fun question. Weight of the piece and feel of the handle in the hand for a sword or a knife would be the very first things i noticed, but that i think is also common for nearly anyone not just a smith. The first knives i made were garbage and you could tell just from picking it up. It just felt wrong off in the hand to round in the hand or sharp on the corners. Then you notice all the flaws, hammer marks, non symetrical shape, a warp in the blade things like that but that examining a piece.
-
19 minutes ago, Ibor said:
Great job!
This towahawk is similar to the Scythian ax from Ukraine, has only a smaller beard.Thanks. That is actually really interesting. I have never done any research or anything into the shape but i had assumed this kind of shape to be more something fantasy based than history based.
-
I know it might sound gross but have you tired your local dump / recycling center. The dumps here are fairly regimented and organized so that certain materials go certain places and don’t get all mixed up. Some of them allow you to poke around for materials. Another option would be to contact the auto wrecker and ask them (even if it seems odd) if they know of a place like you are looking for. You could also call places like Metro Scrap Metal Inc. If they dont sell to you they may know people who do. They are in a similar business to what you’re looking for and may be able to help further. We are Canadians after all famed for our helpful nature
.
-
As always i absolutely love your work. The smaller daggers especially in this batch just look exactly right to me. Its posts like this that really inspire me to just keep going and learning.
-
On 2017-01-07 at 4:24 PM, JHCC said:
Wow man that method is crazy.Super cool but i think it will be quite a few years before i try something like that for myself. I love seeing all the different ways people come up with to make the same thing.
-
On 2017-01-06 at 6:34 PM, littleblacksmith said:
I use spikes when making my longhorn head spatula/BBQ fork sets, and to get the head back in without cold shuts takes A LOT of heats. Or at least more heats than I would like on an item I'm trying to make a profit off of. But for like the tongs, I don't care a flip if it folds over. I typically take one heat, flux it (borax) and beat the snot out of the head, which creates a lot of BIG cold shuts. Then I take about 3-5 welding heats and forge weld it back into itself and seems to work great! afterwards you cant even see the cold shuts, but that part depends on your forge welding skills.
Littleblacksmith
Its good to know that having those shuts in there is a common occurance. If i try another where i fold the head into itself like this i will try to flux it up and weld it shut. I know that for decorative applications they might not be a big deal but for something like this are cold shuts a real problem or is there enough mass that its just an ugly asthetic?
-
2 hours ago, C-1ToolSteel said:
Glad to hear it's just a cold shut. I don't think you will have problems.
Yea i guess i need to pay more attention when im flattening the head next time. Im sure i wont see any trouble with the piece though mainly because i dont intend to use it. The item is crazy scary to swing around because of the spike.
-
54 minutes ago, swedefiddle said:
Happy New Year,
Everyone has a starter line-up. It is lessons on what to do different next time. Keep it so you can inspect it in 20 years, "This is my progression"!!
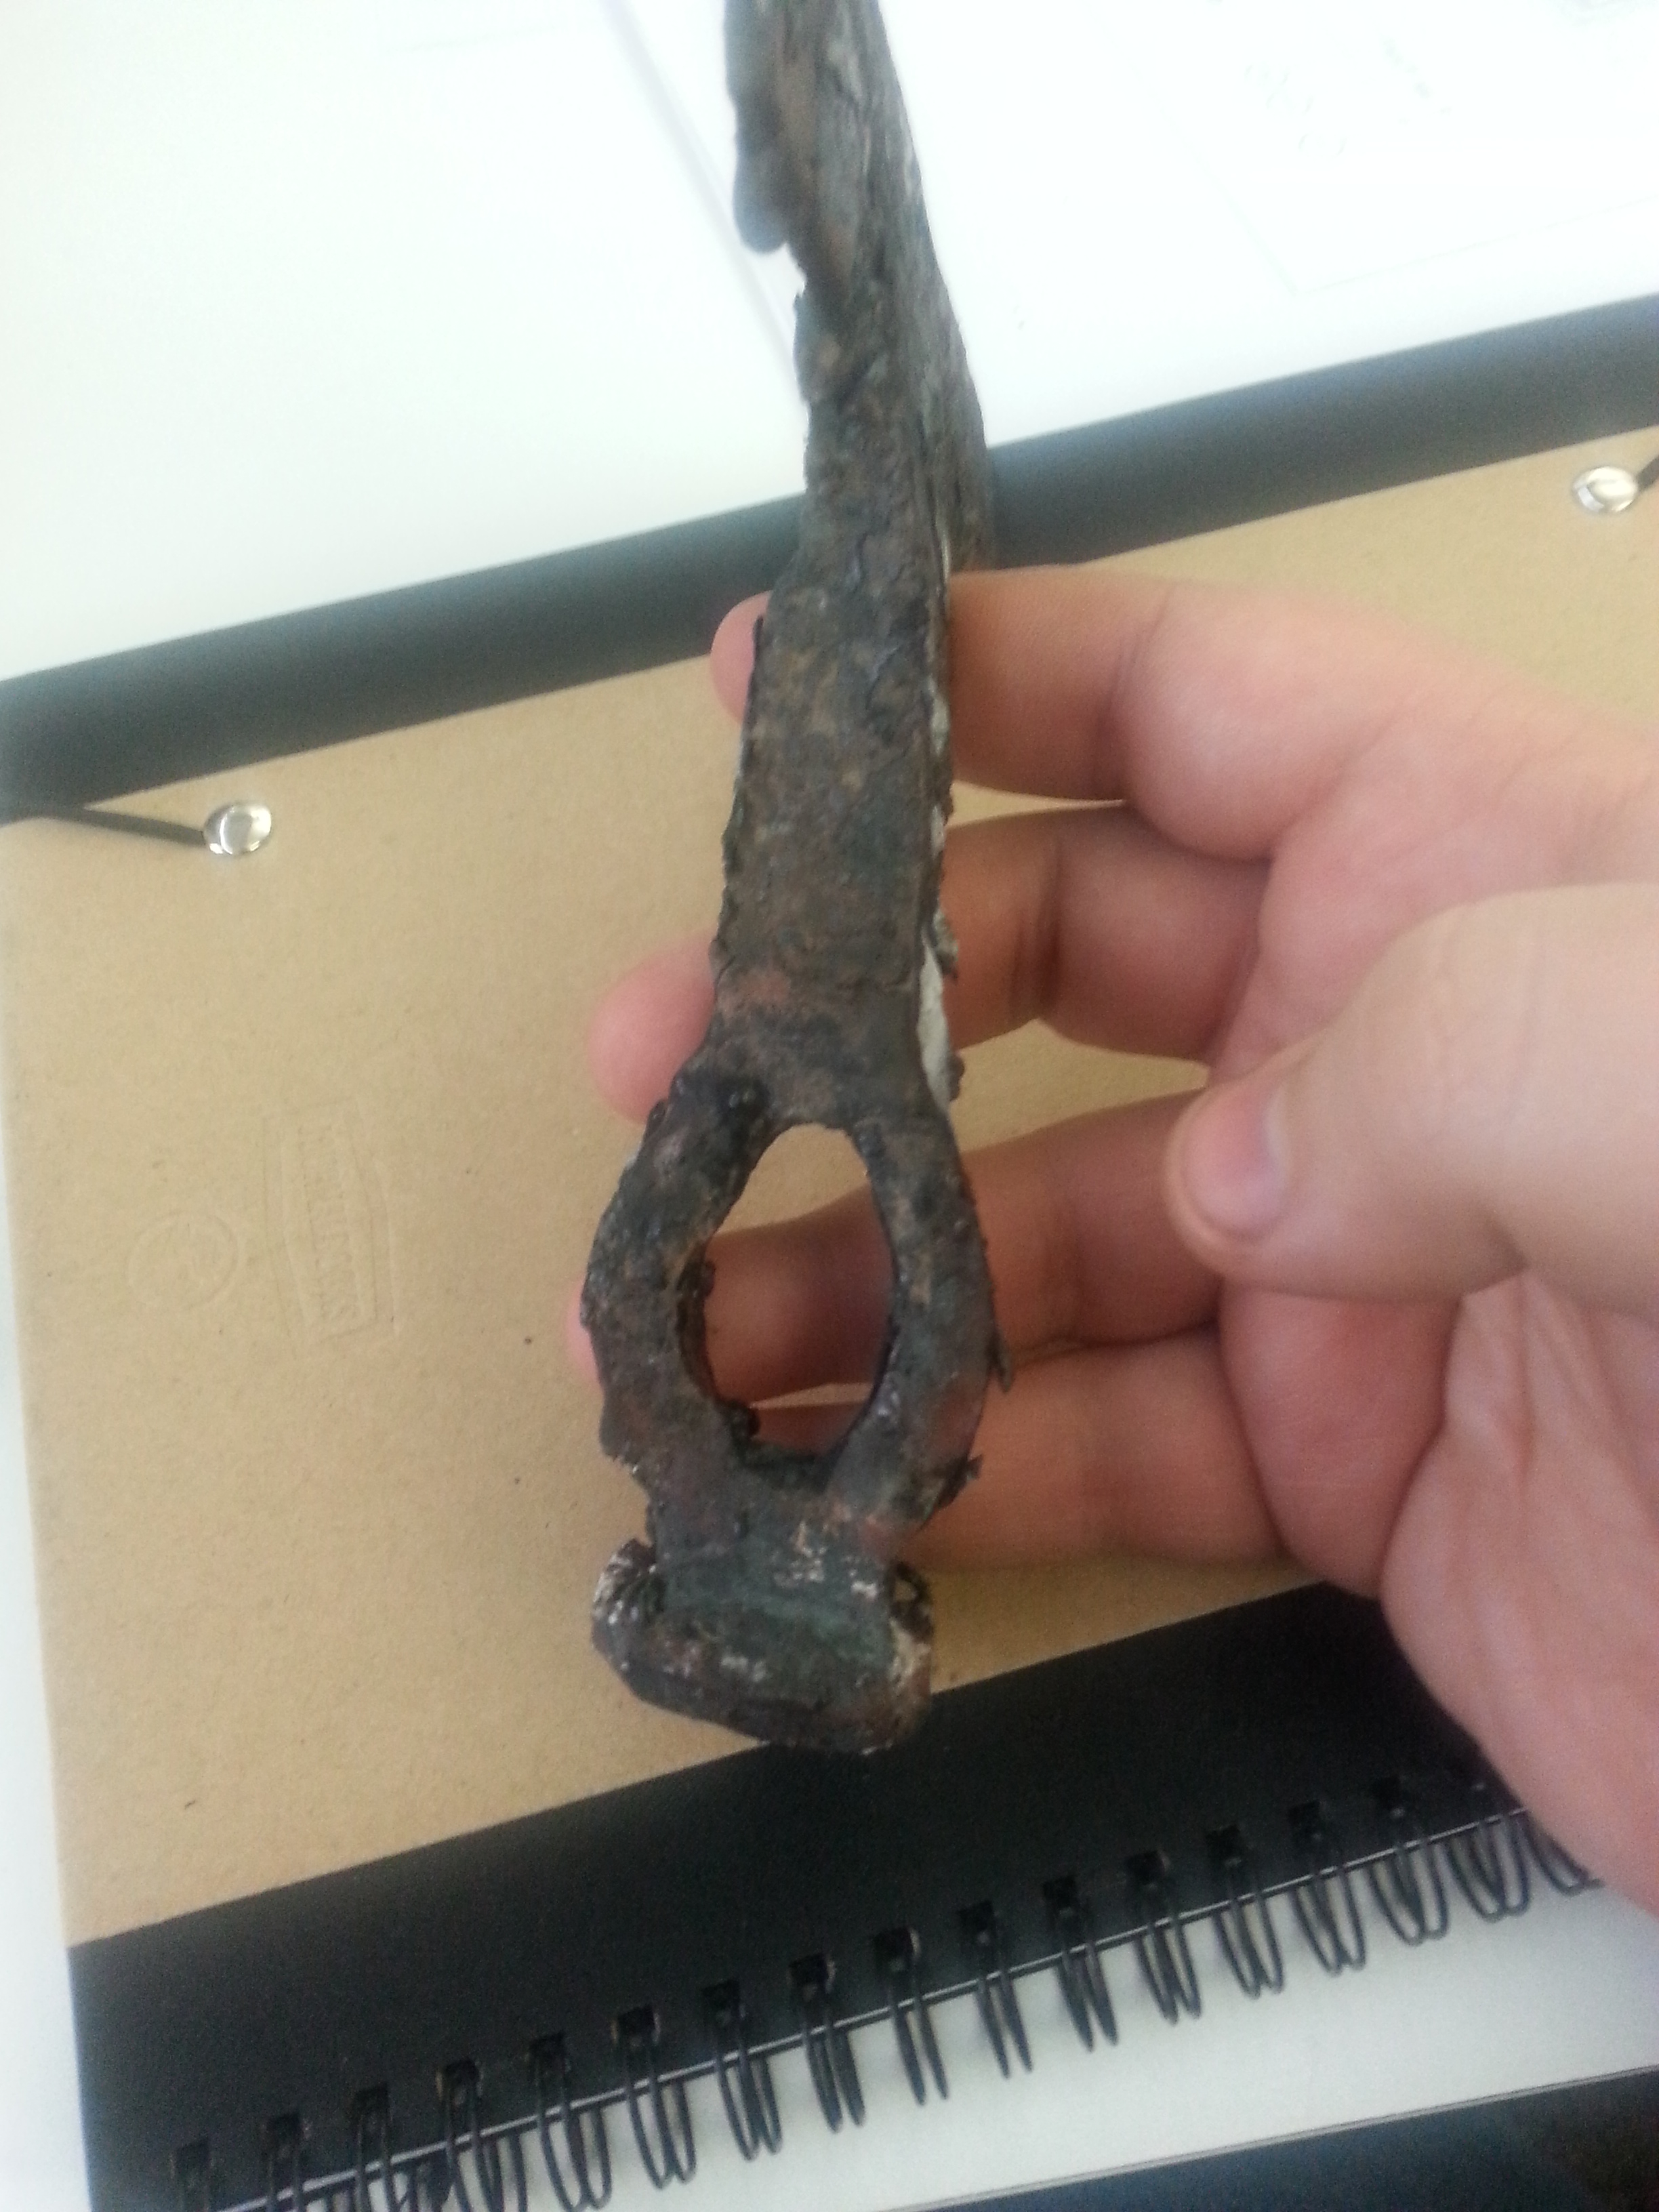
There is not enough meat around the Handle Hole to keep a firm grip on a handle. I am not being negative, you did an excellent job with what you were working with. I would upset some material into the center, before you punch the hole. You need a double taper or hourglass shape, to be able to stay on a Stick/Handle. I have been where you are and I am not ashamed to say it. Keep up the 'Learning', it never ends until you take your last breath.
Enjoy the Journey, there is no Destination other than the smile on your face!!
Neil
Thanks for the tips about the eye. I do need to work on upsetting. I will definately attempt to get some more material around the eye next time. Even as i was working on this i was worried about the eye splitting open as i made it because the material was so thin there (1/8" at the middle and 1/4" at the corners)

.JPG.ec564085806409ed724d1d11e62c4855.JPG)
.JPG.ad844c119973eb9dcffd6946463f99f2.JPG)


Grizzly Model: G1015 2x72 Belt Grinder
in Grinders, Sanders, etc
Posted
The grinder works fine for my needs which are definitely hobby level so you can take this with a grain of salt there. I did make one modification to this grinder which is to remove the shield on the small wheel at the top of the grinder. Alignment was a bit annoying and sometimes the edge of the belts would bite into the shield which was bad and wrecked a couple belts starting out. Other than that i have zero bad things to say about it and frankly for the price i think its a great tool especially on sale.