Light Hammer
Members
-
Joined
-
Last visited
Everything posted by Light Hammer
-
On moving the nozzle, what should I be looking for? As is, the burner has a .023" tapered mig tip that is set almost even with the transition from the bell reducer to the 3/4 pipe. That setting isn't adjustable as I drilled a hole through the reducer to mount the gas tube. I read Frosty's design description which indicates that the tip should, in my case, be about .412 from the 3/4 pipe (if I read it correctly). The tapered nozzle is set at 1.5" from the end of the mixing tube. I'll try moving the nozzle tonight and see what happens. Again, what should I look for to call it a "better flame"?
-
Youtube link in case the above attachment doesn't work for some: https://youtu.be/XJ6VLs90NEU
-
Hopefully the video works... I finally fired my new burner. Can you guys critique the flame? Ok. Video didn't attach. Let me try another route. forge burner.MOV Ok, it's upside down but attached lol I've since added a choke to the intake though I'm not exactly sure how/when to use it. The flame will sustain up to around 20 psi then blows out. It starts "huffing" around 3-4 psi.
-
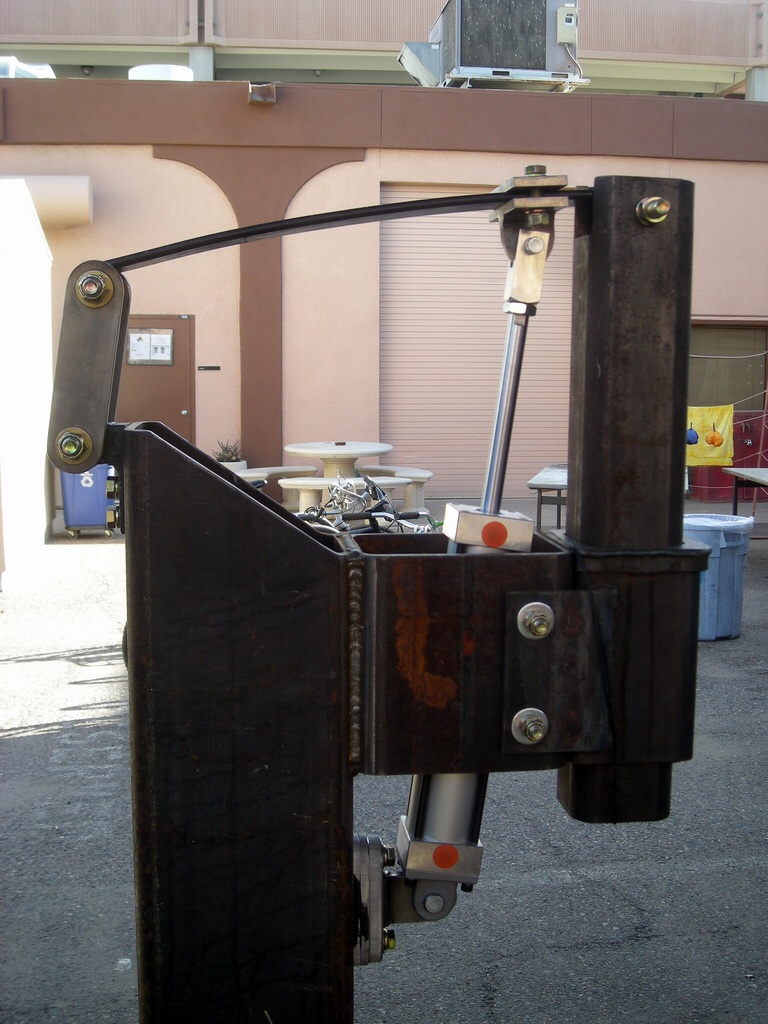
As currently drawn, the ram will weigh ~90 lbs without a die. The information I've found indicates that a single leaf, 1/4" thick x 2" wide spring is required... as shown here:

-
Hello all, I'm drawing up a new style Kinyon air hammer. Looking at the pictures I can find, it appears that the leaf spring used in the design is relatively flat with an eye to eye distance of around 20". I looked at trailer springs and they seem to all be arched in the 3" range. For those who have studied this topic or those who have built a Kinyon; where would I find an appropriate spring for the build?
-
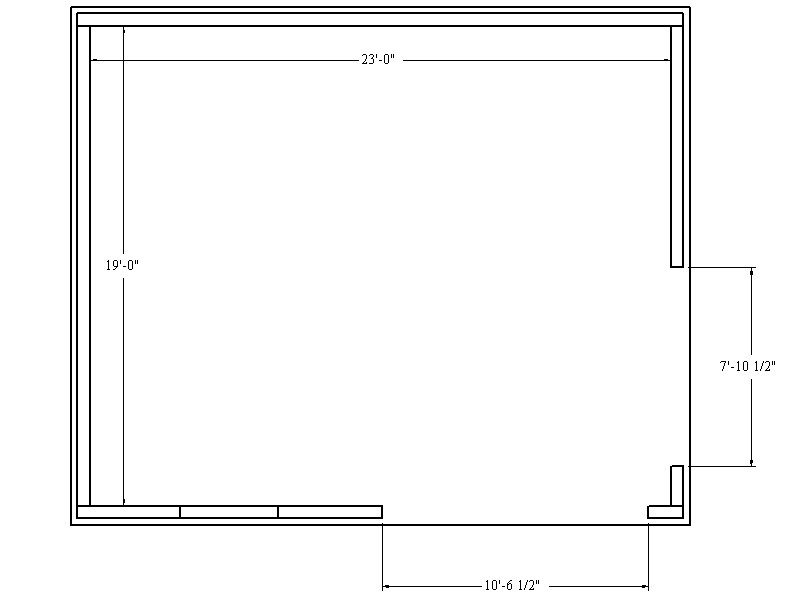
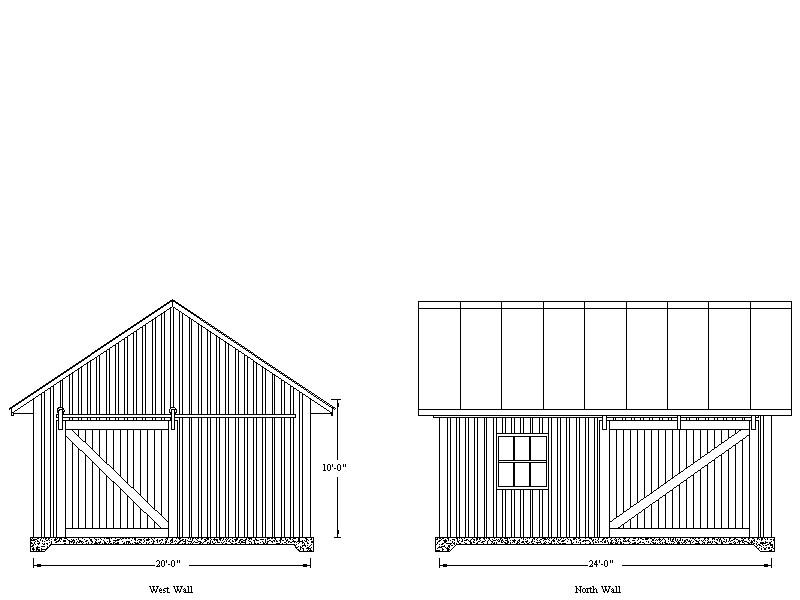
I see your guy's point as to adding more doors for ventilation. I could add a south side door however driving through the building isn't possible due to the tree line and grade. I was thinking about incorporating a window in the north side sliding door which would line up with the north side wall window when the door was fully open. This way I could still get the benefit of light and ventilation through that opening. Also, I may move the north side door over a little (which will mean I'll have to make it smaller) to allow a space to the left of the door for a work bench. Decisions, decisions...
-
To the south of the building there is a tree line. To the east there is another structure. Adding doors on those two walls isn't possible. Windows maybe, but not doors I'm afraid.
-
Ok guys, point taken. How's this?

-
The ventilation fan will be on the east wall at the ceiling peak. I was thinking it would pull air from the north and west sides across the room and out the east wall. Given this arrangement, would you still move one of the doors?
-
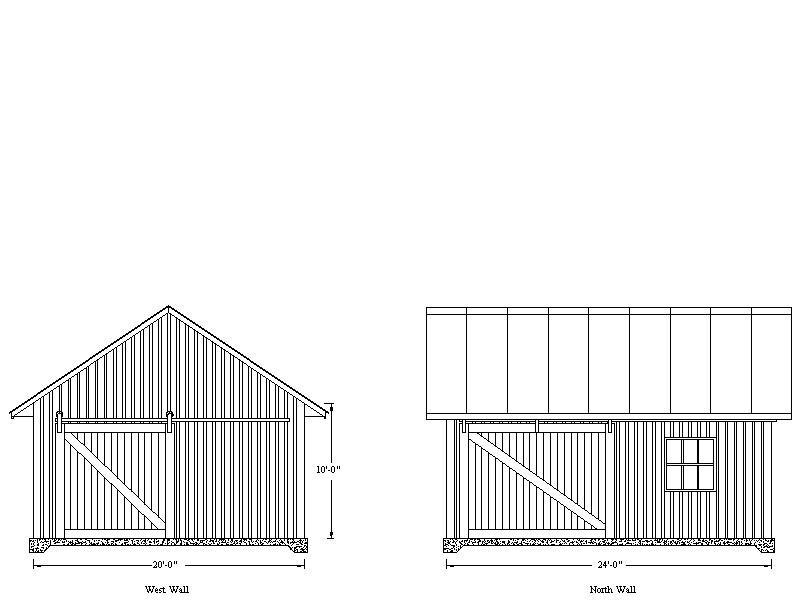
I thought I'd throw in a exterior rendering for those who are interested.
-
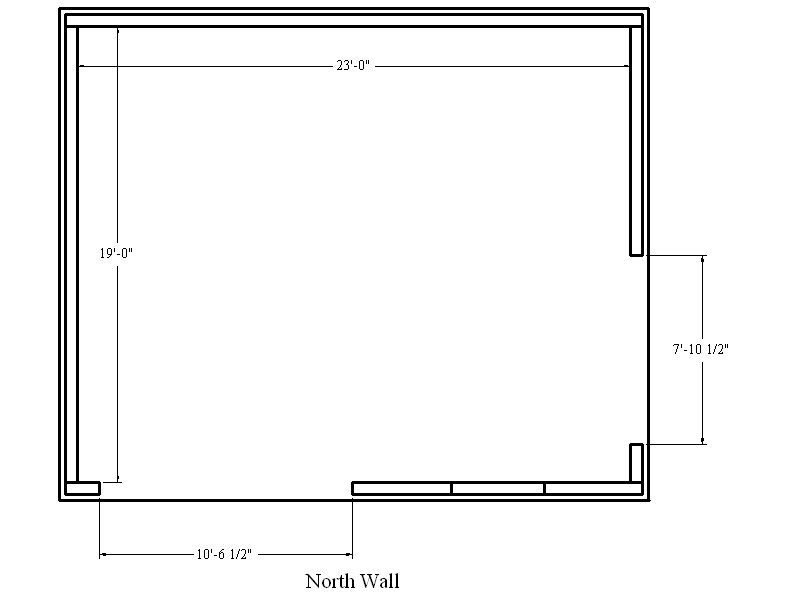
Here is the space I'll have available guys. The gaps to the right and lower right of the drawing are sliding doors. The ventilation fan will be installed on the left side gable wall. Given this, are there any suggestions as to forge, anvil, misc items placement?

-
Yeah, I was thinking the larger fans may just be a little too big
-
Ok, so I just talked to a local truss manufacturer and it looks like I'm going with wood scissor trusses that will leave a 4:12 interior pitch. This will allow for a 24" fan to be installed in the gable end wall. The one I have is rated at ~4700 cfm so I'm looking at an air change every ~80 seconds. The ceiling peak will be ~15' with 12' walls. I'll insulate above the finished ceiling and mount the fan as high as it will go on the gable wall. Hopefully this approach will work.
-
For ventilation, I have several different sizes of chicken house fans. The smallest is 24" and the largest is 48" I can install one or a combination of several to make the air move. The mentioned 10 air changes per hour... is that a minimum? Would there be a point where the fans were too large?
-
I typed a reply however when I "Submit Reply" I'm sent to a screen that says I don't have permission on this server? Hmm... Is there a maximum length for replies?
-
What I wouldn't give for a bridge crane! I use my tractor/pallet forks to move heavy items in my existing shop, though the space will be a little tighter in this one. We'll see how it goes.
-
At this point I have the roof system narrowed to either wood trusses or steel span trusses. I plan on leaving an 'unfinished' ceiling if I go with wood trusses and if I go with steel trusses there really won't be a 'ceiling' per se. Either way, I'll lay insulation over the purlins before screwing the metal roofing on. For the interior walls, I'm thinking of going with the same board and batten as the exterior however I'll cover the wood with corrugated tin wherever necessary, even if that's the entire perimeter of the interior. Hopefully that will cut down the fire risk and still give a solid backing (behind the tin) to attach things. Thoughts?
-
Understood on the sub base. I poured a monolithic slab for my existing shop with #4 rebar tied throughout. All set up on a compacted stone base. It's held for 11 years with no cracks. Hopefully I can repeat the process. I can see the advantage of isolating a section for a hammer. I'll give that some thought. I'll definitely run electric and water as they are already very close to the building site now. For circulation, I'm planning a 10' ceiling minimum and, depending on the roof system I go with, taller in the middle. I was thinking about mounting an exhaust fan up high and centered on the rear wall to help vent the heat during the summer.
-
Understood. If I go concrete, it would be 6" thick at a minimum. Perhaps I could set up a thicker 'area' for a future hammer from the beginning. If the fatigue factor is the only detractor from going with concrete then I suppose I'm past that as my existing shop is on a concrete floor which I've become accustomed to.
-
I agree with you both. Live and learn I suppose.
-
Thanks for the replies. On the subject of the concrete floor, what would a machine foundation consist of? Additional footer? Thicker concrete? If I don't go with concrete, what would be best?
-
Hello all, After some time looking over the forum I decided to join. I hope I'm welcome and my question(s) aren't overly redundant. I'm planning a smithy build and I'd like a few pointers from those who have traveled this path in the past. I'll be sawing all the lumber needed (I own/operate a Frick 0 circle sawmill) for this project so I'm having to plan way ahead for the drying and pressure treating process. The space I have available will allow for a 24' wide x 20' deep building. I'm planning a pole building with board and batten siding and a concrete floor. I'll start with a gas forge then hopefully add a coal forge as funds permit. My friend and I are attending a blacksmithing class at the John C. Campbell Folk School in December. I've been interested in the art for many years and now, with my last child leaving the home, I finally have time to see it come to fruition. I'll post pictures of the progress when the project begins for all to enjoy. My initial question is; are there any pointers for progress or pitfalls to avoid at this stage of the plan?
-
As stated, I defer to the more experienced when it comes to things I do not FULLY understand, such as electrical. That being said, I ran a 75 amp, 240 volt line from my shop to my sawmill using #2 copper. I did the dirt work while a friend who is licensed and experienced calculated the wire size and make the connections. When my smithy is ready, I'll be calling upon him again to run power there. Hopefully it won't be so expensive this time