

Tbmartin
-
Posts
22 -
Joined
-
Last visited
Content Type
Profiles
Forums
Articles
Gallery
Downloads
Events
Everything posted by Tbmartin
-
Hey Dan, I am interested in those of the clay spencer plans as well. I cannot get in contact with Clay himself.
-
First Post and a new hobby
Tbmartin replied to Tbmartin's topic in Blacksmithing, General Discussion
Gents, So I haven't had my forge up and running for a little while. Summer fun has taken hold and all the work to go along with it. I have been slowly & steadily acquiring items for the craft though, so it hasn't fallen completely to the wayside. I just picked up a 100 lb London anvil, the only other markings on it are JB, I will post a pic once I have my stand built for it. I also built a stand for the 75 lb Buffalo anvil I got from the grandfather so it is now ready for service. One of my main problems is my workspace, as I am forging in the garage with the forge out on the driveway. It can be a pain in the xxxx to move everything around just to pull the vehicles in every time. So to remedy this I have made a bargain with the wife... A bathroom renovation for a small shop in the back yard. I'm sad to say that the bathroom renovation will get a far larger budget, but I am okay with that as I quickly got approval from the boss! So far my plan is to make an 8 x 10 shop with an 8 to 9 foot sloped roof. I may increase the size to 9 x 10, but can't go to 10 x 10 to avoid accessory building by laws in the city. The walls will be sheeted with plywood and either cement board, tin sheeting, or cinder block heat shield around the forge area. I will put a hatch in the wall at the back of the forge so I can slide long pieces through to be heated in the middle. The floor is already poured so that's easy. I will probably go with a shingle roof and was thinking about hanging canvas tarps (welding blankets) on the interior to insulate and muffle the sound of me whacking away. I have multiple neighbors across the alley in condos so I want to be considerate of the noise. These tarps will also provide spark containment around the bench grinder and table sander so it should prove to be a three fold addition. As a plus there is a large tarp being thrown out from work that might just do the job. I am running an LPG forge so I am wondering what should be done for ventilation, should I put in a ceiling fan? I could put a louvre or vent on the high side of the sloped roof and keep a door or window open but I'm just not too sure if that will get the CO out well enough. I will have to pull an extension cord across from my house for any electrical equipment so it would be nice to keep it simple. I plan to have two doors on the side of the shop so I can open it up and work half in half out when the weather permits. I saw Jakob Farams shop and thought it would be very similar in design, only the roof being a single slope and the doors on the side of the shop. The interior looks great so I think I could easily fit my kit in and have room to add stuff with time. With the double doors I think it will add expandability as well for the future. SO... I'm looking for ventilation suggestions, canvas tarp thoughts, design flaws or ideas, and any other advice you guys can help me with this project plan. Cheers! -
David your forge is looking great! We should go into production with those air tank bodies hahaha. Have you visited the store Hoof and Nail in Calgary? I have been thinking of ordering a couple things from them but I would really like to go into the shop. With them not being open on weekends it makes it a little tough for me though. When you get those tongs done let us see how they turned out!
-
First Post and a new hobby
Tbmartin replied to Tbmartin's topic in Blacksmithing, General Discussion
CJF, I used a kiln refractory cement to coat the wool blanket but I can't recall the name of it, I will take a look for the receipt when I get back from work. I think the volume is around 370 cu. inches, I have been running one burner for the last few lights, I may have got a little over zealous on the burners but if I run both she heats up material like crazy. It also sends a lot of flames licking out the front door which can heat up too much of steel which I would be grabbing. For longer pieces such as drawing out reins I really like the dual burner but for smaller stuff I only use one burner to keep the hot spot right on the material. I have been contemplating taking out the front burner and plugging the hole with a piece of kiln brick, but I still enjoy the flexibility to run one or both. -
First Post and a new hobby
Tbmartin replied to Tbmartin's topic in Blacksmithing, General Discussion
I've finished my first set of tongs (second if you count the mini garbage trial version)! After a number of sessions and working on three or four different things at a time they are complete. I'm not overly happy with the rivet job I did but I'm going to make a rivet block soon to make things easier. I think I'm going to start on two drifts, one for hammers and another for tomahawks as I now have the tongs to work some railroad spikes. Another set of pickup tongs might be on the list as well as the ones I have now are borrowed. After asking every person I could think of my grandfather gave me his fathers anvil from their farm (which he sold in 1955). The thing was chipped and abused and nicked to all hell, but a sand blasting and an hour under the grinder it looks pretty xxxx good. Hopefully I can find another anvil solid steel and a little bigger but I'm happy with this heirloom to back into use. Just need to build a stand for the bugger... -
First Post and a new hobby
Tbmartin replied to Tbmartin's topic in Blacksmithing, General Discussion
So I have fired up the forge a few times now (avoiding the cold weather we had for a few weeks). I made a small pair of tongs just as a practice template out of 3/8 round, forged a chisel and started turning a big hex key into a cone hardie. I also found a steel supply that sells cut off scrap for cheap so I picked up 20 lbs of different stock types. Yesterday I started on a pair of goose neck tongs that will hold rail road spikes. Got about half done the first side and had to shut it down for the day (had too much honey do items on my plate). One question I have is how to judge if your steel is getting hot enough before working it. I get the steel a good orange hot before pulling it from the forge, but I don't seem to be getting very much time while hammering it out. I even warmed up the anvil by heating a piece of 1" round and bending it at a 90 to sit in the hole of my makeshift anvil. It seemed to help a little but I am just wondering if I need to soak the steel longer in the forge? The stock I was forging was 3/8 x 1". Just want to make sure I am getting enough time between each heat before I start to draw out my reins. Thanks in advance. -
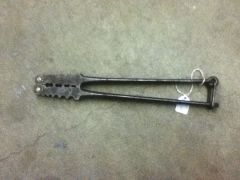 Pretty sure those are king crab leg crackers hehehe
 -
First Post and a new hobby
Tbmartin replied to Tbmartin's topic in Blacksmithing, General Discussion
Well the forge is officially in operation! Fired it up for the first time and did an hour or so bake of the cement. After that I let it cool and checked insulation which all stiffened up nicely. Then I hit full flame and started on a pair of tongs made out of a chunk of rebar. Got done one side and had to call it a shift but I think I've got a good start. I'm going to try and finish them up today but need to get some small material for a rivet. Also made a stand for my small anvil out of an 8x8 post and a 4x4 cross member. Works pretty good but I'll still be on the prowl for a bigger anvil. I'll post a pic of my tongs when complete to show the mess I make hahaha Taylor -
First Post and a new hobby
Tbmartin replied to Tbmartin's topic in Blacksmithing, General Discussion
Excellent that's what I like to hear! Thanks beammeupscotty, I won't mess with something too much if it ain't broke! I put the third and final coat of kiln cement in the forge tonight. After an air dry session I'm going to try to cure it with one burner on low flame. Then it's on to making some tongs... Is that an ambitious first forging project? Hahah either way I'm gonna need them soon! Taylor -
First Post and a new hobby
Tbmartin replied to Tbmartin's topic in Blacksmithing, General Discussion
Burner design was very similar to Kcrucible's design: http://kcrucible.wordpress.com/2010/08/20/burner-modifications/ I might still look for a new tip cone but for now I'm focusing on getting some heat to that forge. Taylor -
First Post and a new hobby
Tbmartin replied to Tbmartin's topic in Blacksmithing, General Discussion
Second layer of cement is on the forge and it looks a heck of a lot better. Got it on a little thicker this time and more evenly spread. Also got the regulator and hoses for the burner and fired up one of them last night. Flame seemed pretty good at 6 psi, I moved the jet forward and back and adjusted the air baffle but didn't get that much of a change in flame colour. It went from a nice blue flame with orange flecks every once in a while to an almost greenish blue. Never found a spot that changed the flame fully orange but I didn't spend too much time testing as it was late, might try lowering the pressure to find where is goes orange. Just to make sure I'm running it in the sweet spot. Here's some pics I grabbed last night. Should have shot the flame without flash I realized now. Ill take some more to compare if I'm running rich later tonight. -
First Post and a new hobby
Tbmartin replied to Tbmartin's topic in Blacksmithing, General Discussion
So the bolt anvil has been placed on the back burner sadly, I might just have to make it later on to be a one percent-er! Instead I had a fellow find a chunk of some hard alloy 2" think x 7" long x 6" high. We did a rebound test with a 1" bearing and got about 70% rebound. I then welded it onto a 1" x 4" x 12" flat plate as a base and added a couple anchor bolt holed to secure it. Once I got it home I gave it a weigh just to ease curiosity and it came in at 40 lbs. There is a 1" hole near the one end I thought I could use for punching steel, and I ground down on edge to make a nice rounded corner. It's got a decent ring to it but I will be putting a magnet on the side to deaden the noise (I will be doing alot of forging in my attached garage with the forge out the car door). I don't want things to be too loud as my 9 month old daughters room is above the garage! I'll upload a picture later today, I was going to make a stump for this out of 4 - 4X4 boards strapped and bolter together in a square, but after looking at it last night I thought I should make the base a bit bigger. Maybe 4 8x8's strapped together with banding and bolted together. The height of the top of the anvil face should reach your wrist when standing straight correct? Now, just this morning another fellow I chatted up about steel will be picking up a hunk of train rail and rail road spikes. So now I will potentially have another anvil from the rail and some decent starter project steel. He asked if I wanted new spikes or old spikes and new or old rail. He said the new rail has a big CANADA stamp on it so I thought that might be kind of a neat touch, but somewhere I read that the older rail was higher carbon content but I cannot seem to find that article again. Thirdly I have two London style anvils, one weighing 100 lbs and the other is slightly smaller (so the owner thinks). It seems as though once you HAVE something to use and don't NEED an anvil plenty of things appear and come out of the wood work hahaha. I really like the 100# anvil but it is a little roughed up, looks like someone welded parts on top of it (not to the face), because there is welding slag beads and marks on top. The horn is also dinged up from use and I'm just wondering if a flapper disc can be used to smooth out those two surfaces? One coat of cement has gone on top of the Kaowool insulation now, I don't feel it will be enough so I'm thinking another two coats will do the job. Since it is colder than a snowman's fart up here my garage is not a great place for anything to cure nicely, so I think I will wait extra long between coats and bring the forge into the laundry room at night for extra heat. Enough prattling, Getting excited to shape some steel! Taylor -
So far with just the kaowool there is a tight fit on the front hatch. That being said I layered up the front pretty well to get it even. Once I put the cement in that could creat a whole different seal though. I was thinking of putting a layer of wax paper between the hatch and main body and then cement right up to the edge to hopefully get a nice tight surface. I will let you know if I succeed or if there are any shoulda done different ideas. I made the slide out of half inch ss tubing. Pretty solid but if I need to upgrade to solid round stock that will be no problem. Look forward to seeing your forge! Taylor
-
David, Nope I'm down in the hat, check out my post on my forge build to see what that tank looks like. I thought about making a third door along the side on the whole tank, so I could pass large and long pieces through. But I think I will make another clamshell forge if I get to that point. '?do=embed' frameborder='0' data-embedContent>>
-
First Post and a new hobby
Tbmartin replied to Tbmartin's topic in Blacksmithing, General Discussion
Oh just another question, I've had a chisel and punch set for a while. Don't use them very often but I'm just wondering if I could use the punches with hot steel? They are drop forged chrome vanadium steel. Here's the set. They don't say cold chisel like another set I have so I'm just making sure before I go and wreck something. https://www.acklandsgrainger.com/AGIPortalWeb/WebSource/ProductDisplay/globalProductDetailDisplay.do?item_code=WSWWPC14R Taylor -
First Post and a new hobby
Tbmartin replied to Tbmartin's topic in Blacksmithing, General Discussion
Just finished a late night insulation session. So far I've got two layers of kaowool. One inch on the floor where it is covered by the kiln shelf. Three layers on the front door, guess i will think about a third layer round but I would like to get some bigger stuff in this bad boy if necessary. I'll have to decide that before ithrow in the cement! Here's a pic so far. Also, thanks for the compliment. I can't wait to see some heat in that puppy! I will try to find the site I based my burner off but I thought the guy said the threads helped with mixing. I'm not saying you guys are wrong by any means, just letting you know the reason I have it on there. I would like to test this burner set up before changing it so I can get a good grasp of the effects, but your comments are definitely noted. Do you use any itc coating on your burner tips? I think it's itc-285 or something for steel. Taylor -
First Post and a new hobby
Tbmartin replied to Tbmartin's topic in Blacksmithing, General Discussion
VaughnT, Never even thought about using it as a post anvil. I've been searching so much for a classic anvil and there was potential right under my nose! I did a little searching online and it looks like those B7 studs are a 4140/4142 alloy steel. http://www.portlandbolt.com/technicalinformation/astm/ASTM_A193.html After my last post I spoke with another fellow from work and he has an anvil I'm going to chase down at his farm. Might have to post size and make to get help on pricing, I'll try to nab a picture if we don't make a deal on the spot. Taylor -
First Post and a new hobby
Tbmartin replied to Tbmartin's topic in Blacksmithing, General Discussion
Thanks for the info on hammers, I will start with something on the lighter size as I do not want any strains from this. I play racquet sports regularly so I would hate to be held back from two hobbies with one injury! Even before reading the TPAAAT thread I had been using the technique with a number of things. I've got ads out on the web, phoned scrap yards, asked everyone and their dog if they have seen an anvil around. I have a lead on two of them but both sound like they want to hold onto them "just in case" they might one day need to straighten out a spoon handle or something. I'm hoping to get something in the range of 100 - 200 lbs, if anyone up here in Canada has a lead on something give me a shout or PM (I'm in Medicine Hat but will drive out). Guess I will continue spreading the word on here to uphold the TPAAAT. :D Taylor Martin -
First Post and a new hobby
Tbmartin replied to Tbmartin's topic in Blacksmithing, General Discussion
So if I ground off the threads or put them through a quick lathe to knock off the threads it would prevent cold shuts? I will have to see how it looks when I draw out a smaller one, like you said maybe it will look interested for some projects. Threads on these bad boys are 8 threads per inch on anything over 1" round I believe, so yea they are pretty course. I'm very interested in making a few hammers out of one of these studs (its 4 inches thick x 24 + inches long) instead of buying all of them. Might be a tough project to take on at the beginning with my skill level. Most videos I see people are using a power hammer, so I'm guessing I'd need a striker to make the task not make my arm muscles bleed! Thanks VaughnT, hopefully I can have it fired up next week! Taylor -
David, I bought my insulation material from plainsman clay in Medicine Hat. Kaowool and cement cost 40 dollars for my propane forge. Still looking for itc-100 though. That's going to be the expensive part. I also used a 5 gallon air tank I bought from princess auto as my shell. Cheers, Taylor
-
Hello everyone, Thought I would post a couple questions and get some friendly criticism on my new forge build. I've been interested in blacksmithing for years and have finally started to dig in and get things moving. So far I have made a 5 gallon air tank into the shell of my forge and I made two propane burners to heat this bad boy. I've just bought Kaowool to do two layers of insulation (2600f rating), and I have some kiln mortar good to 3100f to lay down those fibres. I plan on getting ITC-100 but cannot get it locally so I will be ordering it. I picked up some kiln shelf for the flooring and a soft fire brick to add support to the adjustable porch. So give me any thoughts on the forge build, I'm not sure if both burners will be needed but it can plug off one hole if needed. I thought it's better to have more than rip it down and add a port. Once insulation is all finished I should have a 6 inch port with main door open and 4 inch rear hatch for longer pieces. I'll give an update once I'm closer to finishing the build. My questions for you guys are more about tools. As I said I'm just starting out so I've been making all kinds of tools at work. I work at a gas plant so there is lots of scrap metal going into recycling so I've been nabbing the odd piece and taking it into the welding shop to make hardies or just to hold onto for tongs and my first forgings. There is a massive variety of steel that moves through the plant but one very common piece thrown out is b7 studs. I've looked up that it is usually 4140/4142 steel which should be great for some tools. But the whole thing is threaded and usually rusty & pitted. Obviously a quick sandblast takes care of the rust, but has anyone used threaded studs in forge work? I'm assuming it will be fine but just curious if there's any downside. Some of the studs that are thrown out could easily make sledge hammers or power hammer bits with room to spare. I've already have a solid amount of tools but I need to get an anvil, looking at 100lbs. And some decent hammers, I know everyone is going to have a different opinion but I was looking to get a 4 lbs engineer hammer and 3 lbs cross pien. Does a good hammer make a big difference or should I pick up a twenty dollar joby from a local store? I'm gathering it's how you use the tool not how big it is, but I prefer to get the proper gear instead of having thirty of one thing and only use 3. Also, just thought I'd say that this forum is very good for all kinds of knowledge. Many of the members should be proud to put together such a wealth of knowledge. Enough rambling, hopefully I'll get some insulation done and collect some more scrap iron so I can post some updates this weekend. Cheers, Taylor