

Crazy Ivan
-
Posts
830 -
Joined
-
Last visited
Content Type
Profiles
Forums
Articles
Gallery
Downloads
Events
Posts posted by Crazy Ivan
-
-
18 minutes ago, matto said:
Crazy Ivan if you are up for traveling come to Nebraska too, My father in law is a chiropractor and lives across the road. We could forge all day and then get adjusted. He also likes swinging a hammer so he could adjust while we forge.
I'll be in touch about that for sure.
-
24 minutes ago, ausfire said:
Easy for you to say, Pete! So when do your travels extend to Australia? I need a lesson.
I do hope to head to Australia in the future. When I get there is dependant entirely on how much business I am able to get for myself between now and then. There might be some forge welding juju that rubbed of in that hammer I sent you. It should be there sometime this week. It does that sometimes lol. Right now I need to heal....just threw out my back again 10 minutes ago. Good thing I live with a massage therapist.
-
Good work bud! You must have had an excellent lesson or two from a very talented and devilishly charming blacksmith to make those ;D lol. Keep em coming!
-
I have taught folks who have never even forged before how to weld in 15 minutes. It's not difficult to do, but do one thing wrong and it won't work. Sparkling heat is easiest for mild steel (though I have welded at a much lower heat with no flux too). LIGHT taps to set your weld, then on the next heat (after you brush and re-flux) a little harder, and 3rd heat, draw down and blend. Depending on stock size you can a hieve all the steps in one heat and be done with it depending on intended application. Keep your steel clean and move like a soldier "slow is smooth and smooth is fast" meaning KNOW every single move you need to make BEFORE you come out of the fire. Don't jumble around looking for your hammer or tripping over stuff on the ground. Lastly, don't look at it, HIT IT!! Do not waste heat looking at your piece once it is out of the fire, hit it! Otherwise you will miss your window for succeeding in a weld. You'll get it. If someone is nearby, see if they or you can stop by. You will be welding in no time at all.
-
Definitely not an arm &hammer anvil. It may be a Vulcan though I cannot say for sure. Vulcans aren't bad anvils, but not great. Regardless, I would buy one if the price was right. Do not grind the surface. No reason to. Just use it and the face will polish itself through use. The pitting does not look bad enough so it shouldn't show up in your work.
-
I use all my H13 tools as forged. They hold up just fine.
-
I make all my tongs myself. For wolf jaws, say they are for 1/2" bar, I take a piece of 1/2" sq and (after properly siving the jaws) and put it in the jaws at the desired spots and hit down in the diagonal of the bar between the jaws. That way your grooves line up and are consistent. It's important to work both sides evenly or else your tongs will end up getting skewed. An easy fix, but very easily avoided too. Take your time and make them right the first time and they will serve you well for years to come.
-
Great work! I have a lot of intrigue in lock smithing. I wish I still had my templates and tooling for making them. I'll make new ones one of these days. Is the mechanism a single latching spring or double with a cam?
-
If it makes you feel any better, I have had no trouble getting welds to stick and blend since your last visit. Iirc, you never stuck that weld though did you? ;D
-
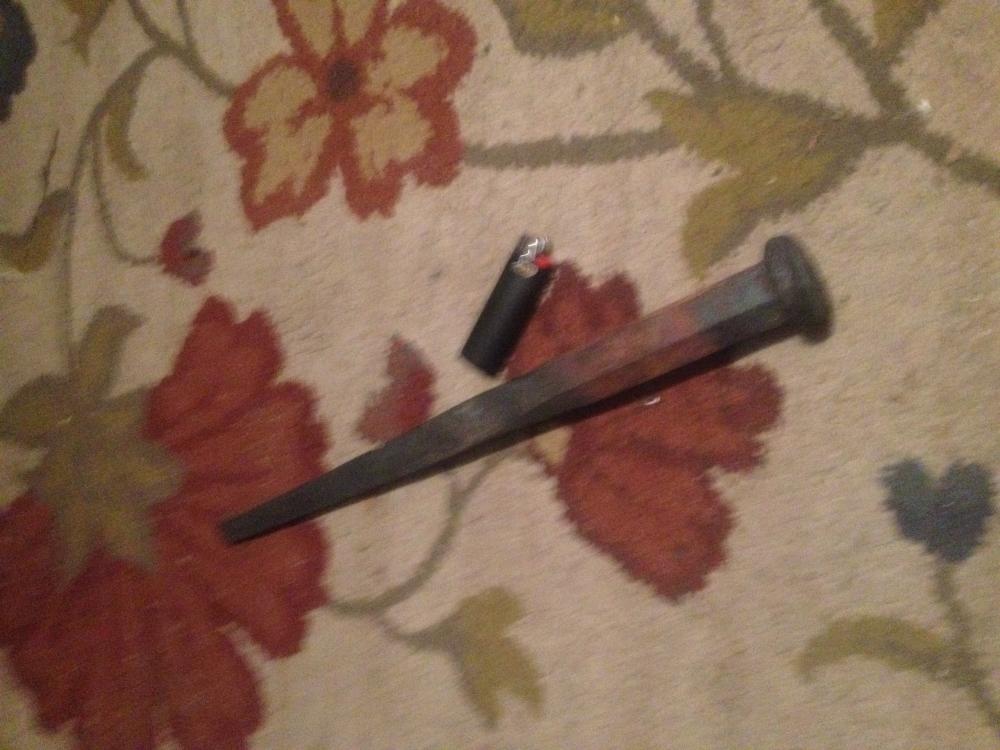
It's a folded eye axe with a 144 layer 15n20 and 1084 bit forge welded in. I haven't decided on the exact style yet. I'm playing this one by ear/inspiration. It's not an order so I just do a little bit on it here and there when I am at the "hurry up and wait" stages of a more pressing project.
-
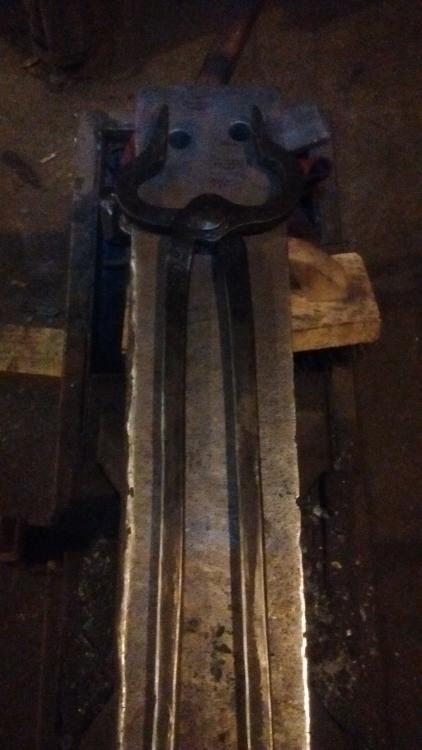
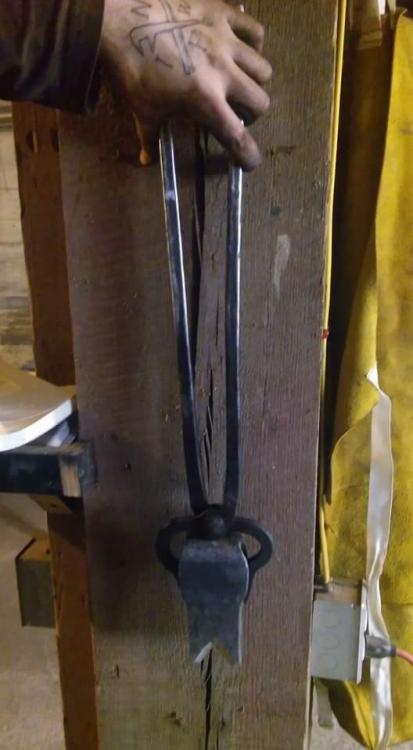
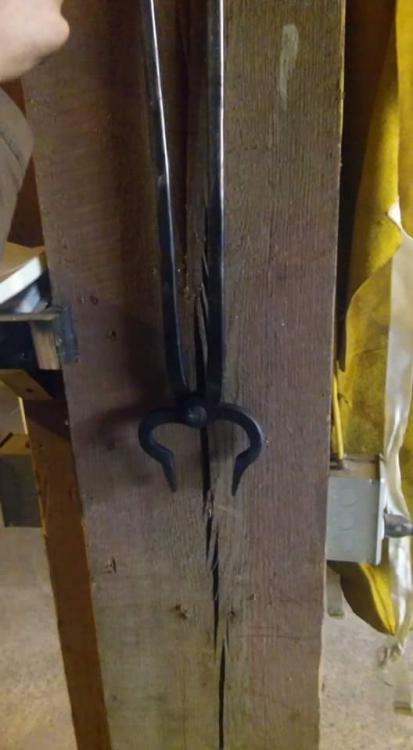
Here is a pair of tongs made to hold a folded eye axe I am working on. They are not the common style of axe tongs or hoop tongs I have ever seen. Thought they were neat and they work exceptionally well. They clear the eye area and hold just past it. I just set the 1st weld on an axe with them and there is zero movement in the piece during forging and they stay out of the way so I am happy. Even tested them by holding the axe to the floor at a 45* angle and stomping on it to see how they held. The axe did not budge even with a 2 finger grip on the tongs. I'm happy with them, they work great and even look pretty cool.
-
2nd for a Hay Budden. Looks just like my old one. If there is an hourglass indentation underneath the feet, it's almost definitely a Hay Budden.
-
No pics on my end either. I'm on my phone though. That does it occasionally.
-
19 minutes ago, Frosty said:
If a person were to want to make more precise concoidal fracture representations in steel a set of chasing tools would work a treat.
What were you knapping? All I had readily available was obsidian. Flint is harder to find here but I admit I didn't look very hard. The chert close by isn't good for anything finer than a hand ax, getting a bi-face is really sketchy let alone dressing a fine edge.
Frosty The Lucky.
Not knapping, just mimicking the look on steel. The ball pein was both struck, and used by hand to get the desired texture in the steel.
-
Years ago I modified a ball pein for this exact purpose. I ground the ball to an oval and radiused it. The texture was similar to that of knapping. I don't have pictures anymore but this may be worth your time to try. I know you have a few ball peins floating around.
-
I would rather neither get damaged. I would practice hammer control and patience to avoid this scenario. That said, mistakes do happen, but if it came down to it I would rather damage the hammer face. Hammers can be much more easily dressed than an anvil face. If you chipped the edge of your anvil it is most likely because you left the edges too sharp.
Take your time. You don't need to forge as fast as a farrier in competition to make a something.
-
The top one is a Vulcan. Bottom teir of usuable anvils but not too bad nonetheless. Many clubs and classrooms use them for student anvils.
The bottom one has all the lines of a Columbian but I am not familiar with the "M" off the top of my head. It does ring a bell but it is escaping me.
-
That is a sad question. I would imagine that kid has never felt the satisfaction of building something with his own two hands. In my honest opinion, modern technology and its wide reach of availability has destroyed young folks understanding of a hard days work and the satisfaction you get from it. Nothing I have ever "bought at a hardware store" has given me any sense of accomplishment. Maybe I'm stoked on a new toy for a while but after a little bit, its just another thing. Things I (or someone else) have hand made on the other hand, have a lingering sense of soul to them. Everything that was hand made is or will be cherished by someone as long as they exist. We create airlooms which may be passed down generation to generation. There is a story behind them. Mass produced tools and trinkets (though some may be passed on because of some family/friend significance) will wither, rust and eventually be forgotten. That is why blacksmith at all.
-
If it does not harden, it is not worth your time and effort. That said, your "hardened and annealed" comment leads me to think you should take a while and read up on heat treat terminology and procedures. If you don't know what the terms mean, how will you know how to properly heat treat? Not knowing the alloy will make heat treating a very big hit or miss. Hammers are alot of work. I would hate to see you get in over your head and waste time/money. Always learn from your mistakes, but don't set yourself up for failure either.
-
Modeling Clay.I do test runs with it when I'm not sure how to work a project to figure it out. It works great.
-
"Ppffftt, I move more metal than you when I blow my nose" -JWS
"HA! maybe with a 2" x72" grinder running 30 grit" -Myself
Lol happy curmudgeon day!!!
-
22 minutes ago, jumbojak said:
Pretty much what JWS said lol. I sketched a rough design on a handle blank (rectangular rough cut wood) and realized I didn't have a draw knife anymore (I'll make one asap) so JWS offerered to rough it out for me. The design is inspired by Jymm Hoffman's hammer handles which I tried and loved back in June when I was in Pittsburgh. The function of the knob is to aid in a solid grip while maintaining loose grip on the handle. There is also a bulge at the end on the handle for the same reason. The bulge under the hammer head is mostly aesthetic to compliment the lines of the hammer.
-
7 minutes ago, matto said:
That's awesome, can you use hay rake teeth?? are Spring steel and usually about 3/8" I will be getting sucker rod soon.
Sure can. I use them for the worm on corkscrews and they also make for tough rivets and small chasing tools.
-
Just now, NickOHH said:
My pleasure, Glad I could make it up, I learned a ton, can't wait to try forging more of my own in fact I forged a proper hammer eye drift outta a jackhammer bit.
Awesome! I'm glad you learned something AND got excited about forging your own. That 4130 you got will make a nice few hammers. I hope you took something away from my "oh shoot!" Moment when the balance was off on the hammer and saw how I addressed it. That is a difficult thing to learn IMO.
6 minutes ago, matto said:Pete great hammer it is very clean lined and has a great natural and organic look. Really see a craftsman/artist mind and skill set in the hammer.
Thank you! You should expect to see yours in the mail within a week or two.


Tool making weekend
in Tools, general discussion
Posted
Sounds like my kind of day! Nice job.