

TASMITH
-
Posts
404 -
Joined
-
Last visited
Content Type
Profiles
Forums
Articles
Gallery
Downloads
Events
Everything posted by TASMITH
-
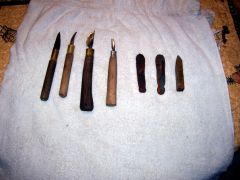
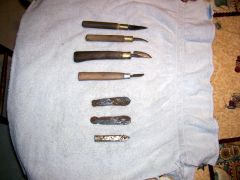
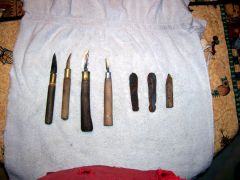
Good job on the carving knives Quenchcrack. Although I don't normally make knives, I have done so in the past. I used to carve decorative decoys and made all my own carving knives. Like you, my carving knives are in a box somewhere as I haven't done any carving for a number of years now. The ones pictured in this post are some i use in the shop now. They are all made from High Speed Steel (Lathe turning bits). On the right side of the picture is a bit that I use for my stock. Next to that are the blanks that are made from the bit before stock removal and finishing. It is challenging to make knives from this material due to the fact they have to be carefully preheated in steps to get them to forging temp. Also they have an extremely narrow range of heat to work in. Overheat and the bits just crumble, and it cannot be forged under 1500 deg. F as they are very red short! After you get them made however they are outstanding for carving. They take a razor edge and will stand up for a very long time.Interesting little devils to try and forge though but well worth the effort.:o
-
From the album: Tools & Jigs
Shop Knives -
From the album: Tools & Jigs
Shop Knives. High speed steel -
From the album: Tools & Jigs
Set of knives for use in the shop. Made from High Speed Steel. Used to de-burr pipe, cut leather or any other tough materials. -
Hey Guys, I was wondering how many Blacksmith's there are here from Eastern Ont. Maybe an opportunity to set up kind of a local chapter as part of OABA. It would be nice to maybe get a local hammer-in going in this area for those who can't make extensive travels to attend other hammer-ins.We only have to list a basic location and we can PM one another, but a central list would help:D. I am in Lyndhurst. Terry
-
Welcome, You picked the right spot to begin your journey. However you had best heed Rob's warning and pack a lunch. It could be a long one.
-
Welcome Akula, Well you have made the proper first step in satisfying your curiosity about Blacksmithing. If you have even the slightest interest these guys on here will drag you into the fold pretty quick! Great bunch of people on here with all the patience in the world for newbies. As you will no doubt be told, grab a drink and pack a lunch, then start your research. You will be here a while!
-
Wecome to IFI Richard. This place is chuck full of ideas and the people willing to share them with you!
-
Welcome to IFI. There is no such thing as a stupid question, especially to someone who doesn't know the answer! Ask away!
-
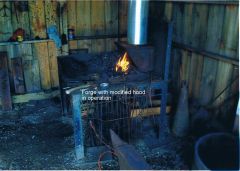
My forge originally had an over head hood which was really not very effective at drawing off the smoke. Any breeze at all would blow the smoke around and fill the forge with smoke. The side draft hood I made is very simple in design.I followed a blueprint made by Lester Beckman and posted on anvilfire.com. The only modification I made was to use 10 in. stovepipe instead of the 12 in. he recommends. It works very well with the ten inch pipe though. Super Sucker Hood: Super Sucker Side Draft Coal Forge Hood Terry
-
-
-
From the album: Smithy
In earlier pictures of main forge you can see a large overhead hood. I removed this and made a side draft hood instead. This vastly improved the draw of the fumes off the forge. Now I don't have any smoke problems in the forge what so ever. -
From the album: Smithy
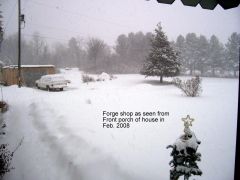
This is the time of year I don't work in forge. At least till the permanent doors are installed and a good woodstove to heat the place to slightly above freezing! -
From the album: Smithy
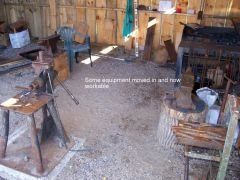
Workable set-up so far. Only time will tell. -

From the album: Smithy
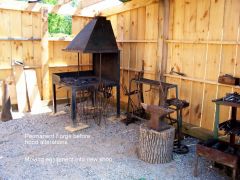
More stuff moved in. Not really optimized yet as have not started using forge yet.Will probably re-arrange a few times before I get comfortable with it. -
From the album: Smithy
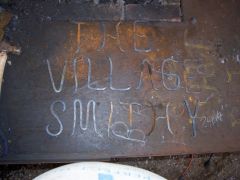
Letters made to go in the frame for the sign for the shop -
From the album: Smithy
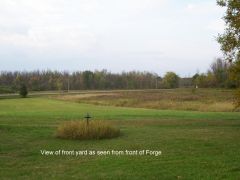
A view of the front yard from the door of the forge. We have ten acres of land with about seven acres of it cleared and open. -
From the album: Smithy
-
From the album: Smithy
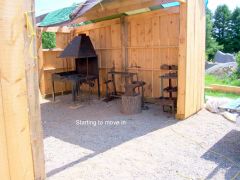
Starting to move some equipment in. -
From the album: Smithy
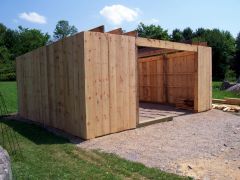
Sides are all up. Still have to put the batting strips on, and the roofing.Door opening is twelve feet wide by eight feet high. -
From the album: Smithy
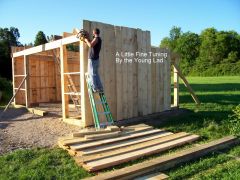
A little fine tuning being done by the young lad. -
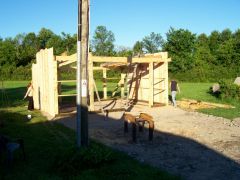
From the album: Smithy
This is the beginning phase of construction of my new forge. It is all rough sawn lumber including the six by six support posts. It is board and batten construction. All material is made by a local sawmill operation and I paid 75 cents a board foot for all the material. The building itself is 15 x 30 feet. -
From the album: Smithy
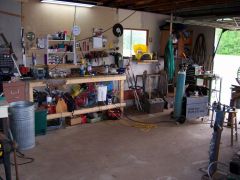
You can see my Mig welder in this picture. I also have an oxy-acetylene outfit, a 180 amp Lincoln ac welder, and a gas driven portable 220 amp DC welder. -

From the album: Smithy
This is my primary welding and cold work area. It is one half of the attached garage of the house. The garage is 24 x 30, so that gives me about 12 x15 area to work here. -
Thanks for the nice comments guys.It is much appreciated. Now all I need is a lesson on photography. My choice of backgrounds isn't always the greatest. Maybe someone with a photography background could do up a sticky on how to take pictures to best show off the work and reduce all the background distractions like I seem to always have,,,LOL:o