
twodogzz
-
Posts
53 -
Joined
-
Last visited
Content Type
Profiles
Forums
Articles
Gallery
Downloads
Events
Posts posted by twodogzz
-
-
Schedule 40, I think. Picked it up at a plumbing supply. You may not need it if you are building the T-burner. I'm not sure. Check with Frosty's design and go with that rather than mine of that's the case.
-
Something I learned from my build that you can consider in acquiring your parts, and that others should take into consideration in giving advice, is that you can waste a lot of time trying to source exact parts from a single parts list and that you're going to have to track down a lot of small parts from different sources.
As a hobbyist, I consider that my time is worthless in monetary terms, but it becomes a serious burden and annoyance when wasting time not finding the part I need, acquiring parts that end up not working and delaying the build by days or weeks because I don't have the free time to go all over town shopping, or when I had to have something else shipped.
For that reason, I advise that the more you can get in kit form from the least amount of suppliers, the faster you will be beating hot metal.
I suggest you get all your lining/refractory material from Wayne Coe. Along with supplying you with exactly the linings that go with his design that you are building, you also get e-mail technical support. I got the regulator kit from Hi-temp tools because Zoeller seemed to be AWOL. He responded to my first inquiry months after I had acquired my parts elsewhere. He may be back up and running now, but I could not get what I needed from him at the time.
And, although your local propane supplier might be able to supply some parts, they are not nearly as knowledgeable about the proper configuration for a gas forge as opposed to a turkey fryer or a backyard barbecue. I have one extra regulator and about another $30 in unusable parts I got from them that I ended up not using. And that was with the burner in hand and telling them to start at the end of my burner and sell me everything all the way back to the tank.
-
Yes I cut the tank and had the welding done before casting. I then lined it in 2 pieces. Be warned that cutting the tank kind of bumfuzzles the structure and you have to clamp everything back into place to line it up.
Will post more later.
Welder did the pipe, hinges, and a handle in about 40 minutes and charged me 60 bucks. Find the right shop and you might get it done for a case of beer.
-
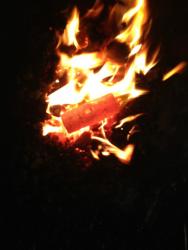
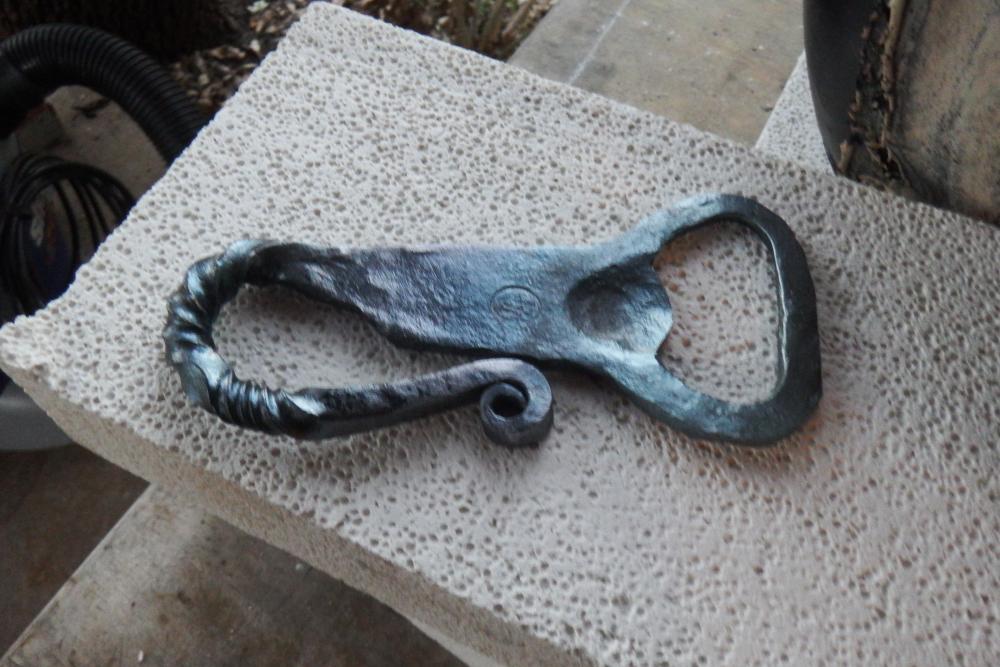
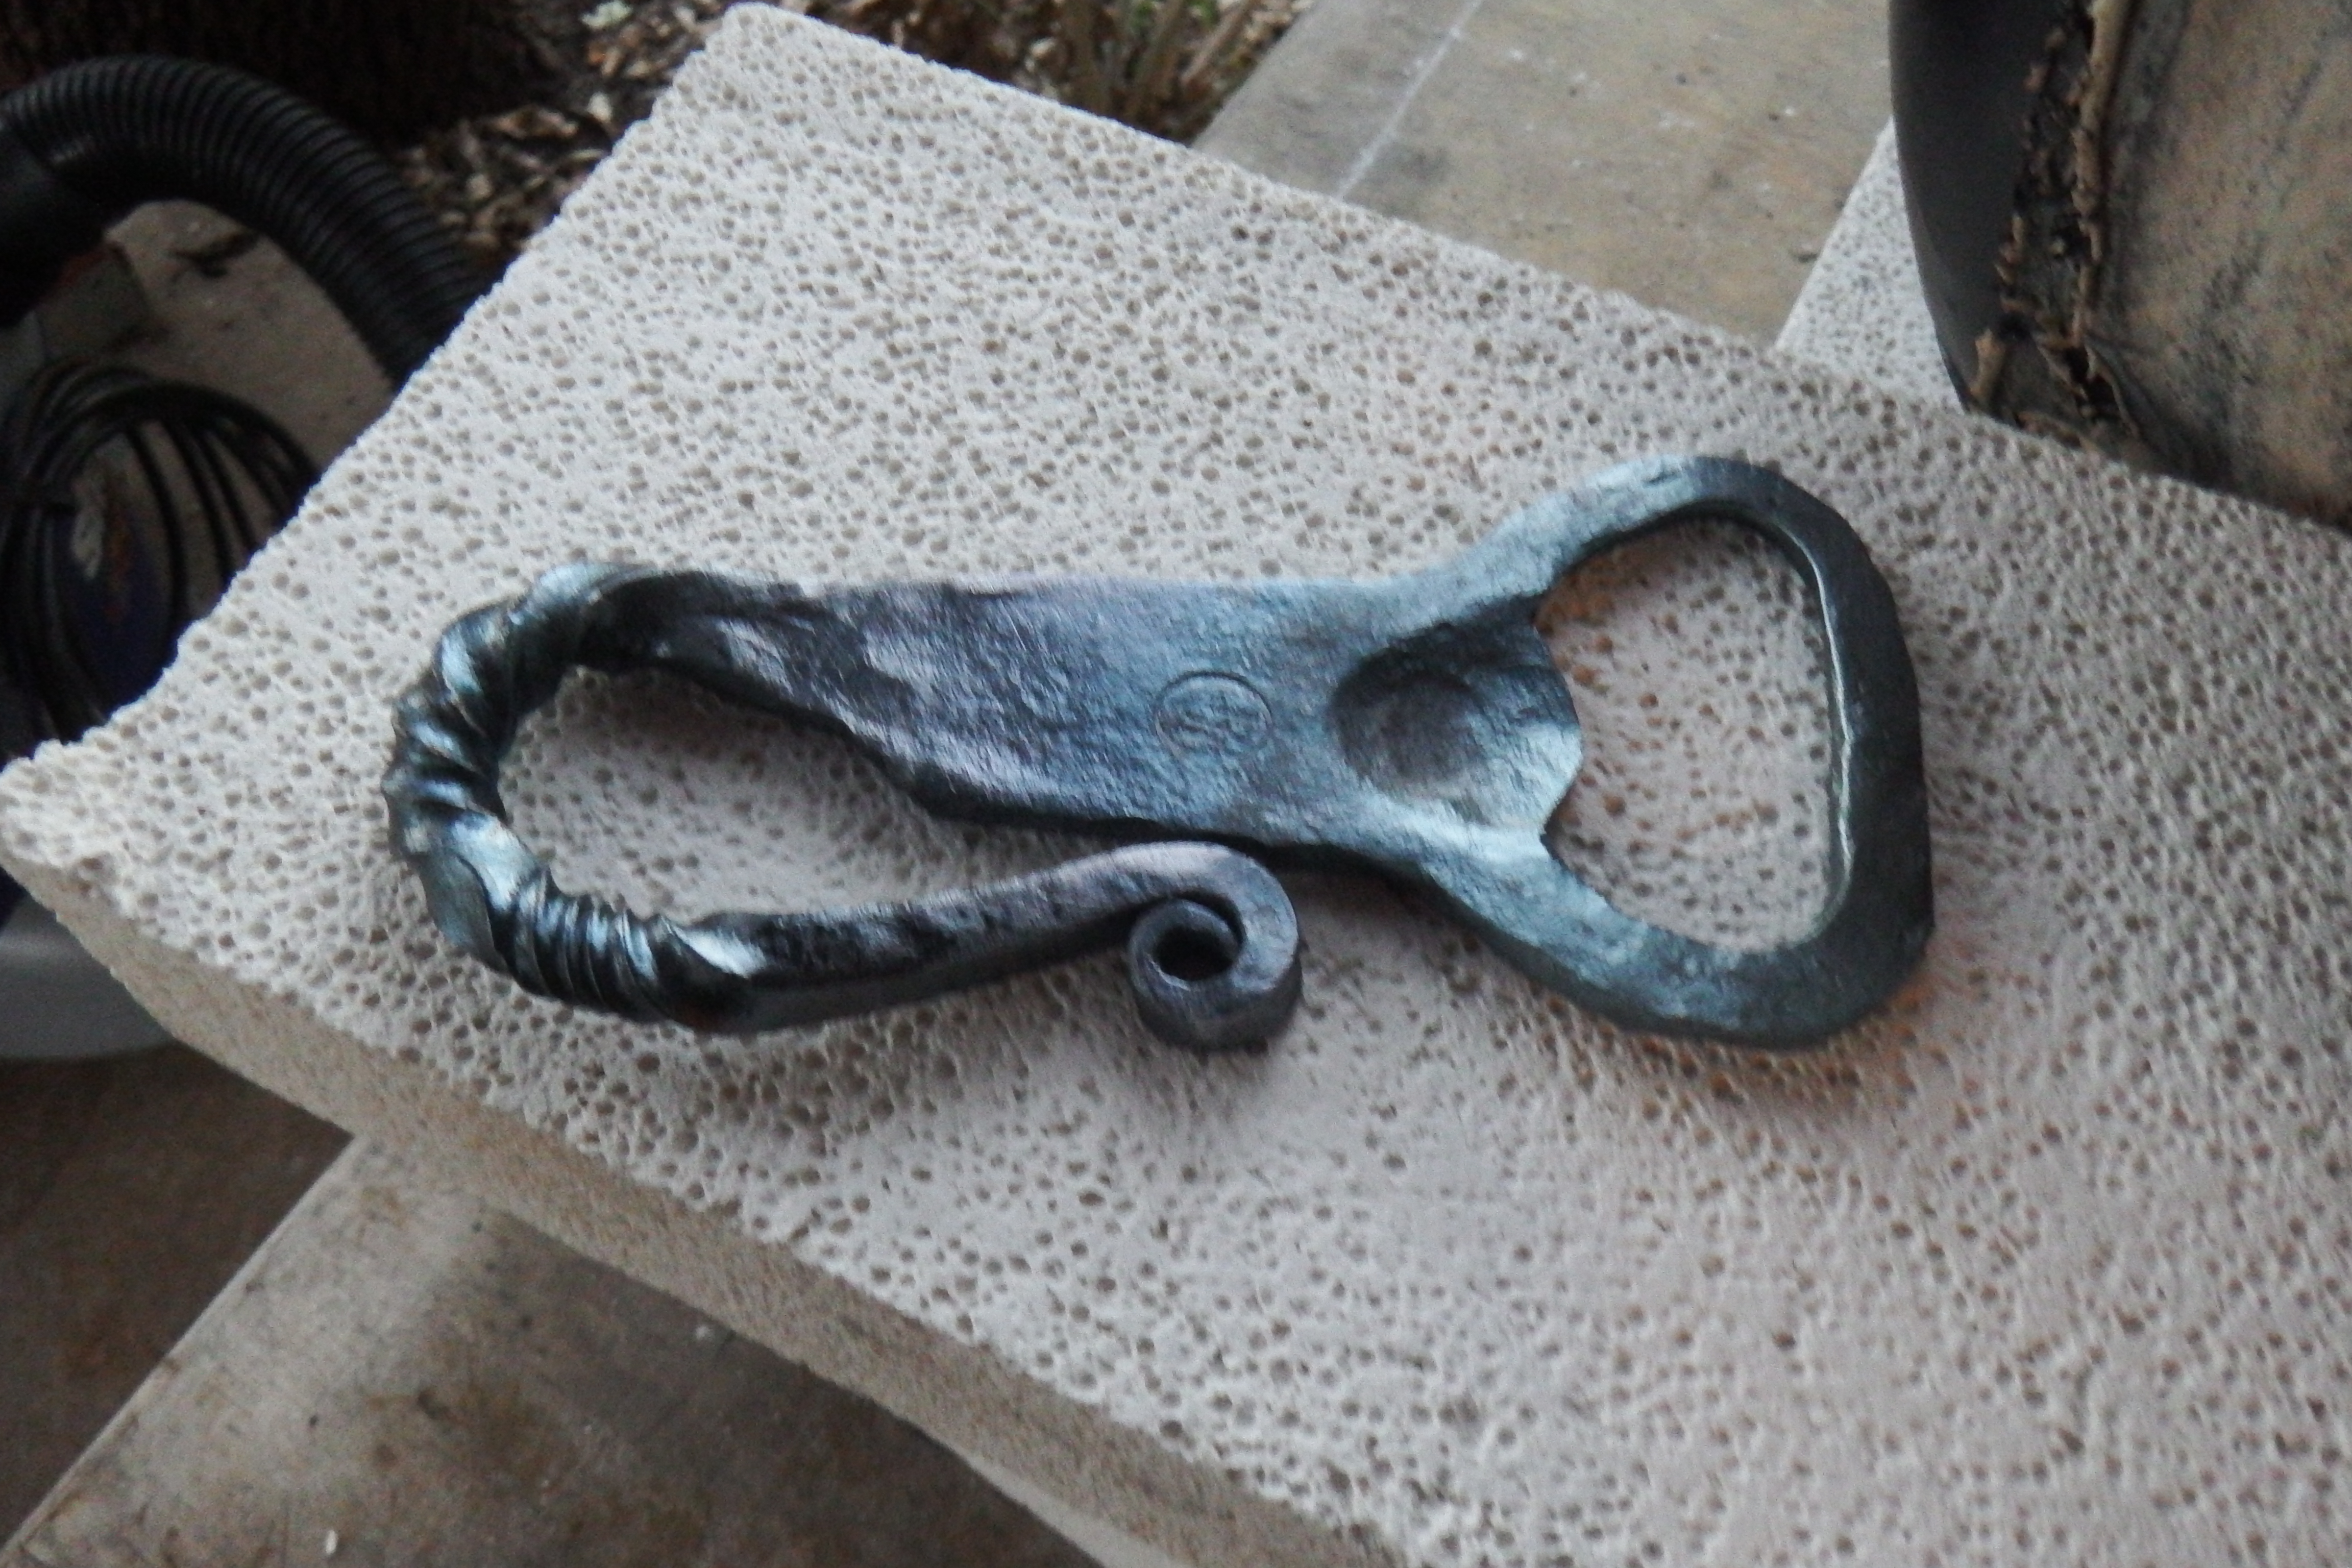
Day 1 was still mostly for tweaking the forge and getting familiar with it and learning how it behaved. After forging a slot punch and drift out of some mystery steel, which, of course, turned out to be 5% iron, 95% butter, I forged the bottle opener: Wire wheeled it and set it back in the forge, which was off but still pretty hot. I was only doing that to take a picture, but when I went to take it out I could see the colors running. Yanked it out with this nice blue temper to it. Dumb luck but noted for later.
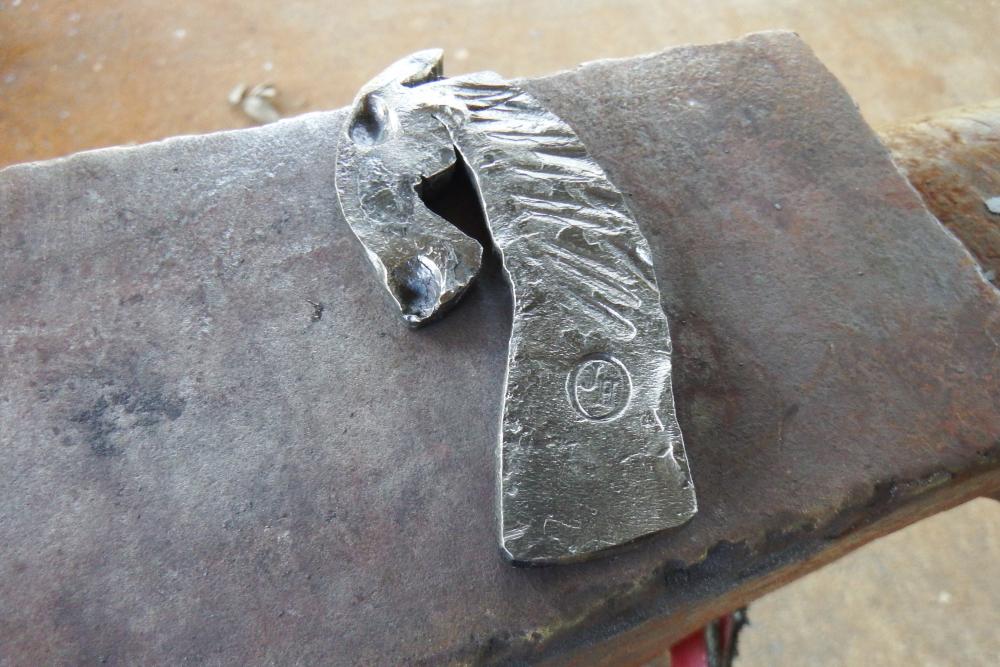
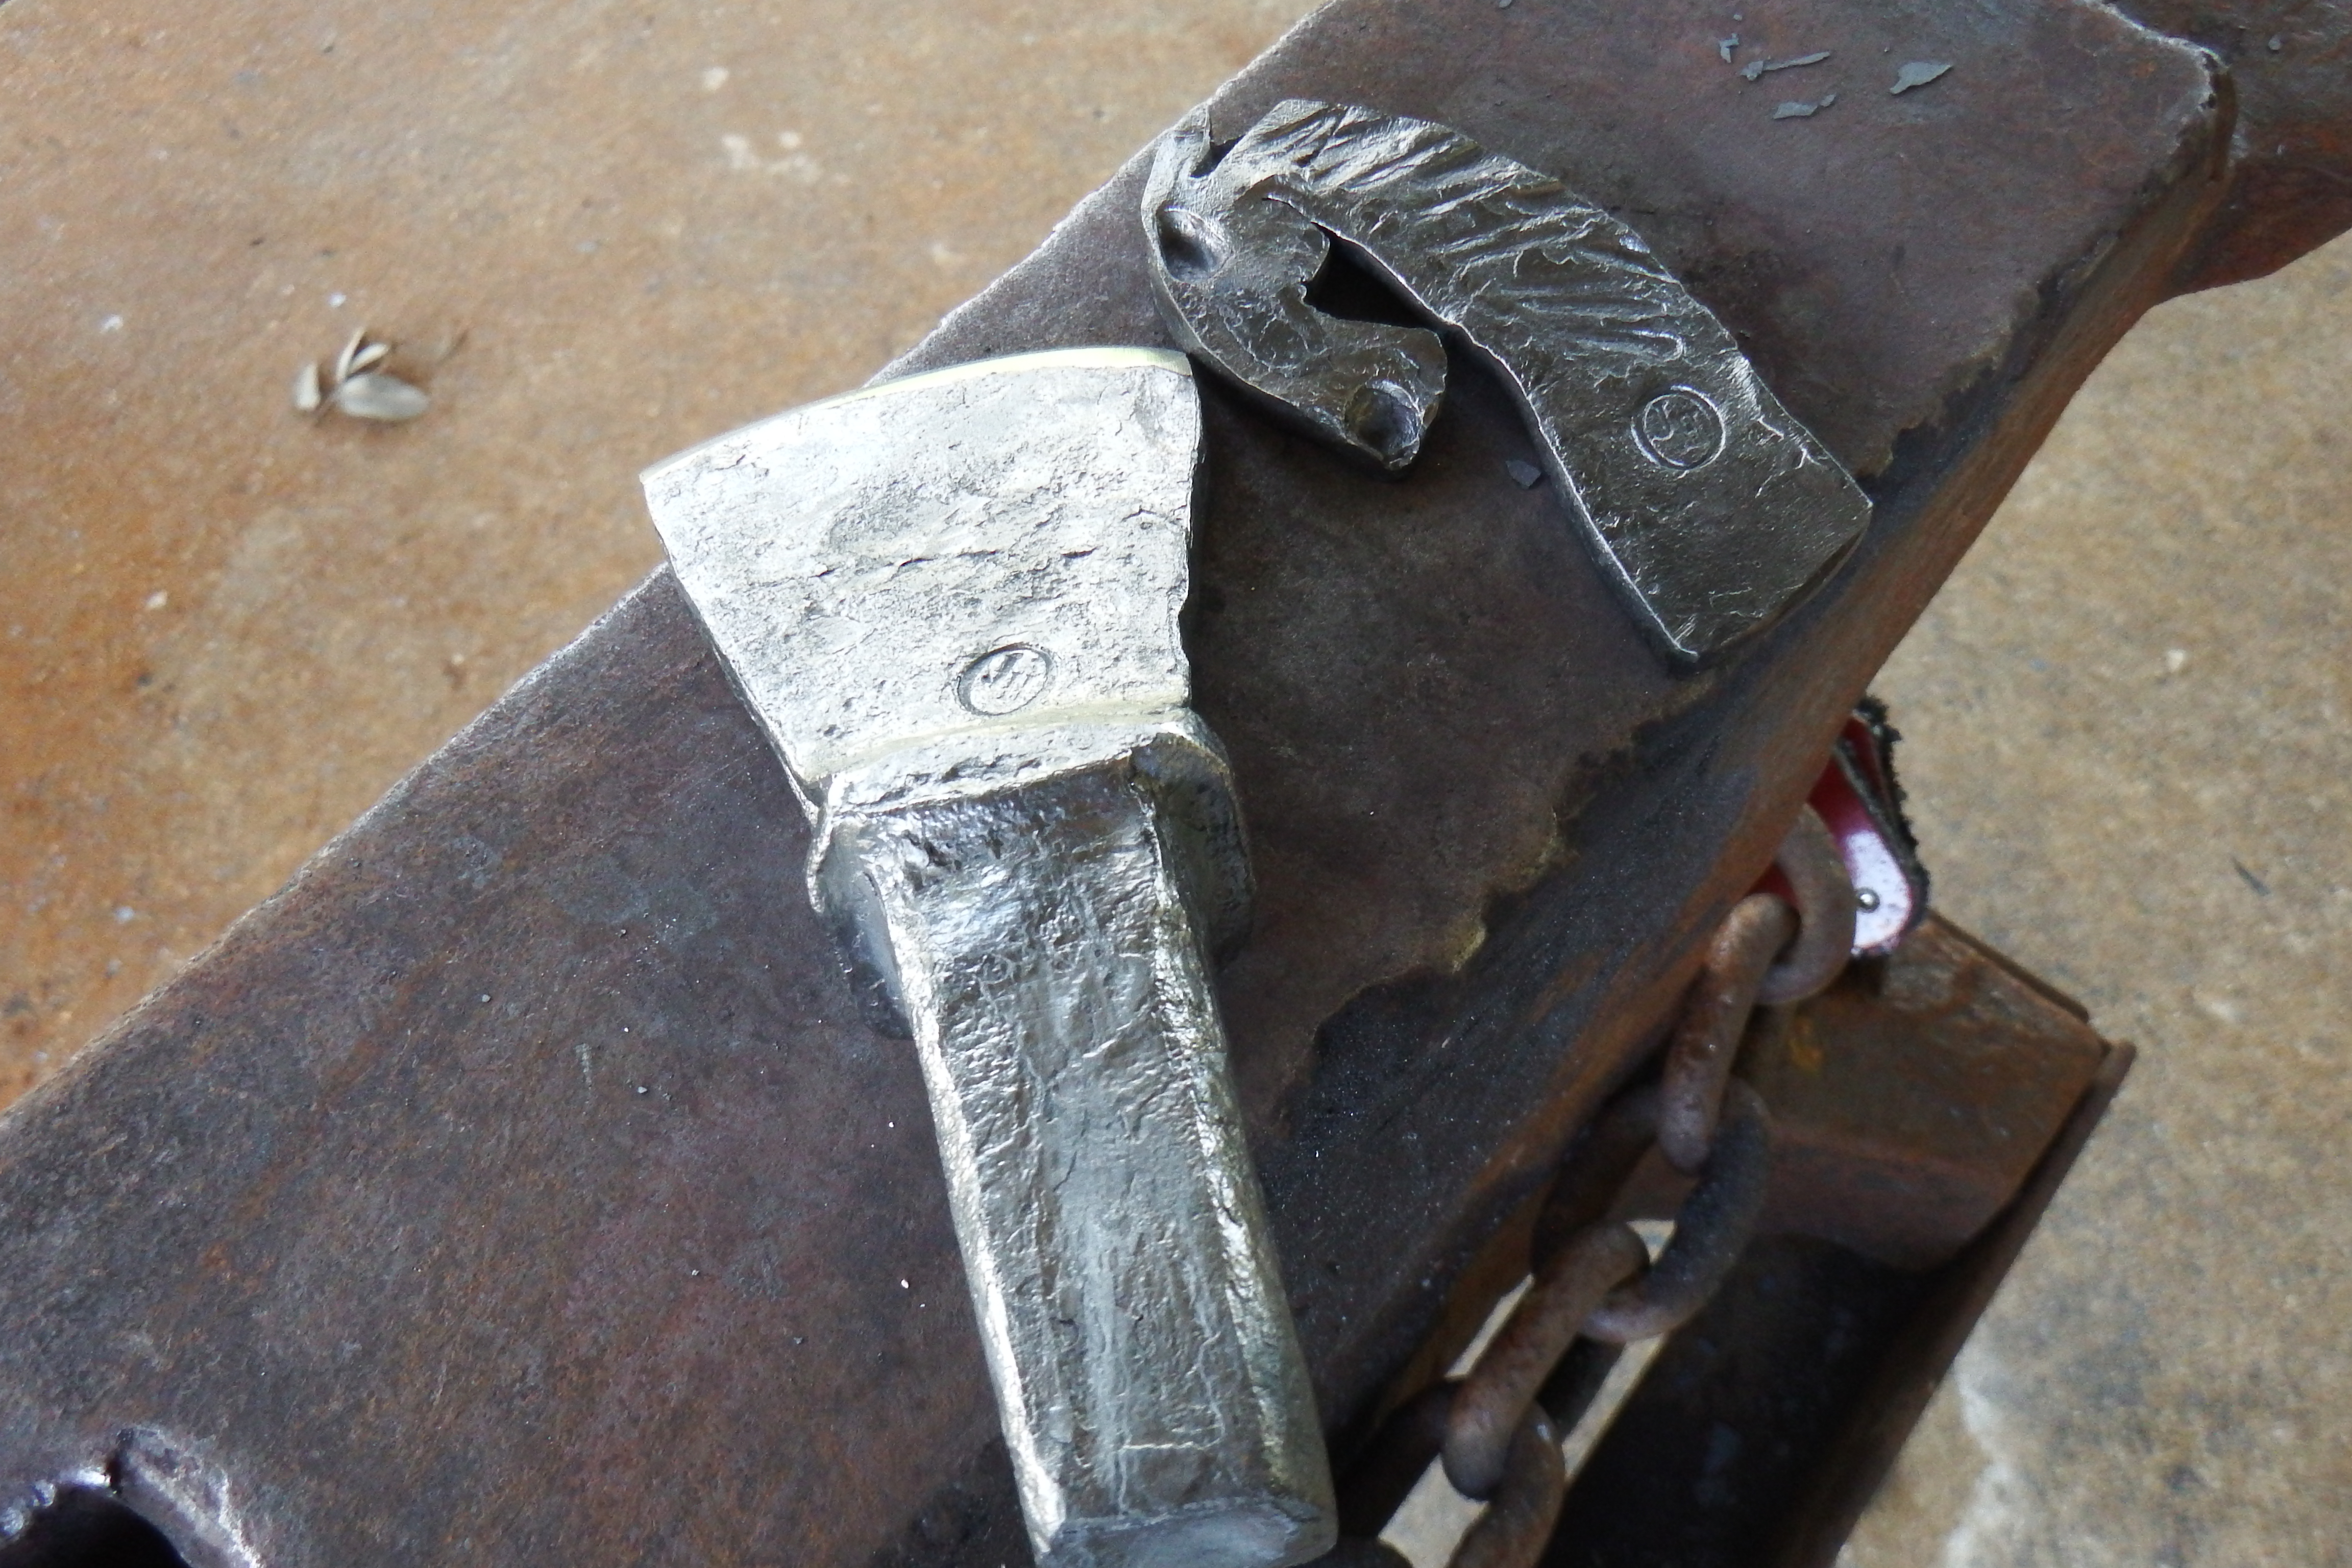
I didn't have the proper tools to forge a horse head.
So I forged a horse head.
After building up a modicum of confidence, it was time to get serious with a sucker rod knuckle. Holy crap, I need a power hammer.
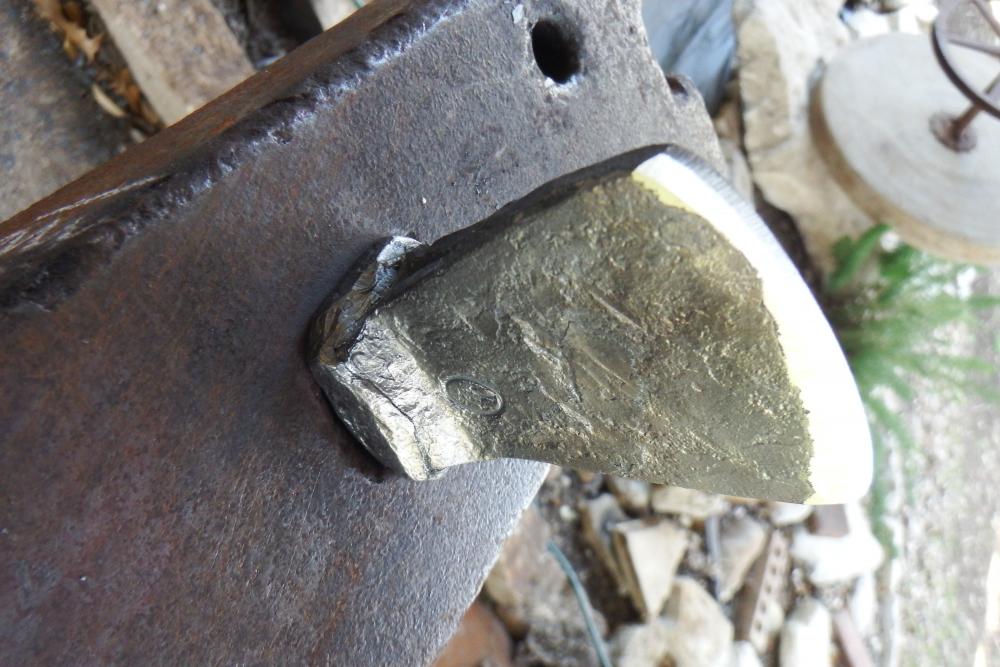
Day 2 was in the books.
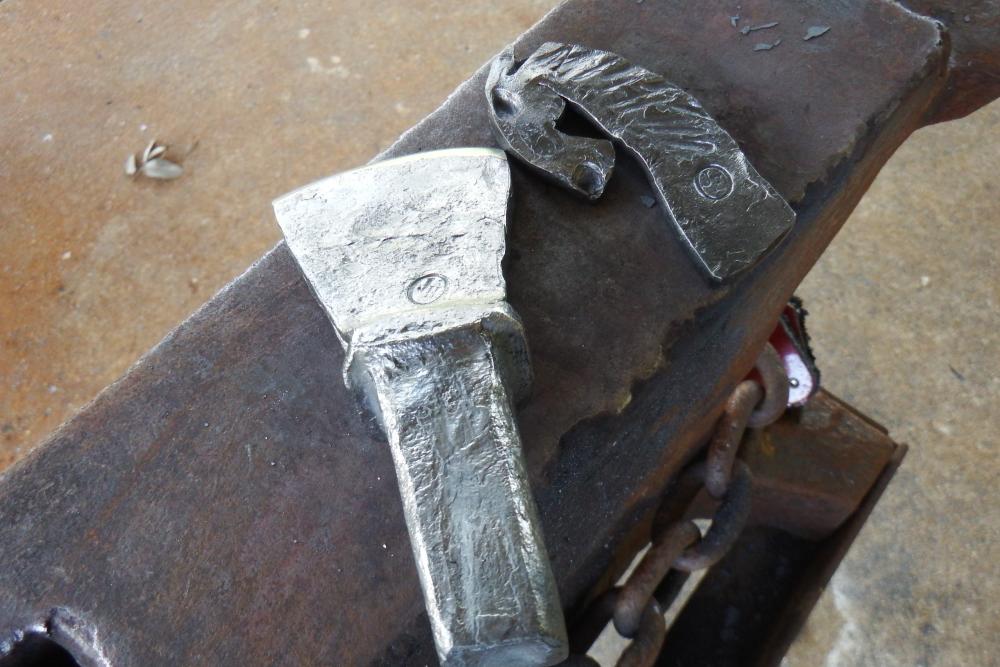
The horse head was supposed to be a bottle opener too, but the punch was a disaster. Never got to the drift. The slot punch was a fail, so I forged a round punch which I think will work better.
Day 3. Forged a hand fuller and chisel out of a crowbar. No pictures as they are soaking in vinegar at the moment.
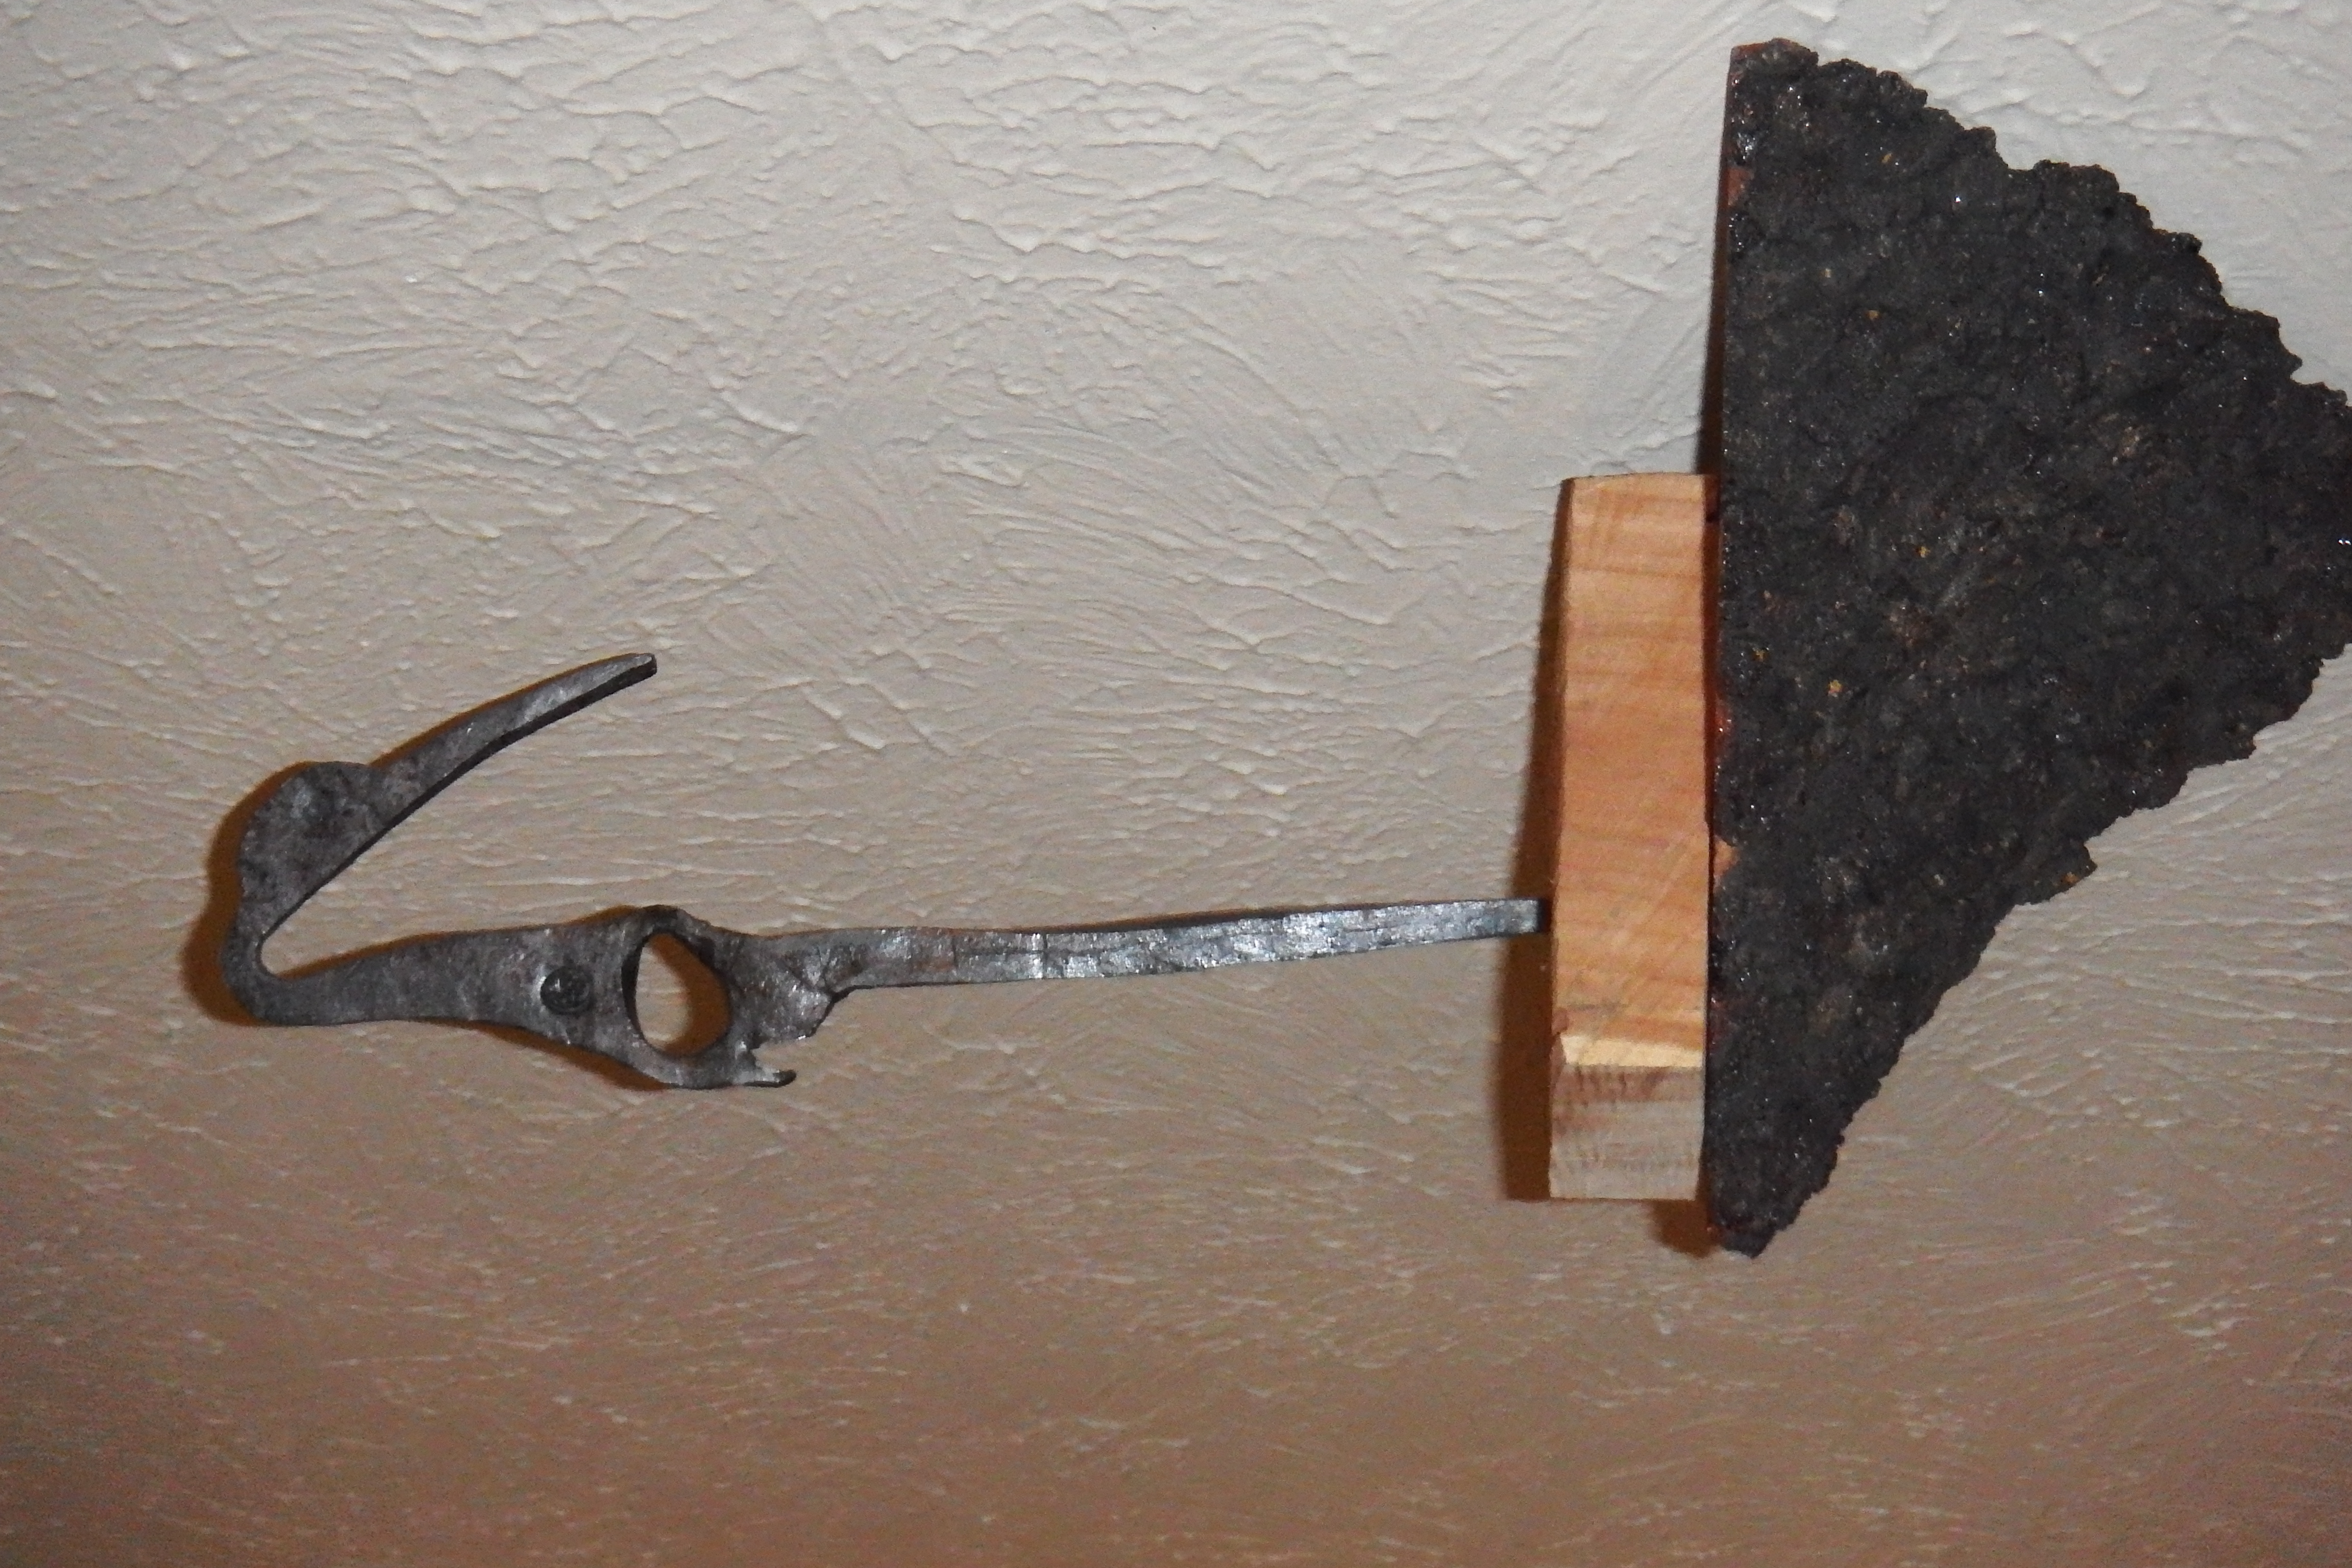
The round punch does work better, but my technique must be lacking. I screwed up another bottle opener and then decided to go with the crane. I've seen them done and Alec Steele has a nice how-to on youtube, so I went for it. The proportions are all wrong and the drifted hole got distorted along with various other little failures, but it got made.
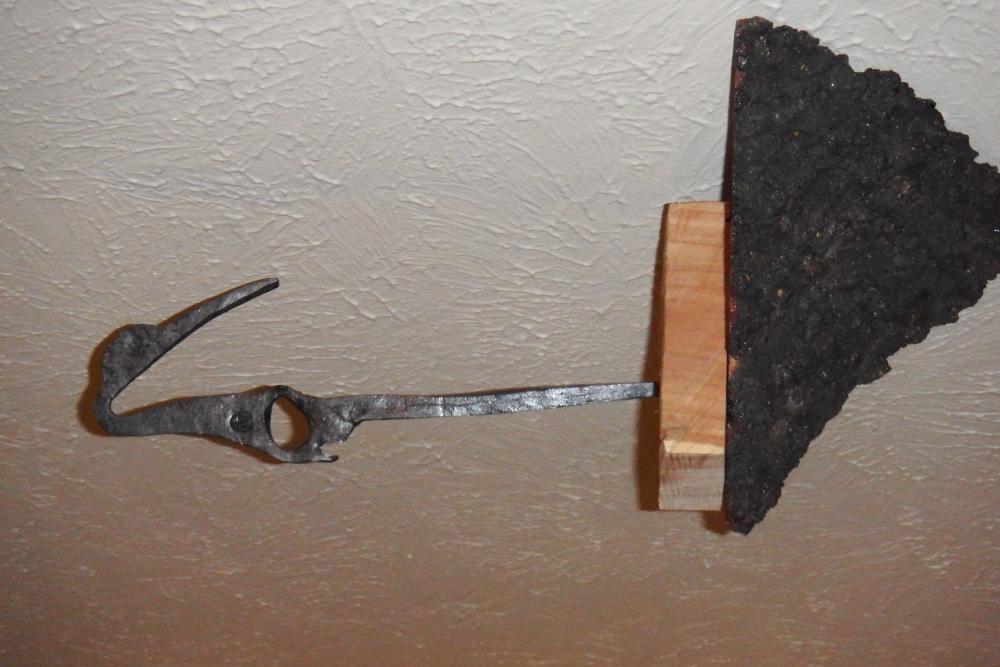
Lessons were learned.
-
On 2/22/2016 at 1:09 PM, Buzzkill said:
Twodogzz,
I hope you'll post WIP pics of your ribbon burner project. During the cold months I've been working on designs for my next propane forge venture and I'm waffling between a blown burner and a ribbon burner setup. Ultimately I plan to use a thermocouple and PID/solenoid setup to provide accurate temperature control in the forge, but I am curious as to how far either of those can be turned down and still function properly. Of course now that the weather is warming up again that build may be put on hold for a while since I'd rather spend my time hitting the hot steel than building a new way to heat it up. Anyway, I'd love to see the pics of your ribbon burner project in progress.
I'm in no hurry to build the ribbon burner forge. I've got an old coal forge I need to restore first. Next gas forge will be a ribbon burner for sure, though. However long this one lasts may change the schedule, though. When I do, I'll do a build thread. I know nothing of thermocouples and such, but others here should be able to comment.
On 2/22/2016 at 2:31 PM, Forging Carver said:That's a nice opener! I'm not sure if that is your first, but is pretty darn good if it was. That is good even if it weren't your first!
Thanks. It is actually my first bottle opener. I've been smithing for a few years on a very occasional schedule at other people's forges. This forge is my first for smithing at home. The only technique new to me on the opener was the punch and drift. You'll see some epic fail in my latest attempt to punch and drift. Pictures to come...
On 2/22/2016 at 2:46 PM, Forging Carver said:Also, do you have hinges on both sides or just one? I couldn't tell on waynes instructions, but maybe you understood better than me. Also, did you weld or screw them on? Thanks
Hinges are on both sides. The entire top can separate from the bottom. Just knock the pins out of the hinges and Bob's yer uncle. This way you can raise the entire top by setting it on fire brick for large pieces. I reckon the only time I'll probably ever use that is if I uncoil a coil spring, or something like that.
The hinges are standard door hinges from Home Depot with screw holes. I suppose they could be screwed on, no problem. I needed a welder to weld the burner pipe on, so he did the welding on the hinges as well. He did plug welds in the existing screw holes. Works great.
-
On 2/15/2016 at 1:15 AM, Mikey98118 said:
Twodogzz,
I really enjoyed your forge build video on YouTube, and hope the outcome doesn't discourage you. I won't add anymore advice than you've already recieved about the forge, other than to encourage you to keep tweaking. If you want to use so much less gas that your tanks don't freeze up, build a different burner. The Frosty "T" burner is as easy a build as you'll ever run across, and isn't a gas hog.
On 2/16/2016 at 9:33 AM, Forging Carver said:What I would do is use this one, make some cash with it, and then make another one with the cash you made if your not happy with it. That is what I plan to do with my little freon forge I am building. You learn from the first build and get better on the next.
I'm not discouraged with the outcome. I've done very few tweaks and it's running like a scalded dog now. I haven't yet attempted welding temps for this one but for general forging I think I have it a lot better dialed in now and it didn't really take as much adjustment as I expected.
Once it's up and running the heat evens out a lot more than before, plus, shielding it from wind made a much larger difference than I expected.
I didn't go in with high expectations for welding, but we'll see. I think I can get there.
I have a coal forge I'm restoring for the next one and then doing a ribbon burner. I think I'll keep this one as a back-up, or secondary unit. Or I may sell it after the ribbon burner forge is done.
Regardless, I'm way ahead of where I was the first day I fired it up and a lot of it is thanks to info you guys posted in this thread. It mostly just needed some tweaking.
The first thing has been forged from it (actually the first 3 things, because I forged a punch and drift to be able to forge the bottle opener):

-
2 minutes ago, jcornell said:
I consistently found when I was using one 20# tank that after about an hour of forging, my burner started getting less hot. The problem was mostly solved when I bought a manifold and ganged two 20# tanks together. Sometimes there would be visible frost on the tanks, some times not.
40# and 100# tanks are dandy, but hard to schlep in the back of my sedan.
I'm certain that one of those solutions is in my immediate future.
-
-
Thanks, Thomas. It didn't "freeze up" with frost on it like I have seen discussed here. It was about 50 degrees yesterday and the tank didn't feel much colder than that. We'll see, when I fire it up next time.
-
I'm at Earnhardt's level... at something. I'll let you know when I figure out what it is.
I think I did pretty good. It seems to be heating up metal, and I learned some stuff.
So here's a simple enough question from a noob: In general, does performance suffer as the fuel tank empties? It feels like it's at about half-full. Maybe a bit less. Something caused the sputtering and ignition in the mixing chamber about an hour in yesterday. Need to figure that out.
Today is a cold day with plumbers ripping up both bathrooms, so all I get to do today is sit and speculate.
-
5 hours ago, Frosty said:
You are making WAY too many changes at once. Change one thing at a time and note what happens. Yes NOTES, take notes! Another mistake is trying to build a device from two sets of plans. Pick ONE, either Wayne's or Dave's. For example, a silly exaggerated example to make the point sure but the point is the same. Would you rebuild an engine using both Chevy and Ford manuals?
The openings in your forge are WAY too large. Even if the burners are running rich the high velocity gasses flowing past the openings will induce outside air into the chamber. Close off the openings as much as practical to maintain a positive pressure in the chamber.
Forget what I said about re-orienting your burner in the chamber. Once closed up it'll get plenty hot enough, make burner orientation experiments in a later forge. This one only needs a little tuning not a rebuild.
I do have one point on which I differ with Wayne. My experience has been that there are too many variables to be able to say what PSI range someone's forge should run under. Barometric pressure is a biggy whether elevation, weather pattern, wind pattern, etc. driven it's probably one of the biggest variables out there. Believe it or not my ears pop if I drive the 1/2 mile across Lucille cr. valley north of me or over the ridge 1/4 mile south of me and it takes several inches of mercury difference to make my ears pop. Humidity is another major factor though not nearly as great.
Then there are individual burner build variations that affect it's operation. My recommendation is to use the gauge to note what pressure makes your burner perform in what way. NOTES!
Notes are really important when a guy is learning how to work a new machine and yes these burners are machines, engines in fact. Once you've built a few, learned to tune them and understand what's actually making them work keeping notes isn't so important but for now. Take notes.
Frosty The Lucky.
I know it sounds like a lot of changes, but it really wasn't. All the initial tweaks took about 10 minutes. 5 minutes after that I was beating hot metal. That's what you said in your first response, no? "A few tweaks"?
I haven't and don't plan to rebuild this one. I've tweaked it. I might need to tweak it a little more, I'm mostly happy with it save for getting the scale issue figured out. The openings are a size I desire and can be closed down easily with $2 worth of fire brick. I did it today. I'm not building forges to "experiment". I'm building forges to forge stuff. For better or worse, what it is, is what it will be, as will the next.
I get your point about not using different designs, but search around and show me any two homebrew forges that are identical. I see a lot of really fine work from people using the sketchiest of equipment. They're one step ahead of me: They've done really fine work.
And remember... Every NASCAR race Dale Earnhardt ever won in a Chevrolet was riding a Ford 9" rear end.
Cheers
-
Thanks, Wayne. The back door was blocked yesterday and was partially open today, so that makes sense. I'll close it back up tomorrow and see.
-
Did some tweaks today, repositioning the burner tube to skew slightly, filed out a bit more of the opening for the flare (it was a little bit narrower than I think it should be). Added fire brick to serve as doors, cut about a 1/4" thick piece from fire brick to serve as a bit of a riser for stock. It performed well in the 7-10 psi range. Heat is spreading out more now. Much more dragon breath than yesterday.
The downside is scale through the roof. Lots of adjustments on the choke and never did get it dialed in.
About an hour in it started sputtering and whistling, so I shut it down. The tank wasn't frozen up and is still about half full. Could the flare be getting hot enough to ignite the mixture in the burner tube?
-
6 hours ago, WayneCoeArtistBlacksmith.c said:
You may want to go back and look at the pictures of my forge on the Forge Supplies page at www.WayneCoeArtistBlacksmith.com. The burner is angled across the top of the forge so that the flame enters at the top where the refractory curves around. This sets the flame up to swirl around in the forge.
As it is is ok and I would not go changing anything now. Plan making corrections as needed.
At 350 cu in you should be able to get to forge welding temps, depending on your elevation above sea level. That is high gas pressure, you should be able to reach forge welding temps at about 10 PSI and general forging at about 5.
If you had made the joint between the two portions smoother by screeding across from front to back while the casting was still soft you would not have the gap issue. As your flame is aimed at that joint you may get some flame exiting there but it is no more safety or efficiency issue than the flame coming out the doors.
Over all a pretty good build.
Thank you, Wayne. I debated with myself whether to orient the burner as you do on the forge pictured on your site. Most of this build was from your instructions, however I also took design cues from David Hammer's Super C design, and perhaps wrongly, I chose to mount it like he does for that design. If you look at his Super C, the burner orientation is more or less identical to mine. I understand there could be differences I'm not aware of, though. I chose to do it this way based on that, and because of the simplicity of the fabrication. That was my thought process, anyway.
Won't be an issue with the next build which will be a ribbon burner.
As for the gap, I went back over it twice while the mortar was still soft, but apparently didn't do such a good job of it.
34 minutes ago, ThomasPowers said:Why do you need such a tall fire chamber? The items you show working don't require it and excess space is excess heat loss. I would definitely close off the upper section of the door to save on gas!
The items I show working are things I had handy to heat and beat in a test firing. I'll be using fire brick to close up the opening when it goes to work for real.
I appreciate everybody's input.
-
I'm not able to post a response. I messaged it to you.
-
I think I have enough adjusting room to skew the burner in the mount to get about 3/4 of the hot spot onto the floor. I may have to flare out the inside of the hole in the refractory a bit to get the clearance for the flare, though. If I'm understanding you right, in relation to the permanent position of the welded mount, the tube should be vertical or close to it, right?
Or wrong?
As it sits, the hole through the refractory does not give a lot of clearance. If by tweaking" you mean cutting, re-welding, grinding out refractory and re-packing in new refractory to get more of a vertical... hoo boy... that's some serious tweaking.
Thanks for the input.
-
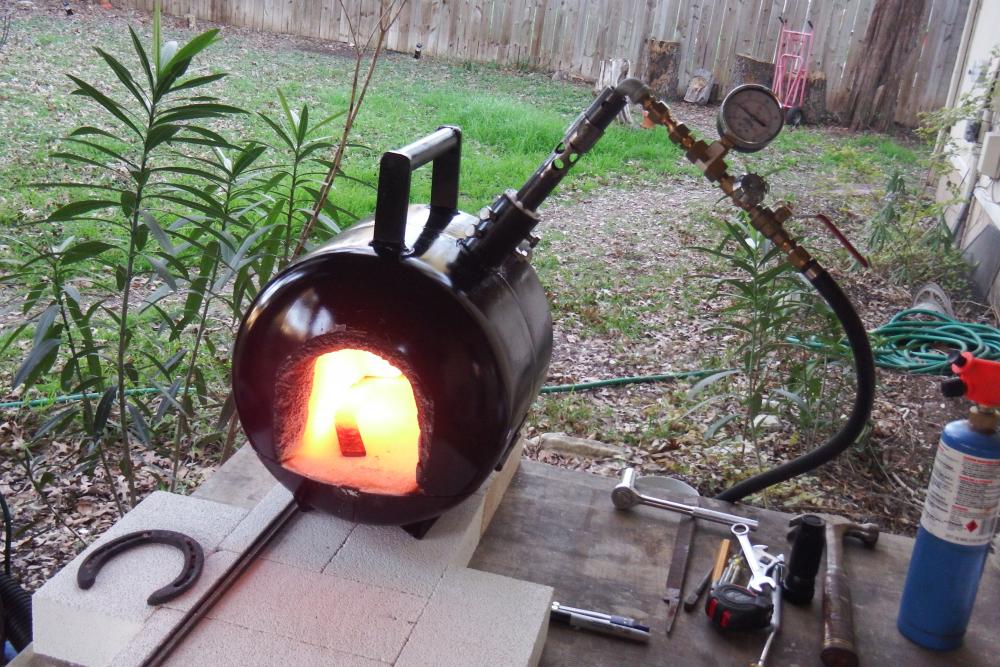
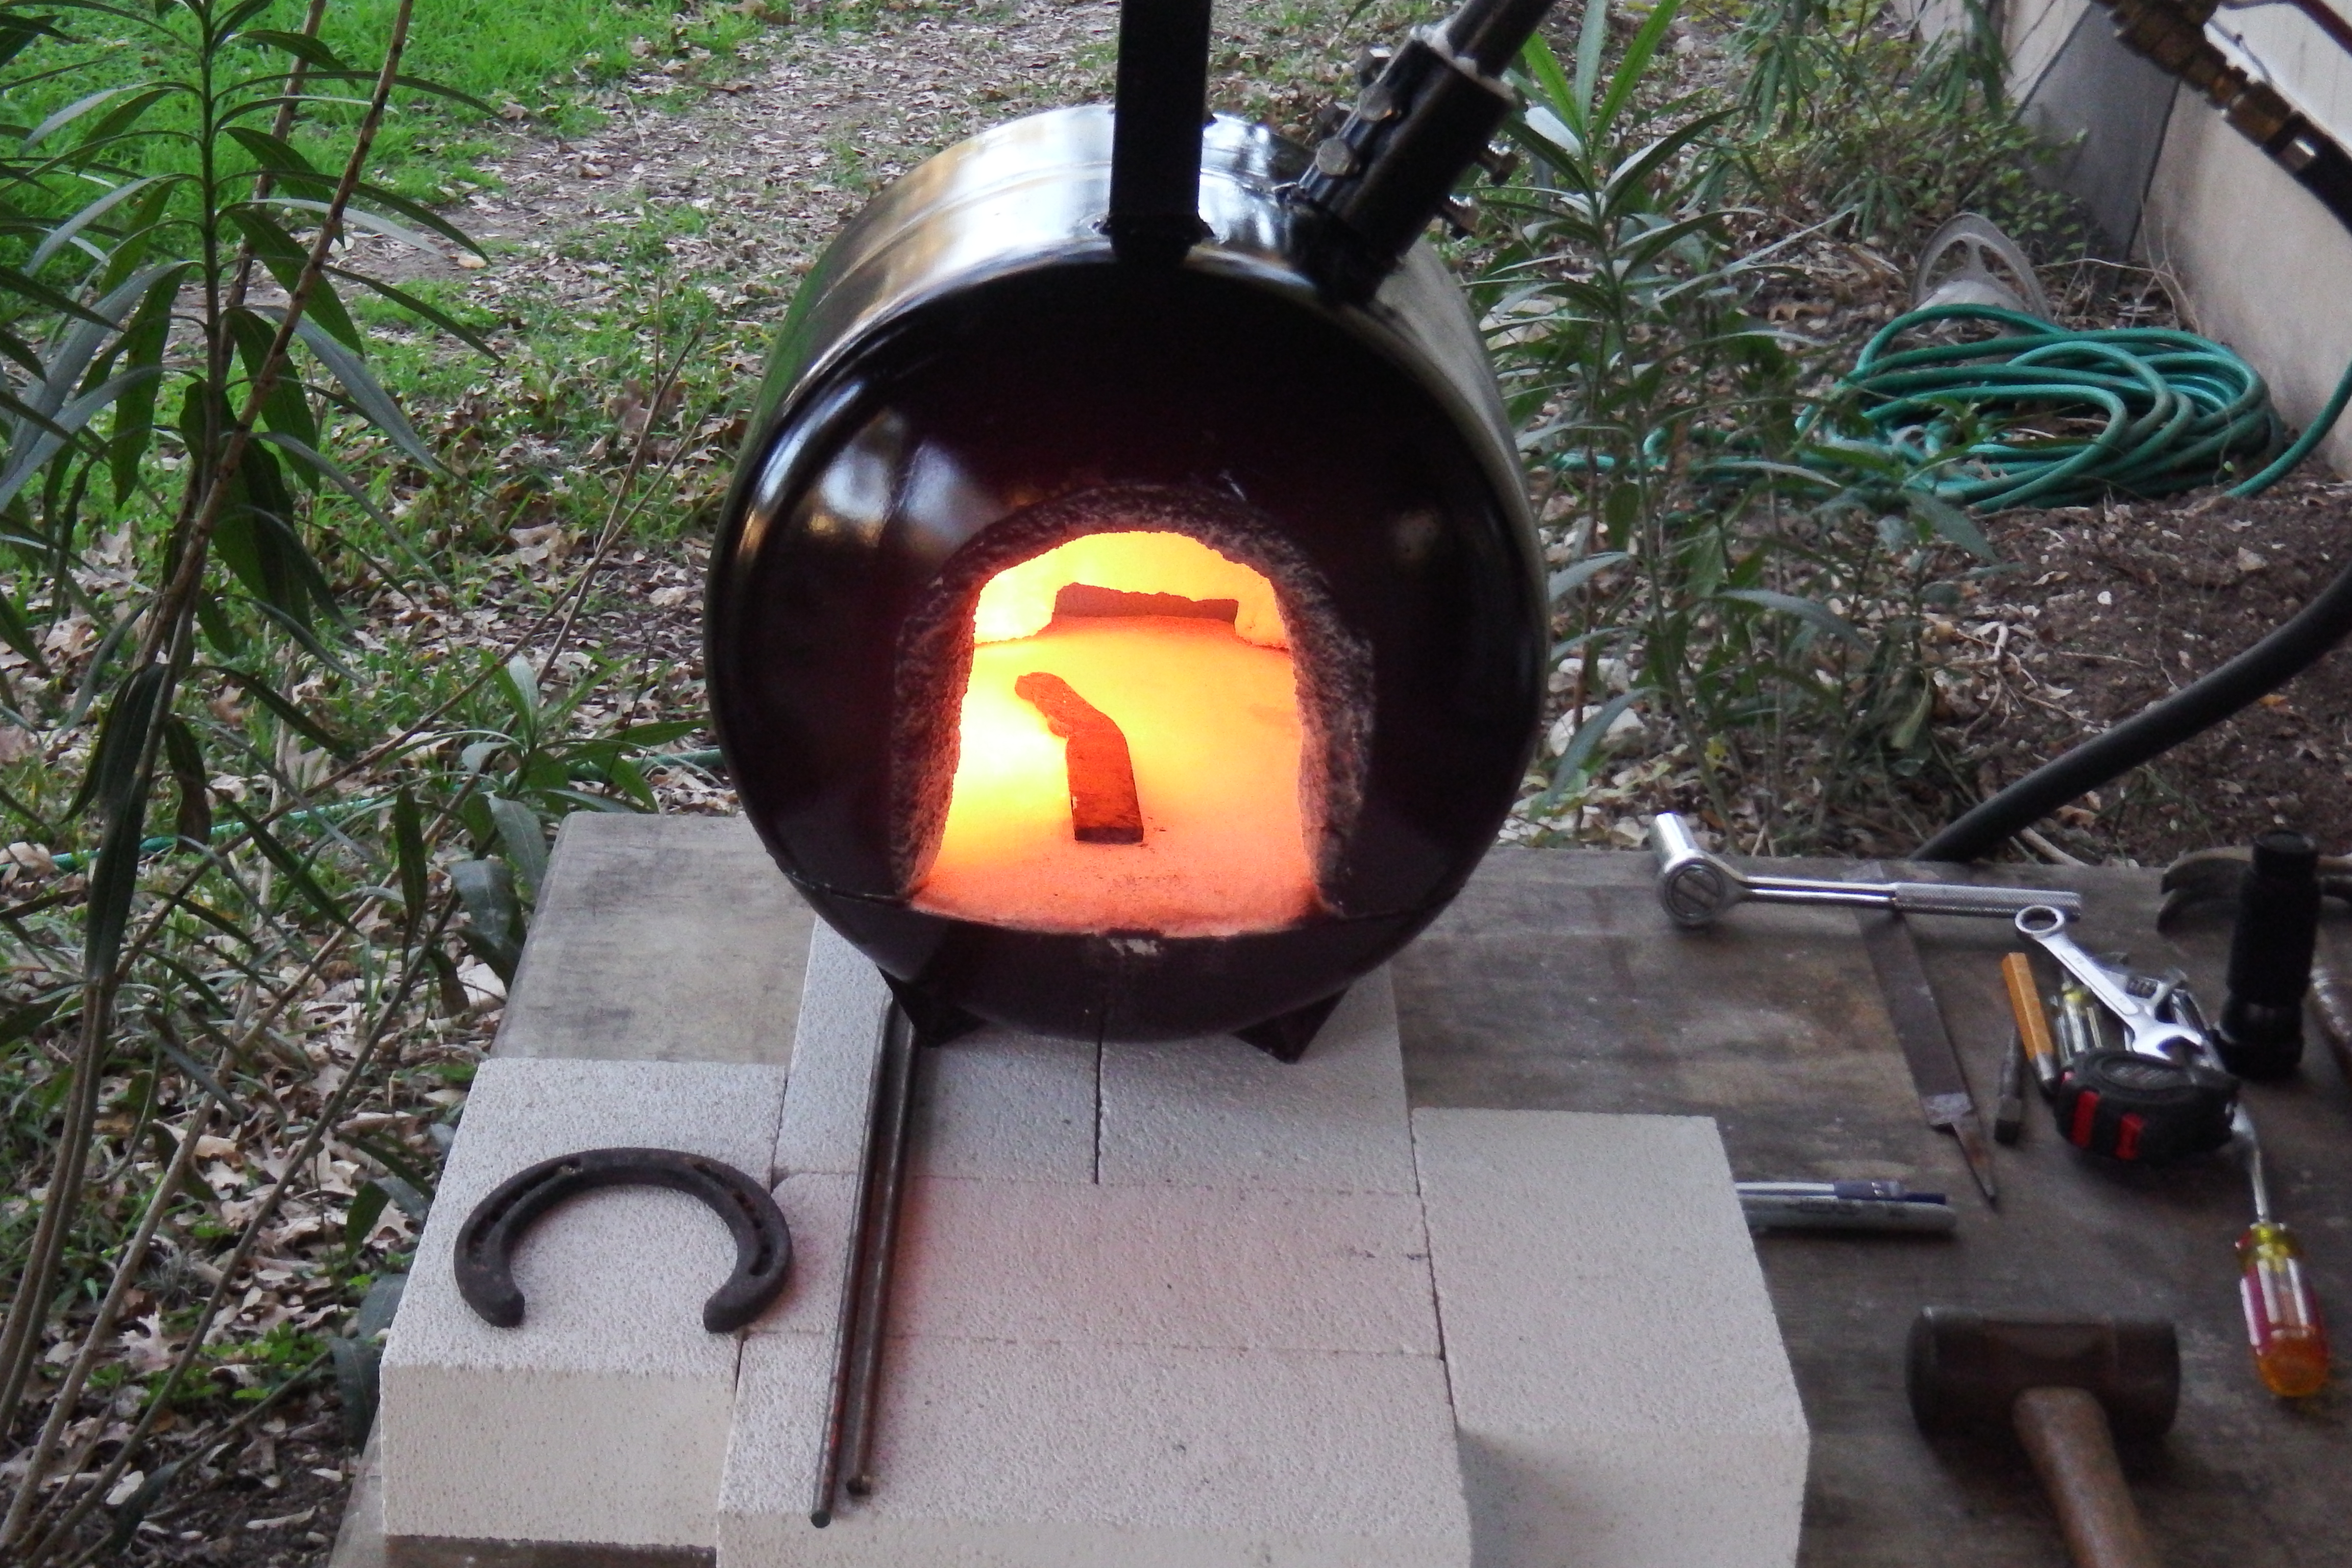
I'm pretty pleased with my first forge build.
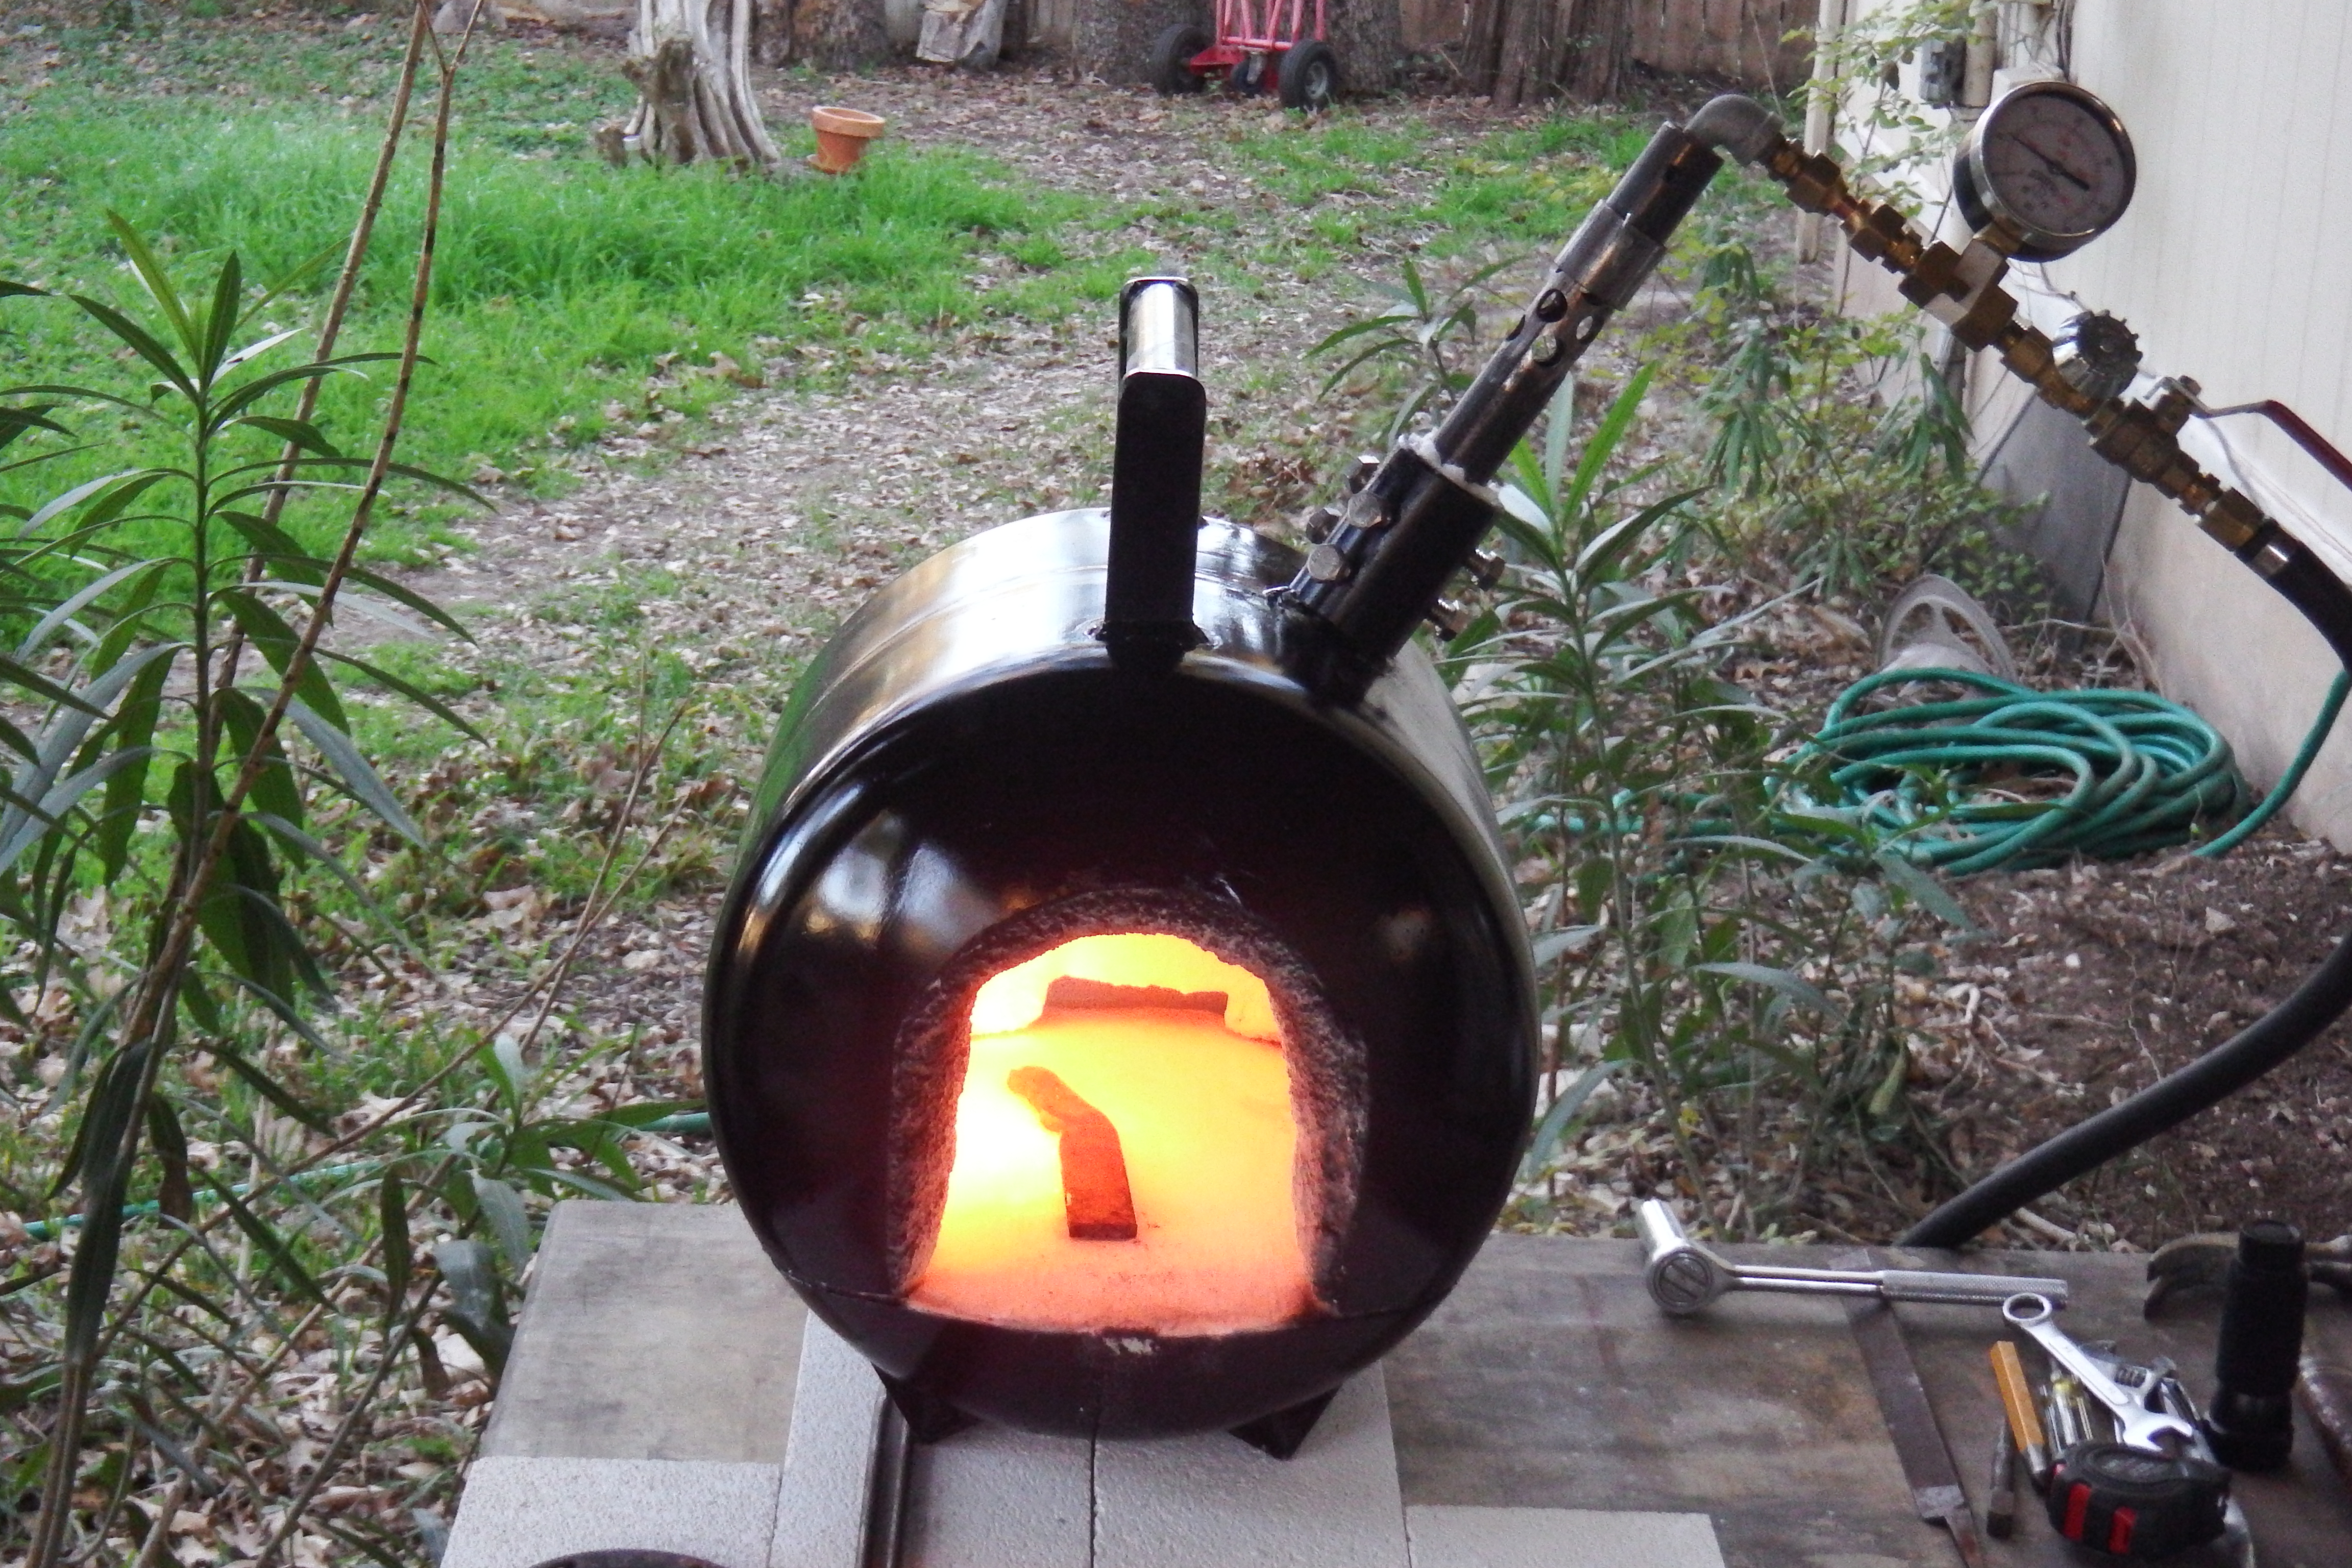
It's a 20# propane tank, Wayne Coe inspired design and materials (thanks, Wayne), David Hammer style burner from e-bay with my modifications. More detail on the design and materials below.
I would welcome any suggestions, comments, and solutions to the issues listed.
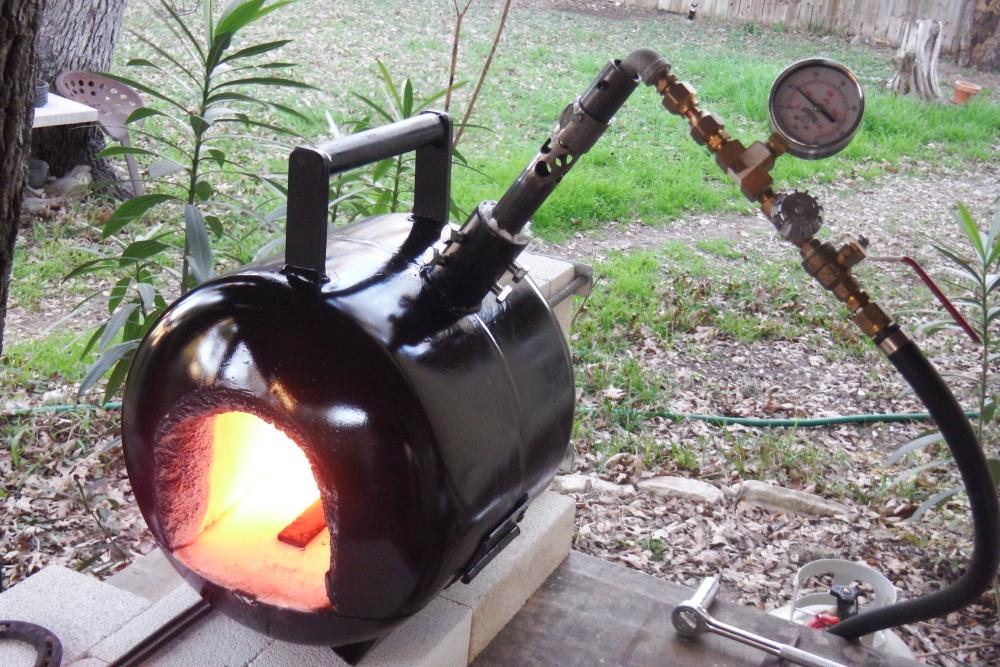
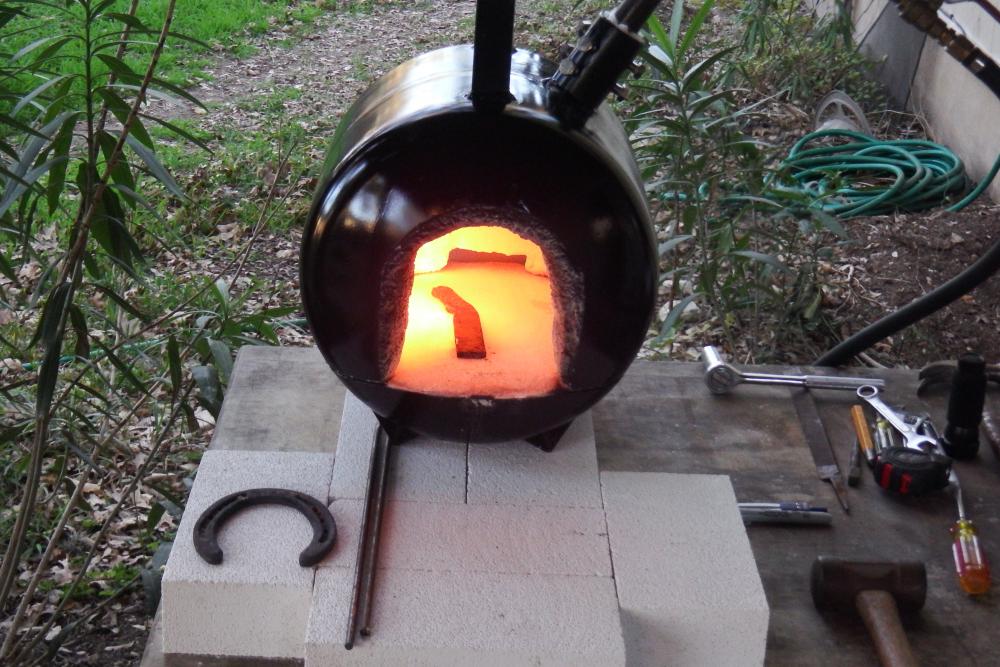
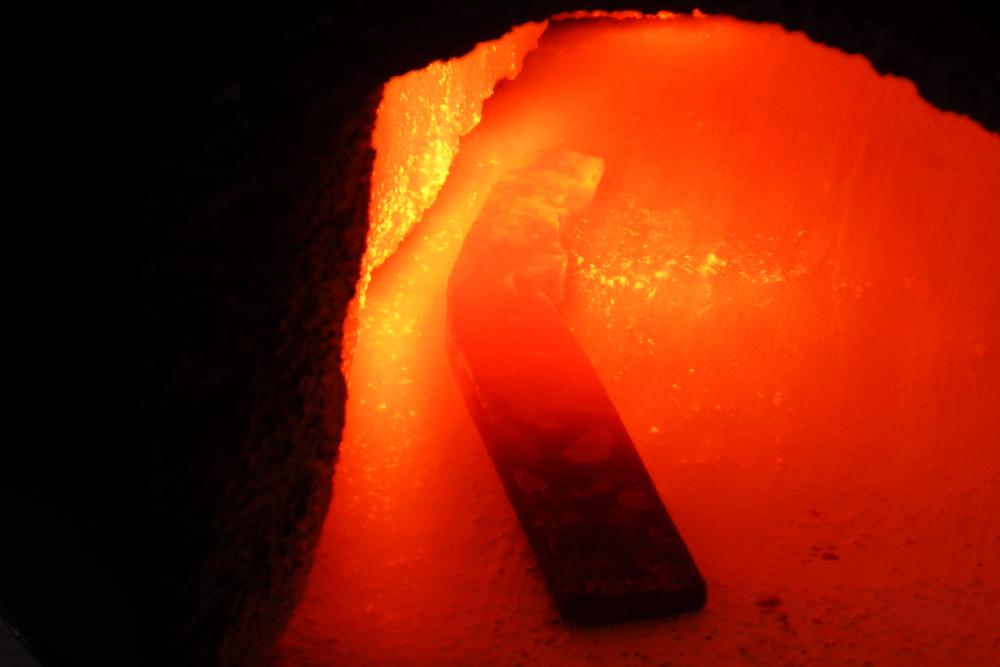
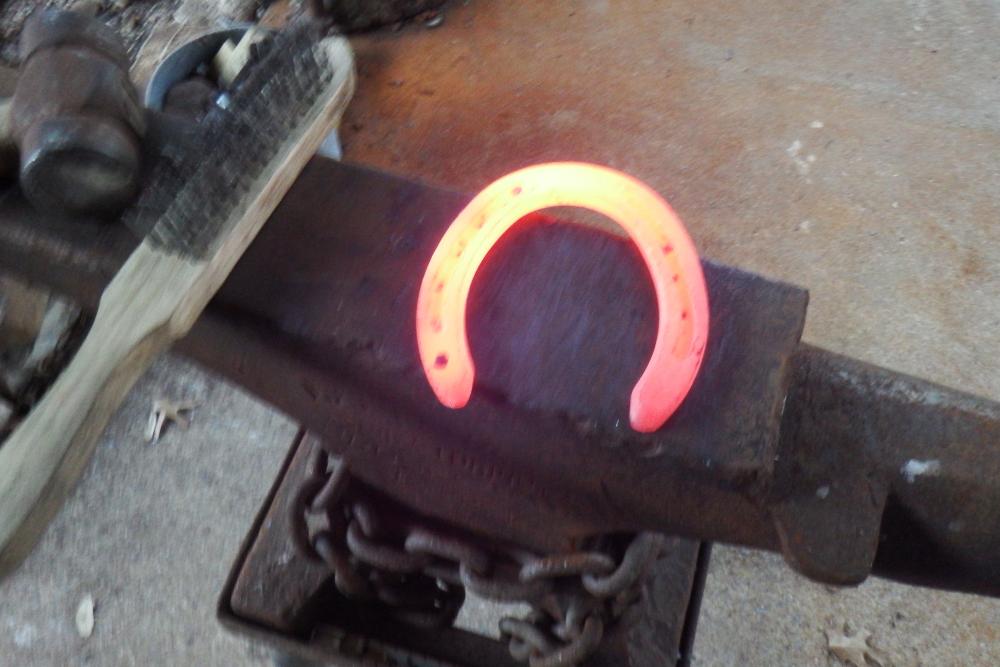
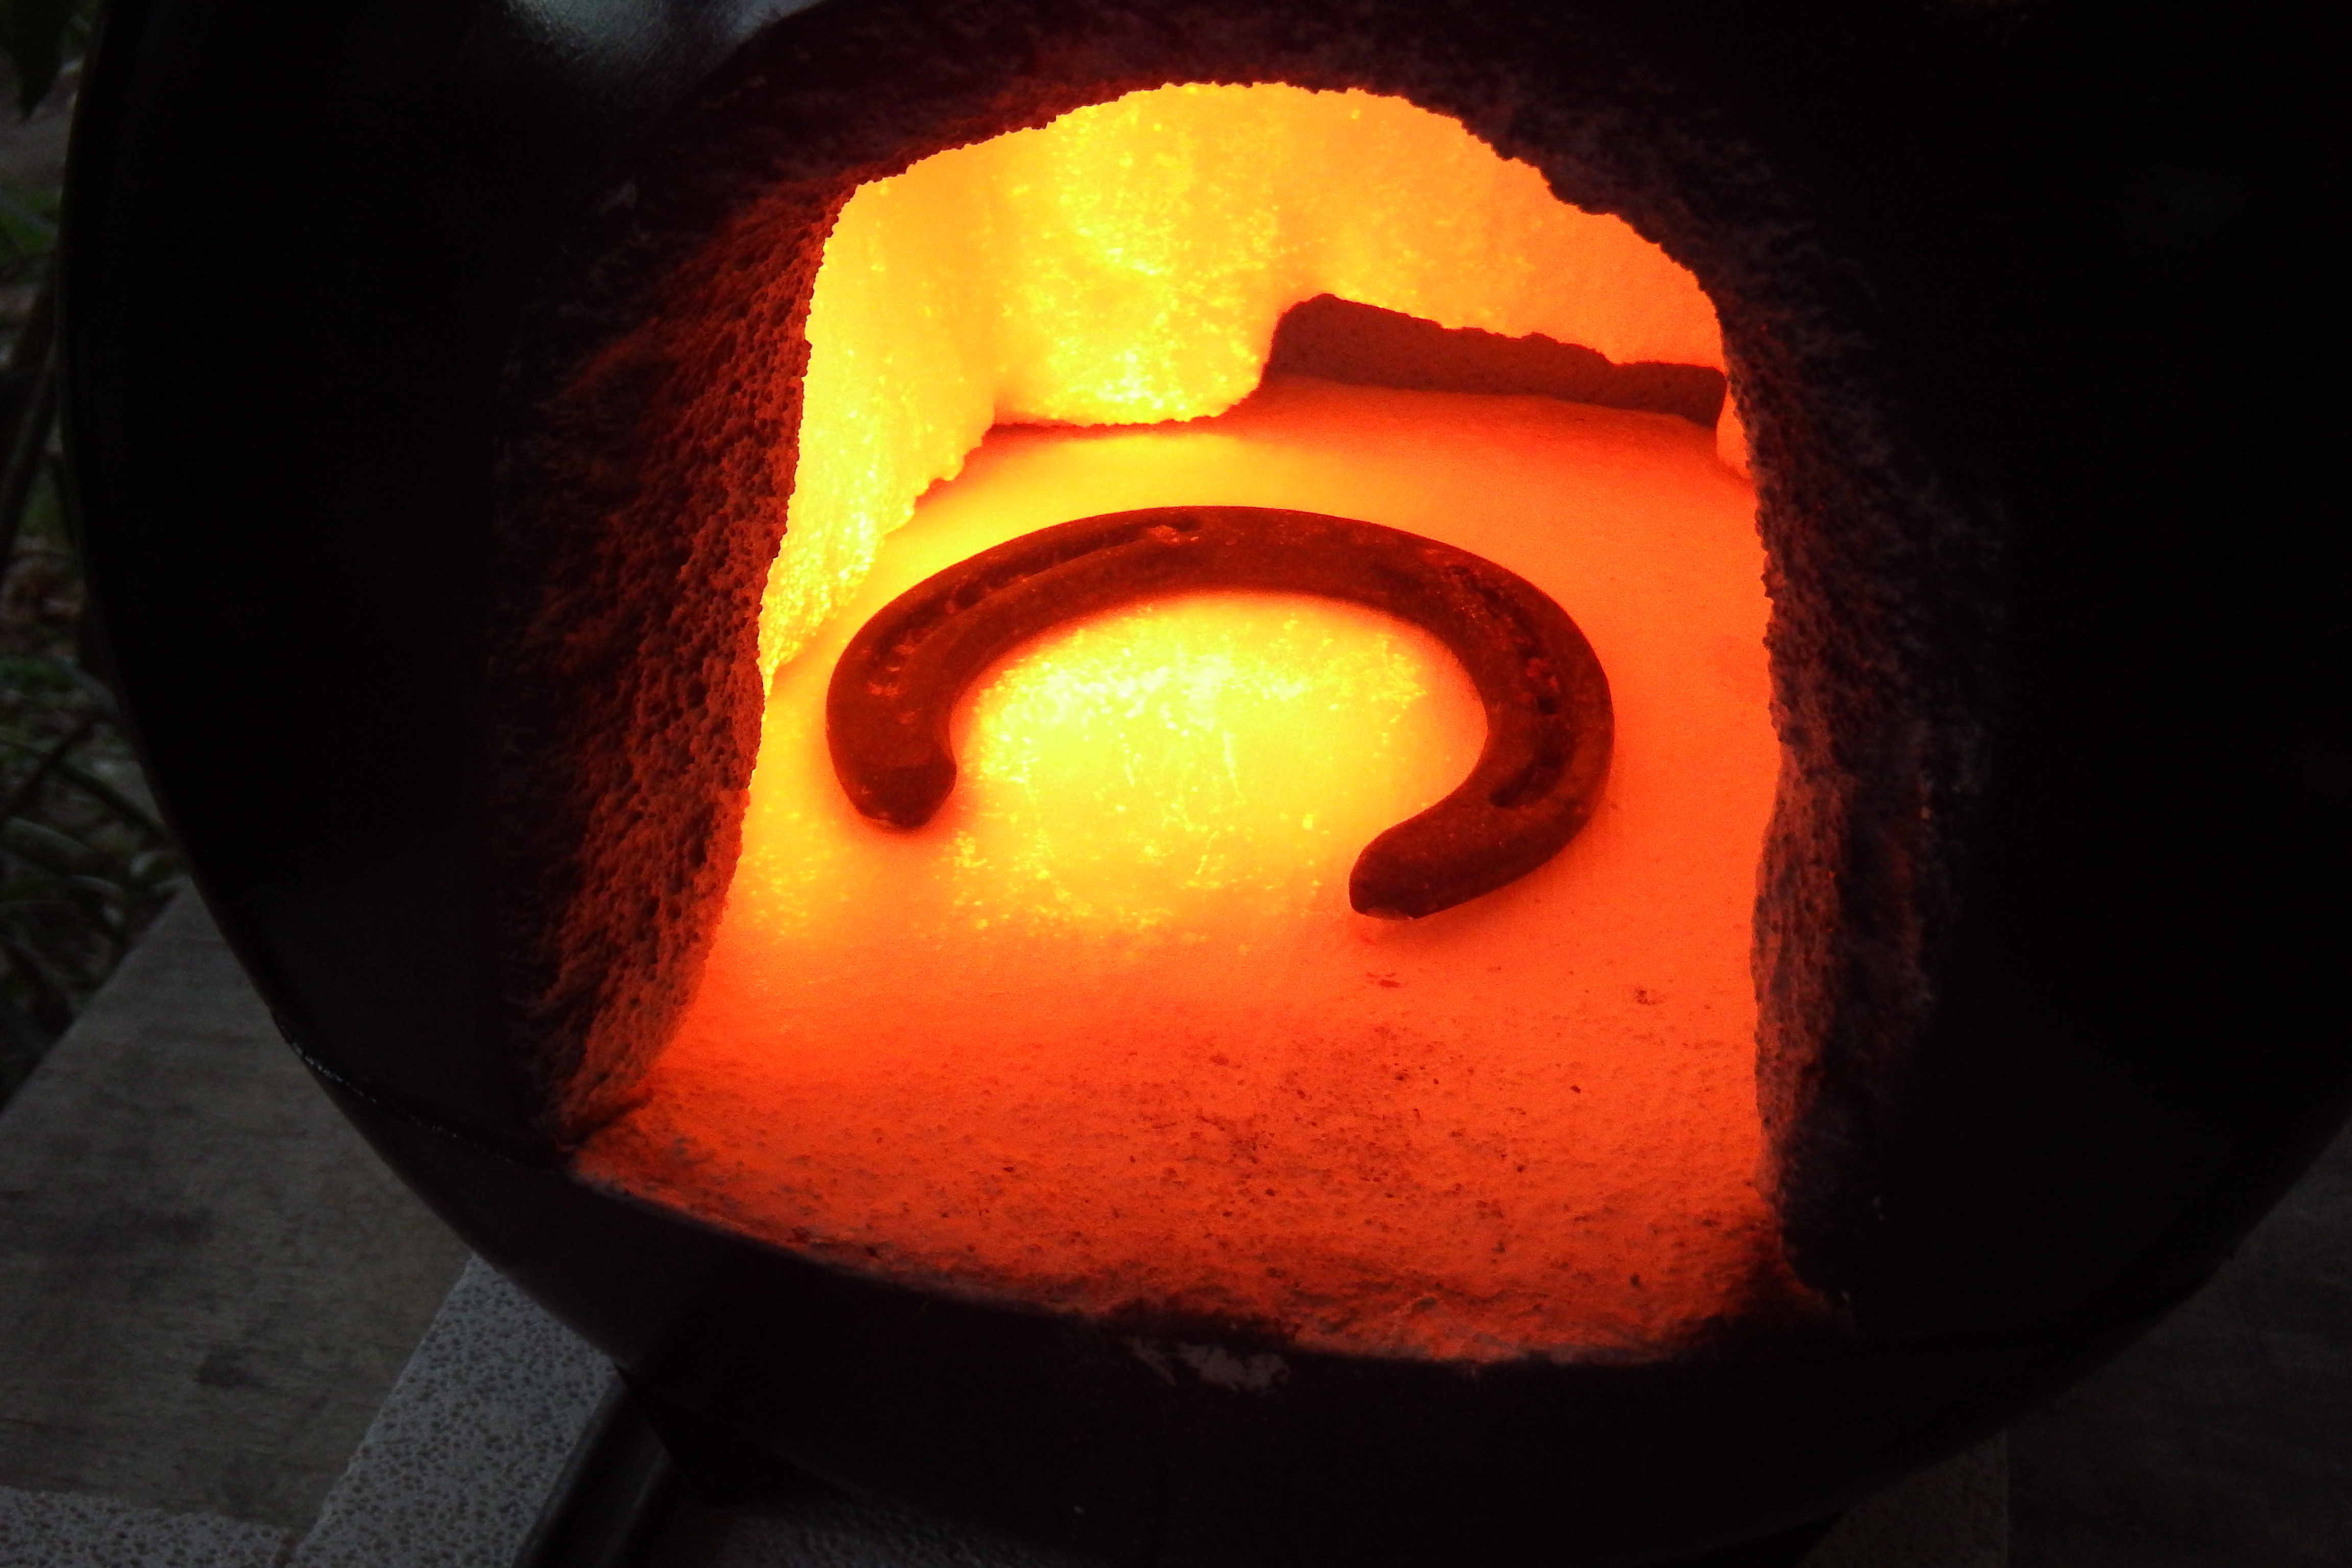
I haven't tried to get it up to forge welding temperature yet but it heated a piece of 1" x 1/4" flat bar up to a bright orange with a wet sheen. Not a lot of scale. It seems to be happiest in the 15-20 psi range which, correct me if I'm wrong, is a bit high for general forge work? Stable operation at 7 psi, but not enough heat at that setting to get up past dull orange. at 15 psi it took about 6 minutes to heat a cold horseshoe to orange.
Here's some random video before I get to details and issues:
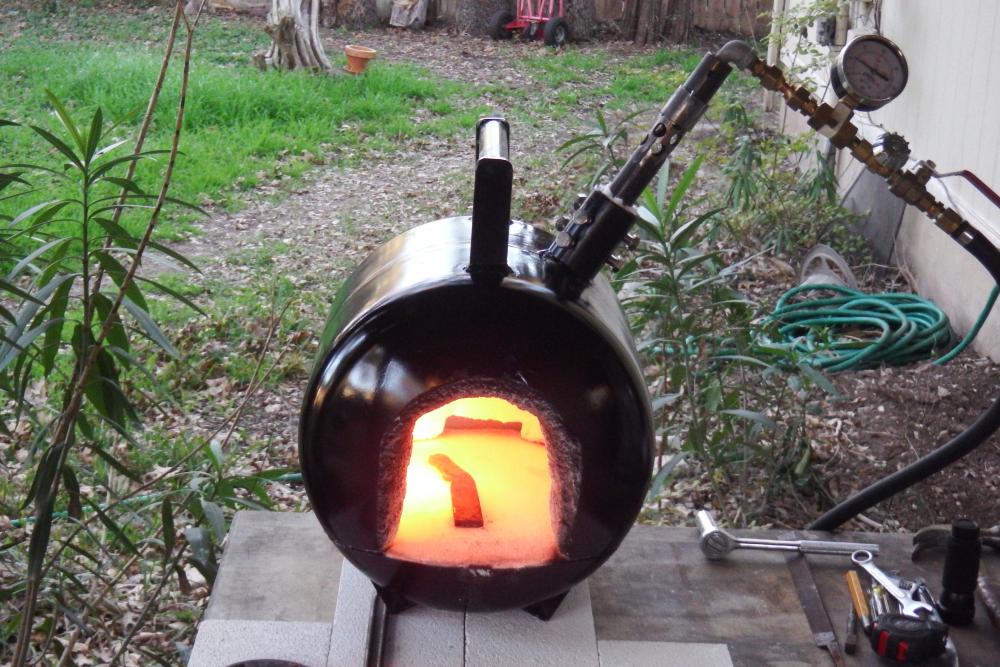
There are a couple of issues that could use improvement if possible to correct at this stage.
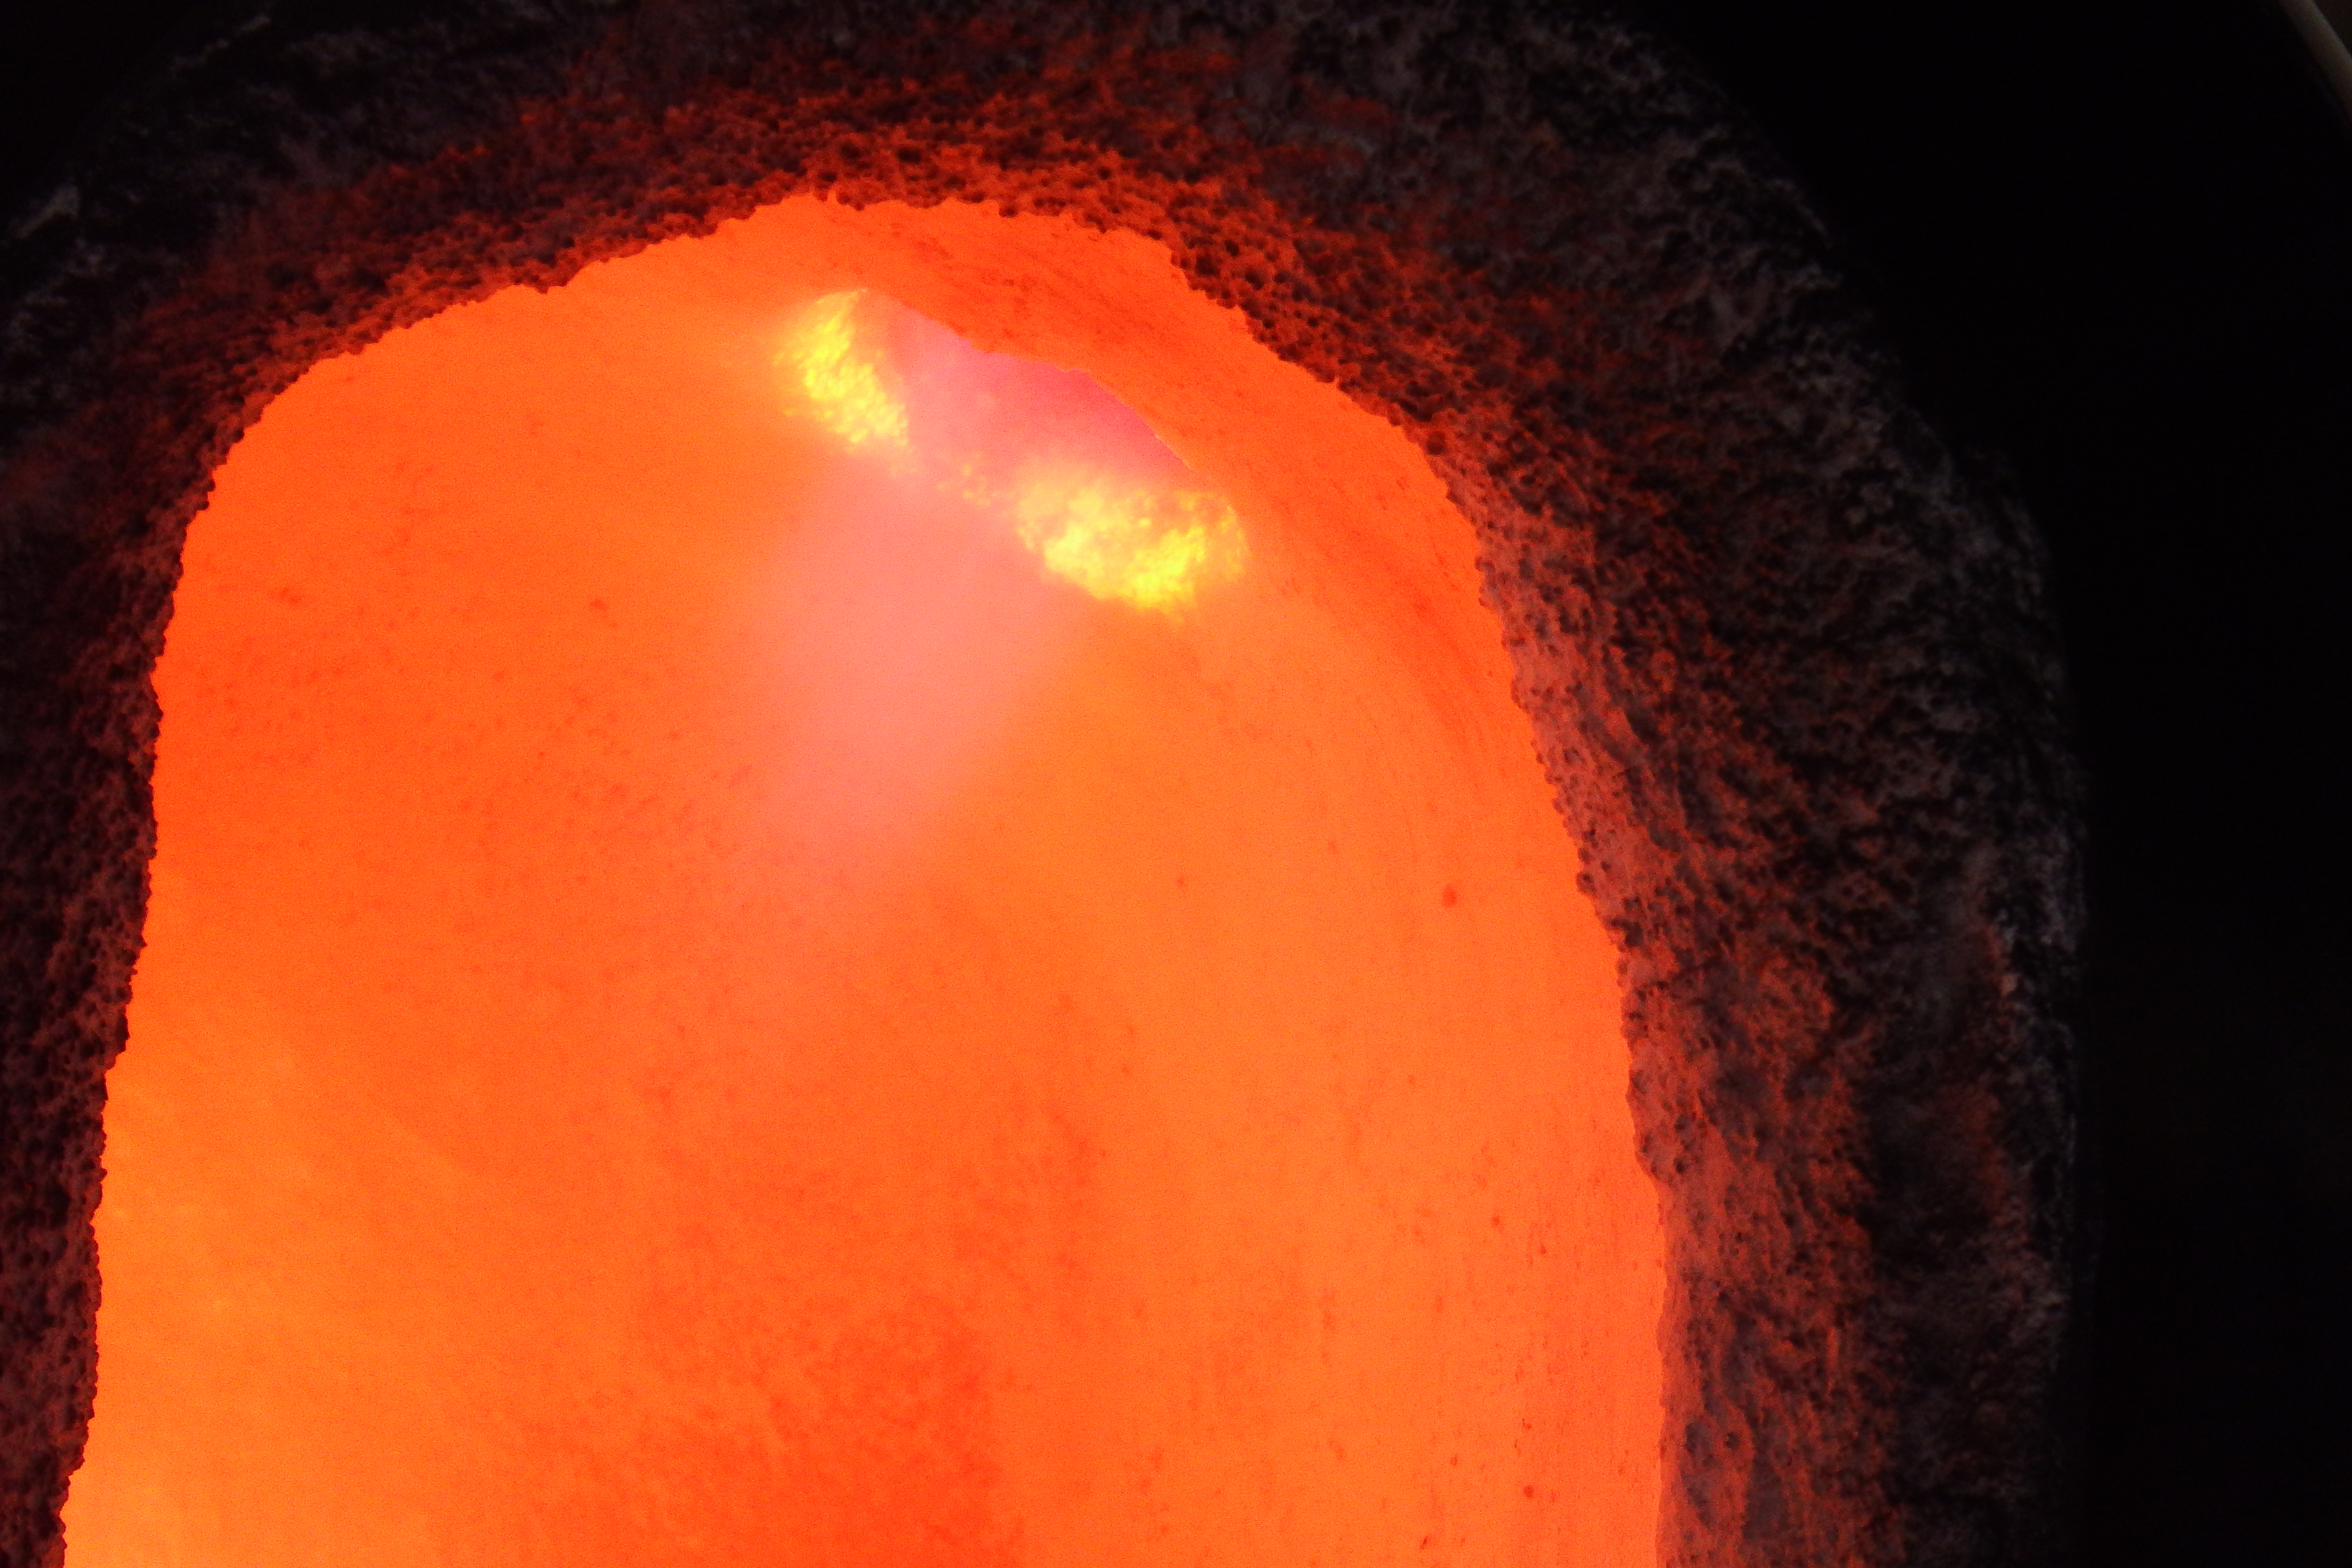
- First issue (or not an issue) is that the hot spot is off center, half hitting the floor, half hitting the wall. Should I try to correct this somehow? The burner tube is centered well. The mounting of the burner tube can be adjusted, could I aim it a bit toward the middle, even if it's a bit askew in the hole? Should I file a bit of the refractory at the opening to flare it out a bit?
- The top and bottom disconnect so the chamber can be enlarged, propped with fire brick etc. There's a bit of gap where the walls meet the floor. I don't think this is a big problem, but should I stuff some ceramic wool in there for efficiency or safety? There was no excess heat on the exterior when it was at full heat.
- Not a big deal, I don't think, but the opening for the flare as you will see in the pictures is glowing at the edge. Should I scoot the burner down until that glow disappears or is it fine/desireable? It's recessed 1" at the moment.
- I think the flame looks to be tuned pretty good. Anybody disagree?
- I know there's no concrete answer, but what is the optimal pressure range for operating a forge of this design?
Here are the specifics of the build:
- 0-30 psi regulator, shut off valve, needle valve, pressure gauge
- 3/4" David Hammer style burner, .035 mig tip
- ~350 cu. in.
- 2x 1" ceramic blanket
- Kast-o-lite 3000 castable refractory
- Metrikote IR reflective
- barbecue heat paint for suburban camouflage (that's just a grill, officer. Honest...)
Some more pictures:


-
5 hours ago, SReynolds said:
I hope you are joking. That makes no sense and makes be second guess blacksmithing altogether.
I concur. You should drop your plans and send me that anvil.
-
4 hours ago, VaughnT said:
You can buy steel balls from King's Architectural and other places that will do the job. They even offer ones that have been drilled/punched all the way through so you can get a nice air flow through and around the sphere.
If you have a grill to cover the hole in the pan, that will work perfectly all by itself. The idea behind the clinker breaker is that you're supposed to be able to clear the opening of any clinkers with a simple twist of the handle rather than poking and prodding with a rake and damaging your fire. They're not a "must have" item, though.
Thanks, Vaughn. I'll check them out. Sounds like a good solution. I figured a ball of some sort and a little bit of grinding was a good place to start.
-
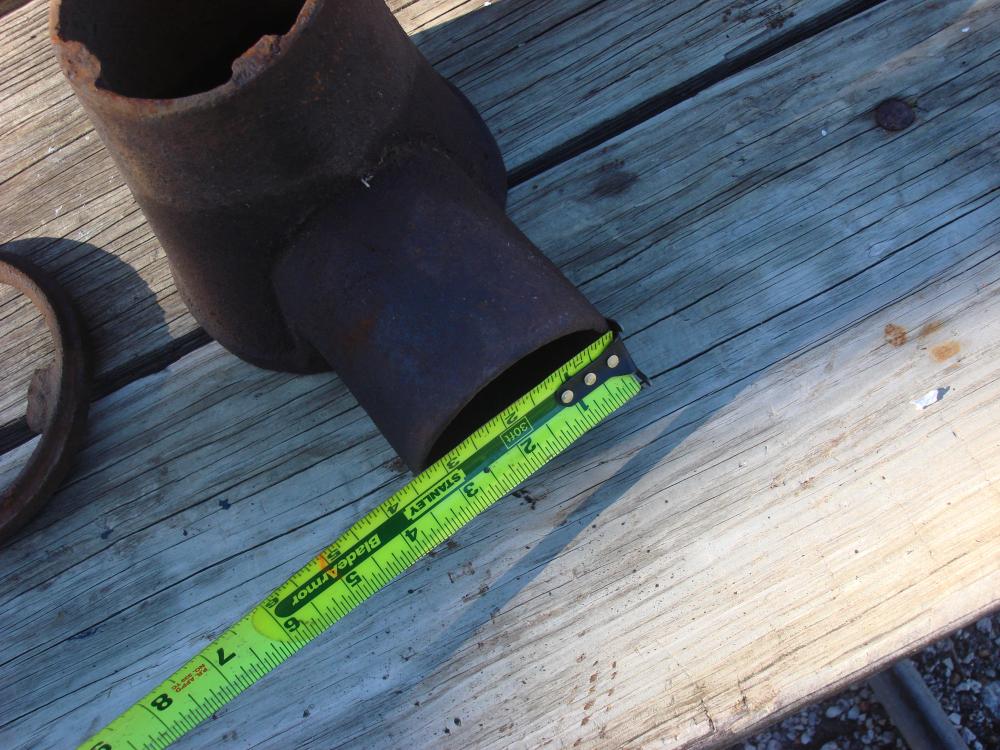
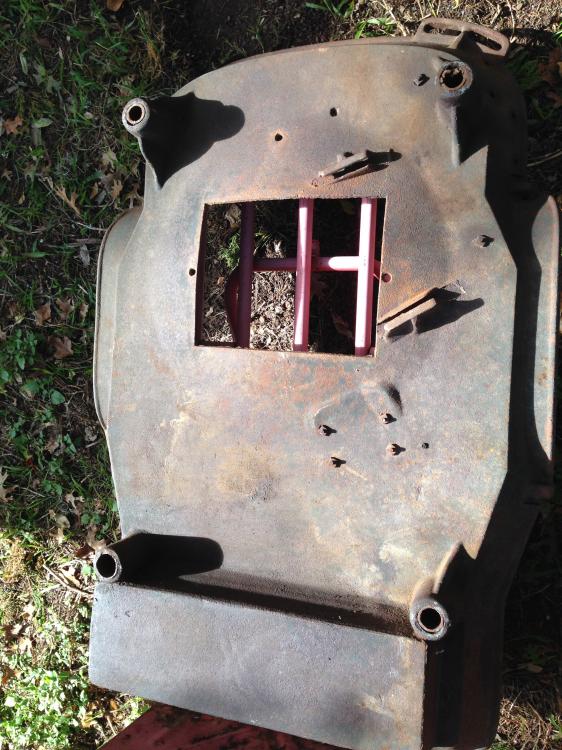
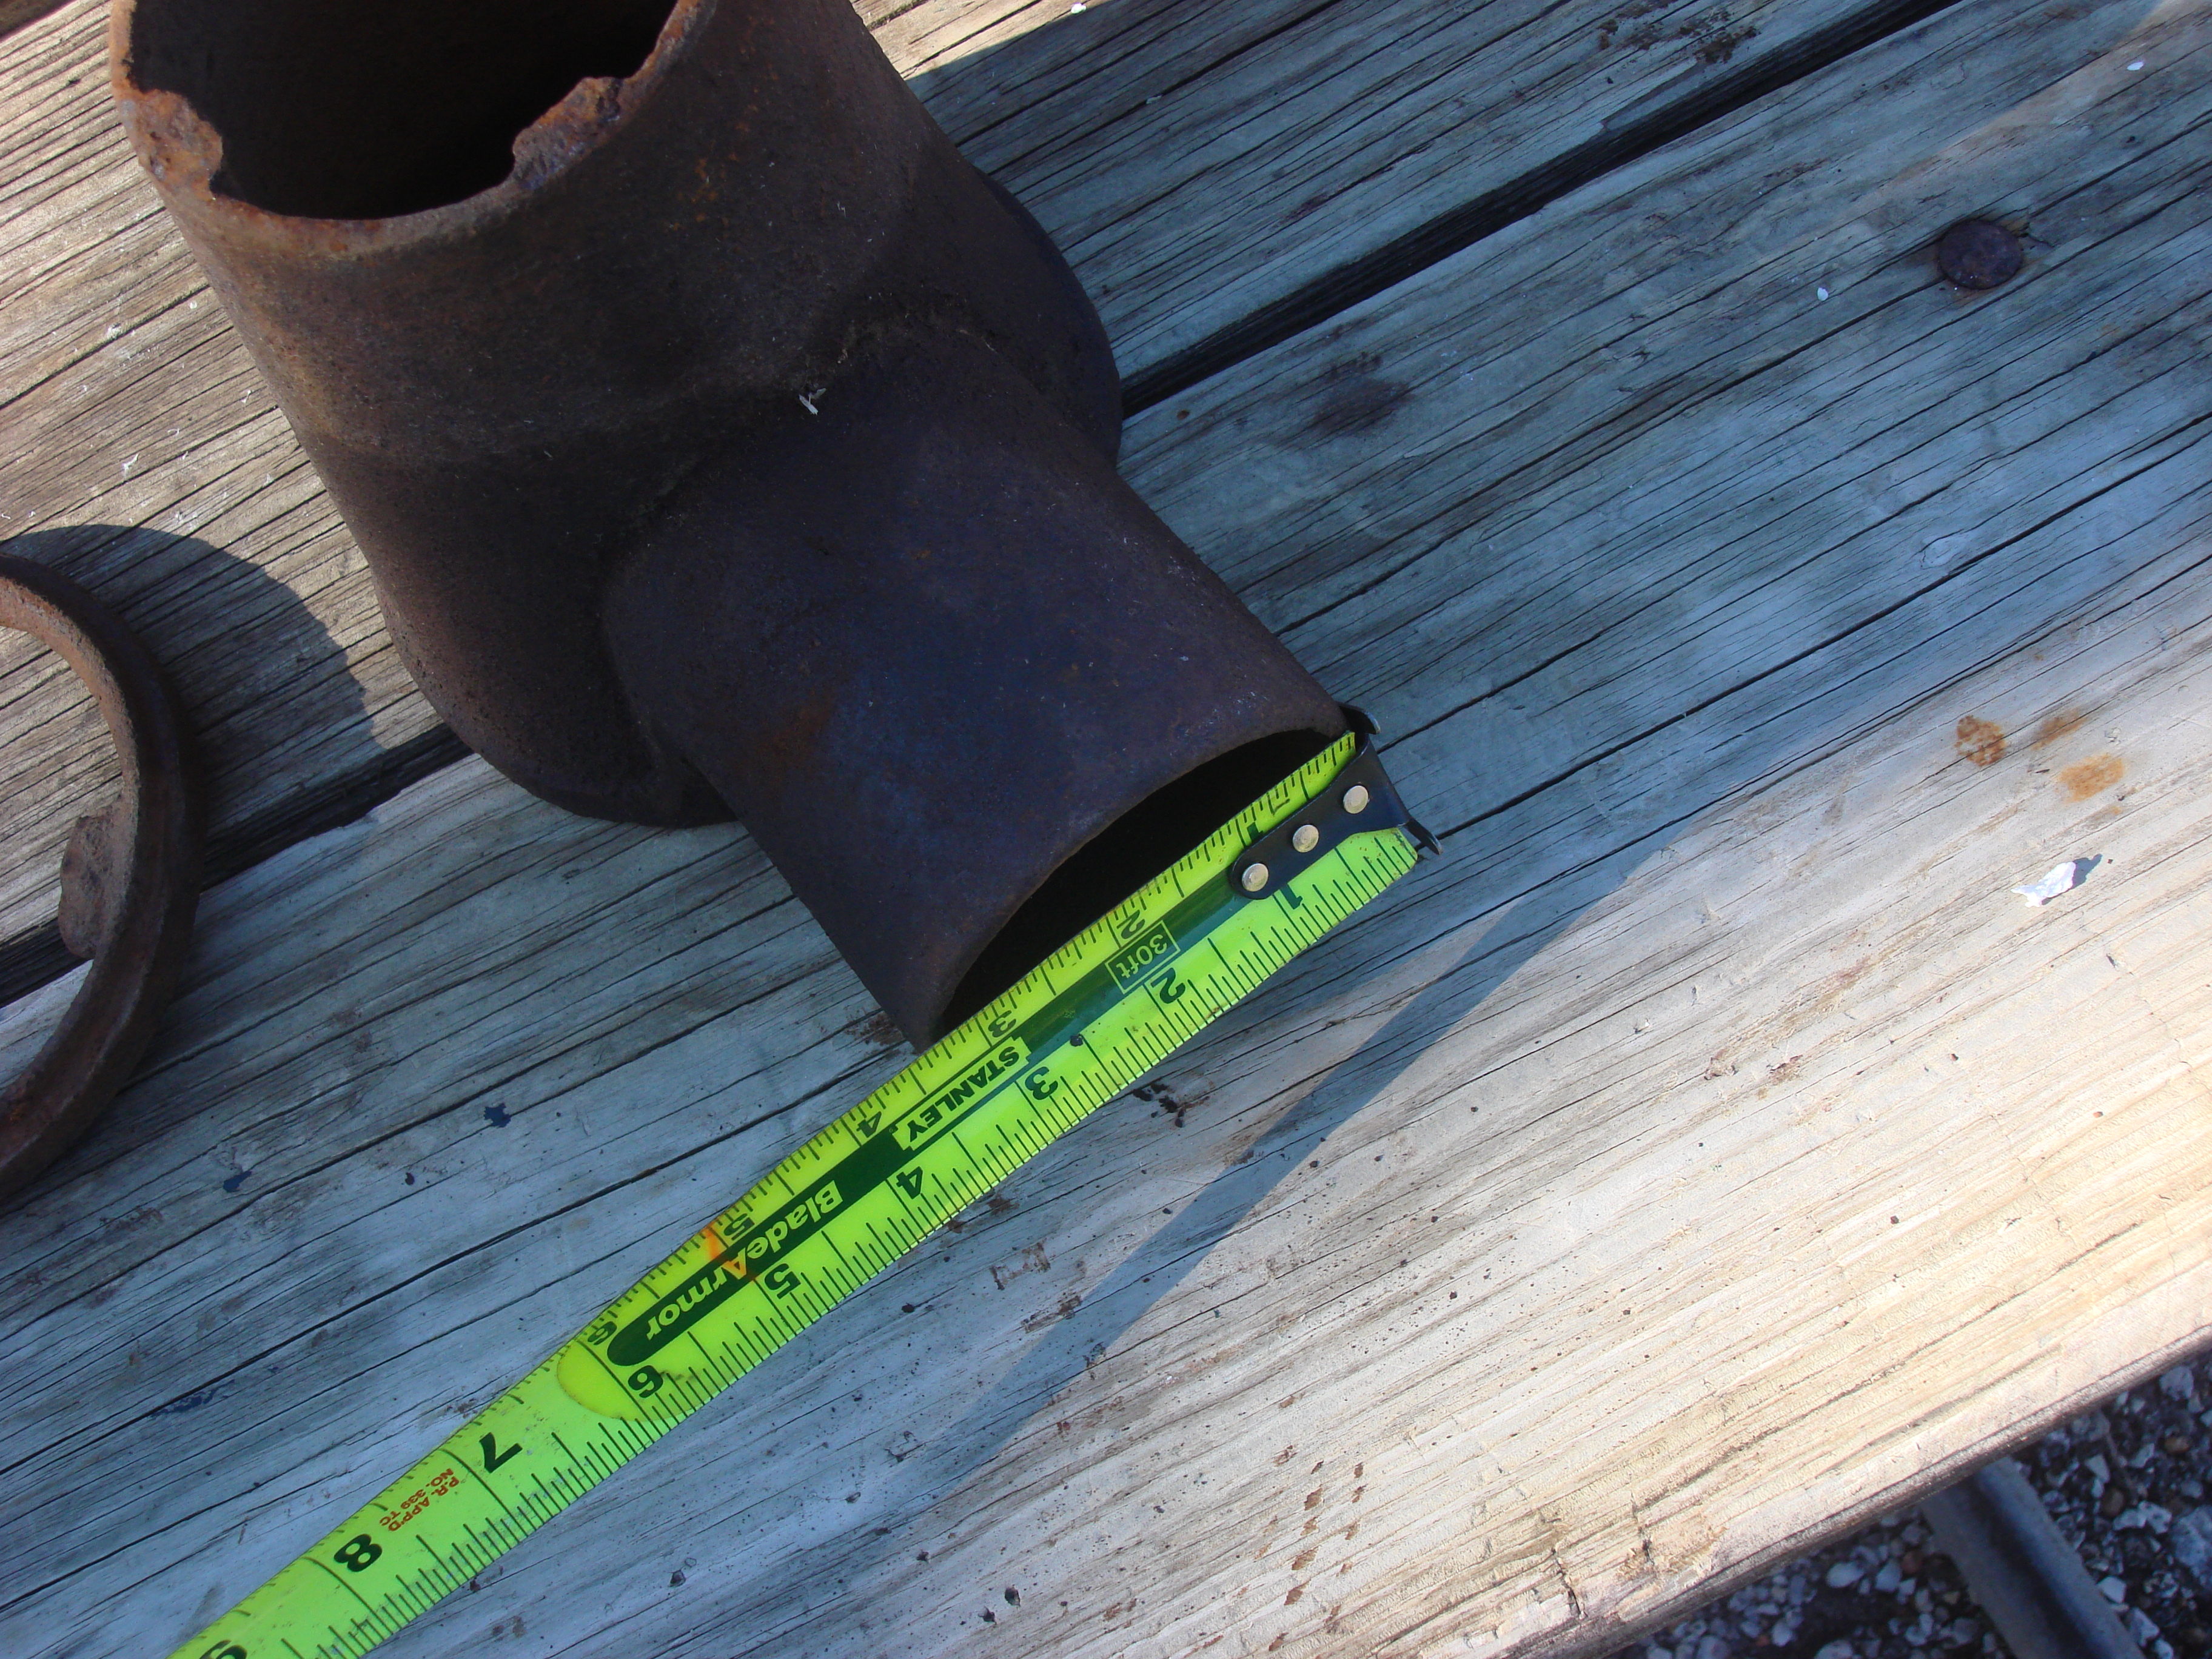
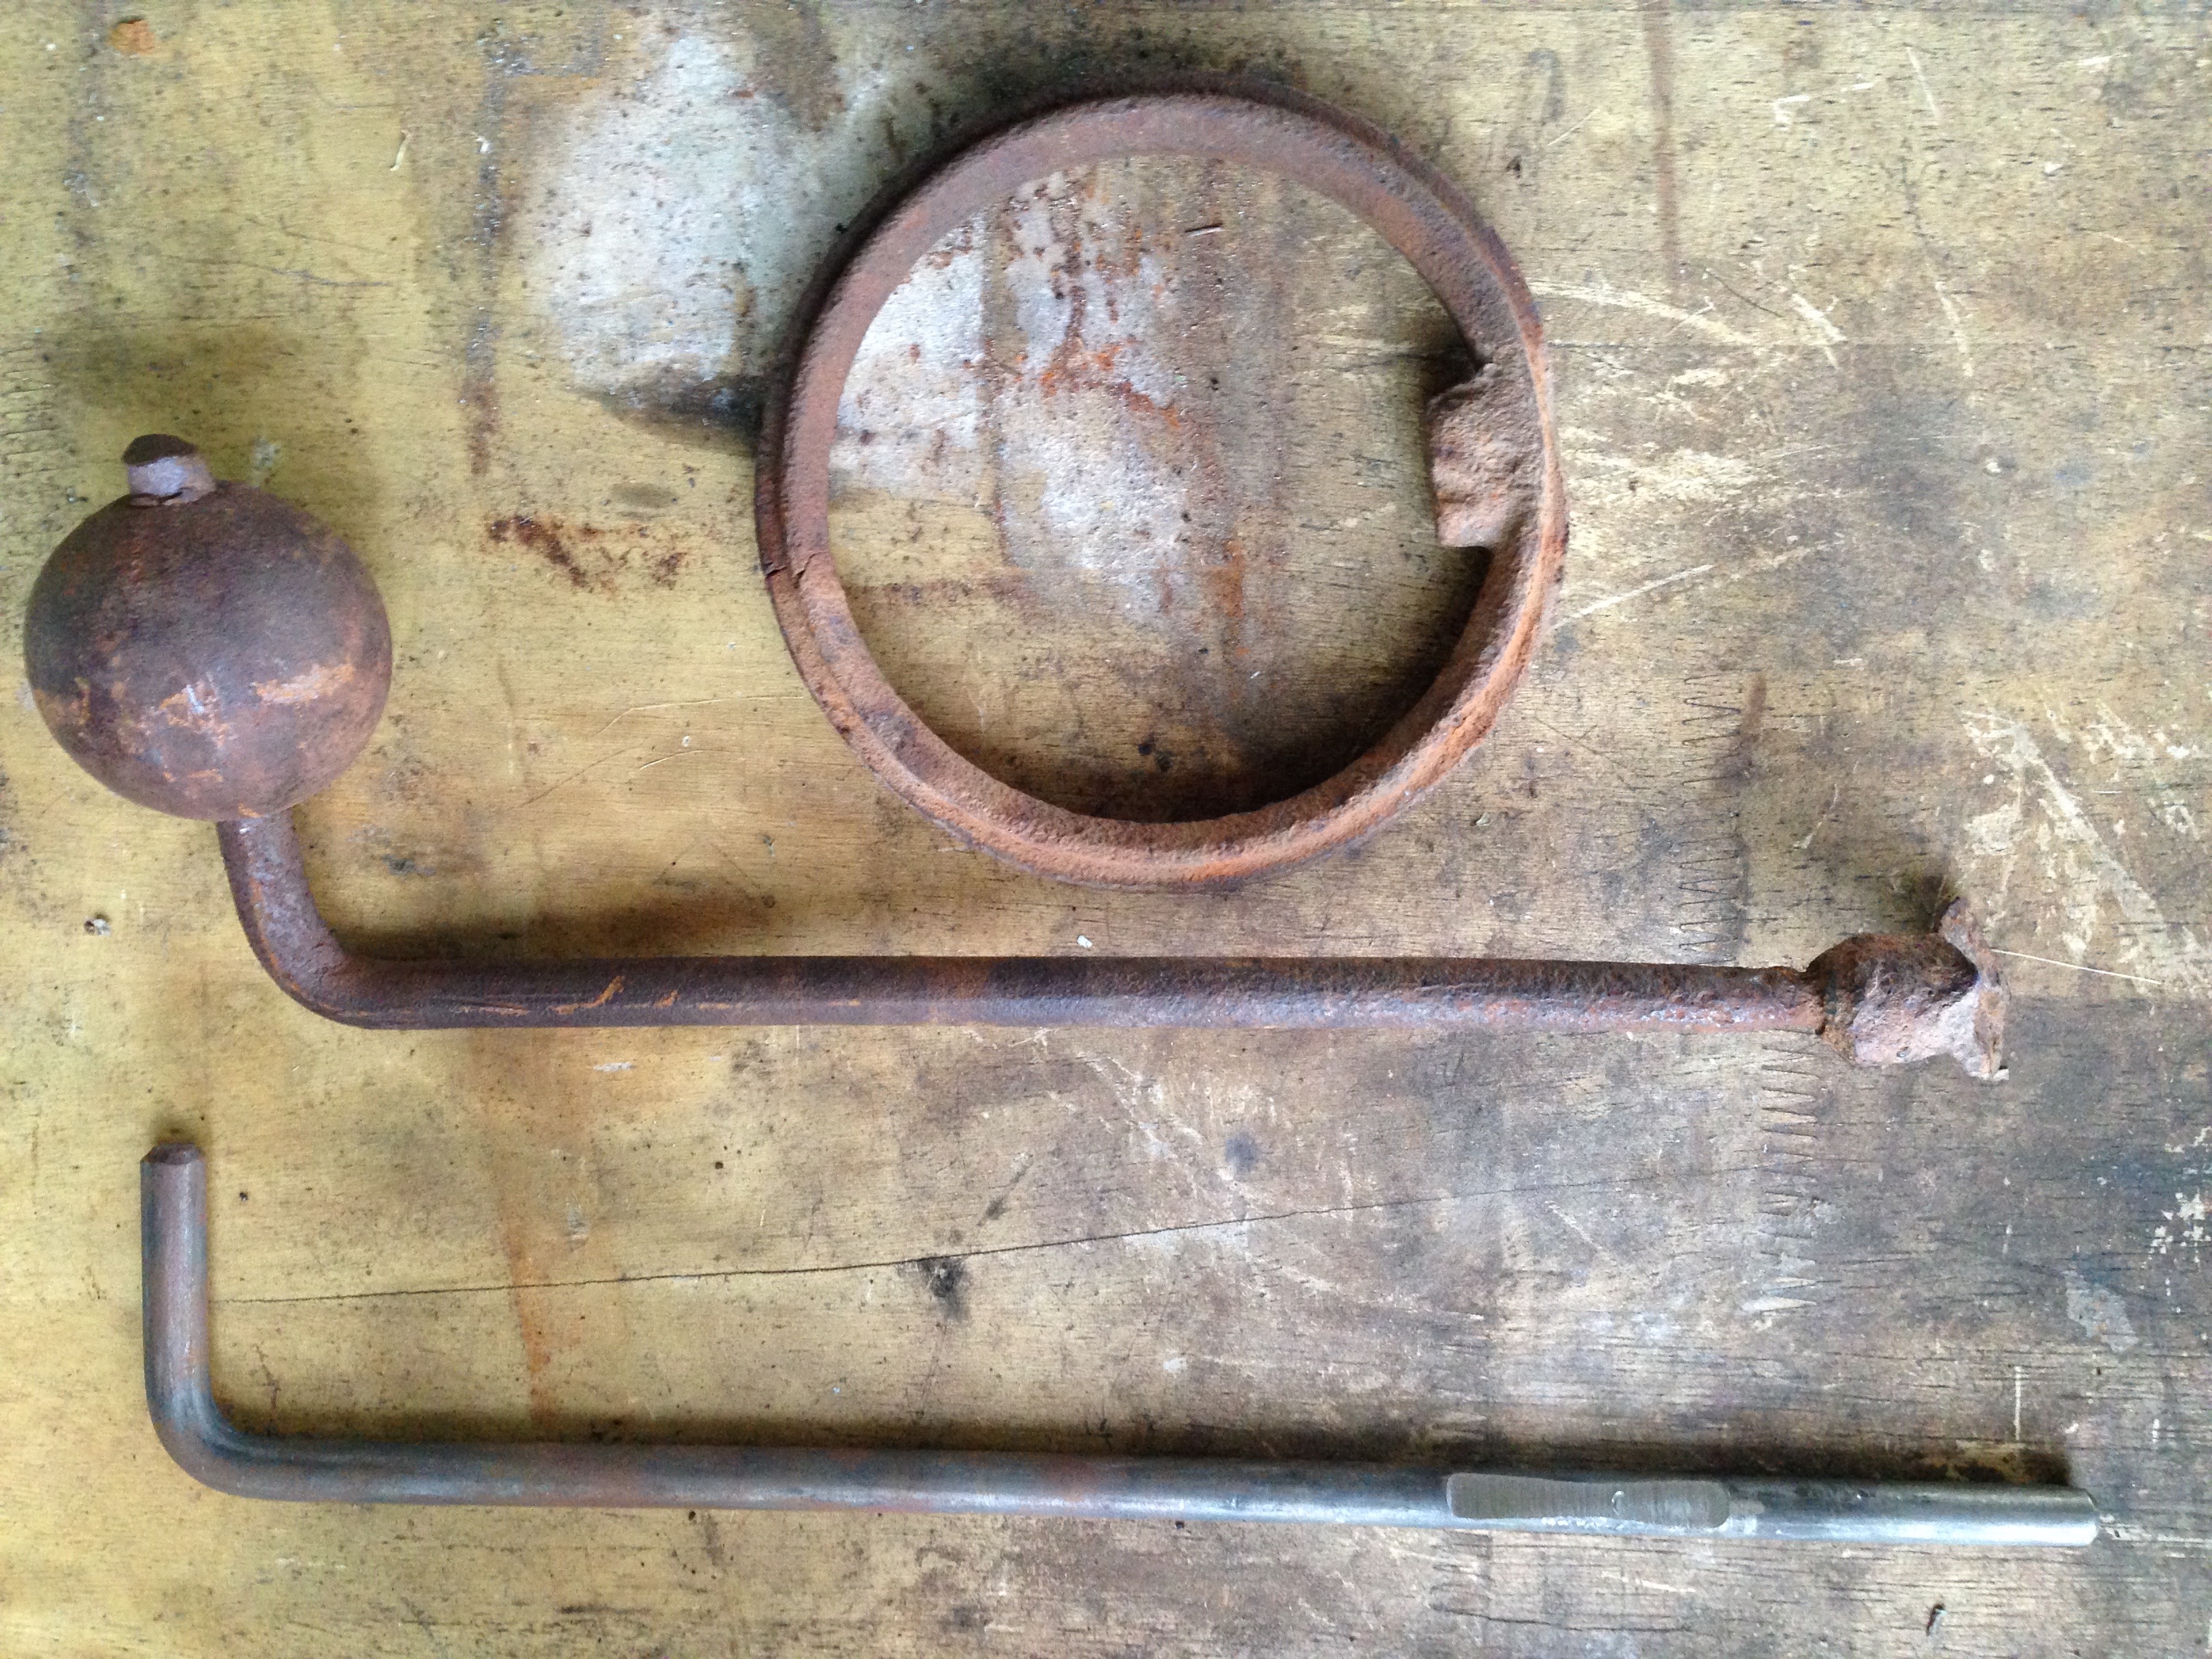
I just acquired a large old cast iron forge and the clinker breaker is missing. The rod and ball handle still exist, but the breaker itself met some sort of tragic end. I need to come up with a design, or find one compatible, new or used. The Centaur Forge clinker breaker is too small. The circular opening in my fire bowl is 3".
I did buy the Centaur tuyere plate but I'll have to cut and grind on it to make it fit. What success will I have with just that and no clinker breaker if I want to get started forging without a clinker breaker solution?
Any suggestions on finding or designing a new one? Here are some pics of the whole assembly. The only marking on any of it is "712" on the throat of the air intake.


-
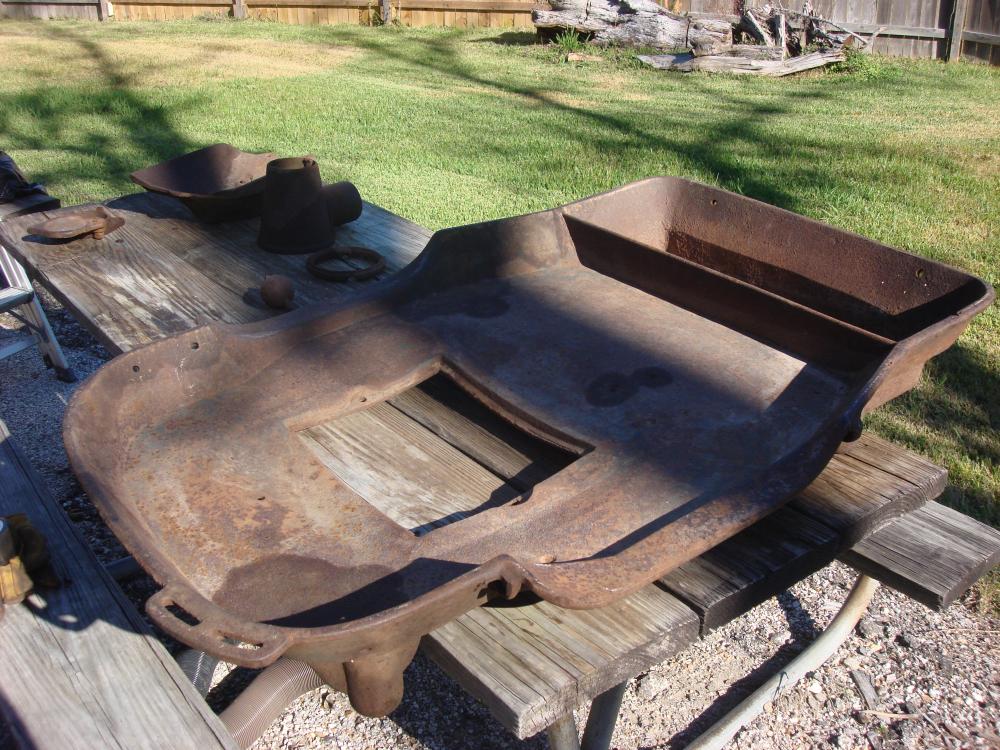
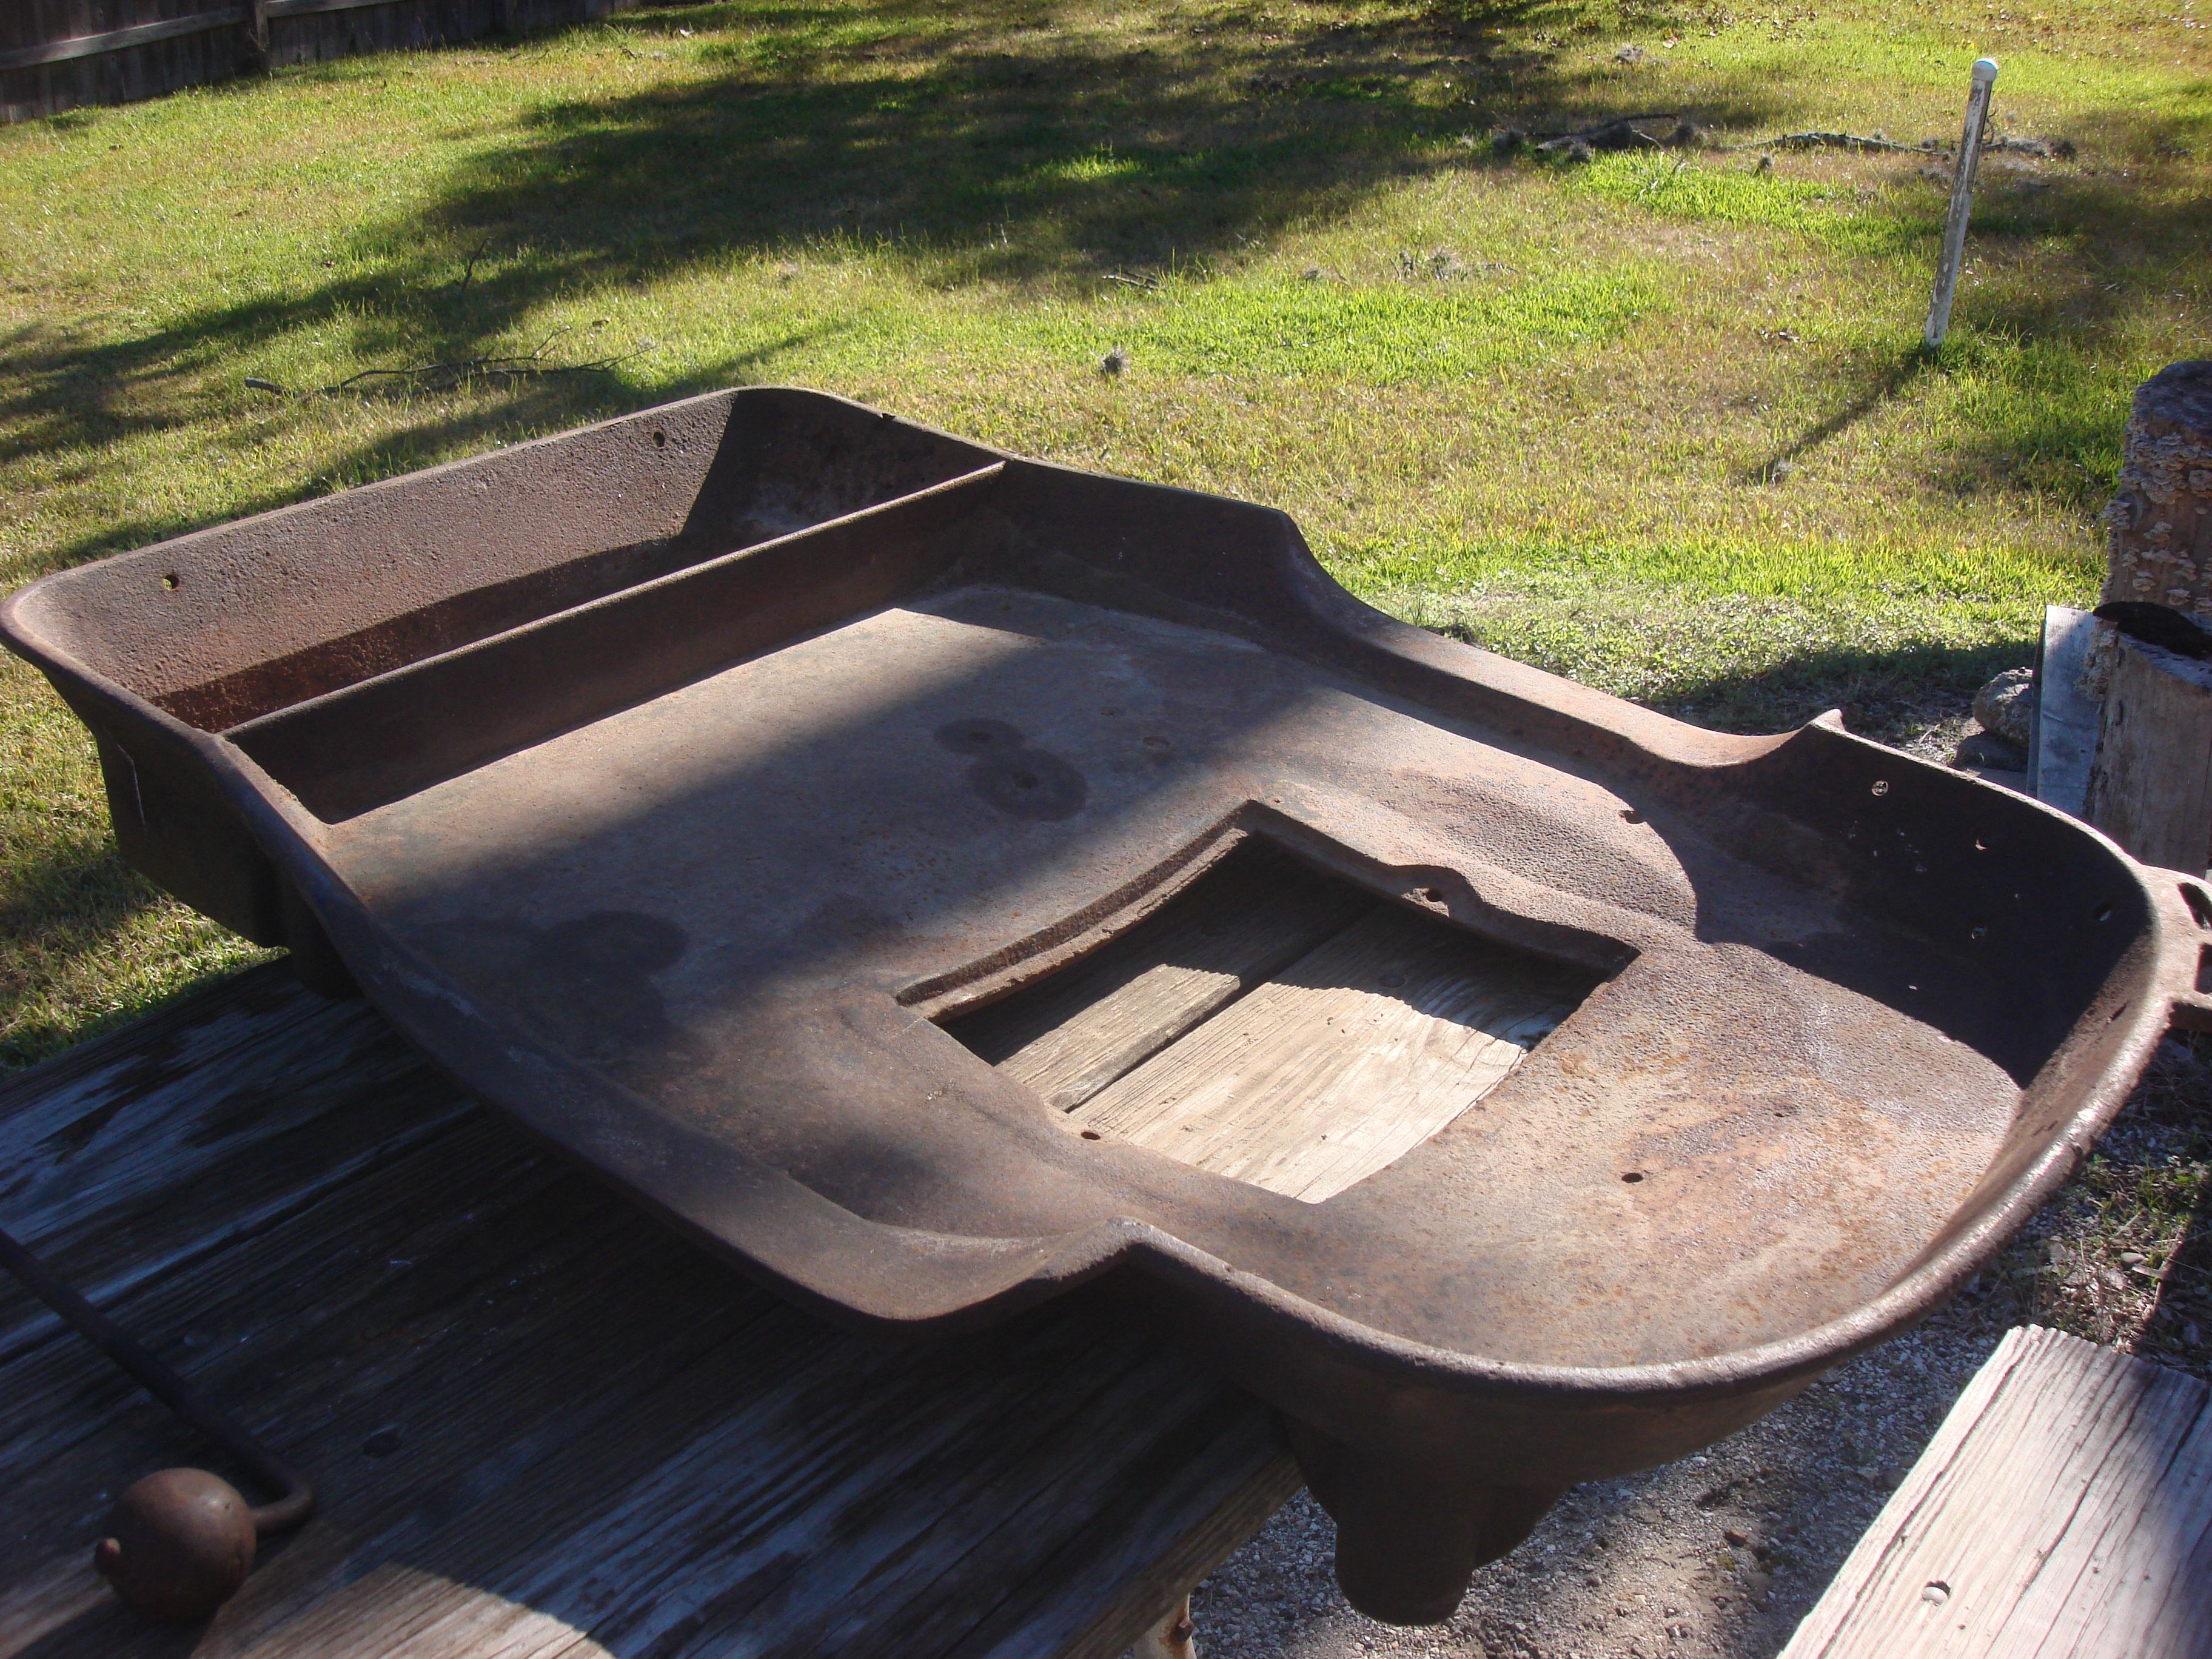
I picked up this beast a couple of days ago and can't identify it.
Before Show and Tell, known issues are:
Forge:
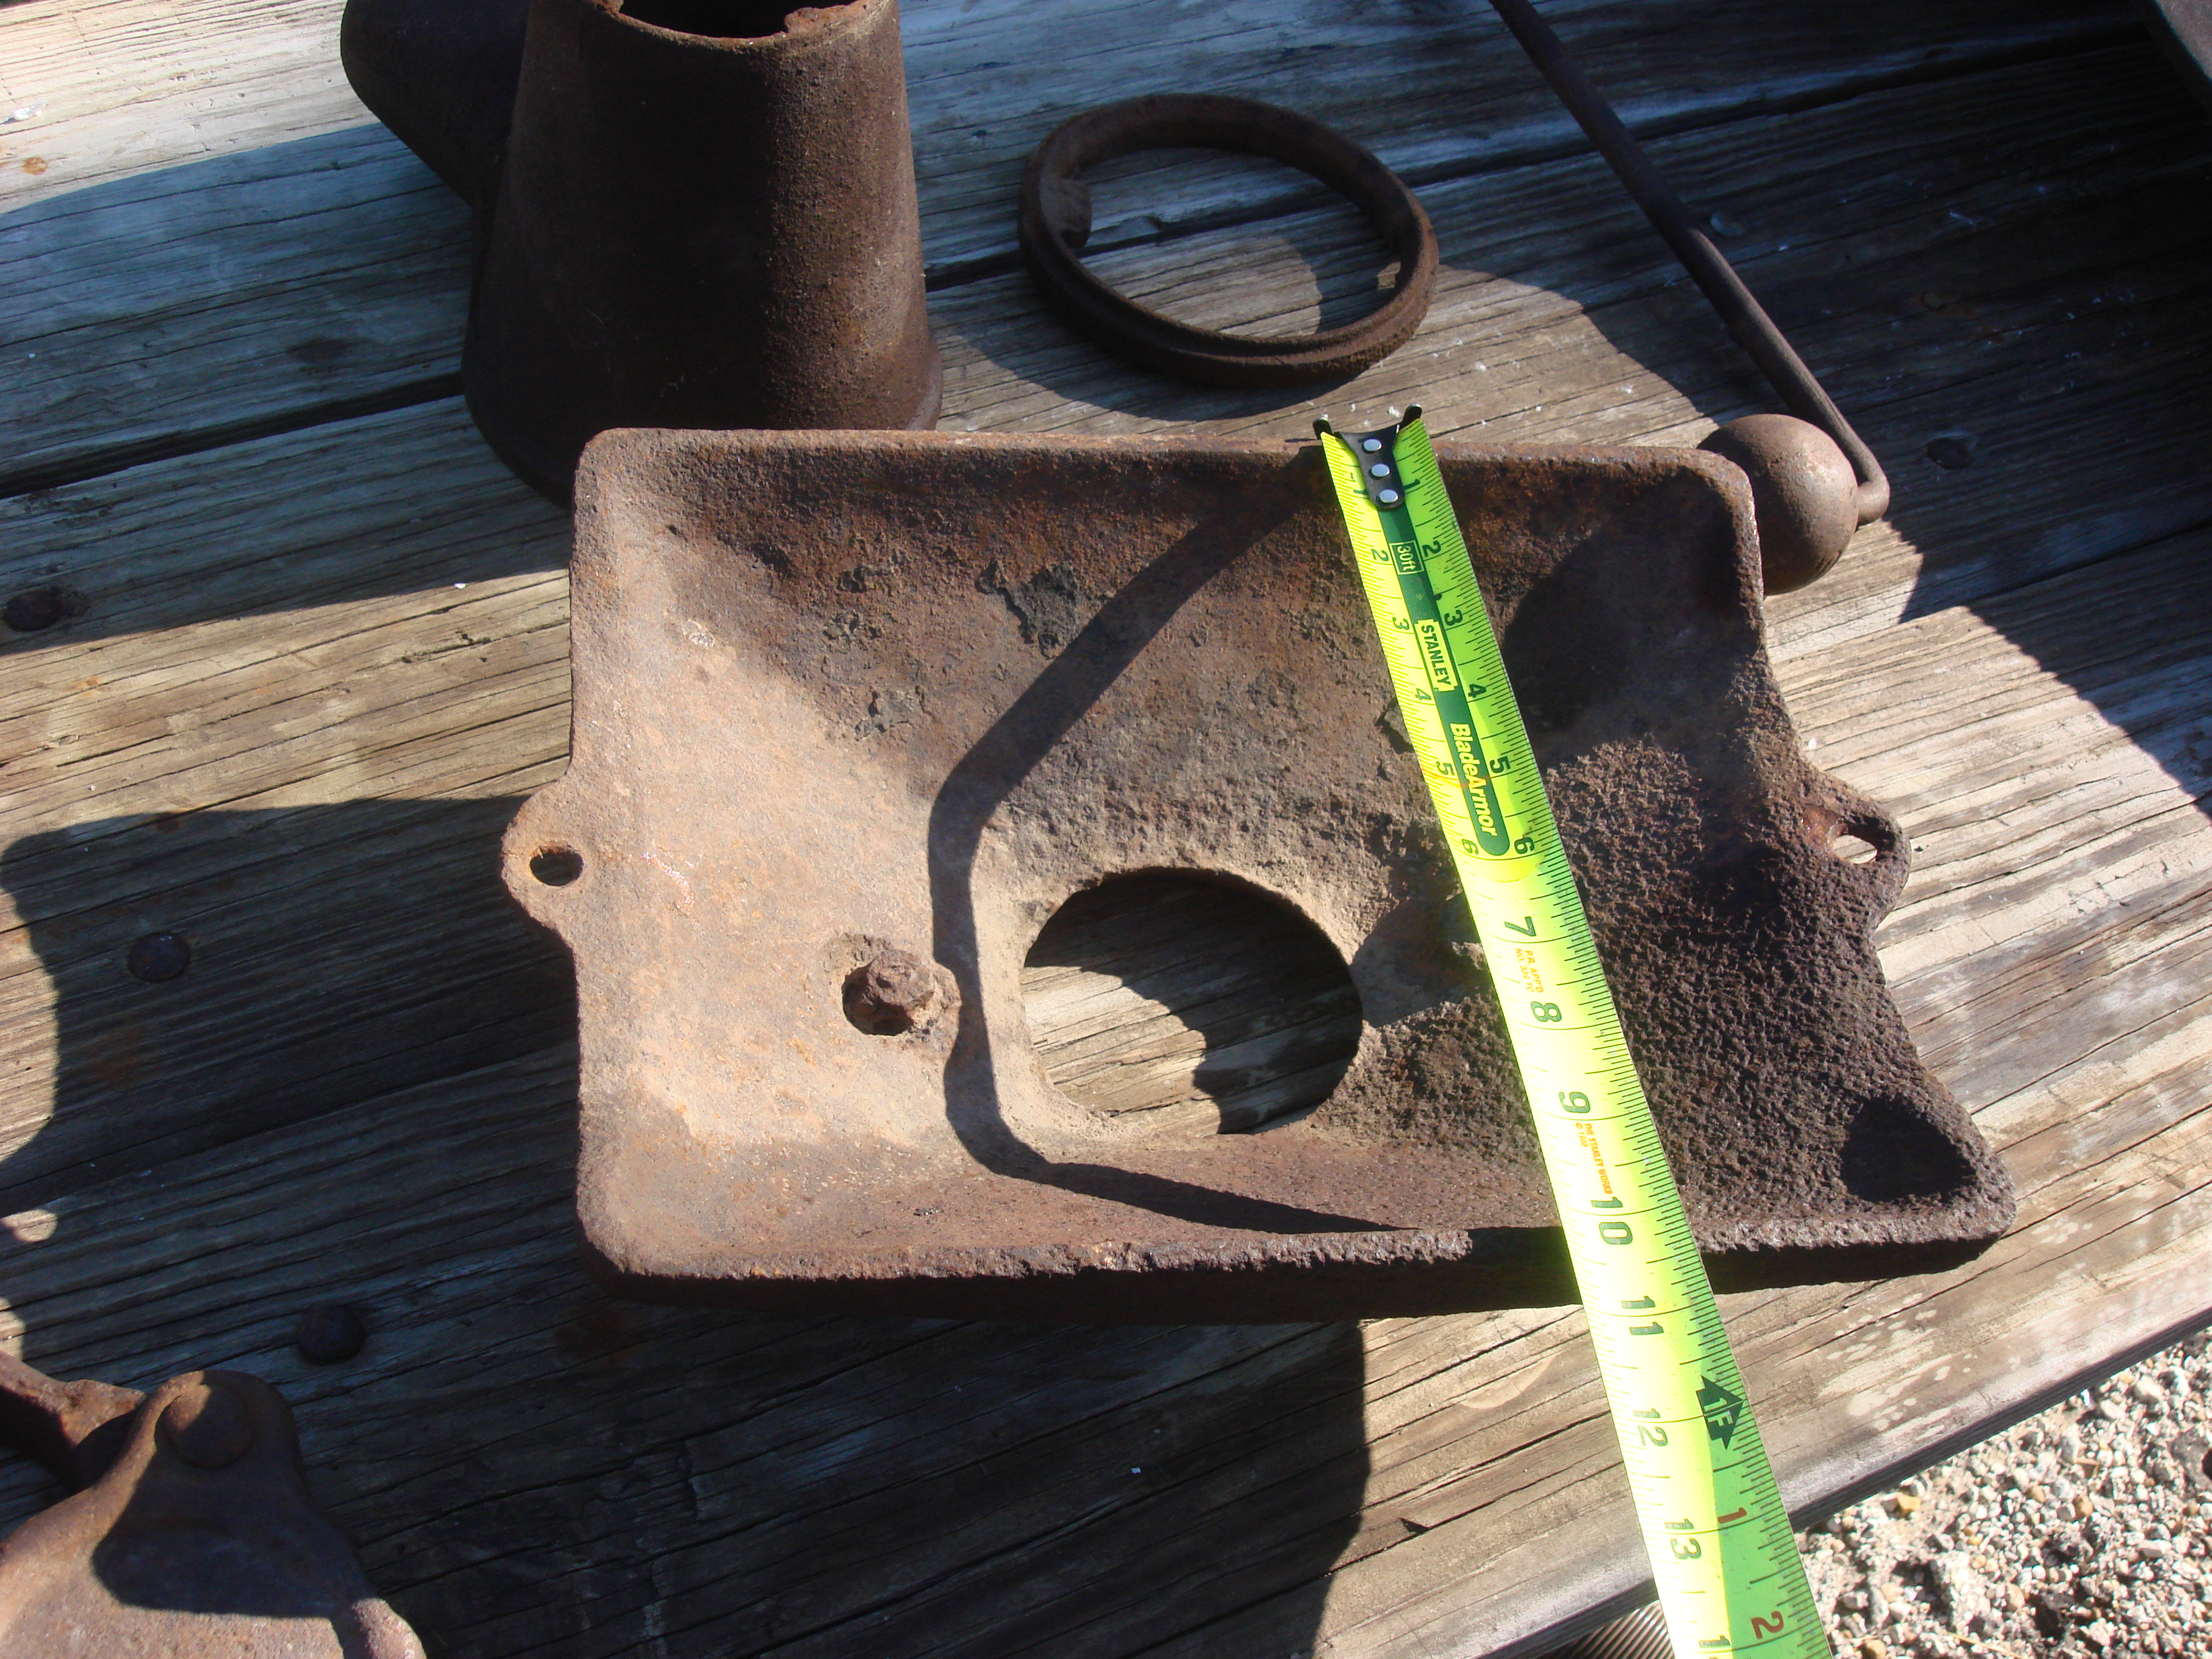
The clinker breaker must have suffered a catastrophic death along the way as it is missing (rest its soul). The Centaur Forge clinker breaker is too small, so I'll need to find one for sale (fat chance?), or fabricate one. I'll welcome ideas on that one. The opening in the fire pot is 3.5 inches.
The ring that holds the clinker breaker is cracked. It is probably perfectly functional as is but if it can be welded I would have that done.
It looks like the fire pot is designed for 2 long bolts to hold the entire assembly together from bowl to ash gate. In their wisdom, whoever disassembled it cut them flush with the receiver and they are rusted in place, so I'll have to extract those.
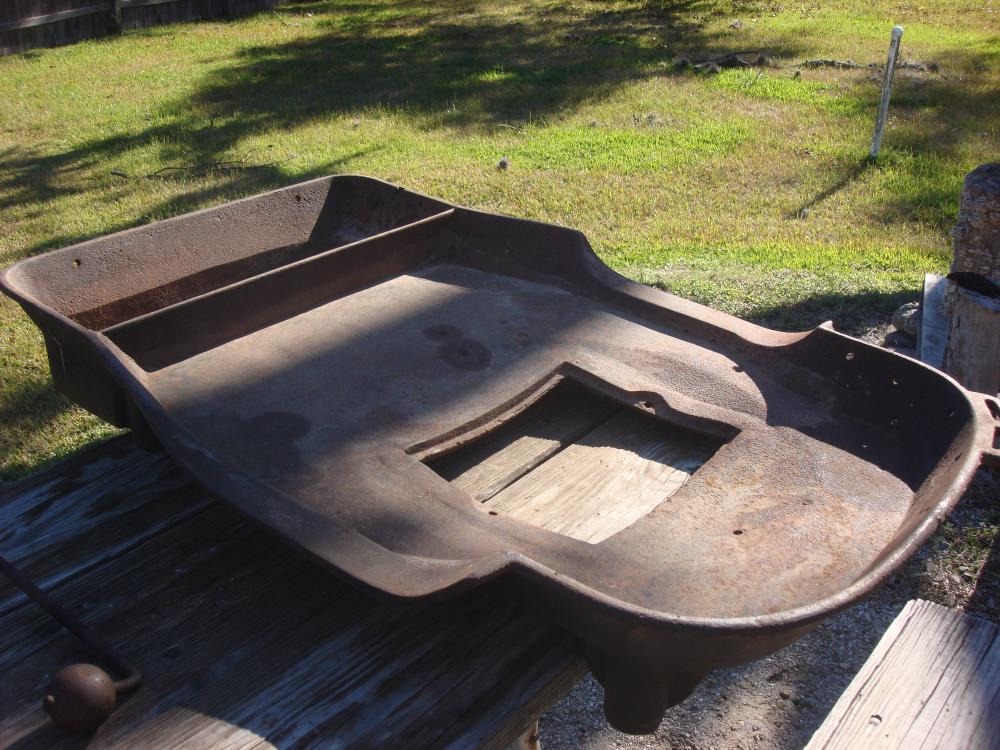
On the forge table, same deal with the legs. They cut them off flush in the receivers and I'll have to figure out a way to extract them. Pictures tell all.
I'll welcome suggestions on how to deal with these issues.
Anybody know the brand and model of this beast? The seller said he thinks it's a Champion, but I didn't see one like it Googling, or in the 1909 catalog. No markings I can find. Anybody know?
Champion 400 Blower:
Thanks to a ton of info here and on other sites I've got a good working knowledge of how it's assembled and what needs to be done to restore it. But in all I have read I still haven't found a single solution for how to get the fan off if the nut is stuck. The jam nut is stuck on and I know cheaters in certain positions are out of the question. It is in good shape but I think the bearings need some work or replacement. I've seen the rear bearing set up and tightened it up a bit, but it's still loud and rattles a bit and it doesn't have a lot of inertia when you release the crank. It goes about 3/4 of a turn when released. No pictures of that. It looks like all the others.
The tuyere opening is 3.5". I'll need to acquire or fabricate a clinker breaker to fit. Any suggestions?

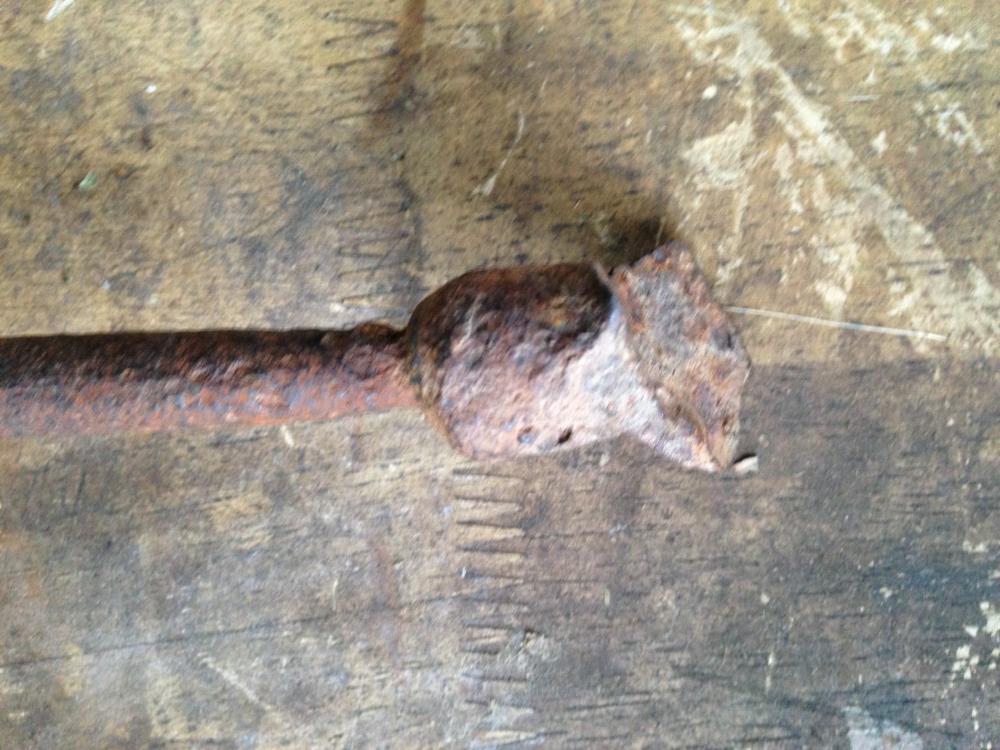
The retainer ring with crack, the old clinker breaker and a possible replacement rod given to me by the guys at Centaur Forge (they rock).

Close detail of the clinker breaker carnage.
On the underside you can see where the legs were cut flush with the receivers. Any ideas on extraction?
Also, any ideas what the various mounting points are for?
-
Had to drive through the woods to get to Matthews when I lived there. I heard Shuffletown has a Starbucks now.
-
You were right. Look what I found on eBay:

Knowing what to google for is 99% of the battle. Never considered they could be for the end of a bar rather than for crossed bars. That gives me some crazy ideas.
Well done sir.
What part of Charlotte do you live in? I am a former resident of the great metropolis called Shuffletown.
-
Going to go out on a limb here and say that the first couple of X shapes were tools used for redressing star drill points, the type used for quarry blasting or well drilling over a century ago. The one with the pin was for hollow bits that water flowed thru. I swear that I have seen similar tools in a museum, somewhere, long ago.
Wow. Never thought about that kind of application. Makes sense about the pin.
Good call.


My new forge - Taking suggestions, thoughts and observations...
in Gas Forges
Posted
The hinges I got at home depot were steel with a "brushed nickel" finish. Welded on with no prep. A farm supply or industrial supply place would probably have plain steel weld-on hinges.
Yes, but by referring to your directions and pictures he can easily see the difference in the way the Dave Hammer burner that I have mounts as opposed to the way the t burner mounts.
There's a big difference.