bengriswold
-
Posts
30 -
Joined
-
Last visited
Content Type
Profiles
Forums
Articles
Gallery
Downloads
Events
Everything posted by bengriswold
-

4140 Forklift Tine Anvil & Introduction
bengriswold replied to bengriswold's topic in Anvils, Swage Blocks, and Mandrels
Thomas - Thanks for the suggestions. I am with you on all but your last example. I am trying to picture the stake anvil.. in my mind. Are you saying you one worked one end around and drove it back through its own handle hole? I did search for pictures under your profile but that doesn't seem to work. Does anyone know a way to search for pictures that a particular member has uploaded other than clicking on each post =). A picture would help greatly. Also apparently a member here brianc, (hello Brian) read my post and he happens to work with my friend Luke that gave me the hunks of forklift tine- their work space shares the same bench.. right next to one another. Imagine my surprise when Luke calls me the day after i initially posted telling this story. Besides the irony of this being worth sharing, the thing I Brian pointed out to Luke after reading this is that due to the size of the forks these are possibly 15b30 instead of 4140. I can upload a picture of one of the forks with some writing Brian if you think it will help. Thanks for correcting Luke we got a laugh out of it. Eseeman - the measurements are 4.75"x1.5"x 16-20" its in concrete so I don't recall how far down it went but it was in that range. I read your other post too and tried to comment then I must have closed my browser before my comment was posted. In case you were still on the fence, the upside down L shape is what you will most likely want. Post pics when its done. Thanks Andy. I finally took frosty's advice (as i said been reading/lurking for a few years) and just made something to use and let go of it being the perfect anvil. I imagine there will be many more. So considering this is most likely 15b30, that looks like it has a low carbon point and I noticed Boron was added? I probably don't want to mess with forging this I assuming there would be a complicated heat treat. Anyone tried forging 15b30? Maybe just for some tooling like a bick or something else useful? -Ben -
4140 Forklift Tine Anvil & Introduction
bengriswold replied to bengriswold's topic in Anvils, Swage Blocks, and Mandrels
The machinist I purchased it from said it was EDM or something. I asked him it he thought it was hardened, he said no. I have confirmed this through use and if my work is getting a duller red color and it is not mild steel it definitely can dent the surface. good point. I find myself wanting a horn or heel type area to work off of so longer work that's bent or curved doesn't run back into the base, whether that be a london pattern anvil or some other solution.. so that came out wrong. Thanks for the thoughts. I think i will make a stand for it. What do folks using an anvil like this typically do for work that would be done on the horn of a London pattern anvil? -
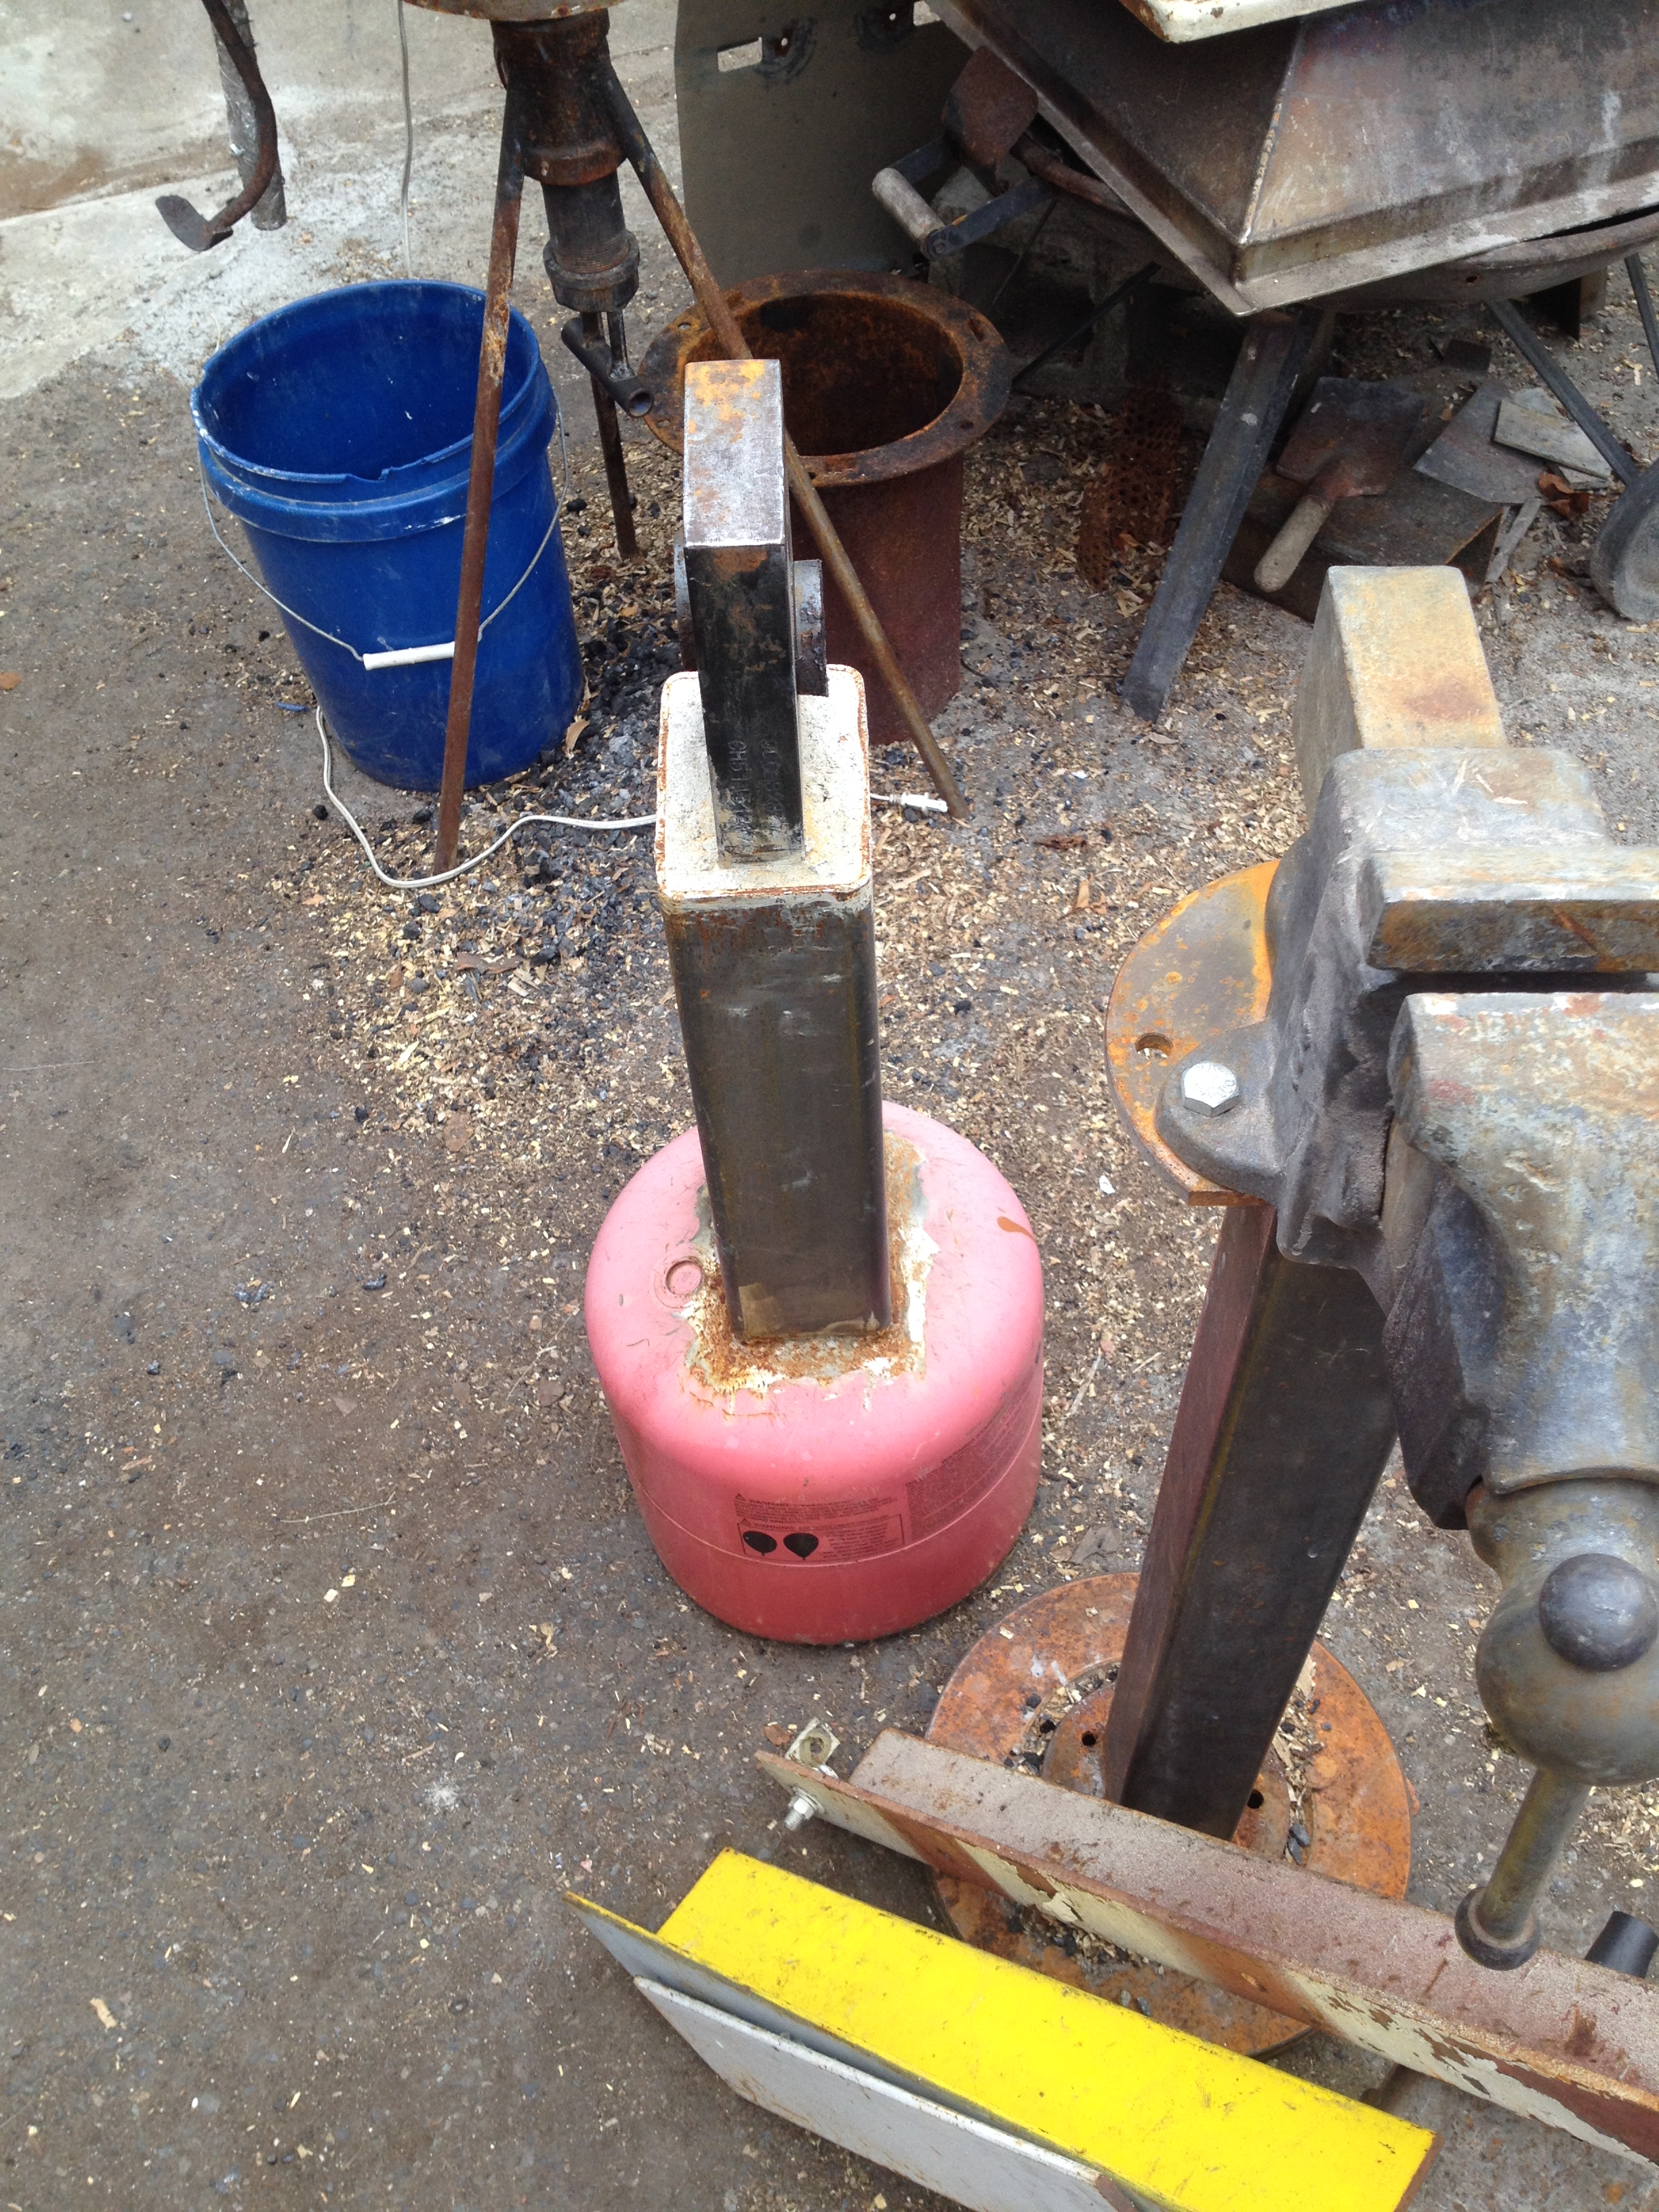
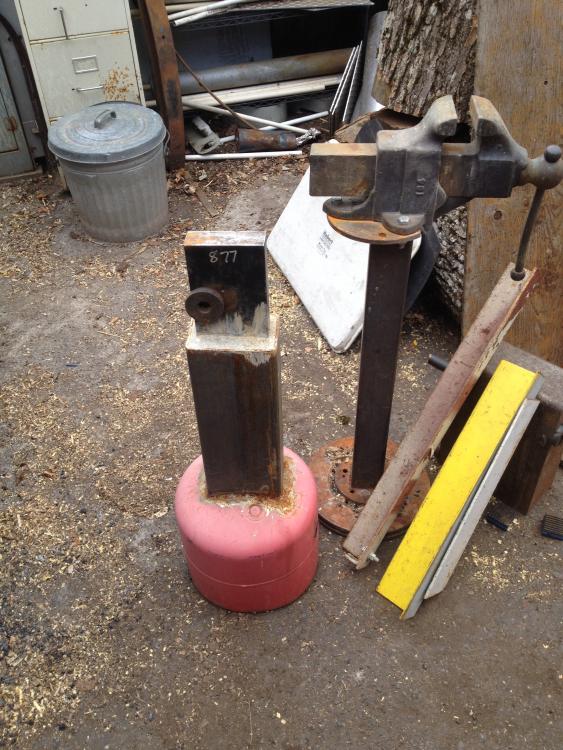
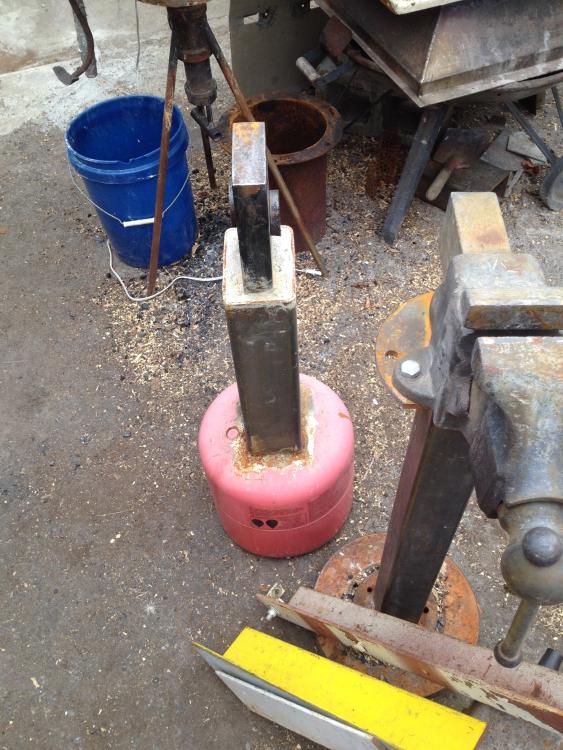
Just want to introduce myself here, say thanks to all the people on here sharing their knowledge and experience, and show some pics of my anvil setup- which is really inspired by many of the things I read here. My names Ben (which you can obviously see from my profile yet I feel weird not saying it) and basically started becoming interested in blacksmithing when I became interested in spoon and bowl carving about 3 plus years ago. I watched a video of Robin Wood Carving a spoon from a chunk of firewood... in his living room no less and I was pretty sure I had to try it. acquiring the tools i needed (some I just wanted =) proved to be more expensive and complicated than I thought. There aren't that many quality, made to order hook knives or bowl adzes and all the references I had come to trust kept pointing me to different blacksmiths in the USA and some in the UK and Sweden most of which had wait lists that was foreign territory so I continued to read, watch videos and prep and modify the tools I could acquire. Funny enough, my indecision led to the all to often thought I have "I wonder if can i make one?" Once I started reading and watching videos of different blacksmiths I was pretty sure i was going to have to try this as well. This is how I ended up here. To transition my story to the blacksmithing part- I did finally buy my first hook knife from North Bay Forge and boy did I feel like 8 years old again waiting for that present to arrive. When it did it didn't disappoint, that was the sharpest and longest edge holding knife I had ever used at that point so naturally I wanted to know more and maybe one day be able to make tools designed for the way I like to work that would be up to my standards of functionality and edge holding ability. So that's some of the background on what caused me to start attempting to make my own tools. I do say attempting because the ones I've attempted still need tweaking. I am still very much a newbie and I love when I get 2 or 3 hours in the evening to work. Just getting some sort of anvil was quite the endeavor. I have let go of finding a real anvil for the time being. After getting the forklift chunks ( i have another still - not sure what to do with it) I came up with the idea to set the anvil in concrete as the pics below indicate. Technically this is my 2nd anvil. It's 4140, confirmed by my friend Luke who works in a forklift attachment testing department. I hope the pics speak for themselves but in case you don't recognize it that is one of those helium balloon tanks. The forklift tine is set into the high strength concrete around 10 to 12 inches below the rectangle steel tube The dimensions are 4”x6”. I wanted a round base for “roll-a-ability”. The bottom is cut out of the tank and to be honest I am not sure why I did that now. I wasn't sure that pouring all the concrete down from the top of the rectangular 4x6 would all settle evenly in the upper shoulders of the tank and I really couldn't access it or see what was going on from the top. So first poured from the bottom and spread it all in the uppermost round parts and all along the inside walls to make sure there were not places where there could be gaps. I then attached with screws through the pink cylinder into the edge of the plywood base. I work on asphalt and so I thought the concrete would stick to the plywood better and there would be less shock with a wood covered base than letting the exposed concrete be the resting surface directly over asphalt. I might over complicated it but it's done and it works for me and has a decent rebound.– I didn't realize how little I had on my 215 lb chunk you can see under that yellow angle iron in the pic. Got that from a retiring machinist in St. John for $15. I was giddy for weeks after that find. Not really sure what to do with that now be honest. Any ideas? Anyways I hope my version of a post anvil is helpful. I know you guys love pictures here (as do I) and any comments or questions and experience is much appreciated.
-
Good god that was funny!
-
looks good. I've been thinking of a similar setup. Thanks for posting the pictures. Hope the leg is healing.