CaptainSpaulding
-
Posts
82 -
Joined
-
Last visited
Content Type
Profiles
Forums
Articles
Gallery
Downloads
Events
Everything posted by CaptainSpaulding
-
 Well I am a quick study so the steep learning curve is a good thing. Haha, yes It is a hat...the character is from a "shock horror" series of movies called House of 1,000 Corpses and The Devil's Rejects. They're tributes to the old gory horror movies from the 50s and 60s. I'm not one to get scared from a horror movie but for some reason that character just creeps me out to the point that I'm captivated by him. The movies are over the top and very violent to the point that it's almost comical at times (but not like real spoof comedy) but that's kind of the "thing" about them...they're not to be taken too seriously. It's someone's art and just like any art, it's open to interpretation and not everybody is going to like it or even get it. If you're into raw violence in film (even in "tribute" or "spoof" format) I highly recommend the movies. If blood and gore gross you out, I'd recommend not even looking at the DVD covers. Also, the "tribute/spoof" aspect isn't my interpretation. The creator of the movies was very clear about that being his theme.
 -
Big Green Egg Lump Charcoal - good to use in forge?
CaptainSpaulding replied to Iron Song's topic in Problem Solving
Good to know, thank you. -
Haha, thanks beth that's very kind. Carry on I will. I learned a lot in the short time I spent on that thing and I can't wait to apply it to my next forging session.
-
LOL, I know what "that looks like it will work and has a certain charm about it" means. Like when you see an ugly baby so all you talk about is how little its hands and feet are, how happy and healthy it looks and how amazed you are at how sleepy it is or how much it can eat. You guys are so polite. Based on the 105 views and 1 comment you all seem to have been raised by parents who told you that if you don't have anything nice to say, don't say anything at all, haha. Anyway, it does work, so there's that. Thanks for at least saying something bigfoot. I'm not discouraged by how much of a disaster it is. I'll be back at it this weekend, trying to make another one with cleaner lines and a smoother finish.
-
How to NOT mount an anvil
CaptainSpaulding replied to Tubularfab's topic in Anvils, Swage Blocks, and Mandrels
What is the exact procedure for this? Do you carve out a section of the stump and fill it with silicone or just lay down a 'mat' of it and stick the anvil in it? Do you do it while it's still wet so it's somewhat embedded or wait until it's dry and just rest it on top of the caulk? Is there a specific kind of silicone I should use? Sorry to bombard you with these questions... -
Removing paint from an old anvil
CaptainSpaulding replied to CaptainSpaulding's topic in Anvils, Swage Blocks, and Mandrels
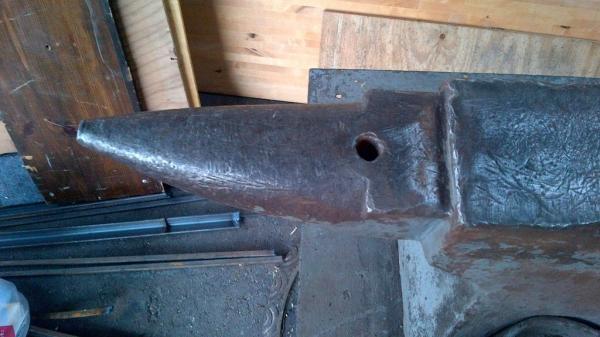
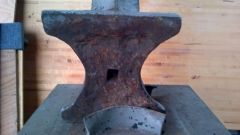
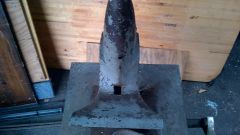
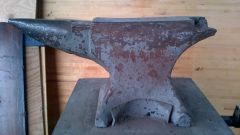
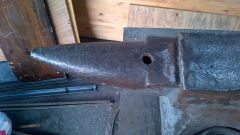
My assumption was also that the original pritchel was lost with that section of heel that's gone. There is one more handling hole under the heel that lines up with the one under the horn as well so 3 total. If the current pritchel is drilled, it was used a LOT because it's as smooth/clean as the inside of the hardy hole and there's no sign of drill marks anywhere on the edges or that I can see on the inside. I can't find a date anywhere but the paint is a lot thicker at the bottom than it is at the top but I can still see the three 1's pretty clearly through the paint. The other side is completely bare except for the indentation just below the waist near the right foot. -
 You bet it is. First one ever, $100 though, so I'm not under the false assumption that I'm sitting on some kind of national treasure or anything. It's better than the block of steel I've been using.
 -
 I saw the youtube video that Tobbe Malm uploaded and I decided that this would be the very first thing I would ever forge. It was the most fun I've had in a long time. Thanks for the inspiration Tobbe!
 -
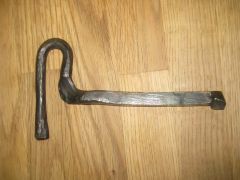
I watched a video on youtube by someone named Tobbe Malm where he makes a bottle opener and I was inspired to do the same. It's easy enough to find on YT for reference. The tools I used were a ball pein hammer, a 3 lb hardware store "blacksmith's hammer" that is still not dressed or rounded in any way other than the factory settings, a set of channel lock pliers as tongs, a chisel that I re-appropriated from a small pry bar, wire brushed it while hot, then wiped it with beeswax/mineral oil foodsafe butcher block finish and of course my "new to me" anvil just acquired late last week. For my forge, I interchanged a deep brake disc and a Weber charcoal BBQ chimney starter with a blow dryer and 3" pipe directed underneath it (not attached, just pointed under the firepot) and once I got the timing and direction for air flow and location of the hot spot in the fire I was rolling. Don't hold back on the criticism and opinions, if I'm going to get good at this I'm going to need to hear the truth. Just keep in mind that the knob at the end of the handle is supposed to be a little more smushed but my bench vise wouldn't hold it tight enough and the piece kept sliding down. Other than that, everything else is open season. http://www.iforgeiron.com/gallery/image/36493-tobbe-malm-inspired-bottle-opener/
-
I understand the need for an anchored support for hammering and I'm on the lookout for one but are they actually more effective at holding material more tightly? Do they hold better than a regular bench vise?
-
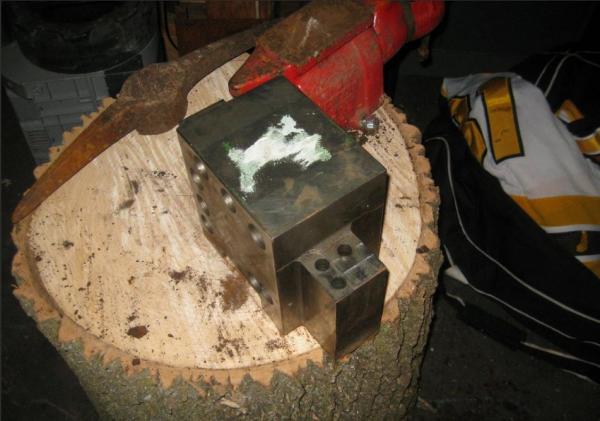
I was always told by my father not to force things too hard or too tight so I'm always a little afraid to overtighten my vise when I need to hammer something in it. It's an old cast iron thing that weighs about 75 lbs (with a tiny anvil attached, which I don't use for forging). I've seen videos where users will actually hit the handle of the vise with a hammer to tighetn it as far as they can but just because someone does it doesn't always mean it's right. Is there something I can do to keep my material in the vise so tight that when I hit it it doesn't slide down into the it? Does the "squeeziness" of a vise deteriorate over time? Is this a case where I should just pound on it until it holds my material? The red vise is pictured here (although not very well since I was actually taking pictures of the blocks of steel):

-
Big Green Egg Lump Charcoal - good to use in forge?
CaptainSpaulding replied to Iron Song's topic in Problem Solving
After my very first project just this past weekend I realized exactly how important "less air" is when using lump charcoal. I had a small amount of air aimed at the general direction of the underside of my brake disc fire pot - not attached or sealed, just a blow dryer on low and a 1" pipe pointed at the underside and after each heat I had to load up on another two handfuls of charcoal. I was only blowing air on it when the material was in the fire and it still disappeared in seconds. It seemed very effective as I was able to get 1/2 inch square cold rolled steel up to light orange in about 30 seconds but my goodness I blasted through a lot of fuel. I've heard cold rolled is harder to work with but it was free, and I find free material the absulute easiest for me to work with. I made a Tobbe Malm inspired bottle opener. So much fun! -
Removing paint from an old anvil
CaptainSpaulding replied to CaptainSpaulding's topic in Anvils, Swage Blocks, and Mandrels
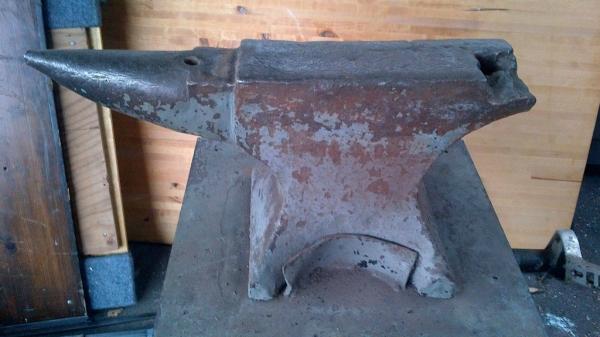
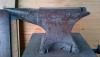
It definitely looks most like a Mousehole and if not, then based on another thread in here it also looks like it could be a William Foster, and I've also read that there were a lot of makers who branched off of the "big name" brands and started their own anvil brands and used a similar thick waisted design so it could be one of those too. The only reason I think it might not be a Mousehole is because from what I've read they have very distinct punch marks between the hundred weight numbers and the numbers are on the wrong side based on all the Mouseholes I've seen online. I can clearly see the 1 1 1 but there is no sign of any markings anywhere between the numbers and nothing on the other side except a small depression in the bottom right corner, which does happen to be on both sides. It's about 1/2" deep and about the diameter of a golf ball right around where the foot meets the base. Anyway, the fact that my curiosity may never be satisfied and I'll never know what make this anvil is and I don't like the grey paint on it it's not going to change the fact that I really have already fallen in love this thing and I look forward to many years of putting it to work. I'd like to get a brand new anvil some day but I may have to wait to buy that for myself as a retirement gift...and that's a long ways away. -
Removing paint from an old anvil
CaptainSpaulding replied to CaptainSpaulding's topic in Anvils, Swage Blocks, and Mandrels
Thanks for all your input so far everyone. I like the home lead test idea so if it turns out to be lead paint I might just drive out to the back of my work which is in an industrial area and do the stripping there and then take the waste to the city dump. If it's not then I'll just wire brush it on my driveway. Any ideas on the maker from the pics or would I be better off just starting a new "Anvil ID" thread? -
Removing paint from an old anvil
CaptainSpaulding replied to CaptainSpaulding's topic in Anvils, Swage Blocks, and Mandrels
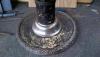
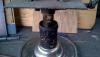
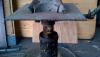
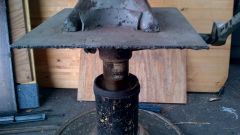
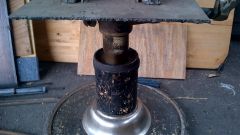
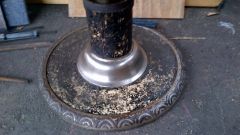
Well, I really only wanted to remove the paint to try to see if there was anything that would help identify the brand/era, etc. but now that I've actually used it I don't care about that anymore. I made my first piece today and I'm beyond proud and I'm fully satisfied with it. From a distance I still don't like the grey paint so instead of removing it, yes, I am going to put another coat of paint on it. Even though I am a Robertson, I will not be painting my clan's tartan or pinstripes on it but I will be painting it a flat black since the ugly grey that's on it bothers me so much. Also, rather than start another thread, I'm just going to post pics of it here in the hopes someone can give me any idea what it is. Sorry for the external link, I can't figure out how to post pics here yet. I really don't have any use for the stand (which is a fully functioning hydraulic barber chair base which came "free" with the purchase of the anvil) so if anybody knows anything about that too, I'd love to know about it. http://imgur.com/a/L0Y2W#0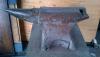


-
-
-
-
-
-
-
-
-

-
Removing paint from an old anvil
CaptainSpaulding replied to CaptainSpaulding's topic in Anvils, Swage Blocks, and Mandrels
Yes, those are definitely options but I'm just afraid that care won't be taken to try to preserve whatever remnants of identifiable markings are still there. Sometimes no matter what you say, the "experts" always know better and I can just picture someone taking a sander or grinder to it and proudly showing me a glass smooth finish when they're done. The antique/chemical bath idea is a good one though. I'll look into that. Thanks.