
Quarry Dog
-
Posts
412 -
Joined
-
Last visited
Content Type
Profiles
Forums
Articles
Gallery
Downloads
Events
Posts posted by Quarry Dog
-
-
It may have been to protect it, but is sure does look nice. Just gotta remember when painting, don't waste your time on anything that is likely to get hot. I'm probably gonna go with something close to Farmall red when I get to painting my equipment. Red makes it go faster :P.
-
Another idea would be to weld on some legs with pre-drilled holes and lag it to a stump. After that weld that half round to it.
A solution for Hardie tools may be made fairly simple by the curve on your "horn". Find some hardenable stock that's about 1.5 to 2 times the thickness of that hole and cut it into about 3 or 4 inch lumps. Forge a tenon to the size of that hole and about 1.5" to 2" long, heat it all, and upset down into the hole. It seems like if the tenon is fairly even and close fitting enough so that it doesn't rattle, the tool should sit over the "horn" like a saddle and not jump around alot. I would try it first with just the lump though, before I did all that welding.
-
If you end up using a piece of round stock, another good idea is to take some tubing with the same inside diameter as the thickness of your stock, weld that tubing to a plate or even to a tripod stand (look around this forum for ideas on that) and fill it with sand until you're about 4-6 inches from the top. Slide in your piece of round stock and you're in business. The sand adds to the effective weight of the anvil and also reduces the ring that steel has.
If you find a big piece of that same size stock, you could just use that as a weight upgrade, which can make working bigger stock noticeably easier. I'm sure you could figure out ways to mounts hardie holes and horns to it, although you may want to make them so that they slip on over the top of you anvil.
-
Yeah, this show was pretty awesome. I came across this show about 2 months after I started.
-
That's a mighty fine knife. Awful clean cuts she made with it. I'm glad to see that even though they're doing population control they still have the decency to at least grab that canadian bacon. I probably would have flipped him over and gone for the slab bacon too. It is sad, but I can imagine that there are probably more than a few people that would just let the entire animal rot for spite, especially if they got into a field that was just starting to look good.
-
I did something similar about 8 months ago with a 4 lb Collins Axe engineer sledge I picked up at TrueValue. I made the ends cross and straight 1.5" fuller. It moves metal very quickly and smoothly. If I take small enough bites I don't even have to use a flat faced hammer until it's time to do the finish work.
About a week after I made it I realized that my only problem with it was and still is due to operator/modifier error. I should have gone with about a 30° right-hand diagonal fuller, much like your picture, as it is hard to draw stuff out towards or away from me without it trying to twist CCW away from me. The straight fuller works great for drawing long heats across the face though.
-
A post heat where you gradually reduce heat also helps with HAZ cracking, although I don't know if you really need it on 40 point steel. I alway do it whenever I'm making anything using airchisel bits though, or they like to snap just behind the weld when I really get to abusing the modified tool.
-
I know the shop that I hammer at has 6 JHM anvils and I think they're all competitors. They're all pretty good anvils, even after 20 years of ab/use generated by someone who is more than likely just learning how to use a hammer.
There are a couple that have sharp spots under the horn from missed strikes of years gone by, and all of them have the odd mark on the face. No chisel marks, torch marks, or serious sway/face damage to any of them though.
-
Until the early-mid 19th century most anvils were just a solid lump of wrought iron. With that in mind I would say even a block of mild steel would work great. I've seen quite a few lumps of mild used as striking anvils, because they're fairly cheap, still do the work, and you're not too upset if they get messed up a bit. If I ever get an anvil with good clean edges, I doubt I will ever do any striking jobs on it. I'd get a lump of mild steel first.
Edit: Oh yeah, leave that 12L14 alone. That spec for that stuff states somewhere between 15 and 35 points (hundredths of a percent) of lead. Supposedly the only really good thing about it is that it is easy to machine. Thank the Heat Treating Society APP for the info.
-
Was the striker related in any way to Gallagher?
-
I'm pretty sure that the wrenches' original purpose was for all the square nuts that people had to deal with, as they're perfectly shaped for it, and there were no standard sized nuts. I have a large and a small one of them, and I've also heard them called Mechanic's wrenches. I have a feeling that the name goes back to the old days when a "Mechanic" was a blacksmith who could build and repair machines. They not only knew how to hammer stuff out, but were also quite proficient with mill's, lathes, and various finishing processes.
These wrenches work awesome for doing twists, as they fit perfectly on square stock, although they have a tendecy to go off-center. I've seen people weld a sturdy bit of square or round stock at the top so that you're twisting from two sides, which fixes that tendency. I can't bring myself to do that to mine, but I'll still use the ones that already have it done. I guess I'll just use mine as templates for another set with the extra twisting handle on it, although it'll be awhile before I do that.
-
It says on the website it is supposed to be playing tonight, but when I scroll through the cable all I can find is "Craft in america: Textiles" for around 3AM tomorrow morning, and then "Craft in america: Crossroads" the next morning. I guess I'll just have to keep an eye out.
-
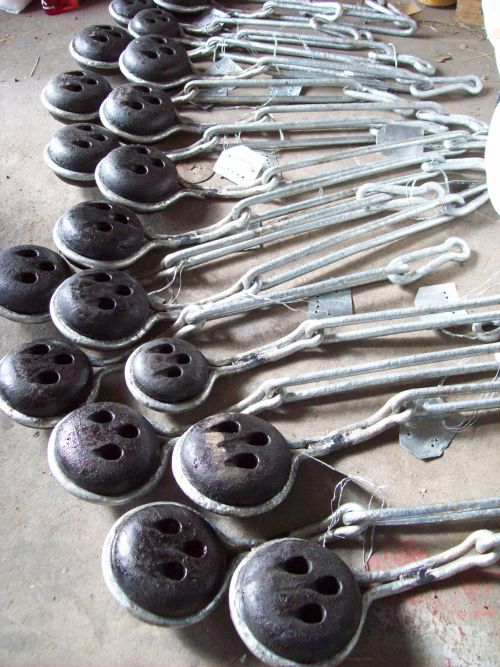
As far as long heats go, I've made something like this out of 6 foot sections of 1" round, although not galvanized and shaped differently:
I wish I had actual pictures to post of that.
And that leads me into clinkers. It was actually while we were making these when we started the months long process of slowly burning a sizeable hole into the side of the firepot in our brick demo forge. We had a bad batch of coal that had so much clinker that it actually coated the bottom of the firepot and redirected a good bit of the flame straight into the side, and we didn't realize it until it was too late. I make sure to check for those little buggers at least on an hourly basis now.
-
Good deal guys.
Arkie: I like the goal post idea, although if I go with a portable forge I'll probably make a Y-stand to hold the end of my stock. I like Y-stands better for long pieces because you aren't limited to a certain angle of attack or a certain length of stock, although if I'm bending 20 footers I might need a few of them. The forge mounted stand seems nice for smaller awkward stuff like if I'm trying to heat up a big curve and I can't really lay it sideways over a forge.
Glenn: I kind of expected something like that with brake drums. The leftovers of the fire pretty much burned down and then slipped down the hole until what was left settled into the angle of repose. I guess you would start with normal old potter style clay with sand before you commit to a shape in fire clay? Or depending on the variety of work expected maybe just stick with the clay? Say if I need really long heats for a bunch of long scrolls and twists, and then concentrated heats for forge-welding them all together. I imagine the desired result would be a shape that lets most of the ash escape out the bottom, concentrates the clinkers away from the grate, isn't so shallow that it's hard to get the fuel at the edges going, and doesn't burn up the wall of your firepot. I also imagine that shape changes not only based on the type of work, but your fuel, as coal, industrial coke, and charcoal all burn different.
Frosty: One of the guys in my local group has a couple of old cast iron duck's nest tuyeres attached to some really deep narrow brake drums. I didn't know it was such a flexible system, I thought they were just a quick way to convert one of the old bellows side-blast rigs into a bottom blast. I've never seen one in use, that I know of. Maybe you could post some pics?
-
Perhaps you are trying to do small work in a forge designed for large work---a self inflicted difficulty
So, basically most of the forges I've used, all built in the last 20 of so years, are built based on an old template where heavier stock and heavier work was more common and you really needed to stack on the fuel? That actually makes alot of sense. Kinda goes with the old say "If it ain't broke..."
the slope in a bottom blast forge is to allow the ash to fall into the pipe, and thus out the ash dump. It keeps it from building up in the fire pot. It also forces a deeper fire which, as mentioned, reduces scale. Basically, the deeper pot uses up all the oxygen before it can reach the metal you're working on. along with making the pot deeper it also shapes the fire. different shaped pots = different shaped fire. There is no one forge that is perfect for EVERY job. so working small material in a large forge wastes fuel and working large material in a small forge wastes time. etc.
It sounds like you're more concerned about using fuel to it's fullest rather than being concerned about keeping the material in the best shape possible. Fuel is cheap, material typically isn't if you compare the two.
I understand why a firepot is sloped to make it easier to clean and promote a clean fire while in use. I'm referring to the bed of the forge around the firepot though. I 've never had much problem with ash outside the firepot.
I do keep the scale build up in mind and under control when working. Am I worried about fuel usage? Yes! I'm absolutely trying to get the most bang for my buck. Good coal costs at least $25+ a bag with shipping here in California, and that's if you buy it in tons. I've only found one place in 50 miles that sells coal, and they sell it for $50 a 50lb bag. With that said, I don't like using more coal than Is necessary, for minimal gains in scale reduction. I would go with a gasser, but I'm not very comfortable with something that could literally blow up in my face If I don't do it right, that and I have no idea how to regulate a reducing/oxidizing environment with a venturi.
The firepots I'm used to are the Centaur Forge coal pots that are about 3.5 to 4 inches deep, 8-10" long, and about 6" wide. The biggest short (12" or less) pieces I've heated in them was 1" round or 3/4"x3" flat, and i don't get much scale, even while hammering and bending. I start by laying my work across the lip of the pot, making sure that the work is well covered by coke, so that I can just see the color of the metal, heating it up quickly but thoroughly, and once I'm up to temperature I kill the blast for a few seconds to ensure a reducing atmosphere before I pull the metal out.
When I'm trying to heat the middle of long pieces (3 foot or more) I have to stack about 1.5" to 2" higher of a pile, force more air through to get the heat up that far from the tuyere, and I end up burning through more coal, which is really kind of sad when it's something thin, like trying to draw out reins from both ends of a piece of steel withough using tongs. More coal, more mass and radiating surface area, which requires more air and fuel, for more heat to keep lt all hot. Meanwhile the smaller fire does just as well with the scale.
I started this post because I couldn't find a definitive reason anywhere and I'm thinking about finally making a forge of my own instead of being limited to driving to the next town over for 3-6 hours and a lunch break once a week with my local group. I just wanted to make sure that it wasn't something I was overlooking, like maybe magically helping the draft of the hood, or maybe I was underestimating how much coal likes to fall of the edge. It's seeming more like it was primarily for keeping bigger work up higher to prevent scale, which I can solve by propping up the metal on something, like a piece of scrap. It could also be for coal storage, but a 1" rim around the bed with a 6" pass through it on either side of the pot should fix that.
Thank you for the info. I momentarily forgot about the days of the industrial grade blacksmith that could swind a 16 pound sledge like it weighed 1 oz.
-
Yep, I'm not one to get between him and a steak, especially not when he's swinging that sledge like it weighs 1 oz.
-
Okay guys, weird question. Why does it seem that all bottom blast forges I've seen have a slope that is graded in all directions to the firepot? I've always been told not to put my piece pointing down into the pot, but make sure it has coal over it. This gets annoying when drawing down long pieces less than half inch, as you really have to pile it up, and I know that half inch really doesn't need that much coal., since the slope is just pushing you away from an otherwise perfectly good fire. Even the forges from the turn of last century have it, the cutouts on the edge sit higher than the firepot. Literally every bottom blast forge I've used has this little quirk. I don't recall seeing this on gassers or on side-blast, so why bottom blast?
It almost seems like some knuckle-headed apprentice was pouring way too much (char)coal into the bed and it was all rolling off of the edge, and instead of telling the kid to knock it off, the master smith decided to make the whole forge slope inward. I can see why either side of the firepot would slope down a little to hold coal for bigger jobs, but why not make a level strip the width of the firepot all the way across? It sure seems like it would be easier to clay the bed of the forge this way too.
Seriously though, maybe some of the guys that have been around for awhile can field why this is the way it is. Pardon the rant, I guess you could lump this in with old world problems.
-
What work does it need? All I see is a little rust, and that should be pretty easily solved by wire wheel, red primer and maybe even some JD green or Farmall Red on areas not near heat. Red would make it go faster.
I like that firebrick idea too.
-
I got my MIG 3/8" 3G cert this summer and moved on to a stick class that started in September, so take any of this with a grain of salt as I'm still a little wet behind the ears, but I'm not a total noob either. When I first started with 7018 I was short-arcing pretty hard when doing 3G and getting exactly the same problem that you are: good tie-in, flat bead, "Jon Wayne" slag. I've since had much better luck hanging out about 1/8" from the surface. I'm even peeling all the way to the top sometimes (8" piece), and the most I have to do is run a chipping hammer down the side of my weld. I do have to run a little faster on narrow passes though, or it all starts running away from me.
The other time I've had that problem is when I've grabbed rods that I suspect weren't quite dried yet. I think another student had just put them back in the oven after they'd been out awhile. I could see the shielding coming off of them in big chunks, instead of melting from the end, and it seemed like the arc was coming out the bottom of the rod and scorching the stuff that I just welded over. The only way that slag came off was in a powder after bashing its brains out, and even then there was some porosity in it.
I hope some of this is useful.
-
Cool, I just wanted to make sure you didn't get your car to start freaking out and not be able to stop it. That might be fun to explain to the cops :P.
-
I don't remember where but it seems I've heard some chrome shops can dip that stuff in an acid bath or something for re-use in electroplating operations. It might be worthwhile to call around and see if there's one nearby that would be able to do that for you. On top of recycling, you wouldn't have to worry about whether or not you've permanently contaminated your forge/work area, and you may even make a couple bucks if you bring in enough chromed stuff to make it worthwhile for them.
-
Found this on Google Patents:
I would not be surprised if he licensed it out to several companies, or even exclusively to HB Smith.
-
Doesn't that kind of key have an integrated circuit chip in it that prevents counterfeiting? I know one of my buddies had something like that on his VW Jetta a few years back. The only place he could get keys made was at a dealership, and it cost around $200. I would verify this with your dealer before going further.
-
Thank's a bunch. Your embedding worked just fine. I'll add that to my playlists. So after seeing that video it seems safe to assume that box and can welding are the same thing. I imagine you could get pretty fancy with something like this.
How did YOU get started smithing?
in Blacksmithing, General Discussion
Posted
A little over a year and a half ago, I found out that one of the civilians I worked with taught blacksmithing. I attended the classes and within 3 weeks I was hooked.