
FordPrefect
-
Posts
105 -
Joined
-
Last visited
Content Type
Profiles
Forums
Articles
Gallery
Downloads
Events
Posts posted by FordPrefect
-
-
Happy belated birthday Brian!
-
Aaron, does it not look good?
Thanks Frosty, it cleaned up nicely, I tried to make it look more appealing so that I would go out every morning and pound on something with a vengeance. -
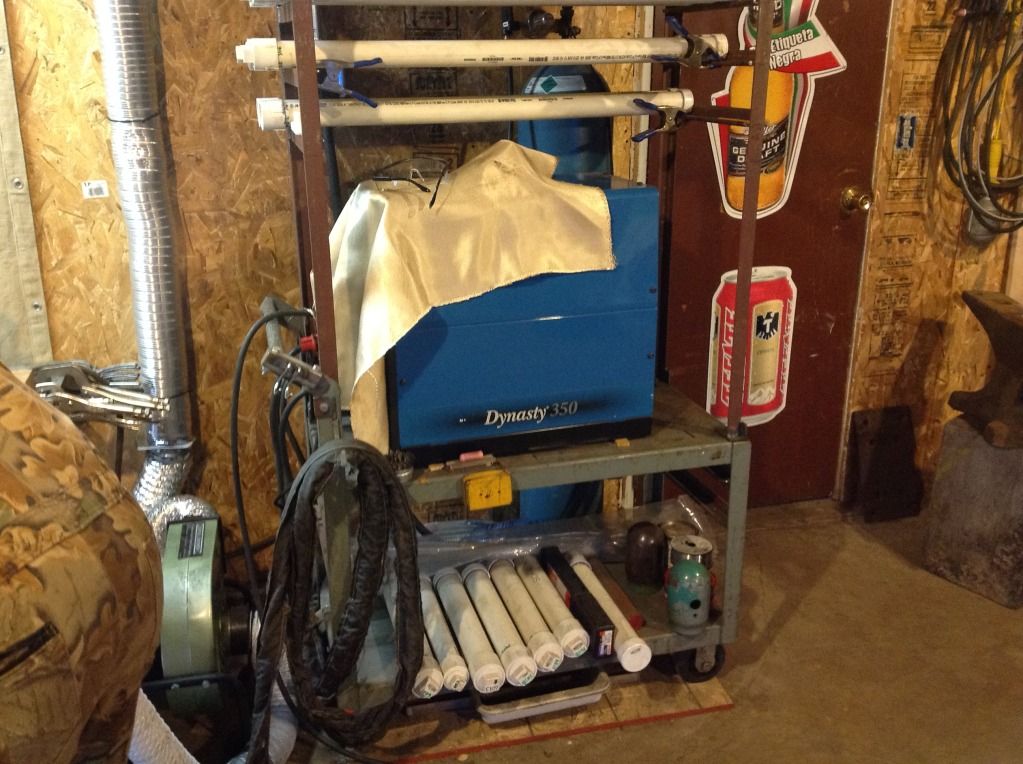
I decided that I will repaint the gasser first and all the parts in high temperature black paint, then reline, and coat inside of the gasser with Bobble Alumina refractory coating. So first I will get some paint, then I will disassemble the gasser sand blast the gas housing, and paint and reassemble the gasser, reline, and finally coat. Second I will make the cast-able table and legs that will support the table inside the gasser. Pictures will follow when each step is completed.
I will have my friend Mark weld my stand which will use eighteen wheeler hub as a base for the stand, it will be approximately four foot high. I will also paint the stand black. -
I got this used gasser from Ebay for $250 plus $78.55 for shipping 90lbs according to ups.com in December of 2011, the seller Dennis is a great guy that did an excellent job of designing and building this three burner gasser.
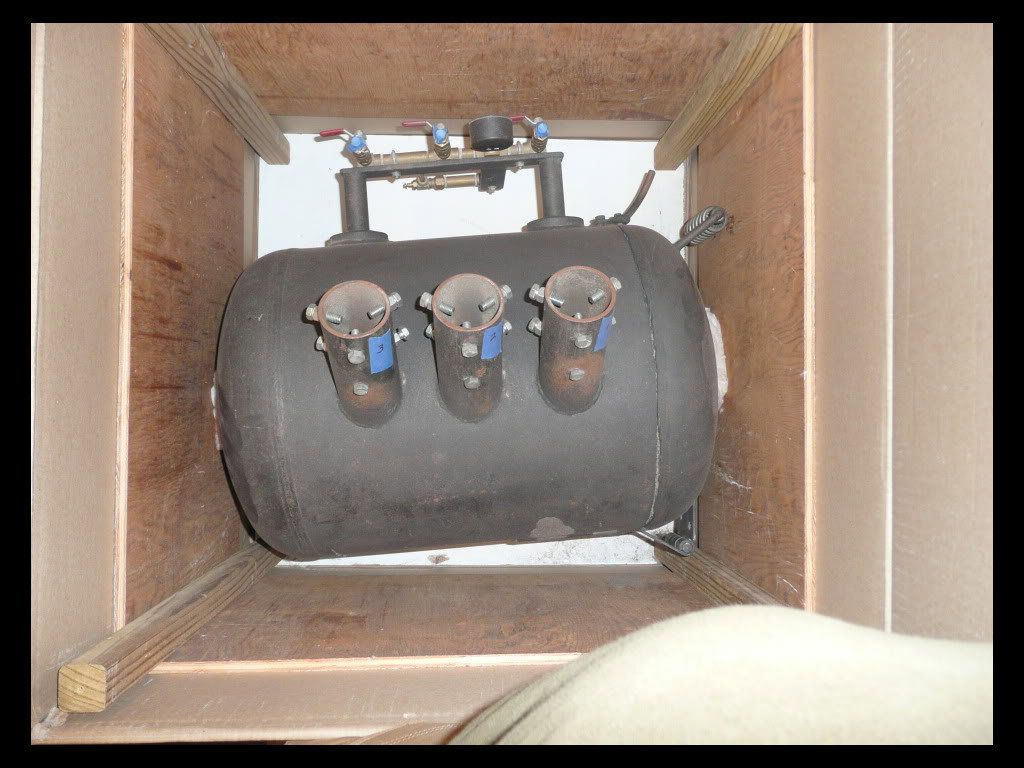
Gas forge in the box.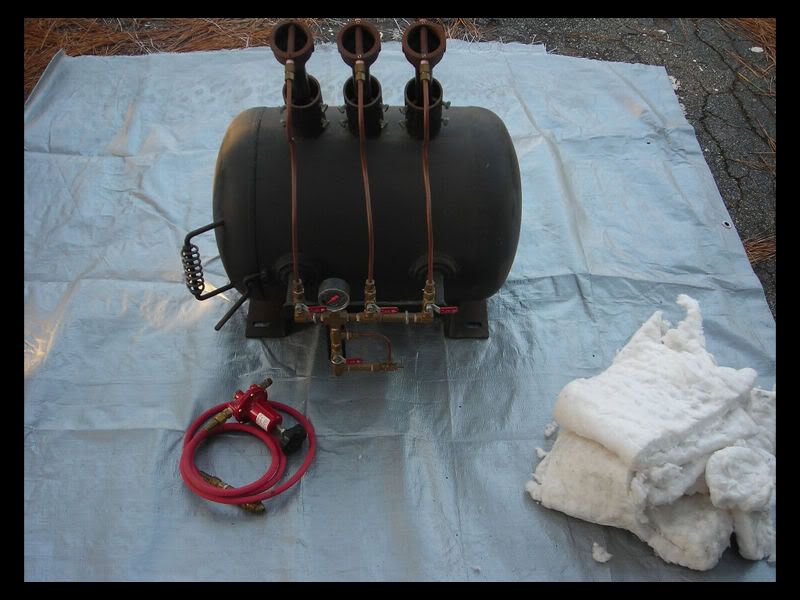
All the parts of the gasser laid out.
"He said that the ball valve in conjunction with the small needle valve is the idle circuit. When adjusted properly it will reduce the flame to an idle to save on gas when you are not heating anything and to save on relighting. To adjust open the needle valve, lite the forge and let it warm up a little and then close the ball valve under the gauge. The flame should be reduced to an idle at that point. Adjust the needle valve so the flame is at its lowest point to keep it burning.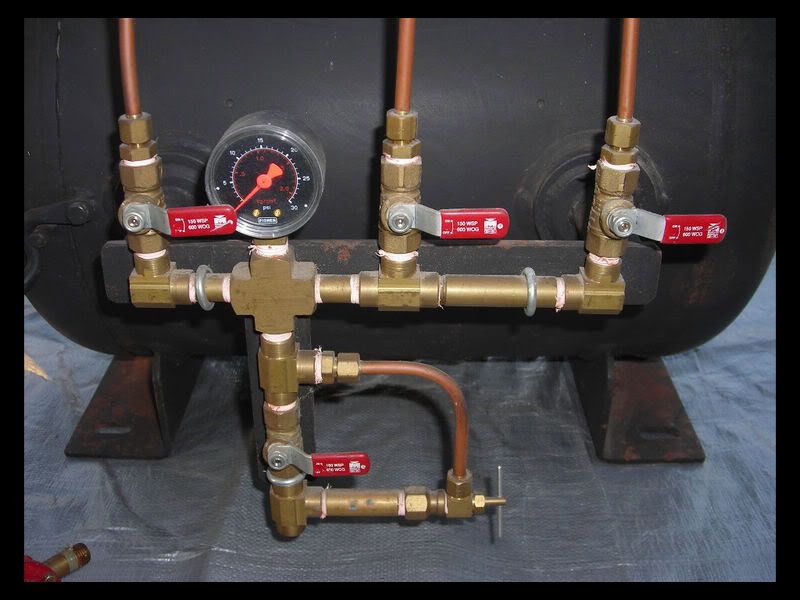
Control panel of the gasser, the right side of gasser if one is facing the front door.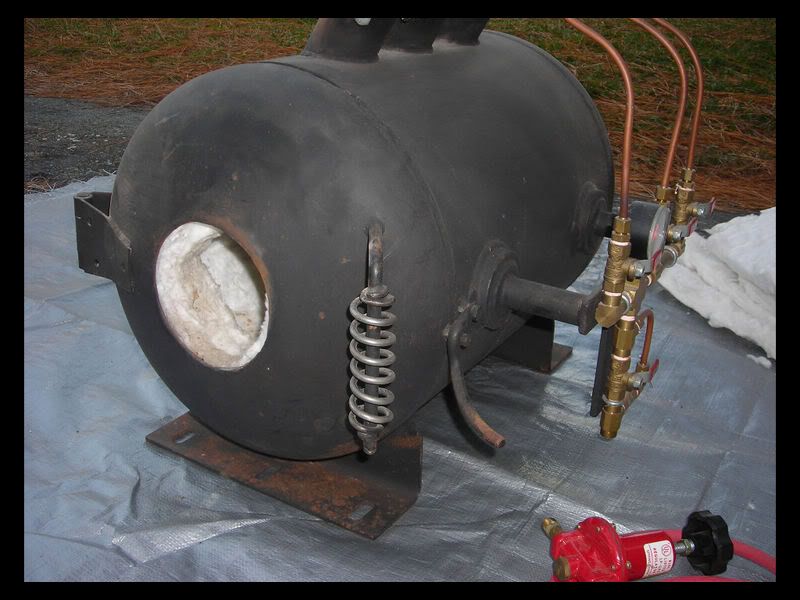
Front view of the gas forge.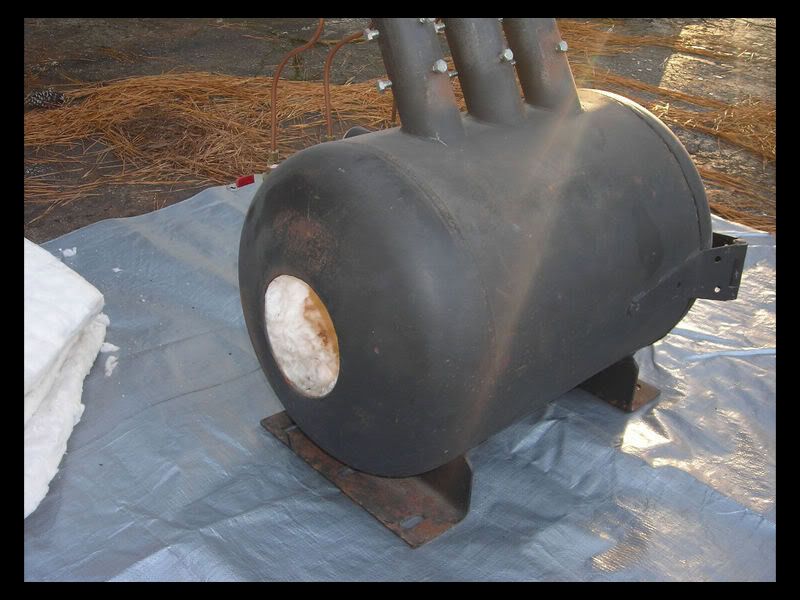
Rear view of the gas forge.
He also said he has used fire brick in the forge not for welding but to raise smaller pieces up off the bottom of the gasser floor.
Per Dennis the insulation is about 8 or 9 years old and was what was recommended at the time. Even though there is not a lot of use on it, you may try replacing it first. I also have never welded in the forge so I am not familiar with the process. if you are doing a lot of welding the Bubble Alumina Refractory Coating could be an added improvement with out replacing the insulation."
I intend to do the above after I realign gasser with new insulation that came with the gasser and and coat with Bubble Alumina Refractory Coating which I just got the other day. Since I will use the gasser for forge welding I will cast a nice table (the table will be concave) that will sit at least an 1 1/2" off the bottom of the gasser with four legs made out of same cast-able refractory material as the table, I want the flame to be able to surround the metal that I will be heating, since all three burners are set at approximately 45 degrees from horizontal, flame will be circulating in a counter clockwise direction, if I just use a solid break it will disrupt the circulation, and the metal piece will not get evenly heated. -
Bigred1o1, yeah I love the way this anvil looks, very tough looking, like an anvil should look. This anvil could have had a stamp on it, but not sure it matters, this anvil was not abused, so it may be that it is a anvil made by smaller anvil maker few suggested here.
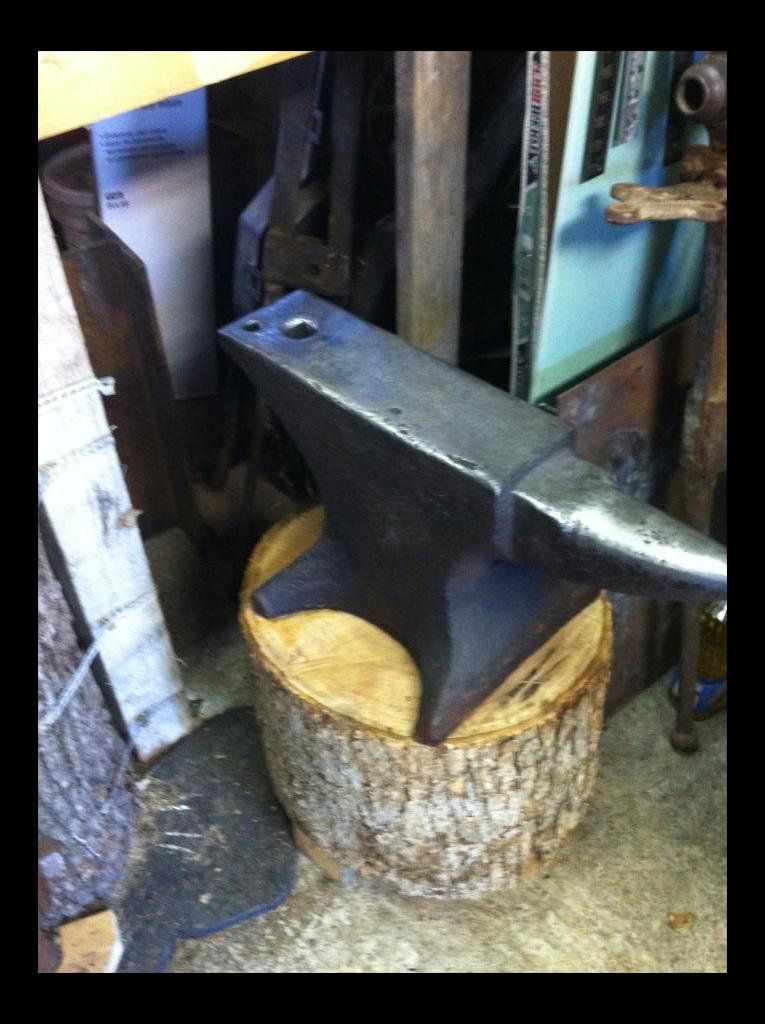
Thanks Curley George, Aaron can't afford this anvil anymore, with white oak stump, cleaned, oiled up, this anvil would go for way too much money, unless he wants to trade for a power hammer. :D
Oh it will be used to the fullest Aaron, few more weeks, need few more tools.
Thomas I could care less if this is a Mousehole or not, it's a great anvil worth what I paid, would have been better if I paid $35 like my friend Mark that got a 205# Hay Budden at an estate sale, but I am not that lucky. -
Brian Brazeal! Some day I will have the pleasure of taking a class from him.
-
That is a nice find, Marcus.
-
fluidsteel, it moves metal very nice, has a nice sweet spot about 4" away from the hardy hole towards the horn, but not sure why it does not have any markings?
-
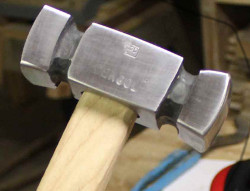
Wayne, the hammer is 6' tall and 44" inches wide, the wood blocks are 600#.
-
metal99, keep looking everyday, actually install the Craig's List app and make sure it alerts you when an anvil put up for sale.
-
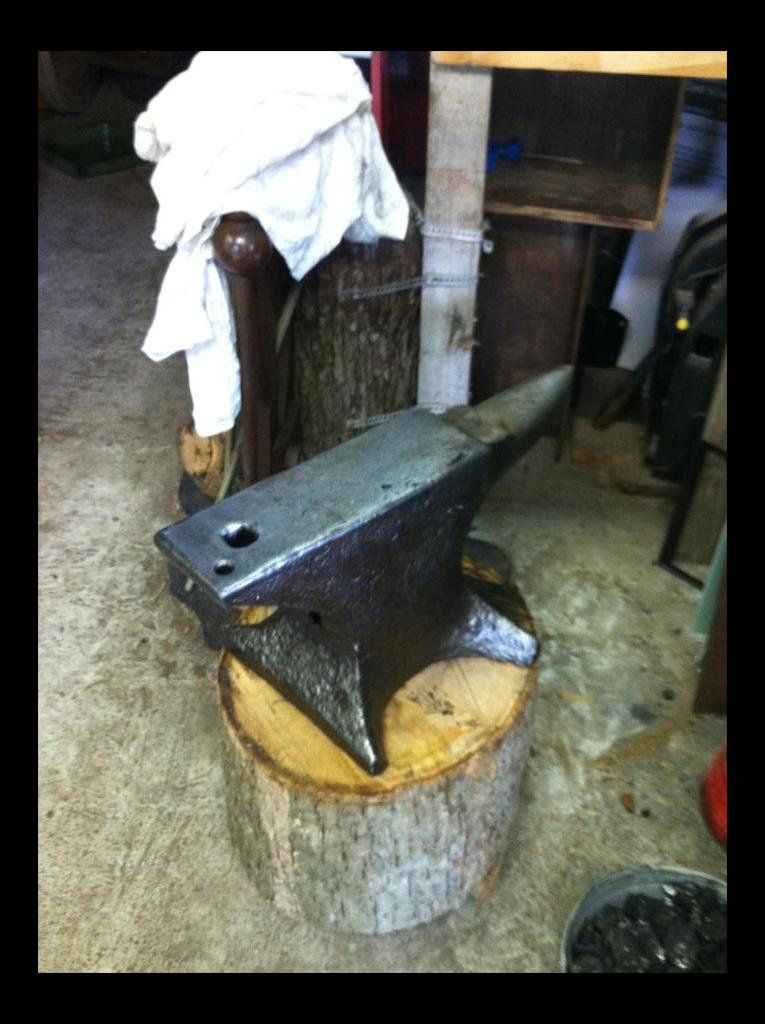
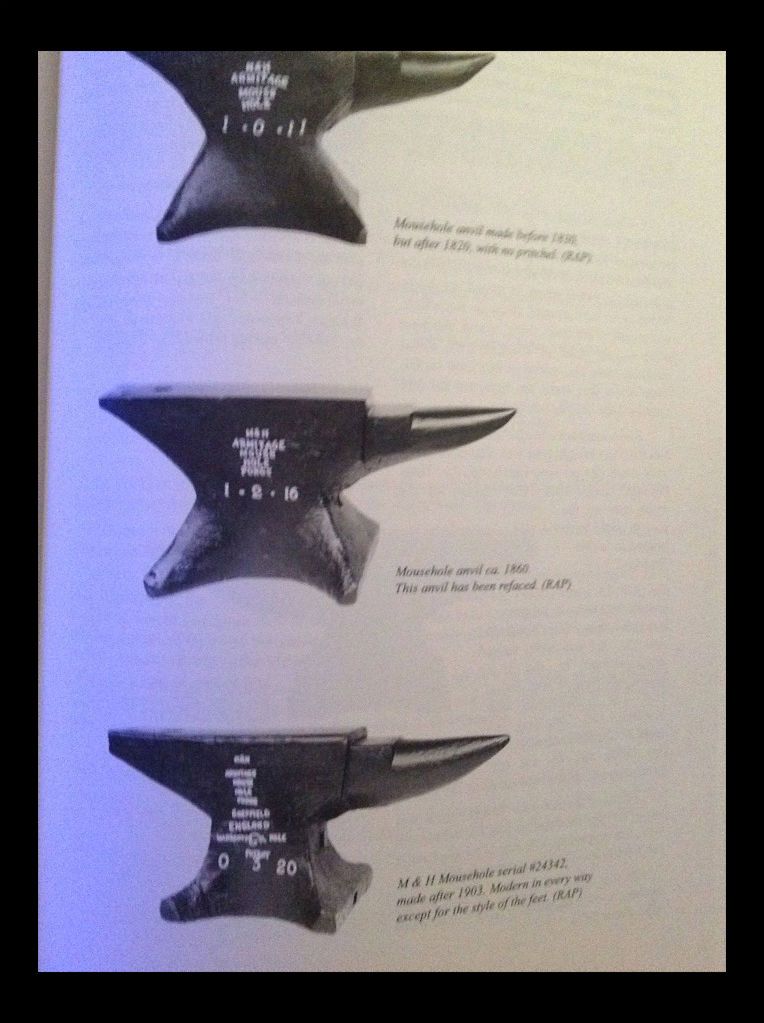
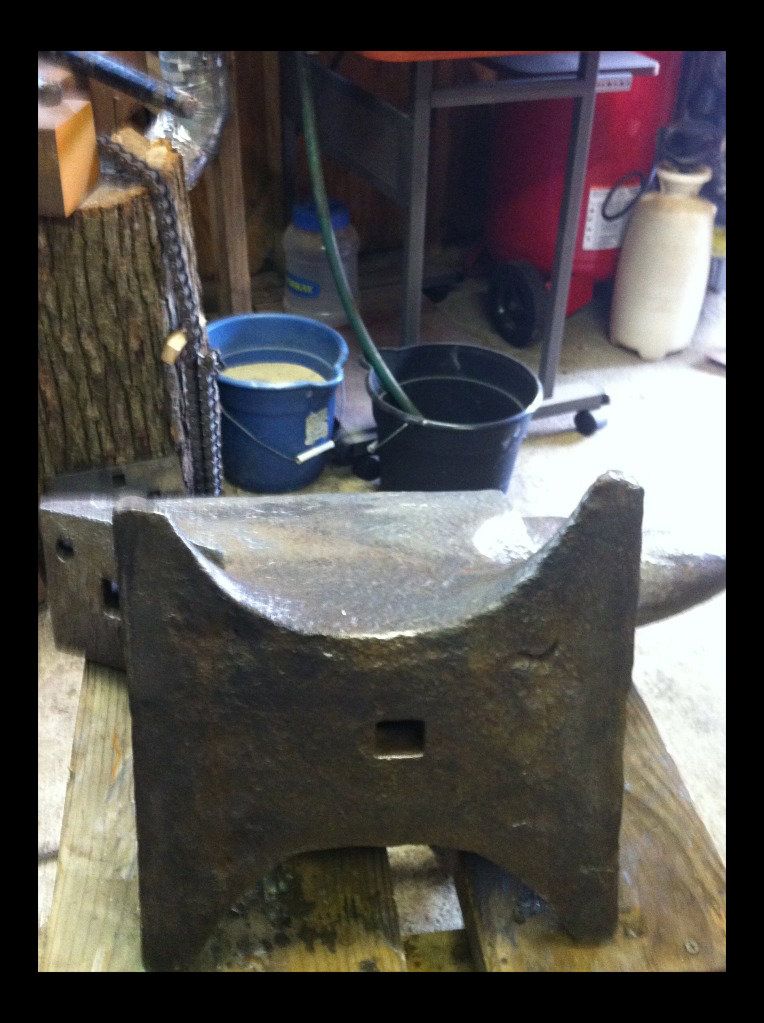
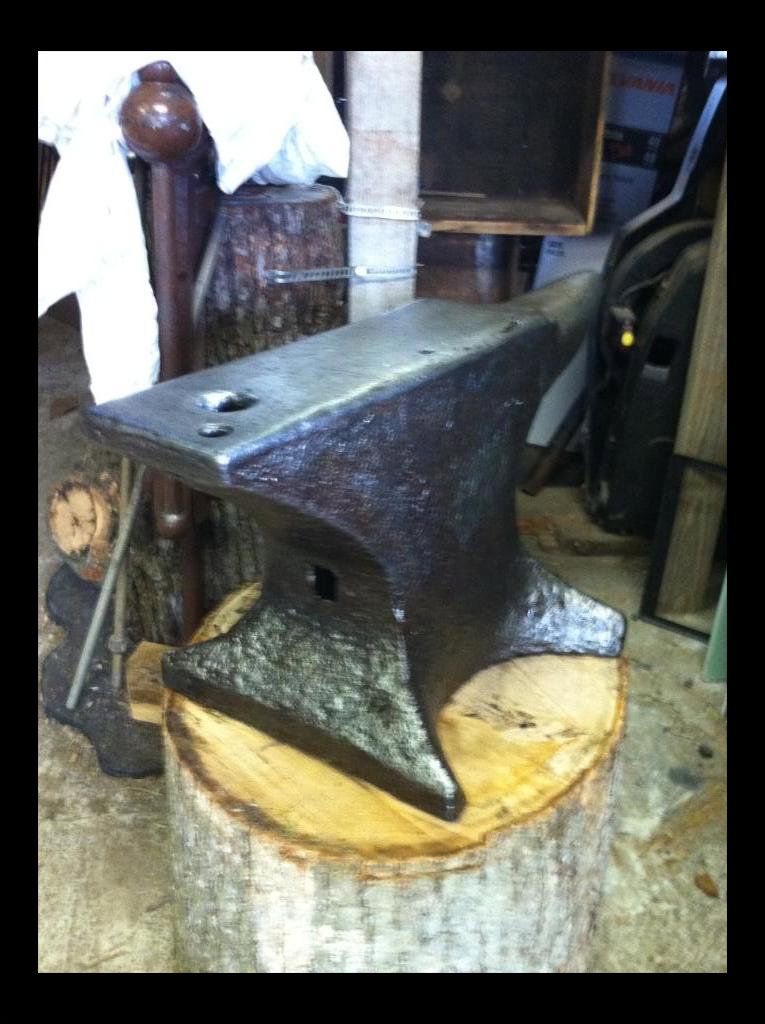
Well here is my Mousehole anvil, just got it cleaned no markings, no nothing on it, per Mousehole Forge book it looks like a 1860 Mousewhole see picture below, I believe the picture in the middle is my anvil.
This is what it looked like when I first seen it.
This is what it looked like when I brought it home, or to my brother in laws shed, placed on a new white oak stump.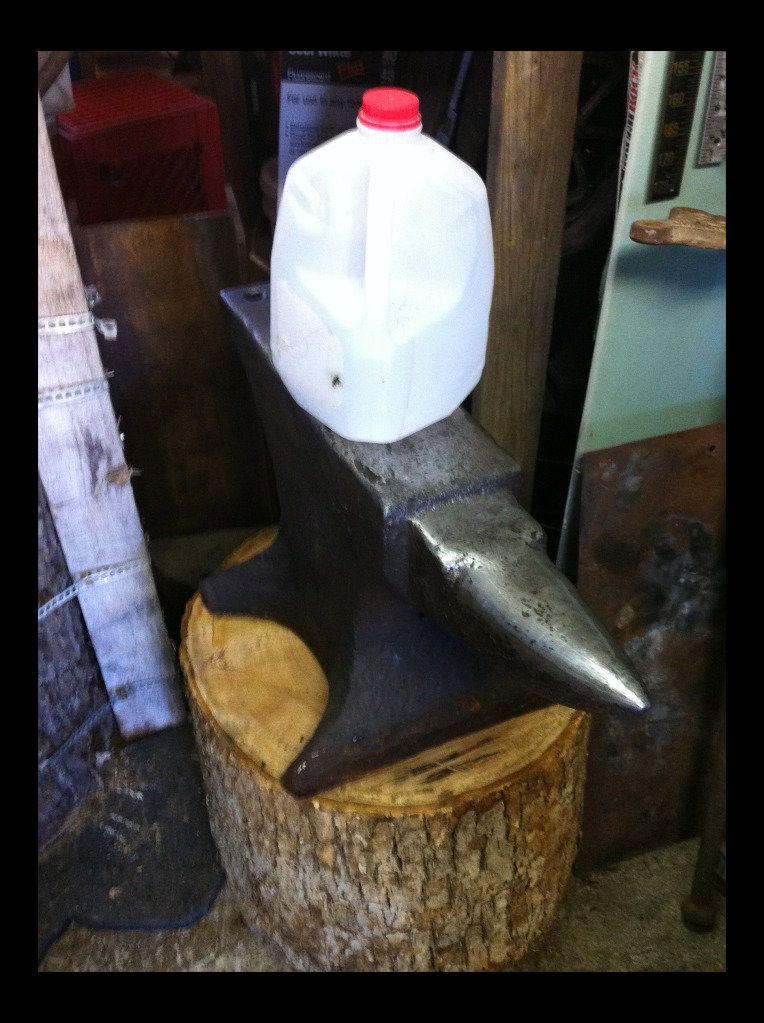
Here are the pictures of the anvil being cleaned.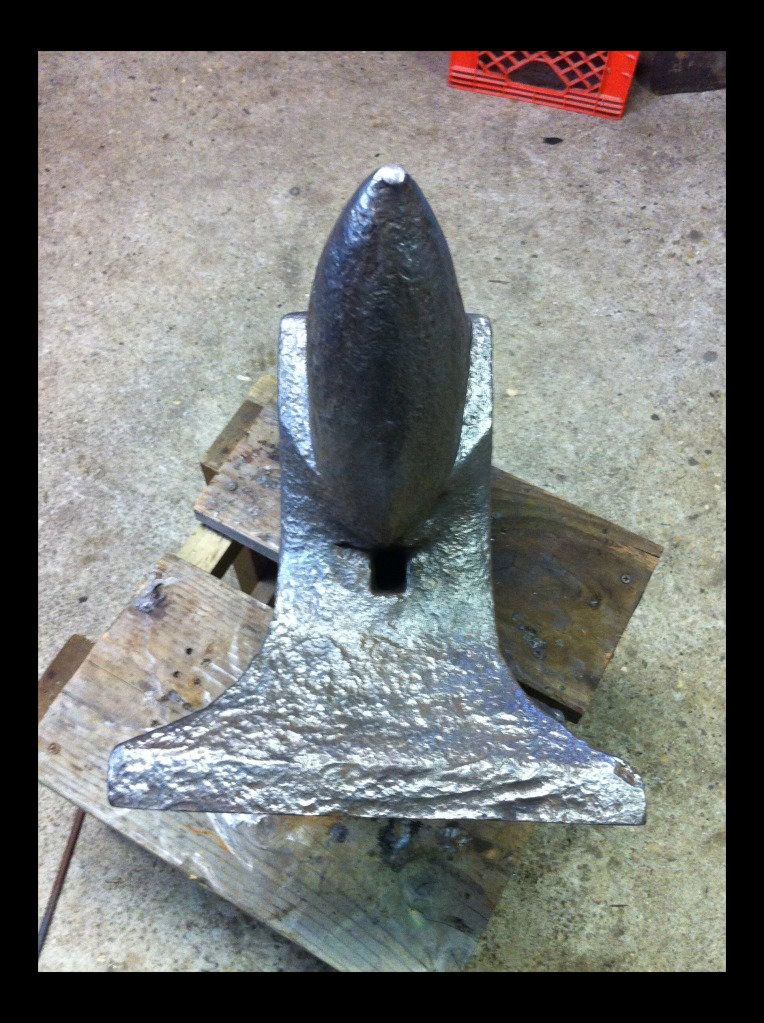


-
Brent Bailey, I use all his tools, reasonable cost custom made tools.
-
For general blacksmithing I would choose Brent Bailey, and Brian Brazeal. For knife making I would choose Rich Hale, but not sure I am worthy.
-
-
bajajoaquin, no that is not me, since I am not sure what expo is?
-
Gator, it's just the beginning, my brother in law, Bill will make it a nice tool, that we could both use for those tedious tasks such as making Damascus billets from wire rope, and drawing metal, and tongs will be easier to make, etc.
-
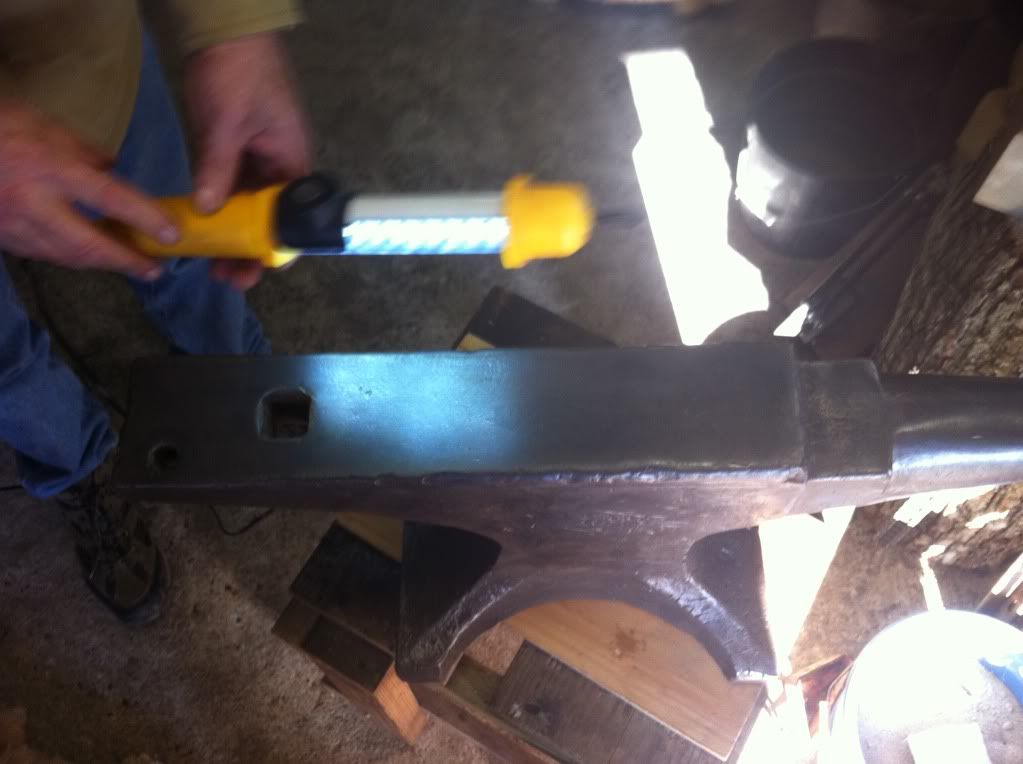
Pat, if you look at that last picture of the anvil when he first got it, it was rusty, you could not see any markings, had something welded on one of the sides. I had to use a wire brush to see the serial number on the bottom and manufacturing marking on the one side. Mark removed the welded on piece of metal and must have just cleaned it very lightly. While Mark was welding I was using a hand wire brush and I went to town on it. Really he could use a power wire brush and make it look brand new, oil it and leave it, in his will for me.
-
VaughnT, I tried to quadruple his money, he said no, and I am his best friend, and he is not using it for blacksmithing.
-
-
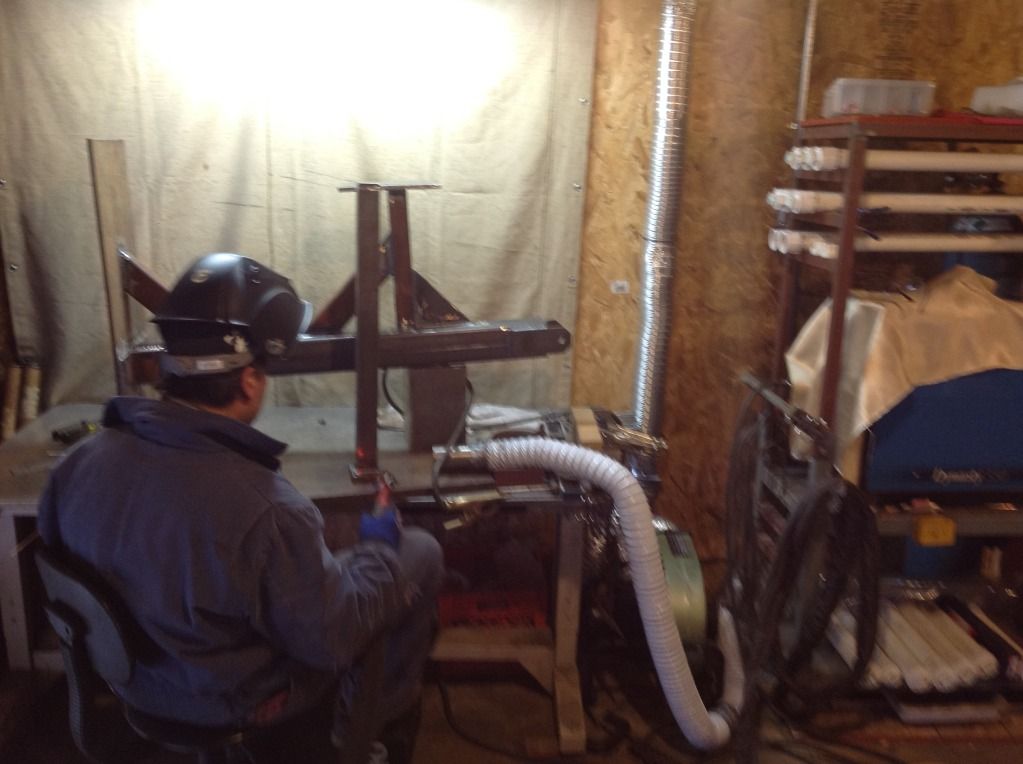
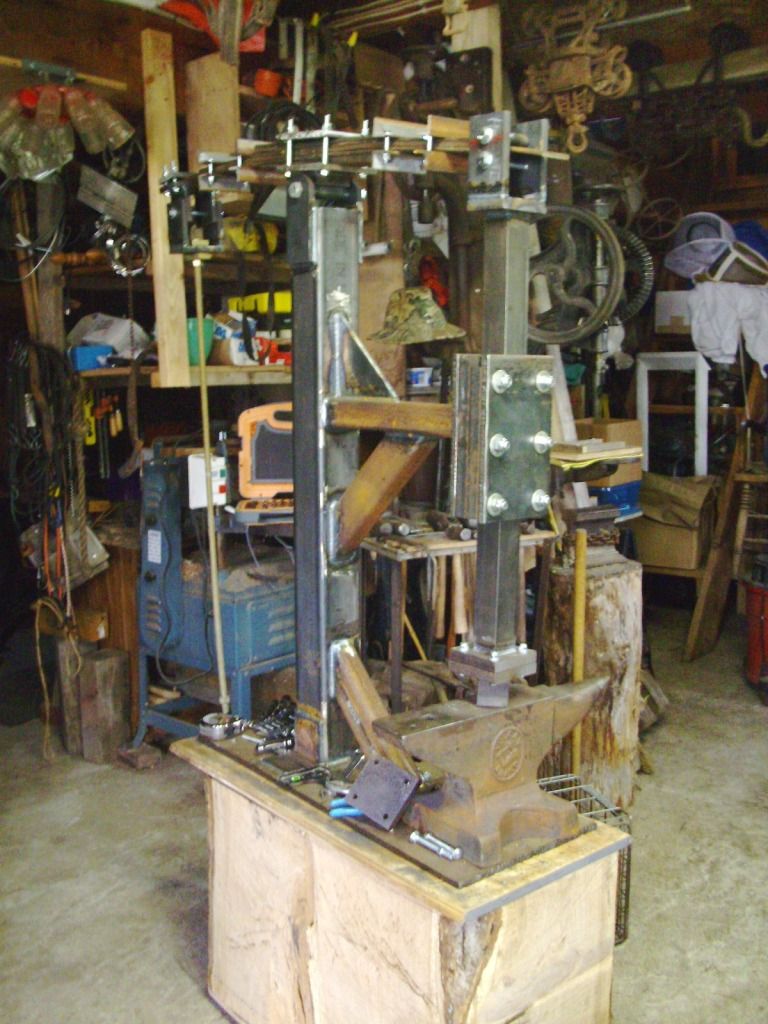
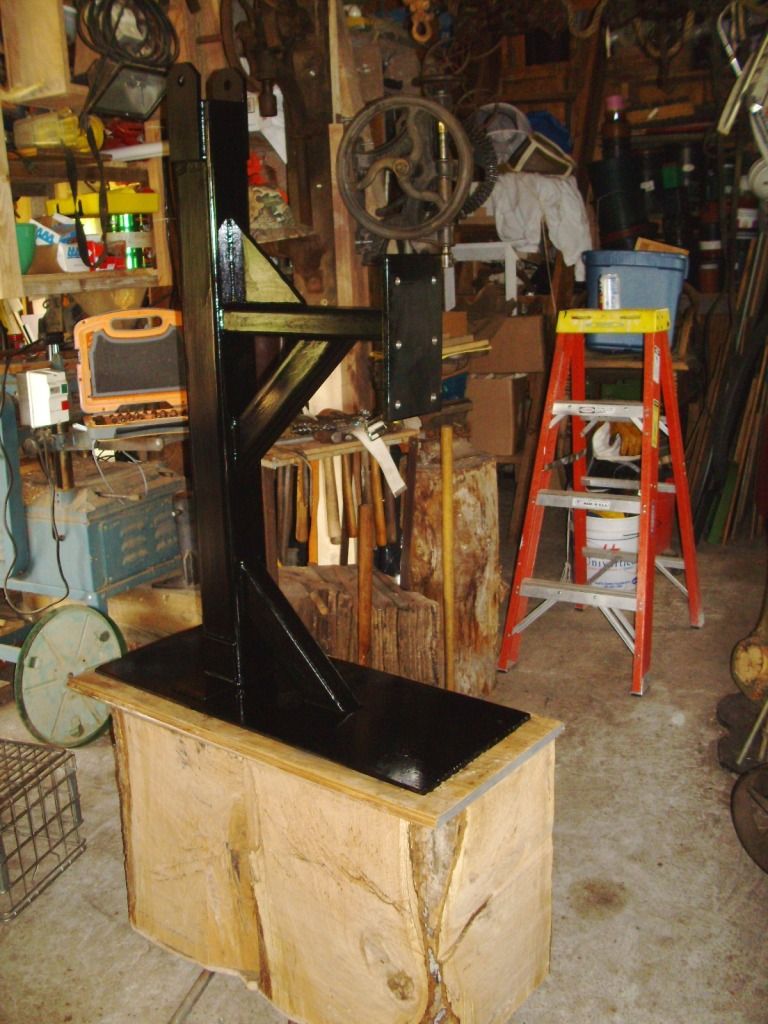
My brother in law, Bill is building a power hammer, so we can make billets, the hammer chosen was the "RUSTY" the Appalachian Power Hammer. Last night we took most metal parts that needed welding and got them welded by my friend Mark. Now the assembly will begin, here are some pictures of my friends garage.
http://www.appaltree...rusty/RUSTY.htm
Here are some pictures:
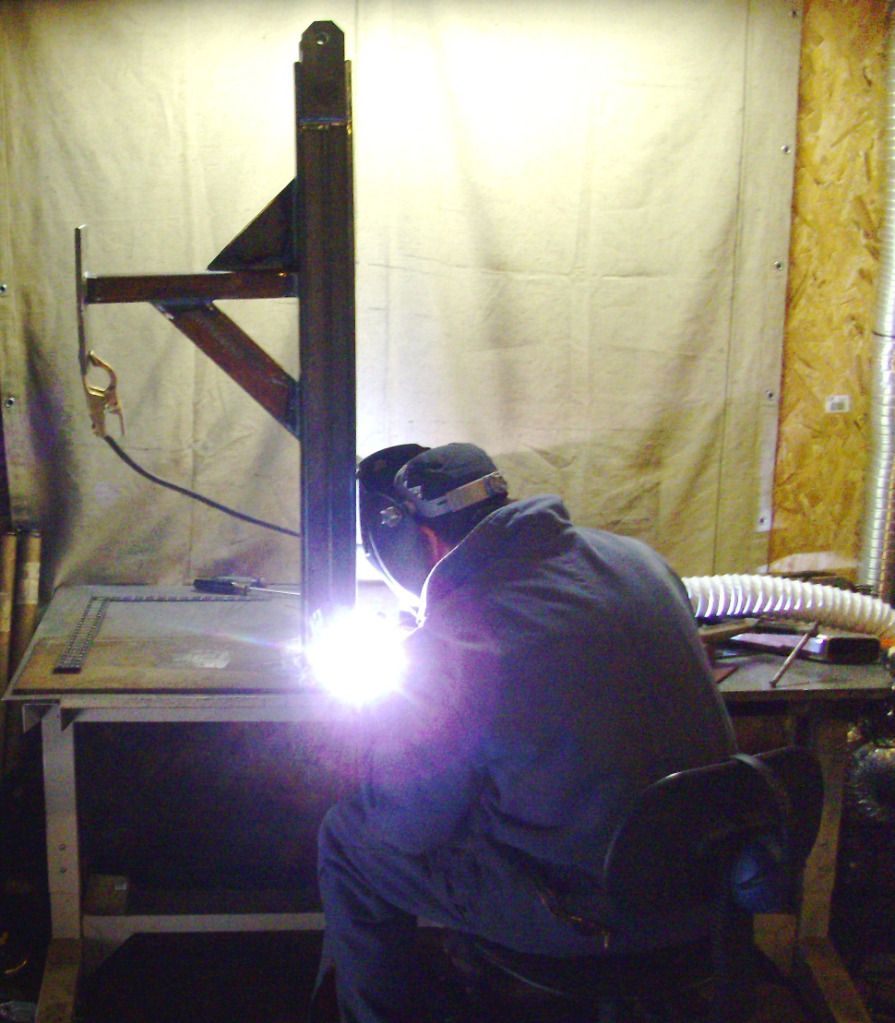
Here is the final hammer without the electric motor: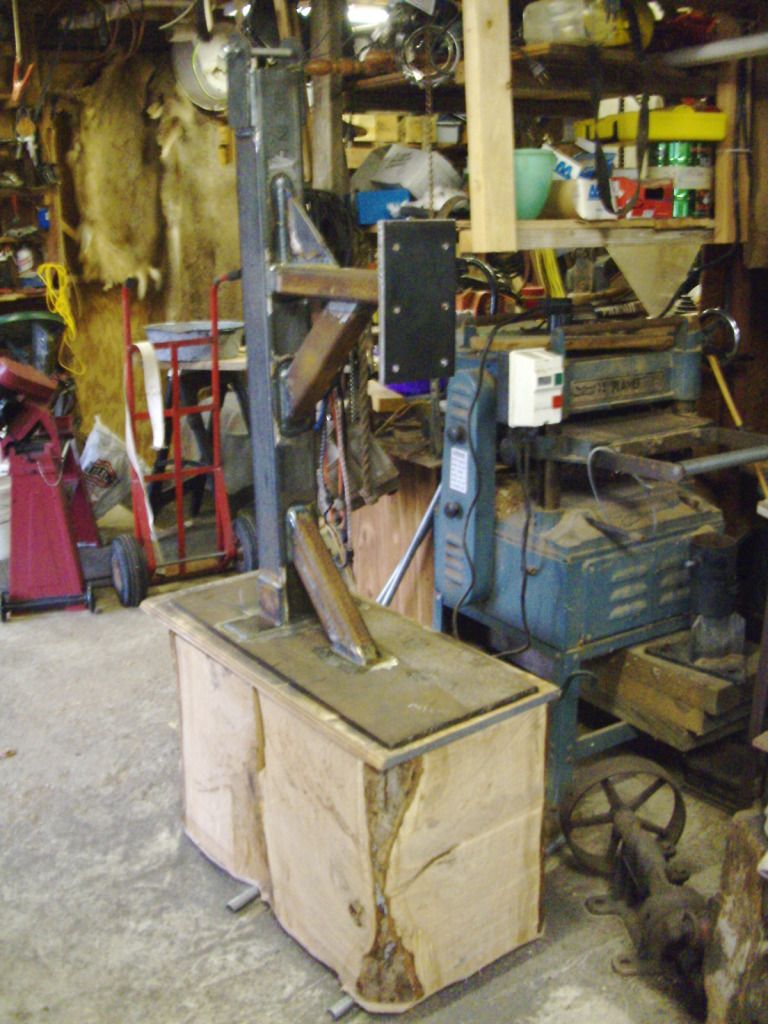
-
Thank you Curly George, my friend is elated that he did so well.
-
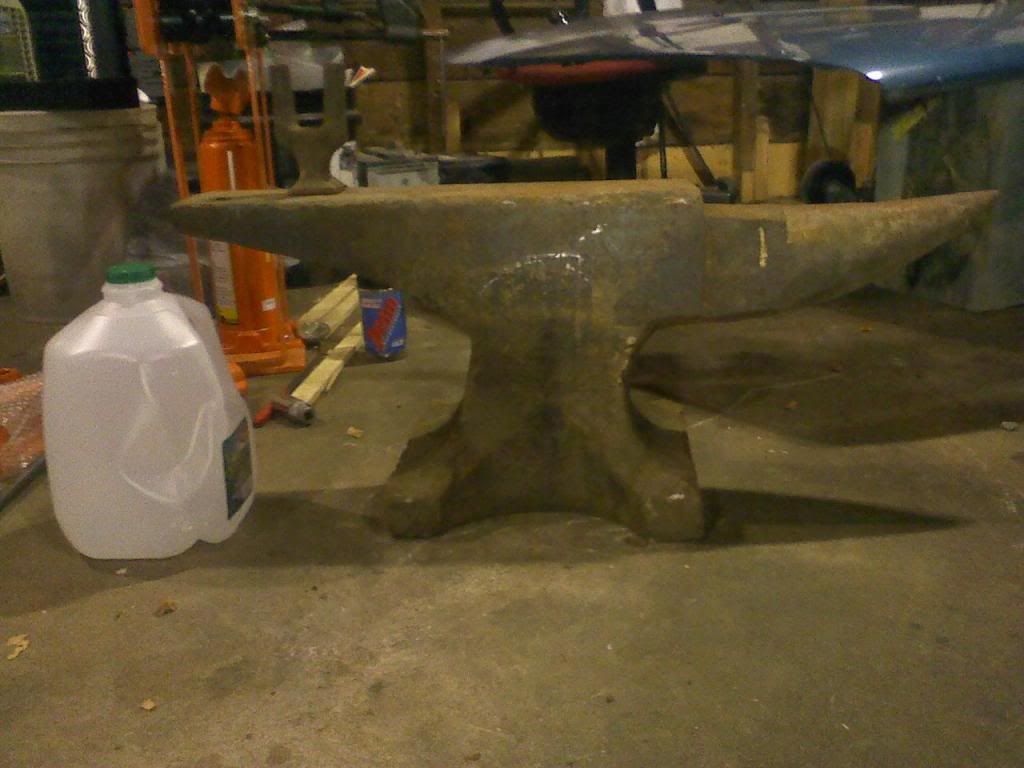
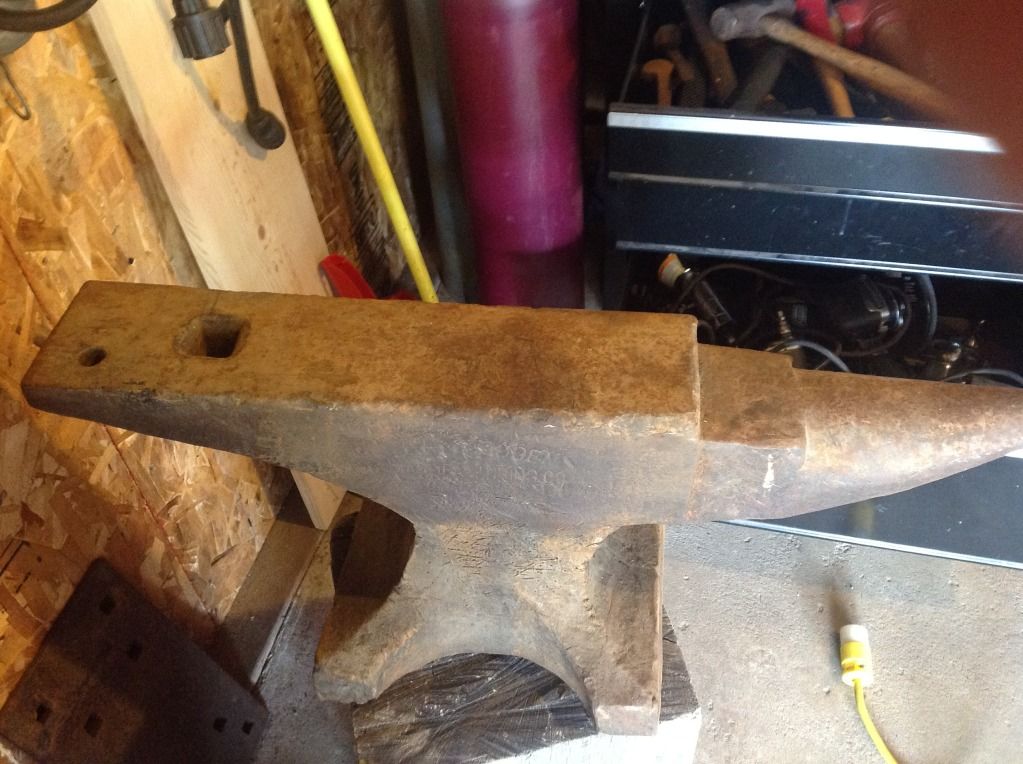
This was the original picture taken of the anvil after Mark purchased the anvil at an estate sale for $35.
-
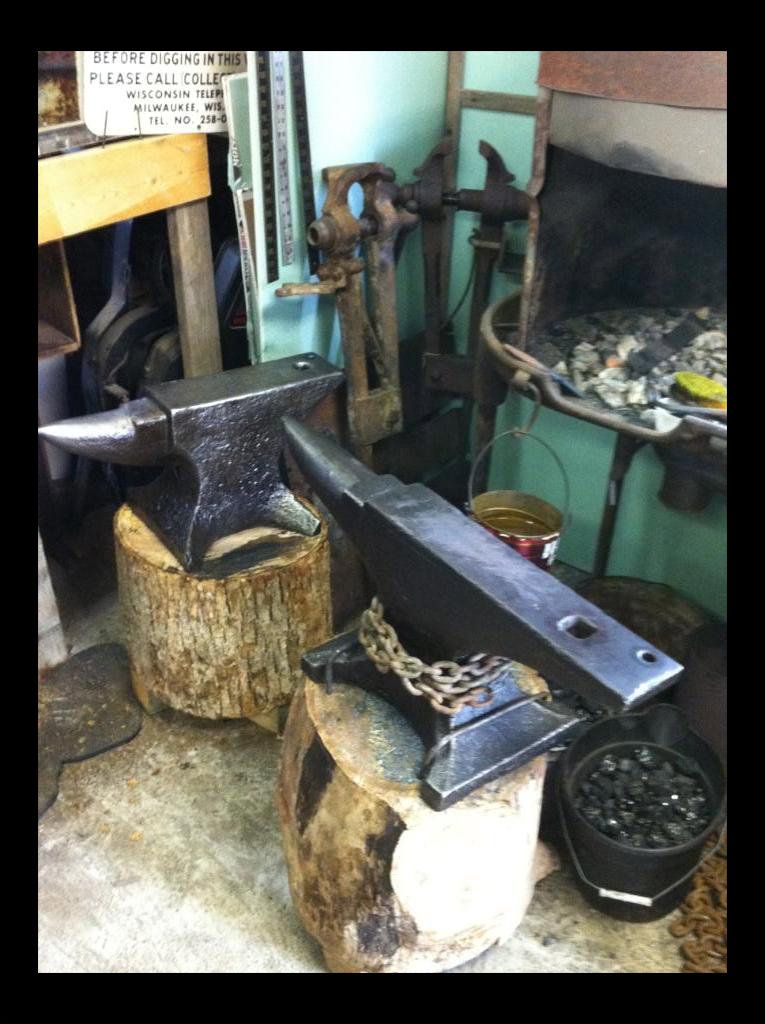
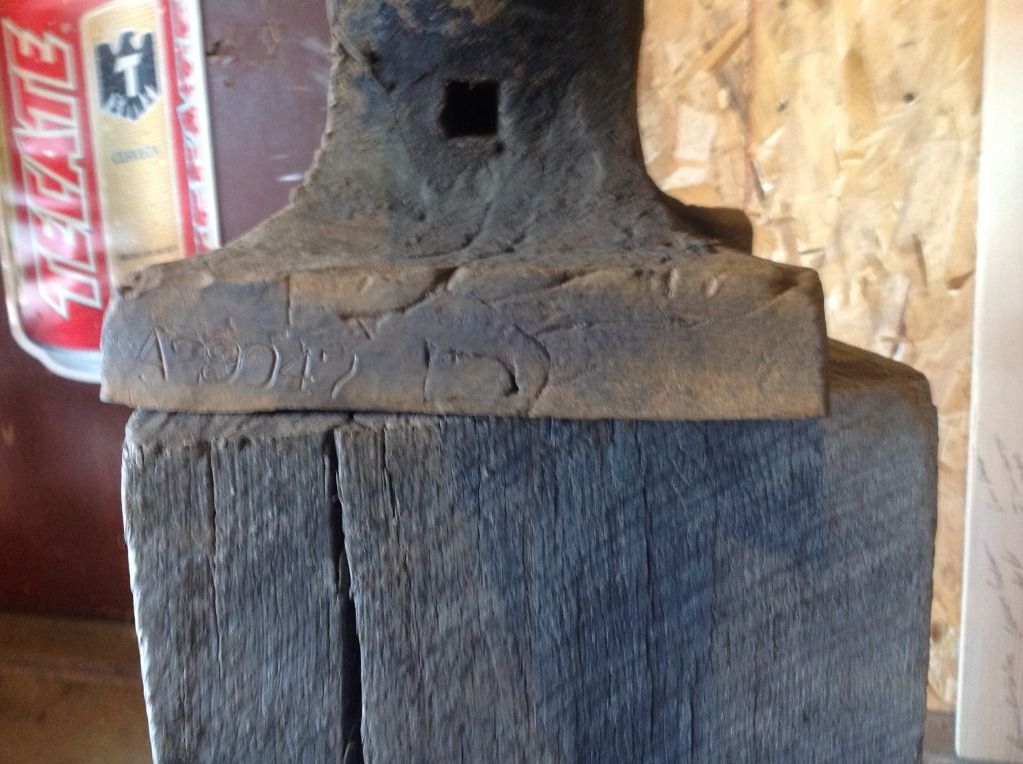
My brother in law and I went to my friends Marks house to get power hammer we are building, well brother in law is building, it's all welded, started at 10am got done 7:45pm. While we were there I went over to his anvil, which we thought it was a 149# Trenton, to our surprise Trenton turned into a 200# plus Hay Budden. The serial number is A29047, right under the horn, and Hay Budden Manufactering Company on the side of anvil, see photos.
-
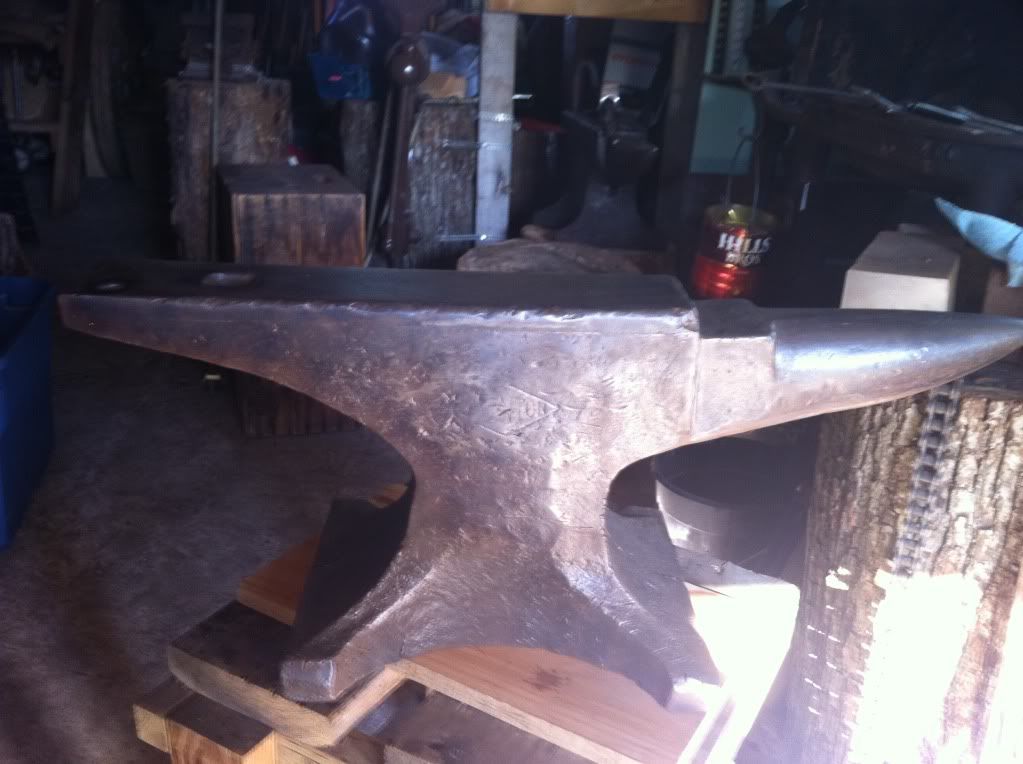
The anvil is now clean:
Finished Broken Arrow
in Knife Making
Posted
WOW that is nice, great job LF.