

BlissStreet
-
Posts
121 -
Joined
-
Last visited
Content Type
Profiles
Forums
Articles
Gallery
Downloads
Events
Posts posted by BlissStreet
-
-
I really am liking the false edge. It suits the blade.
-
Storm, I have found plenty of info on the Turks head especially on YouTube. But what about the rest of your handle wrap? Any chance you'd share your process? I'd like to try a full tang knife soon and think an under wrap/over wrap would suit the idea in my head.
-
As Thomas said, you need a forge, an anvil, a hammer, tongs and something to shape. Leaf springs are slightly easier to start with, IMO. I would add paper and a pencil, since you need to give yourself something to guide yourself; few things are harder then starting with no end point.
All these things can be made or improvised for cheap; I'm an example of that.
Welcome aboard. -
Well with spray painting and solvents you are going to want an organic vapor filter. For grinding, a good particle filter is all you need. I have a 6000 series 1/2 mask and keep both handy and swap them out as needed. 3M have a great selection of filters, so you really don't have to compromise to match the filter to the job.
-
Nice work. I found that starting this was very fulfilling, more so then if I had went out and bought a forge and anvil.
-
I thought I'd drop everyone a line here and let you know that the impending relocation actually happened at a much faster pace then expected. We made it safely to the Atlanta area and are on the hunt for a new home. Our shipping container won't get here from South Africa until the 15th of December, but I'm looking forward to getting settled. I'm really looking forward to getting back to smithing, and setting up a forge as soon as possible.
-
Having *just* relocated to the Atlanta area, this looks very interesting indeed. Sadly, I don't fit the requirements. and then there is the whole not living with my wife for 2 years.....
-
Is that the PBR tooling it came with?
-
300 rand is definitely a steal. 3000-4000 rand is what I'm seeing for 100 kilos.
-
Having gone through 2 careers now that are artistically inclined, I think the best approach is "This is good, the next will be better". Learning to appreciate what you have done, and can do is as important as looking forward to what you will learn and improve on.
-
Well, I just finished up the Deba. The danish oil is just dry enough to let me move it over under the softbox for a few shots.
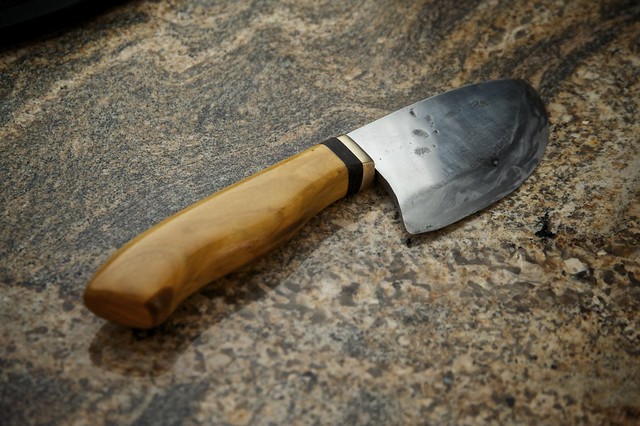
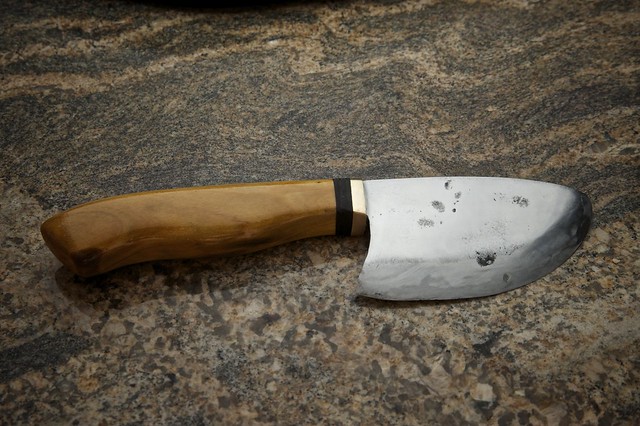
Yes, there are hammer marks left. No, the fit and finish aren't up to the standard I want to be at. But, I made it, it's wicked sharp, and it's making dinner tonight.
Thanks for all the help and for looking. -
I'll venture an answer. As I understand it, there are 2 ways of differentially heat treating a blade. One is to quench the edge, letting it cool faster then the spine (claying the blade or 'goop' quenching). The other is to harden the entire blade and then draw the temper along the spine using a torch or tempering tongs.
Fair warning though, I'm new to this and others here have by far more experience then I do. Edit: also, see the heat treat stickies. -
Threads like this are the reason I have been a member for so long.
And the reason that new members find it rewarding. It's also a good push to look into an area I hadn't considered previously. Thanks. -
Looks like you had fun. A small bit of advice - stand closer to the anvil so you are more upright. Your back will thank you.
I've gotten better about that, the anvil I made for myself is the proper height and easier for me to approach. V2.0 will be even better, as the idea is evolving with use.Find your wife a smaller pair of gloves. Forging in welding gloves is hard on the hammer control ! And find some non-tinted safety glasses. ( Although there are pictures, on this site even, of me demoing in safety sunglasses! )
They were what was on hand during the class. Since then, I have gotten a better pair for at home, and when my wife finds the time to make another knife, I'll get her a pair of her own. And those yellow glasses got lost a while back, and now I have a clear pair.What Drewed said! Also; I'm a "no gloves" forger doing 90% of my work without a glove---when I use a glove I find that it's very tiring to the hands. Even then I usually don't use a glove on the hammer hand. If I have to use one it's a very thin leather one---like a glove used for tig welding---or driving...can be amusing seeing me work a piece with a heavy stick welding glove on my left and thin leather on my right. (note that this is common enough that most industrial supply companies will also sell gloves individually as well as pairs)
If you had fun and want to continue you done it right! Very nice blades for a starter set!
I am at that point where I rarely use gloves now, if so then only on my tong hand. I do have a lighter pair for moving things around the garage, basically work gloves, just in case things are a tad warm. But I really find that having a 'lefty' glove handy to put on and off as needed is easier on my hands then wearing a pair constantly.
It was a great class, and we're having even more fun with the whole thing since then. It's gotten to the point where our discussions about our next home have are now including space for a smithy/car building. Before it was just defined by space for the rats dogs. Thanks for the feed back. -
The reason I asked (I didn't mean to have this thread wander) is that kitchen knives, unlike other knives, are subject to frequent deburring on a steel and sharpening on a stone. Ideally the grind profile should be one that is easily maintained. In the 11 years I was cooking professionally, my morning ritual was: coffee, left over pastry and 5 minutes on a water or diamond stone. (the flip side being my Mother, who has never sharpened her kitchen knives...ever)
I'll be the first to admit that I'm learning to make knives, and I'm open to new ideas. Using them though, I'm pretty good at that, lol. -
Is there any reason you chose to hollow grind for a kitchen knife?
Don't get me wrong, they are beautiful, I'm just curious. In all my years as a chef I have never seen a hollow grind. Flat grind, which over time becomes convex seems to be the norm.
I'm particularly liking the bottom one, and the flow of the line from the spine into the handle. -
I'm not sure the actual wood mantle is my taste, but the doors are pretty sweet.
-
Where might I buy some of the pepper wood you used? It is terrific looking.
Dave
The pepper tree isn't native to southern Africa, but is common here on farms. The stock I used was part of a stump that was being pulled and the gentleman that was teaching us grabbed it. I haven't seen it for sale here, or anywhere for that matter. Pepper trees are native to South America, so you might look at anyone importing wood to the US from there. IIRC, the genus is Schinus and the most common species is molle. Sorry I can't be more helpful, I'm looking for some myself. -
I'll look for a file like that here, thanks for the tip. I'm finding that I'm heating less because the stock is holding heat longer and I get more work done with each heat. I did test a small piece after I cut up the stock into manageable sizes. I followed the "heat until non magnetic, and then let soak a minute more. quench in pre heated oil" and it worked a treat. I'm hoping to be able to be more precise then that, once I get settled...where ever that may be.
You have no idea what it's like to be in limbo for his long, not knowing when you are moving or where or for how long. -
I am not a blade specialist, but would like to voice concern on the undercut at the transition of tang to blade, It looks like a potential point for breakages, small radii on transition points are what I would aim for. Others more experienced may have an opinon here.
Otherwise, its good to see the progress you have already made in your journey of learning. Well done.
I 100% agree and I would be worried about it if it were used anywhere but in my kitchen. I don't have a spring fuller to start the tang and so I used a hack saw and the anvil edge to start the transition. I zenned out with the rhythmic cutting and went too deep. I am trying to file out the sharp corners and the notch. Obviously this will be something I hope to learn from and look out for in the future. -
Ok big update: The first blade turned out to be a steel that wouldn't harden in oil or water. So that was a failure.
Then I started another, but the tip of the blade burned off in the forge. So, I started this thread. After some great feed back, I made some adjustments to my forge and decided to finish the knife. It was more the point of finishing it as a process then trying to end up with a daily use knife. My wife suggested it be a "look back and see progress" knife. So I took it this far: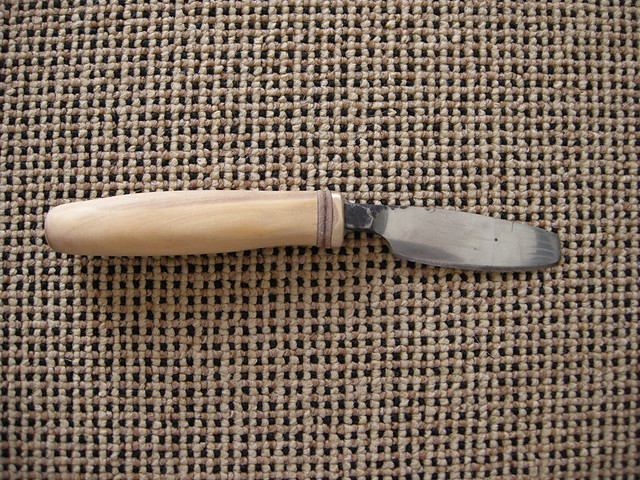
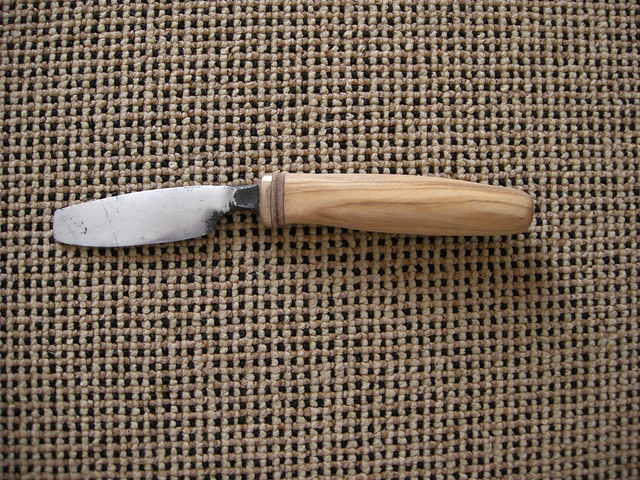
Then, as I was shaping the handle a hole appeared. I had drilled the hole for the handle freehand, and had gone to deep.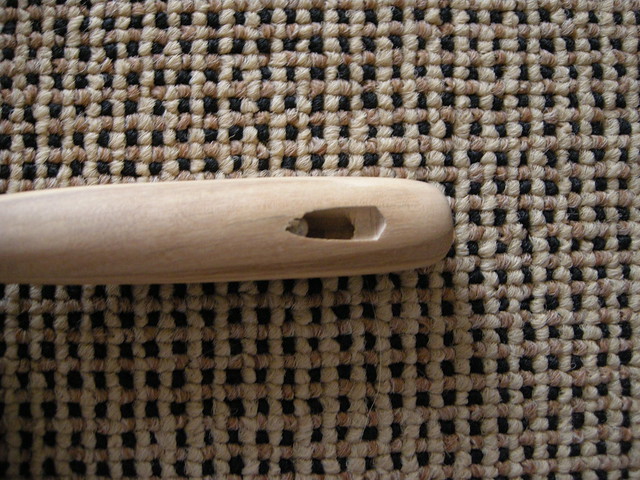
This is attempt #2, and part of learning process. But I was still disappointment in myself. So, I set it aside to look back on later with laughter. I started attempt #3 and have it in the filing and shaping process. But, I'm feeling really good about this version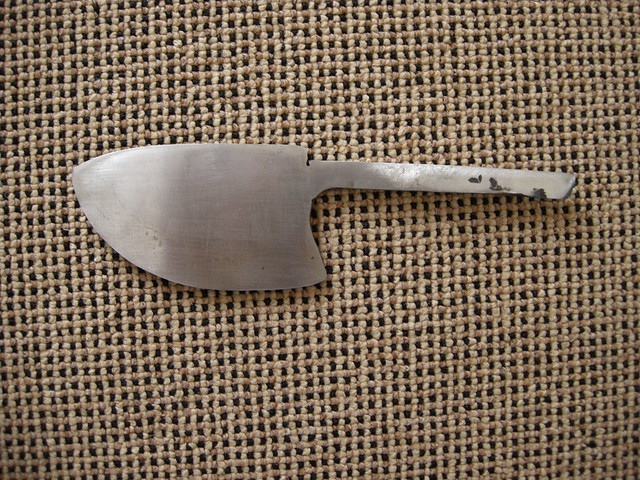
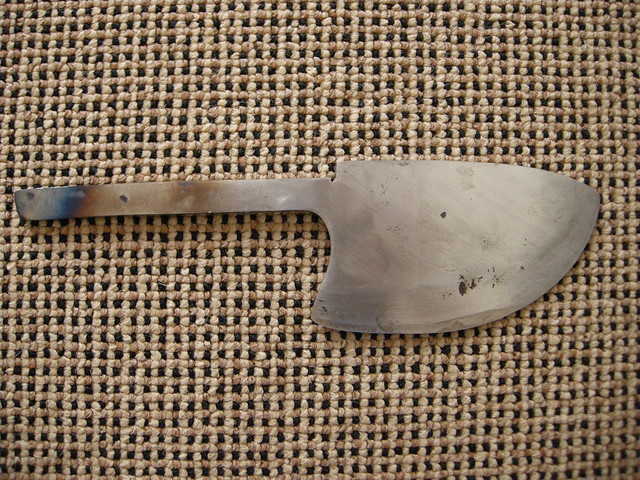
I decided to go with a thicker blade in a Deba style, rather then the thinner blade I was trying earlier. And starting with flat stock really helped. I had by far fewer self inflicted hammer marks and forged the bevel in saving myself the need to file it in by stock removal. I think that should have the blade done today, with the handle and furniture roughed out. Wednesday I'll normalize it, harden and temper it. And hopefully Thursday have it assembled and epoxied.
Thanks again for everyone chiming in in the other thread and for the advise that was given. It really did make a difference and was very much appreciated. -
Thanks for sharing it, it's a great looking knife.
-
Beautifully done, and I'm impressed with the consistency of your work. Thanks for sharing and the motivation it provides.
-
What did you have to eat?
Oh, awesome work and a great write up as well!
Best allround filter for me?
in Personal Protection Equipment
Posted
The 6000/7000 series have a very different filter fitting then the one you are looking at. So, I'll be honest here, I'm not sure where to look for yours. A google search for '3M Jupiter PAPR' gives me a whole lot of .au and .nz site which I refuse to click on because I'm a Springboks fan.
I did pop onto the US amazon site and found this. It lists OV/HEPA Cartridge GVP-441 as the included filter, and a quick search does state it's an organic vapor filter. That led me here, which lists it as a HEPA filter; so only for particulates. 3M lists a similar cartridge as a GVP-440. So I'm guessing your model line up is GVP and the 400 series filters are what you are looking for. Edit: 404 is ammonia, 444 is ammonia/HEPA, 402 is acid gas, 440 is HEPA, 405 is formaldehyde, 445 is formaldehyde/HEPA, 403 organic vapor/acid Gas, 401 is organic vapor, and lastly 443 is organic vapor/acid gas/HEPA.
I hope that helps a bit.
And yes, I was totally procrastinating when I did all this searching. I really don't want to get to the dishes just now.