
scrapartoz
-
Posts
343 -
Joined
-
Last visited
Content Type
Profiles
Forums
Articles
Gallery
Downloads
Events
Posts posted by scrapartoz
-
-
Thank you Ausfire. There is an artist down here (Helen Hay ?) that does a fantastic emu with those scarifier tips for the beak . I have a good collection (over 500kg) but am amazed at the new shapes I keep finding . The versatility of these curved shapes is really outstanding and I could not do this stuff without them .
-
Thanks Ausfire I had another look at your roo and I was wrong about the elbow bit. I recognised the chain hook off the horse hames? on the upper arm but I thought the lower elbow was one of those heavy min tillage tips. Your work is great . Looking forward to seeing more of your stuff . cheers n beeers!
andrew
-
Looks a treat , Im sure you will get a few orders. Don't part with it for less than 1500. if it doesn't sell it is worth keeping for the day you have a (or another) major exhibition, .
-
Thank you Ausfire , yes I only use arc welding as I don't have to clean the metal . MIG is no good unless clean, My process is very manic so I rush out to the boneyard and bring in 3 or 4 items have a quick look then on they go. I also noticed your scrap items . I was most impressed with your use of the elbow pieces in the arms of the kangaroo ......I have about 50 of those minimum till tillage tips and I have never been able to "place "them in a sculpture I was thinking maybe the toes of a BIG T-Rex?????? please keep posting your progress pics as we can all learn from each other.
-
Fantastic Beautiful Art
-
That cassowary is SOOOOO good. If you didn't know how lethal these xxxxxxx are ask yourself why there are more warning signs on its enclosure than the big saltwater crocodiles at the zoo in Nth Queensland.
That is outstanding mate! looking at your smaller stuff I see you have access to some very envious scrap. I always say "use your best bits , you will always find more" .... I see you are using this principal. I now have some serious competition.I will now have to work a lot harder.LOL cheers mate
-
Love the attitude! great stance , clever use of the 'right' part , - well done mate , what is your next masterpiece?
-
The
Thanks, I did some of the photos my self and and a cople firinds helped with the others as they had nice cameras
The photos (and your artworks) look great.
-
Well folks this is my first attempt at a YOUTUBE video of the peacock construction. My crappy satellite upload/download speed was so slow that ' you tube' would only accept this low quality resolution clip. Please tell me how (other than definition) I might improve the process. Do you guys think this is a better medium than posting lots of progress photos? cheers scrappy . PS excuse the lack of make up ( LOL )it was 45 degrees Celsius which is bloody hot ( 113Farenheight)
-
Love the spray of leaves, such beauty and balance. Your website is great and looks a treat (so much diversity),.Do you do your own photography or did you hire someone? well done
-
Very Nice , I love the texture of the whole thing. The use of copper makes it pop!
-
thanks mudman!
-
thank you Beth and Cold Ironkilz
-
Ok beth , if I do light it up and take it to the show I will post some pics. that would be April? I think.
-
Thank you WHS III , (if that was a compliment lol)
-
Thank you Dick, Dodge, Dillon and Beth ,
Yes this project was a bit different and I am happy with the result. One aspect that I did not anticipate was that when viewed from below, with the blue sky as a background , much of the Blue shades in the fan 'eyes' are lost .I had hoped to place the sculpture on a mound with the sky as a backdrop . now I will keep it in the garden. If I were to do this again I would select different tones that would not get lost in the sky. Thanks again folks . Now I gotta see if I can illuminate the sculpture with LED at a reasonable effort and cost as there is an art show I want to enter with a theme of : light.
-
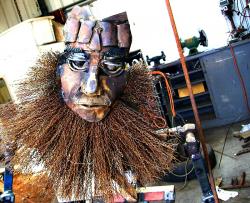
finished!


-
that's a good idea steve. however I have some green all ready in place on the back to' marry up' the colours of telephone insulators so by inserting blue in place of the yellow it will interweave the blue /green mix . thank you for the feedback.I also have put "Dichroic" glass on top of the comb and in the eyes looks very nice . pics in a few days cheers andrew
-
Thank you Steve.
Yes the glass discs really work . I had 3 yellow ones on the back as real peacock have this colour in front of the fan BUT they stood out too much and overtook the beauty of the fan. So we are cooking up a few more blue ones today to replace them.
Final photos in about 5 days. cheers.a
below is the sequence for constructing a rotating base for the peacock. I used an old wood fired copper wash tub to cover the structural components.


-
Ok folks now I get my wife to make me some round edged coloured glass discs to fit the rings I cut.
first use a template (ring) mark with marker , score with glass cutter , break off scored sections with special pliers.
Next ground off rough edges to make coloured round discs.(this is with an electric diamond impregnated wheel) SAFETY GLASSES are needed. do the same for clear glass to go on top of each coloured disc.
next cook the things in a kiln to create lovely rolled edges and to melt the clear to the coloured glass.
(leave this to the experts as there are set heating and cooling rates and times that if not followed will result in cracked glass or exploding in the kiln)
next go mad with the silastic caulking gun and install the discs in the waiting rings.(then I try to get rid of the mess ) my wife has made made blue ,green,, brown and yellow to match certain parts of the peacock
cheers


-
here is some progress . there will be glass discs in the smaller rings . also some glass eyes and on the comb on top of the head. chers.a


-
The carp looks great Kent . Well done! I think it would look cool hanging from 2 fine wires .like its swimming in air. What are your plans for its display.
-
Thank you Jim.!
-
thank you Dick,
I will start on the back and chest area this weekend also some color on top of the head.(dont know if that will work) some more pics in a week
cheers.andrew


Boxing kangaroo sequence
in Metal Sculpture & Carvings
Posted
Yes Aus lots of cereal farms around me which has made collecting the points a lot easier . I still buy brand new points if I need a size / shape that I have run out of . I found a website over here called " points direct. " not too pricey but freight is the killer. on the outer ring of the peacock I used new plates that permit 'Knock on' points to be driven on to the bolted plate . I age with fire and rust with zinc chloride. ( must be removed after 1day or its hard to stop rampant rusting) cheers andrew