

utaholdiron
-
Posts
146 -
Joined
-
Last visited
Content Type
Profiles
Forums
Articles
Gallery
Downloads
Events
Posts posted by utaholdiron
-
-
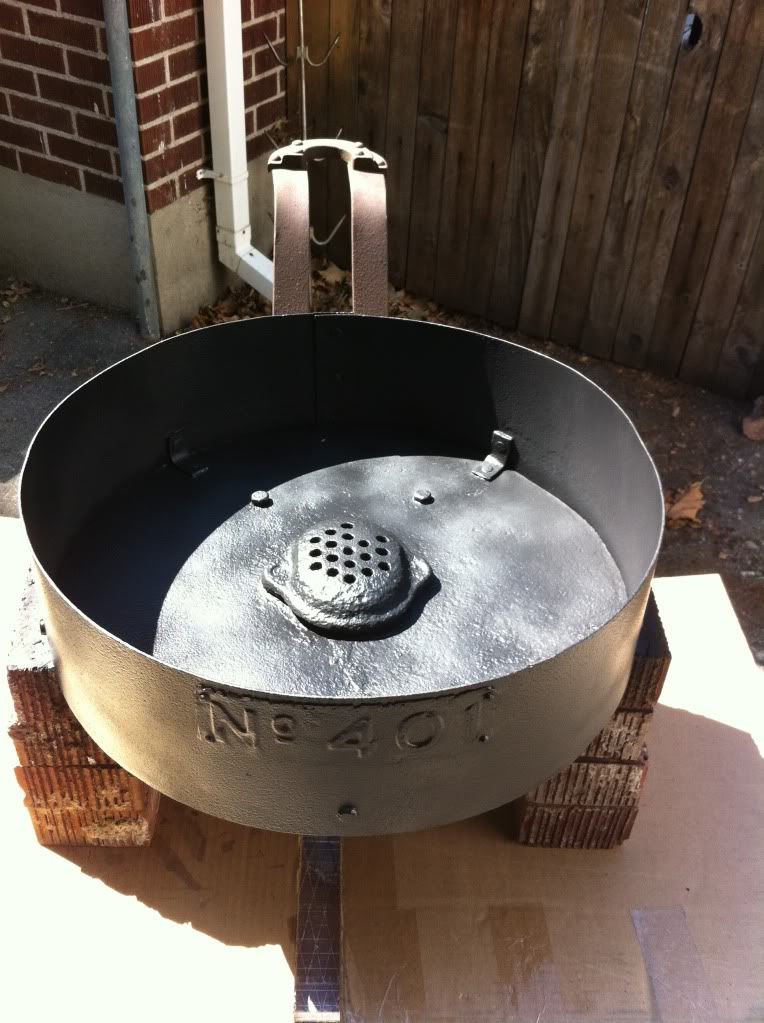
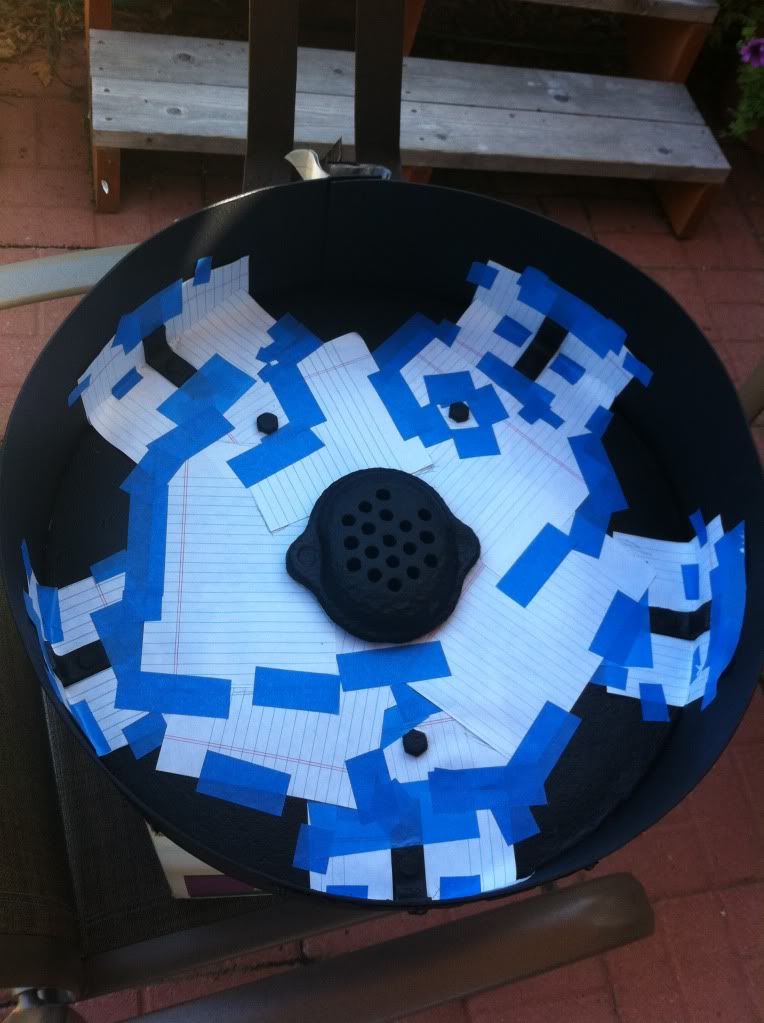
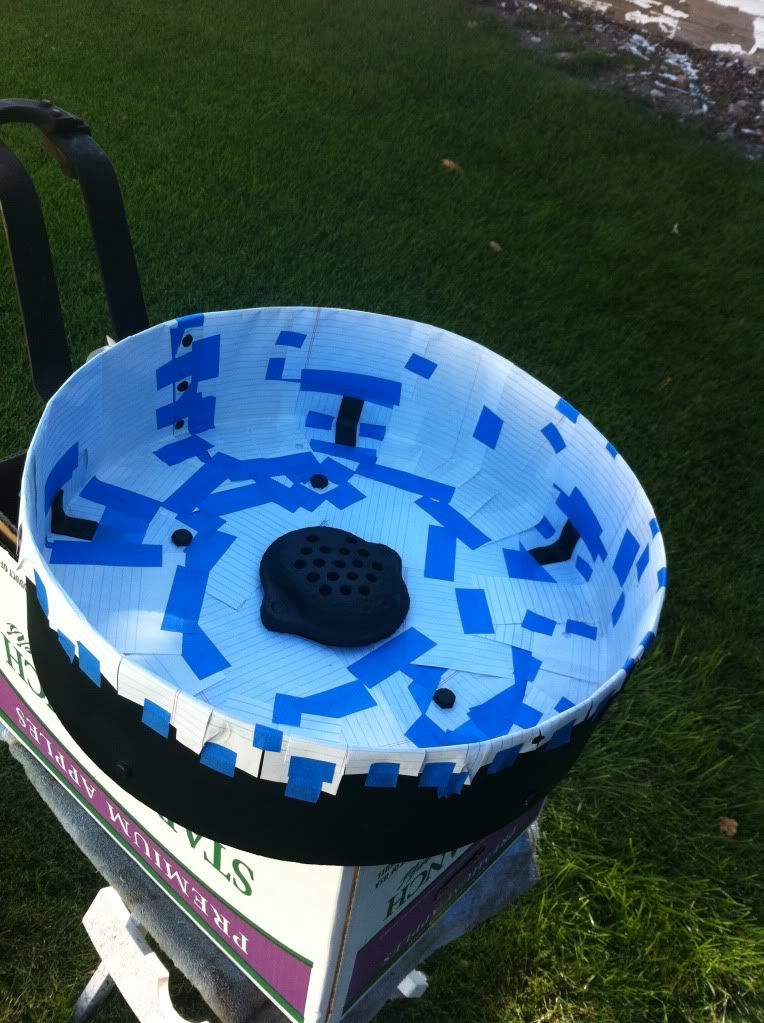
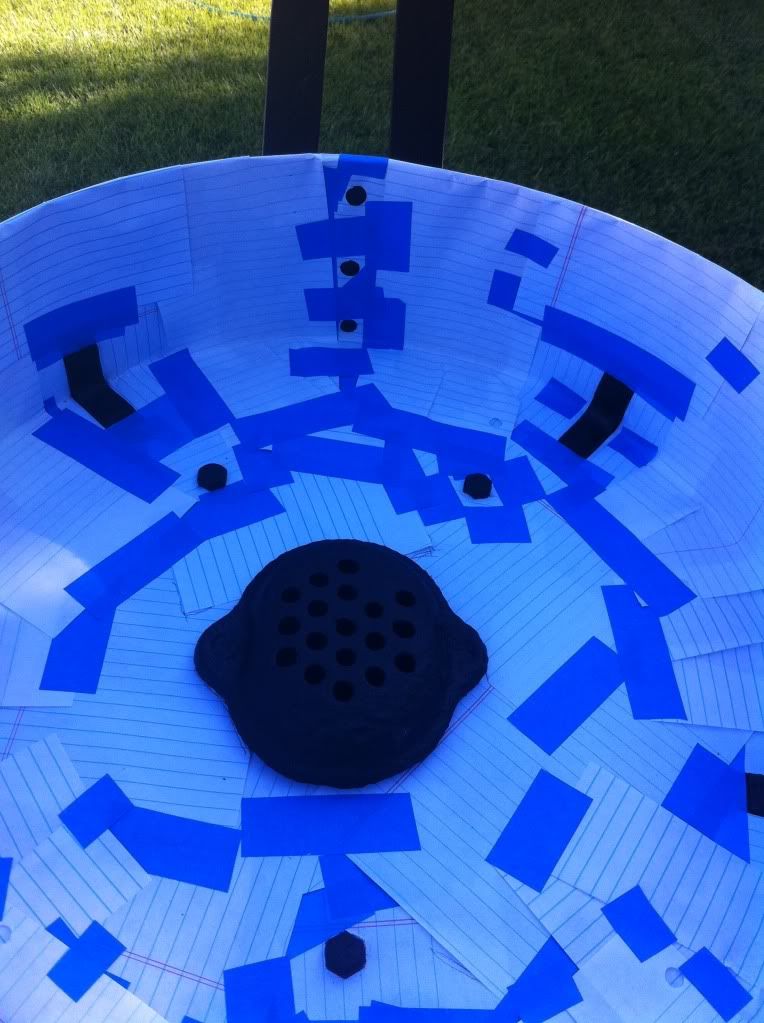
I finished the outside of the forge pan today. The trickiest part was painting the "No 401" sign. I wanted to have the background of the sign red and the letters and numbers painted black, so it would really stand out. When the sign had dried for two day, after being painted red, I covered it with blue masking tape, the kind that doesn't stick super hard and is easy to remove. I pushed it around all the raised parts of the sign as close as I could. Next I traced around all those same raised parts with a ball point pen. This forced the tape even closer and tighter and provided an ink line to follow. Then, using a utility knife with a new blade, I carefully cut around all the raised parts. When the cut out sections were removed, I was ready to paint over the sign in black.


-
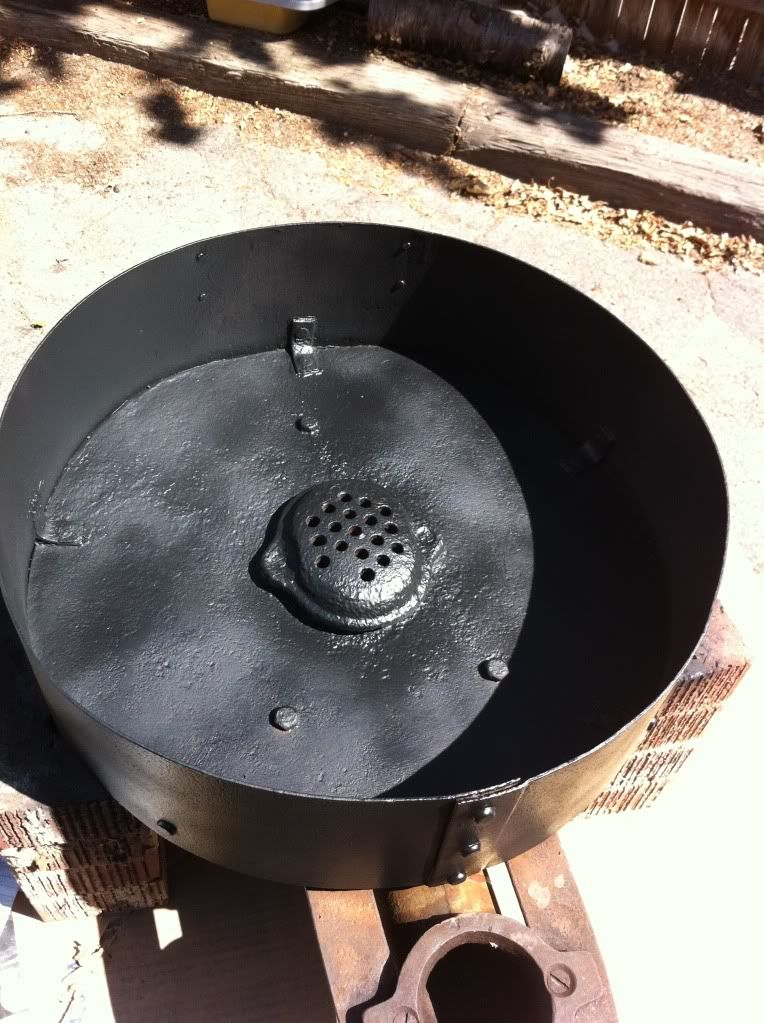
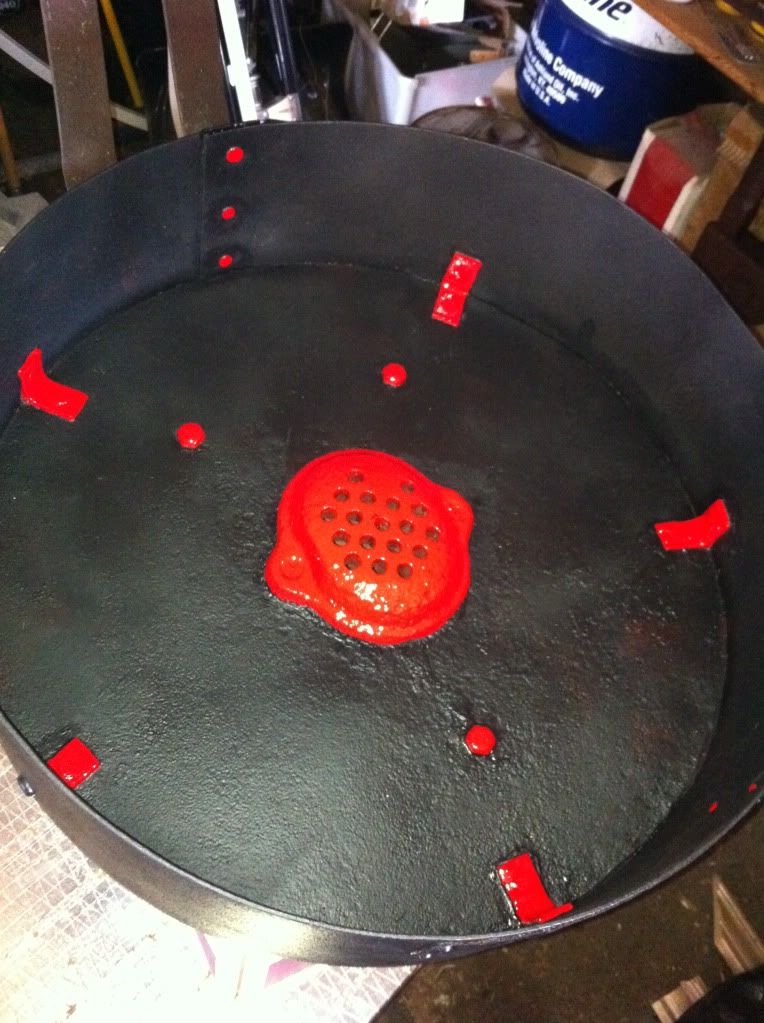
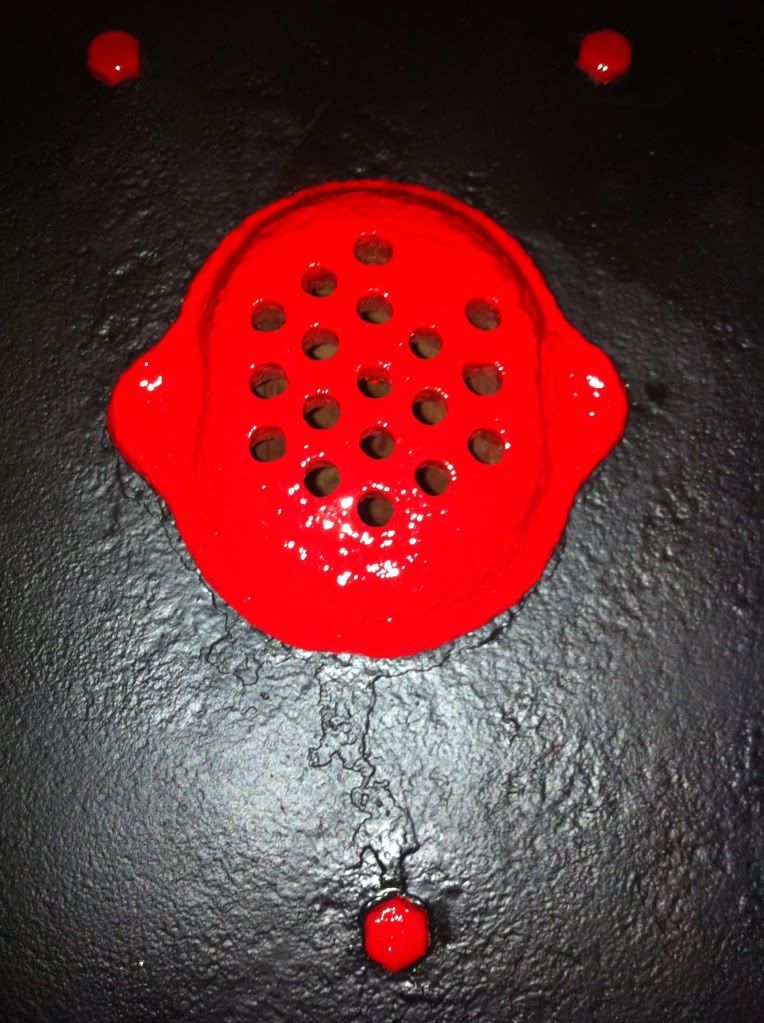
I got this old #401 forge the other day. I cleaned it up and primed it and painted it black. I should have stopped there, but instead wondered how it would look with certain parts painted red. After carefully masking the areas I didn't want red, I grabbed the red spray paint can and went to work. Only when I was done did I realize I'd grabbed the high gloss red instead of the low gloss. To continue the foolishness, I'm going to also paint red the rivet heads and the little sign that says "No 401" on the outside of the forge pan. The finishing touch will be to paint the letters and numbers in the sign black, so it really stands out.
About now many of you are thinking, "This guy has way too much time on his hands!" Which is true, but it was a learning experience. The masking off took HOURS and was a big mistake! When I do the outside, instead of all that masking off, and then spray painting, I'm planning on limited masking and using a painters brush. This should be quicker and there's no overspray.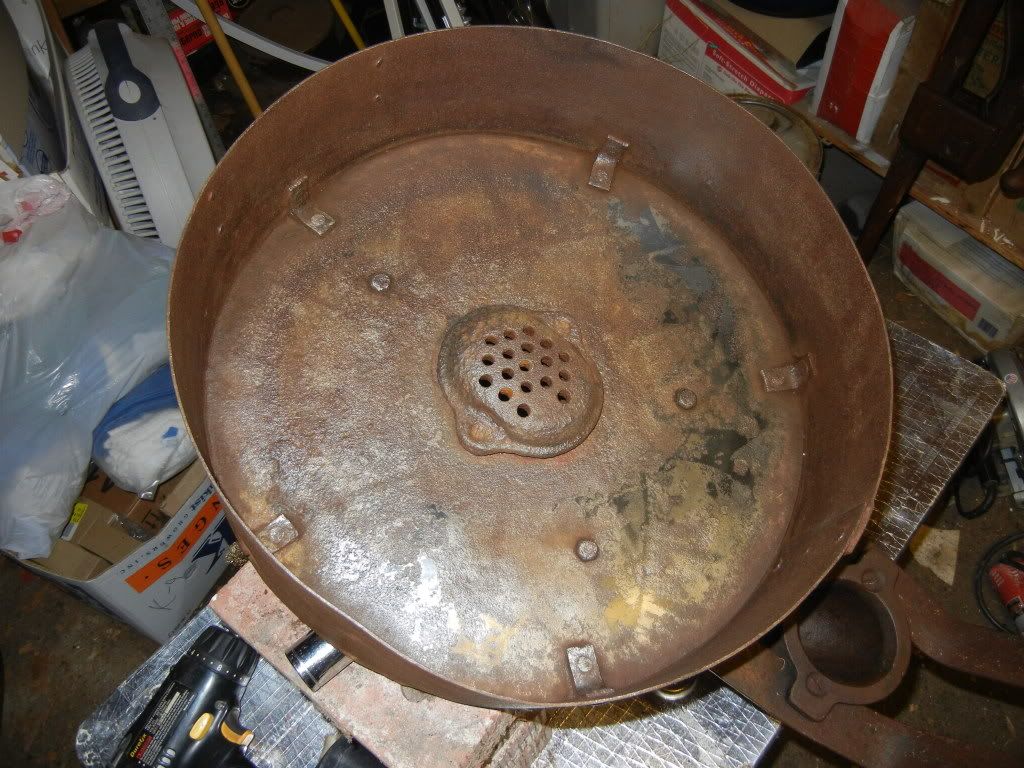
-
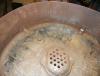
I recently acquired a badly rusted Champion #401 forge pan, with the leg assembly, but minus the forge blower. After attacking the rust with vinegar, wires brushing and finally a circular wire brush attachment that fits into a drill, the forge pan cleaned up quite nicely. Then I got to thinking it would be nice to paint the forge pan flat back, the tuyere plate red, the outer circular upright also flat black and the little #401 tag red. I really just want the unit to stand out.
Now I'm thinking it's not so great of an idea because the heat produced in the forge pan would cause the painted surfaces to smoke, blister, catch on fire, etc. I know they make a high temperature (1200 degrees) spray paint. If I used a rust inhibiting primer, then the high temp paint over that, would that work? Any guidance or suggestions would be appreciated. I don't want to make the forge unusable just for the sake of giving it some bling.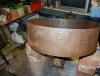


-
I have a forge/blower similar to yours, but mine came with a broken drive belt. I'd be interested in seeing some pix of the blower and gearing on yours. Also, if you "resize" your pix before posting them they will be much easier for others to view. Here is a link to a website that lets you resize photos for free.
http://www.resize2mail.com/ -
Hi guys!
I just completed a blower clean and adjust project. It is the small one like pictured in the top post (eight inch fan on a 401 forge)
I could not remove the fan from the shaft! I pulled the locking nut off (impact gun and 1" deep-well.... right handed threads) but no way to remove the fan. The fan hub is threaded onto the shaft.
I made a socket that will fit over the hub of the fan and I used an impact gun to knock it loose. Worked perfect. I really need to patent these!!!!
Once you have the fan off, the dust cover comes off, then there is a backing nut behind that. It locates the fan/dust cover on the shaft.
Then the threaded cap is removed from the gear case to expose the bearing balls and the adj cone.
Don't mess with tryuing to remove that cone and it's locking nut. It's really simple............remove the REAR bearing locking nut and cone. Drop out the bearings here (eleven of them) and then pull the shaft from the front. The front bearings (thirteen balls) will follow.
To get a damaged part, one would have to buy another gear case. I HAVE seem them on e-bay (gear case only) and all the 400 gear cases are the same for the most part. Some very slight differences.
The fan shaft willnot hold oil. if you look at the shaft, one would soon discover why.............
That shaft is THREADED and, it has a key-way groove cut into it. Little wonder it won't seal oil.
Here is a link to a guy who rebuilds these. I dissassemble them differently than he does. He fights with that fron bearing locking nut and cone while inside the case. I don't like to. I remove the rear most bearing as it is much easier to do so.
http://www.practicalmachinist.com/vb/antique-machinery-history/help-please-champion-blower-113740/
Thanks for the input. I like your idea. My problem is I can't find a socket wrench deep enough to take off the backing nut that is behind the blower housing. The "deep socket" wrenches at all the major outlets are 3" in length, and I need one that's another 1/2" deeper. I'm thinking of cutting a deep socket off with a chop saw, so it will fit onto the nut and then using a pipe wrench on the other end of it to loosen the nut. -
Except that brute force and thin cast iron often devolves into jigsaw puzzle work with expensive nickle rod!
Master Curmudgeon, of course you are right. I'm still figuring out how to post on this site. My initial post had no text with it, so I added some today. I always enjoy your comments. Alan -
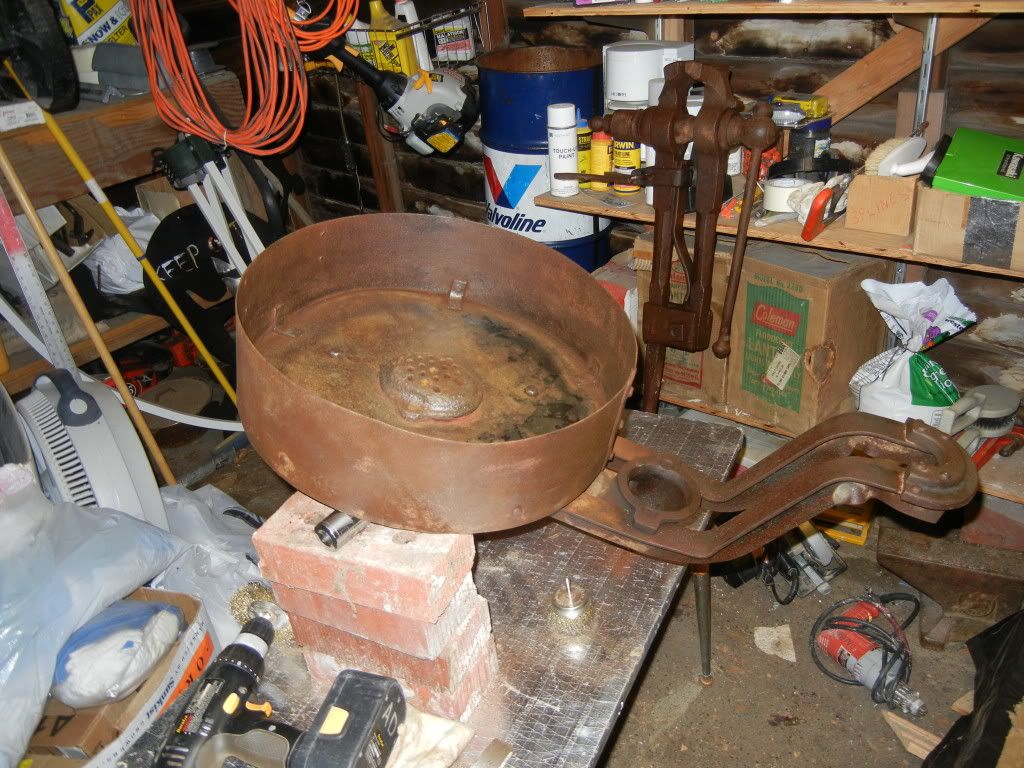
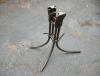
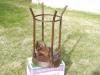
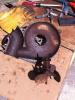
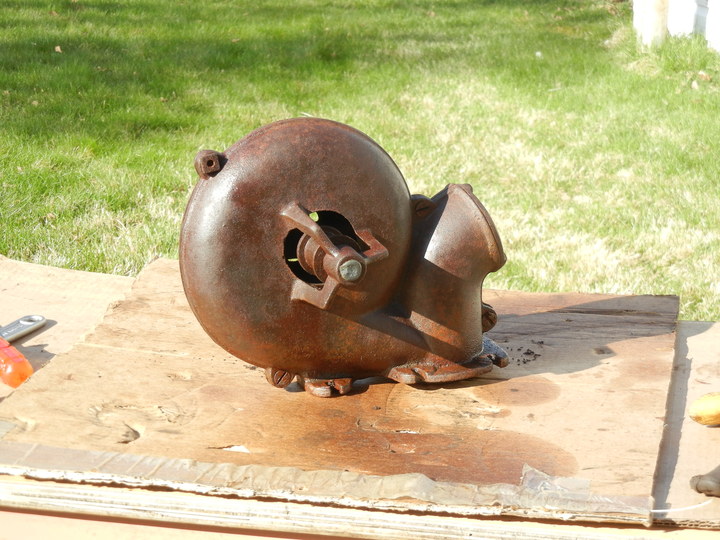
A very old forge and blower. The gearing mechanism is long gone. It was housed beneath the blower and consisted of gears that drove a belt connected to the blower blades. A long, wooden handle operated up and down powered the gears.
I got this unit quite cheap because it was not complete. I basically just wanted the blower. All the fastening nuts and bolts were badly rusted, I ended up using a cold chisel and hammer on some of them. Both blower and forge are cast iron so I had to be careful not to break anything. Cast iron being easily shattered.
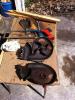
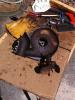
I finally got the blower removed from underneath the forge pan. The blade housing consists of two sides held together by 4 or 5 bolts and nuts. Again, these were also badly rusted. I tried "liquid wrench" repeatedly to no avail.
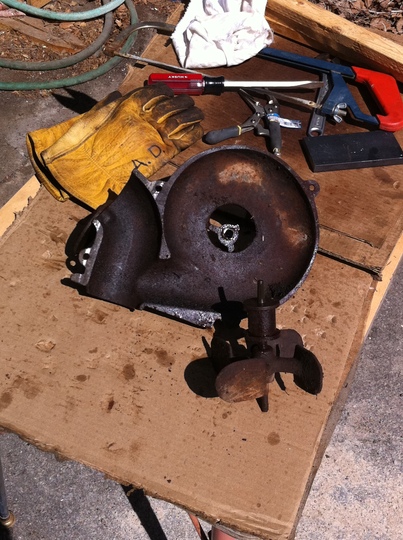
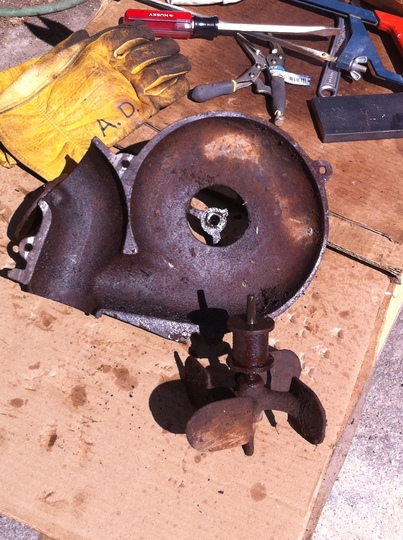
As a last resort, I cut through the bolts with a hacksaw. There was minimal damage to the housing halves and it would be hidden when everything was put back together.
The blower blades are all one piece of cast iron, and pretty heavy. I think it would take quite alot of force to get these blades moving fast enough to do any good.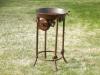


-
My German anvils have arrived. There were discoveries, question marks, and a few major thrills which I will try to describe. I have several of them cleaned up and documented to add to my collection on Anvilfire. I will probably make videos for selling some of them on Ebay.
Most important is that my wife has taken an interest in them, and has staked a claim on the little 50 kg Peddinghause. On the other hand my dog is a little jealous of all the attention the anvils are getting.
First is an anvil with weight stamped (153 kg) and an unknown logo.
Second is a 221 kg anvil with weight stamp and unknown logo. I have worn my eyes out studying German logos from the Ruhr region trying to identify anvil makers. If anyone can identify either of these please let me know.
I was able to identify the third anvil from the logo which is 3 squares (top right of last photo). The 3 squares are the geometric image of the Pythagorean Theorem. The weight stamp (282 kg) has the 2s as beautiful scrolls, made by the firm of H.W Holt in Dahlerbrueck, Westphalia (Hermann Wilhelm Holthouse (trans: wood house)- born 1776). Holthause and his progeny were evidently deeply steeped in the classics, as am I. The anvil date is faint but readable, 1885.
The whole business has been a thrill for me but this last anvil is one of the highlights, a near Mint Soeding and Halbach with the best "Forget me not" logo I have ever seen.
This anvil is probably spoken for. I just have to work out the details.
More later if you all are interested! Any questions, drop me a line: joshandingrid@hotmail.com Thank you, Josh Greenwood
Josh, nice looking anvils, but impossible to get a GOOD look at them because when I click on them the resulting pictures are too large (in megabites)! I use "photobucket.com" to resize pictures and from that site it's easy to post them in this forum. -
although all things made by smiths can be considered as art, being the craft itself is an art form but i have a hard time seeing a perfectly good peice of equipment wasted, that blower could be use to make 100's of artsy things for instance, to me its counter productive i guess...if i drive by a place that has blacksmithing equipment in there yard as ornaments i have no choice but to stop and talk to those poor ppl...maybe even yell lol, cant find tools to save my life and ppl have them displaid in there floor beds....
I'm totally against perfectly good blacksmithing equipment put on display in someones yard! I hate to think that could become a trend, but I could see it happening. People like you who are using the vintage equipment are keeping the art of blacksmithing alive. In this age of Harbor Freight junk it's refreshing to see machinery that has survived for so long and is still functional. -
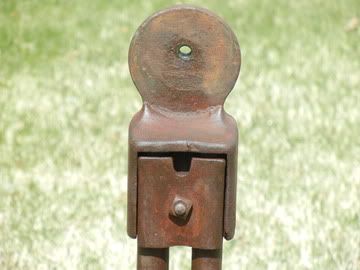
I like the stand by itself visually. I will definatly buy a tool just for the industrial aesthetics of the thing but its even better to make art with art!
DD, I agree. The legs remind me of a table I saw once on Antiques Roadshow. This table had four legs that swept out in the same manner as the stand. I believe it was a type of card table where the top could pivot down so it didn't take up as much room when not in use. Thanks for the input, Alan. -
I've recently subscribed to Marshall McLuhan's definition of art.
Tell me more, and are we by chance both residents of "the beehive state"? -
Years ago, a horseshoer/blacksmith friend from Pueblo, Colorado, was driving along the highway and saw two floor mandrels used as entry pillars either side of a driveway. They had chains welded to the top and draping away to connect with front yard fence posts. He contacted the residents and talked them into making a trade. He got the mandrels, and he forged two ornamental posts for them.
http://www.turleyforge.com Granddaddy of Blacksmith Schools
Frank, I'd say your friend got the better of the deal. I'm more of a collector than a smither so can you tell me what the mandrels are used for? I see them on eBay and they always fetch a nice price. Thanks for your input, Alan. -
I can understand the beauty in blacksmith tools and can understand that some pieces should be saved in museums for others to see and learn from, but I have a hard time with a usable tool being used as "Art" or placed in a garden. Just me I reckon.
Mark<><
Actually, the anvil I referred to was obtained through a trade and the fellow had it outside his garage on a brick wall. He didn't know anything about anvils (and I'm far from an expert) and he'll probably end up selling it. -
While buying some beat up blacksmithing items from a fellow here in Salt Lake City, he related his experience with selling a large blacksmith "cone mandrel" on eBay. He said he got a good price for it, but all the blacksmiths bidding on it were ultimately outbid by an artist in New York City. The artist said it would be "displayed" as artwork in his gallery. Another fellow I know has a very high end "petroliana" collection worth several hundred-thousand dollars. He has a 150# Hay Budden, farrier's anvil on a brick pedestal on his grounds. He said he just likes the look of it.
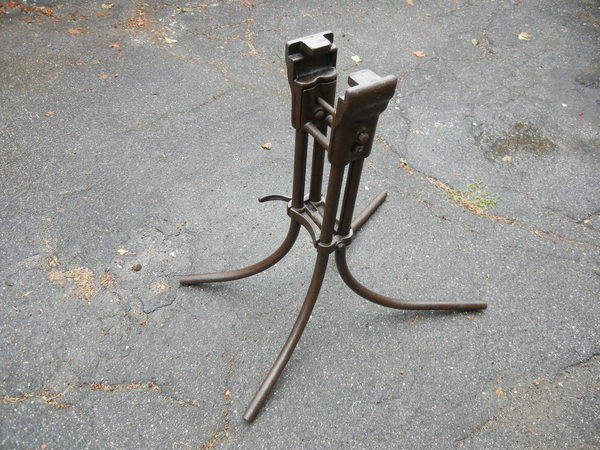
I was taking some pictures of a Champion #40 forge blower yesterday and was struck by the beauty of its pipe-legged stand. I'm not the artsy-fartsy type, but the pure simplicity and functionality of that stand really caught my eye.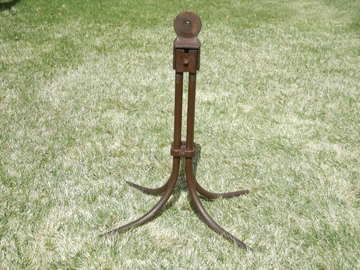
Of course, the blower is the perfect complement to the stand. Together they really are a work of art.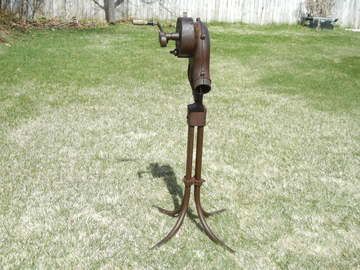 xxxx, I wish I had the phone number of that artist in New York City.
 -
Remove the gear and pm me. I will straighten it for no charge if you can't get it yourself.
Highlander, I tried to pm you but was told you could receive no new messages. That is a generous offer, but I would feel better paying you something for your trouble. I'll see if I can get the gear out and try to pm you tomorrow. Thanks again for the offer. Alan -
i heard Frank Turley recommend a sand /cement mix 3 parts sand - 1 part cement (portland) not concrete mix. has held up for about 14 years in my lil grate fire forge i use for demo. pax
Thanks, Alan -
Through a gear system torgue times RPM is constant (neglecting friction). For my blower and I assume most are similar in speed ratios, the RPM increase from crank to blower is about 50 fold. With two equal gear increases this would be about 7 fold from the crank to the intermediate gear and another 7 fold from the intermediate gear to the fan (7 times 7 is almost 50). Going backwards, torque would increase that fast. If you put 30 ft pounds on the fan nut, it would have been about 200 foot pounds on the gear you bent.
I suspect the mfg built the gear on the assumption that input from the crank should not exceed perhaps 45 ft - pounds (30 pounds force on a 1-1/2 foot handle) or about 7 ft-lb on the intermediate gear. With high multiplication gears, it's risky to apply force backwards.
Jack, I think you are spot on about "applying force backwards"! The info about RPMs in a gear system is very helpful and enlightening, thanks for the input, Alan. -
I just went through this with my champion 400. I had the same issue with getting the fan jamb nut off. I didn't bend my gear though... Gentle!!! Its brass or bronze! As far as getting the centering nuts off the gear shaft- try a crescent or vice grips, again gentle, and use another wrench across the jaws of the one on the nut to turn it. Mine has holes for a pin spanner. Adjusting the location of the gear may make it run smooth again.... Mine responded well to just fiddling around with the adjustments until I found the sweet spot. Now it turns like a dream....
Just a warning- the upper gears on mine are all race bearing while the worm gear on the fan blade shaft has loose bearings.
These blowers are made to be taken apart and adjusted. Go slow and be gentle. If you have to force it, that may not be the correct way to go about it.
Good luck!
Thanks for the input. I have a Champion 400 blower that needs some adjusting, your info will help. Alan -
I don`t see having to scrap it.If it can be bent out of shape it can be bent back.Look it over and decide how and where it was bent and and then apply an equal force in the opposite direction being careful to NOT press against any of the cast iron parts like the housing. I`d try to figure out a way to bend it back as is before I tried to take it apart.See if the a magnet is attracted to that different colored gear,if not then it`s most likely made of brass or bronze and will bend back fairly easily.
Bob, thanks for the input. I like your optimism and advice about working around cast iron. For me, taking that gear out will be a last resort. I'm thinking of using a metal "backer" on the concave side of the bend and clinching it with a large C-clamp. That should allow me to use gradual force and not end up bending it too far. A magnet is not attracted to the gear. I appreciate the advice, Alan. -
Why were you taking it apart in the first place? Was it seized up? did it turn free? did it coast at all? I see too many people who want to "restore" a piece of equipment that works just fine, or at least it works. My thought on old rusty equipment- if it works don't fix it. I do not spend a lot of time cleaning up and painting something like this, I would clean up the gears and bearings with brakekleen or solvent, blow it out with air and re-lube with ATF, no disassembly required. most of these blowers have a dust cover over the bearings that can be popped out from the out side
Clinton, the blower turned smoothly and worked fine. I took the blower cover off to clean the blade housing which was covered with a thick layer of old grease. I wanted to remove the blade assembly to make it easier to do this.
I'm not an obsessive type that needs to tear something apart just for the sake of doing it. Had I used an impact wrench to remove that nut, nothing would have been damaged. I plead quilty to being mechanically challenged. Thanks for your input and info about cleaning blower gears, etc. Alan -
I'm getting ready to line a big old "RR forge". I'll just be using the adobe mixture left over from my bloomery. Take the stuff that didn't calcine add a bit of water and pack it in place.
Thomas, your "senior moment member" made me chuckle! Also, it's nice to meet a master curmudgeon; I qualify as a journeyman in that department. I'm familiar with adobe, and have access to some adobe bricks, but what exactly is a bloomery? Alan -
That looks like a bronze gear. Why not try to straighten it?
Keith, thanks for the input and you are right, I will definitely try to straighten it! I'm thinking of using a strong piece of metal as a "backer" on the concave side of the bend and clinching it with a large C-clamp. That way the pressure exerted can be gradual and somewhat controlled. I should be able to do that without removing the gear. I wish I had a pair of sheet metal crimpers, the small, hand-held variety. They might prove very handy for what I'm trying to do. -
If, by chance, anyone out there has this size gear, I'd we willing to buy it. Is there anyplace on the internet that has miscellaneous parts for forge blowers? I have several other Champion blowers but they aren't the same size as this one.
-
Worst case scenario, I'm definitely in the market for another circular gear! I can always go down to Blacksmithzone and see about getting one ( wouldn't that be nice ).


Jazzing up an old Champion # 401 forge
in Solid Fuel Forges
Posted
@ jeremy k............Probably not, I think it will end up being a decorative item in someones shop. I still have to "jazz up" the blower that goes with this forge.