
3lbhammer
-
Posts
80 -
Joined
-
Last visited
Content Type
Profiles
Forums
Articles
Gallery
Downloads
Events
Posts posted by 3lbhammer
-
-
Jim
Thanks for the suggestion I will look that up. -
Thanks that is new information to me.
-
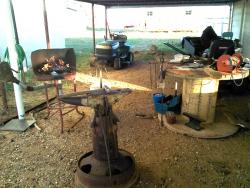
Some of you have kept up with my forge build = click here. My next step is to find a good material for the chimny/ smoke stack. I am looking at culvert material as the fireplace smoke stack material is to small in diameter and to expensive.
-
Pat thanks
I can get those twin bed springs for $20 a lot cheaper than the supply angle iron around here. Thanks for your comments. -
Piglet-74,
I did find a welding instruction book at Home depot Welders Handbook by Richard French. It only has one chapter on stick welders and welding but it has been a big help. I will look for the sources you suggested.
Thanks -
Fiery;
you have a lot of skill and that looks like a great forge. I will continue to follow your progress. Thanks I am learning a lot. Really beautiful welding.
Rick a.k. 3lbhammer -
Firyfurnace,
Thanks for your encouragement and reply. I will keep you posted
Rick -
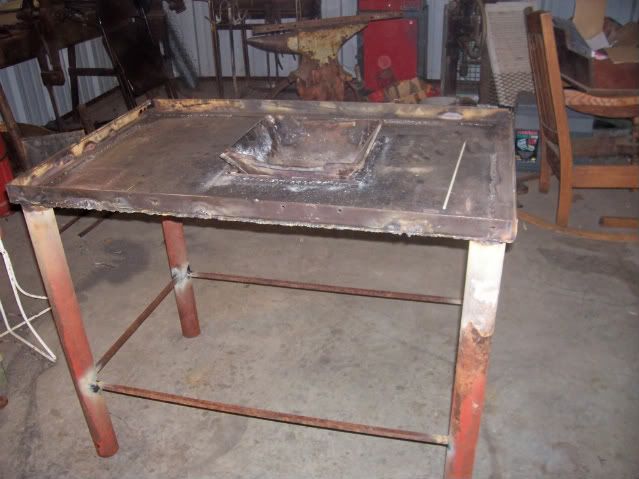
The whole setup is not very heavy, but it is stiff and ridge. It will have to hold fire brick, fuel and what ever iron is being heated. Not really lots of weight. But I wanted the forge to stay put.
-
Greebe,
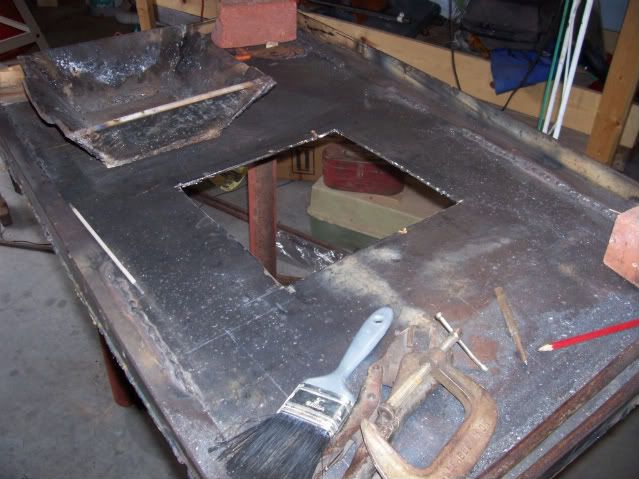
I plan to have a refractory of some sort on the table up to the level or a little higher than the fire pot and a side draft chemney. The whole now has welded angle iron on each side and the fire pot will be just set in the table and not welded in. I moved the pipe legs out to the corners from the original plan. I had planed to have a brick box and the whole forge set on it but changed my plan to just use the pipe as the legs and the 3/8 inch square as the bracing. It is quite ridged. -
I am considering using either firebrick, or some clay fill, or some pumice stone to fill the table up to the level of the fire pot. Most of the table will not need to be to fire resistant just near the firepot.
-
Phil thanks for your suggestions of the welding resources. I will look at them.
I you notice I have made some additions inspired by the forge build of Kevan in recent
posting. YOU can see the addition of a frame to the rear of the table to put a side draft chimney. The access channels are the same hight as the side rail of the table.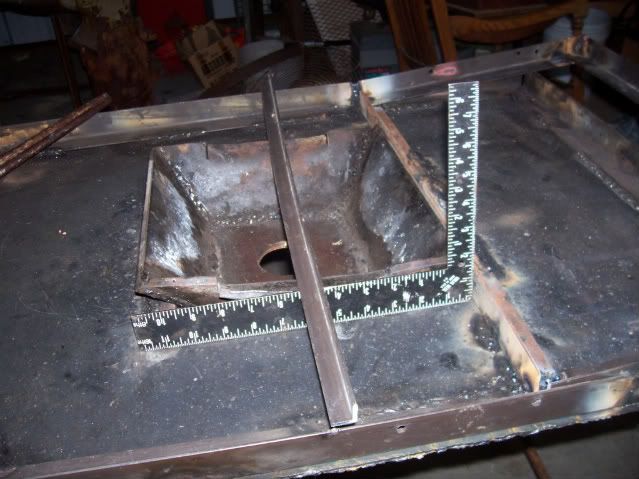

-
Greebe,
I plan to have a refractory of some sort on the table up to the level or a little higher than the fire pot and a side draft chemney. The whole now has welded angle iron on each side and the fire pot will be just set in the table and not welded in. I moved the pipe legs out to the corners from the original plan. I had planed to have a brick box and the whole forge set on it but changed my plan to just use the pipe as the legs and the 3/16 inch square as the bracing. It is quite ridged. -
Here is an update of my forge project. Please excuse my welding as skill which I am new at. My instructors are Dr. Trial and Prof. Error.
-
What are the dimentions of the table? I really like the side draft set up. Nother question, What kind of pipe or tube did you use for the smoke stack? I am working on a forge and need to make some decisions about material for side draft and smoke stack.
-
Thanks, I think they need to be some deeper. I will report more in a couple of weeks.
-
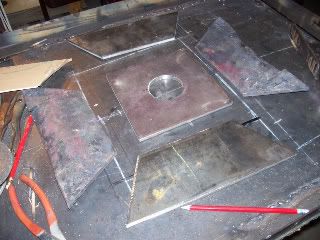
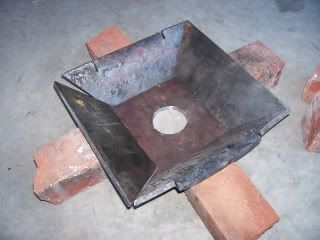
update the parts for the firepot
-
Clinton,
How thick is that new pot and what are the dimetions? I am amazed at how the old one even of cast can warp and twist. -
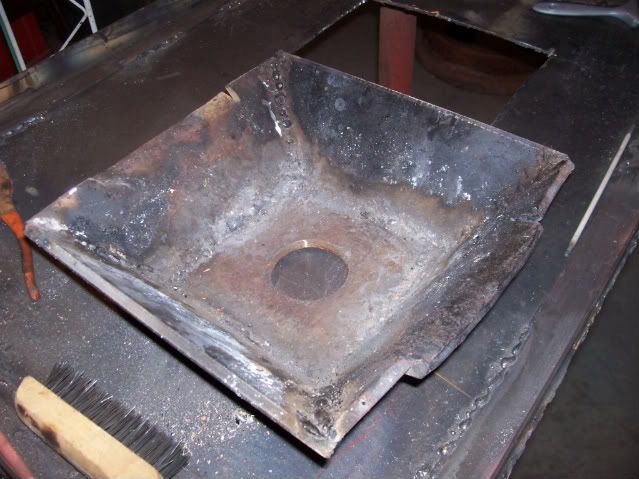
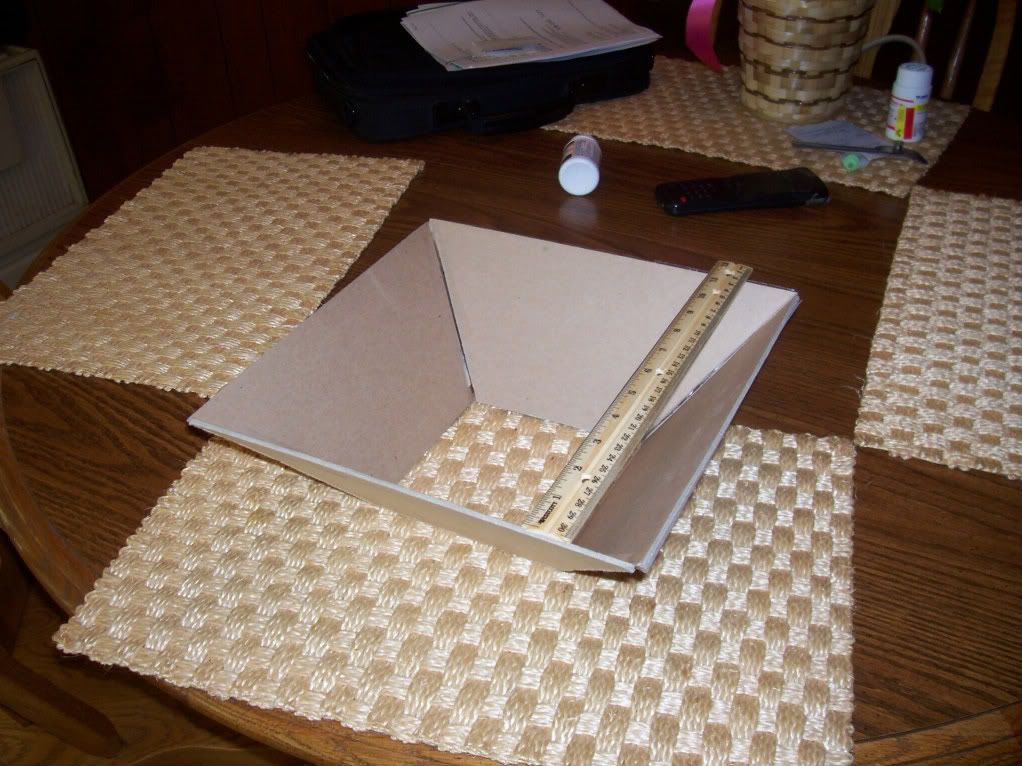
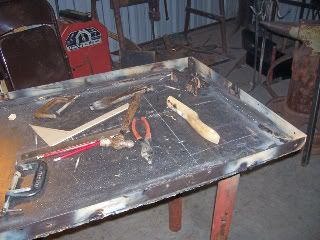
Here is my new forge in progress. firepot model from thick cardboard. It is formed of four sections 11 inch length with 60 degree angles and 4 inch wide, four of these to be welded of 3/8 sheet steel. The forge is 39" X 24" I came across an old bed frame for the angle iron. It is a good source of angle iron.

-
A society that must have blacksmiths. Great photos.
-
thanks
I will look for a spring making supply. -
I plan to build a “Appalachian power hammer”. I have been looking for springs. I have found lots of new spring of different lengths and sizes. Most are sold by the weight of the trailer that these will carry for a few hundred pounds to several thousand pounds. What would be the right size for a 30 to 50 lb hammer.? A set of new trailer springs of about 25 to 30 inches with three leafs cost around $50. or less with a weight of 750 to 1000 lb.
-
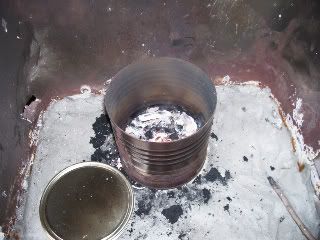
I have "lost" small parts in a regular forge fire. So I have a need for a small forge that does not burn up the small parts. I am thinking of getting a cast iron sauce pan and maybe a foot pump bellow of some sort. Small parts lose heat quickly so being close to forge and anvil is necessary. The can in my forge had the bottom cut out. It worked suprisinglly well.
-
Iam either going for 1/2 inch or a side blast forge. Not sure yet.
-
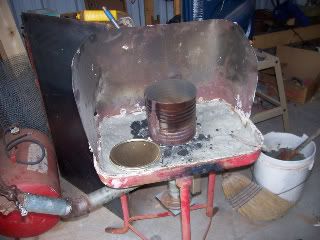
Some many years ago I saw a article in book about metal smiths. It was a time/life book. In it a asian smith was in his shop with a small bowl of coals with which he was heating small brass parts to soldering. I needed to make a small part for a cap lock revolver so reduced the size of the fire in my forge for a small part. Used only about two cups of charcoal. The smith in the book had a blow pipe he blew from his mouth. My small forge worked well to control heat to forge small part from a piece of spring 1/8 in diameter to 1/4 x 1/16. Id like to hear of other solutions to the problem. I do not have a torch. I think If I do this again Ill use brick or cut the can in half.
Free forge
in Solid Fuel Forges
Posted
I could not see where the cracks are!! if in the fire pot round replacement firepots are available. If it is on the table use bolts and washers to pull the gap together and clay the bottom and continue to use.