

Phillip Patton
-
Posts
120 -
Joined
-
Last visited
Content Type
Profiles
Forums
Articles
Gallery
Downloads
Events
Posts posted by Phillip Patton
-
-
The compressor is wired and running. The air pipe is plumbed from the compressor into the shop and more importantly, directly to the hammer. The hammer is up and running good. I think it may need some tweaking.
The compressor needs a couple of new fittings as it is leaking around where the compressor head pushes the air into the tank.
Ok for the hammer. It is hitting good and hard, but it seems to stutter....meaning that it will hit harder every couple of blows. It's not a distinct pattern, just an irregularity in the hammer pattern. Any thoughts on what adjustments need to be made for this?
A video of the stuttering would be nice. All I can think of right now is make sure the guides aren't too tight, and make sure there's no water in the lines.
I don't remember it doing that, but it may be I just got used to it. ;) -
Hello:
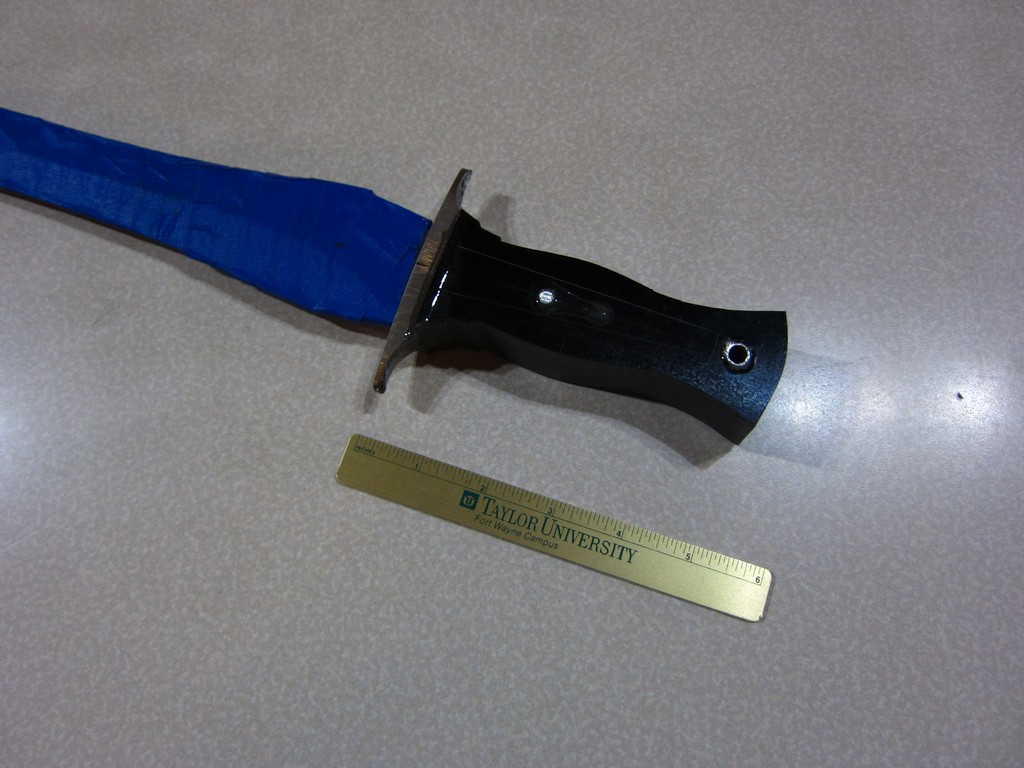
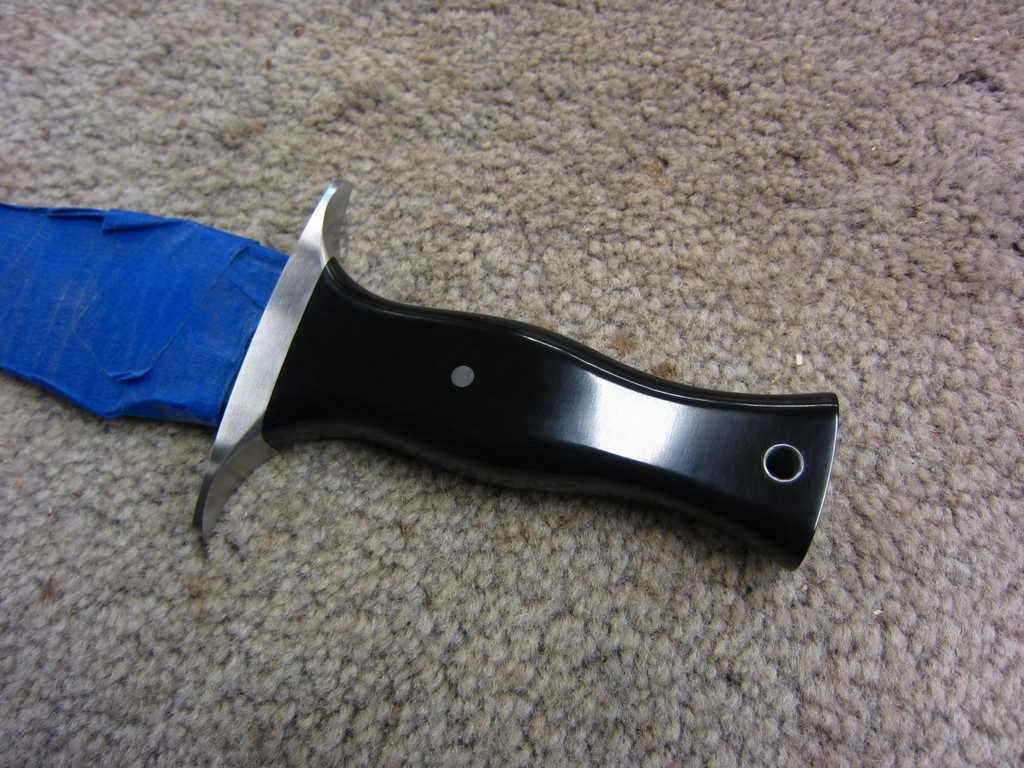
It was in book I by the way...nice clean welds...very even lines..my only "complaint"...and it's not any where near a valid one (It's a personal, totally arbitrary prejugdice of mine, I admit.....) is the use of a piece of plastic on a blade who's entire "presence" screams out for a highly figured hardwood, or dare I say the "I" word?? Ivory? for the grip.
Looks great...
JPH
PS: By the way I am stealing your idea on holding the guard in place for soldering....
Hey, the man himself! Sorry this reply is so tardy...
Good question about the handle material. The reason I didn't use something with more bling, is that this blade is actually a reject from another project. When I ground the grooves for the pattern, I didn't do the entire bar. The blade ended up being longer than I had planned, and this meant that the pattern does not continue onto the ricasso. There were no bad welds or any other fatal flaws, so I didn't scrap the blade, but it was not good enough for the commissioned piece I was working on, which is this one: http://pattonblades.com/shortsword.html
Thanks very much to everyone who commented!
Phillip
P.S. The guard holding jig isn't my idea originally, but you're welcome to it anyway. ;) -
last try for 15n20 from uderholm was £5.50 per kilo and min order of 600K so thats me shafted .
thats $3.91 per pound for steel I need. ( I use it as an element in all my blades)...they will not cut to size or even give a dimension , you get what they are rolling . the steel comes hardened so cant be cut in a saw...
I would be interested in what you are paying for 15n20 as sweden via Uk is no longer viable . It could easily be the case that sweden via USA then to UK would be a better prospect , which is ridiculous!!
Kelly Cupples is the guy to get 15n20 from here in the states. Good prices, and he'll shear it to whatever size you require. Don't know if he ships overseas though.... -
drops I get for 30 cents a pound. These are left overs from the companies that bought full 20-22 ft lengths, and resell the left over sections, so I get 4 to 9 ft bars, mostly new steel. 2.50 to 3 pound for new of same.
tool steels are double that. this of course is a guide for comparison only. this place even has bridge guard rails and trusses from old RR bridges
Hey Steve,
Where do you get your steel? In the past I've gone to Decatur Salvage (that's where I got the base for my (now Mr. Custers) air hammer.) Most of the small stock I have I've gotten at C. Henry Surplus.
Mild steel I usually pay around $.30 per pound, high carbon and low alloy tool steels about $3.50 per pound, high alloy tool steels and stainless up to $15 per pound. But I have about 250 pounds of CPM T15 and CPM M4 that I paid $.50 per pound for. :lol: -
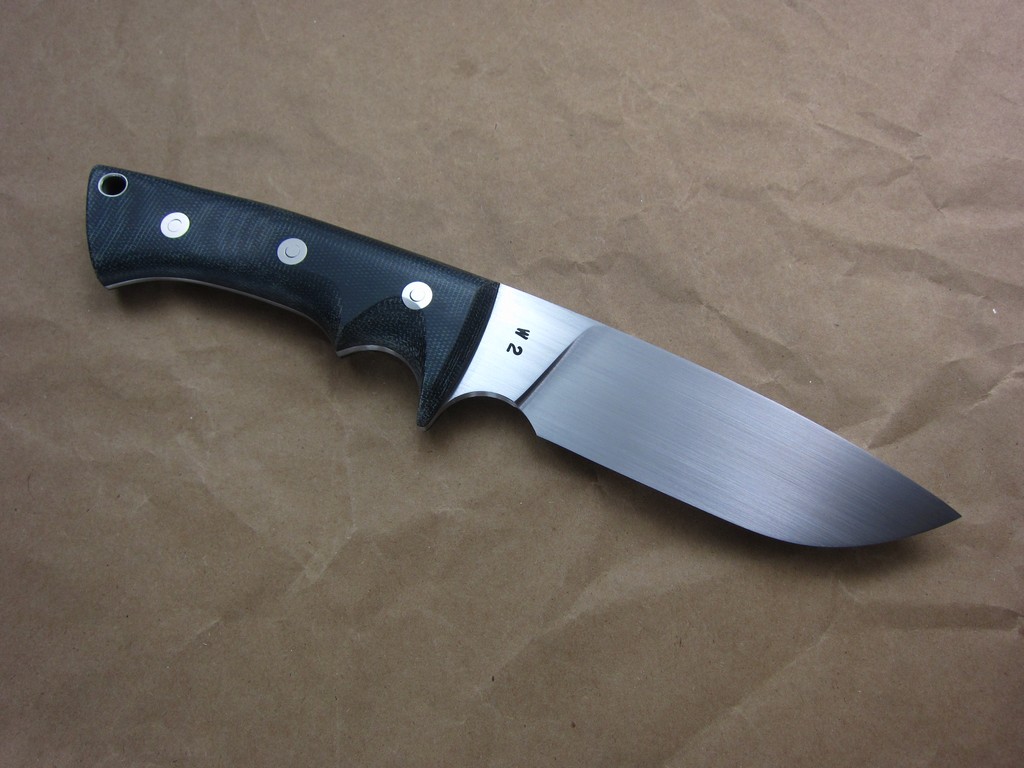
Great knife. With W2, do you have a hard time not clay coating the blade for HT knowing that a great hamon is just waiting to come out? I know I do . I usually have a plan for a plain blade and at the last minute wip out the satinite, adding numerous hours to the finishing.
Yeah, I used to have that problem. But W2 is such a great using steel, I got over it.
Here's another one I finished today: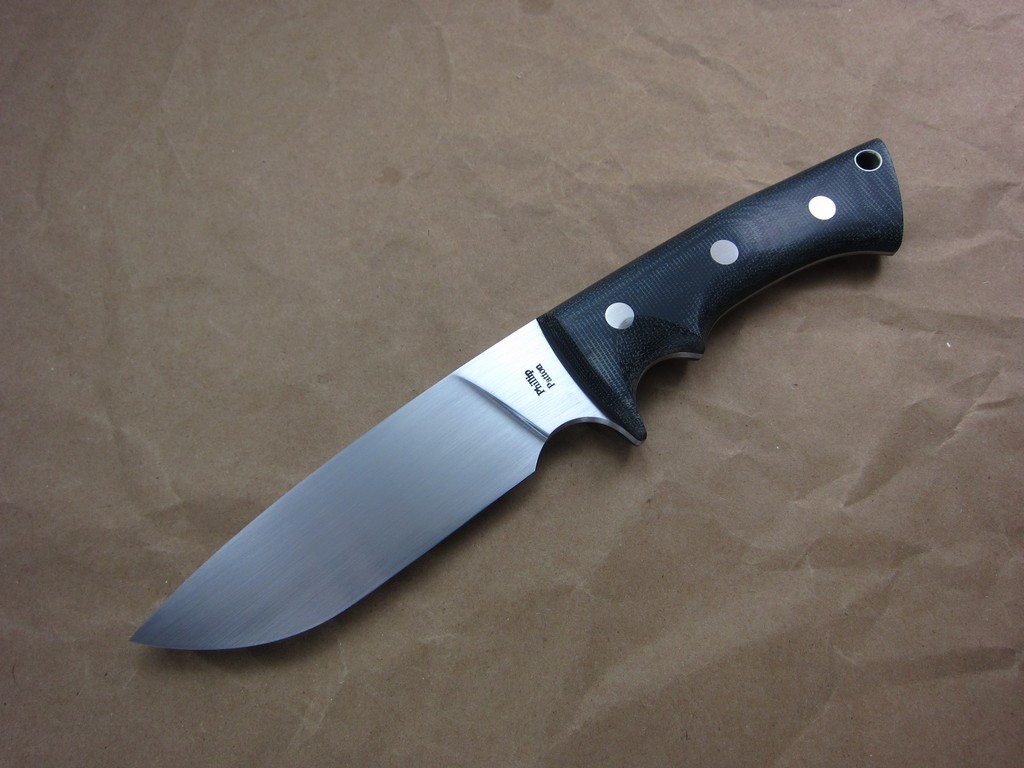
-
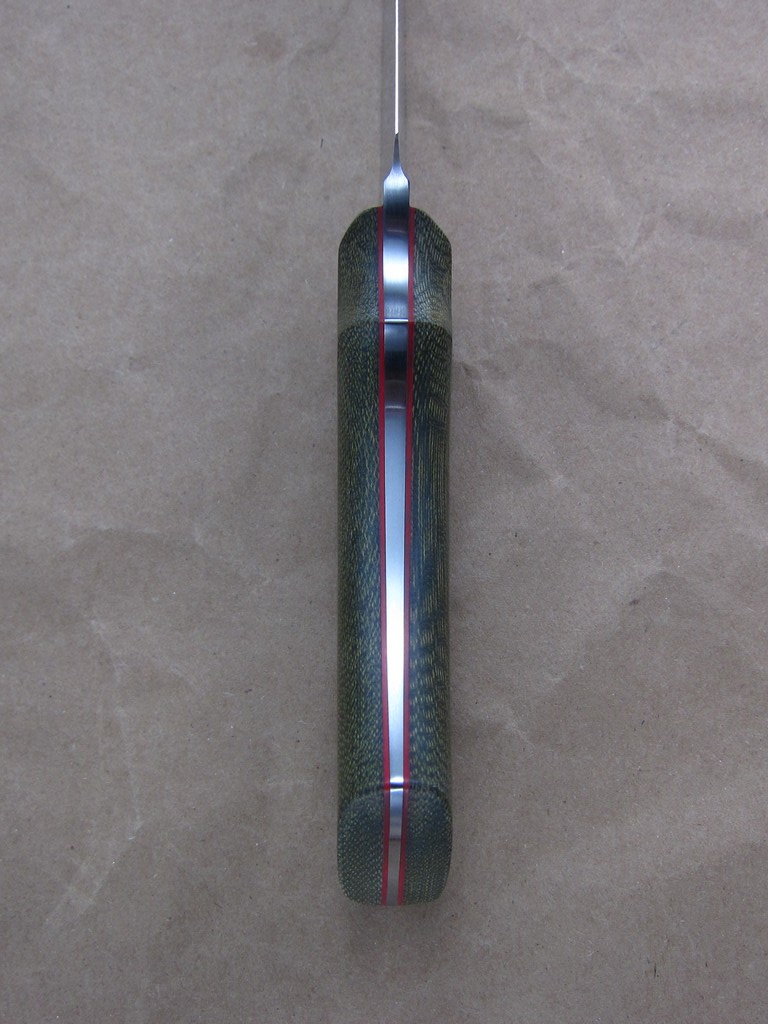
Steel: W2, forged from 1-1/4" round stock
Hardness: 60 Rc
Blade length: 5-7/8"
Total length: 10-1/4"
Blade thickness: 3/16"
Handle material: green canvas micarta, with red liners.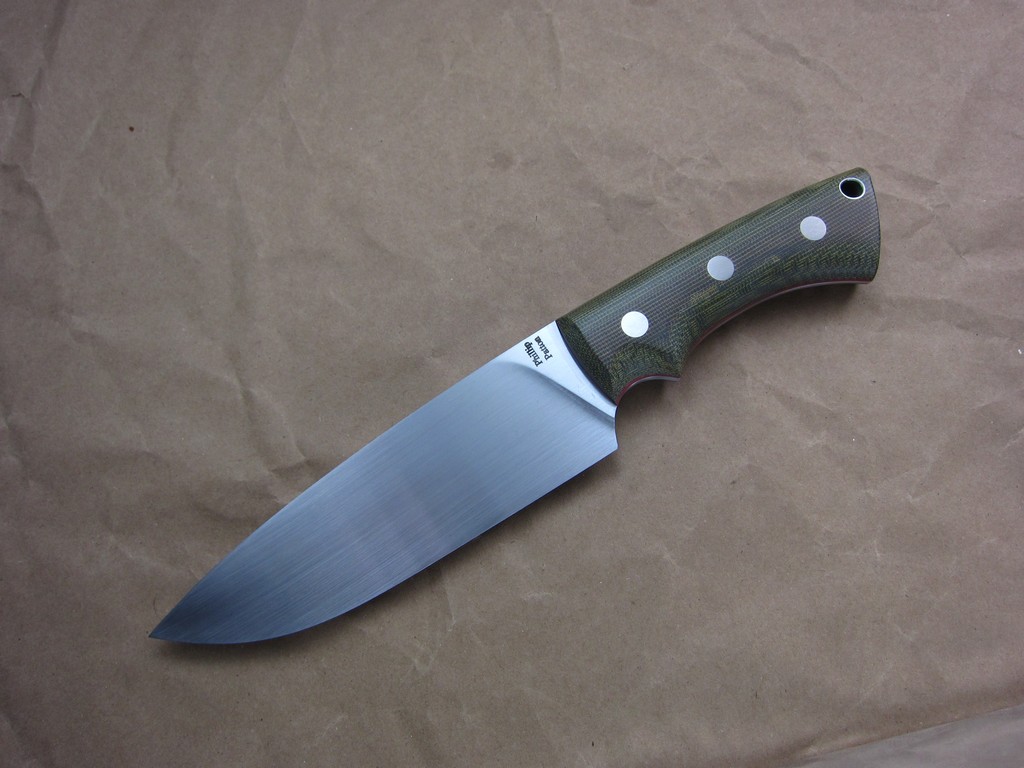
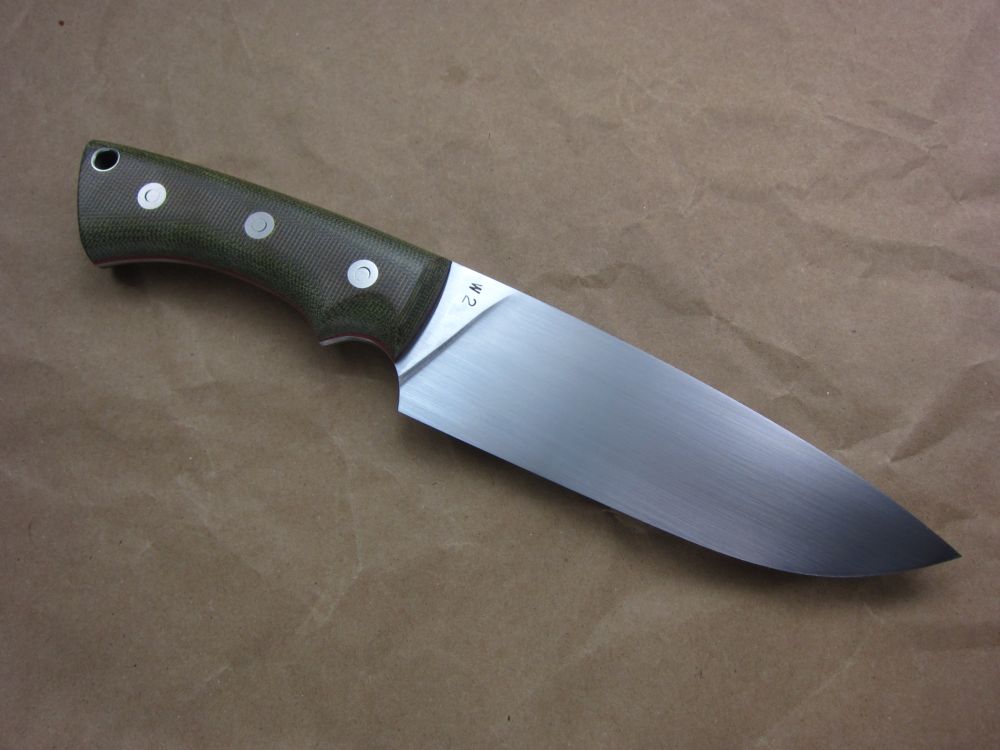
Thanks for looking! -
Mr. Philip
I put the shims under the right and front sides of the anvil mounting plate. The lower die was leaning to the right and front so the shims would push it back and left. It worked left to right, but didn't cut it front to back!
So, if you took the shims out of the front edge, would that move the die to where it needs to be?
My memory is a little fuzzy, since I last assembled the hammer a few years ago, but I don't think I had any shims under the anvil.
BTW, nothing's going to fall off and crush something, as long as you torqued all the bolts to specs. ;)
;)
-
If I recall correctly you had a few shims under the anvil post or the dies one. (Can't remember from dissasembly...)
I put them under the edge of the anvil post and added some 1/16" plate as well. I'll try some under the dies....I'd rather not expand the holes too much!
Which edge of the anvil post did you put the shims, and which way is the lower die off? -
If I recall correctly you had a few shims under the anvil post or the dies one. (Can't remember from dissasembly...)
I put them under the edge of the anvil post and added some 1/16" plate as well. I'll try some under the dies....I'd rather not expand the holes too much!
Maybe I'm not understanding you correctly, but putting shims under the dies won't help the mis-alignment I'm seeing in that photo. I had some shims under the lower die on the right side (looking from the front) to make the space between dies the same. -
I've got to play around with it some, but for some reason the dies don't line up just perfect...about an 1/8 of an inch. Mr. Philip, I don't recall seeing that when I bought the hammer, any suggestions on the best way to fix that?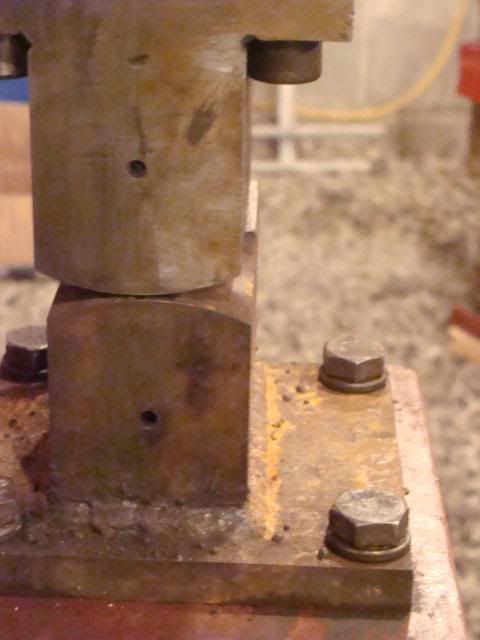
Hi Dave,
You're right, the dies were lined up when I had it.
Before you try the shims behind the head, try loosening the bolts holding the anvil down, as well as the bolts on the stabilizer, and see if you can move the anvil in the right direction. Also, the bolt holes in the bottom die are slightly oversized, so you could try moving it some. If all that doesn't work, then you should probably go with ciladog's advice. -
That's great! Do you think you'll be using the extra weight? I guess if you took the bolt out you're at least thinking about it.
 The weight does slow it down some, and really only helps when moving heavy stock.
FYI
There was a broken bolt in the ram head. The broken bolt was from an added weight that can be bolted onto the ram to transform the hammer from 60#'s to 80#'s.
It was broken off flush so I couldn't get it out.
Well, I was bored and didn't have much get-up-n-go the other day so I grabbed the ram head and looked at that broken bolt. I got to thinking about the way I used a cold chisel to get those compressor parts out.
So, I center punched the broken bolt and drilled 3/16 and then 1/4-inch, pretty deep into the bolt. Then I grabbed a junky cold chisel, hammered it into the hole inside the bolt, clamped on some vice grips and out she came!
Pretty neat little method, when you are dealing with larger material stuff! -
More pics:
-
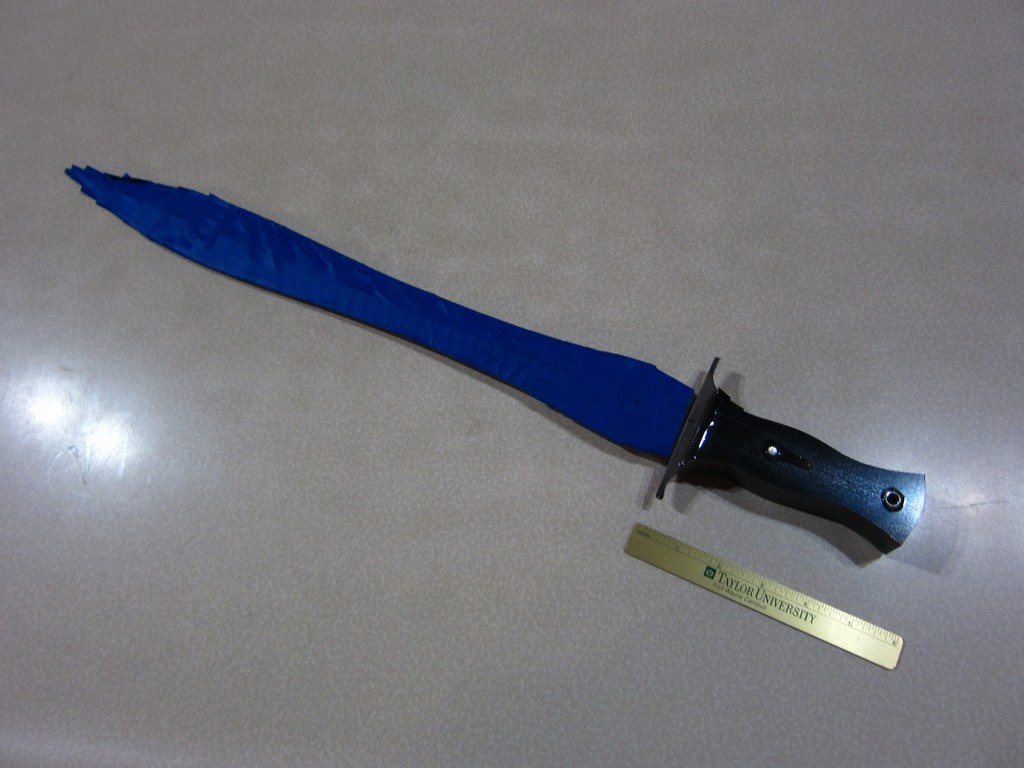
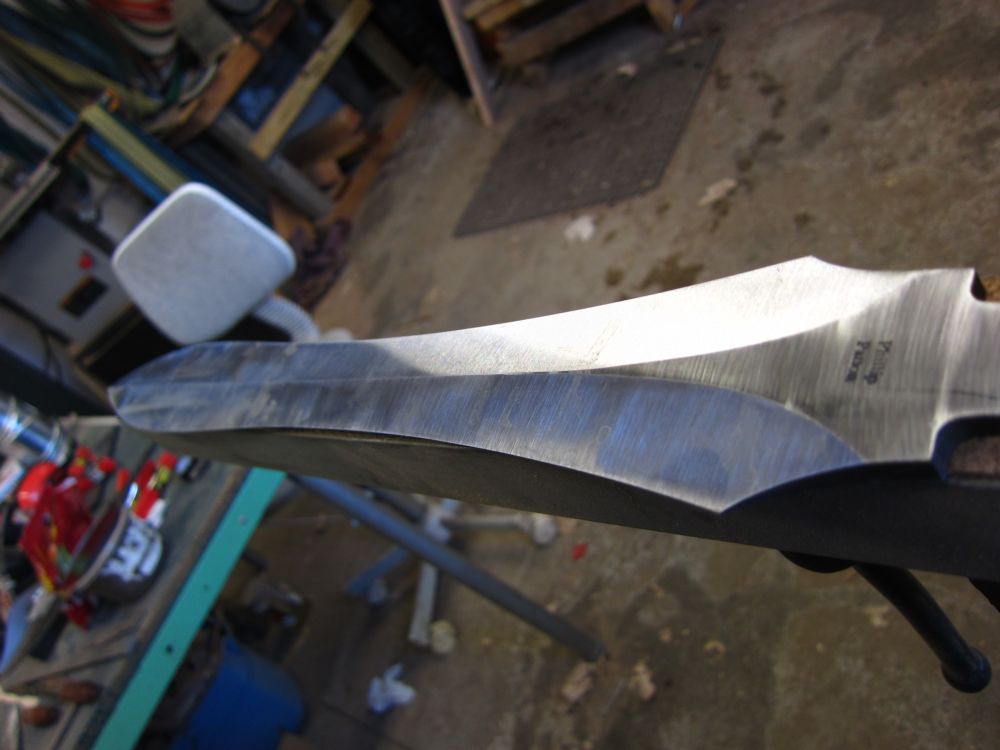
I can offer not critisism on your sword. I love the design, how did you get that pattern? Do you have any WIP pictures?
Hi Tim,
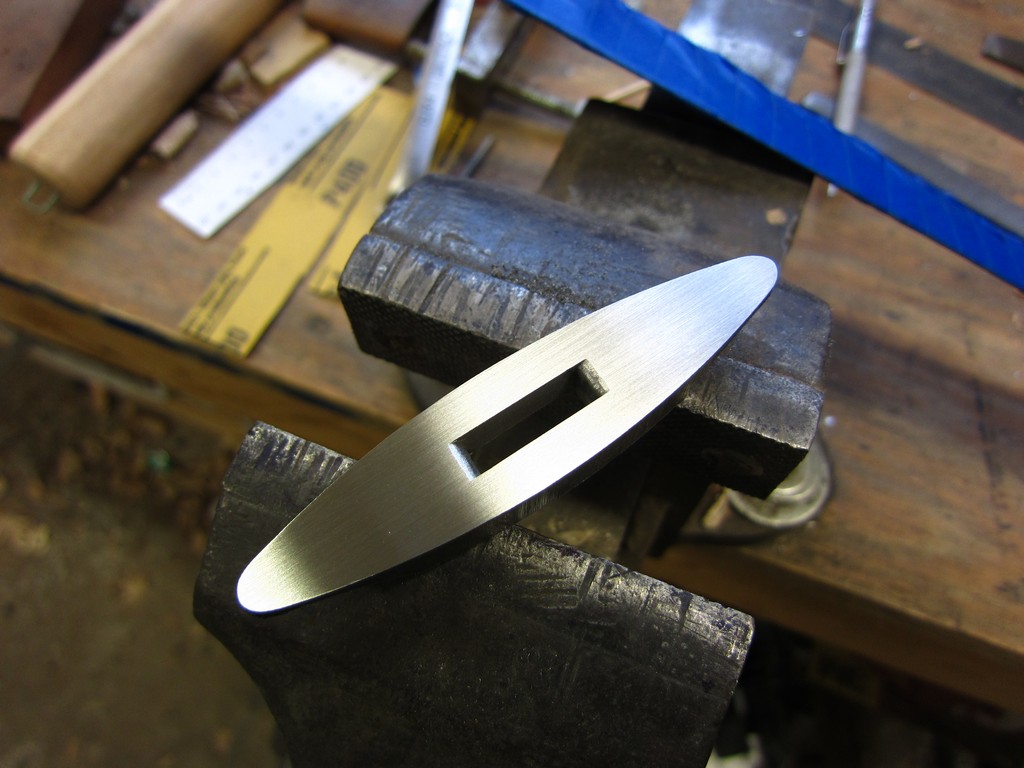
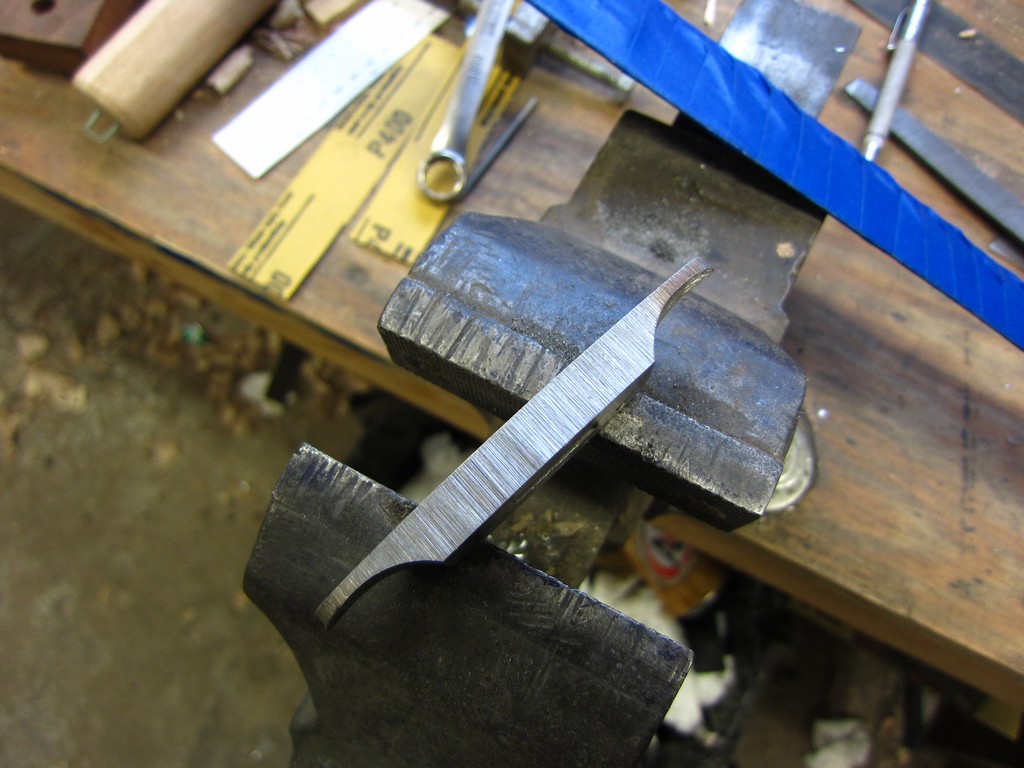
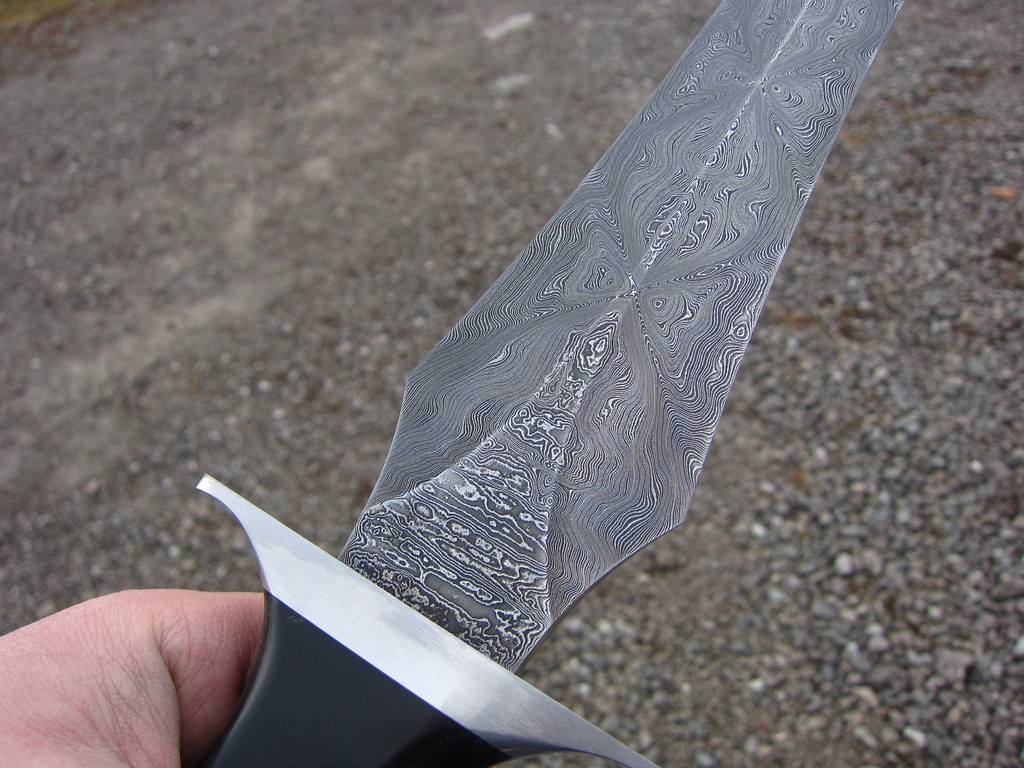
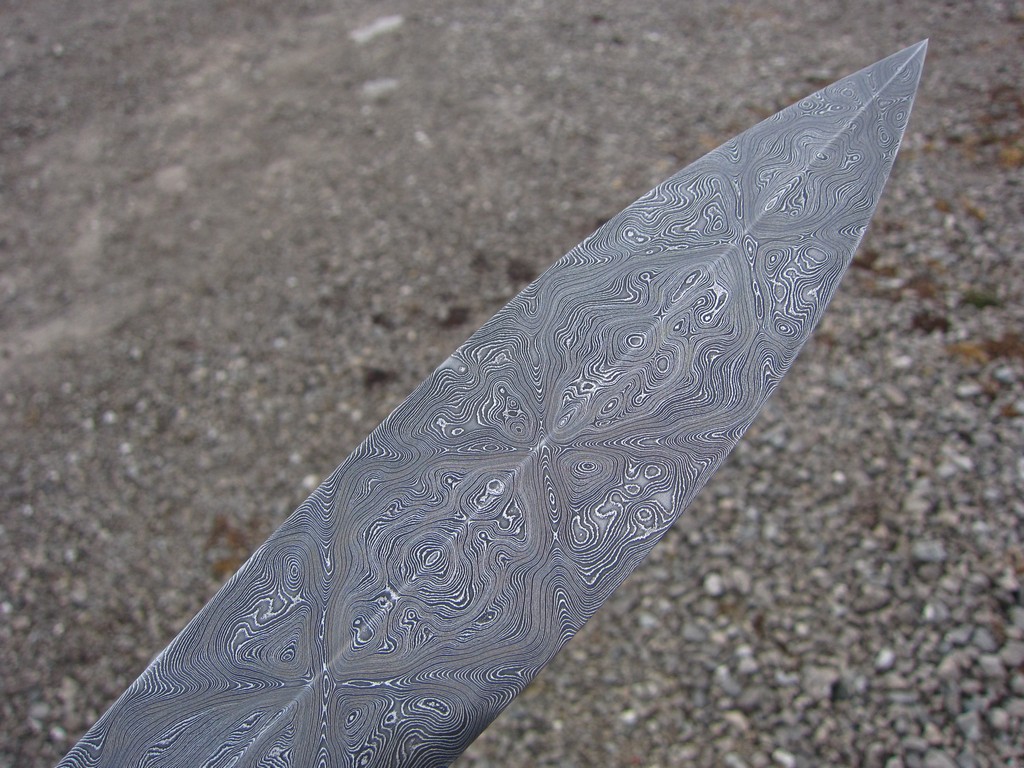
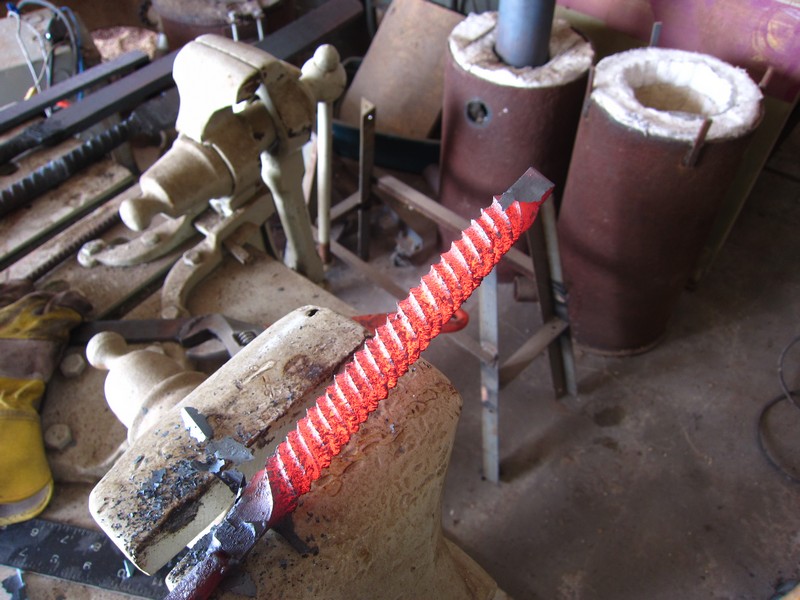
It's basically a modified ladder pattern. You grind a series of X's along the blade, off-setting them from side to side. Then flatten and work as usual. I learned this pattern from one of Jim Hrisoulas' books. I forget which.
The blade was pre-shaped, and then the grooves ground in. The layout can be a pain with a leaf shaped blade like this....
I don't have any pics of the blade prior to heat treating, but here's a few: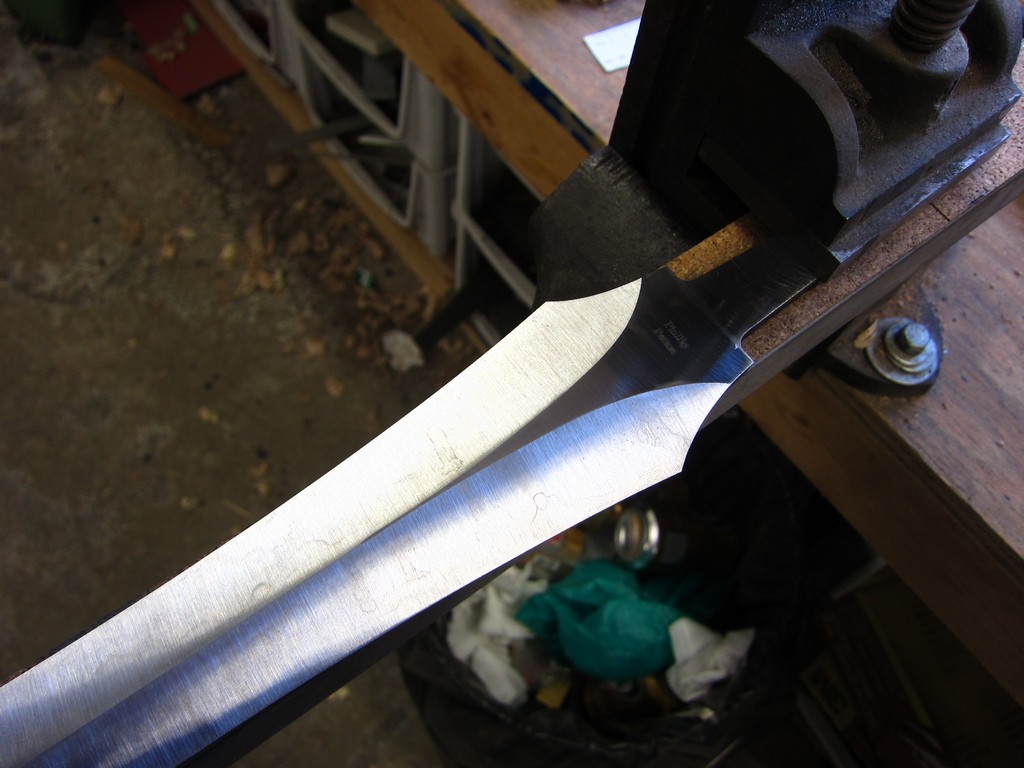

-
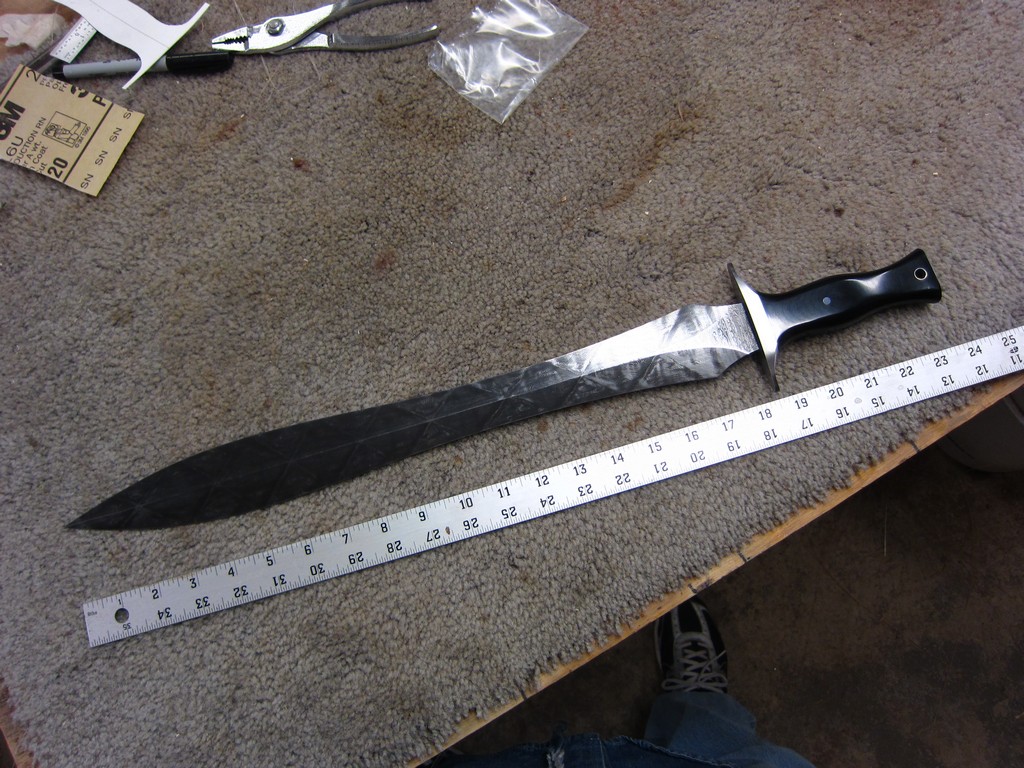
Steel: 1084 and 15n20, about 300 layers, in a butterfly pattern.
Blade length: 18.5"
Total length: 23.5"
Blade thickness: 1/4" at guard
Handle material: black paper micarta
Some pics I took: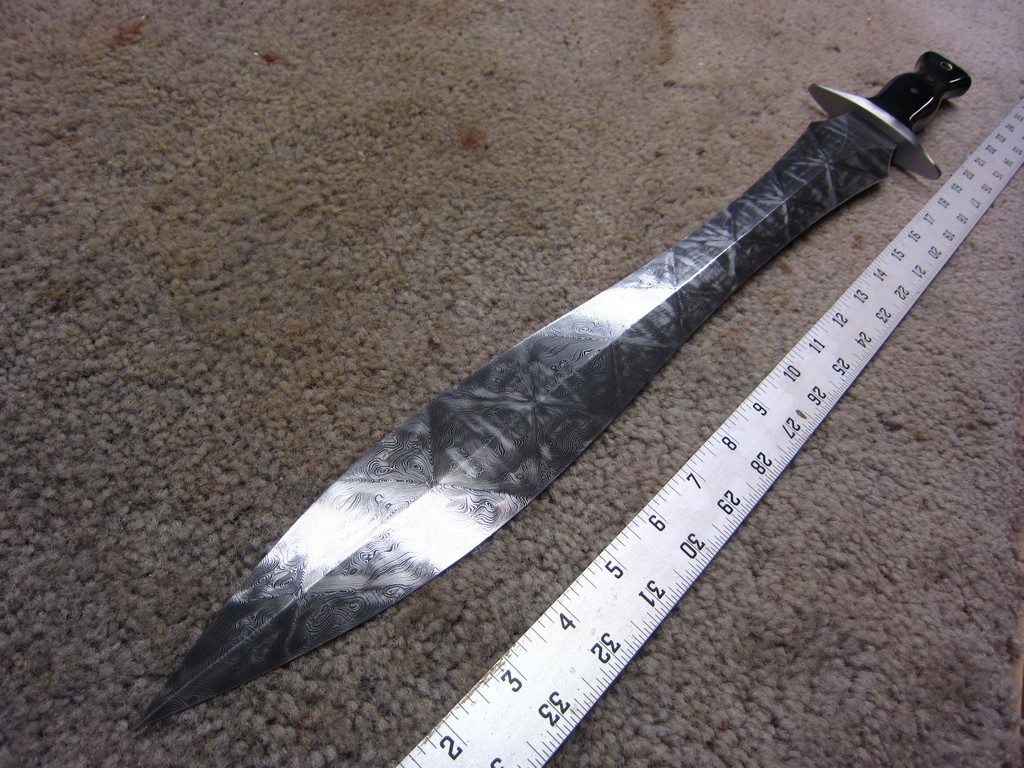
A pro shot: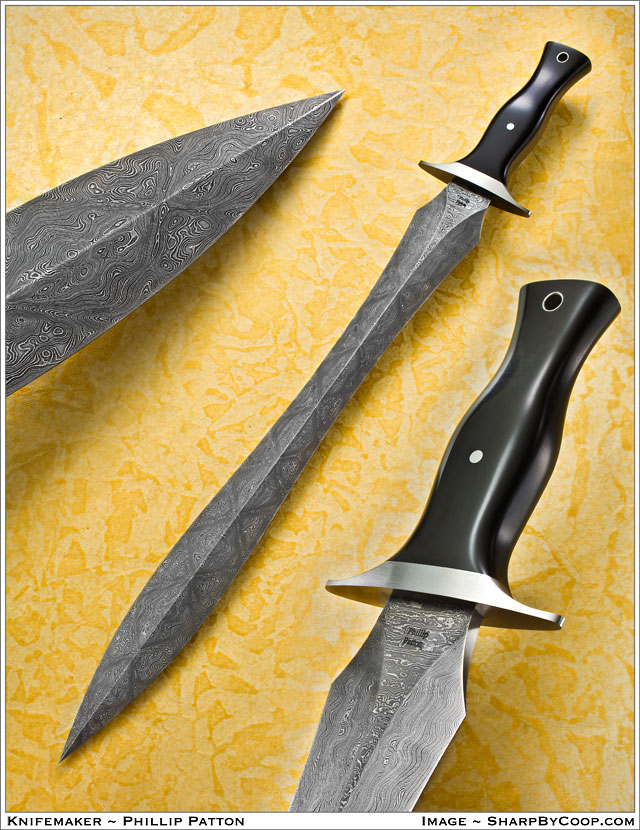
Thanks for looking, and constructive critique is welcome. :) -
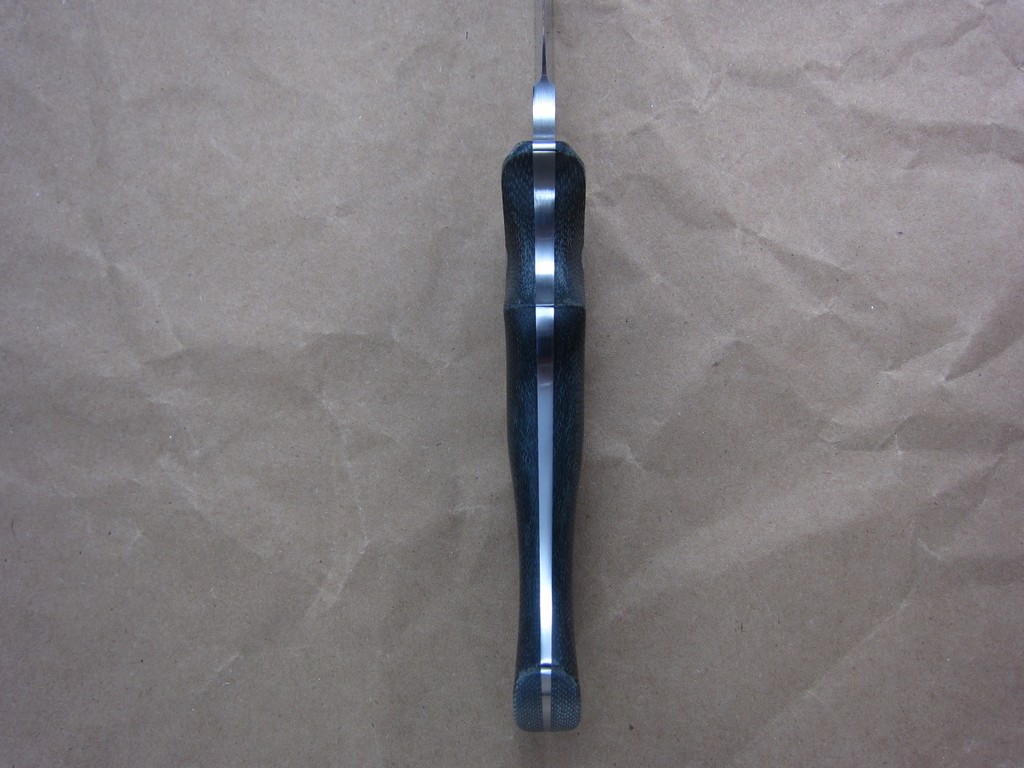
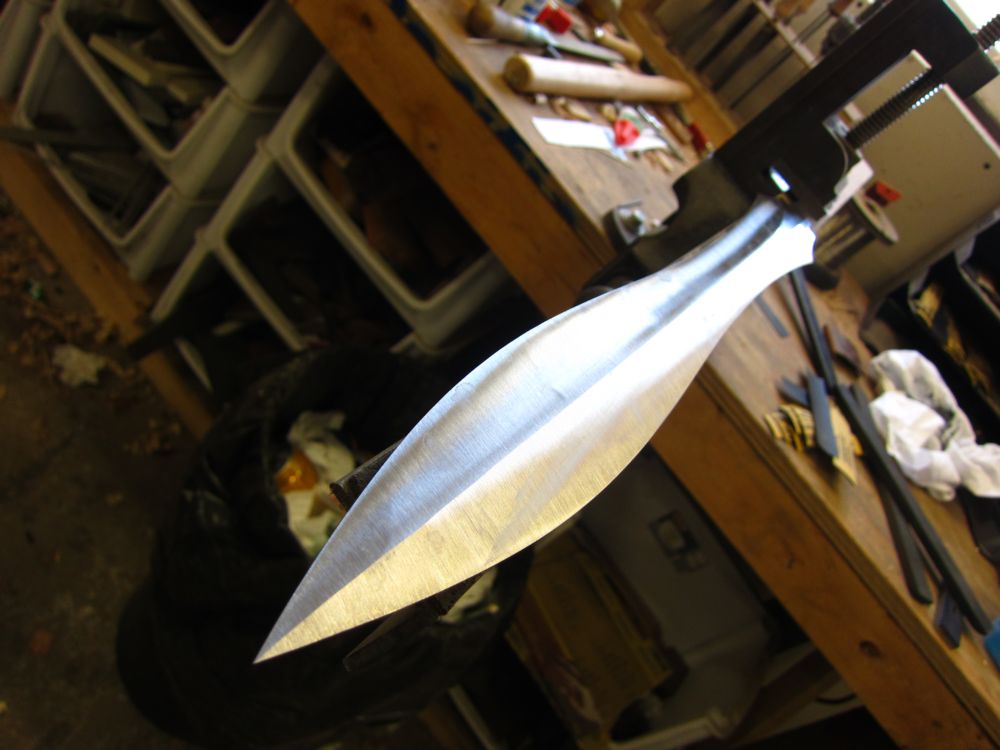
Steel: A2
Hardness: 59
Blade length: 9"
Total length: 14"
Blade thickness: .200"
Handle material: African Blackwood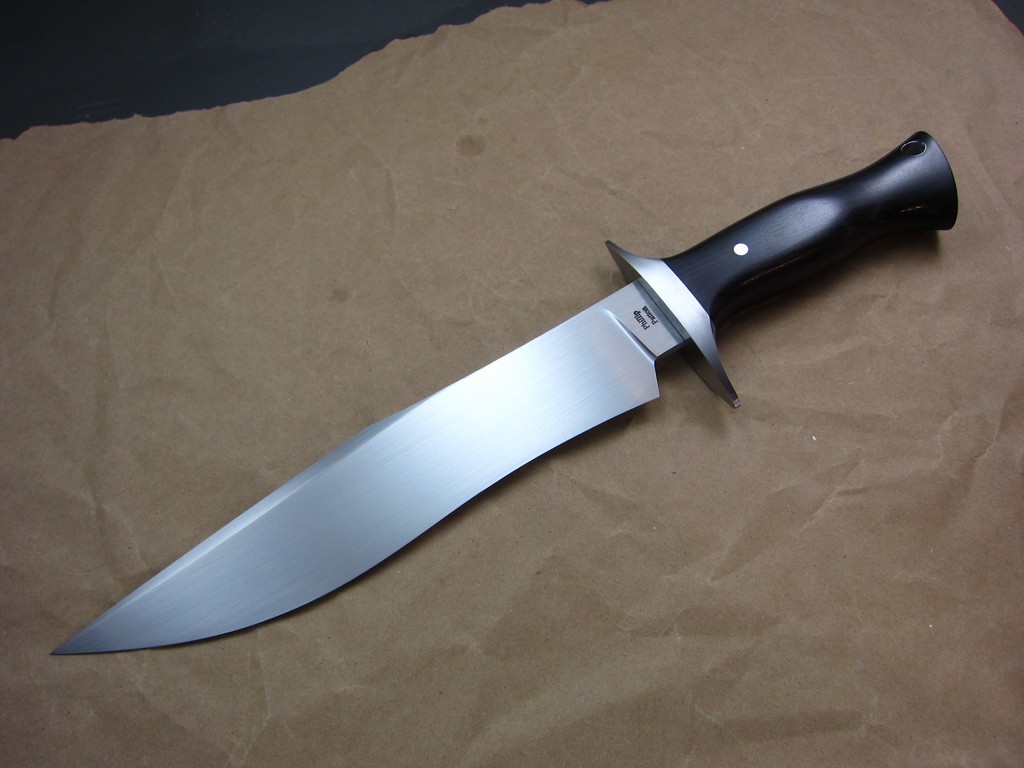
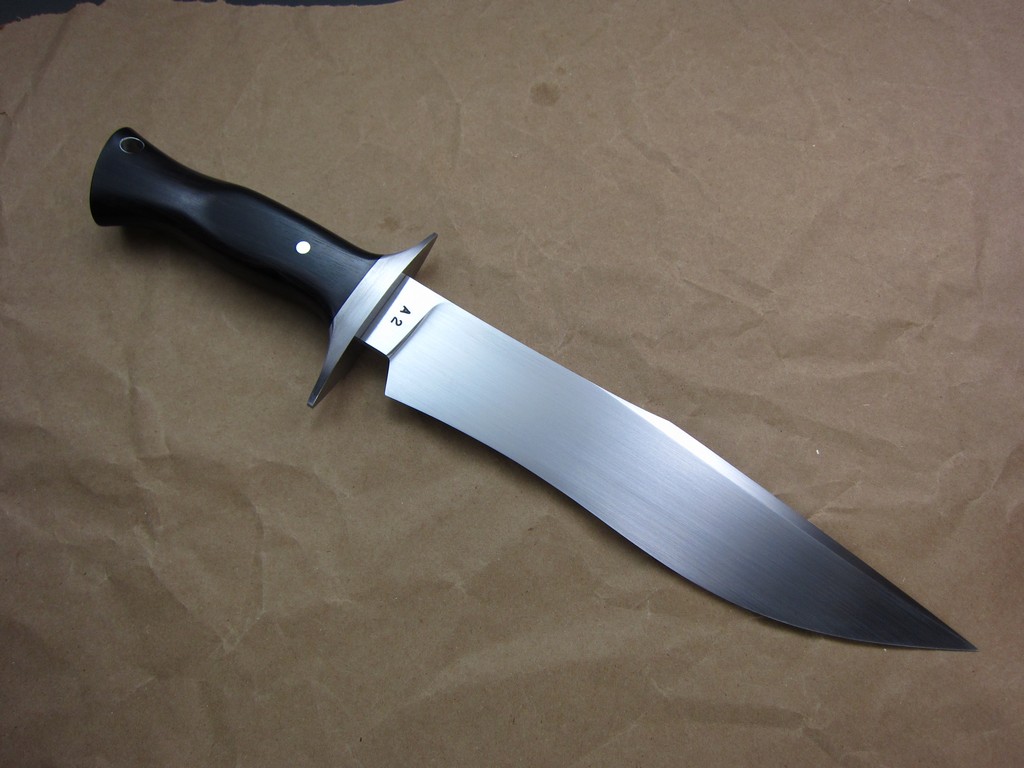
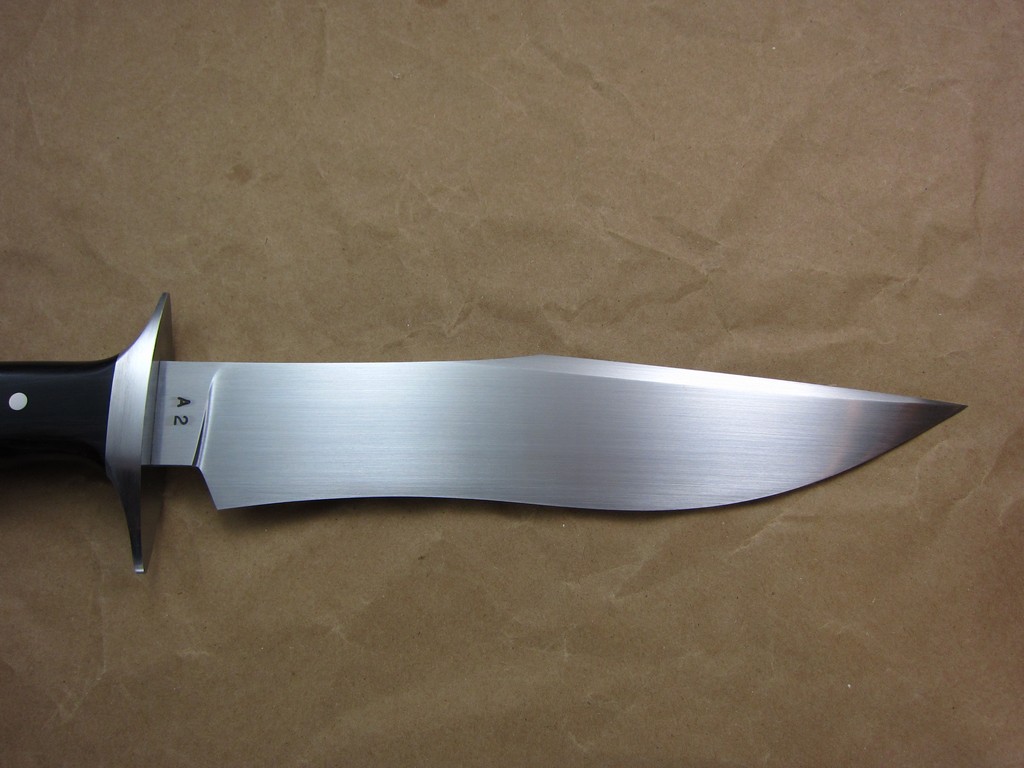
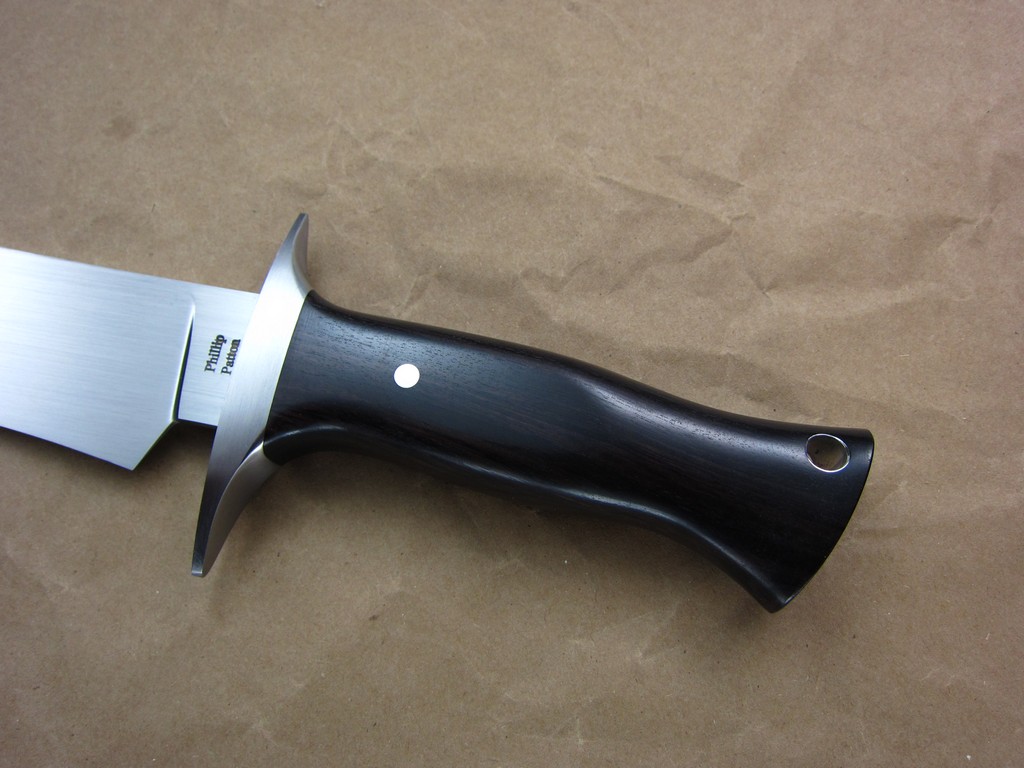
Thanks for looking, and all comments welcome.
Phillip -
I think clearance is good but I won't know for sure until I run it!
Oh and BTW, I tried turning the top die 90 degrees as well, and got all four screws in with no problem!
The top die can be rotated. It's the lower die that's the problem. The die isn't centered on it's mounting plate, so if you want to use the dies rotated 90, then you'll have to cut the lower die off and re weld it in the correct spot. You'll see what I mean... -
I didn't take any of the guide assembly and shims apart. Didn't feel like fooling with that! Also I figure there wasn't much use cleaning all the grease out of the ram guide, painting it, and then regreasing. I left the head in tact, unbolted it from the backbone, and painted around the whole guide assembly!
Sounds like the way to go. Getting the ram lined up just right is a pain! You may have to loosen one side and increase the clearance slightly if it acts like it wants to bind up, as it does in cold weather. I would try the block heaters first though. -
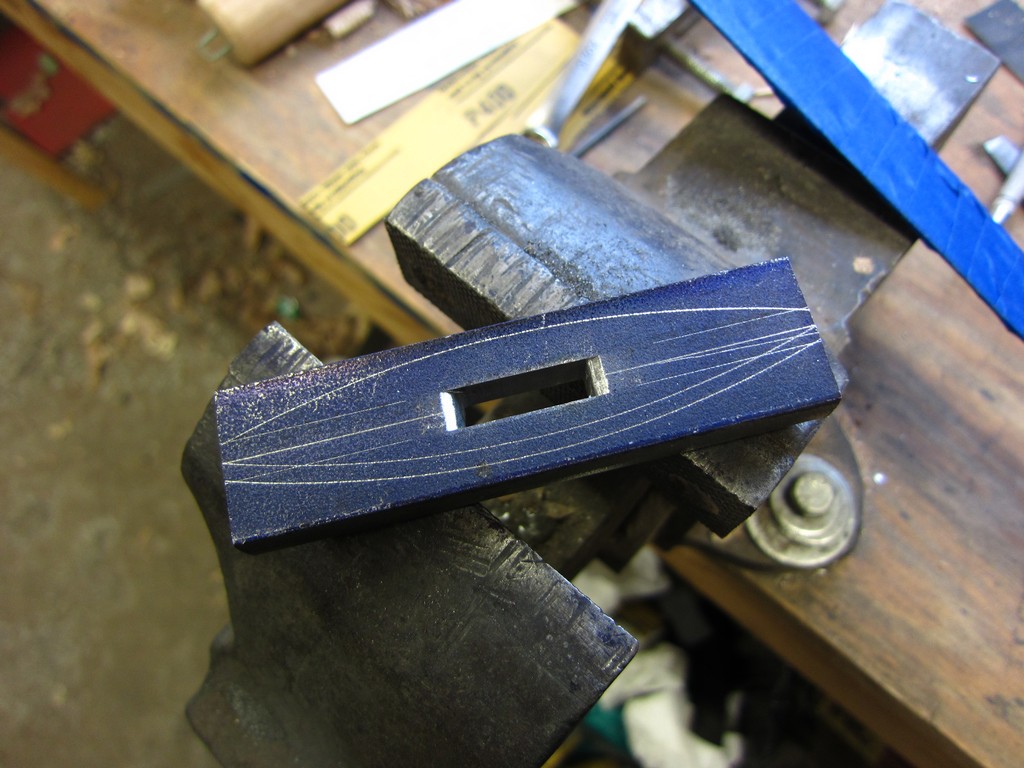
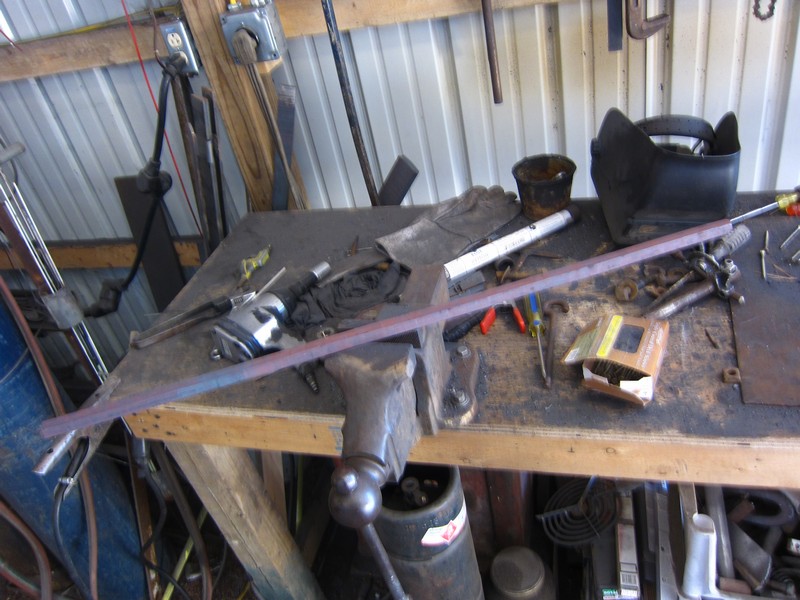
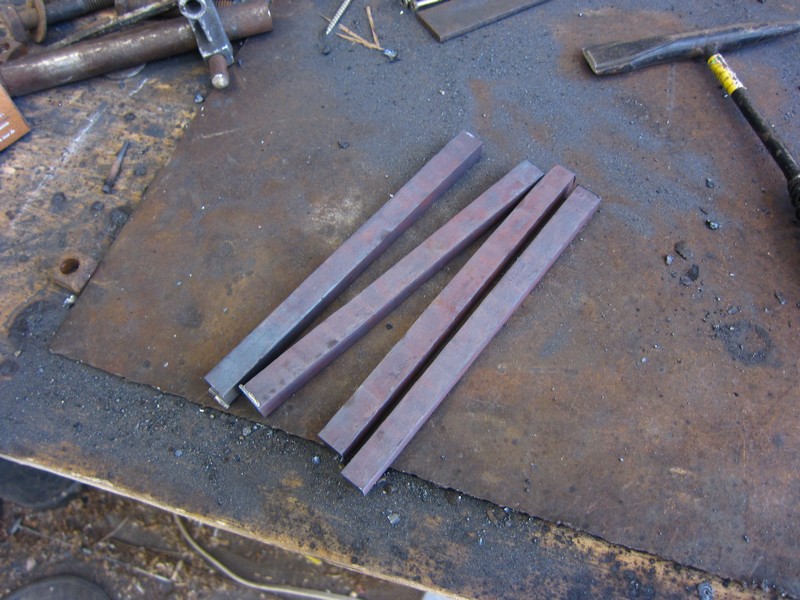
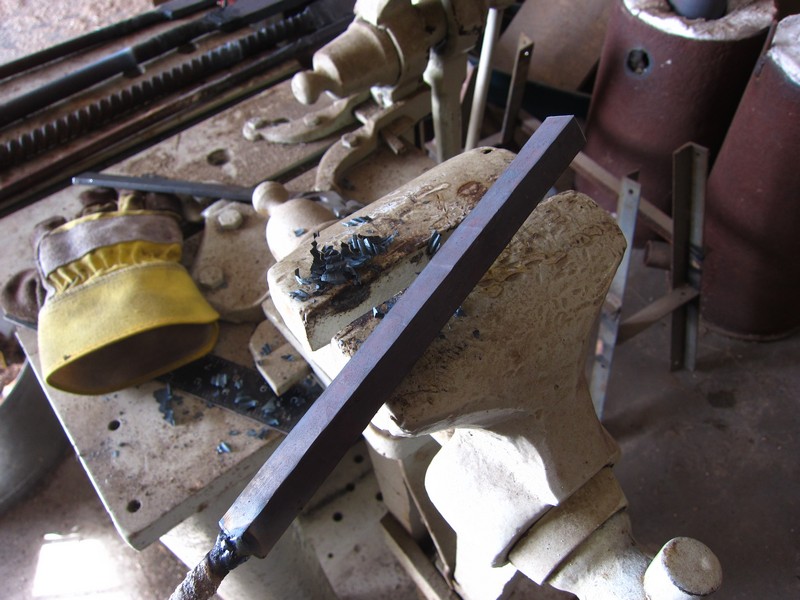
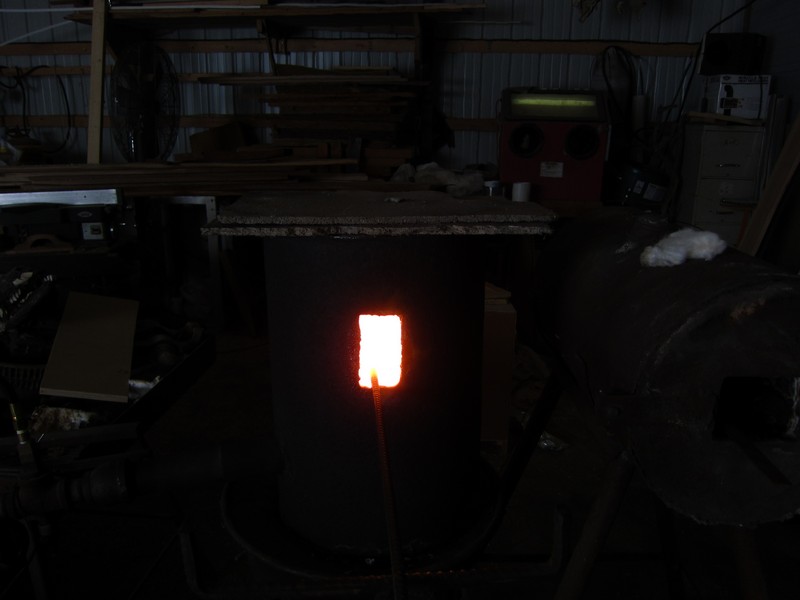
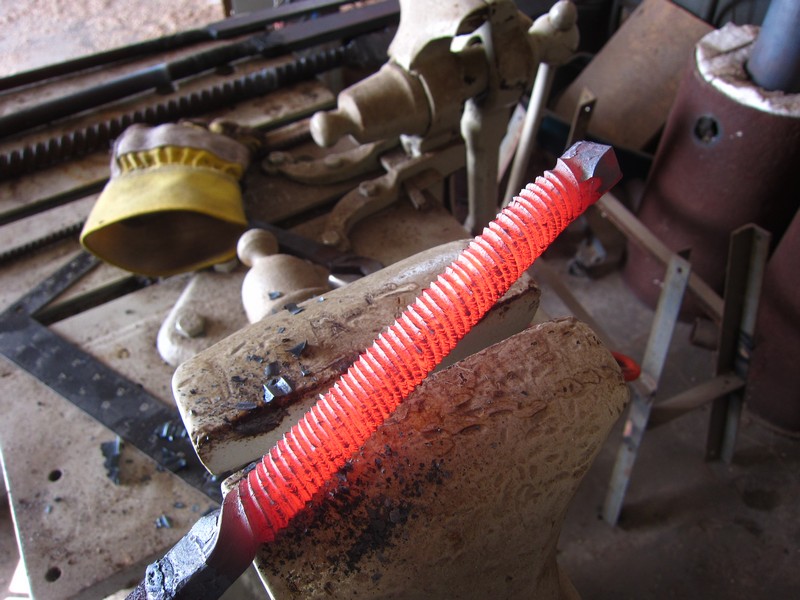
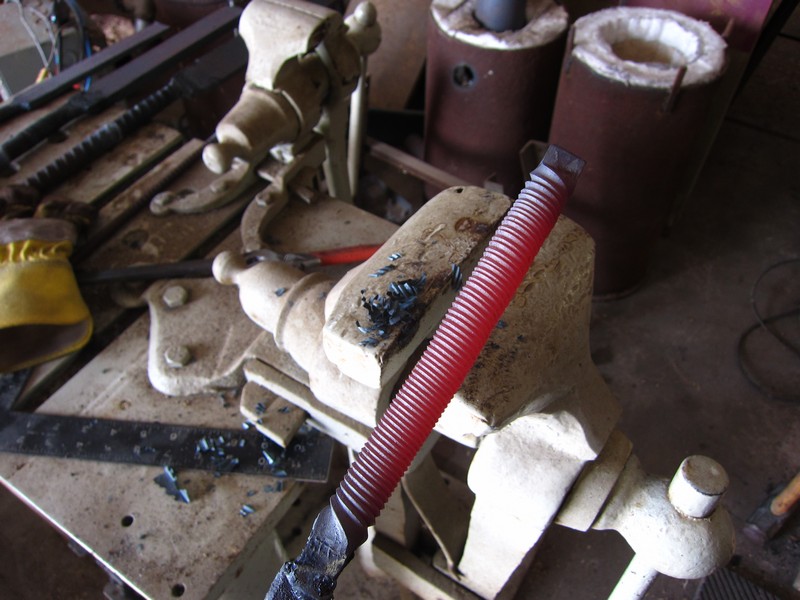
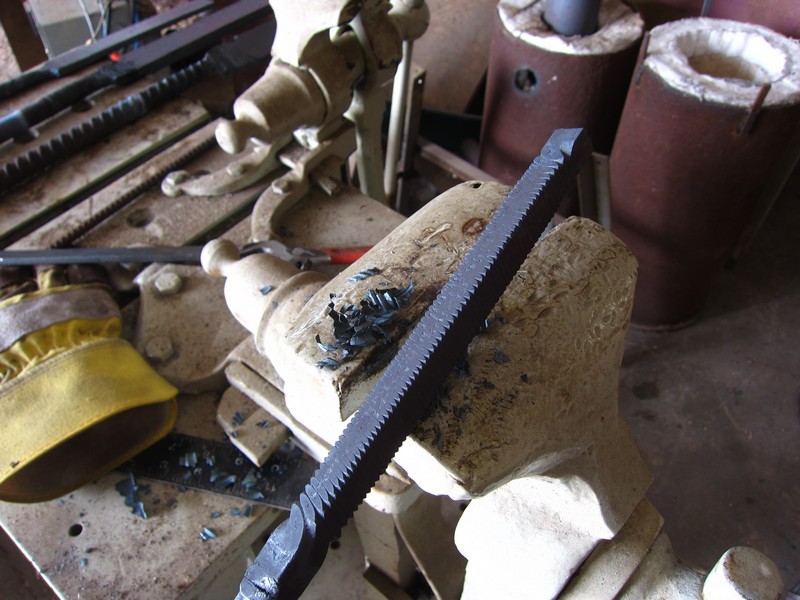
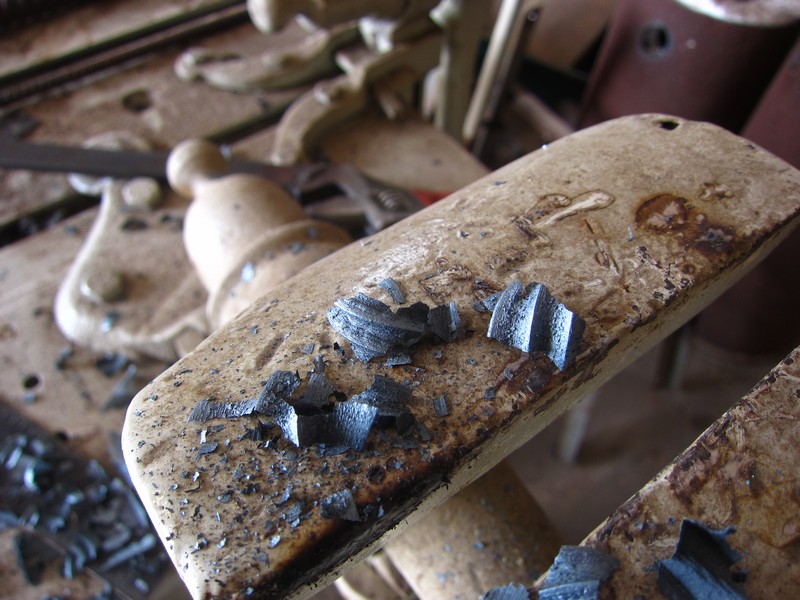
I'm forge welding a billet of about 20 layers:
-
I got the head all painted up today! Hopefully I'll get her all put together soon. Compressor is still in the shop!
Great! Where's the pictures?
I'm sure you know this already, but when you put the head back together, make sure the cylinder, ram, and anvil are all lined up together. If they're not lined up just right, the cylinder will wear out faster... Don't ask me how I know this. :P
-
I don't know how much you're spending on the single phase motor, but you might be money ahead to get a phase converter, or build one yourself. I know a guy that built one out of a 3 phase motor.
-
In that case, the air coming out of the compressor would not smell good! LOL
Well, you're not supposed to use your own socks!
Make any progress lately? -
Or just put a sock over the intake. :D
-
My goal is to provide enough detail that you could make one yourself from reading the thread. :)
-
Hi Dave,
Doesn't look too bad. Looks like the oil drain pipe broke off in the hole, which is better then tearing out the hole.
You really should re-install the pressure gauge, because it looks like it also has a pressure relief valve, which comes in handy should the compressor ever get stuck running. :)
Damascus Fighting knife WIP
in Knife Making
Posted
Hey folks,
I recently started this project over on another forum, and thought I might as well "mirror" it here. Enjoy!
I'm forging a billet of "Gordian's Knot" damascus. The original bar had about 100 layers.