

Wolf's Den Armoury
-
Posts
86 -
Joined
-
Last visited
Content Type
Profiles
Forums
Articles
Gallery
Downloads
Events
Posts posted by Wolf's Den Armoury
-
-
I'm re-organizing/re-orienting the layout of my smithy. Obviously part of that endeavor will be moving some things around, including the forge and the anvil (don't have a post-vise yet, but I'm workin on it)
For those who've been doing this for a much longer time that me (for a definition, a much longer time would be more than three months. ), what is your preferred orientation for the anvil?
 -
I just went around the shop snapping pictures.
wouldn't that be a potentially dangerous distraction? :D -
So, can I assume that these were *not* taken at your shop, Grant? :cool:
My biggest ones....
If you think it's cooled down, it hasn't.
If you aren't sure...it's hot. leave it alone or use tongs to pick it up.
(with regards to hammers) THIS IS NOT A BAT!! [baseballs bats are, for the most part swung with uncontrolled energy and force] (I used the same rule when teaching my kids how to fence when they were small. To this day if Dad asks his boys, now 25 and 18 years old "what's rule #1?" They will reply "This is not a bat!")
David -
I got *two* new ones late last summer. A big ol' Poplar tree was being taken down, so I asked the site foreman if one of the guys could cut two chunks for me x" tall, "nice and level" Used the magic words "amateur blacksmith" and told him what I wanted them for (anvil stand and post vise/swage block stand). Next thing I knew there were too big-xxx chunks of wood on my lawn!
D. -
No need to get rid of the old girl. As already said a plate across the bottom of the forge bolted in, some straps or a plate across the crack, also bolted, connect the tuyere to the new plate and you have a functional forge. Much easier than starting from the beginning.
OK, then...I have a stupid question related to the plate...would the lid off a 55 gallon oil drum work? or would it be too thin for this use?
I only ask because it seems to be approximately the same size (or I could trim it down a little bit).
To drill the bolt holes in the original pan...I have a DeWalt 18v cordless drill...would this have enough cojones to do the job? Any particular size/type bit I should use? (If the drum lid is sufficient, I can just punch the proper size holes.)
How many holes should I drill around the outside of the pan? Would eight (8) be sufficient?
If it's not necessary, I'd really rather not get rid of her, so going to try and repair her as best I can.
By the way, thanks UnicornForge. I had no idea what kind of forge I have. For now, I'm just going to be doing little doo-dads and decorative stuff while I learn how to do this wonderful art. I like the idea of having a larger forge like you describe, but being honest with myself, I'm not quite ready for that yet, nor am I quite at the level of expertise that I would feel comfortable having a forge that size. Thanks for the suggestion anyway.
David -
If you're talking about the clover shaped things I have tons of those. I also have lots of the track plates, spickes, bolts and the big brackets that tie the track together, I don't know what they're called but they're big chunks of steel.
hmmmm....I could use a track plate. My anvil doesn't have a hardy hole, so need something to weld a chunk of square tubing to to use with hardy tools...
Or make a smithing magician on...
David -
Congrats!
Your smithy sounds like the one I'm planning. Almost exactly the same size, same height and dimensions roof, etc. We're using two existing stockade fence as one side wall and the back wall. Adding a small section of stockade for a third wall and a couple of small sections in front.
Be sure to post pics when it's finished (or progress pics would be better)!
Good Luck!
David -
When I got the forge, it already had a small piece of 1/8" flat stock bolted to the pan across the crack (which has widened, but not migrated). All the welding was done with my buddy's stick welder, including the portion with the small plate. The tuyere is bolted to the plate (got it that way) and every time I fired her up, the plate would shift and the tuyere would move *with it* whenever I moved coal around.
Maybe it's just time to put the old girl to rest and build a new one.
I can re-use the tuyere for the next forge, so that's an expense I won't need to worry about. Hell, for the matter, I might be able to forge the pieces for the new forge with the old one....kind of an asexual reproduction thing....
Thanks for the advice guys.
David -
I got the google ads as well, but I hit the "page down" key and got the text. The ads fill up the entire first screen.
Lots of good information. Might end up buying the printed version at some point.
D. -
I just started smithing in earnest about a month ago. I found an old hair dryer at the Salvation Army thrift shop for $2.00 US that has a selector switch that allows you to decide whether or not to even *activate* the heating coils (which I never do, of course). It also has a seperate switch for fan speed (high or low).
Serves me pretty well. I'm even able to get my coal up to welding heat fairly easily.
I do have the blower assembly from a clothes dryer, just not hooked up yet. If I don't get a 110V motor for it, I might turn it into a hand-crank setup by using a bicycle cranks and gearing.
David -
everal years ago, I received my forge (as well as the rest of my smithing equipment) as payment for some historical reenactment maille I had made for a client.
It sat pretty much idle for probably 5 years until a little over a month ago when I had a sudden *need* to fire her up. (don't laugh...you know you've been there)
Anyway, I noticed a fairly substantial crank on one side of the firepot
A buddy came over with his arc welder and "stitched" up the crack on the inside of the firepot, so that seems to be fixed for now, but what's a bit of a concern to me right now is the rather decent sized hole that seems to have developed around the tuyere...
It's also migrated to a spot in the firepot where open air is visible (it's large enough that some good sized chunks of nugget coal have fallen through!
So I guess my question is.....
1) what would be the best way to repair this well-used old soldier? I'm fairly certain that it's cast iron.
2) would it really be worth it? Should I just start over and make a new one?
It actually feels bad to think I may have to actually retire this old forge. (my wife keeps threatening to turn her into a planter) -
Let me explain my horseshoe. I was told by a blacksmith that he should put the horseshoe as to dump all the good luck into his shop. Everyone else should put the horseshoe up to hold all the good luck in. I have enjoyed all the good luck falling into my shop!!!
Gaylan
Thread Resurrection!
I've always heard this as well. That because the Blacksmith is the only one who uses all four elements, and because he *makes* the horseshoe, that he's the one who put the luck there in the first place. Because of all this, the Smith should place his horseshoes toe up, and allow the luck to flow back into the forge.
David -
Many years ago, I was at a library sale and picked up a copy of "The Art of Blacksmithing" by Alex Bealer (copyright 1969)
Has anyone here ever read it? What was *your* opinion of it?
Photographs would have been nice, but there *are* about 500 illustrations, one of which was the patch of maille that I studied for hours trying to figure out the basic weave, leading me to eventually be a full-time, professional maille smith.
Anyway, to those more experienced smiths, I ask you...
What do *you* think of this book?
Are there others that you personally would recommend to the beginning blacksmith?
Thanks,
David -
This site says..
"The researchers speculated that married men live longer because they adopt healthier lifestyles and take fewer risks. Married woman, on the other hand, probably live longer because of the improved financial well-being that comes with marriage."
but i'm not sure there's all that much fact or science behind this yet.
*I* heard said...."Married men live longer....really, it just *seems* that way!"
LOL
David (married 16 years):cool::rolleyes:
-
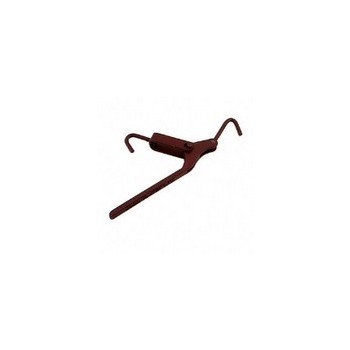
Well, with me just starting blacksmithing a couple of months ago, I am by no stretch of the imagination an expert, but going on this pic,
The bracket the you *do* have would seem to be part of the mounting hardware, and also clamps down the top section of the spring.
If you can't find the missing portion of the mounting hardware, it might not be that difficult to fabricate. Even if you don't forge it, it could still be made cold with the right size steel and a cutting torch or bandsaw (go slow and use plenty of lube).
Might just be my inexperience talking. Anyone more experienced have any ideas?
David -
David,
One arrangement you might want to try is put the Vise against the fence, the forge on the right side (where your anvil is now) and put the anvil on the side towards the camera. Spacing between the three would be such that you only need to rotate your body to get to the next working position. Also this pulls the forge away from the fence, and gives you as much room as possible on all sides of the anvil. This is the arrangement I use whenever I setup, as I don't have a permanent location as of yet for my shop. The more you have to move to get from one workspot to another the less time you have to work on the metal while it is hot and the quicker you wear yourself out.
Thanks, Rich. I'll definately take those suggestions under consideration. So far it seems to be the grouping of ideas that might be workable and look good to my wife.
Not sure if I would leave the toolbox out in the VT weather, see if your wife would mind if you to make a tool cart that stores in the garage, or a lockable shed. Can be as simple as a small shelf unit with a door, mounted on a hand truck. Hammers on the bottom shelf standing on their heads, tongs on the next shelf or through rings on the side (old hand sized drawer pulls work nicely) and punches, hardies and such standing in pockets on the top. If you get the type of hand truck that is setup for buckets, you will have some room behind the storage area to stand up materials or a tin box could be added to a flat backed one. One selling point for the wife is the replacement cost of your small tools, should someone jump the fence and walk off with the tool collection.
Well, unfortunately no garage or shed. closest I've got is a deck over a back porch which my wife keeps threatening to make me enclose with lattice. Somehow I don't think she'd go for 3/4" plywood as a substitute.
95% of the smithy *wouldn't* be left outside in the cold Vermont Winter anyway. My stock, round and flat have a place in the basement. all my hand tools have their designated drawers in my 16 drawer toolchest, also in the basement.
During "smithing weather" is when I keep my stuff in the Army Surplus mortar box, and that locks. I supposed to make it easier for someone to just walk up, do a deadlift of a couple hundred pounds and walk off with my tools, their hernias dragging on the ground behind them. lol
Most of my tools are handmade by me anyway, except my hammers. The hammers themselves cost a grand total of *maybe* $30, harbor freight and garage sales.
hmmmmm.....maybe I can talk her into putting 12"x12" pavers under the porch, enclosing with 3/4" plywood (painted black on one side) then covering the plywood with white lattice.....would still give the look she wants and the security I'd want.
hmmmmmmmmmmmmmmmm
David -
I, too apologize for not seeing this prior to Samhain.
I found this at a British site that appears to be Pagan and historical reenactment focused.
Typically, these would have been made of bronze or copper, but iron wouldn't necessarily be out of the question as long as it was properly seasoned (not that food safety was a huge issue back then)
As an armourer (I'm in the SCA), I agree with what Thomas said about getting/making a good dishing hammer. for smallish pieces, I have a commercial tack hammer that I've rounded the face on that works quite well for small, tight spaces. It doesn't weigh a lot (maybe 8 ounces) so it doesn't *move* a lot of metal, but she does a pretty good job with patience.
From a Pagan Standpoint, I would probably make five panels (to represent the Elements of Earth, Air, Fire, Water and Spirit), and perhaps cut a sigil in the "bowl" section, as a nice touch. The five panels might be easier to work with for size and shaping as well.
I think I'll give one of these a shot too. I need a new cook pot for SCA use...lol
David -
Well mine's not quite *that* bad, Thomas. Although I could probably weld a chunk of round stock to the end of it and make it close. hehehe
I'd say it's more like a piece of 1/4" round stock.
I think I'm concerned more because I don't really have a clue what I'm doing yet, no one to learn from in person where I am and I'm using you guys (more or less) as my teachers. [grin]
David -
well, what I was thinking for the chain, is to have one side more or less permanent, with the opposite side having a single locking caribeaner or a single link and tightened with a small chain binder similar to this (or hand-forged like this)
then it would be able to attached or removed in a couple of seconds.
David -
Hi all.
I'm not sure if this would work or not.
I have a home-made anvil (I-Beam with a chunk of forklift welded to the top as a face of sorts, and what passes as a horn welded to the front). It's pretty ugly, but it works for now, and since it was free (got it with my forge and some basic tools and tongs) it will work until I can afford an actual anvil.
An idea I've come up with, might be seen as an alternative to those without a hardy hole, but not really sure well it will work in practice.
The drawing is just a quick sketch and is not even remotely to scale. Basically (and this is just because I have some of this stock on-hand) it's a piece of 3" x 1/4" x 8" hot rolled steel bent hot over the edges of the anvil. A 3/4" x 3/4" square is cut 1-1/2" up from the bottom edge for attachment of a chain intended to go around the bottom of a legged anvil stand, or in my case through the existing hole in the moddle of the I-Beam that my anvil is made of.
Below, I have a photo of my current anvil, with a rough drawing of how this would be implemented.
I would love to hear opinions of those more experienced. I plan on going over to a friend's this week to do some welding (making my post-vise that day as well, so we'll be able to see how it looks at least.
Thanks for looking.
David -
Mine's pretty ugly. Not even an "actual" anvil, but it works for now. Got it along with my forge, some tongs and a couple of hammers and round, square and flat stock as payment for some historical reenactment chainmaille gauntlets I made for a guy a few years ago.

-
I have as my primary hammer, a fairly old cross peen that I picked up for about $2 at a garage sale a few years ago.
The peen on this hammer is really, fairly rounded and what I (of limited knowledge) would consider to be quite dull and wide.
How thick should the edge of a cross peen be??
What would be the best (and most) way to narrow the thickness (without throwing it in the forge. don't want to ruin it)
Thanks.
David -
Not going to be making anything big. mostly little trinkets like S-Hooks, various hang-something-on-this hooks, letter openers (made one for my dad's xmas present this evening in fact!), fireplace stuff, leaves, etc....like I said, Just little stuff. I leave making armour to working cold.
Can't really put the anvil on end. At the same time, this isn't my permanent anvil. looking on various online resources for an *actual* one by spring. (Will be nice to have a hardy hole and a pritchell. not sure what I'll do with myself then. [grin] )
I know what you mean about gathering stuff, Tim. In the last week I've managed to find all kinds of stuff to work with next spring. now where to put it all without xxxxxxx off the wife...lol
D. -
I have an incredibly limited workspace available to me. 5' 7" deep x 10' 4" wide. My area *CANNOT* exceed these dimensions (It's really the largest that the darling wife will allow me to impede her back yard.
)
Below is a pic of the current layout. Ignore the photo date, I changed the battery a couple of days ago and just forgot to change it [grin]
As you can see from the photo, I have my forge (obviously), an ASO, various tools and tongs (in the green wooden mortar box in back) and coal storage (in the 20 gallon galvy can)
I plan to make my post vise at some point this week, probably a close approximation to this
or this
Sooooooo.....
Any advice for those more knowledgable (which is pretty much everyone) on how to take what I have (including the post vise) and arrange it in the most efficient way? My wife's only *real* request is that it be efficient (for my safety) and that it looks nice (cuz she has to look at it too.)
(A note to the work triangle...there's only about 12-16" behind my forge before it's too close to the fence.)
Thanks for your help and advice. I really appreciate it.
David


preferred orientation?
in Anvils, Swage Blocks, and Mandrels
Posted
ok...so I'm an idiot that can't remember there's a search function on a forum site. This is already been addressed several times.
 )
)
Please disregard (Glenn, can you delete this post for me please? I tried but seem to be having a blind moment or a brain cramp
David