

Daniel S
-
Posts
122 -
Joined
-
Last visited
Content Type
Profiles
Forums
Articles
Gallery
Downloads
Events
Posts posted by Daniel S
-
-
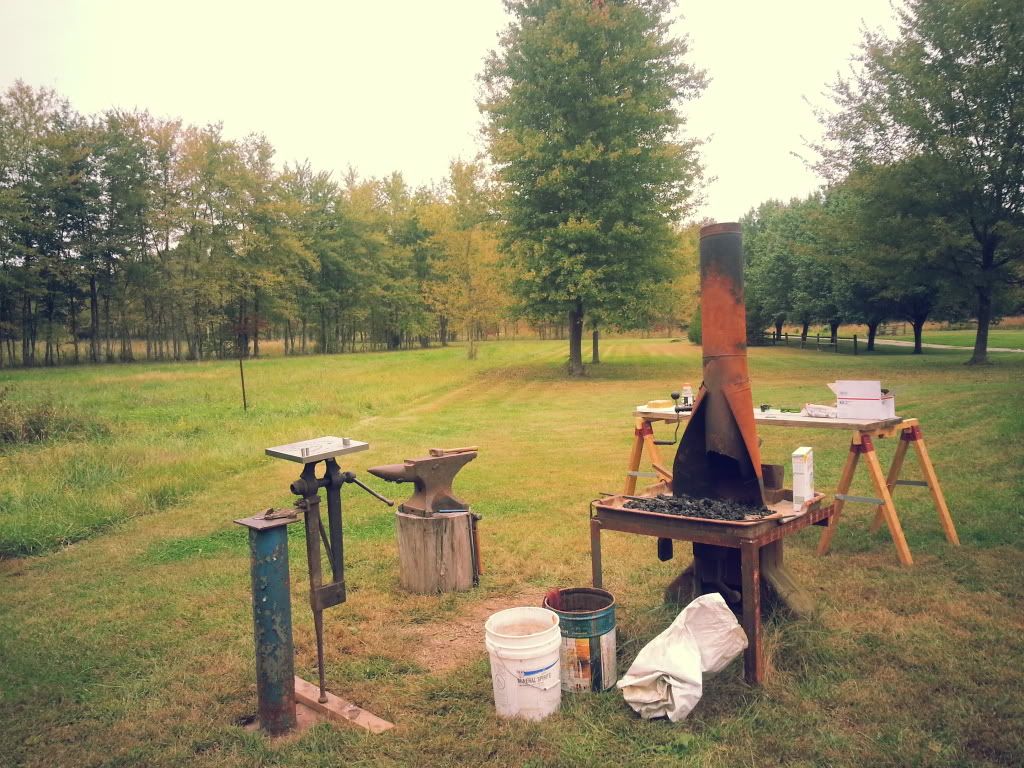
I got an ultra jig from Yesteryear Forge at Quad State this year. This past weekend was the first chance that I've had to use it. It is quite an impressive tool. I also fired up the large forge for the first time.
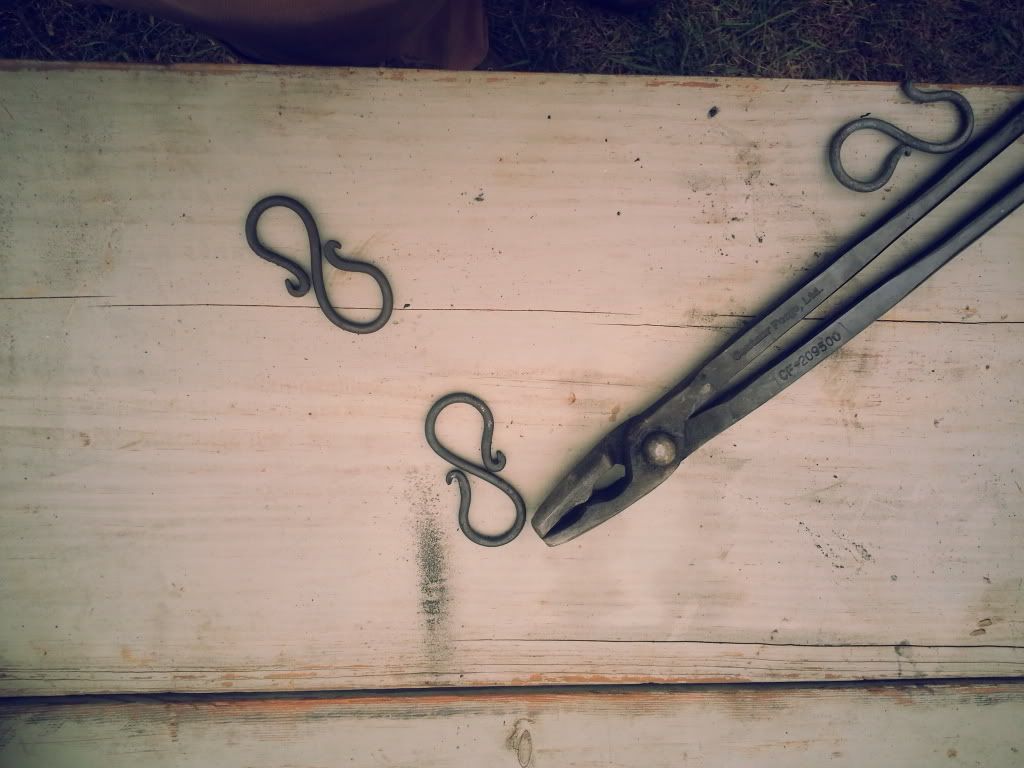
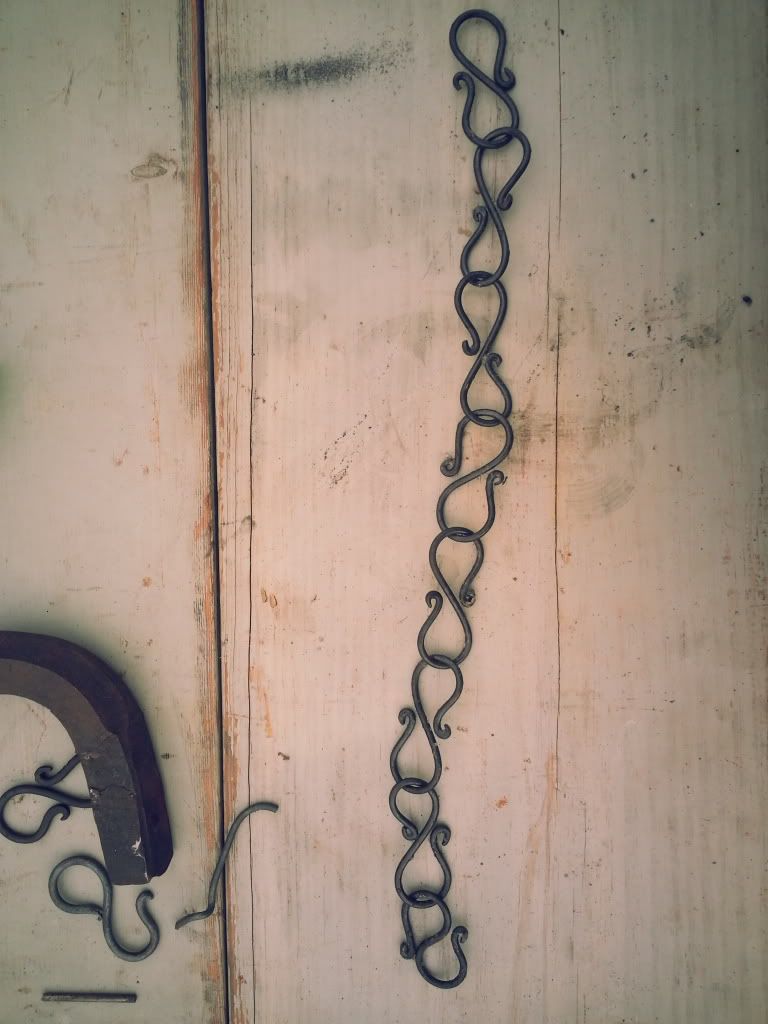
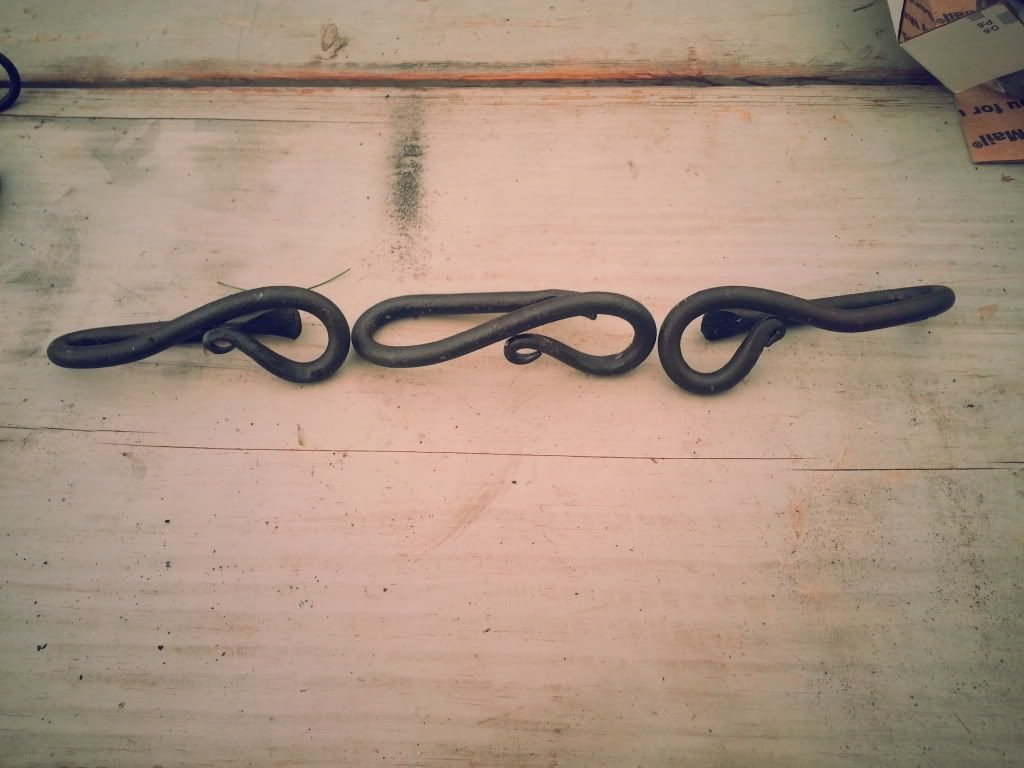
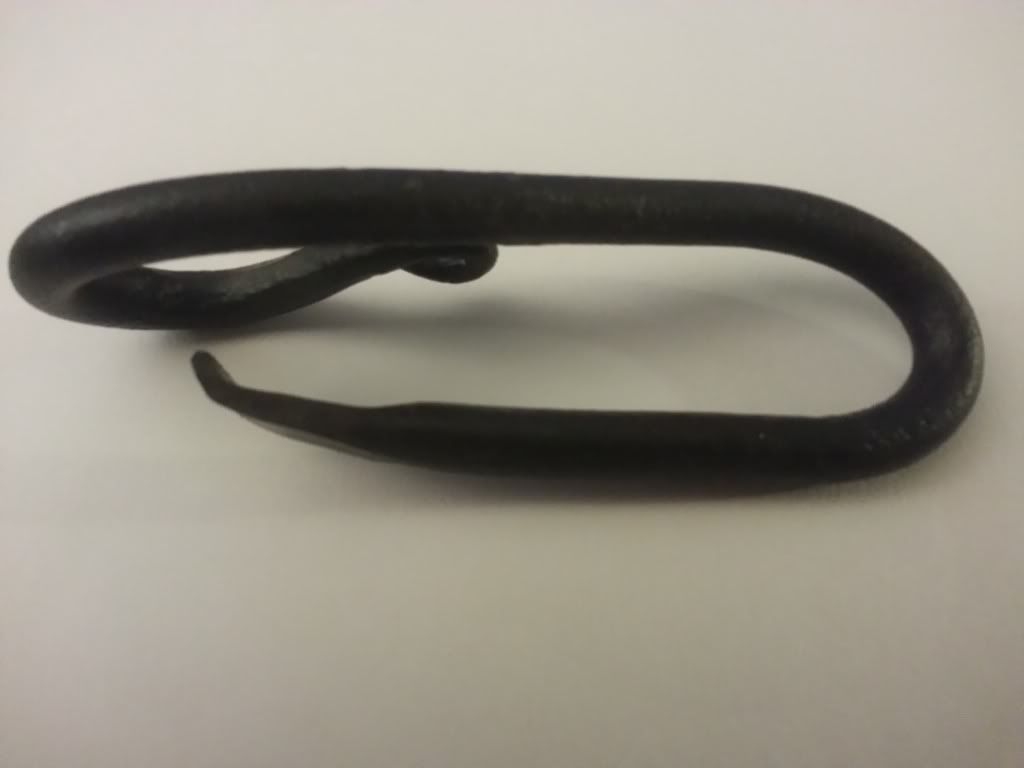
The first thing I made was some s-hooks and then an s-hook chain, like they had at their booth at Quad State.
Then I made 8 bottle openers, 7 passed QA/QC. I'm sure with a slight rework the last will perform as well.
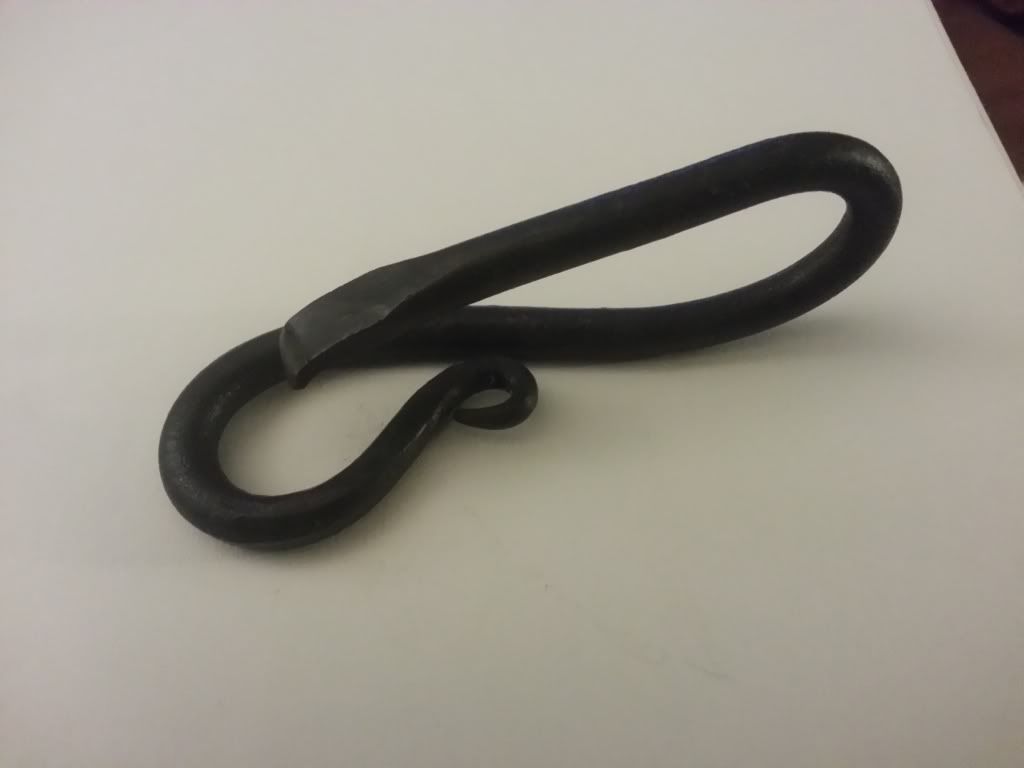
To this point I have nothing but great things to say about the ultra jig. I've only just scratched the surface of what the tool is capable of, but I can see that I will be getting a lot of use out of it in the near future. Unfortunately 4 of the bottle openers already went to family members, now I will have to think of something else to make them for Christmas. I'm thinking of matching refrigerator magnets.
.
I have to give a nod to Thomas Powers, the s-hook chain is recycled election sign frames.
-
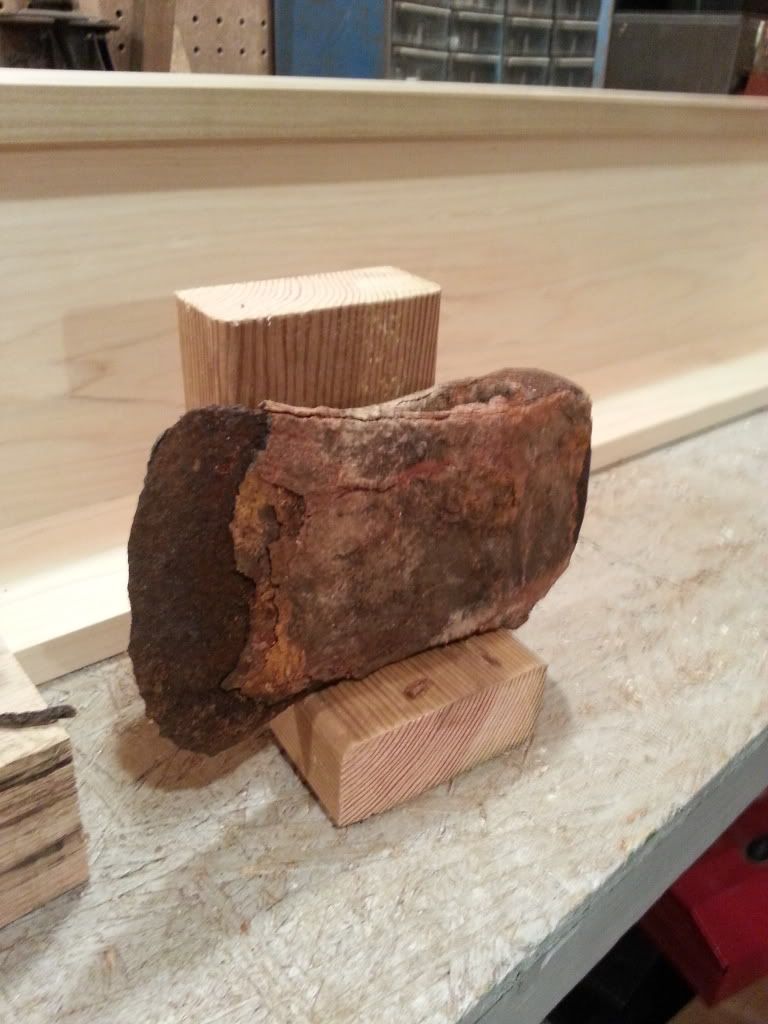
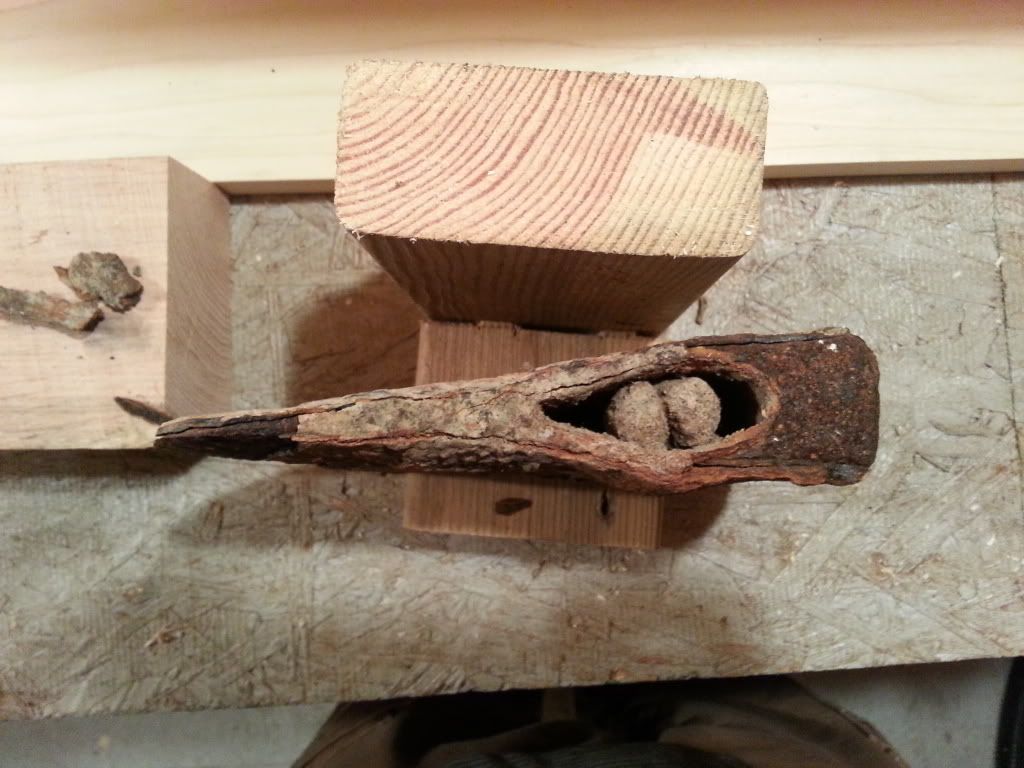
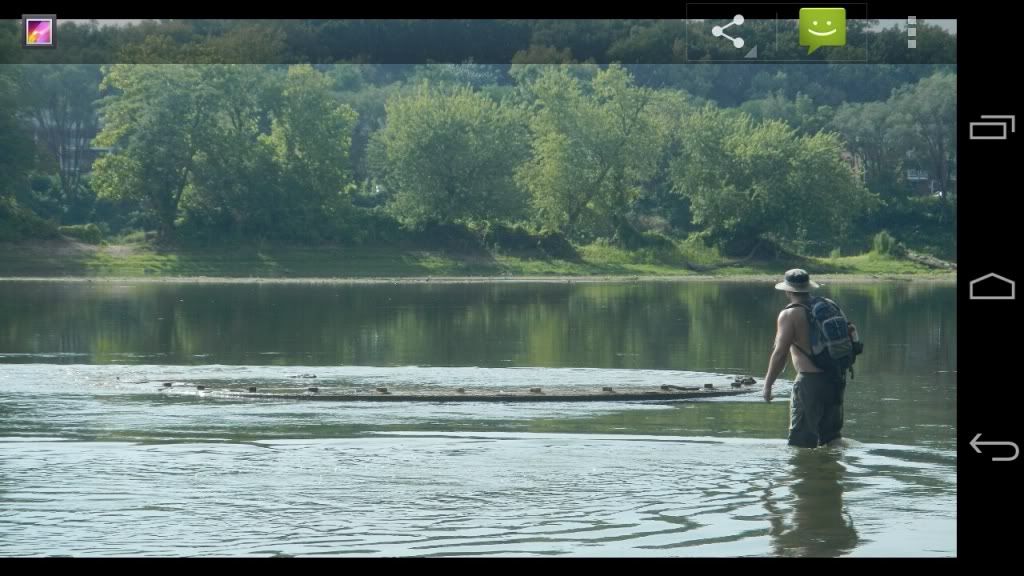
It was laying partially under them. It was covered in algae. The area would normally be under water, but we had a significant drought. The eye was packed with the same rocks. Some of the outer layers have flaked off.
-
The same day as the picture of the caisson was taken, we found an old axe head in the rocks while walking around an island.
-
They used to draw drinking water from the river in town. A caisson is sti ll there. It's about 20' across. I was a little scared walking out to it. It's only visible when the water is really low, a cookout is planned for its next appearance.
-
I've never gotten a blister from a hammering, but definitely from what I was hammering. How often do you work? I know that when I don't hammer for a while my calluses go away. When I was rowing in college, I had some gnarly calluses. I also had sub callus blisters that came off, not pleasant. It's a strange feeling when the palms of your hands are bleeding but you can't stop what you're doing.
Good luck with the blisters going away. -
I believe that I purchased this from you at quad state. I've been looking for a Fisher around this size for a while. It was nice meeting you.
-
Thanks for the info. I'll clean it up better after work and see how it goes.
-
<p>I know this is an old thread, but another couple of places that seem to carrt the kind of oiler cups I've seen on old blowers are:</p>
<p>http://www.americanmodeleng.com/id32.html</p>
<p>http://www.brassaircocks.com/shop/category/lubricators/</p>
<p> </p>
<p>I haven't contacted either company yet but need to get a few for some old blowers.</p> -
All bolts that I could see, 3 around the outside of the case and 2 on top of the bracket, are removed. This picture was just to show that I have disassembled it to a certain point. My hands were pretty dirty, so I didn't want to touch my phone after removing the bolts.
-
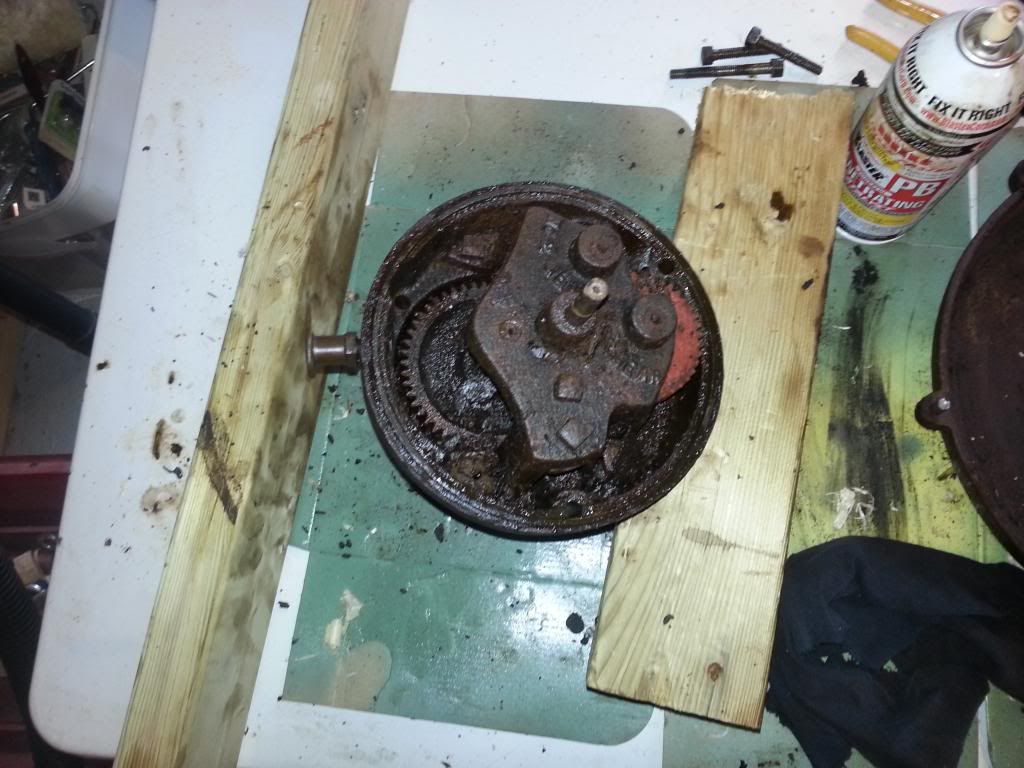
I picked up a seized Canedy Otto Western chief a couple of weeks ago, but am having trouble fully disassembling it. Does anyone know how to remove the bracket supporting the shafts inside of the gear box. I've removed the bolts securing it to the case, but nothing moves.
It has been soaked with penetrating oil for a while. Does the bracket and shafts come off together or should the bracket come off and then the shafts? I've searched the forum, but most posts seem to be about removing the cover, fan, or replacing bushings.
-
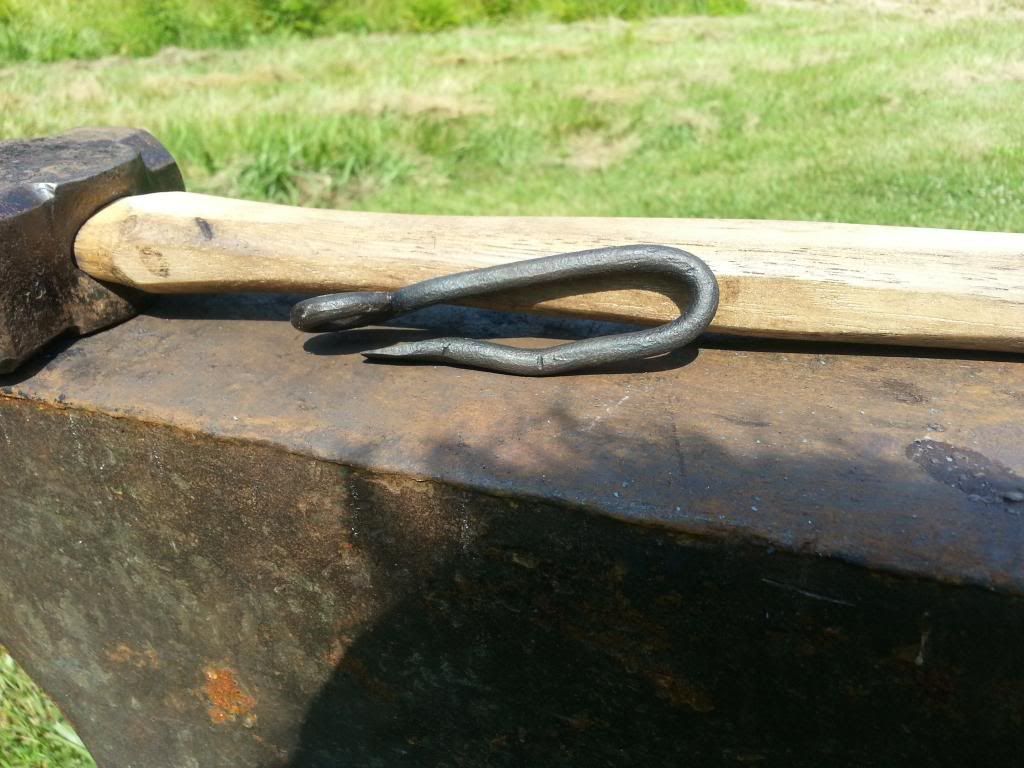
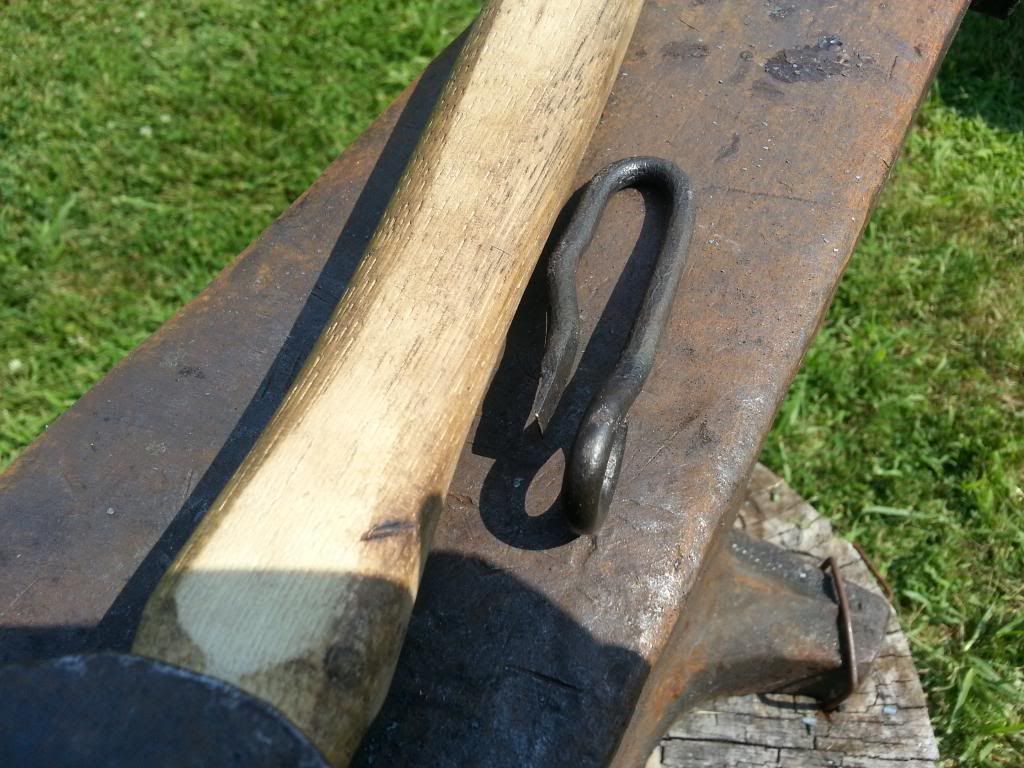
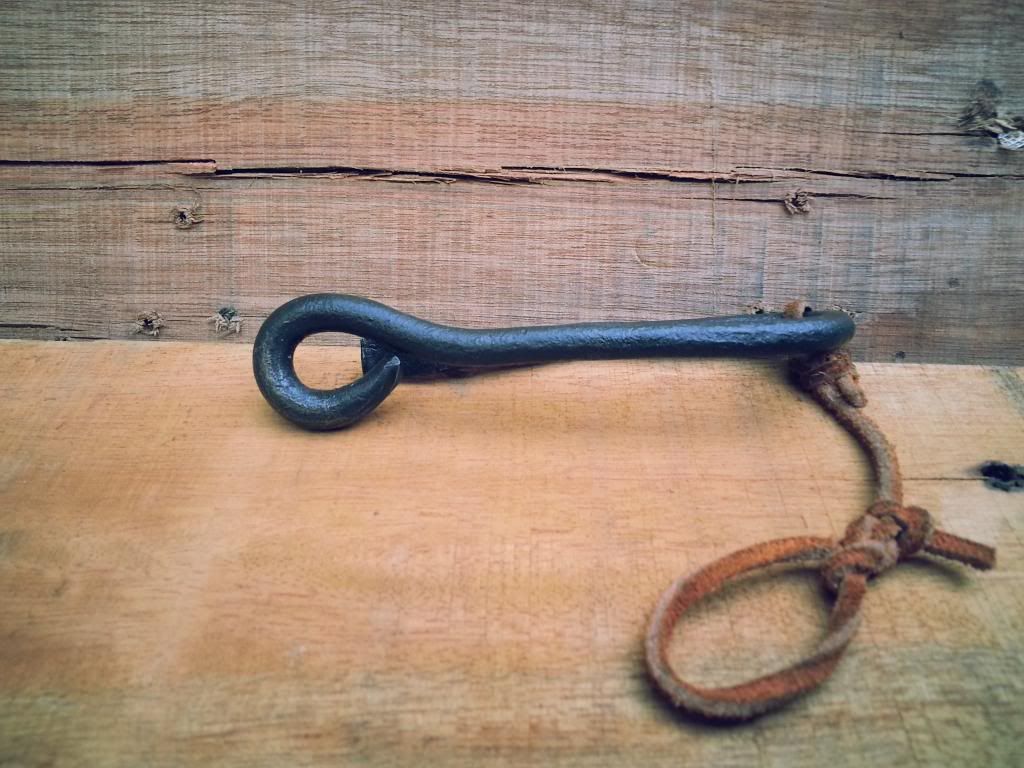
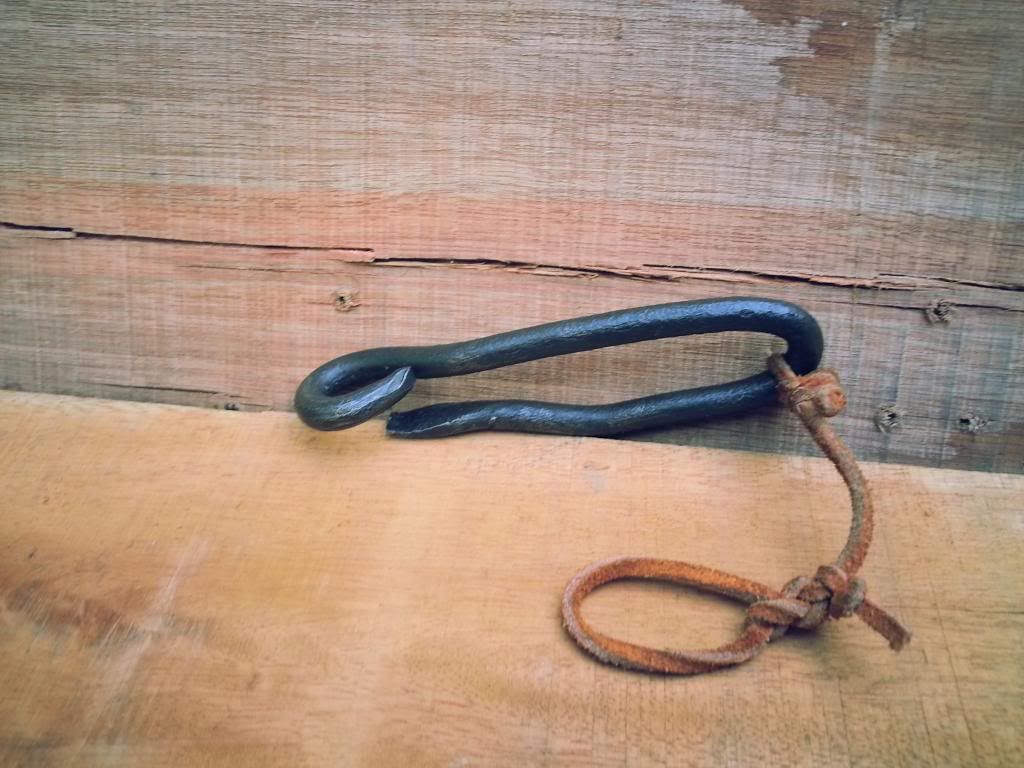
Thank you. On the next revision I'm going to either fuller a groove or punch a hole to keep the lanyard in place a little better. It hasn't caused a problem yet, but it moves around a little.
-
I made a bottle opener this past weekend. It was fun making something to do a job and have to fit fairly closely. After shaping it, it bent to easily. I then normalized it 3 times and hardened it in water. I then tempered it to purple on the working end, by sticking the non working end in the fire.
Since this was the first bottle opener, I left my marks from measuring. This is the first pass.
Unfortunately, I didn't have another bottle opener around as an example. The prying portion needed to turn up a little on the end. Then reheat treated.
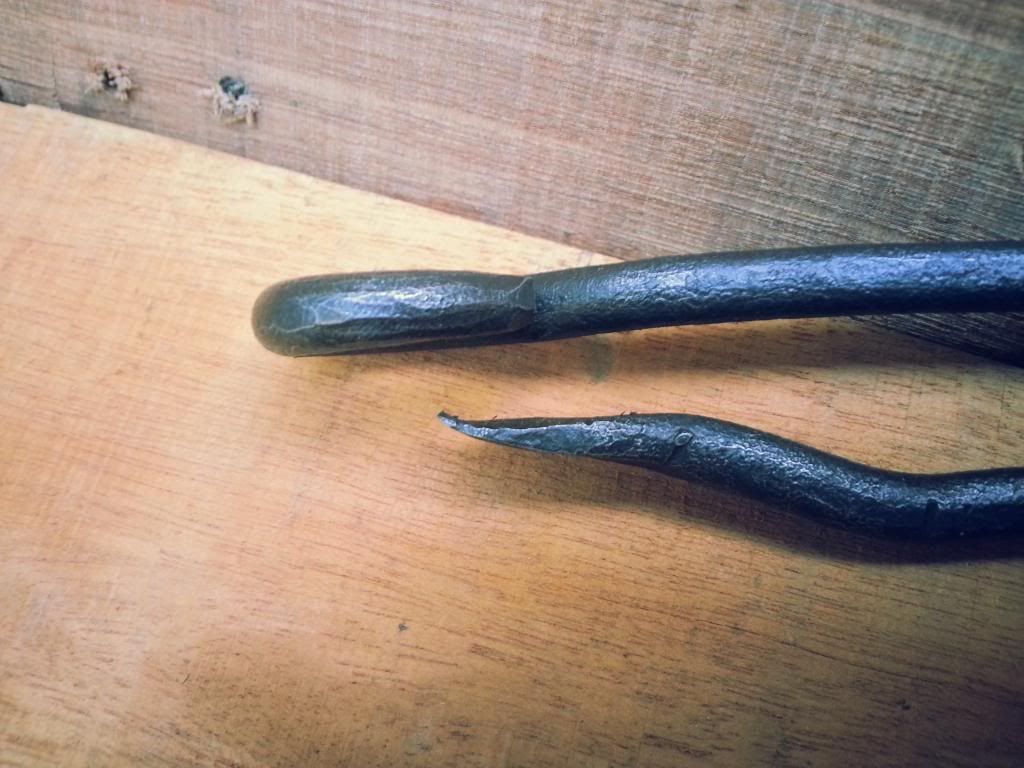
The steel came out of a bucket of scrap, so I have no idea what it is. The upside of the whole project was, a friend said he would take a few to sell in his taxidermy shop during deer season. I will probably be more selective of the steel choice for those.
-
I wish we would have had more time in the area. We were visiting some of my girlfriend's family. Brewery tours and Polish Fest took up a lot of time.
-
I was in Milwaukee this past weekend. I got to go to the Villa Terrace Museum and see the Cyril Colnik exhibits. If you are ever in that area and would like to see some very impressive work, I recommend that you stop in.
http://villaterracemuseum.org
http://content.mpl.org/cdm/search/collection/VillaTerrac -
That is a lot of money for essentially a metal box and some pipe. The gearbox for the blower seems to be missing. A man had one at sofa last year for less, in working condition.
-
That is a very nice looking hammer.
-
Hello Rex. Is that the forge from Kirklin? Looks very nice. Makes me wish I had less will power (more money), I drove through there a couple of times while that was up. I'm sorry that I don't have any setup tips. I'm sure you guys will have lots of fun using it. If you haven't already found them, the Indiana Blacksmithing Association has lots of good information and people, http://indianablacksmithing.org/ .
-
These links may help. Though nothing conclusive.
http://www.trentonnj.org/documents/housing-economic/zoning%20ordinance%20update/2010%20zoning%20ordinance.pdf
http://books.google.com/books?id=1rJMAQAAIAAJ&pg=PA1197&lpg=PA1197&dq=grinslade+blacksmith+shop+trenton&source=bl&ots=CSP1xidbBL&sig=V_qmaERCxLE0HKIi2aOnVYQh8R8&hl=en&sa=X&ei=hL24UICKBPKN0QGS3IHACw&ved=0CDUQ6AEwAA#v=onepage&q=grinslade%20blacksmith%20shop%20trenton&f=false
http://maps.google.com/maps?hl=en&bav=on.2,or.r_gc.r_pw.r_qf.&bpcl=39314241&biw=1600&bih=1084&q=334+North+Olden+Avenue&um=1&ie=UTF-8&hq=&hnear=0x89c15851b9806285:0xadfc16c66d11e868,334+N+Olden+Ave,+Trenton,+NJ+08638&gl=us&sa=X&ei=7724UJuqKemt0AGSmYGQBw&ved=0CCsQ8gEwAA -
Thank you for the suggestions. It was all oak(red and white), cherry, and poplar. I'll look keep an eye out for the woods you've suggested. Cherry was listed in another thread as a handle material, but making a handle is easy enough.
-
The handle on the larger hammer does. The smaller handle was quickly roughed out of a piece of poplar with a hatchet, a rasp, and some 40 grit. It will be replaced. I made the larger handle out of a piece of cherry firewood that my parents had at their house. I will probably do another cherry handle for the small hammer, since I still have some laying around.
A gentleman at the last monthly group meeting that, I attended, let me try his hammer with a similar handle. I sized this one to my hand. I admit, it is a much rougher version than his handle. -
Thank you. This was the first time either of us had struck tools with a sledge hammer or done a project like this. Punching the hole took a few heats, but seemed to turn out ok. If we do another, I'm sure that we will do a better job.
-
Over the weekend, my dad and I made a couple of small hammers.
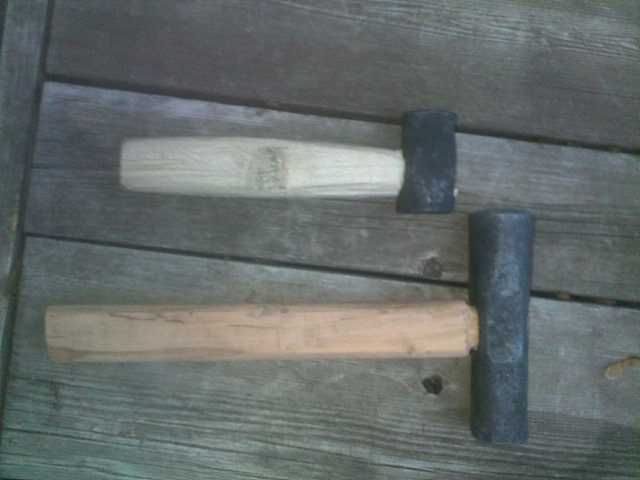
I made the smaller hammer on Saturday as practice, and the larger one was made Sunday.
One face of the larger hammer was rounded in a small swage block that we have.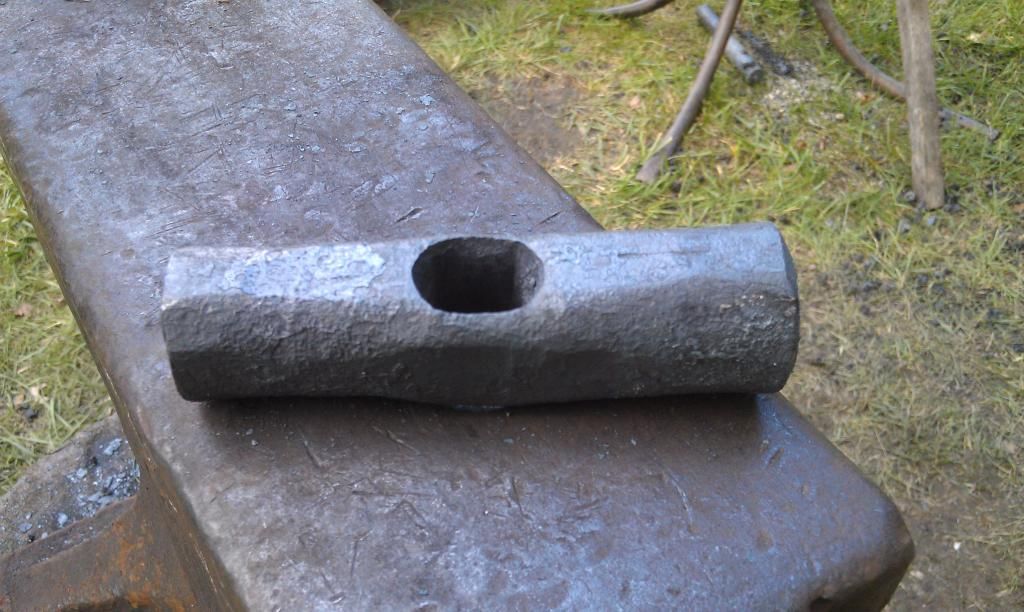
The whole exercise was very good learning experience. I would highly recommend anyone who has thought about doing it.
There are a few more pictures here; http://s1078.beta.photobucket.com/user/jaimechimie/library/ , if anyone is interested. -
Graber Farm & Home Center LLC
(812) 636-7880
Odon, Indiana
It's still a drive, but probably closer. They are only open until around 11 am on Saturdays. Also, be sure to specify that you want coal for blacksmithing and not heating. -


Western Chief Disassembly
in Bellows, Blowers
Posted
Fixing this blower has taken, a lot longer than I'd initially expected. I've gotten the bracket and two shafts to come off. I'll keep soaking it in diesel with atf until the rest frees up. I was a little surprised at how nasty this gear box was. I've redone a Champion 400 in the past, it was in far better shape to begin with though. Thanks to everyone for the information, when I finally get this thing going, I will post some more pictures.