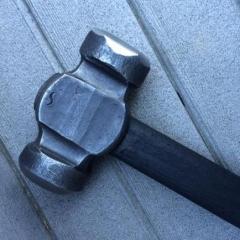
September 9, 201510 yr The finish of your project can make or break the entire work, including the price, durability, and overall look. You use different types of waxes for different types of purposes. The most common reason for a finish such as wax is to protect the work from the elements and rust. Some may be very expensive and other are dirt cheap, but this all varies with what your piece will be used for and the customer. Will it be kept as an outside or inside decoration? What type of wax, how to use it, and how to or where to make or buy it can all be very dificult and confusing to find by your self, but will all be covered in this post. Let's get started:Chapter 1: Surface PrepBefore you go out and apply your wax, you will need to prep the surface of your work. Applying a finish to a piece that has just been finished forging without doing the proper surface prep will result in a less attractive and durable piece. Before you think you are done forging a piece, you want to make sure you prep the surface of it for the wax you are going to use. To do this you need to remove scale and then you need to clean it up a bit. Scale are the tiny shards that form on the steel from heating it really hot then pounding with a heavy object like a hammer, that often times fall off onto your anvil face when they become loose. We need to remove this or else our wax will be not as affective and not as attractive leaving what looks like chips in the finish, which can see in the picture below. I made a drive hook and didn't prep the surface of it before applying the my finish of shoe cream, and you can see the scale left behind that looks like chips in it. To do so, heat your piece to a nice red heat then brush with really hard. The scale will look almost like sparks coming out of the steel while you brush it. Do this until the piece almost has a clean, dull polish to it making sure that every part of the work was evenly brushed, then let it cool. Your piece should be free of all or most scale and is ready to be cleaned up. To clean the work up, you just want to take it to a bench grinder with a wire wheel or a vise and use a dremel with a wire wheel bit and clean the entire thing up to get rid of anything we may have missed while hot brushing, any small pitting or scratches, or something that is coating areas of the piece such as rust or the coating you get from forging that blackens your work. Be sure to use proper safety equipment when doing this, as using a bench grinder can cause lost fingers and the wires on wire wheels come loose with excessive use and can cause you to loose an eye. If you followed these steps, you are ready for finishing.Chapter 2: Wax SelectionIf you have researched into finishes and waxes, then you know that there are hundreds to choose from. You can't have just one finish for every project, you want the finish to vary with your situation. You want it to last as long as it will make the customer happy. "If you are at a demo, you want something quick and easy to apply and that will last long enough that the customer does not complain. It needs to be CLEAN and not sticky because it will be handled or go into the customers purse or pocket.If you are in the shop, you can take a little longer and a little more effort to apply. It should remain in good condition until it is sold, and longer in order to please the customer.If you are making the item for yourself, your spouse, or your friend, you want the longest lasting finish you can find as they know where you live. They will bring the item back so YOU so you can fix the rust.If you buy a car you want to the paint to last 10-20 years before it needs resurfaced and repainted. Do the same with your metal. Preparation to get the item down to bare metal, coat with galvanized, apply a good primer, and then apply several coats of a good paint, followed by a clear protective coating. You may want to look into a marine paint. The cost of the finish will most likely be more expensive then the metal product itself."-Glenn Waxes:Wax based floor polish: good cheap wax to use that gives a dark color and protects your work fairly well.Classic blacksmith's wax recipe: It is a great, classic, quick wax that protects and waterproofs your work really well. It gives a nice color to it. 1 part bees wax, 1 part turpentine, 1/2 part linseed oil. Heres a good video on it https://www.youtube.com/watch?v=bcndMLZV7hs.Penetrol: was recomended to me by Moony who is an industrial blacksmith on this site. I love it and it gives a nice color that looks to be a bit grayer than finished forging color. It's pretty durable. http://www.homedepot.com/p/Flood-Penetrol-1-qt-Clear-Paint-Additive-FLD4-04/100130893Tre Wax: according to some guys on this site, trewax is one of the most durable waxes they use for both indoor and outdoor decor. It gives a real dark color to the work. http://www.amazon.com/Trewax-Paste-Wax-Clear-12-35-Ounce/dp/B005SRV1PI/ref=sr_1_1?ie=UTF8&qid=1441834797&sr=8-1&keywords=trewaxShoe cream: good cheap polish that is good for indoor decor. Different color shoe cream gives different effects. Red makes the the steel look like it is still hot! http://www.amazon.com/Meltonian-Shoe-Cream-Polish-Black/dp/B0019N8C4I/ref=sr_1_1?ie=UTF8&qid=1441834895&sr=8-1&keywords=meltonian+shoe+creamPaint: whenever you want color paint is the way to go. Apply primer on steel first, then paint. If doing multible coats of paint, seperate with primer. Finish with a clear coat if you want it to be very durable.Lacquer: do a couple coats of this if just looking for a clear finishChapter 3: Application and removing To apply the waxes, you want to heat your work up to a touchable heat and apply with a cloth then let to dry. To remove any wax heat up the piece really hot on the forge and it should melt it all off. Choose wisely and you will have a good product that make your customers happy every time. Got to give credit to all the guys on this site who helped me out so that I can make this post to help you guys out. They work hard to keep this site running, and it is greatly appreciated.If any of you see something to add or tell me something i need to change just tell me and I will fix it.
Join the conversation
You can post now and register later. If you have an account, sign in now to post with your account.