

jcornell
-
Posts
309 -
Joined
-
Last visited
Content Type
Profiles
Forums
Articles
Gallery
Downloads
Events
Posts posted by jcornell
-
-
I'm a weekend warrior hobby blacksmith - my first two forges were made from soft firebrick. Both were a lot of fun, but they weren't very durable. Forges three and four were coffee cans lined with ceramic blanket - durable, but not very efficient. Forge #5 is a helium tank lined with ceramic blanket with bricks for front and back doors - other than reapplying the kiln wash once a year, it's pretty low maintenance.
-
The commercial products are Metricote, Plistix and ITC-100. Many of us brew up a combination of kaolin and zircopax for pretty much the same result at lower cost. You won't find any of these at Lowes or Home Depot - try Axner or Wayne Coe or High Temp Tools to name three off the top of my head.
-
On 5/24/2017 at 10:48 AM, Mikey98118 said:
Thanks, Thomas,
So the larger cylinder would be about the same size, as a two gallon Freon cylinder, and the small size would be roughly coffee-can size, but nicer looking?
If we're talking pink "Party Time" helium tanks, the big tank is the size of a propane tank like you'd use for your BBQ grill, while the smaller pink tank is about the same size as the typical freon tank - my impression is that it was slightly lighter gauge steel, but I could be mistaken.
-
I tried 4", 5" and 6" - I think I was happiest with 5" with a piece of conduit connector (minus zinc coating) for a flare tip.
-
1/2" Frosty T-burner, I use a .023 tweeco tip.
-
5 hours ago, Mike Hall said:
Thanks Frosty. I have a couple more challenges.
1. Need to call around and see if I can find thread protectors. Any thoughts on alternatives?
2. Locating the correct pressure regulator and associated hardware. Any thoughts on this?
I may also have to buy another 3/4x1x1 tee. It appears I drilled the hole crooked and the jets isn't in the center of the 3/4 hole. Am I correct in reading the plans that the mig tip should only extend halfway into the T? If so do you have any good suggestions on cutting the mig tip down without messing up the .035 opening?
Go to the electrical section of the big box store and pick up conduit connector - it's basically a threaded tube - 1/2" for a 1/2" burner, 3/4" for a 3/4" burner, etc. You'll have to soak the zinc coating off - I use muiratic acid.
A very cheap 0-30 regulator is the https://smile.amazon.com/gp/product/B007PS0938/ref=oh_aui_search_detailpage?ie=UTF8&psc=1 bayou classic - it's what I've been using for the last two years. I added a t to the line so I could add a pressure gauge.
-
I've started putting bevels on some knives I've forged with a file jig. I went online on Amazon and saw a lot of people unhappy with the current made-in-mexico Nicholson files, so I'm wondering if this group of wise bladesmiths have any recommendations for double-cut bastard files? Brand names and where do you buy them, please.
-
Had a series of fails this afternoon- I'd drifted some holes in 3/8" square stock and then made a tenon - tried to put the tenon in the hole and then upset the tenon. Holding it in my vise, when I'd smack the steel rather than upsetting the steel, it would slide out of the vise. Granted, my vise is a post vise made from a couple of different vises (we'll call it Frankenvise) so maybe better equipment would make this job easier, but any advice from the crowd here?
I was at the high end of orange to yellow when I was trying to upset the tenon.
-
I've successfully used the conduit connector as a burner flare for years - it's reasonably durable, and really cheap to replace. I can't tell from your picture if you ate the zinc coating off with acid before using - out my way the conduit connectors from Lowes and Home Depot are galvanized, so they get an overnight dip in muriatic acid before I deploy them.
-
Top dead center has some issues - my first three forges used that burner placement. You'll need to stuff excess wool in the burner tube to prevent the tube from being a chimney and feeding exhaust gas into the burner intake - when that happens, your burner will sputter and flame out. If you're using it outside, you'll have a similar problem when the wind blows the exhaust coming out the front back into the burner intake.
-
For you, Frosty, I'll try to find another lid.
 I usually buy my popcorn tins by how large they are, not by the picture on the outside, although I'm a sucker for kettle corn - caramel corn coming a distant second.
-
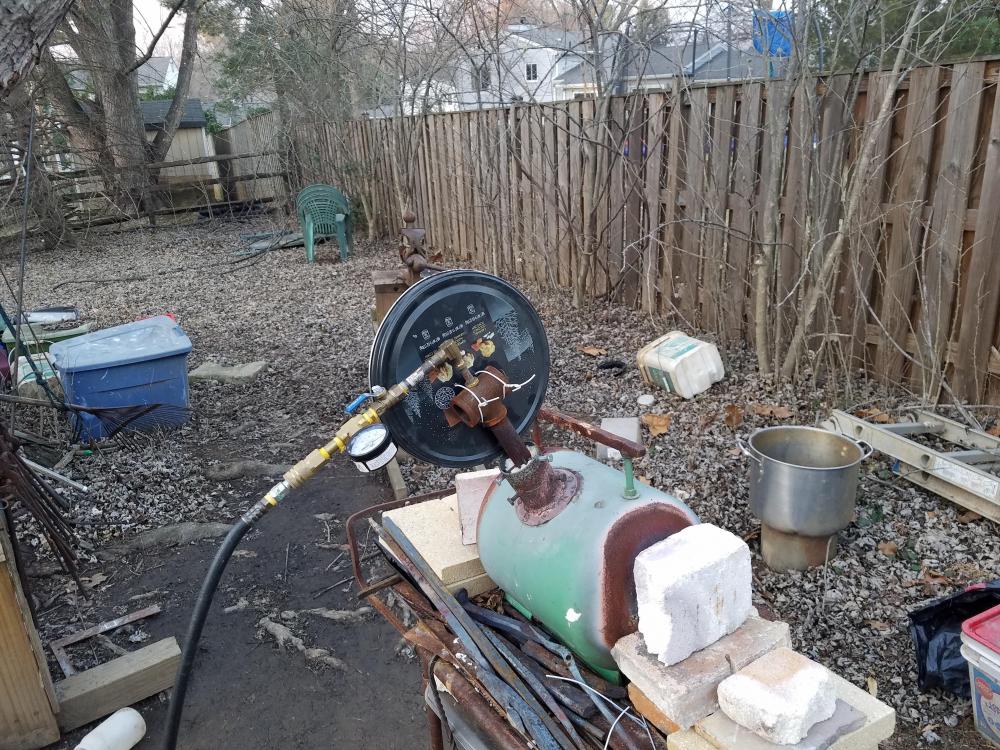
My smithy is outdoors, in my back yard, under a maple tree. I've noticed that when the wind is blowing in the right direction, it takes all the exhaust gas coming out of the mouth of the forge and blows it up into the air intake of my T-burner (Frosty burner) which makes it sputter and flame out. If the forge is up to temperature, you just turn off the gas and when you turn it back on again, you're back in business. That got to be a bit annoying, so I noodled on how I could shield the air intake on the Frosty burner, coming up with all sorts of very complicated solutions. Finally inspiration hit, and I took the metal lid from a popcorn can (they're popular at Christmastime in the USA), punched four holes with a nail, took some hanger wire and wired it up to the Frosty burner.
Thus far, the wind isn't causing my burner to sputter out any more
-
The hearth is awfully deep for a general purpose forge. I bought one for a project and it's about 2.5"-3" deep, which is a bit of a heat sink. If you're welding damascus for hours on end, that might be okay. Otherwise, it's a bit expensive. It's an otherwise okay design, although I'd pile up bricks at the end to cut down the heat loss.
-
A 3/4" Mikey burner would be too much burner for that little amount of space. I'd recommend a 1/2" Frosty T burner or comparable.
-
2 hours ago, ede said:
Hi Frosty,
I noticed on my 3/4" T burner that the end of the mixing tube has a large ridge on the inside and was wondering if this is normal or something that should be removed?
Thanks!
The cheaper pipes have a seam, which is where it was welded shut. The more expensive pipes are seamless. Some die-hard performance people (I'm looking at you, Dr Frankenburner) ream the inside of the pipe to remove the seam. The T-burners I've built have all been seamed, not seamless, and they've worked fairly well for me.
-
Rigidizer and zircopax would work as a reflective coating, but it wouldn't do anything to protect your lining against flux. So, if you're not ever going to use borax in your forge, it might be a good move.
Face it, kaowool with rigidizer is still delicate stuff, prone to get knocked about when you're moving hot steel in and out of the forge. If you're going to use borax, it will eat holes in your kaowool with great speed.
Kaowool needs rigidizer to protect the user (from particles) and the kaowool. Even better is a hot-face surface (MIzzou, Kastolite) that will protect the outer layer of insulation from pokes and from borax. Even better still is a hot-face surface that reflects heat back into the forge (ITC-100, home-brew zircopax and kaolin, Plistix, Metricote, etc.)
My experiments with rigidizer/zircopax/kaolin was to try to find a hot face that was reflective - it does a fair job of that, but next I'm going to try something like kastolite with zircopax.
For me, the ongoing experiments and problem solving are almost as satisfying as the blacksmithing itself.
-
Start small. A forge with a six inch diameter with a pass-through back door can be used to make a short sword (I helped my son make an approximately 2' short sword in a forge body made from a coffee can).
Until your strength and skills develop, you're not really going to be smiting truck axles and making awesome stuff on a large scale - you'll be forging leaves, hooks, etc until you build up a basic arsenal of skills.
The typical noob mistake is to think that because someday "I might want to make a sword" that you need to build a four foot long forge with six naturally aspirated burners right now.
The coffee can forge is heated either by a 1/2" burner or a torch (Mike Porter has written about how to rebuild torches on this forum).
The freon can forge is heated usually by a 3/4" burner (try the Frosty T burner, it's an easy build).
The larger propane can size forge is heated either by 2 3/4" burners, one 1" burner, or two 1" burners (depending on what you intend to be makeing).
After that, you're talking about specialized heat treating forges, heat treat ovens, brick pile forges, clamshell forges, yada, yada, yada.
Then there's always coal/coke/charcoal.
Start small, you'll learn a lot, and you won't be wasting fuel while at the steep end of the learning curve. Once you've made one or two forge bodies, you'll know that it's a rather easy project, so building forge #5 or #6 for a specialized purpose is not so daunting. I currently have two decommissioned forges (that I may rebuild) a freon can size forge that's my main workhorse, and I'm building a larger forge dedicated to welding.
-
It's reasonably resistant, but it's not flux proof. Buy the fumed silica on ebay in powder form, much cheaper than trying to buy a bottle of rigidizer where the shipping weight is very high.
-
5 hours ago, Jay.bro said:
i have a forge idea and another question. my idea is im thinking about building the forge from stone instead of brick what are the pros and cons of that? and can you compress wood ash to make charcoal briquettes i keep searching the question but it keeps saying it can be used for annealing but nothing about forming briquettes
Stone can be used, but if you're using solid fuel, the better question is what you're using for a fire pot, how much air you're getting into the bottom of the fire, how you're keeping clinker and ash from choking your fire, etc. Take a look at the fire pots manufactured by Dave Custer (who I believe is active on this board - otherwise look on FB) to see pretty much state-of-the-art setup for solid fuel, whether it's charcoal, coke or coal.
Me, I'm a propane guy.
-
I use a fumed silica solution (water and fumed silica) for rigidizer. I'll combine this rigidizer with zircopax and kaolin (range of 3:1 or 4:1 ratio of zircopax to kaolin) to make a very economical reflective coating. It will eventually wear out over use, but it's reasonably tough and does a nice job making the forge reflect heat. I also paint this on the hard fire brick that I use to block the front opening of the forge - I paid for that heat, and I don't want it to escape without doing some work. ITC 100 is nifty stuff, but I like the price of my home brew coating better.
-
I use anhydrous borax - I run it through a dedicated coffee mill to make a finer powder, and keep it sealed between uses. Only advantage is that it doesn't foam up when I'm using it.
-
On 10/9/2016 at 4:30 PM, Mikey98118 said:
I would also suggest that you mount an external baffle plate on the door of that forge, to make it even finer
")
Is that something to block the opening, like a door in a doorframe? I never knew that I had a doorknocker on the external baffle at the front of my house.
-
You probably want to turn your burners 90 degrees, so they don't start trying to suck each other's air supply.
-
You will most likely learn (eventually) that a forge that does "everything" doesn't do a particularly great job on anything. I'm on forge #5. Two brick forges, two bean cans, and one Freon can forge. I have already started collecting parts for forge #6, which will be my dedicated welding forge, and I have a plan for #7, which will be a small, small forge for doing light stuff, economically.

My propane forge ... finally built
in Gas Forges
Posted
kiln shelf makes a fine door. If you have some channel iron to serve as a track, it's a dandy solution.