

DonS
-
Posts
78 -
Joined
-
Last visited
Content Type
Profiles
Forums
Articles
Gallery
Downloads
Events
Posts posted by DonS
-
-
25 Lb Canadian Giant (Jardine) with the original drawing dies and brake and a 34 Lb homemade "rusty" style hammer with combination drawing / flat dies.
-
56 cases of beer in my '61 Pontiac Stratochief. All but three cases fit into the trunk. I was the designated driver for our class party, but "designated driver" had a different meaning four decades ago.
-Don.
-
Hi Daniel,
I have a small coal forge on wheels that I just drag out onto the driveway, about four feet away from the garage. I leave the anvil and tools inside, close to the overhead door. As long as it is not windy, it is quite pleasant to work when it is around 20 or 30 degrees F. If the anvil is too cold, just heat up a large piece of scrap and place it on the anvil for a while to warm the anvil up. Also, a hood on the windward side of the forge would help if it is a bit windy out.
I also have a propane forge about the size of a Whisper Baby (about 20-30,000 BTU) which I use in the garage even when it is below zero F. Make sure that you have sufficient ventilation! I open the overhead door about 18 inches so that the bottom is open, and the top section is also rolled back to create an opening at the top to allow air circulation. Make sure that there is nothing above the propane forge that can overheat.
My old metal overhead door rolls back above the propane forge when I open it all the way, and had about 4 feet clearance from the top of the forge to the door, and it only got a bit warm. When I replaced it with an insulated overhead door, the new door got quite hot - fortunately it was not damaged, but just keep that in mind.
-Don
Edmonton, Alberta -
I think you can cast the babbitt around your original shaft provided it is not worn out-of-round. That's the way the bearings on my 25 pounder were done.
-Don S -
Hello R.D.
Holding 3x3 inch pieces of UHMW inside the square tube might be a bit difficult. Your original plan to use a long strip might be simpler and has been done before. You could use the long strip and route, file or sand 1/32 or 1/16 inch off the center portion to reduce drag. I lubricate the ram with some silicone spray. It seems to help, and it reduces the chance of rust developing on the ram. I am not sure if the silicone does any harm to the UHMW, but so far so good. Maybe someone else knows about the compatibility of silicone and UHMW.
For rollers I used 1/2 inch bolts and some close-fitting pieces of pipe. I always save odd sizes of pipe for simple bushings and bearings. I drilled a hole in the center of the pipe for oil, and apply oil regularly. The spacing of the bolts will depend on the thickness of the pipe and the leaf spring. You might have to file out the holes to add a bit of clearance so that the spring still fits between the rollers at an angle at maximum travel. I gave it a bit too much space and it made an annoying click-clack noise. (about 1/4 inch too much space) I temporarily taped a pair of 1/8 inch oak strips to the leaf spring to quiet it down. That's about 5 years ago, and I only had to replace the tape once. If you plan to use a 3/8 inch bolt with a 60 lb ram, that might be a bit light for that kind of abuse.
Regards,
-Don -
I used 1/4 inch UHMW on my Rusty hammer. I had to adjust it a bit after the first couple of hours of breaking in, but it has no noticeable wear in 6 years of hobby use. Ram is 34 lb. Main part of ram is 2 inch heavy wall square tubing (smooth, not rusty).. I have a band of UHMW 2 inches wide around the top of the guide and 2 inches wide around the bottom, so that there is no contact or excess friction in the middle.
Using material that is thicker than necessary could result in more expansion with heat and require it to be a bit loose at low temperatures and too tight at high temperature.
A drawing of the guide assembly is here: http://www.wcbg.ca/wcbgsite_015.htm
Don -
Thanks Phil,
I score some marks 1 inch apart on a 3/8 inch square bar, and fuller them on the 2, 4, 6, 8 etc inch marks to form the cross peins back-to-back using a guillotine fuller. Then fuller the edges on all four corners, on each side of the 1, 3, 5, 7 etc inch marks to form the face. I drill the holes for the handle and then cut them apart and finish the faces with a belt grinder.
The handles are 3/16 dia by 2-1/4 long mild steel. I grind a slight taper on them, heat the hammer head to a yellow heat and pound the (cold) handle into the head until about 1/8 inch protrudes out the front. I pein the end over cold with a small ball pein hammer. Last, I heat the end of the handle and draw out a 1/4 wide by 1/2 inch long tab and roll it up with small scrolling pliers ( they are actually old snap ring pliers).
The hardest part is wire brushing them on the bench grinder without loosing too much skin.
I just picked up a few dozen 3/4 inch split rings to thread on the end to finish the key ring part.
-Don -


Key Ring Hammers
This year I made some key ring hammers to hand out at our December guild meeting. They are made of 3/8 mild steel, have a metal handle, and are not heat treated - all characteristics of a very poor hammer.
Regards,
Don -
Hello Aikisho,
I am not sure where you are located, but I am in Edmonton. We have been using coal from the Dodds Coal Mine near Tofield, Alberta in our Western Canadian Blacksmiths Guild shop near Leduc. This might be the same sub-bituminous coal that you referred to. (We ran out of metalurgical coal this spring.)
This stuff works OK for about the first half hour, and then you have to remove the large clinker that develops. It might not be the percent ash content that is the problem, but the large amount of coal that you have to feed into the firepot in order to get enough heat. As mentioned earlier, this gets a bit tedious, but it works - even well enough for a forge weld if you have a clean fire.
This month we are switching over to the real smithing coal that Home Hardware sells. (They buy it from Thak). Around Edmonton, the only Home Hardware store that knows the ordering process is the one in Sherwood Park.
I tried contacting Cardinal River Coal, Gregg River Coal and Grande Cache Coal, and all you get is office people who are not interested in selling small quantities. They only deal in unit trains going to the Pacific coast. Based on the Alberta Research Council reports, the only good smithing coal is in Cadomin (Luscar Mine), Grande Cache and around the Crowsnest Pass area (including Sparwood, Elkford B.C.) There is/was anthracite in the Cascade area near Banff but I don't know if there is a mine there anymore. Anything east of these locations is low grade bituminous or sub-bituminous domestic heating coal. We have not given up in our quest for coal. If we find a cooperative source, we will list it on our wcbg.ca website.
Don Sinclaire -


I have a Jardine 25 Lb Canadian Giant, almost identical to the original LG. I need to be able to move it around in my garage, so I did the following:
I bolted the base to a 30-inch x 3/4 inch steel disk with the back trimmed to fit a pair of 6-inch wheels.
There is a 1/8 inch "gasket" between the disk and the casting to match the irrecularities of the base.
There are two layers of 3/4 inch exterior grade plywood under the steel disk to raise the hammer up a bit.
On the steel disk, a few inches behind the center of gravity, I welded a pair of steel bushings to accept axle stubs.
When I want to move the hammer, I pry up the steel disk about 3/8 inch and insert an axle/wheel assembly. One on each side.
The front of the disk has a 1/2 inch thick steel loop attached, which I use to lift the front edge, and drag the hammer into place.
I still have to make a "Y" shaped bracket with a castor at the front and a hook in the center to grab the loop so that I can roll the hammer around more easily.
With the wheels in place, there is just over 1/8 inch clearance to the floor. The wheels are hard polymer material with very little give and rated at 2000 lb. I have run the hammer with the wheels attached, but I normally take them off.
I will try to load up some photos.
Note: I originally had 1/4 inch rubber from a truck box liner under the plywood, but the hammer rocked from side to side at some speeds. I removed the rubber and just have the plywood sitting on the concrete, and it is OK now.
I also have a 34 lb Rusty style hammer, and originally had it on a small trailer so that I could haul it outside for storage. Even with the jack stands in place, it did not hit very hard until I moved the hammer over to a solid base. The original anvil/ram ratio was 8:1. I replaced the trailer with a 300 lb bench firmly standing on the floor, it now is OK.
-Don -
Hi urnesBeast. The body has a 5/16 hole punched for the arms, a 1/8 x 5/8 slot for the wings and another 5/16 hole for the legs.
The arms are made out of one piece of 5/16 round with a flat area in the middle fullered cold. Same for the legs. The cold arm and leg rods are pushed through the hot body and then the body is squeezed down onto the flat parts of the rod to keep the rod from sliding out or turning.
The wings have long tennons on them and they pass thru the slot in the (cold)body. The ends are then wrapped around the body, trimmed to length and pushed down tight to hide the ends. One tennon wraps over the body, and the other goes under the body to form what looks like a collar. If you do this part hot, you can texture the "collar" and blend it into the body. If you make the end of the tennon too long, it won't be tight. If you make it too short, you can heat it with a torch and draw it out a bit longer using a slender cross-pein hammer (auto body hammer) until it touches the other wing.
The wings are made out of 0.060 inch sheet, so two tennons just fit a 0.125 inch slot.
After that, I do the hands and feet. They are hard to fit into my small propane forge at that point, but a coal forge works well for that kind of work.
-Don -
I recently crated up a dragon to ship to a friend as a Christmas present. The dragon apparently did not enjoy being caged up. Here are some photos.
Happy New Year to all those on the forgeiron site!
Don


-
Thanks Drq. I found some rubber/canvas belt. A single layer worked well. I tried running it without the toggle links attached, and it seems to work. I get 407 rpm with a 2-1/2 inch pulley on the motor. That is close to the LG 25 design speed or upper limit, so I might try a 2 inch pulley instead to slow it down a bit. I will keep the clutch oiled, but wonder if it will leave a black streak on the ceiling.
Are there any other smiths around Beaverlodge? One of the guys fom our Guild (Earl) moved to the Hythe area a few years ago.
Don -
Bob S: Thanks for the link. That's an excellent article. It mentions "7-ply belting", so I will see how that compares to what I can find locally, otherwise I can call Sid. I have seen it listed on his website, but don't know if the clearance in the clutch is the same on the Little Giant and the Canadian Giant. If it is thinner, I can shim it, but if it is too thick, I don't know how much I can sand off without having the belt come apart...or maybe it is fused together internally and that is not even an issue. I found an old snuff box in my junk collection with the exact flat head copper rivets the were used originally.
Sask Mark: Yes, mine is made by Jardine. I know of two others in this area that are up and running. Mine has very little wear and is complete except for a treadle spring, upper die key and the clutch material. Its main problem is heavy rust on the pulley / clutch. After cleaning it up I discovered that the clutch cone shaped ring had a severe crack in it. I thought I could have the clutch turned to remove the deep pitting, but there won't be enough cast iron left to hold it together. On Thursday I am having the ring cut out and replaced with a section of heavy pipe. After the piece of pipe has been installed we will turn the 5 degree taper inside the ring, and hopefully all will be well. I will be replacing all the pins and bolts, but I thnk I will leave the single sided spring adjusment on the toggle links as-is for now. -
I have just aquired a Canadian Giant No. 25 trip hammer, which is very similar to the 25 lb Little Giant.
I need to replace the belting inside the clutch. It presently has two layers of 2-inch wide by 1/8 inch thick
belting, and appears to be original.
Are there different types of transmission belt, or will any old farm machinery belt work?
I remember seeing that stuff at school a few times. I wonder if the principal still has a piece in his office... -
Something to consider if you are planning to build a fly press or buy a screw press for blacksmithing purposes:
If you use a single start lead screw, it will work much like a vise, and clamp down hard on the work piece.
Then you have to let go of the work piece and use both hands to back off the wheel if you want to take a second or
third run at it. By that time, the dies have sucked all the heat out of your project.
I built a small fly press using a 1-1/4 inch two start screw. The two start screw is less prone to jamming up.
(I originally picked up that screw to fix a leg vise, then realized that it would not hold things firmly.)
It's too bad someone does not sell a "kit" consisting of a 2 inch four start screw and matching nut to build a flypress.
Building the frame and ram only requires some heavy wall rectangular tubing and a decent buzz box welder.
See Hammer's Blow, Vol. 13, #3 (summer 2005). Shipping a screw and a nut would be a lot cheaper than trying to ship
a 600 lb machine to western Canada. If the kit was in the $100-$200 I would consider it.
-Don -
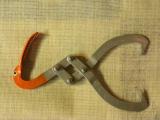
Glenn, some ice tongs have the same linkage, and some just have a pair of rings to put your hand through. If you have the kind with the rings, you have to squeeze the rings together to hold the ice. With standard size ice blocks, the rings can be made to be a comfortable distance apart.
The logs I pick up are a variety of diameters, so that design does not work as well because if you make it to handle smaller logs, the handles could be uncomfortably wide when carrying large logs. Also, with the linkage shown, the heavier the log, (larger diameter) the tighter it pinches into the wood, and the handle stays relatively horizontal and can be held with heavy winter gloves. -
I painted the handle on my log tongs so that would not loose it in the weeds. Then someone mentioned that it looked like it had a beak, so I added eyes and teeth...later I realized that birds probably don't have teeth except in cartoons.
On a similar note, I added a bird's head to my post drill, since it already had the perfect animation.
-
Sorry, it looks like you can't attach a picture directly. I will try the URL method.
Don -
Nice work on that hammer! You are setting the standard real high.
Here is my version of a cross pein hammer that I just completed with the help of one of our guild members (Dennis G). It came out as 1 3/4 pounds. The face turned out to be a bit soft, but maybe it will work harden over time...I already have the handle attached. -
I was going to weld a piece of pipe on for a handle, but forming a curve in the swage block and then bending the handle out of one piece was easier than setting up the welder.
Don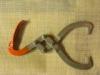
-
We used to buy coal in metal drums from one of our guild members. The coal was essentially coal dust and small pieces 1/4 inch and smaller (fines), so that might affect the weight, but our barrels supposedly held 400 pounds.
We paid $100 for the coal and $20 for the barrel. The coal came from the Cadomin area West of Edmonton. We have used up all our supply, and have been searching for a new suppliy. I tried the Gregg River and Cardinal River coal companies and they are not interested in selling anything less than a train load. I am going to try the other source at Grande Cache to see if they will sell us a truck load. We are currently buying smithing coal from Home Hardware at about $60 for a 50 lb bag of east coast coal. Excellent to work with, but a bit pricy.
-Don- Western Canadian Blacksmiths Guild -
I made an "anvil" out of a piece of rail back in high school. I cut it into an anvil shape with a torch and drilled a few holes in the top as pritchel holes and to hold dowels for bending. I started cutting the top flat with a hacksaw because it had quite a crown to it. After about 2 inches I gave up, and used it for the next 20 years on the workbench mostly for flattening or straightening things out cold...then I took a blacksmithing course and found out what a real anvil was like.
Unable to find a real anvil, I thought that I should finish what I started back in high school, so I continued to saw the slab off the top of the rail and ground it flat. That took many days of hacksawing, only to discover that the top was now much softer than it used to be. It was time well spent though, because this became the seed anvil that led me to a 150 lb cast steel anvil about 6 months later.
The rounded part that I cut off was probably work hardened.
I usually work on small stuff under half-inch square. If someone is using the "real" anvil in the shop, I find that there is nothing wrong with using a scrap of steel held in the vise to do some small forgings.
If you can't find an anvil, use a piece of rail and scale your work accordingly. If you have a good vise, you can do plenty of blacksmithing since it can hold scroll jigs, hardies fullers and bicks. A 6-inch mechanics vise is pretty hard to break with a 2-1/2 pound hammer. If you can find a 40 or 50 lb leg vise, use that. Around here they are easier to find than an anvil, and certainly a lot cheaper. -
I built a Rusty-type hammer: 34 lb running a bit over 200 beats/minute.
The motor is a 1 HP TEFC Frame 56-75 and draws 13.4 amps under rated load. 1725 rpm.
When I first got the hammer running, the motor ran hot. I checked the amps and it had current spikes up to 25 amps. I added some weight to the large pulley as a flywheel, and now the motor runs cool.
I have a "large pulley" that is 12-3/4 inches in diameter. The motor pulley is 2 inches O.D. and I don't think you can get a smaller pulley that will still fit the 5/8 inch shaft. Fortunately it gives me the right speed. If you find a motor with a 1 inch shaft, you may have to settle for a larger pulley on the motor which will require a larger pulley on the hammer. I don't know if this is an issue for you.
Some of the other variables besides Ram Weight and beats/minute that will determine the necessary HP would be the length of the stroke or velocity of the ram at impact, and the overall efficiency of the hammer.
Good luck with your project.


Want Basic Blacksmith Course, Alberta, Saskatchewan, Montana, Idaho, or surrounds
in Blacksmithing, General Discussion
Posted
Hi David,
I am a member of the Western Canadian Blacksmiths' Guild. We have a shop west of Leduc, at the Alberta Heritage park, and give demos during their scheduled events. We have monthly meetings there on the second Saturday of the month. New members get one day of one on one instruction in the basics and safety. You are probably past that stage, and could take any of the several blacksmith courses offered by the Northern Alberta Institute of Technology in Edmonton. We have a link on our website (www.albertablacksmiths.ca) that takes you to that page of the course catalog.