Turby333
-
Posts
19 -
Joined
-
Last visited
Content Type
Profiles
Forums
Articles
Gallery
Downloads
Events
Everything posted by Turby333
-
Working on my first forge. A question or dozen.
Turby333 replied to Turby333's topic in JABOD - Just A Box Of Dirt
Awesome, thanks, pnut. Enjoy the festival! -
Working on my first forge. A question or dozen.
Turby333 replied to Turby333's topic in JABOD - Just A Box Of Dirt
So after this jar test, if more than 10% is on top its good for forges? -
Working on my first forge. A question or dozen.
Turby333 replied to Turby333's topic in JABOD - Just A Box Of Dirt
Ok, damp sand added... gonna let it dry up then see what happens when I put some charcoal in it I guess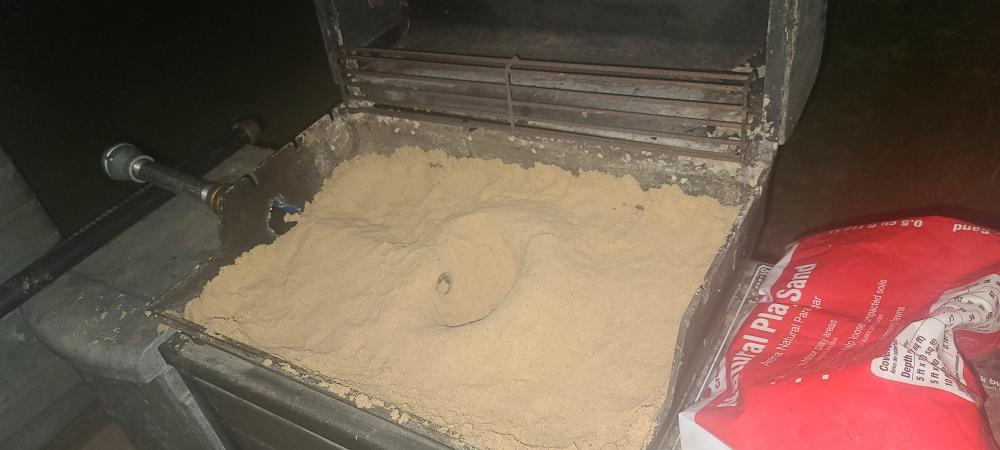
-
Working on my first forge. A question or dozen.
Turby333 replied to Turby333's topic in JABOD - Just A Box Of Dirt
More or less trying to mimic your design, having a small horn and a hot cut for this one, but what's likely to happen is I'm gonna have a few of these things with different tools built in to it... at $10/ft for RR track, just feels like a good idea. And... shaping this anvil gives me some kind of metal work to pass the time before the move. -
Working on my first forge. A question or dozen.
Turby333 replied to Turby333's topic in JABOD - Just A Box Of Dirt
Obviously still a long way to go, but it being "cut" with a torch at the scrap yard made it rather messy... just now starting to get it looking almost kinda flat and smooth.
-
Working on my first forge. A question or dozen.
Turby333 replied to Turby333's topic in JABOD - Just A Box Of Dirt
I will read over that thread next. Did some cleaning up on the edges but they are a mess... I like the multi use of your design though. For giggles I heated up a piece of scrap with my propane torch and smacked it with a painfully light claw hammer... maybe I just needed to hear that satisfying ding noise -
Working on my first forge. A question or dozen.
Turby333 replied to Turby333's topic in JABOD - Just A Box Of Dirt
I just bought this... if this doesn't work I'm gonna lose my mind.... 10 1/2" long, 33lbs... So just clean up the sides and try to find a way to install it on a stump?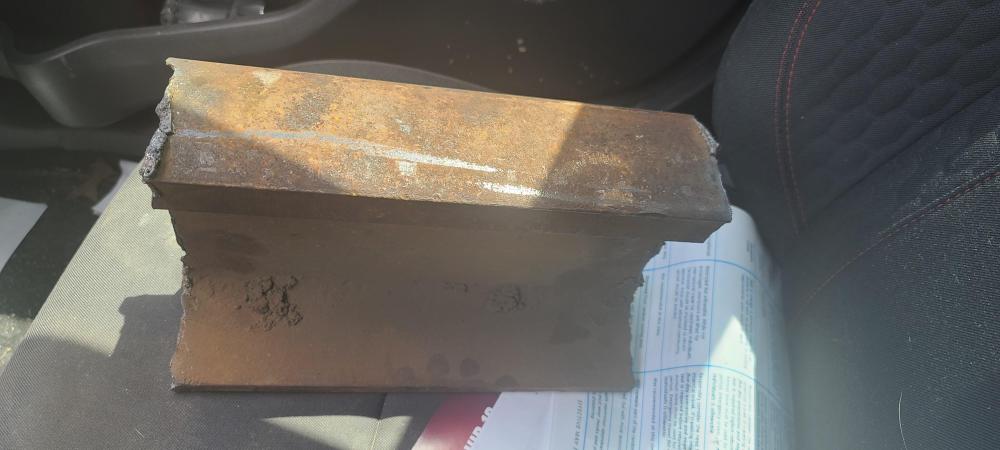
-
Working on my first forge. A question or dozen.
Turby333 replied to Turby333's topic in JABOD - Just A Box Of Dirt
-snip- -
Working on my first forge. A question or dozen.
Turby333 replied to Turby333's topic in JABOD - Just A Box Of Dirt
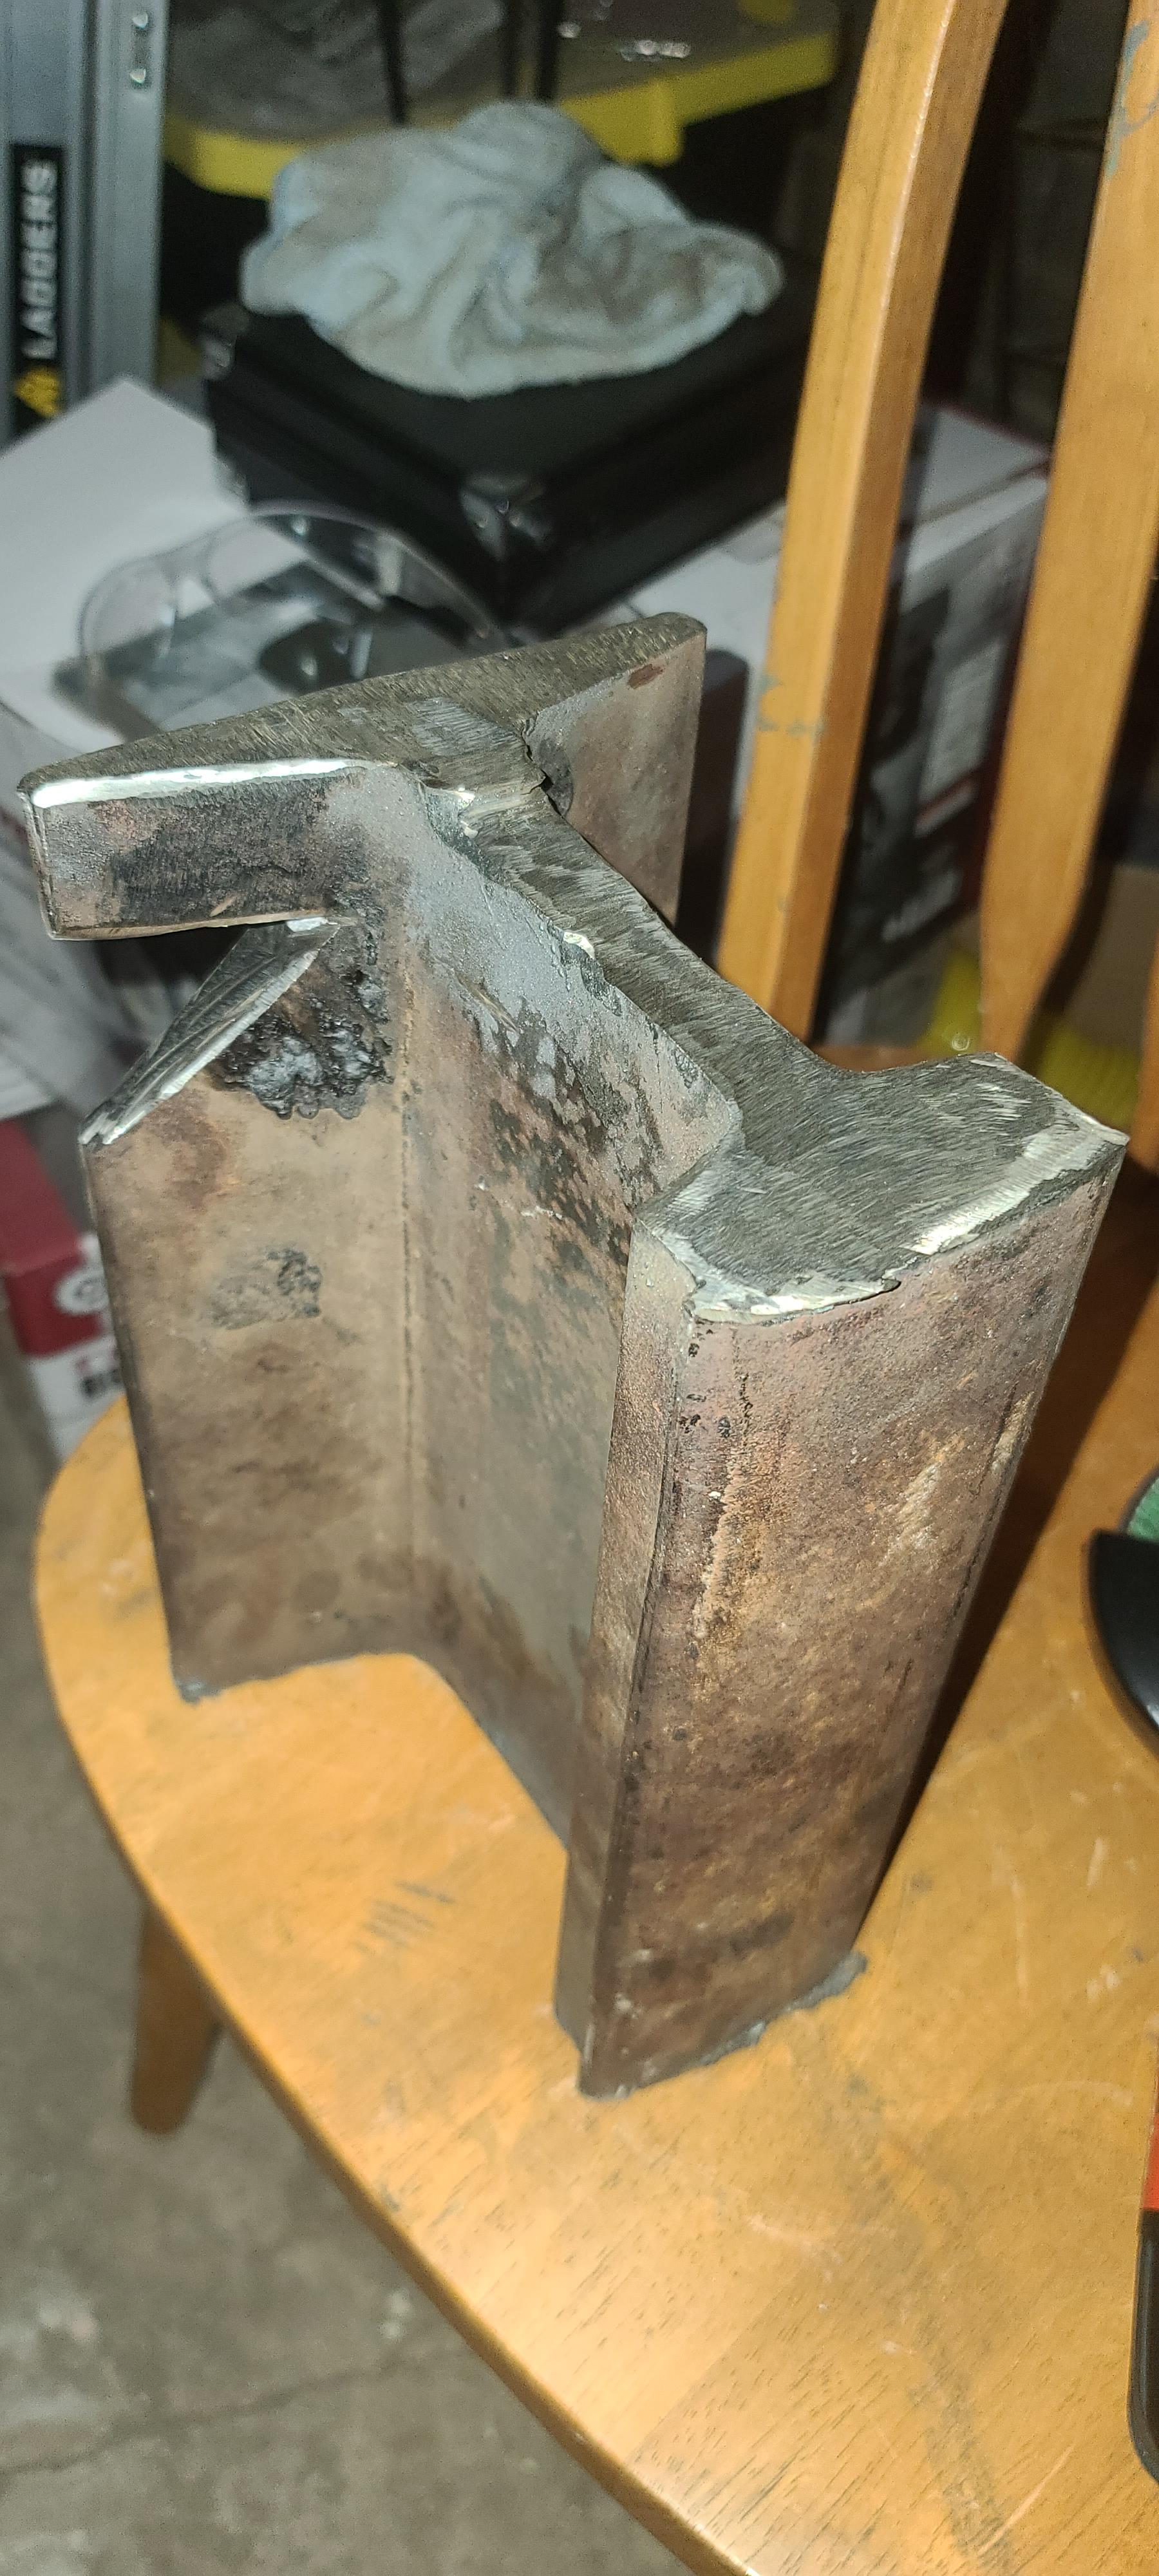
I think the light bulb just came on. Obviously won't be certain until I put my thoughts in to practice, but what you just said made some other post around here click. Also, I think I found my anvil. Still paying for it, but until I locate a scrap yard that isn't collection only, I think it'll do. A 13" section of I Beam (oddly that's just the size section they sell). -
Working on my first forge. A question or dozen.
Turby333 replied to Turby333's topic in JABOD - Just A Box Of Dirt
I feel like that will indeed be the case... Just gotta get that first one under my belt lol. Tomorrow I'll drill the hole for the tuyere and maybe that'll give me more perspective. -
Working on my first forge. A question or dozen.
Turby333 replied to Turby333's topic in JABOD - Just A Box Of Dirt
No, but I truly was going to prior to finding the grill, and somehow finding that grill resulted in me bothering to ask questions instead of applying literally the same concept as I initially intended. I'm really not sure exactly what made me think to look in to it more... I saw that, wasn't sure if it was intentional or not, but made perfect sense to me. Though I bought my pipe from HD, was rather pricey... I don't know of any scrap yards within a reasonable distance, only car junk yards of which there are plenty. But after I have a forge running, I'll be less pressed to go to stores as a rush. And it was purchased before joining IFI... Because it's what he had lol, but he knows what he's doing... But it's sounding like I'm probably not going to be able to escape the use of bricks of any fashion. Now I'm back to being confused lol. I thought charcoal wanted a deep fire? -
Working on my first forge. A question or dozen.
Turby333 replied to Turby333's topic in JABOD - Just A Box Of Dirt
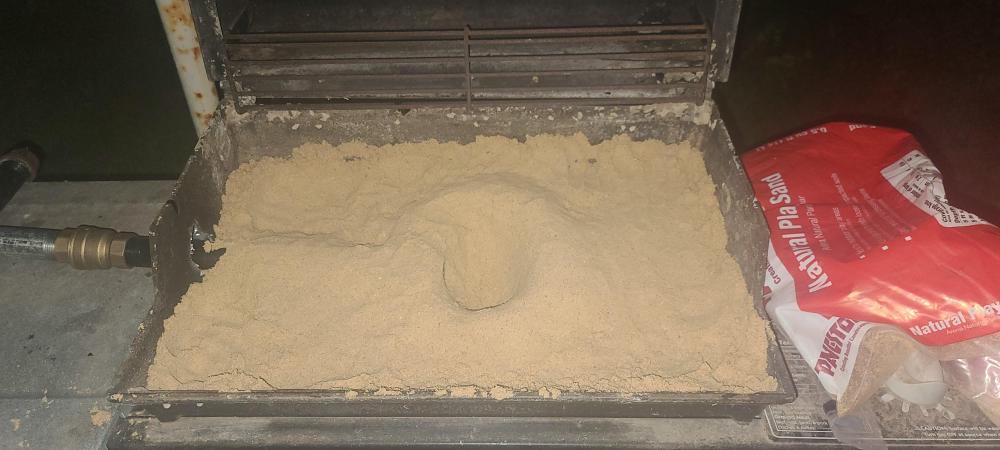
They are indeed sugary inside. So now I'm at what if I used those strictly as filler to fill the bottom of the grill (There's a few little holes from where things connect down there), sand on top of that (It's a big grill...), then go to dirt above the sand which is the layer the fire would actually be in? Would the heat really be traveling down through the sand and to the gravel to the point of possible explosion? I understand. Started the same way when I picked up mountain biking... Watching videos and doing that, then later on finding people who actually knew what they were doing... Eventually got to where I can tell if it's worth watching in about 30 seconds. But for smithing, I've a long way to go... (Guess I didn't learn my lesson about the internet) I've been through the MarkIII thread more times than I care to admit lol. I've seen a lot of red bricks good, red bricks bad, but he's clearly using them and considering his post count here I assume he knows his stuff... But they are consumable I believe? Am I gonna go broke replacing the bricks and apparently tuyere? (What rate do they on average decompose/melt/crack/die?) What if I only made the fire pot with red brick, filling the rest with dirt? I mean I understand parts will eventually wear, but hopefully these parts last (Especially the tuyere) a decent amount of time. Wait. WHAT?! That's a thing!? Amazing! o.o So, current plan is... Drill hole in the side of the grill, fill only the bottom with the pebbles to block off the tiny holes, add sand, make a red brick fire pot (I'm thinking 6" deep, 6" long and 6" wide?) with the 1" ID tuyere wedged in there somewhere above the bottom of the fire pot, fill the remaining area with either good dirt or cheap kitty litter (Curious about the smell... lol) Perhaps a small gap between 2 bricks on the bottom for ash to fall? Any arguments as to why I shouldn't do that? Other than I'm trying to make a spec sheet -
Working on my first forge. A question or dozen.
Turby333 replied to Turby333's topic in JABOD - Just A Box Of Dirt
Added to my bucket list. Maybe the hardest part for me right now is all the theorycrafting instead of doing... But don't really want to start doing when I'm going to have to transport it in the very near future (Regarding how I'll set the forge up) -
Working on my first forge. A question or dozen.
Turby333 replied to Turby333's topic in JABOD - Just A Box Of Dirt
This is the stuff I have, just pea stones.That's... about all I know about rocks lol.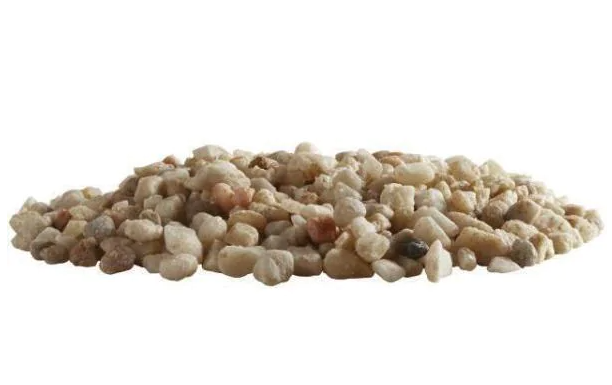
-
Working on my first forge. A question or dozen.
Turby333 replied to Turby333's topic in JABOD - Just A Box Of Dirt
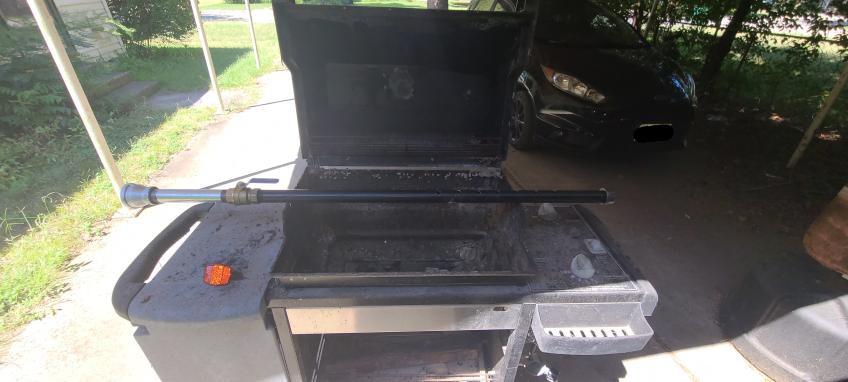
Thanks, Frosty! Since the above post, I've actually been looking a lot more in to other types of anvils, with RR track being high up on my list. My biggest misconception so far was thinking I needed a massive work surface to keep things flat, but reading and thinking on it more, I can see where I was wrong. I'm actually becoming more interested in an increasingly "primitive" set-up. (I can understand the appeal, but the ideas of power hammers and gas forges don't appeal to me as much as charcoal and a Turby hammer) Thanks for the heads up on gravel also. Becoming increasingly glad I posted before going in. Ceramic tiles, gravel... Sounds like I was gonna make a giant bomb, though ideally the forge would be covered when not in use, but that won't combat the humidity. Not sure where I can find some proper clay, but regular dirt wouldn't be an issue. For the fire bricks, it's been a combination of ones people have made and box store ones. But ideally, I'd like to refrain from using them. I was basing my ideas off of this video. But it seems like side blast would be more ideal for charcoal, so my mind is saying same concept, just change the tuyere to be higher, and not put it all the way through. But it seems pea stone isn't ideal. So maybe sand on the bottom, and dirt up top? Then I also think I need to replace my tuyere on a semi regular basis being side blast since the heat is going right to the edge of it. I'm gonna start rambling if I don't stop. So much reading today my head is starting to spin over something that's apparently not that complicated lol... And I still have just under 2 weeks before I can actually set up said forge (Moving...) But ok, here's a VERY crude idea of what I'm thinking. Yellow being sand/dirt, black being pipe, at that length, with a hair dryer pointing the general direction of the pipe because charcoal doesn't need as much air it seems. Second picture might work better. Cutting the pipe down to the middle, and cutting a hole in the side to where the pipe rest on the table.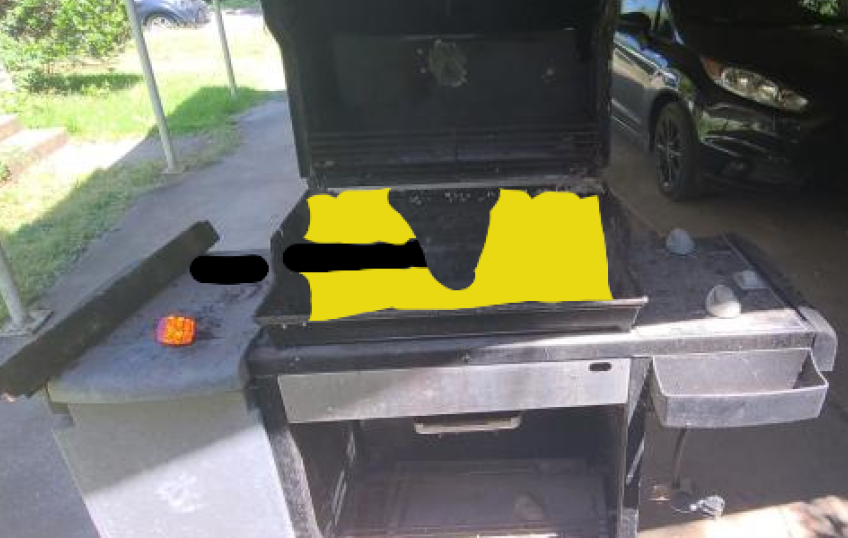
-
Working on my first forge. A question or dozen.
Turby333 replied to Turby333's topic in JABOD - Just A Box Of Dirt
It's not. Only using the grill because it's there. Eventually I'd like to do something more visually appealing and functional. (Which, tbh, will be another JABOD, just different box.) Wow! Ok, I can certainly get some kitty litter. Will do some reading on the washtub forge you mentioned also! Thanks. Because I hadn't actually considered that. Glad I posted before buying. Will try to find something suitable! (Though it does raise questions that will require a lot more reading, such as how to get good curves without a horn. Though that may click once I'm actually attempting it) I'm closer to the Denton/Sherman area unfortunately. Seems a lot less of everything happens up here lol, but I will look around. And that is a good example of what I need to look for for an anvil, thank you. No pottery stores nearby, but I might be able to dig up something in the plethora of scrap yards. -
Working on my first forge. A question or dozen.
Turby333 replied to Turby333's topic in JABOD - Just A Box Of Dirt
I got my warning and accept it. Spent a lot of time finding post here via google, but jumped the gun and didn't hit the read here first part. However, that's been done now. Won't happen again. Thanks for the heads up with the tiles though. I had assumed since they require such a high heat to make, they could handle it. And I understand the forge is just a tool, I just have the problem of overcomplicating things lol. Before this, my hobby to get out of my head was mountain biking, but Texas weather, work, wife, kids, etc makes it hard for stars to align to get out. This seems like something I can make work regardless since it's in my own back yard, and a simple covering can allow me to play regardless of time or weather. I had the same issue when getting in to MTB... Eventually I learned to relax and just flow with it. The hardest part for me was just getting started. Tomorrow I will take pictures and edit them in to my ideas and hope I can be pointed to the more efficient/safer variant. In the meantime, good night. -
Working on my first forge. A question or dozen.
Turby333 replied to Turby333's topic in JABOD - Just A Box Of Dirt
I do apologize. I just attempted to change that part to possibly the large amount of stress relief from beating the metal, however it... Wouldn't let me... I tried about 3 times and nothing. -
Firstly, hello all. I'm not sure how I ended up here to be honest, but now I'm too far down the rabbit hole to climb back out. It started with a simple angle grinder and saw blade making a knife... One thing lead to another, and I forged a knife out of a leaf spring at a friends house, ended up catching some scale in my hand and possibly xxxxxxxxxxxxxxxxxx from beating the metal, and now I'm wanting to make my own forge so I can go at it on my own time (And move on to more than just blades). My friend just uses an off the shelf propane forge and 22lb cast iron anvil (Or is it an ASO from what I've read?) which was enough to forge a few nice knives, but I am not my friend... I have my heart set on using Charcoal (Something about it just feels... right...), and as a boo to me, also grabbing a 55lb ASO to start with... But anyways, enough introductions for now! On to the situation and the questions! I don't really want to be on the ground anymore (Have dinked around with a very small trench forge and homemade charcoal which worked well enough to get the metal glowing nicely, but that's not where I want to be...) so, I have a gutted gas grill, 3 ft of 1" plumbing pipe (Which I unfortunately drilled 7 holes in thinking I was gonna be going bottom blast, but reading here made it pretty clear side blast was the way to go for charcoal...) Now, I'm perfectly fine with it being an elevated JABOD forge, but I do want it to be fairly safe as far as forges are concerned. My current idea is to fill the bottom of the grill with pea gravel, then sand above that, digging a hole that will be about 6" deep, with the pipe going in the side about 2" from the bottom of what will be my fire pot? to give the ash a place to go. (More parentesies!! I've accepted I am cursed when it comes to fire bricks, store bought, or made.... I've had 4 explode pretty much in my face, and a few others crumble, so I'm trying to avoid fire bricks if I can...) But back to safety... Would the heat coming off this melt the backing of the grill? And what about using ceramic tile on the bottom of the grill (Not the bottom, but to make it a little less deep...) Or better yet, could any of you post a drawing or send me to a decent video of someone using this type of setup? It's a weber genesis silver. Thank you all for your potential replies.