hotplot
-
Posts
13 -
Joined
-
Last visited
-
Hi Tim I did butter it with water, and I've had good results doing that in the past. In this case the kaowool seemed to be slightly hydrophobic after rigidising, and that probably stopped the refractory from soaking into the surface enough to bond. I used water and West Systems 406 Colloidal Silica as the rigidiser. Sam
-
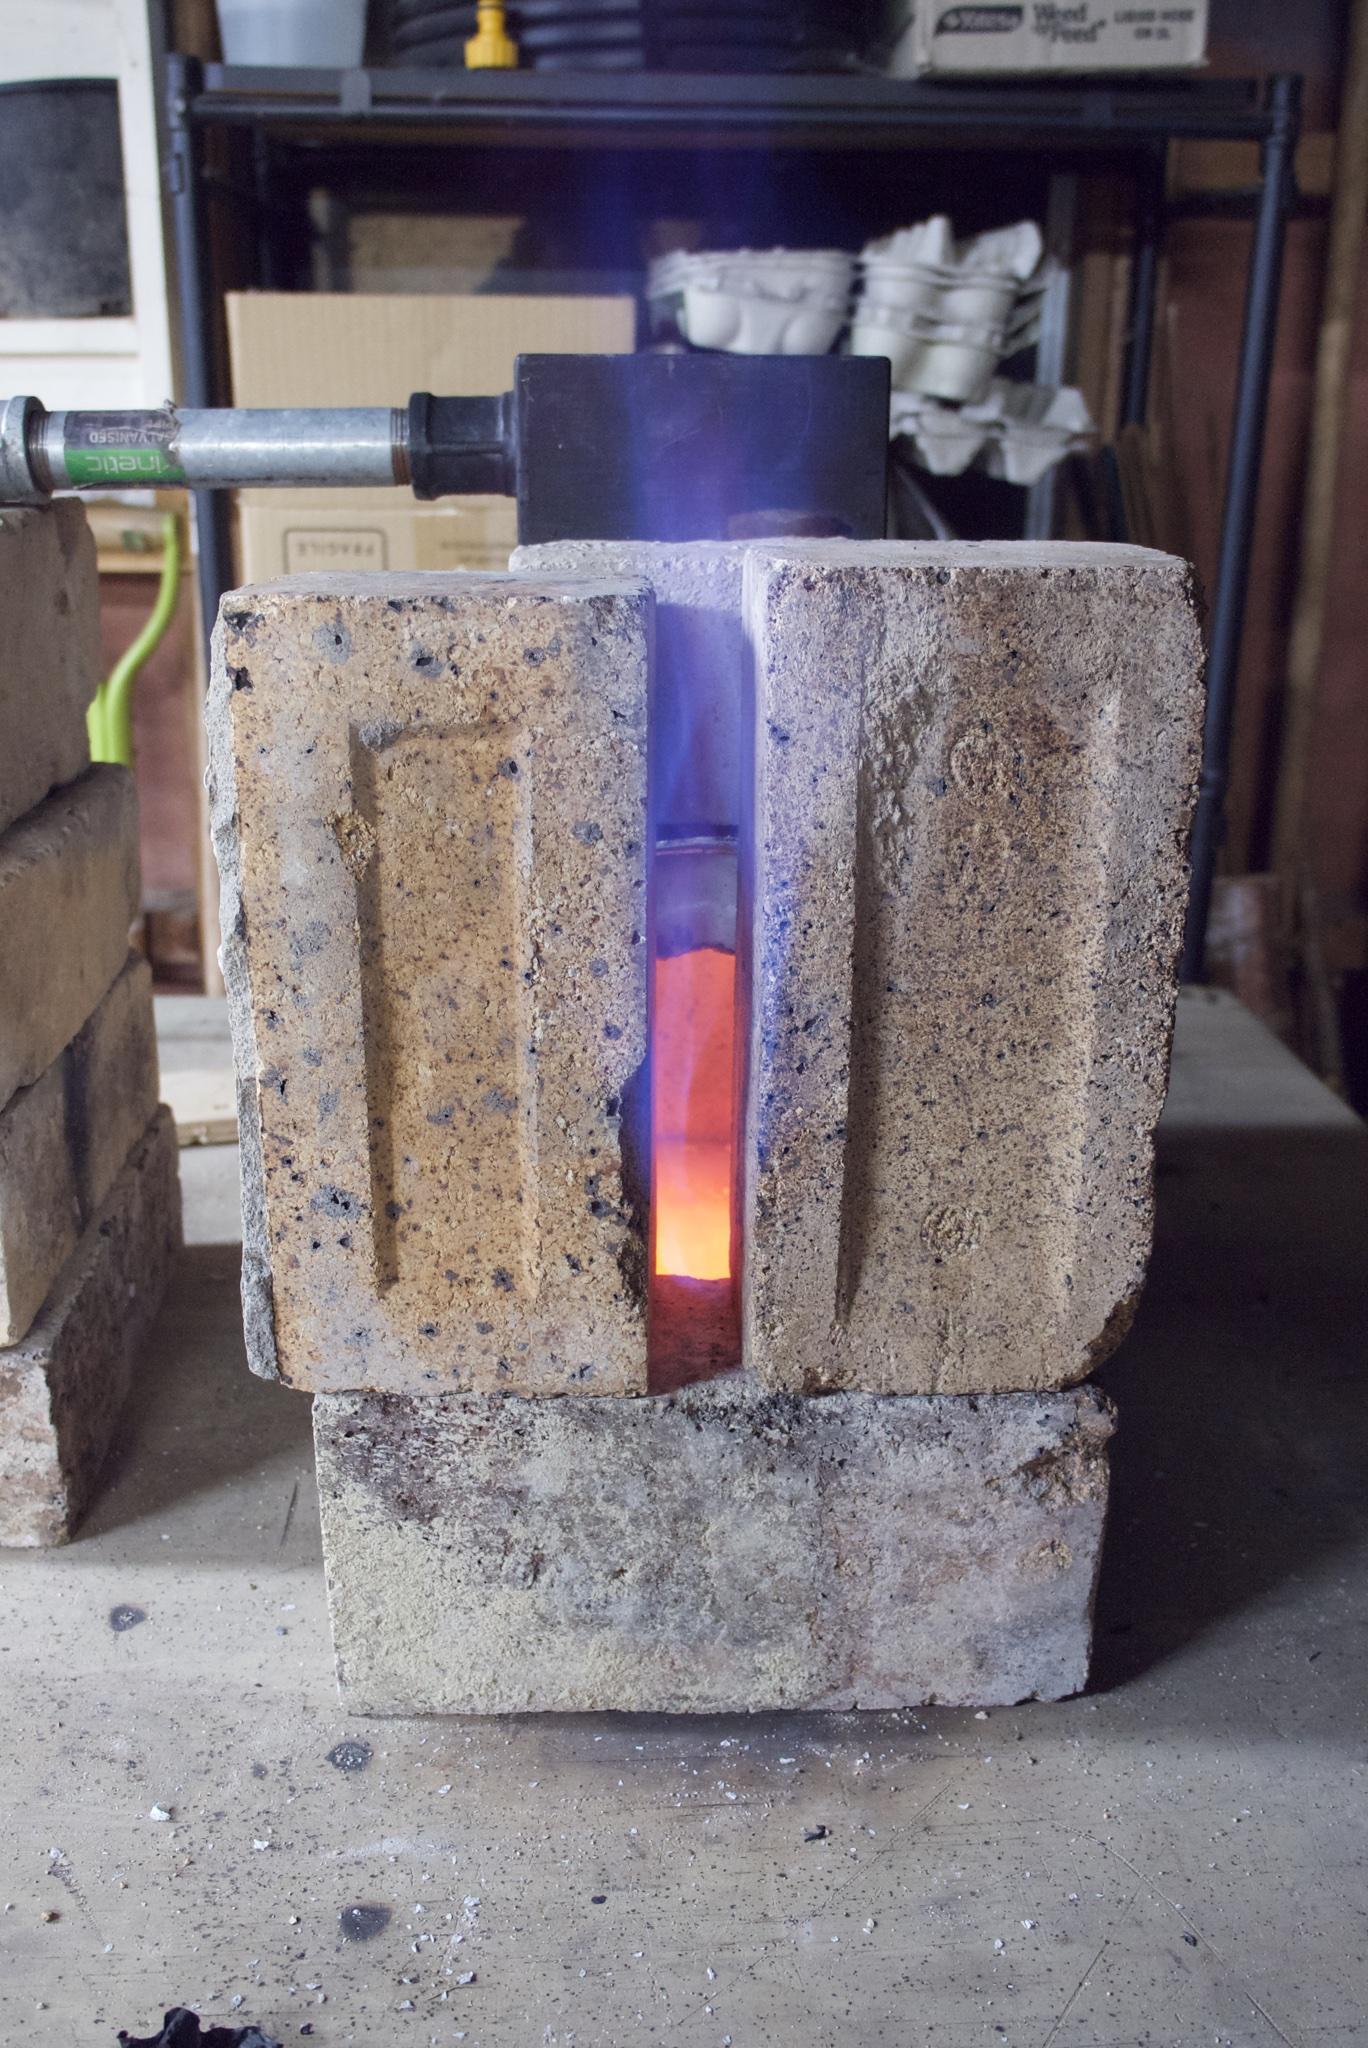
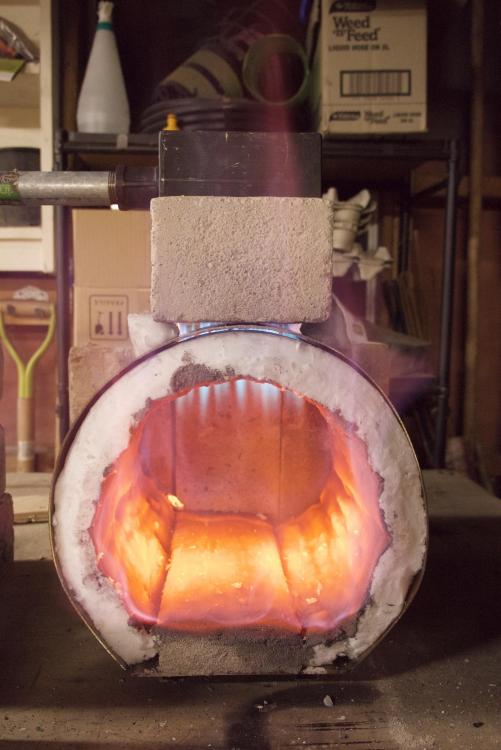
Hi Mikey It probably isn't as hot as the camera makes it look. I think it was about 1175 C / 2150 F in that photo. I usually keep it around 850-900 C for forging. The shell is just a simple kaowool shell with a thin refractory liner. This time I rigidised the kaowool before applying refractory, but I probably won't do that again. The refractory doesn't seem to soak into and bond with the kaowool as effectively once it has been rigidised. I'll make another at some point. Fortunately with this design there is relatively little effort required to make each shell Sam
-
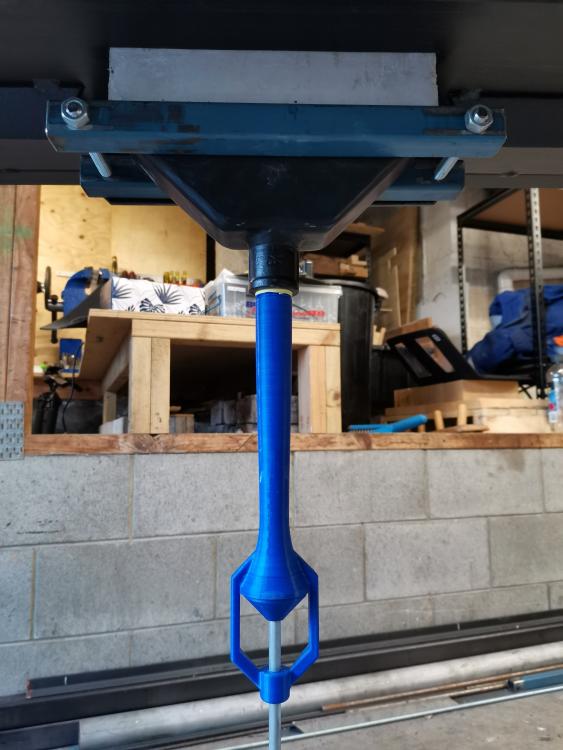
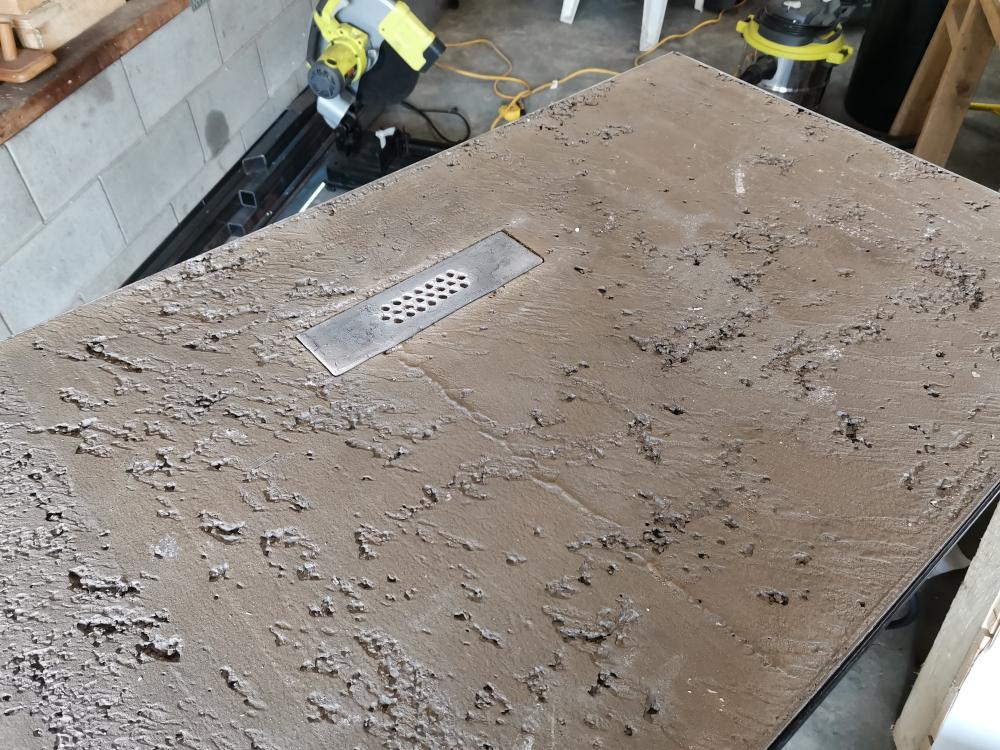
Well it took a bit longer than expected, but I'm finally back with the photos... Here's another photo showing the burner mounted in the table top

-
Yeah they seem to have vanished. I uploaded them to the forum so they should have been stored on the IFI forum server. I'll add them again when I'm back home.
-
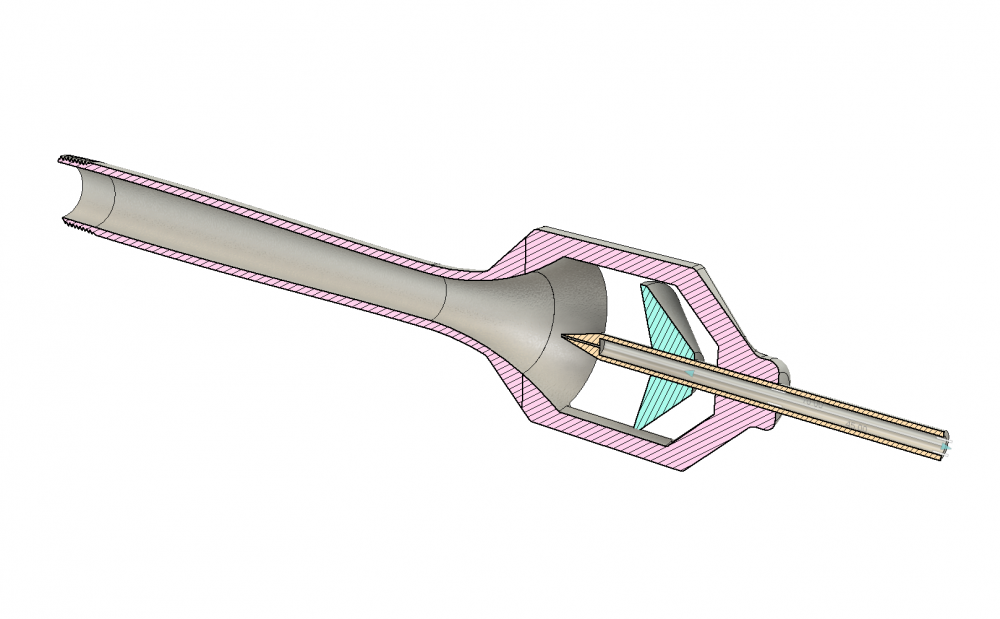
Seems to be holding up fine. The first version was printed in PLA and that was definitely weaker - I could hear little creaking/cracking sounds whenever I threaded the inspirator into the plenum, and eventually the last turn of the threaded section sheared off. The current version is printed in PETG and hasn't shown any sign of failing. I printed using three perimeters which means the section is solid right through for most of the inspirators length. For a handheld version I would be more concerned about the two legs holding the jet in place. They won't break off, but they flex easily (thanks again to the PETG) and you would need more reinforcement to keep the jet aligned correctly with the centre of the throat. Using three legs rather than two would definitely help on that front, but I think flex would still be an issue. How hot do you think a hand-held burner would get? The ribbon burner has the advantage that not much heat is actually conducted back up towards the plenum, but I suspect a steel burner would get a lot hotter. Of course you could always cast the inspirator in bronze or maybe aluminium, but that's a lot more work than just 3D printing it... Yeah, I would like it to be shorter. I did try a shorter version, but the flame became unstable once the burner was up to temperature. It looked a bit like the air flow in the plenum was turbulent and causing the flames to leap around chaotically. I'd like to experiment more with this though. Not sure why the burner temperature should have significantly affected airflow from the inspirator into the plenum so I have almost certainly misunderstood what was actually happening. I don't think forge back pressure would have changed. Sam
-
Yeah, it certainly isn't a new idea. It's just an interesting alternative to building a more or less fixed-size forge in an old propane tank, which currently seems to be the standard approach for new blacksmiths who want a gas forge. There's nothing wrong with a propane tank forge, it just doesn't suit my needs very well and I didn't want to commit to a single forge size when I want to be able to try all sorts of different projects! It was nice to see the occasional alternative design like Eric Fleming's when I was searching for ideas, and I'm hoping this post can serve a similar purpose for others who want something other than the standard fixed-size or brick pile forge.
-
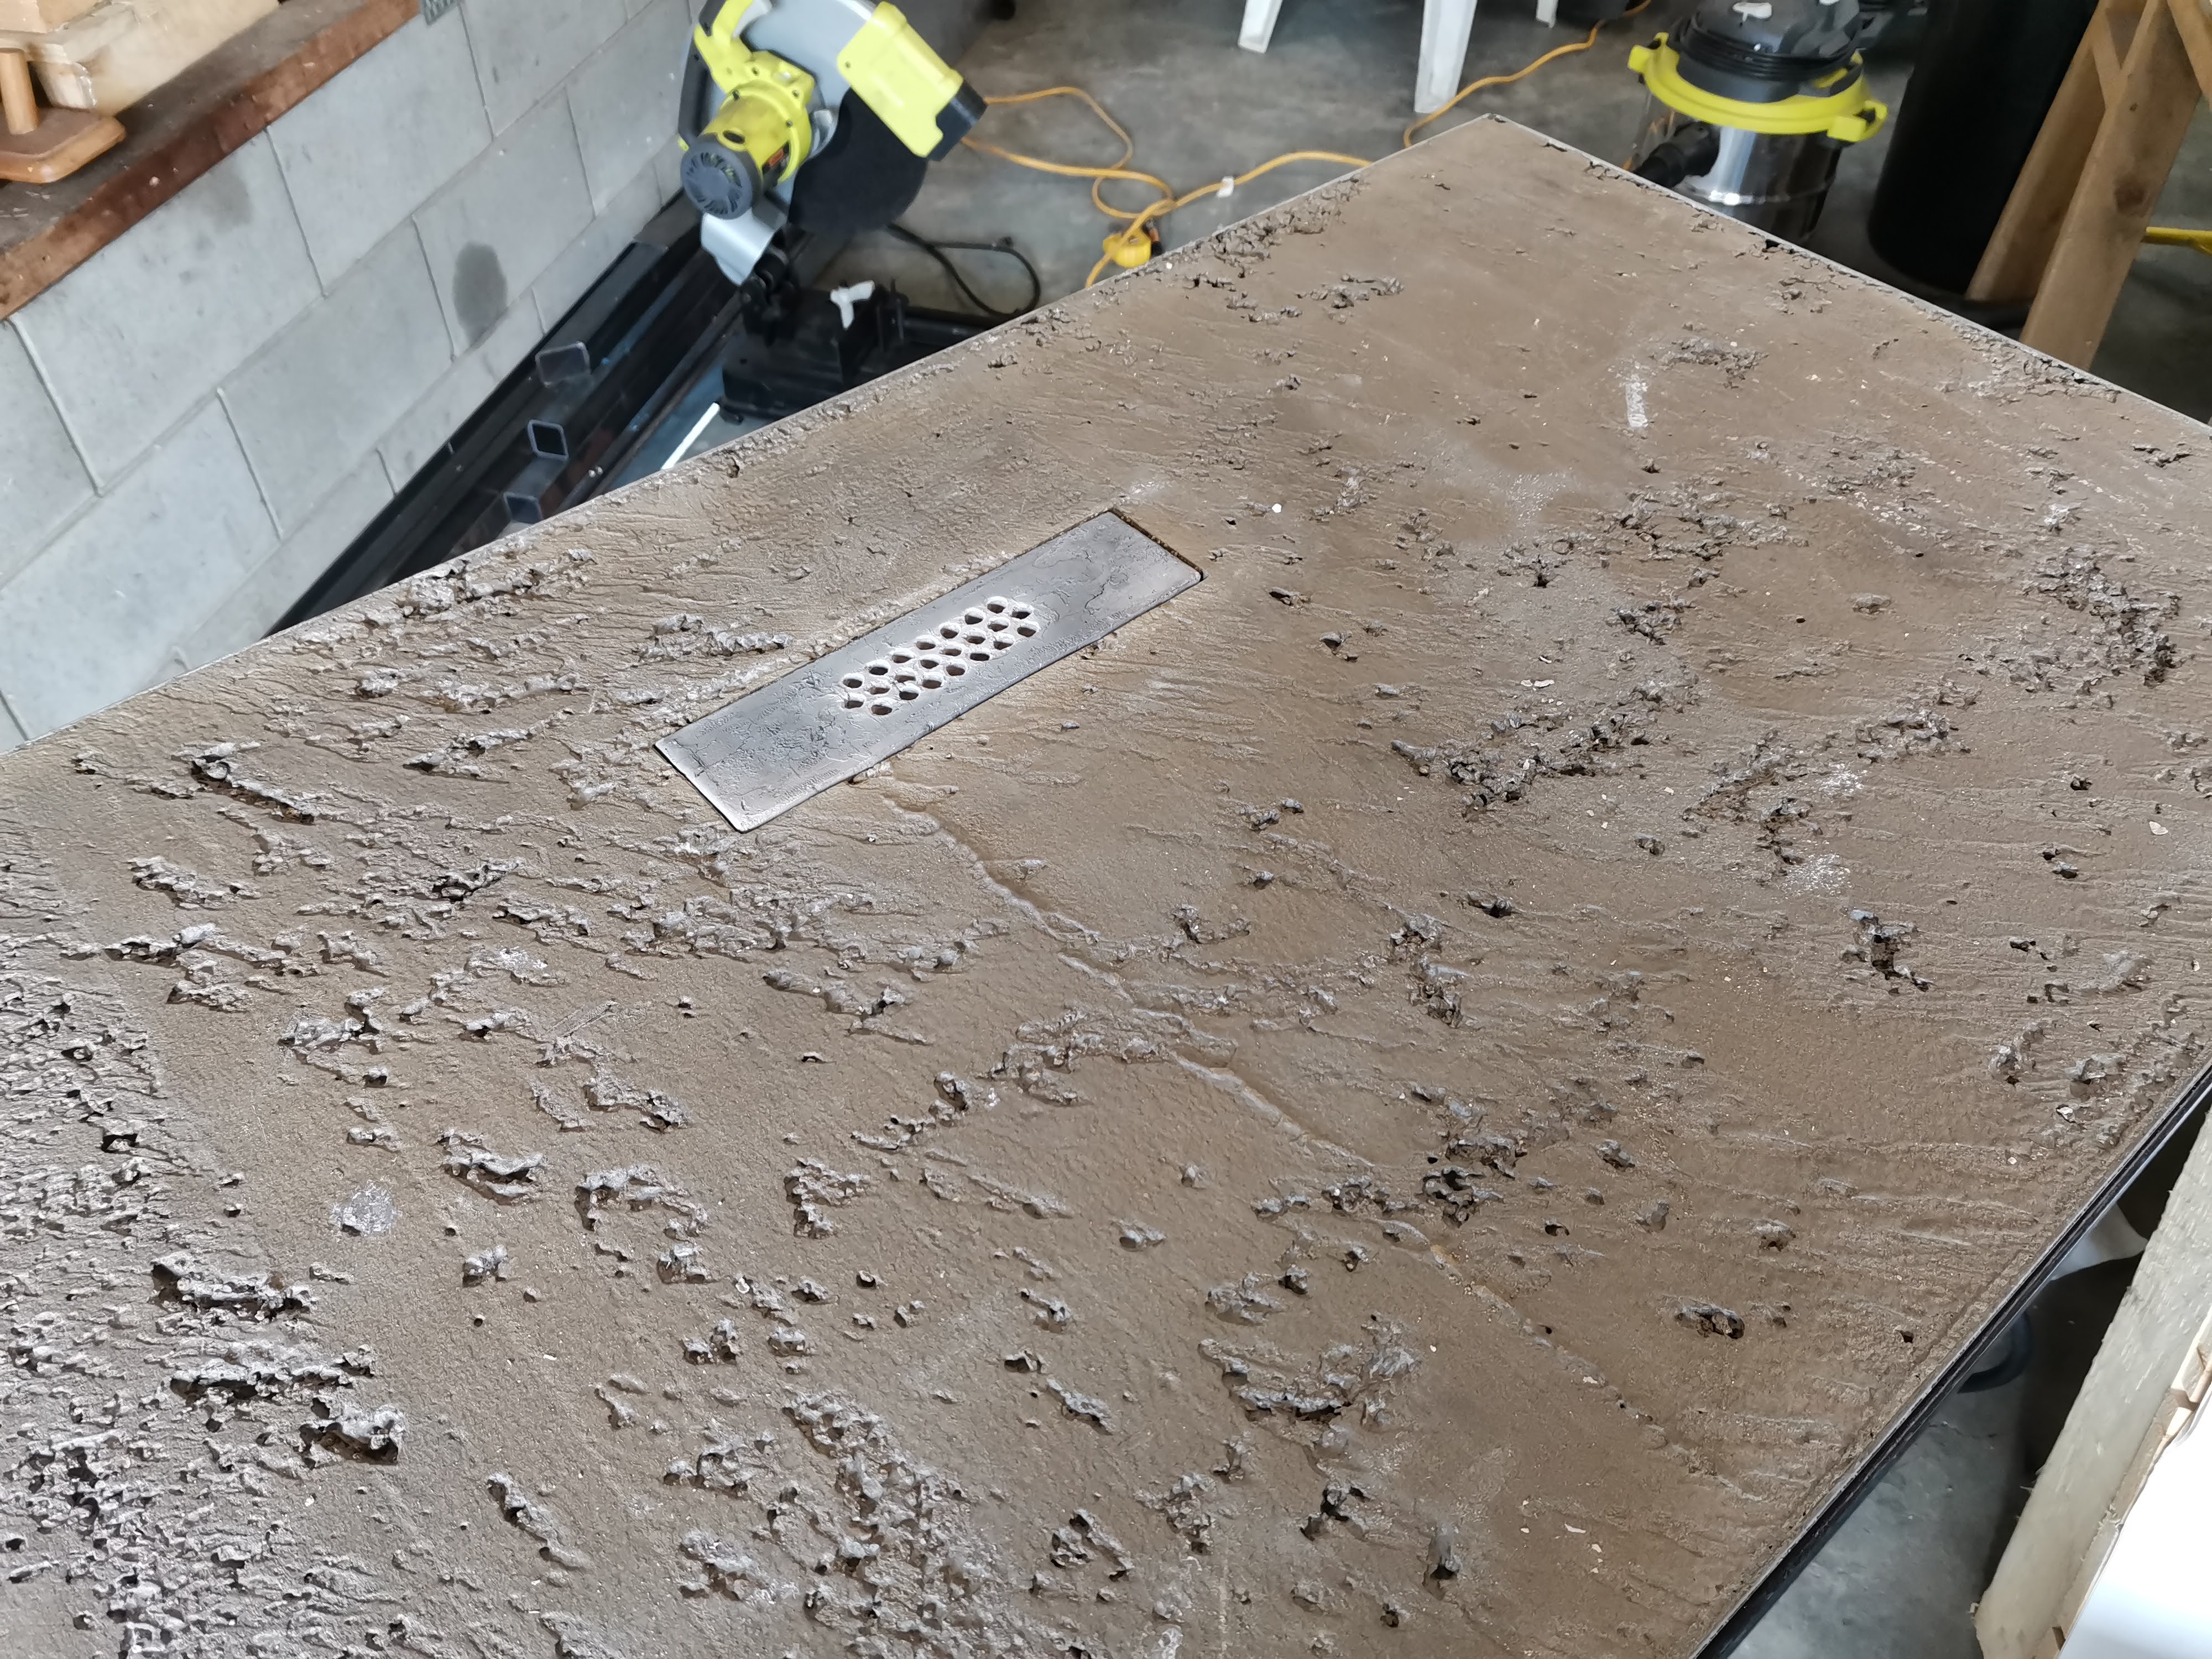
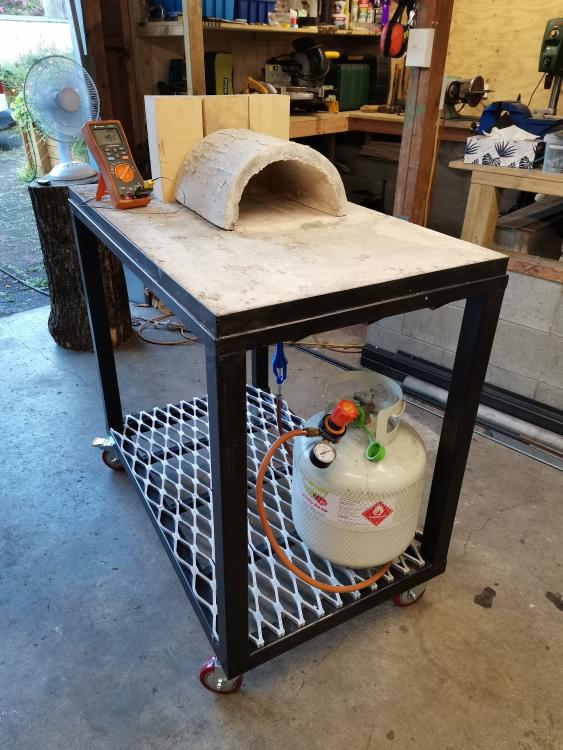
I recently built my first "proper" forge and thought I'd show you all what I'd done. The design is definitely not new, but I haven't seen many other people using it - which is a shame, because it works quite well. Hopefully this post inspires some other people to try it out I shamelessly copied the idea from Eric Fleming's web page The basic idea is that I have a refractory table top, with a ribbon burner sticking upwards, and can sit any size or shape shell over the burner as required by the project I'm working on. Here's a picture: This design has some nice practical advantages: No danger from chimney effect (in fact, the chimney effect acts to keep the burner cool in this design since the burner is below the forge) It's fully self-contained and portable, which makes it very quick to set up and shut down It's trivial to change the forge size when necessary - just sit a different shell on top. It has much less thermal mass to heat than a brick pile forge, and is much more reconfigurable than a propane bottle forge The burner is a ribbon burner inspired by the great posts on this forum from Frosty and others. It uses a custom 3D printed inspirator which I'll put some pictures of below. I did not expect to be able to use the plastic inspirator for anything beyond prototyping, since PETG starts to lose strength at around 80ºC and the forge is operating at >1100ºC. In practice the burner stays cool during operation and the plastic inspirator has been working without issue for a few months now. The inspirator was designed using information from the paper Design of Atmospheric Gas Burners, which was linked in another 3D printed inspirator thread somewhere on this forum. It seems to be pretty efficient at inducing air. As you can see in the photo, I have to choke it off to almost nothing to get a slightly reducing flame. The gas nozzle uses a 1.0 mm 3D printer nozzle (which is substantially smaller than a 0.9 mm MIG tip... Go figure) and at 40 kPa (about 4.3 PSI) the forge sits comfortably at 1150ºC (2100ºF). I've pushed it over 1200ºC but haven't needed to keep it that hot for any extended period yet. Running cost is NZ$2.30/hr, or about US$1.60/hr at todays exchange rate. Honestly, I'm pretty stoked with how well it works. It's cheap to run, and it gets *hot*. Of course, I made plenty of mistakes during this project and most of them were immediately obvious in hindsight. The two main ones are: The tabletop should really be thicker, and have more insulation. It currently has 25 mm of kaowool under 25 mm of refractory, but when the refractory eventually fails and needs to be replaced I'll put some taller sides on and 50-75 mm of insulation under the refractory. When I cast the tabletop, I calculated that I would need 22 kg of refractory based on the numbers in the datasheet and the volume of the tabletop. It turns out I actually needed closer to 26-27 kg - which was a bit awkward, since I only had the one 25 kg bag... It isn't a big deal, but it means the surface of the table isn't as gorgeous and smooth as it could be. And a few other improvements I just haven't got around to doing yet: Making the forge shell thicker and more robust. Since the shell in the photos in the one I'll probably use almost all the time, I'll make a more robust version with thicker kaowool inside a stainless shell and a decent refractory lining. Making insulated doors, rather than the heavy heat-sinking bricks I currently use Lining the floor and shell with an IR re-radiator Building an even better ribbon burner Adding a frame to secure the LPG bottle so that it doesn't fall off when I take the forge off-roading Maybe... Doing some actual blacksmithing....???? I can post more photos or info if there's anything else you want to see. Ah, that's unfortunate. And I can't edit the post to remove the link text? I'll attach them here instead.
-
Thanks Frosty. You're right, the pops did quickly stop being a shock. I quite enjoy turning the burner off now. Once I added an additional 4 holes it started burning back at very low pressure. I ended up casting a block with 29 x 6.25 mm holes and it worked well in the brick pile forge, despite the fact that the uneven bricks meant the forge was almost more gap than brick. I ended up making another small forge out of some scrap stainless and kaowool. The burner certainly gets it hot but it runs very rich. Adjusting the position of the MIG tip doesn't help much, and I assume the inlets on the 3/4" T are too small to let sufficient air in regardless of MIG tip position. Do you think it would help to trim the shoulders off the T so that the inlet area is increased? Or is that likely to cause other problems?
-
Hi Frosty The flames start to move back toward the plenum between 20-30 kPa (3-4.3 PSI) and touch it somewhere around 10 kPa. Hard to tell as the gauge doesn't read below 20 kPa. The flames didn't burn back into the plenum at any pressure using this block. I assume the smaller holes (6.0 mm vs. 8.0 mm) and rich mixture are responsible for that. It is nice being able to extinguish the burner without any loud pops I tried a block with 25 x 6.0 mm holes in a rectangular grid today and it seems to burn well too.
-
Thanks Frosty and Latticino. Here's a better video of the flame using a new test block. This one has 24 x 6.0 mm nozzles, and is similar to some of the Joppa Glassworks burners Latticino mentioned. The block is burnt from previous use, but is wet and not burning in this video. It looks to me like it's running quite rich, and the way the outer flames start much further from the nozzles suggests it could benefit from a diffuser (no idea whether that's actually correct, just guessing here). I already have the MIG tip adjusted as far back as it can reasonably go, so I'll cut it shorter tomorrow and put a diffuser in the plenum before trying again. Latticino, you are correct that I used the wrong T... Unfortunately at this point I cannot go buy a reducing one so this will have to do for the time being.
-
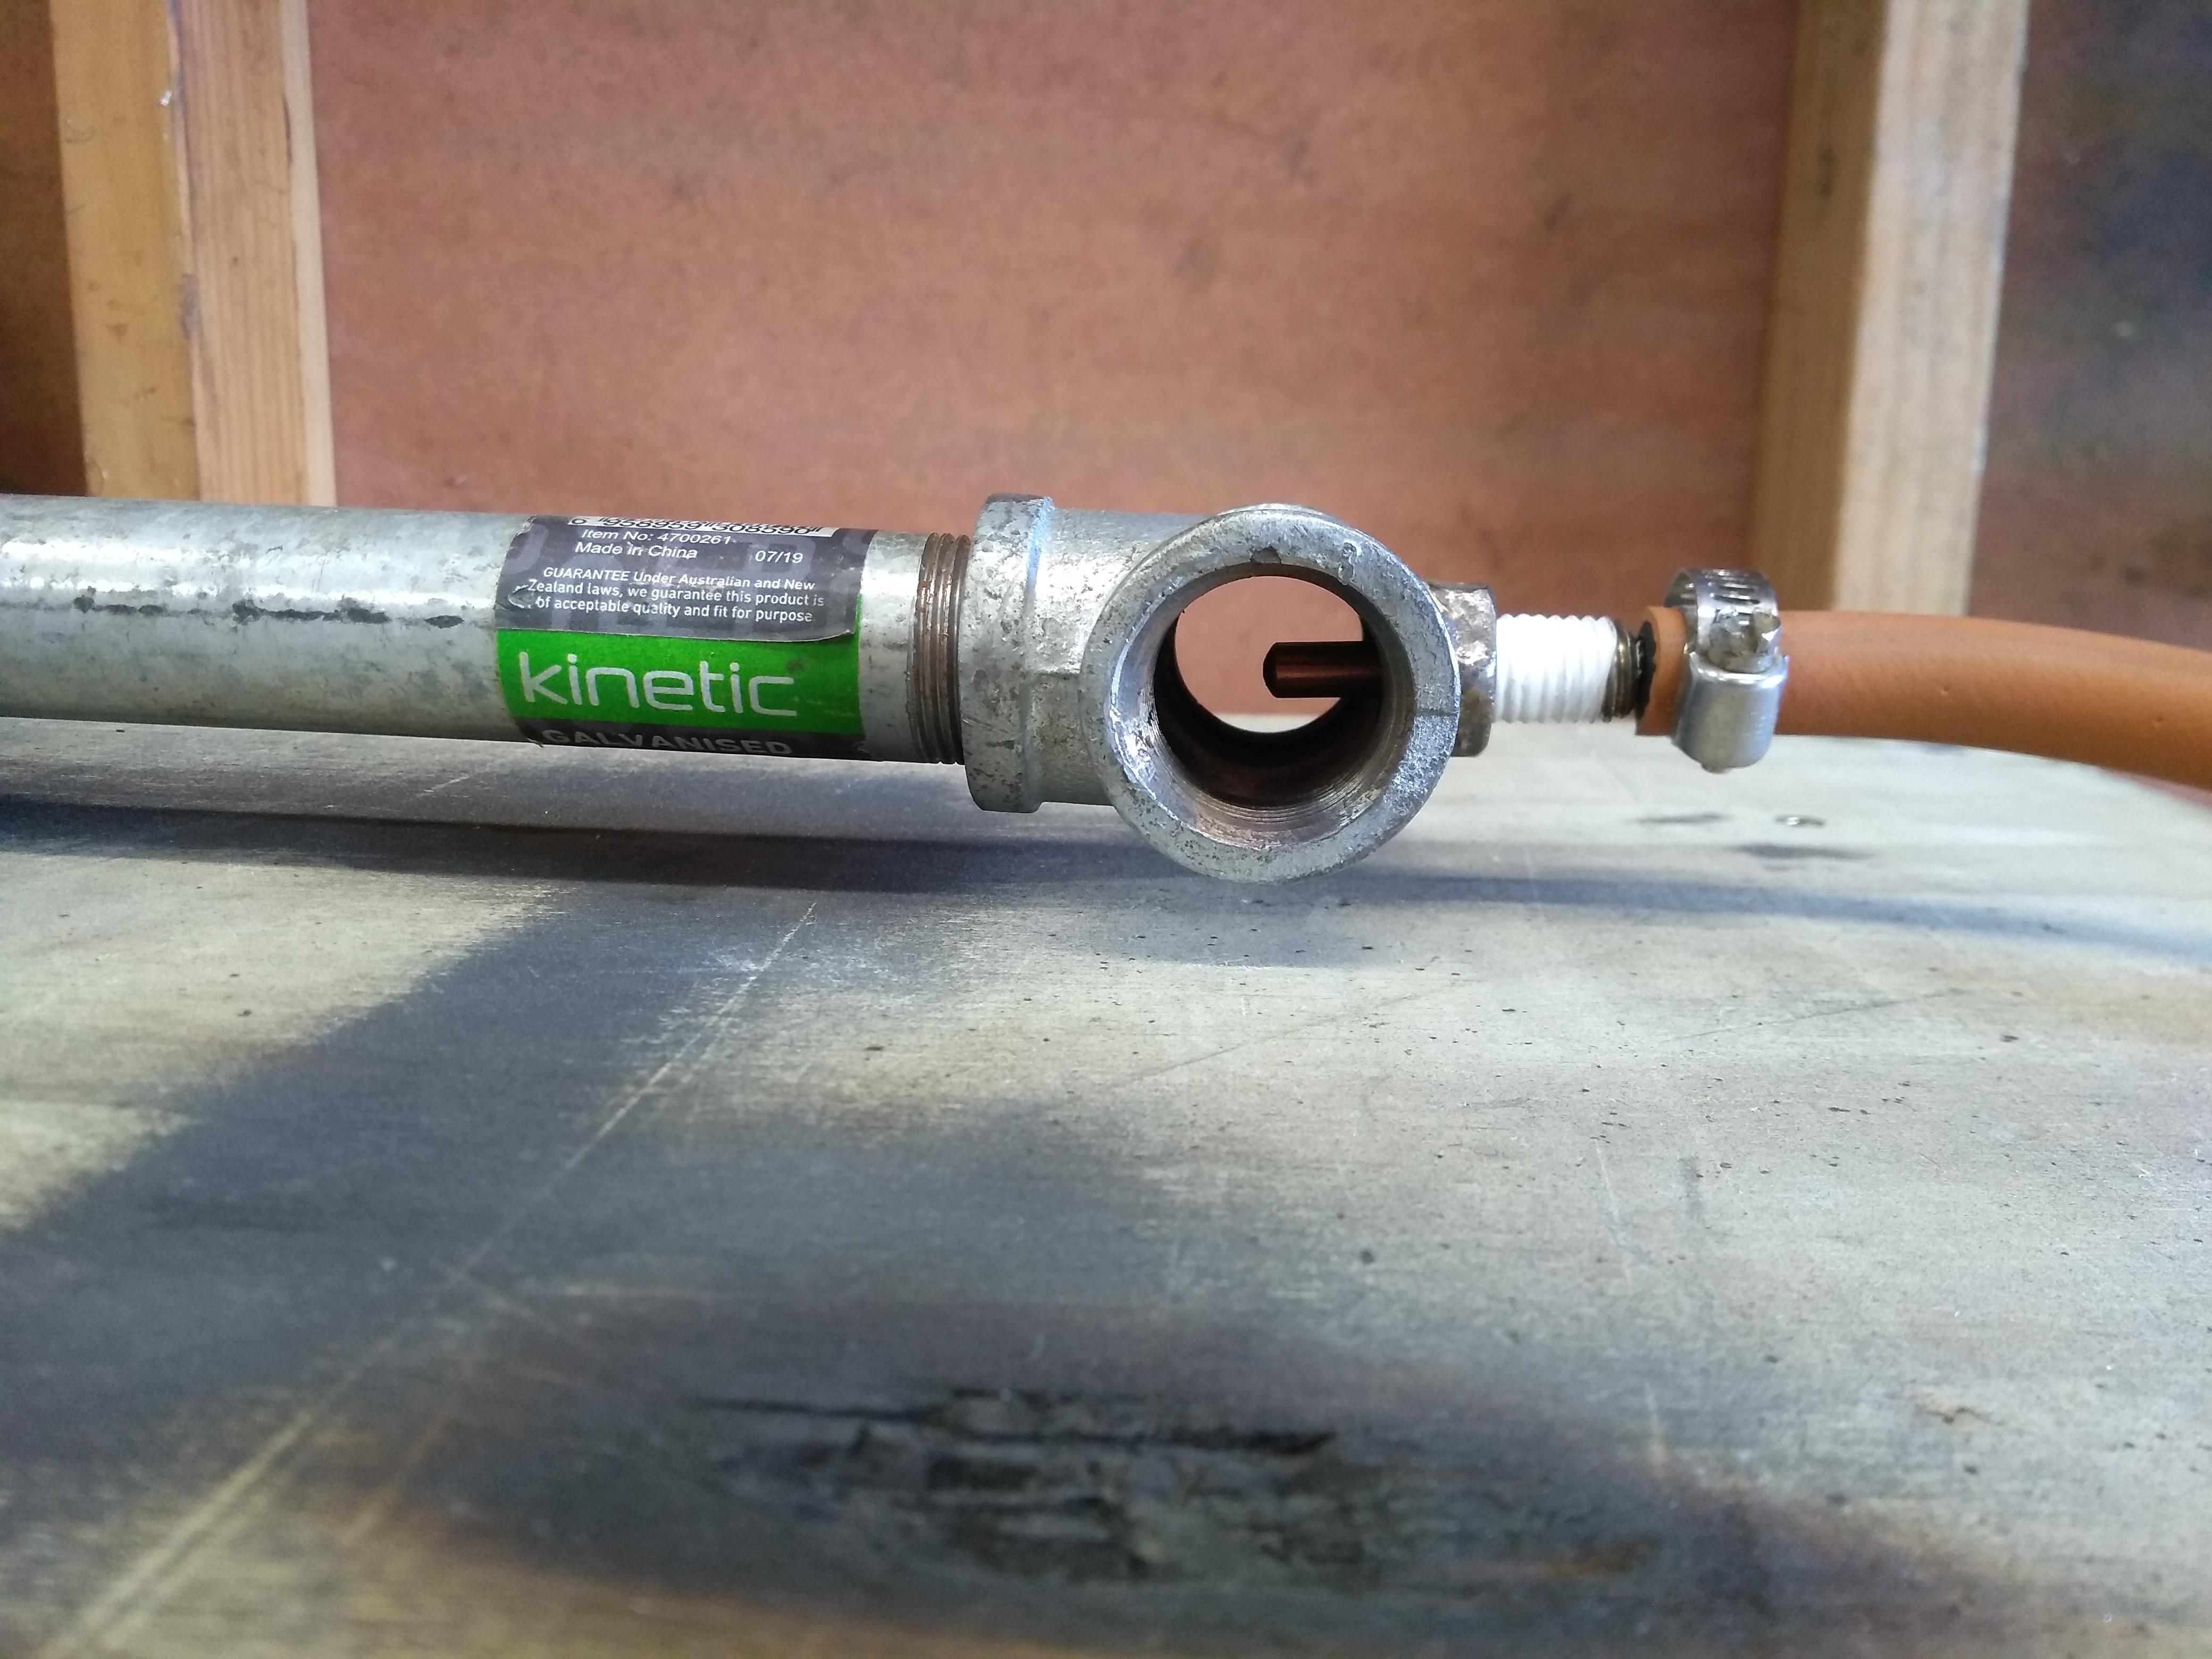
Thanks for the advice. The hose is specifically rated for LPG. I think removing the galv is a good idea, but I'll do it once the rest is ready to paint.
-
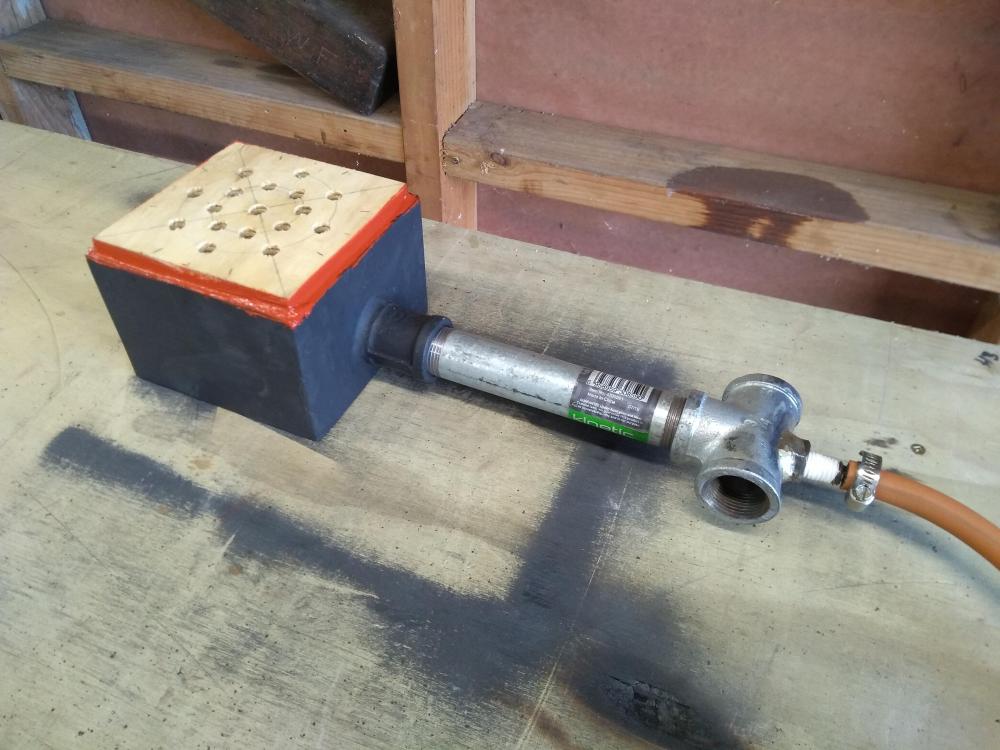
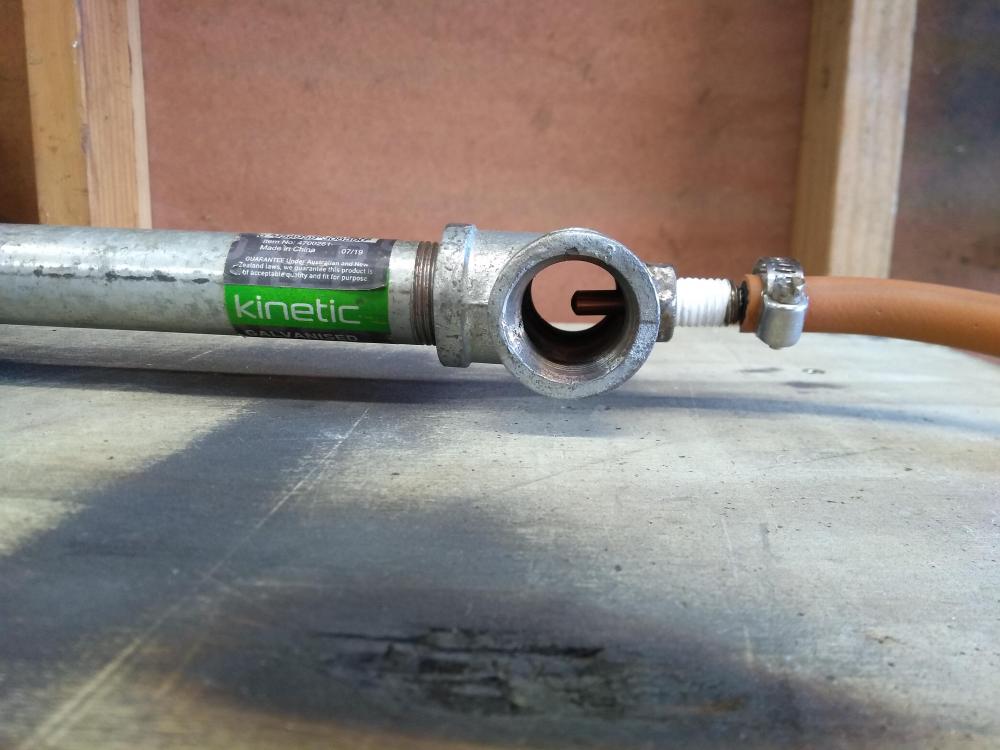
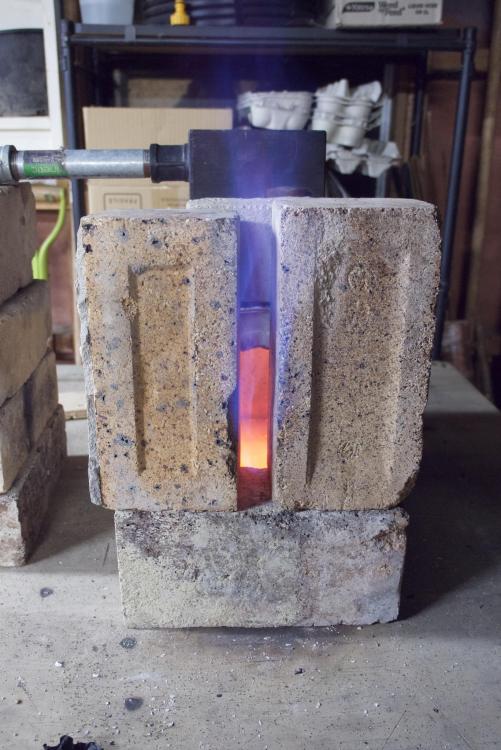
I've just finished the initial prototype of a ribbon burner that I intend to use for general forging in a brick pile forge, and would like some advice before I continue casting the refractory block. The design is inspired by Frosty's T-burner instructions and the various ribbon burners shown in these forums. I say "inspired" because NZ is currently under quarantine and I do not have access to any hardware or tools that aren't already in my garage. I had to improvise the connection between the LPG hose and the MIG tip. First some pictures: For the hose connection, I brazed a M12 nut onto the T joint and then drilled and tapped some threaded rod to accept the MIG tip in one end and some M6 threaded rod with hole drilled through it in the other end. Once the quarantine is over I may try to find a better way to do this, but it seems to be functional. Here is a video of a test firing, with 13 x 8.0 mm nozzles and pressure at about 30 kPa (~4.5 PSI): Now, the questions I have: Firstly, safety: is there anything that might pose an unexpected risk with ribbon burners, or LPG burners in general? I have plenty of general experience working in hot and dangerous environments (as an industrial electrician who does bronze casting as a hobby), but I don't have any specific knowledge about gas burners beyond what I've found on this forum. The idea of lighting a home-made bomb disguised as a gas burner terrifies me! The LPG hose is connected to an adjustable regulator with pressure gauge, but I don't have a flashback arrestor installed since **in theory** the LPG is not in a combustible mixture until it exits the MIG tip. Of course if there's a hole upstream of the MIG tip then all bets are off... In Frosty's NARB thread he seems to be using 19 crayon-sized holes, which he says are slightly under 3/8" (9.5 mm) dia. In my test block I only have 17 holes at 8.0 mm each, and still had to block up four of them to prevent the burner from immediately backfiring. Is this likely because I have my burner in open air and will need the extra holes once it's inside a forge? Or is the circular vs. linear layout of the holes or some other design difference to blame? It occurs to me now that the nozzles will have higher resistance once they're cast in the deeper refractory block too. It's a bit hard to see what distance from the block the flames are igniting, but does the burner appear to be behaving roughly as expected tuning wise etc? Is the loud pop as the gas ignites inside the plenum normal when shutting off a burner? It seems like having the flame travel back into the plenum is unavoidable once the cylinder valve is closed and the gas velocity starts to taper off, but if there's a way to avoid it I would love to know! Thanks for any help you can give Sam