Azhobbychick
-
Posts
20 -
Joined
-
Last visited
-
Take it out of the forge and show it?
-
Thanks frosty!
-
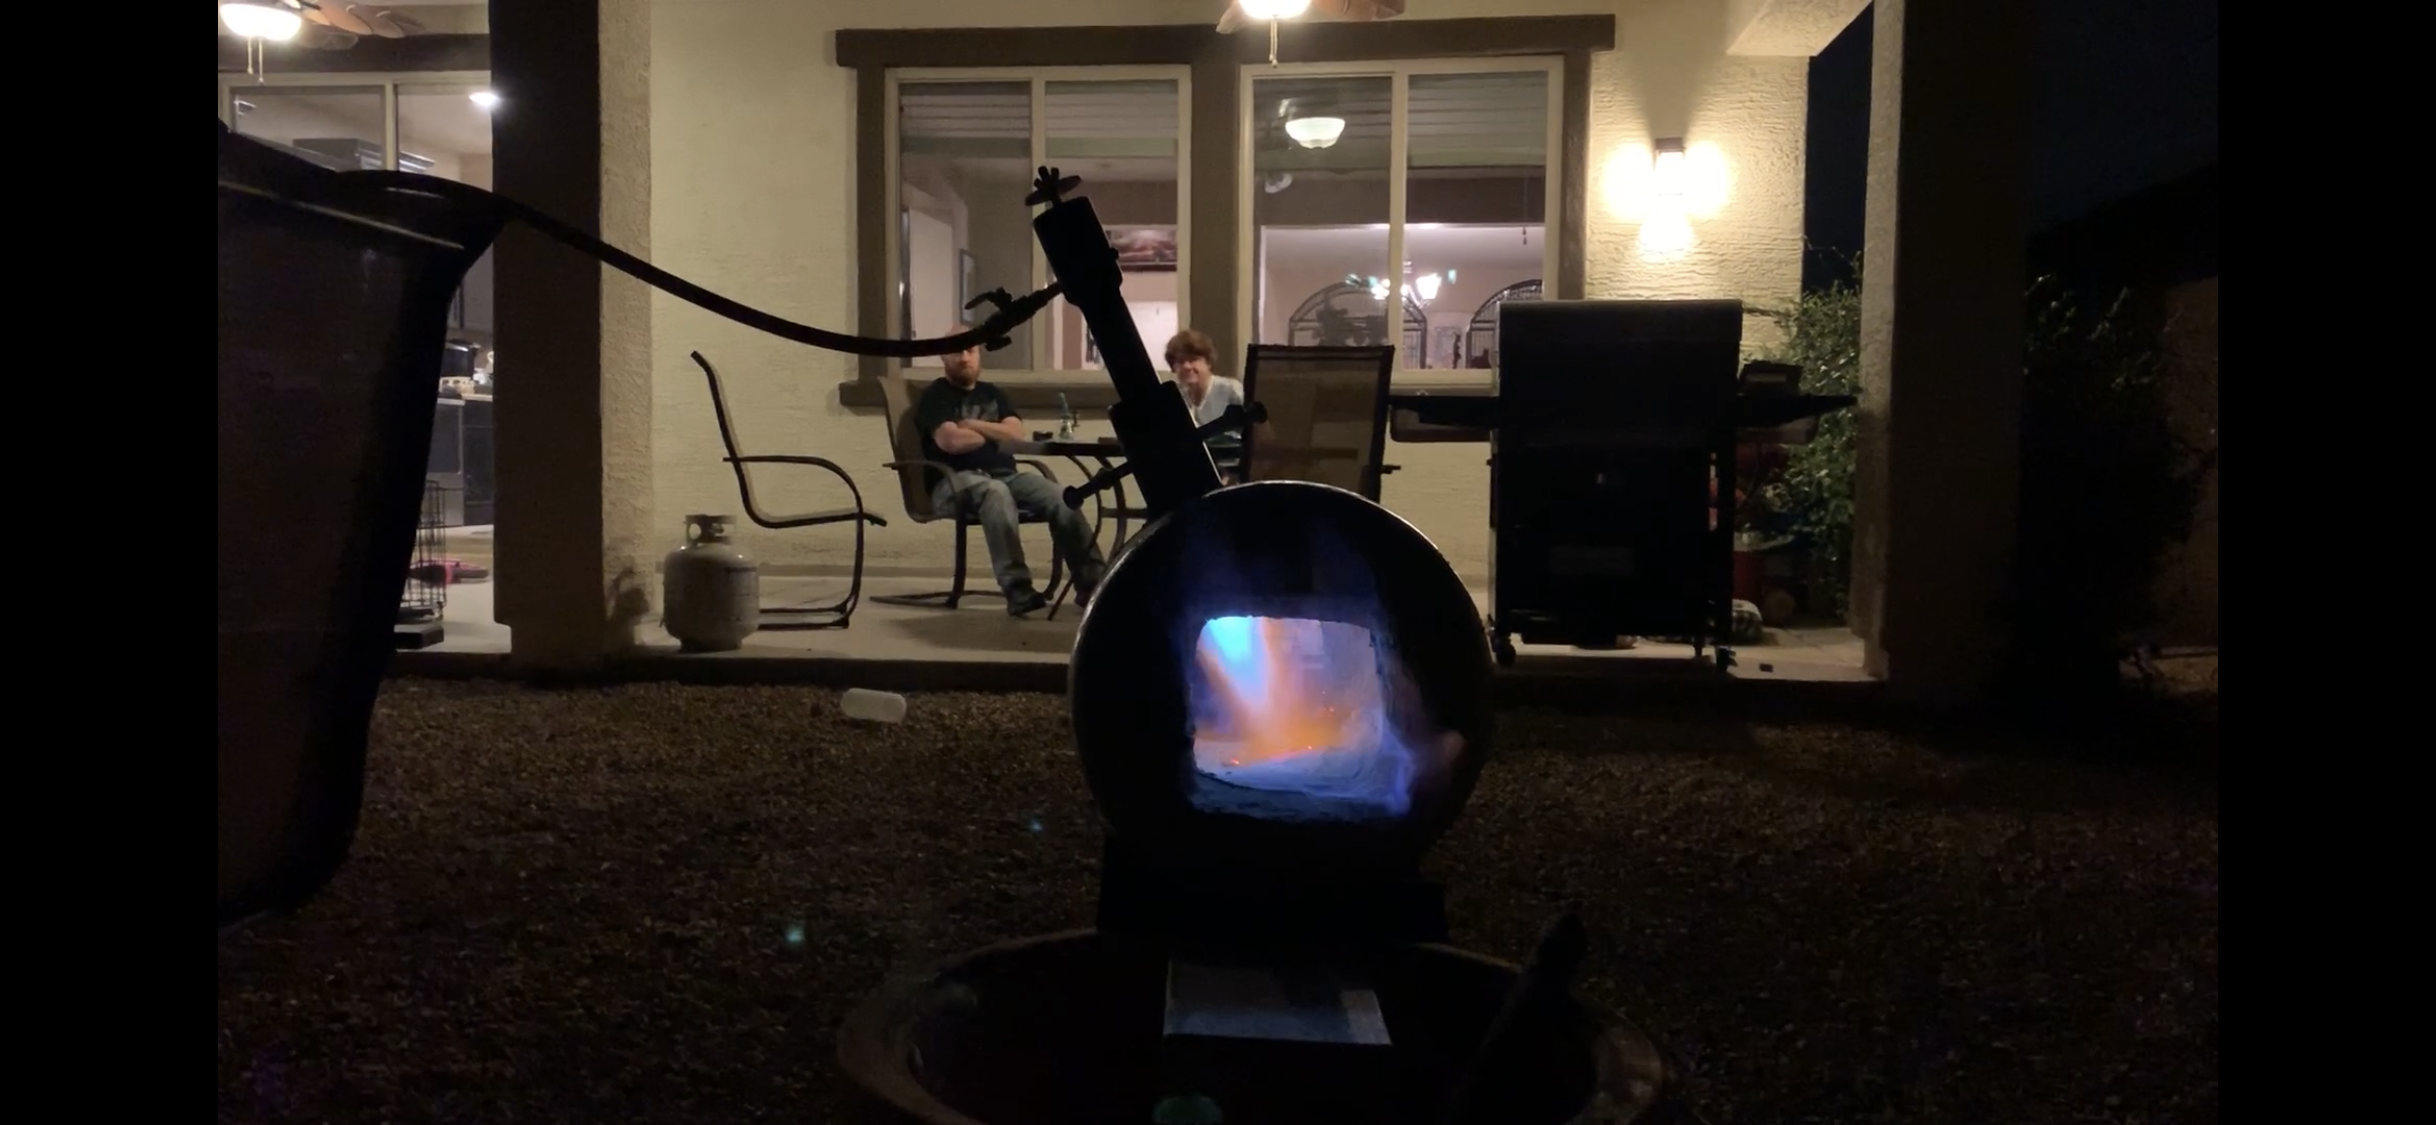
It’s done! Ceremonial first lighting (and possible horrible failure...) coming soon! Edit!! I lit it!! There is fine tuning to be done and I will be detaching the burner pipe and backing it out a bit but it works!! Thank you everyone for your help. I am now working on my ASO stand.

-
Thanks guys! The kiln cement is sold by Marjon ceramics in Phoenix. I can’t remember the name. I will see if I still have the bag. edit: it says KCD 5 kiln cement. I can’t find it online.
-
Ok, I ground down all the bad welds and after a lot of practice on scrap went for it again. This time I actually got the the puddle to form and come with me. It seems to be a lot better.
-
That’s a good idea! I’ll try it! Thank you.
-
Having slept on it, I’m going to grind the weld down and try again. This is not going to go well.
-
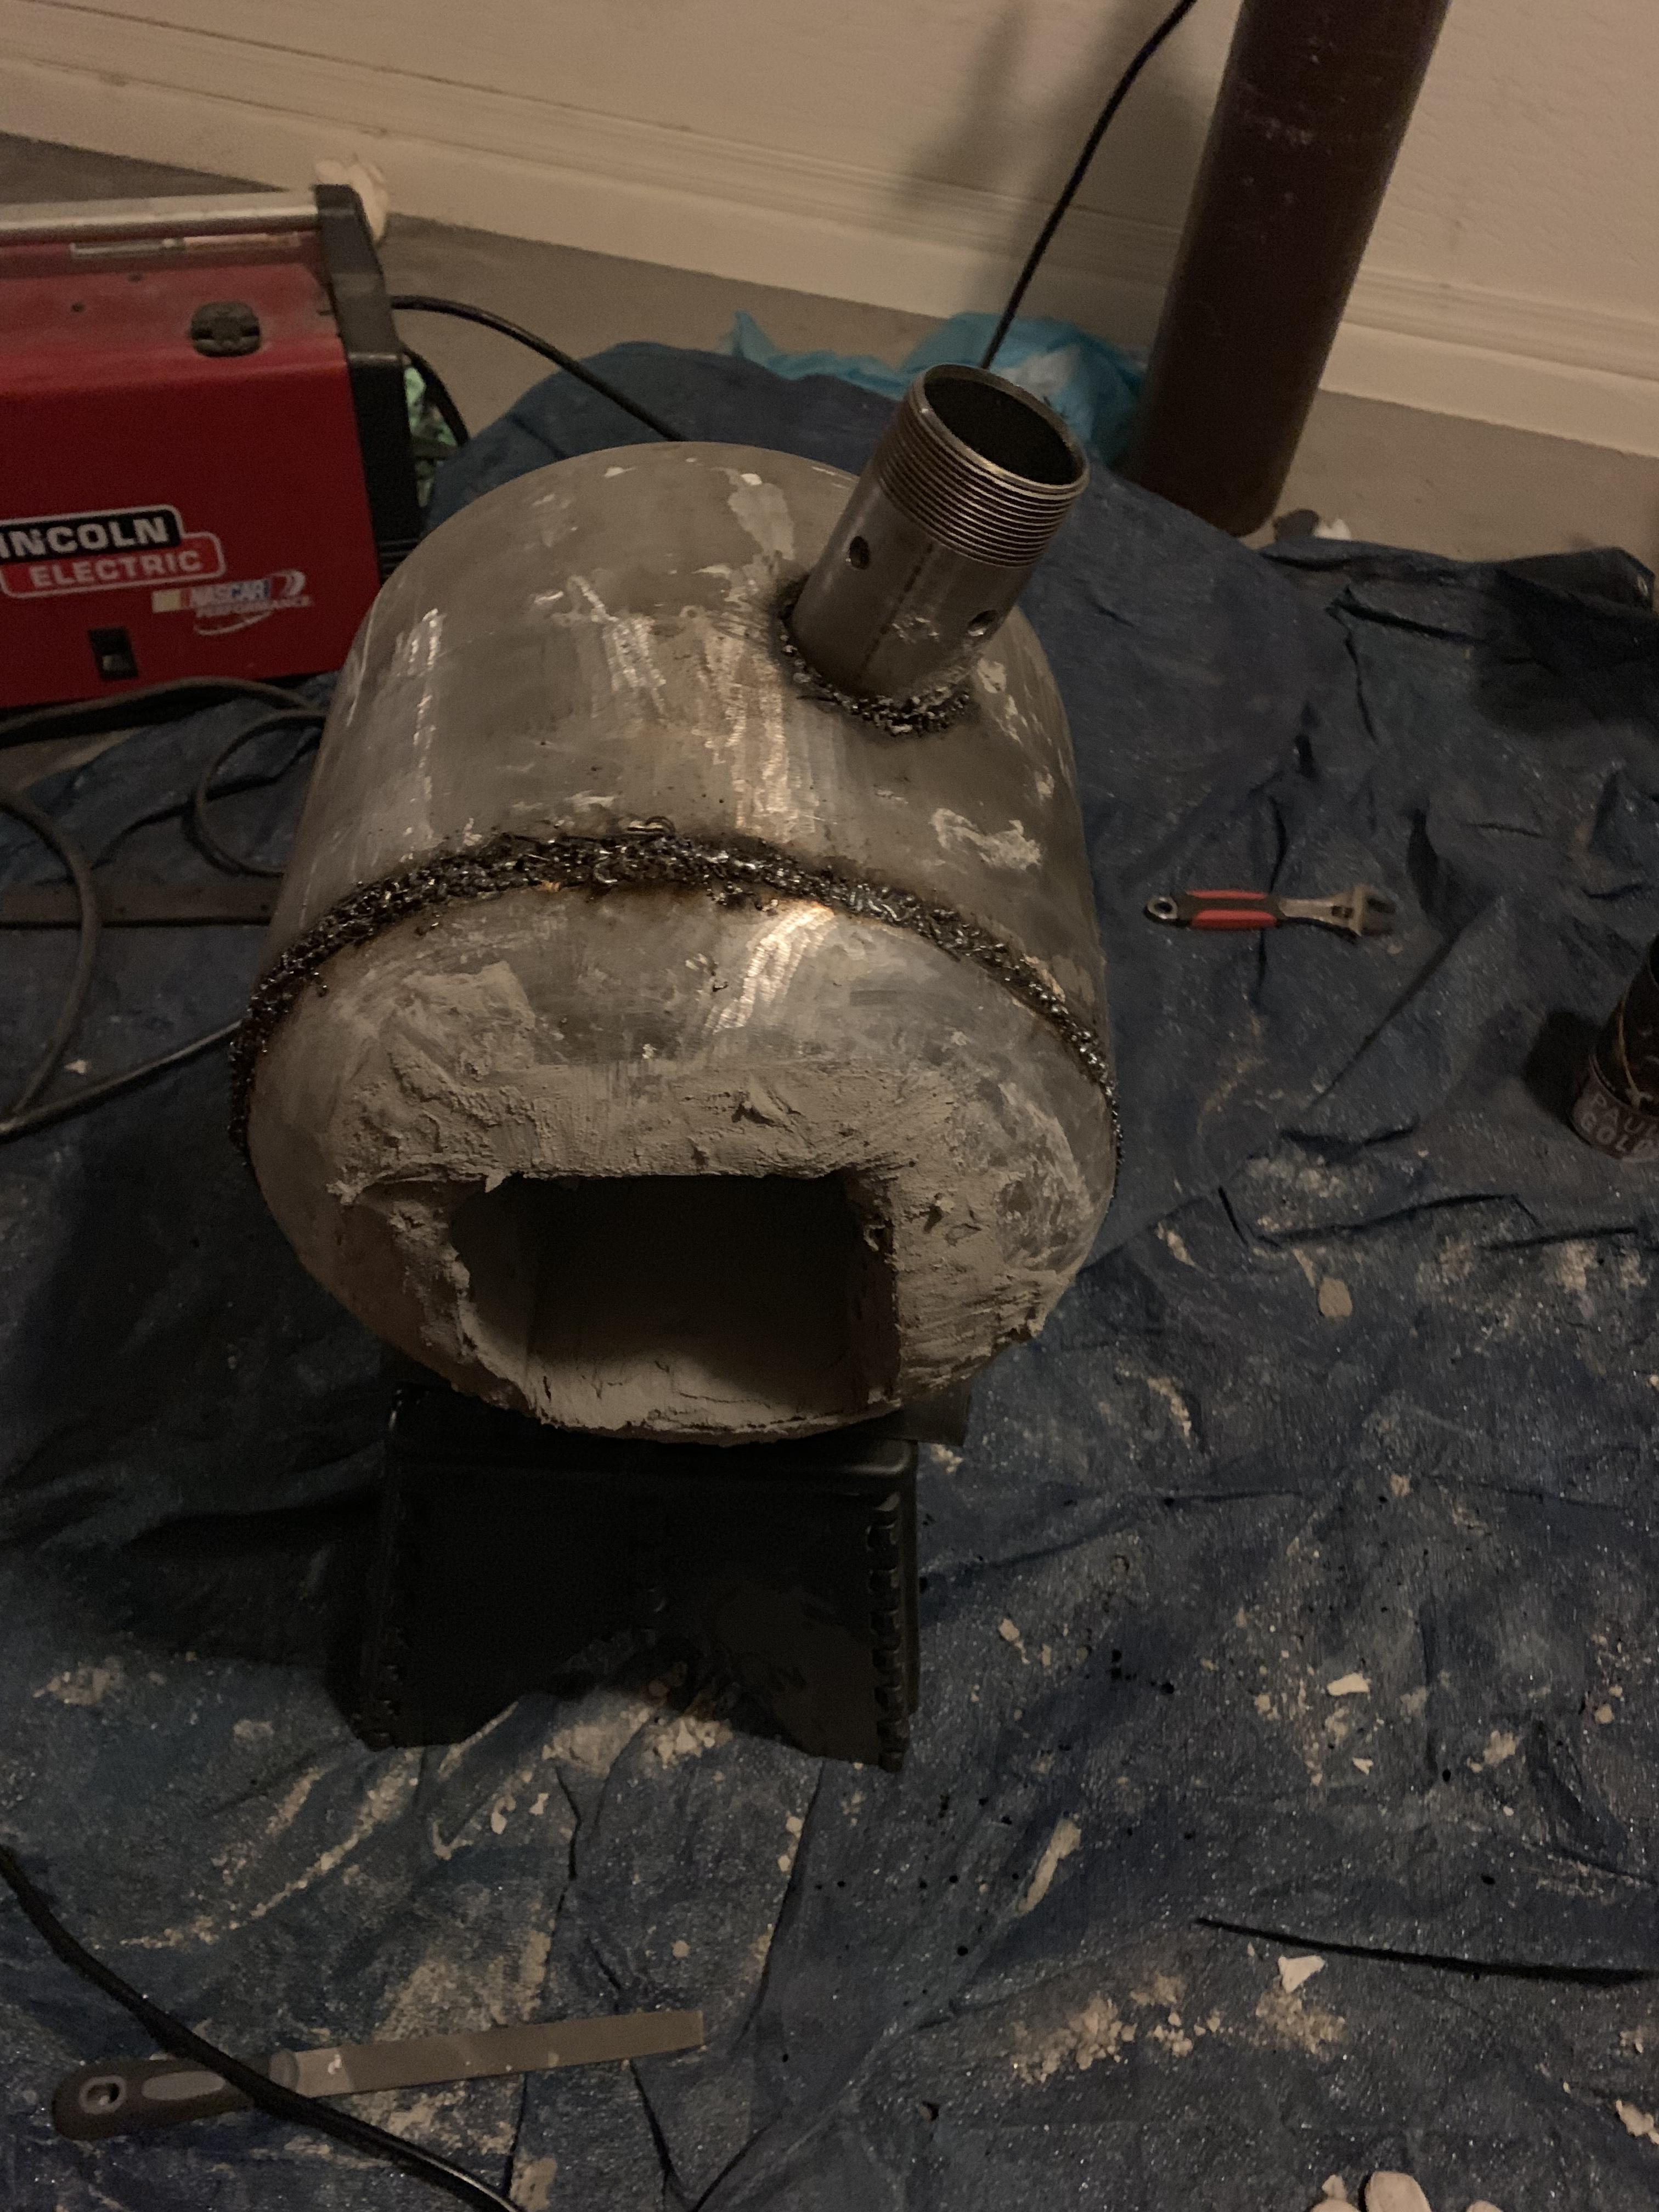
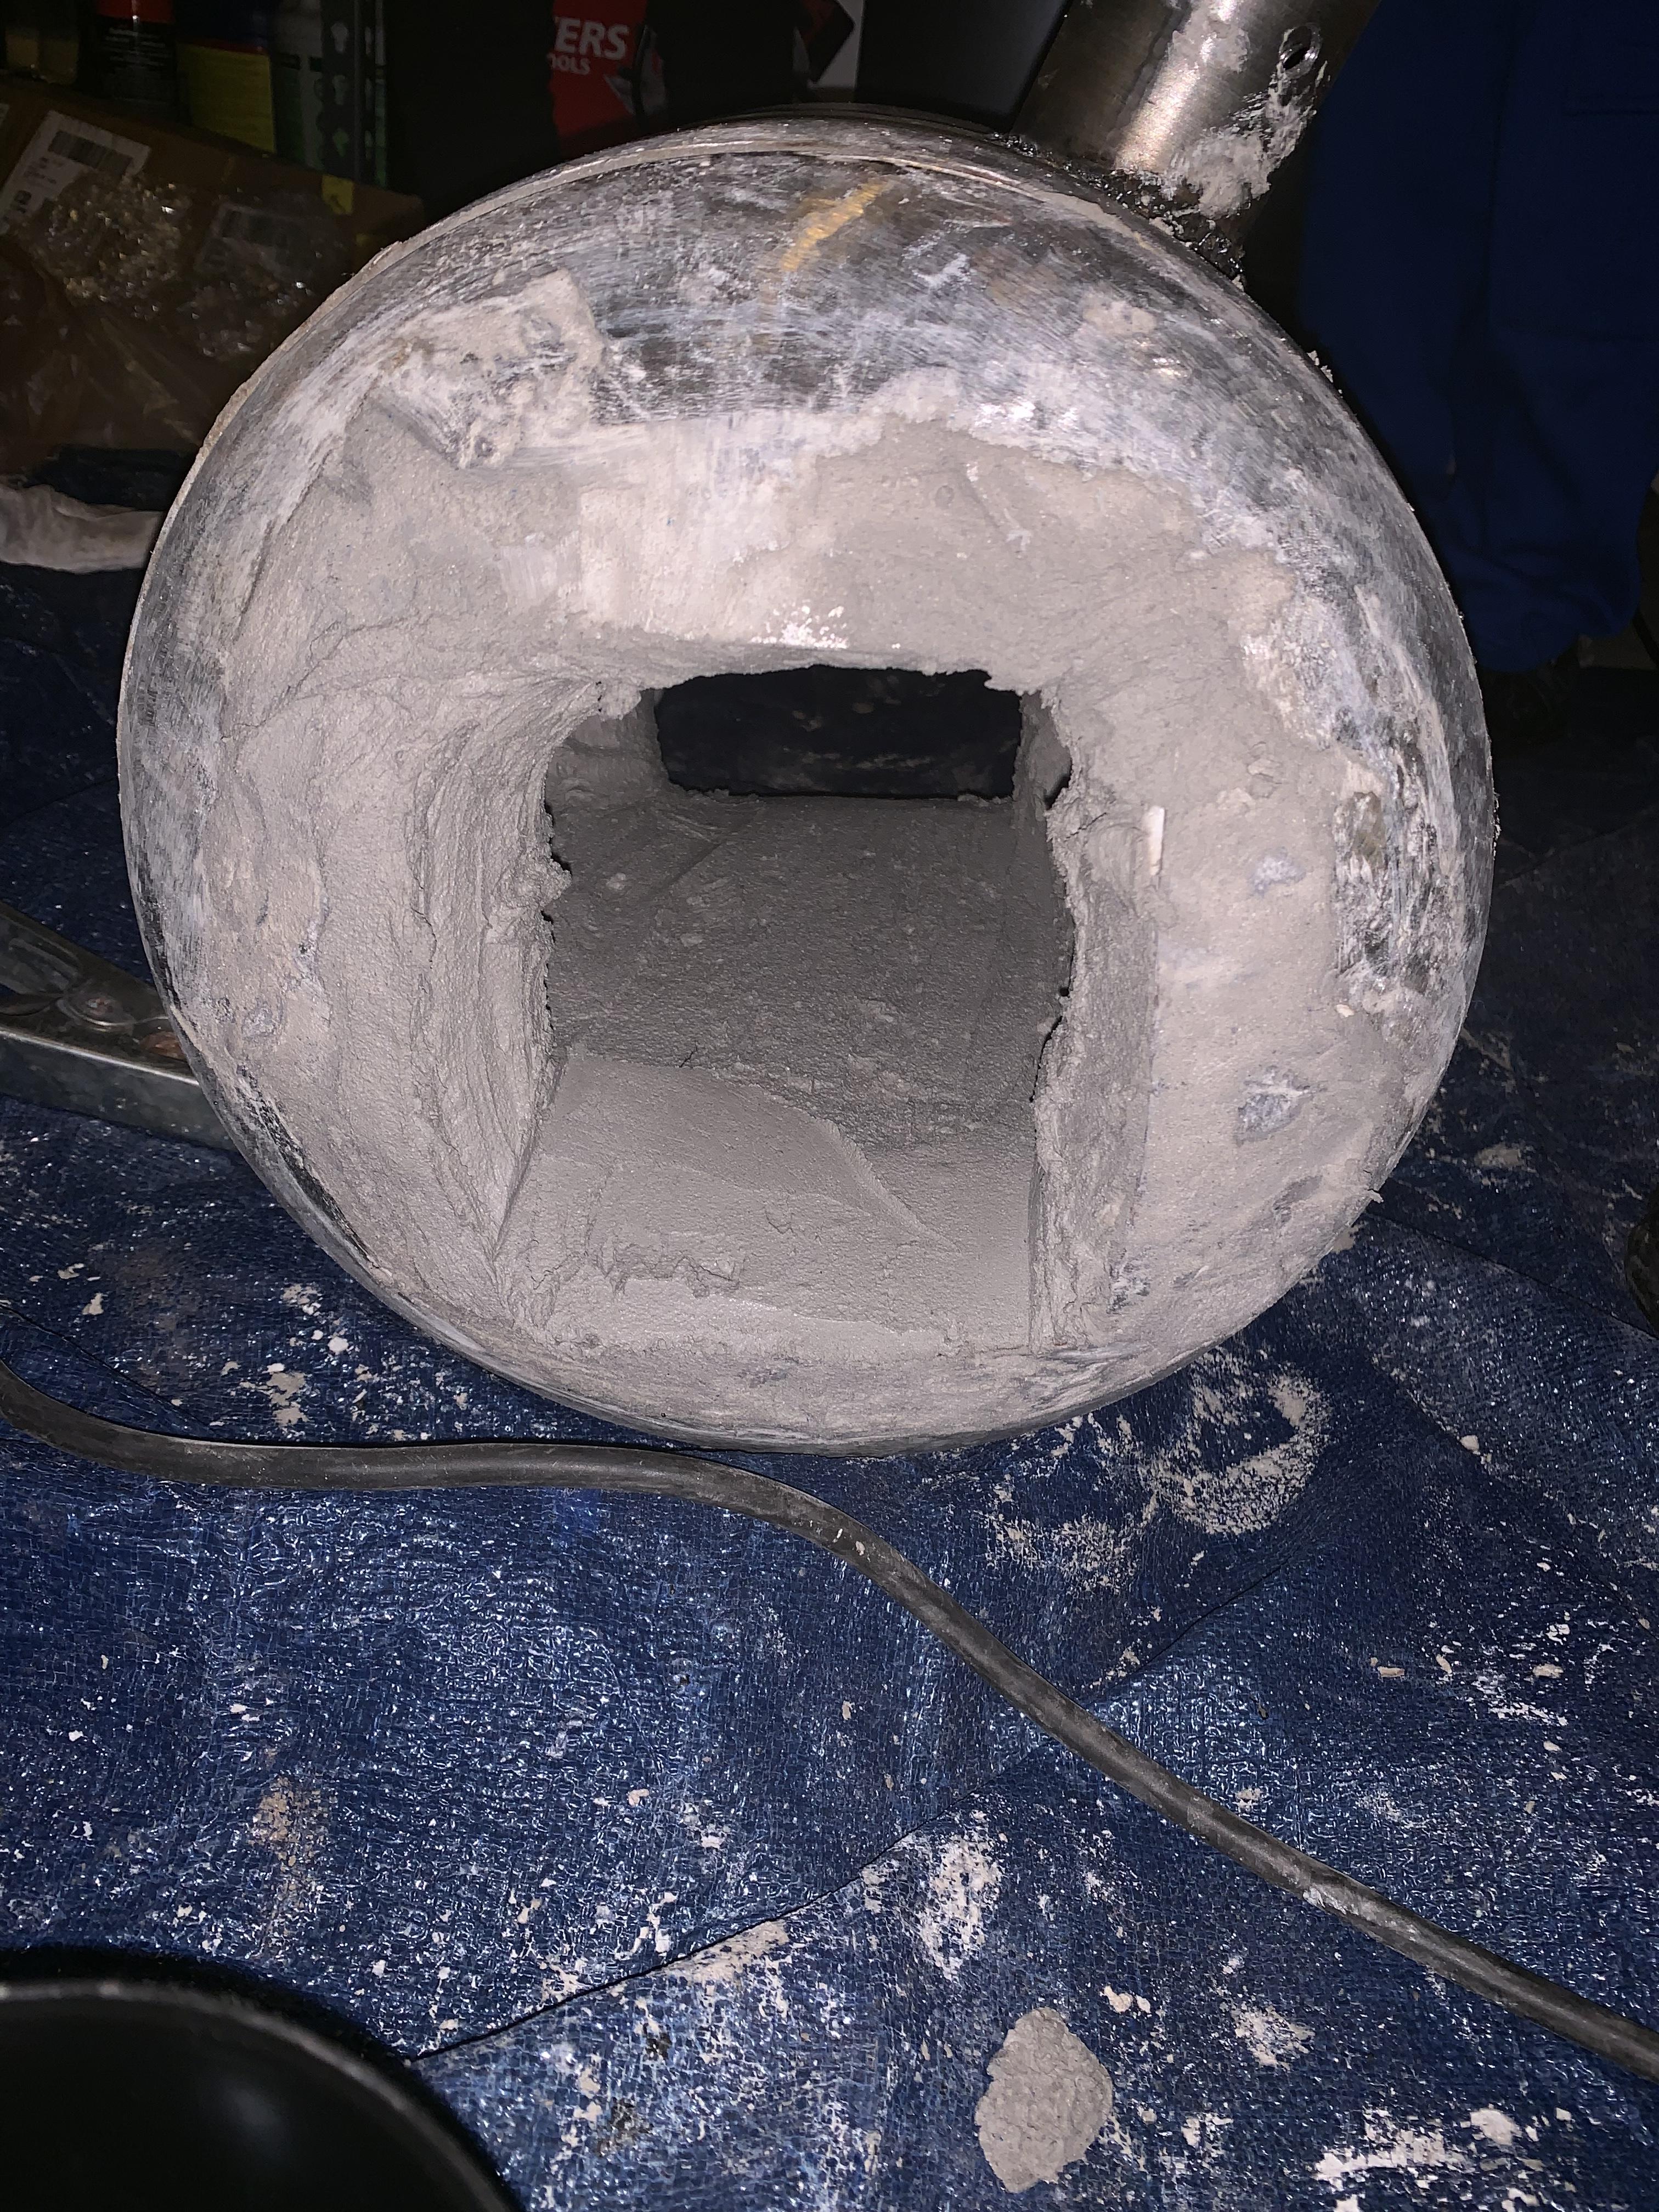
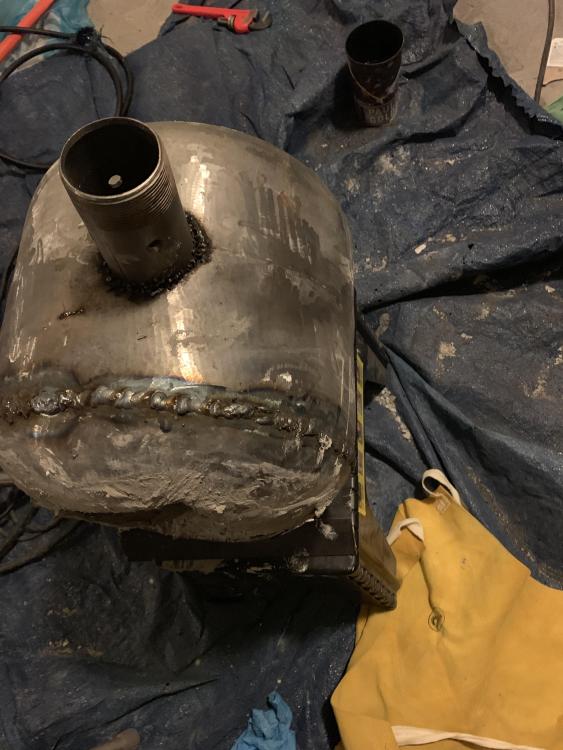
So I have finished assembly and kiln cement and have now welded the two pieces together. The bead is ugly but it does hold and fill the gaps. Next step is to fire the burner and then do refractory.

-
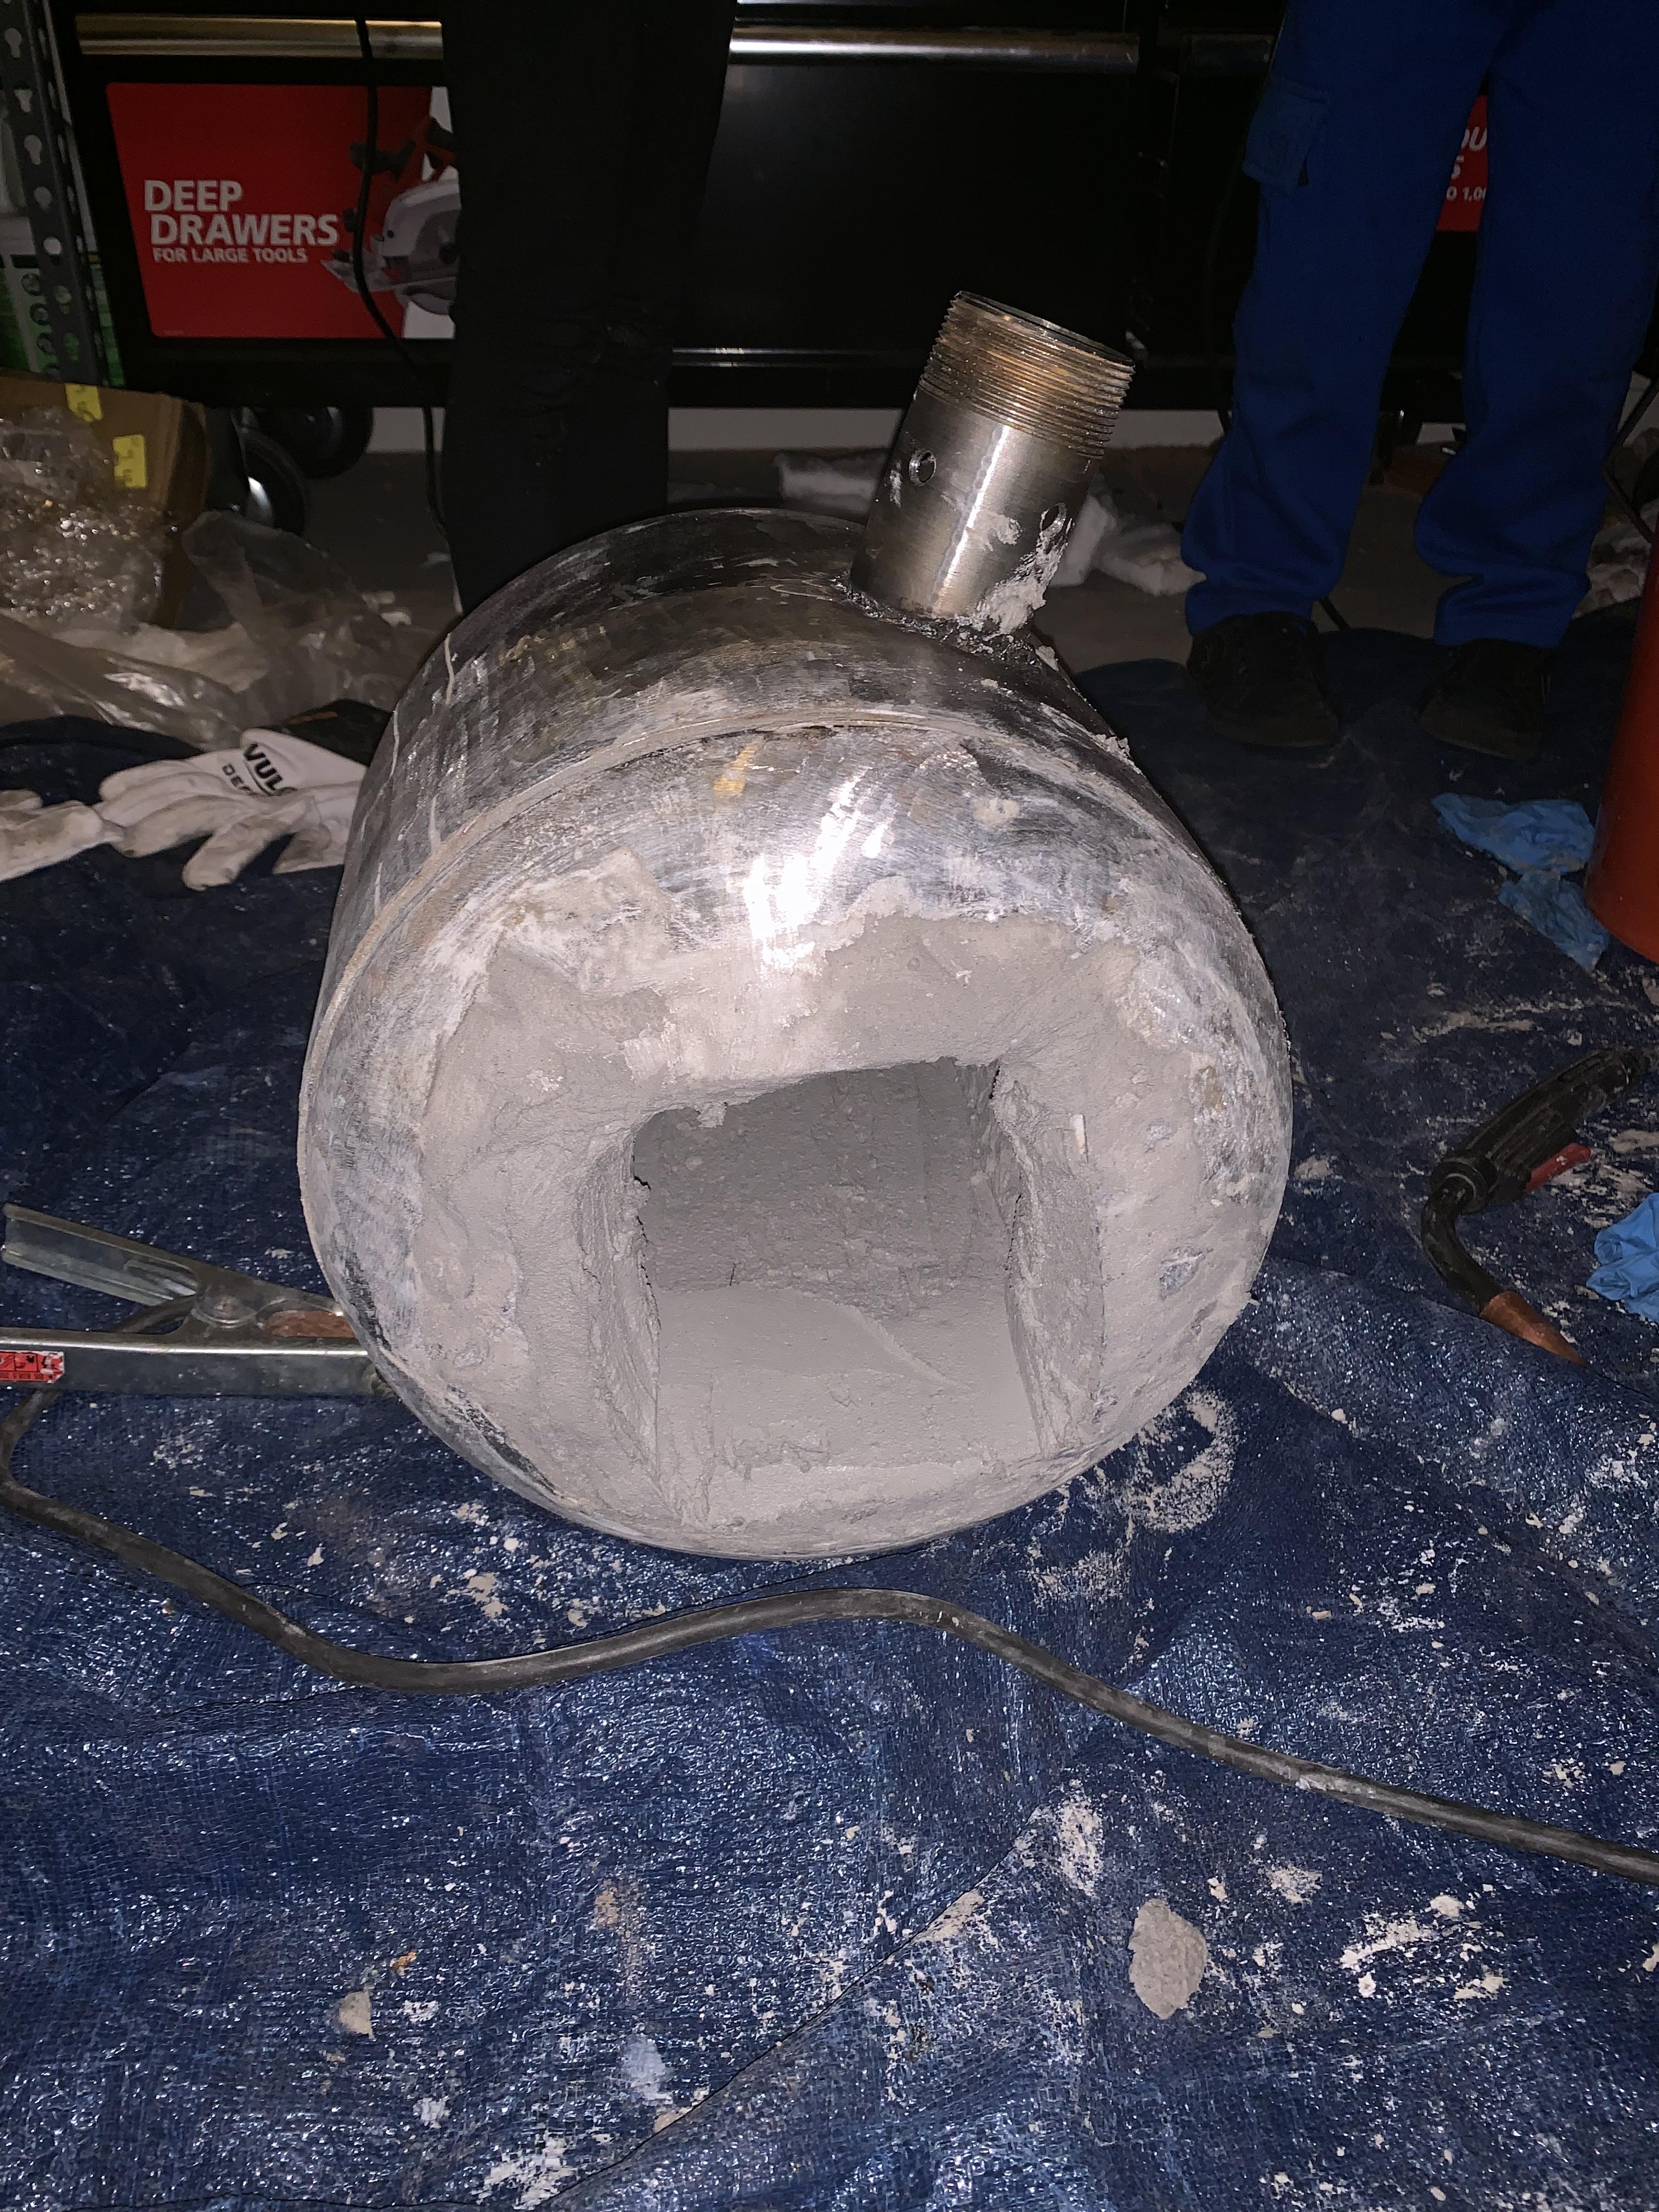
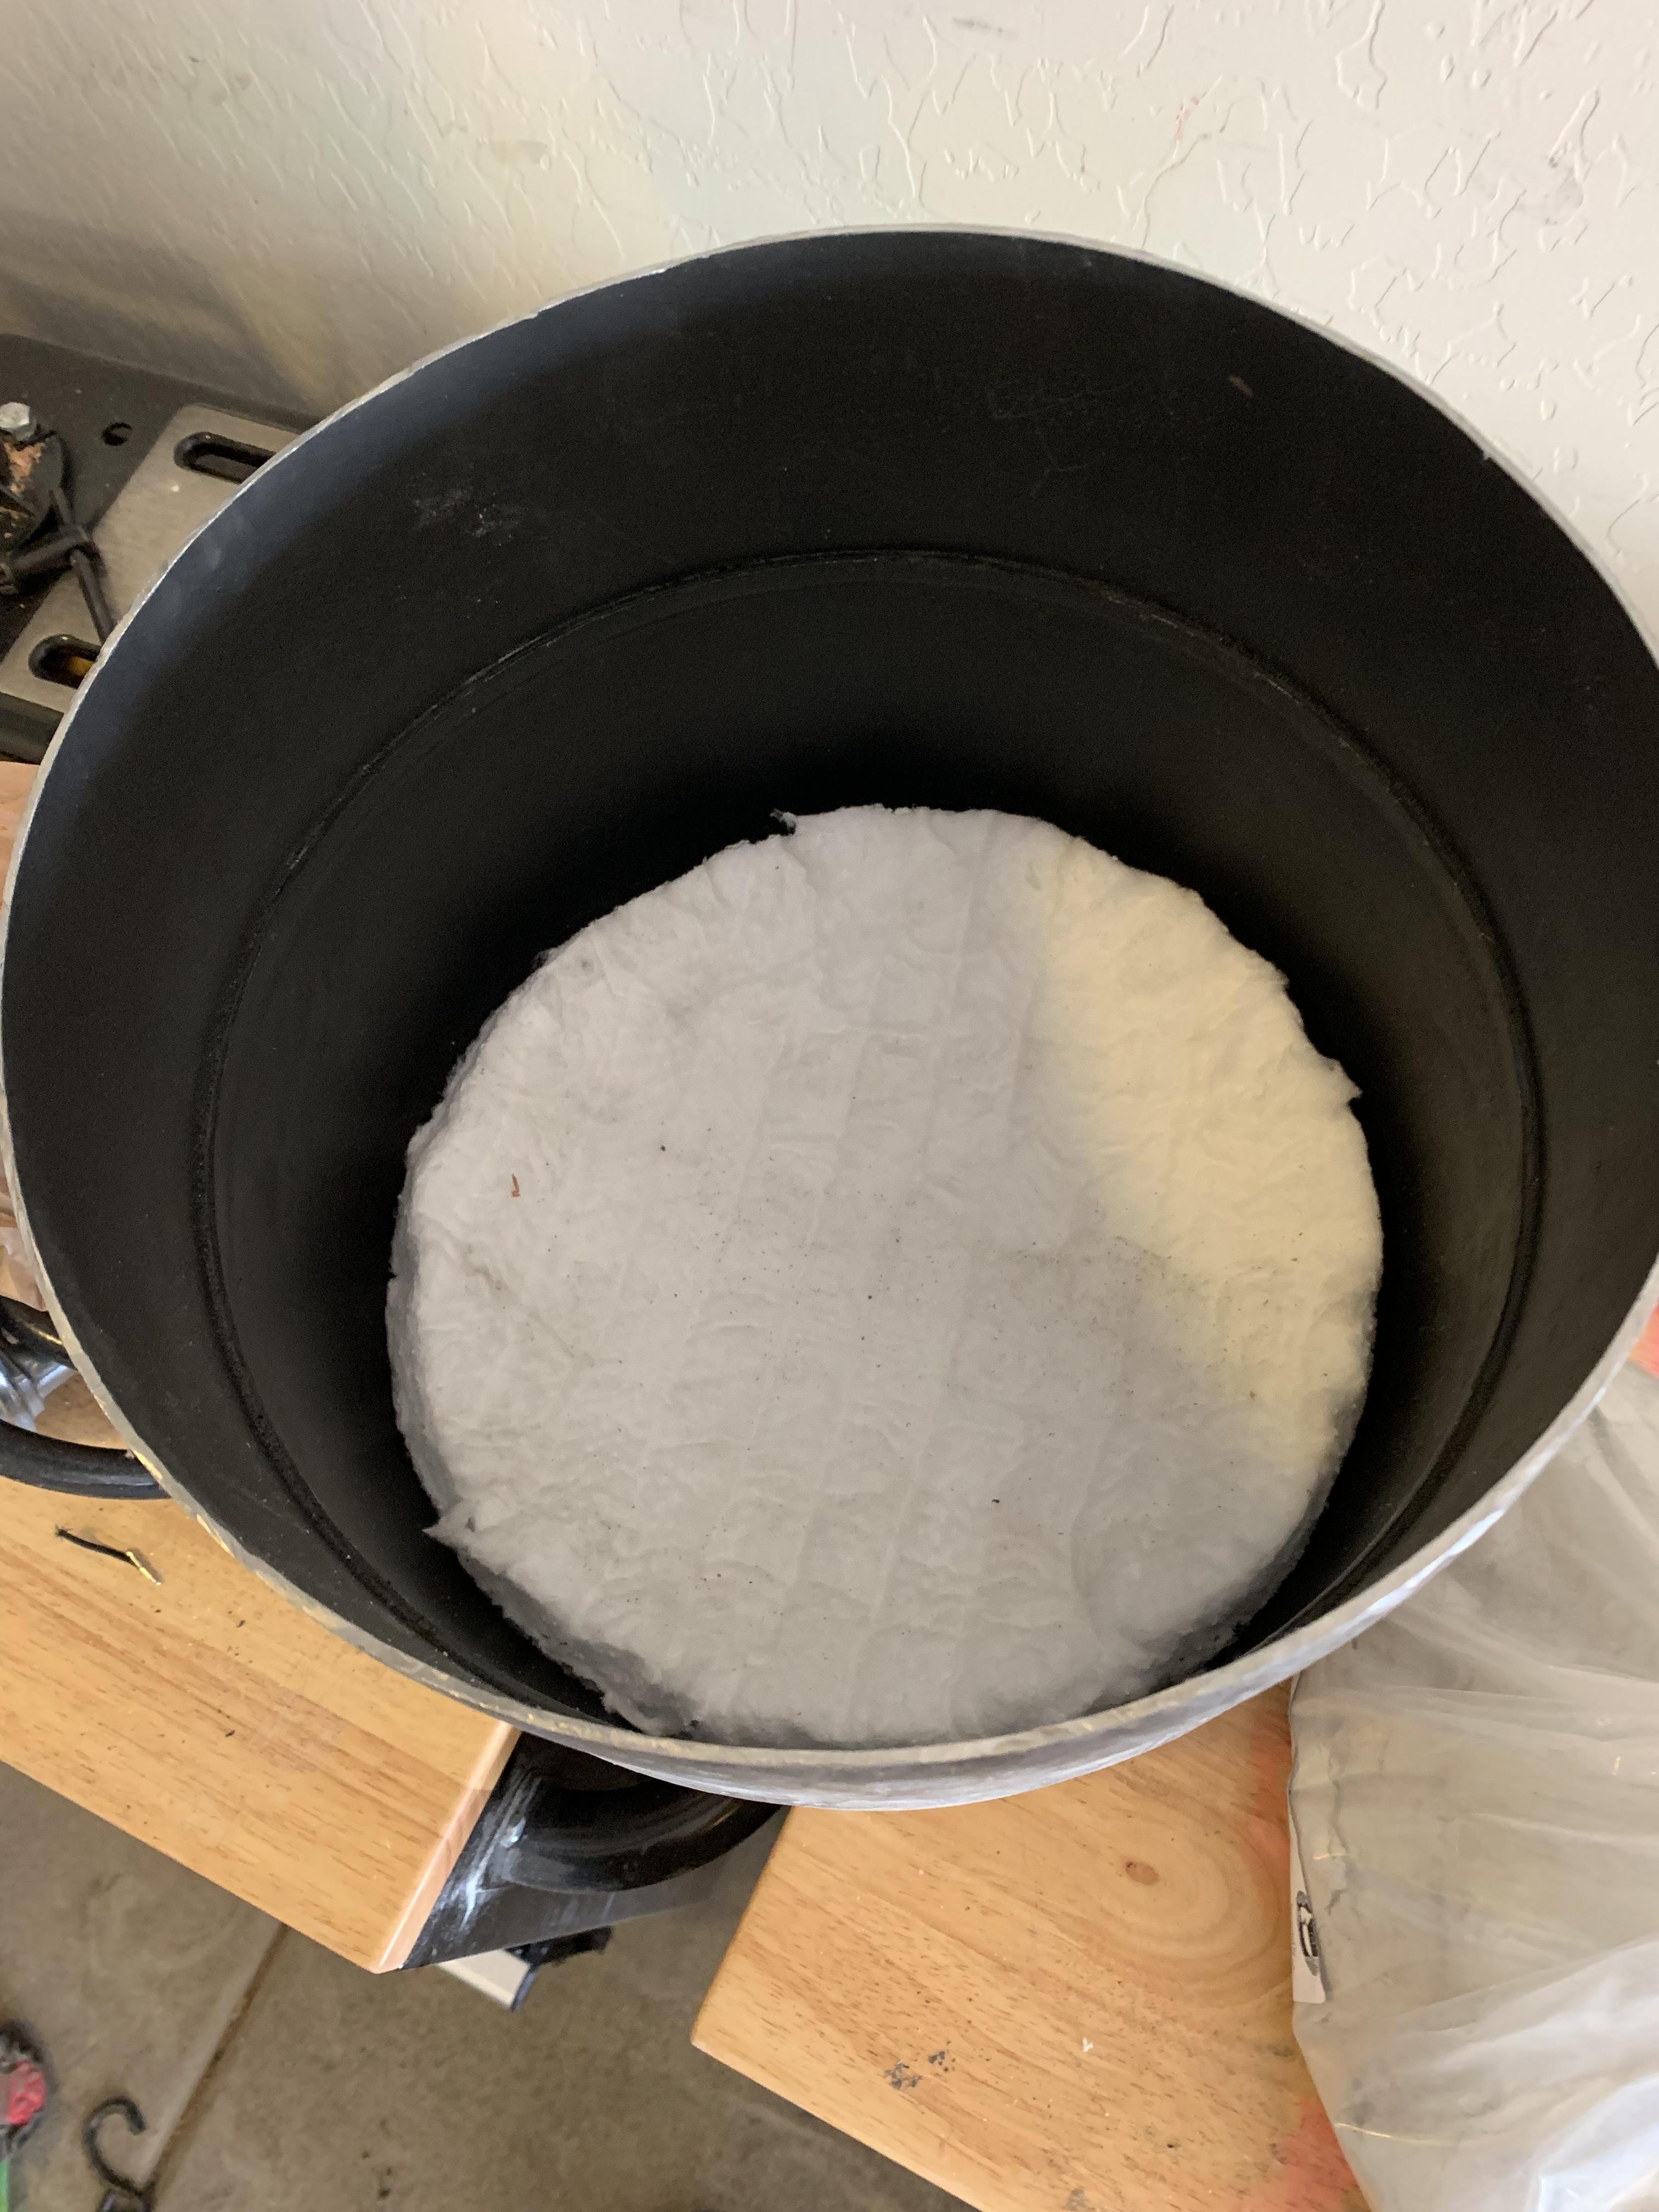
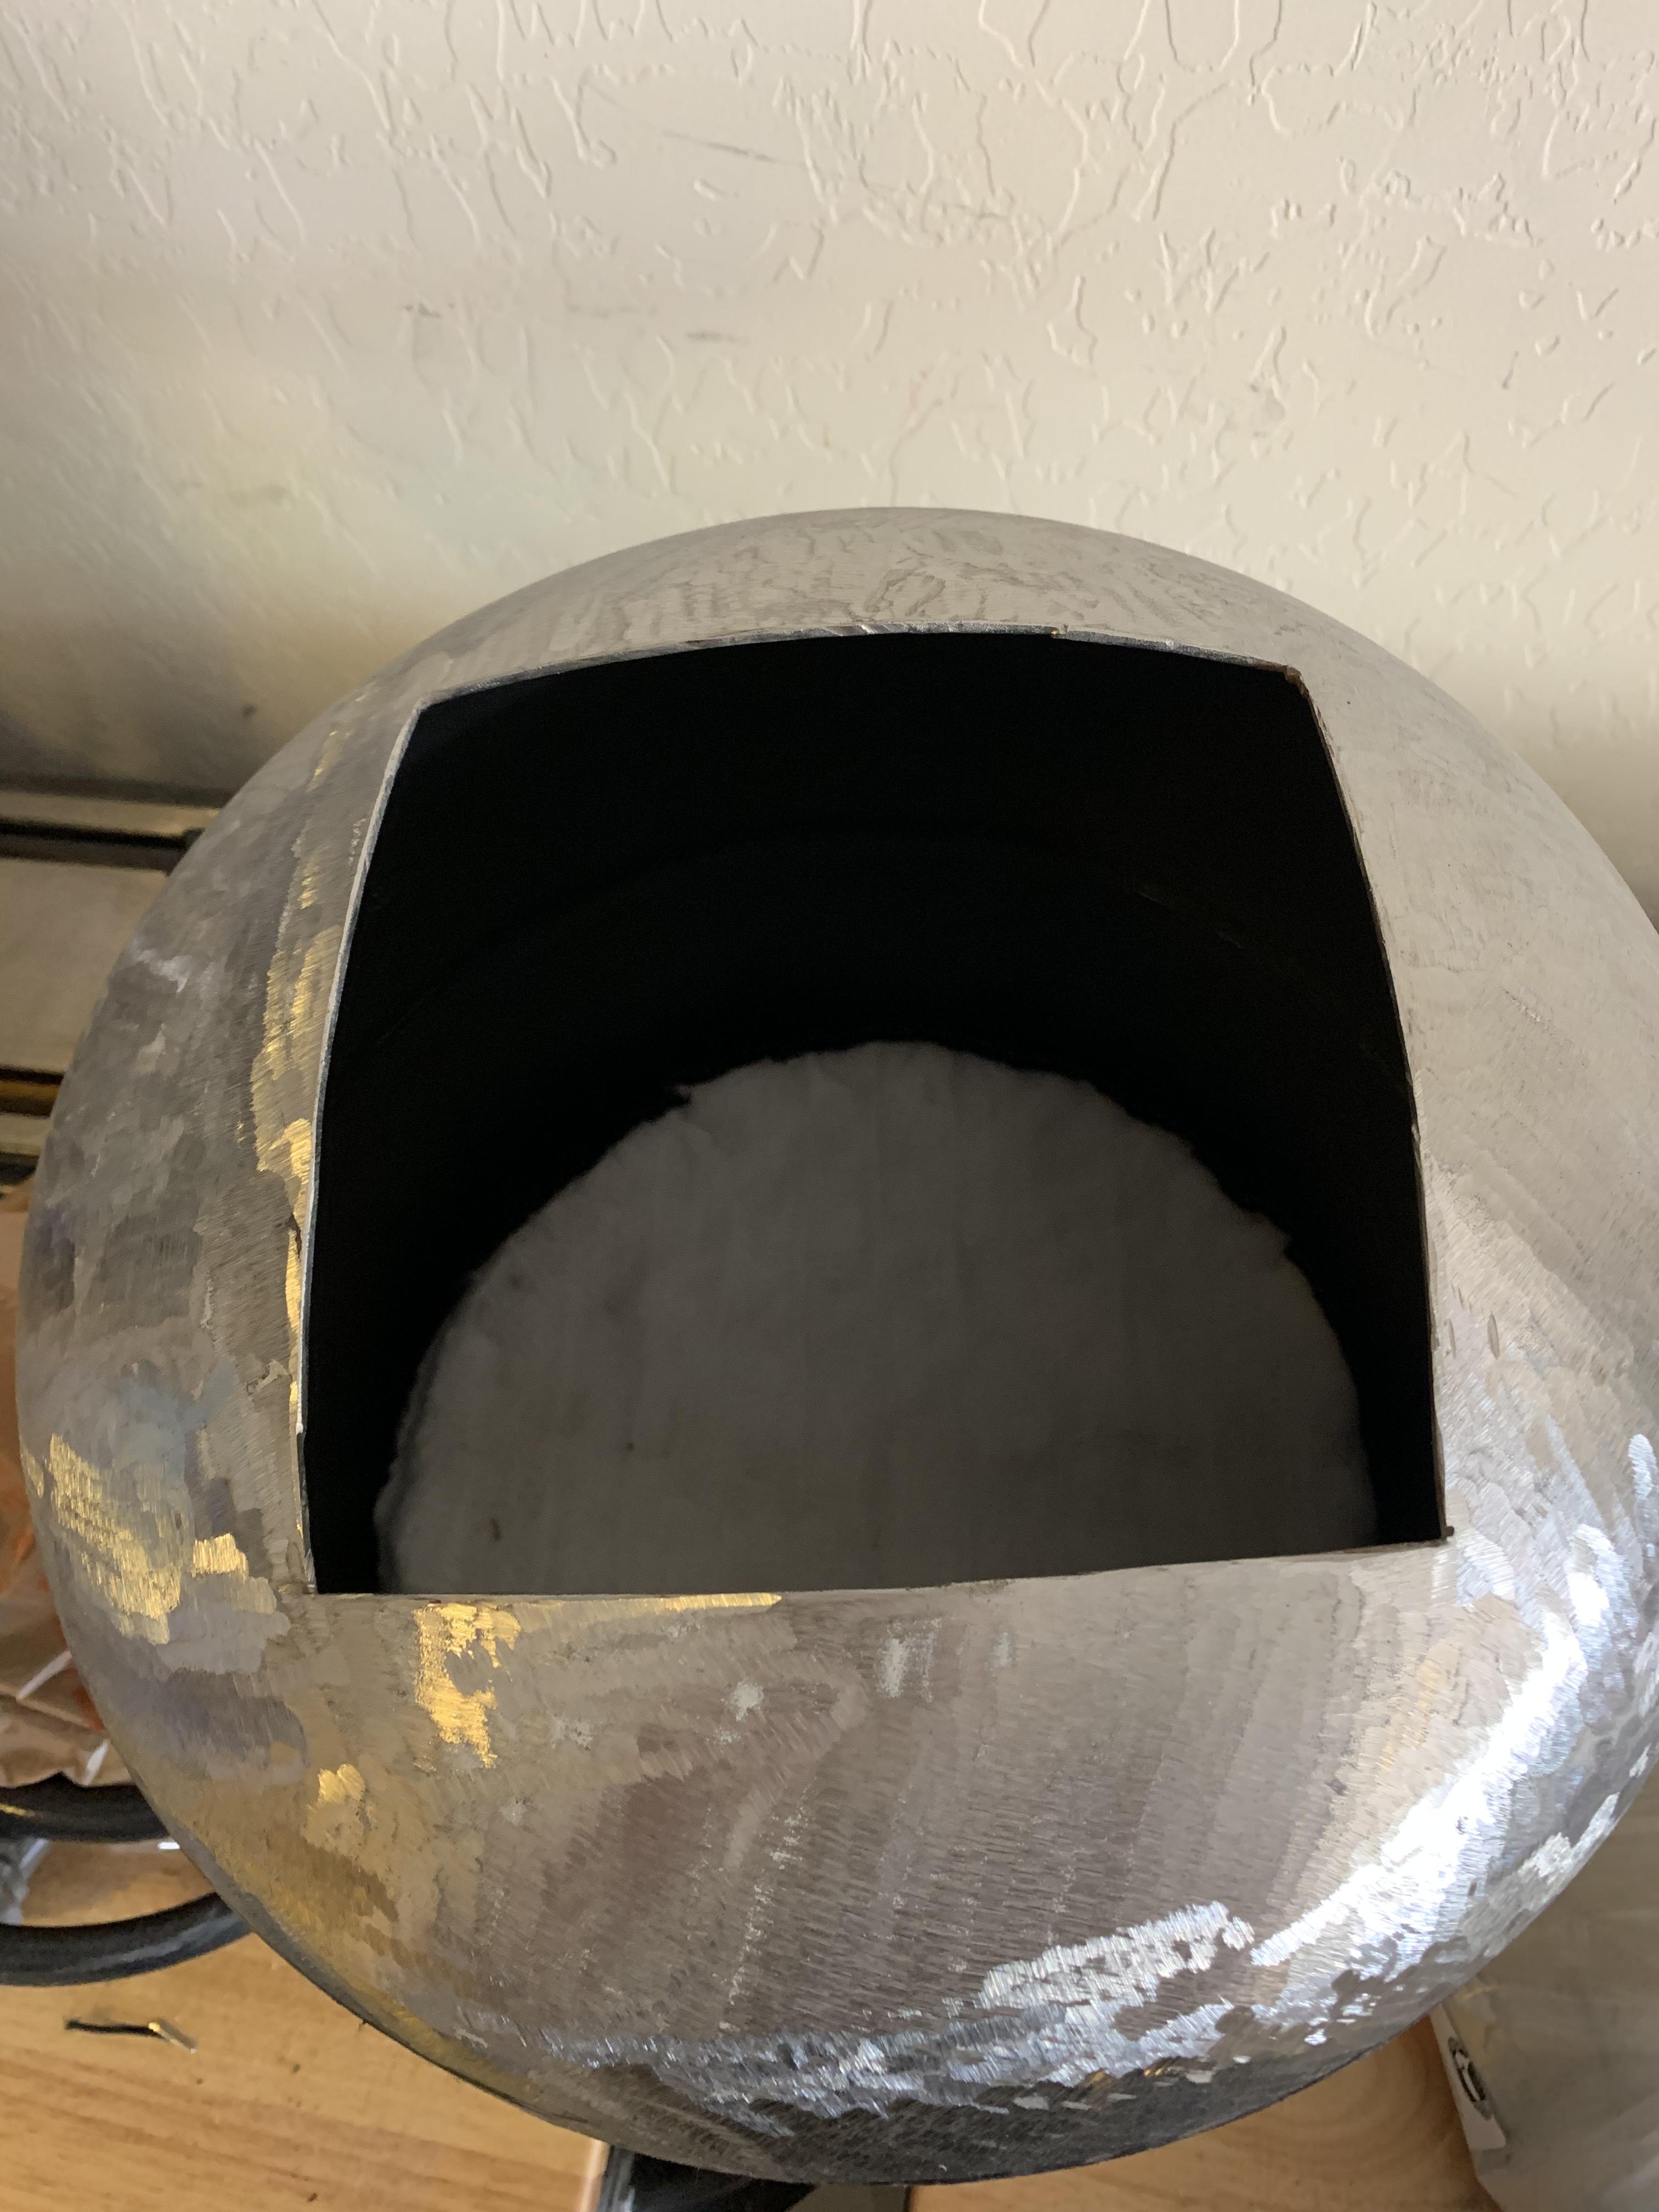
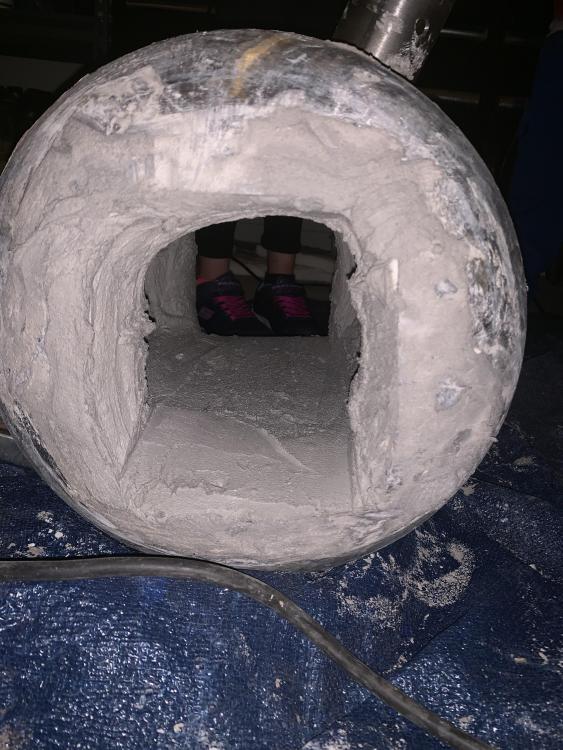
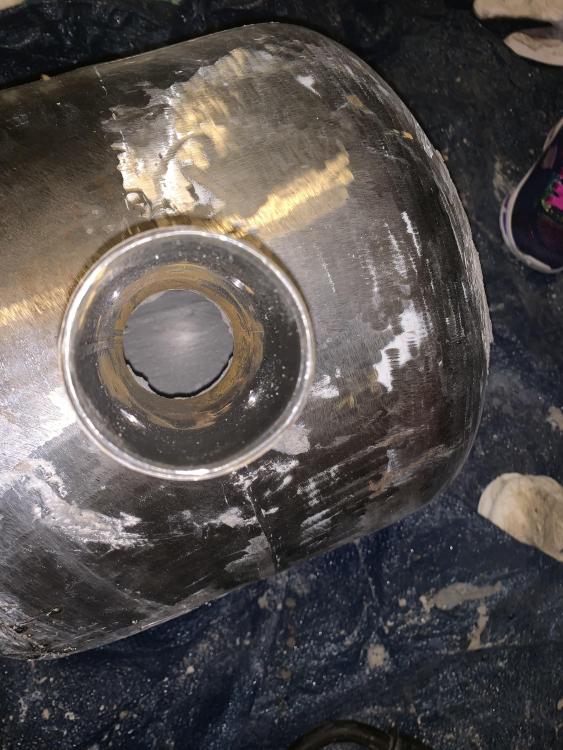
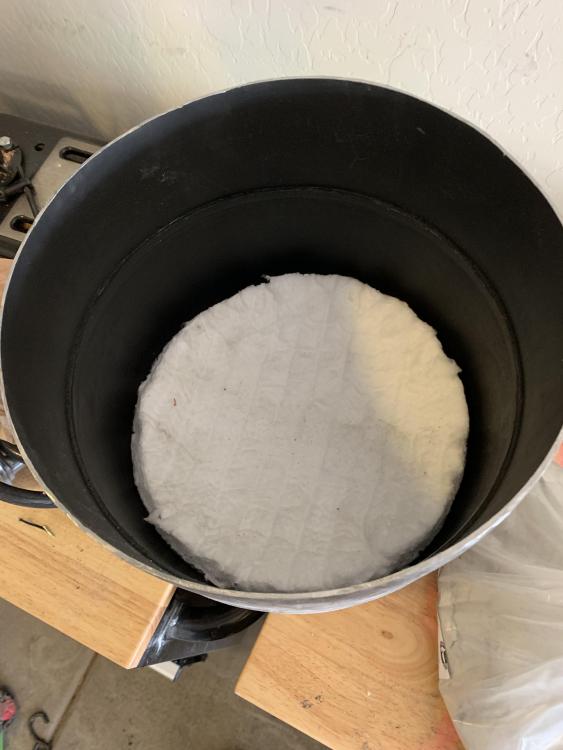
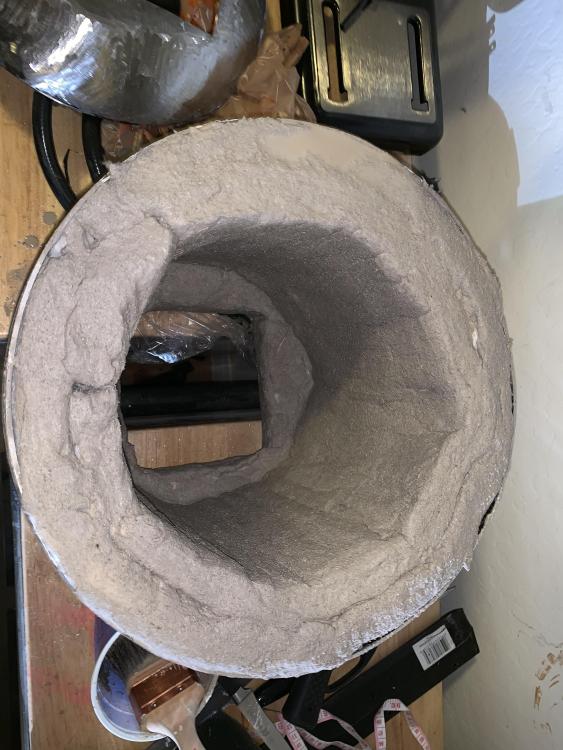
Hello everyone! Thank you all for the tips and help! I have gotten a lot of work done. I have use fumed silica to harden the cyber blanket as recommended. I also used a 2 inch wide black pipe as a burned port. I have drilled and tapped it in 4 placed equidistant apart and the burner can be adjusted to hit anywhere from the near side floor to halfway up the wall. I used straws taped to the burner to confirm aim. I welded the pipe into the propane tank with the edge just past even with the cement. I then used high alumina kiln cement made for 5000 degree kilns to line the entire forge. I also used it for the floor. The floor is even with bottom opening partially to keep the material easy to work on but mostly to close up a bit of the volume as it’s a single burner forge. I also made sure to cement over the lips as advised. I have a little bit of welding to finish to close the seam where I put the two pieces together, but overall it seems to be coming together well. The stand is made of angle iron sitting like a point up triangle, 3 pieces. Think an M but with one extra hump. I am cutting in the reverse image of the tank and tacking it to the angle iron. All 3 pieces of angle iron are welded together. The burner is a devil forge DFC. On to some pictures in progress.


-
For the record the one inch pipe is one hundred percent not gonna work! It needs to be closer to 2 inches it looks like. I will re-evaluate size once the burner gets here. I have not cut a burner hole yet so no problems there. I can move it by washing off the marker. Beforw I make another mess up like using $30 worth kiln wash for nothing, what types of things do you recommend for the floor? It sounds like my cast floor may not be best?
-
Thanks guys I will fix that mistake! That’s the main reason I posted it. I have already marked out the entrance for the burner and was planning on doing a 45 degree angle on the halfway point to swirl the flame. From what I have been reading that is a good way to avoid hotspots? I am currently building a frame out of angle iron with crescents cut into it that match the curve of the tank. I was planning on putting that frame contraption on top of a rolling steel cart with wheel locks. The intake tube/mounting tube for the burning is planned to be a 1” black steel pipe with for tapped holes for bolts to hold it in place. Thanks guys I will fix that mistake! That’s the main reason I posted it. I have already marked out the entrance for the burner and was planning on doing a 45 degree angle on the halfway point to swirl the flame. From what I have been reading that is a good way to avoid hotspots? I am currently building a frame out of angle iron with crescents cut into it that match the curve of the tank. I was planning on putting that frame contraption on top of a rolling steel cart with wheel locks. The intake tube/mounting tube for the burning is planned to be a 1” black steel pipe with for tapped holes for bolts to hold it in place. Thanks again for the advice! And see Frosty I told I’d screw up soon
-
Hello from AZ everyone. I started with a standard barbecue propane tank, cut the collars off and made duel opening measuring 5”x5” which I will adding doors too later I have cut off one end to get the lining and refractory right and so far I have just applied the htc 100 to the inswool. I will by updating the thread as I make progress. I have ordered a burner from devil forge as my husband has requested that I not use my homemade frosty burner in my first attempt I think he’s nervous... The next step is lining, buttering and painting the top piece.


-
It was amazingly fun and the help was invaluable. I will definitely be going to the next one.
-
Thanks guys! Full disclosure it was at a forge night so there were guys there giving tips.
-
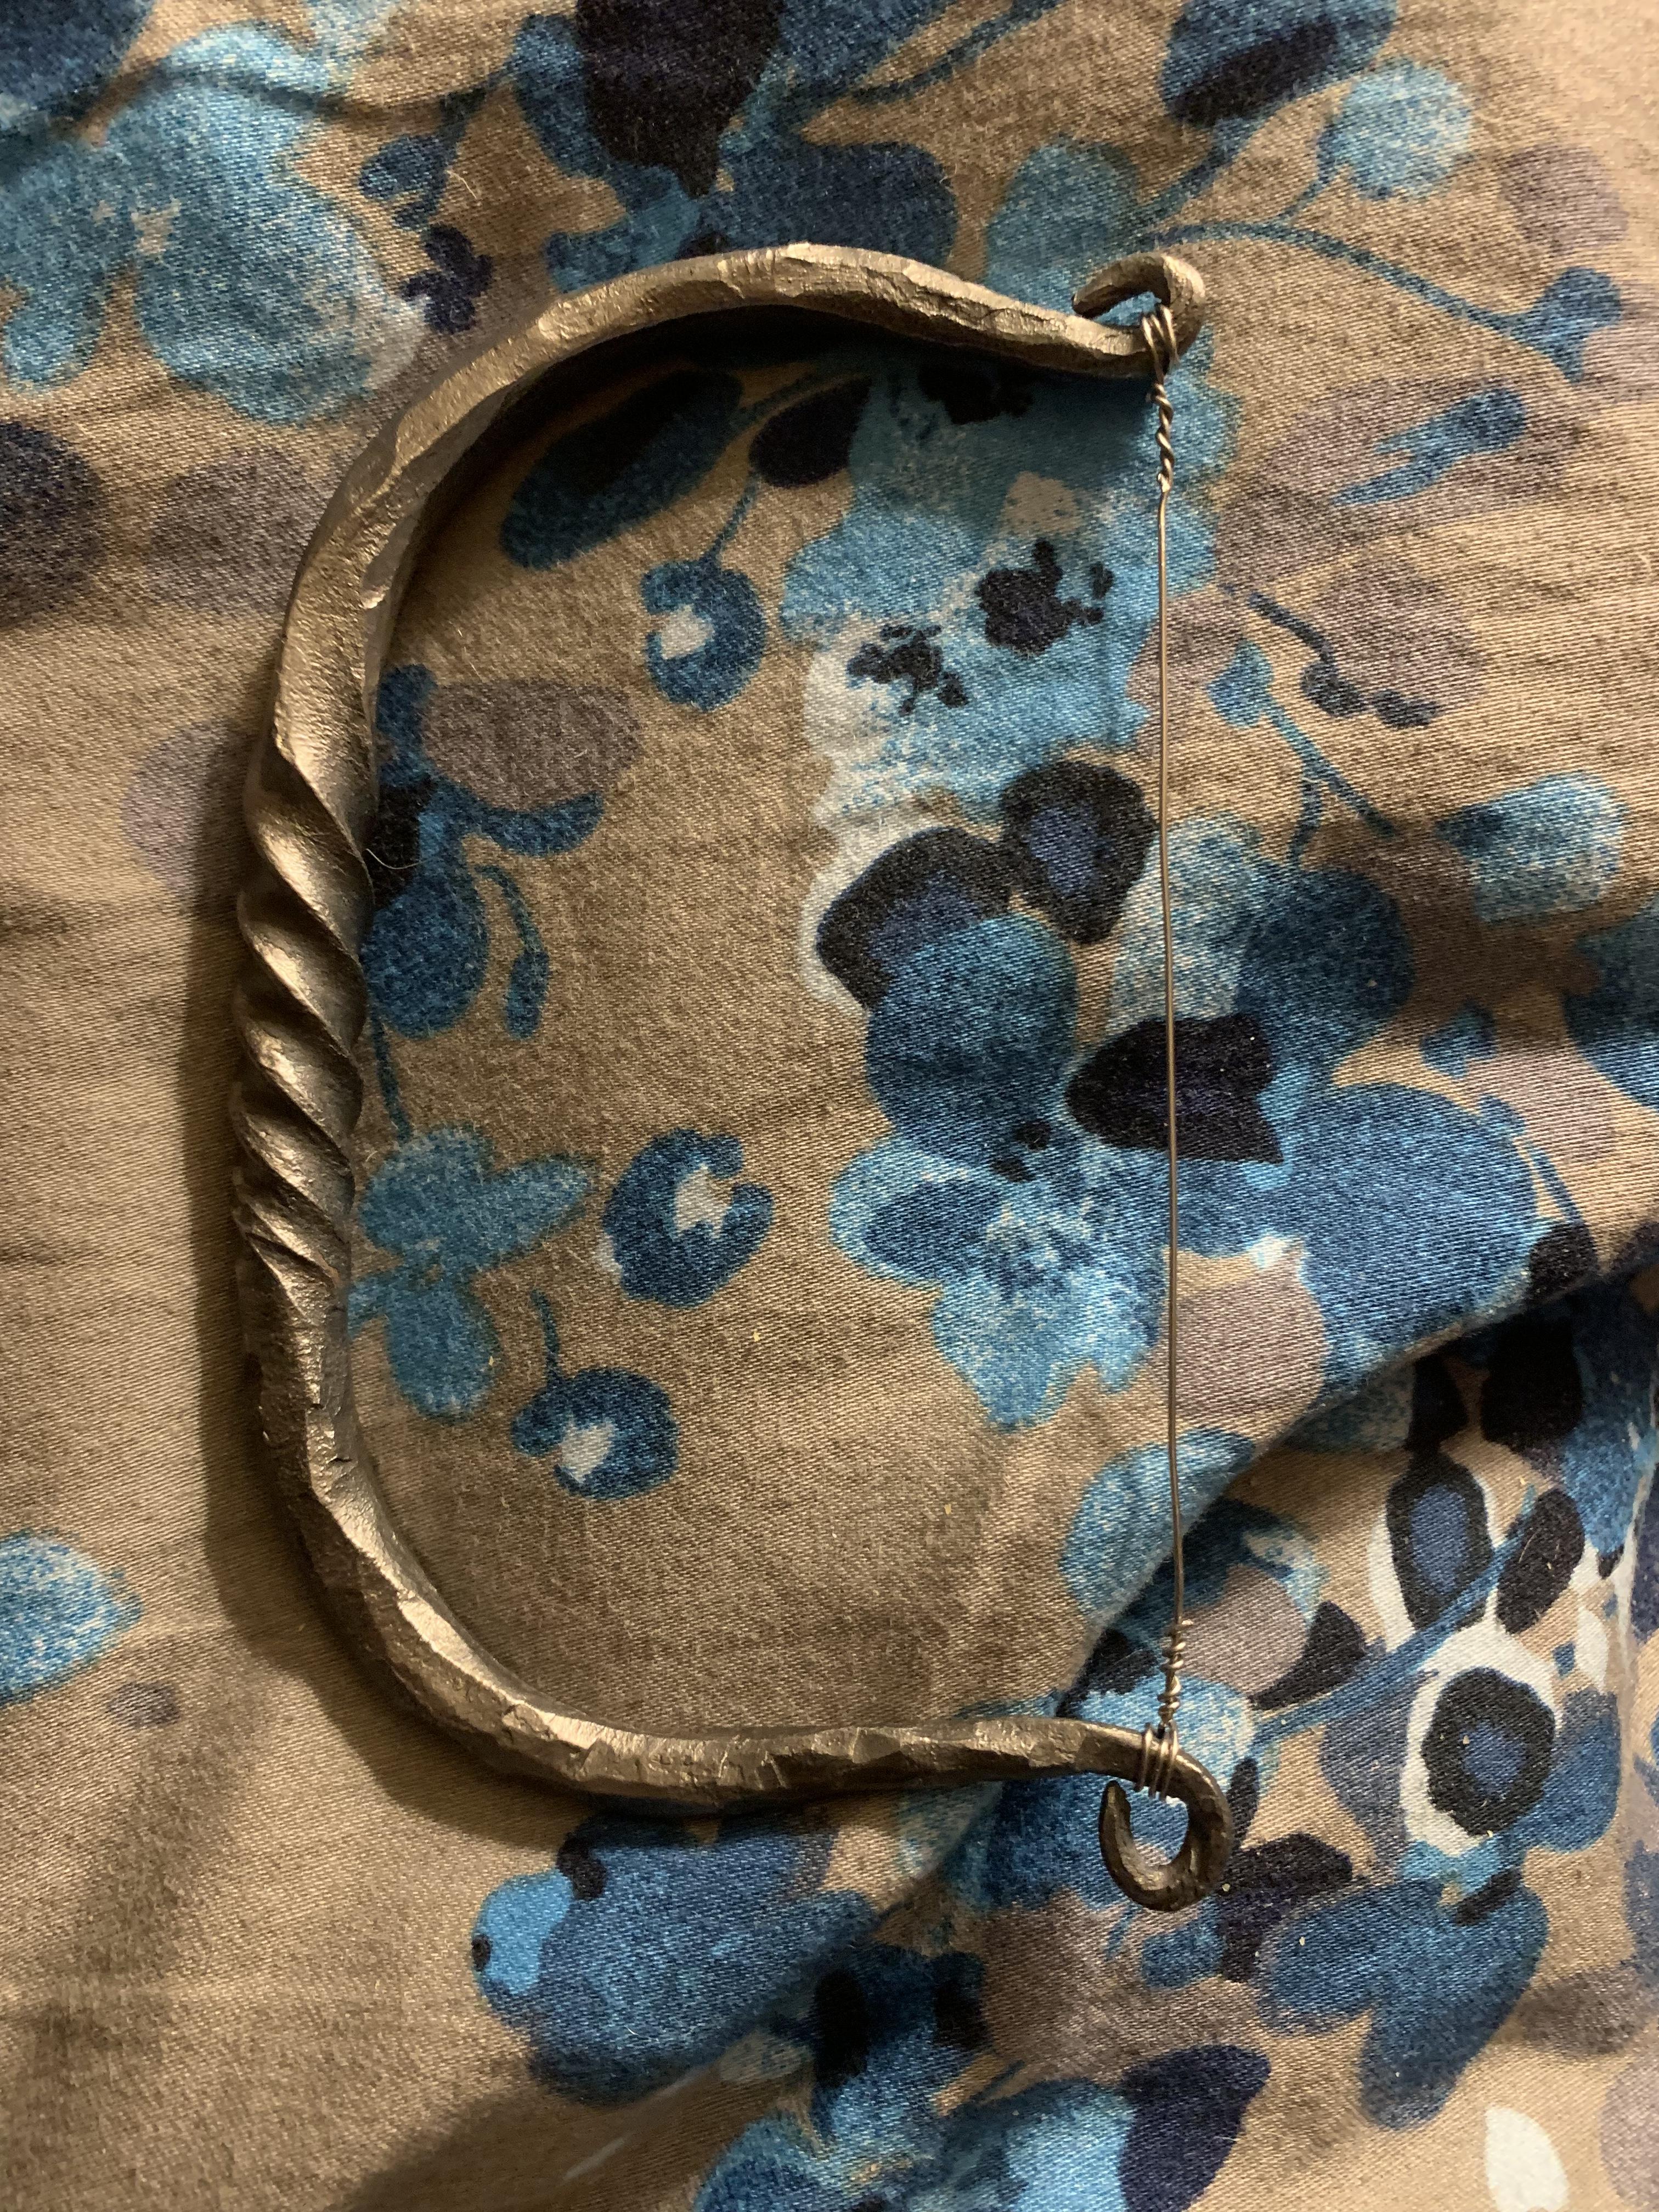
Hey guys. Here is a picture Of the race car. Also I made my first forged object. A cheese slicer out of 6 inches of 1/4 inch mild steel bar.