Mycelium
-
Posts
12 -
Joined
-
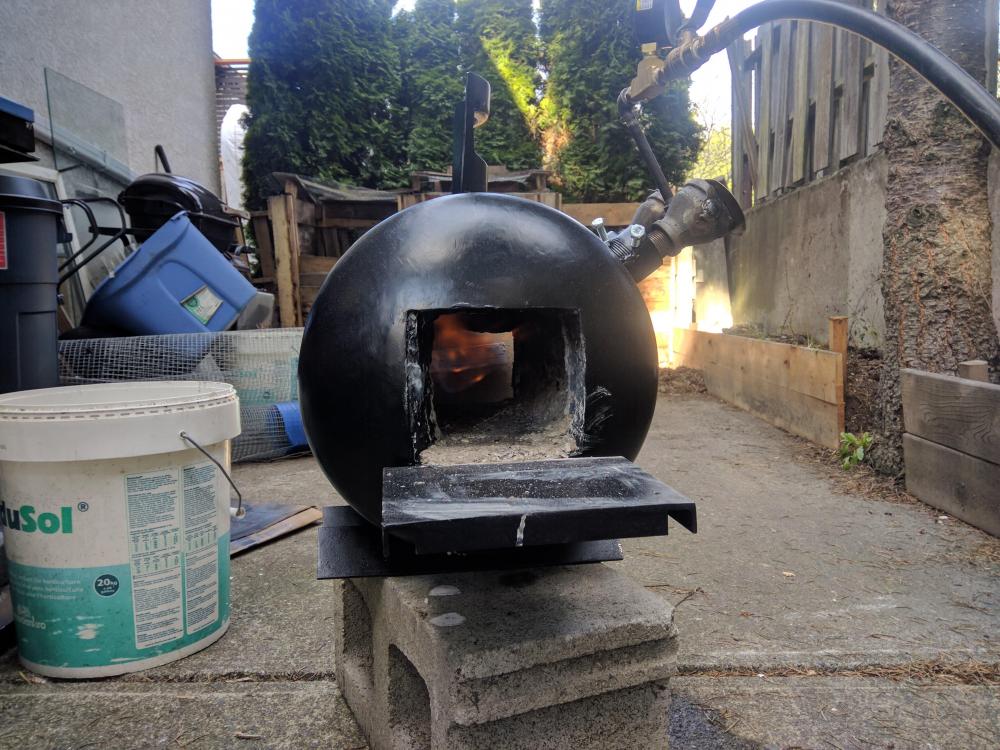
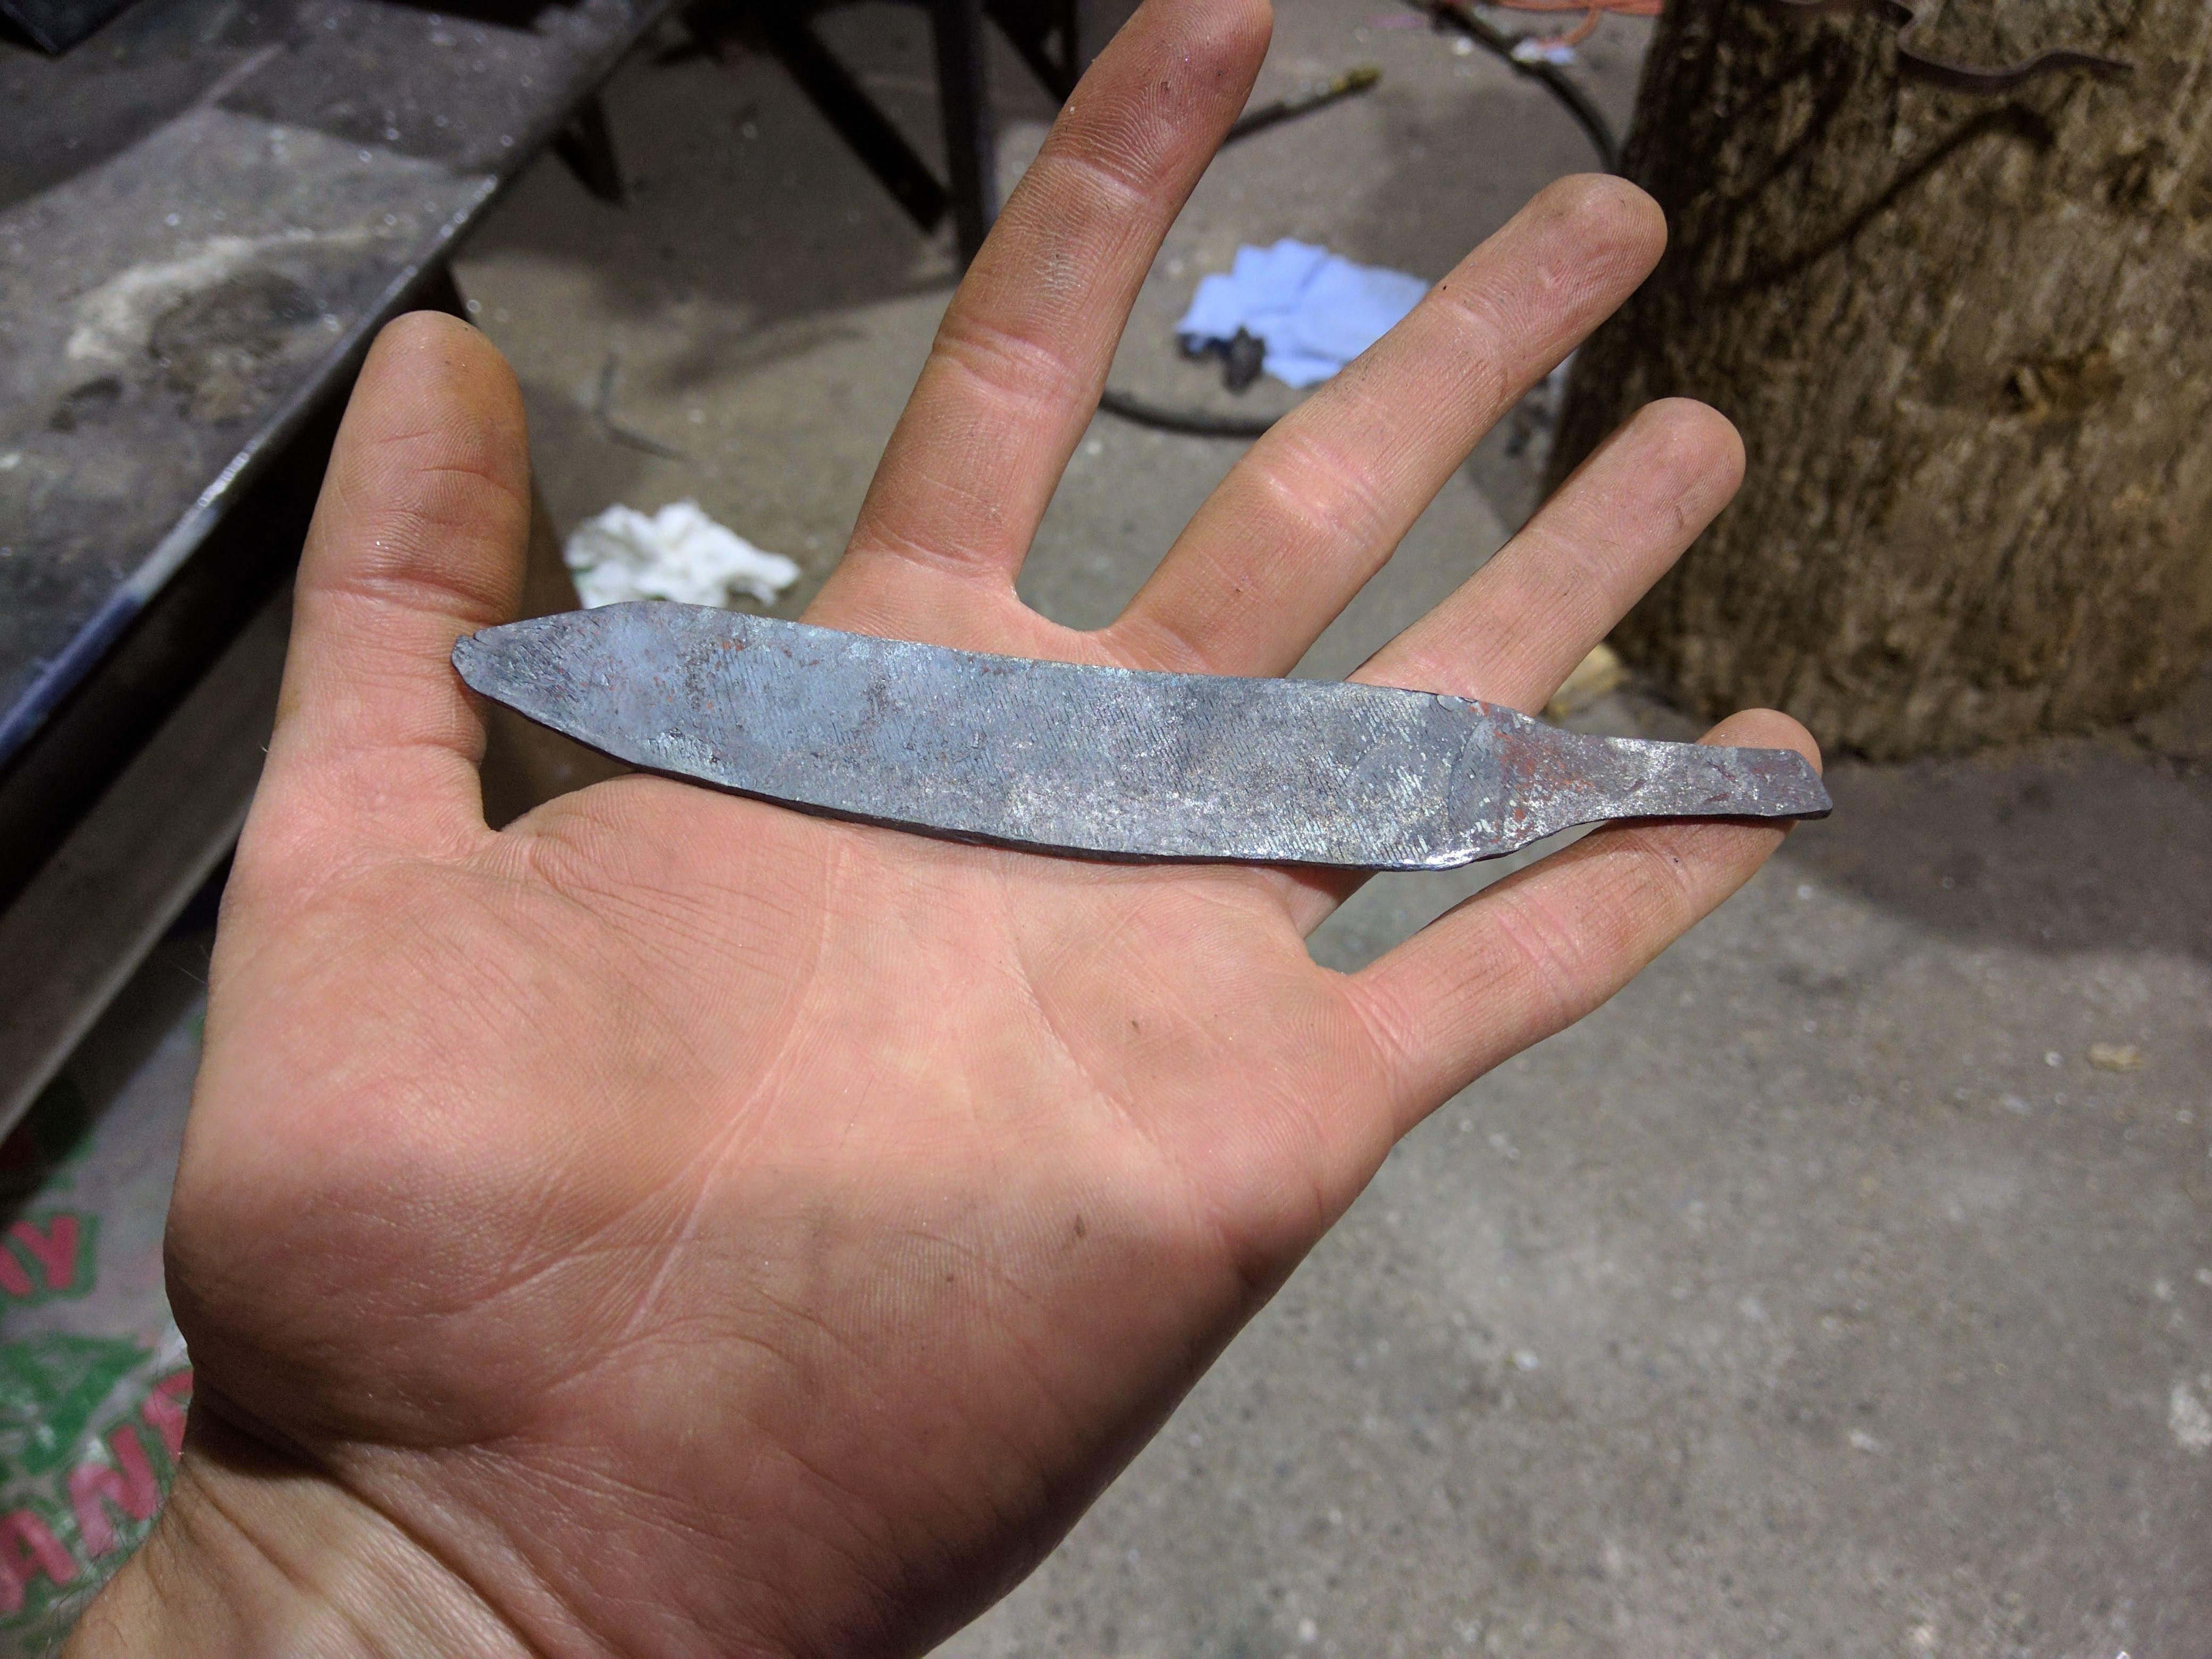
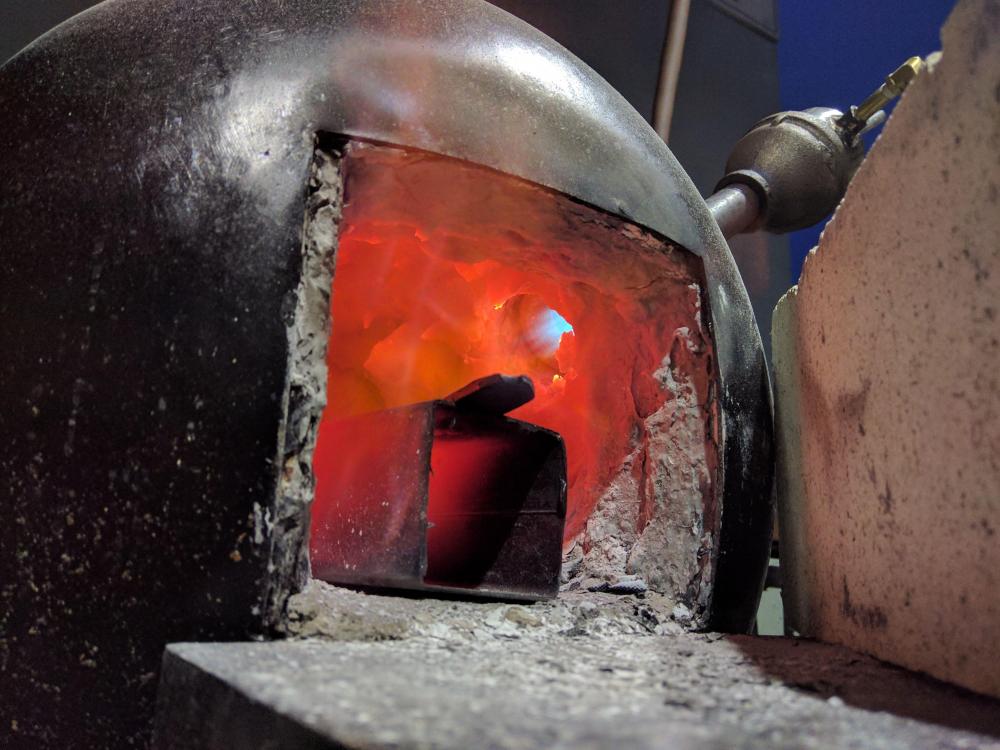
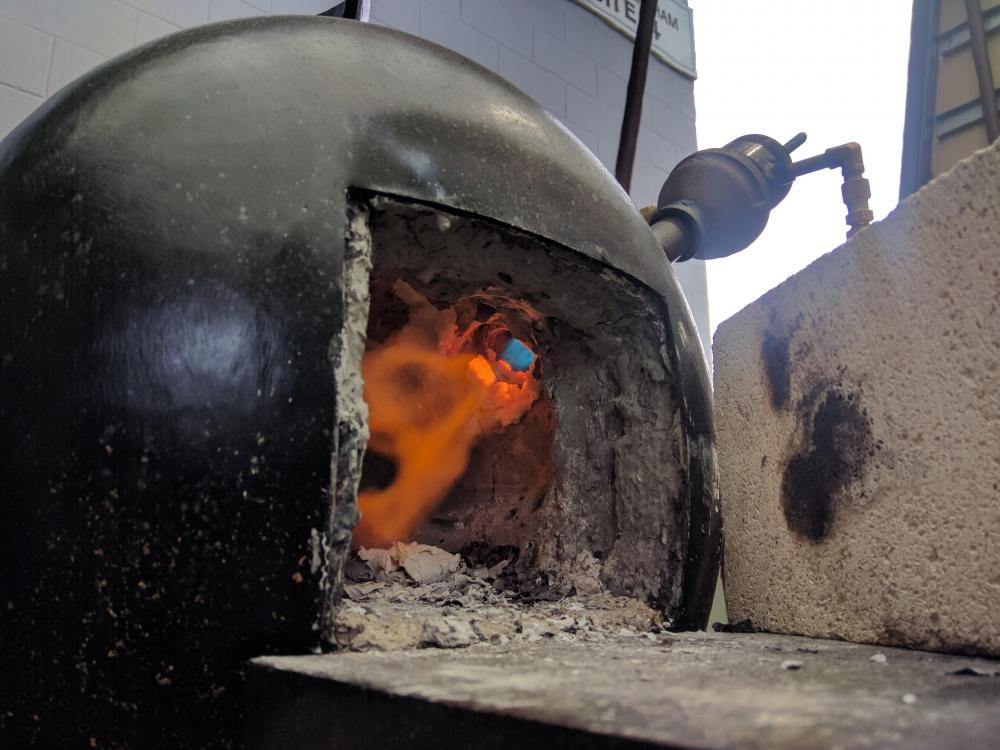
It was xxxx near empty. Just enough in there for the burners to light but not able to supply the necessary pressure to run hot hot. Working great now! Thanks everyone for the troubleshooting help : ) Some tweaking will definitely be necessary. I'll have to get in there with some extra Kaowool and refractory paint to protect the flare. I ran it for 40 minutes or so last night and the flare defs got up to an orange heat. Also had a go at beating out a knife shaped object. Rather crude but felt like an appropriate way to celebrate. Now for the hard part. Learning to blacksmith

-
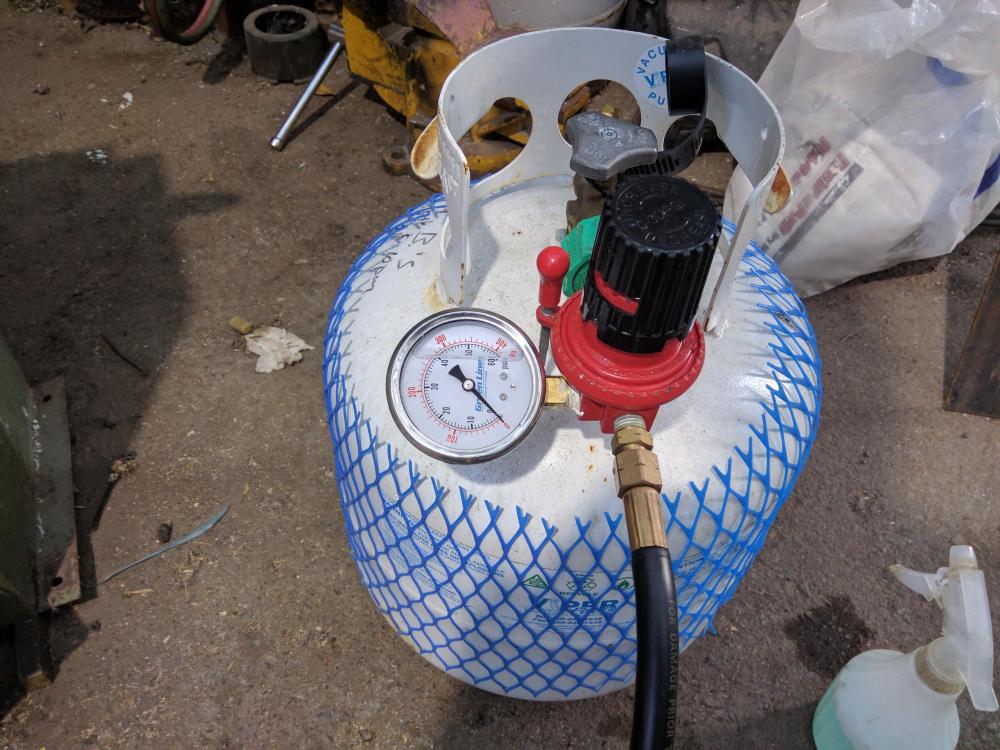
It's definitely the tank. Might be that it's low but regardless I borrowed another tank and now the burners running a high enough pressure to blow itself out. Going swap out the 0.023 for something bigger to see if I can stabilize the burn. Edit: I am running a 0-30 high pressure reg already.
-
Should I be seeing the same line pressure as what my regulator is set too? I would assume so but maybe this is a counter intuitive thing at there's going to be a pressure drop in the line? Despite my best efforts googling I can't find any useful source of information on trouble shooting high pressure propane setups. It's all BBQs and residential tanks with none of the articles providing any real information. Maybe I'm just using the wrong search terms.
-
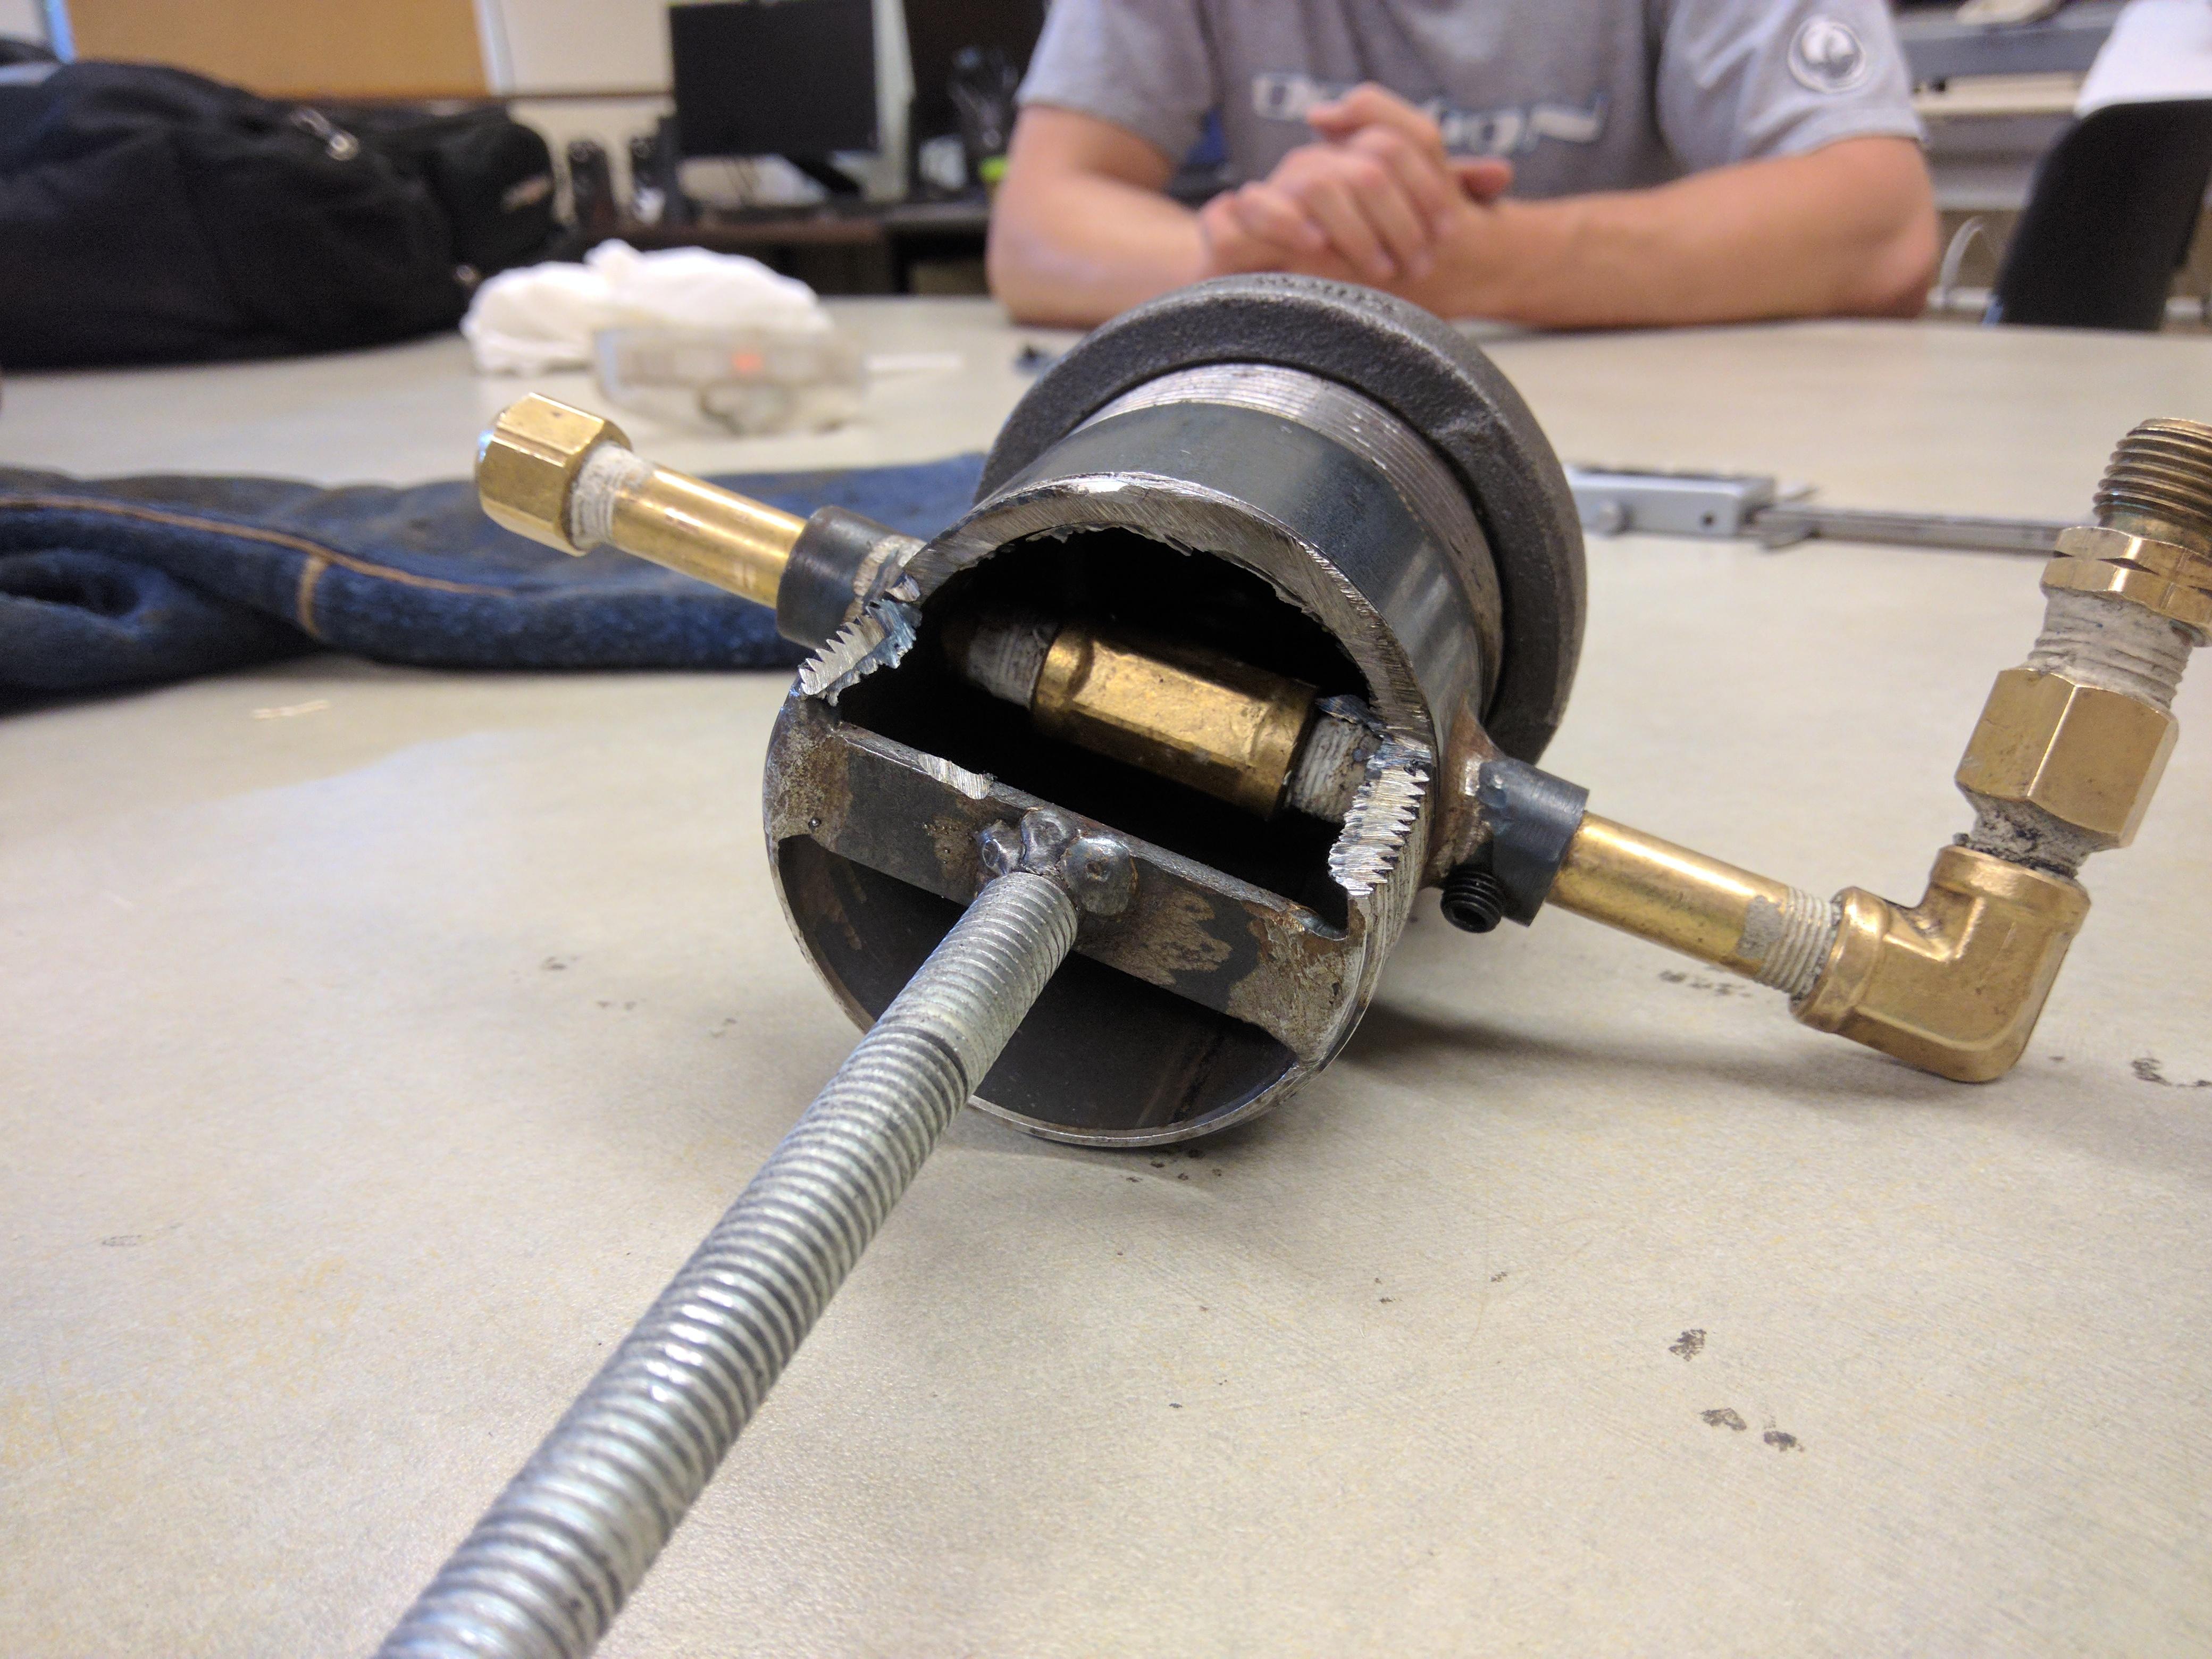
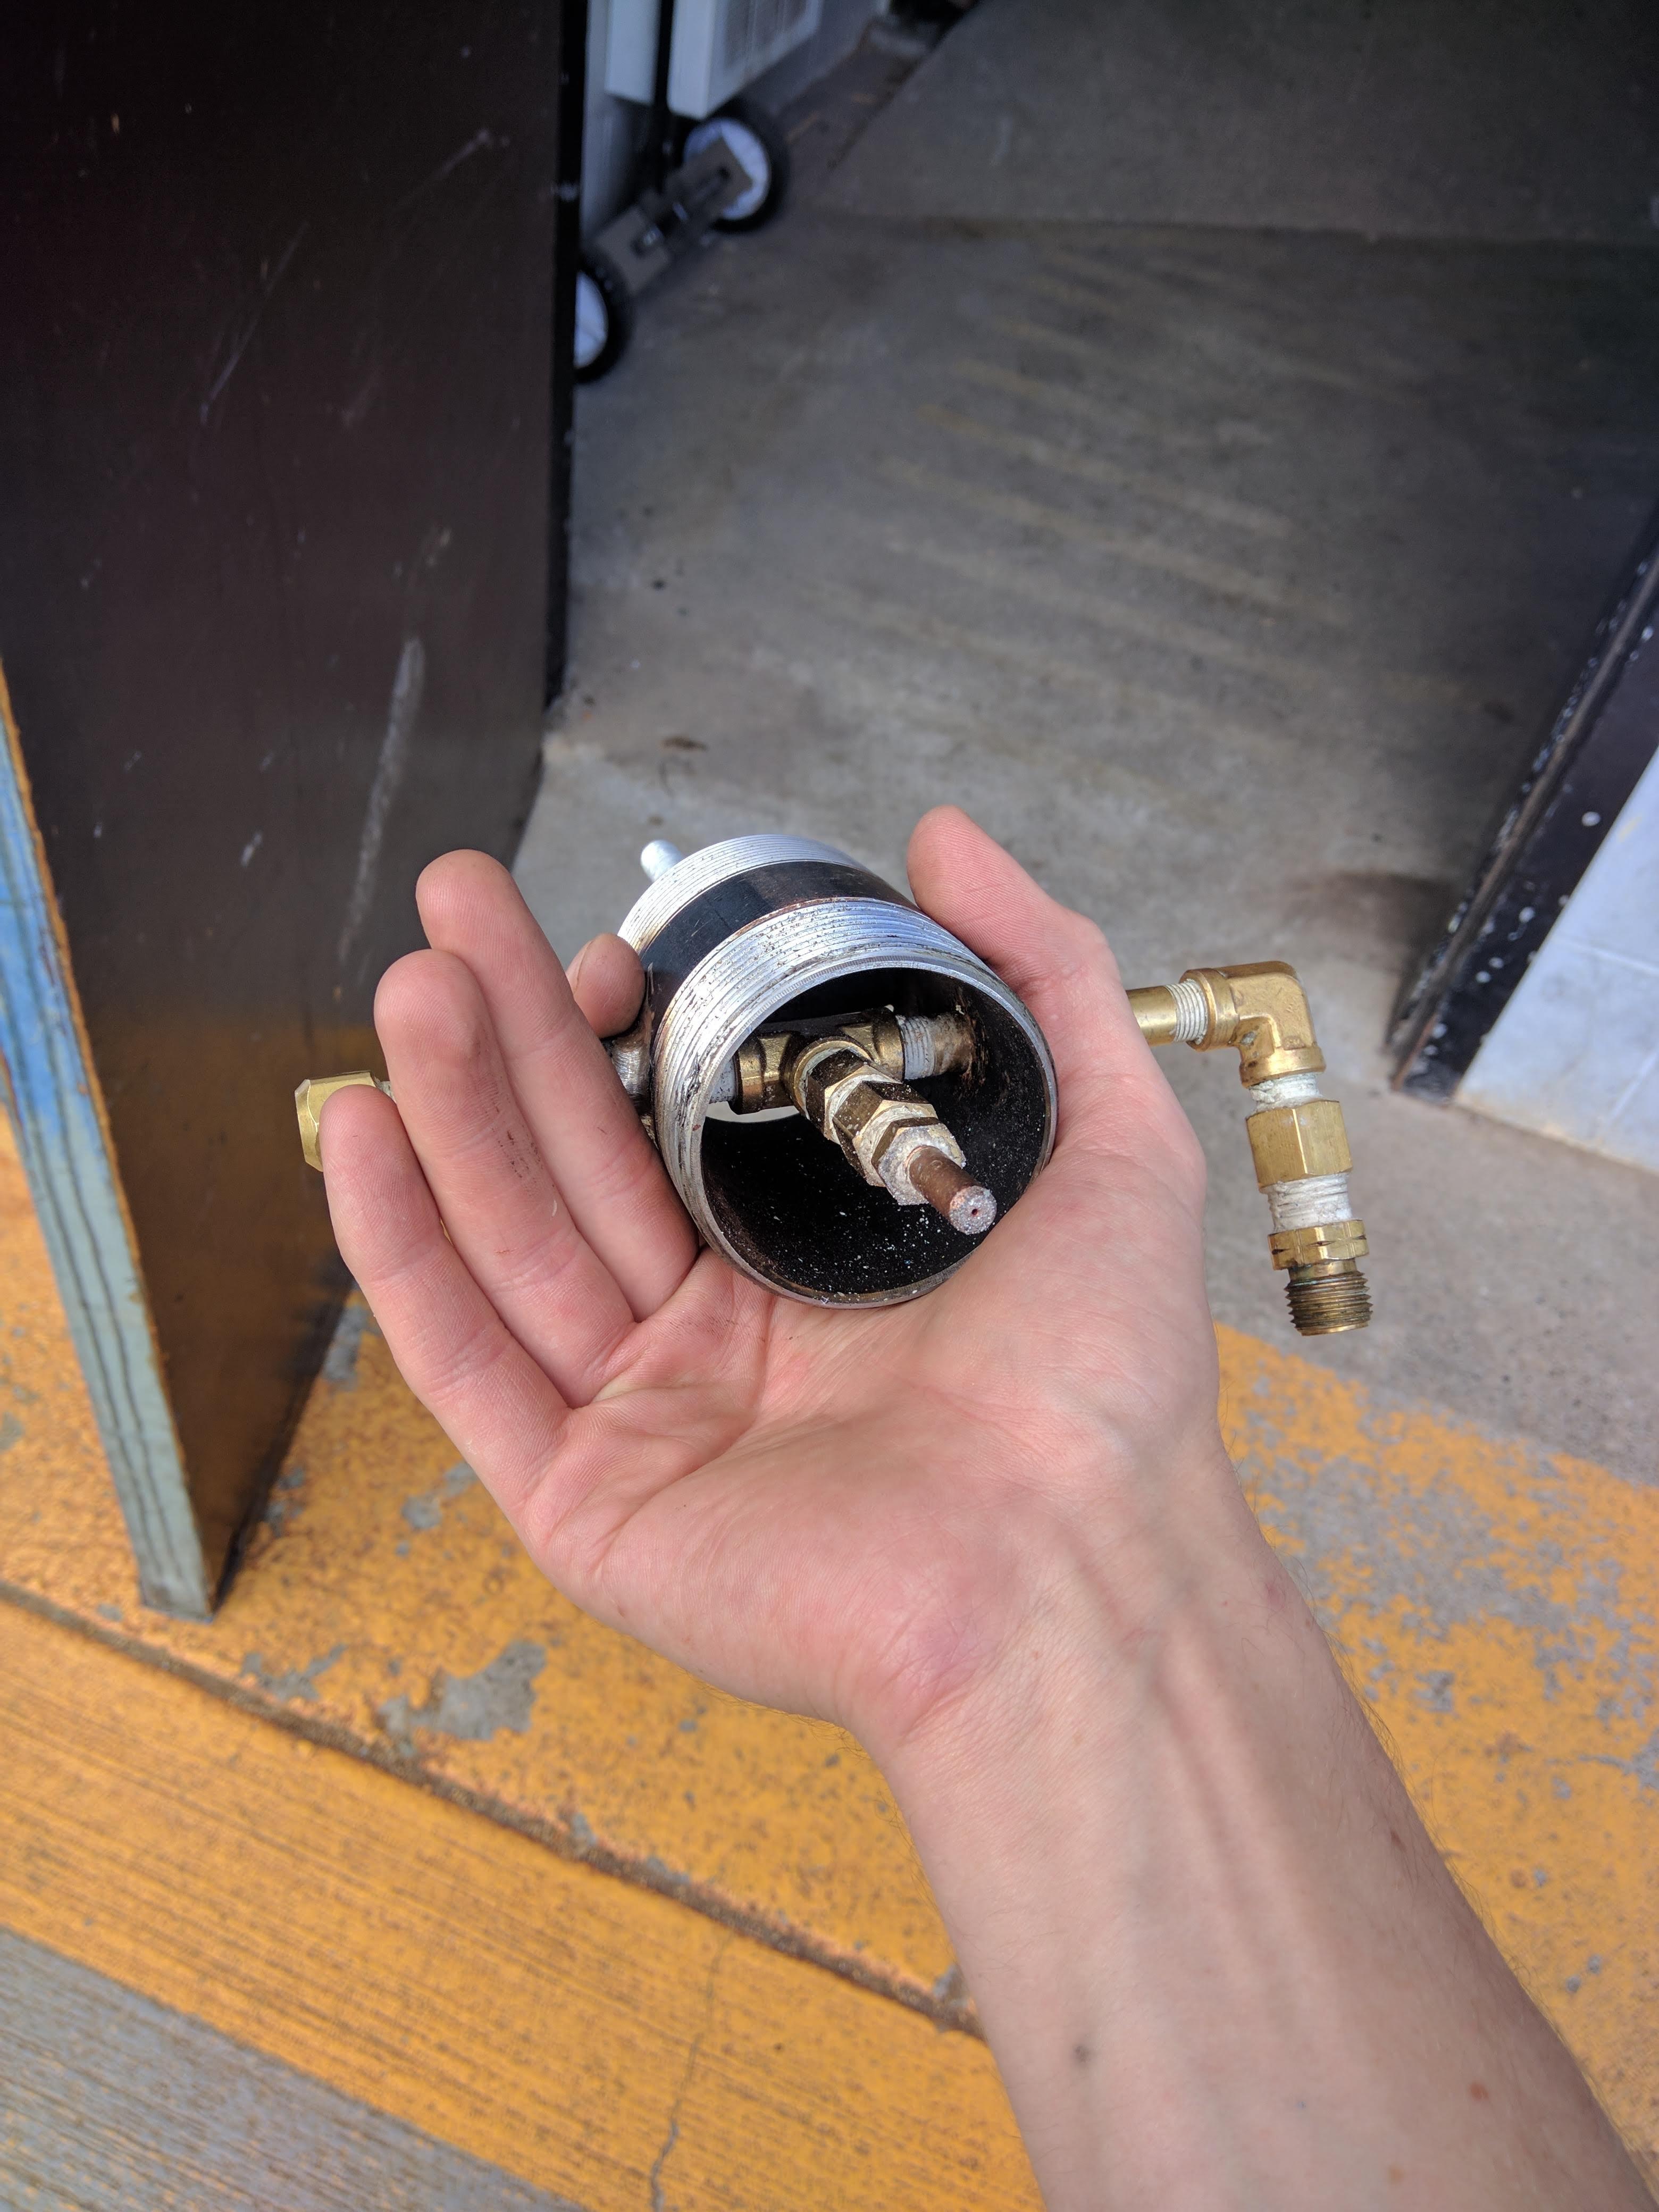
Oh hey Neil, I am using a 0.023" jet as this has given the best results thus far. I do indeed have the burner hooked up to a forge. It was just easier to photograph off the forge right after I cut the back open. Is there a way to determine if my tank has a flow limiter? and if so how does one source a tank without one?
-
Ooookay. I found time to tinker today. First thing I tried was varying the number of fittings between the injection fitting (MIG tip) and the T fitting it is plumbed into. I tried running with only one spacer fitting and it gave a unstable burn. The flame would catch in the flare but would start chasing up the mixing tube within 5 minutes. I opted to go back to two spacer fittings (no spacer fittings also behave unstably last week) which had at least given me a 20 minute burn last weekend. After this I actually broke out the calipers and figured out that with the two spacers and two turns of the pipe nipple the injector nozzle was pretty xxxx close to 3/8" from where the bell reduces down to 3/4". So that spacing is on spec. Next thing I tried was hacking a section of off the back of the pipe nipple. Initially this did improve the quality of the flame. Certainly a leaner flame only now the burner won't run stable for more than five minutes and once it's hot I can't get the flame to catch in the flare :/ Additionally I picked up a gauge for my regulator. I ended up with a 0-60psi (the hose fitting guys were out of 0-30) only to discover that the line pressure is actually way way lower than that. More like 1-5psi making the gauge almost useless. The only way we could get a noticable spike was to put a finger over the MIG tip and it would jump to 10psi even with the reg set to 30. I also tried cranking the reg up and down with the burner running and I have to get very close to 0psi before there is a noticable dip in the intensity of the flame. Anything above that spot doesn't seem to affect the flame too noticably. At this point I'd run out of time and had to pack it in. I guess I might as well hack the rest of the back off the pipe nipple just to see if it improves things? Unfortunately I don't think I'll be able to tap the bigger tank at the makerspace so I don't currently have an option for trying a different bigger tank.

-
I've read through Ron's website a few times actually. As for the running of the gas line through a pipe nipple rather than the bell reducer I've seen in a few places I decided to opt for that as it would be easier to dis/assemble. Adding the extender fittings actually improved the performance of the burner. With just the bushing that the MIG tip threads into I was lucky if I could get the flame to stay in the flare for five minutes let alone 30 before it started to chuff. The tip isn't quite in the throat of the reducer though. It's maybe half into the body. I haven't tried it with just one of the spacer fittings (there are two). Maybe its a matter of meeting in the middle. TBH, where that fuel injector nozzle needs to be in relation to the burner pipe is what I've been haziest on in the whole build. Chopping off the back half is definitely another good idea. I will however test one things at a time and dropping a fitting before I go chopping anything.
-
Alright, I'll see of I can russle up a bigger tank. My local makerspace has a big tank for the oxy-propane torch. I've not had a reason to examine it's fittings closely but I might be able to hook up to that for a test run.
-
So I need to be running off a bigger tank or a different reg? I have tried that and it doesn't make any difference that I am capable of detecting.
-
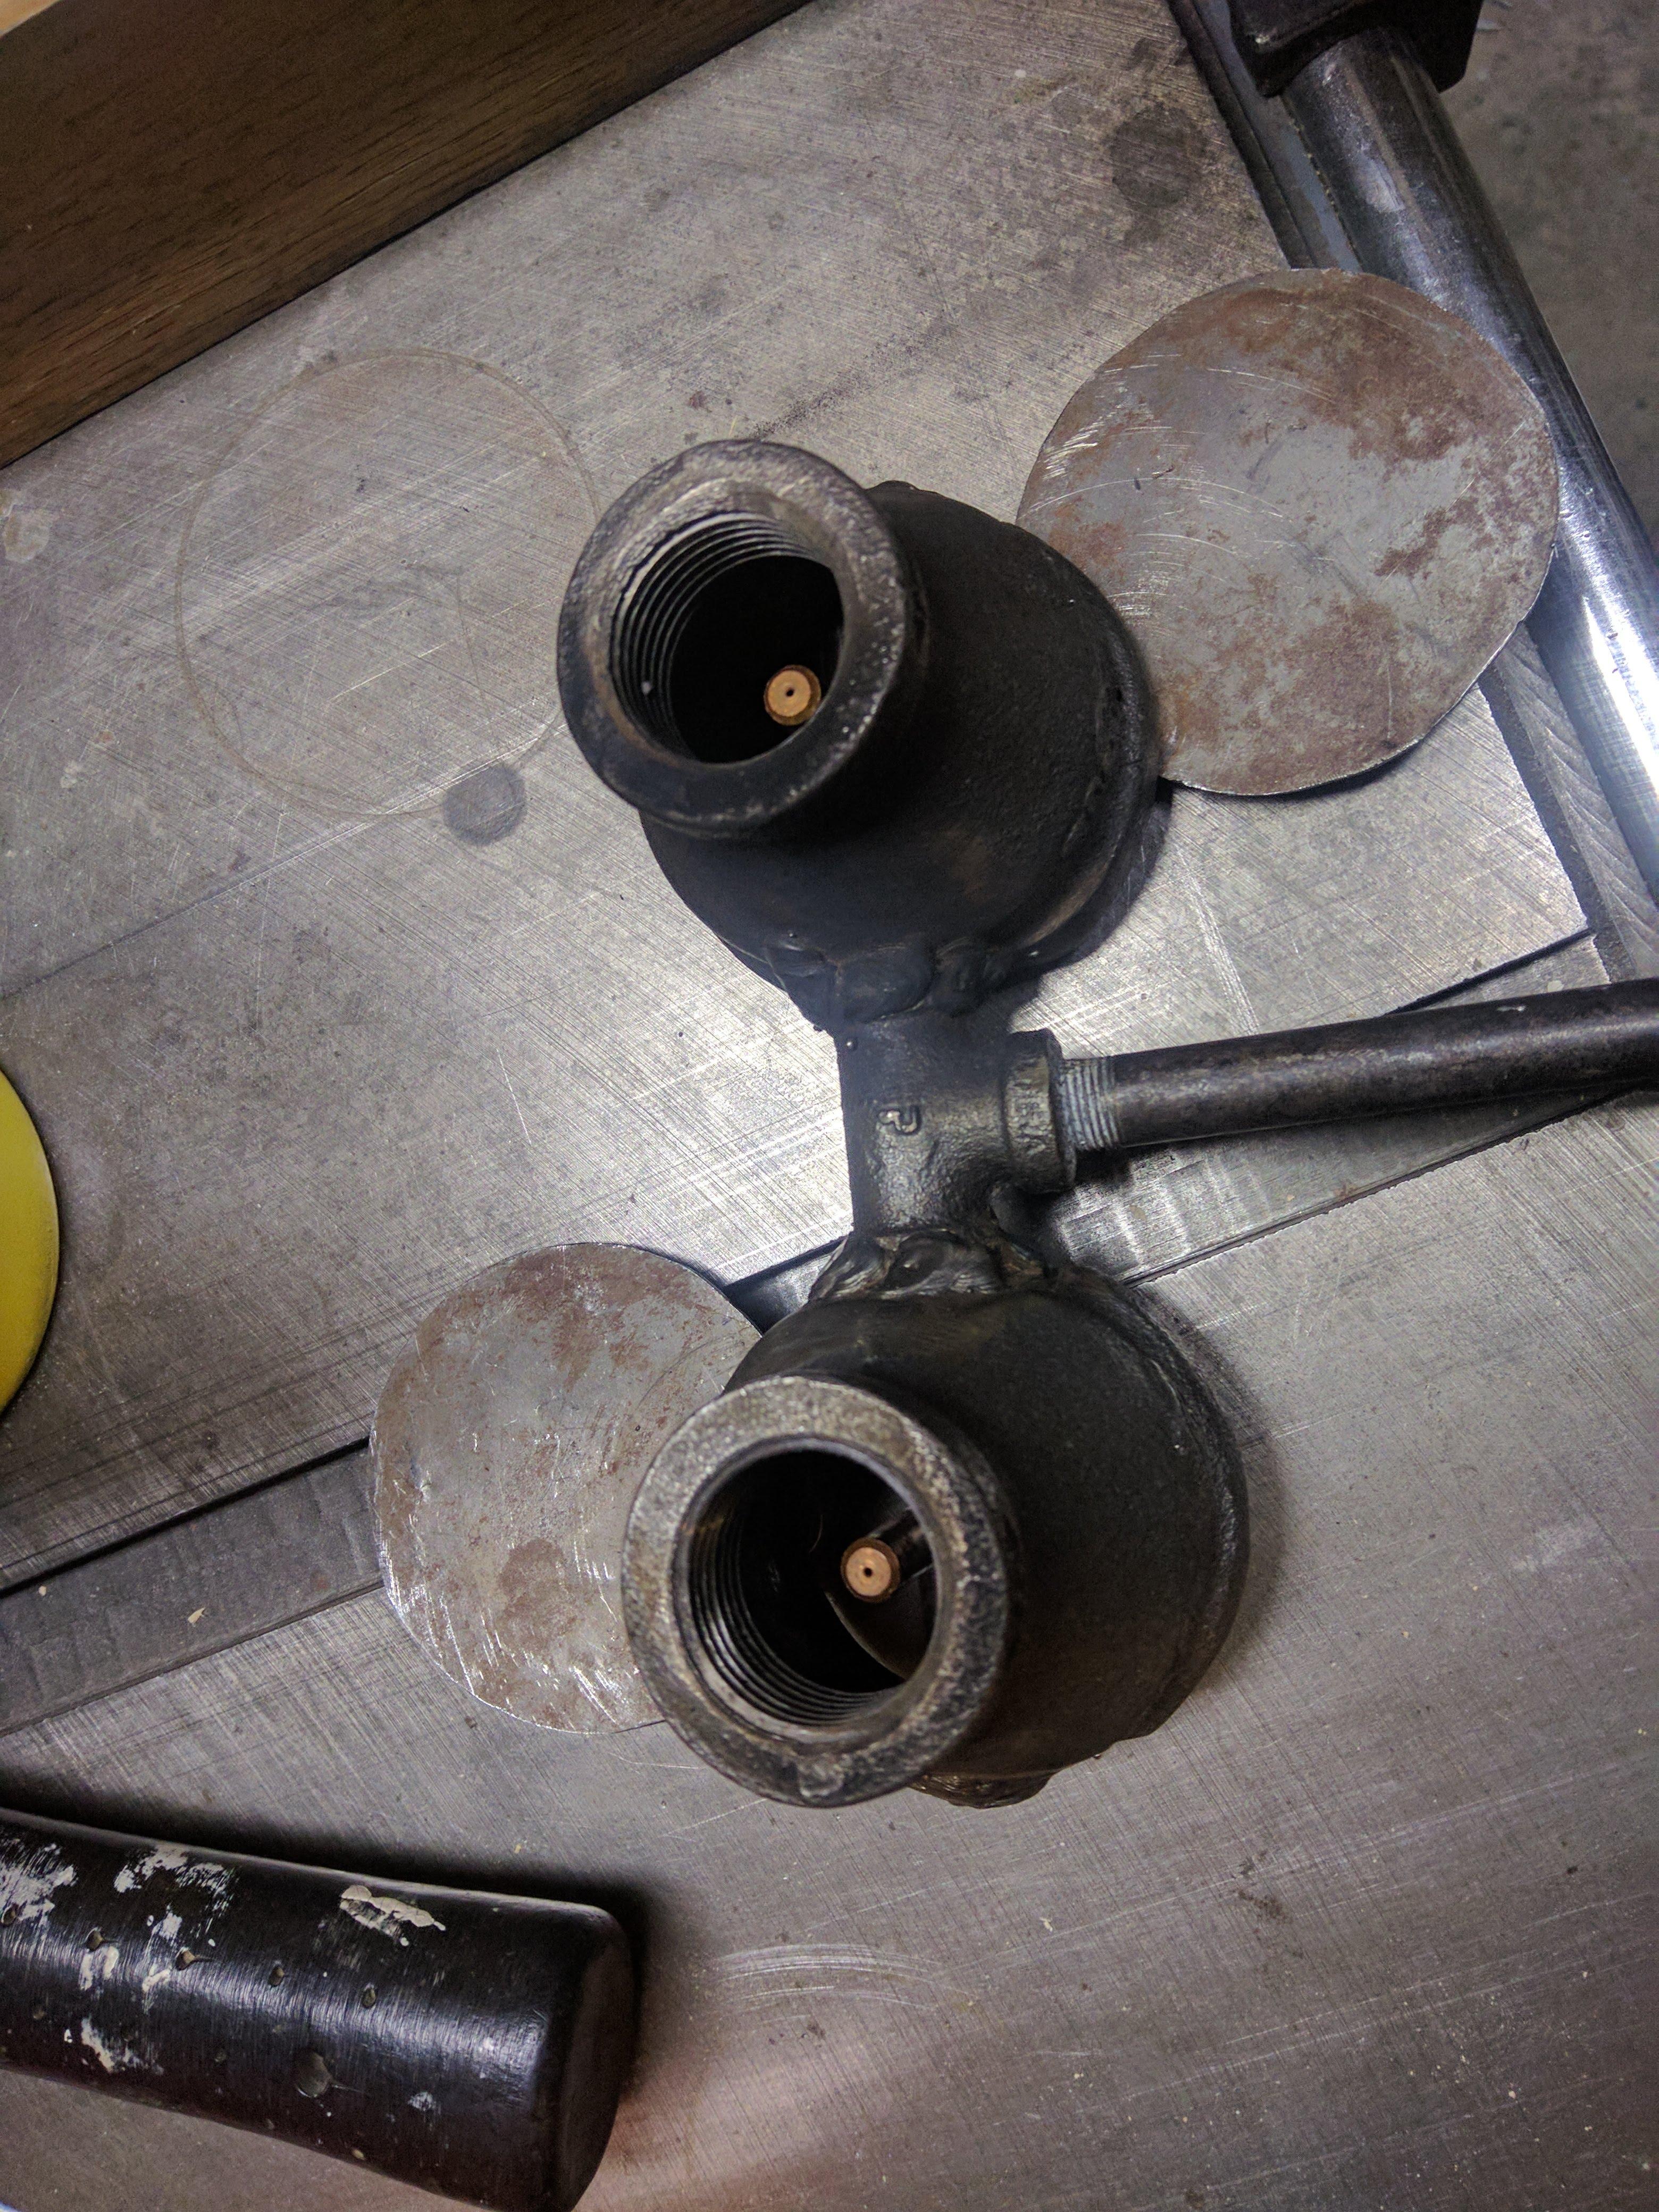
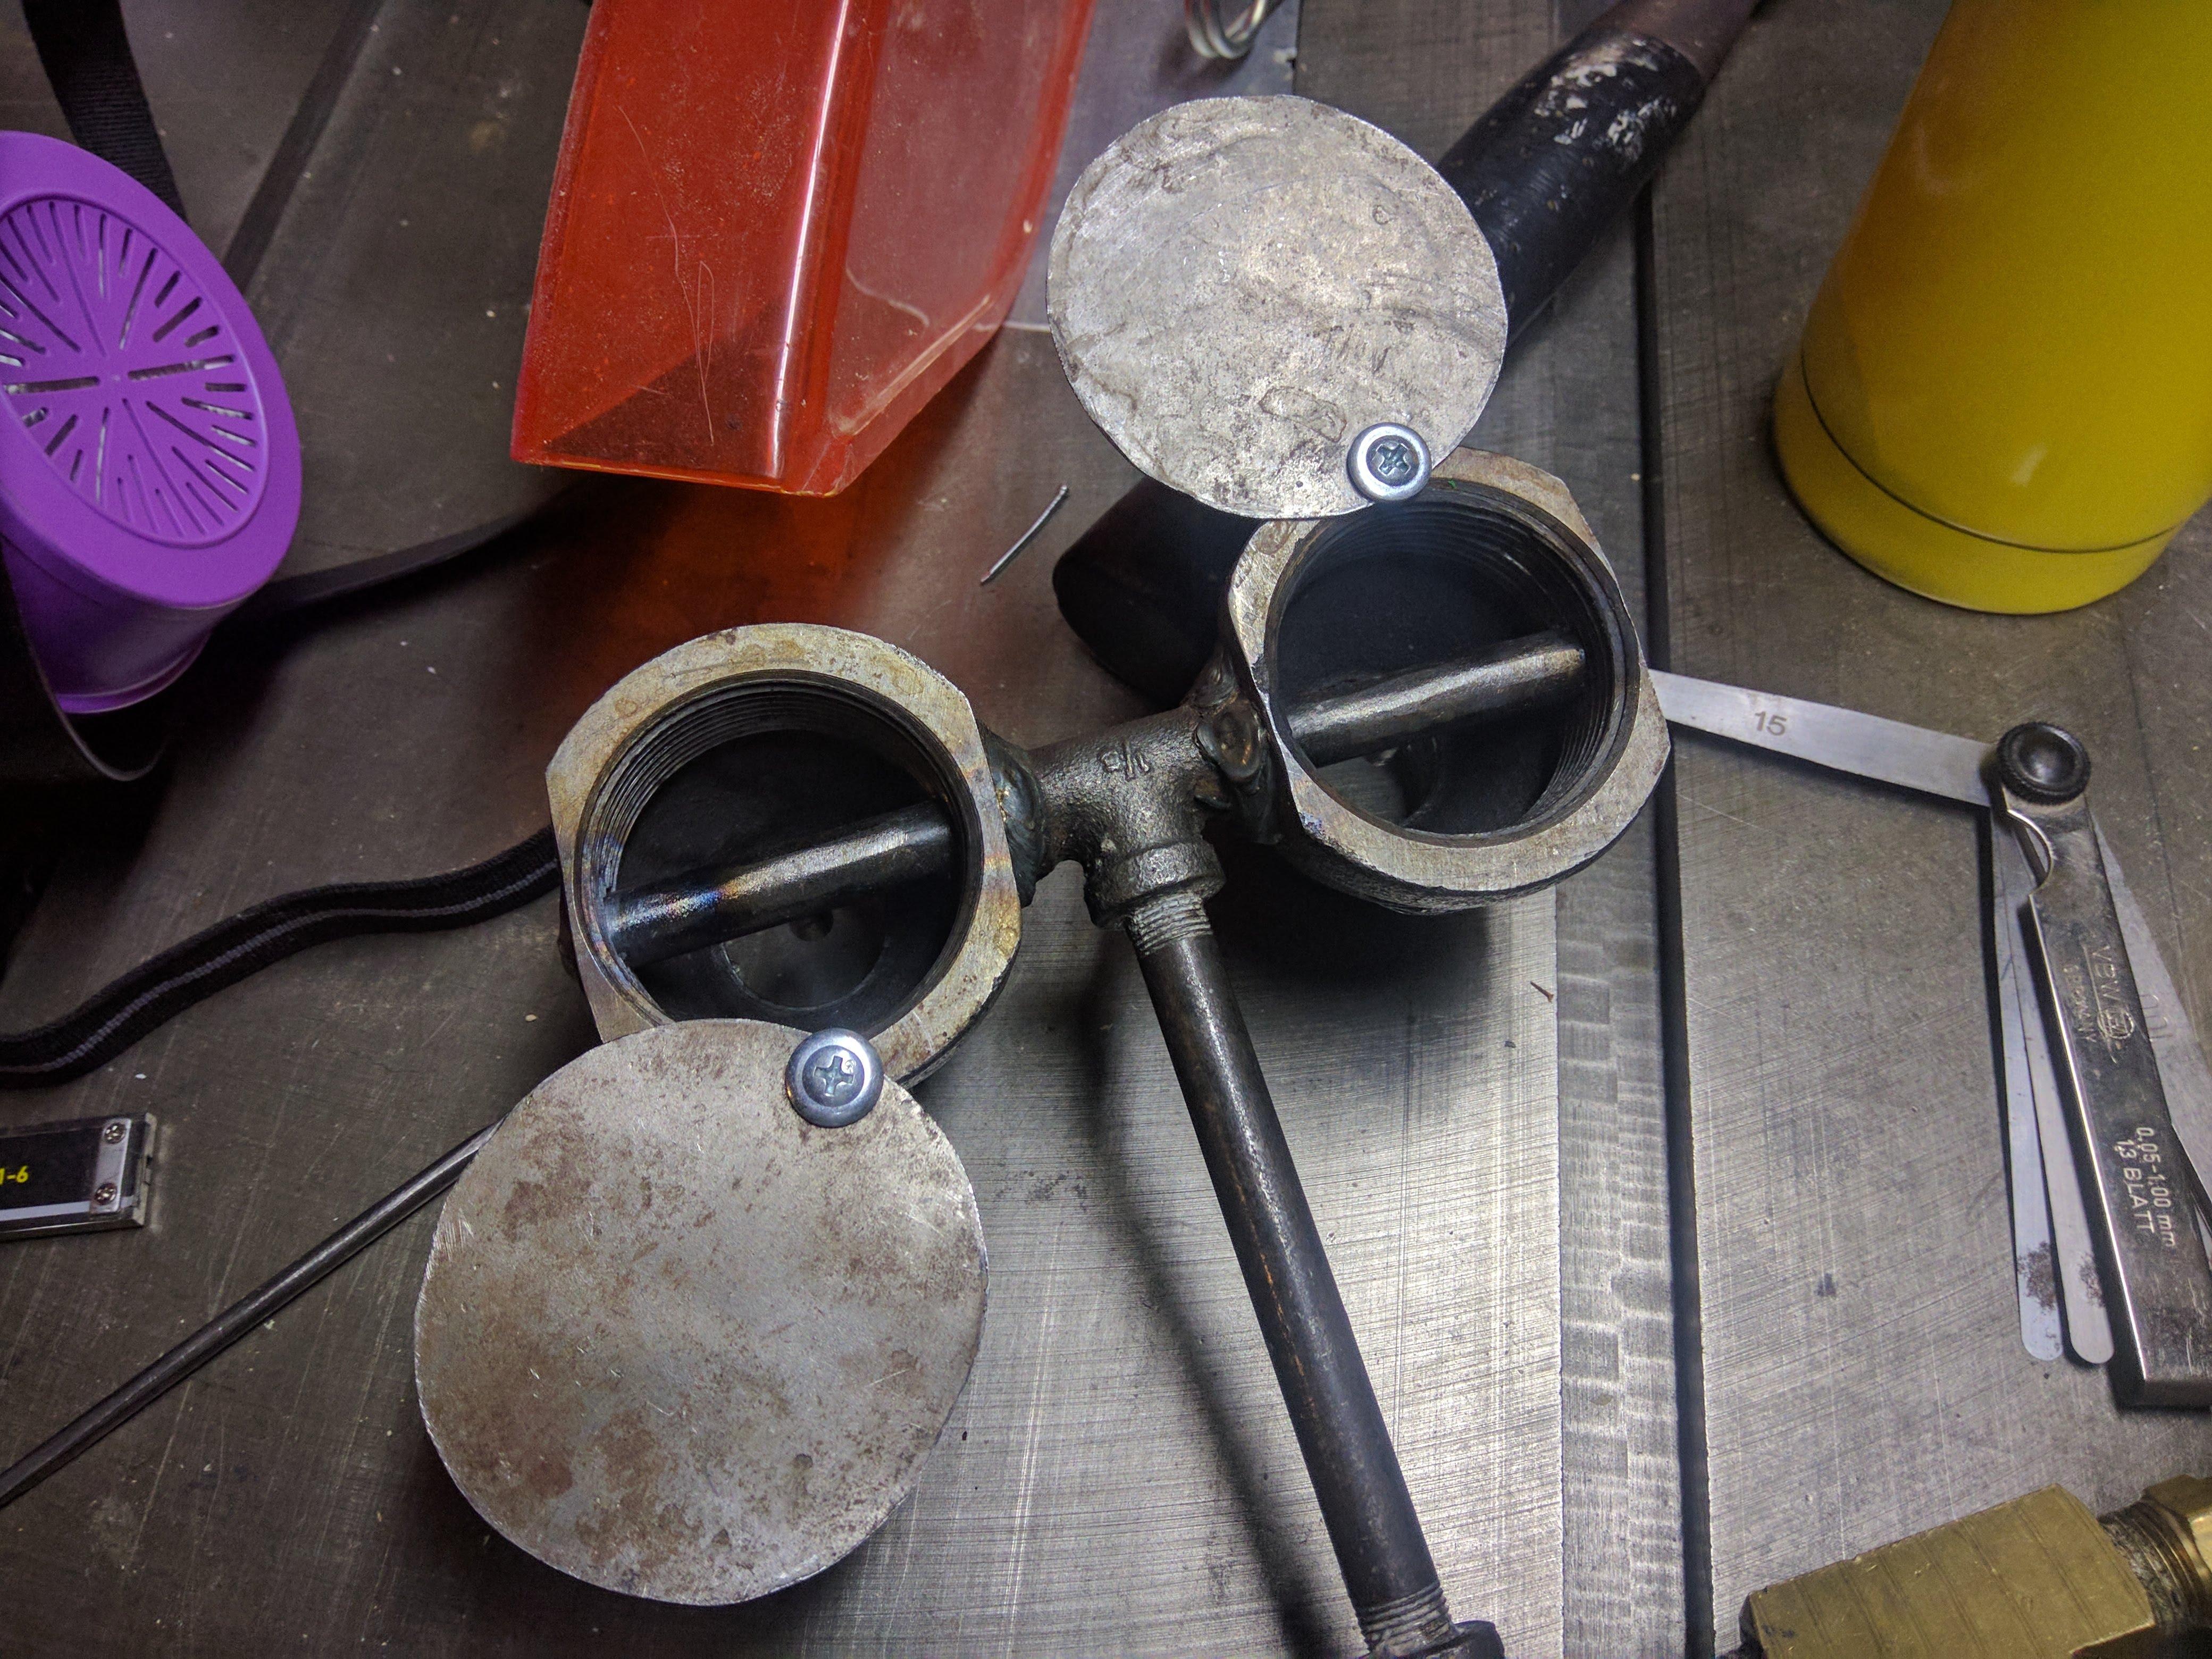
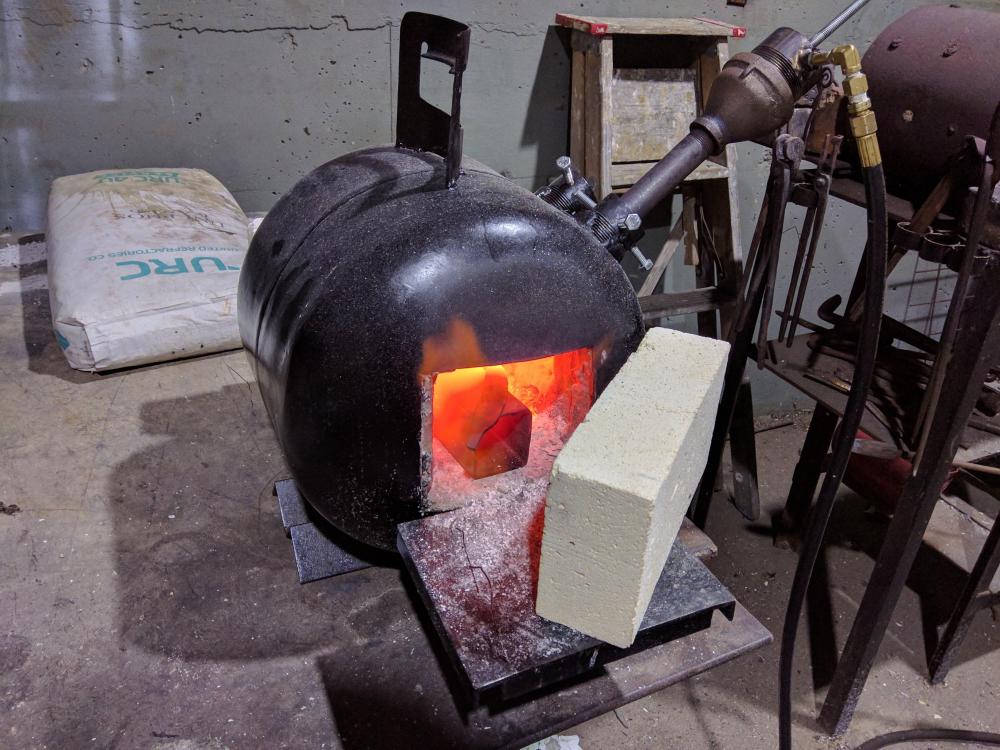
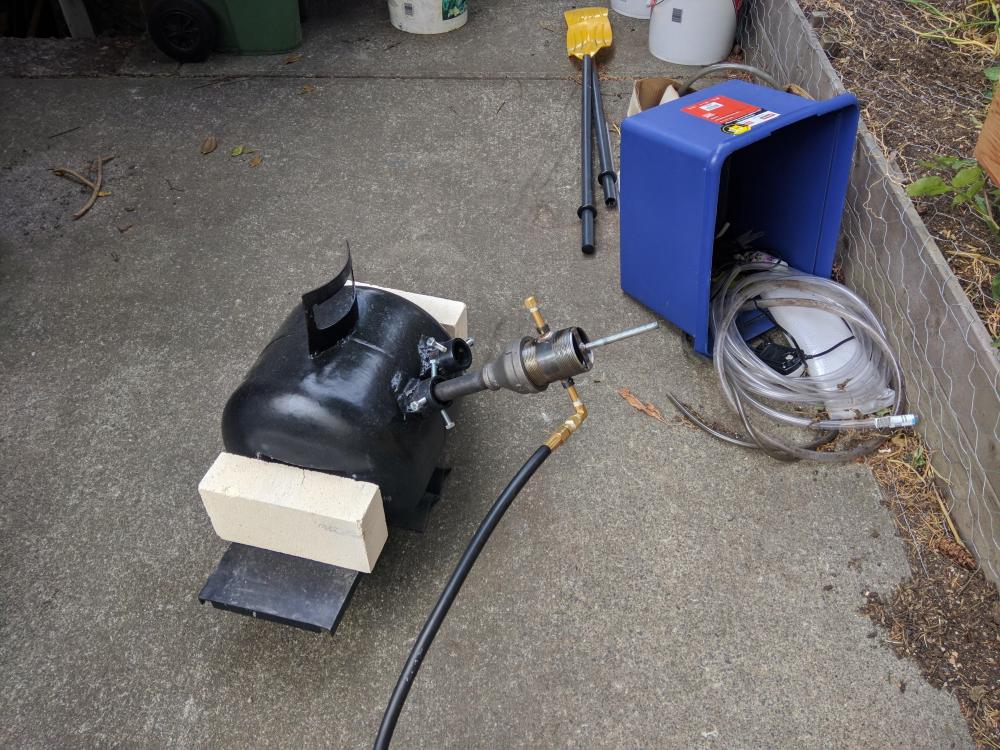
Greetings IFA, I've posted here once before with my initial attempt at building a pair of Venturi burners (that were rather crude). After several months of diversions and learning new skills (basic machining and TIG welding) I've looped back around to attempt #2 with better results but still not quite functional. Forge body: Standard 20lb propane tank lined with 2" of Kaowool coated with a refractory stove paint and a Unicast 3000 bottom. Burner: Propane line hooks up to 1/8" brass fittings that are T'D inside the 2" pipe nipple. There is a grub screw that allows me to adjust the position of the gas line. I have a very crude A 0.023" (I have tried 0.030" and 0.035" but the 23 seems to produce the most stable flame) MIG tip is used as the injection orifice and the tip of it is about 0.4" from the throat of the 2" to 3/4" bell reducer (still had the threads on the inside which I could machine off if necessary). The burner pipe is 6" long and there is a 3/4 to 1" reducer on the end as a flare. The flare is currently pulled back into the Kaowool liner. Propane source: Standard 20lb propane tank with a 0-30psi adjustable regulator and standard flexible line (not ideal I know but once I have the burners working I'll look at hard plumbing). Does it work? Kind of. It will light and I can get the flame to burn in the flare. I can even heat steel up to forging temp. However after about twenty to thirty minutes of run time the burner starts to chuff which so far as I can tell is the flame chasing up the burner tube ( carefully peering down the back end of the burner confirms this). After reading numerous threads on others experiencing this problem there are several things that can cause this: 1. Regulator freezing up and causing the gas pressure to drop off - I have tried running the forge with the tank in a bucket of water and still only get about a half hour of run time before things start chuffing. 2. Back pressure from combustion gases cause turbulence and interfering with the propane/O2 mixing. - Once the chuffing starts I have tried opening the forge up entirely and it seems to help initially but still ends in things chuffing. 3. IR radiation off the opposite wall heating up the flare and the burner pipe causing the propane to ignite in the tube. - I do have my flare pulled back into the Kaowool though the rim of it is still exposed. I suppose I could get in there with some extra wool and paint to cover up the rim a bit better. I am not entirely sure how to proceed in troubleshooting. Suggestions are appreciated.

-
ThomasPowers - Our sole local pottery supply place would seem to have some. Thank you for the reminder. I always forget about them. Frosty - Oh I know its not the greatest design. I put it together before I realized there was better stuff out there. Getting the rest of the forge finished up got pushed onto the back burner for awhile and I'm just getting back to it now. I figure I'd see if I could make what I have work before I reconsider re-building the burners. Knowing the flaws in the design is rather instructive though. I will say that despite what it appears in the photo my fuel line is positioned well out of the way of any chimney affected areas but I will certainly look into some copper tubing. Having only had the time to skim Ron Reil's website thus far I think I might actually be able to salvage the reducer fittings should it come down to a rebuild. It'll mean some extra time with an angle grinder but I suspect do-able. Failing that black iron fittings are mercifully cheap. Either way thank you for the referral, very helpful. Unfortunately today got busy and I was unable to get better photographs of my burners flames. Mikey98118 - Indeed. I am considering my options in that regard. Irondragon Forge & Clay - No worries, every forum is different. I see that I shouldn't have @'d people but I'm not clear on how my links violate the TOS. The read this first document doesn't seem to mention anything about linking out to pages external to the forum. swedefiddle - I have sent you a message.
-
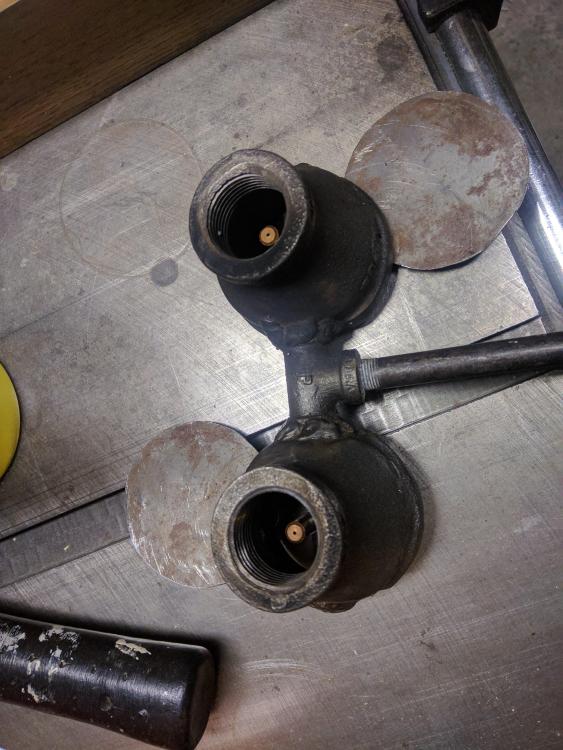
Frosty: Its very hard to actually get hold of people on youtube. The best you can hope for is that they see your comment on their video there is now way to DM any more. At least so far as I can tell. I'll grab some clearer photos of the flames once the sun starts to go down today. Mikey: For clarification, by mixing tube you mean the pipe nipples that the flame is shot down? If that is what you mean the MIG tips aren't projecting down into the mixing pipe. I busted out my calipers to check exactly where they are in the reducer fitting. The opening in the MIG tip sits 43.23mm (1.701969) from the 1.5" end of the reducer (air intake) and 17.46mm (0.6874016") from the 3/4" end of the reducer. give or take a mm or two. The reducer fitting itself is 64.73mm in length (2.54"). Here are some better photos of the burners. Firebrick addendum: I did a little investigation and believe the firebricks I have are actually these. Given that they are described as high density I presume they are in fact hard firebrick not soft so that probably isn't helping. I'll have to figure out where to get some soft ones. So far two of the stove supply stores I've called have been surprised that there is more than one kind of firebrick out there :l

-
Greetings! I come to y'all in the hopes that someone can help me trouble shoot my gas forge. I've been building myself this forge so I am not as reliant on hauling propane out to my local makerspace which has a lovely forced air forge but getting propane to it is a PITA when all I want to do is heat treat. I've just been doing the curing burn on my refractory cement bottom and have run into some trouble getting the forge hot. For refrac curing purposes this is kind of helpful but I'd actually like to use this thing to heat treat and possibly forge at some point. The design I worked off can be found here. Yes I know, its a youtube video and there is an inherent risk to working off designs on youtube. The design seemed simple enough that I was pretty confident it would work but maybe I am missing some glaringly obvious flaw. Here is a picture of the forge running earlier today. Forge details: The body is a standard 20lb propane bottle. It is insulated with 2" of Kaowool that I rigidized and then coated with stove refractory cement for additional durability. I pour about 1" of URC 4U Uni-cast 3000 (a bronze foundry a friend worked at was moving so I got it for cheap) on the bottom. I allowed this to dry for two days at about 19-20C. Burner details: 0.6mm (0.025") MIG tips threaded and loctited (565) into a 1/8" iron pipe that is T'd and connected to the propane line. The 1/8 pipe ends are MIG welded shut. The air intakes are 1.5" to 3/4" bell reducers with simple sheet metal flaps for air control. Where the 1/8" propane line passes into the bell reducers is also MIG welded xxxx (all welds and loctite'd areas have been leak tested). The propane would leave the MIG tips right about where the reducer comes down to 3/4" so about 2" from the mouth of the reducer. The flame is shot down 3/4" wide by 6" long pipe nipples which then flare out to 1" by means of another reducer fitting that I have pushed back into the kaowool. I am using a 0-30PSI high pressure propane regulator and am pretty much at sea level. I can get the burners to jet (can vary them from consistent jetting to periodic sputtering) however by the time they get down into the body of the forge they seem to be putting out fairly long tongues of flame. Ranging from very yellow orange to a mix of blue orange depending on how I fiddle with the air intake and fuel pressure. Problem 1: Not hot enough. I don't have a probe so the way I'm gauging how hot its getting is simply by sticking a piece of scrap steel in there and watching for a colour change. I let the forge run for about ten minutes with fire bricks (pretty sure they are the soft variety) across the front/back (more or less how the forge appears in the picture above). Then lay a 1/4" wide by 1/8" thick by 4" long piece of scrap steel in there. I gave it a solid fifteen minutes and at most I get some bluing on the scrap. Not getting anywhere close to non-magnetic. I figure I'm loosing too much heat out the front/back (the fire bricks don't totally close off the openings) and through the tubes that hold the burners. In attempting to address this I ran into a different problem. Problem 2: Burners going out As I said above I though I was loosing too much heat so I grab some scrap kaowool wool (I was keeping it in the yard where I thought it would be safe from moisture but it seems I was wrong so its sopping wet. Not sure if that's a problem?) I have left over. I squish some kaowool around the rim of the front/back to act as insulation gaskets around the fire bricks and stuff some between the burner tubes and the pipes acting as mounts to reduce heat loss. Now with all these holes plugged I relight the forge with no issues and I go to close up both ends. The burners run for about 2 minutes before going out. They'd go out silently. No sputtering no cracking. I relight them and try again to the same result. I try this at low pressure (5PSI) and high pressure (25PSI) all to the same result. This suggests that the burners are using up all their oxygen? Which I guess suggests that I have effectively insulated the areas where I was previously loosing heat? At this point I was loosing daylight so I wasn't able to carry out further tests to see if I could really get the forge up to heat. In addition I suspect that although my kaowool "gaskets" appear to be working the water boiling out of the is presumably acting as a heat sink to some degree. I'm somewhat at a loss for how to proceed in an effective manner. Advice would be appreciated