

L-M&F
-
Posts
23 -
Joined
-
Last visited
Content Type
Profiles
Forums
Articles
Gallery
Downloads
Events
Posts posted by L-M&F
-
-
On 1/7/2021 at 10:17 AM, Justin Topp said:
I know it’s unlikely since the owner hasn’t logged on in over a year but does anyone happen to know where there’s a video of this in action. Since the links were removed
Added a video for ya
-
Video
Hadn't logged on in a while, for anyone still interested in the video
-
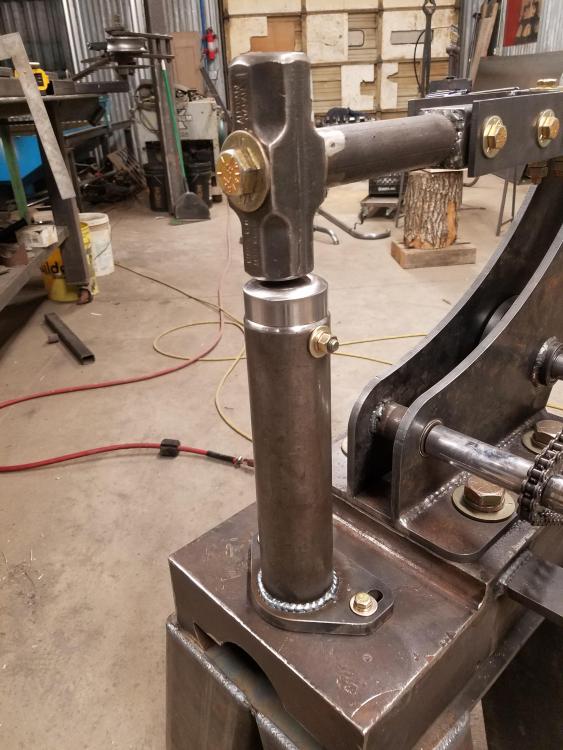
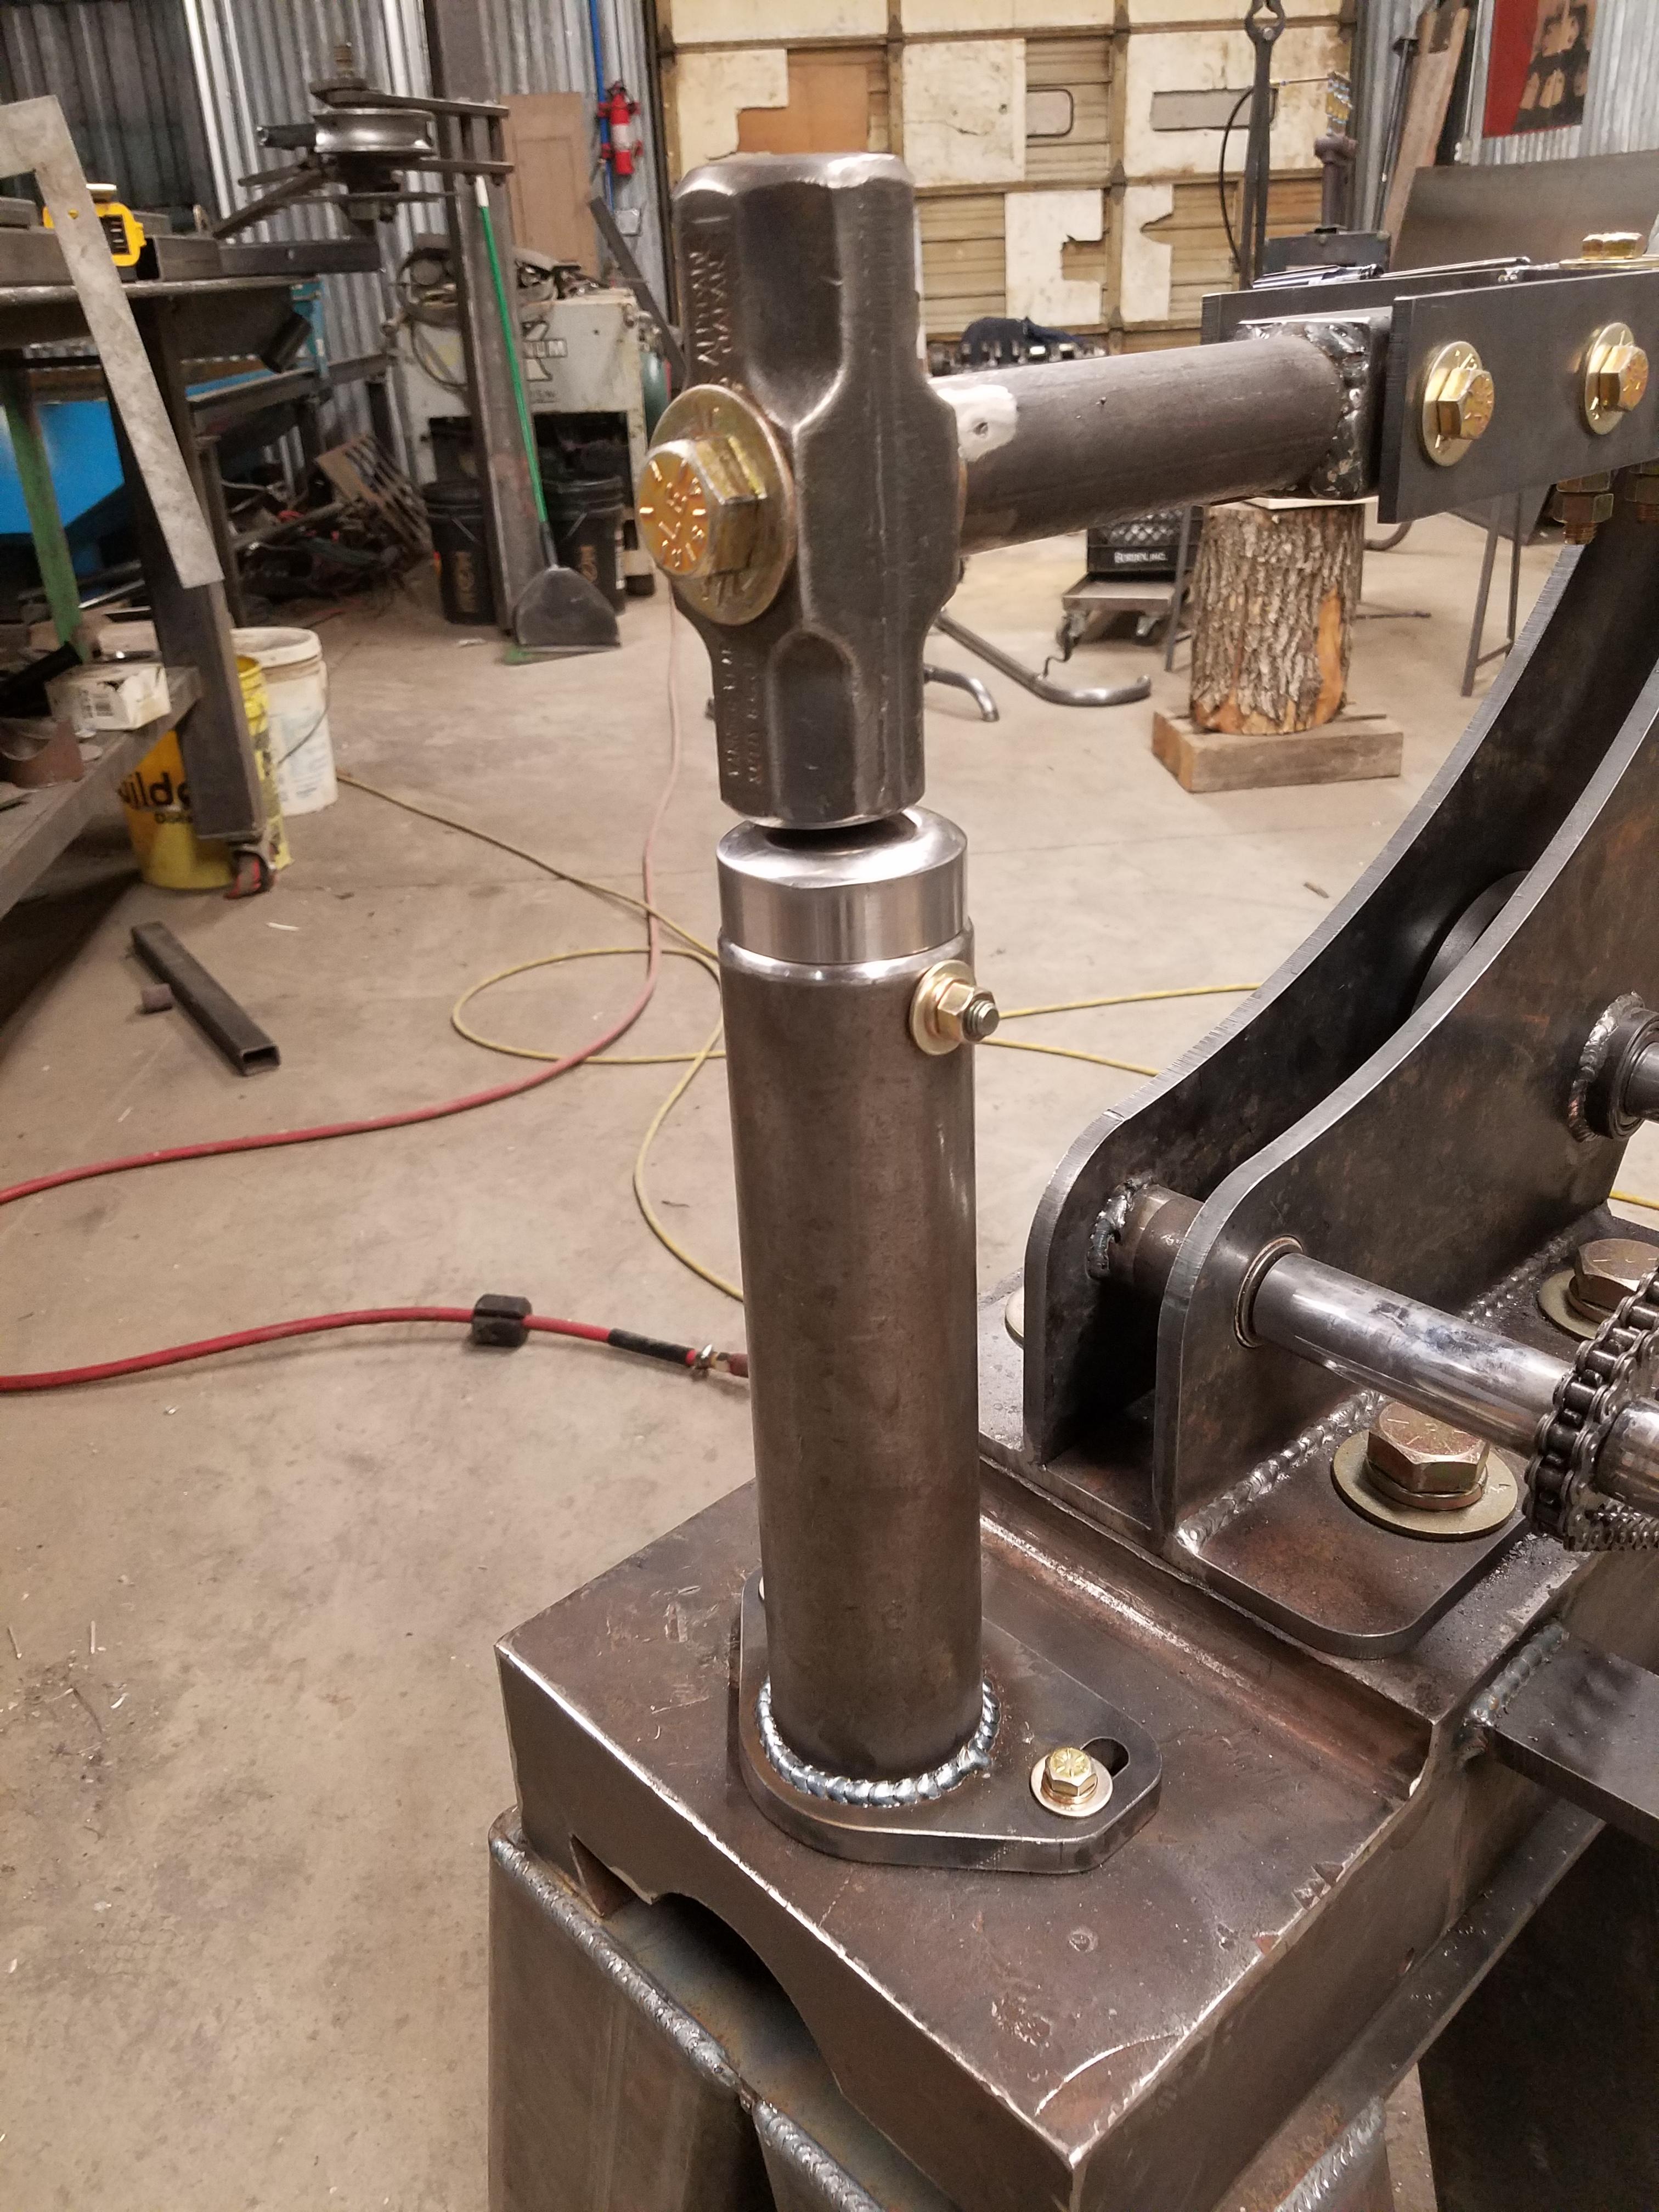
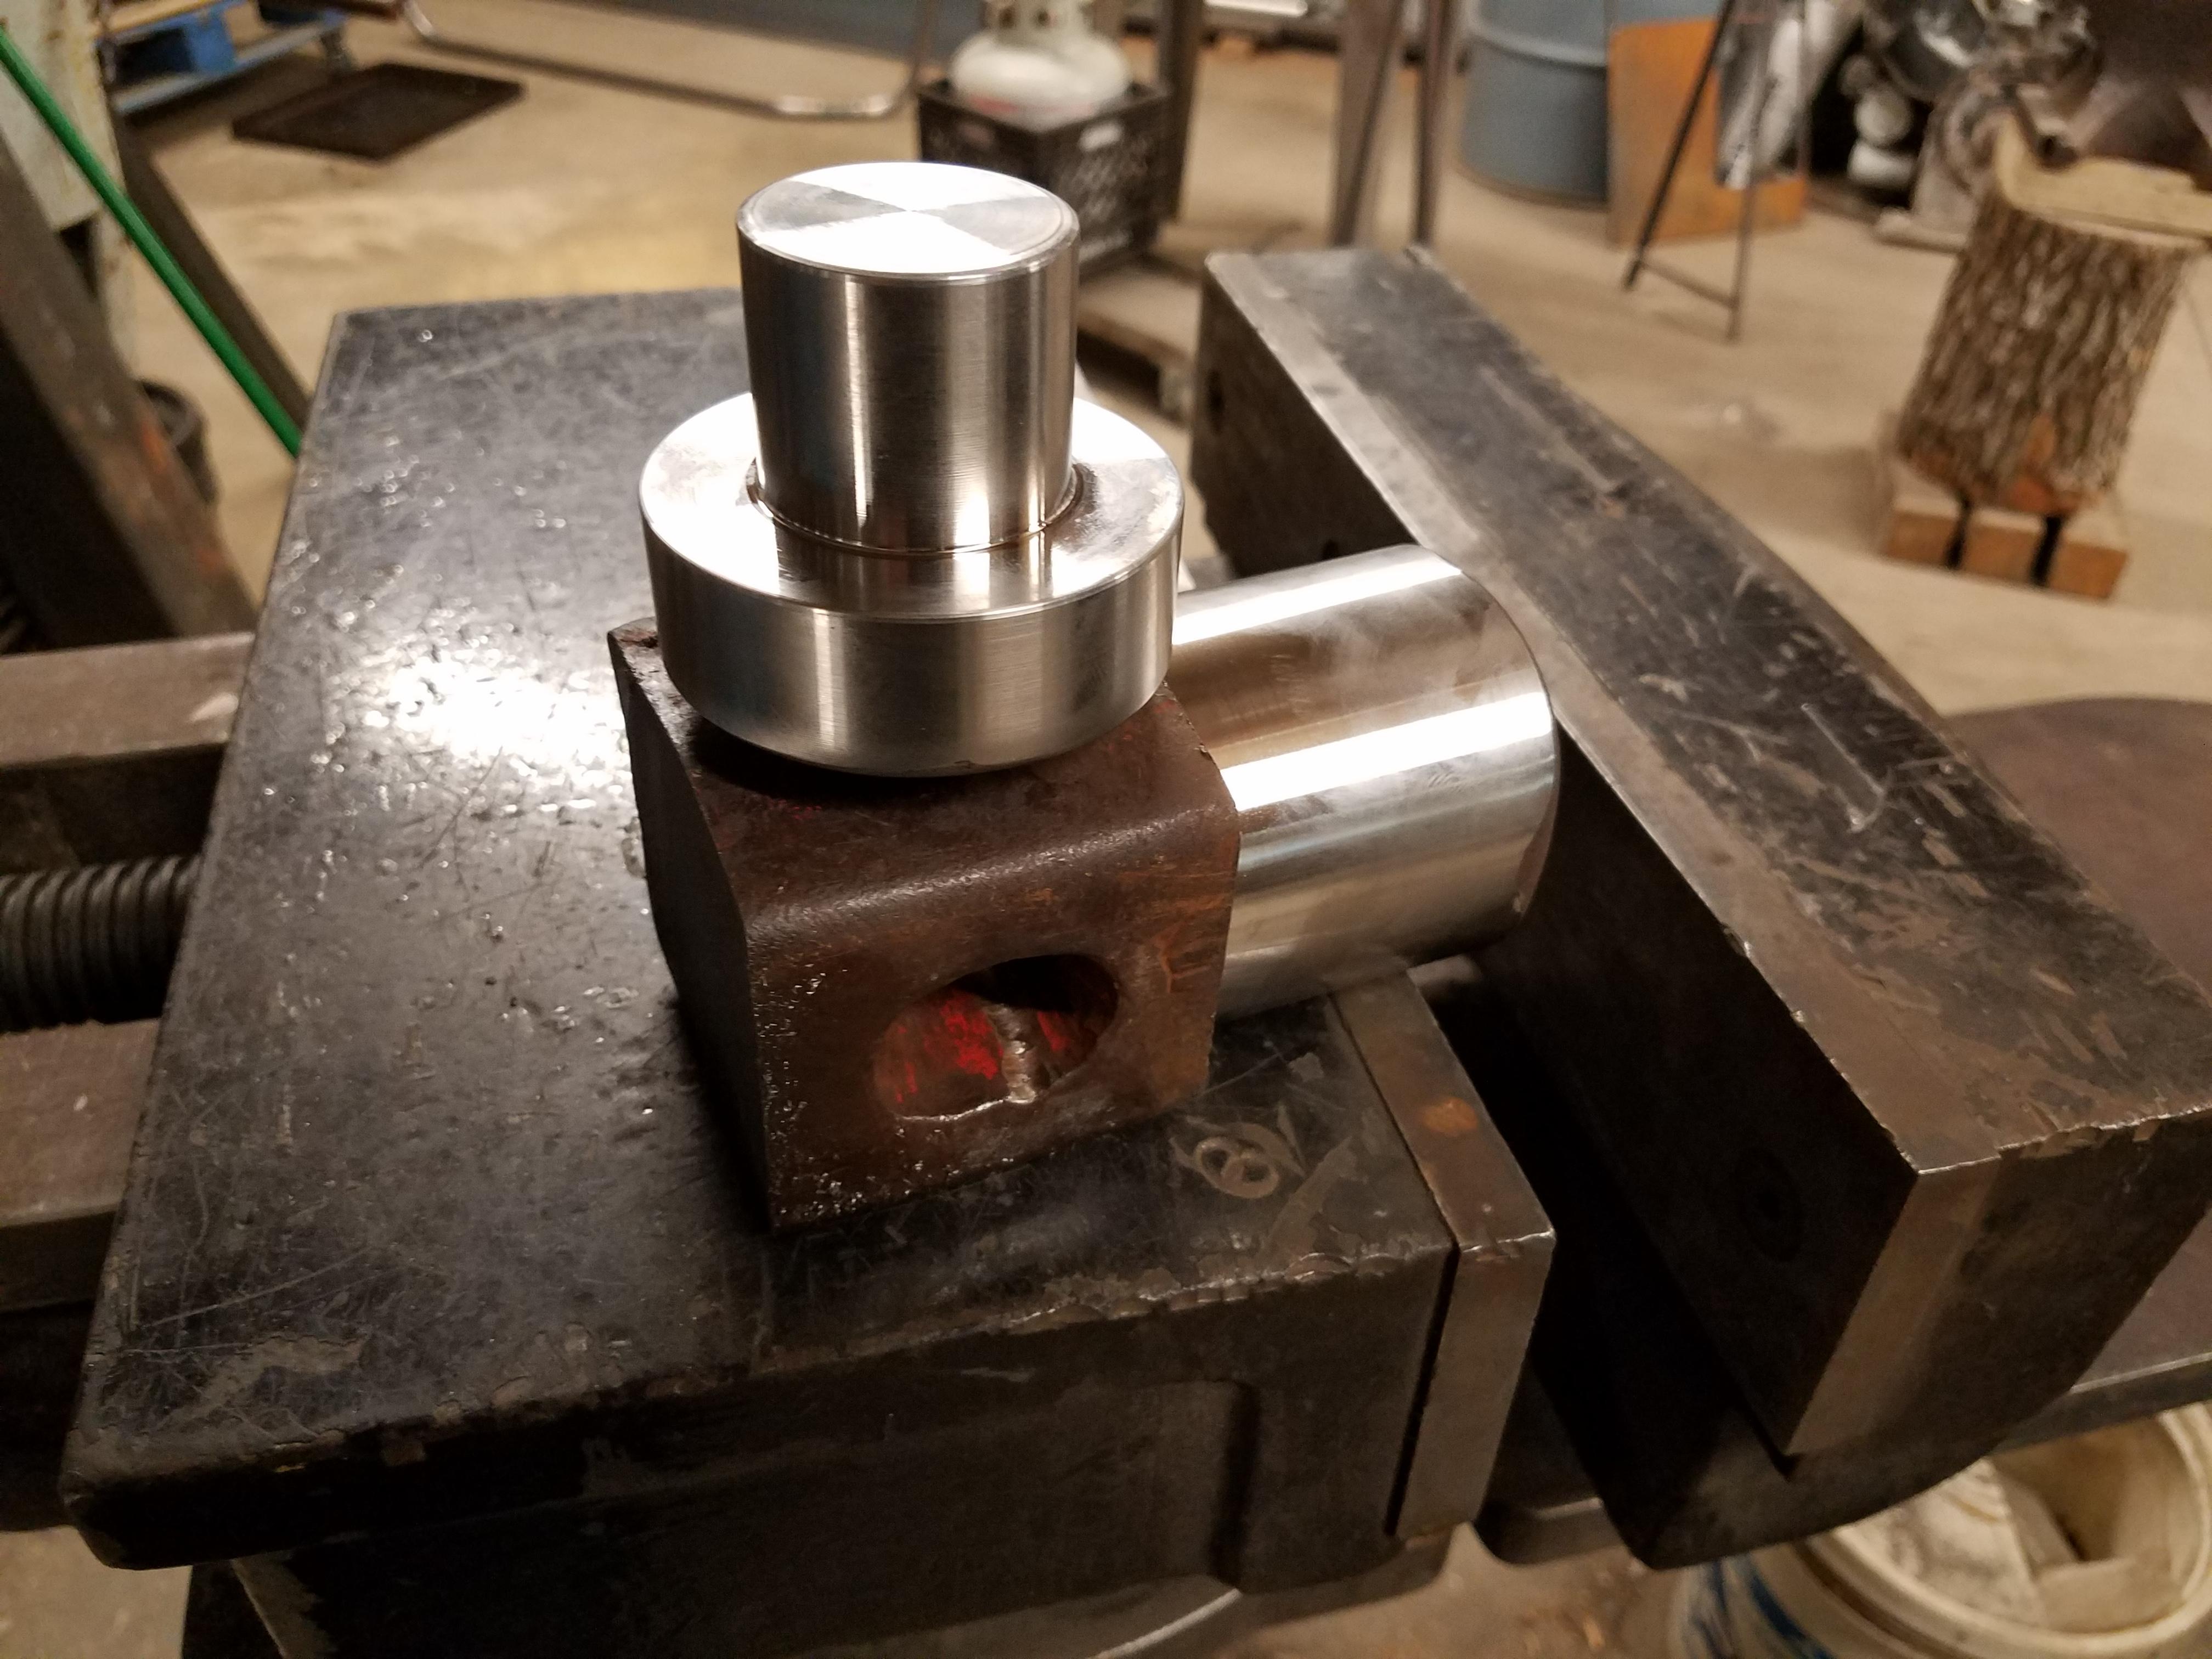
Updated my bottom die last night. I figured an old sledge hammer would be my best option for material at the moment. Also made them interchangeable. Also shined up an old 6lb sledge for the top die. Works way better then the 3lb obviously, and the drill doesn't seem to have any problems swinging it. Hopefully have a cool video of it making money later today.

-
Thomas - That's a heck of a friend! I would of been happy to pay for a few meals also! Heck 75 is a deal! I bet you had alot of good memories wandering back in the 80s! I was just a twinkle in my parents eyes as they say haha. I've been keeping an eye out for a hammer for a while now but i don't think they're very common here in the central us. Or im not friends with the right people!
-
12 minutes ago, ThomasPowers said:
I knew a fellow who bought a completely restored 25# Little Giant for that!
Tell him I'll give another 50 and trade haha
-
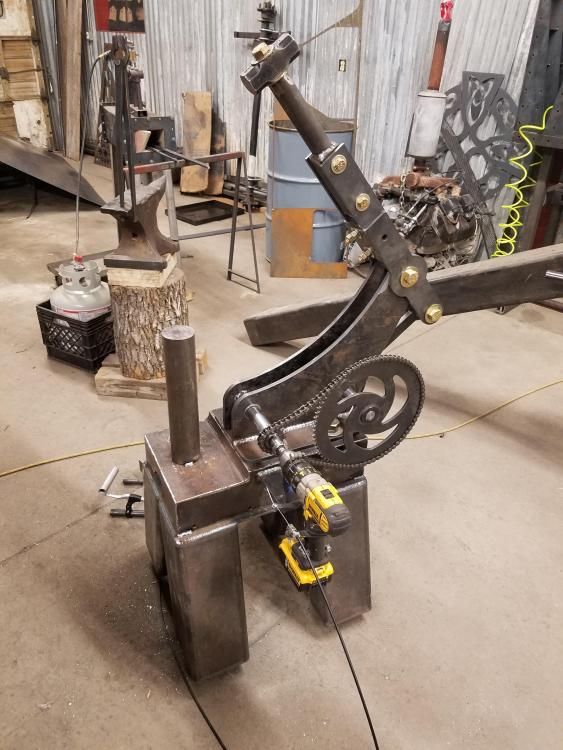
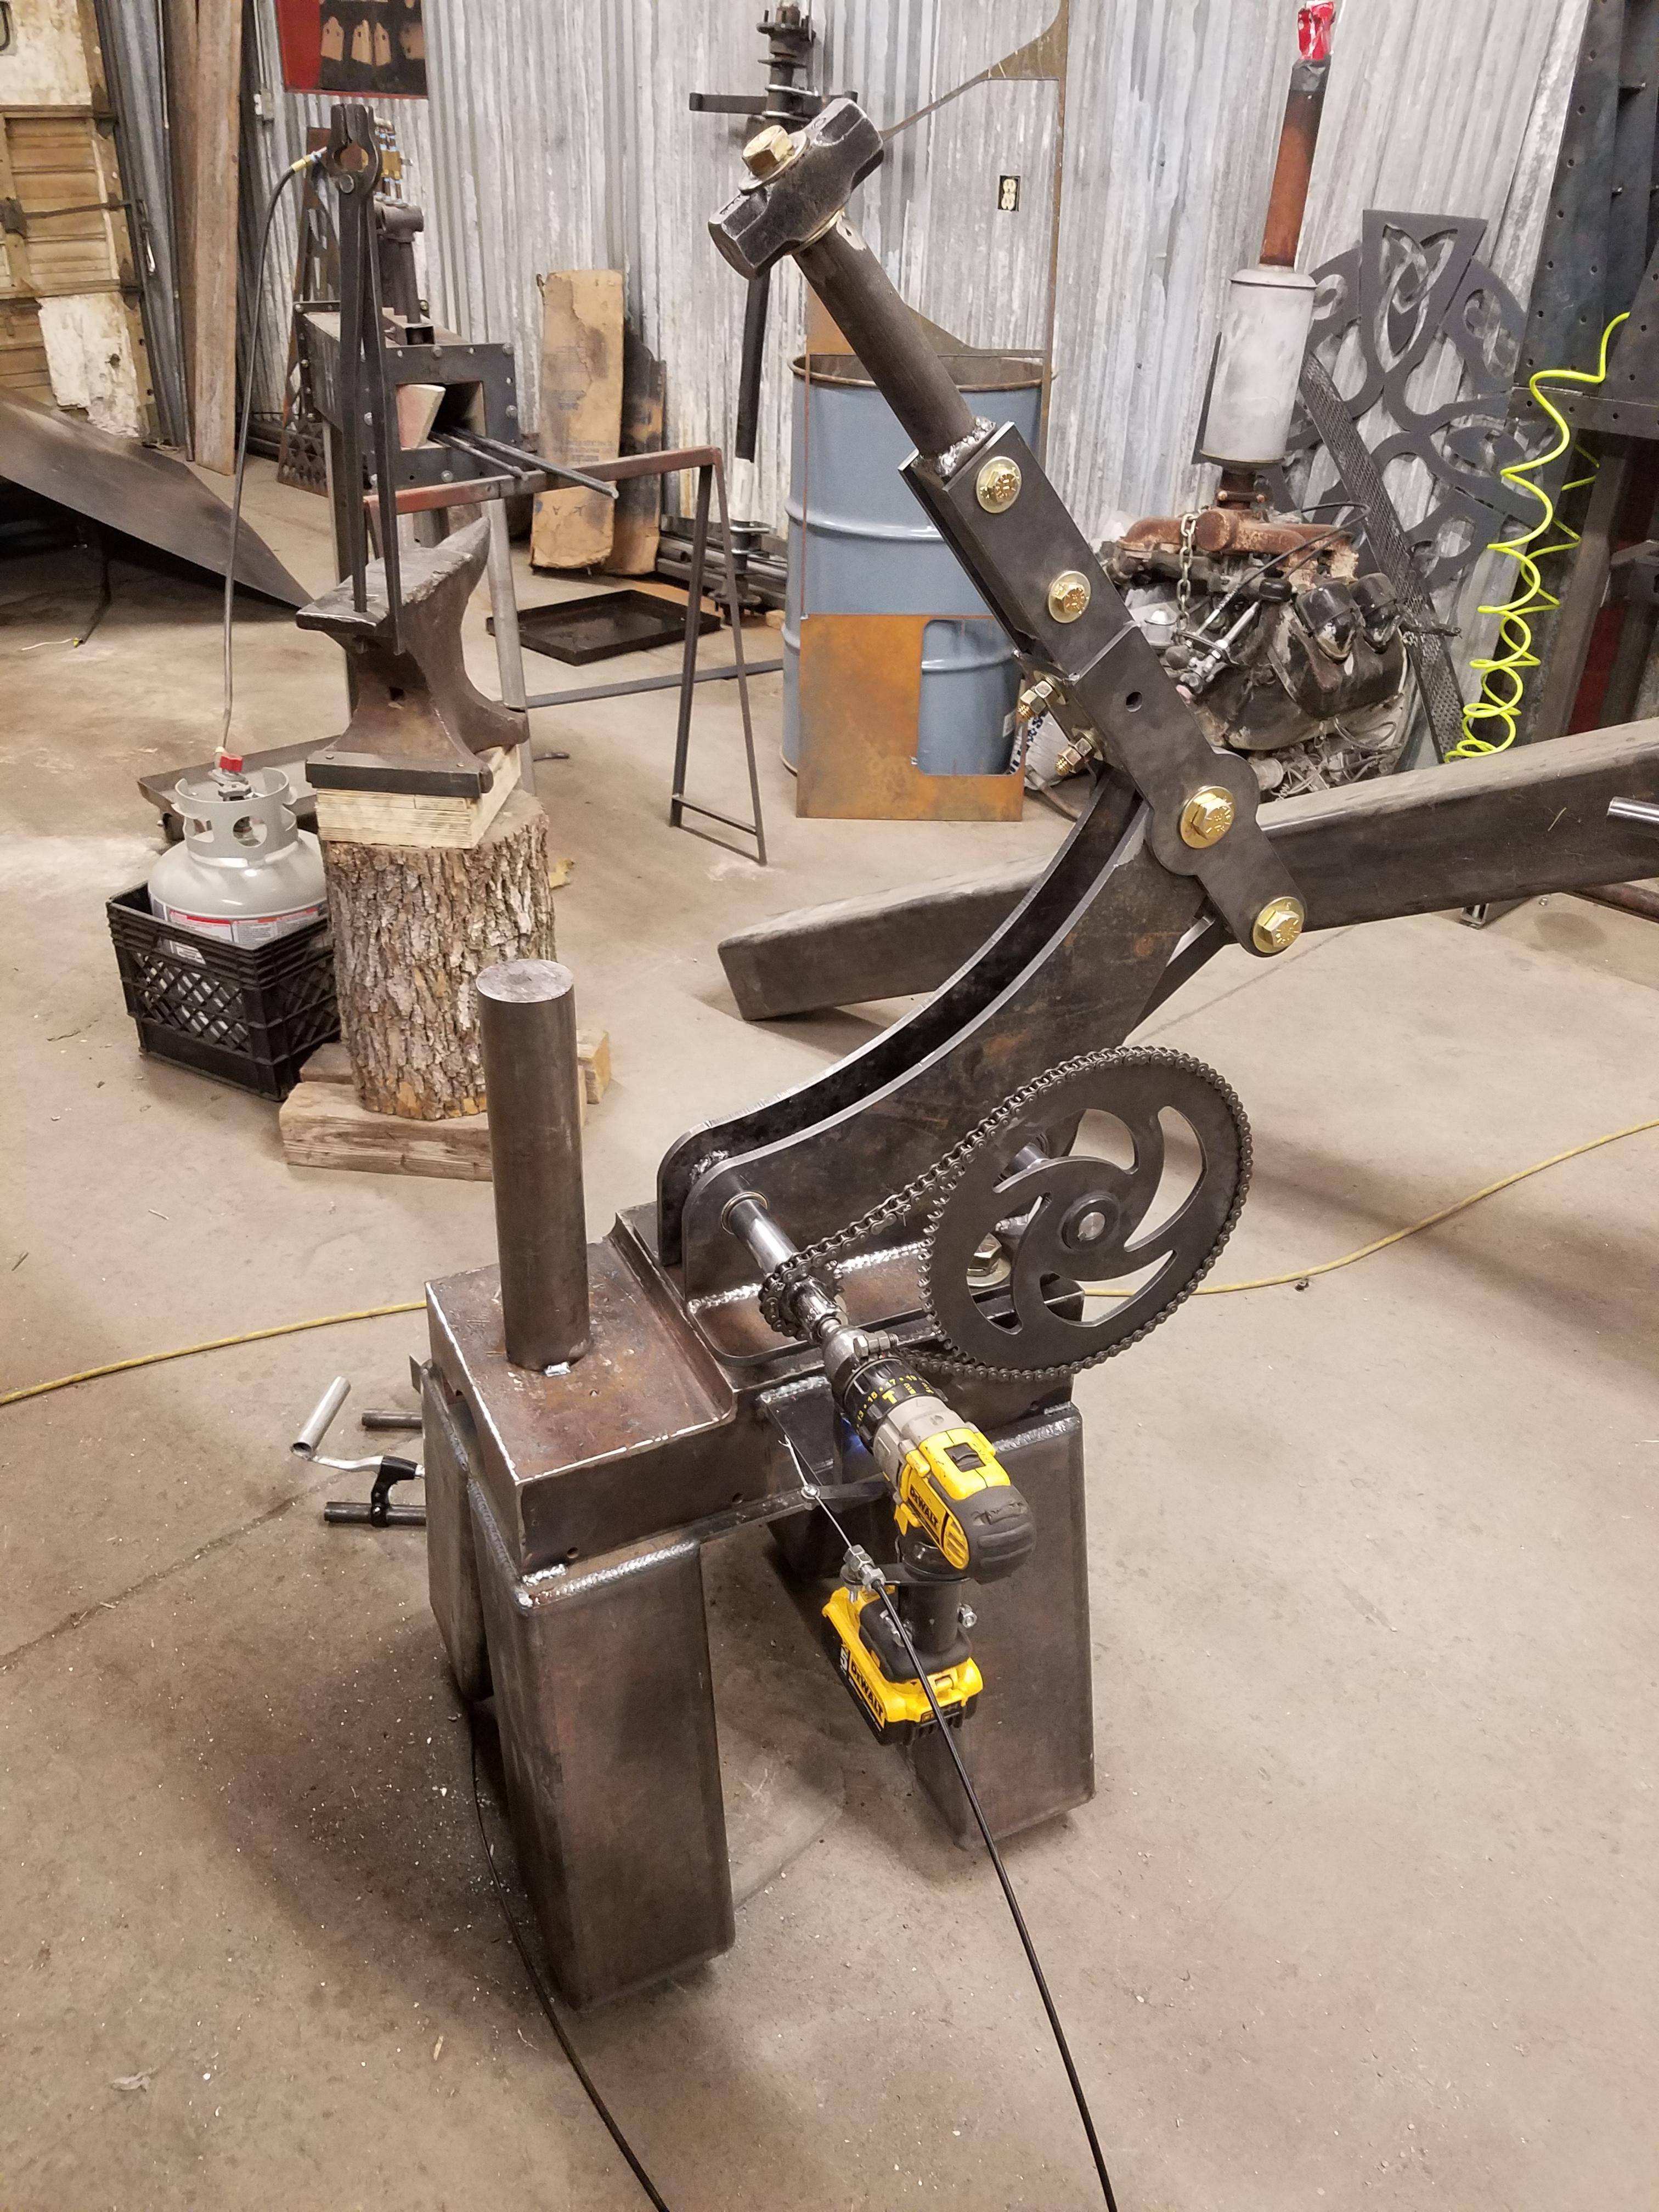
setlab - Thanks it was a fun project for sure. And the only thing i didn't have laying around was the keyed shaft collar for the big sprocket! My $15 power hammer haha
-
7 hours ago, Irondragon Forge & Clay said:
My wife said ohhh I like that, which translates to make me one.
") Love the throttle cable control.
Love the throttle cable control.
Haha well it's always nice to have the boss on board, thanks. I originally built the drill control to run my rotary table as a weld positioner.
7 hours ago, Marc1 said:Well done LMF, that is very ingenious. Reminds me somehow to Tom and Jerry's mouse trap ...
 You should send it to DeWalt and offer to post on YouTube for a fee
Haha yeah thatd be cool, everyone tells me i need to put it on youtube
-
On 1/10/2019 at 2:48 PM, ThomasPowers said:
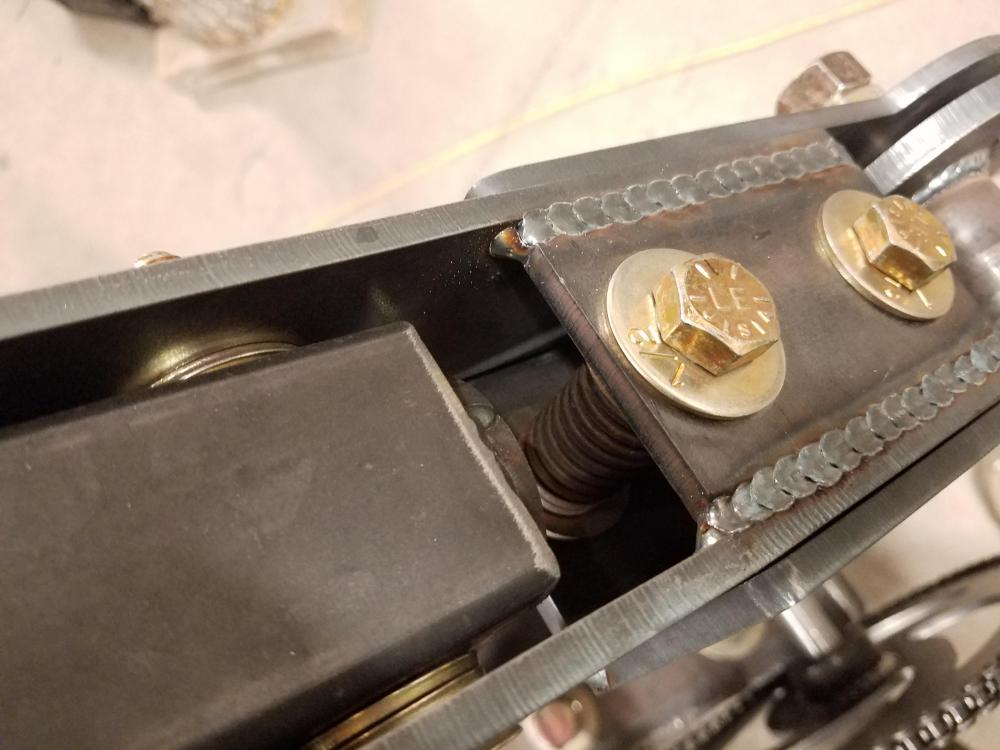
Where is the flex point that allows it to work on different thicknesses of steel? From what I see it can stall if a too big of a section is inserted? Can't access videos from work if you have it on there. It's in the arm. Hard to see
 On 1/10/2019 at 2:52 PM, Frosty said:
Must've been me last time everything's working now. That little beast does hit hard. I'm sure looking forward to you beating some hot steel with it.
See above post haha, it's got quite a bit of flex If needed
-
Link removed if the other link won't work you can get to my main page here. It's the most recent post
-
Thanks! There's not much you can't power with a good drill!!
-
36 minutes ago, Frosty said:
I don't want to sign up to Instagram so I can't watch the videos.
Thanks frosty.My profile on Instagram is public so you should be about to check it out. I've barely had a chance to play with it yet so i can't give you a very accurate answer as far as run time but the 10-15 minutes i used it the gauge on my battery didn't move.
-
Thanks, Ive barely gotten a chance to use it yet. Maybe about 10 minutes tops but so far i love it. It hits harder and faster then i can. I have a few changes to make but it's pretty impressive for being powered by a drill
-
Thought some of you might find this interesting, I was tired of my shoulder hurting so I whipped up a little power hammer. Not sure how to upload videos so I'm putting a link to the video I posted on my Instagram Link removed
-
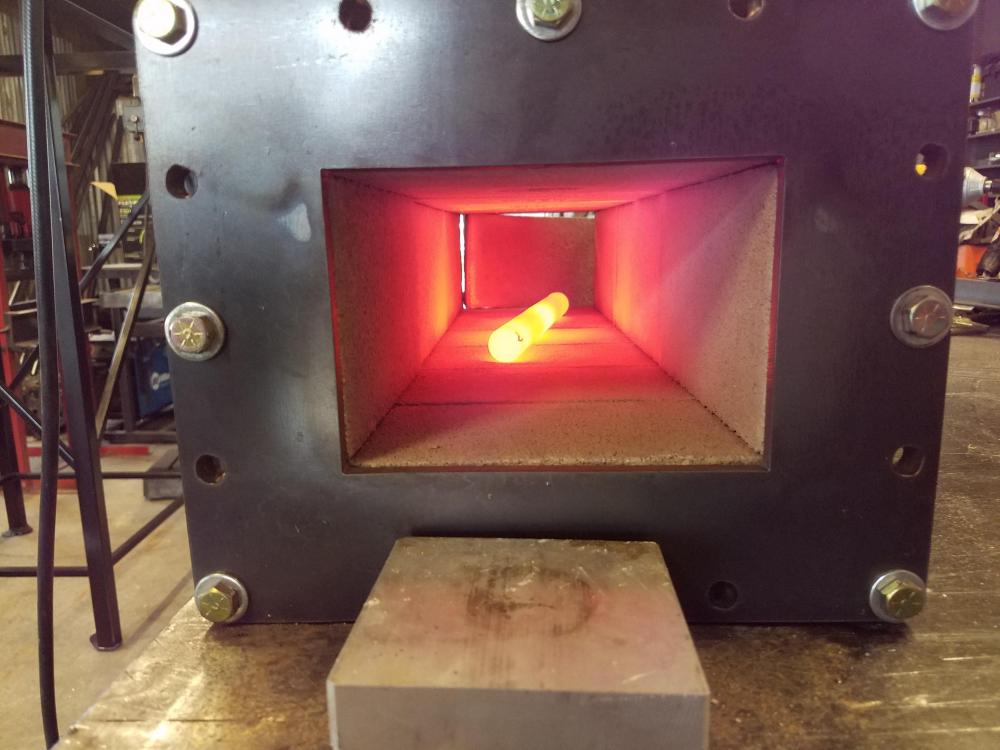
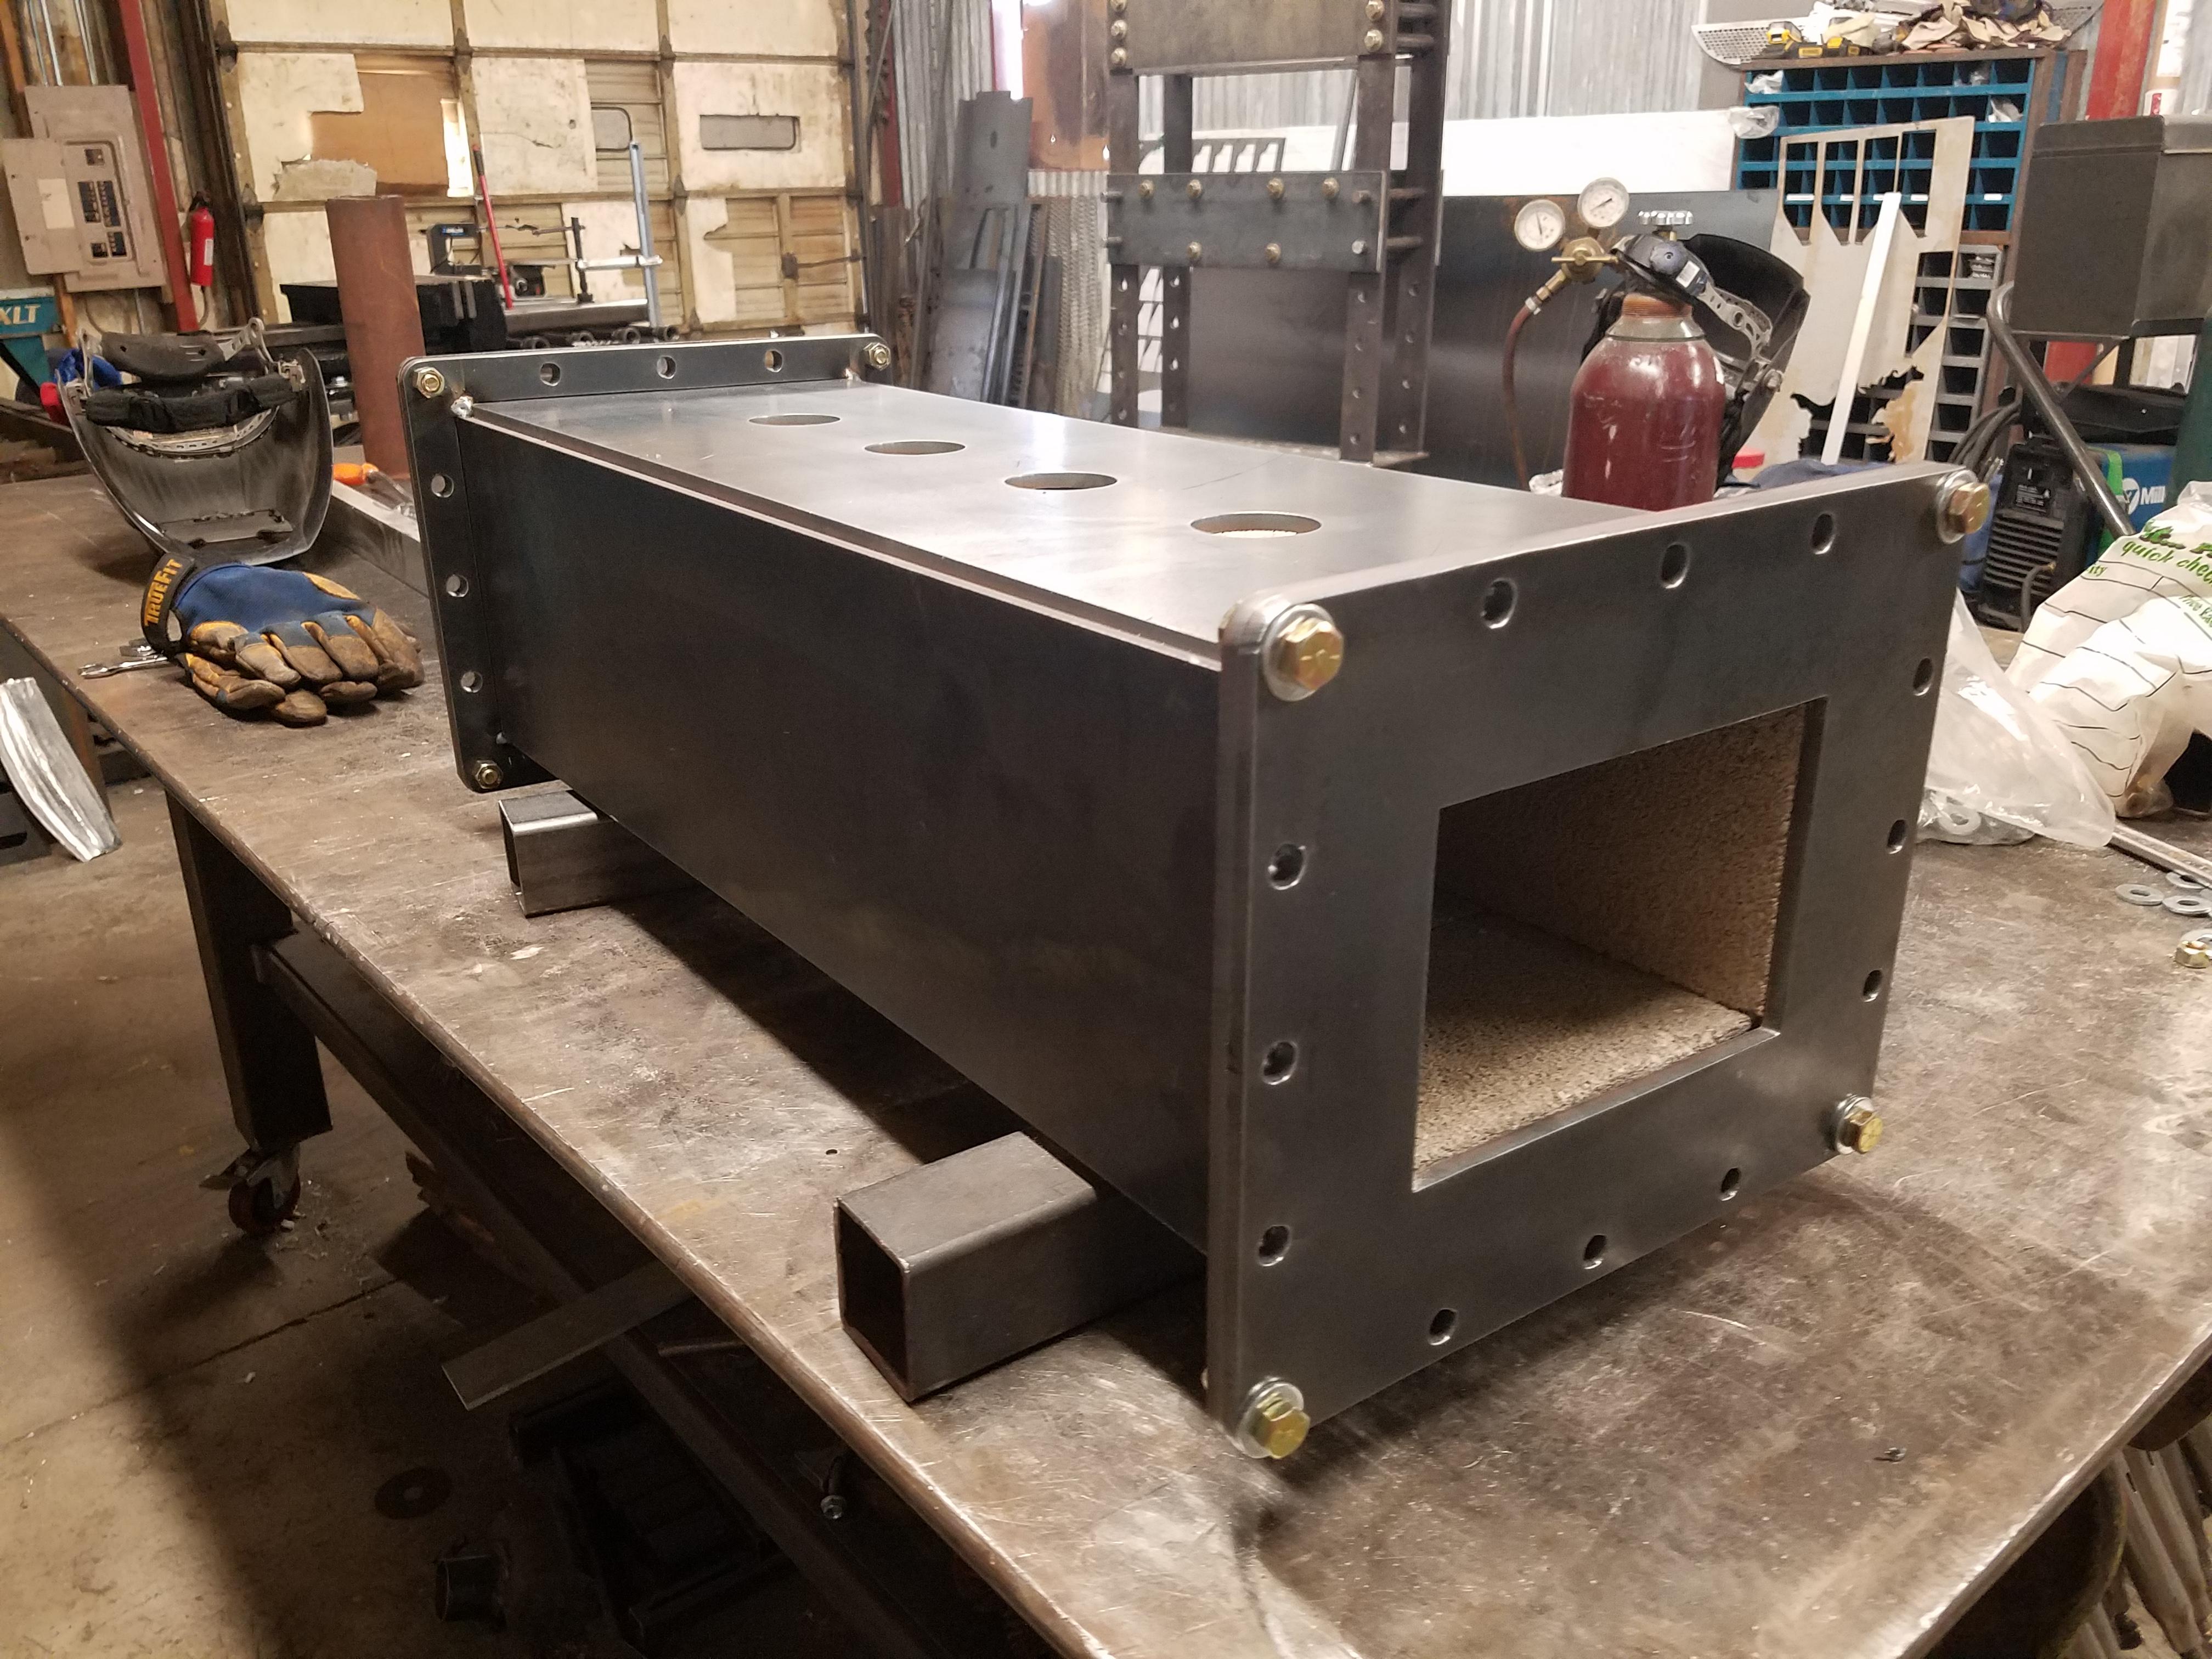
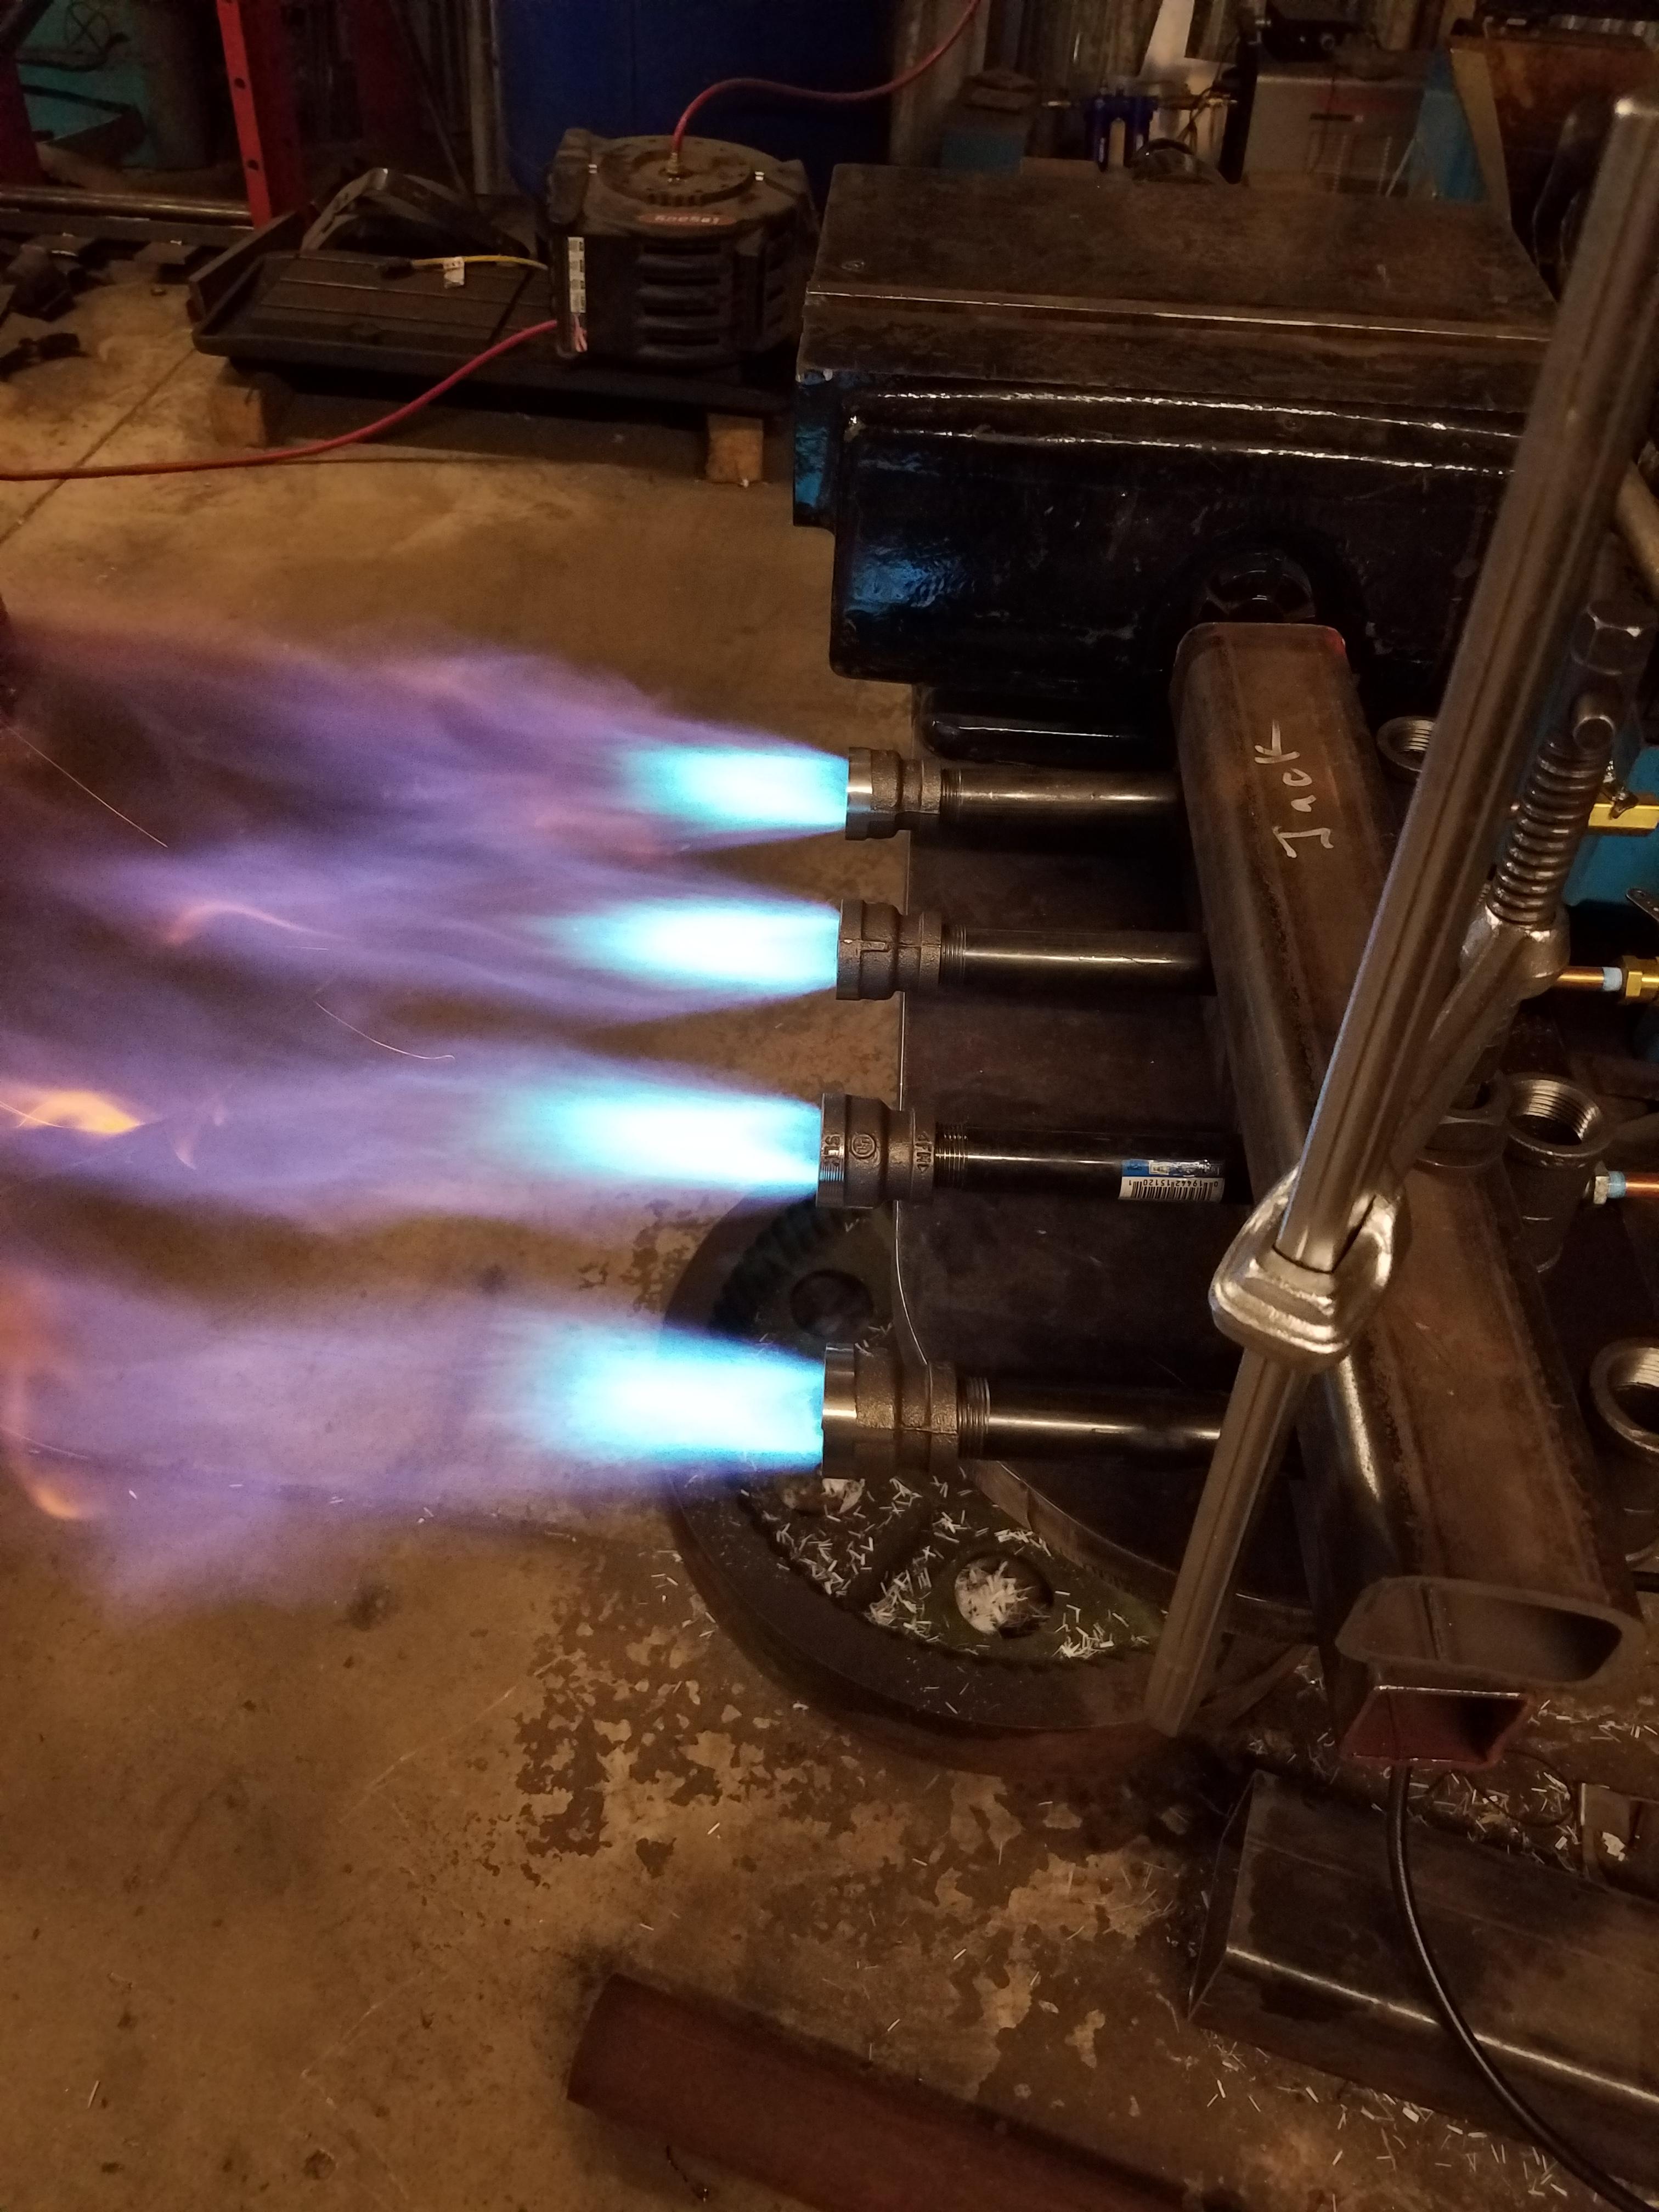
Finally had a chance to get the box welded up and do a quick test run on a small piece of 1" cold rolled round. I recon it'll do what i need! Need to get the legs on it in the morning and get going on this railing. I'll modify as i need as the jobs demand but overall in fairly happy with it.
-
9 hours ago, Frosty said:
You DO have an insulating layer behind the hard brick. YES?
In the pictures, no there's 1/4" spacers between the bricks and shell. But i have a one ordered...
-
I got a chuck on order, and borrowed a chuck from a friend to drill smaller holes in some new plugs. My main burner tube is 3/4 the tees are 3/4-1" should i start with smaller then .030 do you think?
My original plan was to use mig tips but my local hardware store had nothing small enough to thread. Maybe i should just drill and tap those plugs
-
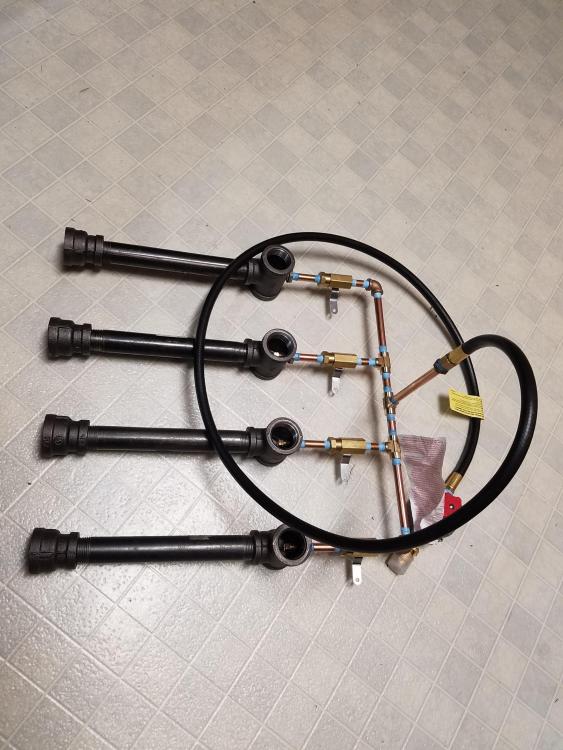
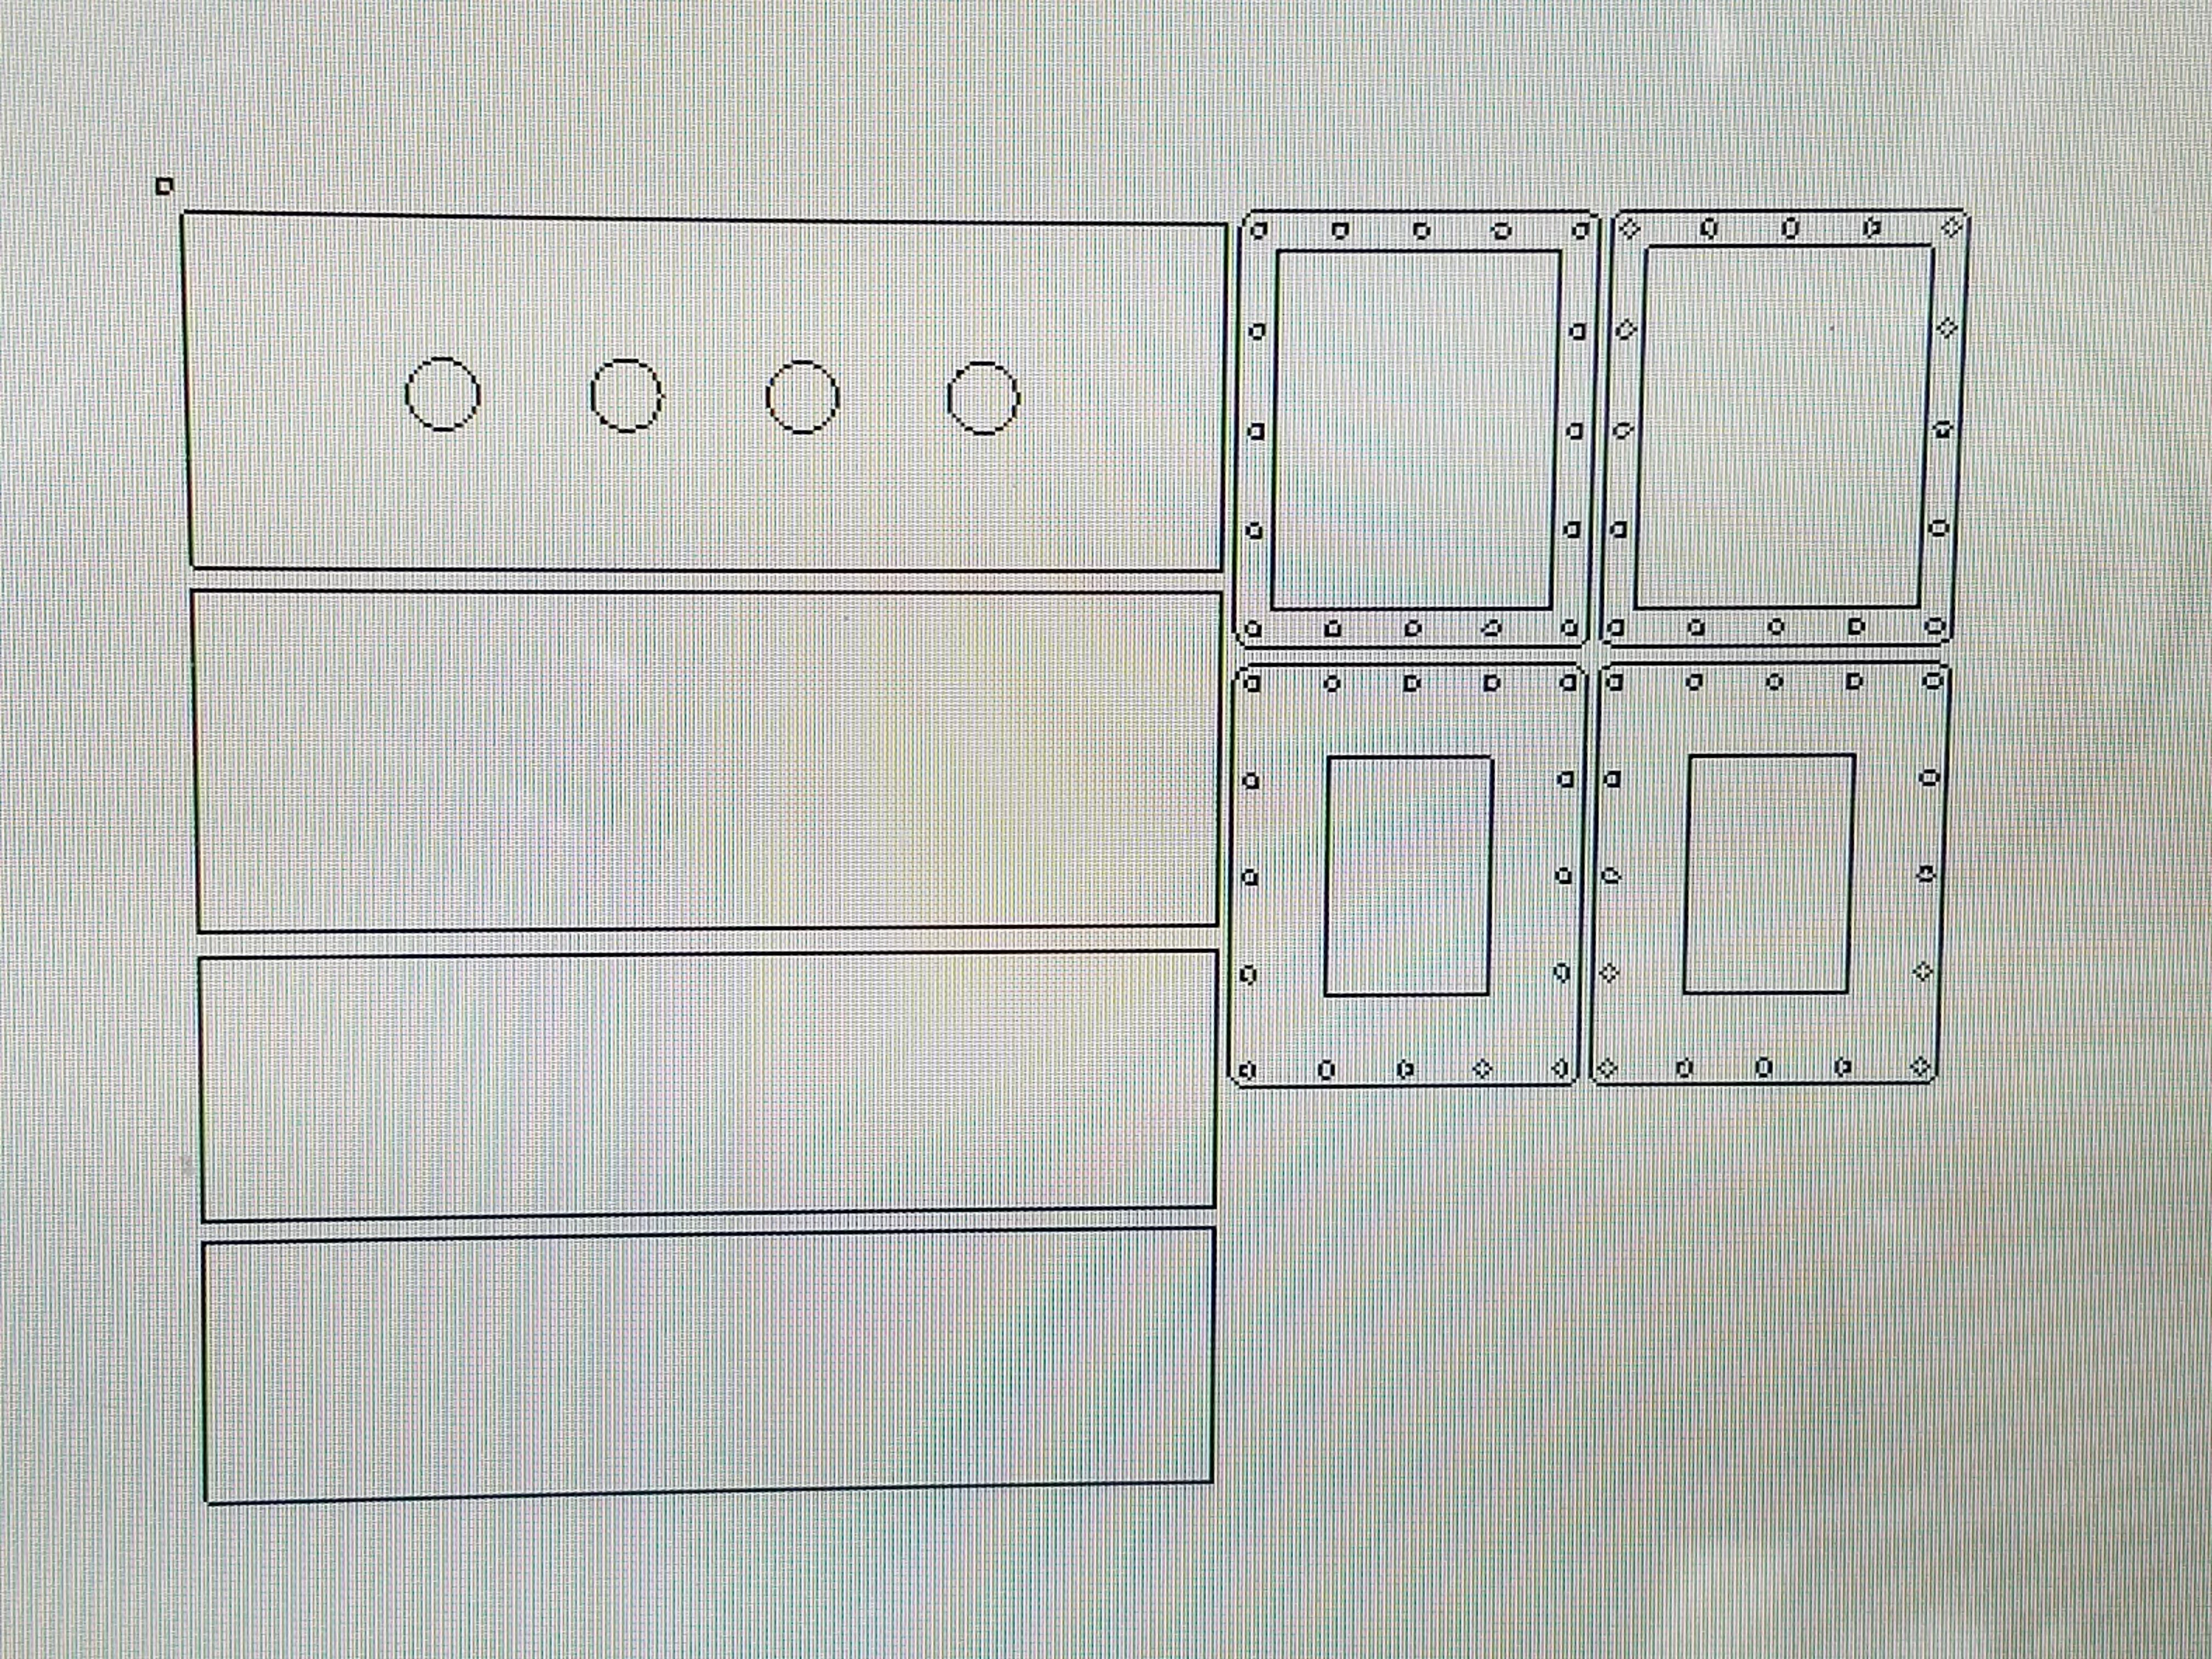
Got my parts all tacked up, feeling like a kid the night before Christmas again. Anxious to get the rest assembled and try it out/ get my burners where they need to be. This is all a learning experience for me and if it's successful at getting this job done but needs changes then so be it. I know 1/4" plate is overkill but it was left over from other jobs and is paid for

-
Thanks for the advice frosty, i might have to do some adjusting of my tip one way or the other if i can't get the desired flame. Smaller then. .040 is waaay smaller than 99% of the work that comes through my shop so i haven't needed micro stuff. It will be soon though. Building all 4 burners at once may be an optimistic/ kid outlook but hell I'm both of those so i spose I'll accept it haha. Had to give it a try anyways, keep in mind im building this to crank out heavy hard to bend scroll work fast. I can't start with a 1 burner forge. What do you think?

-
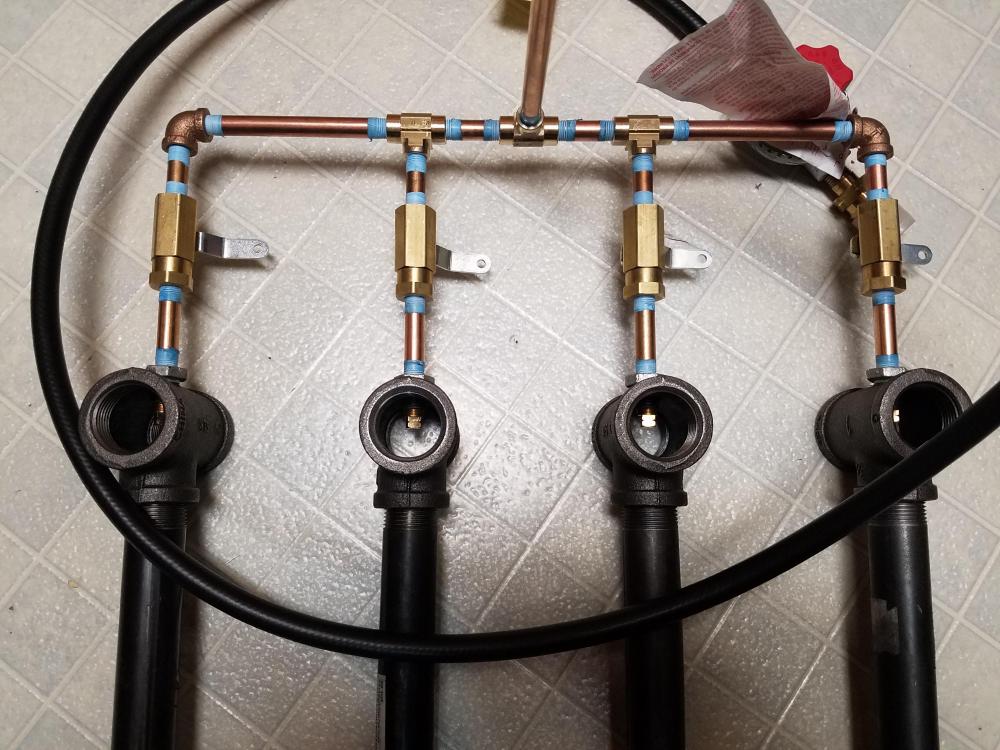
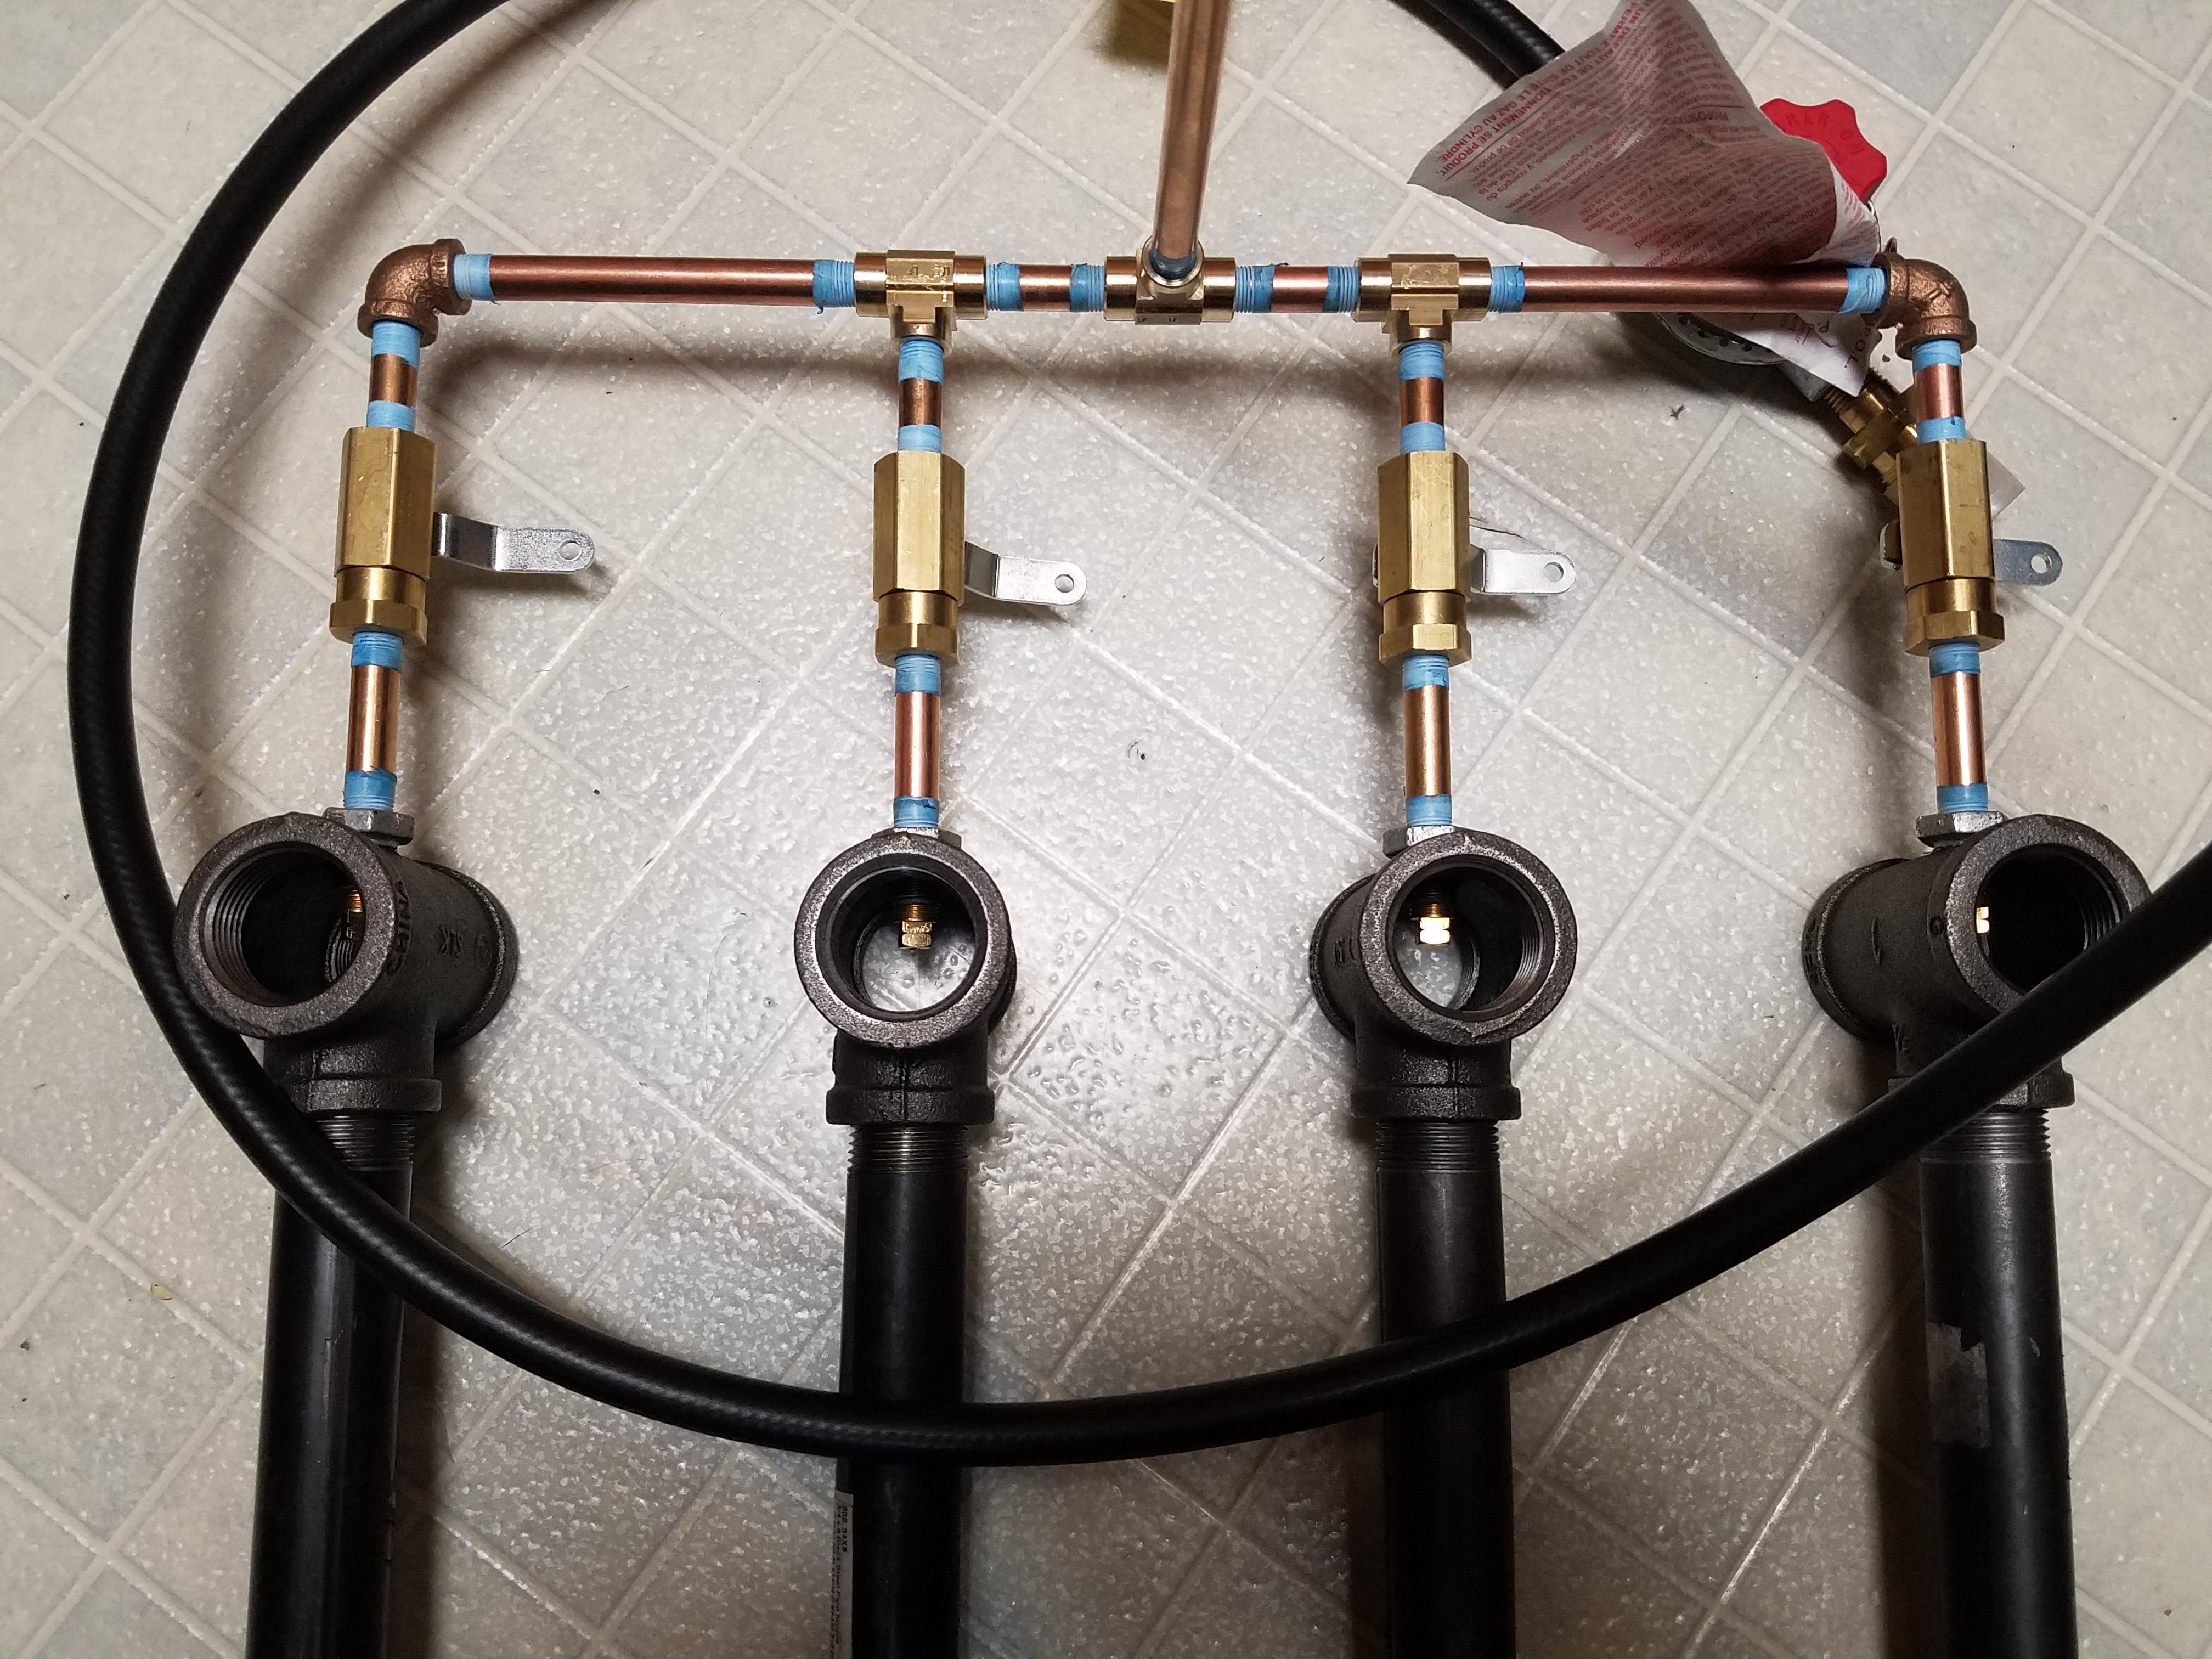
The main burner tube is 3/4 NPT x 8". tees are 3/4x1. The small pipes are 1/8" npt. Thanks a lot! I've done lots of reading but at a certain point my minds just becomes scrambled and I've gotta just get started building haha.
-
3 hours ago, timgunn1962 said:
Quotes removed
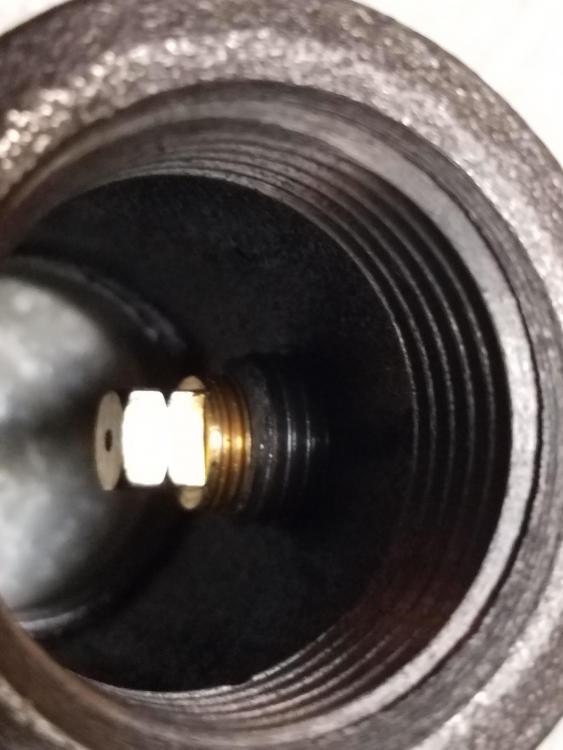
The holes are. 040, the smallest i could clamp in my chuck. Might have to do something different for more adjustment. I suppose I'll have to try it out and just see what happens, about to cut parts for the rest of it now.

-
Thanks for the reply Thomas, I hadnt thought of that. But honestly Im not going to have much invested in time or money, plus i love building new tools. I can see a smaller setup being very handy, ill have to build another i guess!
-
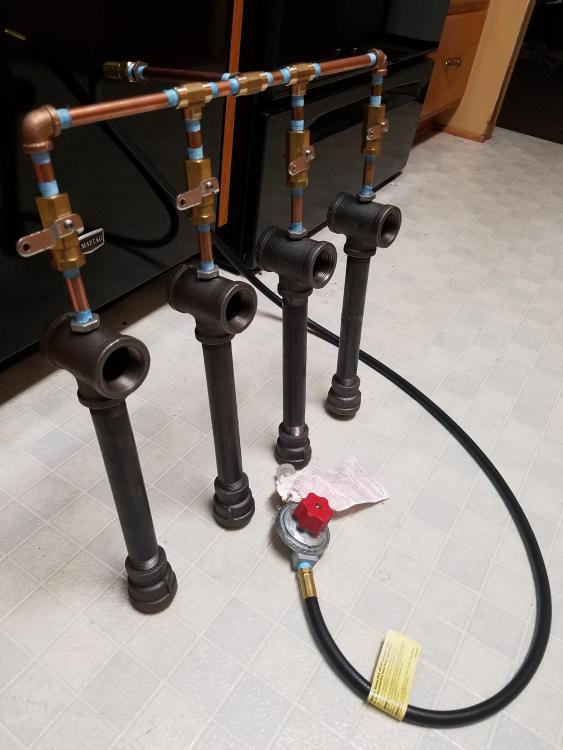
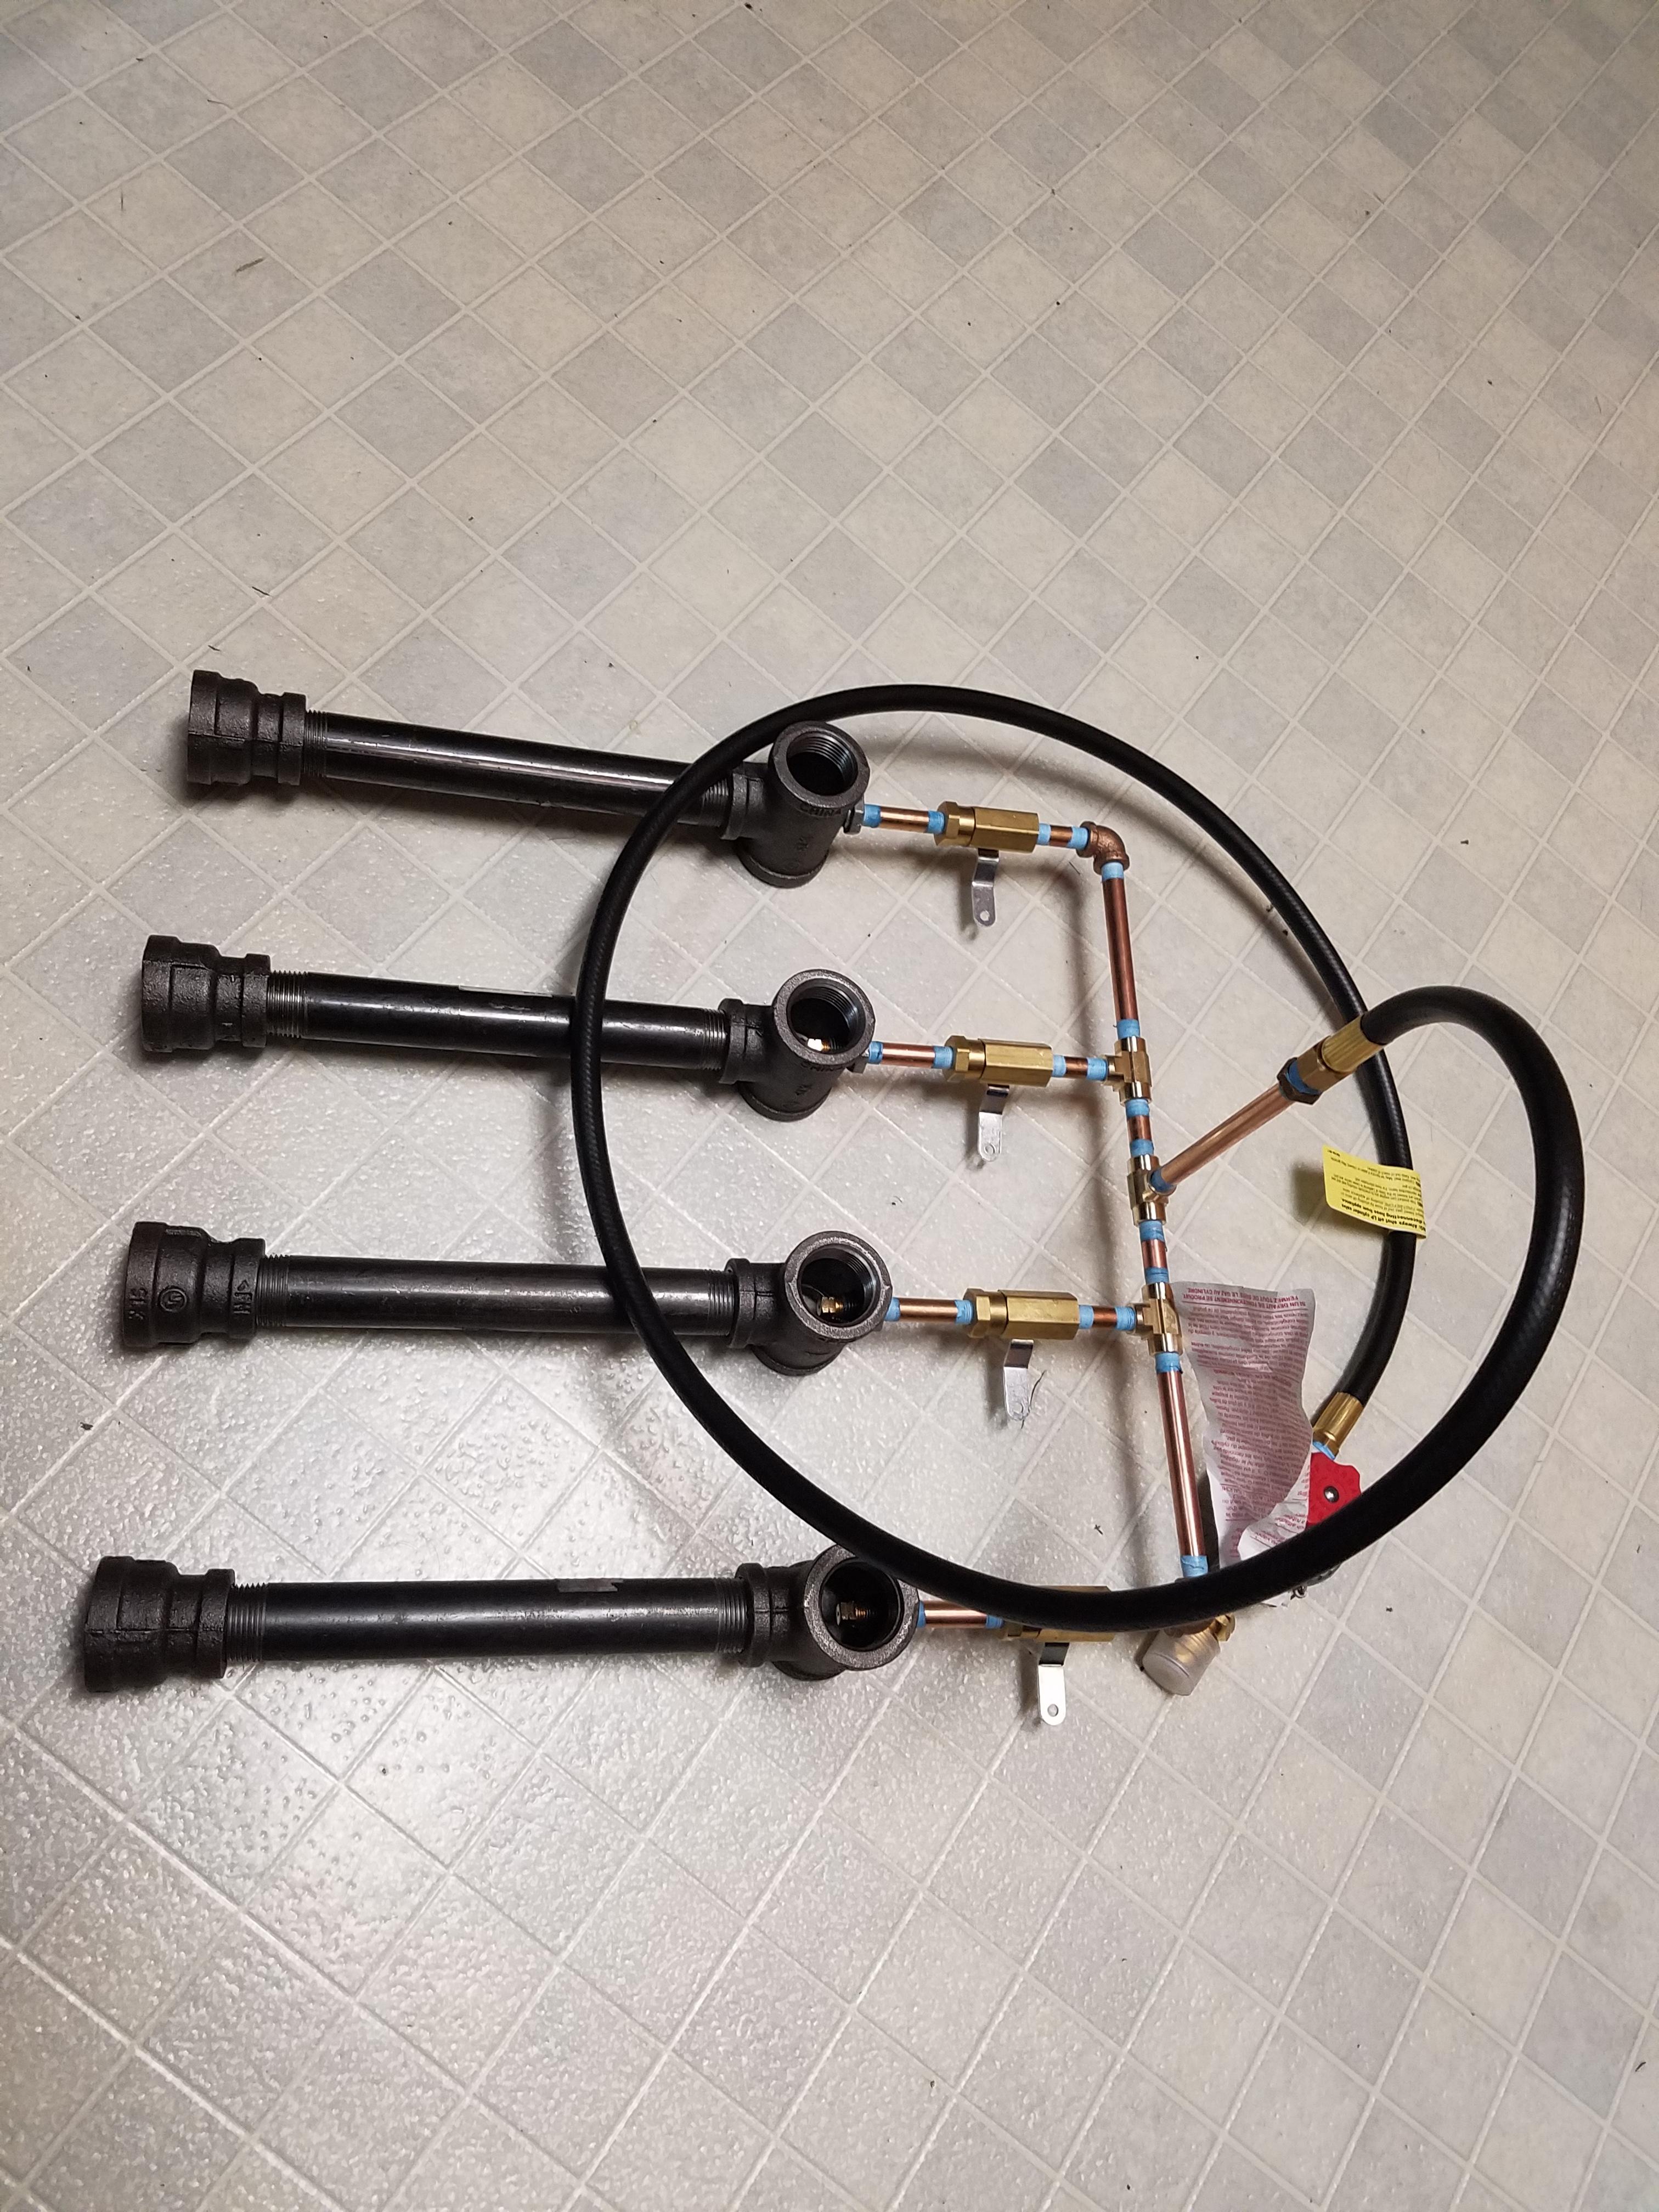
Hi everybody, been lurking on the site for a while soaking up the great info. Finally have a job coming through the shop i can justify building a forge. I'll be using this forge to heat sections of 1" hot rolled Rod and 1/2" hot rolled Rod to form scrolls for a custom railing. Figured id start by building my burners and build off of that for the rest. Anyway, here's my 4 tee burners. I'd like some constructive criticism, or changes i should make before trying it out. All my parts were drilled and tapped in my lathe to keep things straight. Thanks in advance!


My mini hammer
in Power Hammers, Treadle Hammers, Olivers
Posted
It seemed to work really good, although I'm very inexperienced with power hammers. It worked way better then my arm haha