Anthony Bruno
Members
-
Joined
-
Last visited
-
good point about the size. And I thought same thing swedefiddle brought up and I asked but the estate has been cleared out.
-
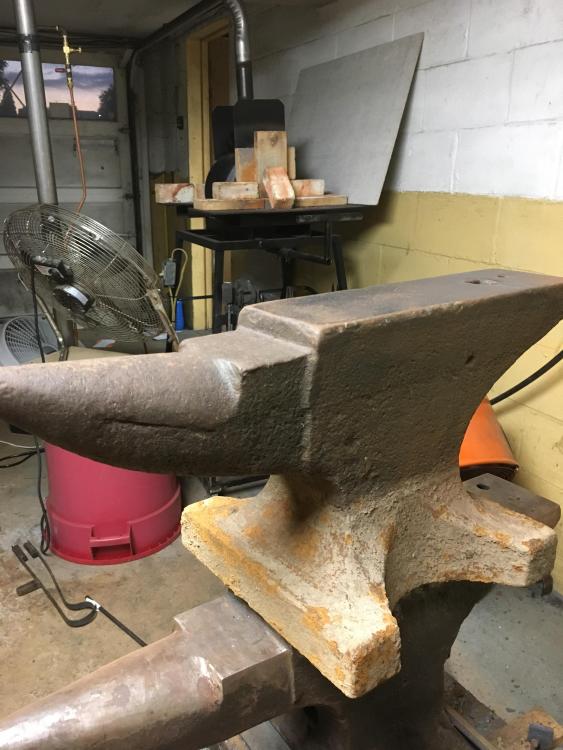
Well I have the anvil mounted in place of my hey budden just to give it a go and see what it feels like working on it. I’ll probably end up with both anvils mounted and useable, not sure why, but why not lol. I have not gotten a chance up until now to work on it. This is the busy time of year on my day job so all hobbies tend to get neglected a bit at this time of year. The word has gone out in my circle of friends and family that I’m interstate in anvils and blacksmithing tools and I just had a near connection on another anvil. I missed out but it is a prime example of how once the word spreads you’ll be surprised how you will encounter someone who knows someone who has one tucked away or sitting in a flower bed or left behind by a deceased family member. My mother was just talking to a coworker about me and my hobby and the coworker said oh that’s funny you say that, if you had told me that 5 days ago he could have had first crack at the one that was in my aunts garage that we had just settled her estate. She told my mom it was a big one and it was the first thing to sell when the held the sale it was her uncles that had passed years before. Even tho it was a missed opportunity it really illustrated the importance of getting the word out.
-
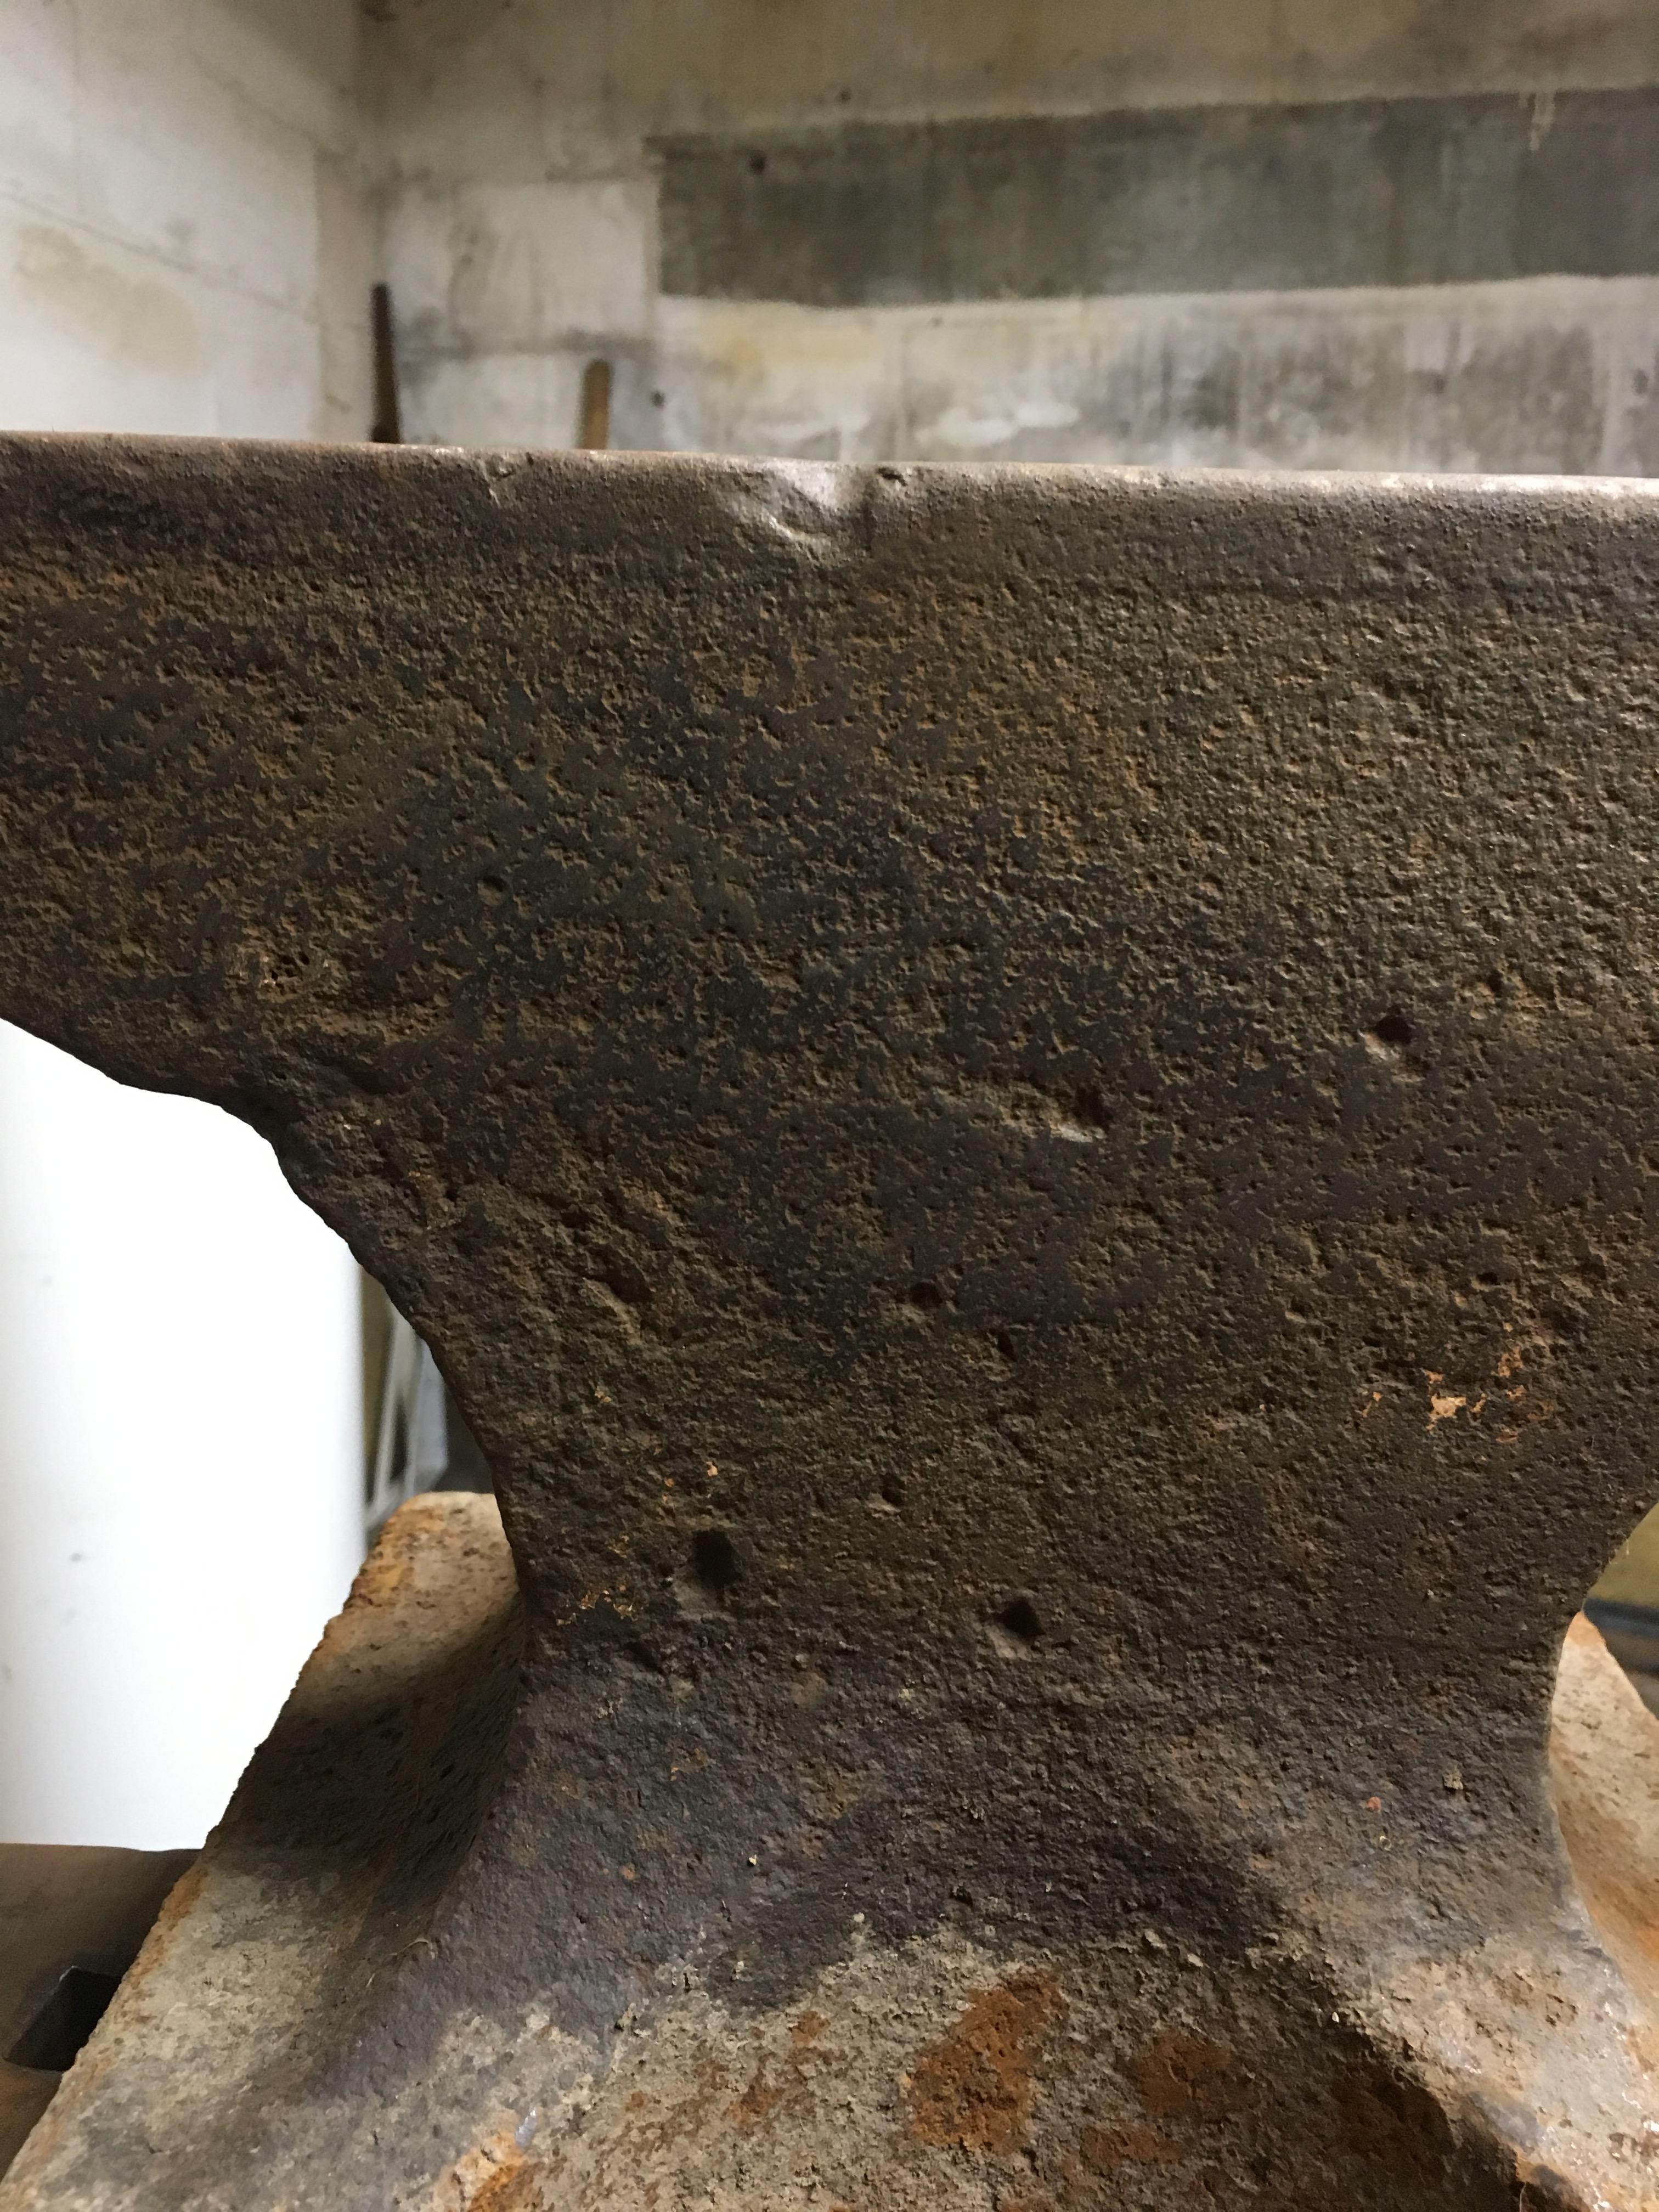
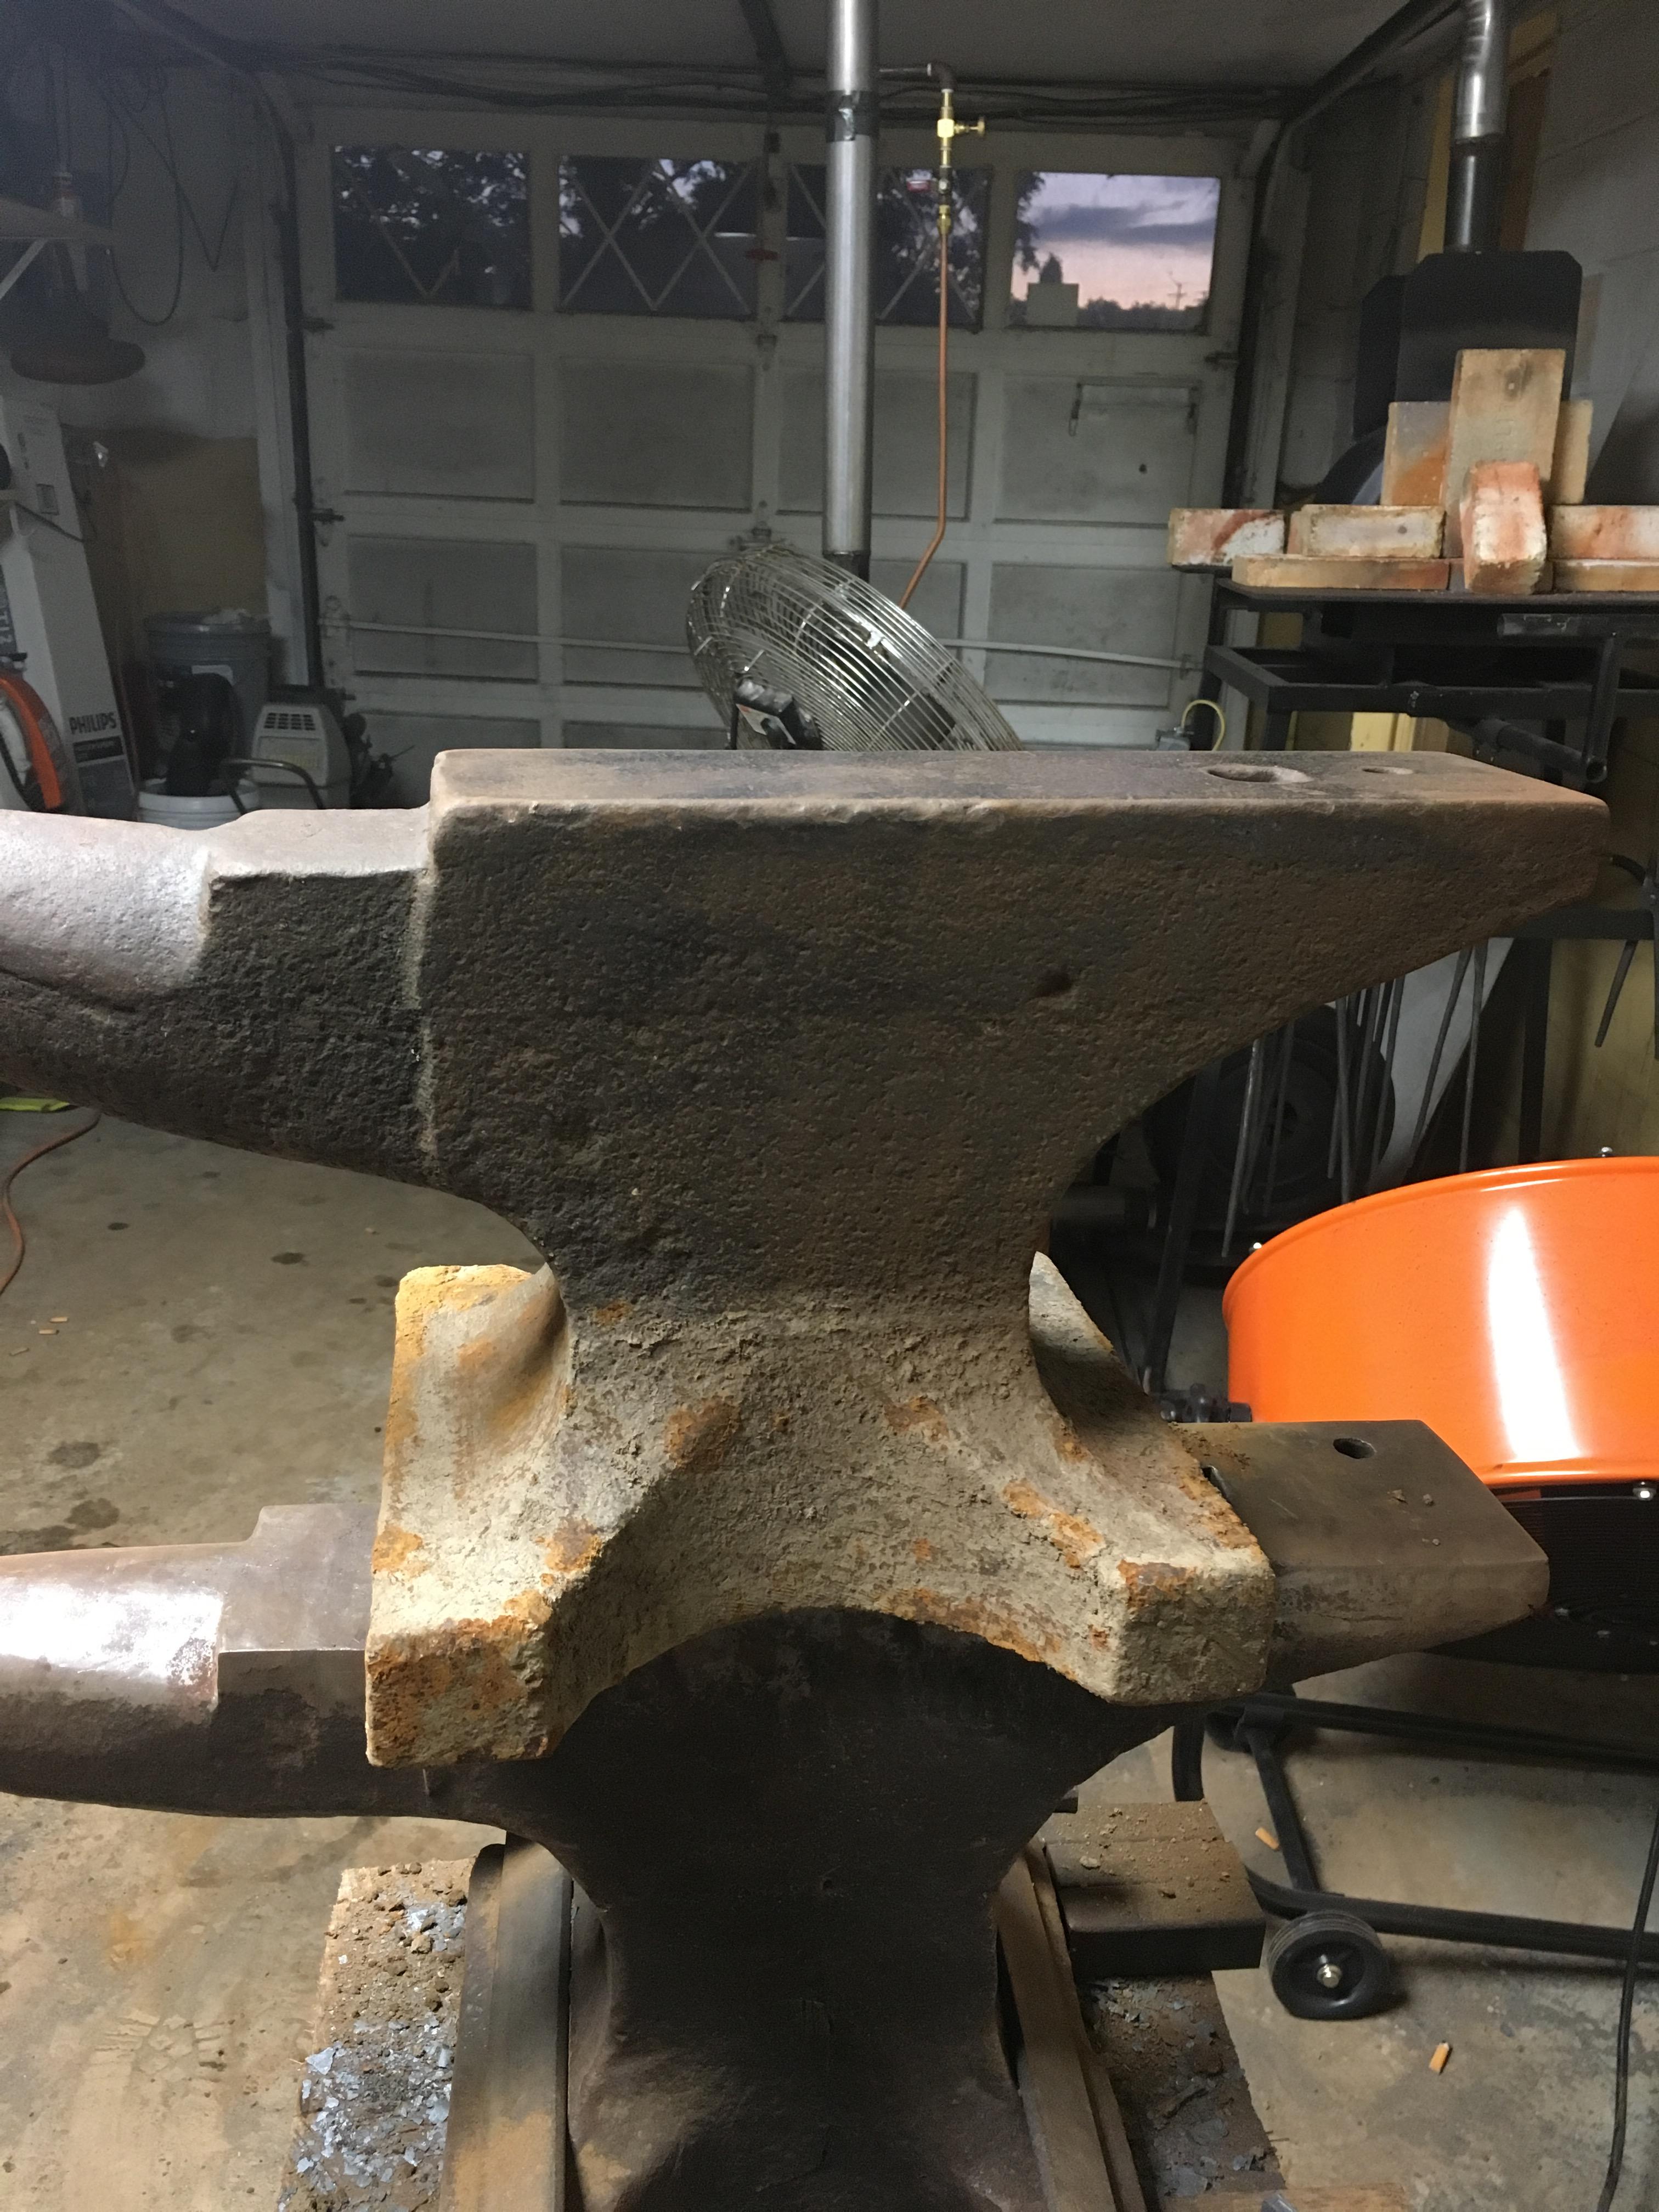
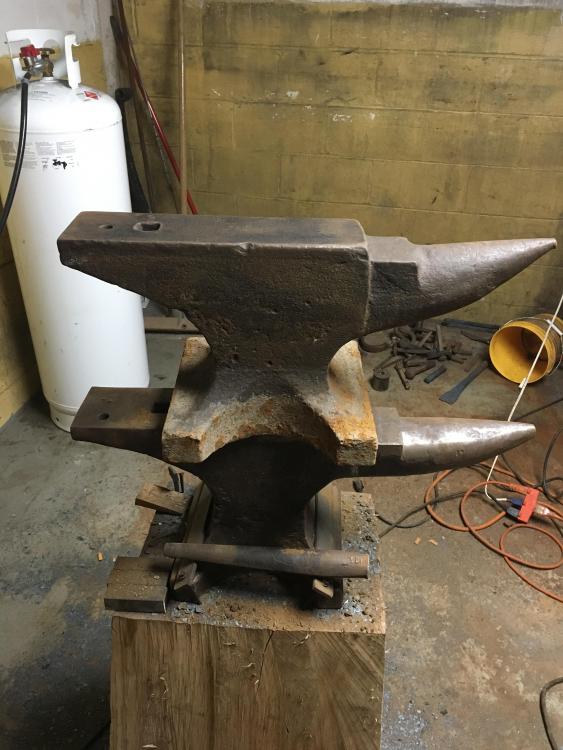
I was already thinking of something as a thank you project, and I may have been guilty of having some alterior motivation as well...he has an old garage that it just chock full of older, tools I’d love to get a chance to poke around in there.. and I believe you are correct about the weight being more than my budden, I moved it around lastnight and it definitely feels heavier. I took a cup brush to it. There was a stubborn layer on the face that didn’t seem to be bothered by the brush too much so I switched to a semi worn out flap disc and that cleaned the face up nicely without removing any of face material. The rebound increased quite a bit now that the face is clean. It was already good but now it feels as good if not better than my budden, now has a very lively surface when lightly tapping with 28oz ball pein. I know time and hot steel and forge scale would polish the face but I wanted to better be able to see the condition and figured a flap discs wouldn’t hurt anything so I went for it.
-
I hear you, no grinder action will be taken. No need really anyhow. I hit the face with a worn out flap discs lastnight just to take some of the rust off, the face is in great shape, far better shape than my hey budden that has a good bit of sway and some putting but has still served me well. I have not weighed it yet I don’t have s scale handy I’d say it’s about the same as my budden which seller told me weighed 135. I’m 40 now and I’ve been interested in smithing since I was much younger but I didn’t actually get into it until just recently, I wonder how much better I’d be if he had sold that anvil to me 20 years ago when I asked, oh well everything in its time and everything has a reason. I was stunned when he said I could have it because this guy is not know for being generous, in fact just the opposite. I guess he’s mellowed a lot in his old age. I’m just glad I was able to save it and put it to work.
-
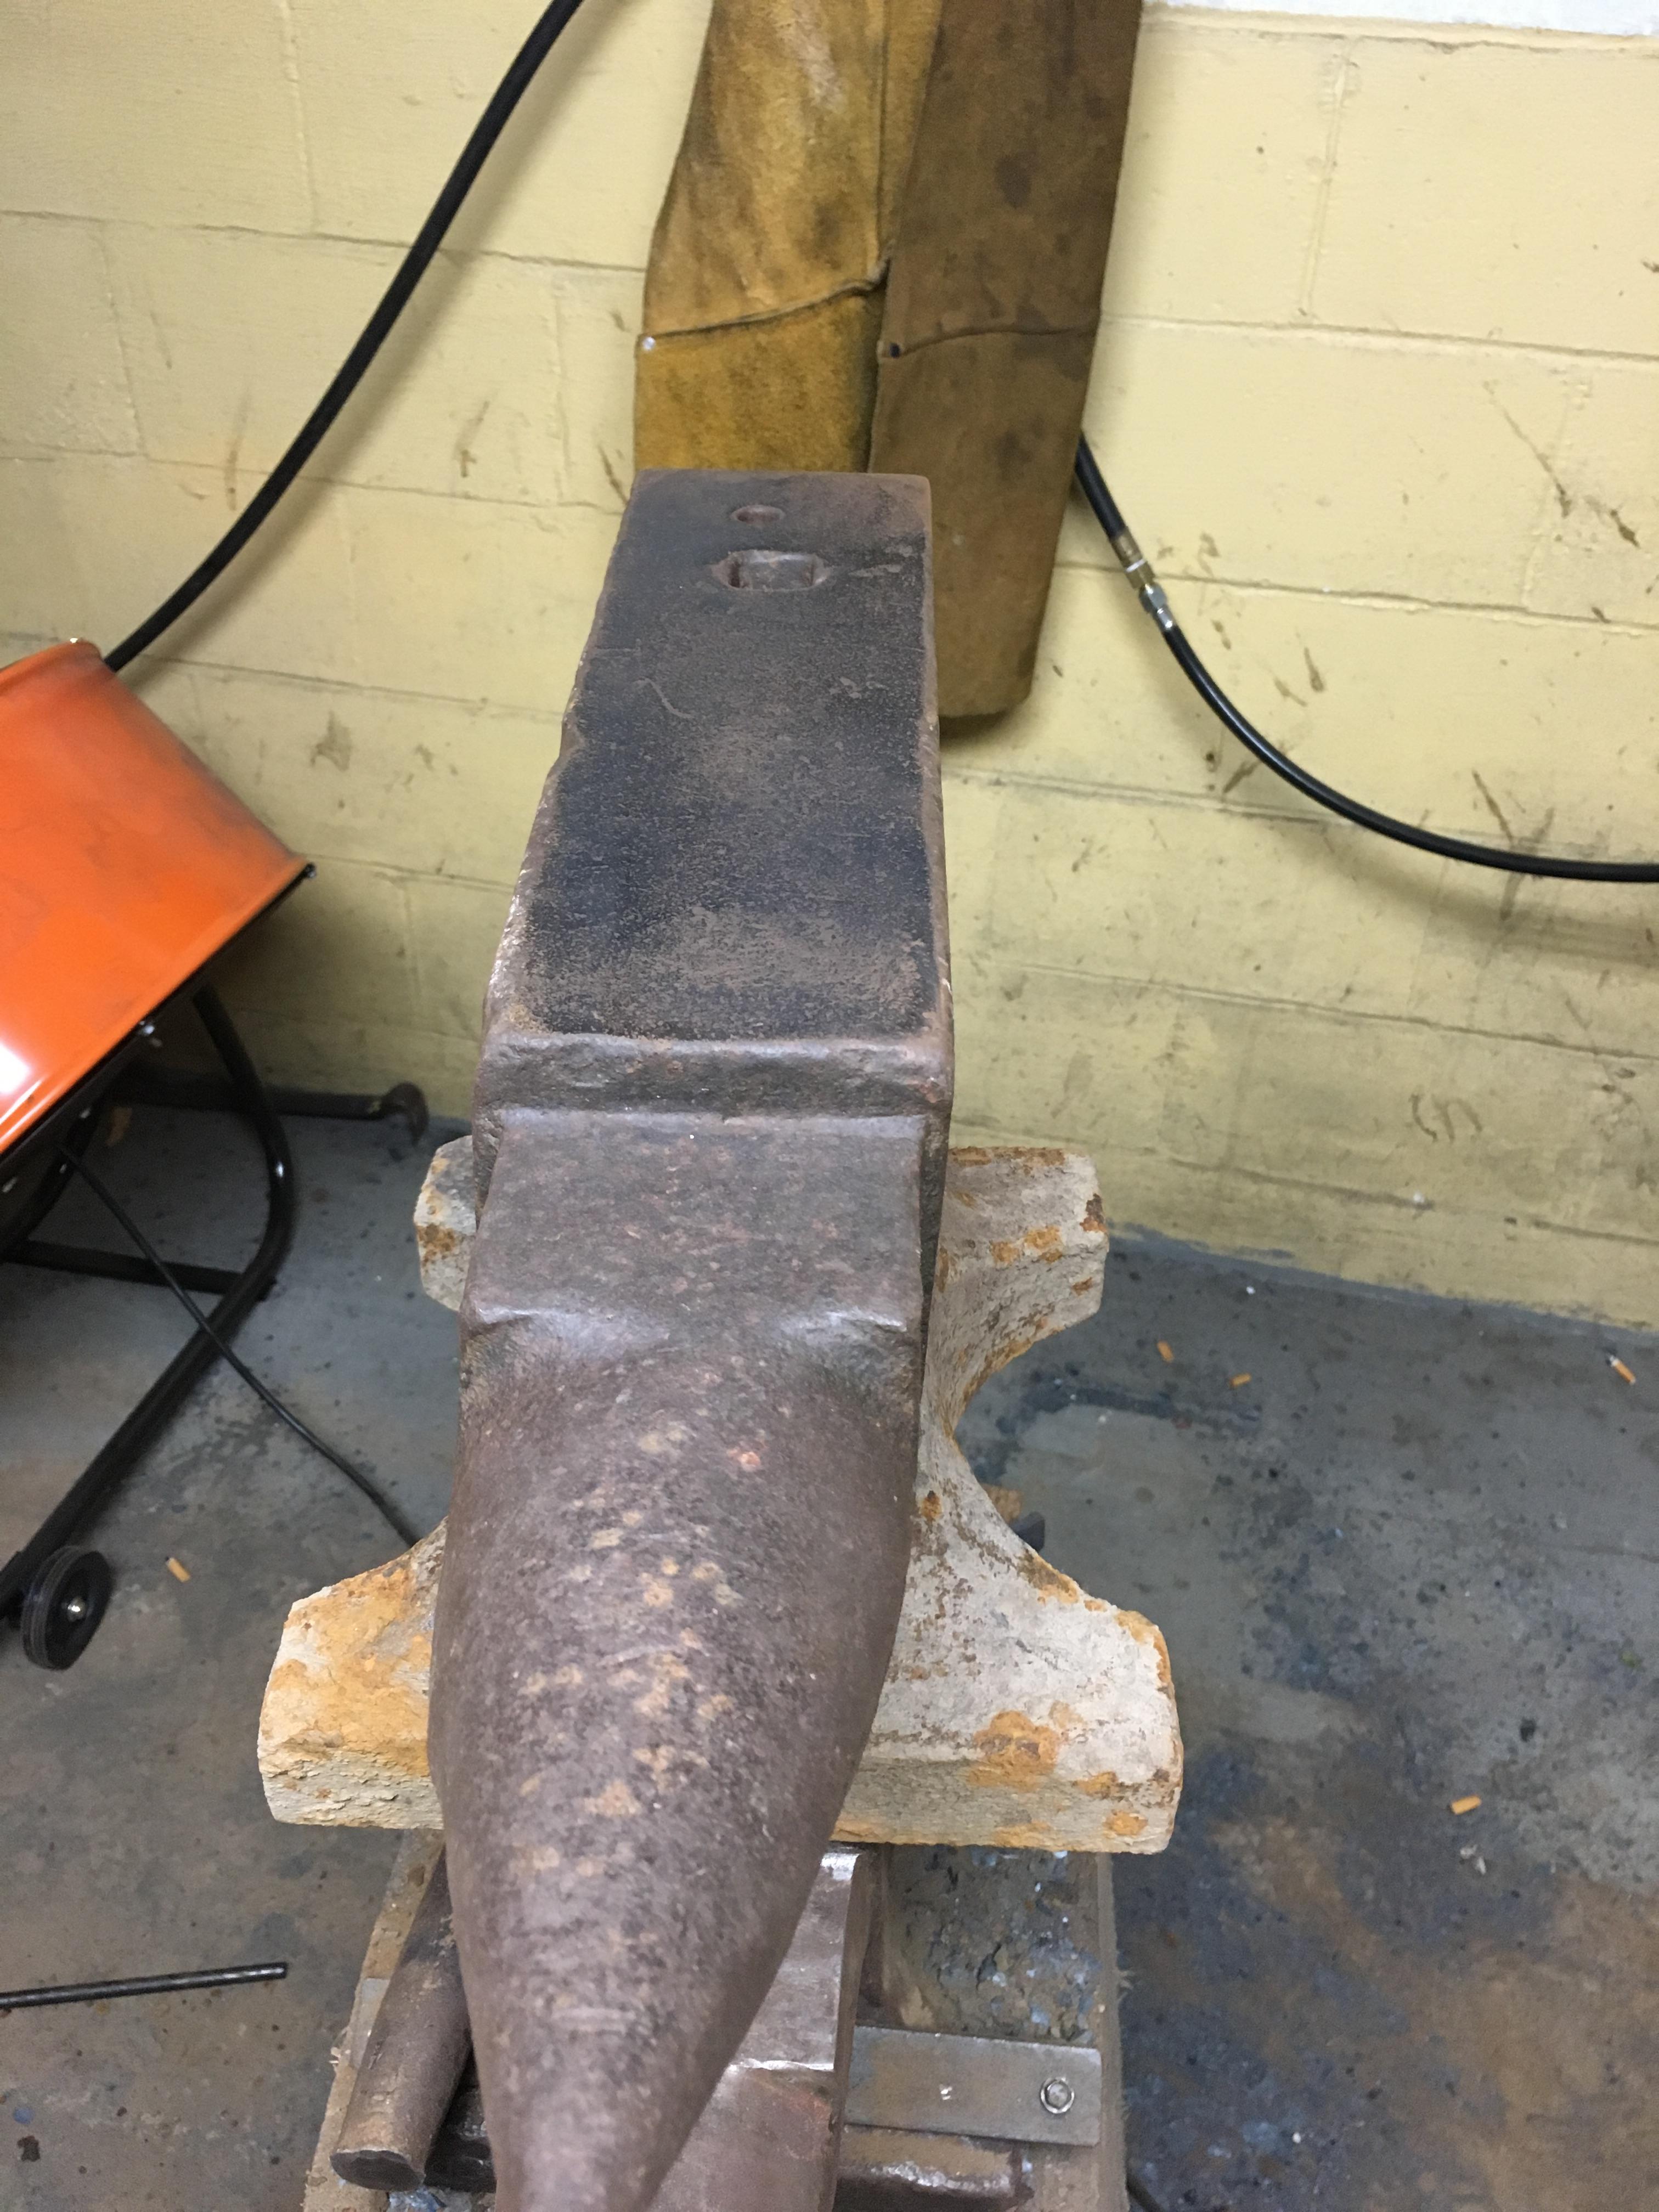
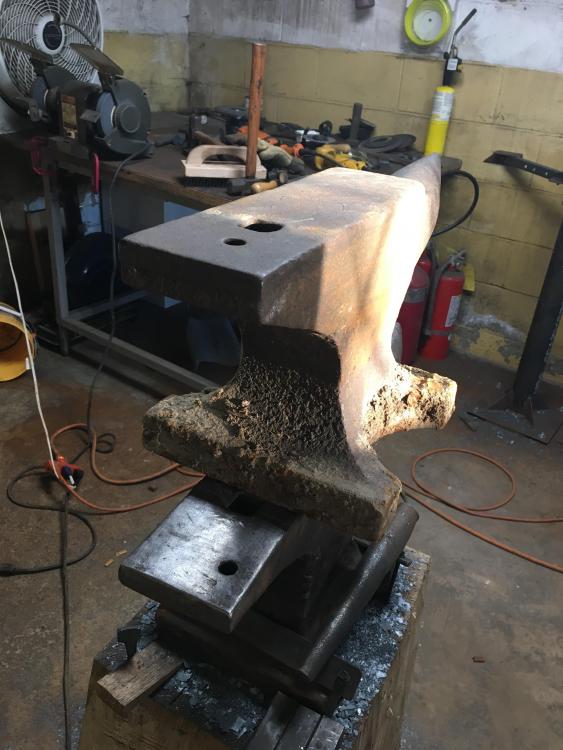
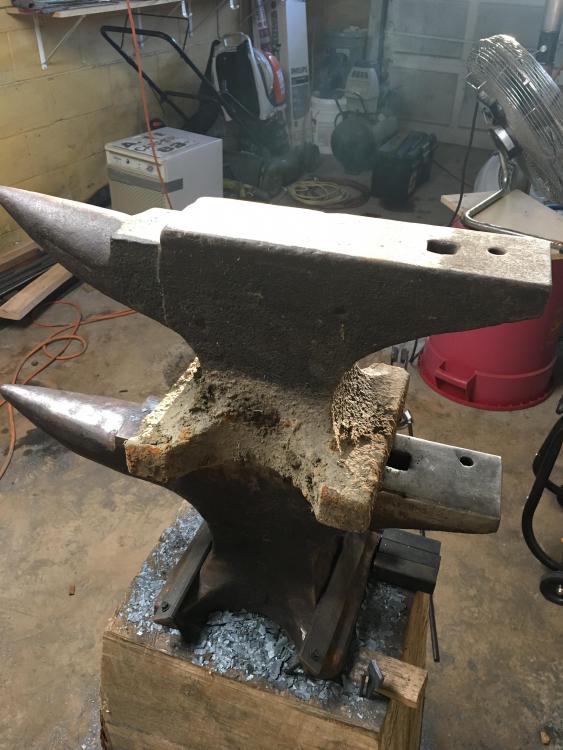
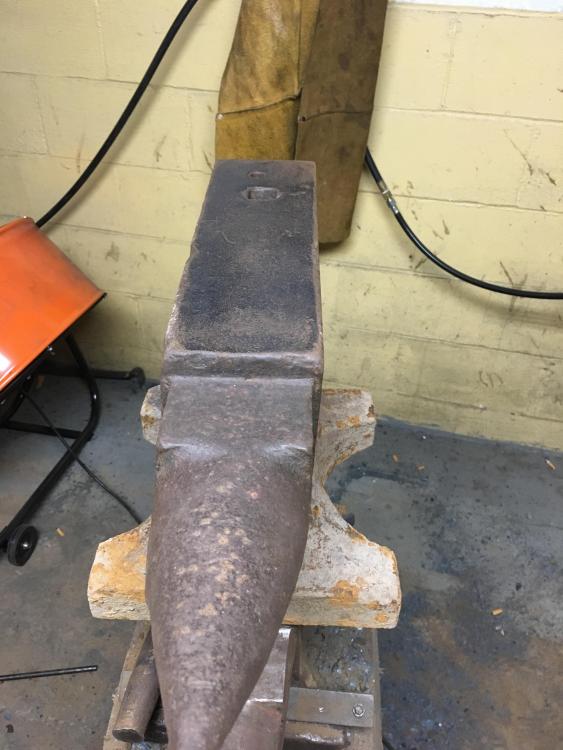
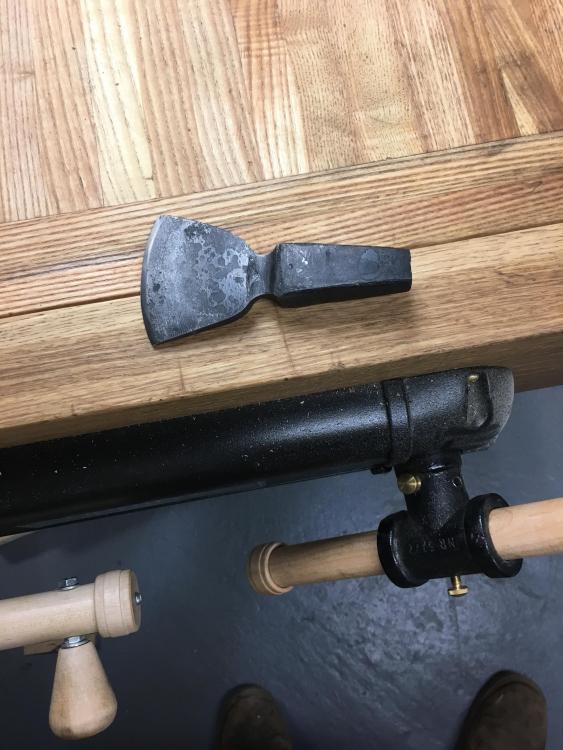
Hey everyone, I got lucky and had a friend of the family who is a bit of a hoarder who happened to have an anvil sitting in his backyard sinking into the ground. I offered to buy it off him probably 20 years ago when I wanted to try smithing, he said no he wanted to keep it. So here we are 20 years later, as with most hoarders it’s still sitting in exact same spot it was when I asked him to buy it 20 years ago. I haven’t seen the guy in years but was able to confirm a while back that the anvil was still there, it’s been killing me knowing there is an anvil just sinking into the ground never to be worked on again. I have been meaning to contact the guy but it’s not easy to do. Today I just happen to run into the guy and ask him about it and tell him I’ve gotten into smithing and I offered to buy it after I look at it. He says well if it’s for you just go and grab it you can have it. So I finally got this thing after 20 years. It’s in good shape and looks to me to be maybe cast iron with a tool steel face. Face is in beautiful shape, it’s got good rebound but not much ring which I read is another indicator of cast iron steel face. I can not see any makers marks. I think I can barely make out some letters but I can’t actually make them out. It just looks like there may be some letters. I’ll post some pics and maybe one of you guys can help just by looking st shape or some other giveaway. It’s not the anvil on the bottom if that’s not obvious, it’s sitting on top of my hey budden


-
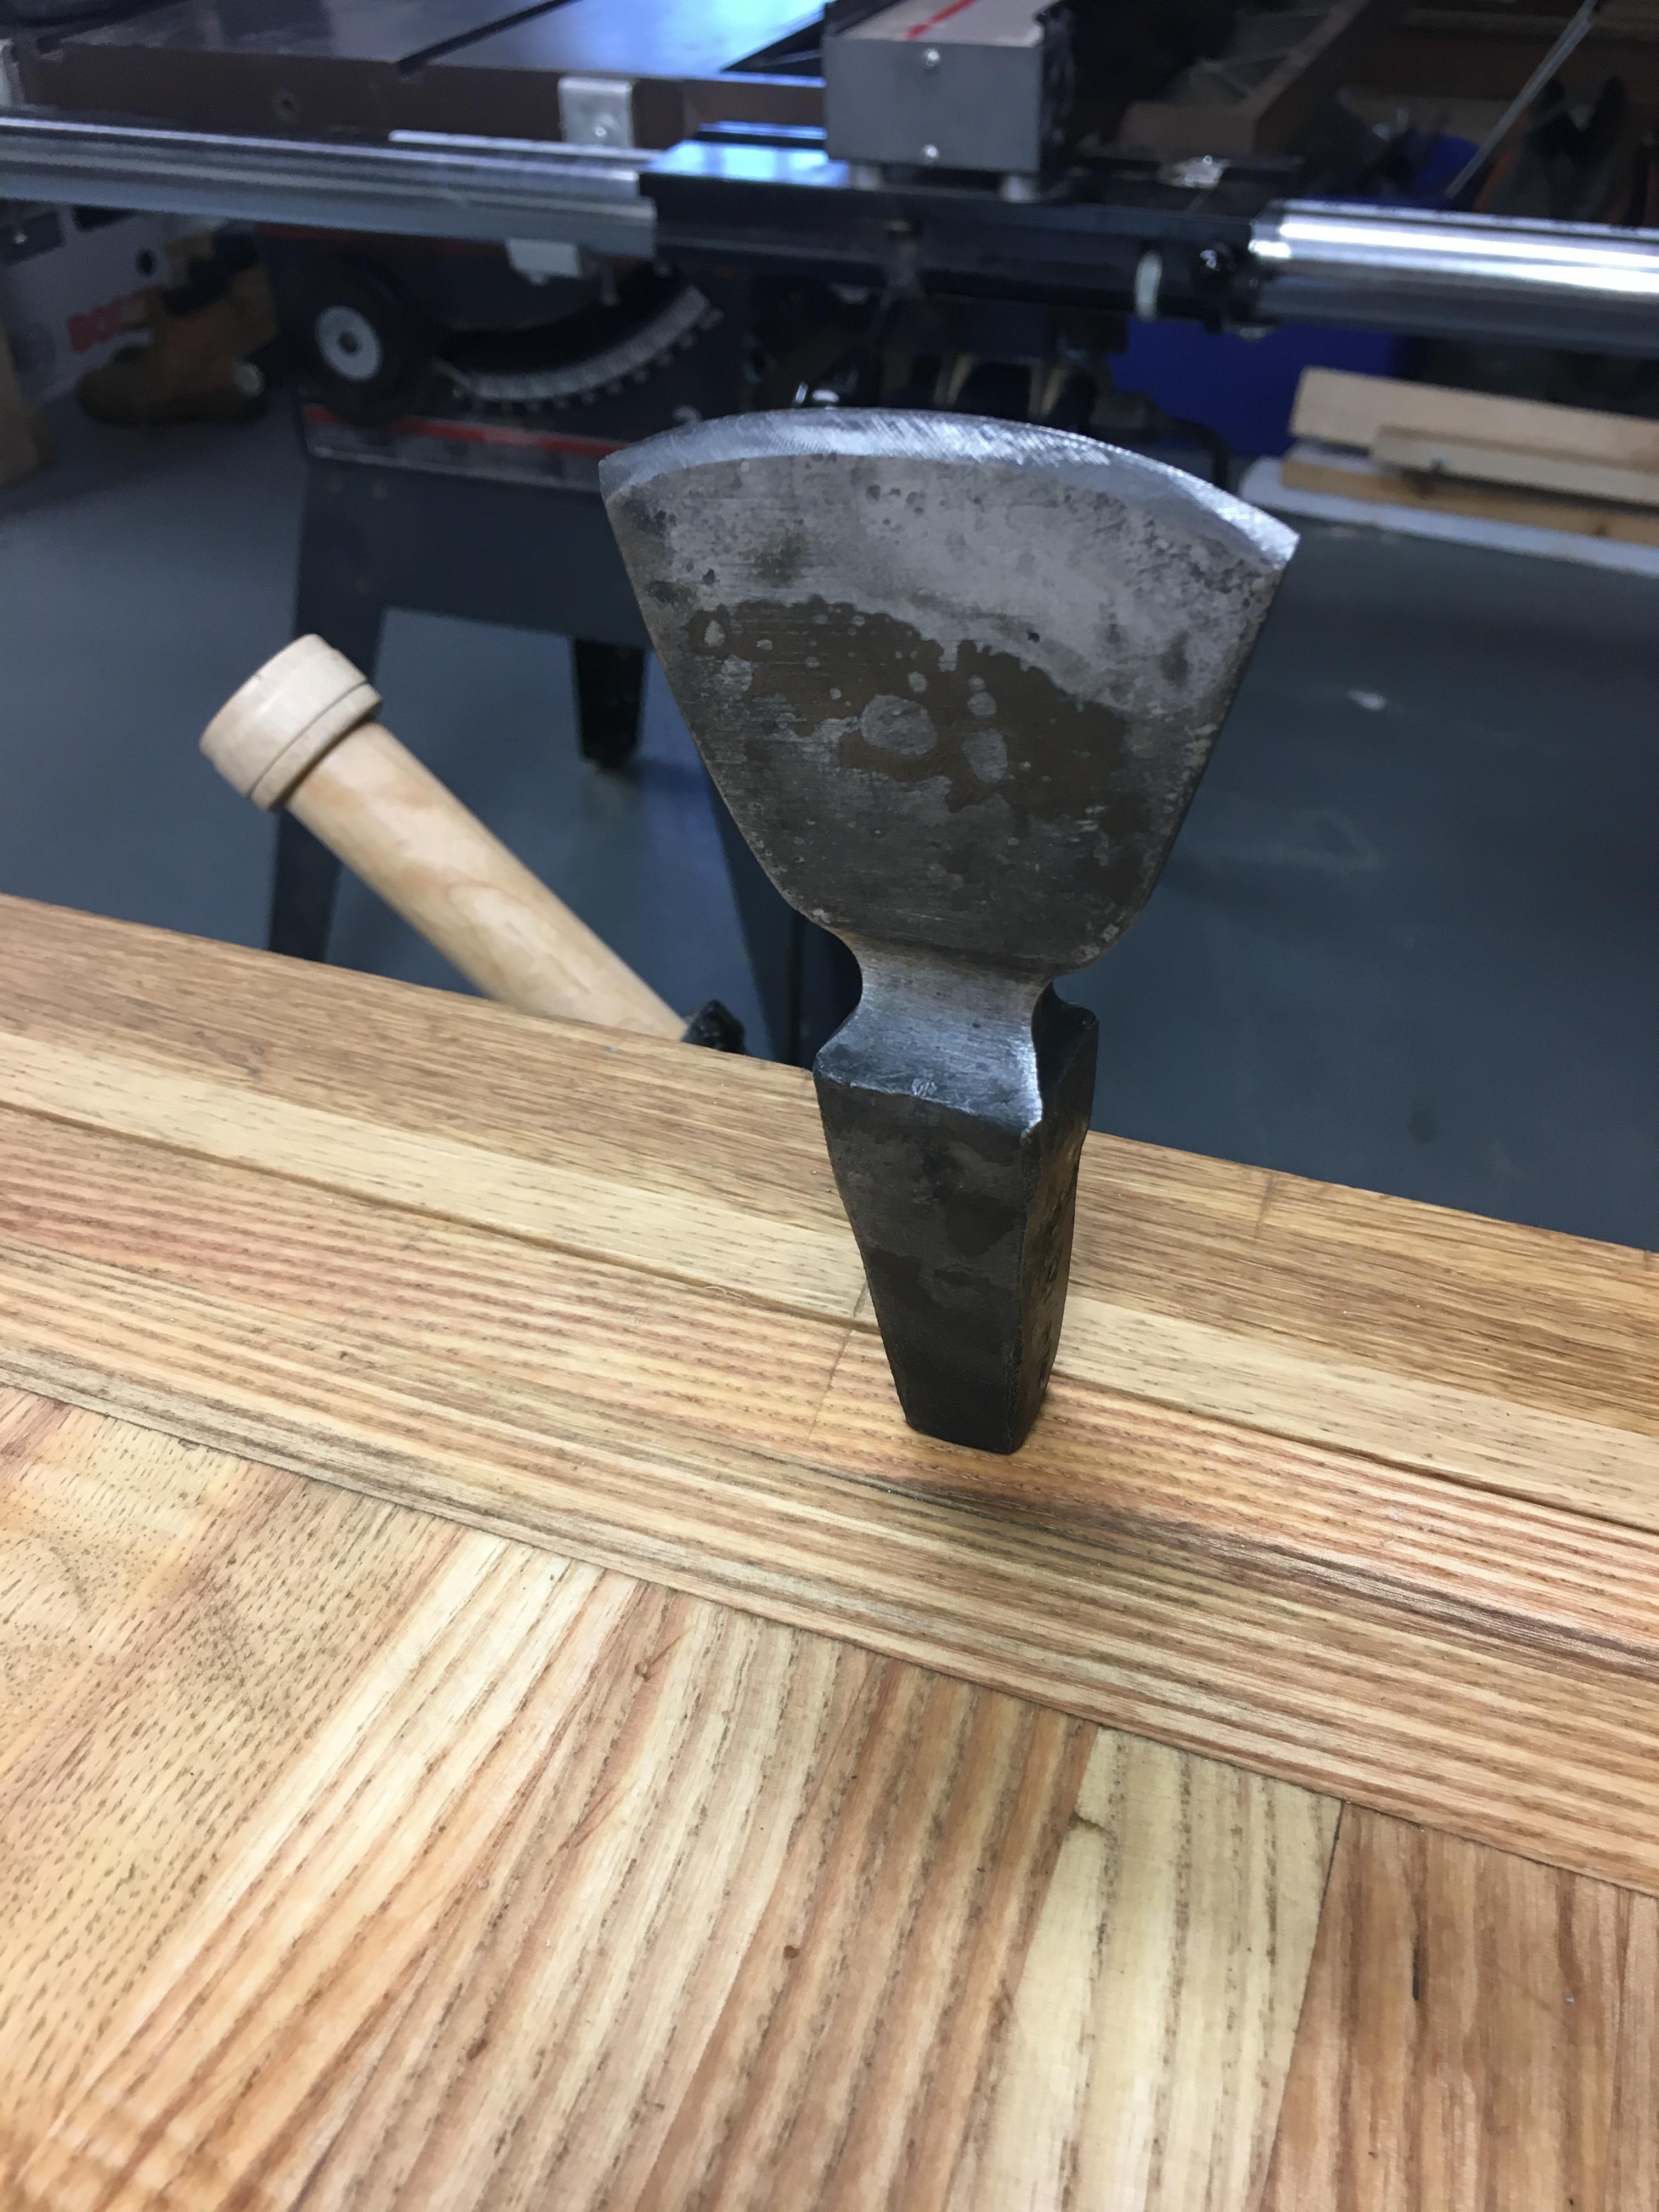
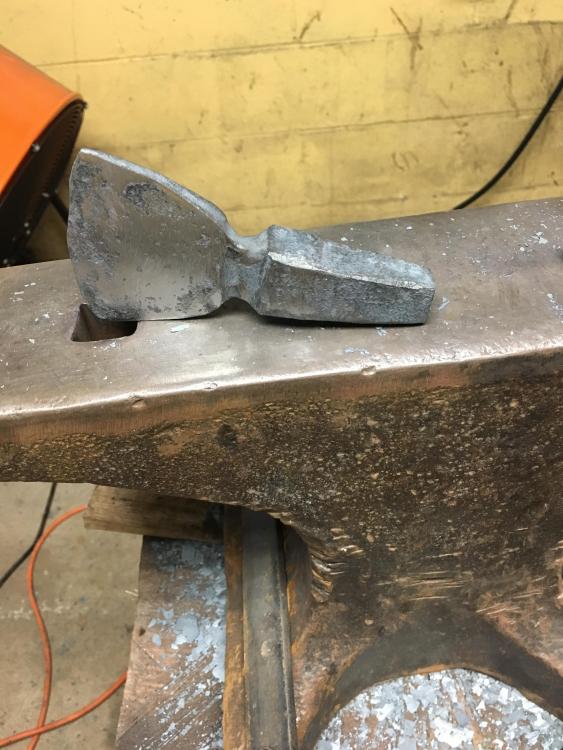
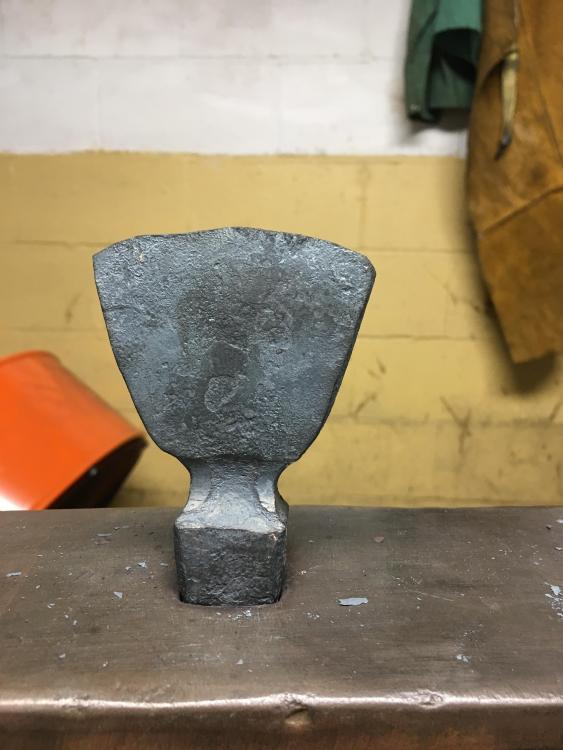
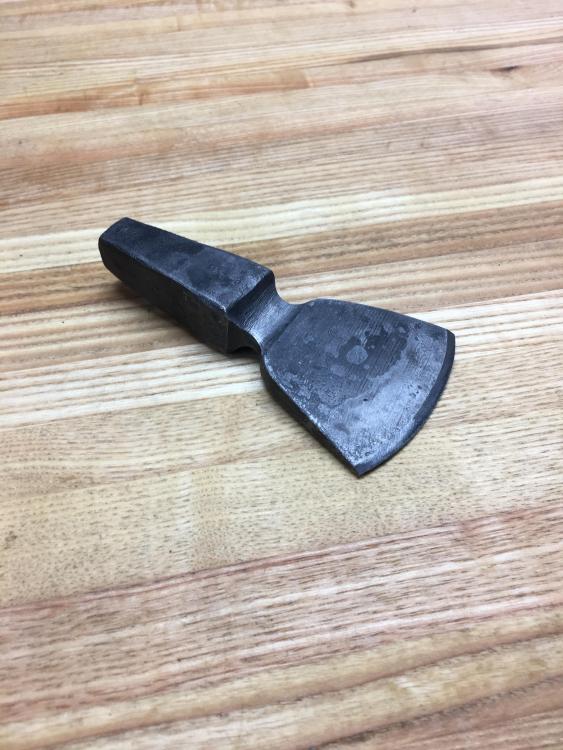
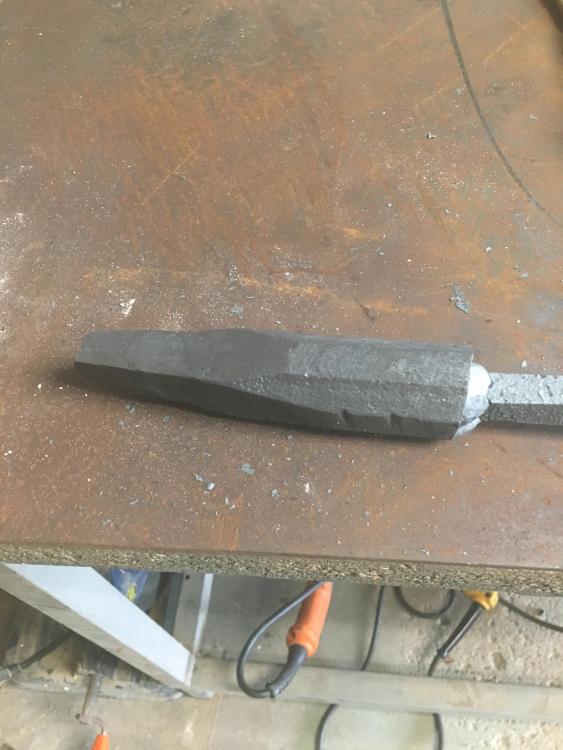
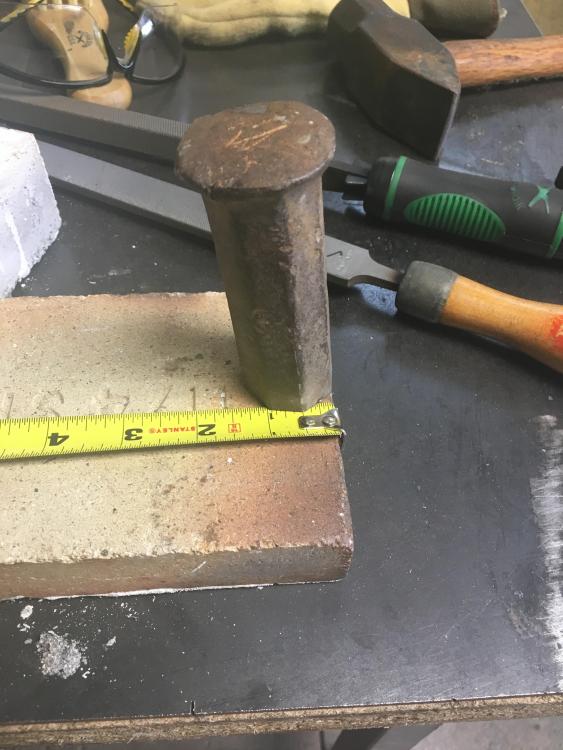
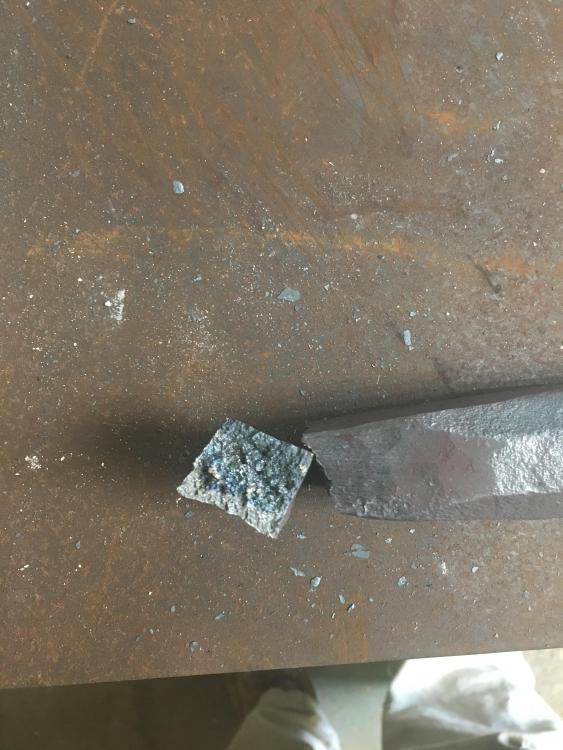
Hey guys I appreciate the input you guys gave on my original post. I decided to try again my hand at making a hot cut hardie. This time I decided to sacrifice a spare set of front axle shafts from my 96 Ford. After some input from you guys I had a better idea of how I should go about it. I whipped up a quick spring fuller and forged this out. Pretty happy with how it turned out. I included a few pics before a little filing clean up and after a few after a bit of filing and quenching. Just need to temper now. I read a few threads and I e read some guys saying not to bother heat treating cause the hot steel will ruin it and other guys saying to go ahead. I see the logic in both but I felt that heat treating is t gonna hurt and if it gets softer oh well. It took a nice hardening. I’m still very low on the actual finished product count so it feels food to make a useable tool from scratch. Something very satisfying about creating a useful tool. I get a somewhat the same feeling when I create a piece of functional furniture but something aliitke differt about forging out a tool from a round piece of stock. I appreciate your guys help. I’m learning every time I light the forge.

-
Thanks frosty, that does make sense and you pretty much summed up why my taper ended up so long. I will give it another go and try and employ the advice given. And thanks to everyone else that weighed in.
-
Well I don’t honestly know why I made the taper so long lol, I was just going for the Brian breazel style hot cut I saw images of. I started out with 2.5 lb hammer and switched to 4 lb. I cut off and discarded the mushroomed end thinking just what you mentioned about it being stressed from cold work. I’m pretty sure now that too much heat for too long like you mentioned is probably the cause. Like I mentioned ,I’m still very much a novice. I’m a fairly knowledgeable woodworker and it took me many years of trying new things and failing and learning from those failures to get where I am in woodcraft.I fully expect to have to put in the same effort into blacksmithing. There is just a lot more sweat and physical exertion involved in making mistakes in blacksmithing lol. Thanks for the input so far.
-
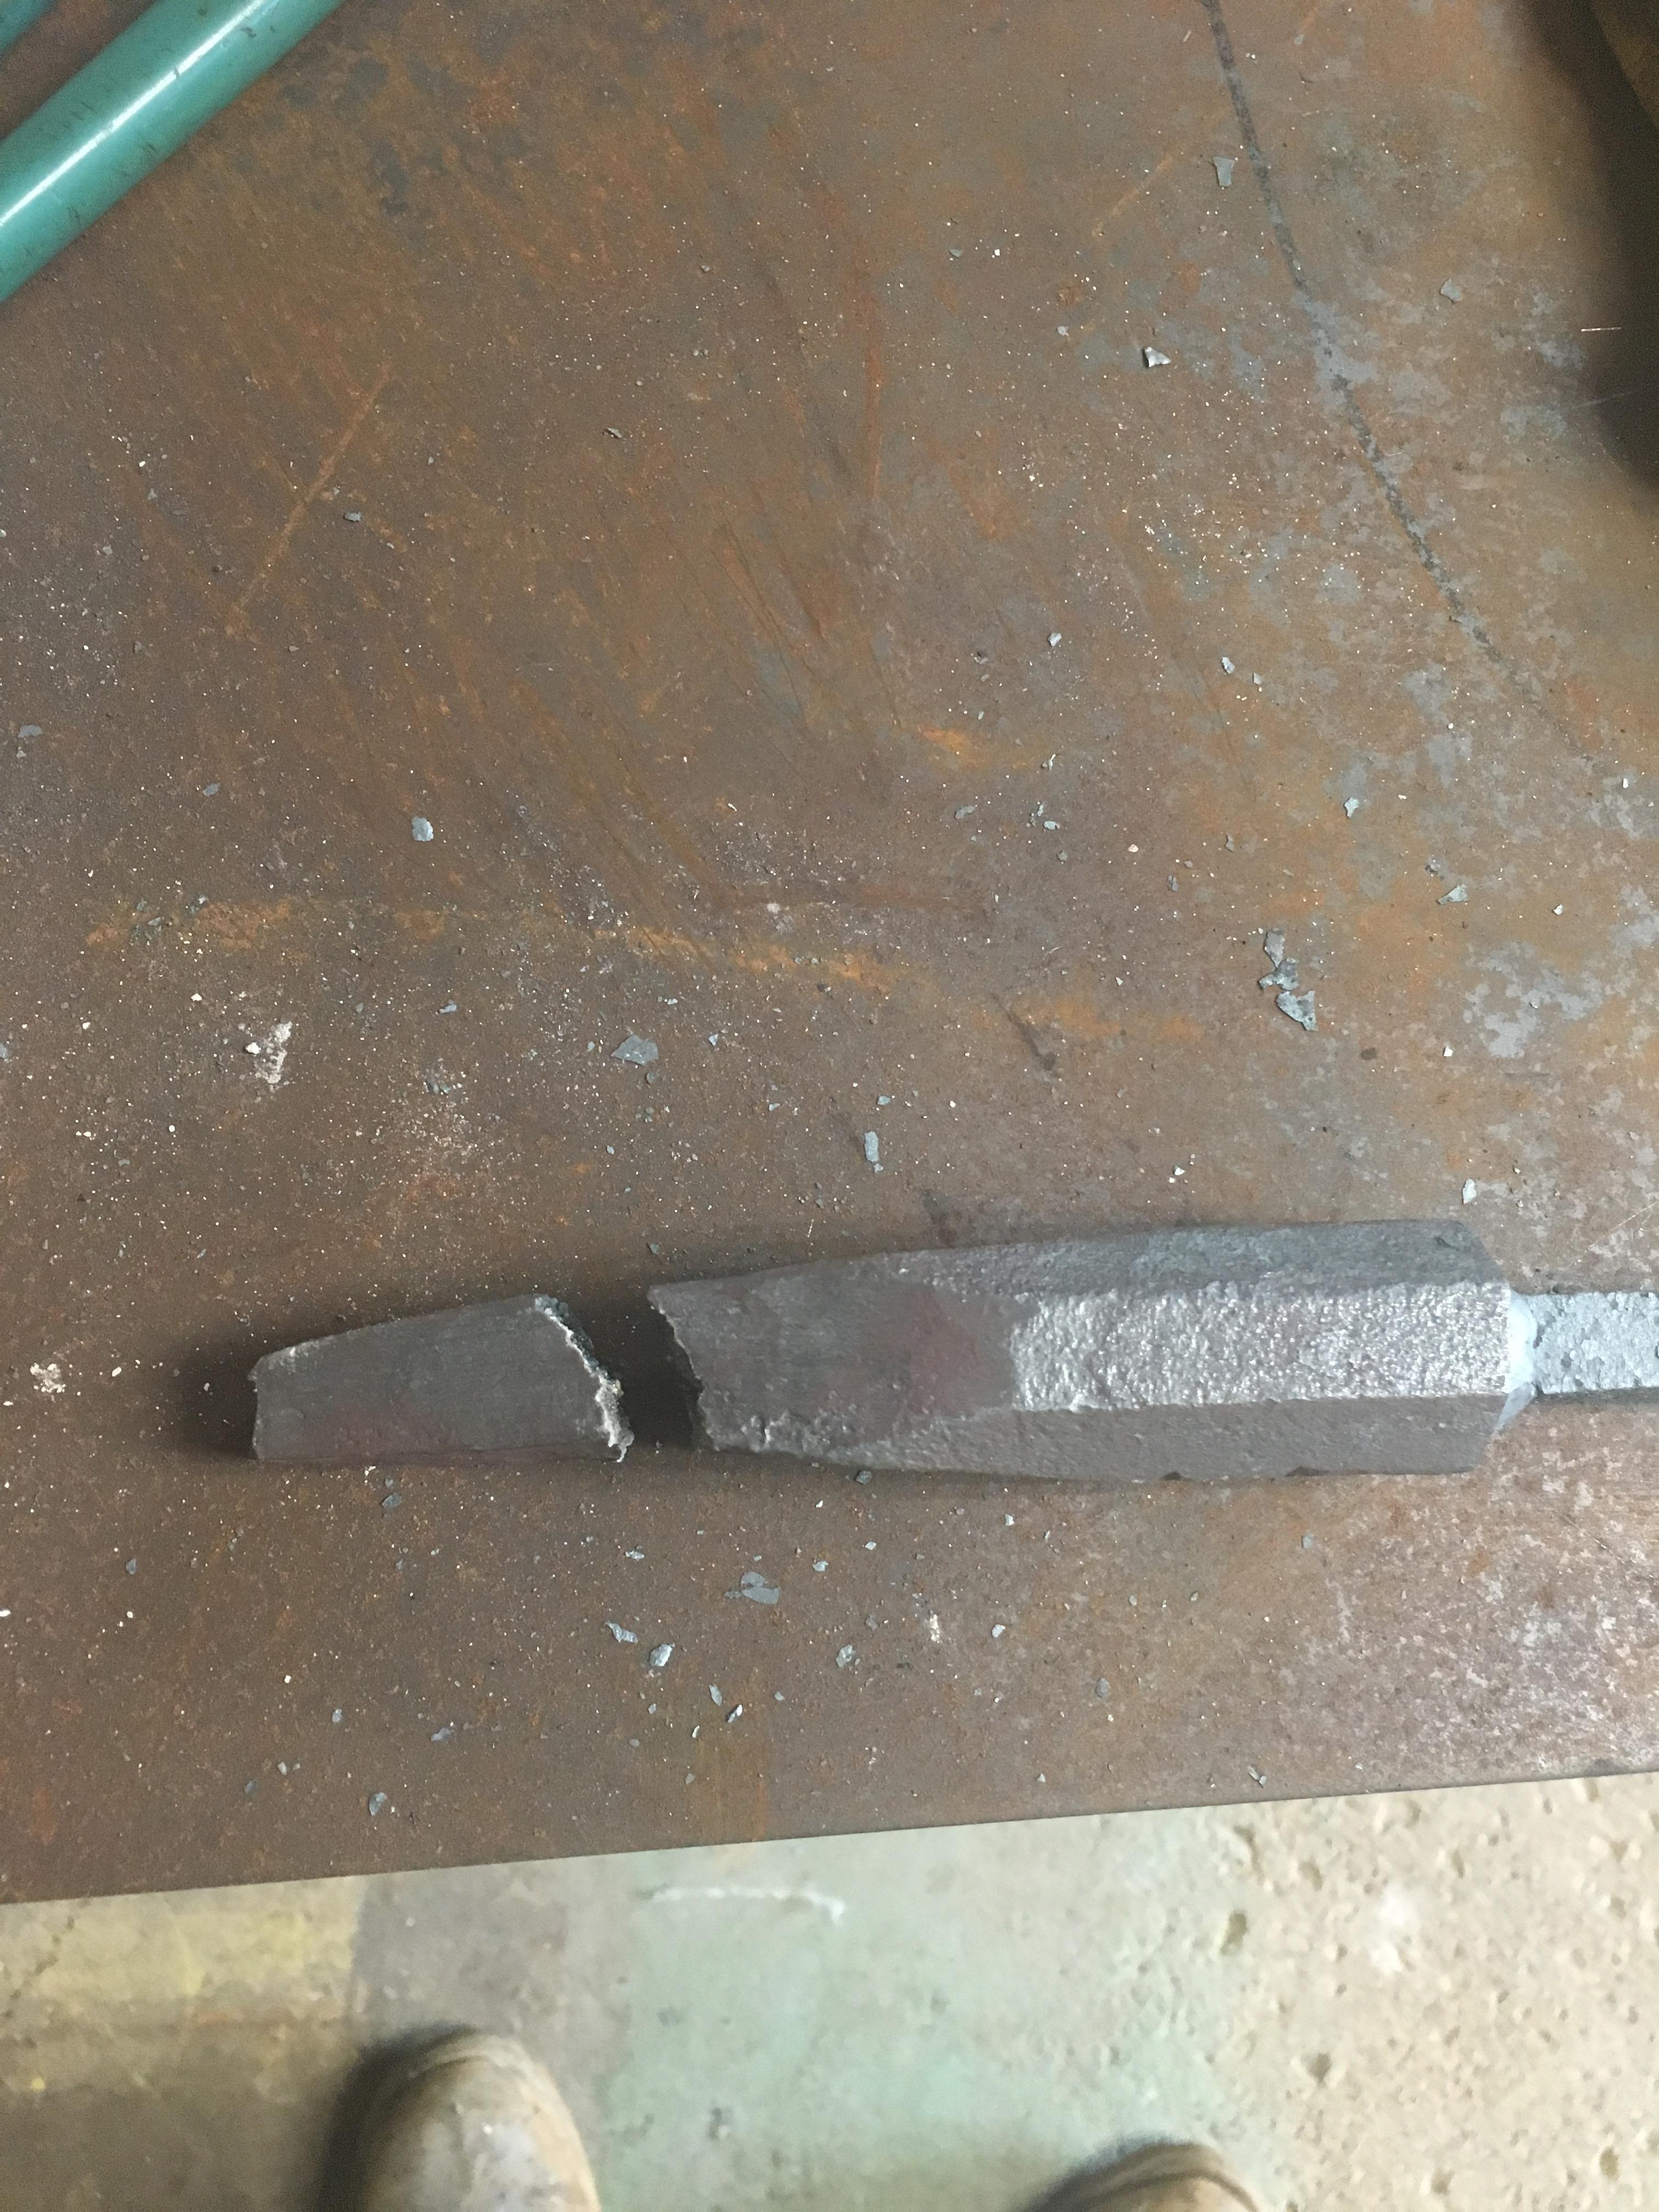
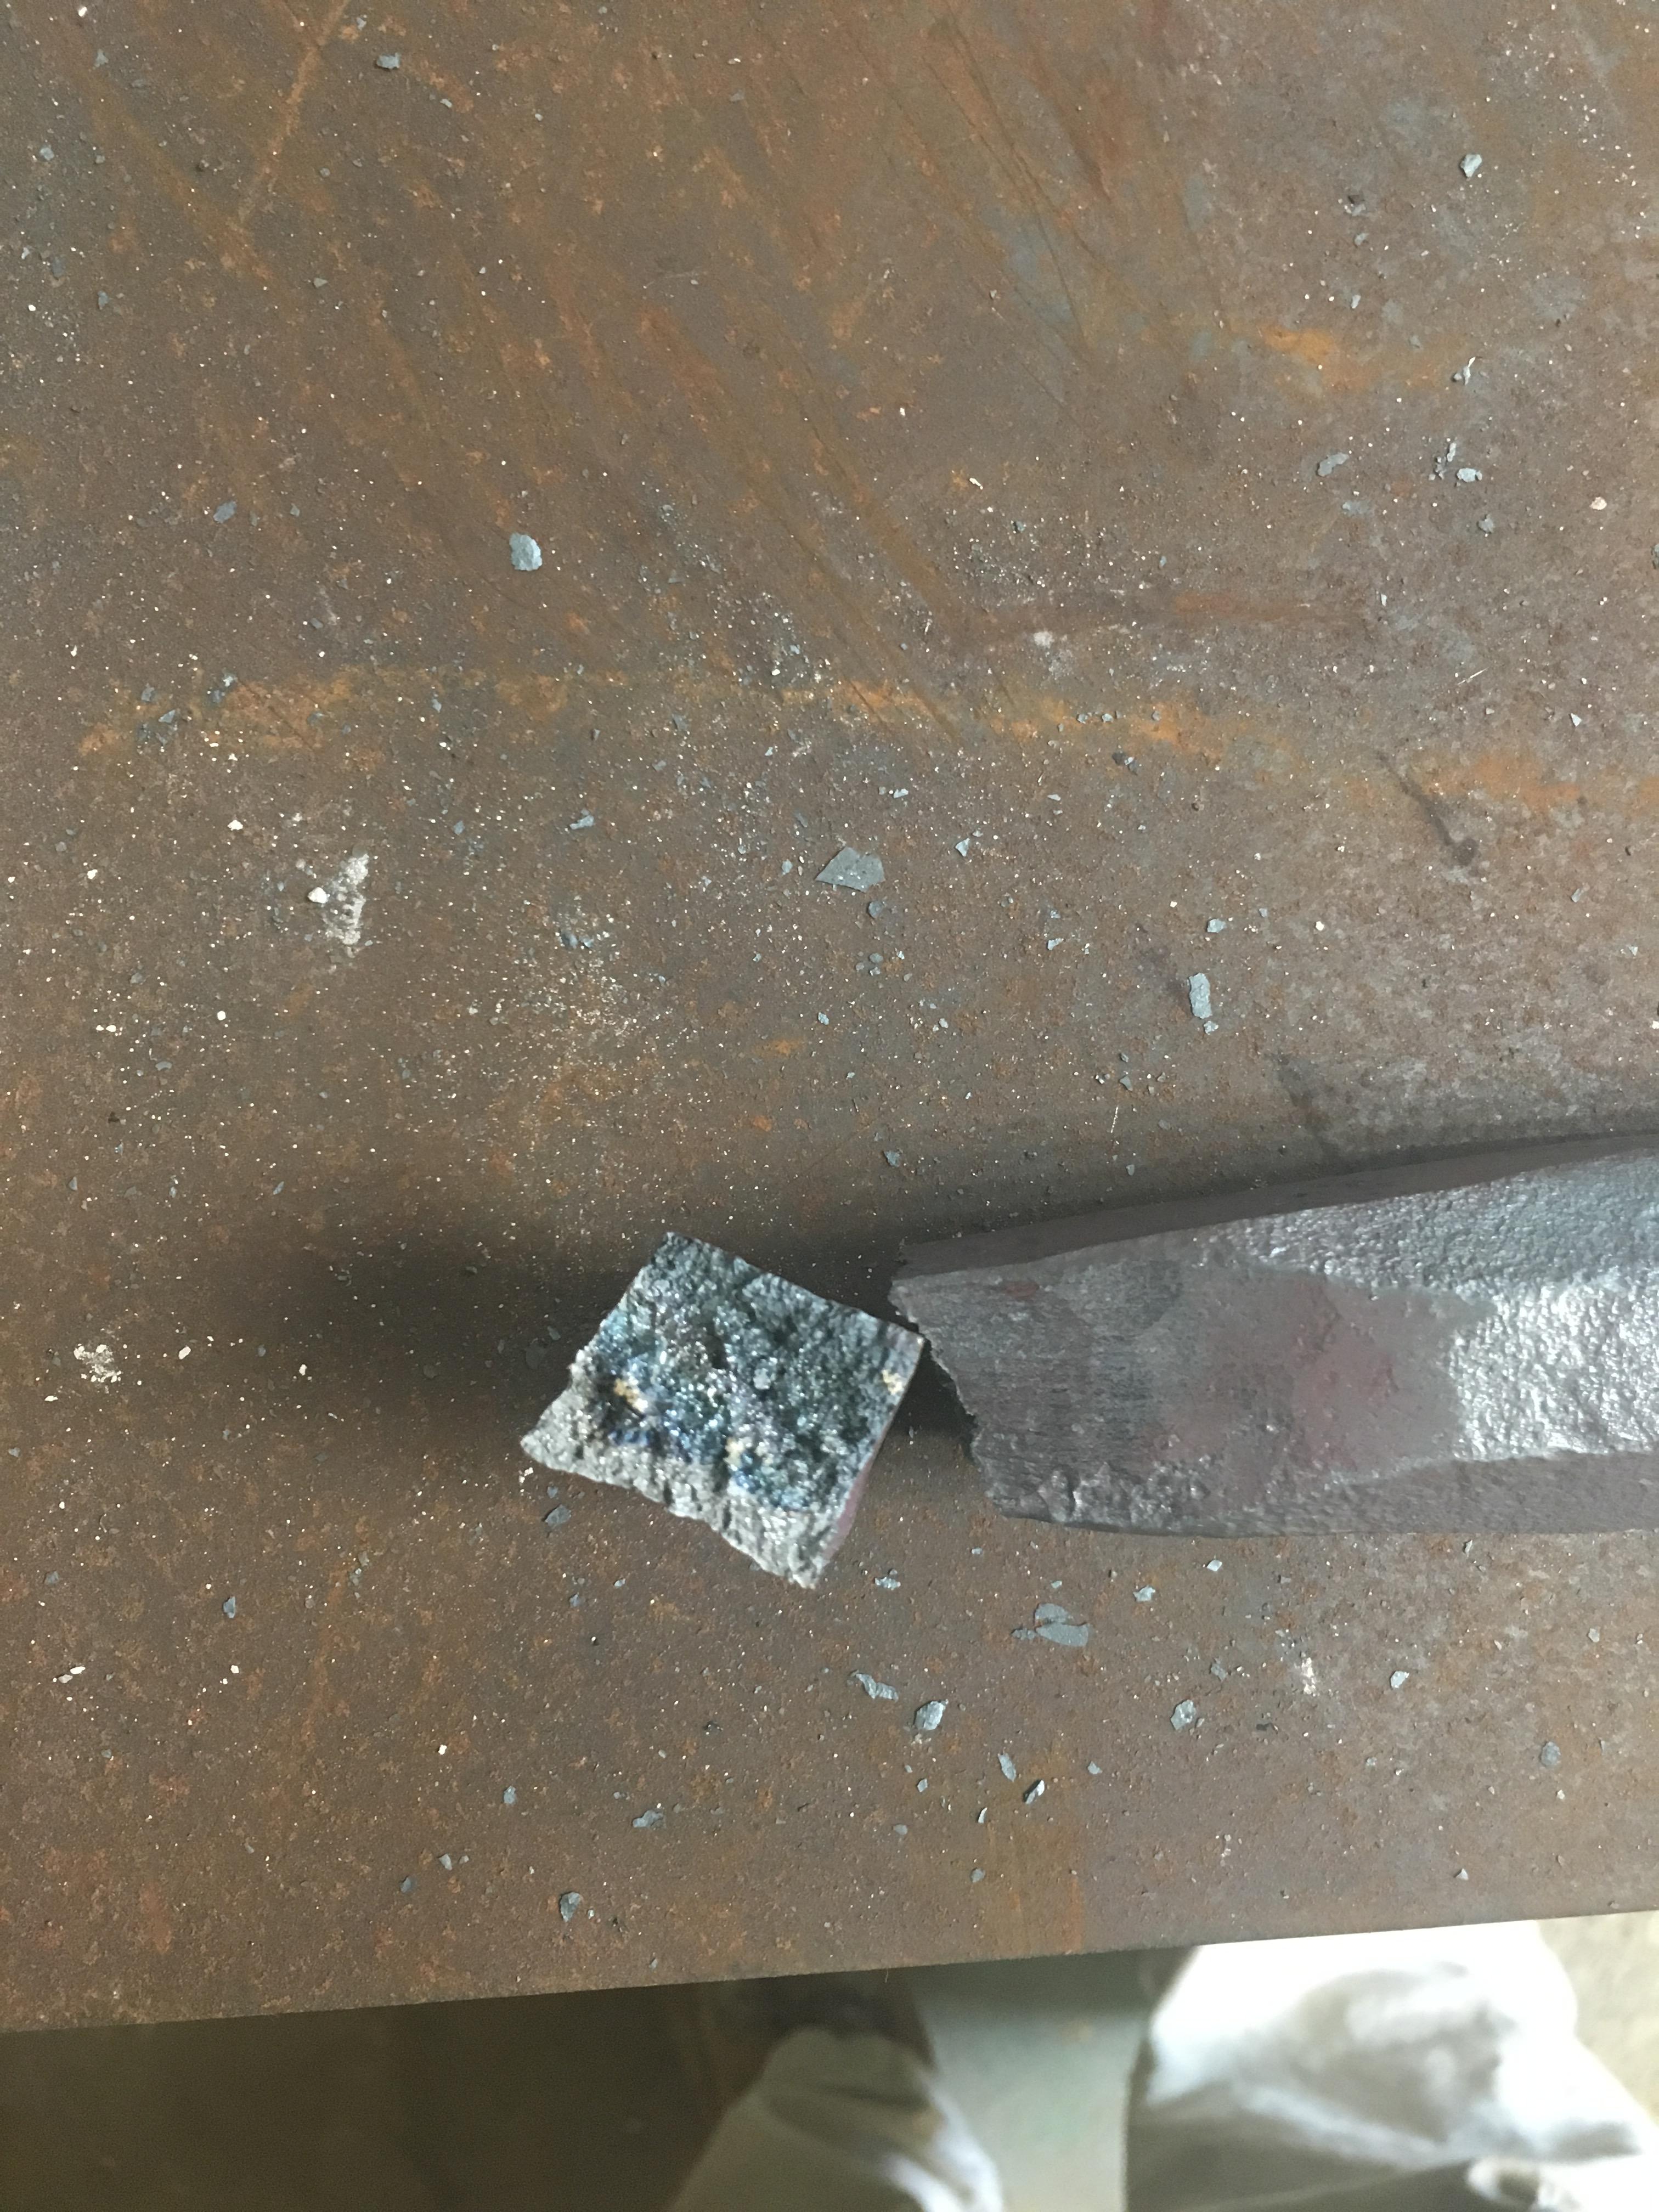
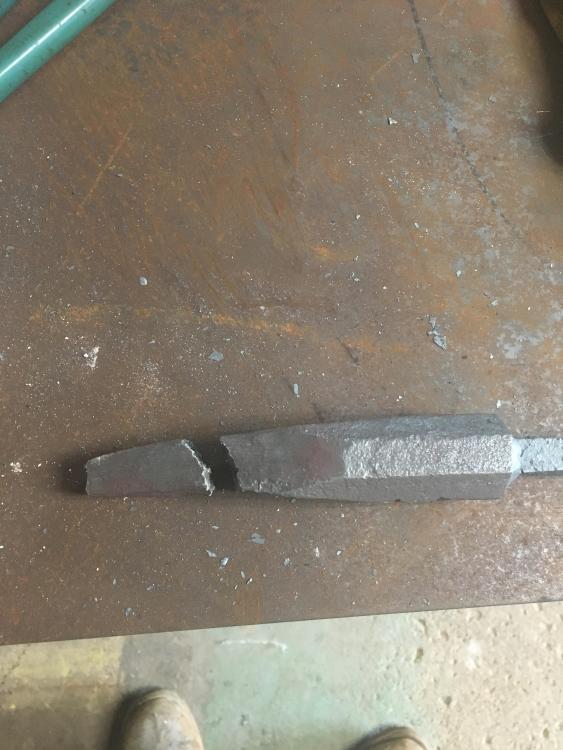
Hey everybody, got a question. I believe I know the answer but I figured why not run it by you guys. So I started work yesterday on trying to forge a hot cut Hardie tool. The stock I was using was an old jackhammer bit that someone long before me had cut off and was using as a large chisel judging by the mushroomed end. I did some searching and did a spark test and from what I read and what the sparks show me I assumed it’s a 1060-1075 or so Steel. So I started forging out a taper on one end and found that at anything under a very bright orange bordering on yellow that my hammer blows were pretty ineffective. So I kept gradually raising forge temps until I got to a heat that I was able to actually start moving the steel. I know some of my issue is still in technique and I’m trying to learn more effective ways of forging. Anyhow I worked pretty hard to achieve the taper and I called it quits after that. I came back after price had cooled only to find a crack that goes almost all the way thru. I will add that at one point I burned the end, about the same amount the broke off was just starting to throw little sparks when I pulled from the forge st one point. So I’m guessing I burnt that thinner end of my stock. And then I also probably worked it when it was too cool so I’m thinking the combo of burning it and then stressing that portion by working it too cold caused the issue. Any input from the pics and my description would be appreciated I am still very much a novice and I am hungry to learn and grow and develop my skill set. I’m not embarrassed by mistakes or by asking stupid questions. So any tips would be great on how to work heavier stock like that.
-
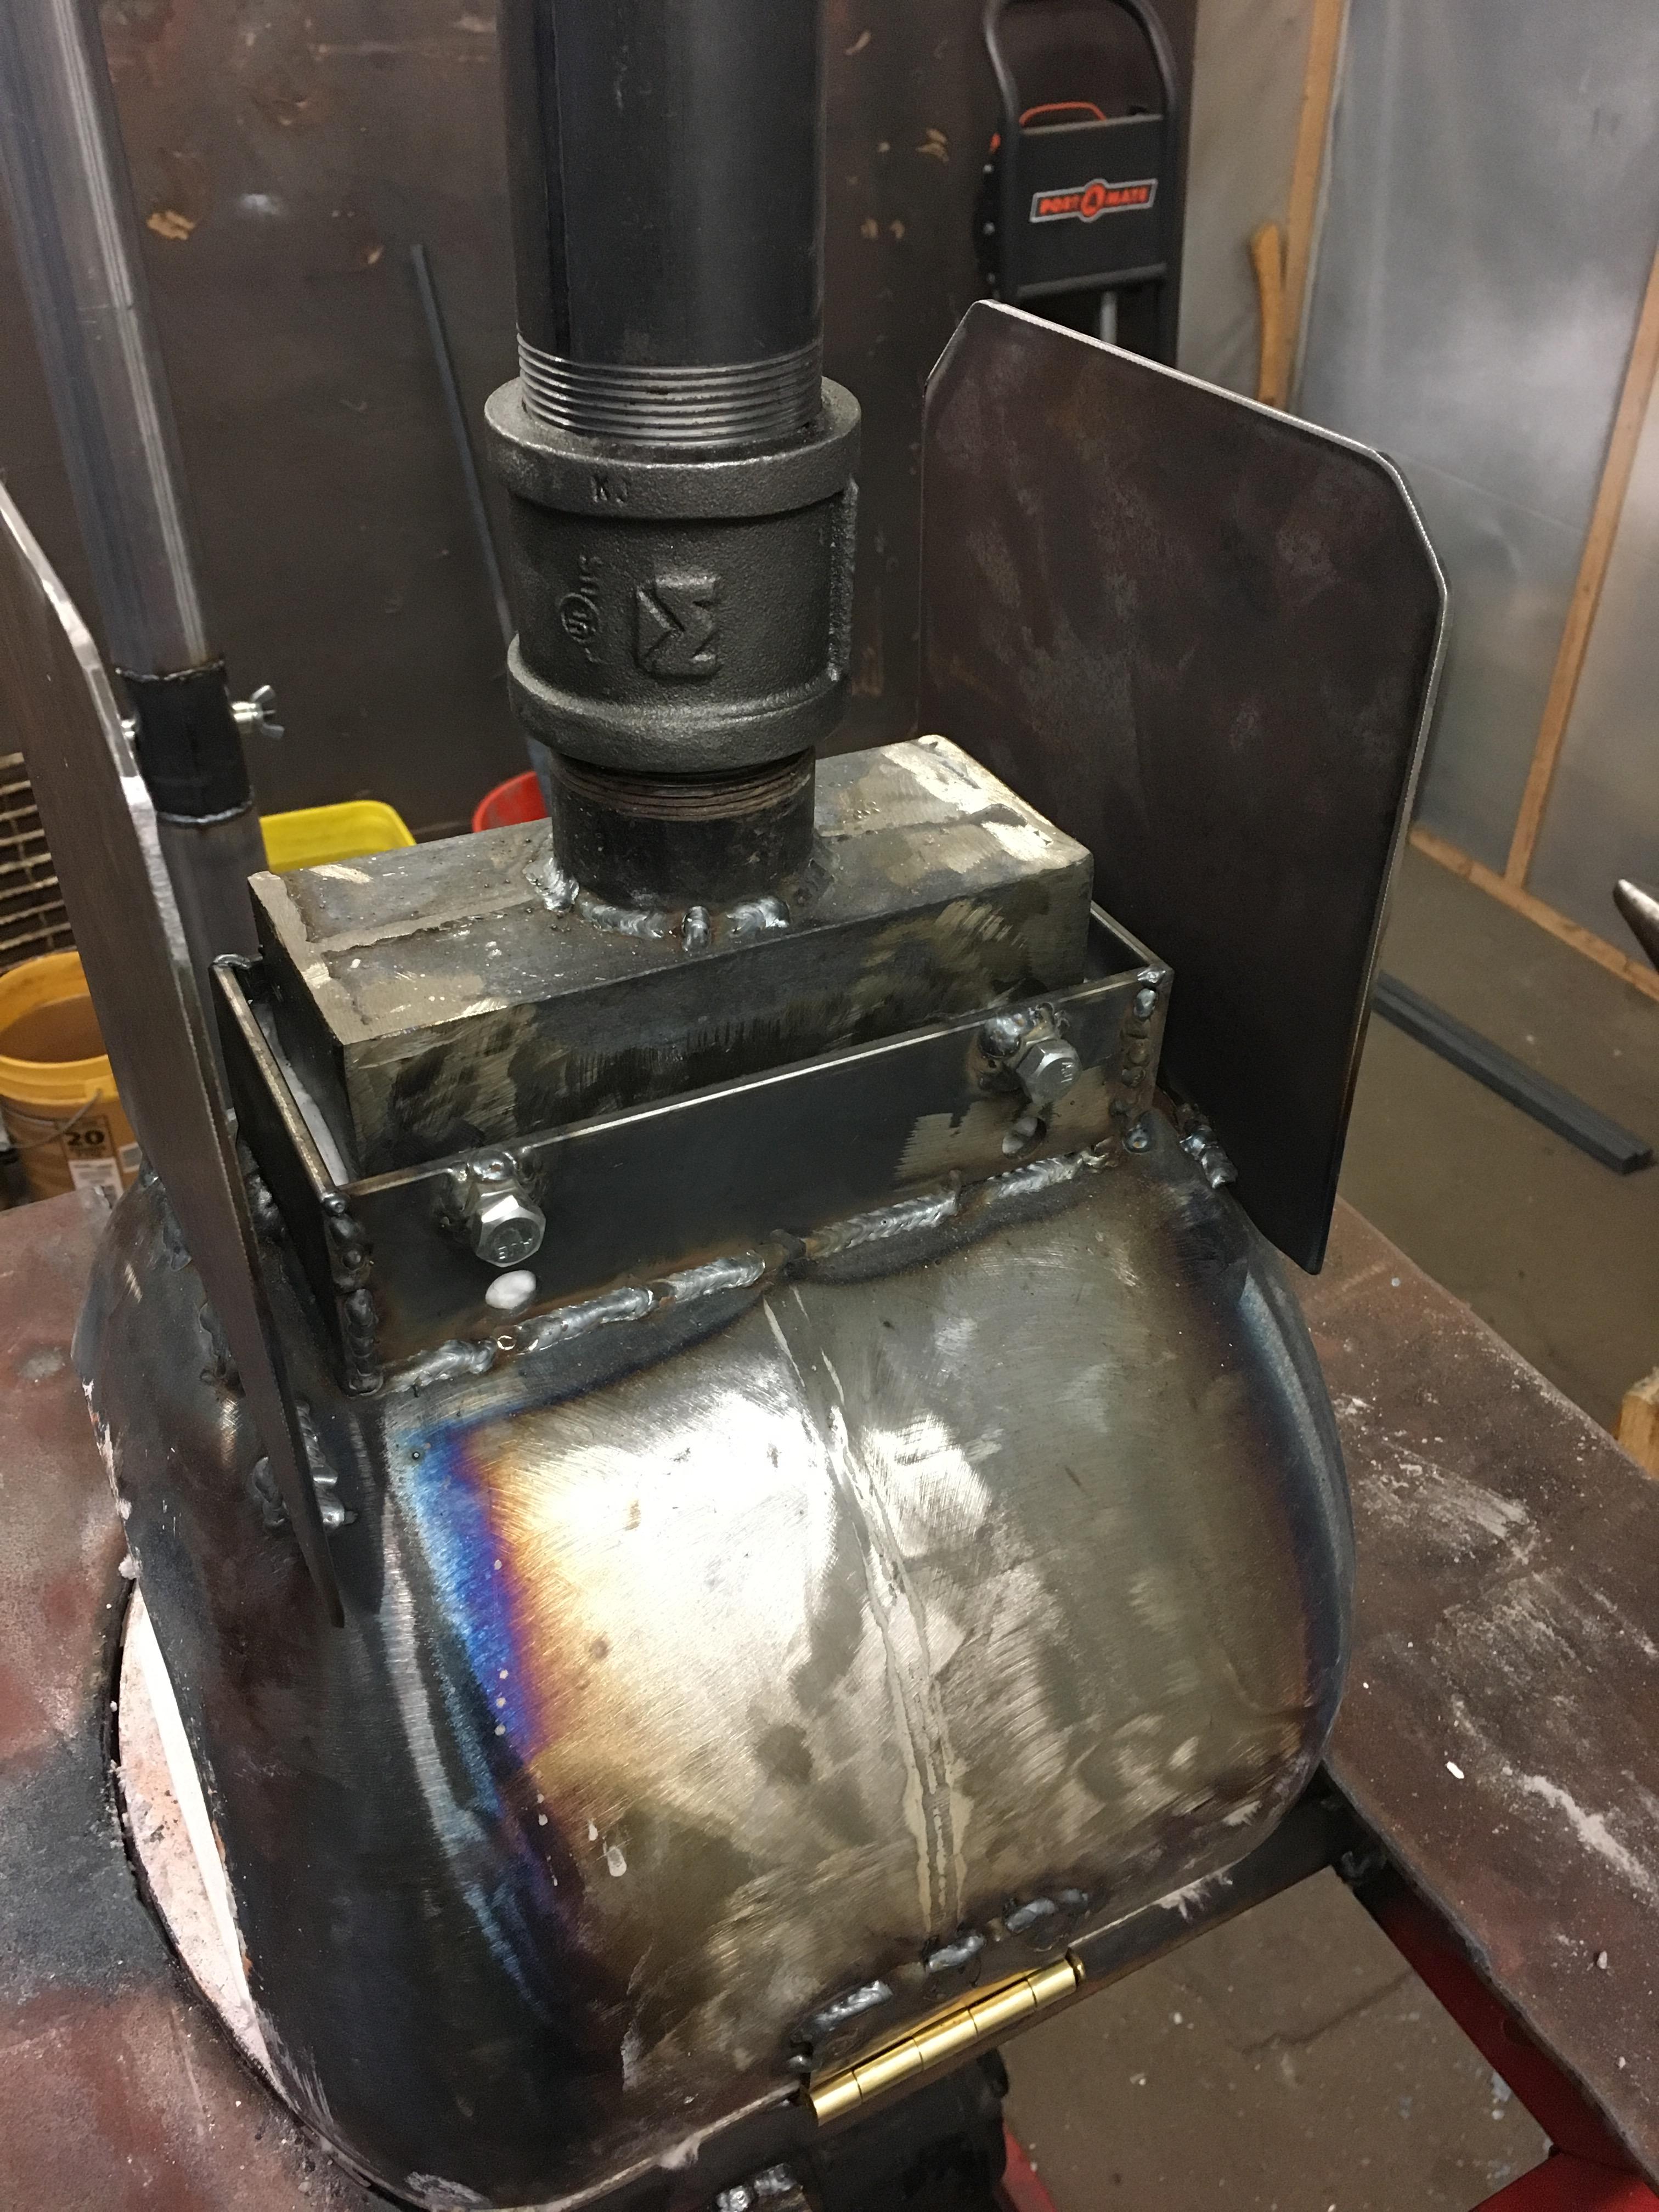
Hey guys I do appreciate the input so far, some helpful points have been made. I still have not switched out the butterfly valve for a gate valve, I do intend to do so tho. But in the meantime I’ve since had some time to run the forge a few different times over past few days. I am now a lot more comfortable with getting adjustments where I want them. And like mentioned above I am now really starting to get a feel just by eye and ear. I am much happier with this design than I was with my previous forge. Like I mentioned before my previous build worked well as far as it got metal very hot but it was the overall design I wasn’t pleased with. This set up with the sturdy “porches” front and rear and the adjustable rest for longer stuff and how it’s all contained as one unit attached to the stand is just much nicer to work with. I’m learning everyday and I’m loving it. I’ve so far made all the tongs that come in a bundle set of rapid tongs from kens custom iron which I thought was a good deal for someone just starting out using visegrips for tongs. After making all in the bundle it gave me the skill level to make blanks from some stock I had and make a pair of my own from scratch only a bit larger since the ones from kens are a bit on smaller side. , I’ve akso made a few s hooks and other small type items. So my actual forging experience isn’t all that much yet but you gotta strat somewhere. My ego and brain tell me I’m an experienced blacksmith already but once I’m standing at the anvil with hammer in hand I quickly find out I am not lol, it’s nowhere near as easy as it may look to some to make hot steel move where you want it to move with hammer blows lol.. I learned valuable techniques just making simple tongs tho like using the horn to draw out the reins. My inexperience had me just going at it flat on the anvil face but a little experience from others taught me about the principles behind fullering and using the edges of the anvil and or the horn to work in that manner. I was very impressed at how much quicker drawing out happened using the horn as opposed to when I went flat on the face. Anyhow I don’t mean to ramble I just appreciate people sharing their knowledge and helping a newcomer along on the path.
-
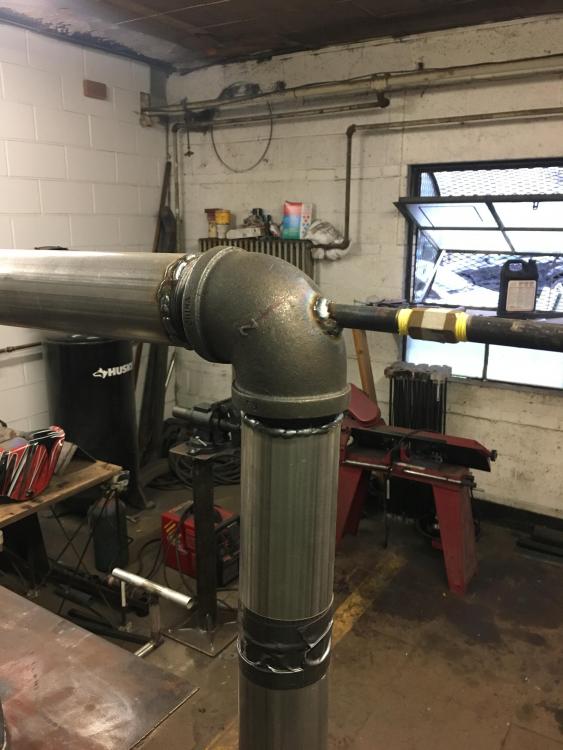
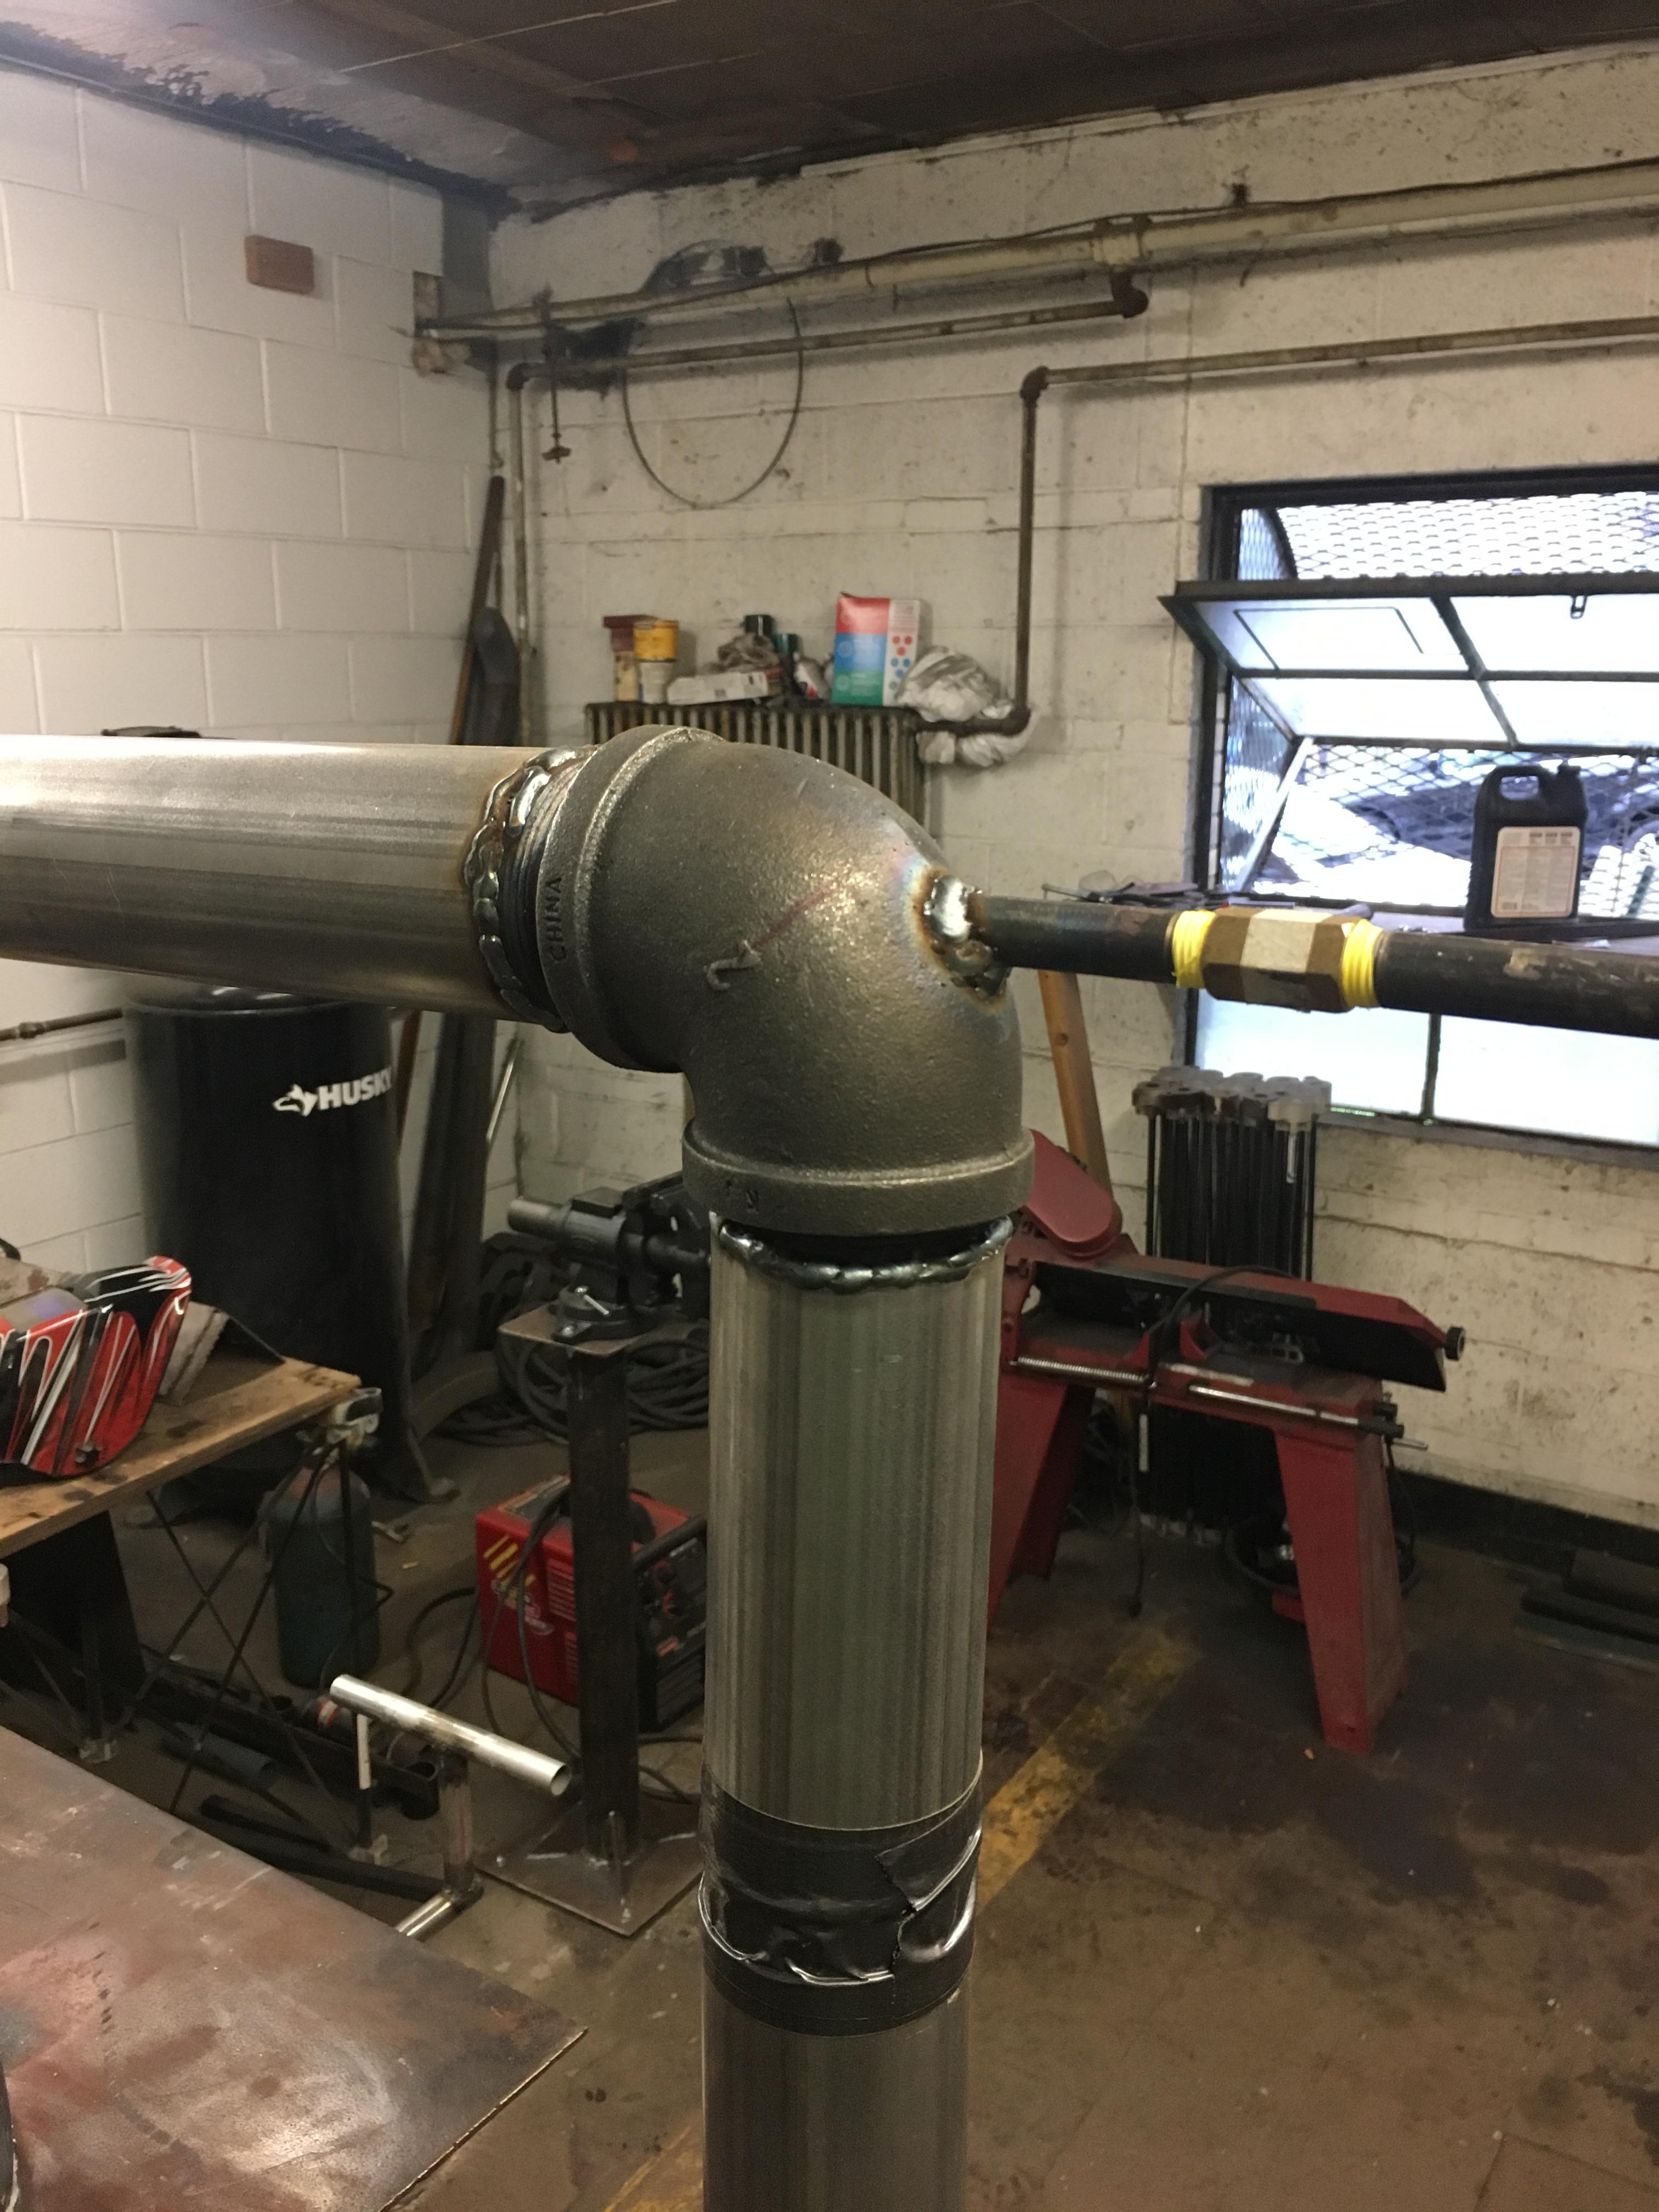
Thanks for the input Wayne, you’ve been s big help thru this whole process and I know I appreciate your efforts. I believe you are right on the gate valve, the butterfly valve my buddy and I built is very nice and and works well but I’m finding it’s hard to get a feel for where I’m at in the range of it’s travel. I was picturing a throttle body type set up and that’s why we went that way. I thought it would be more controllable but it’s looking like I may have been wrong. I also believe I may go ahead and experiment with moving the gas entrance point to the vertical run like you mentioned. I’m not committed to my current set up and I struggled with deciding on how long to make each run. I had read about the distance needed for nat gas vrs propane But other than that there is no set reason my piping is that long. I see your pipe runs are not as long.i built this forge at work in my off time so it will be getting broken down some to make the trip to my house so I may make my changes at that point.
-
Thanks for the input so far guys, I had a chance this afternoon to play around a bit more with my set up and I had it running pretty hot. Still haven’t pushed it to a high yellow heat yet but after playing today I’m sure it’ll get there and beyond I just needed your guys input and to play around a bit more to get a feel for how it reacts to different amounts of air and fuel.its a bit if a learning curve moving from a naturally Venturi burner forge to this. My Venturi forge got really hot no problem I just wasn’t happy with the overall design of it. It was my first and I kind of designed on the fly so it ended up looking a bit sloppy in the end but it did function well. I don’t quite know what possessed me to start another so quickly after the first but..meh..here I am. Now I need to start practicing some actual forging techniques. Lots to lear, glad to get to know this community. It sure seems like a lot of knowledge on this site.
-
Hey thanks for the reply, I had my regulator set at 5 or 6 lbs this morning and it seemed to be running well with how I had it set thru the needle valve and air gate. I had a piece of 1/4 x1 inch stock about 12 inches long in the forge and I had it up to a bright orange and I had the air gate open very little so I know there’s plenty more to get from this set up. Like I mentioned in previous post I have only fired this set up 3 times now because I was trying to “break in” the refractory.and this morning I didn’t try to adjust beyond that bright orange I obtained because of the “break in” So I know it’s going to take a little bit of playing around with air fuel to learn the ins and outs of a blown set up. I’m very certain this set up will hit welding heats no problem I just have to experiment more and get more comfortable with settings to be able to set it where I need it. So far I’m very impressed with this set up as opposed to my dual Venturi burner set up. That forge worked well and would hit welding temps but it used a lot of gas to do it. Now actually being able to forge weldis a different story at this stage lol. Anyhow I appreciate the reply and I’m just trying to get a feel for how others run theirs.
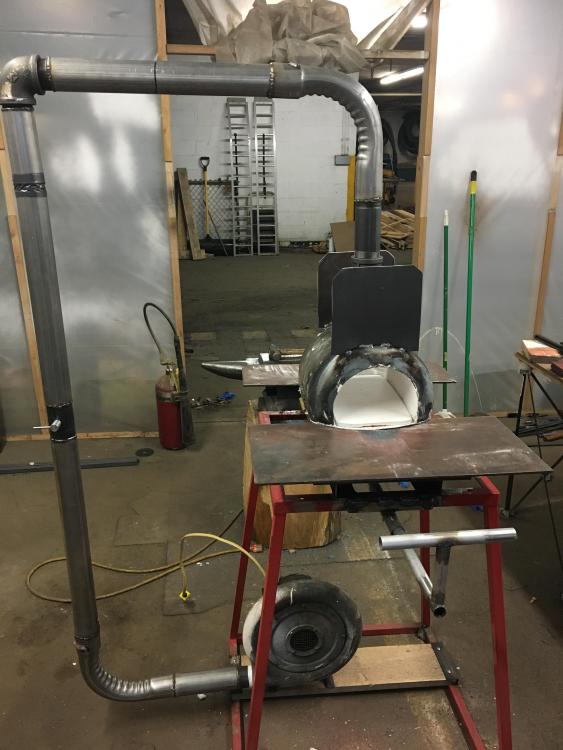
-
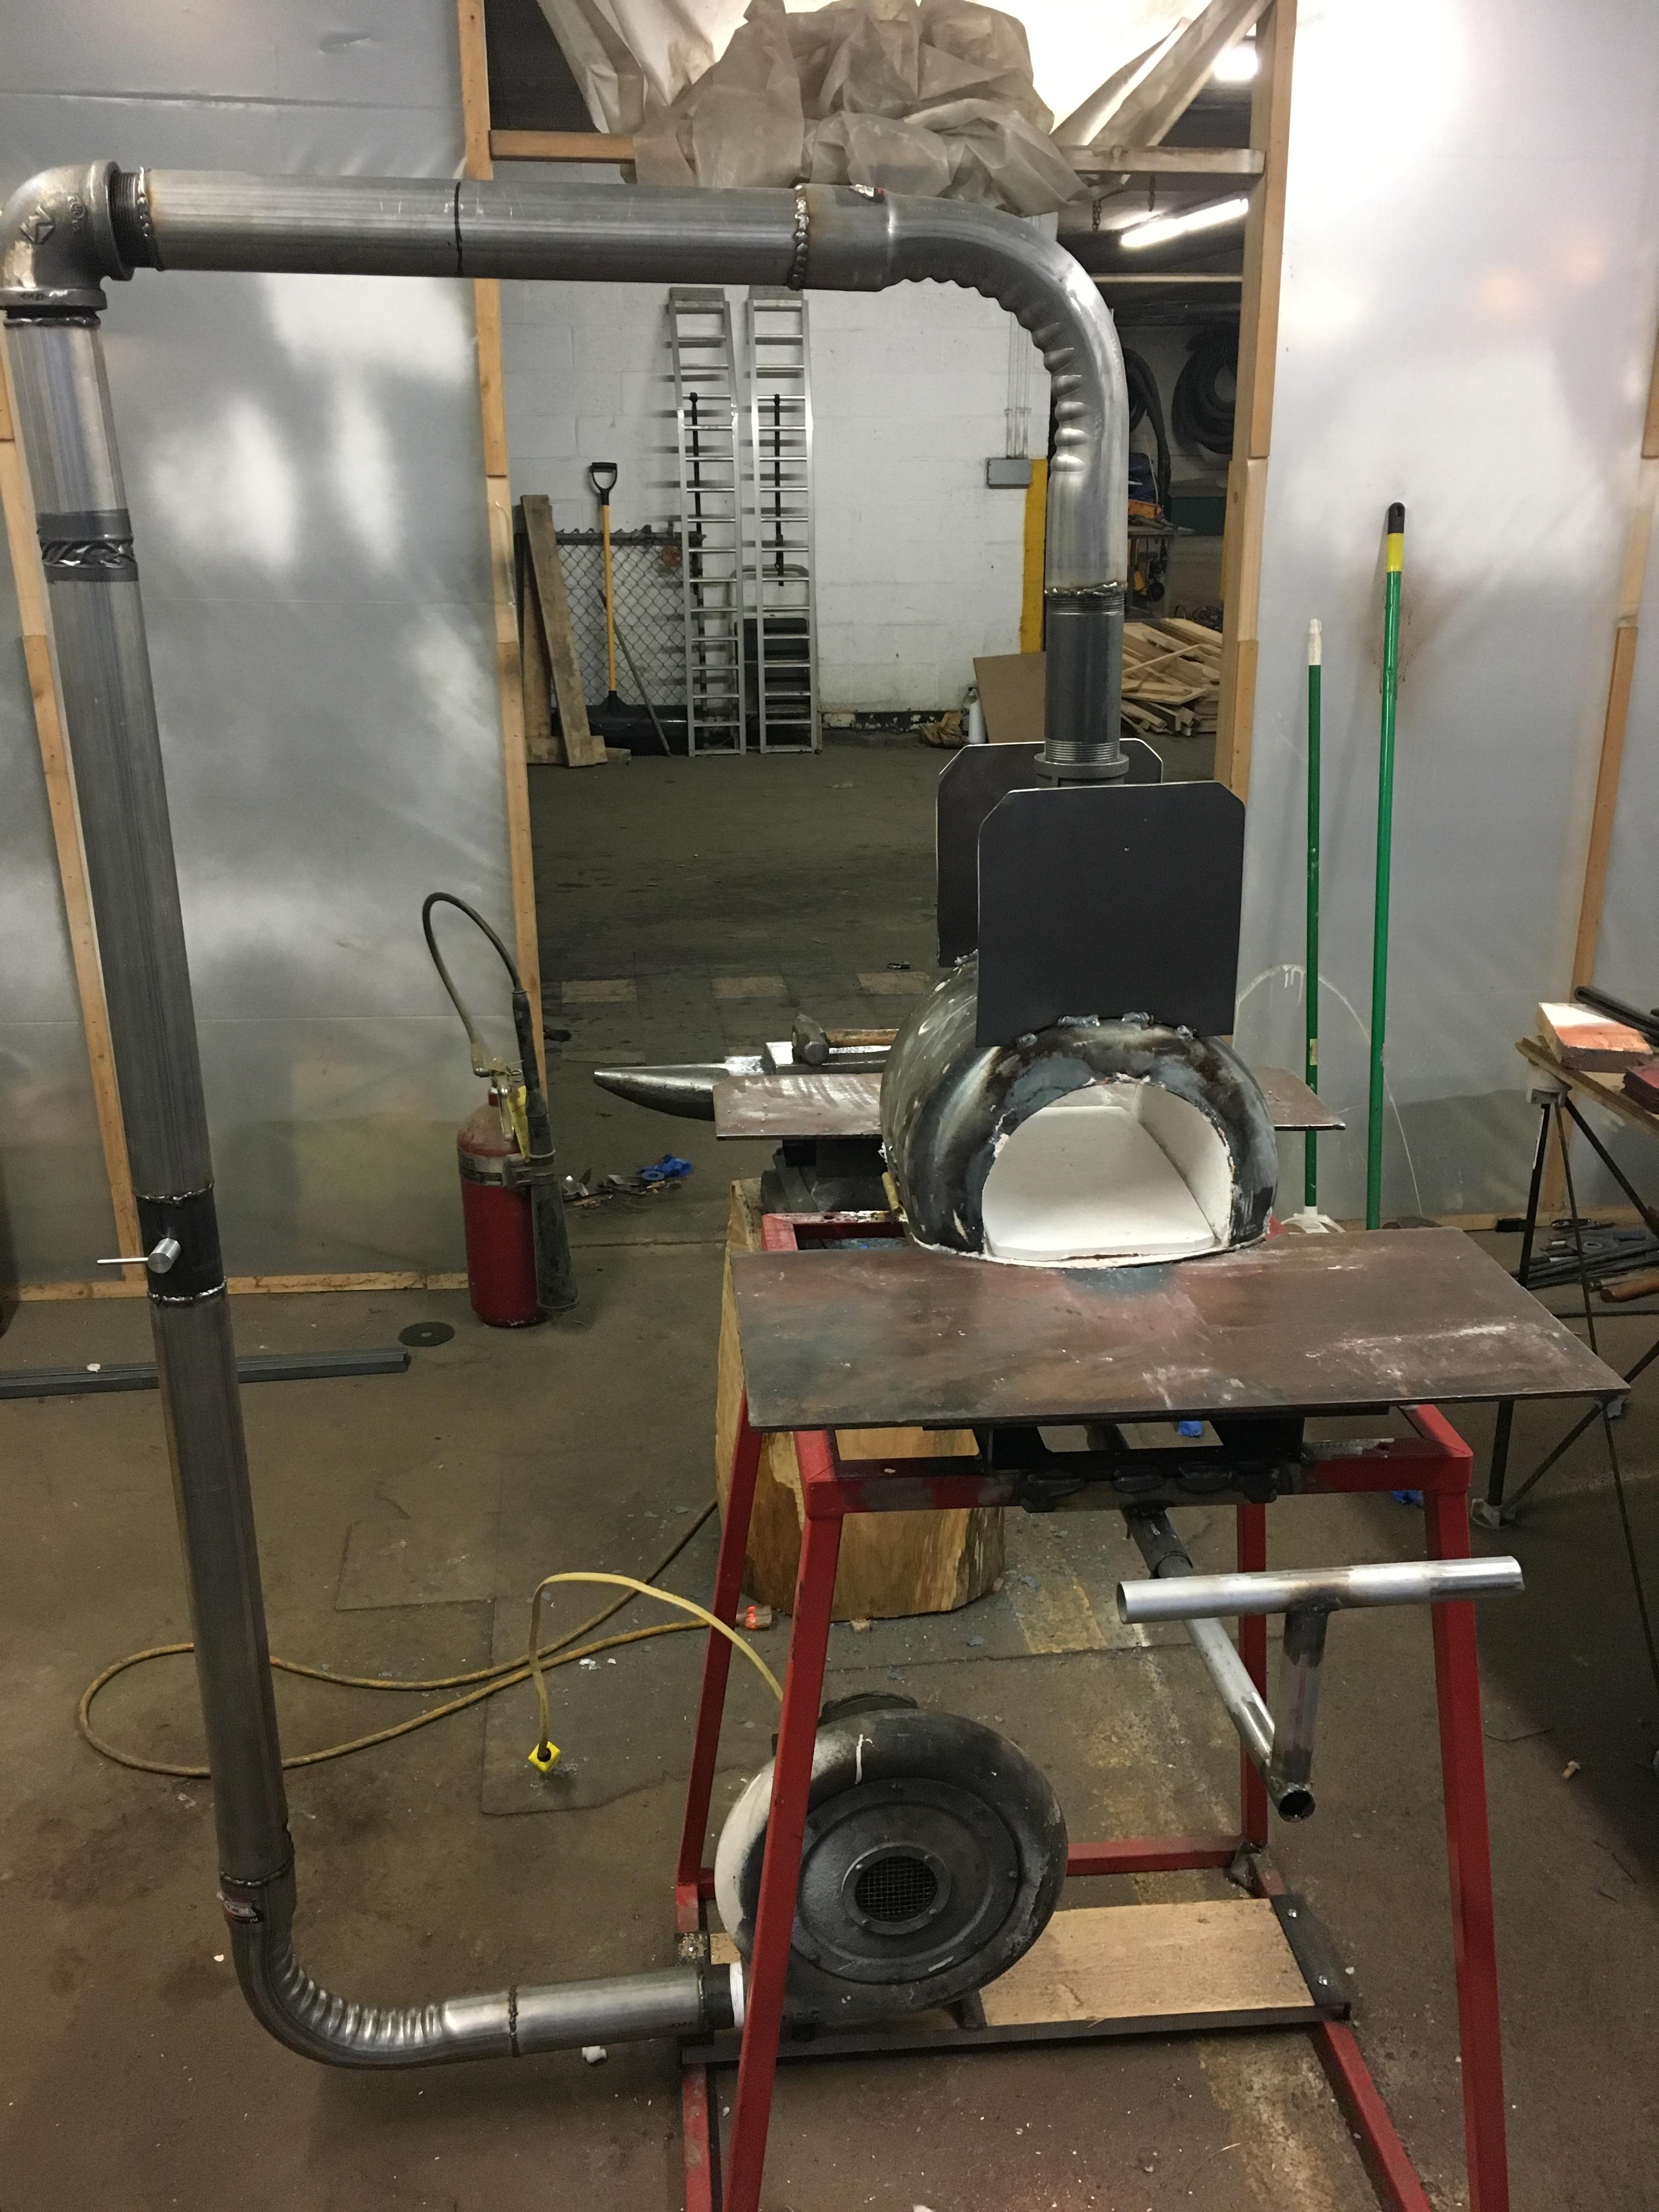
Hey all, new here and first post. I’ve been a lurker for a few months now but I’ve now signed up. I just completed a ribbon burner forge based on Wayne coes design on his site and in fact got the supplies from him. I just have a few quick questions and wanted to introduce myself.my question is what kind of gas pressure guys with similar set ups are running. I have only fired this forge 3 times so far and I’m still learning how to best regulate it. I give a quick run down on the forge. Like said already it’s a copy of Wayne’s design and burner was built as per the specs on his site only I increased length by an inch so mine is 7 as opposed to 6. I got the blower for my forge from the old trash incinerator set up in one of the large apartment buildings I work for as maintenance. It’s a pressure blower not a squirrel cage type. Blower is rated at 80cfm. Seems to run this forge with air to spare. I am regulating air flow via a nice butterfly type valve my buddy and I made inside a 2 inch diameter 6 inch pipe nipple in his home machine shop set up. I’m feeding propane from a 100lb tank thru a regulator to hose running to needle valve and dumping from valve thru a 1/4 nipple welded into a cast 90 I have a mixer in the pipe between gas supply and burner. I’m not having and uneven burn or anything like that it seems to run beautifully I am just curious as to what kind of pressure I should be looking at. Like I said I’ve only fired it 3 times so far to ramp up and not overheat the castable so I’m just lookin for a few guidelines on regulating a ribbon burner. Blower seems to have plenty of air to spare. Also wanted to add I use firebricks to close up the front and rear openings so I’m not running with ends wide open like that. Also wanted to add I use firebricks to close up the front and rear openings so I’m not running with ends wide open like that.