DeNomad
Members
-
Joined
-
Last visited
Everything posted by DeNomad
-
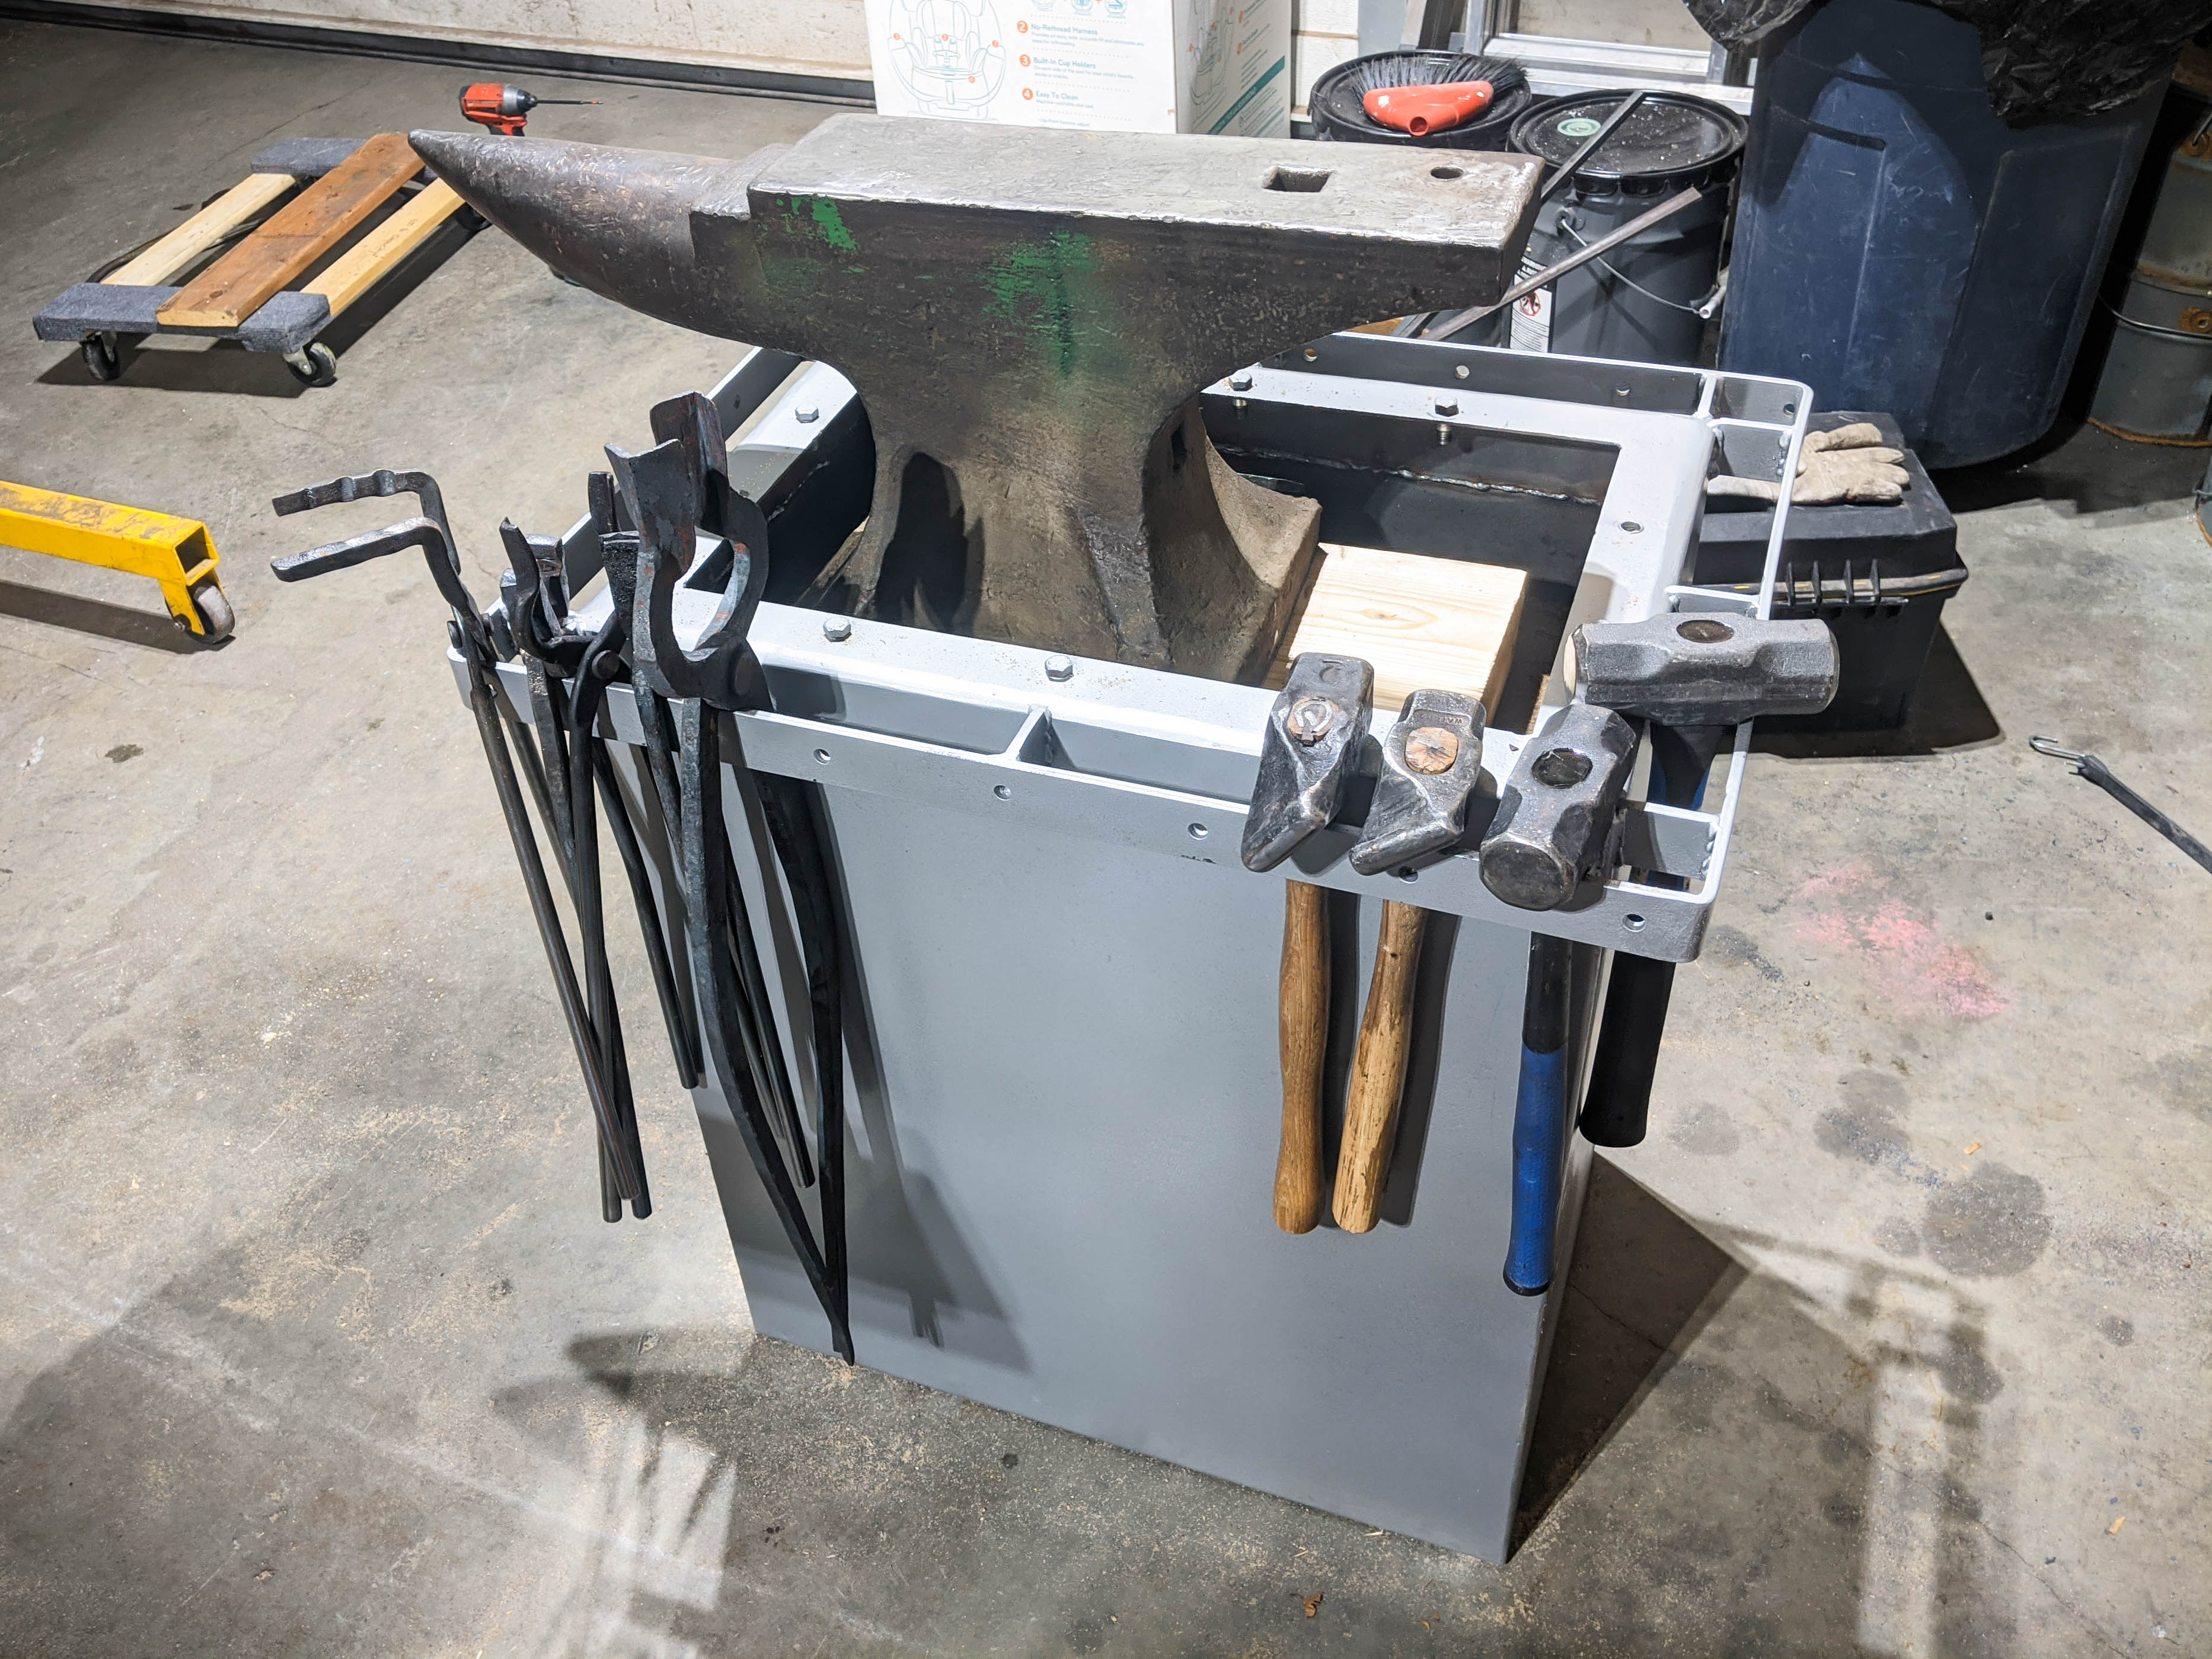
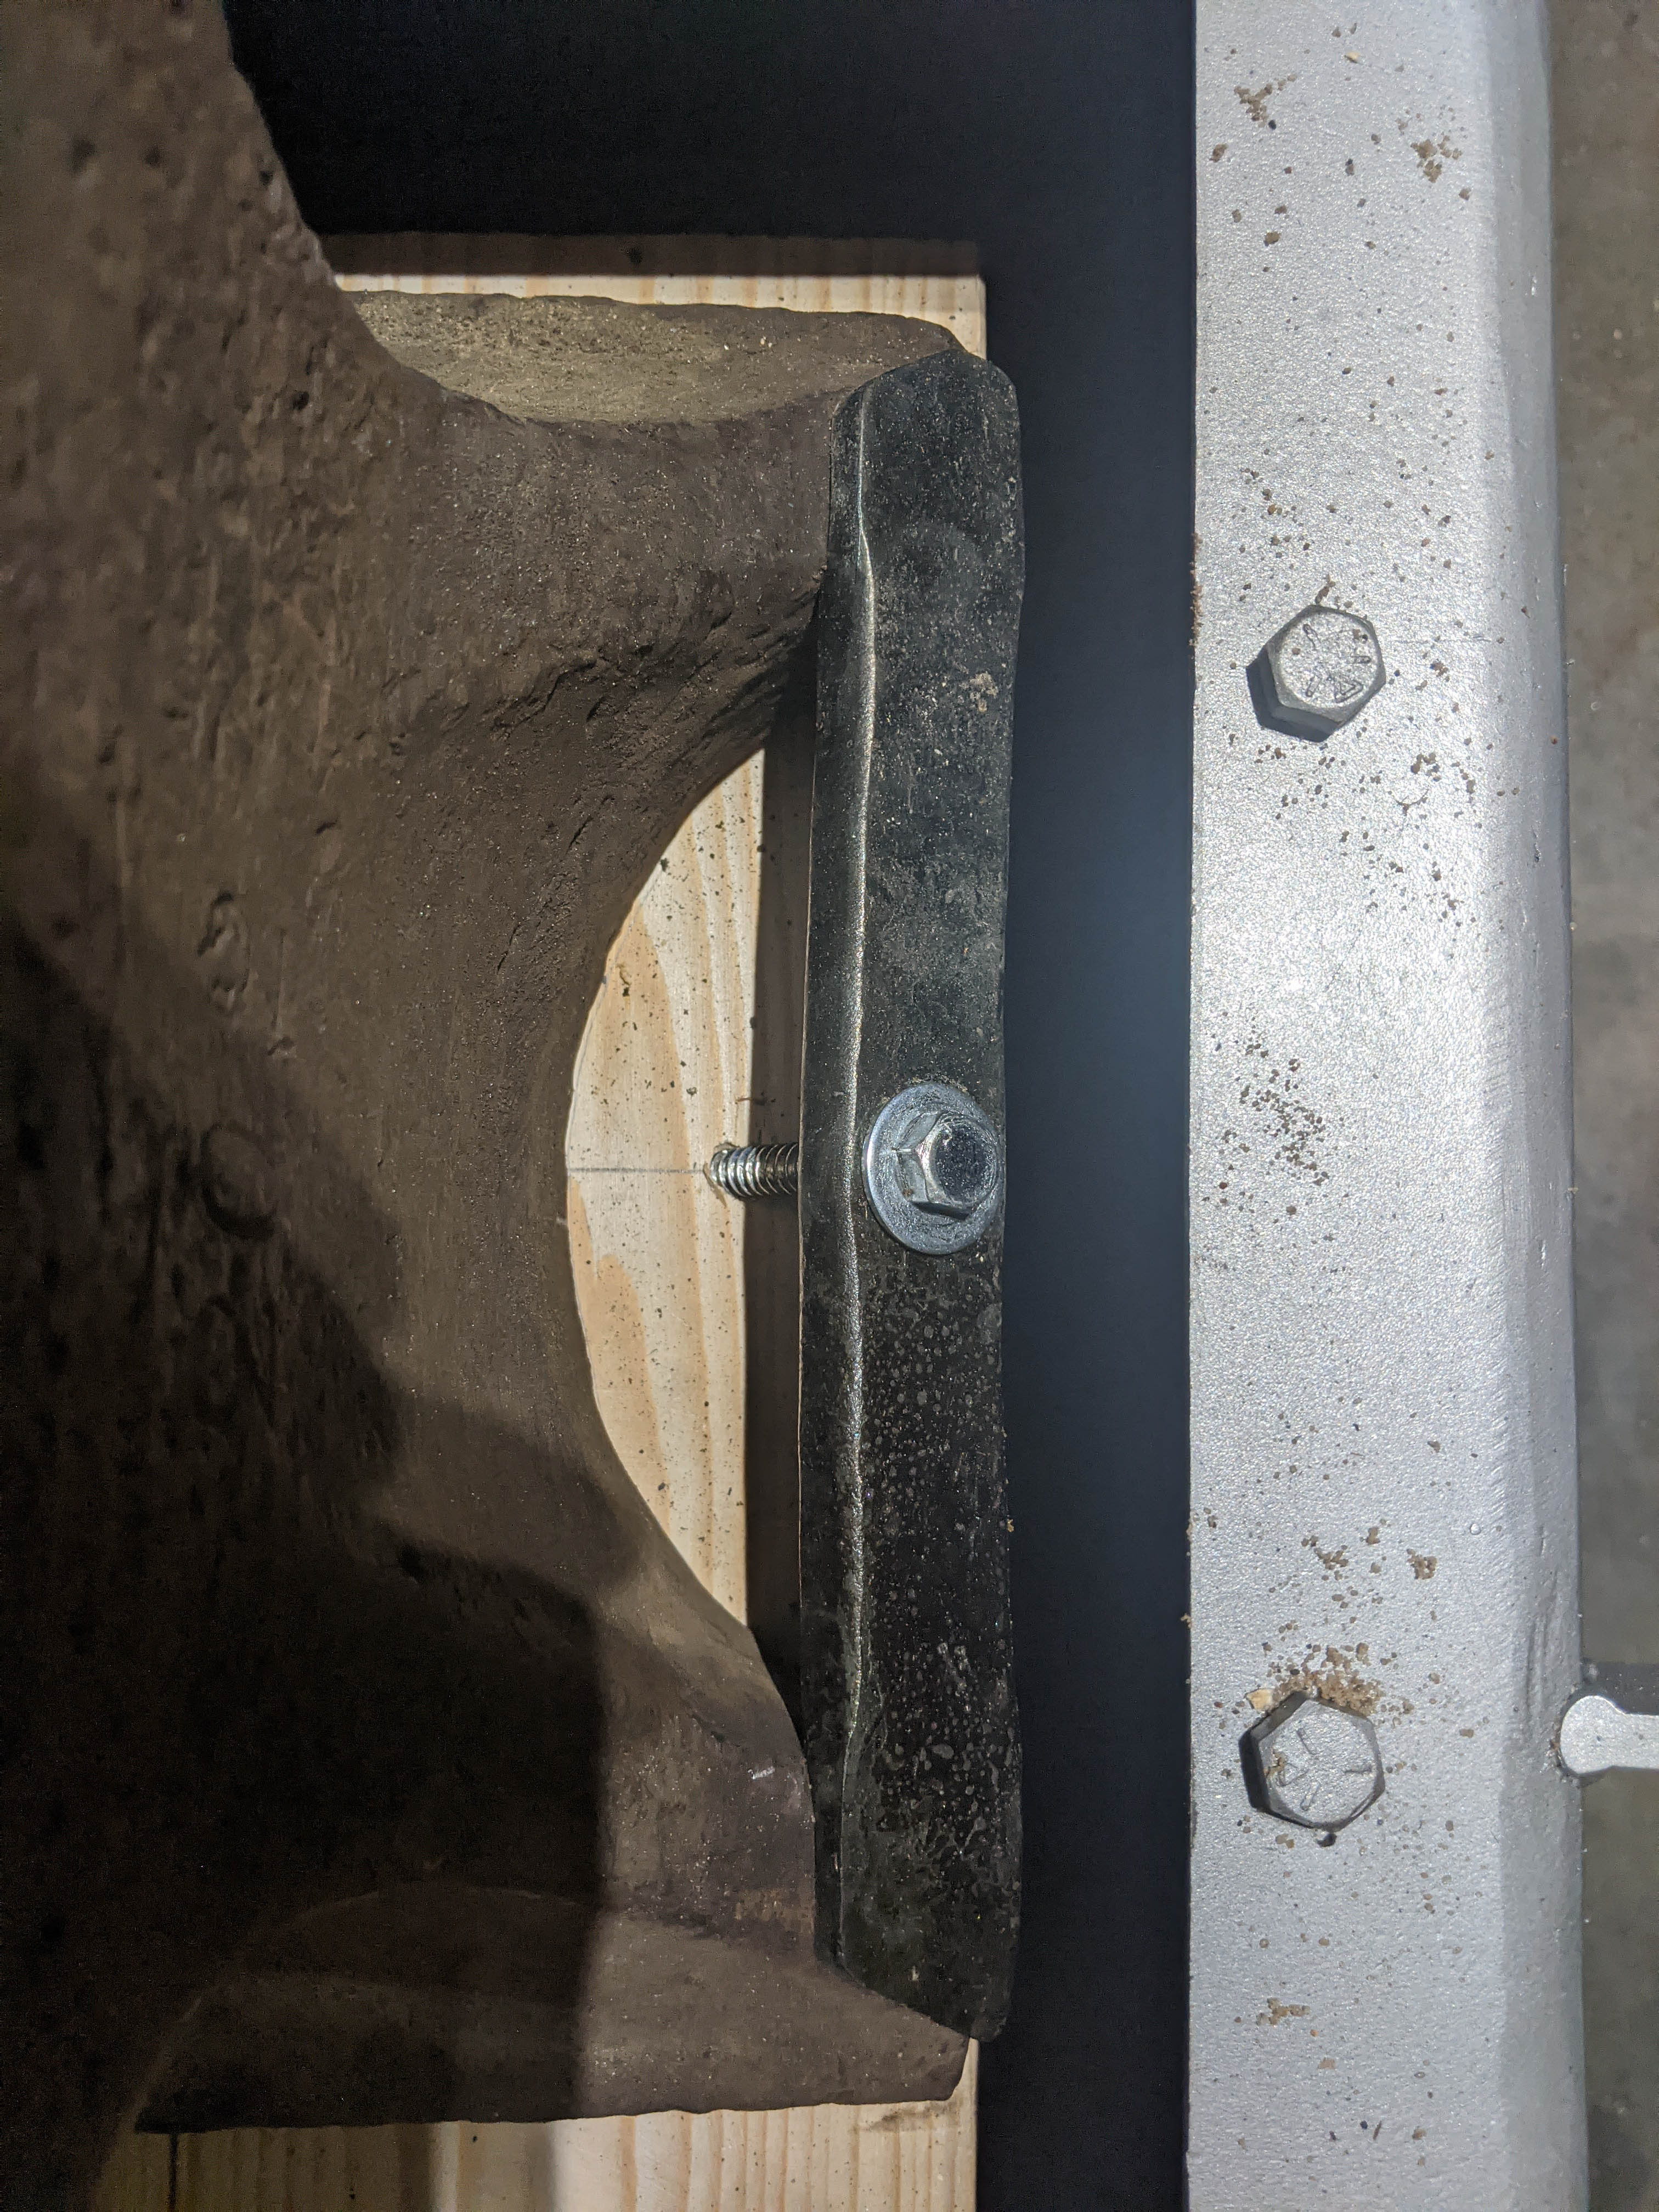
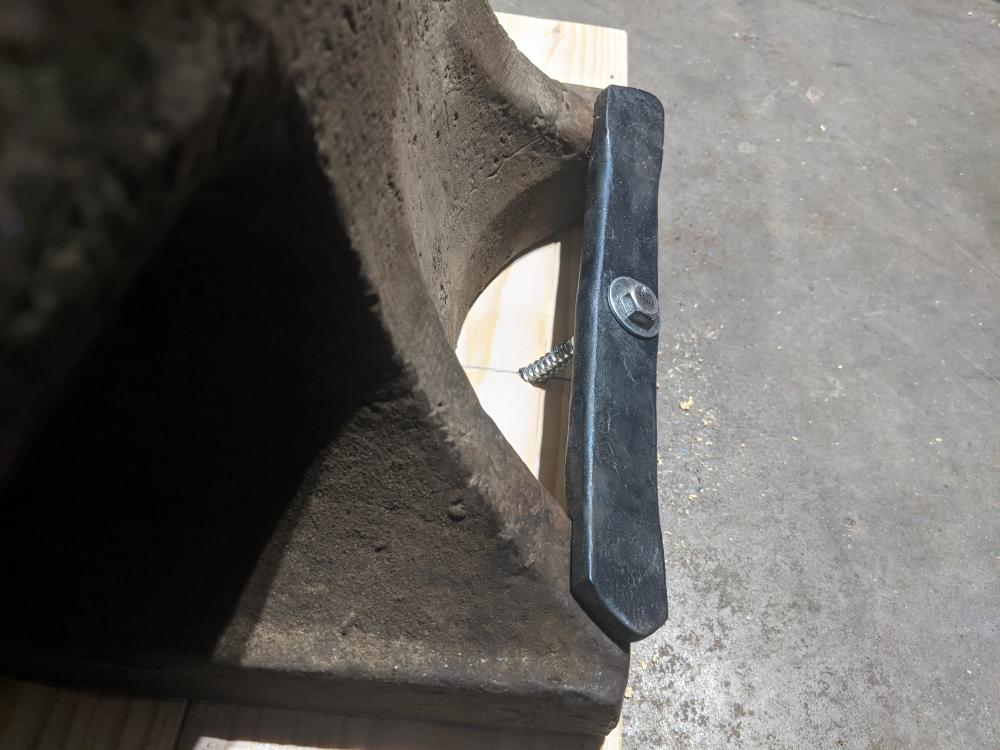
Thanks for all the feedback Frosty, IronDragon, jlp, ThomasPowers. I ended up pushing my anvil right in the corner. In this position my tool rack extends 2" from the foot of the anvil Which seems reasonable, will cut off if it bothers me. I ended up wedging my base in place with 2x6's and shims. Then I put some cross beams under bolts at the front and back to apply downward force to my wooden anvil base. Covered everything with sand. After I did that this anvil became really really quiet and I am pleased with that. It is also very very secure. I might re-make the stand one day as it is over large, I agree. But it works as long as I stand on the "close side". I have enjoyed having an area to put a flux tray and spread out my tools. Maybe I should just get a bigger anvil so I can better utilize my stand better My wife would love that...
-
Good safety tip Thomas, thanks. My practice is to put hot tongs "in use" next to my forge on a cart (aka my old bbq cart) so I always grab the reins. I will move the tongs "in storage" to the far side rack, much better than cluttering my shop table. Having a dedicated stand for tongs and hammers would be nice, I might look into something wall mounted in the future after I redo some electrical for 220V. I have been looking at my layout in the garage to make every inch count as I want to squeeze in a belt grinder somewhere one day. Oh and yes this is a stationary set-up. Previously I had all my hammers on the ground next to my stump and 100 lb anvil. Bending over to swap hammers got tiresome. I change between 3 hammers quite frequently and I could use a few more. I am considering bolting a piece of plate behind the anvil heel to use for a table so I could spread out tools like chisels/stamps/punches/extra hammer.
-
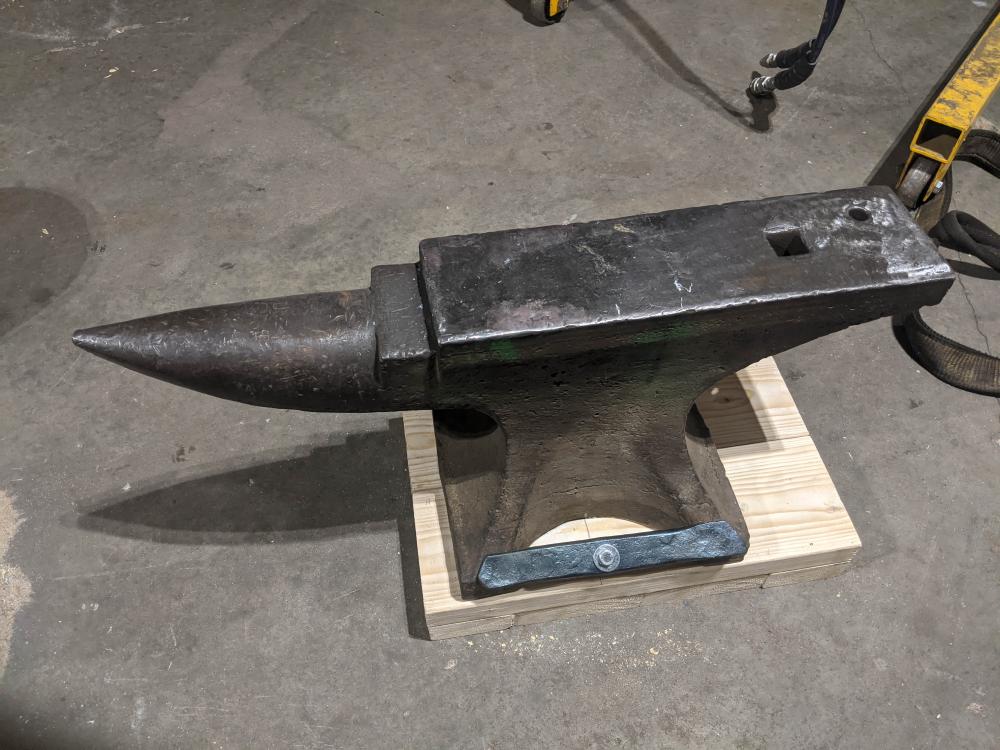
Thanks, and that is a very valid point with not standing close enough. When I was making the wood base I cut the base fairly small so I could shift it around in the stand and mounted the anvil off center so the horn overhangs. I have moved the anvil to my "working corner" where I usually stand. If the tool rack ends up being an issue I will zip off 25% of the tool rack to stand closer. I will need to forge a few things on the new set-up and see what is comfortable.
-
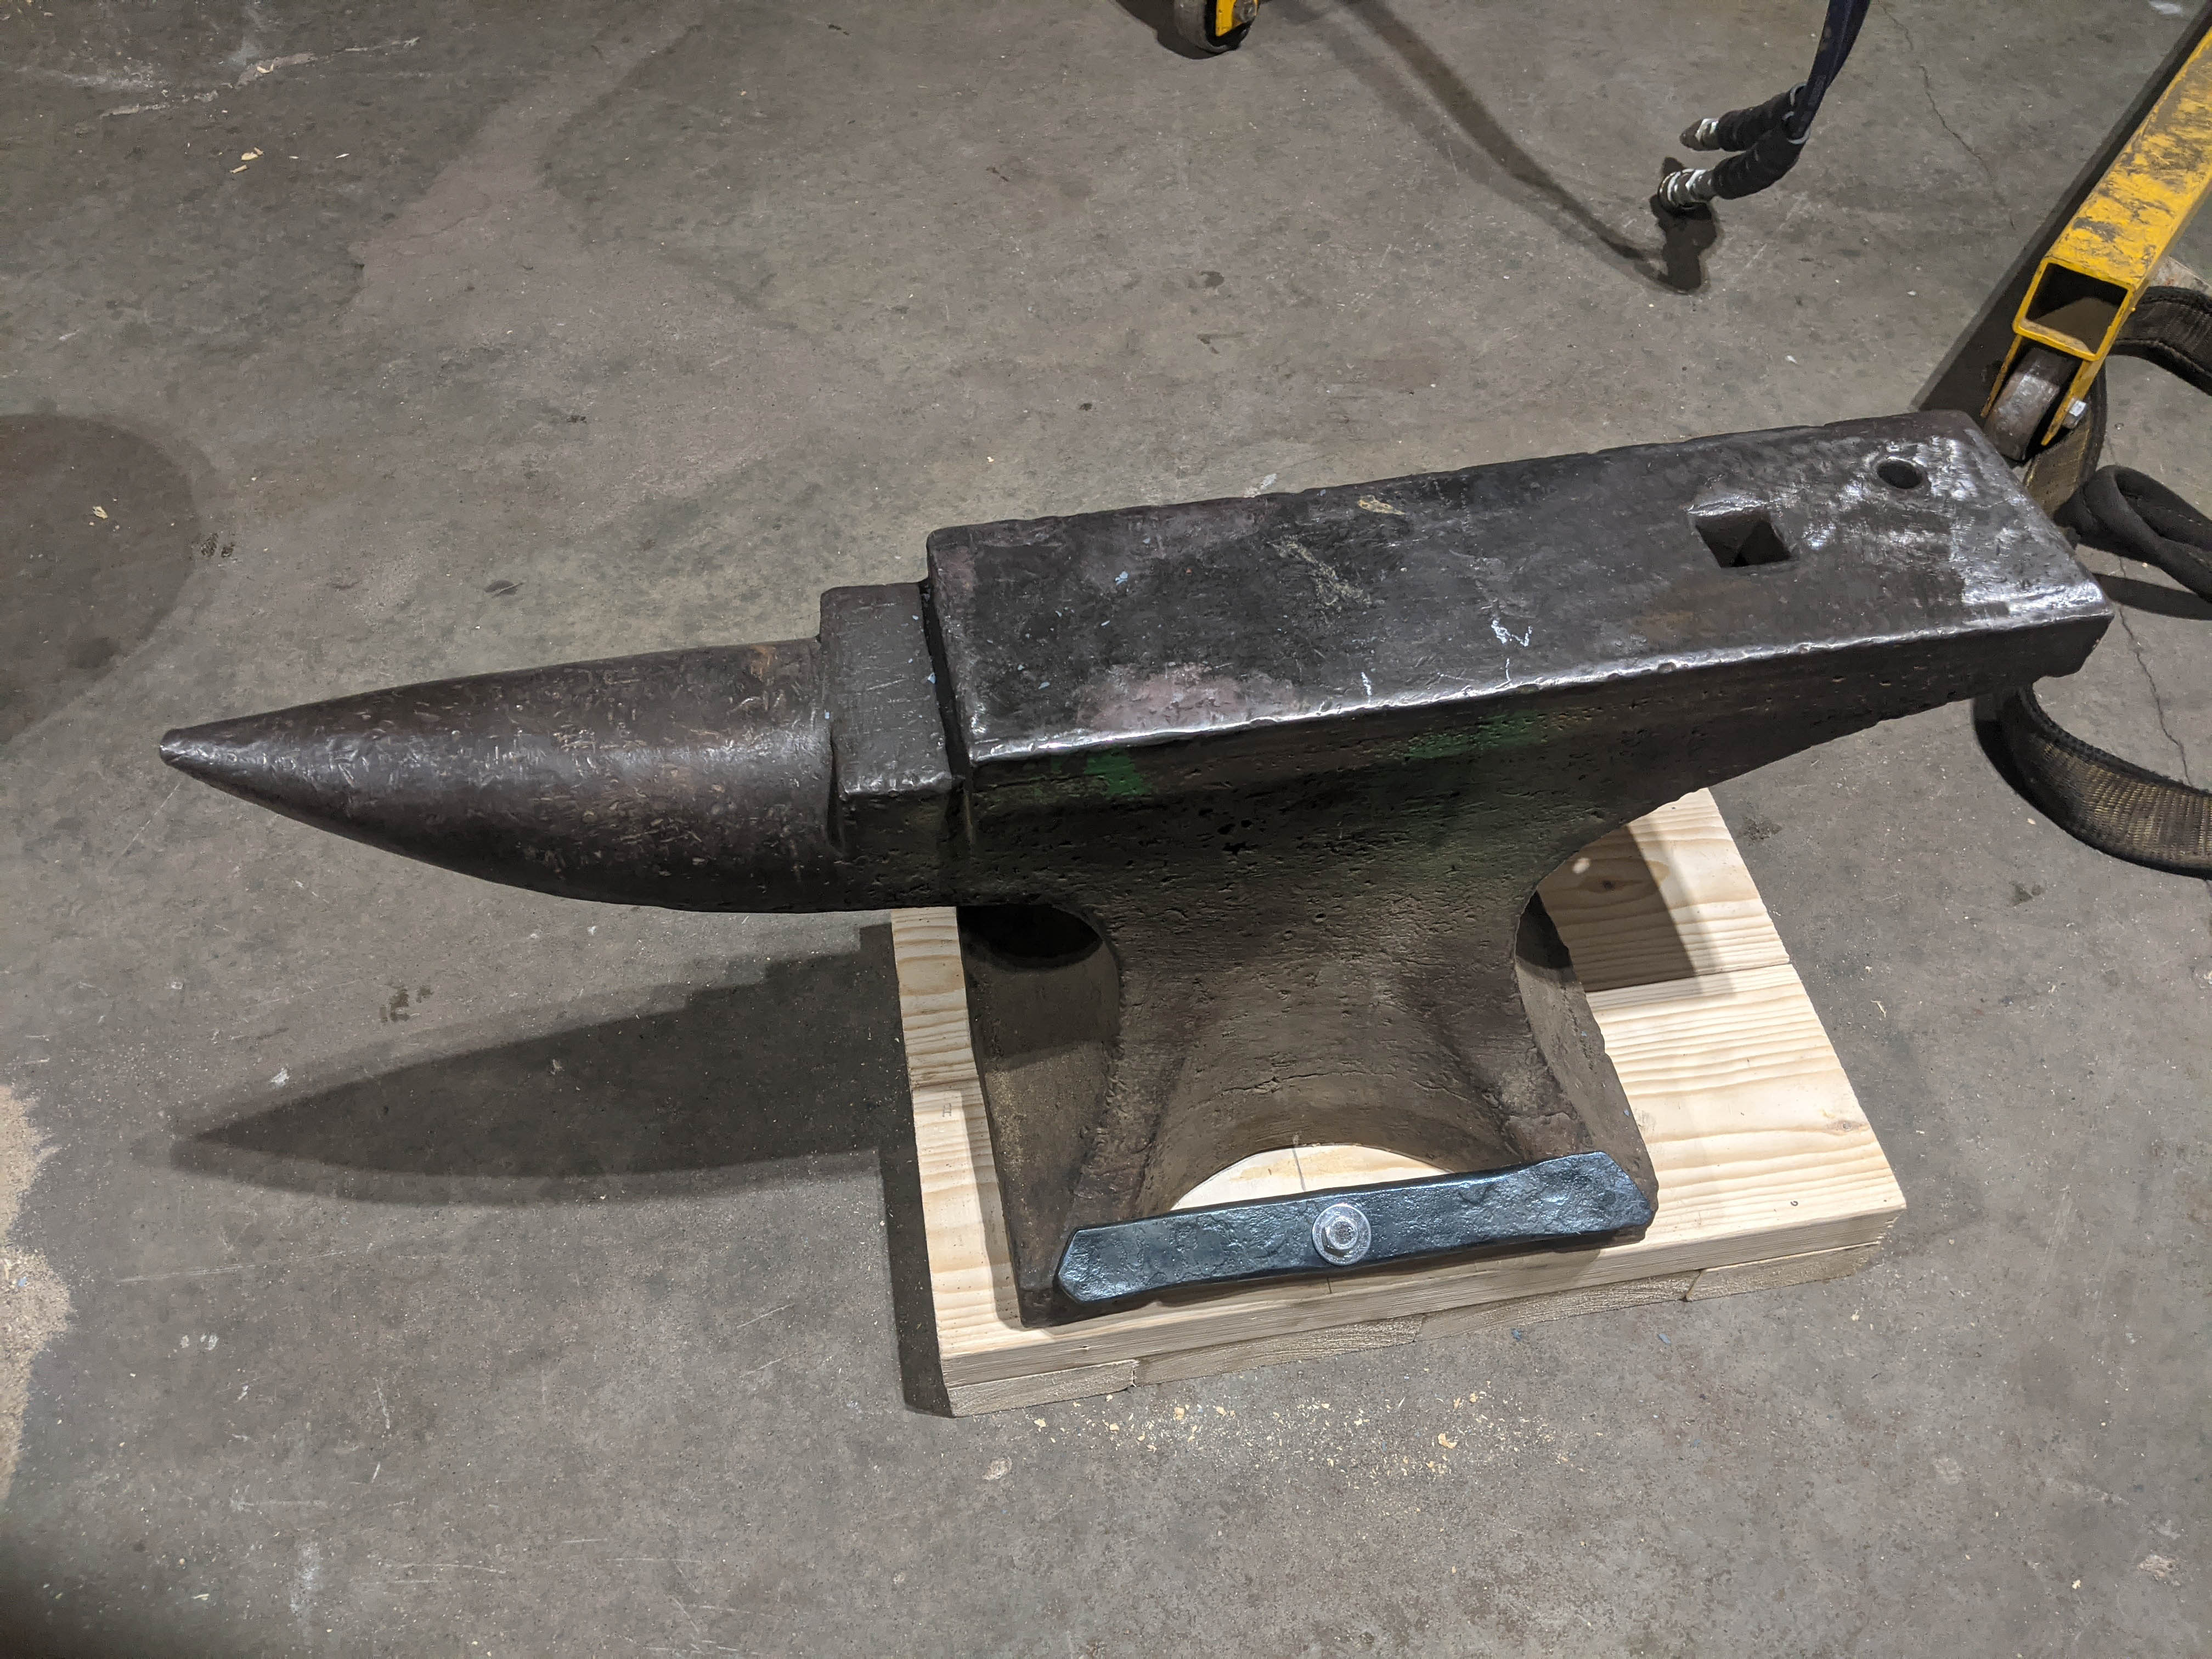
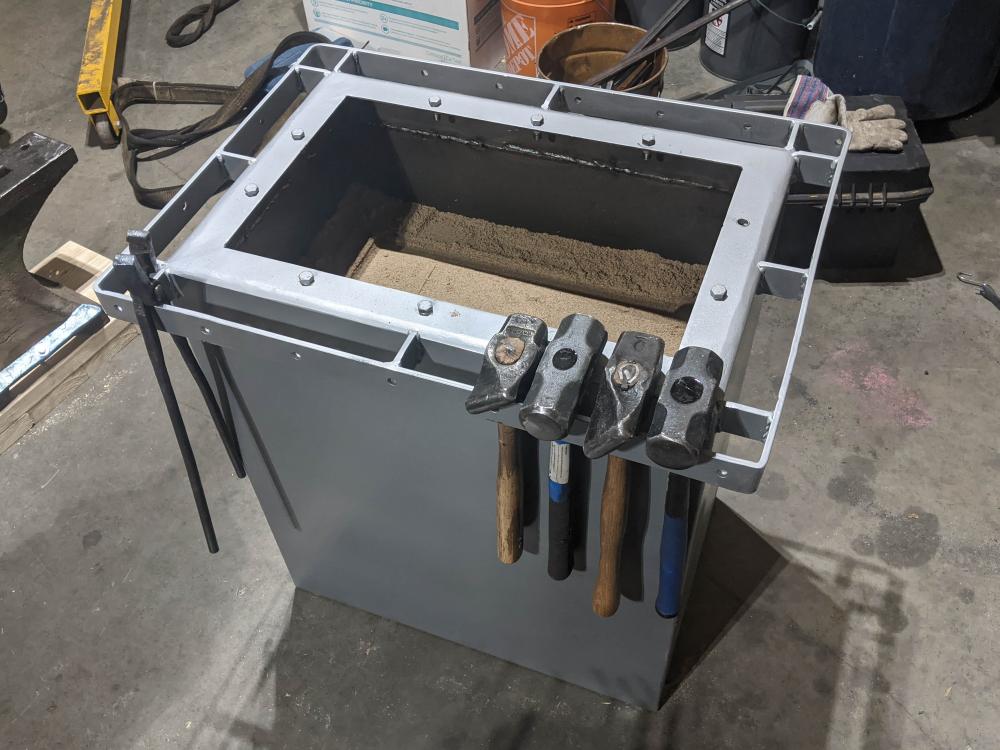
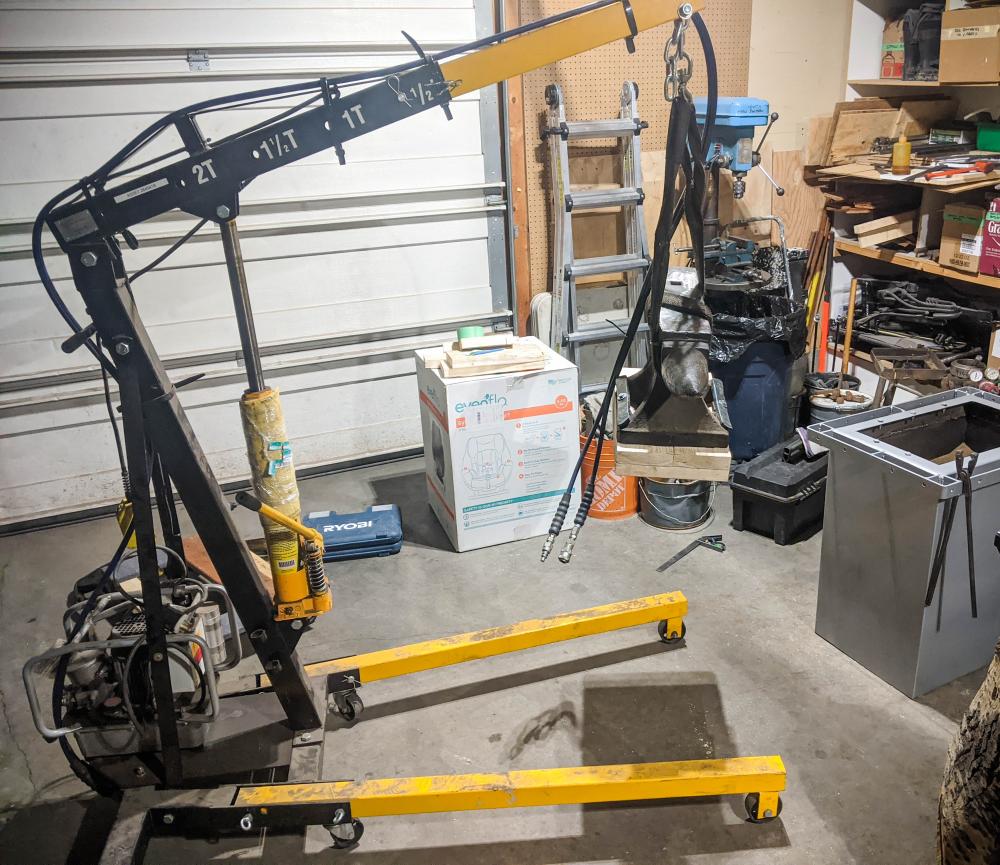
Frosty, all finished up. The motor hoist was a good tip, I borrowed this one for a week. Back-saver right there. I quickly forged some straps and lag bolted my anvil to a wooden base. The straps lock in place on the edges of the anvil. I cut the top off a scrap hydraulic tank lowering it to a good working height, saved the top of the tank with the threaded holes to use for accessories and stiffen up the top of the tank. Welded a collar that goes all the way around to hold hammers and tongs out of scrap flat bar. Then filled with around 600 lb of masonry sand so I can adjust height up and down. Gotta say masonry sand is cheap in bulk, like $30 for 1000 lb dropped onto my trailer with a backhoe. Gonna try some forging at wrist height rather than knuckle to see if I prefer taller before piling sand all around this anvil to "lock it in place". I plan to use the bolt at the top to press on a 2x4 to push down on my wood platform since that would be easy. Also I want to wrap use a chain with a stirrup on my anvil for working on some stuff without tongs. Going to try out wrist height for the first time, will see if I prefer that over knuckle height. If I do I think I will make a wood platform to stand on for sledge/drifting holes in hammers. This Soderfors seems to benefit from a magnet on the heel to quiet the ringing. At 800 lb (sand + anvil) I don't think this will be walking around my garage. Material was scrap, so only costs were spray paint, sand and time.


-
Thanks for the tips Frosty! The engine hoist looks like a back saver as well. My 202 lb Soderfors is no where near portable as a 100 lb anvil. I'll post a picture up here when I am done. The scrap metal box on hand happens to be about perfect size, just need to cut it to height and fill with sand, might take about 1/4 yard or 500 lb of sand, so not likely I will be moving it around the shop at all.
-
I've been liking this thread, lots of good ideas. Looking for feedback on a stand that needs to quiet down a Soderfors anvil for residential forging. I am thinking masonry sand piled into a handy scrap hydraulic reservoir I have on hand. Would a threaded system be recommended to tighten everything down, or would piling sand a couple inches above the base of the anvil be enough? Still trying to decide how a threaded system would look with sand if I go that route. Might run some lengths of threaded rod to the base, or something a little more fancy.
-
Ethan great job on the hammers! I enjoyed your videos as well. Hope to see some more of your work on youtube in the future.
-
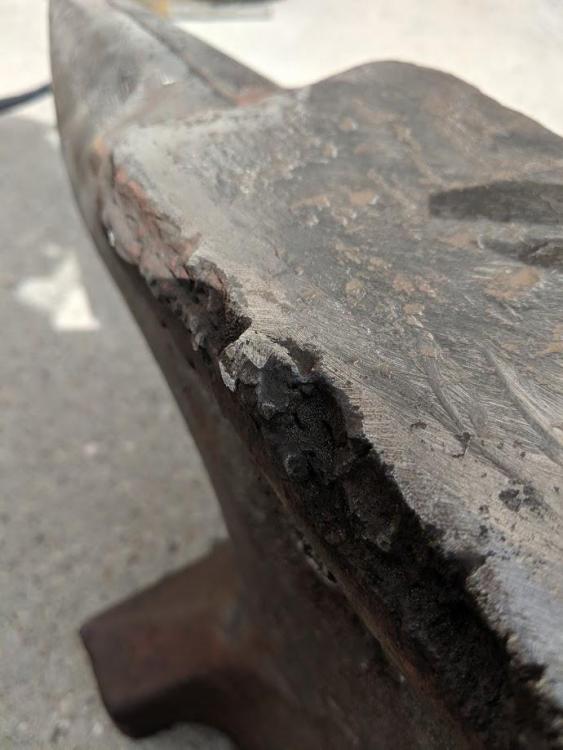
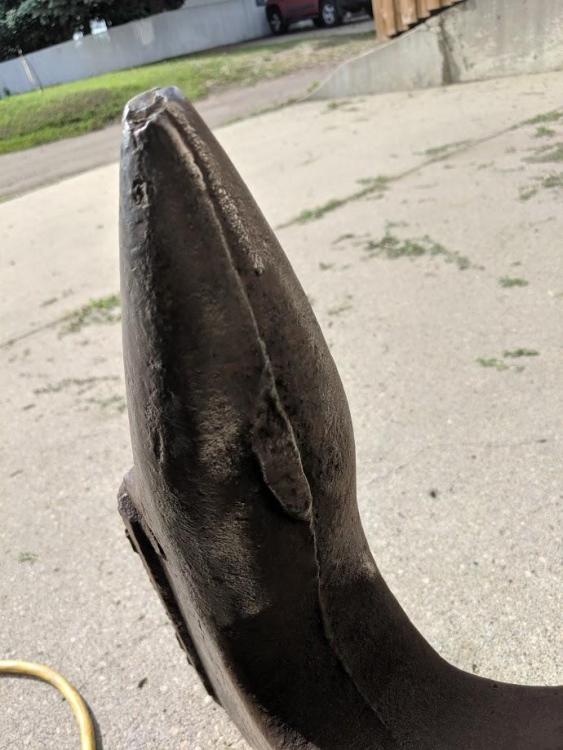
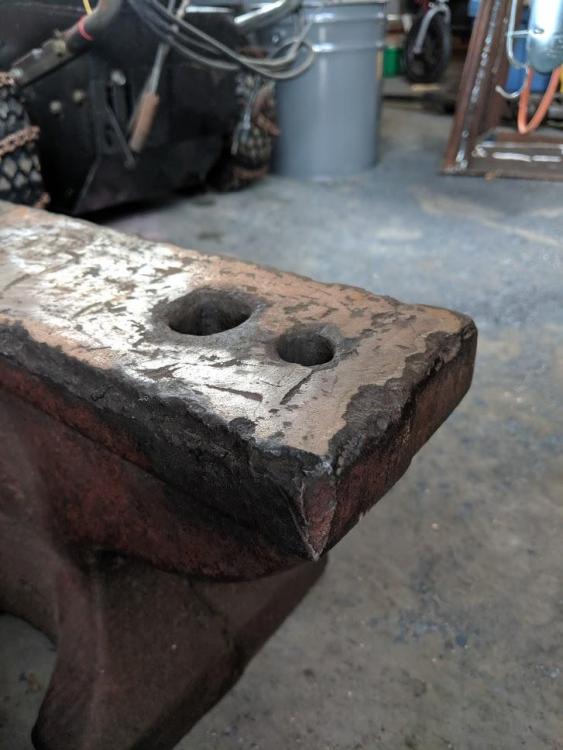
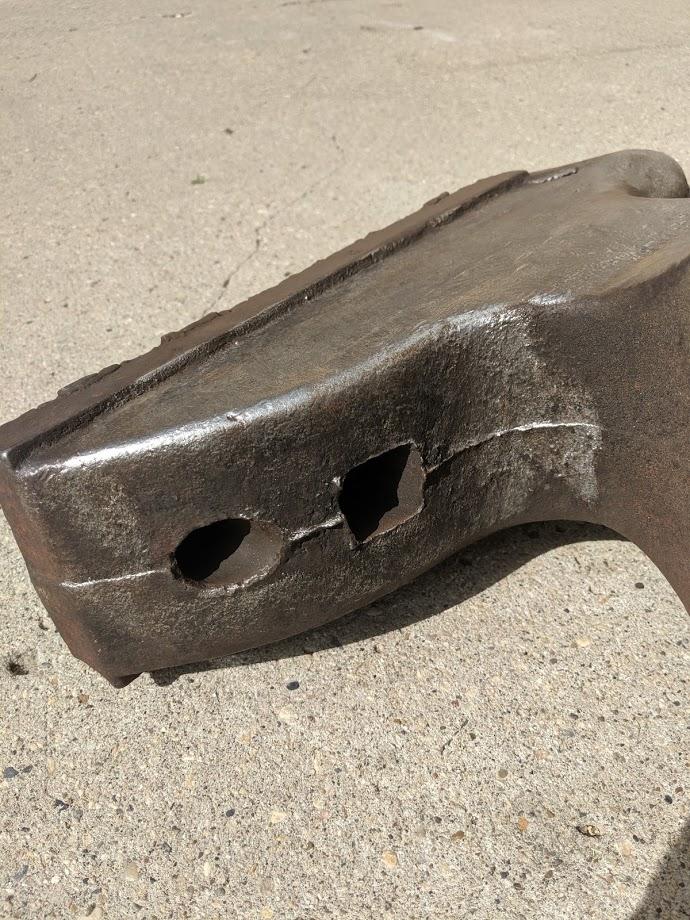
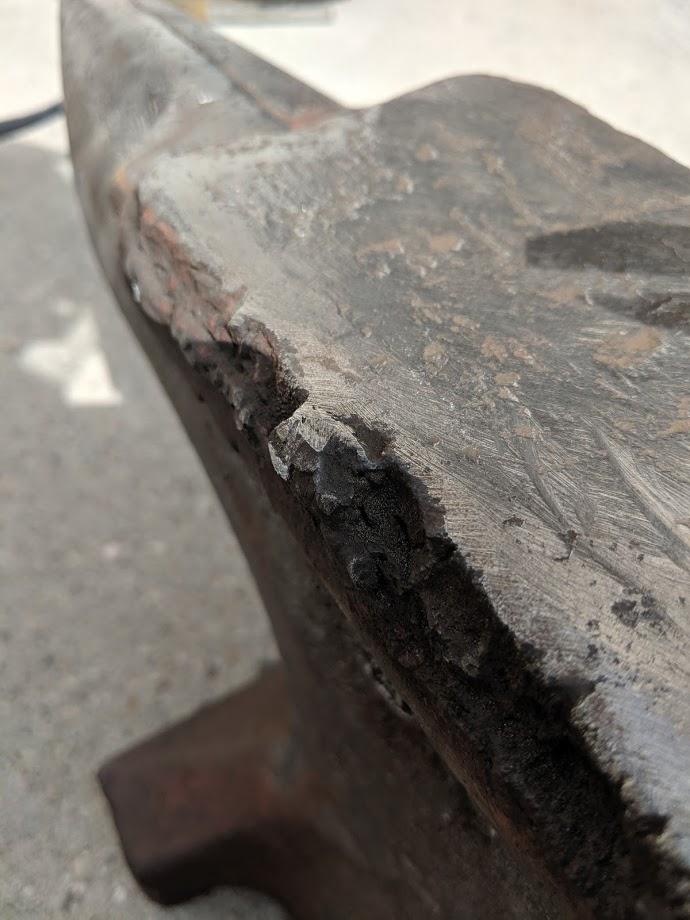
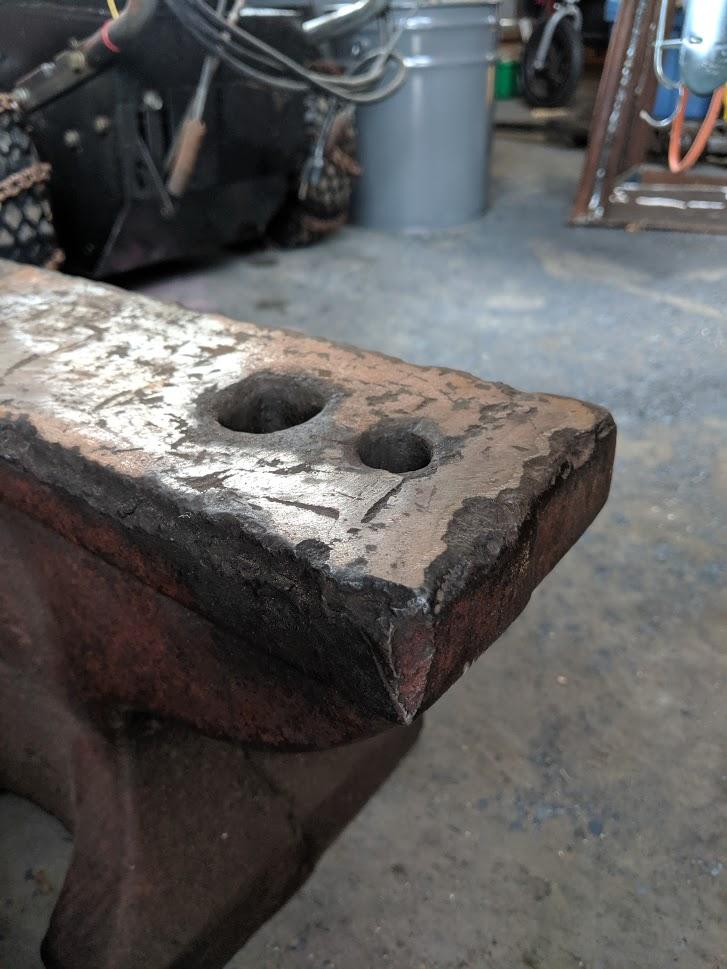
ThomasPowers multiple radius hardy tool is is a good idea, thank you. I am on the same page with you regarding sharp edges. I added radiuses quickly to my ASO after a few hours of pounding on it without knowing better. My current issue is edges which are both jagged AND sharp. I am not sure if it was clear in my photos on the long edges, the heel is a little radiused. It looks like someone hit the long edges with a big sledge hammer and making the faceplate come off like shrapnel on the long edges. I think I will grind a radius for a small length, around 2-4" of the long edge where until I can put a decent radius into my work and see how it goes. If I need a sharp edge I have my ASO with sharp edge on one side. Out of curiosity how is the faceplate attached in a cast mould? Is the backside of the faceplate criss-crossed with grooves? I appreciate the advice everyone, thank you. I learned a fair bit about anvils yesterday. Look forward to using this one as the rebound is a huge improvement to my ASO.
-
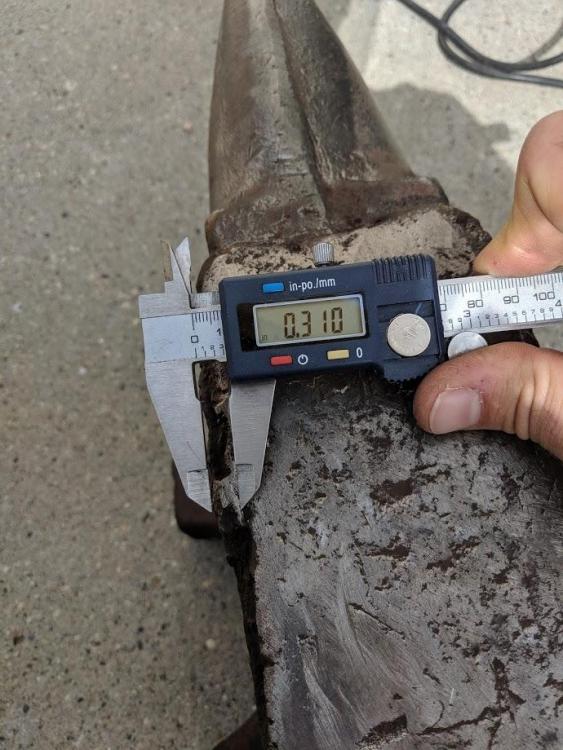
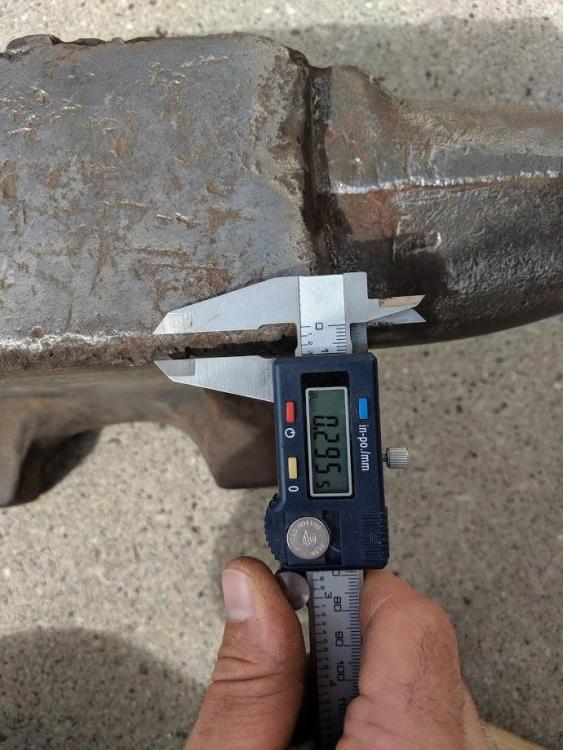
Thanks for the replies! BIGGUNDOCTOR, this is cast iron definitely. The tip about drilling into the bottom and getting grey chips should go in the sticky at the top of the anvils section, thank you. ThomasPowers, the starting width of the face is 4 inches, so if I milled off 1/4" on each side I would have about 3.5" left to use. Seems like that is on the skinny side. I might be able to retain more width by milling 1/8" per side and grinding a radius, about 3-3/4" width. The entire length on the long edge is jagged, so I figured it wouldn't be great for half faced blows. Perhaps I would be better off trying to blend it with the grinder although I would end up with 1/4 or 3/8" wide profile with a shallow depth.
-
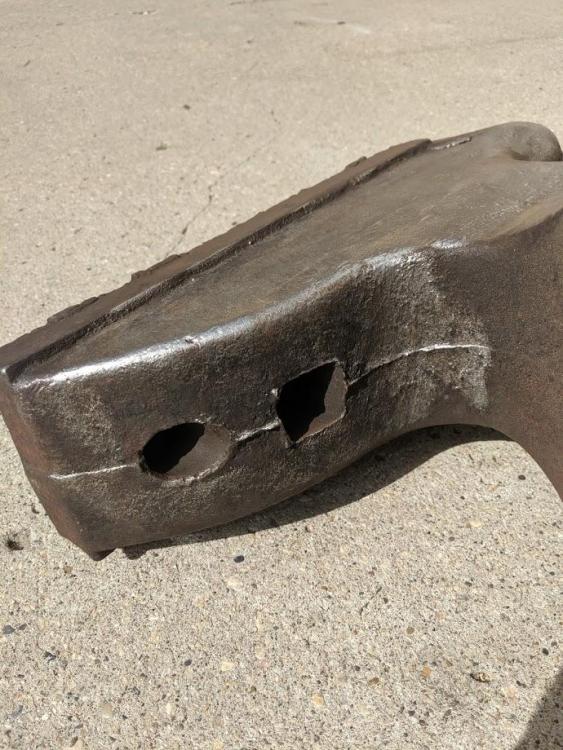
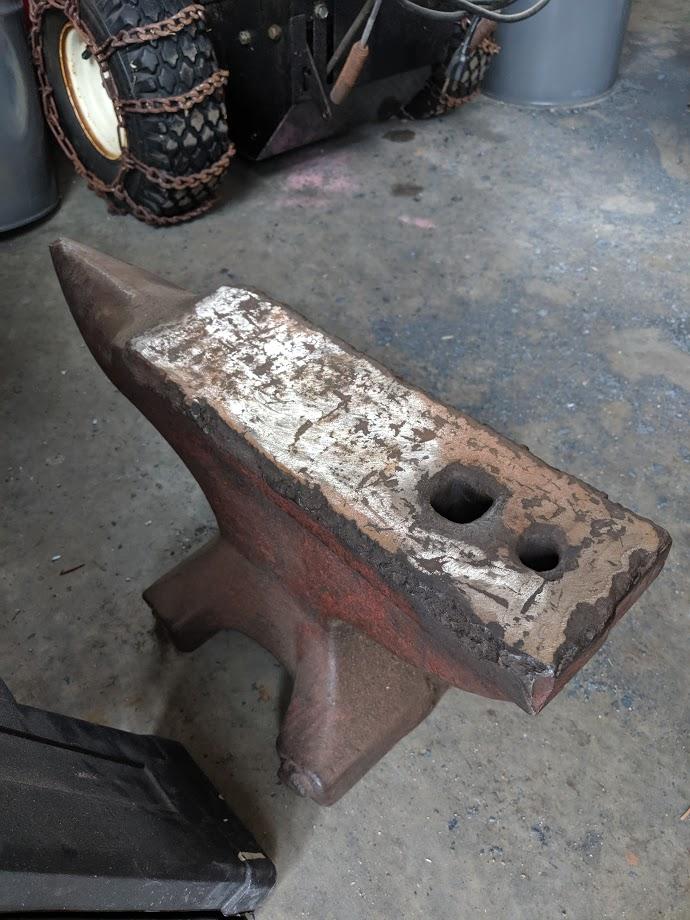
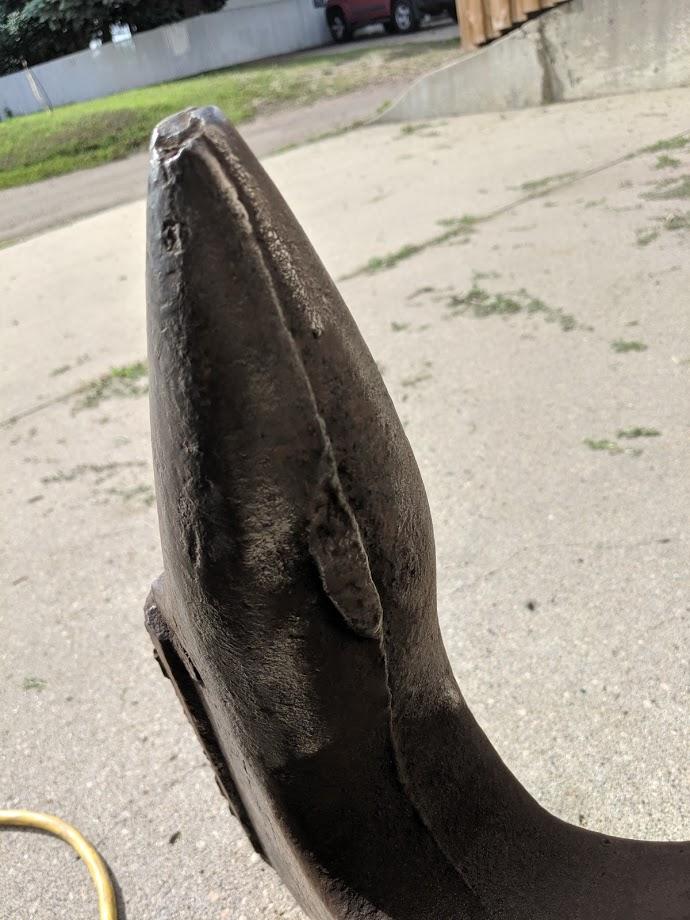
Hello, looking for some help with identification and some advice on how to use this anvil. Picked it up in rural Alberta, Canada. Thomas Powers method while having a cold one on a porch with friends of the inlaws. A little over 100 lb, maybe 110 lb Previous owner took a grinder to the faceplate, not me. I just wire brushed the sides looking for identification Didn't find any markings, no handling holes on the bottom. There is a mould seam running right down to the feet. Guessing cast iron with a welded steel face. The difference in from faceplate to body is easily visible from the sides. Additionally the rough edge condition might from be from perimeter welding? Could be cast steel but I'm no expert. I attached a video with a "ring" test. Rebound is respectable. Might be a Vulcan, but hoping the experienced folks can give me a bit more information. The edges are really rough, I think I have to do something to make it useable. I might be able to get access to a mill at work. Would it be advisable to mill off the rough portion of the perimeter and skim the faceplate? For the edges if I was to take it down to the good material I would have to remove around .250-.300 inches per side. I am worried that doing this might cause the faceplate to pop off. Not sure if faceplates like this are forge welded? Advice would be appreciated Video with ring test at this link: https://photos.app.goo.gl/cnLskf5LDSox96DZ9 Some photos below.