acrosteve
-
Posts
7 -
Joined
-
Last visited
Content Type
Profiles
Forums
Articles
Gallery
Downloads
Events
Everything posted by acrosteve
-
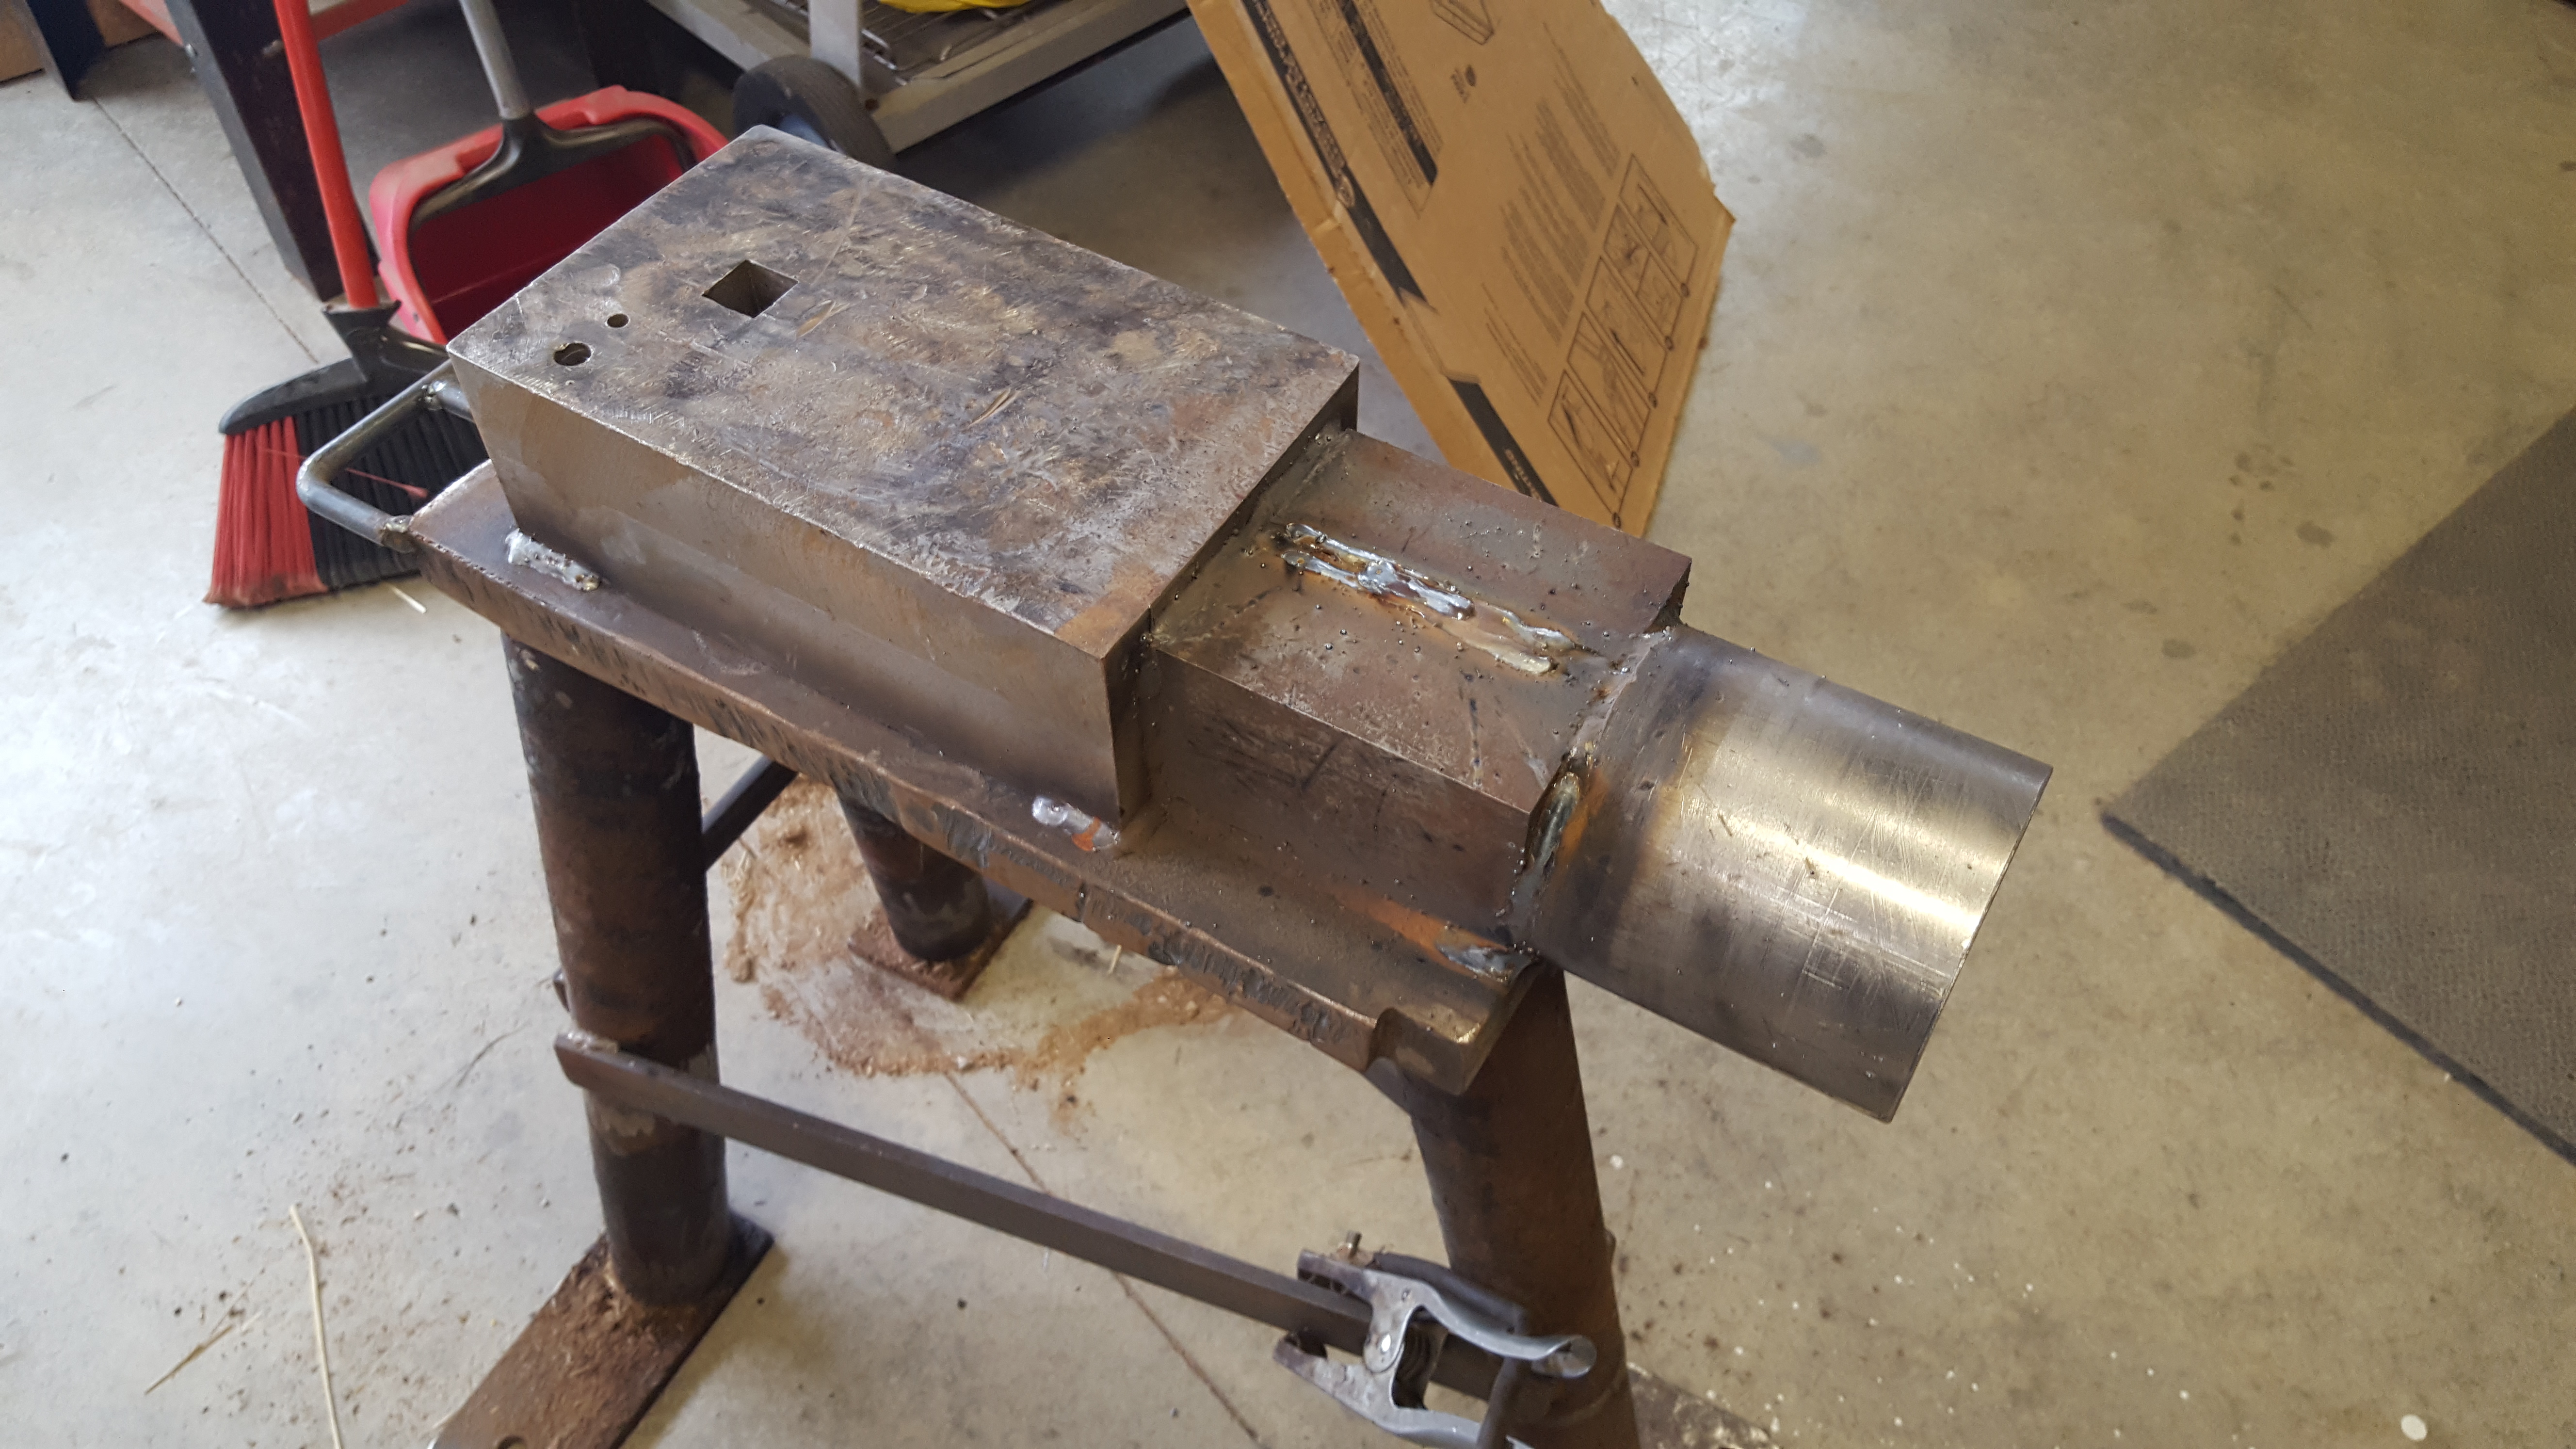
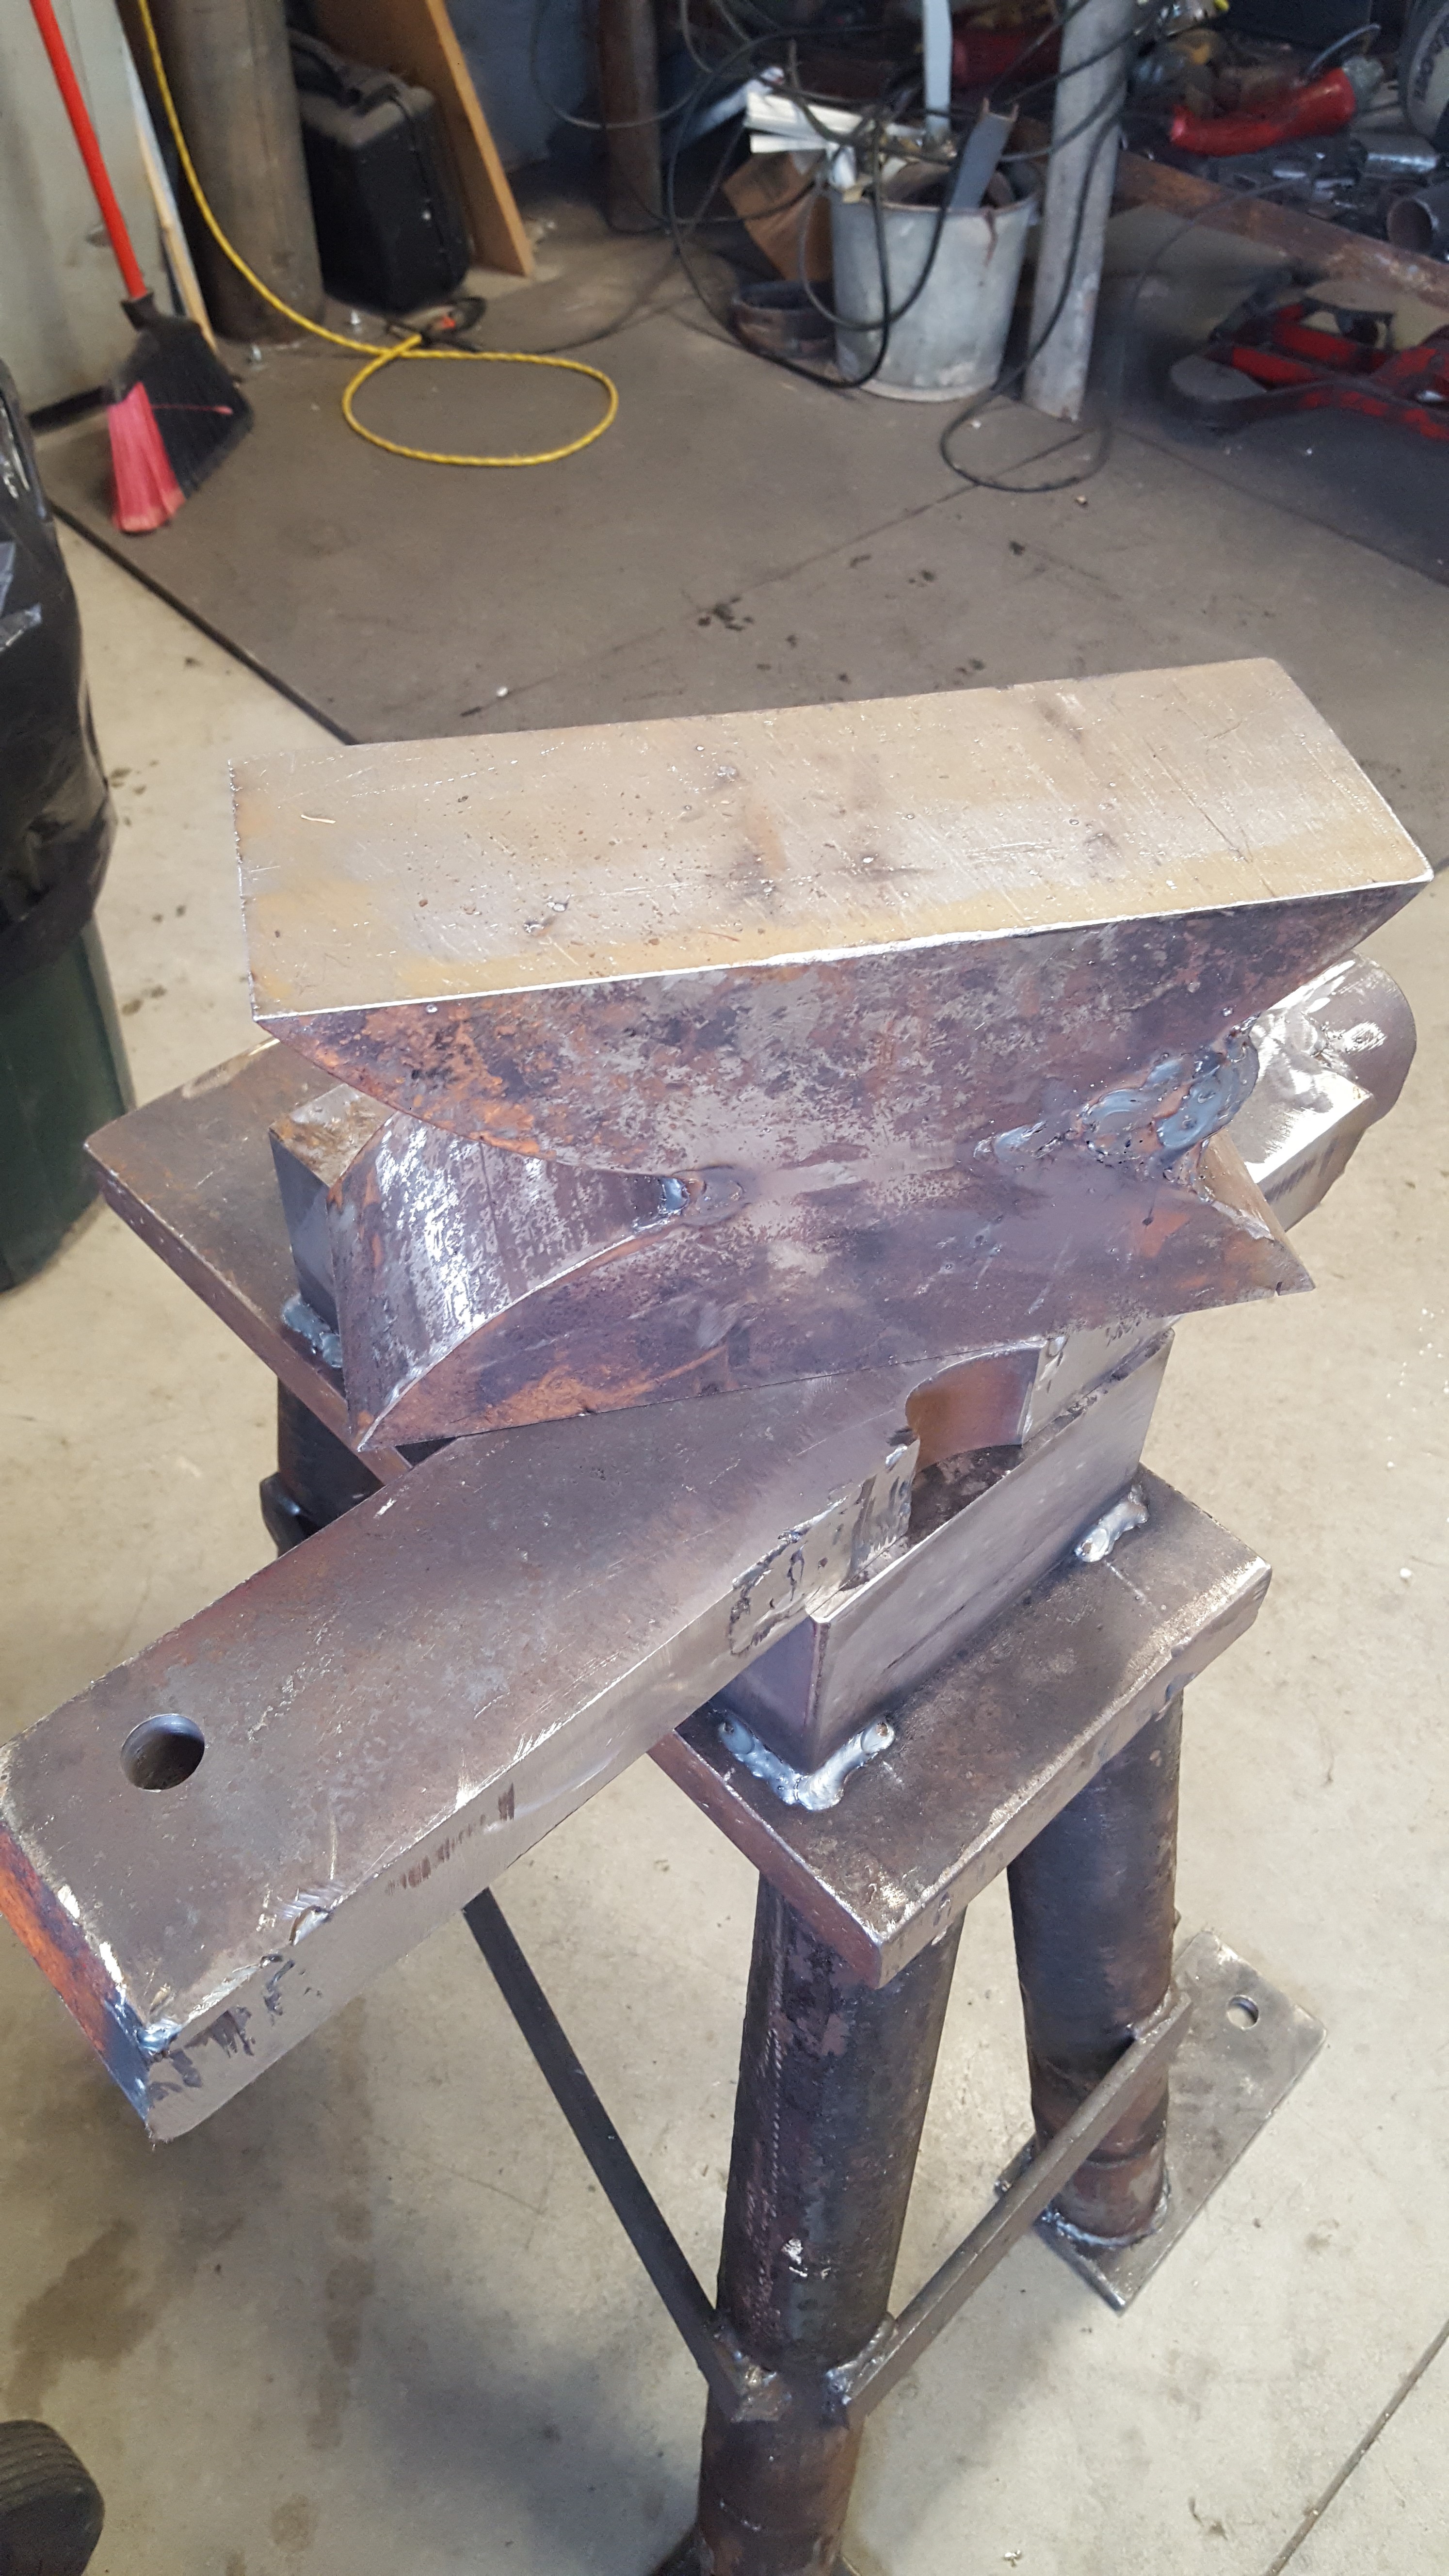
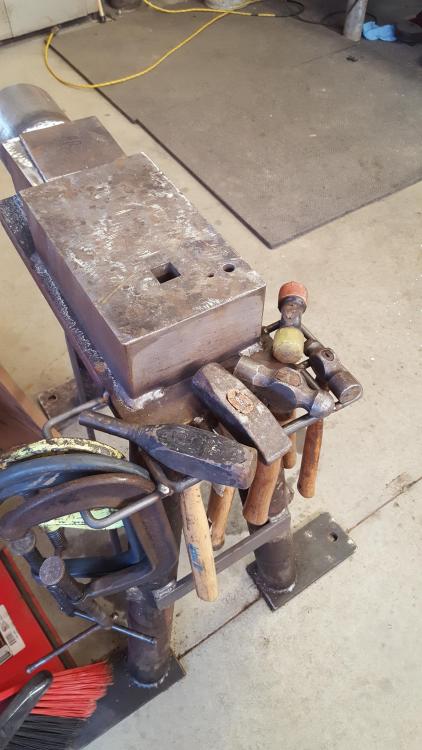
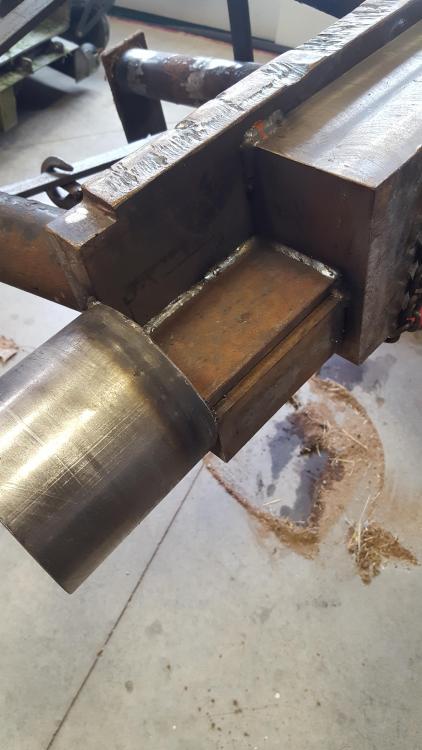
Still a work in progress. I picked up a piece of 5" shaft about 5" long for the start of my horn. Tied it back to the main striking surface with some bar stock. I will cover with some 1/2" AR plate to bring up to the level of my striking surface. Also some more places for hammers and clamps. So I added about 30 or 40 more pounds and more working surface. I will likely get more shaft of smaller sizes to make the horn smaller in steps. Maybe not ideal, but hey - it's cheap enough.

-
Thanks for the discussion. It will likely help when i do build a forge which will be propane for sure. However, for this discussion, the purpose of this flame is just heat, and not a roaring jet type flame meant to heat metal. This is for where I work - a grey iron foundry. I forget what the gas pressure is, but it is plant supply, not regulated like it would be for a device. Let me describe what I did today. It may or may not relate to some of the discussion, which are naturally geared to forge use. To be clear - the picture I posted was NOT my actual burner. Only the style I built. Differences are - My orifice nipple is steel, not brass and 1/4", not 1/8. No flame stabilization nozzle flare. 1st thing I did was to replace the 1/4" nipple with one made from 1/8" pipe. I tapped my hole and installed a .030 welding tip. Well, actually 1/2 of the tip, as it was too long to install and rotate, so I cut it in half. I also used a 1/8" valve, rather than the 1/4". This resulted in a smooth, stable flame, but I would like it to be a little more powerful giving me the option of more heat. The valve is wide open. I was building two of these. So with the 1st one burning and in use - I turned my attention to the other. Wondering if the smaller nipple really made the difference, i kept the 1/4" nipple and valve, but tapped that hole for a mig tip also. This one I used a .045 tip - hoping to get more flame. I did not have another 3/4 x 6" nipple, so I used a 3/4" x 5". Well, this one would not even light at all. I could hear more gas coming through the bigger tip, but the 1/4" pipe must block too much of the air. Strange, I thought, as previously I had a very strong flame from a .0625 hole and slightly longer nipple. I had other stuff to do, so that is where I left it. Next, I will change it to the 1/8" pipe with the .045 nozzle and see how it performs with the shorter "nozzle".
-
Thanks. I did use the 3/4 x 1-1/2 bell reducer. The photo above is not mine.
-
I built a basic burner using Ron Reil's design. Sort of like this, but without the nozzle on the end. Now, at this time I am not using it in a forge, nor do I intend to yet. Just in free air. But there is a problem with it I would like to work out without a whole lot of fuss. I am running on natural gas with pressure of a few psi. My problem is that I can "blow" the flame out quite easily. By this, I mean that as I open the valve, the flame gets pushed away from the end of the nipple. Up to nearly 5" or so before it "blows" out. I don't really need more heat, just a stable dependable flame using the line pressure I have on hand. I used a 3/4 x 1-1/2 bell and have a 6" long 3/4 nipple in it. I am thinking that the nozzle pictured on the end of the nipple is not needed in my application. Where I differed from the original design is that I used 1/4" nipple for the gas, rather than the 1/8 recommended. I started with an orifice hole of 1/16" but increased it to around 3/16 and improved things a little but not much. Is the 1/4" pipe obstructing the airflow that much? I am thinking that is the 1st thing that I am going to try is going to the 1/8" pipe. I have also seen that perhaps my 3/4 nipple is not long enough - something about cross sectional area to length ratio. Perhaps using a 1/2 x 6" nipple in the same bell assembly? We have some other similar burners, not using pipe fittings and the gas orifice opens into a much larger diameter pipe - perhaps 2". And an orifice size of around 3/16 - 1/4". I would like to keep the nipple type design, as it allows me some flexibility in mounting or holding it. Thanks
-
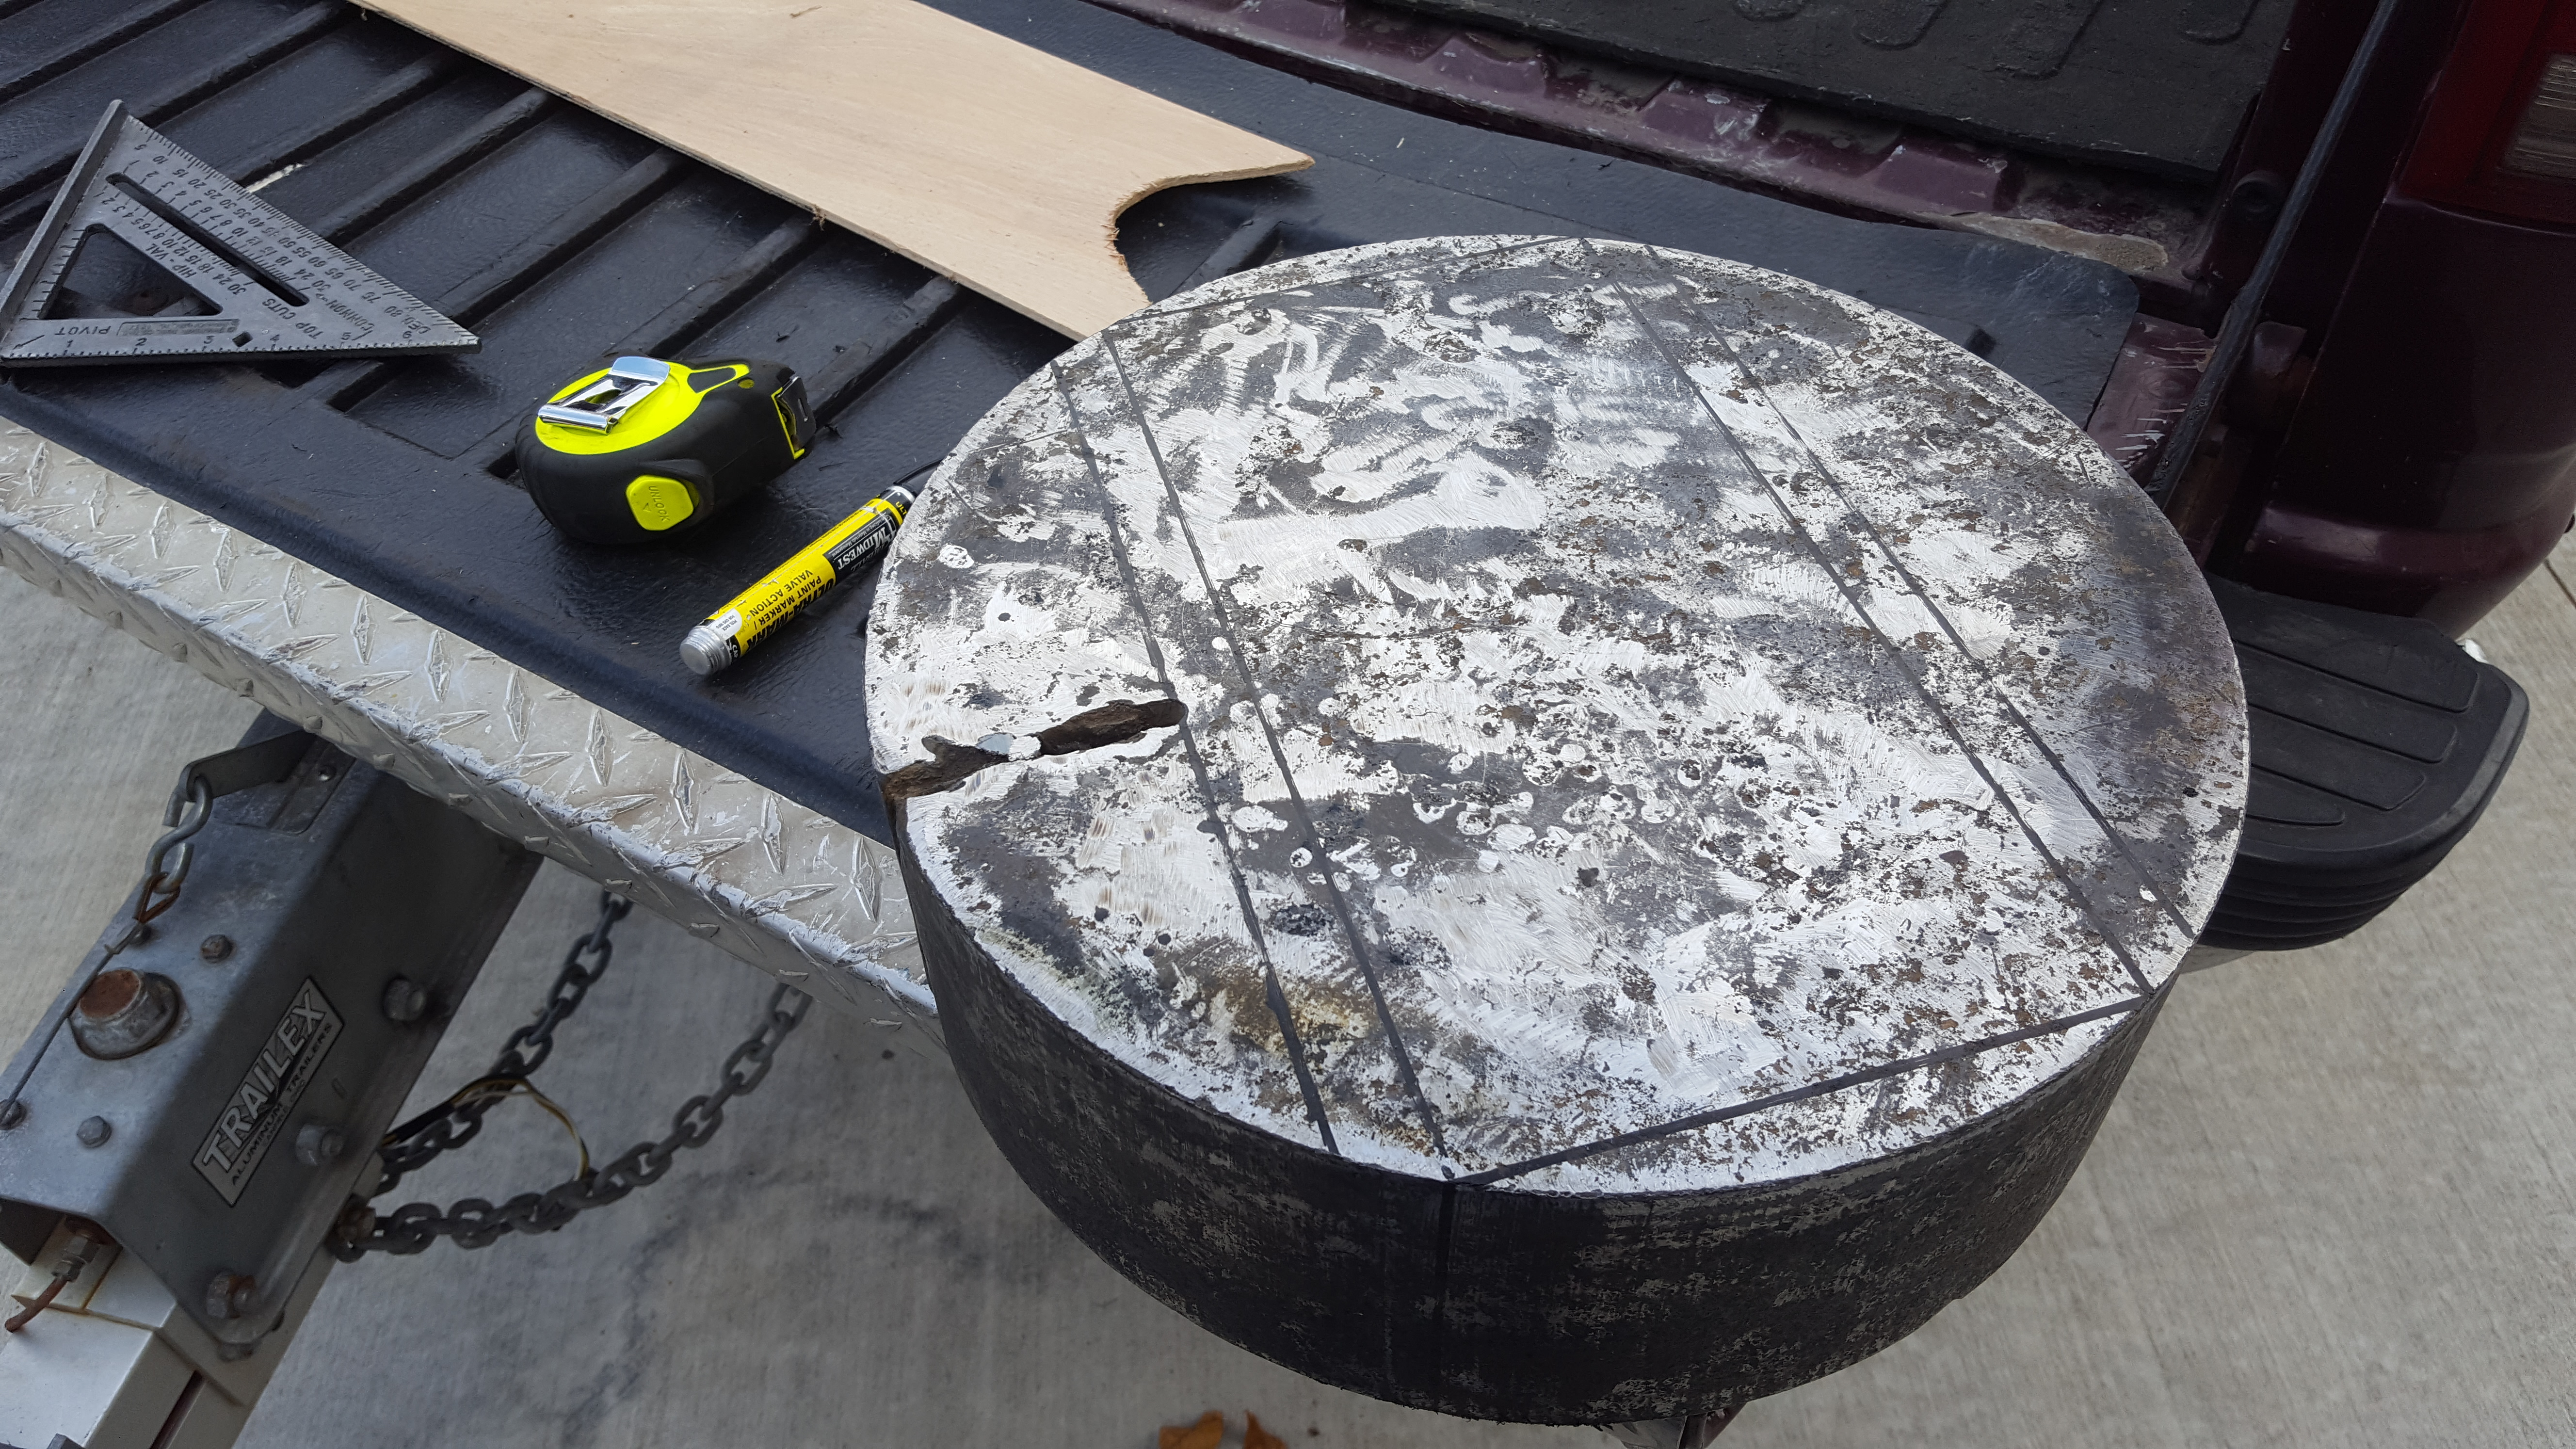
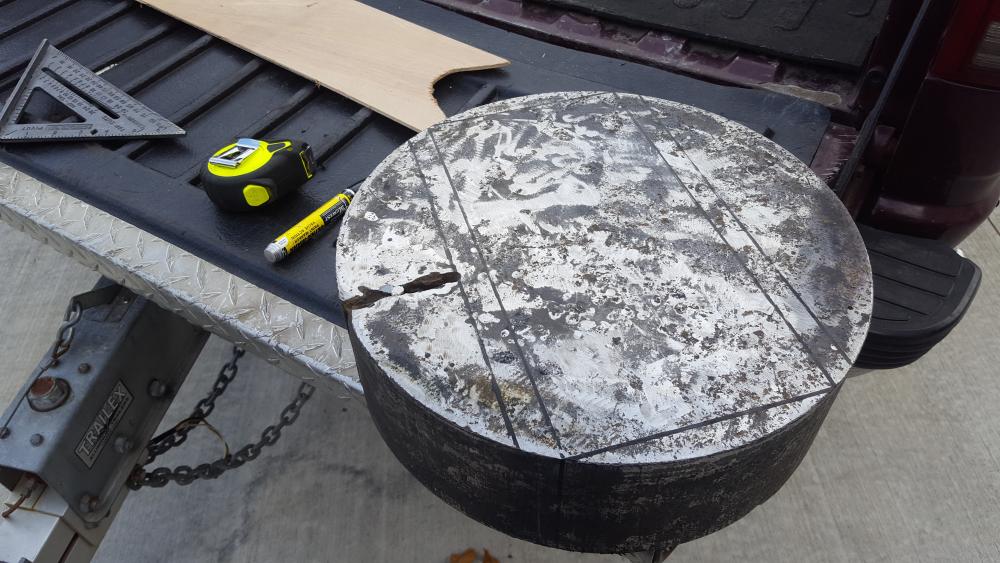
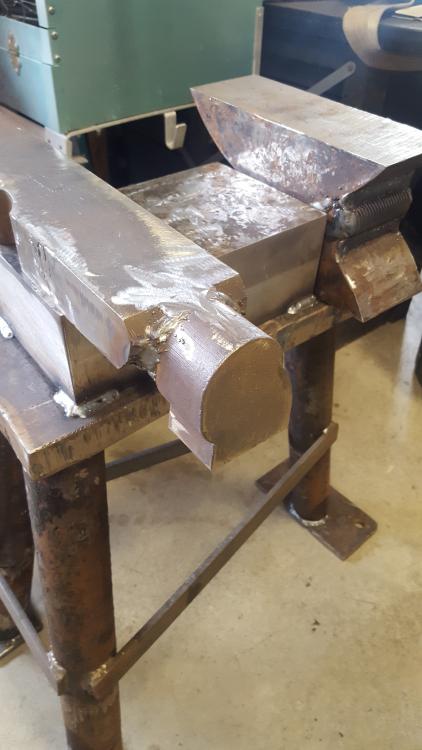
Well, I went ahead and took some pictures. What I started with for the 4" piece. I am using the drops for another anvil of sorts. I can put this one onto my workbench which is only 3/16" thick and not very well suited for hammering. The start of my "horn".

-
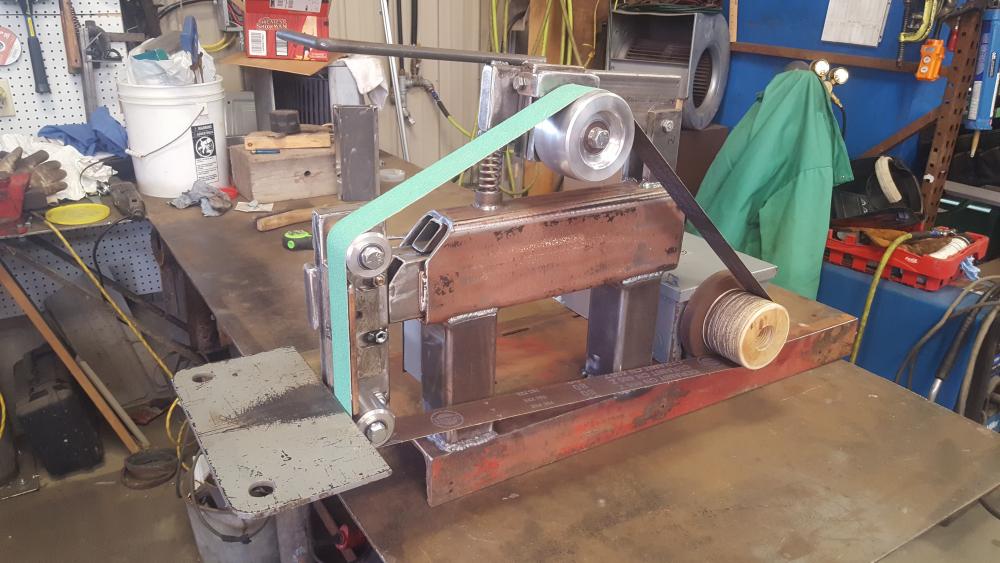
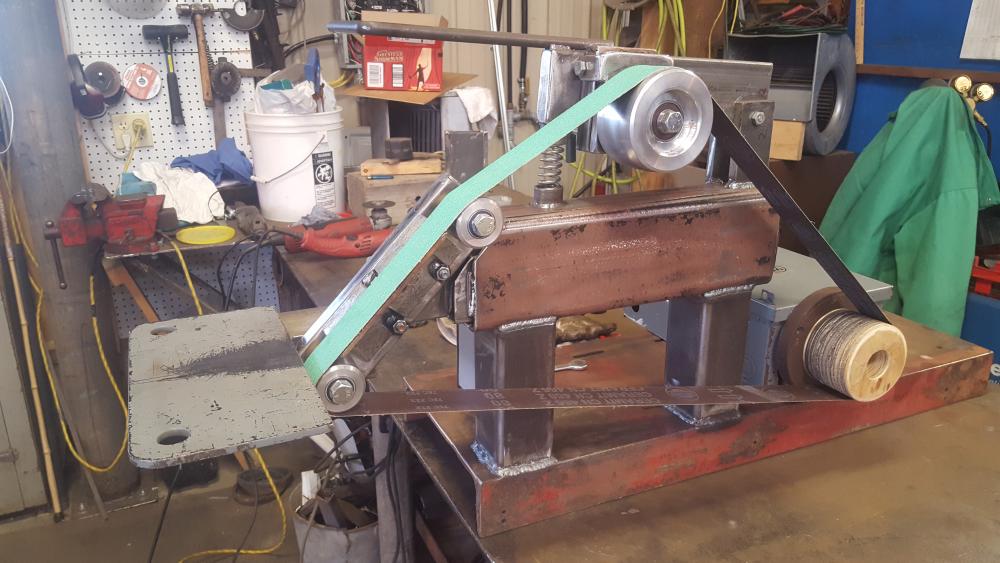
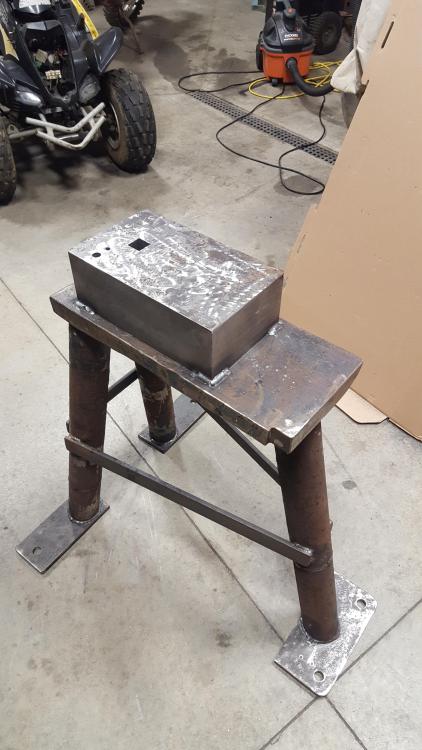
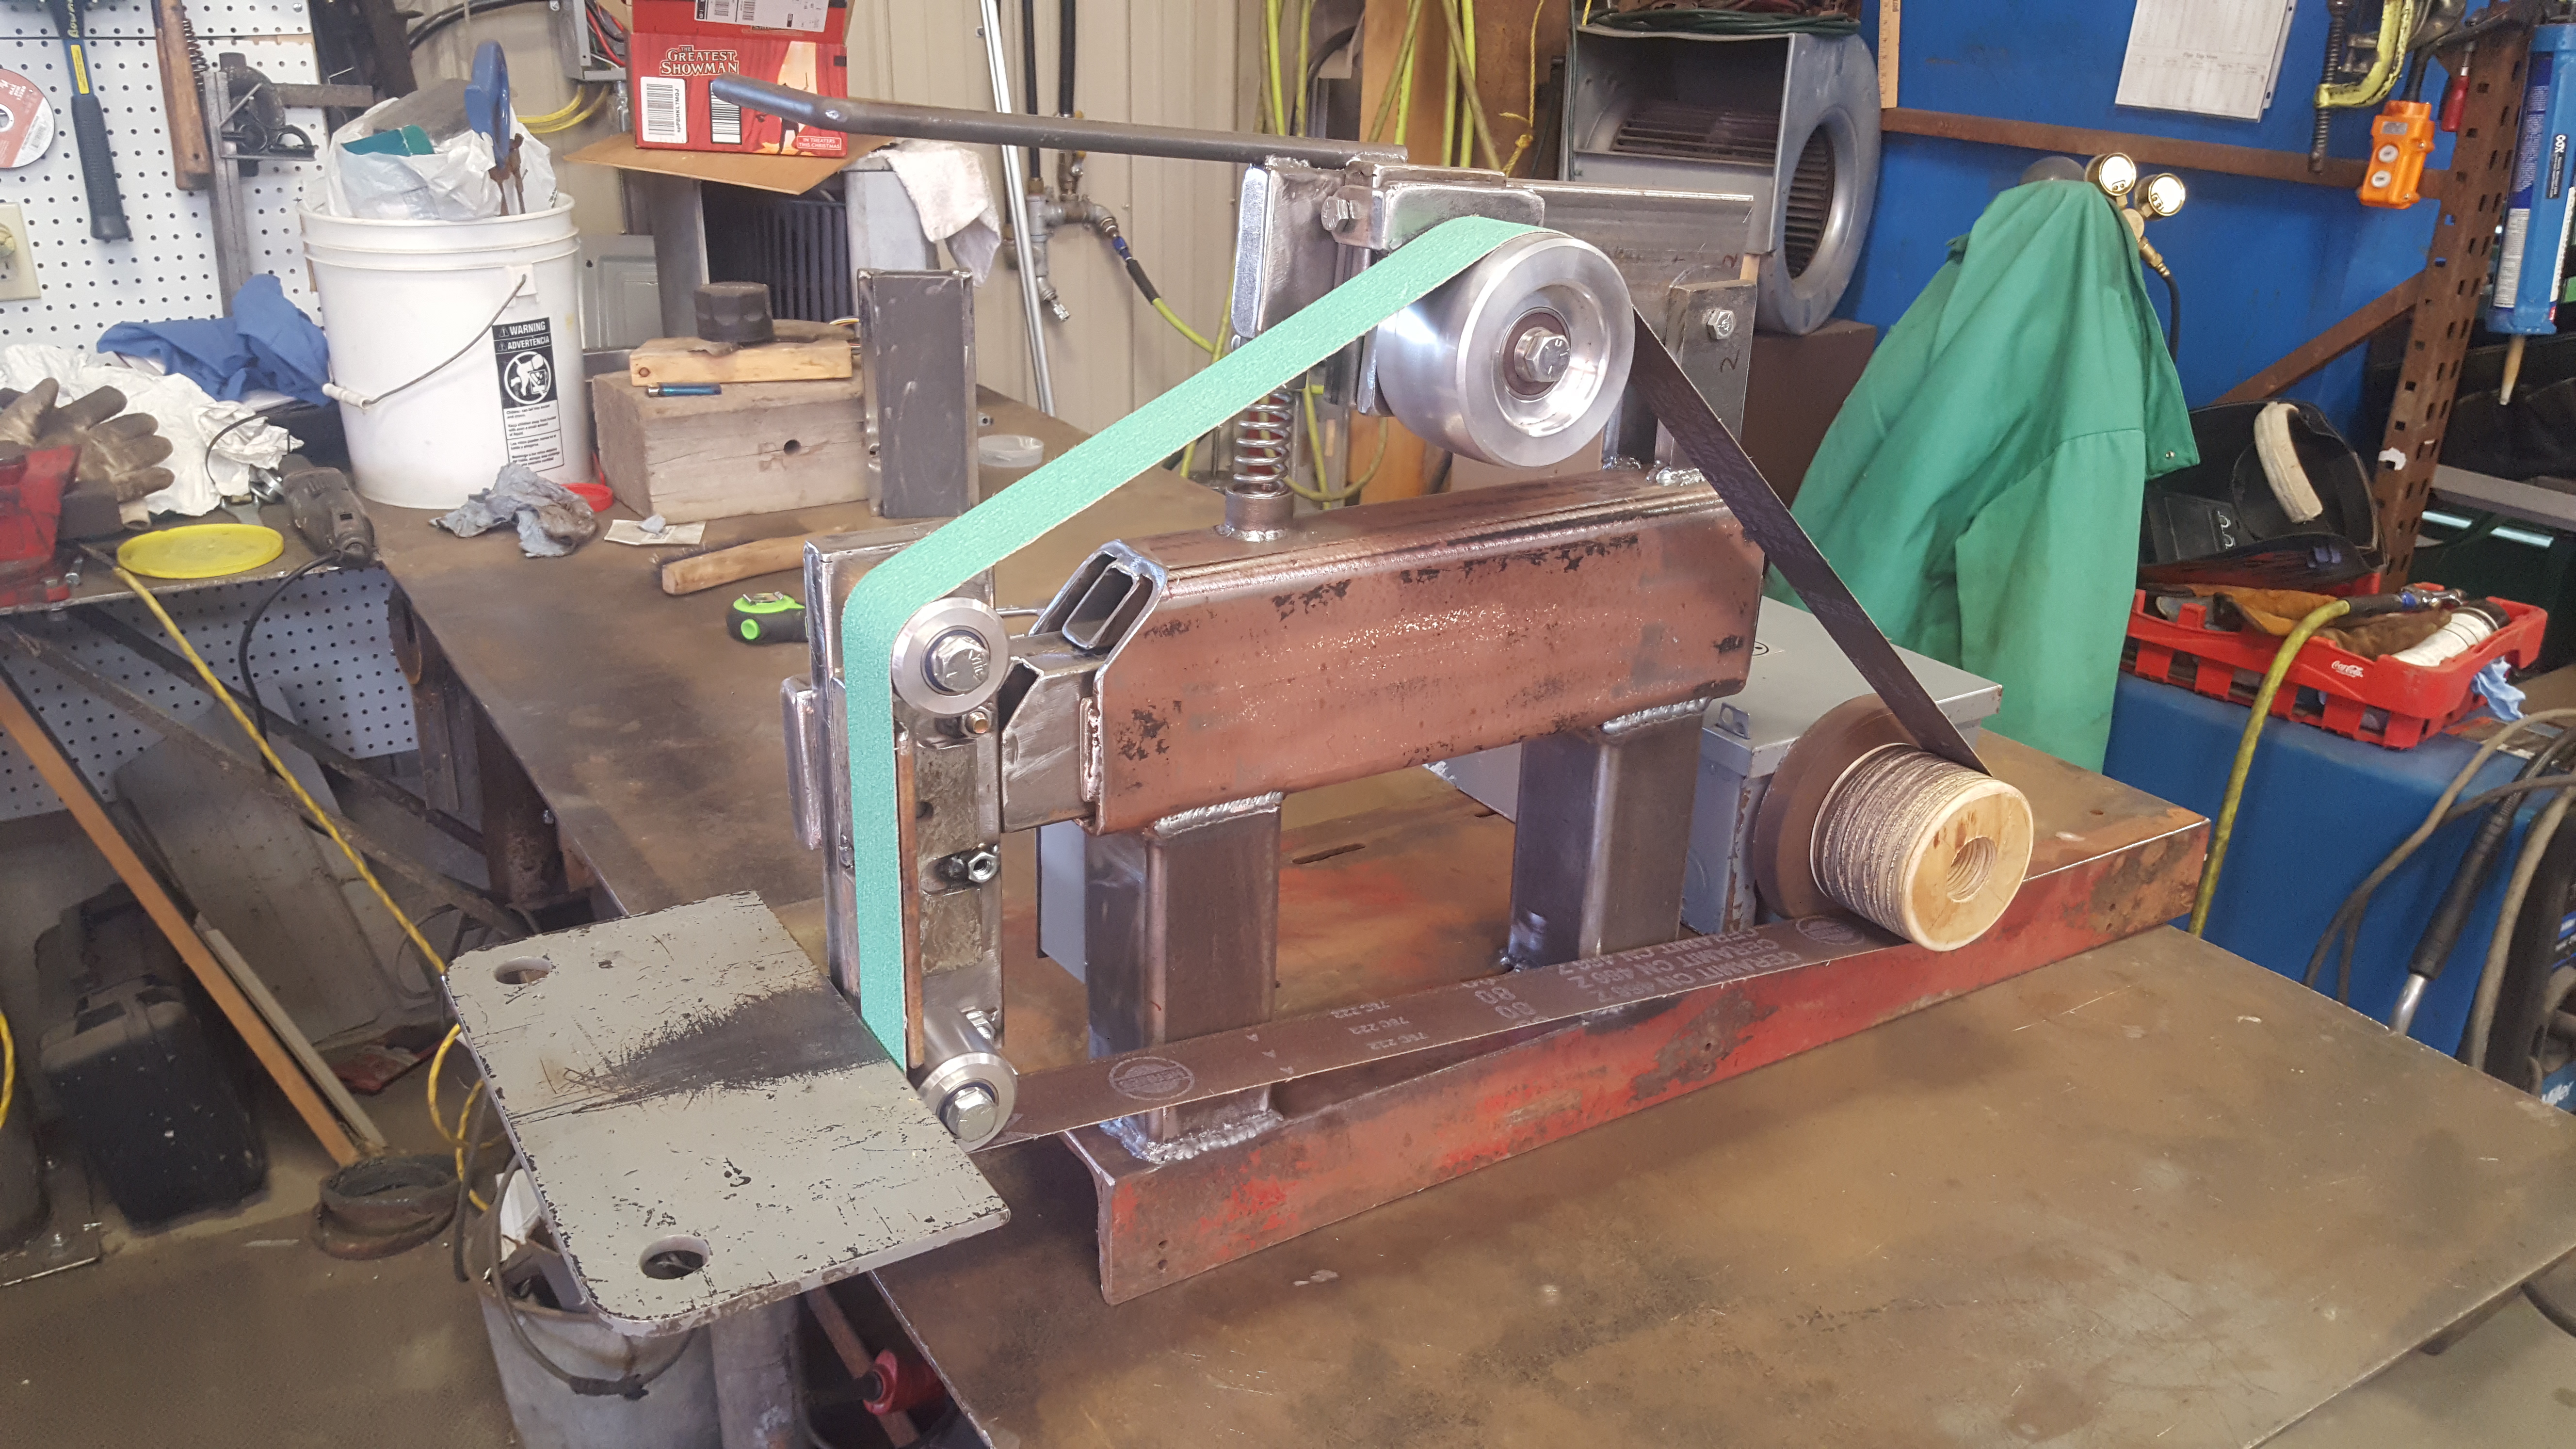
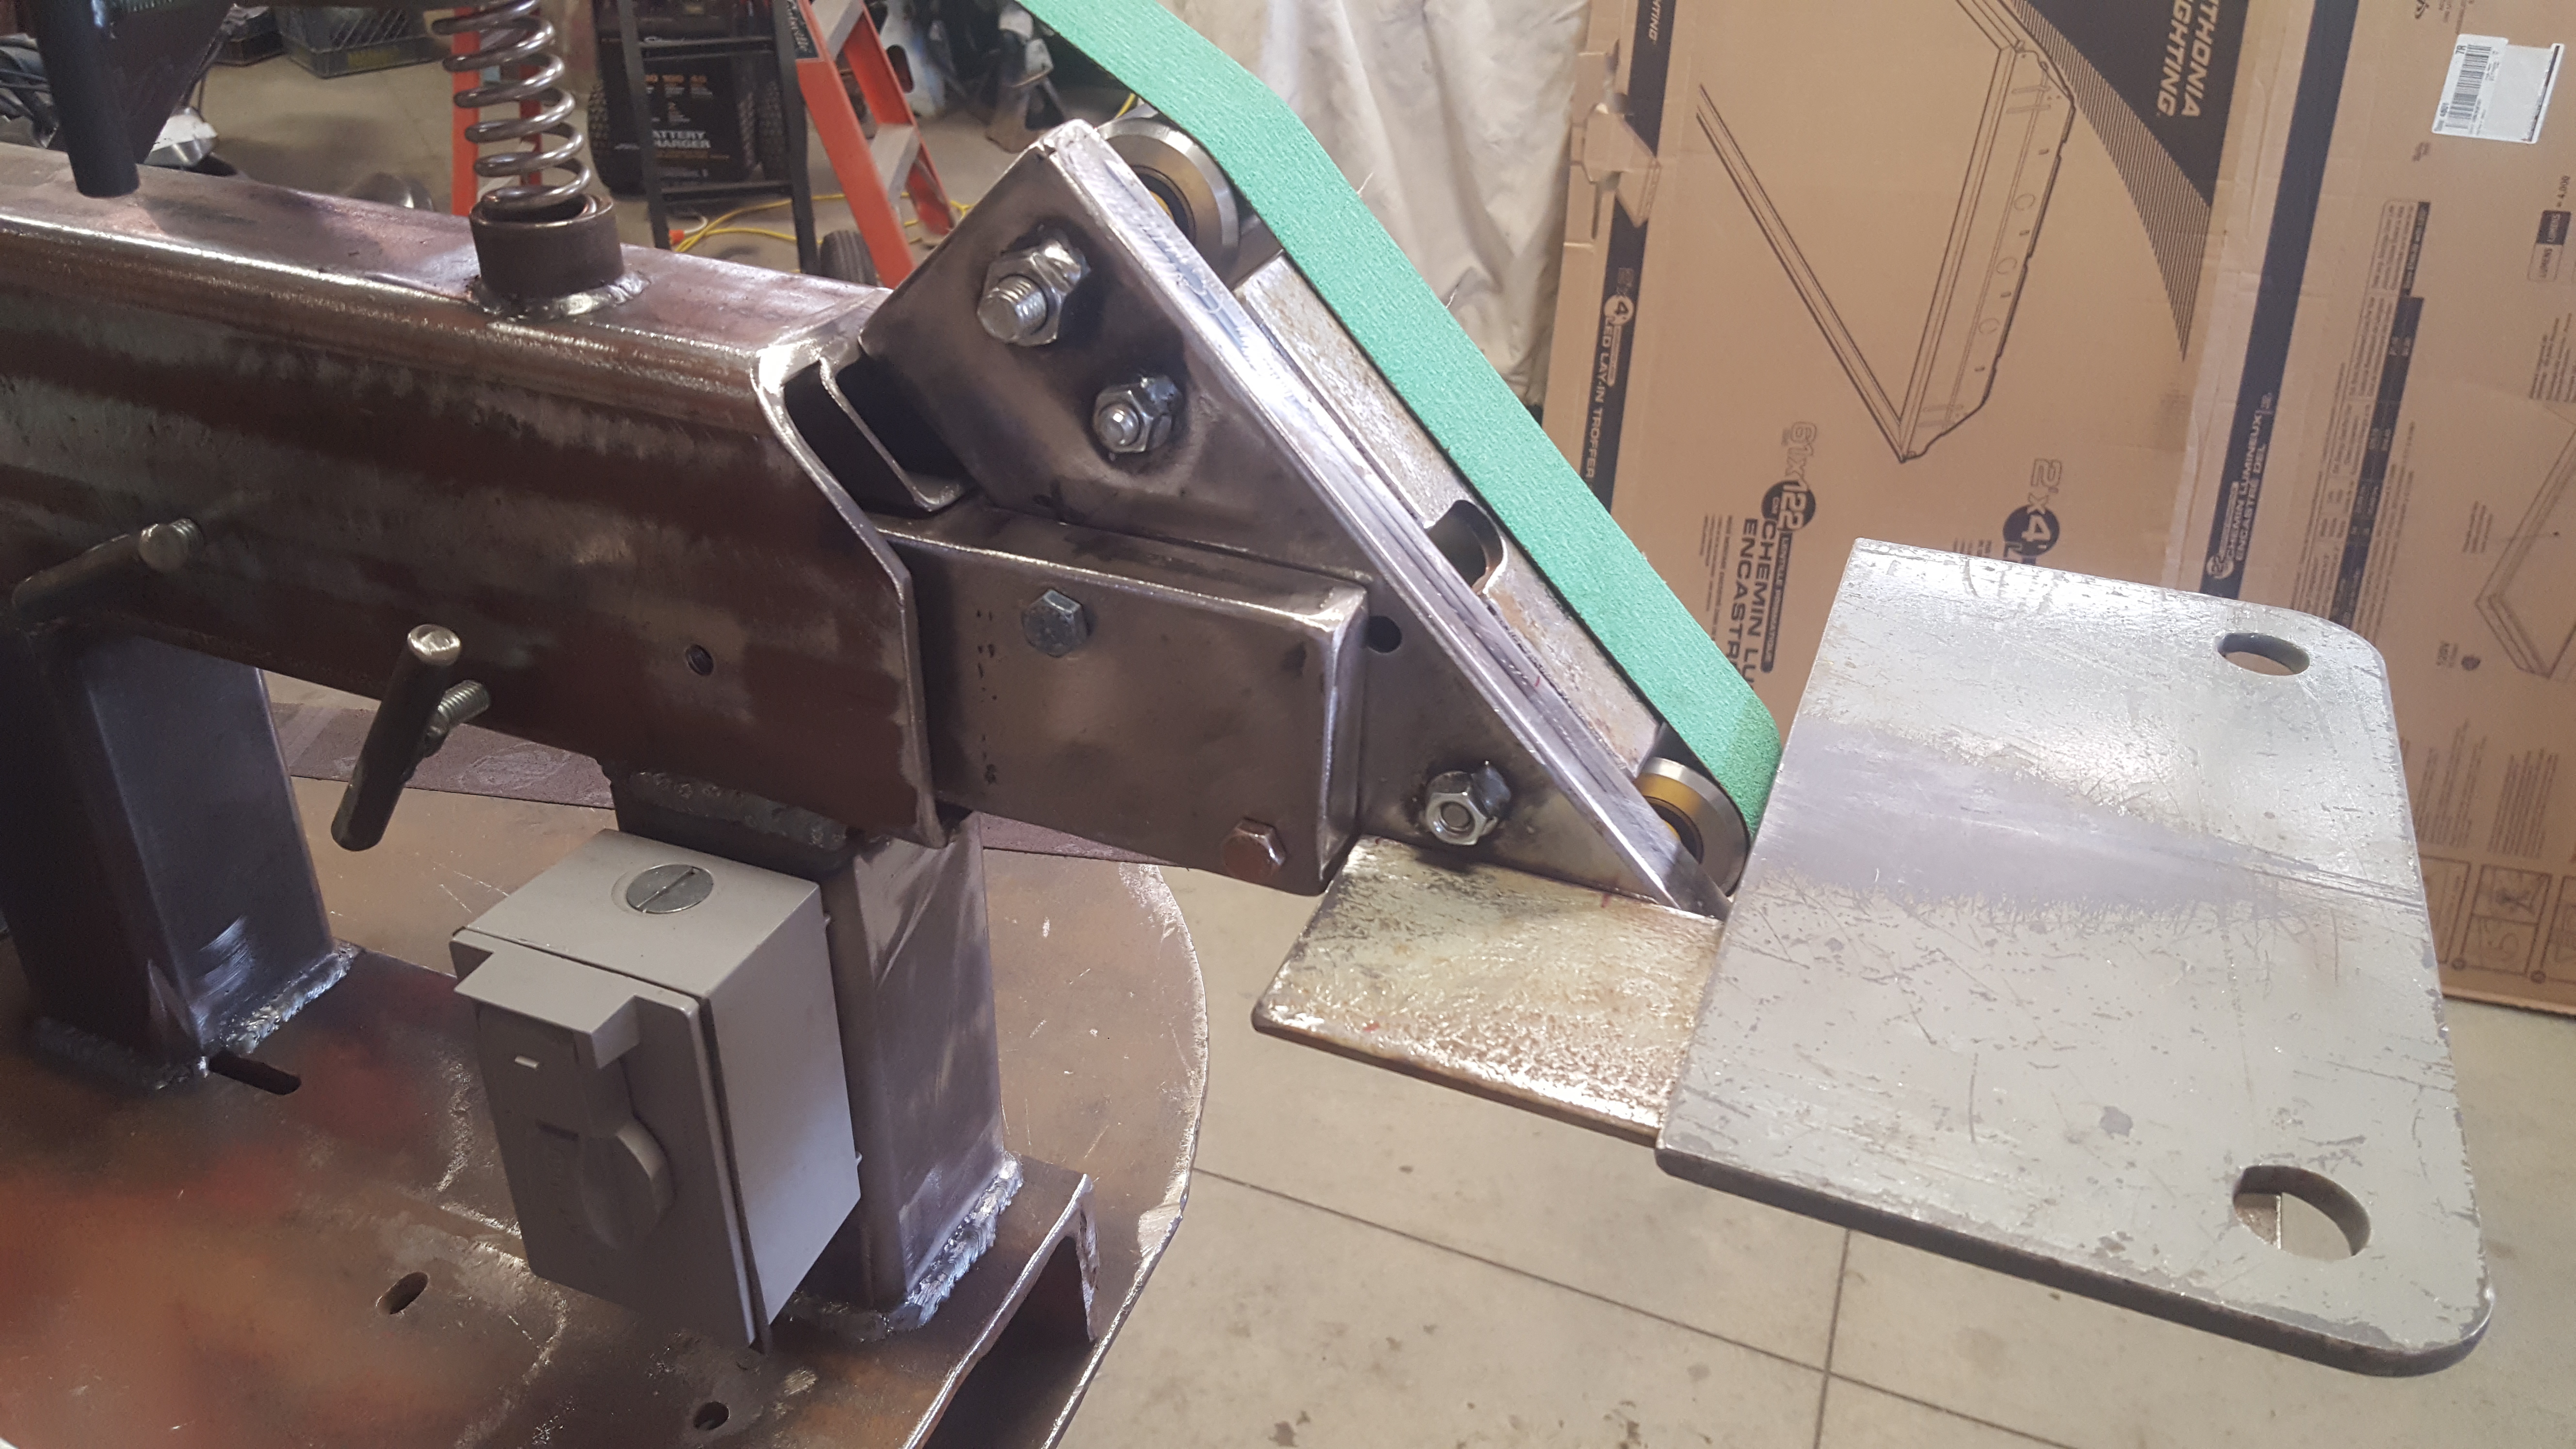
Thanks all. I did update my profile. I am in Southern Ohio. The belt sander was made using scraps and materials I had on hand, other than the 3 aluminum wheels. Main tube is 3x5, and the base is a heavy 10" channel. Motor is 1.5 hp from a treadmill, but is a little weak compared to the rest of it. We shal see how well it works. The anvil top is 4" thick 7x11 I believe setting on an 1-1/2" base plate. The hardy hole is 1" - I "cheated" and had it done with EDM, rather than a proper drift. EDM and Pritchel holes are through the whole 4" thickness. So, I(or the next owner) do have the option at some point to flip the plate over for a new surface. I have had a piece of track for a long time with intentions of making it into an anvil, but never did. After reading up on the shortcomings of track anvils and learning about striking anvils I decided to go that route. Then I was fortunate enough in finding the other plate metal for free, basically. The legs where from house trailer axles I shortened for other purposes. Basically 3" pipe with 1/2x4 bar for the feet. They are filled with a mixture of sand and oil. It weighs about 200lbs. This metal is all just mild steel. I am also considering adding a piece of hardenable steel to the lower striking are of the anvil, and probably creating a horn of sorts. More pictures on that in the future. Keep in mind that I don't have a specific use or focus in regards to the anvil. I do have a concern where the main part of the striking surface of the 4" surface is over an area of the 1-1/2" plate that is unsupported from below. I am considering tying the middle area of that plate to the front leg near where the existing braces join. I am thinking there may be some flex experienced during heavy striking which over time may case it to sag in the middle. Is that concern reasonable?
-
Hello, I just joined today. I am working on getting myself equipped for forging some metal. I have recently completed building my own 2x72 belt sander/grinder and also a striking anivl of sorts. The belt sander is currently off getting powder coated - Kawasaki Green. lol I do not yet own a proper anvil, but this will have to do for a while. I think my next metal working project will be a propane forge that I will likely construct using an old compressor tank. I am thinking that I want to go ahead and build a ribbon burner for it also. Then possibly a power hammer. But 1st I am starting my research on forge building.