
Bounty Forge
Members
-
Joined
-
Last visited
Everything posted by Bounty Forge
-
TP - I understand what you're saying. JHCC - Good point, at the very least I now have a hammer to work stainless with....also, funny how that happens as time goes by.
-
Thanks, I had no idea that stainless was so finicky. I guess we'll see how stainless the hammers stays after some use.
-
I mean hardenabel in terms of martenitic stainless steel based on what I've read. Haven't gotten a chance to look into electropolishing yet but I plan on it.
-
You are right, I got my wording mixed up. I meant that it is not magnetic. I read up on Austenitic and Martenitic types of stainless when the idea came about to forge a stainless hammer. From everything I read, all 300 grades are austenitic; meaning they are not magnetic. The presence of magnetism is what allows martenitic grades of stainless to be hardened...something about the crystal structure. Once I read that only martenetic stainless can be hardened, I quit looking into austenitic and was crossing my fingers that the stainless stock I could get my hands on was hardenable. Now that I know it's actually austenitic I need to read up on it more. I also got some 316 grade tubing that I flattened and turned into a bangle. It didn't really work that great and started to pit up. One piece actually crumbled once it got a little orange. After that I really didn't think the hammer was going to happen, but it did. It didn't really feel any different from steel except that it dissipates heat a little faster. Looking into 312, it is used for dissimilar steel welding and is also known as a universal alloy steel. It's so close to 316, but maybe that made all the difference....and maybe we got lucky. We were just hoping that if it wasn't forgeable it would become clear in the beginning instead of the end. Passivation was suggested to clean it up, and after reading up on it, it sounds like the right way to go. Do you know anything more about hardening 312 or cleaning it up? I read this and my ears perked up. I have not hear of that rule, can you please explain it a little? After looking into passivation, my guess is that it's got something to do with the whole thin layer of trace metals that adhere to the surface causing oxidation.
-
The next hammers we do together should go a lot quicker now that we know a bit about each other's style. I just can't wait to finally swing it and see how it works. I like the damascas cross peen a lot. I like the style of the hammer mixed with the damascas and the dark handle....it looks sharp! Everything else looks good too.
-
I think I'll go the citric acid route and see how that works...you can get it at the grocery store, so that's easy. I'll post pictures of the results.
-
LB - Nice working with you too. You killed it striking for me, and I eventually got in a groove striking for you. Two hammers in half a day isn't bad for working together for the first time....with an odd material too. After a couple more hammers together we should be pretty fast. A ball peen sounds great for the next round. That's disappointing that it didn't really clean up with the wire wheel. I was going to wire wheel it and then buff it a little to see how that works. JHCC - I looked into passivation too, and it's sounding like to way to go. I have done small things in stainless before and got it to polish up ok on the wire wheel, but it does tarnish right back to a dull color if you don't clear coat it. Stainless is some weird stuff, so I guess I shouldn't be surprised that it takes a special technique to finish it. Thanks for the tip.
-
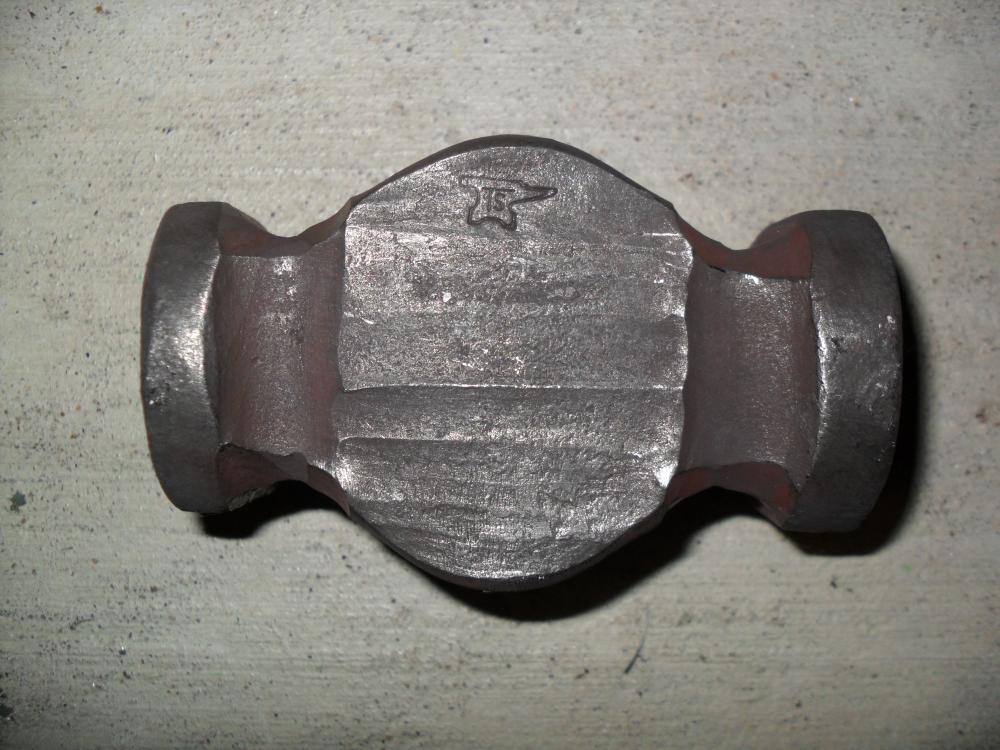
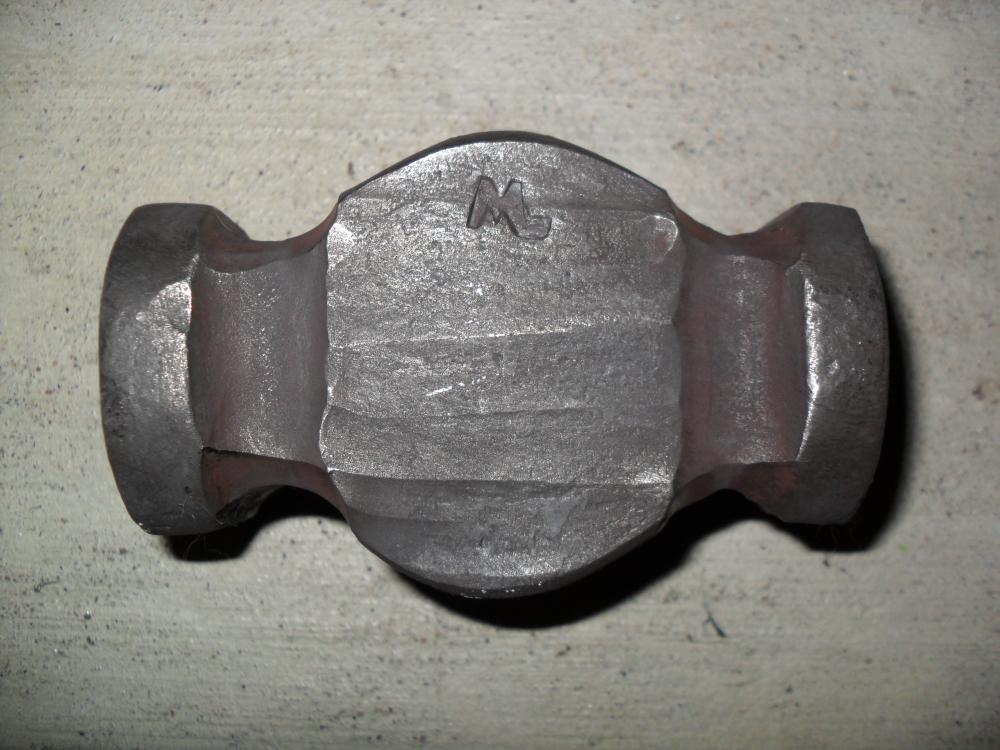
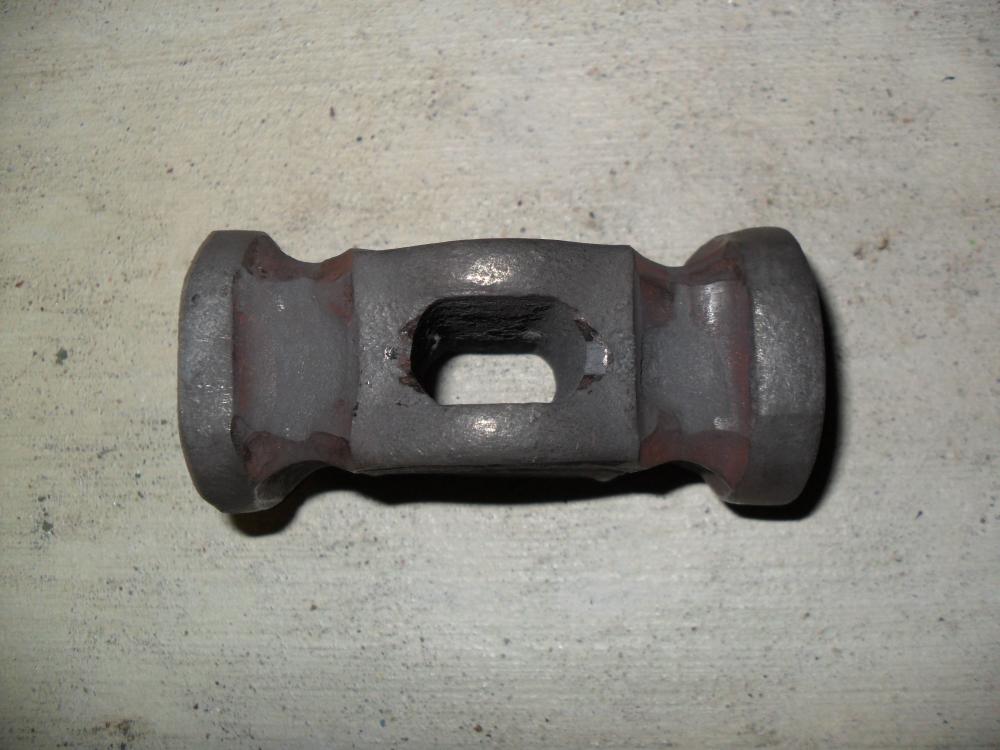
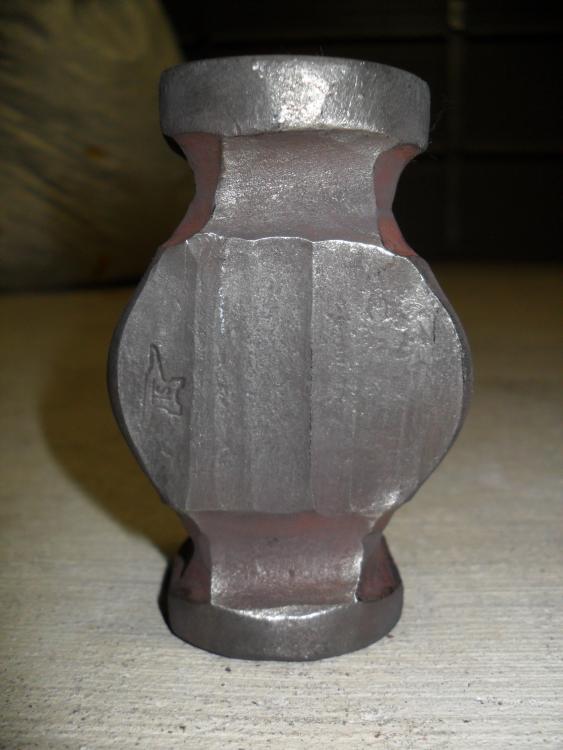
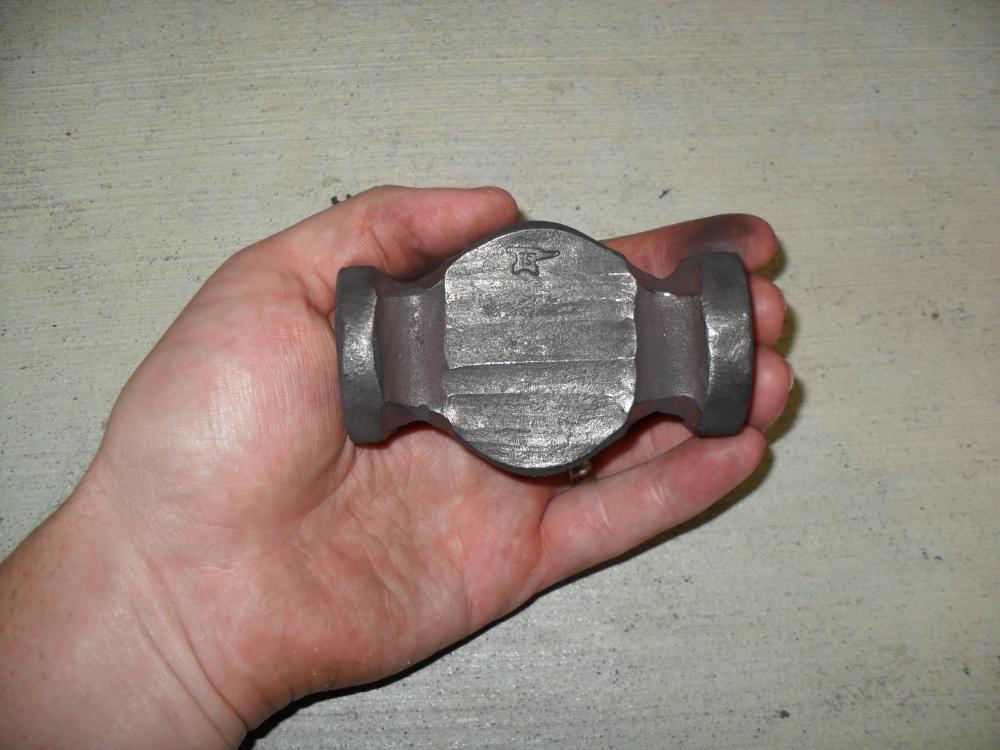
Made a stainless steel rounding hammer today It has been in the works for a couple months now, and I finally got a chance to forge it. It is made from 312 grade stainless steel, and weighs about 1.6 pounds. This grade of stainless is non-magnetic (austenitic), and I wasn't sure if it was even forgable. Thankfully everything turned out great. Just have to clean it up, dress the faces, and put a handle on it now. It's not hardened in any way...not quite sure how to go about it without any ferrous materials in it, and didn't want to run the risk of messing it up at the end. I made it thanks to Mark (Littleblacksmith) who was striking for me. Once mine was done I struck for him as he directed his own stainless hammer. Both turned our great!
-
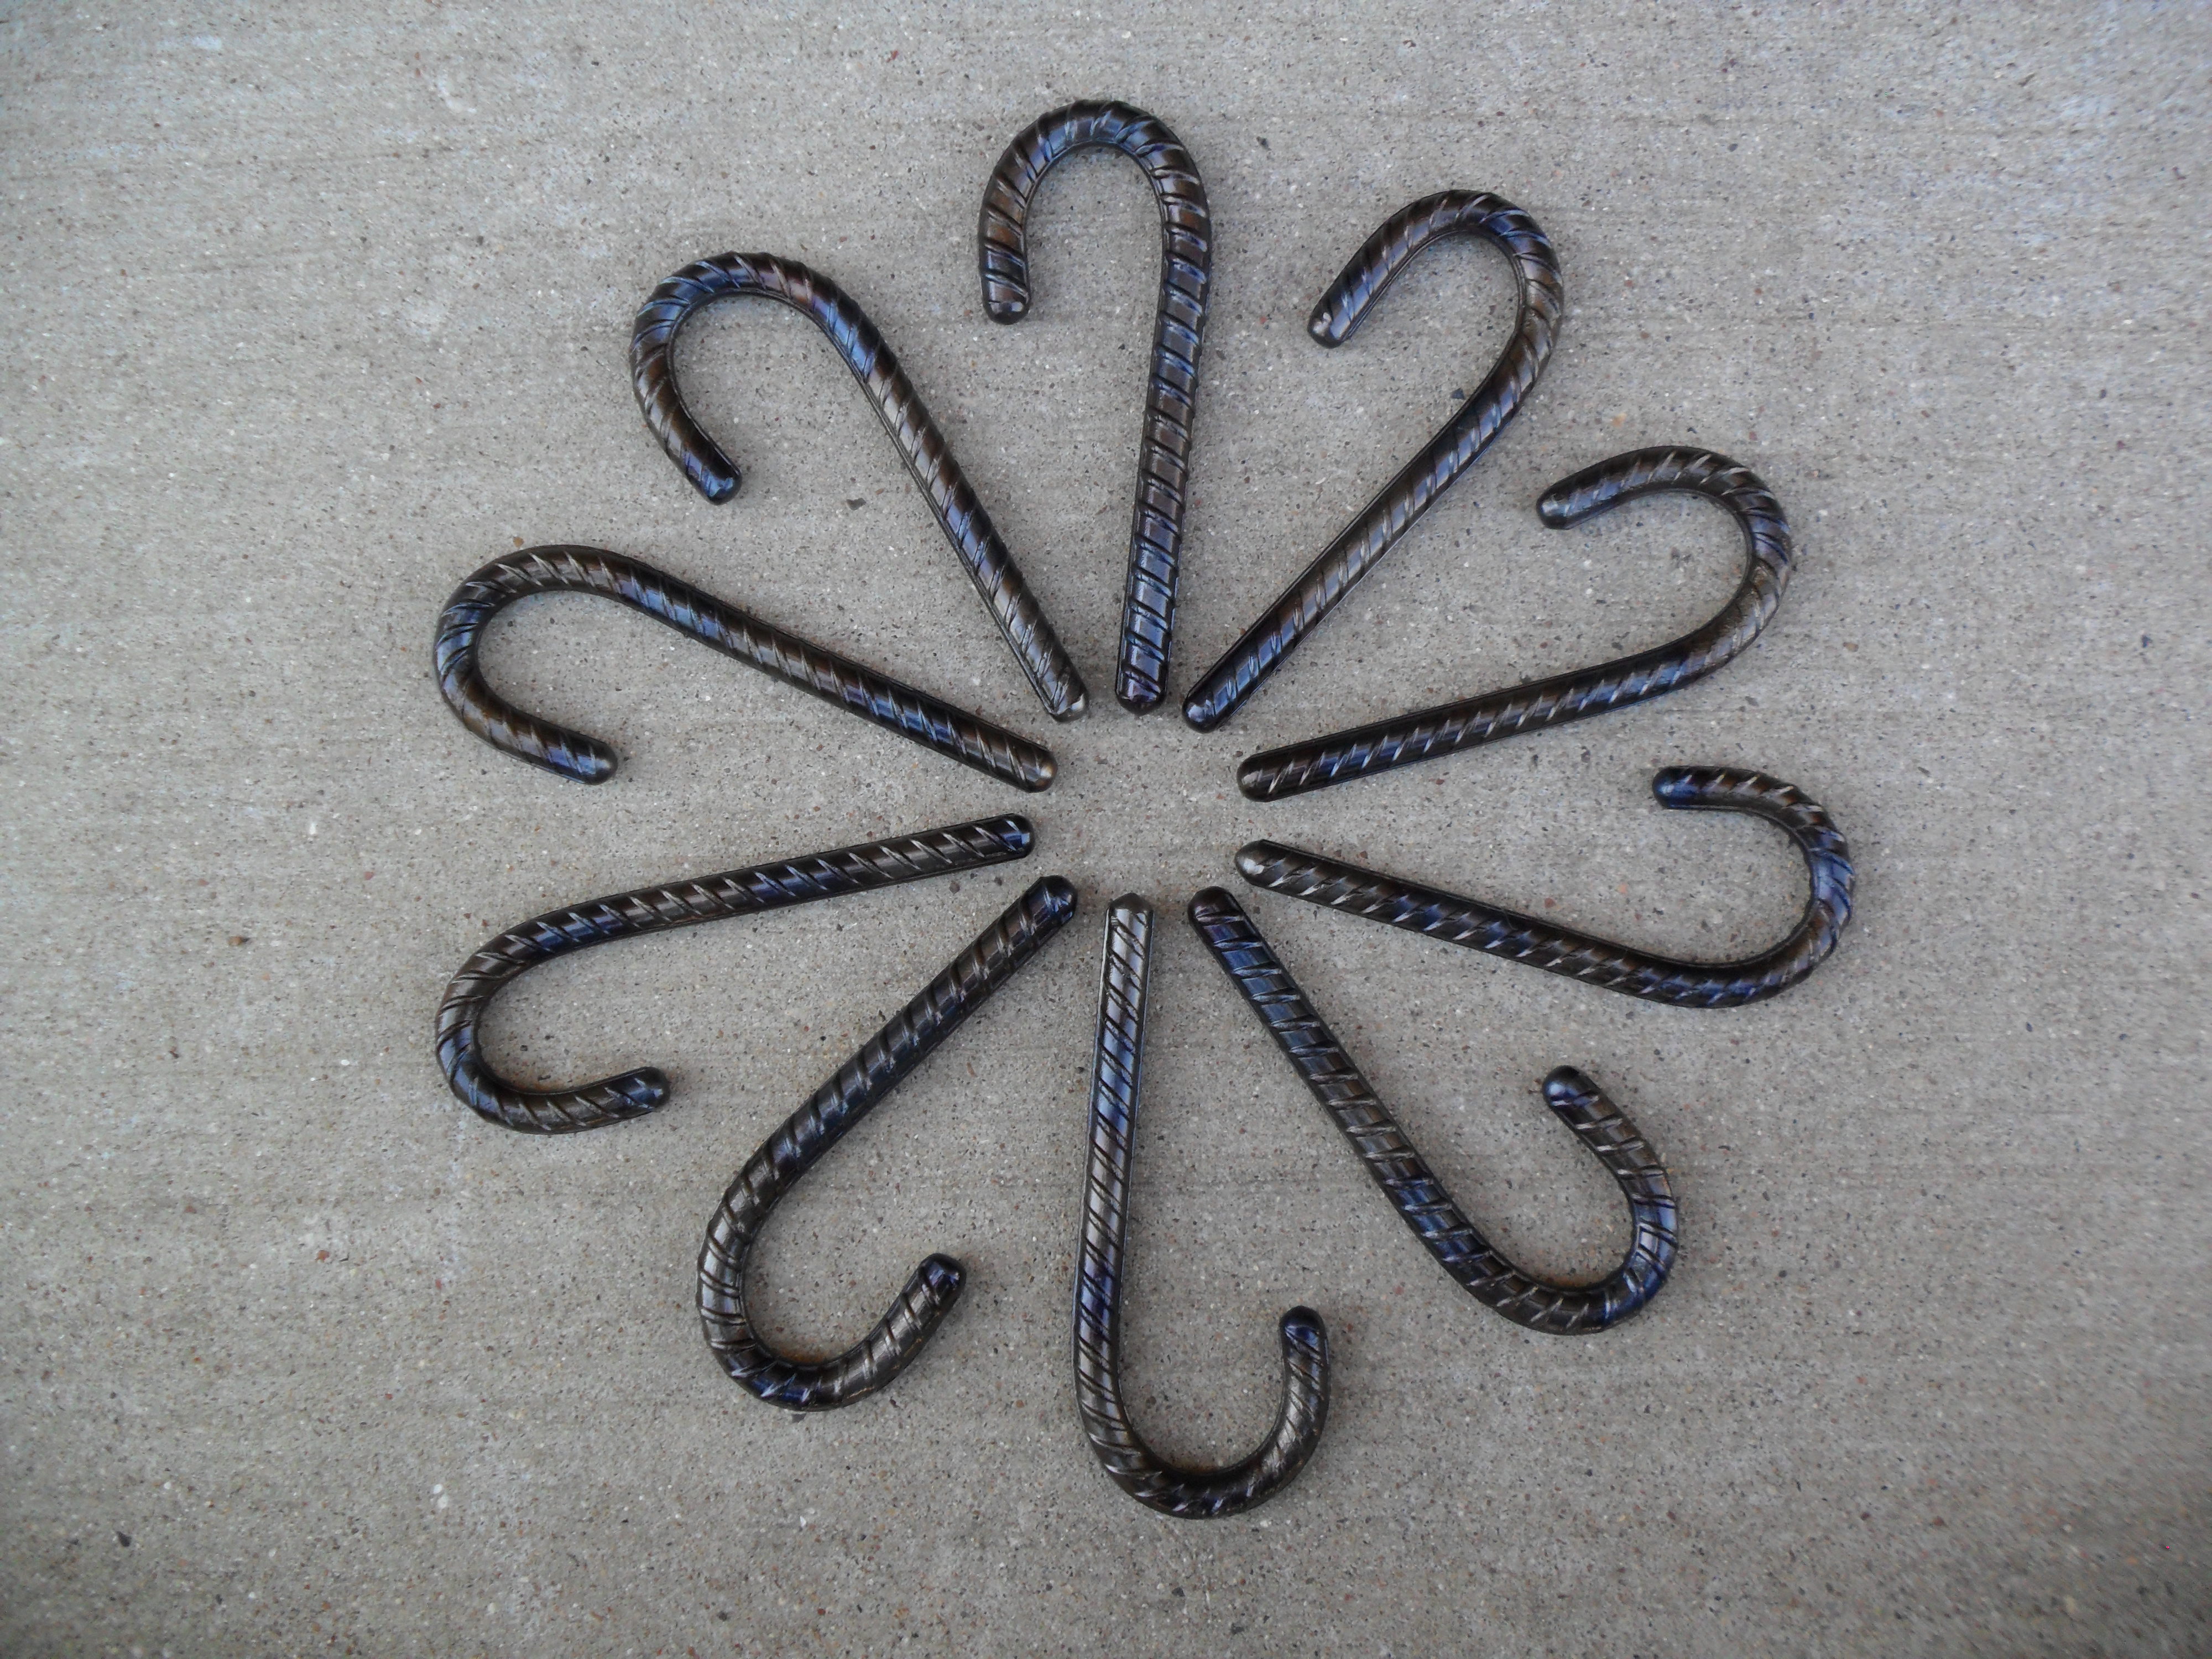
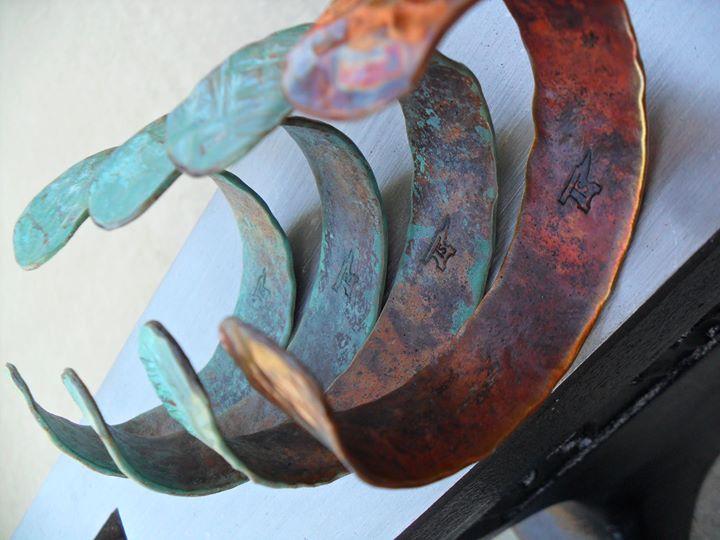
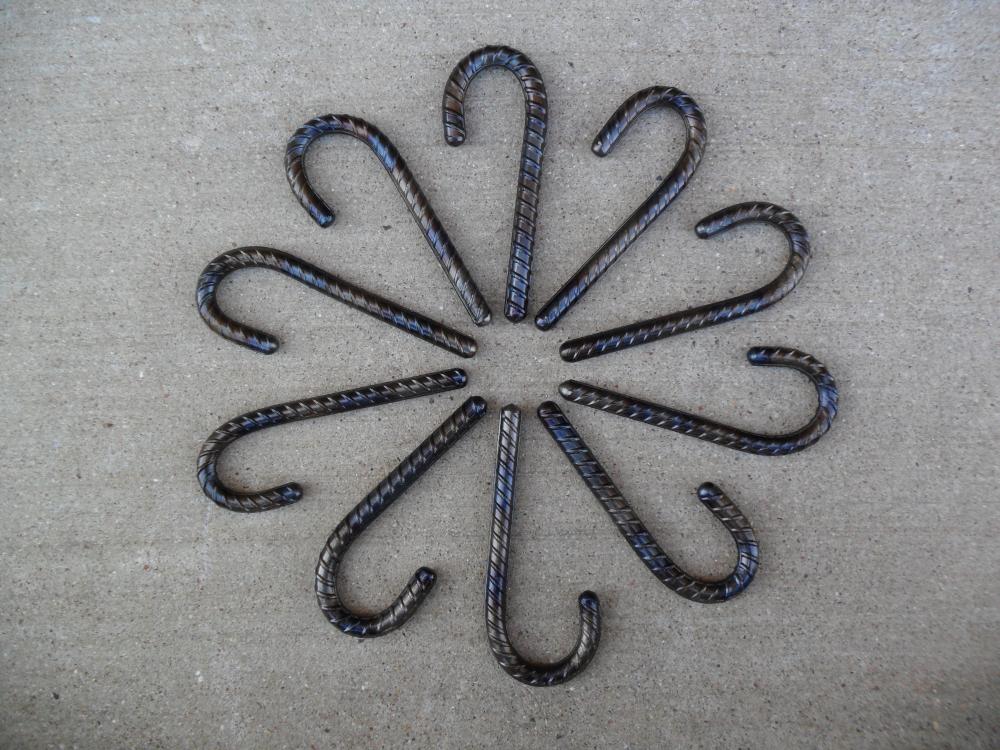
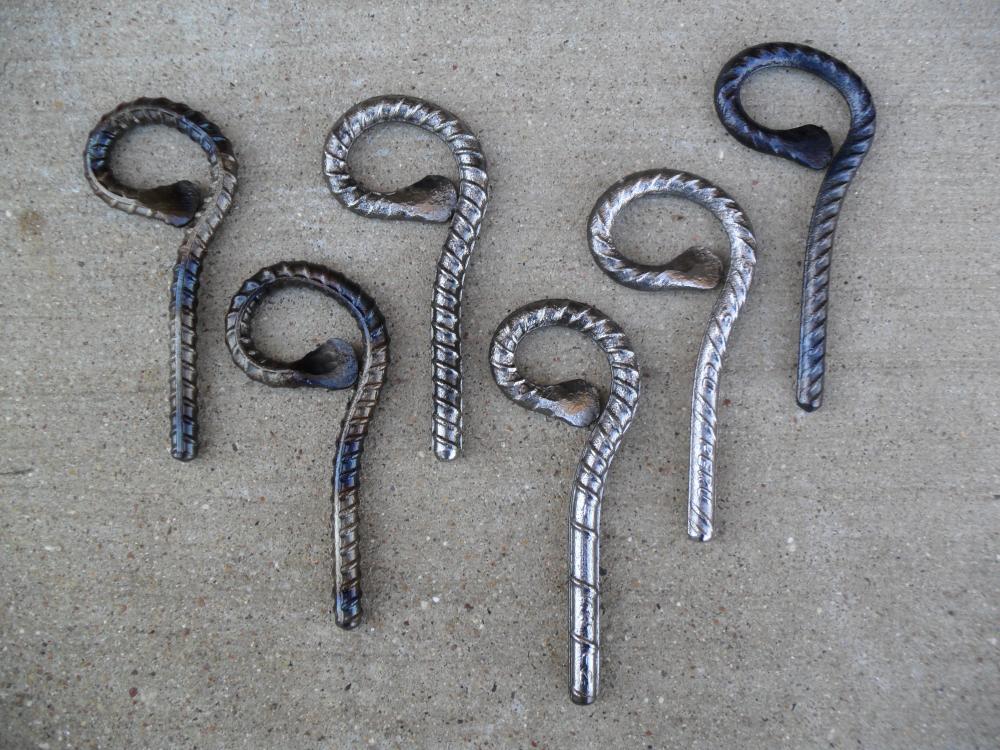
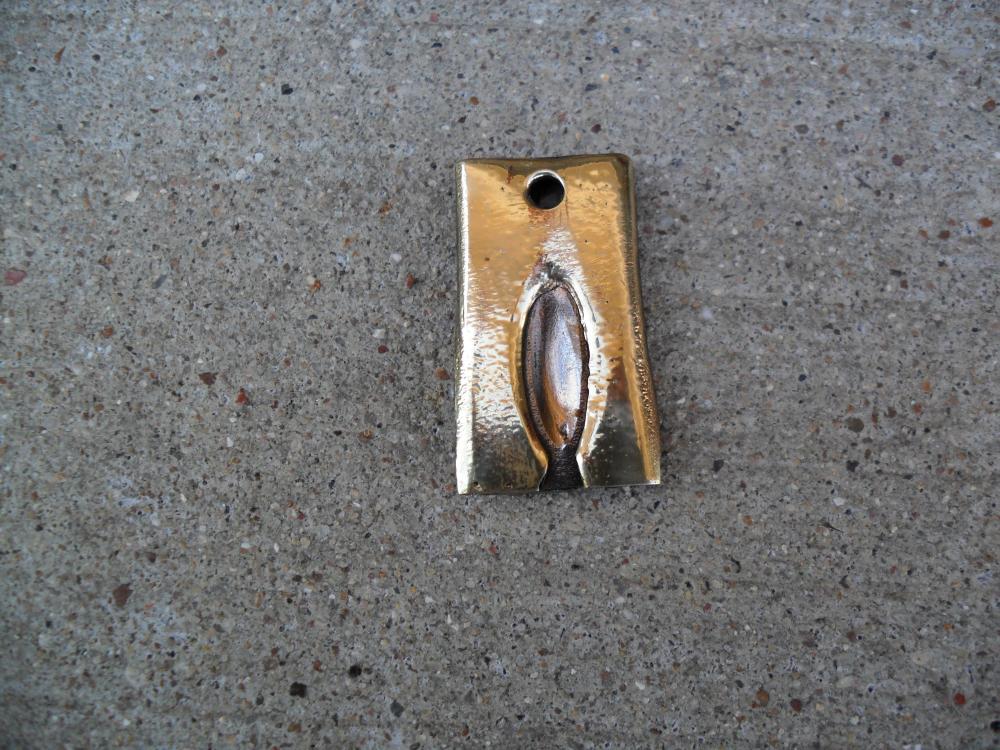
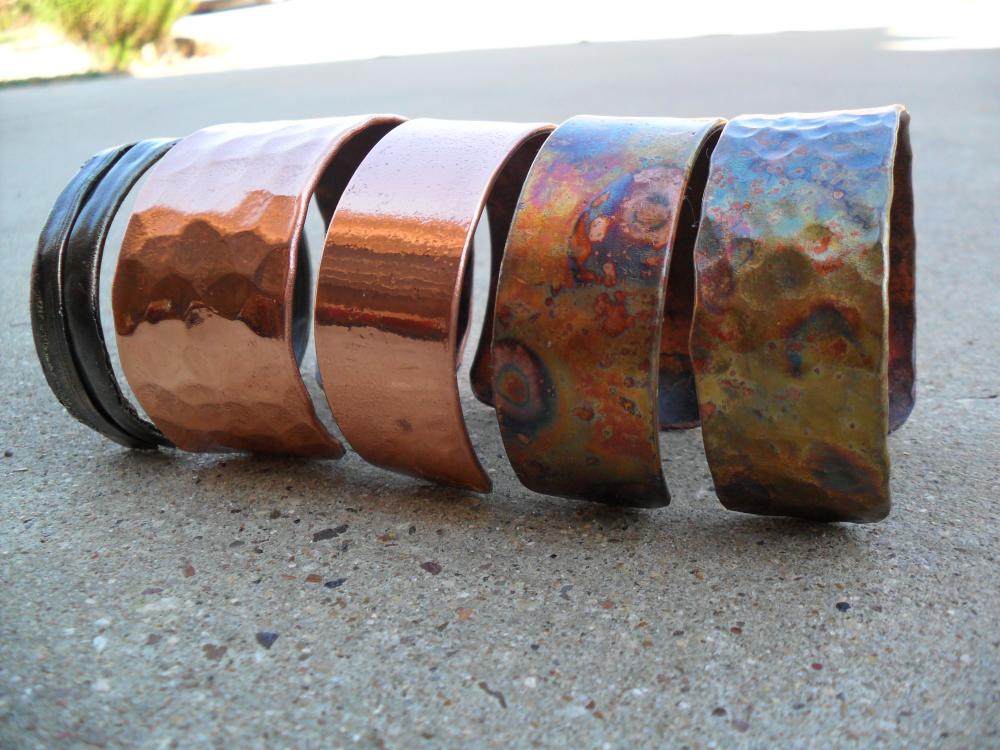
Here is the latest round in the shop. Made some candy cane rebar ornaments to be festive, some rebar bottle openers, copper bangles, and a brass coated steel pipe pendant.
-
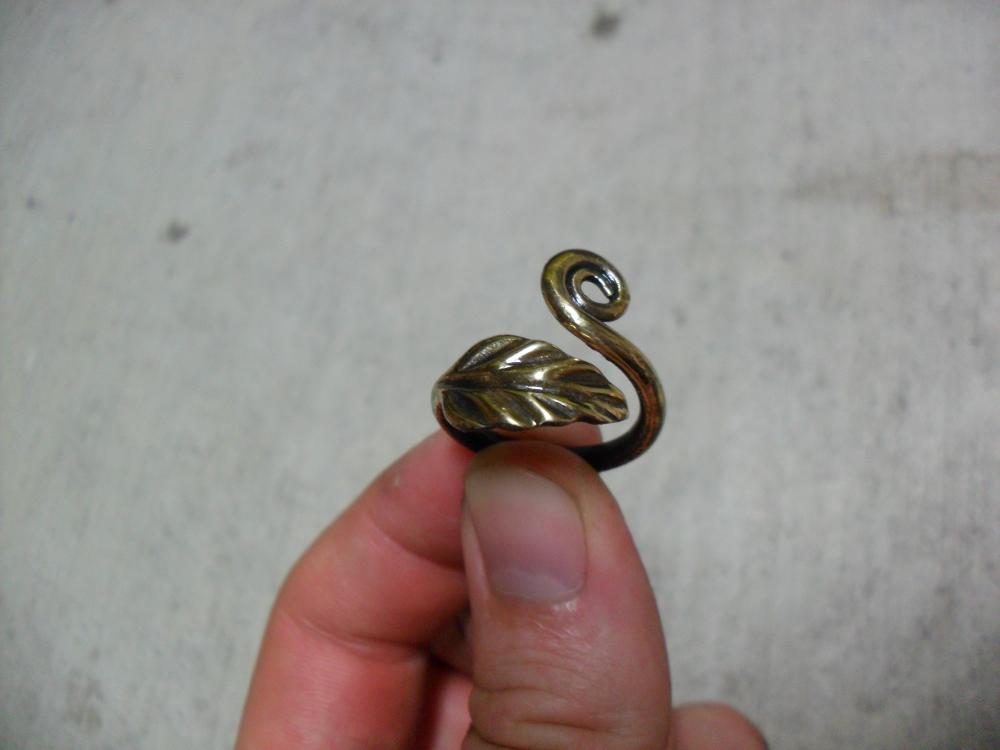
Made some more stock for holiday markets. I successfully forged aluminum for the first time and made a key chain/pendant and a ring out of it....didn't even melt any somehow. I also made my second brass ring...I love the look of a high polish on brass! Also found out that wrought iron tempers pretty much just like steel for some good looking accent colors.
-
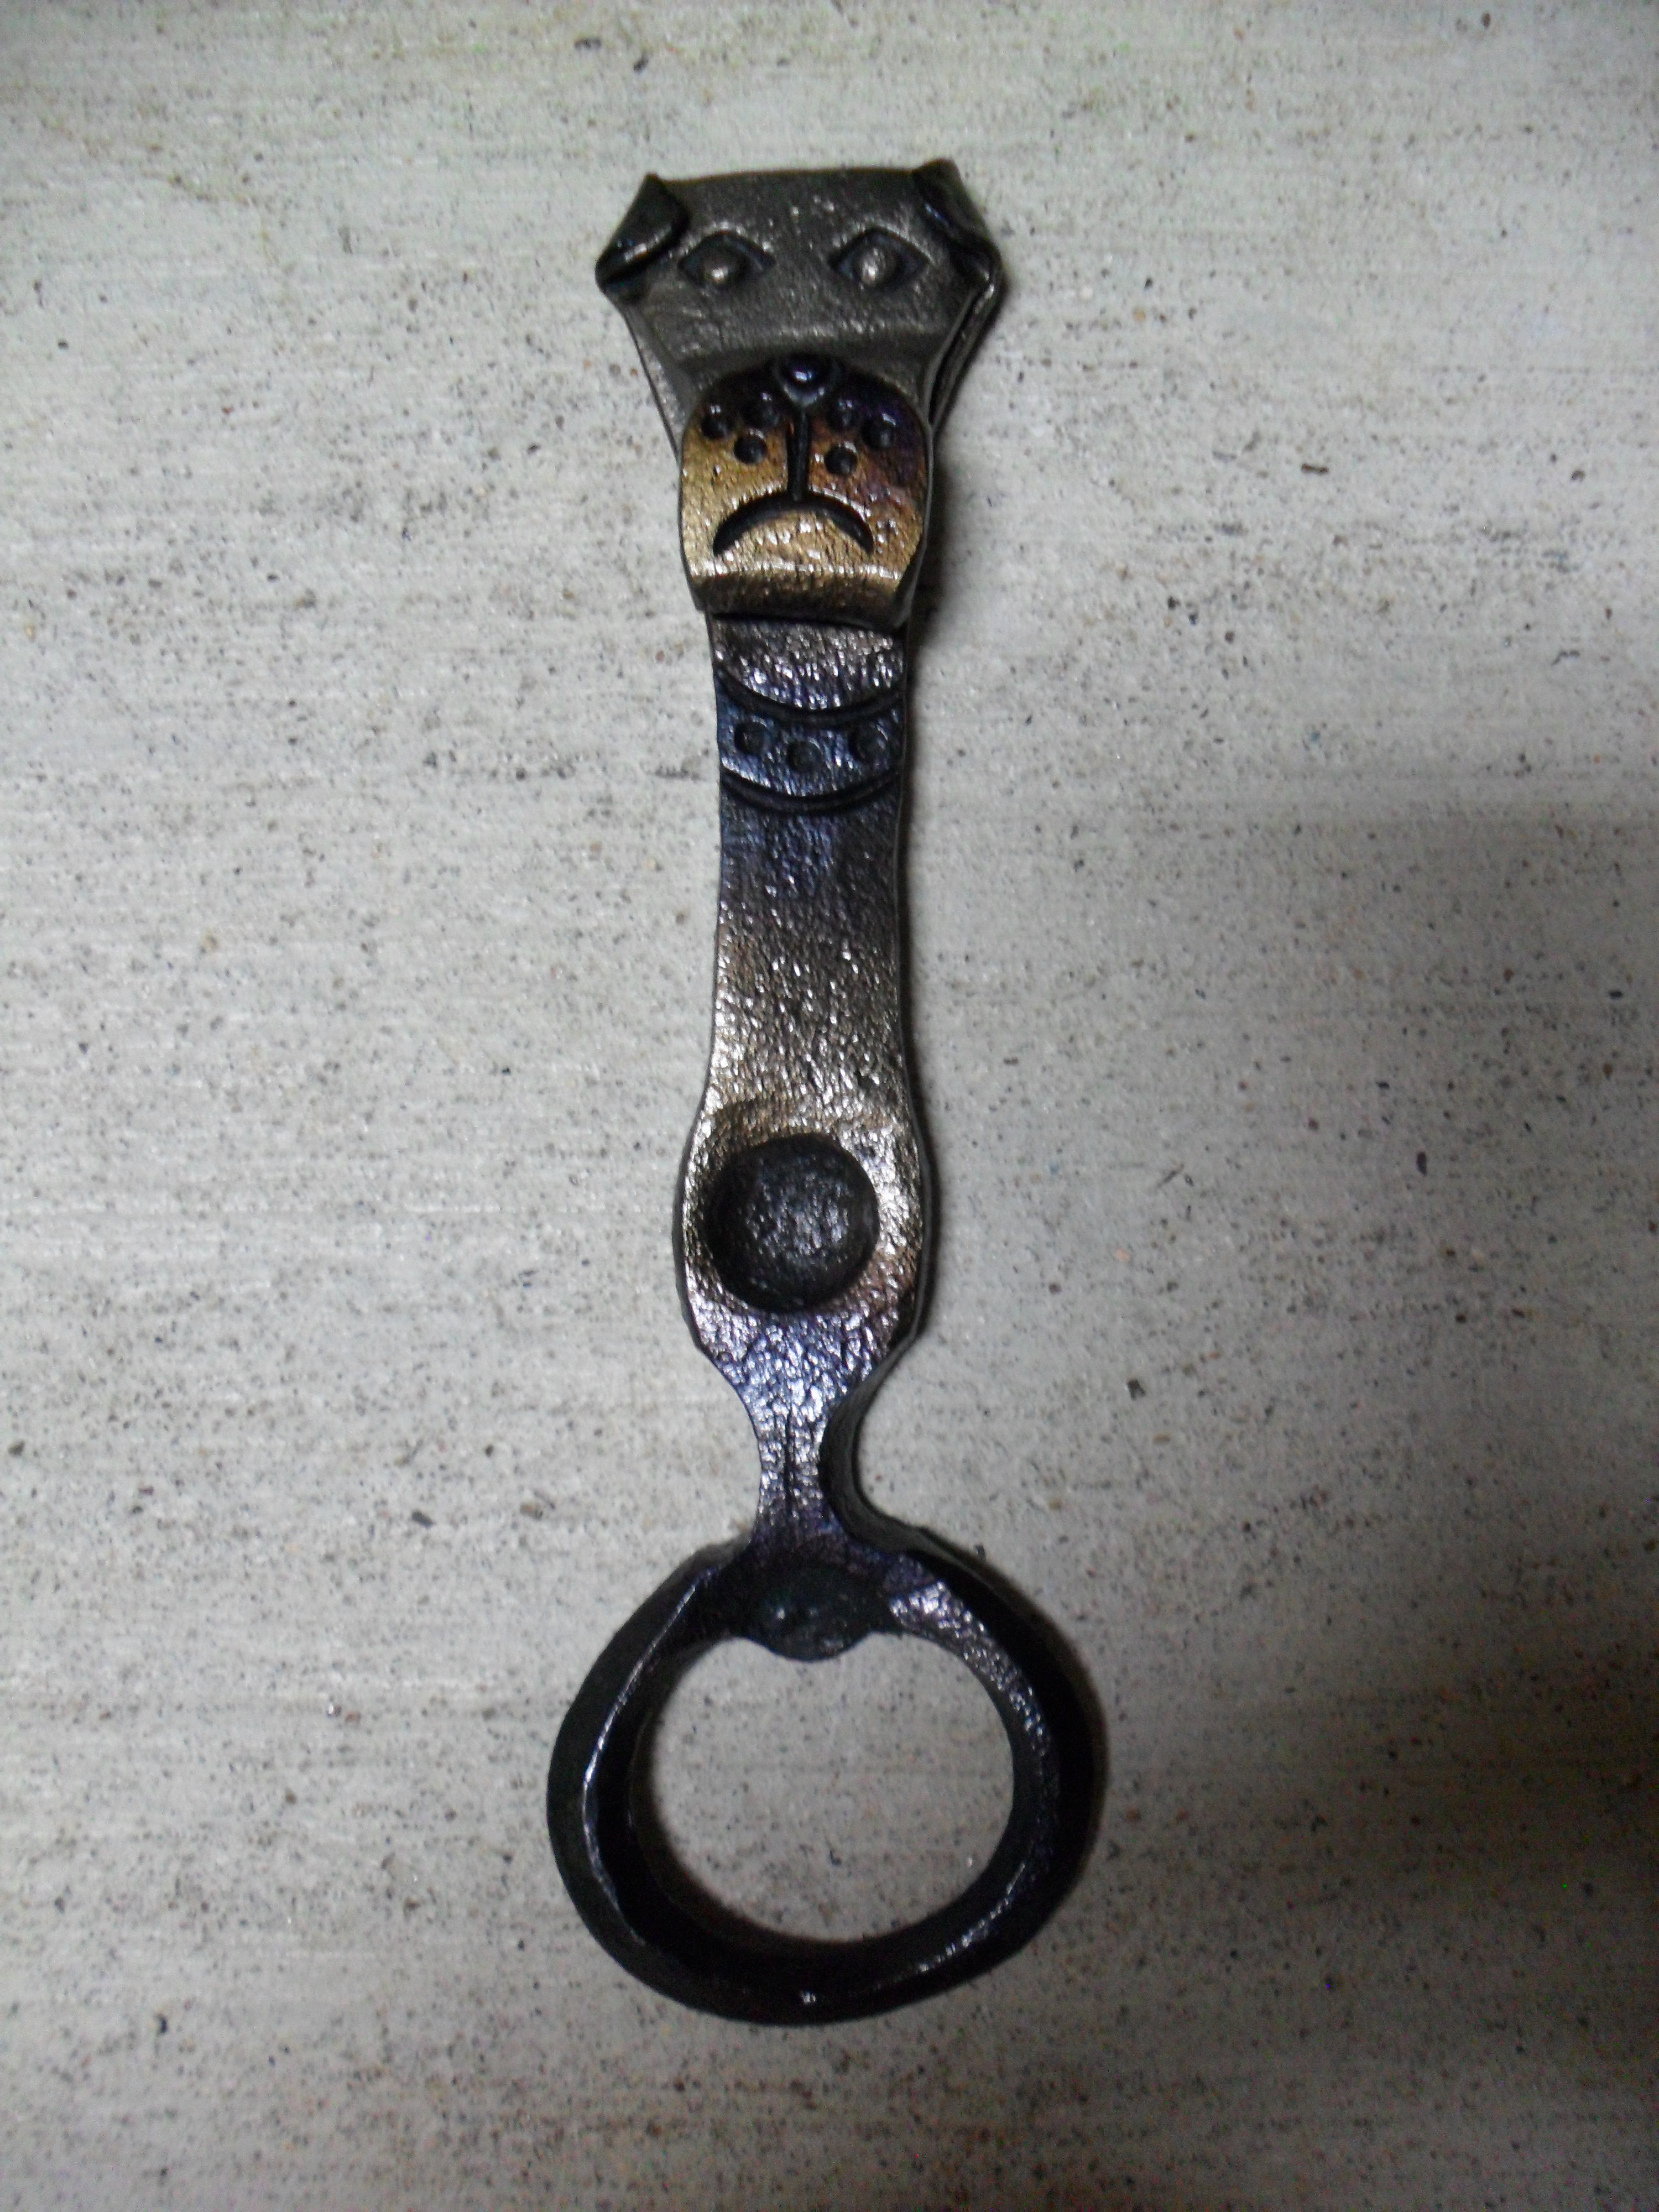
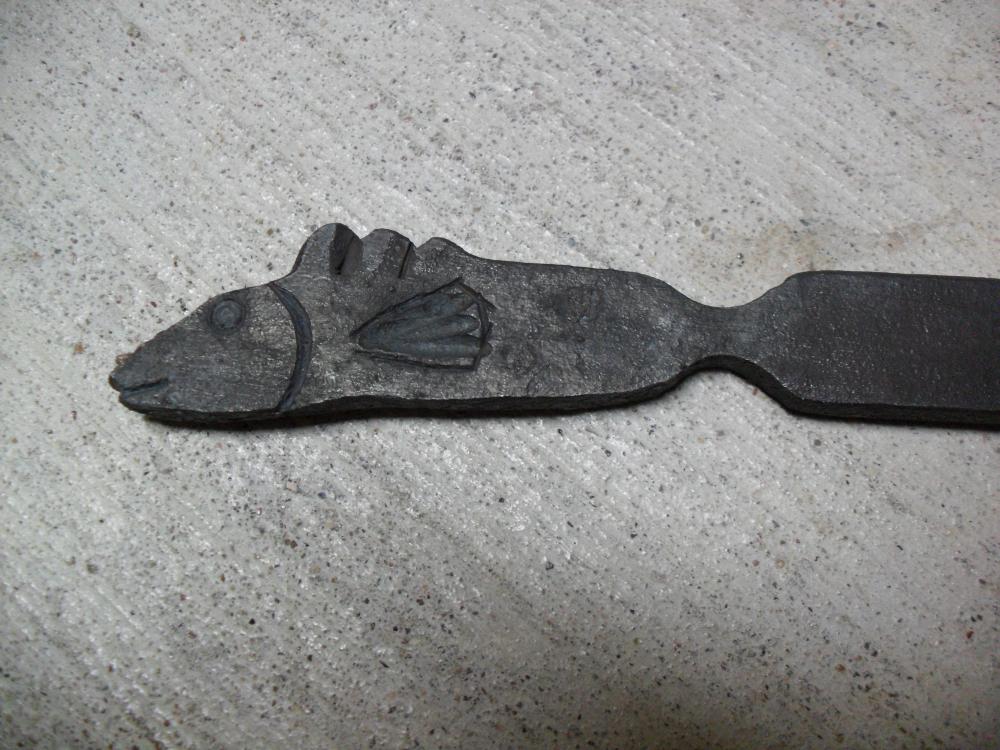
I did a one hour demonstration for the local art council the other day. It was fun and I showed how to make a bulldog head bottle opener. I warmed up by starting fish bottle opener 2.0 while everyone was getting seated, and I'm liking where it's going.

-
Any idea as to the grade of older rebar? Is it similar to today's grades, or totally different?
-
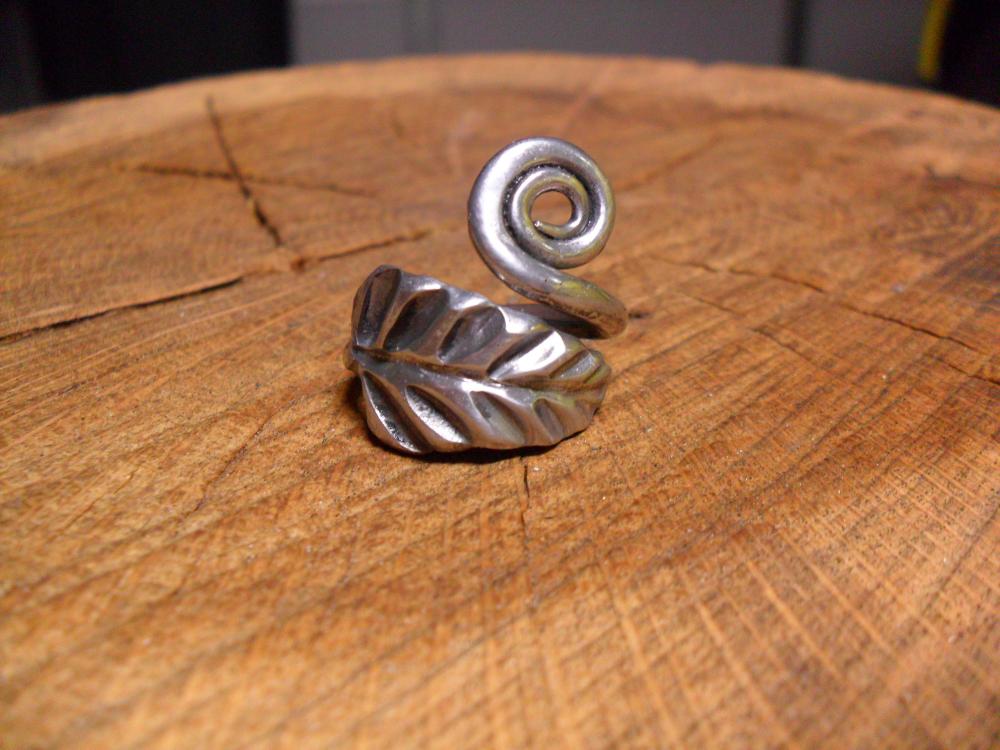
Nice finds! I have never gotten into metal detecting, but it looks like a pretty good hobby to go with blacksmithing. The square rebar is pretty cool. Looks like you had a busy day forging. I like the brass leaf a lot. I've only pulled off a small ring so far. The copper leaf from the stranded wire is really cool too. Love the little hammer...it's just fun to look at. Your flower design is really good. I like the stem off the back instead of being off the side like I see it often. So I'm in love with the brass finish on these! I haven't heard of or seen this finish technique until now. I originally saw it on another post of yours...in the brass/copper finishes forum, and you described how to do it. I plan on giving it a try next time I forge.
-
I have heard may experienced smiths say they don't care for wood stands. Are there any true grounds for one being better than the other, or is it more personal preference? One of the more common reasoning I have heard for metal vs wood is that you can step up closer to the anvil with a tripod design. I have had both now, and I have no complaints with either one or found one better than the other.
-
I see. I just tried it and that is a lot easier.
-
I see the four pieces you are talking about. Thanks for the advice. I didn't know I could delete a photo when commenting back. I'm still learning how to use the forum and I've never been on a forum before, so tips like that help.
-
Thank you sir! I think next time on the fish I was fuller the dorsal fin from the back and show it with line work on the front so it's not so inset. Sadly, I had to tack weld the arms of the cross on the back. I thought about hitting the cold arms over the hot stem of the cross to make an inset channel, but I had already textured both pieces by the time I remembered. I tried to get it all hot and pull and squeeze them together real well, but it just didn't work. You'll have to show me if you make that largemouth opener...it sounds cool. That's a cool idea for custom stamps. I can see fishermen being into that. For me the best part is letting the metal naturally fish lip to create the mouth.
-
Very nice! Is the base one solid piece of wood?
-
That's a heck of a good idea, and I never thought about it. I always have to get my wife to help me move it back and forth. I do the same with my forge too. I have a 24"x24" portable coke forge from Centaur Forge, and that would work great on it too!
-
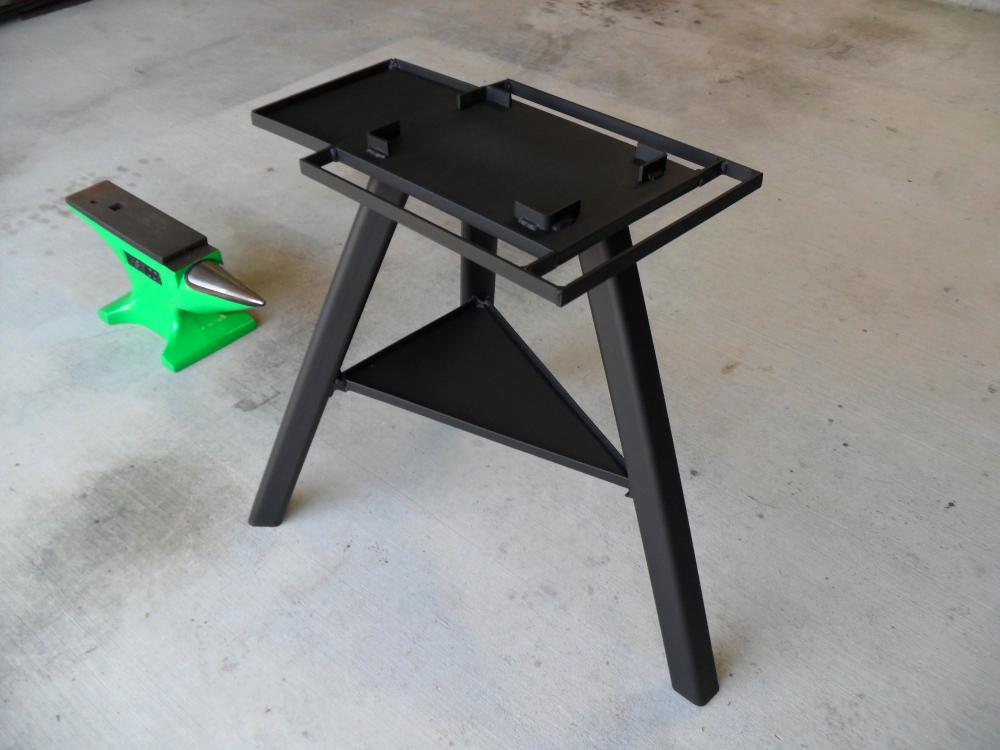
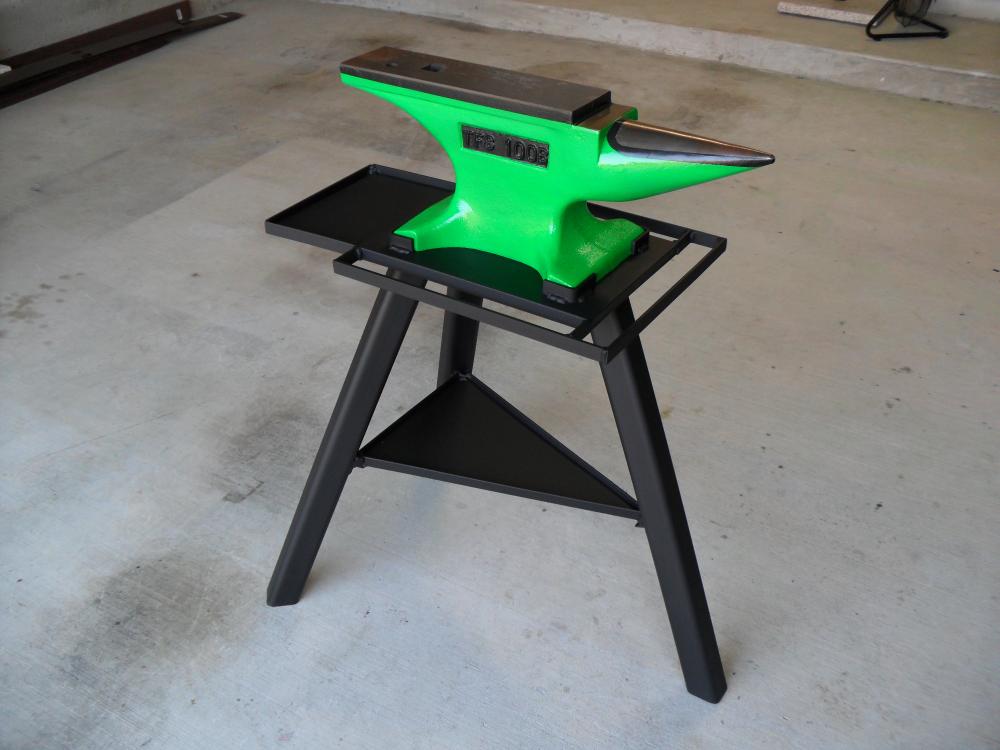
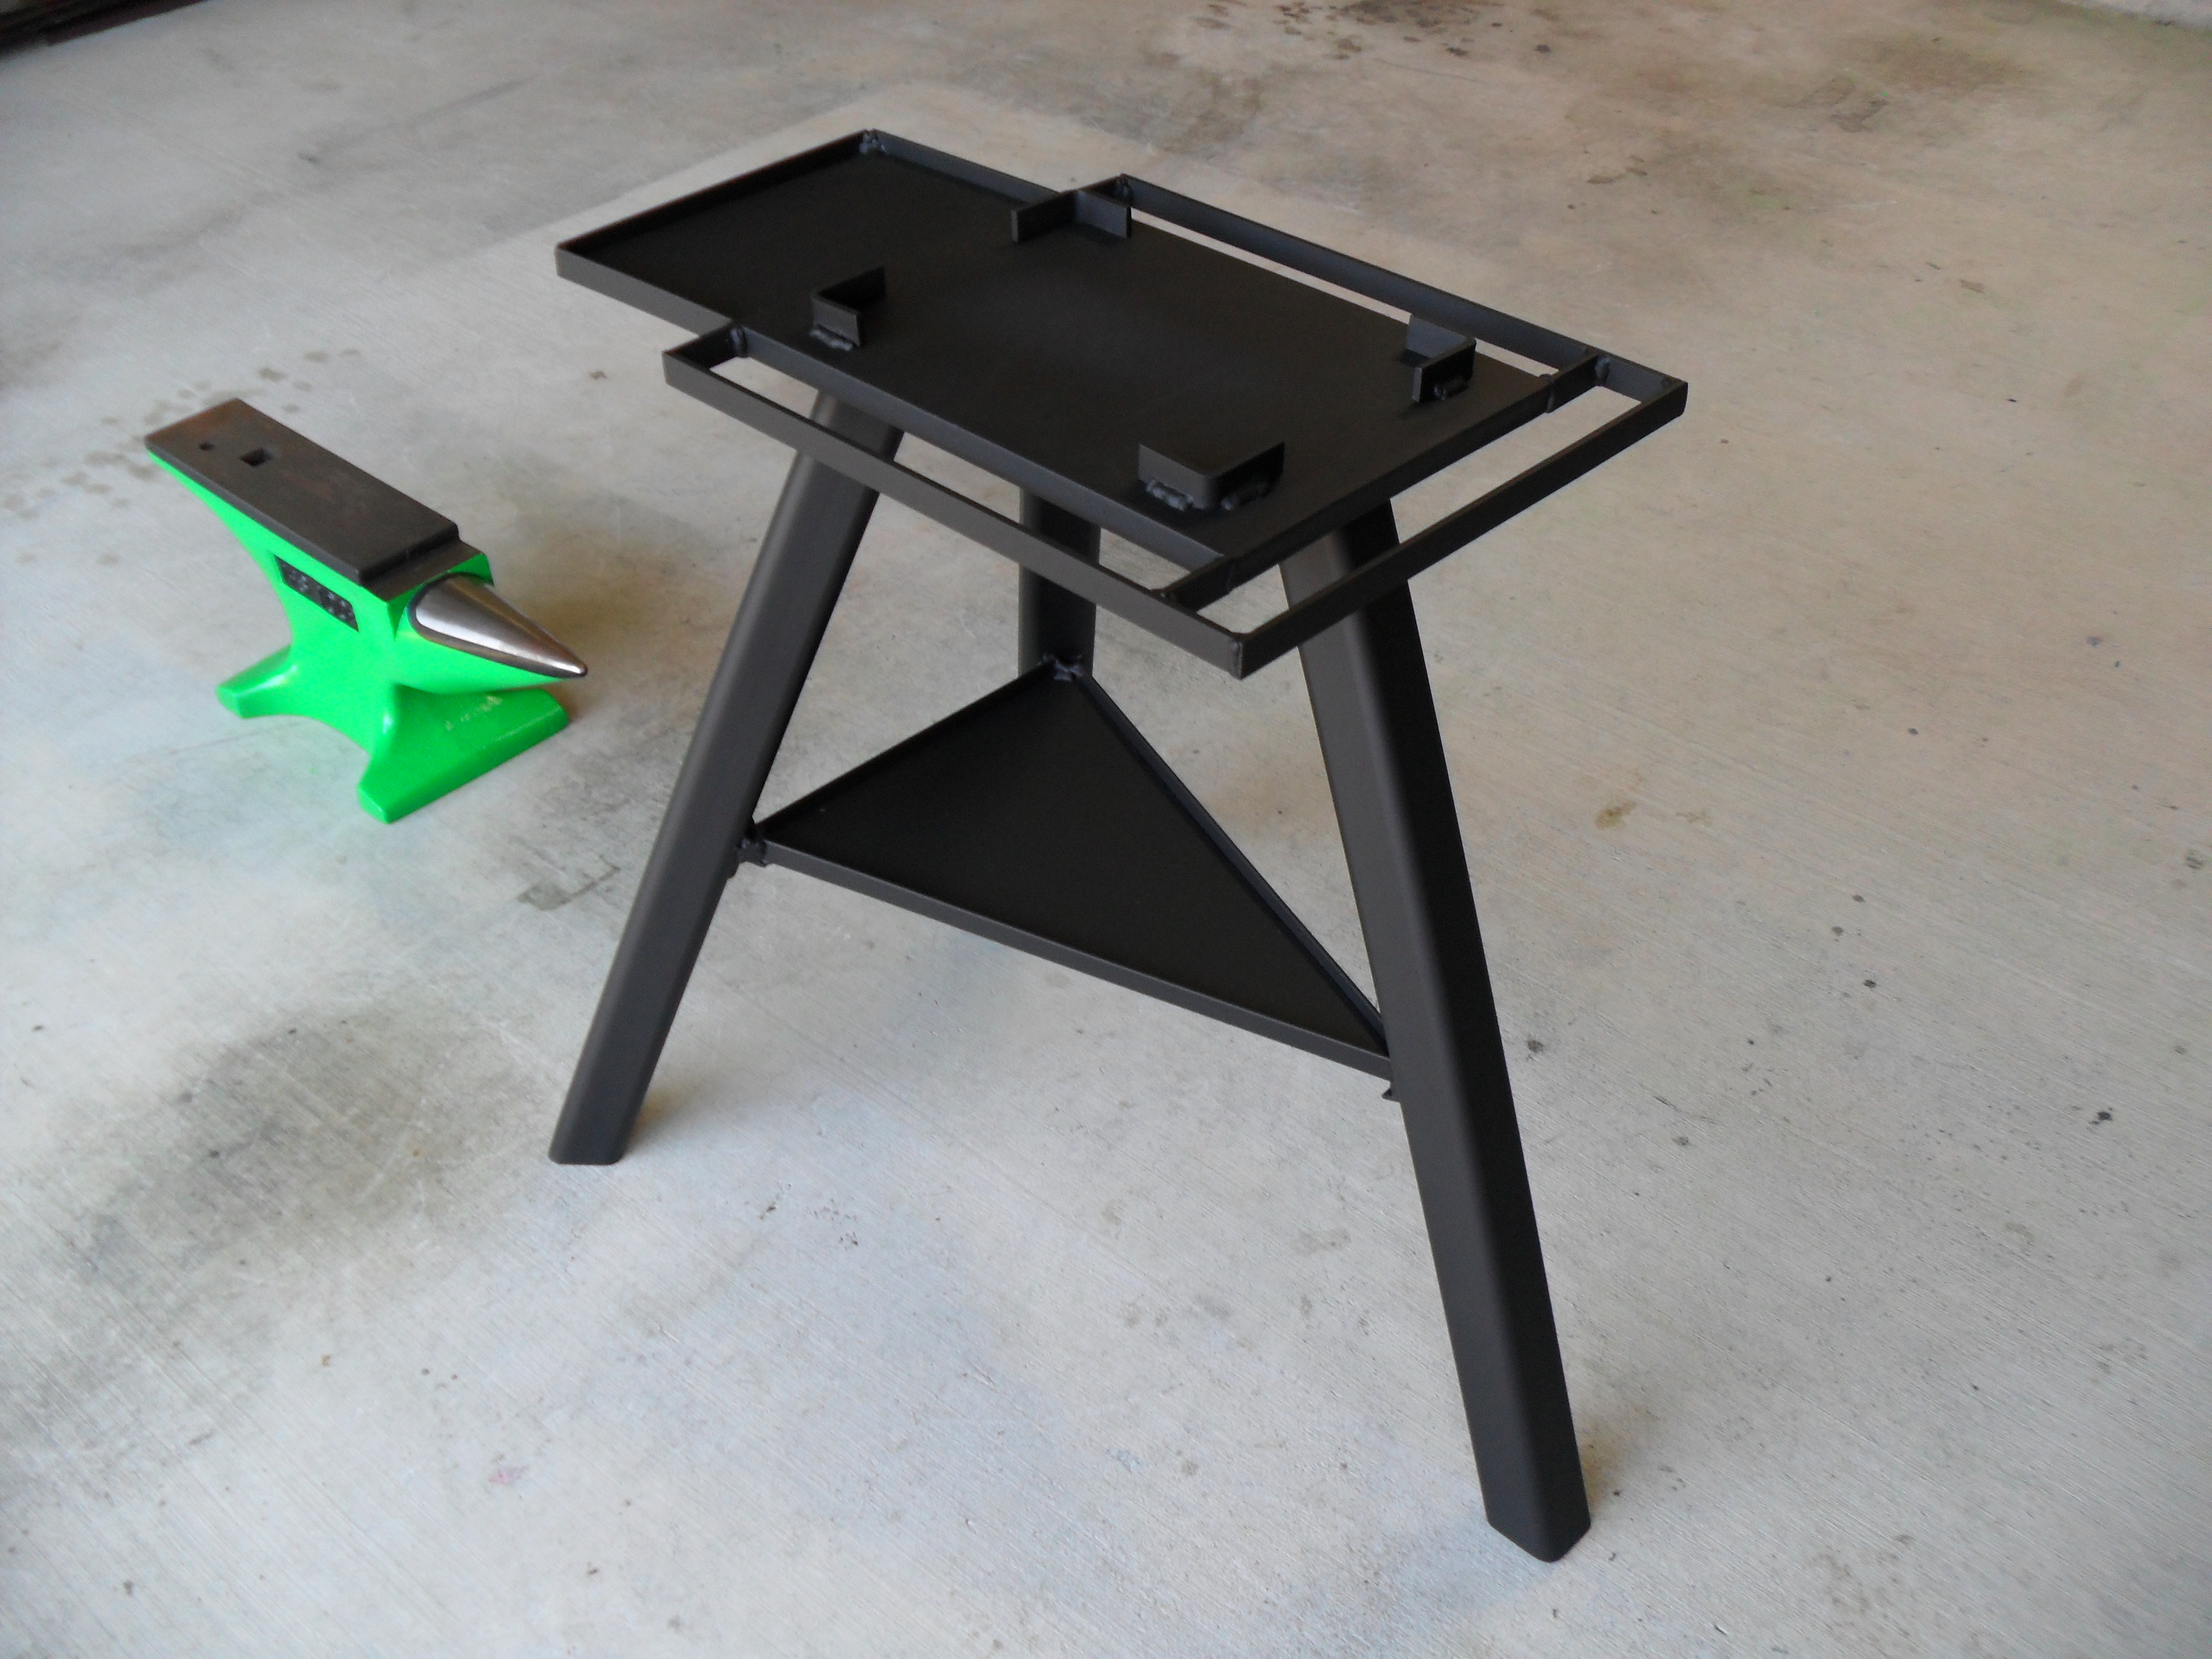
Thank you sir. I originally posted this in a different location. I was told it did not belong there, and my post was moved by another person without my consent to this forum. Not sure what to post if everything I do is incorrect. I would greatly appreciate this topic being utilized as intended (to share anvil stand ideas, designs, and pictures) with comments such as yours and Littleblacksmith's, instead of being schooled because I am a newbie. I will have to go check out your stand under the correct posting location. I did show how to measure and cut the legs. That was one of the big ticket items that I wanted to include. It is so simple how the angles and cuts work when you know, but not a fun task to figure out on your own. Thank you very much for the welcome, and I greatly appreciate it! There is a lot of good stuff here, and I hope I end up fitting in.
-
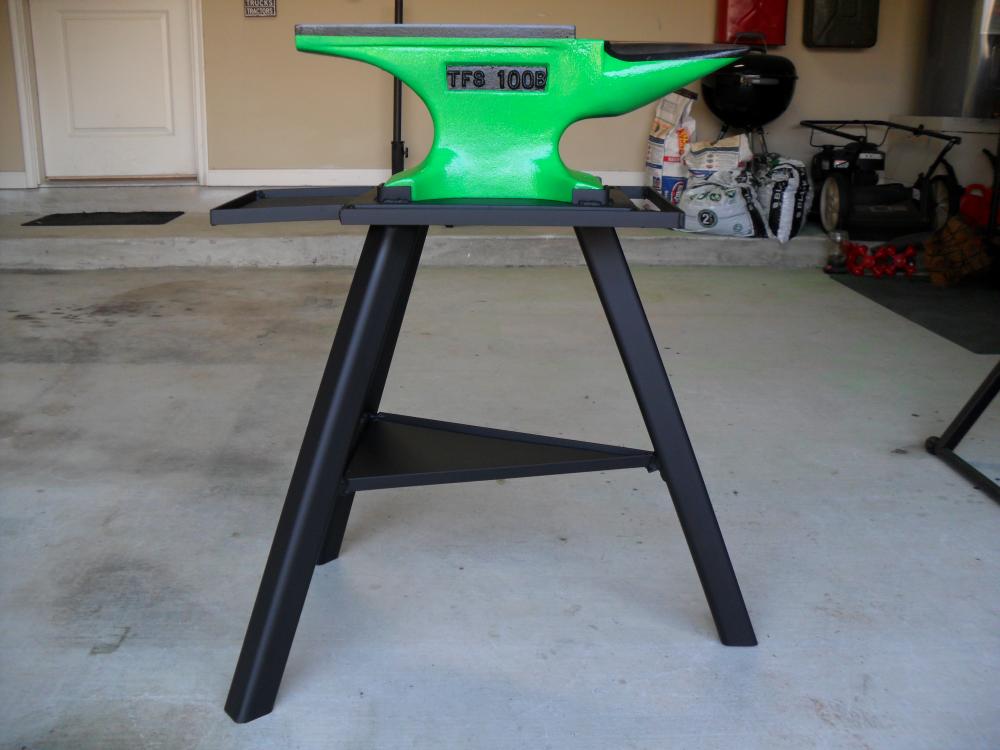
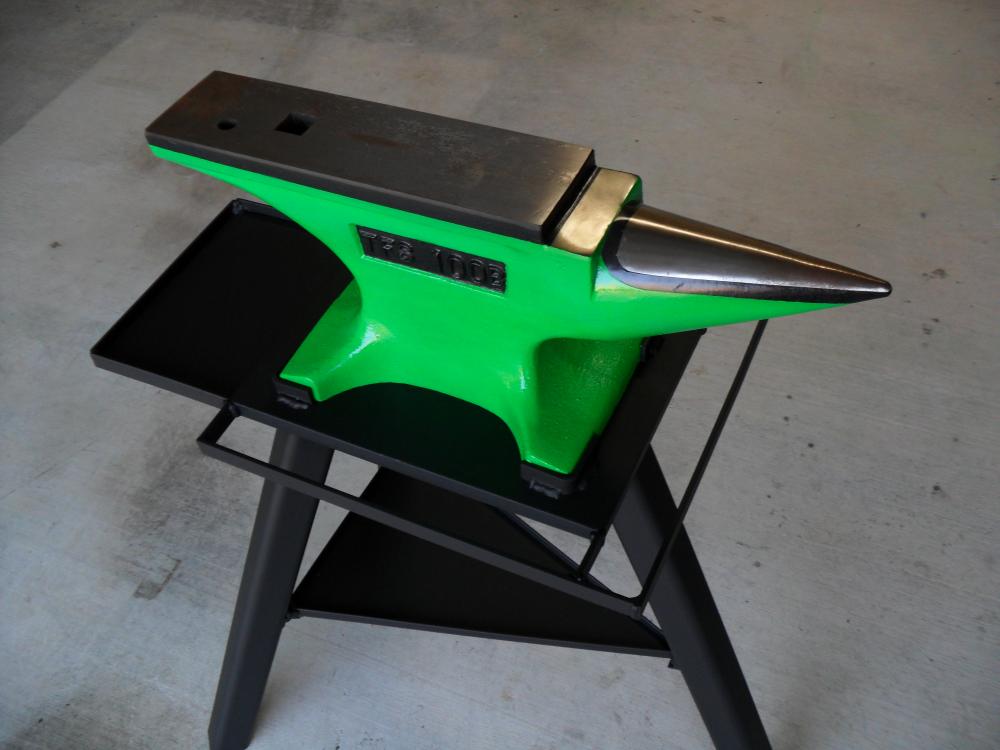
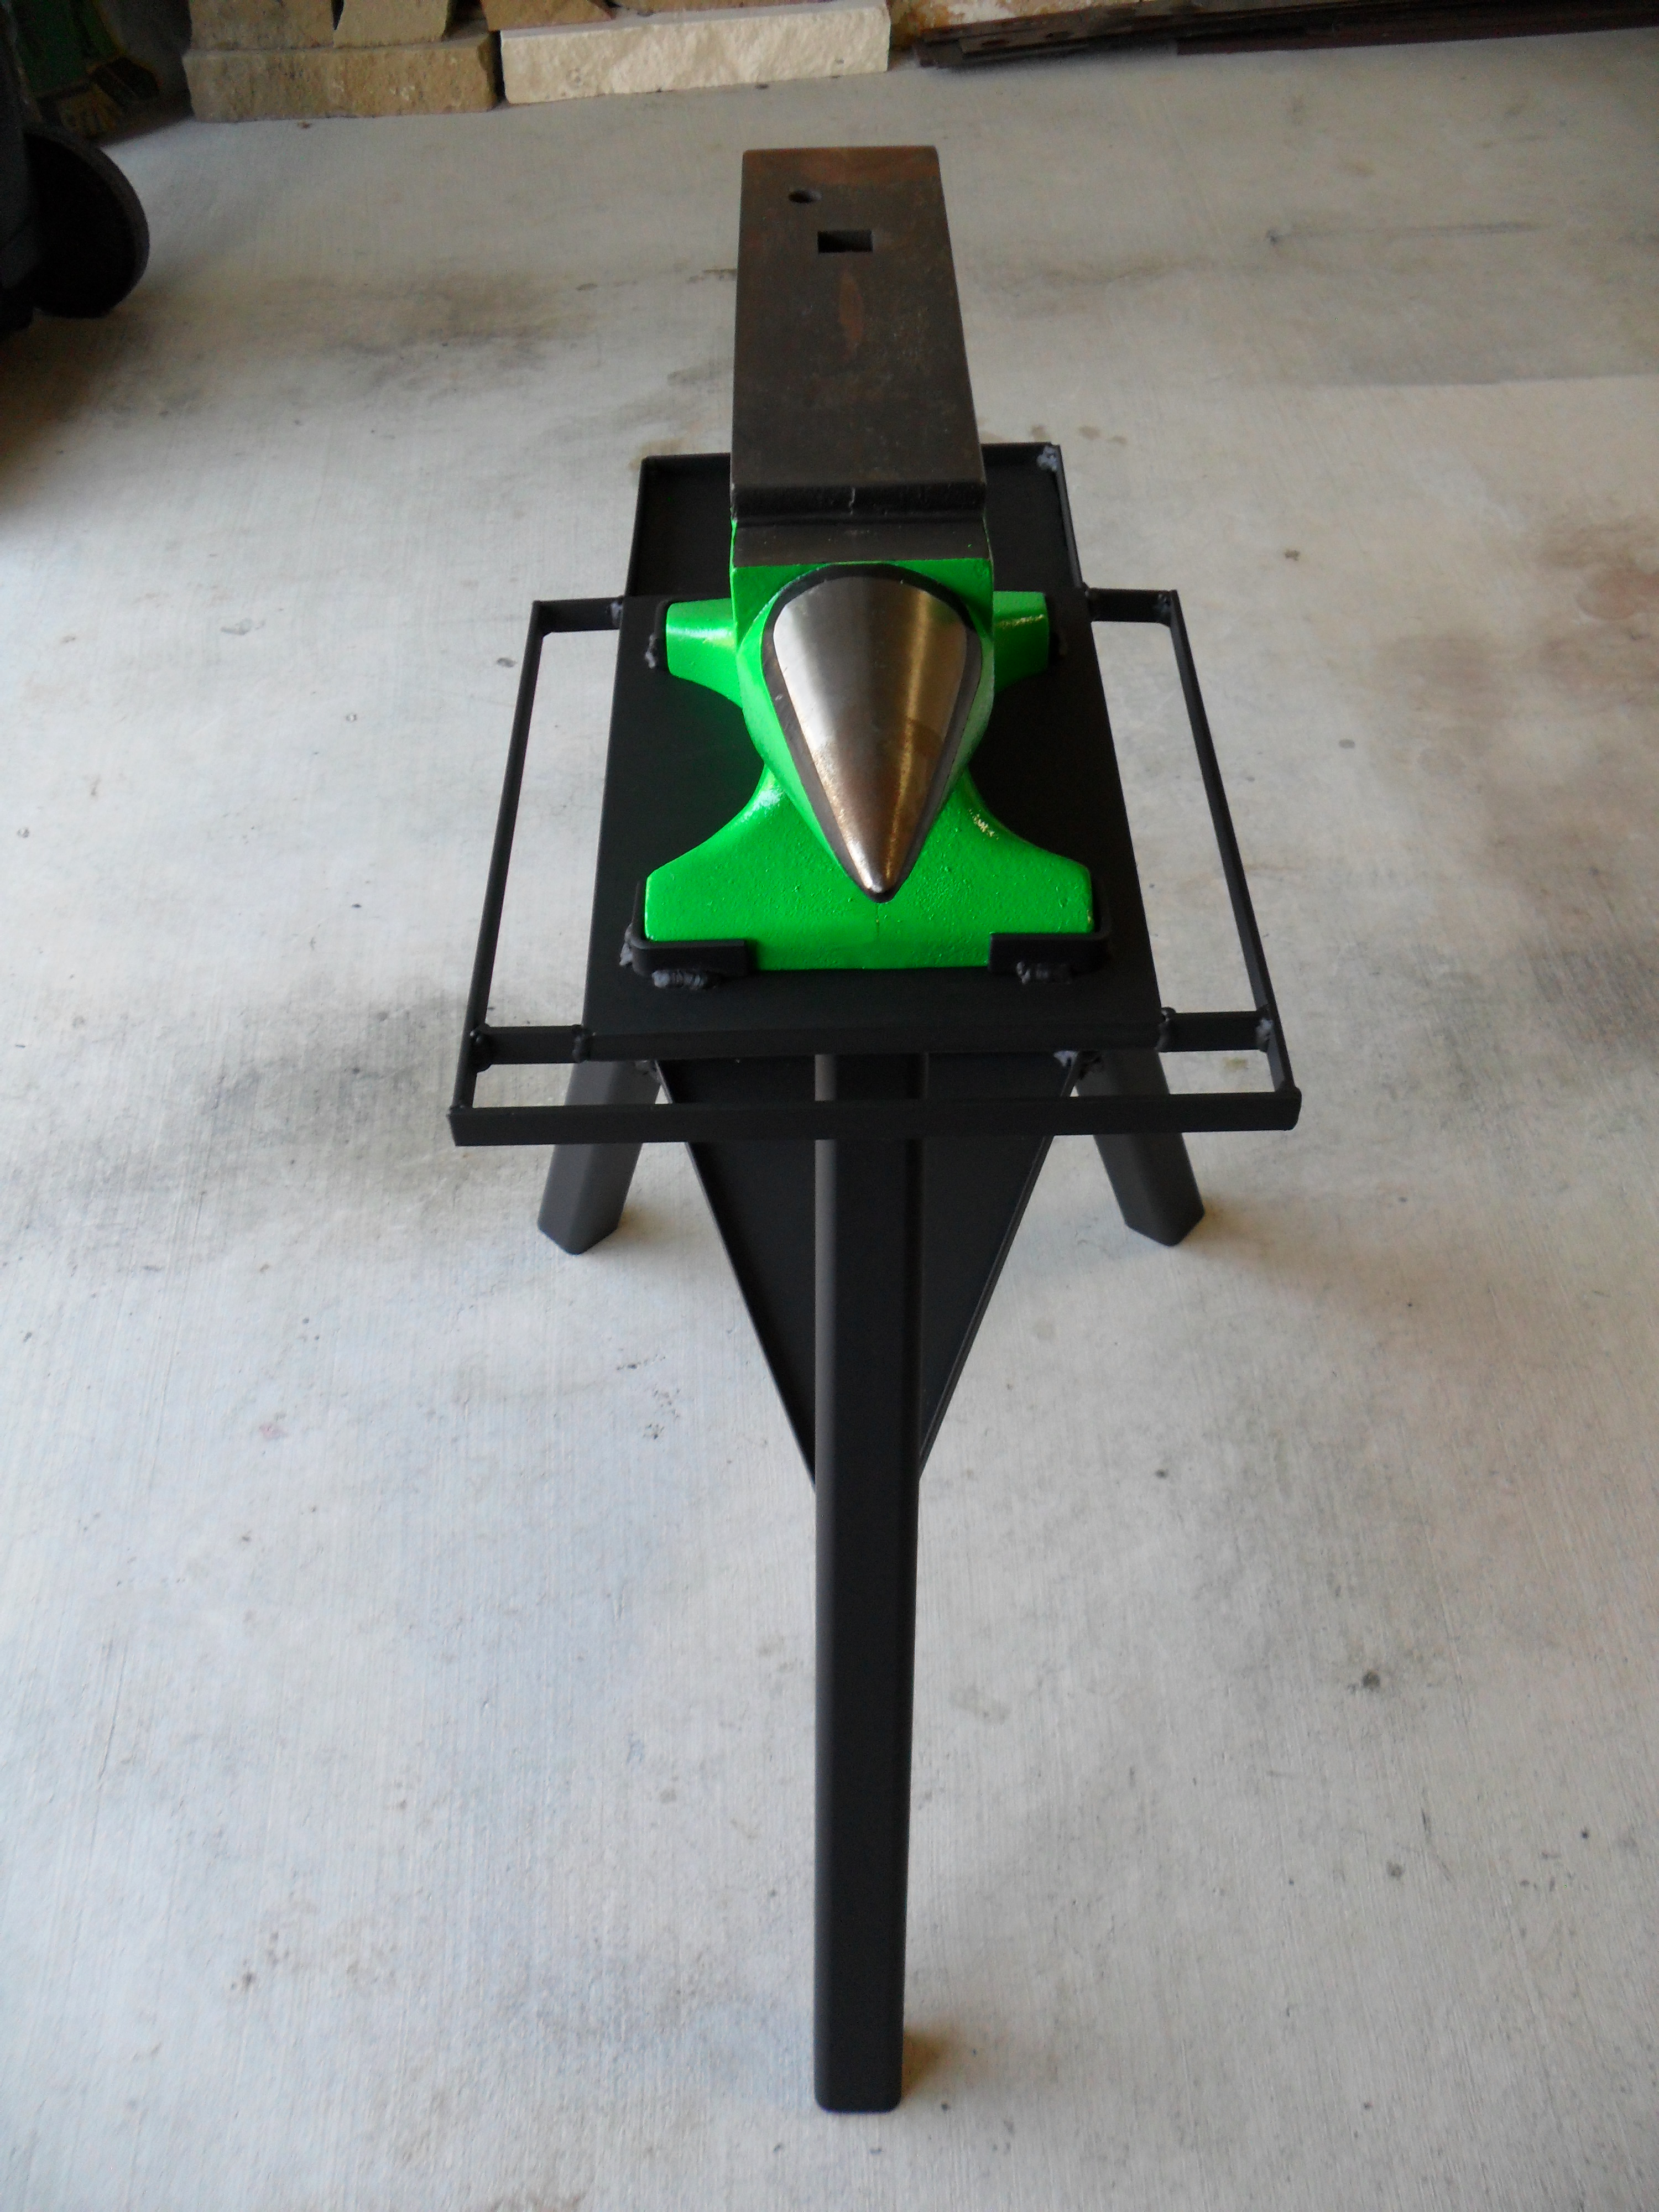
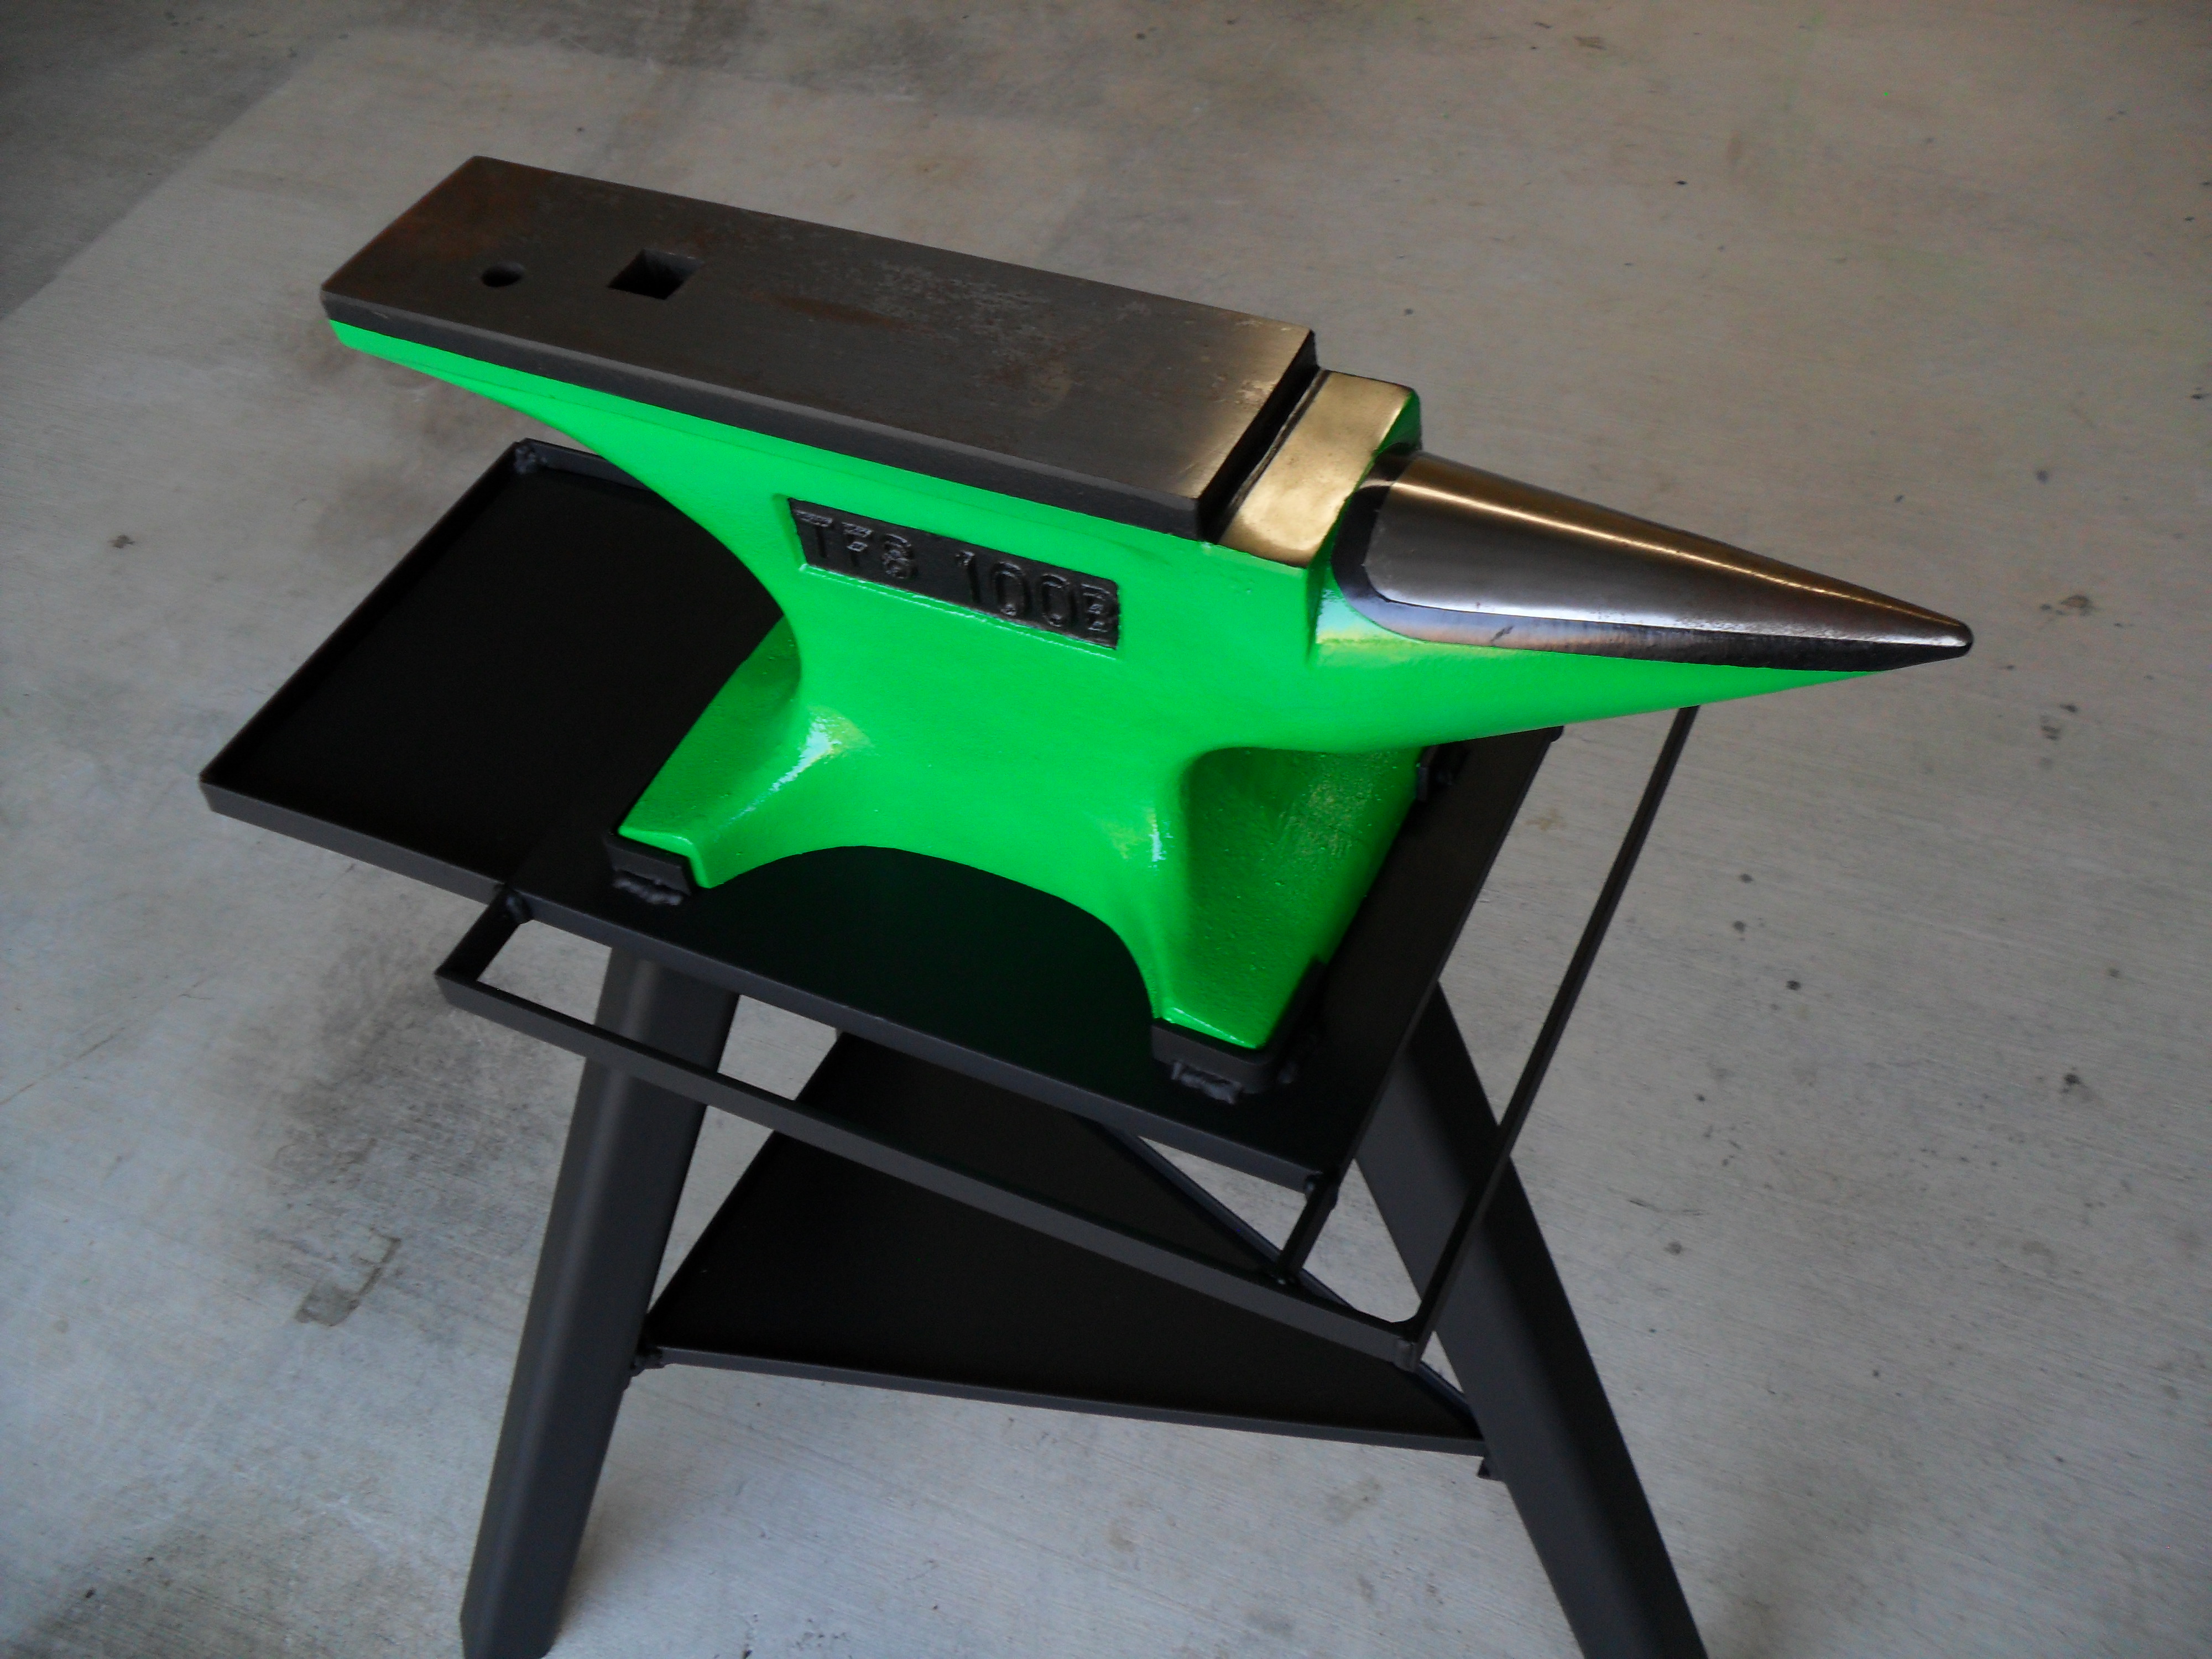
My apologies, I do not assume less of others. Inherent is the understanding this design will not work for everyone; nor is it meant to be carbon copied by everyone. I believe the original wording does not allude to your assumptions, and I merely wish to provide helpful information to others looking to build their own anvil stand as I did. I can say what I wish, but other will read into what they will. The anvil stand works great. It works great because I thought about how I use my anvil (i.e. height, tools, applications, techniques, etc.) and took that into considerations of the design. It is solid and strong with no movement. I did not fill the legs with sand or oil because I wanted to see how the ring would be first before adding additional weight. I glued the anvil to the stand using E6000 adhesive that you can get at any hardware store including Lowe's and The Home Depot. Before anyone tells me that is taboo, I was advised this by our local blacksmith shop owned and operated by two very talented smiths. It works great and it is an easy way to attach your anvil. All the ring is diffused by the glue and my anvil is quiet as a mouse in terms of blacksmithing. There is no need for sand in the legs for me. I did not put base plated on the feet because I forge on my driveway and move everything in and out each time I forge. It would be wonderful to have a shop someday though. Thank you very much for the kind reply Litteblacksmith! I greatly appreciate some kind words in my direction. I have wanted to post those plans and pictures for a long time to simply help others find a starting place. I was very excited to put myself out there and participate in something that I care about. I love the tool space too, I have yet to fill the entire space. I guess I just need more tools lol.
-
I did not miss the thread. I felt the post would be better suited under the original forum; for it is not an anvil, swage block, or mandrel. Below, another comment has be made to the fact that it does not belong in this forum either. I understand I am new, but now I am being pulled in multiple directions with conflicting information. I would greatly appreciate a kind word that my post had been moved from its original placement.
-
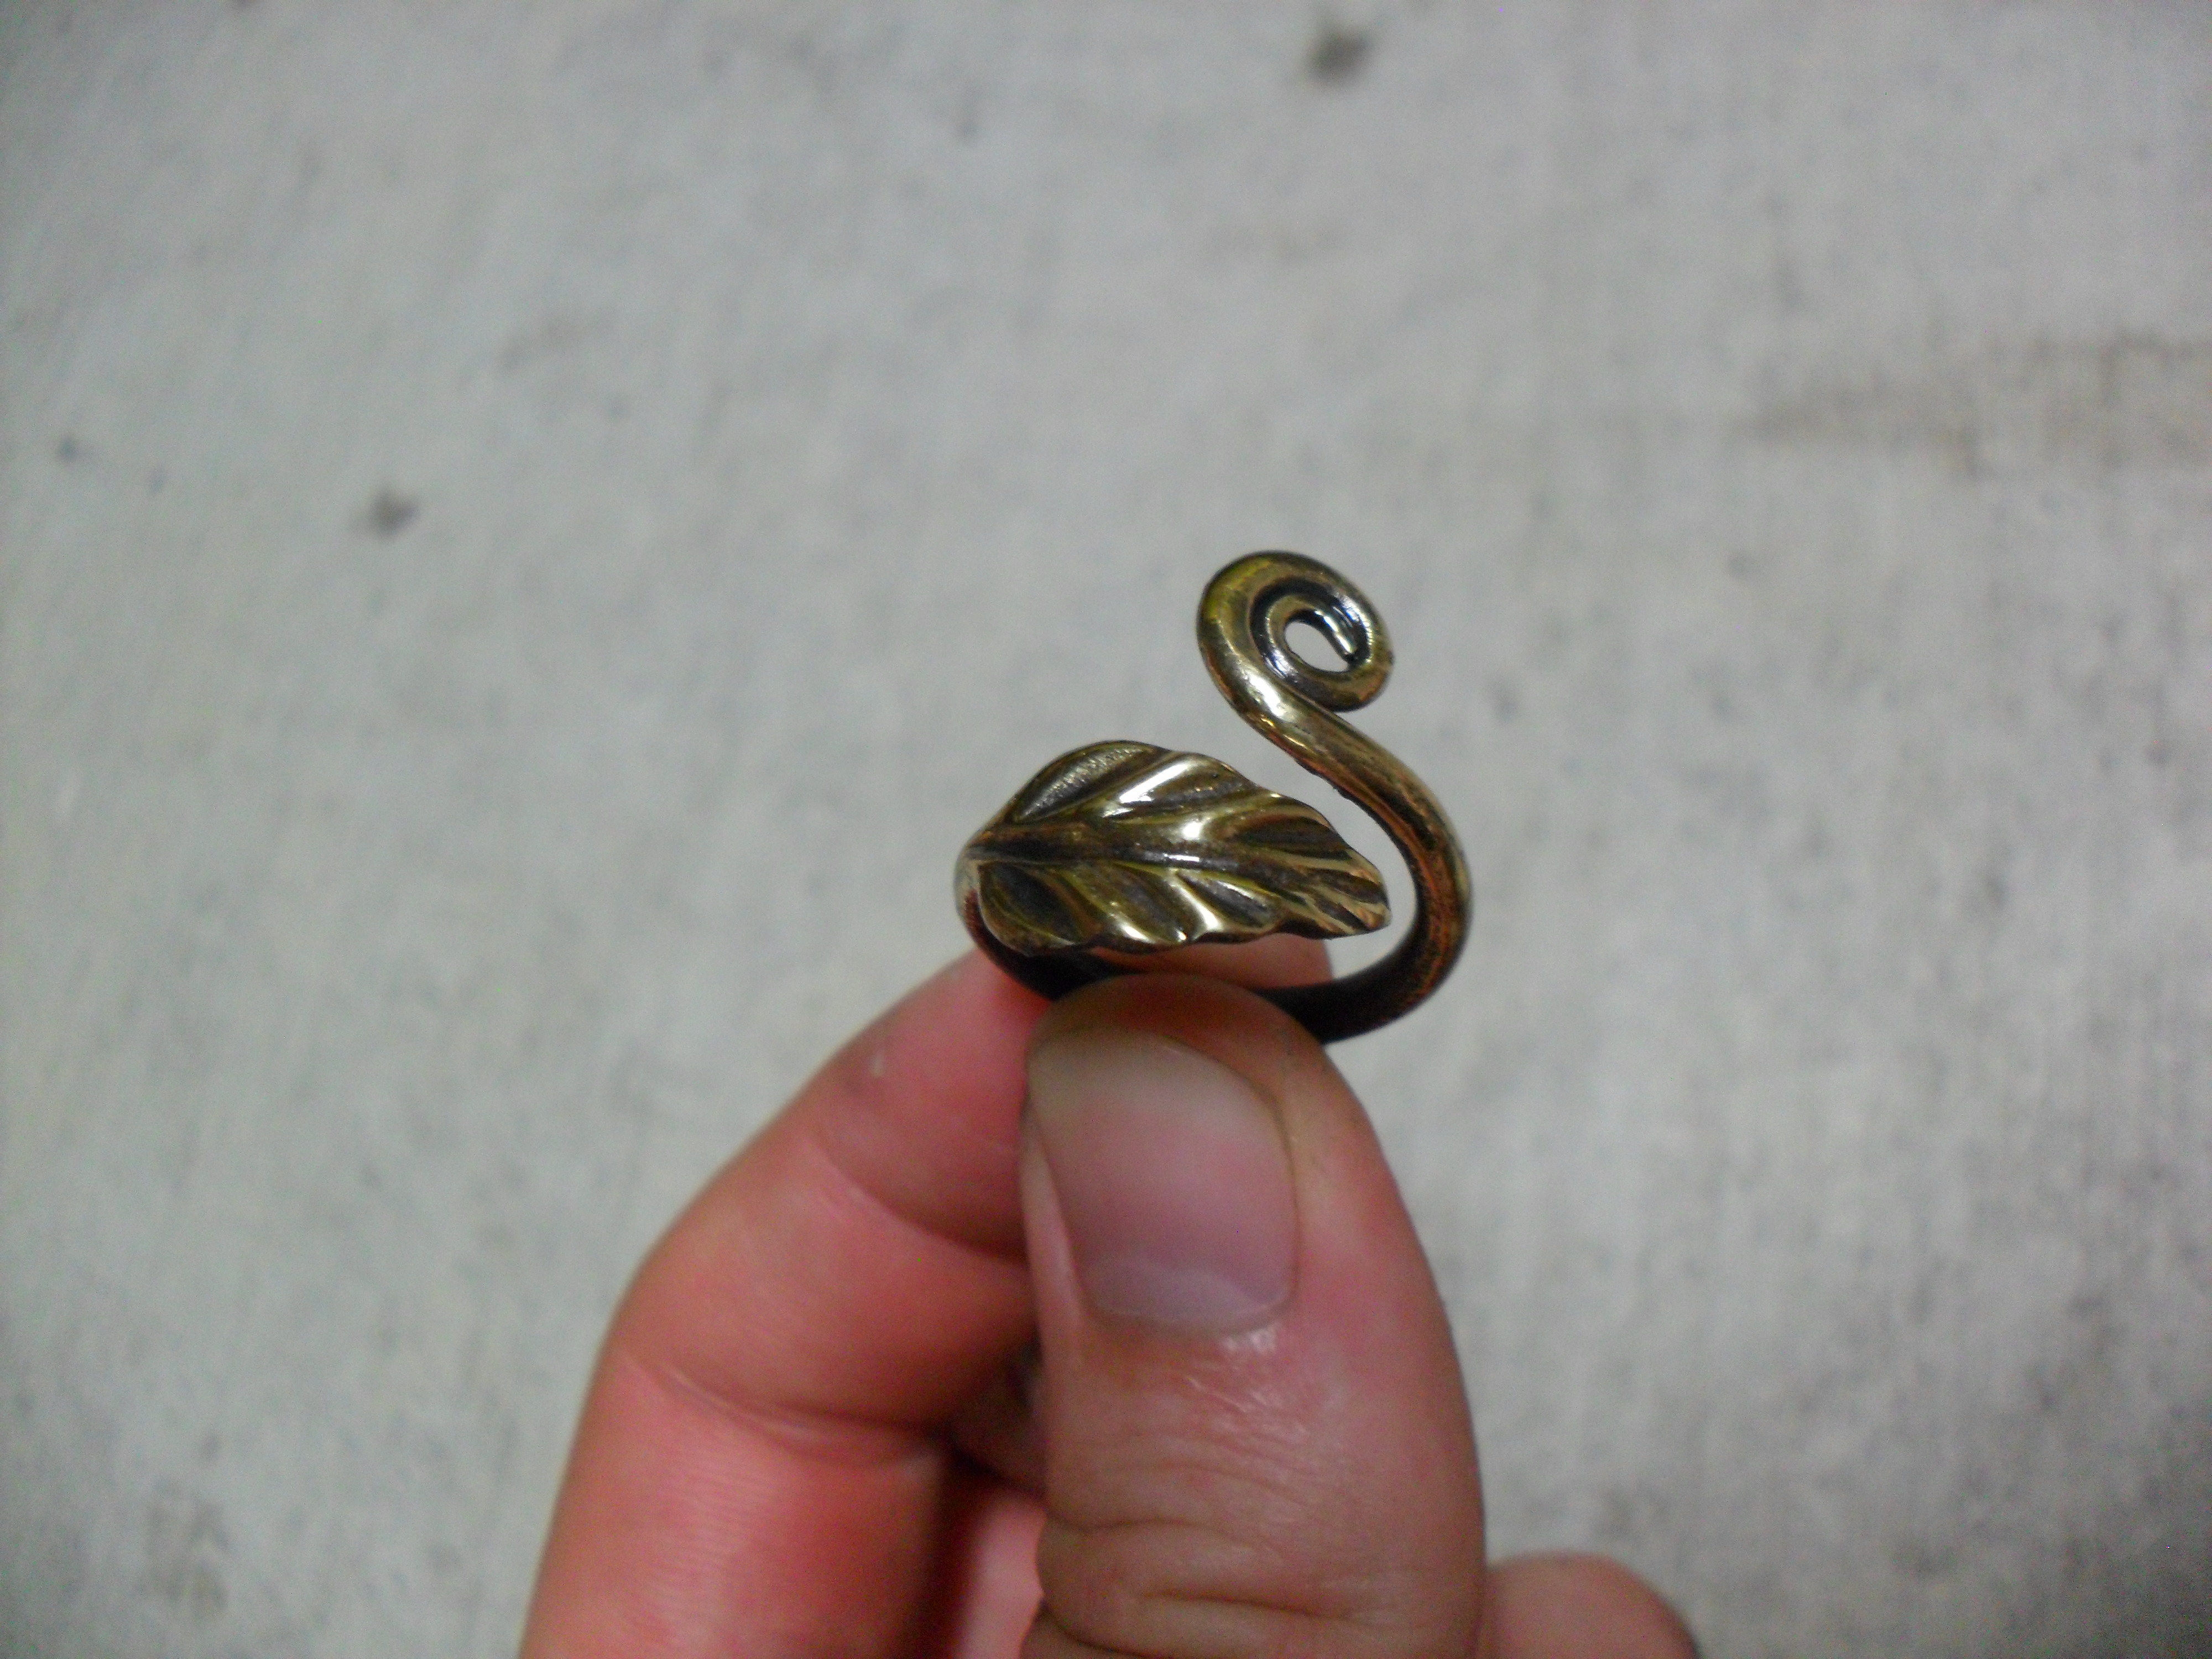
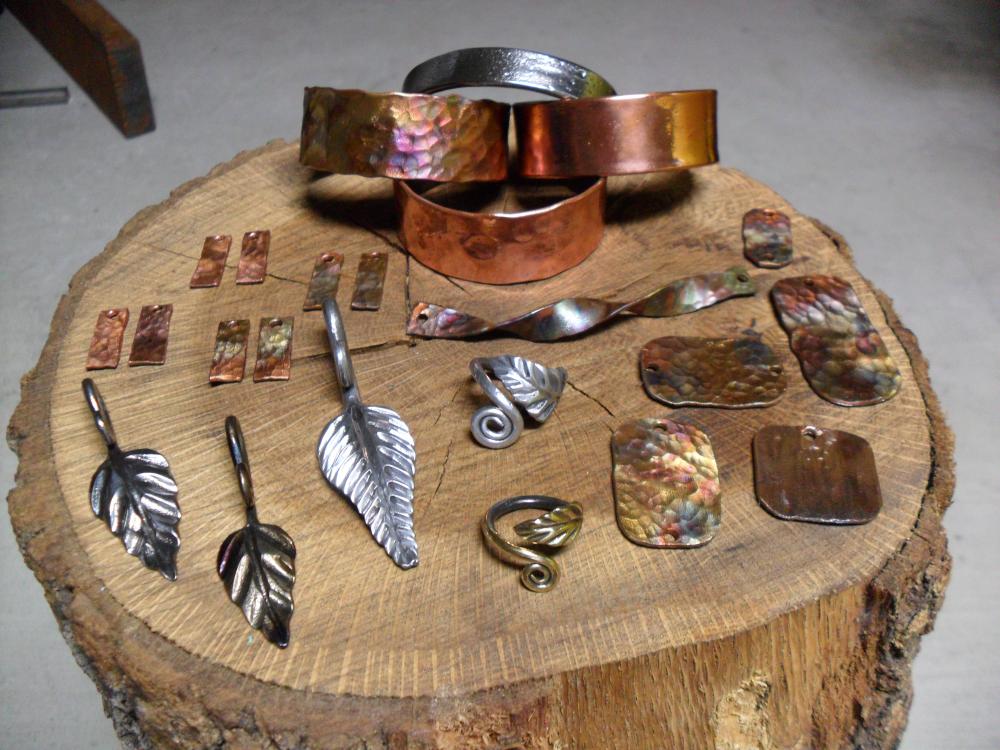
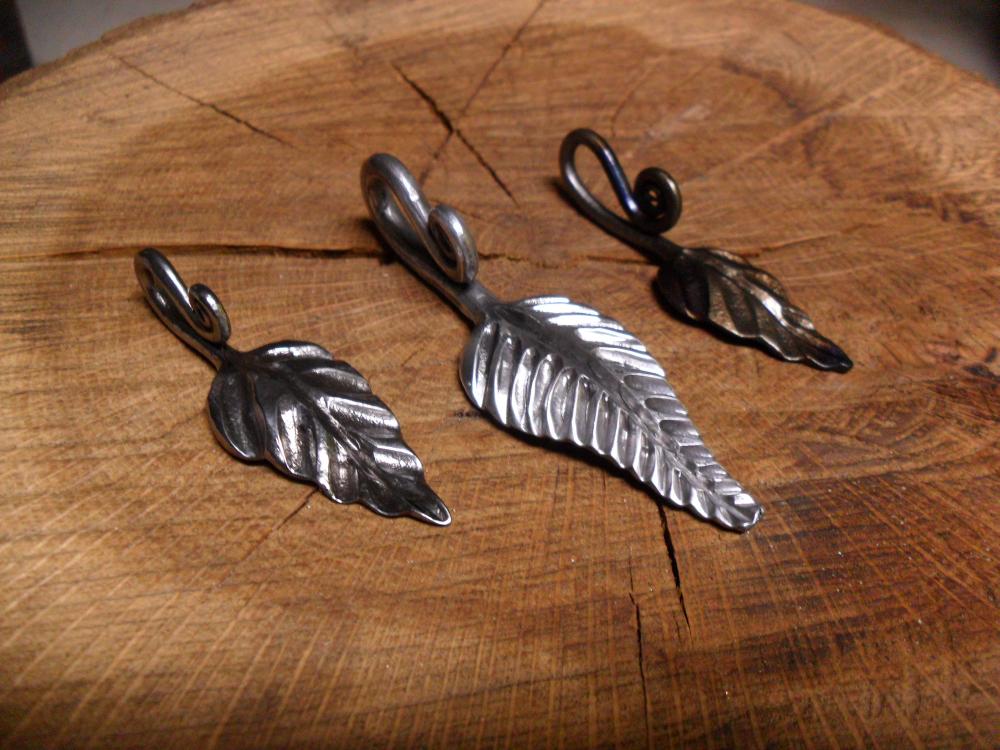
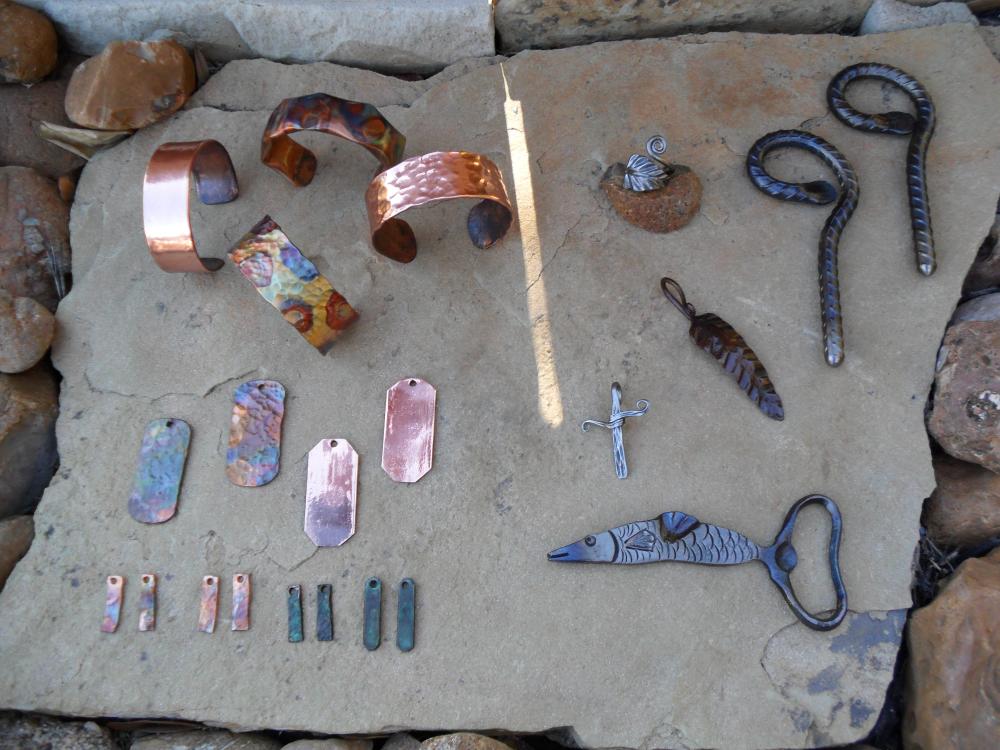
I'm a little late posting this, but here is what I made on Saturday. I really only get a chance to forge on the weekends, so I try to make them count. The copper bangles, pendants, and earrings were needed to restcok inventory. The two rebar bottle openers are a special order from work...I work in construction and the rebar came out of the slab for a future candy store. They are going to the owner as a gift. The cross was another custom order and custom design thanks to my wife. The fish bottle opener is the first of its kind. I thought up the idea a while back and finally got a chance to try it out. The ring is my first go at wrought iron and it turned out pretty good. The leaf is just another restock item.
-
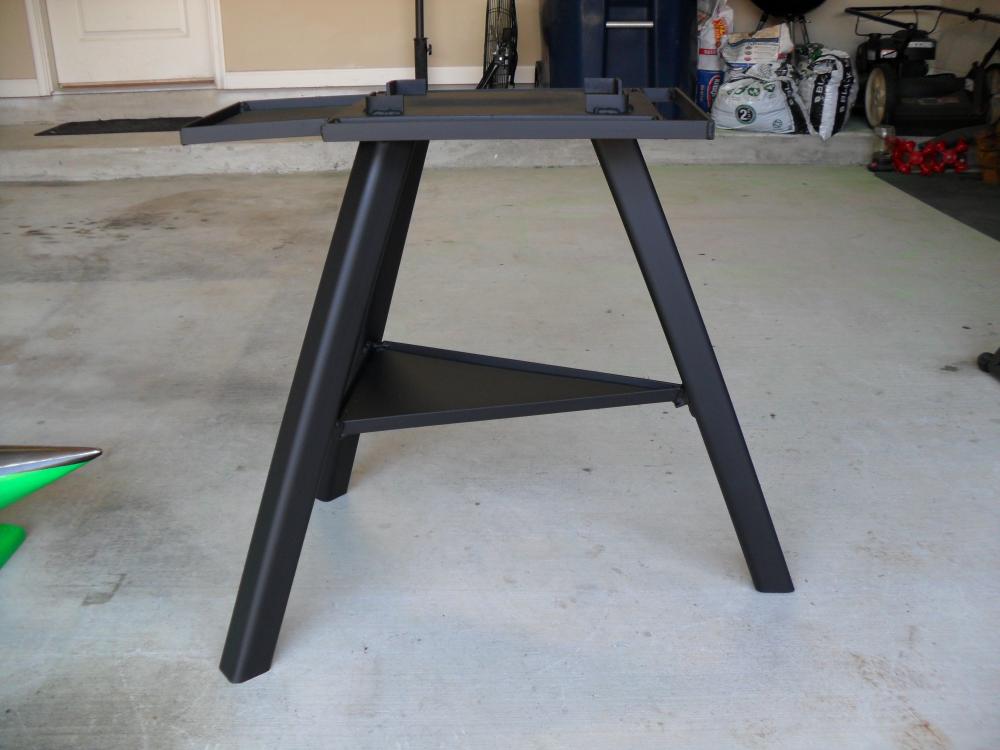
This topic is for everyone to share your anvil stand ideas, designs, and pictures. I recently fabricated my anvil stand based on a design I came up with. I wanted to make my own stand for a while, but I didn't really know where to start. I looked everywhere online and realized there are no plans out there to go off of, or to even get inspired by. I saw pictures of stands that I liked, but I had to come up with all dimensions and materials myself. Thankfully, I am fairly comfortable doing that, but perhapse other are not. I drew up my plans with as much detail as I could in the hope that it could help others in the same boat. Here are the designs and some pictures of the finished product. Anvil Stand - New.pdf