

81pistolsfiring
-
Posts
32 -
Joined
-
Last visited
Content Type
Profiles
Forums
Articles
Gallery
Downloads
Events
Posts posted by 81pistolsfiring
-
-
I have an overwhelming supply of grade 8 bolts that are 1 1/2 in dia. 9 inches long. Research has shown these are “medium-carbon alloy” but I can’t find a true steel grade rating. Anyone have an idea?
good for forging? Quenching?
-
On 9/3/2017 at 1:54 PM, Frosty said:
I did some research on read on Wikipedia that bentonite is mixed with sand to withstand tempatures reaching the molten metal stage of heating.
So is sand needed in a kitty litter jar mixture as well? Haven't researched all the ingredients of kitty litter as of yet.
-
This is my first burner so I really just wanted to make sure it works and is able to be tuned. Wanted to make sure it was completed or at least operational before I put the wool/fumed silica in the forge body so I'm able to cure it.
-
this is the burner with a longer pipe and bell reducer. Seems like the pressure maxed out on me again. It works but not much of a jet stream coming from it. I will try a different size mig tip to see if it boosts the performance.
-
Hey Bud. You ever find yourself out towards Thalequah I highly suggest you reach out Ray Kirk. Great guy and always willing to help, especially kids. He's a family friend
-
Personally I would recommend a T burner. They are so simple a teen could make one and they work very well. Bought all the parts for less than $20, had 2 built in less than an hour. both work great with no tweeking other than gas pressure . The burner your doing sounds like a headache to me. Jmo
Yeah I will probably go back to a t-burner but I like to see things through and understand how things work. I've tried several different burners already. not a headache... yet anyway. I'm in no rush
Dave hasn't been a member for quite a while.
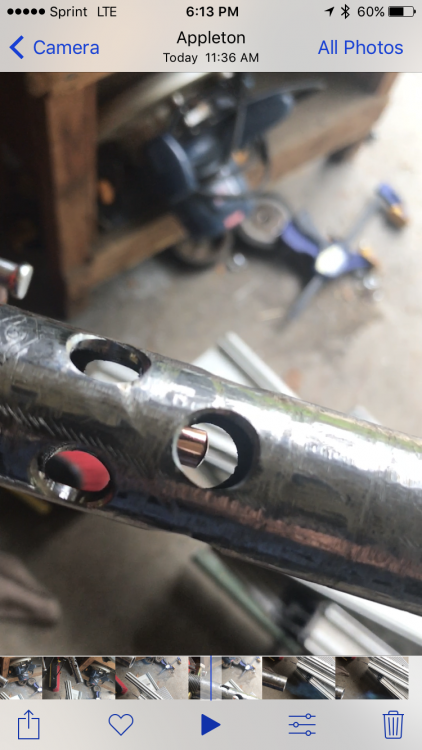
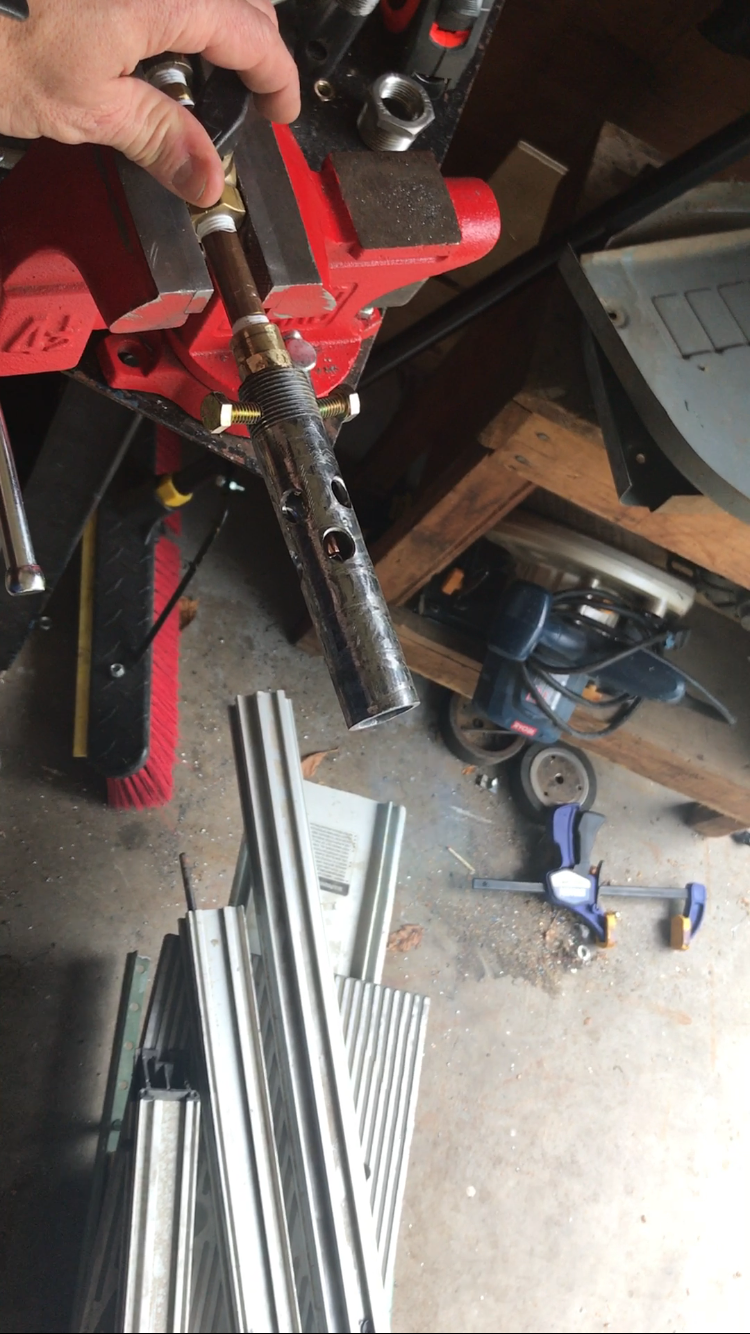
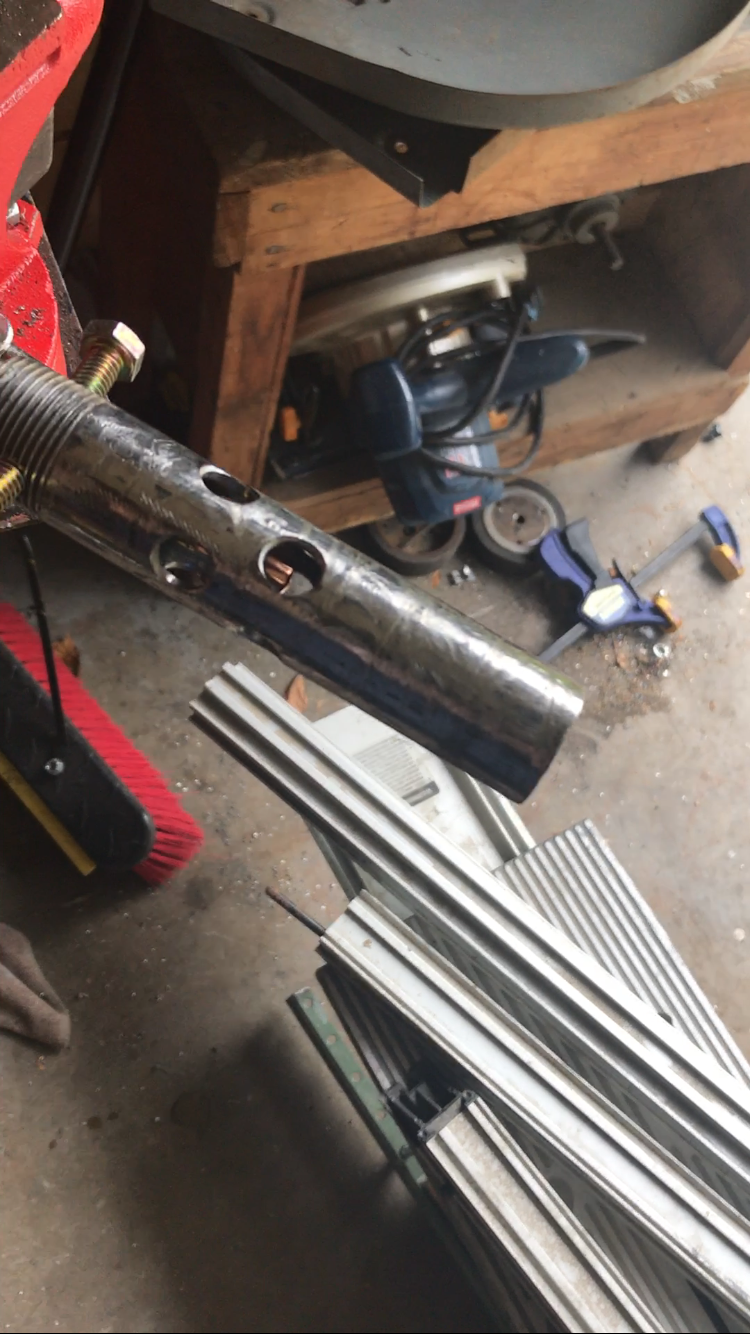
My question wasn't clear. The overall length of the piece of pipe you make the burner from isn't that important. By tube I meant "Mixing" tube, not being clear was my bad. The mixing tube is the length of burner from the last air intake port to the outlet end. Not counting the flare.
If you packed all that in a 6" length it's WAY short.
How can the holes be drilled from 2" AND 2 3/4" from the end?
Didn't those guys put up any drawings or is it all just Dave talking?
Frosty The Lucky.
Oh mixing tube? Then yeah I'm short cause the entire tube is 6" haha.
-
pretty sure they call for a 9" pipe not a 6" pipe like I have on there right now. But Without a good flare I'm kind of at the mercy of what I've got at the moment.
Holes are measured out 2" from the end of the pipe and 2 3/4" and drill them out alternating pattern around the pipe.
The video didn't give a good explaination for the street elbow. However I did read a post YOU replied to Frosty about a Mathewson burner and you had stated how you didn't understand the need for the elbow (which I agreed with) so I by passed it for now until I get another reason for it.
I haven't found a good source to get in contact with either of these gentlemen. I though I saw Dave on this forum but couldn't find him in the members list.
Mat work right now but will fire it up when I get home and post another pic.
-
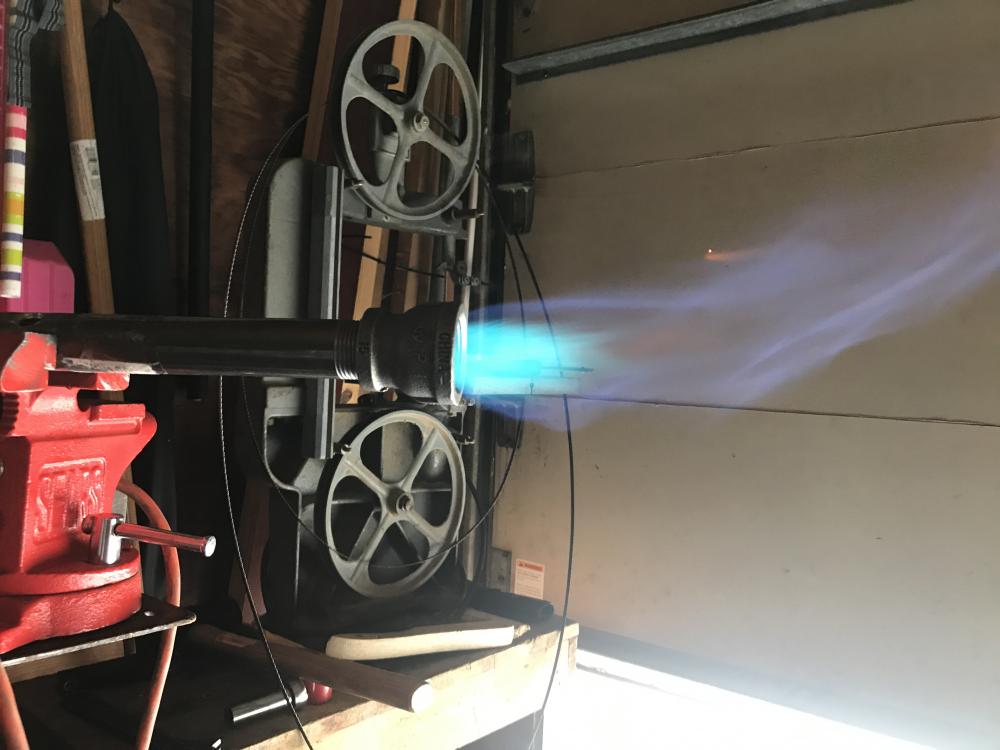
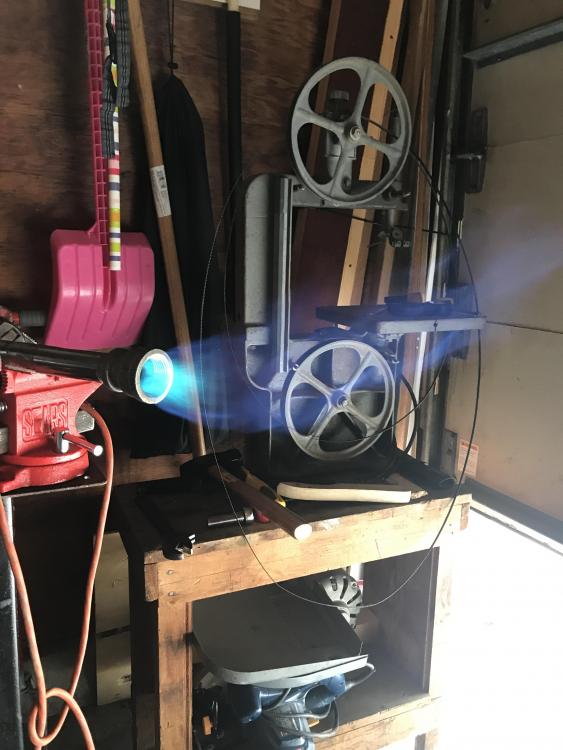
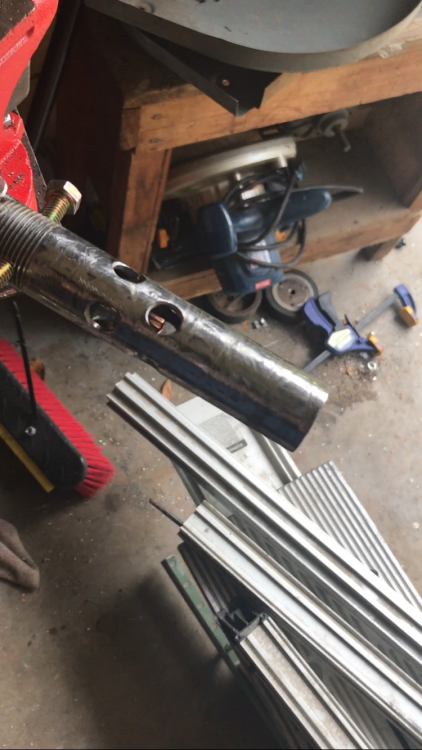
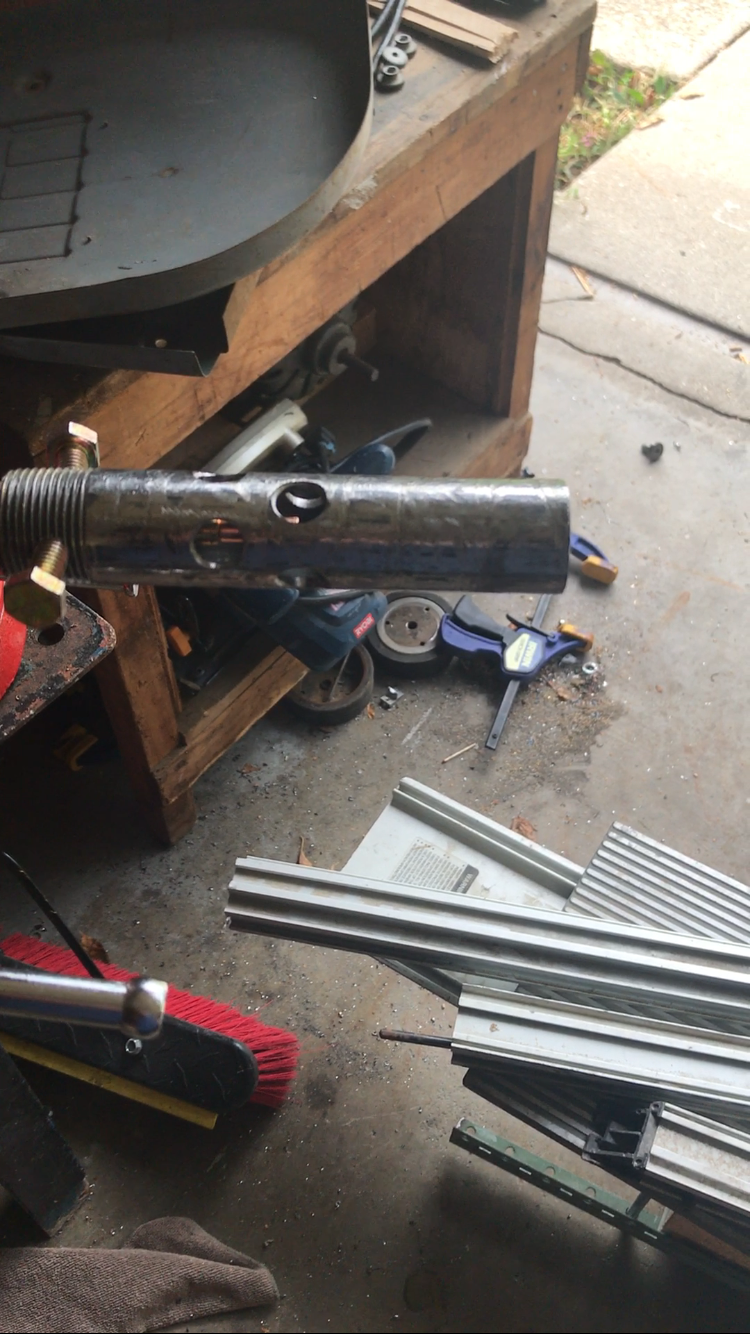
I saw a video on the you tube by Dave Hammer and he demonstrated how to build one of Steve Genshiemer's burners. Looked simple enough and I had the parts for it... kind of. The design calls for a street elbow which I don't have avalible (of course I can pick one up) so I went straight into the burner with the mig tip and have it set with a couple of bolts to hold it in place Which these are temporary too. Like I said before I don't have a flare yet which is a big part of the tuning process with this type of burner but I was just happy I got a steady flame and wanted to share. I do think this burner tube is to short with how hot it is going to get. Hopefully these pictures work better than the video attempt. Oh and it's light out in these pictures so it is a little hard to see the flame. Let me know what you guys think.

-
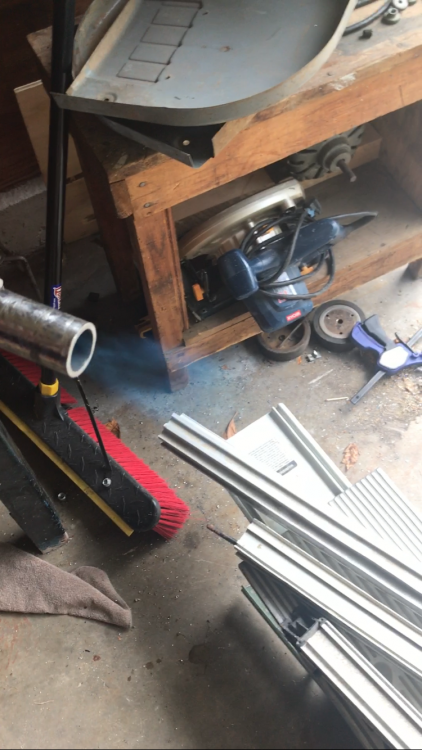
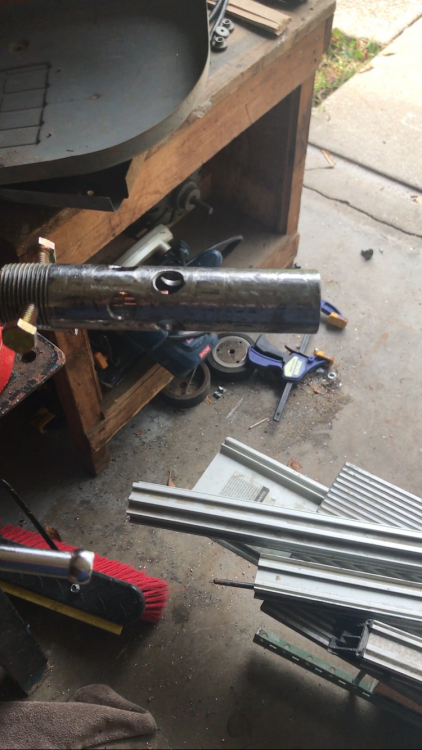
So I think I'm enjoying myself more than I thought I would. I have played around with several designs for burner and I have found the larger mig tip I was a 1" pipe using was producing to much forced gas. I used a 3/4" tube and made air holes for it. Seems to be working well I just need to get a longer pipe and a flare which I think I'm going to have to order online cause I have no way of finding one or making one myself that is properly sized. This is a 0.30 tip in the video. Pipe is only 6" long right now. Open to suggestions if you guys would be so kind. IMG_7021.MOV
-
-
So is this tank cashed since the valve isn't working and allowing any flow do to the restriction? I've opened this thing painfully slow on both the tank and the high pressure regulator with no better results. Kiddos in bed so no going out to get a new one tonight anyway.
-
Did that. Opened it up without anything on it outside and same lite hiss so the blockage must be in the tank.
-
This was messed up before his stellar advice. I listened to him but I did not follow it.
-
My buddy told me to try and flip the tank upside down and the back again, said the valve might be stuck, but yeah this was a swap on a swap on a... I'm probably screwed on this one.
-
Even opening the tank slowly and the regulator slowly I'm getting nothing but a lite hiss. Not sure where to apply the sharp rap so I think I'll try a fresh tank
-
Bad propane tank
I've set everything up to spec for your T-Burner Frosty and my tank is no good. Won't give me any pressure. Going to try again with a new tank and hopefully show a video of my progress.
-
Thanks buzzkill that was going to my next question
-
Who sells fumed silica
-
So as I said I slowed the process down and I've come to appreciate the build more than before. Learned a lot from this forum so far but it's helped me understand the importance of sustainability rather than rushed hammering.
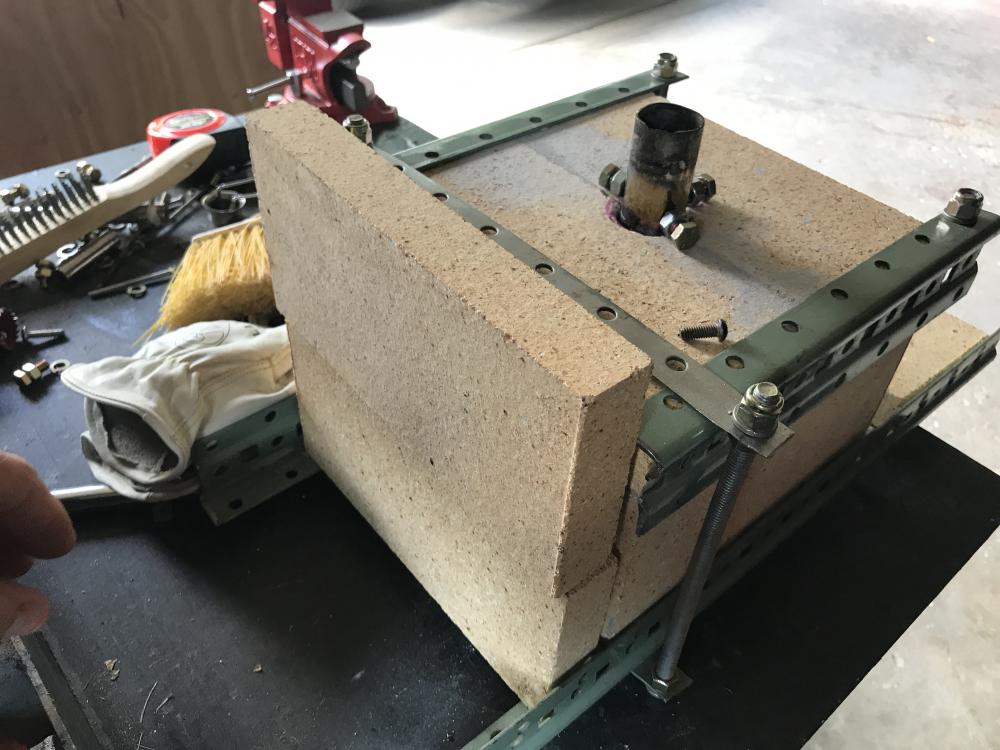
I wanted to see what would happen to the yellow brick I purchased and here is the result below. Heat sink info was right on the money. I tried a setup I found on Larry Zoellers website, he has been emailing me back too and is a really cool guy.
So moving on I found 6 k-26 brick on eBay for $30 and also found a local insulation supply shop who sold me 10 sq ft of kaowool and she is checking on a rigidizer for me as we speak. (See pics below)
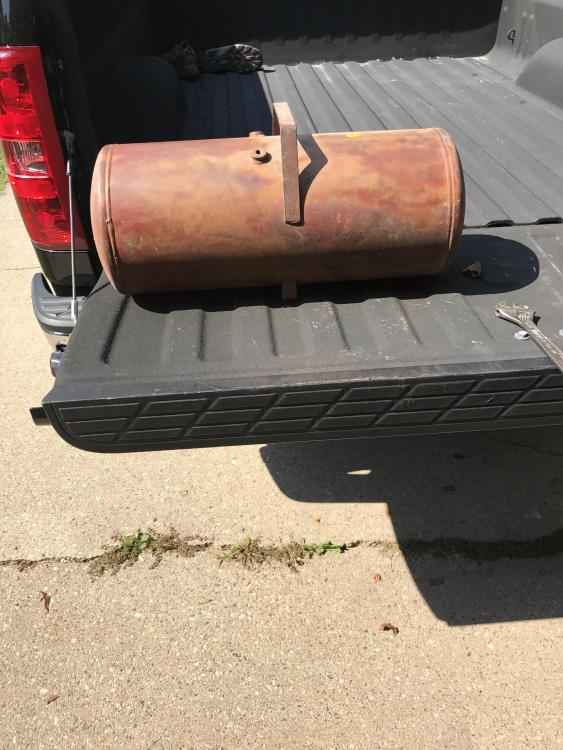
with some time to spare waiting in my kids I popped into the local re-store and found this tank (pic below) I want to work with eventually but for now I will wait on the k-26 and experiment with that.
Anyways that's my progress so far. Hope this helps beginners and shows you experts knowledge being followed.


-
You guys remind me of my father who was is an old school mason. This must be like if bricklaying all the sudden became the popular with the masses and everyone regardless of experience knows everything before even laying their first brick. That would drive him nuts so I can only assume your frustration if being a smith has been your craft your whole life.
I for one plan on respecting the craft and learning what I can from the people who know. It's hard to find them in person so that's why most of us flock to the computer.
-
Being a probie or newbie whatever you wanna call my position. I am a grown adult and can tell the difference between bad advice and outright dangerous examples. It's all about understanding my own abilities. For example rigging up these elaborate propane burners for a forge is something I won't mess with. I am a firefighter so I can put one out, an explosion is not so easy.
I am grateful to all the people on you tube who make an effort to share their knowledge and experiments. Any body can comment from a keyboard. For all you guys know I'm an ABS master smith pretending to be a newbie right NOW...yeah right I wish haha!
-
I kind of think this post is meant for people just like me who want to get into this but come to realize there is a reason ABS Masters have 20 plus years, TV makes it look easy and fun and you tube makes it looks doable and fast and cheap. All things I can honestly claim I fell victim too. This is an excellent website and I have been flipping thorough threads all day. I am learning as I have several books from the library I'm studying right now. But Im also learning this is not really a trial by error friendly craft.
-
You guys think if I made a small one out of just the brick I have and lined the inside with koawoll it would work ok? I realize now I purchased the wrong fire brick
-
So does anybody know a blacksmith in Wisconsin? I have contacted a guy named Benson in Green Bay and I plan on attending one of his 101 glasses this fall.
I really just want to find a guy close by to watch for awhile.


Vegetable oil vs Mineral oil
in Heat Treating, general discussion
Posted
I am making tools etc out of an unknown carbon content steel. They are A 3/4” B 8” C 3’ grade 8 (I think) U Bolts used on fire truck suspension. They are painted and easily grind down to good usable steel. I have made several tools with this steel and quenched in Mineral Oil and Vegtable Oil. I’m confused has to why the Mineral Oil was useless while quenching and the Vegatable Oil seemed to harden the steel properly. Anybody have any clue to the difference in these two oils and the carbon content in these u-bolts? I have tried to research the carbon content online without any luck. Not really that important cause they are making good tools but it would be nice to know what I’m going working with. Thanks guys!