

CHUCK M
-
Posts
47 -
Joined
-
Last visited
Content Type
Profiles
Forums
Articles
Gallery
Downloads
Events
Posts posted by CHUCK M
-
-
11 hours ago, Lou L said:
Wow, nice job. You need to make a small tool from an old chisel to put the veins in. Basically just round off the end a little si it isn't too sharp. The you can add texture to your leaf. A narrow pein on a hammer works as well. I bet that felt good, eh?
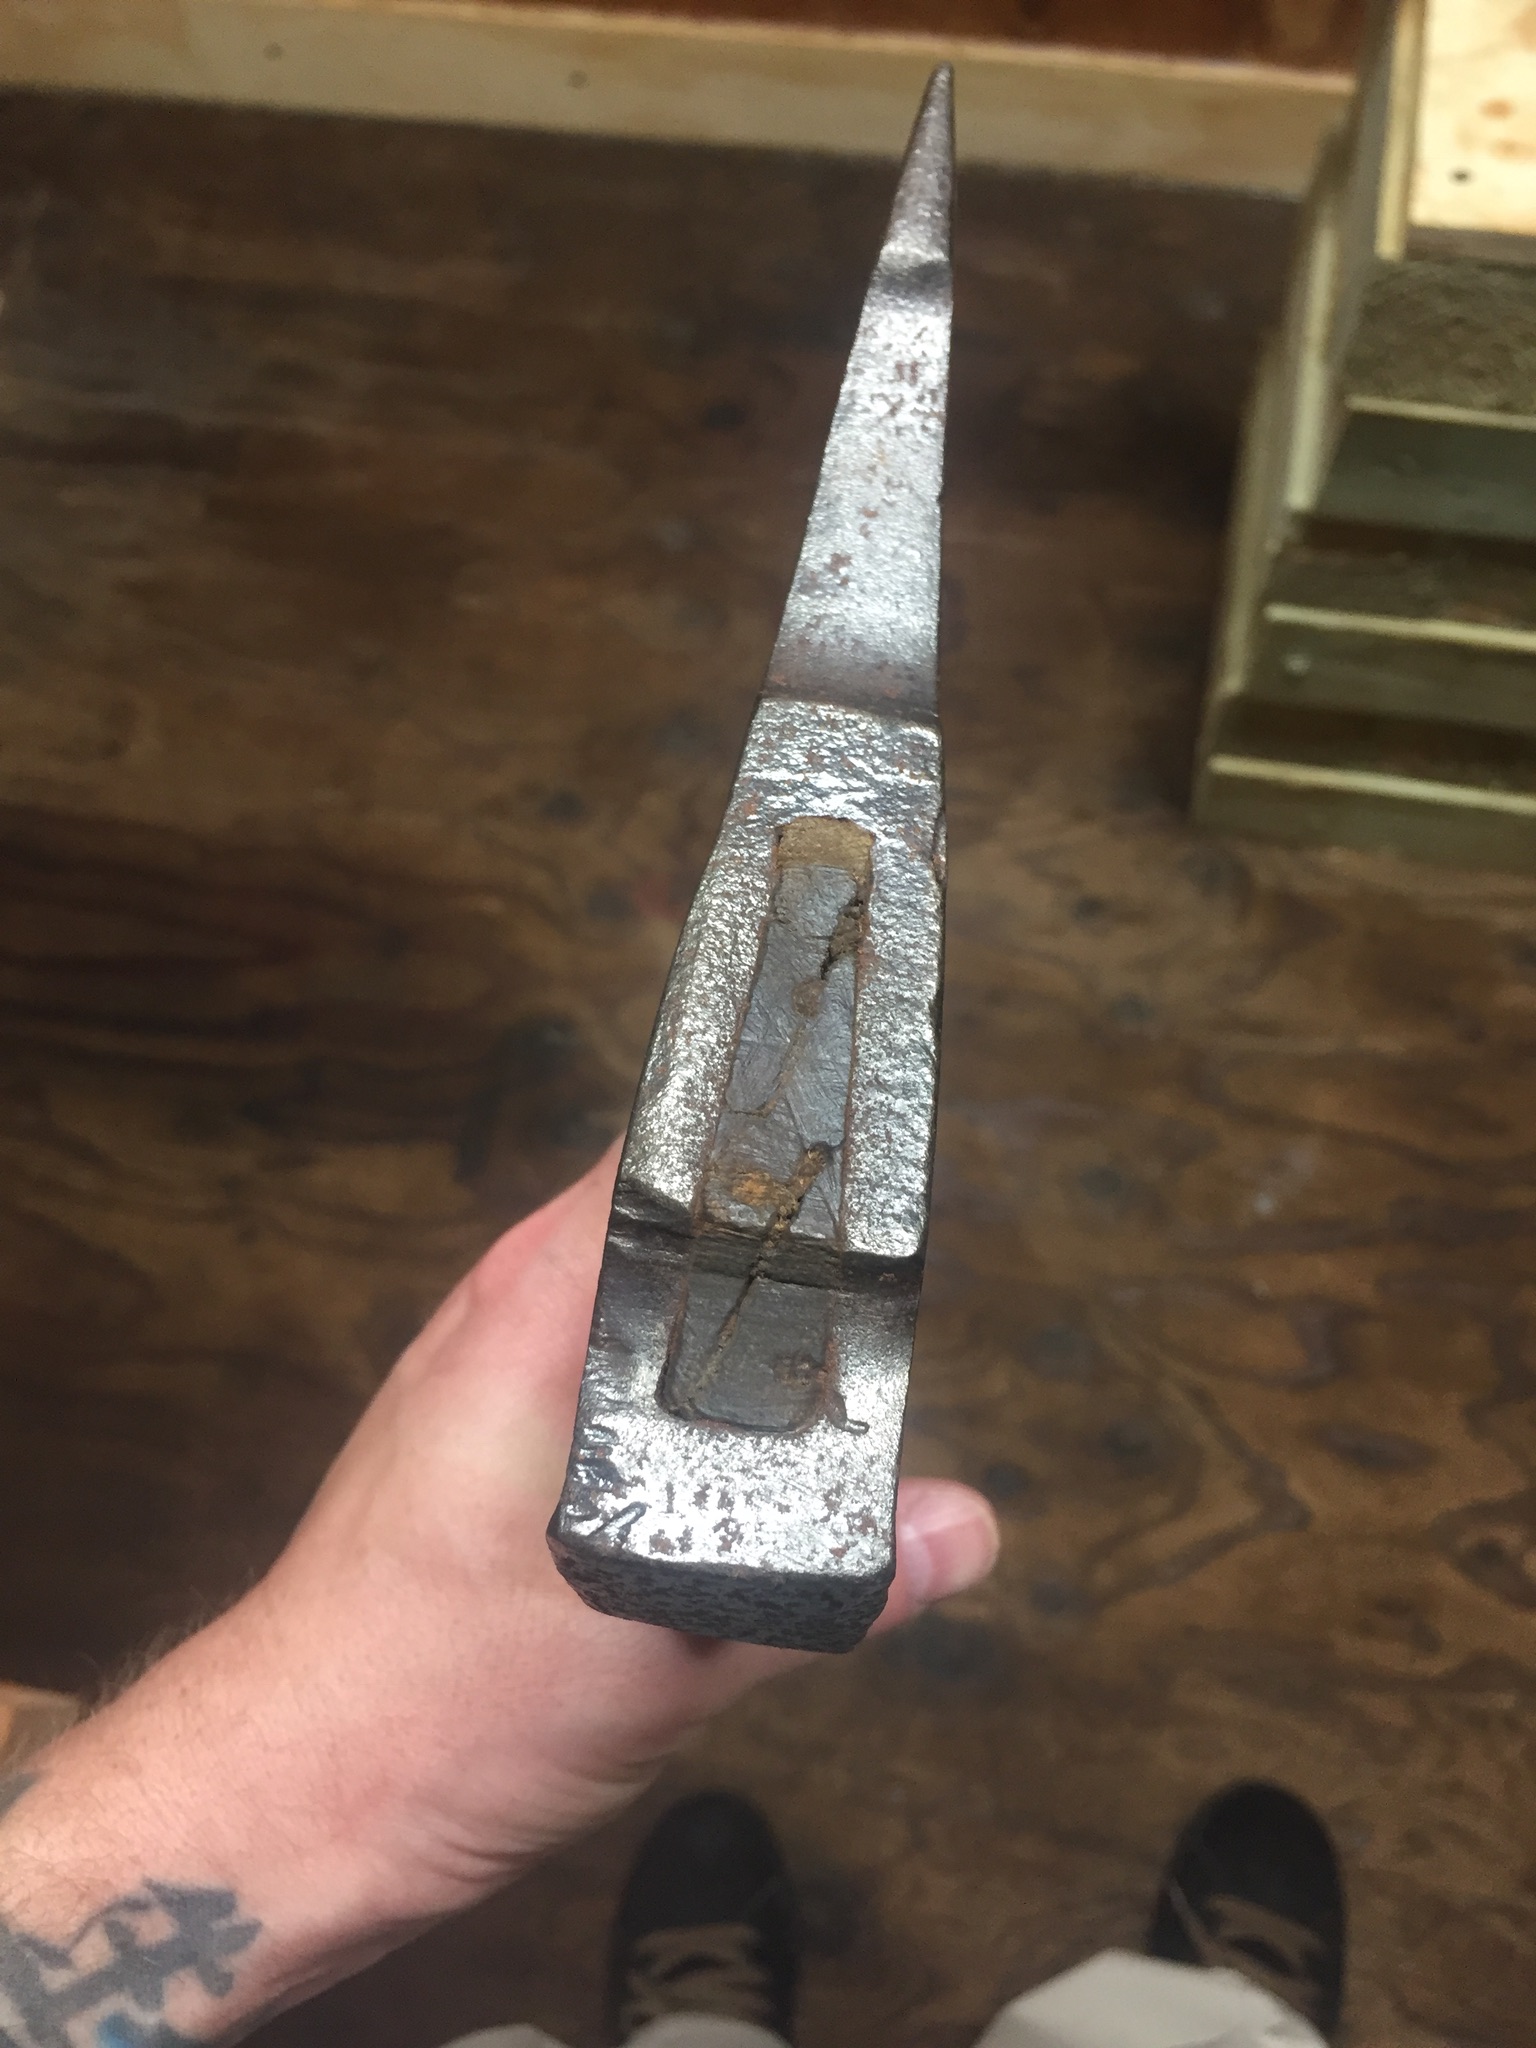
i have a coil spring that i am planning on making some chisels, punches, and fullers from...in due time.
1 hour ago, Frosty said:Well done Chuck! You're catching on quickly.
") A little practice and I see nice heart key fobs in that general profile. A couple dull file make good veiners I made my center veiner a little larger and rounder, the lateral veins can be smaller and sharper. Not sharp but sharpER.
A little practice and I see nice heart key fobs in that general profile. A couple dull file make good veiners I made my center veiner a little larger and rounder, the lateral veins can be smaller and sharper. Not sharp but sharpER.
If you want a drip edge draw a sharp thin tip on the preform. Serrated leaf edges can be made with a bolt as the die.
Frosty The Lucky.
i was having some problem with the original tapering i believe its call fish lipping? also, are you talking about hammering bolt onto the edges of the leaf or vice versa?

-
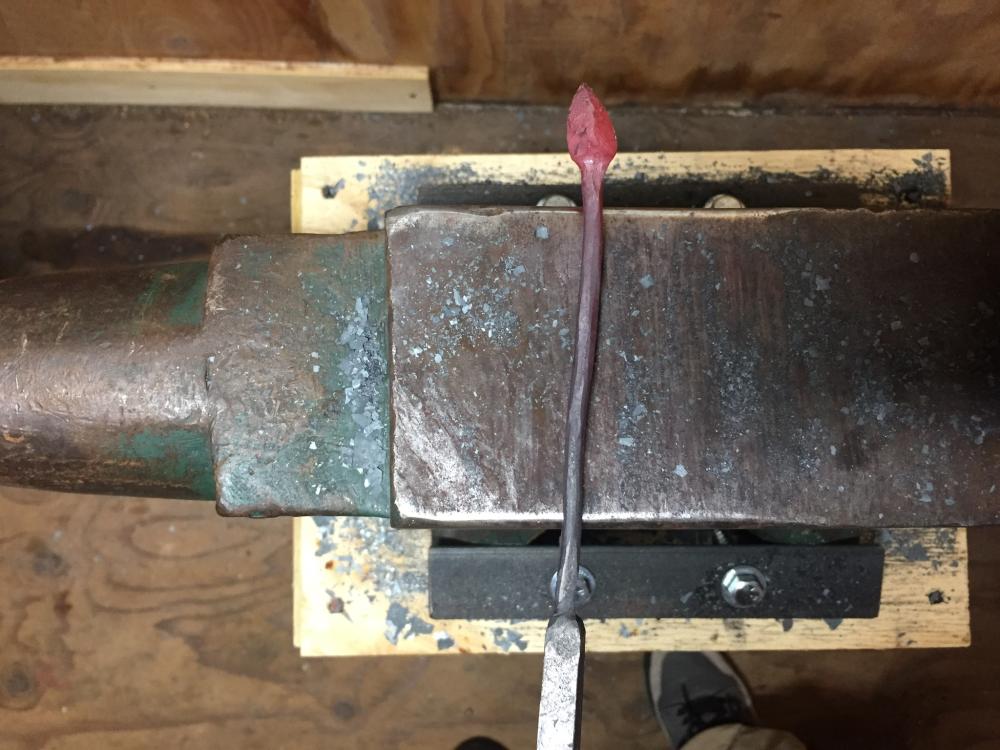
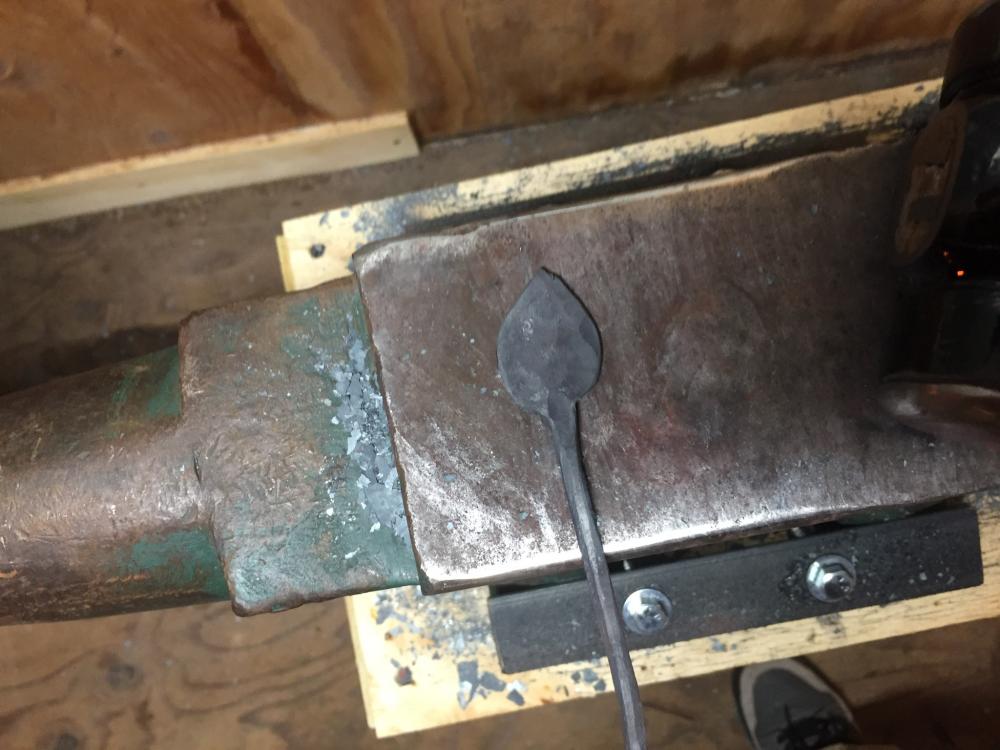
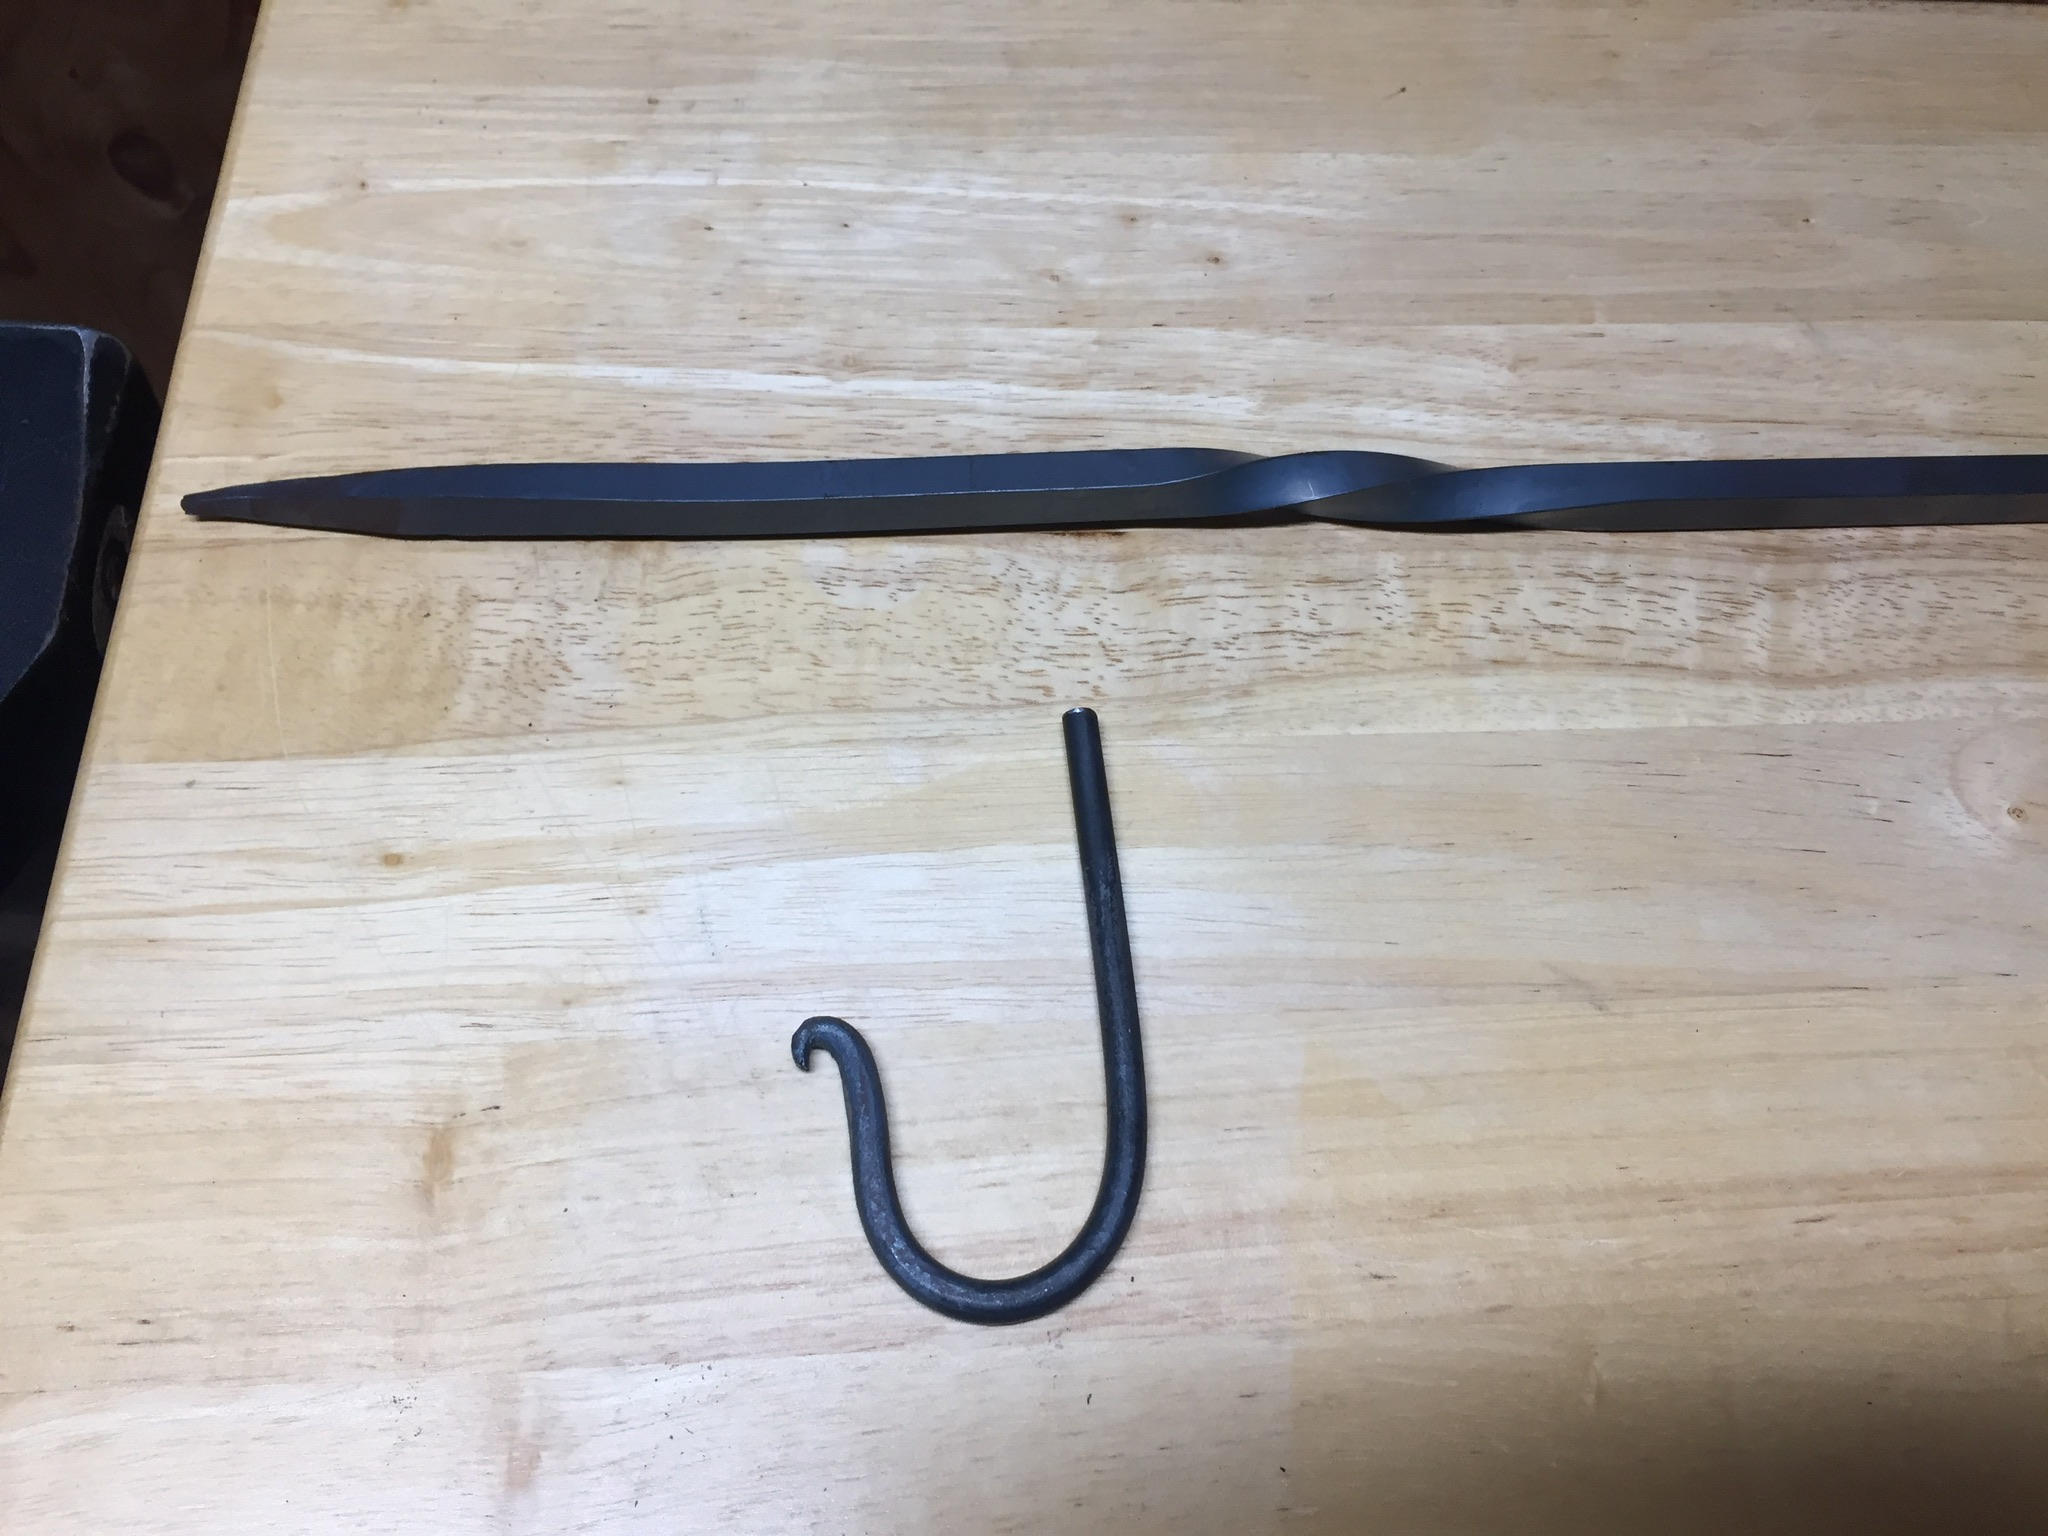
Finally got out to the shop tonight, after over a week of not forging. Was going to give the 2 sided taper/leaf project another try, but this time take all the advice given, really worked on stance, rhythm, and not bring the hammer down like Thor....and wow couldn't believe how much of an easier time I had, at no point did I feel like I was fighting it. Didn't set any speed records and took many many heats but I could not be happier with the results of my leaf shaped object...started with 3/8 sq.


-
On 8/19/2017 at 1:46 PM, Frosty said:
Sorry Chuck, we're not really hijacking your post we're just chatting till you ask your next question. Think of this place like a big cocktail party. Yeah, like I've EVER been to a cocktail party.
It's all good....enjoying the conversation.
-
On 8/18/2017 at 4:28 PM, Charles R. Stevens said:
You need to dress that cross pein...
Dressed the face, pein is on to do list....
On 8/18/2017 at 3:41 PM, arkie said:Chuck, in lieu of taking classes, have you checked into any blacksmithing clubs or organizations in your area?
There is a New Jersey blacksmith association, but only checked the website out briefly...will be hard to find the time but plan on looking into further
-
Frosty, Charles R. Stevens, Lou L Thanks everyone for the tips, these are not short replies so i appreciate the time invested to write these. I will try to put all of these to use, some observations i have made about my short sessions after reading this. 1. i definitely try to put to much power into my hammer swings (baseball bat reference is the truth) 2. i think certainly i am not getting my steel hot enough, i dont think i have ever let it get to yellow (i feel this is because in my head, i have such limited forging time that i try to hurry...obviously this is not working, will have to start exercising patience during heats). 3. need to take a step back and think about whats going on and "visualize" what i am doing (think i am suffering from newbie excitement).
will try to get out to the shop tonight to make a 2nd attempt at the leaf (just going for a leaf shaped object), but unfortunately i don't think the weather is going to cooperate. Might just have to play with the kids playdoh instead....
-
35 minutes ago, littleblacksmith said:
Oh, and I mean 3/8" square, 3/8" round will give you a much smaller leaf than what you are probably wanting.
Thank you!
Littleblacksmith
You mentioned square in your post, i have a few feet of it, good to go.
18 minutes ago, JME1149 said:Looking at the leaf attempt, I might have a couple suggestions that could help. Only rotate the bar to set-down the leaf part 0° and 90° (not all four sides), and it looks like you may have had your tong hand too high. When doing the set-down, hold the bar at a lower angle to the anvil face (looks like you may have been lifted up at 45°). This will give you a more defined shoulder. Only work the mild steel in the orange-yellow range, when it drops down into the reds it fights you more. You can straighten that twist out pretty easy when the bar is hot.
Get yourself a block of modeling clay to practice on, moves a lot like hot metal without wasting the fuel and heating time.
i was only doing the 90* turns, but i think i was holding it at a higher angle....will definitely try to keep it lower next time. I try like hell to only work the steel at forging temp but in my noobness, loose heat really quickly, have to work on surface area contact. Thank you for the advice.
-
16 hours ago, littleblacksmith said:
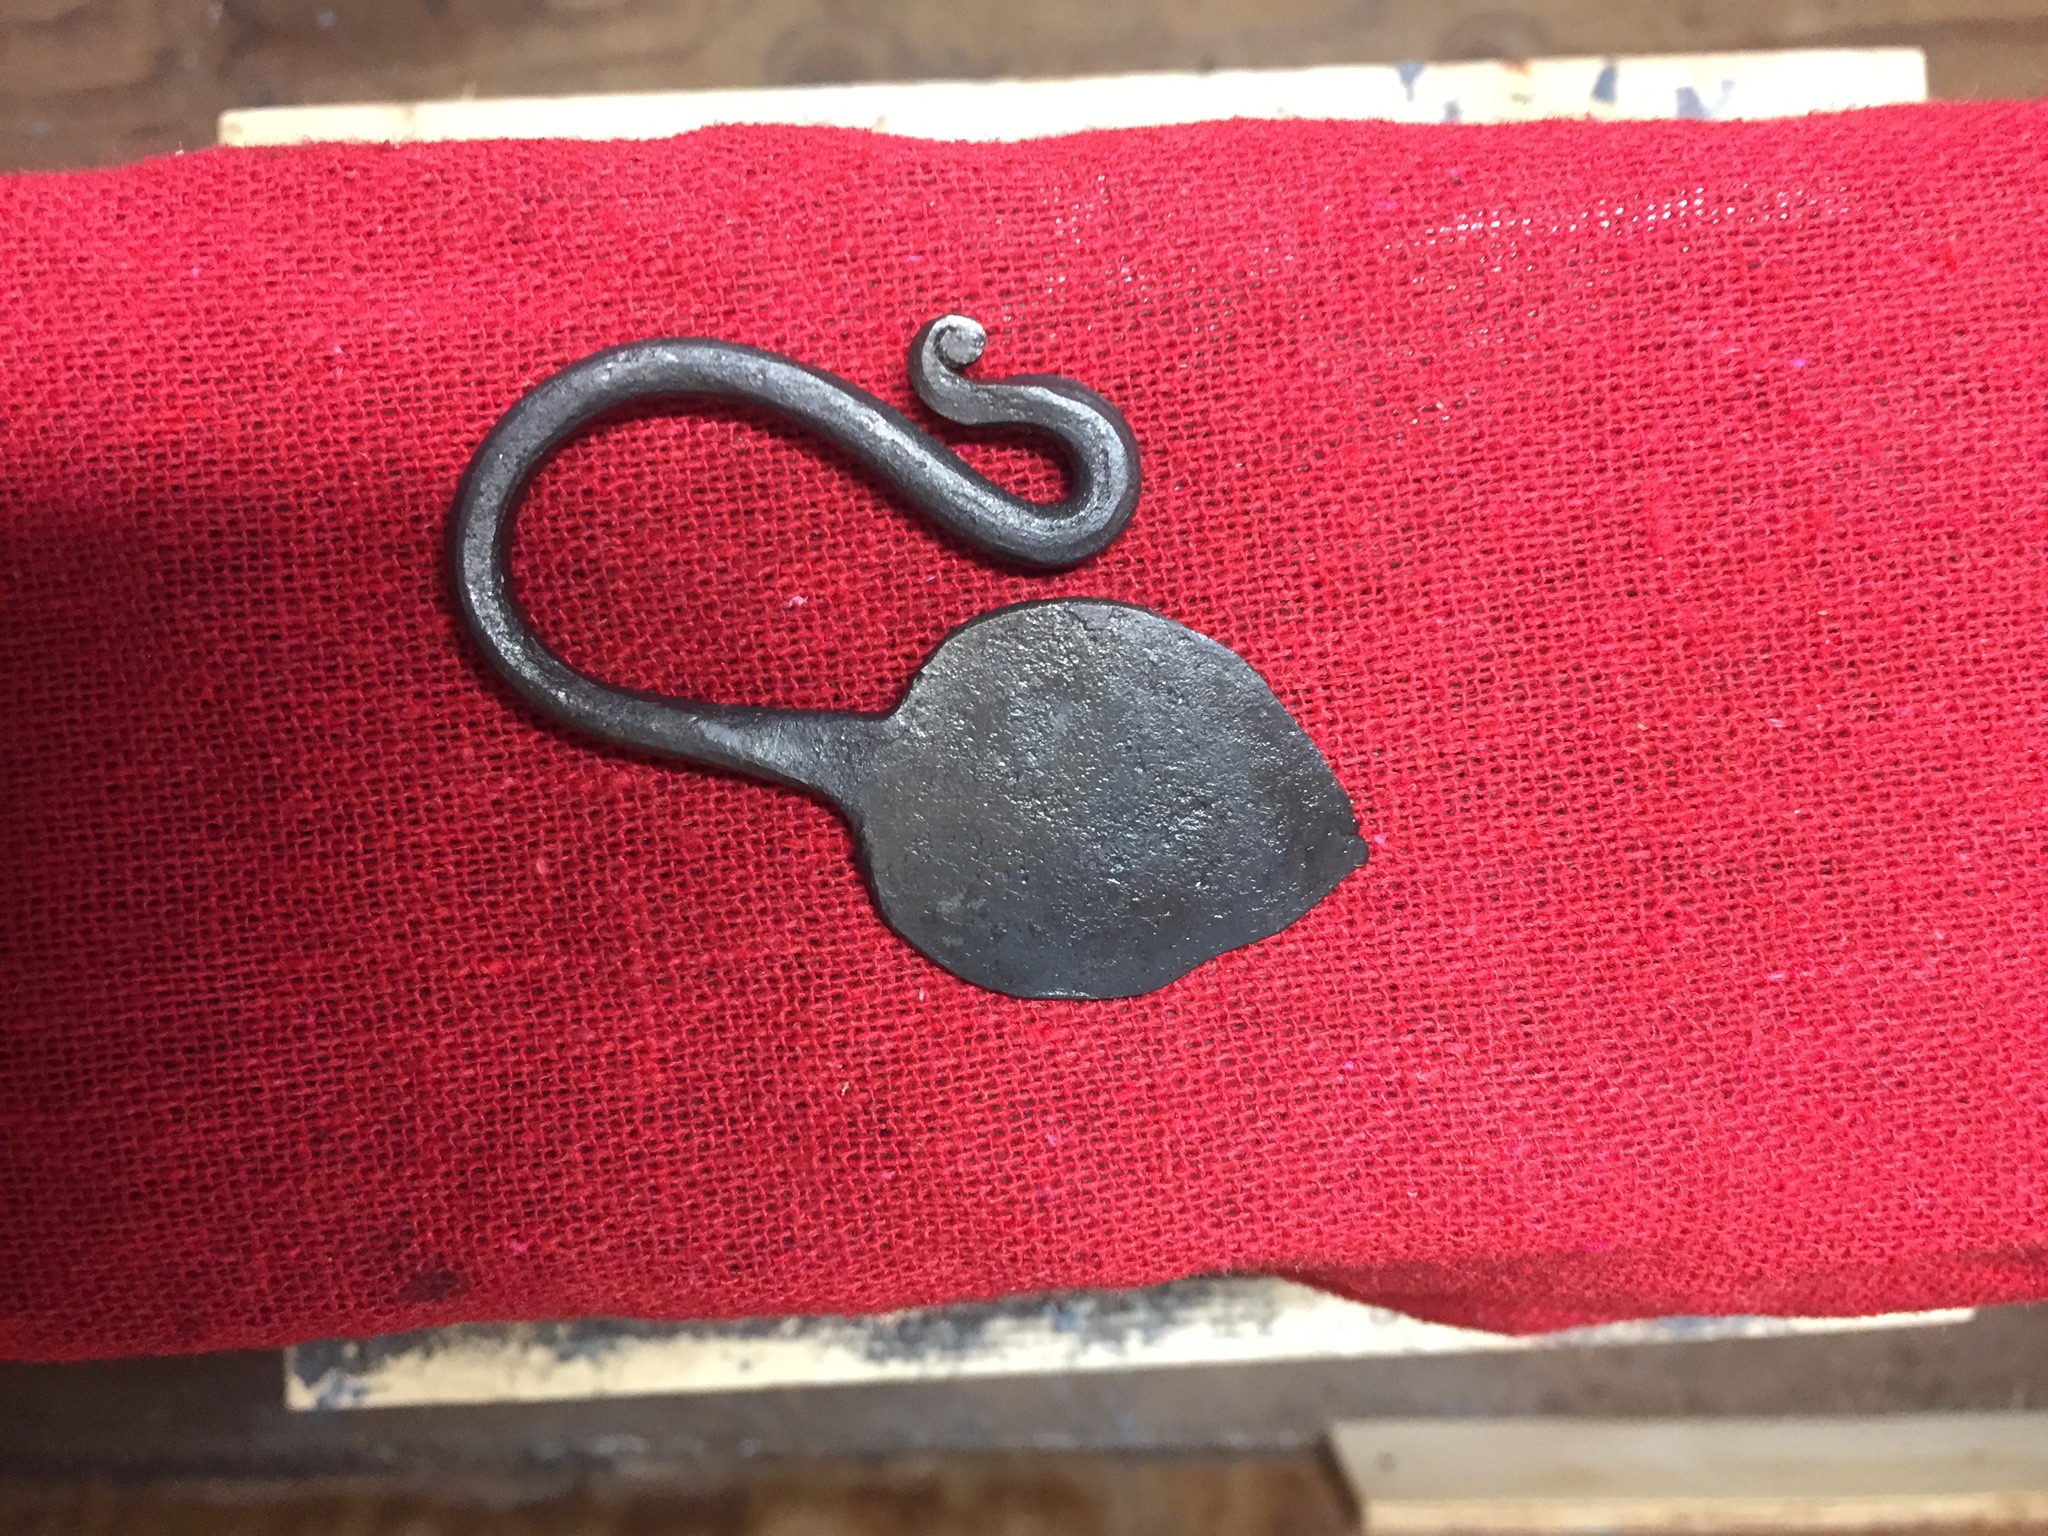
very nice hook. yeah, leafs took me a while to get down. It is sometimes difficult to get clean shoulders/set downs. about 100 leaves later and I'm pleased with the overall shape of my leaves, you just keep at it and you will get it. it took about 10 tries before I got something that looked sorta like a leaf. my first leaf took me about 1-1/2 hours, and now its about 7-10 minutes. try 3/8 square.
you are doing very well, I am enjoying seeing your progress. I have high hopes for you, I cant wait to see stuff your making a year from now.
Littleblacksmith
thanks, going to try the 3/8 next time and see how it goes...will certainly post the pics. Seen one of your recent posts, stuff looked amazing.
6 hours ago, lyuv said:I"m a newbie too. Started pretty much like you (I guess) - got basic tools, watched youtube and started hammering. Eventualy I did manage to make a leaf, but after few weeks I realised I didn't realy know what I was doing, and needed REAL guideness. So I took a 5 days blacksmithing class, which was a HUGE stepping stone,
I guess it's possible to be self taught. But it takes long time, with the risk of picking all sort of wrong and bad habits. I STRONGLY suggest such a class.
I would love to take a class, been searching around online, havent found much and what i did find are all booked till the end of the year. Still going to keep looking though.
-
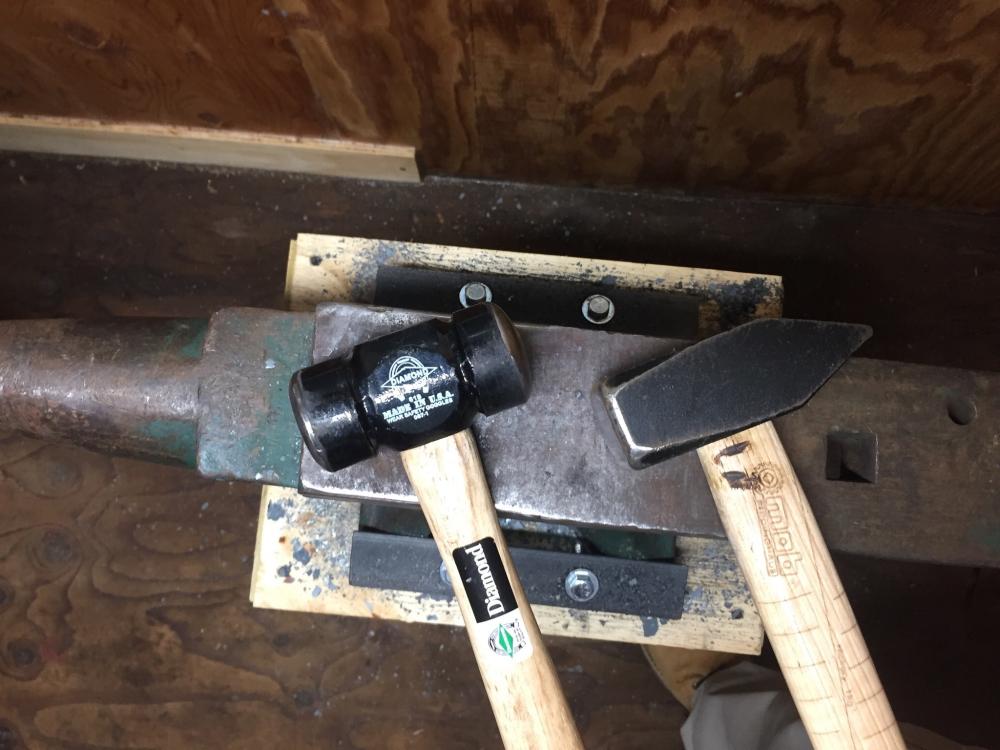
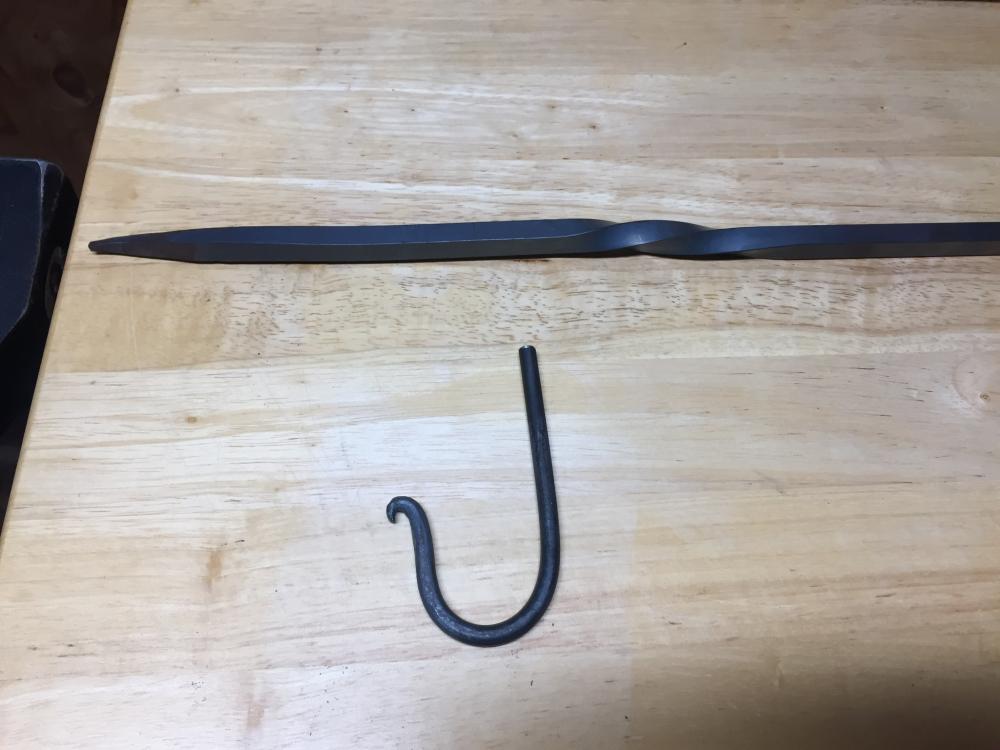
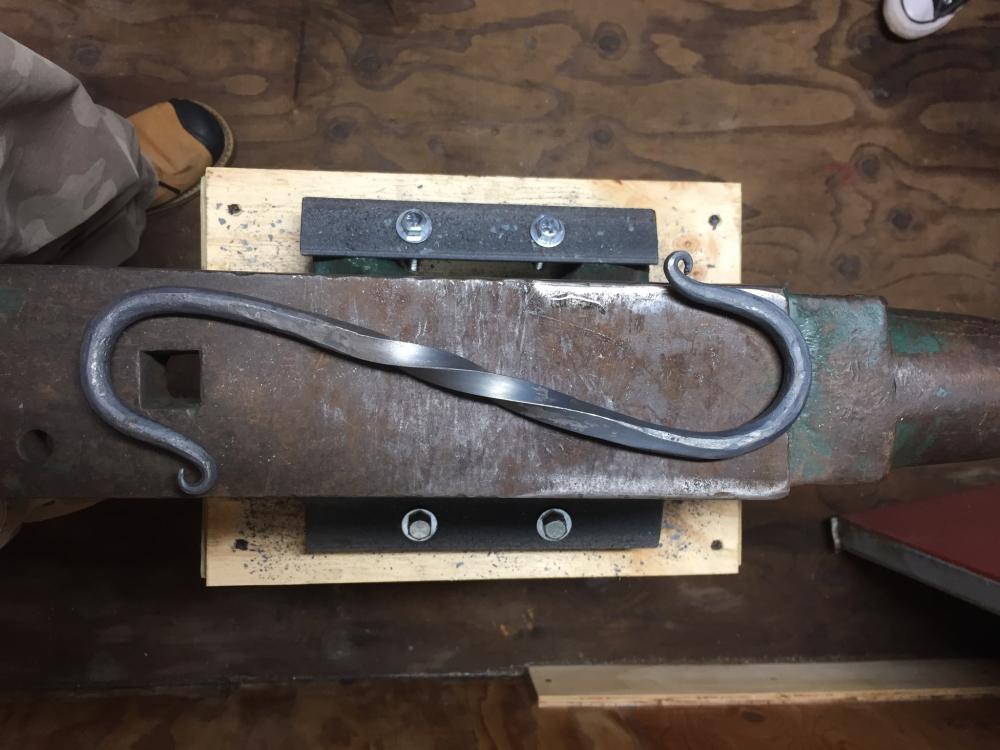
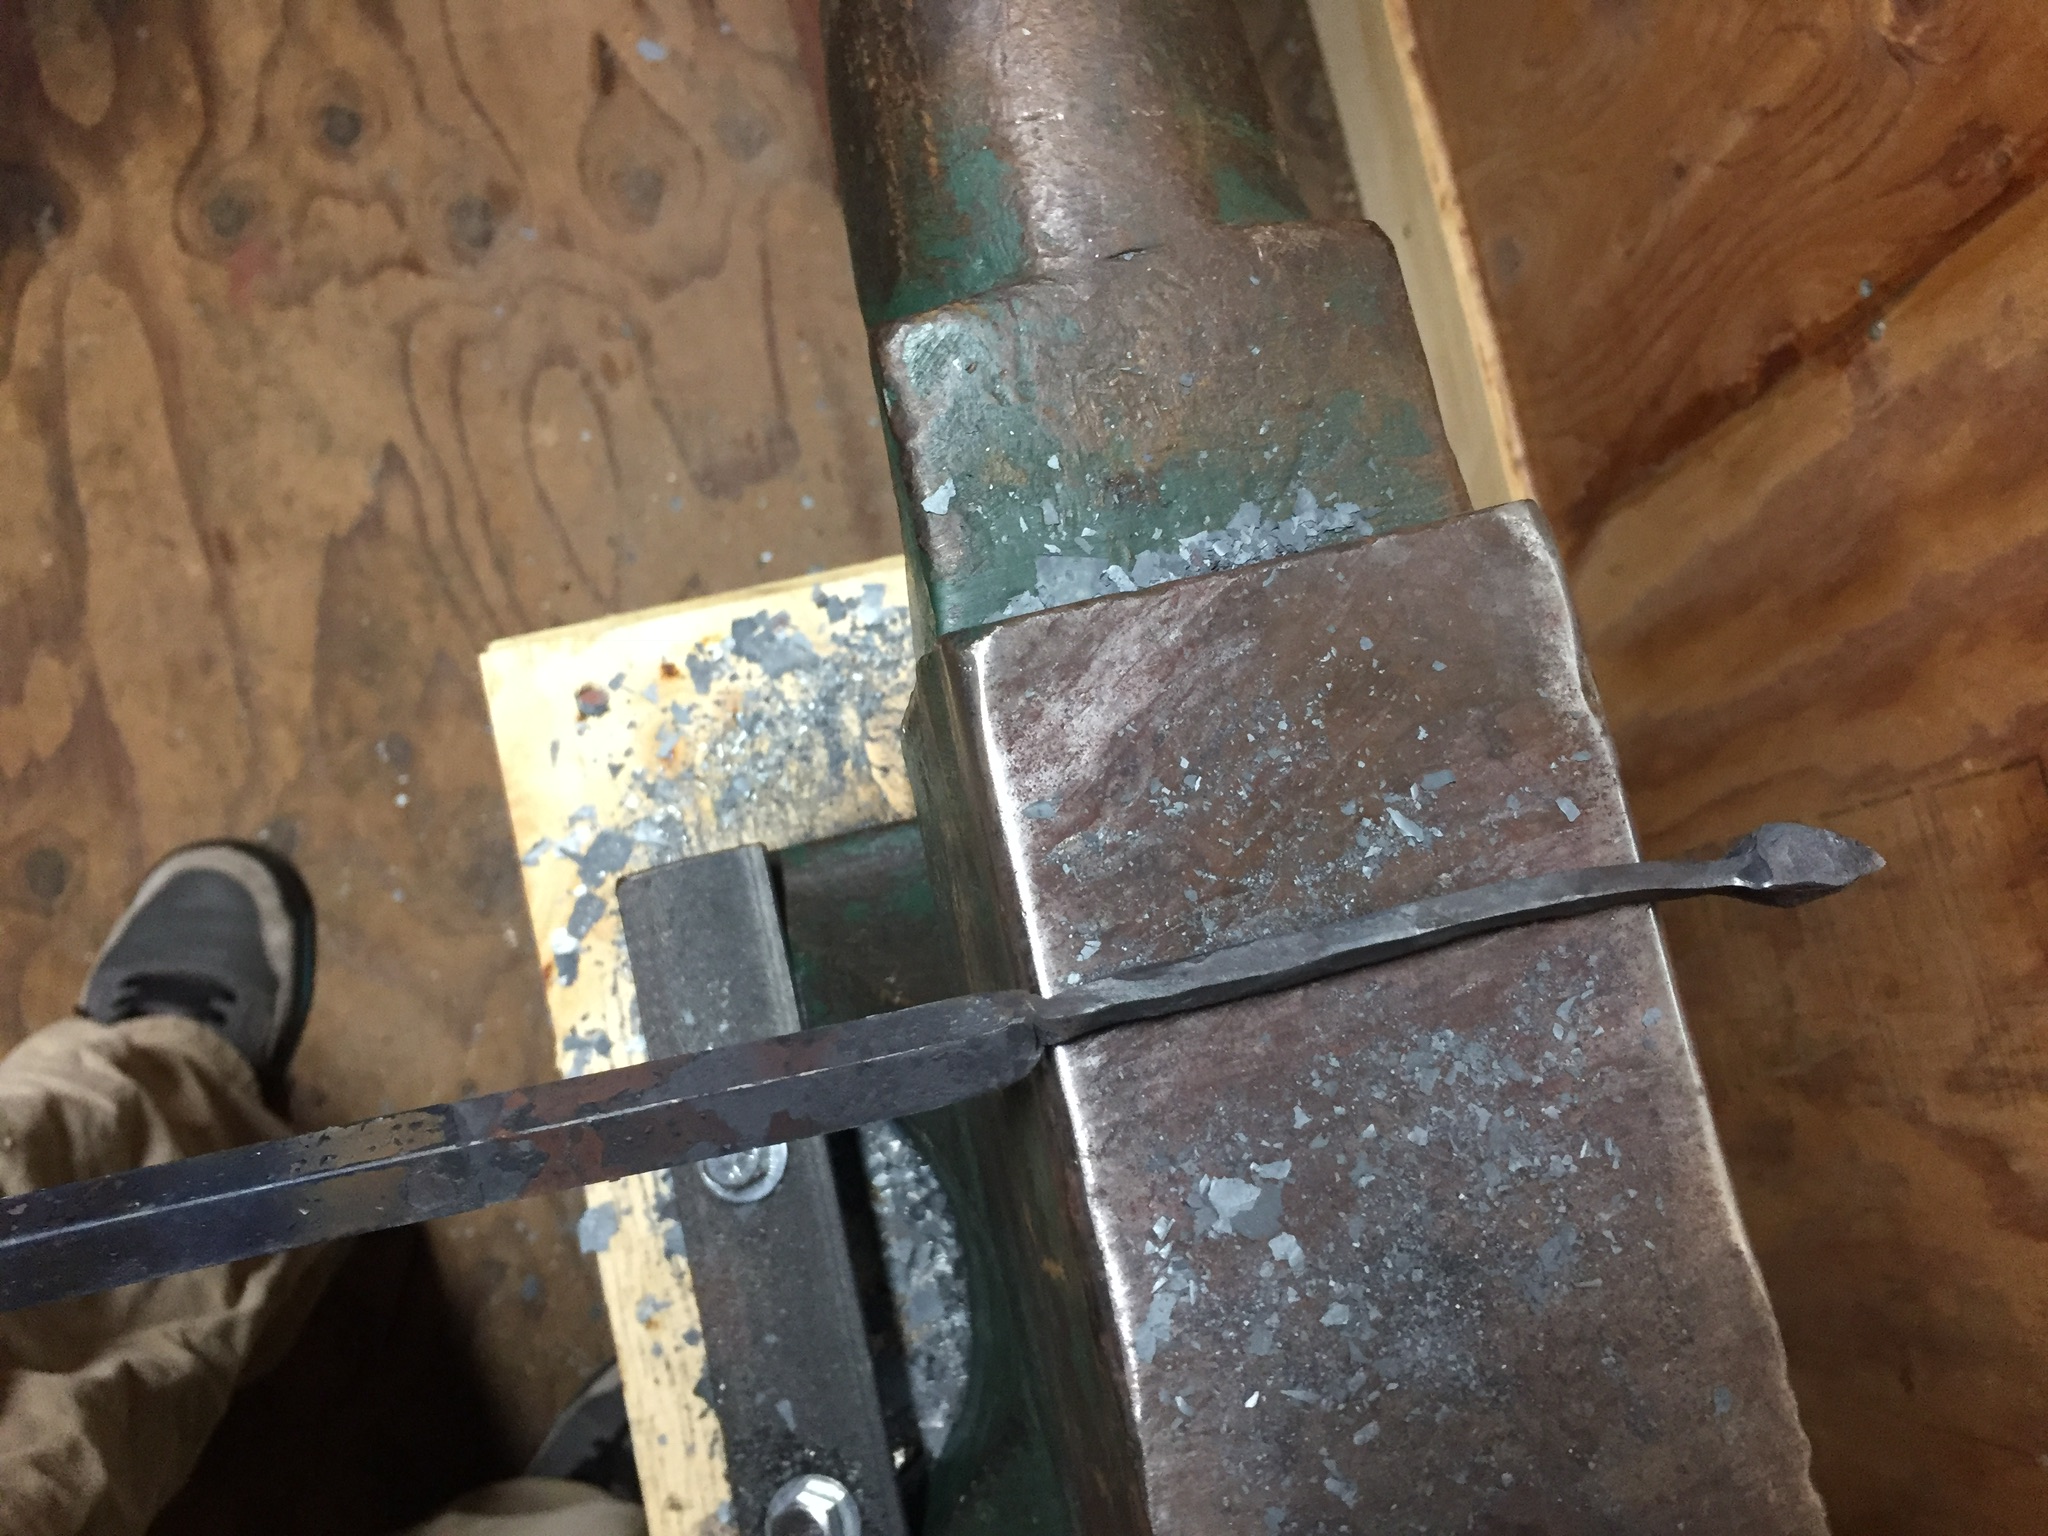
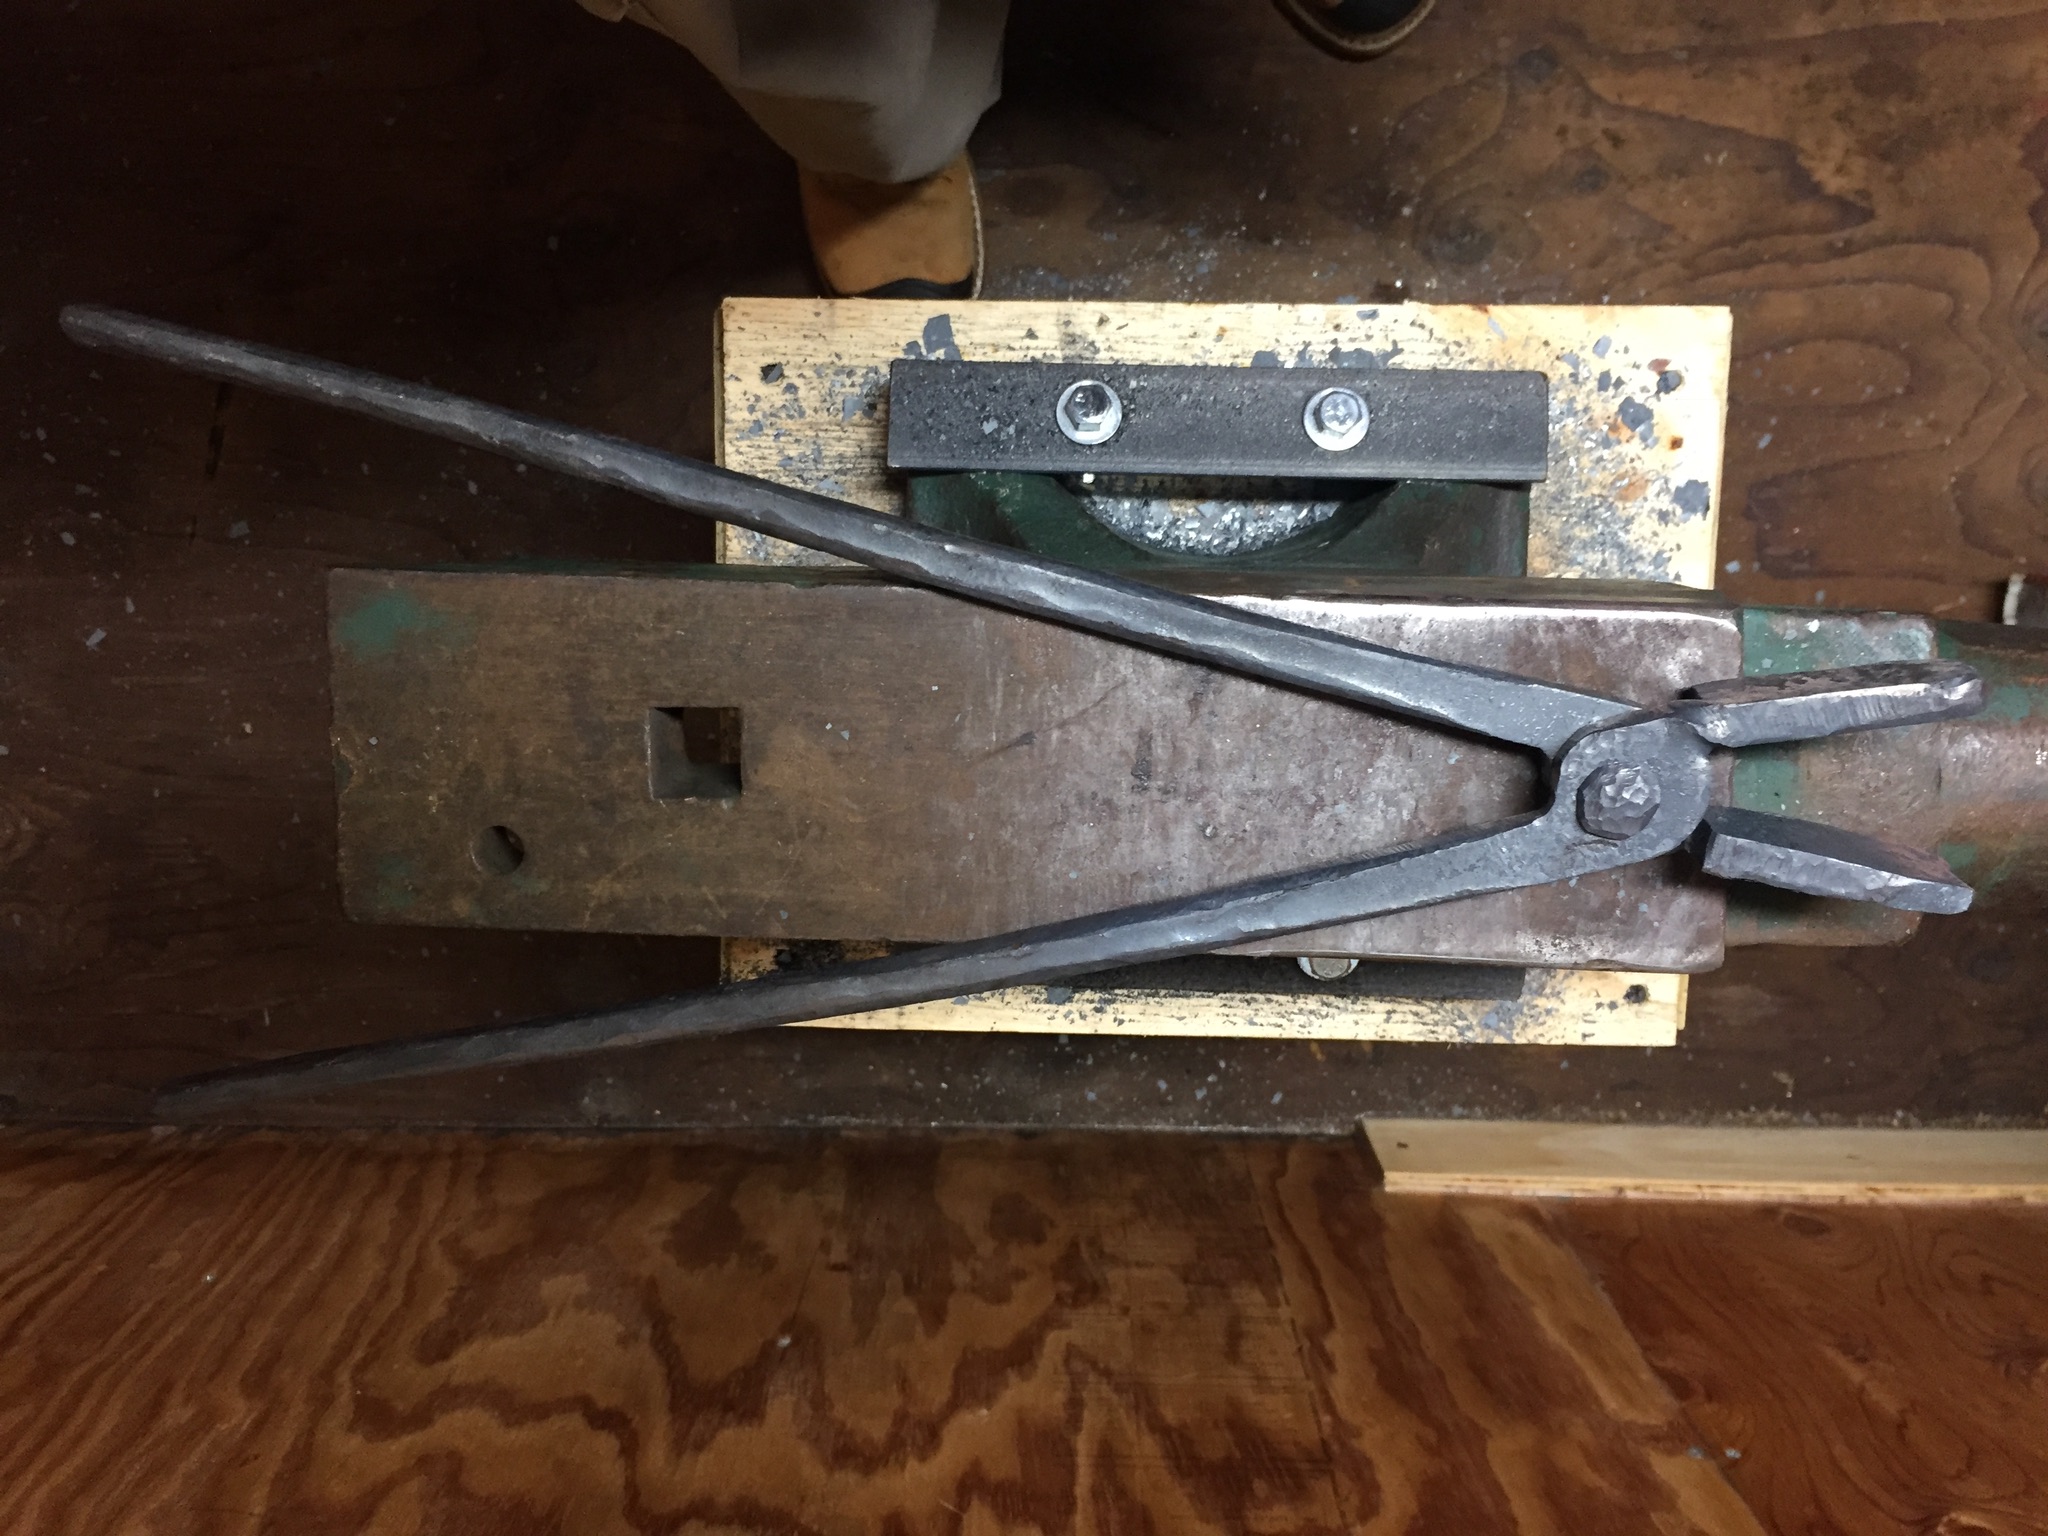
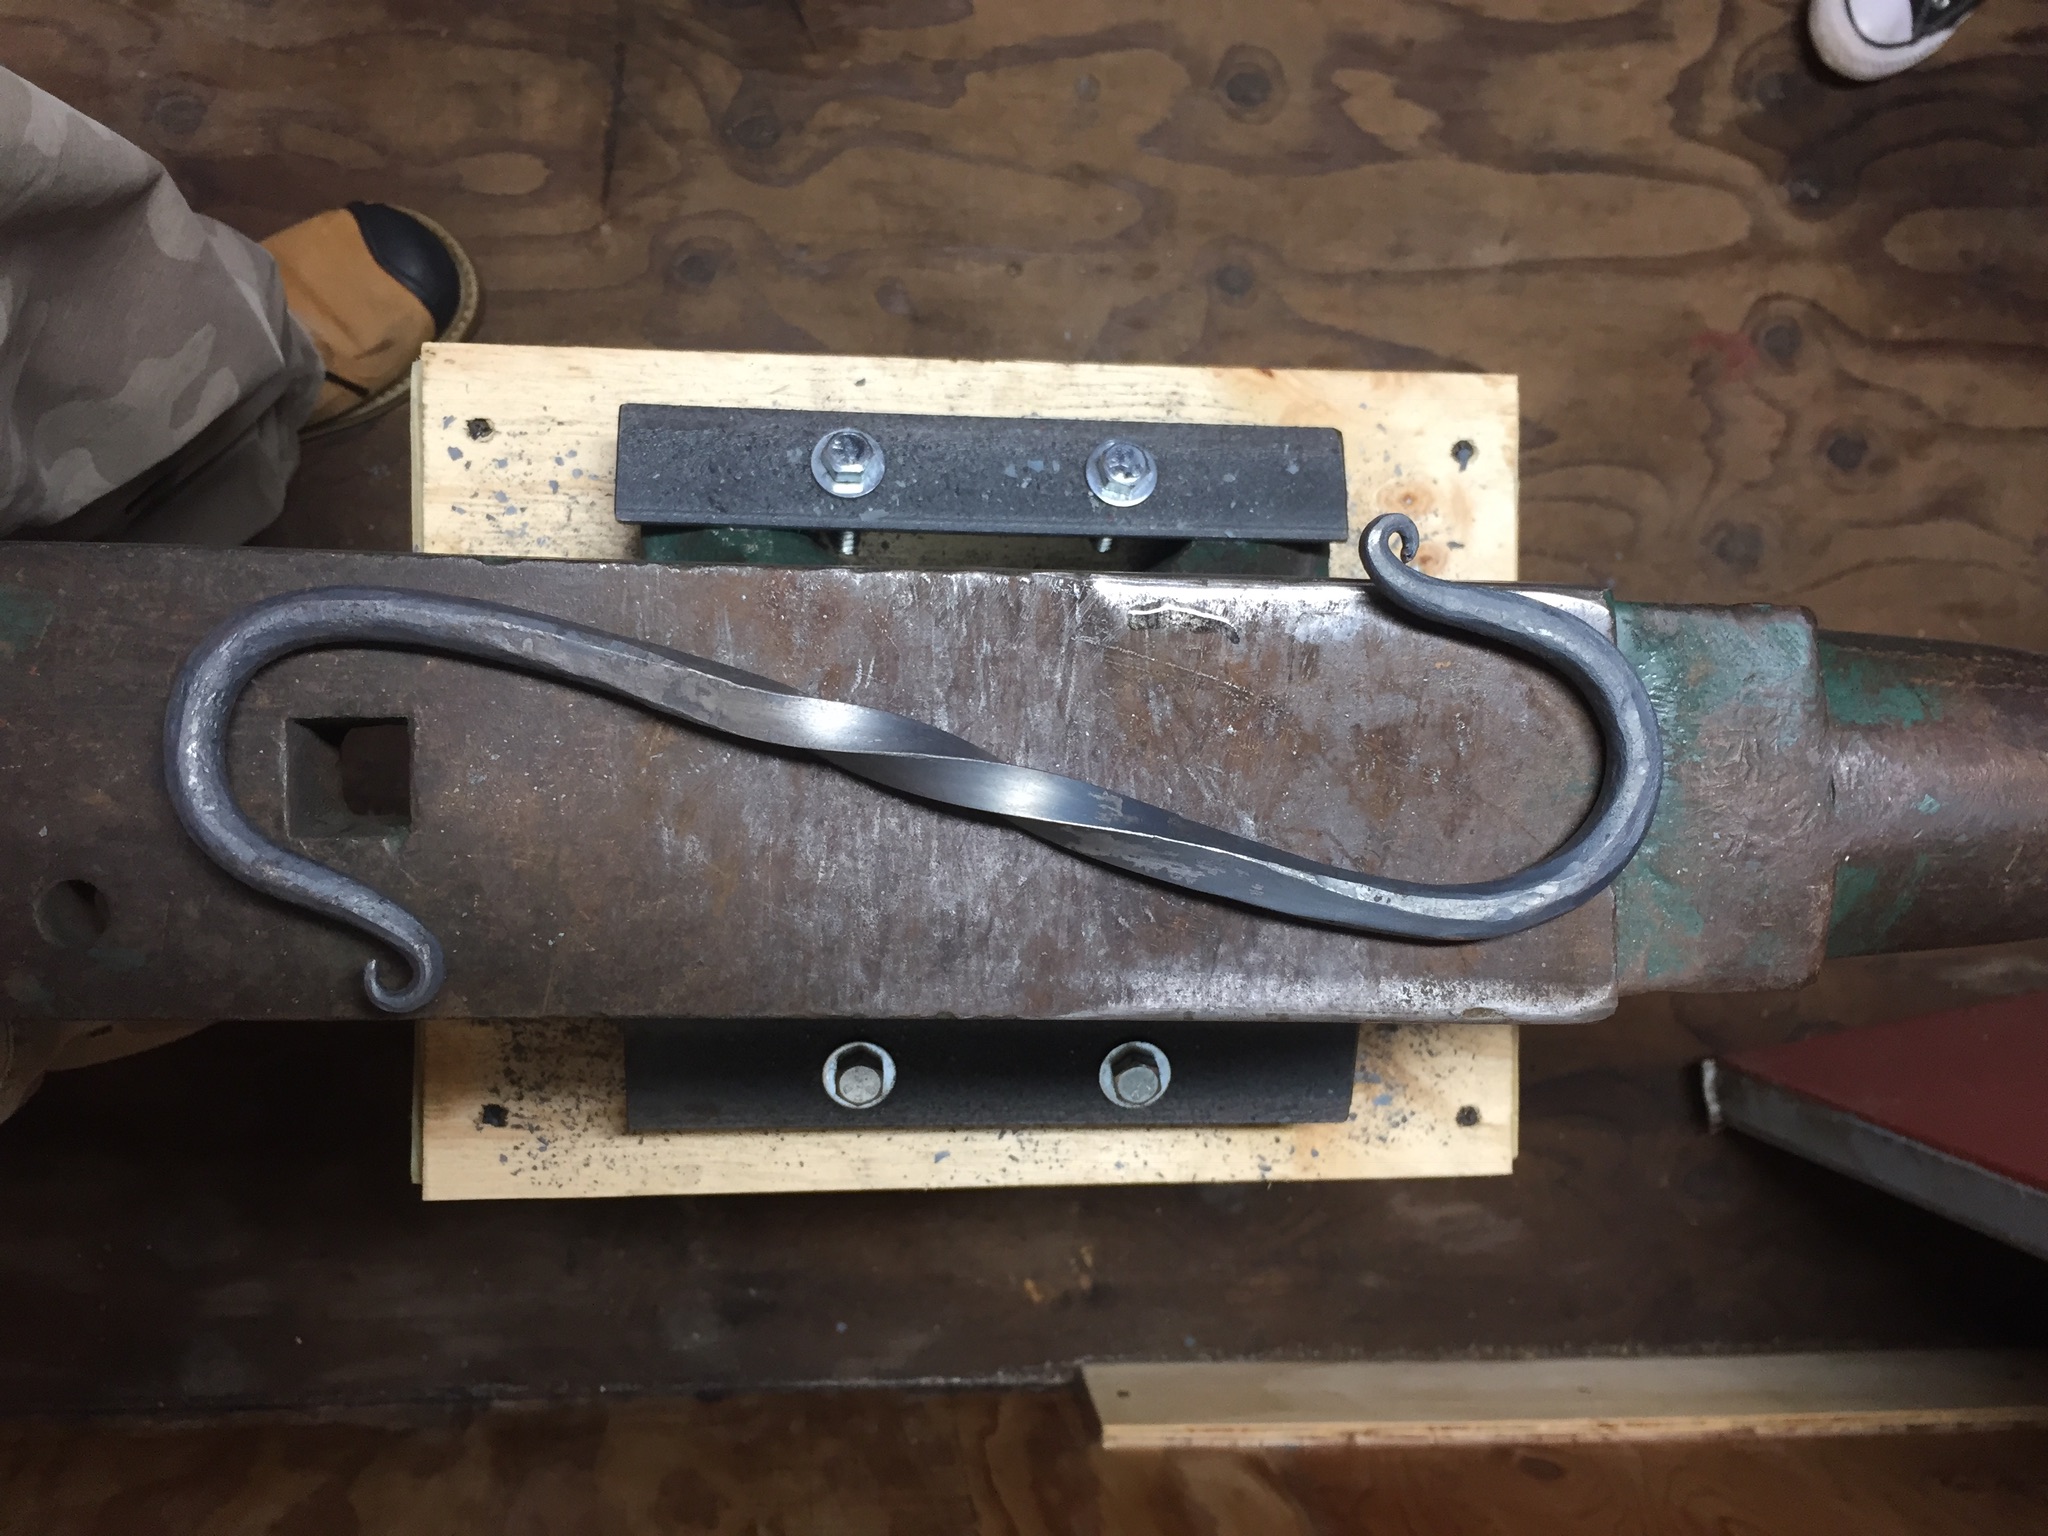
Had 2 more 1-2 hour forging sessions this week, definitely more downs than ups. Wanted to try a different hammer so I ordered a diamond rounding hammer spent about an hour dressing it, to decent shape. Decided to put together the flat jaw quick tongs I got off ebay, so pounded out the reins, twisted the jaws....tried to thin and shape the jaws, was a complete failure, so just hot riveted and I guess no shame in finishing with the angle grinder. So, then tried to forge a leaf key chain using the Brian Brazeal 2 sided taper with 1/2" square, had a hard time moving the metal to form the far shoulder and realized too late that I didn't leave enough material for the leaf. Continued on and the near side shoulder wasn't forming right then when trying to thin out in between, metal wasn't going anywhere, gave up when it started to twist. Was starting to feel a little down, needed a win so decided to forge another hook, and came out beautiful, my taper was much better this time.

-
29 minutes ago, Frosty said:
Nice job Chuck, well done! Those are darned long tapers, getting them smooth and even isn't easy and yours are very nice. The bends are even and well matched. I don't see anything to critique. A little practice and we'll be asking you for advice.
You need to find a pair or two of tongs and have someone show you some of the tricks that make this stuff easier and faster. For a quick pair of tongs that'll get you by till you start making them search , "twist tongs". These are quick and dirty but functional tongs you can make with a hand drill vise and big crescent wrench. If you have access to a welder you can even make wolf jaw and side bit twist tongs.
When you're drawing those long tapers are you drawing them square then rounding them up when they're finished? Drawing tapers round is intuitive but not the better method. Square, octagonal, round. is another thing to search on the web.
Frosty The Lucky.
I will check those tongs out no welder yet...I drew them out square then went octogon then to round.
and thanks everybody for the confidence boost. Probably going to be making some punches and drifts next...was thinking of making a single thread to post my stuff all in one place...I have seen others doing this, would this be received well or considered bad etiquette?
-
Thanks for the kind words.
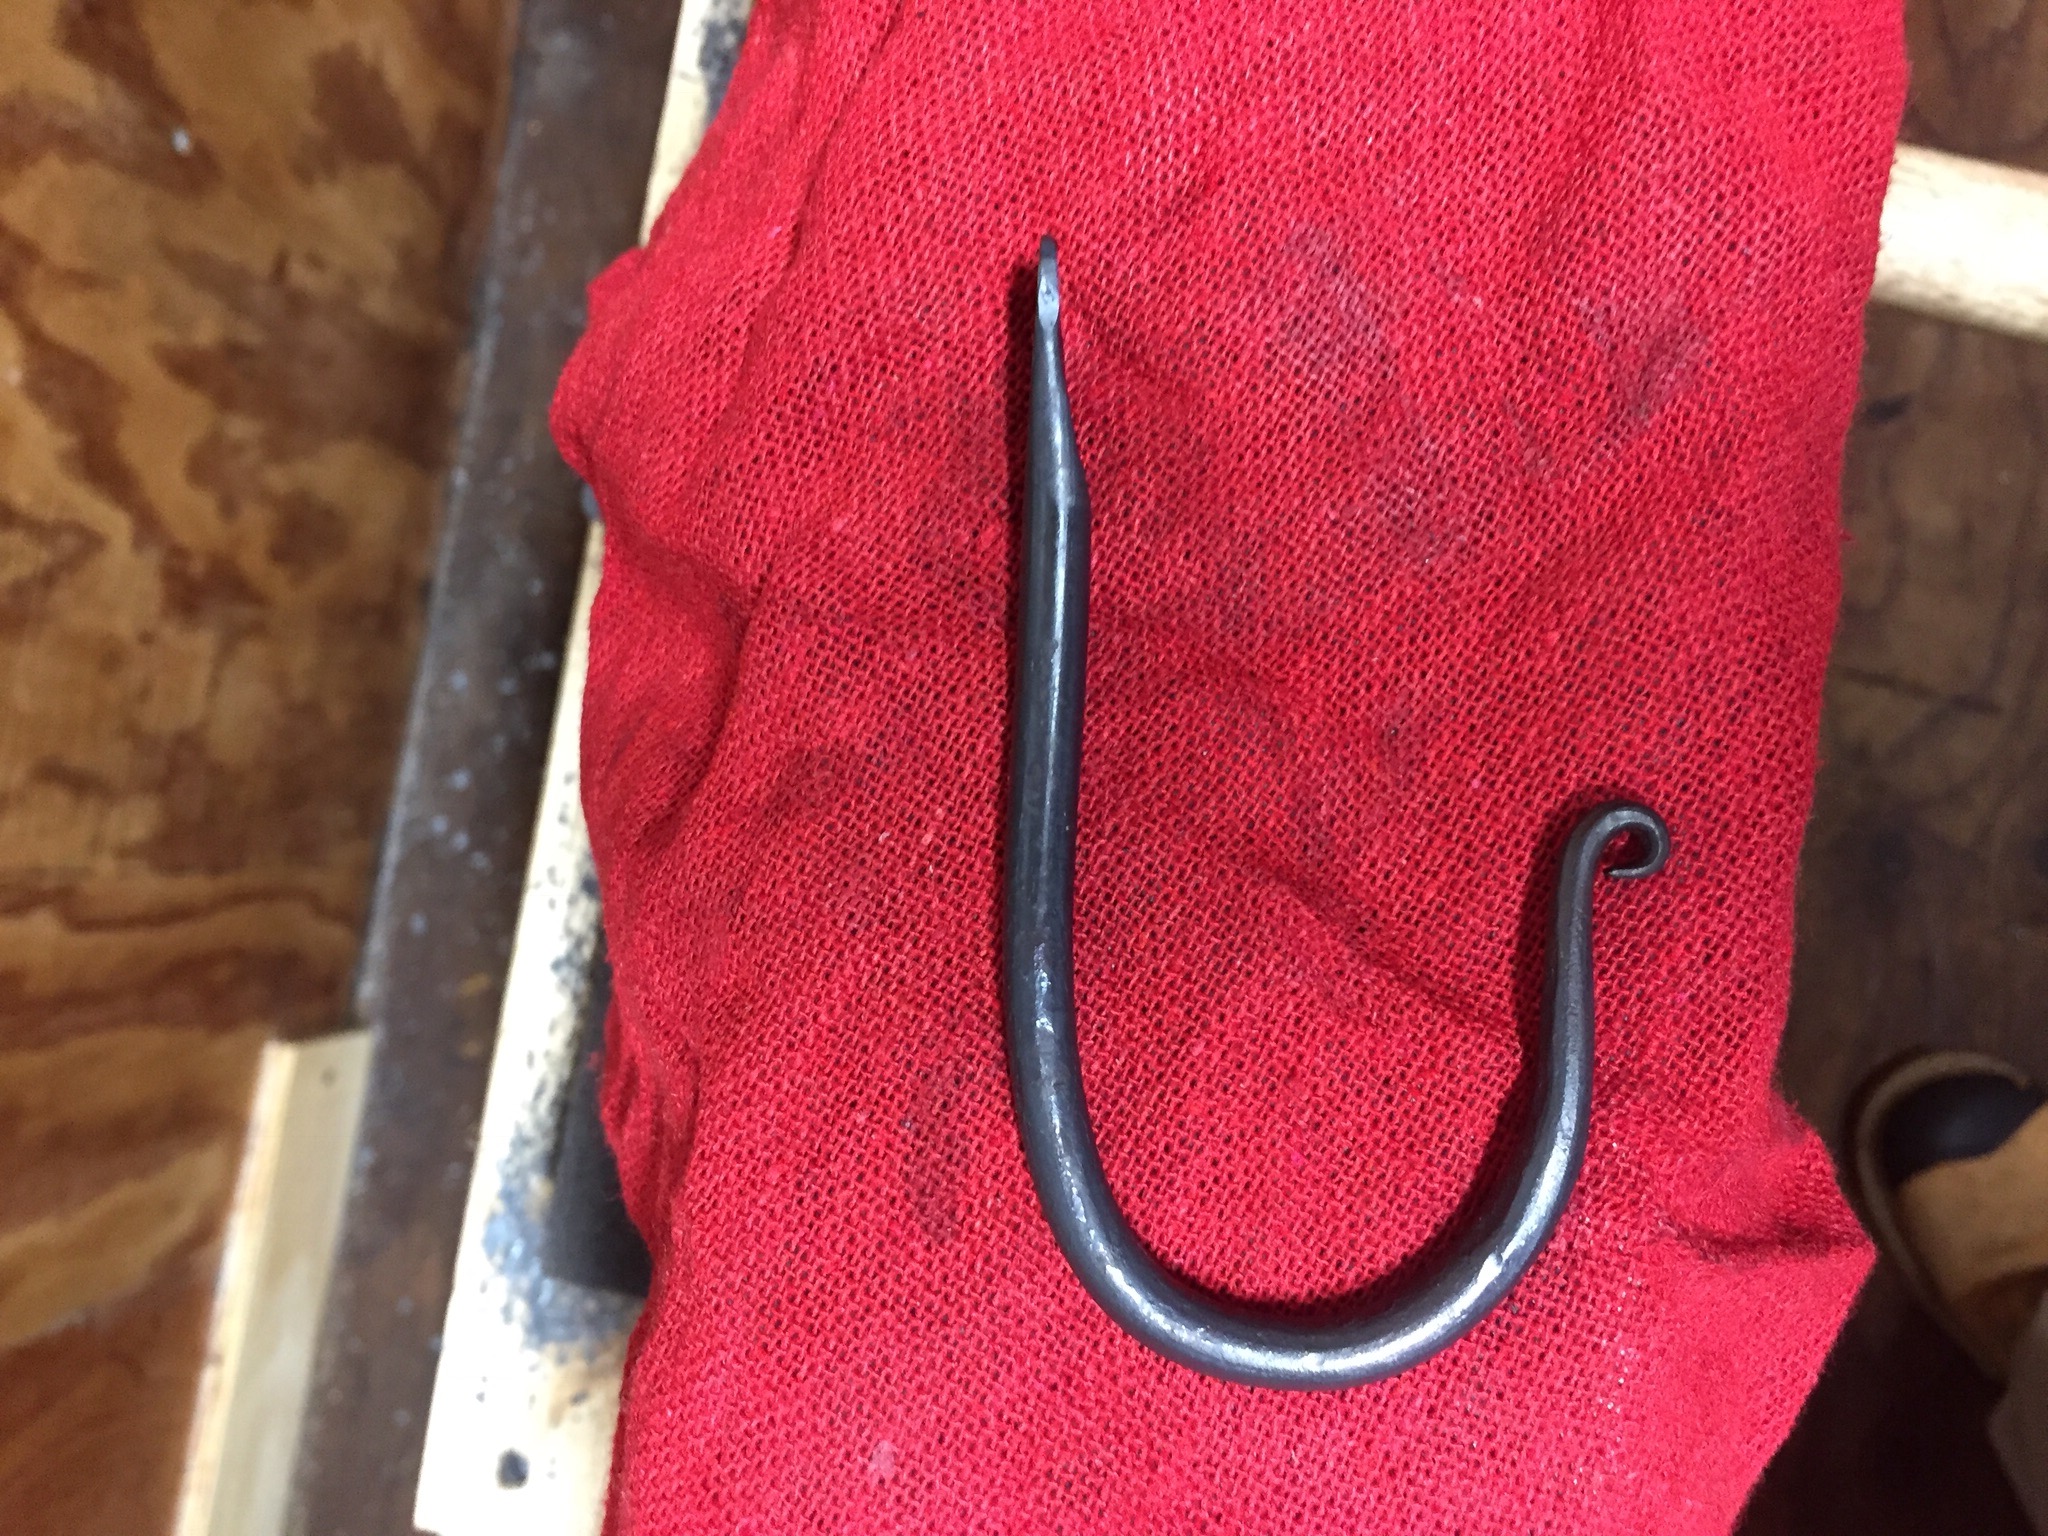
5 hours ago, ThomasPowers said:Good hook; did you bend the ends freehand?
Yea, just the hammer and anvil.
-
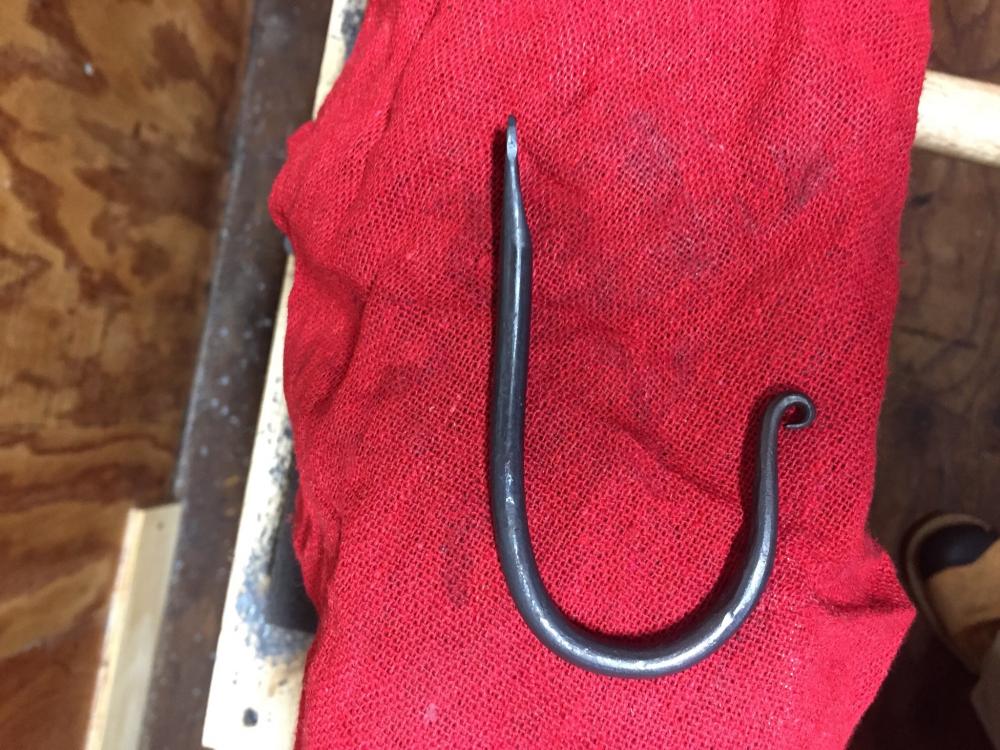
Total beginner, just finished my first forging session. Pretty happy with the results, but what a humbling experience it was. Forged the hook first, then the s hook out of 3/8 square....probably took me a little more than 2 hours to forge. I don't think I was heating the metal up enough or was having to much surface contact with the anvil, was loosing my heat very quickly. Also, had a xxxx of time trying to hold onto the piece doing the 2nd side with pliers, which marred up the metal, definitely have to work on coordination. Any advice or critiques would be greatly appreciated.
-
6 hours ago, ThomasPowers said:
Dimples may be owner or ornamentation too; eye looks european. Does it show evidence of steeling? Did you find it locally (east coast)? I'm thinking it could be colonial.
No steeling that I can see, got in in southern jersey the flea market seller was an antique dealer that only sold knives and axes, had lots of nice things. he bought it from an estate sale.
-
8 hours ago, ThomasPowers said:
I'd like to know if it has a more European style eye or one of the standard American versions.
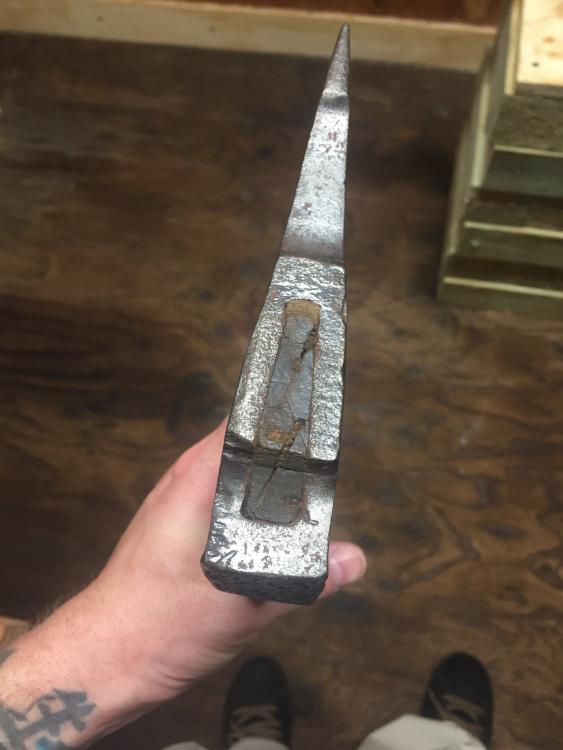
Here is a pic of the eye, possible maker mark let me know if it makes any sense.
-
6 hours ago, ThomasPowers said:
Got your CO monitor installed. With a small space I'd want forced ventilation or a good monitor.
I have one, but run the forge outside.
-
7 hours ago, ThomasPowers said:
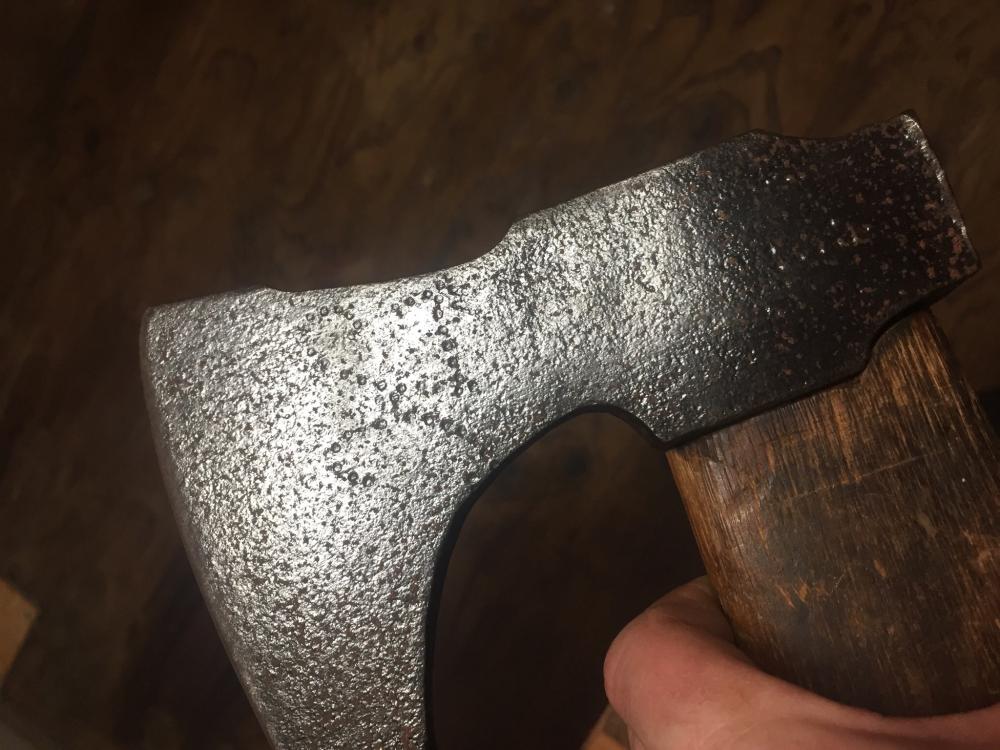
What does the eye look like on the ax?
Circles like the Krupp Logo? (search on it)
Didn't notice anything thing unusual about the eye pretty standard, but I will take another look!
-
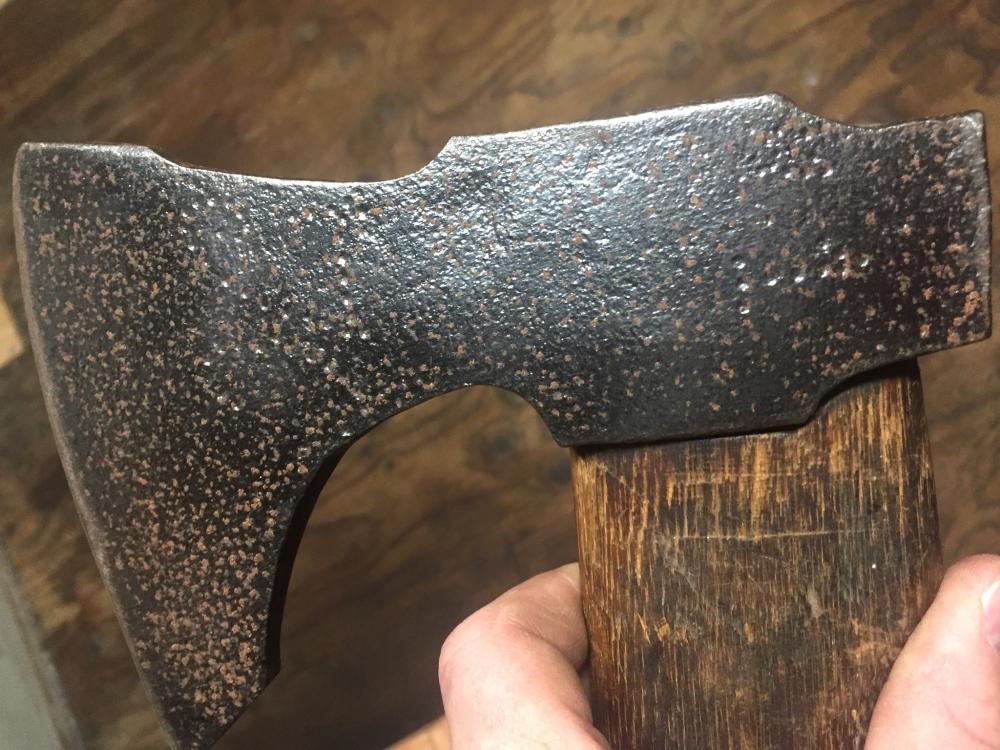
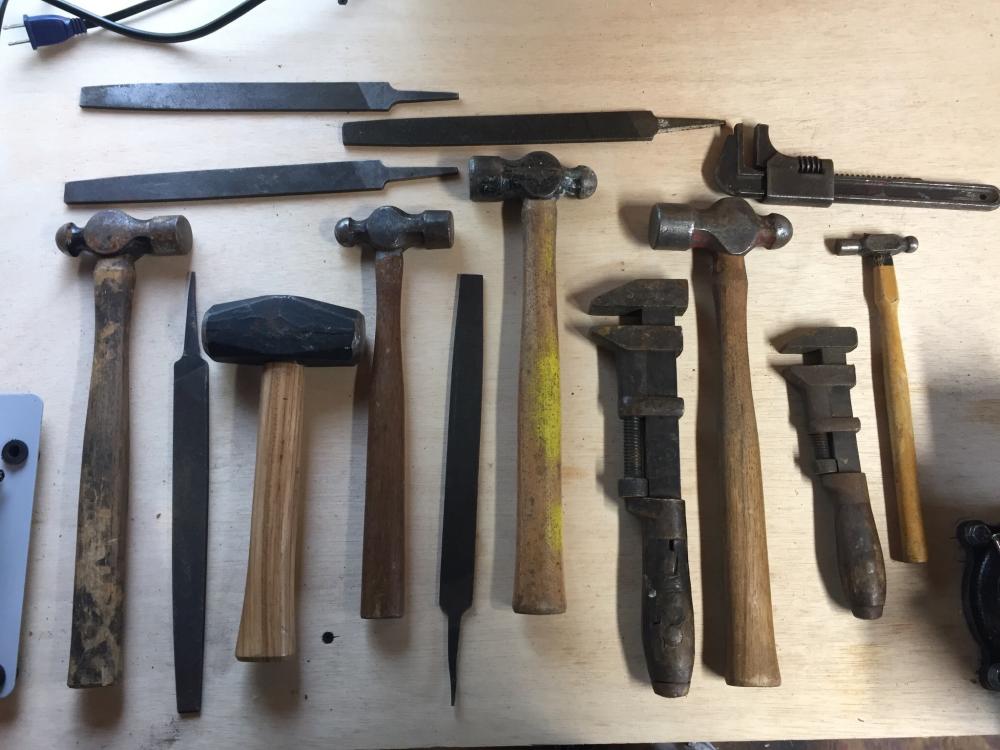
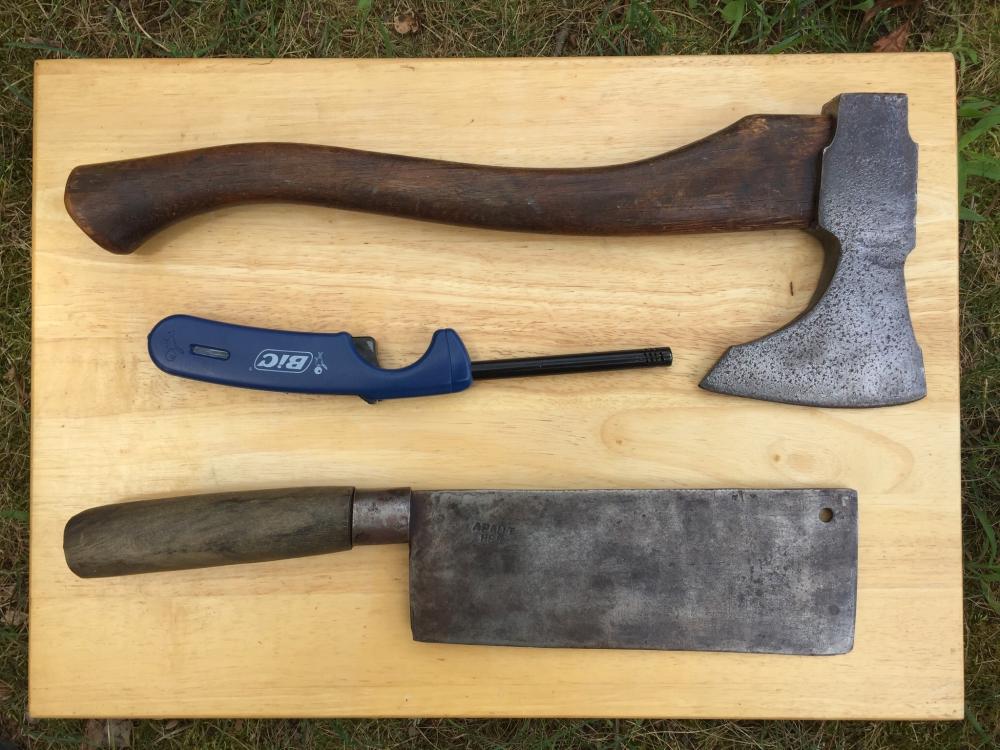
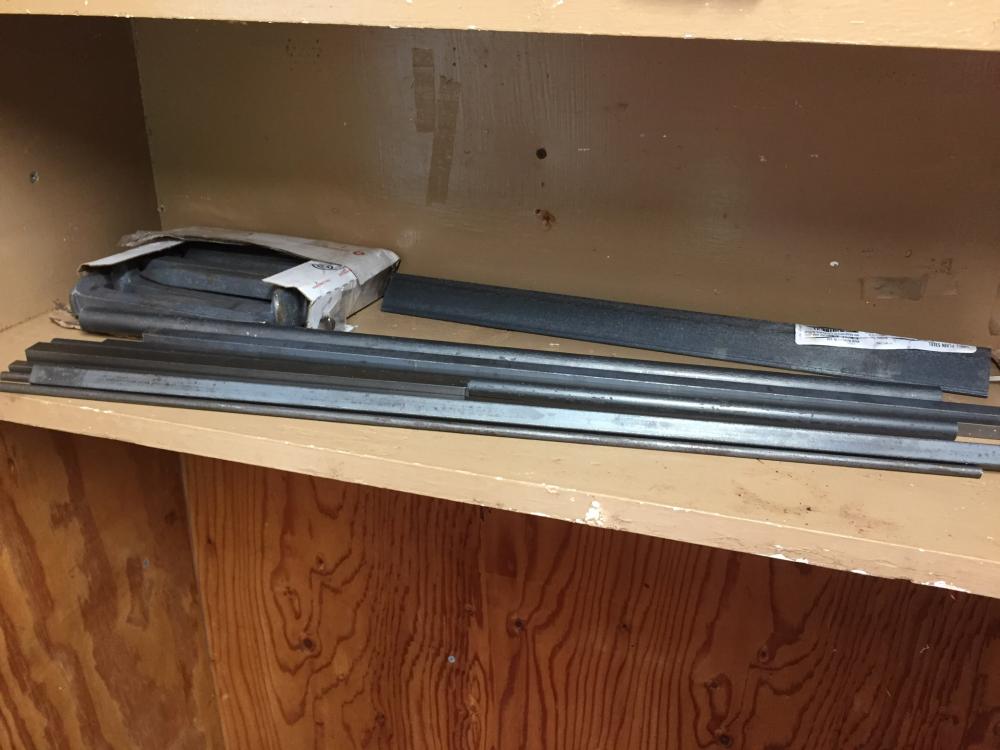
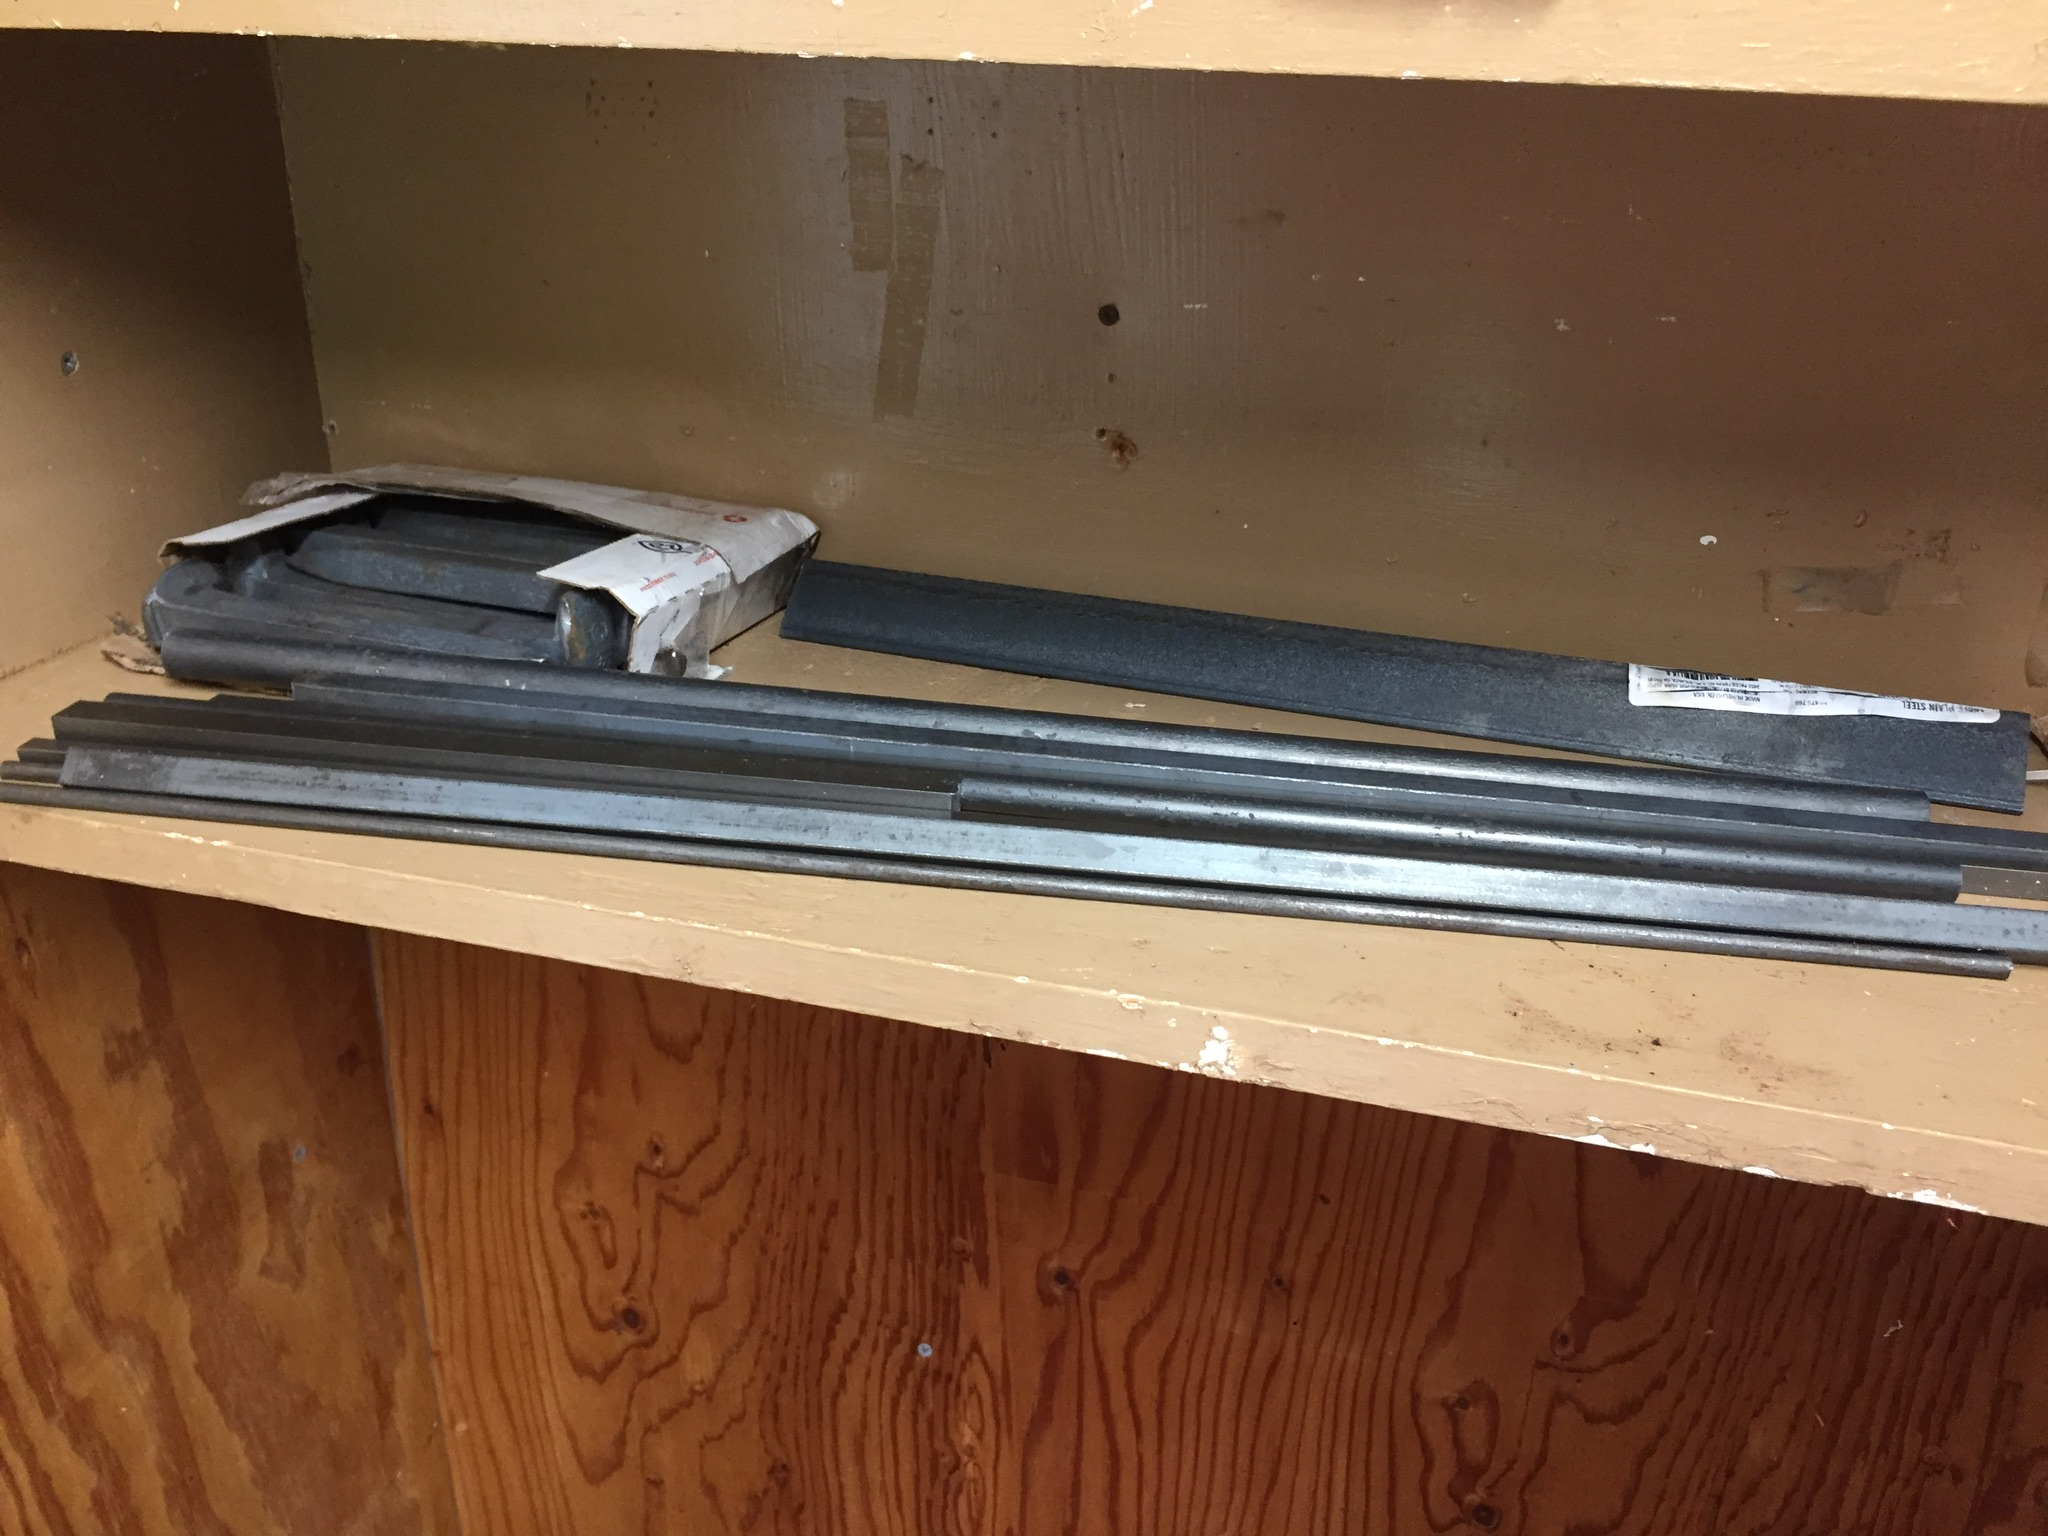
Took a trip to the local flea market today. Picked up a bunch of hammers, files, and wrenches for dirt cheap $25 for everything in that picture. But , the reason for the thread is i wanted to show off these 2 gems I found, the cleaver has a makers mark that I wanted to research, and the axe has what looks to be a big makers mark made out of little circles, will have to get a rubbing. BBQ lighter for size reference. Will post pics of makers mark if anyone is interested, let me know what you think.
-
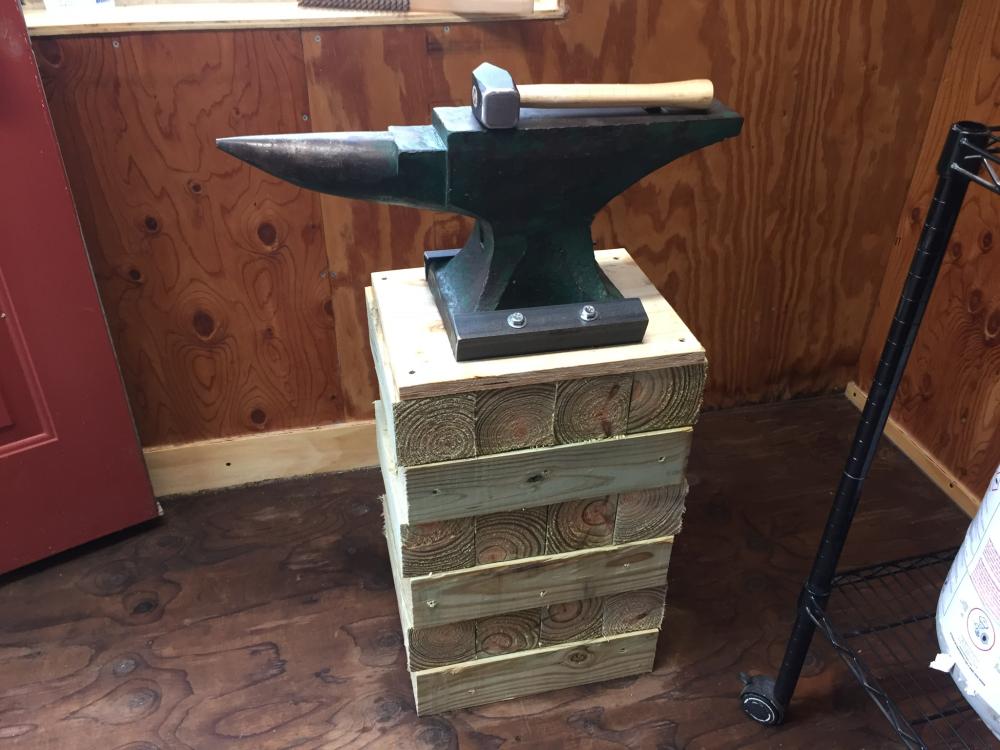
9 hours ago, 51 Papy said:
Chuck
You might want to think about moving your vise out to the edge of your bench. That allows you to put a long piece of metal straight up and down...guess what I did today. Great smithy! Enjoy
Yea I thought about this after the fact, I made a spacer out of scrap wood and angle iron to solve this problem temporarily.
7 hours ago, mutant said:I get a lot of comments saying that I should cut a hole in the floor and place my anvil stand through it and also several feet into the ground. That's probably the best solution but I didn't want to do that. Instead, I was able to get a few 18x18 pavers wedge between the floor joists and the ground. It did help. I also made a hollow anvil stand and it's filled with sand.
Exploring all options at this point but going to be a while before I do anything about it right now, thought about cutting the hole making the stand off the ground and also putting in a concrete pad, we'll see.
-
38 minutes ago, mutant said:
Looks like a great smithy! Enjoy your new setup and let me know how you do with the rapid tongs. I've been debating getting a set.
Will do, going to wait a little so I don't screw them up. On another note I feel like in am going to run into the same issue you had with the raised wooden floor, no pad underneath and have suspicion that there is several inches of nothing between the ground and floor.
-
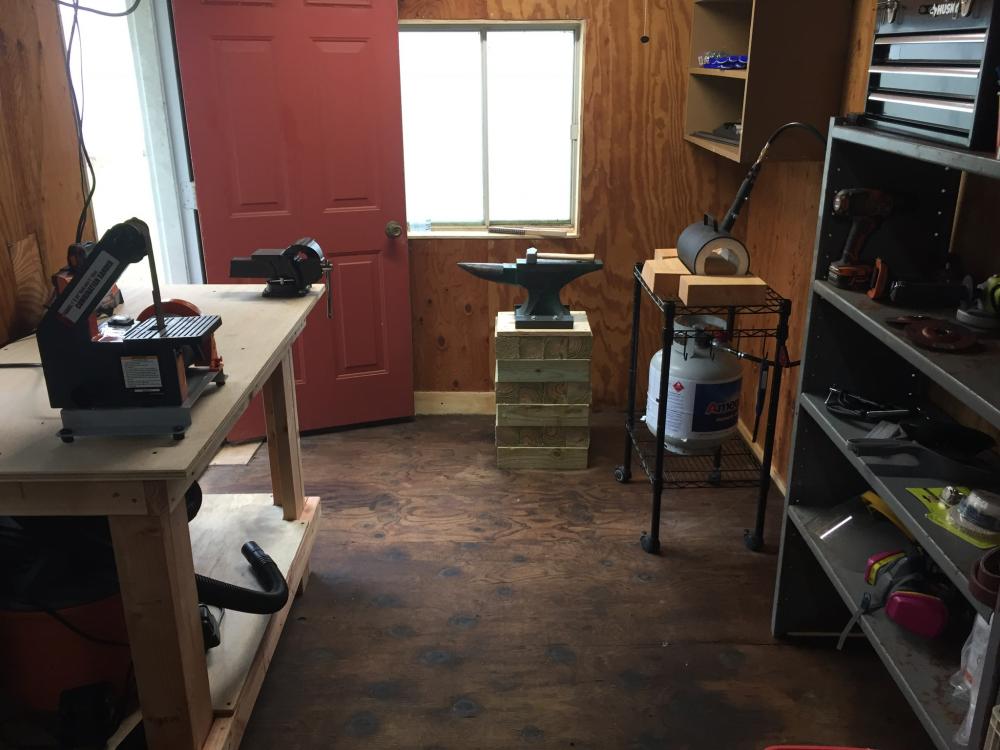
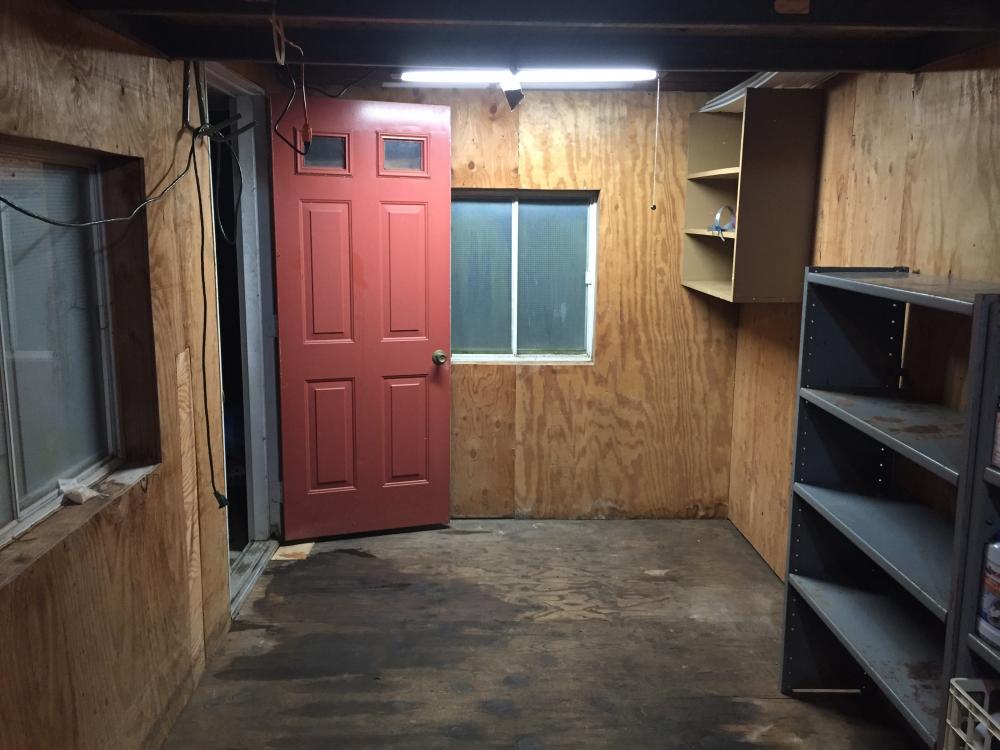
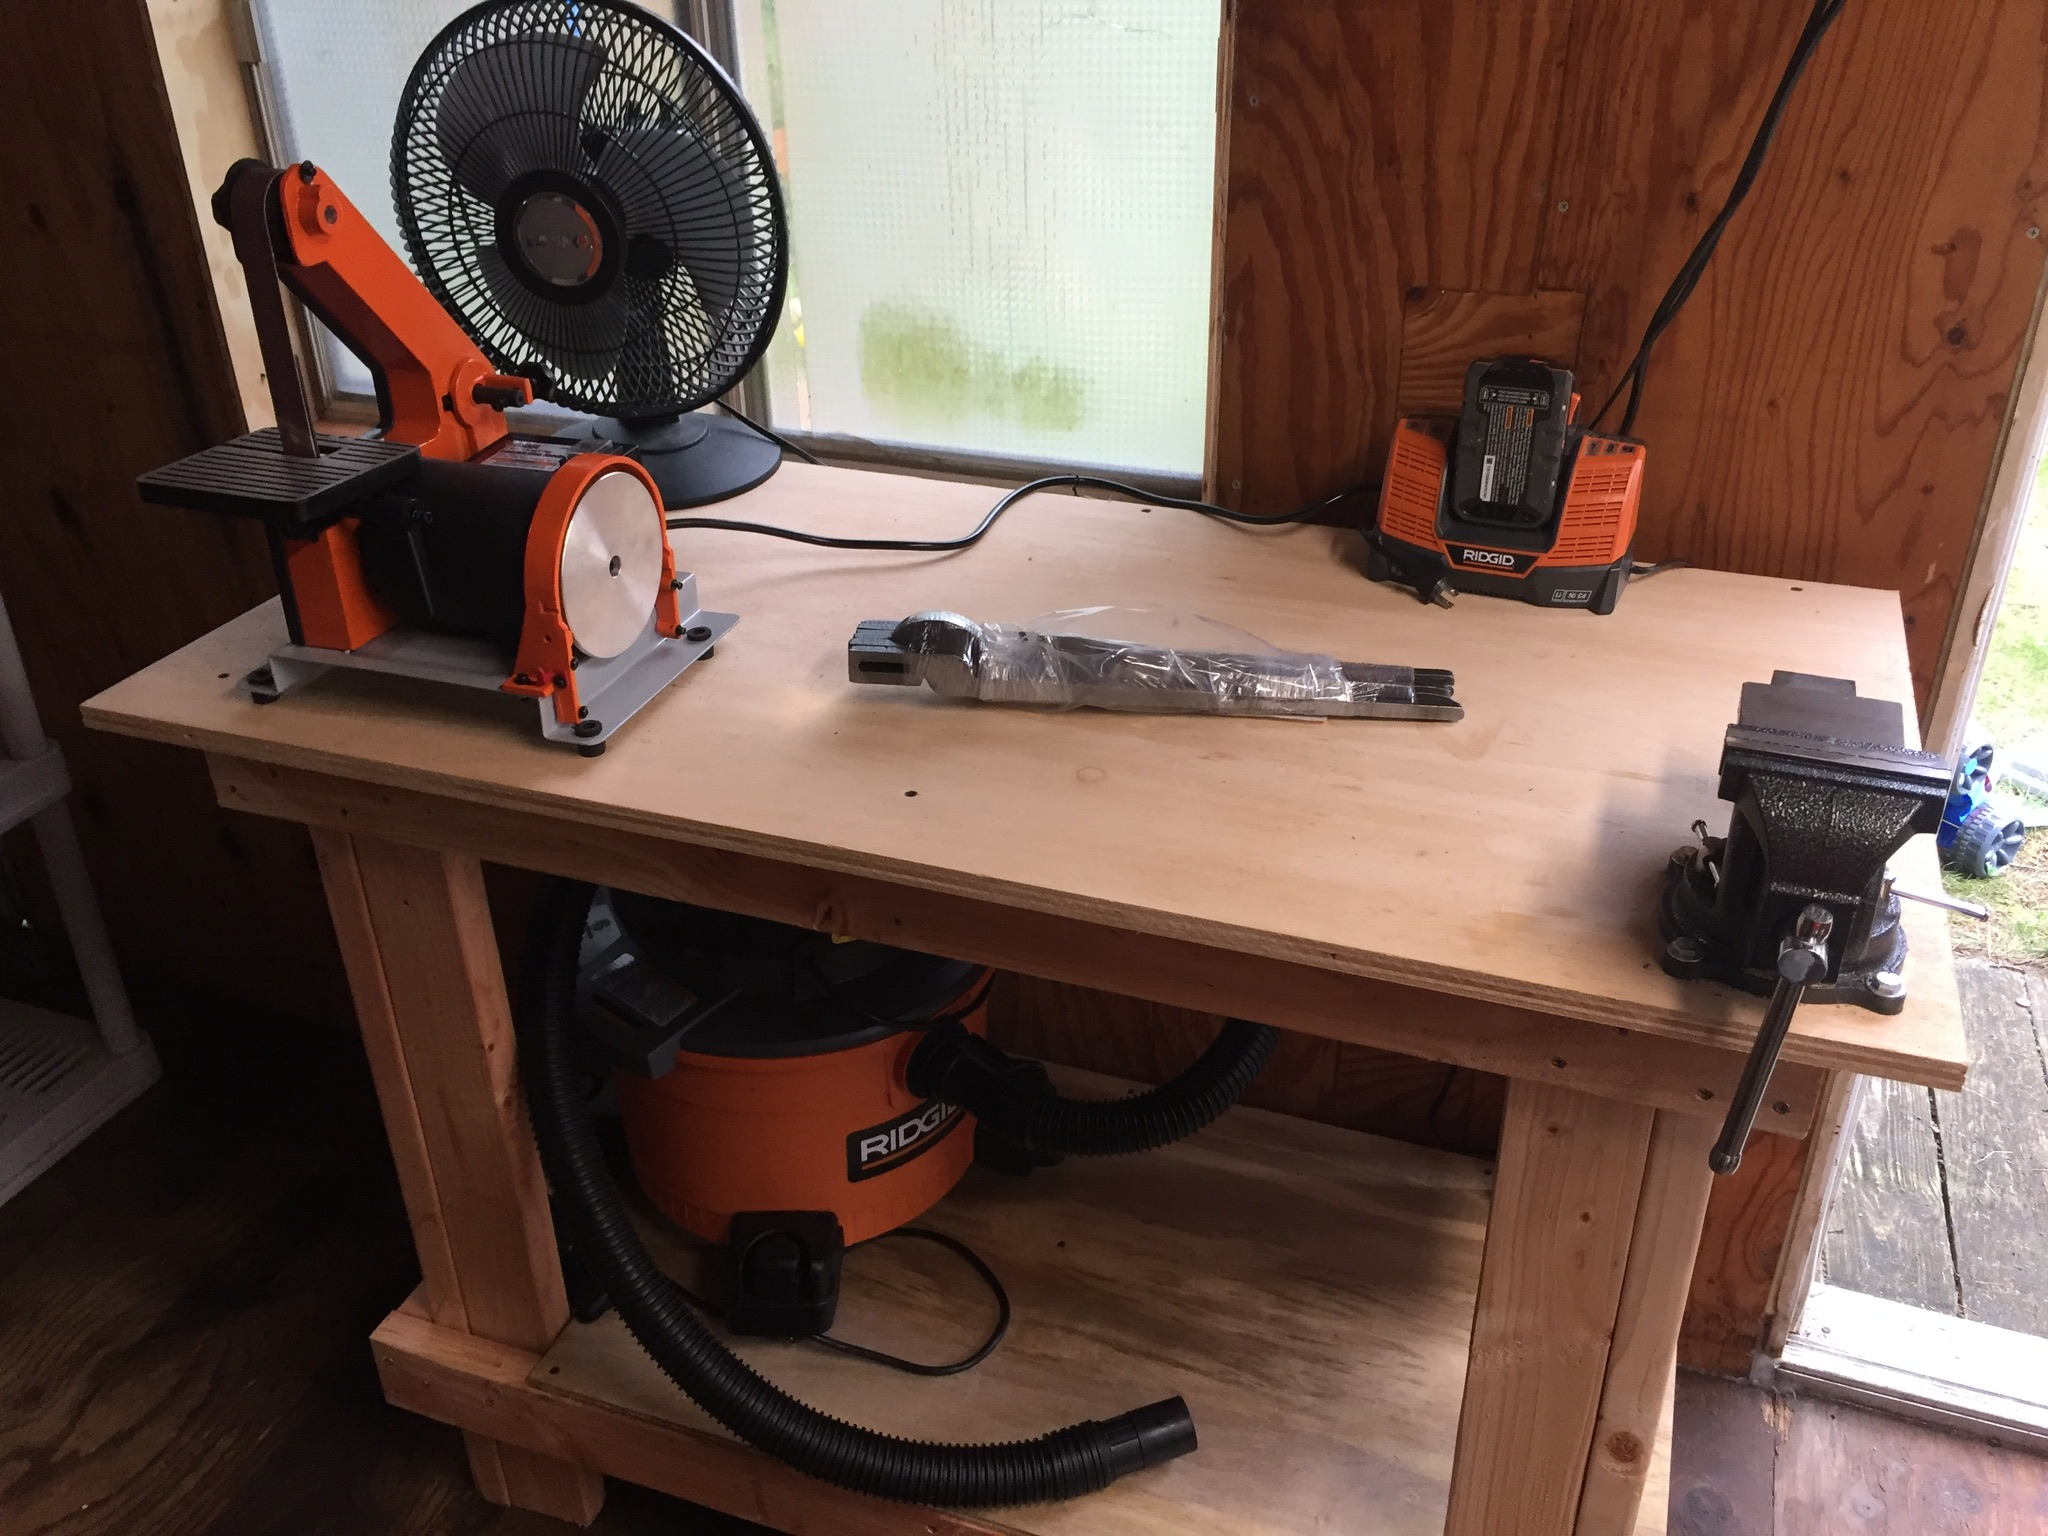
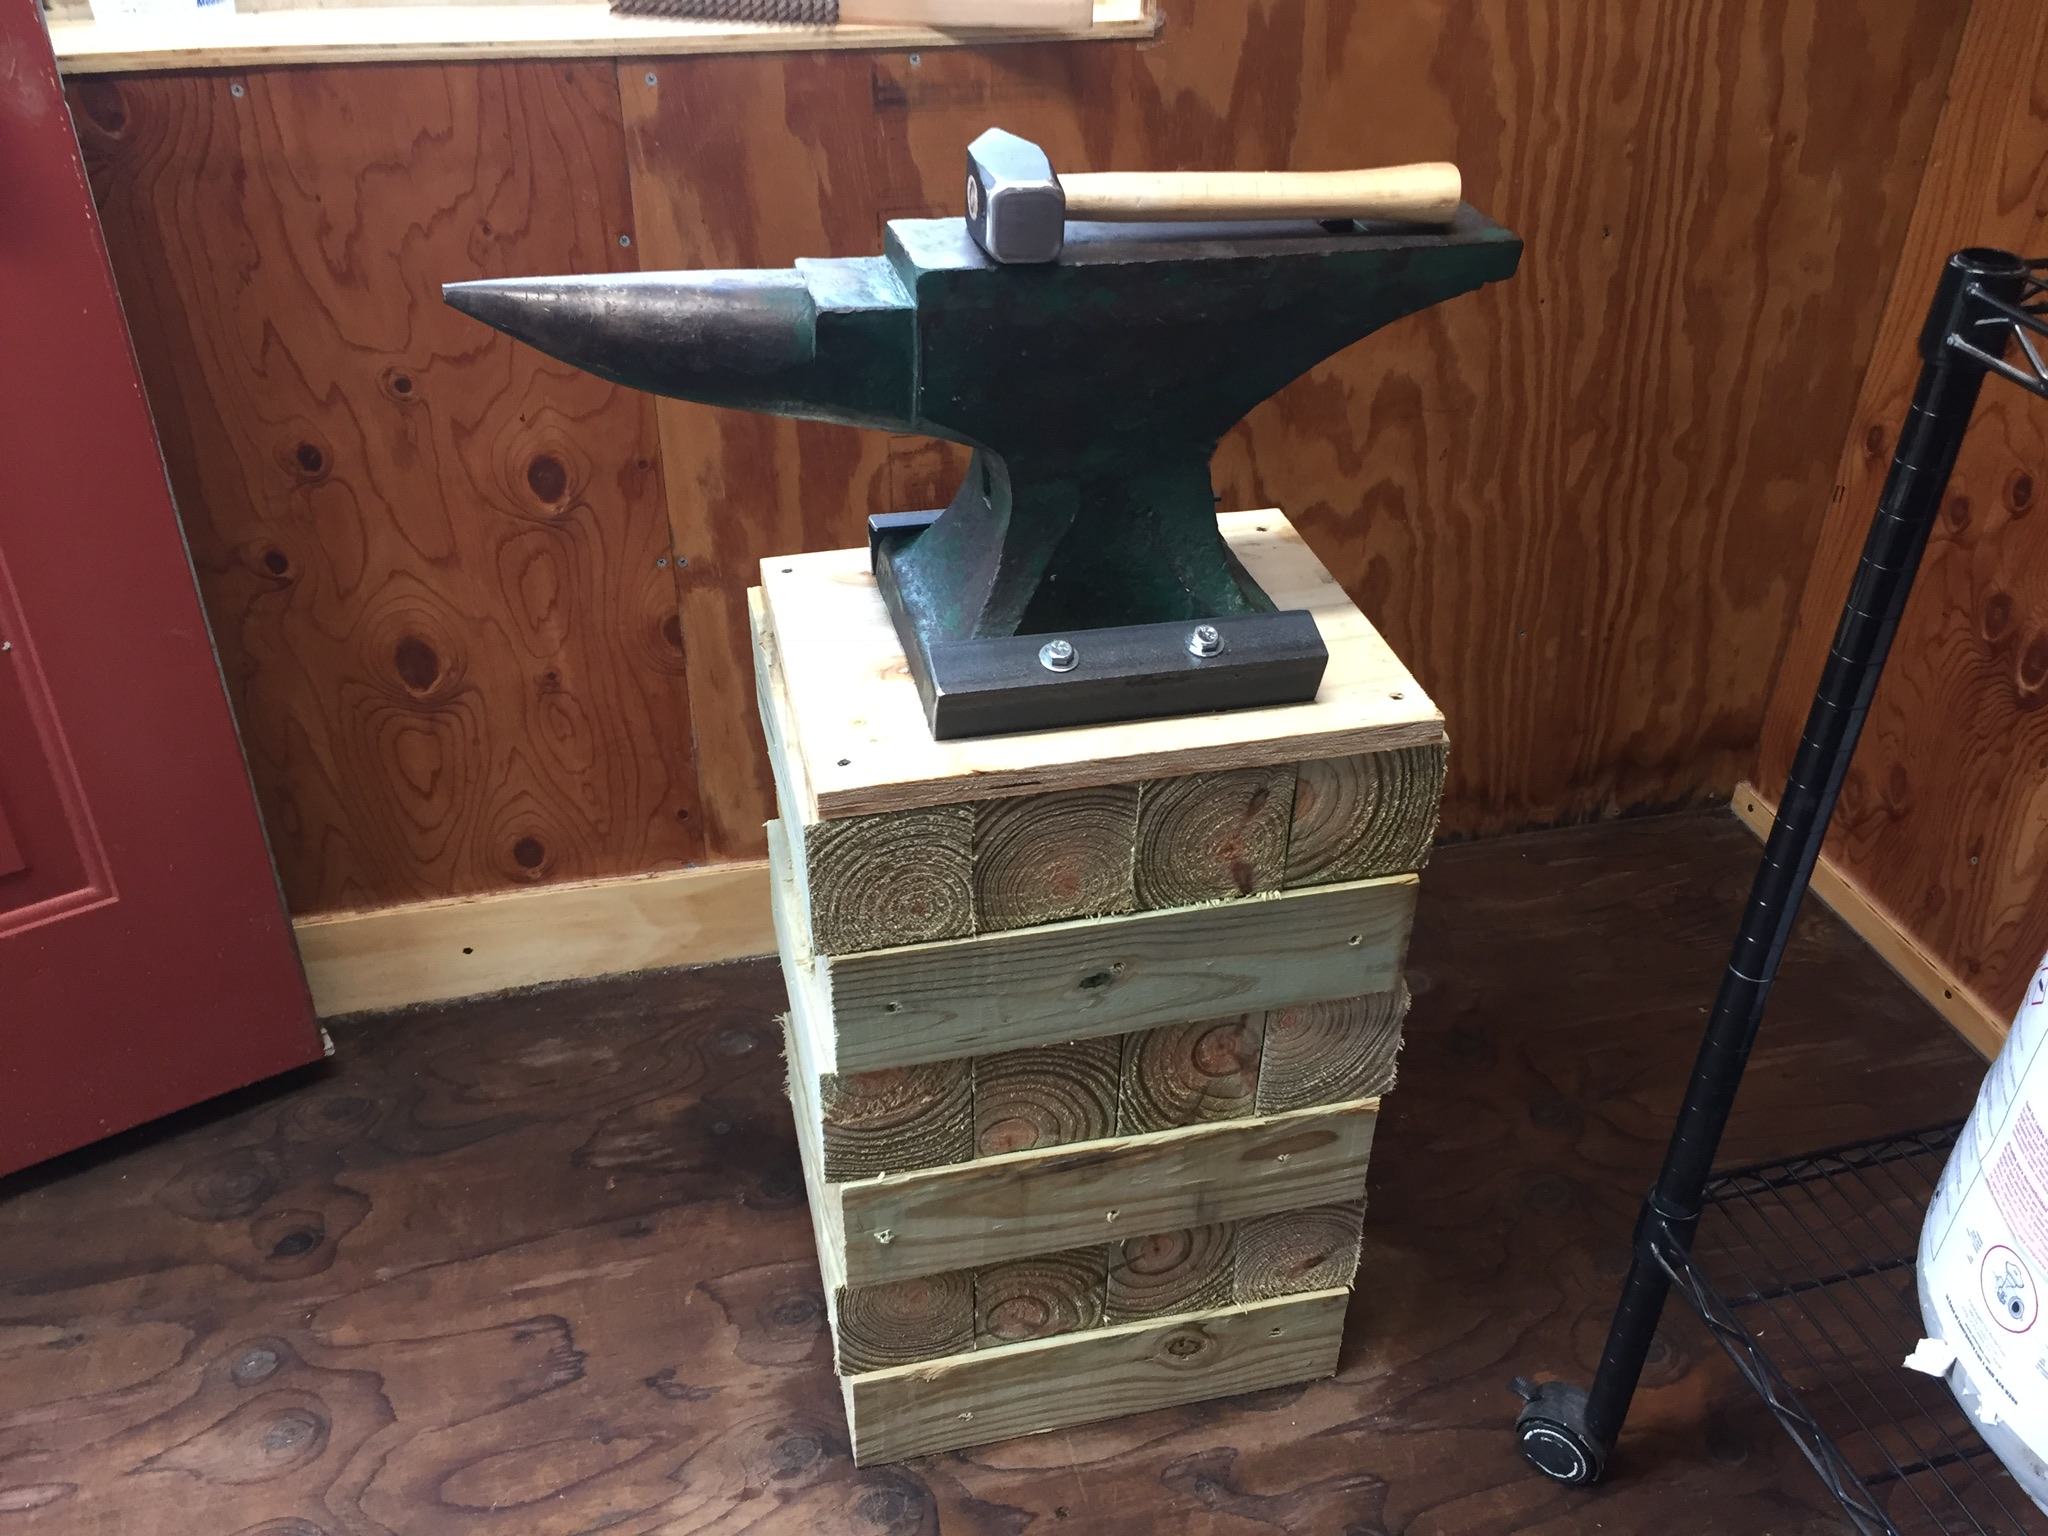
So tonight's the night, going to be swinging the hammer for the first time!!! Here is some pics of the 95% competed work area, maybe went a little over board but starting out good. I added a harbor freight special 1 x 30 grinder that I got for $40 that works better than I expected, tested it on the angle iron I used for securing the anvil. Have a good variety of steel to start with and some railroad spikes, also bought a set of "rapid tongs" off eBay that just require some modifications and shaping, seemed like good practice at a fair price. Lit the forge up once to soap the fittings and checked for leaks, after taping threads and assembling....flame seemed rough, I haven't done much research on tuning yet. Going to start out with the standard j hook and s hooks. Will post a thread in the project section if anyone is interested in following, again thank you everybody for the advice, and will add to this thread as the shop changes.

-
57 minutes ago, mutant said:
I covered my shed floors with sheets of 1/8 inch plate that I picked up at the scrap yard and most of my walls have old corrugated roofing tin on them. It was't all that expensive to do. I think I paid more for the rockwool insulation that I put in for sound and fire proofing.
I have watched all of your build videos on YouTube, i plan on doing something similar in the future depending on how serious i get into it. Trying not to get to crazy without even having swung a hammer yet.
-
10 hours ago, Frosty said:
Yeah, trimming it out is an important fire precaution. If you don't have flammable scraps hiding in nooks I've found plywood is pretty fire proof. It takes a long time to get smoldering even with pretty hot steel and then it doesn't want to stay going. ON the other hand a box or two of borax is pretty darned cheap.
Looking good so far.
Frosty The Lucky.
This is the plan going to use plywood around the windows and going to silicone the rest of the area.
-
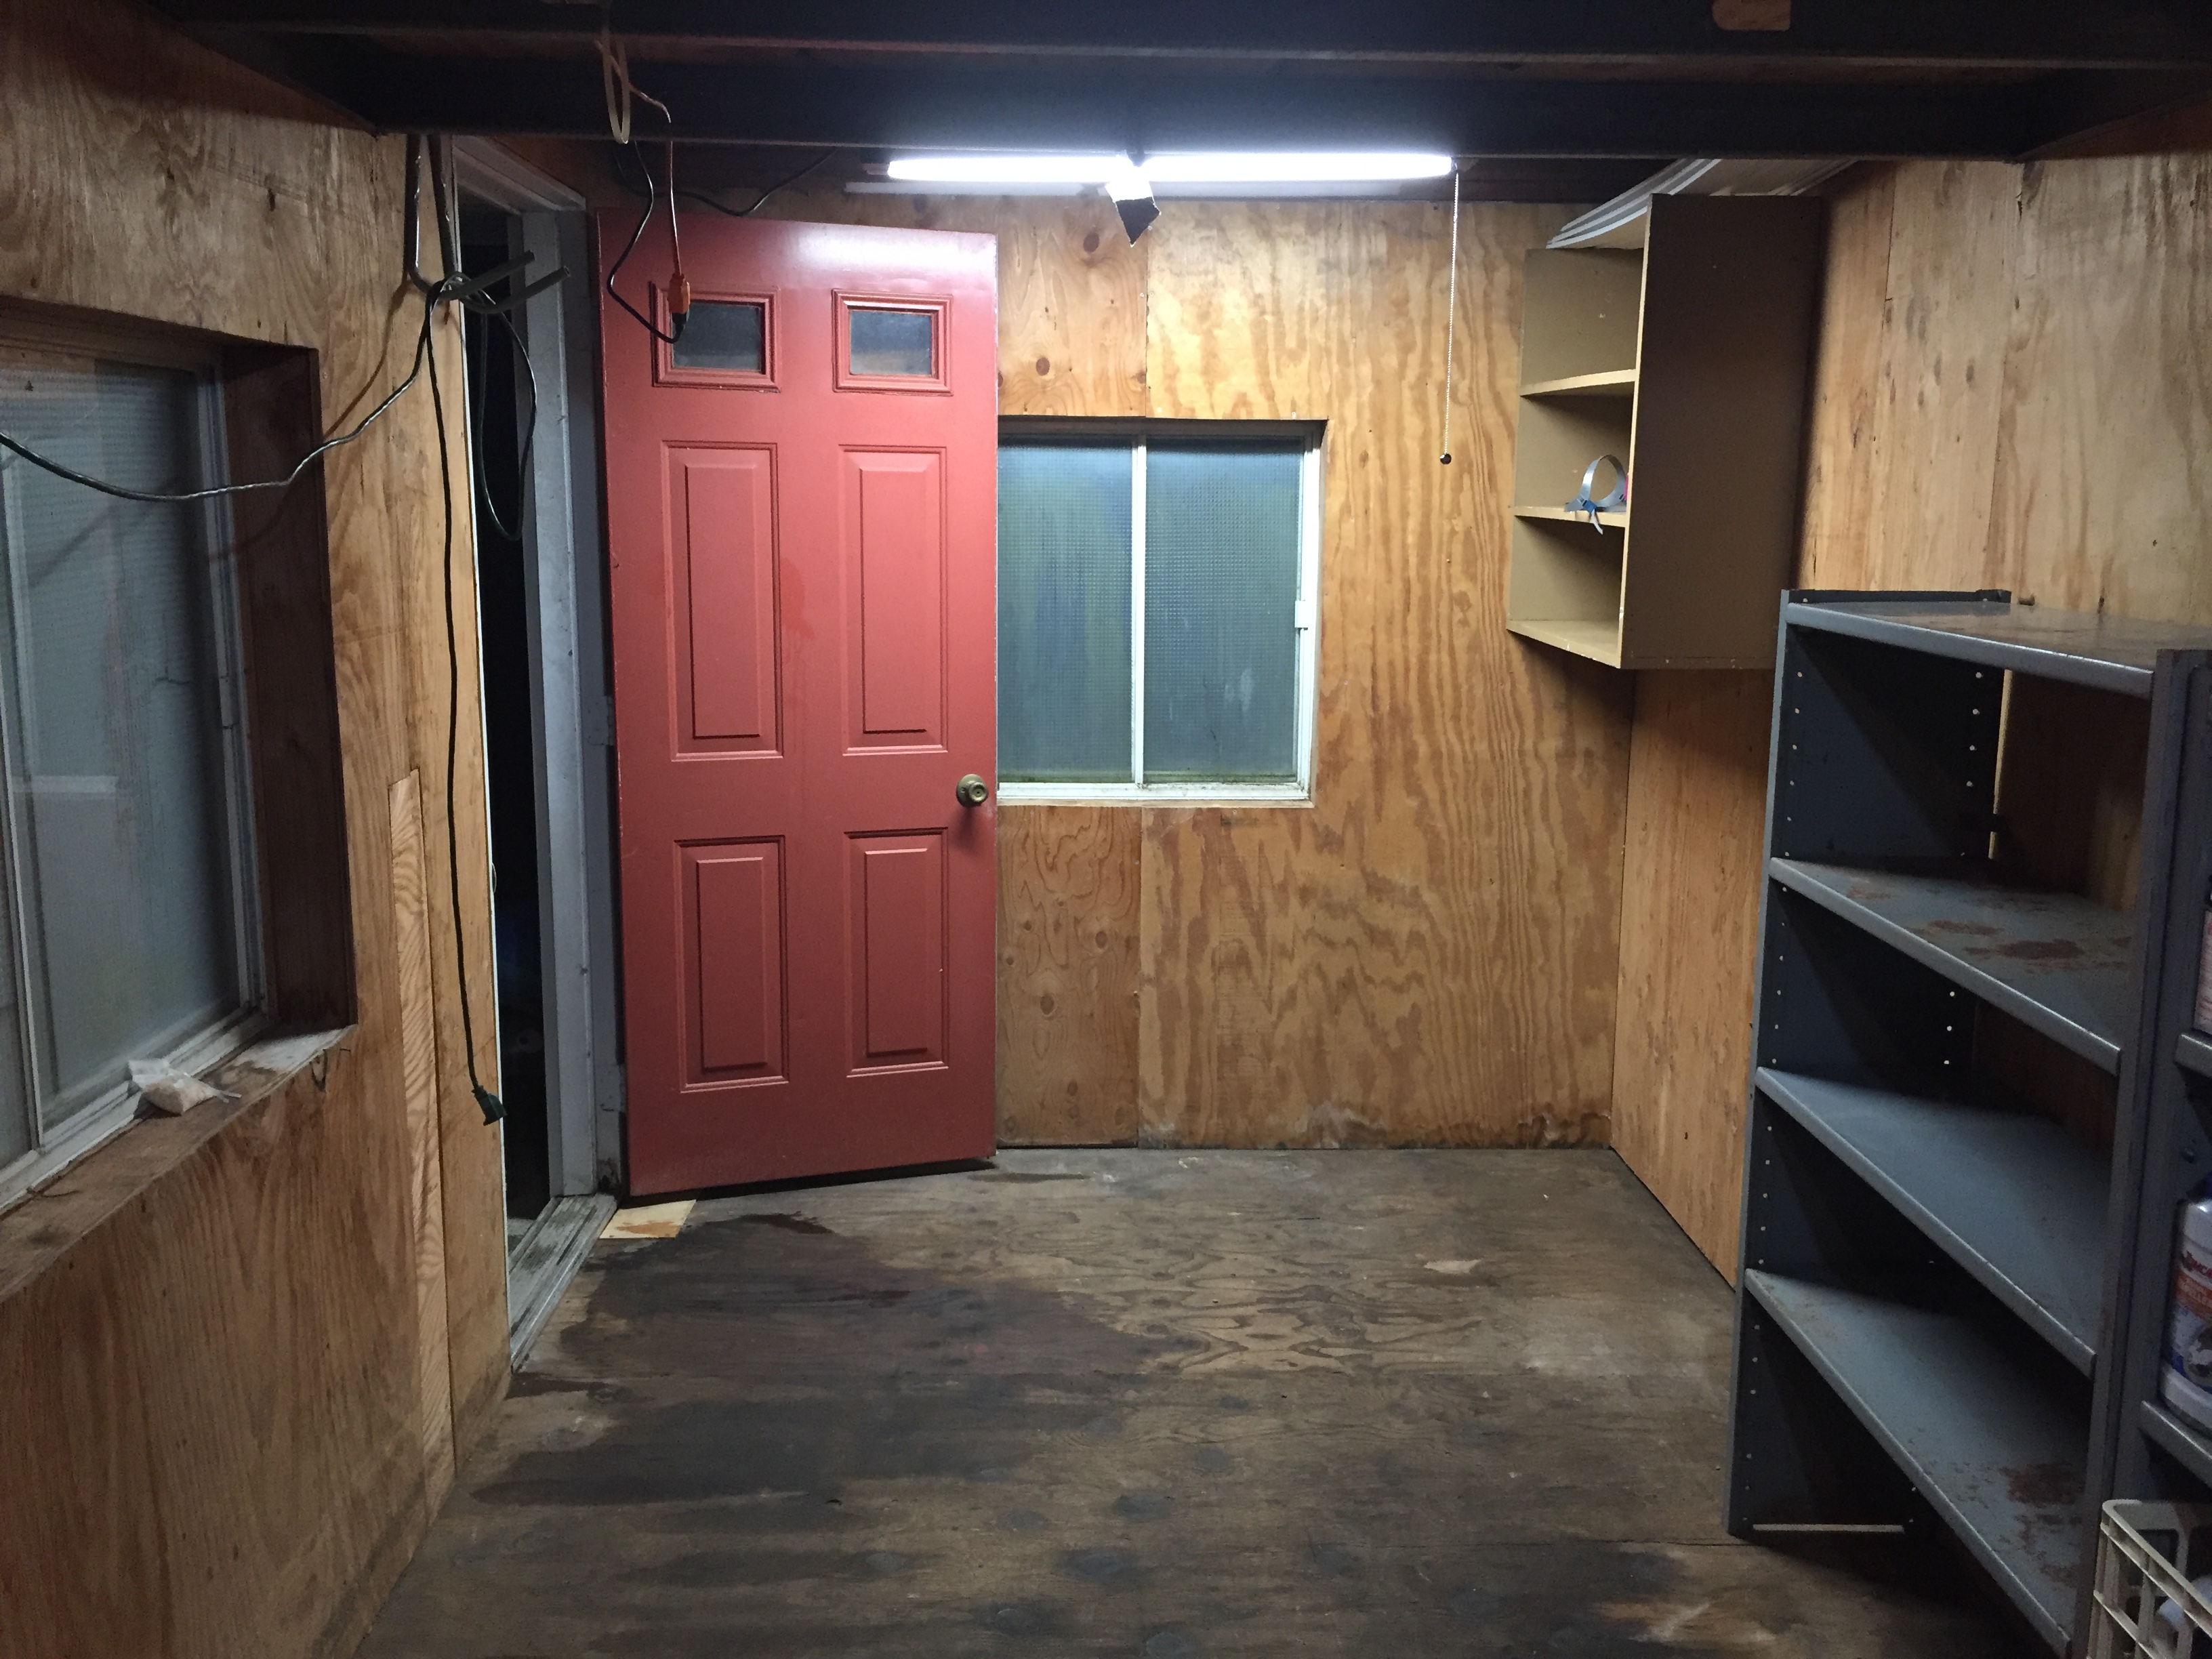
Rodents seem to be gone and thoroughly cleaned. Led light installed. Using about 3/4 of the the shed space for now, have some pretty big gaps between the floor and walls that need to be filled in , as well as around the windows. Next up build work bench and spray fire proofing.
-
1 hour ago, wpearson said:
borax is a fire retardant also.
I was going to go with borax, but switch it up still going to do more research
-
On 7/19/2017 at 7:36 AM, Yuppiejr said:
I also have a forge of this design likely from the same eBay seller, you will want to seal that kaowool insulation with something that will prevent the insulation particles from becoming airborne and trashing your lungs over time. There is a bunch of good info on the topic over in the gas forge subforum.
If you want to keep the mice away, get some pure peppermint oil extract and soak some cotton balls to place throughout the space. I had a rodent issue with my camper and shed, this solved it in both (the cat option is also a good one, but ours has passed his mouse hunting prime so this is our best option.
i have read lots about the kaowool, is on the list....i have purchase a few bottles of pepermint oil and put it to use the smell inside is offensive.
On 7/19/2017 at 10:55 AM, Daswulf said:Just remember not to use rodent poison and cats. Rodents eat the poison then cats eat the poison in the rodents, poisoning the cats.
My cats regularly come into my shop when I'm working to " inspect " it.
i dont plan on using poison i quite enjoy the neighborhood cats, they are very cool and always visit when we are out on the deck/.
On 7/19/2017 at 11:43 AM, Scrambler82 said:Out here in SoCal, French Valley area, Coyotes are the problem, yes we have Field Mice and a cat would be good but if the cat is left outside all night it needs a good retreat location or it will be the main dish on a Coyote plate.
I have found the electronic modules, that plug in a receptical, work well to keeps the little critters out side, then the snakes, coyotes, and hawks can eat better.
i have also purchase an electronic repellent with sound .
yea scrambler not sure what happened reposted.
I also came across a product while researching called Inspecta shield a spray on fire retardant, seems to be a good product and would be perfect for my application, has anyone had any experience or ever heard of it. Was considering making a new thread about it, just to get more opinions...link for product below.
you tube link for product as well:


Forges 1st fire...the results
in Blacksmithing, General Discussion
Posted
I have tried a few different things to no avail, but if I just quickly dress the sharp cornea on the metal prior to forging seems to do the trick.
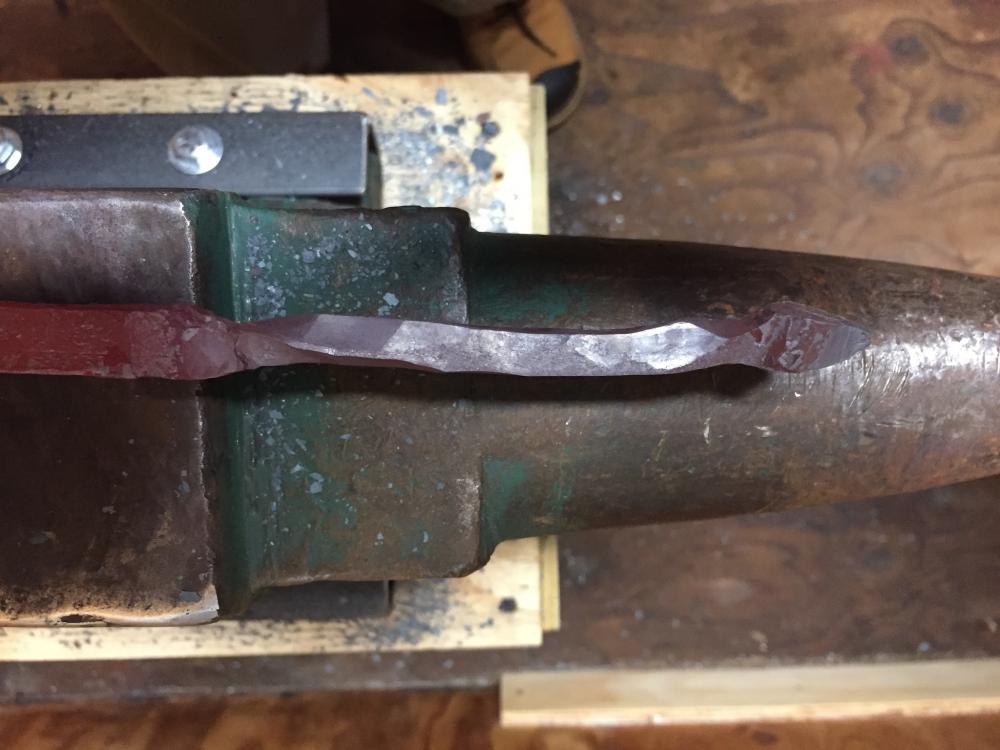
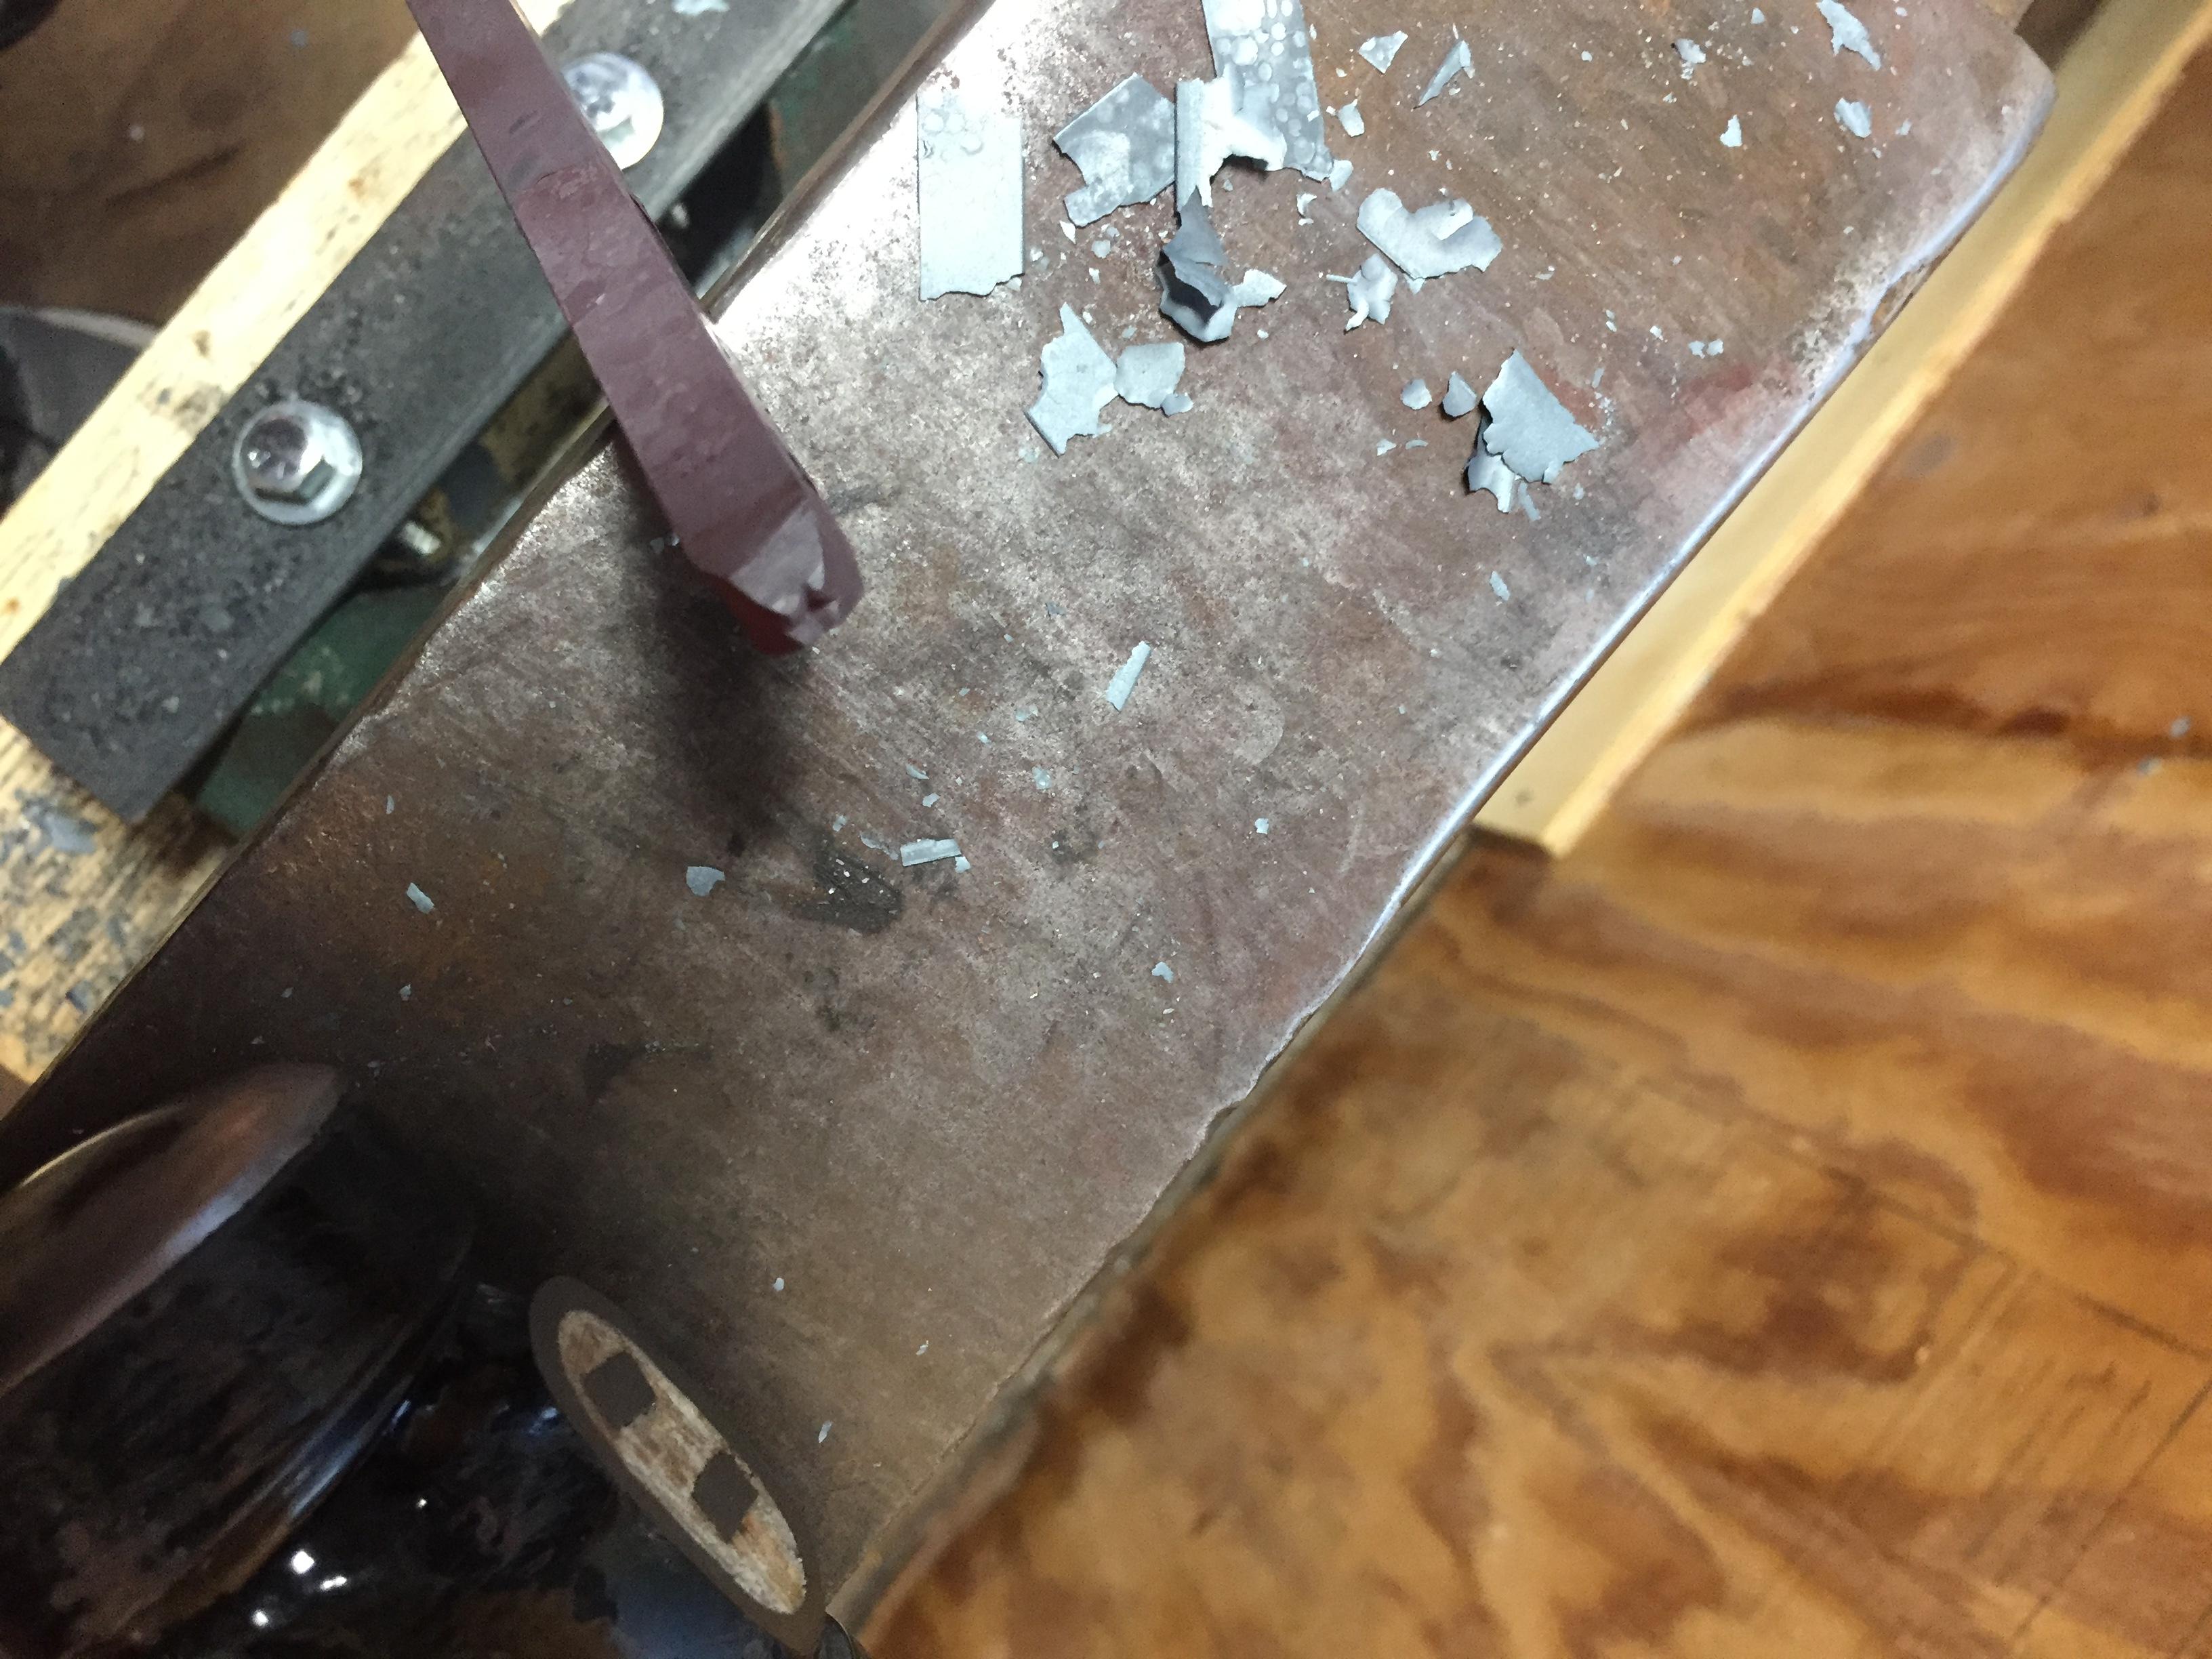
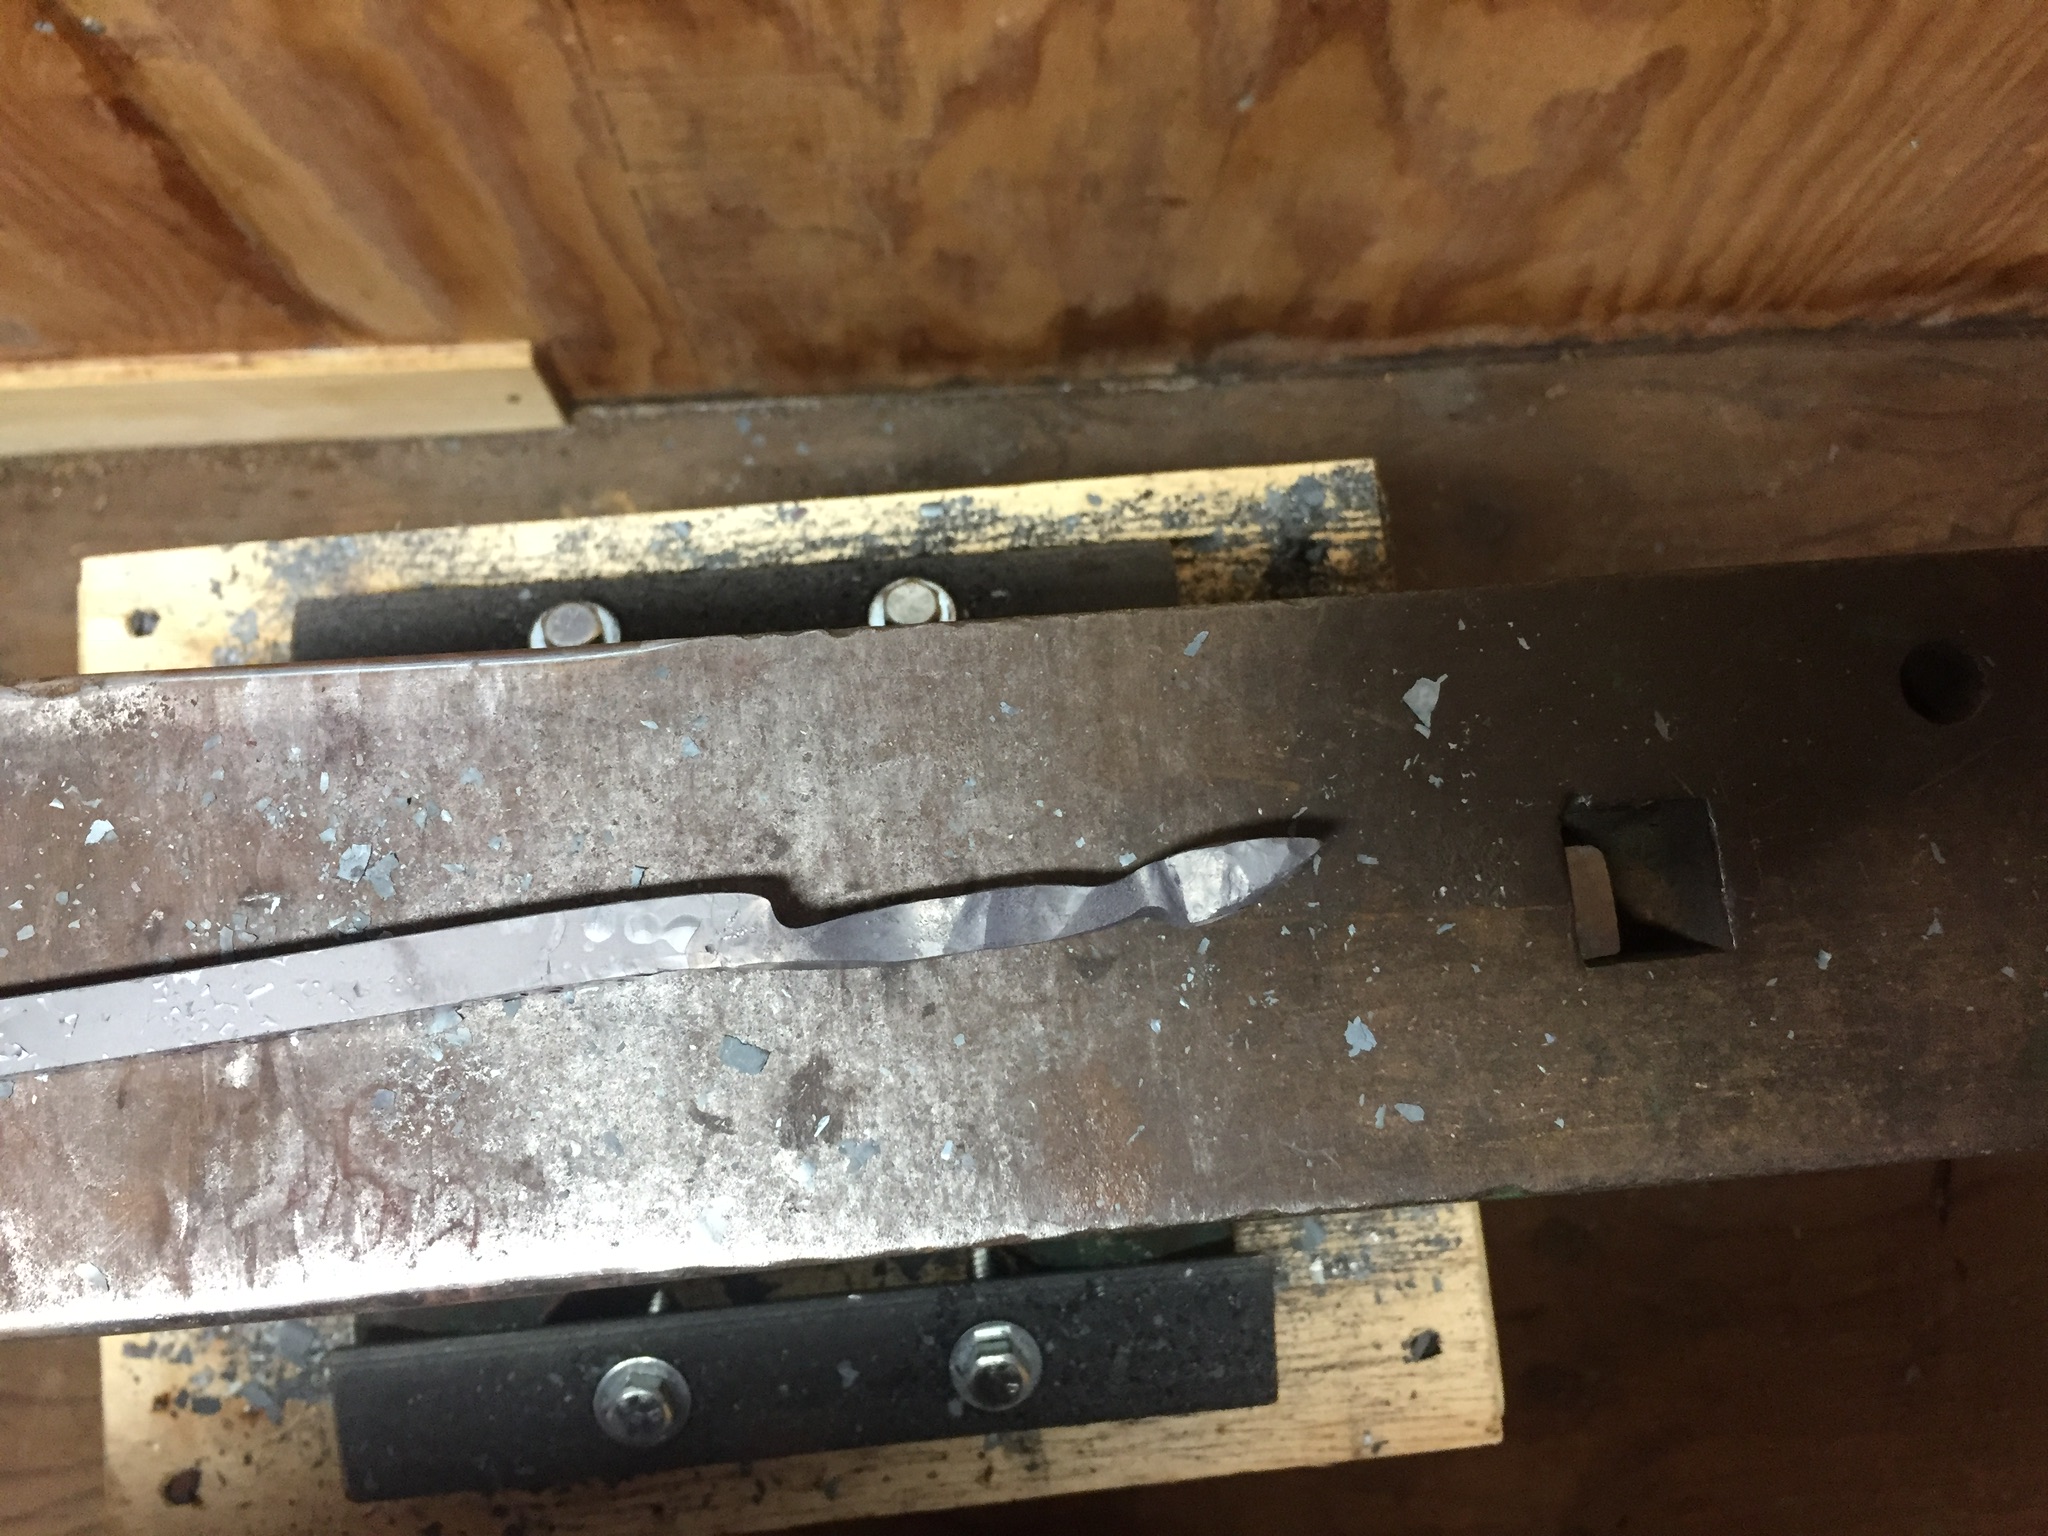
Been out to the workshop (I think I can call it a shop now?) twice more....1st was to heat up and finish up the quick v-bit tongs, definitely needed them for the next projects. I have a coil spring that I cut into sections, forged a little neck knife that came out ok, a 3/16 and 3/8 round punch, also a slot punch that's not fully finished yet. When the slot punch is done I will get my first experience hardening and tempering everything. Let me know what you think?