

Moose5124
-
Posts
16 -
Joined
-
Last visited
Content Type
Profiles
Forums
Articles
Gallery
Downloads
Events
Posts posted by Moose5124
-
-
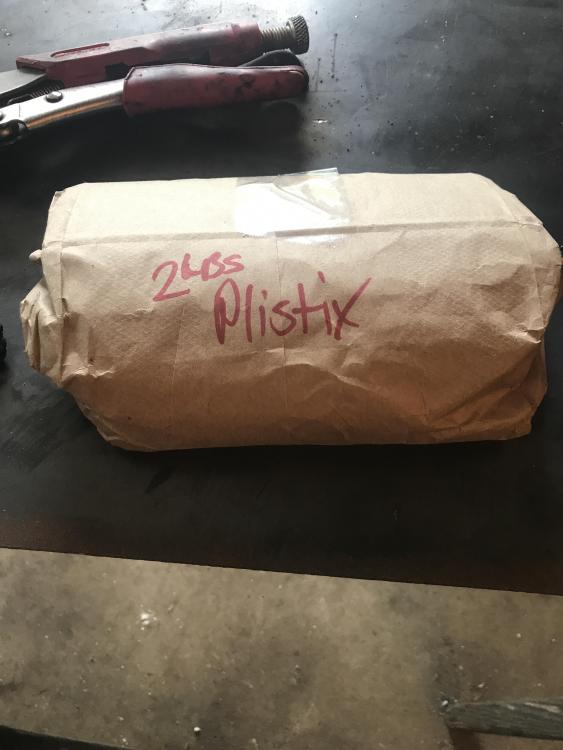
Plistix arrived in its fancy packaging, no directions although from what I read it can be mixed to a sour cream consistency if anyone can confirm this. Also wondering about dry/cure times
-
26 minutes ago, Michael Cochran said:
Have you coated that liner yet? If not you could be blowing loose fibers into the air you breath possibly causing health problems later in life.
Not yet plistix should be here Monday, I'm well aware of the dangers of working with fiber insulations
-
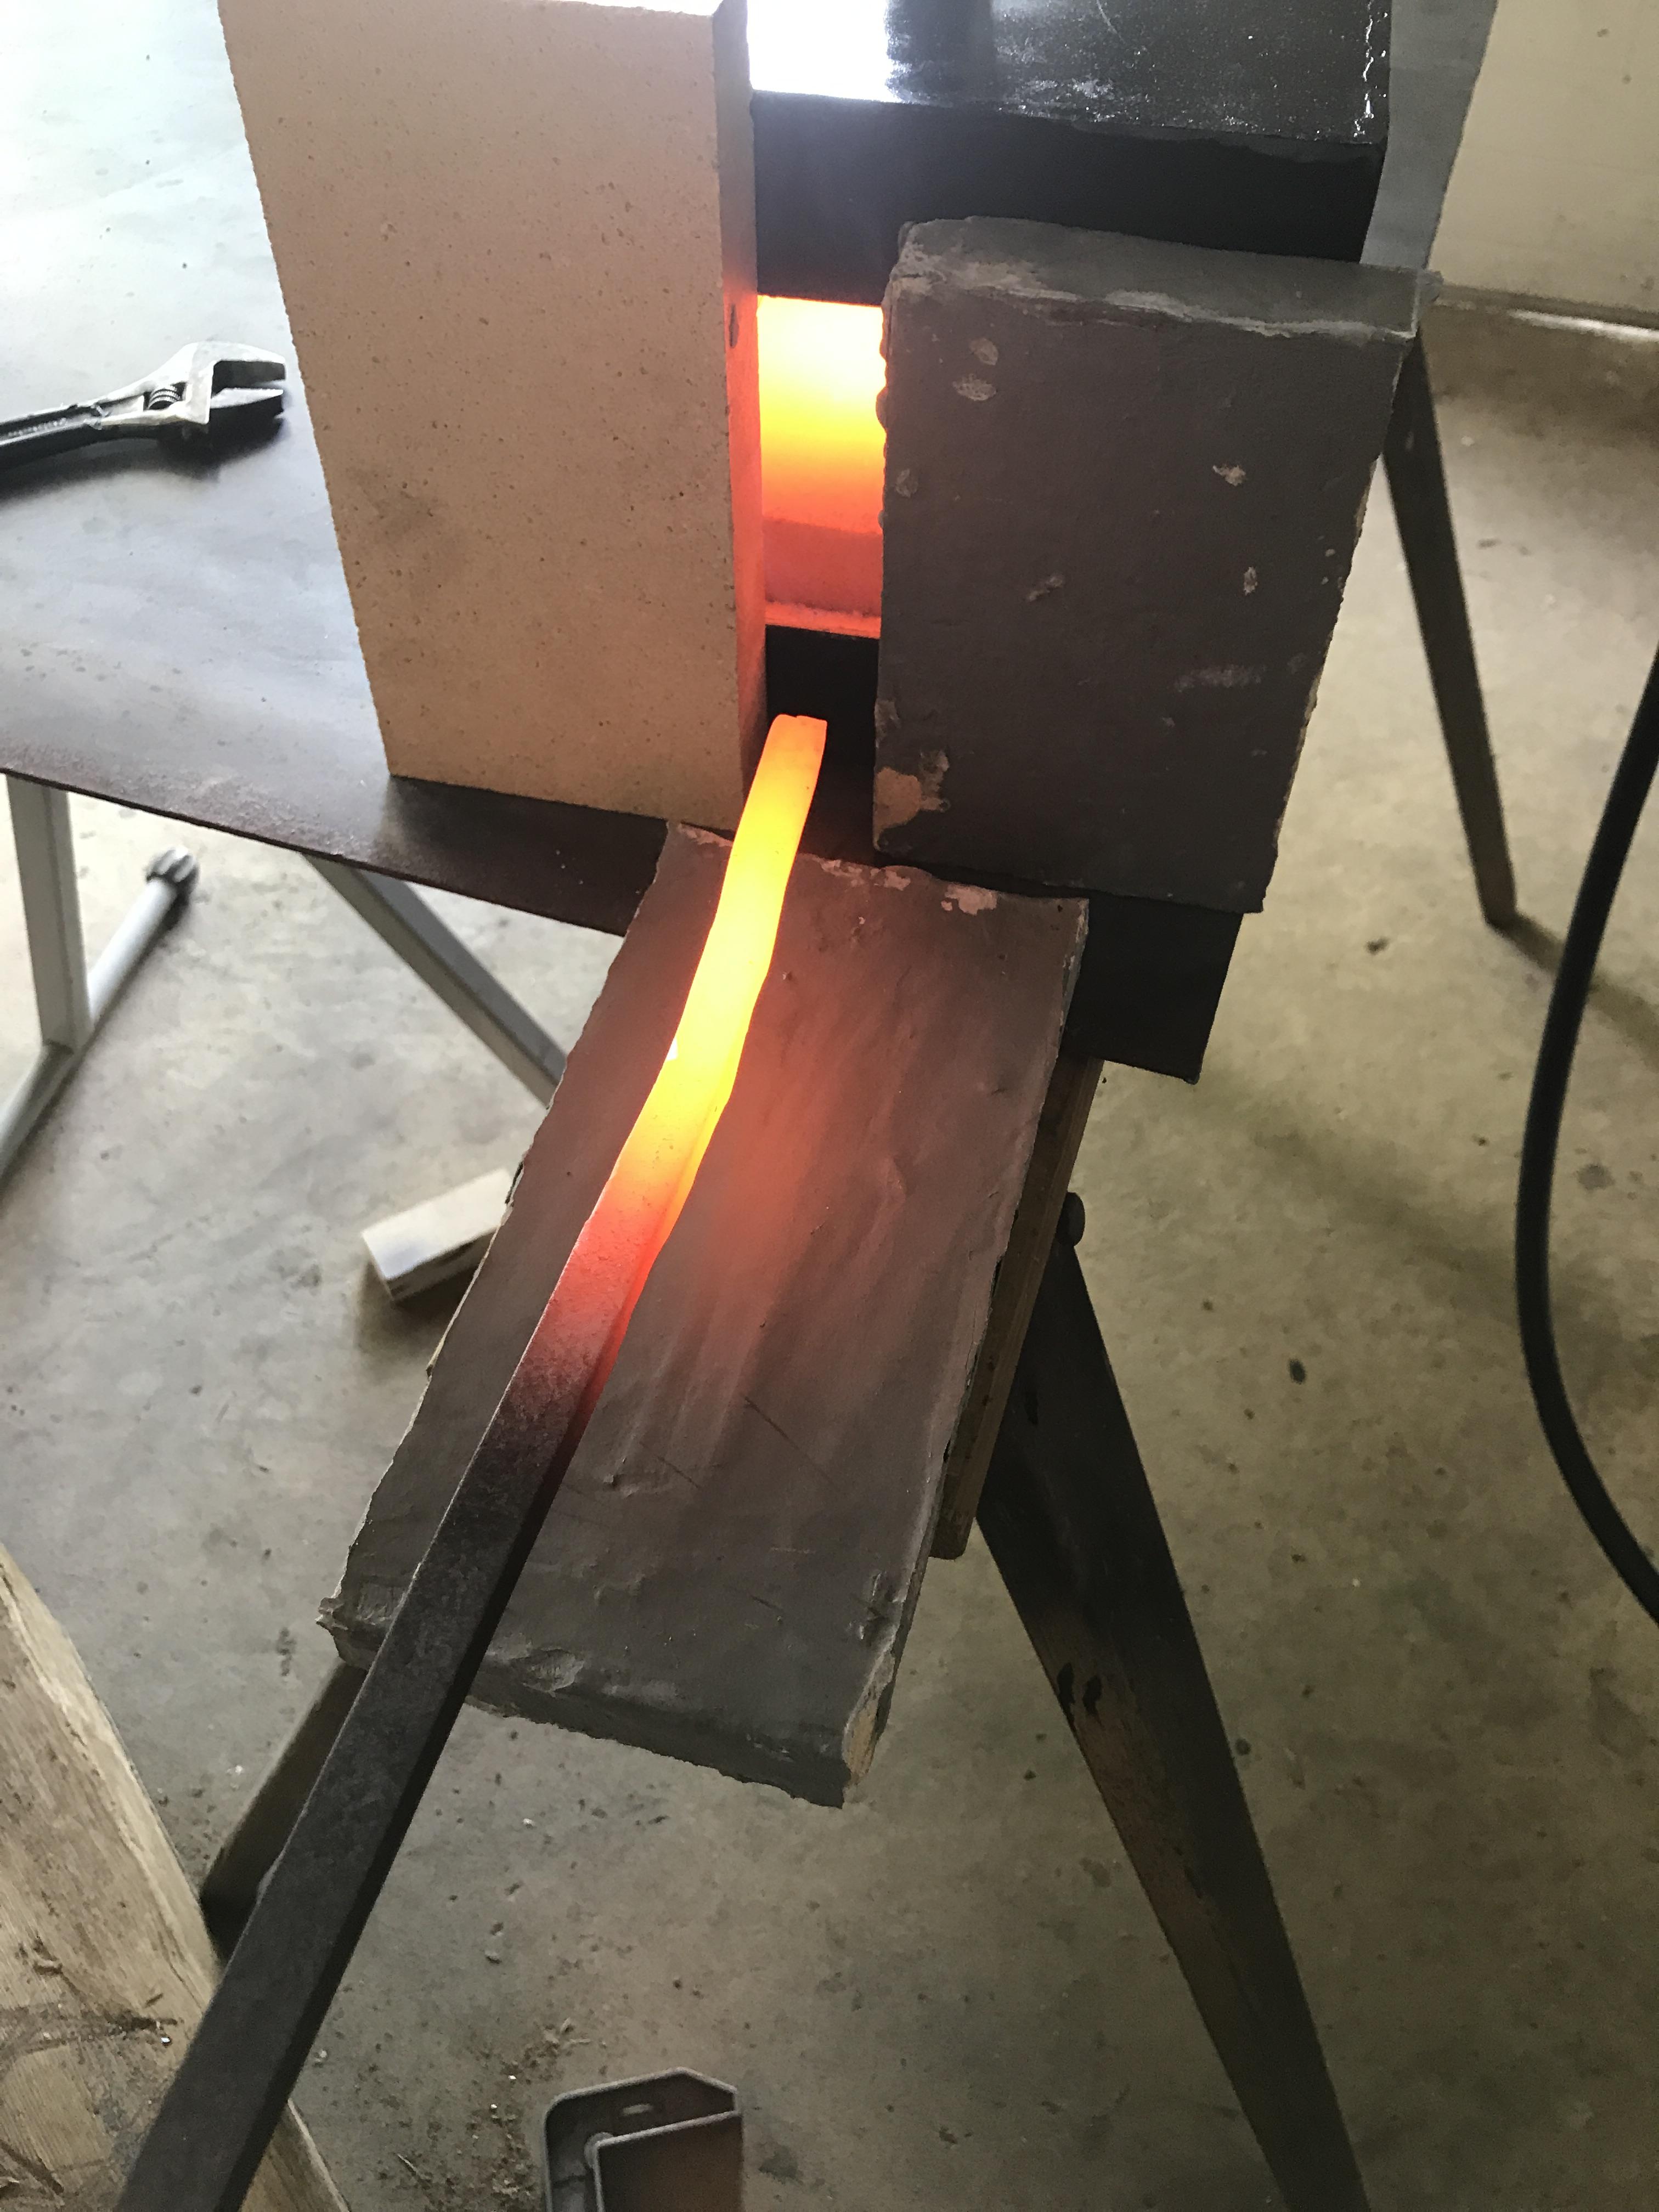
Changed to a 1"x3/4" T and left more space between the mig tip and beginning of the nipple, tried it with a .030 tip and couldn't get the flame to stay steady but went back to the .035 tip and work much better. Put a piece of 1/2" wrought iron and got it red hot fairly quickly it was easy to bend and hammer on but don't have an anvil yet so I can't do much but I think I'm making progress


-
9 hours ago, Frosty said:
What works for me is a 1" x 3/4" T. A 3/4" T has half the air intake area so it can't induce nearly as much combustion air. I found using a 3/4" T with a 0.030" mig tip touchier to tune but tunable. That's what caused me to try using 1" x 3/4" Ts and I'm much happier all round with them.
I don't know what you're using for the fitting to mount the mig tip but the end is less than half way back from the throat. The fitting is also obstructing the air intake part of the burner. I think you have a lot of little problems adding up.
If you want to keep most of this burner I'd put a 0.030" contact tip in it. Don't be surprised if you have to trim it back about where this one is to get it tuned.
Frosty The Lucky.
I have no problem switching out contact tips, but I misread the direction in your write up didn't realize you used that 1"x3/4" T, I'll start there and see what it does then try changing/shortening mig tips
-
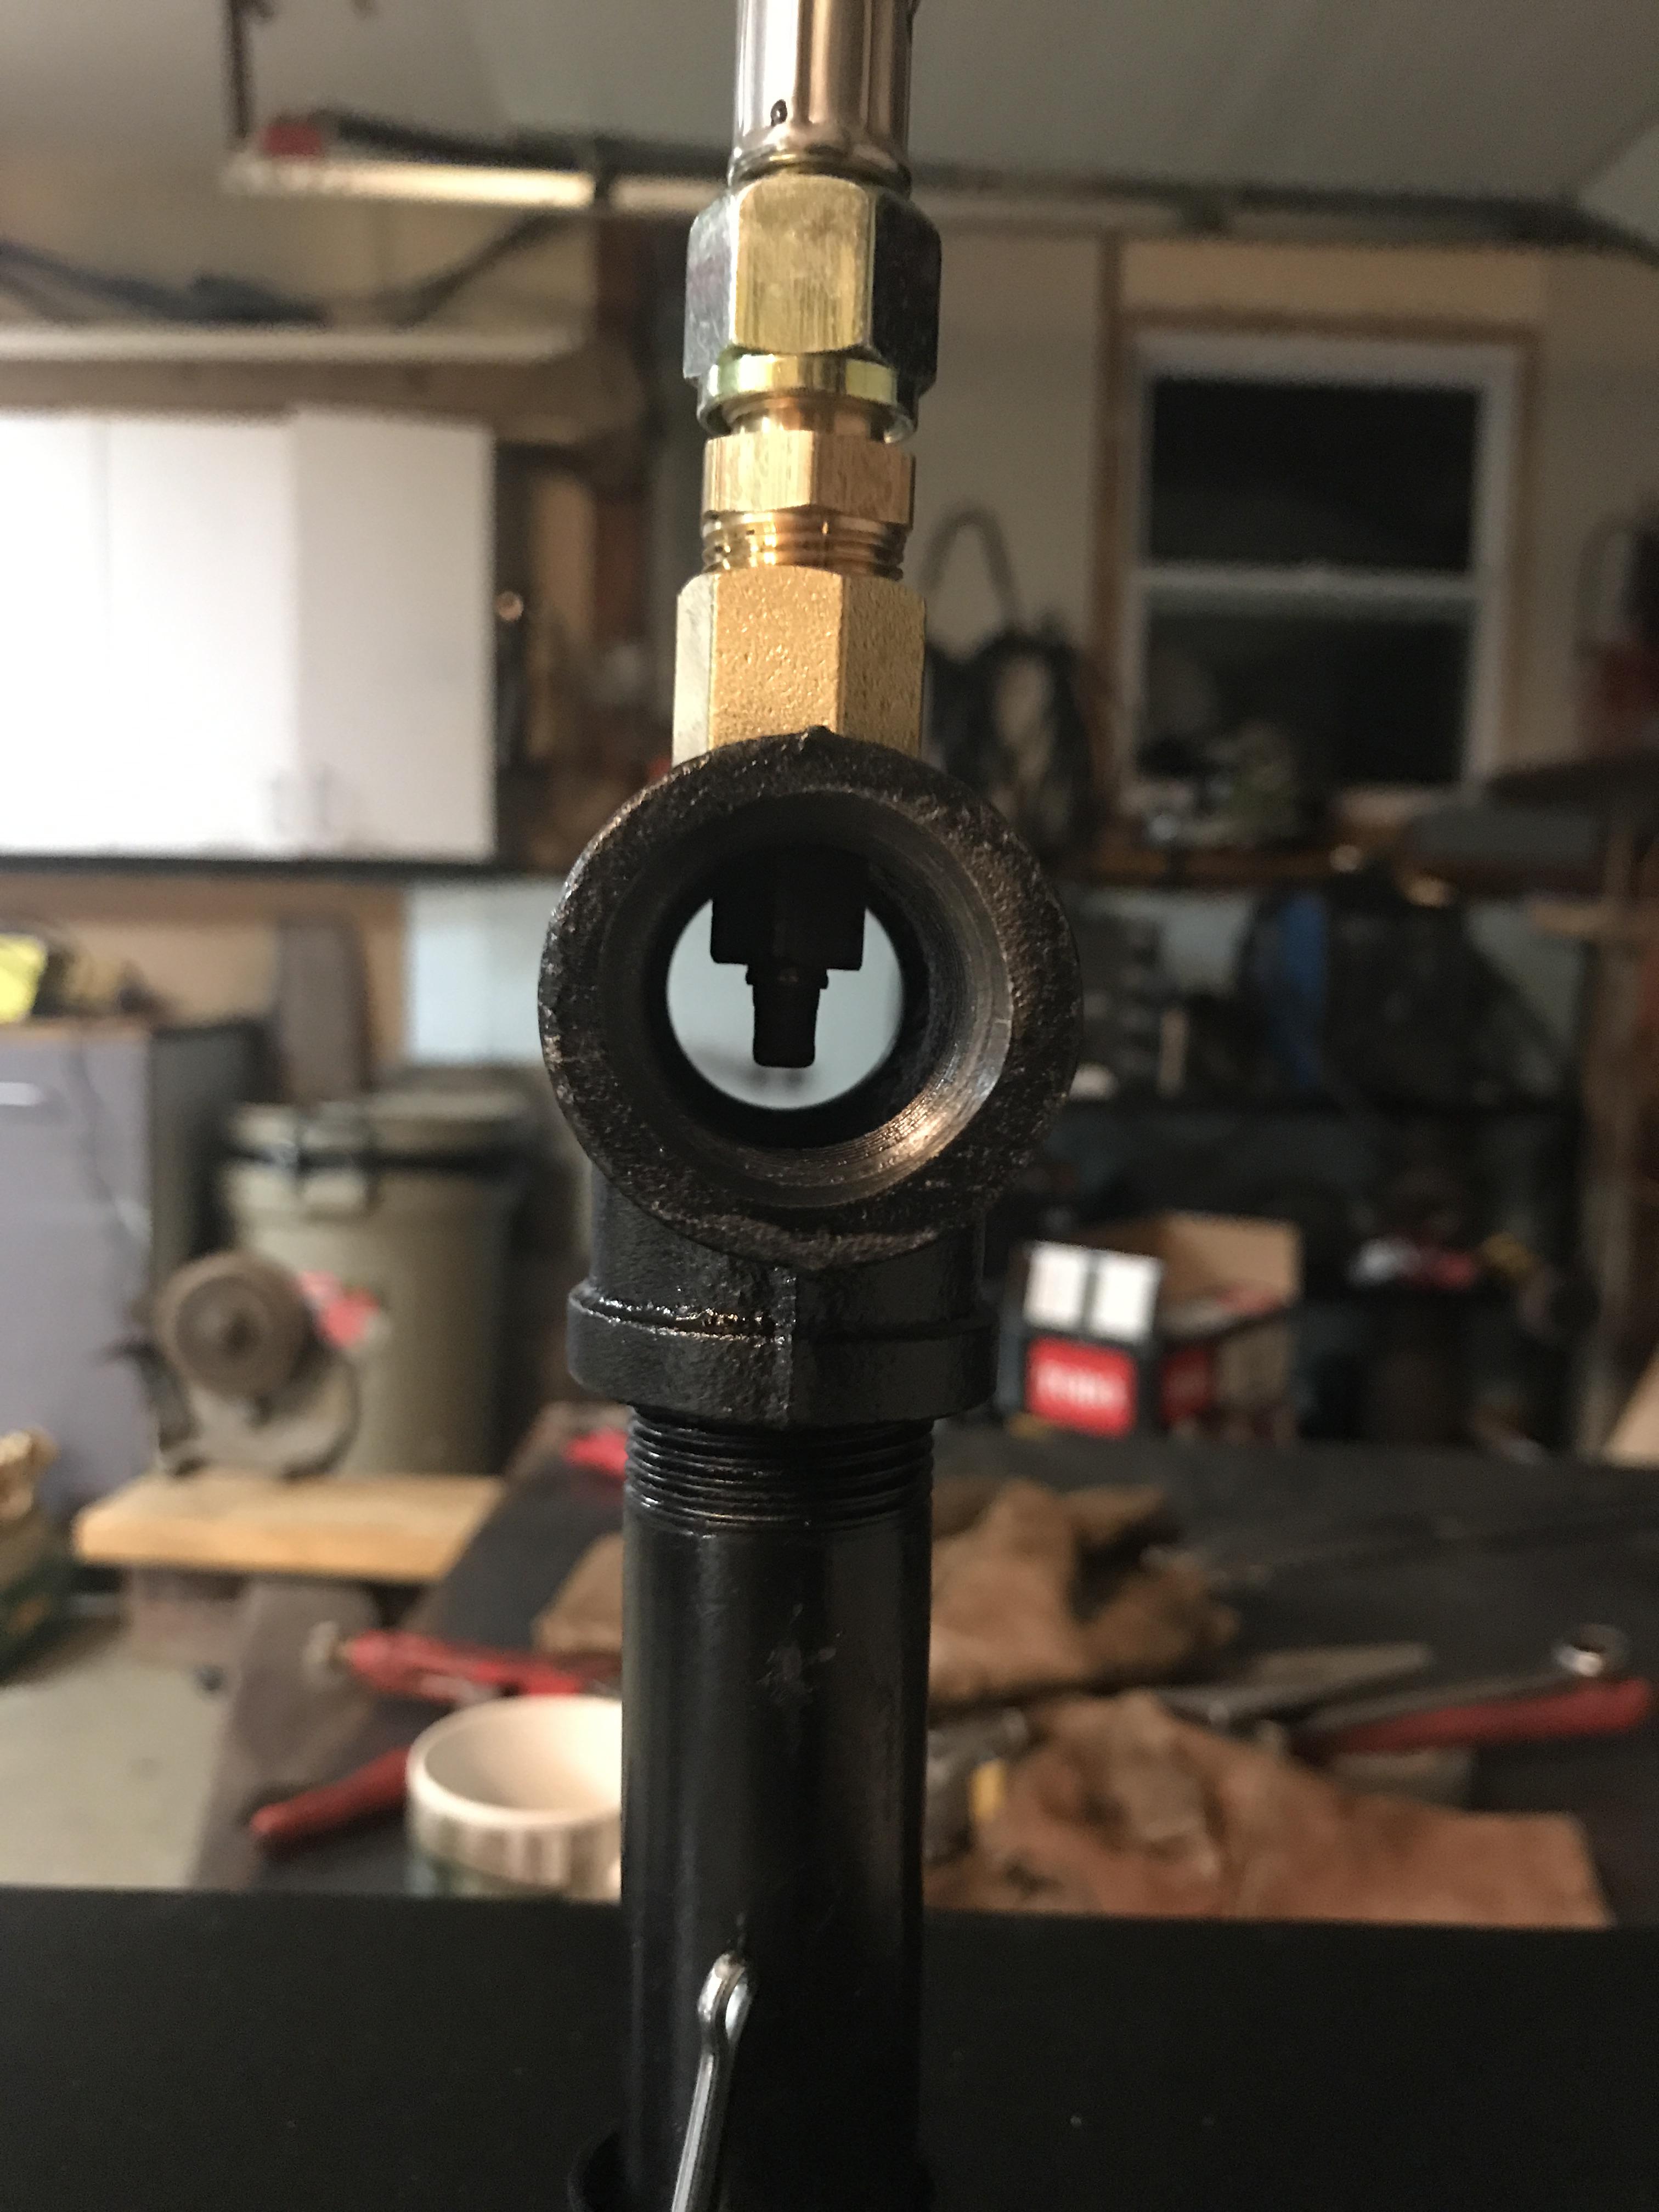
Regular 3/4" T from Home Depot, yes it seems rich it's very touchy as far as adjusting it goes, more pressure my flame hits the floor like in the first pic or it starts puttering out of the tube, any less pressure and it's just a weak red and yellow flame or dies out, here is a pic of the jet inside the T. And it is a .035 mig tip maybe sits to low now that I like at it?
 1 hour ago, Mikey98118 said:
BTW, that flame is looking pretty good.
Thanks Mikey I'm pretty happy with with way it's turning out, not bad for my first one thanks to you guys of course, little more tweeking I think the flame is a bit narrow
-
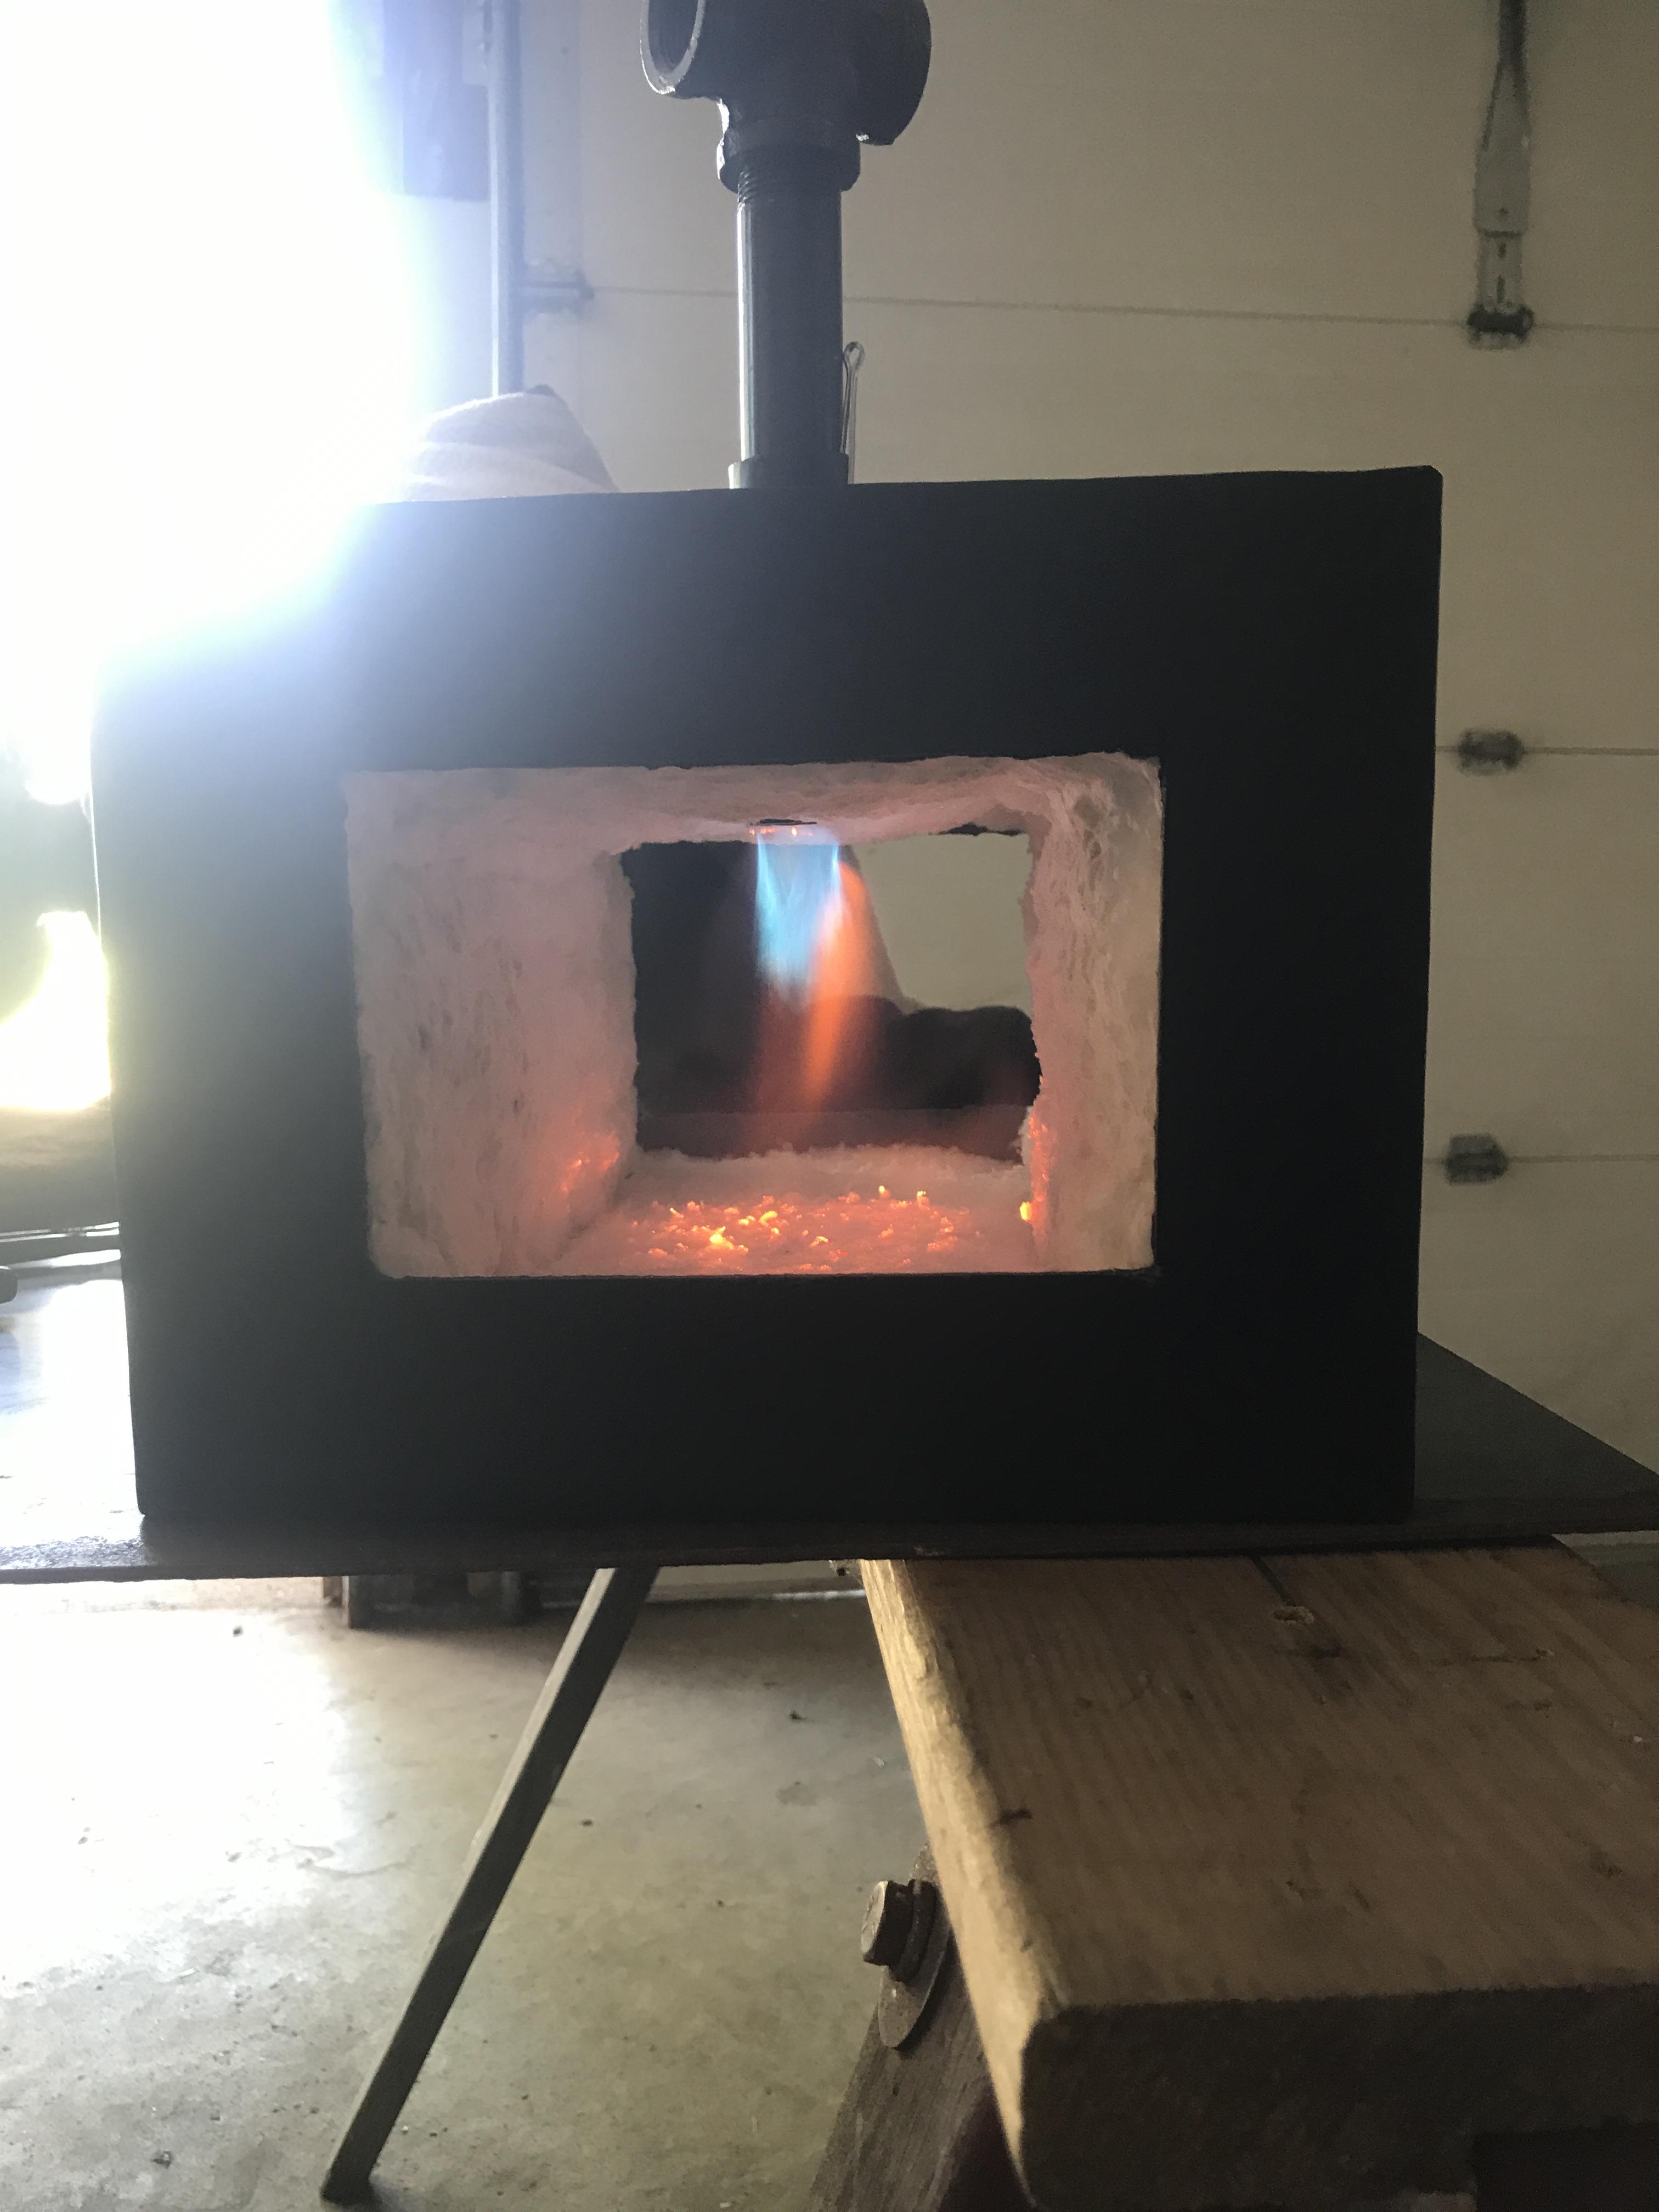
Played with the regulator a bit looks much better but seems like a flare would be big help
-
8 hours ago, Frosty said:
Looks like the flame is rich and blowing off the end of the burner. What psi are you running?
Frosty The Lucky.
There is no gauge on the regulator just the red adjustment knob so I can't say exactly but the dial should be right around 5psi maybe a little higher, I played with the dial a bit and it seems like any lower and I have a weak red flame, any hire I can see and hear the pressure go up but the flame stays about the same distance from the end of pipe. Wondering if a longer nipple might help? It's currently 6-1/2" from then base of the tee and is flush with the kaowool on the ceiling
-
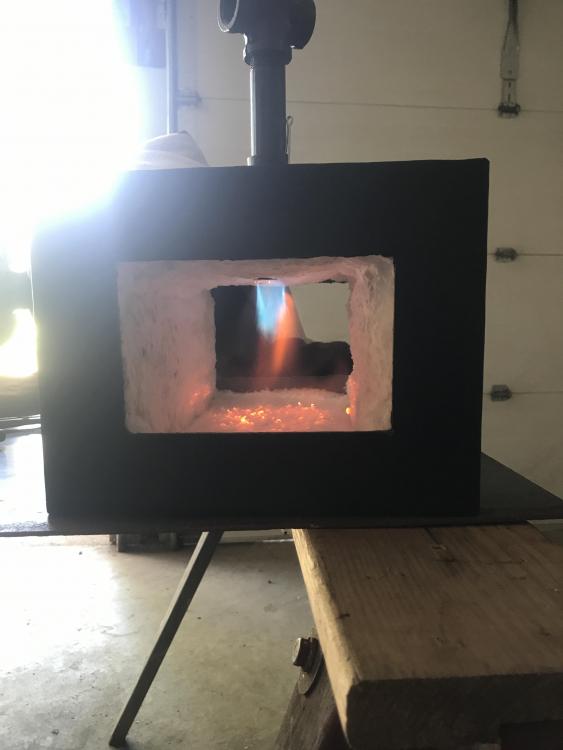
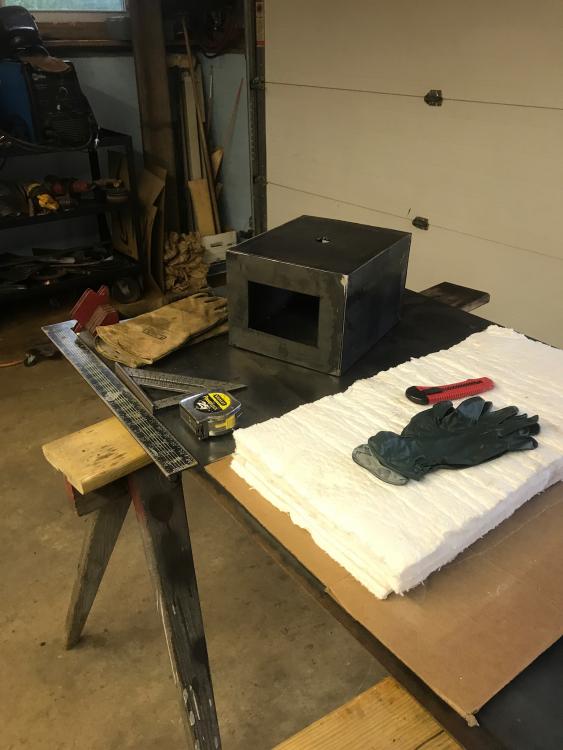
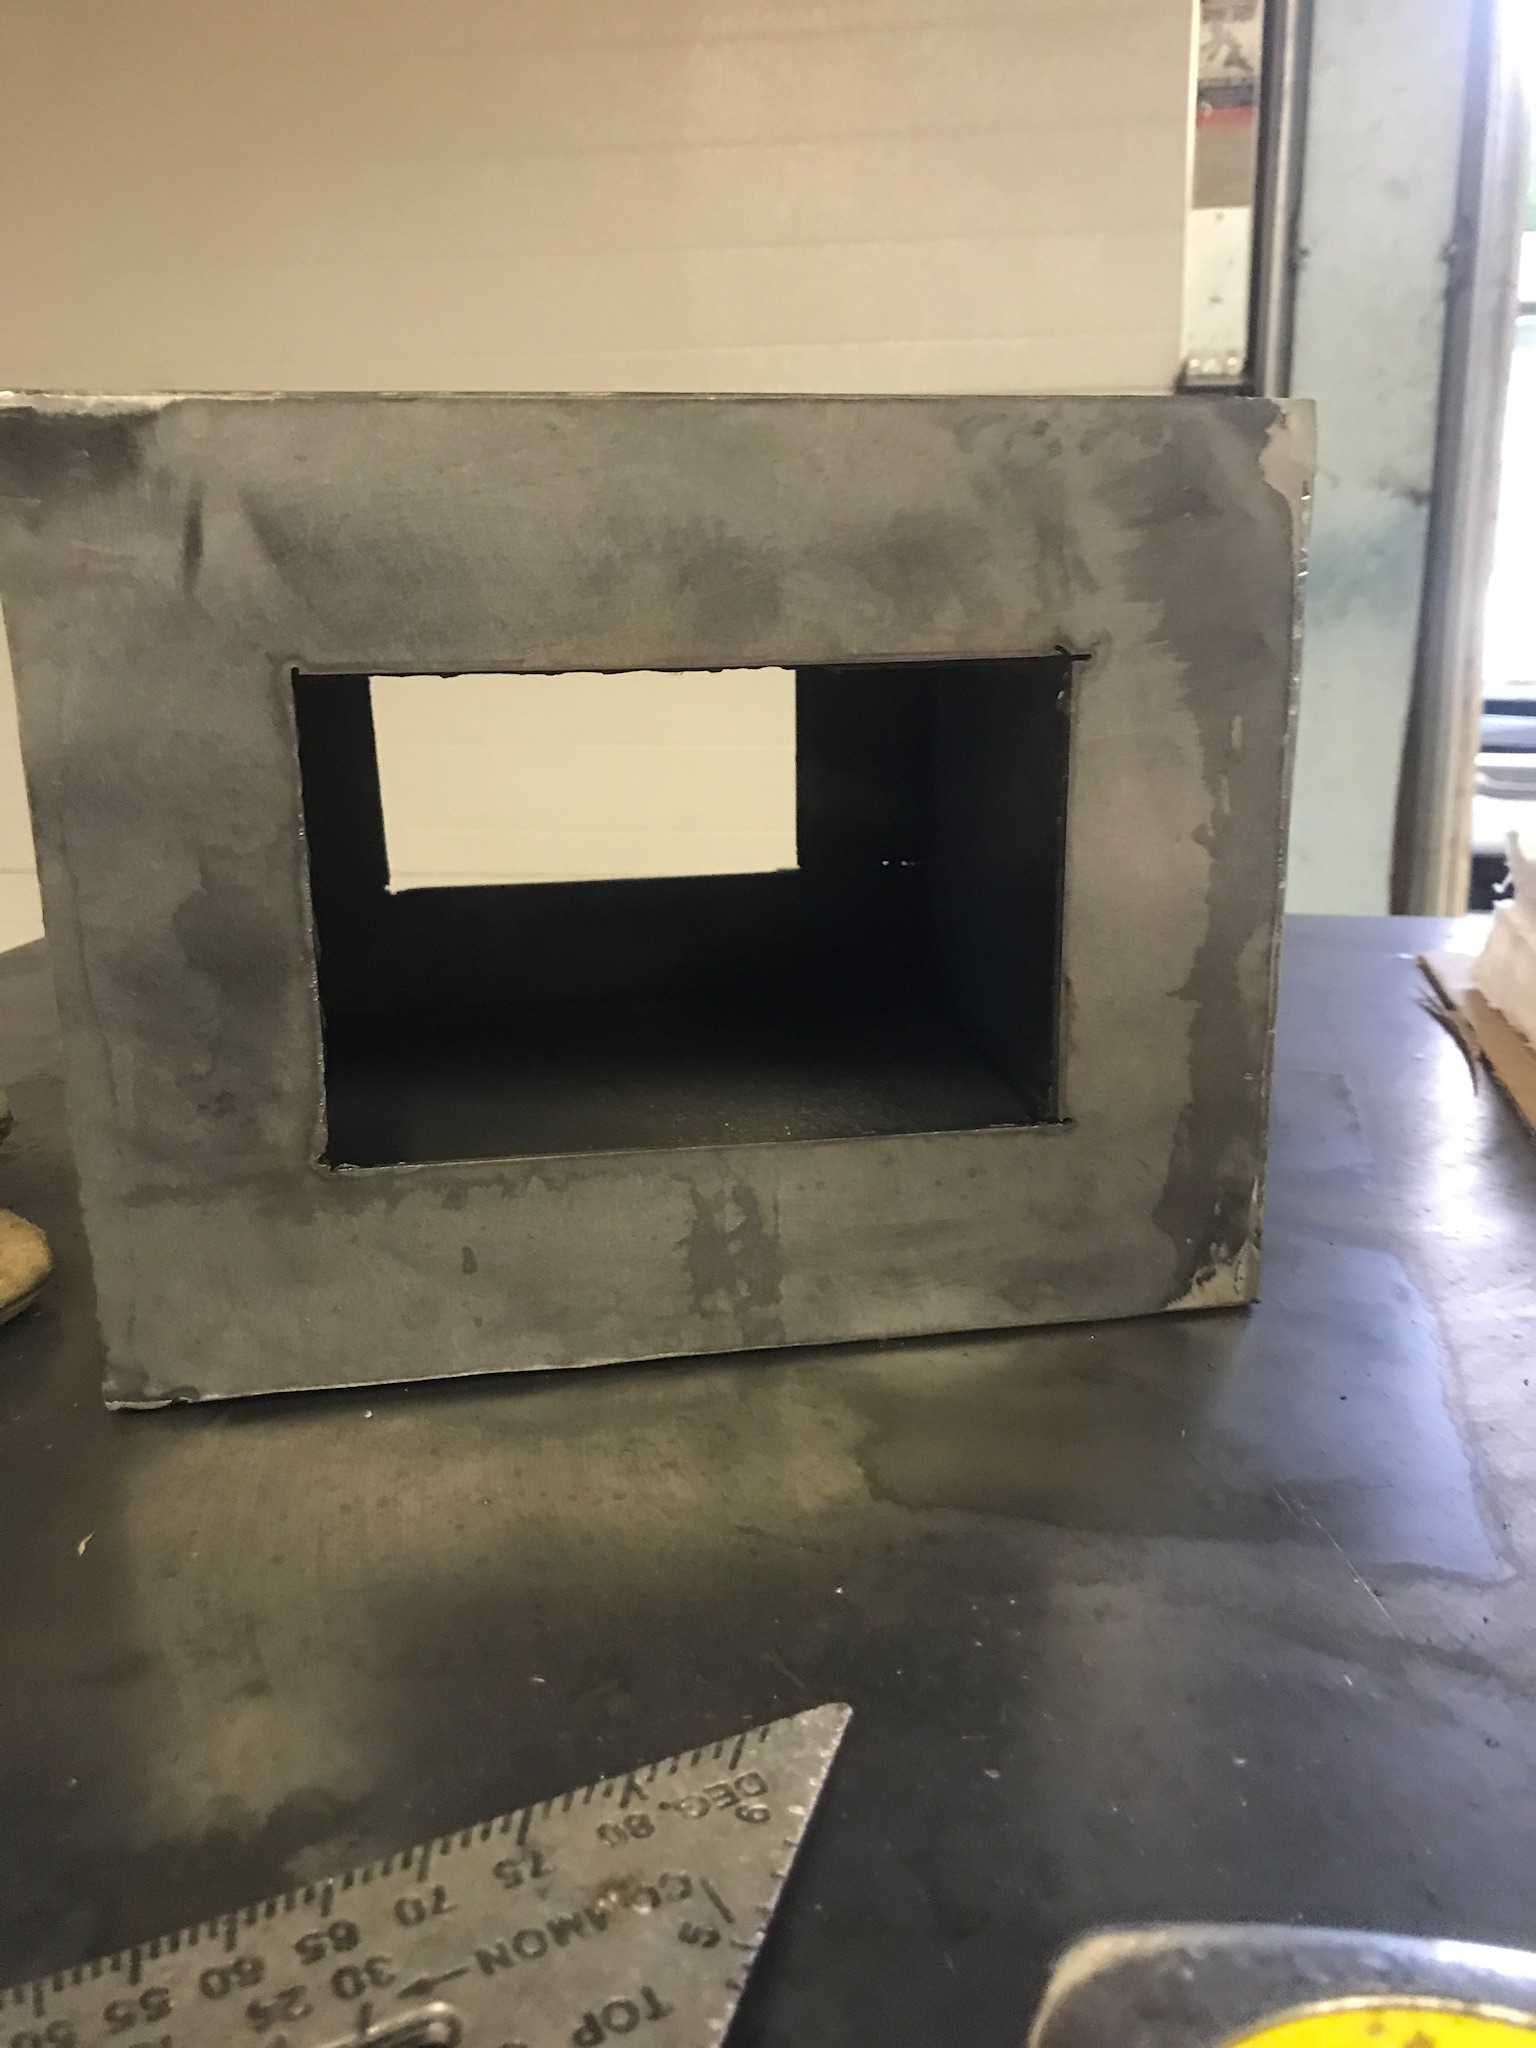
Still waiting on the plistix but got my box welded up and insulated with 2" of kaowool and I'll have to pick up some fire brick for a floor and baffle doors, burner is all together and working ok it's burning hot for sure but It may need some tuning it's not a great picture but lmk what you guys think


-
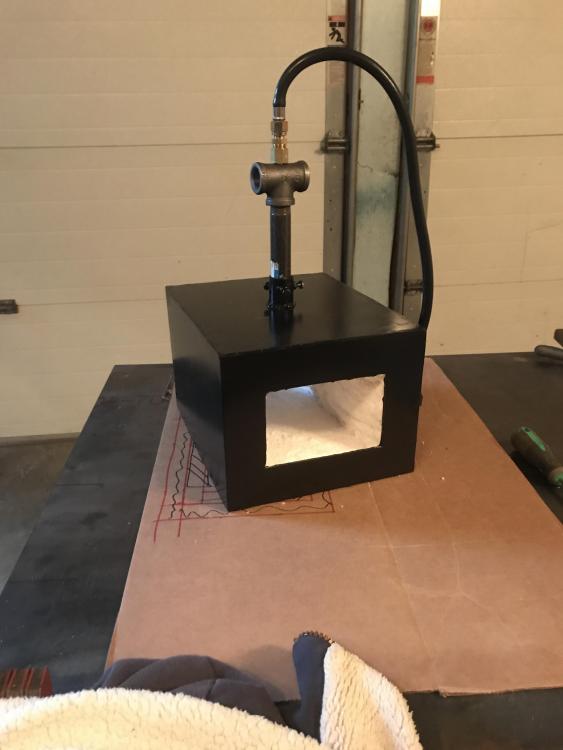
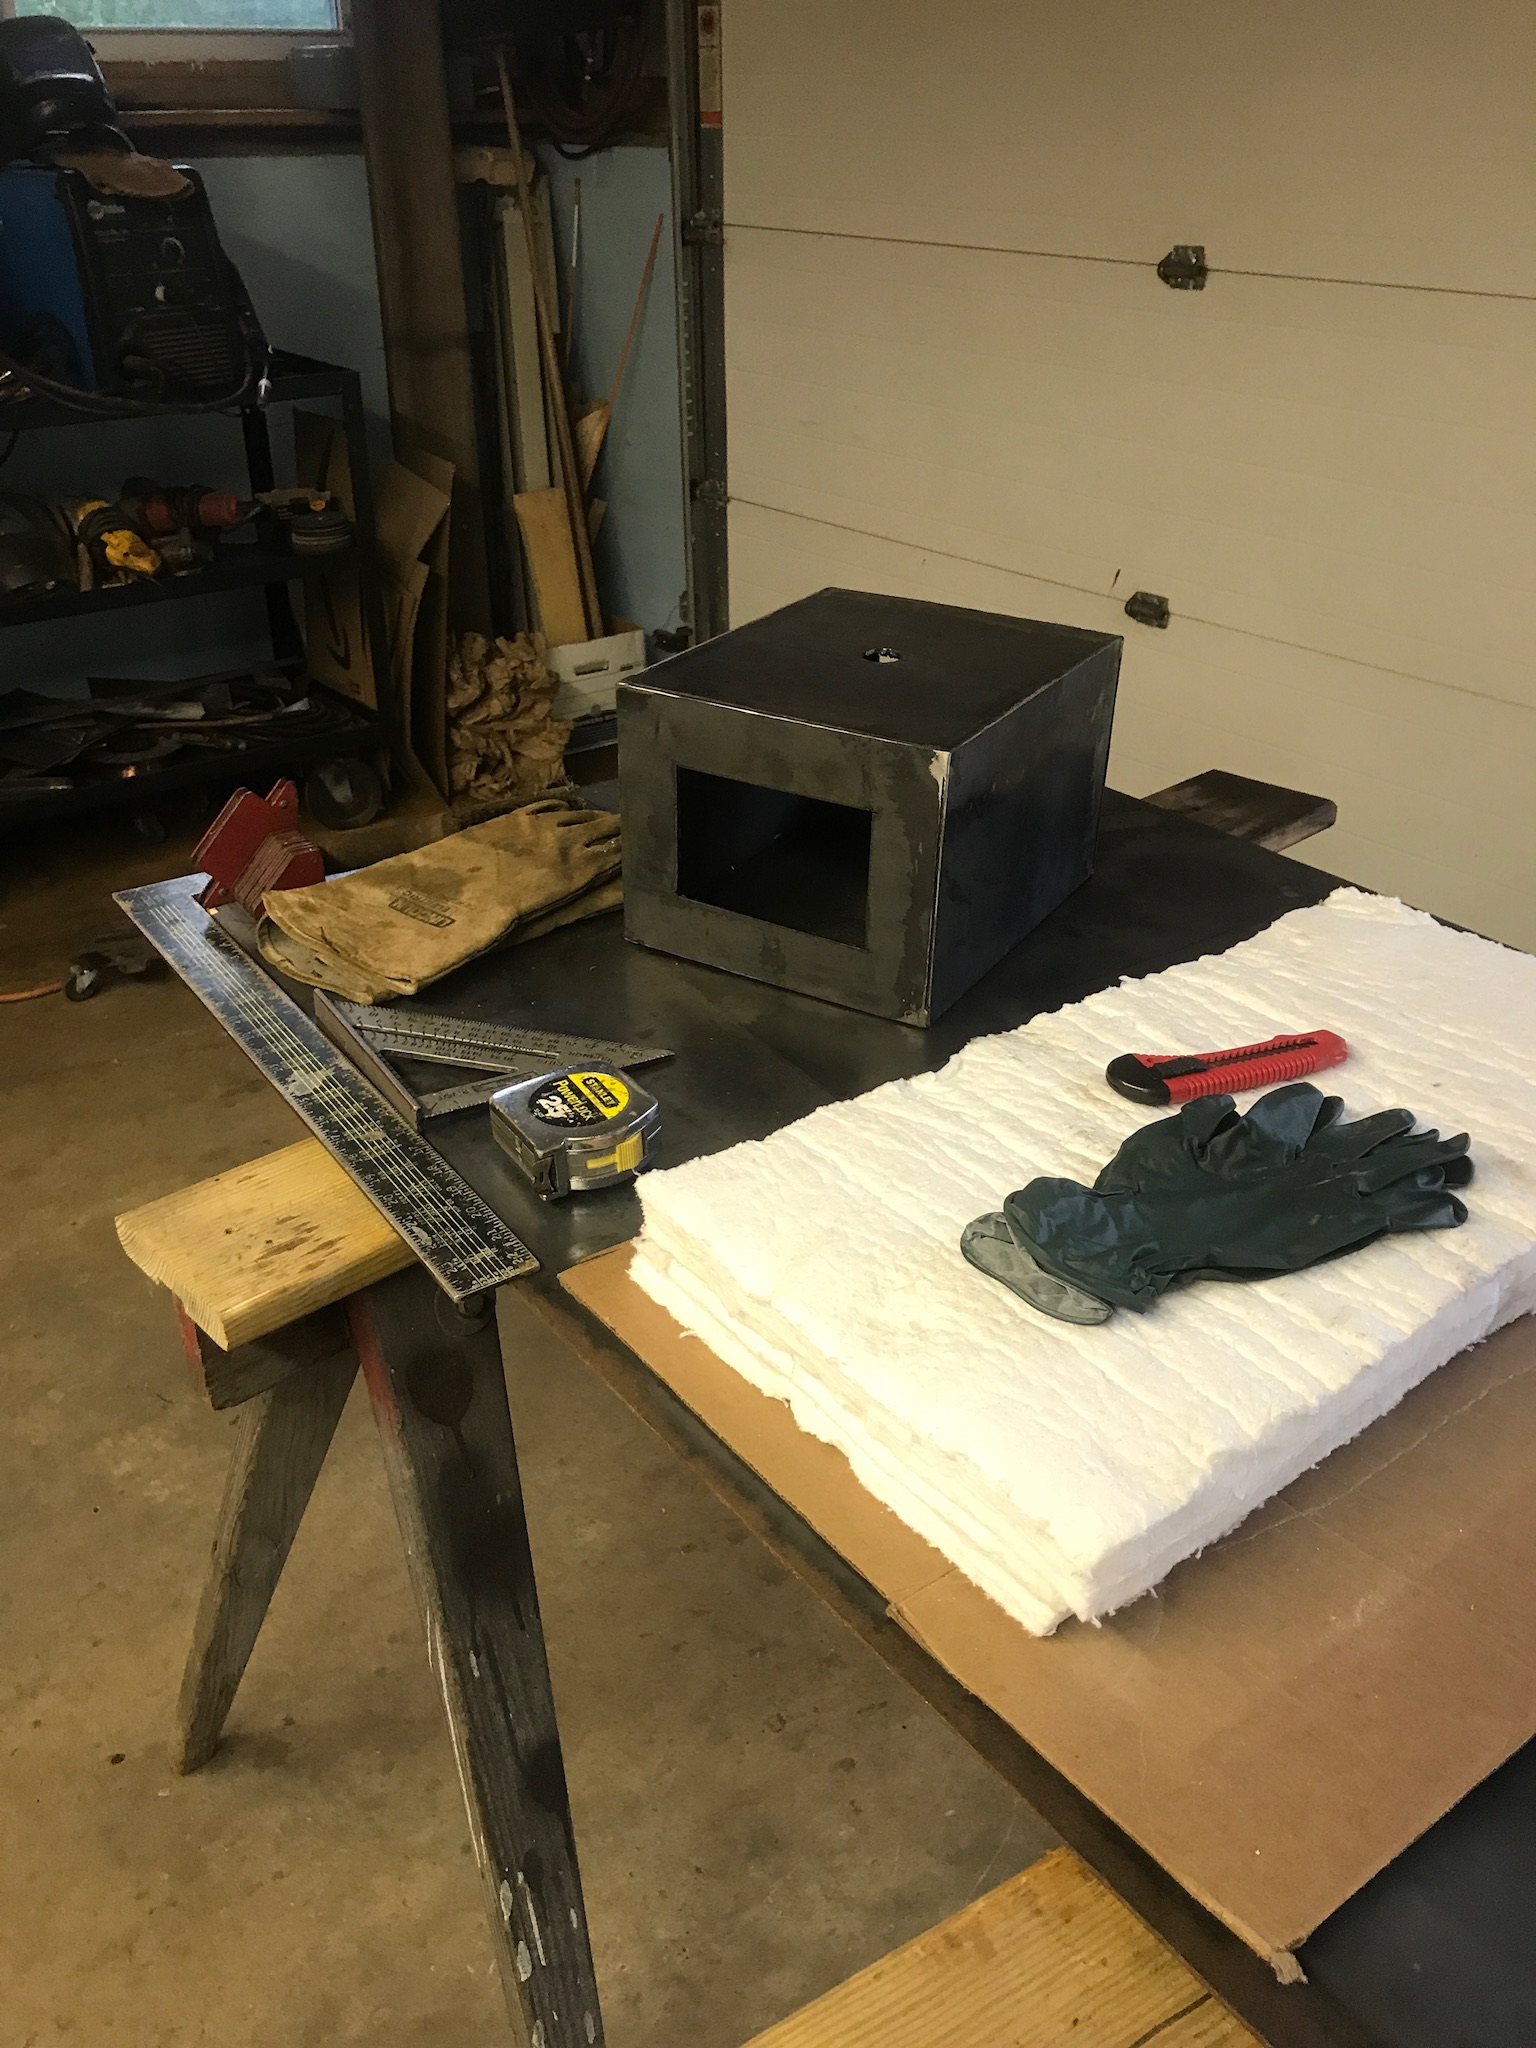
Kind of a busy weekend but managed to squeeze in some time to get started got my box tacked together have to wait til Monday to get my gas bottle filled to get everything welded, as of now the box measures 12"x10"w x 8"h minutes the 2" of insulation. Kaowool was delivered this morning and I have some plistix on order hopefully won't have to wait long. Tomorrow I'll pick up some pipe and fittings to make the 3/4" "Frosty" burner. As it sits now.

-
thanks frosty. I have decided to skip the experimental mini forge and go right to building a decent size forge using better insulation and design. I ordered some ceramic blanket all i could find was 2400*f. they were 1"x2'x1' and ordered 2 pieces figuring it would be enough for 2 layers with 1 layer on the floor and an insulated fire brick for a durable flat surface and i figured i have a small piece or 2 left for the back wall and doors. Going to stick with Frosty's T burner and go up to 3/4". not sure exactly how large i will go looking for thoughts on that...I know there is no perfect size and it will depend on what im using it for, as stated earlier in the post it will be for learning and hobbies (making knives and swords) but regardless if i get good at it i know ill enjoy hammering metal. I just dont want to find myself using it often and wishing I made it a little bit bigger as of now im thinking 1ft length with a 4"x4" opening and 2-burner setup? let me know what you guys think the cermaic blanket should be here tomorrow but im trying to find something comparable itc100 but less expensive and where to find online or possibly local.
-
Perfect I have a 6" piece laying around, the roof of the firebox is the fire brick so I was able to grind a flare shape on the inside and figure just leave the pipe recessed an 1/8" and weld a flange to the outside of the box, tap it with a couple set screws to adjust if needed. You guys have been a huge help great forum with great advice. Already planning a larger forge build but can't wait to see how this mini forge heats up
-
And how about th length of the burner? also wondering if there should be a flare on the burner I suppose it can be added later if necessary.
-
Took a look at that design, looks like the way to go not sure if I'll get to it today but seems very simple. Next question...that's design is for a 3/4" setup. If I'm going to use 1/2" then what size mig tip should I use? Would a .035 still work or try a .30? Thanks again for the help
-
Not actually sure on the fire brick specs but hoping the refractory cement with do the truck, if the cement and or brick break down no big deal I will order up some kaowool and recommended refractory to coat it with. I will look in to the burner design and 1/2" is what I was thinking
-
Ok gentlemen, I'm new to the site and to forging itself, I'm a welder but looking to step it up in the fabrication world. This will generally be a hobby forge with the possibility of making small custom pieces for other welding projects. My first forge build is going to be somewhat experimental because there wasn't much material easily available. To start I used some fire brick and coated it all around with 3000*f refractory cement also used to join the bricks together to make my fire box. Can't say how it will hold up most importantly to me is getting the burners installed correctly there seems to be a lot of information regarding burner size, quantity, and design. If it doesn't get hot enough...not a big deal what I don't want is to have a dangerous setup but something I can learn on and study the design.
So back to my fire box which will be wrapped and an 1/8" steel box (leftover sheet) witha hinged door and a slider window so I can't adjust ventilation. The box measures 4-1/2" x 4-1/2" x 9" deep. If my math is correct its about 182 cubic inches. My first thought was obviously an efficient and effective burner setup. The question is 1 burner or 2 and what size. I can obtain and adapt any fitting together no problem but looking for recommendations from someone with the knowledge and experience.
Ill post some pictures of what I have together and what iaccomplish today thanks in advance to anyone taking the time to help a rookie, looking forward to hammering some hot steel


Show me your blacksmith pets
in Blacksmithing, General Discussion
Posted
I’m a hobbyist not a blacksmith but this is my dog Moose aka dumb dumb boxer pit bull mix
Beautiful dogs, I grew up with a white German Shepard and she was an angel. Incredible dogs