

Jclonts82
-
Posts
312 -
Joined
-
Last visited
Content Type
Profiles
Forums
Articles
Gallery
Downloads
Events
Posts posted by Jclonts82
-
-
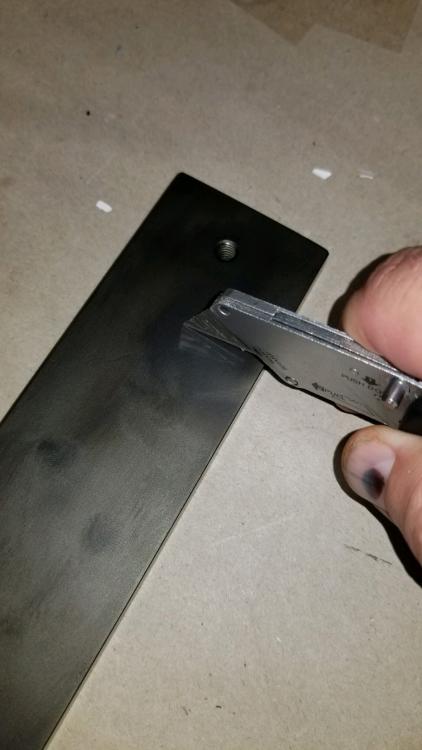
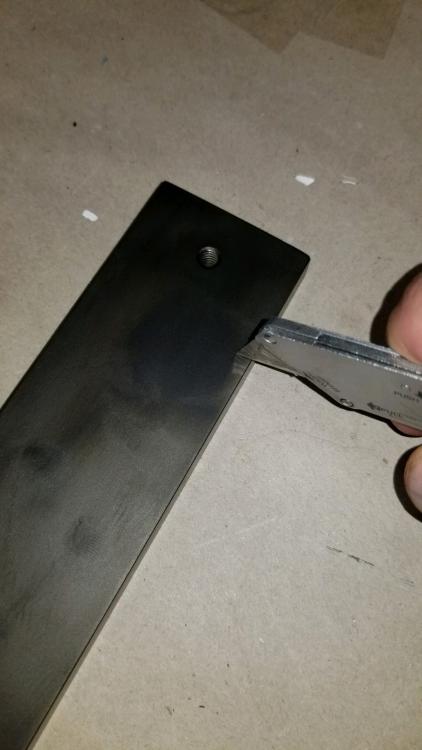
I had him coat a platen I made for my grinder as a test as well, we we took a standard utility razor blade, and "scratched" the heck out of the coated steel. It left marks, but come to find out it was like chalk on a chalkboard, it was the razor blade rubbing off on the DLC coating. a few swipes with a thumb and some pressure and they wiped off...
Still no idea on price points, He is not at liberty to tell me his operating costs, with companies he contracts with, that is kept under NDAs.
Lately I have been helping him test firearm components for various companies. Today, we just completed a 20,000 round torture test on two pistols that they had coated every part of the frame and slides. 20K rounds each pistol, and where the barrel locks into the slide, the coating is still pristine, it has polished the barrel where it makes contact and looks like it had been buffed. guns got so hot the fiber optic front sight melted off... lol I thought hammering for a few hours made my forearms sore... I had no idea.
What would be an agreeable price point? I guess it depends on the individual makers volume...
-
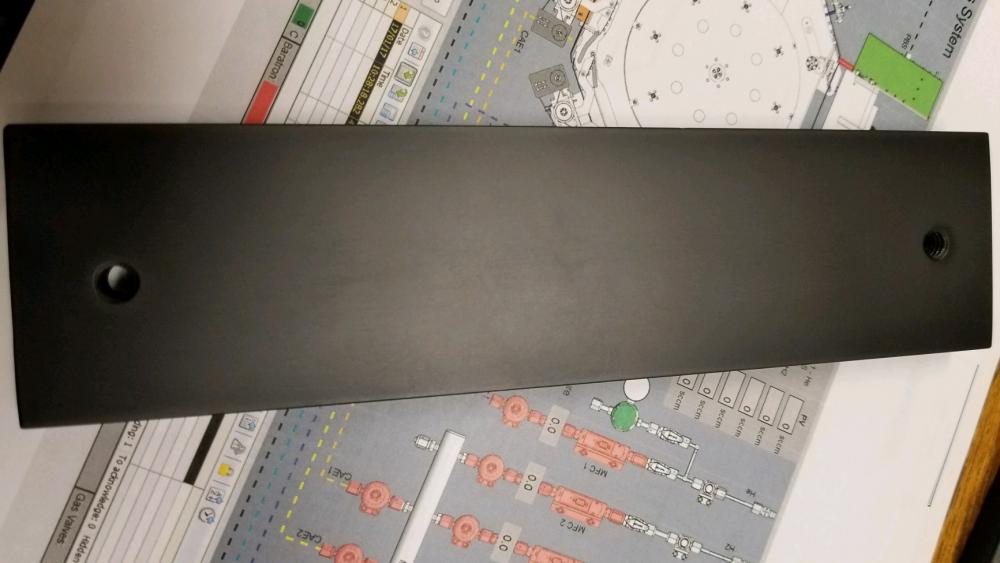
Long story, kinda short: My uncle works for a company that has developed an extremely fast (20-60 mins) method for coating electrical conductive materials in a bonded layer of "Diamond Like Carbon" basically they strip xylane gas apart in a plasma field to unbonded C4+, and very carefully deposit it into, and onto the substrate of their choice. (read: grow microns thick layers of diamond on the surface of whatever they want) They are figuring any and all industrial and practical (sometimes impractical) uses for the tech.
He wants me to reach out on some forums to see any market potential for knife makers. The machines he builds to do this are unobtainably expensive, but he wonders if "any private makers would be interested in any coating business we could provide them" Right now, NO idea on cost, just simply asking for market feasability, interest, and utility.
A few properties of the coating off the top of my head are:
* incredibly hard surface, scratch resistant. 3-4 thousandths thick surface coating gets to an estimated equivalent of about 80+ on rockwell C (they measure in vickers, more adaptable for most industrial purposes, 2200-2700+ vickers), so extremely abrasion resistant.
*hydro and oleophobic: water doesn't stick, oil doesn't stick to it. doesn't rust, doesn't really get dirty.
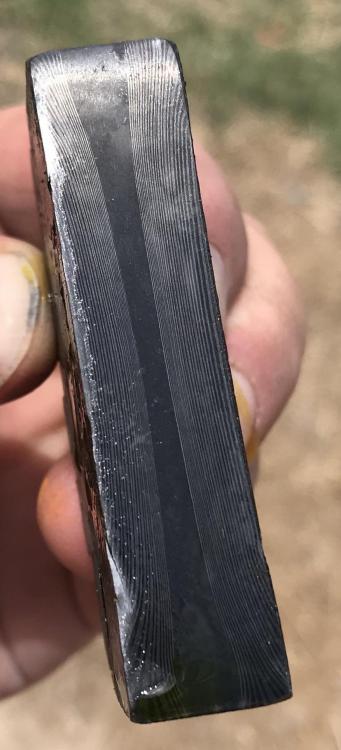
*the coating is dark, like a golden black, almost entirely opaque, but some underlying material can be seen... kinda trippy...
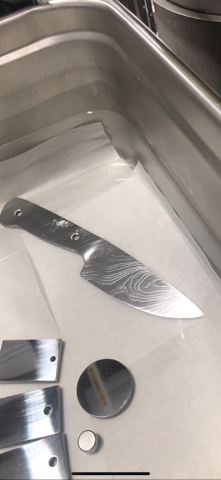
*steel core, cutting edge, so can be sharpened, but corrosion and scratch resistant coating.
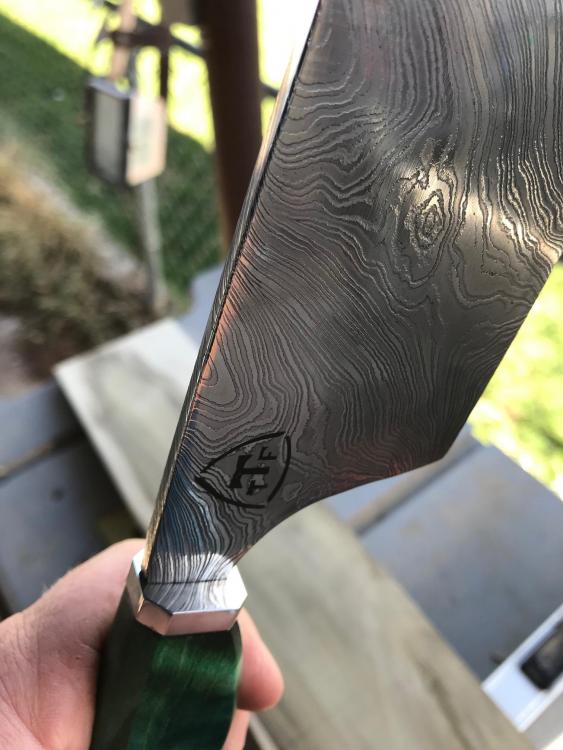
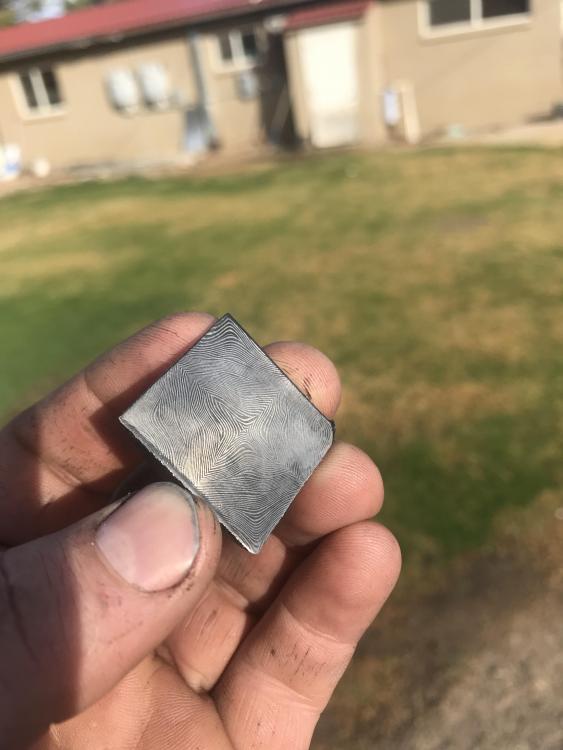
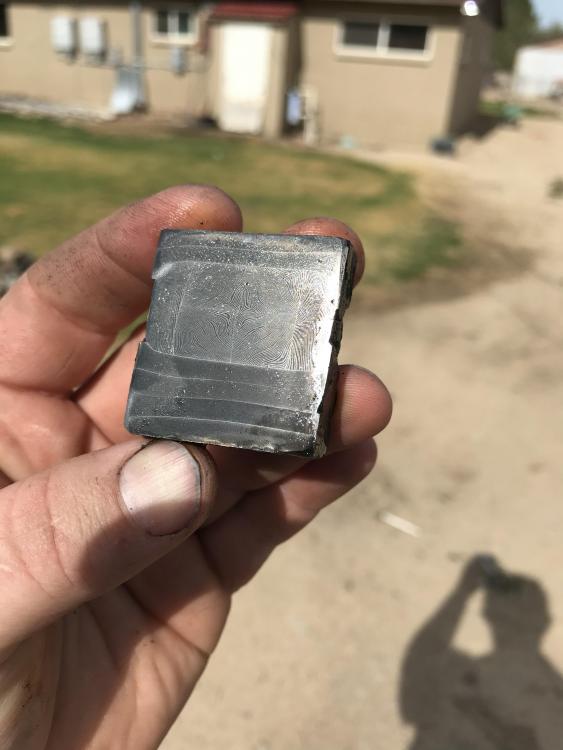
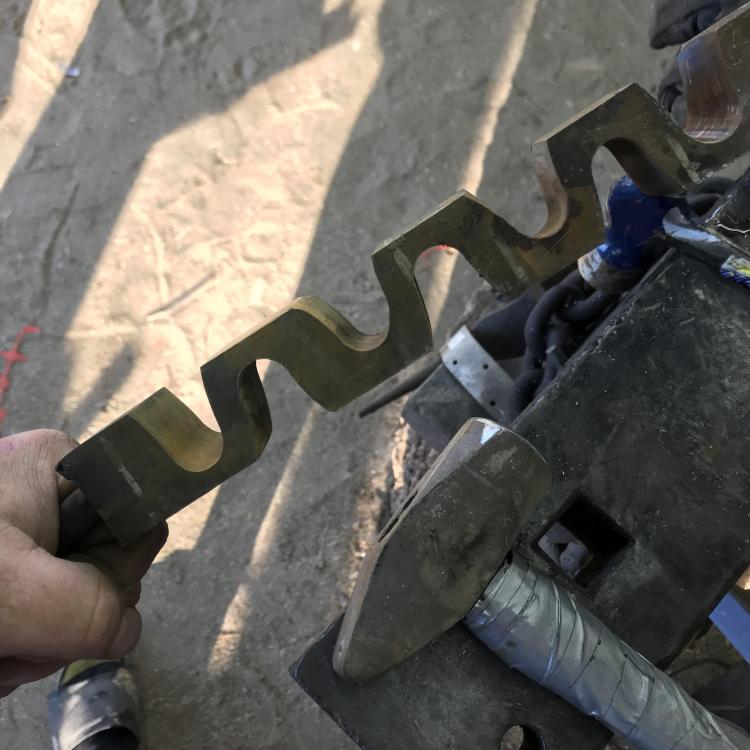
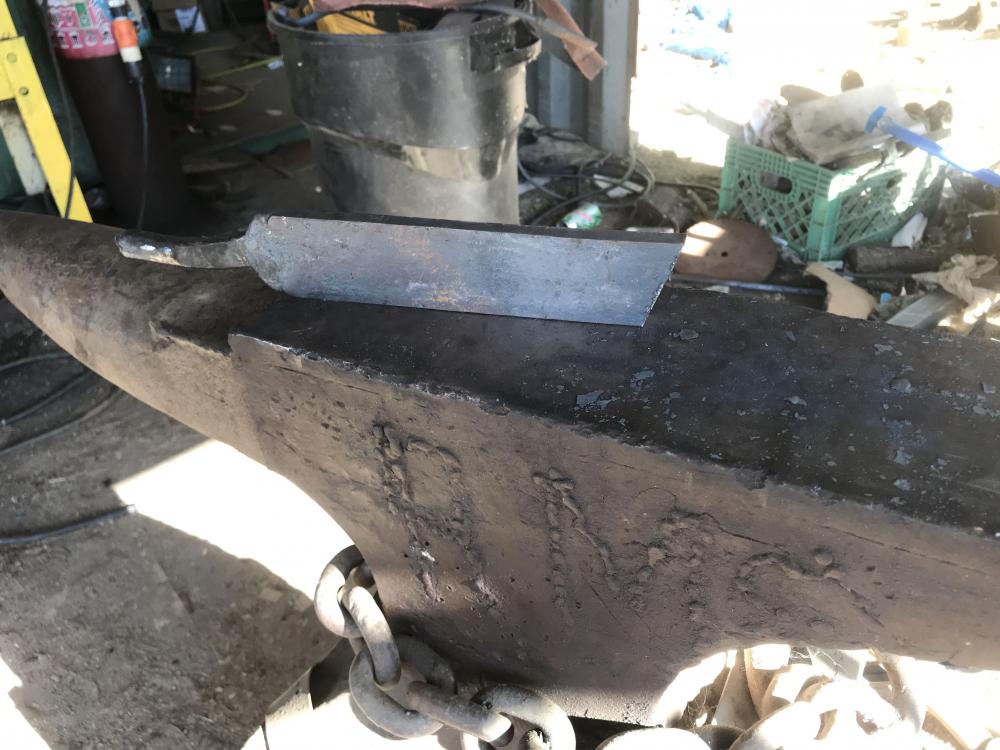
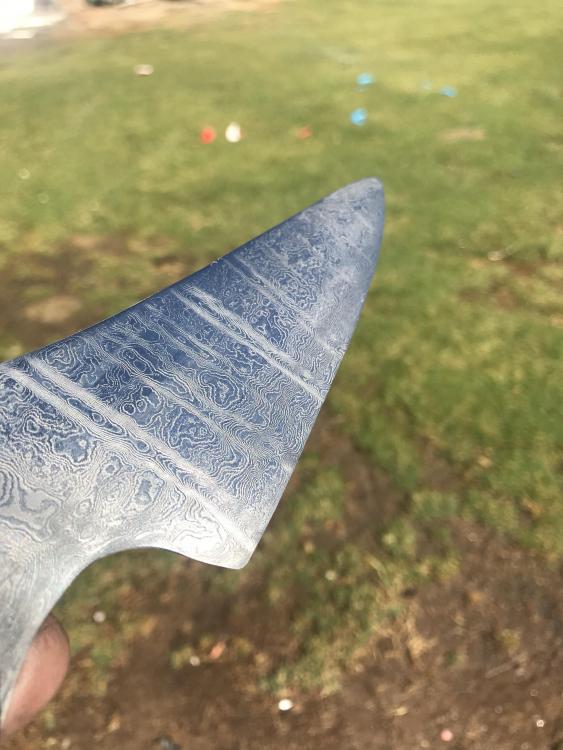
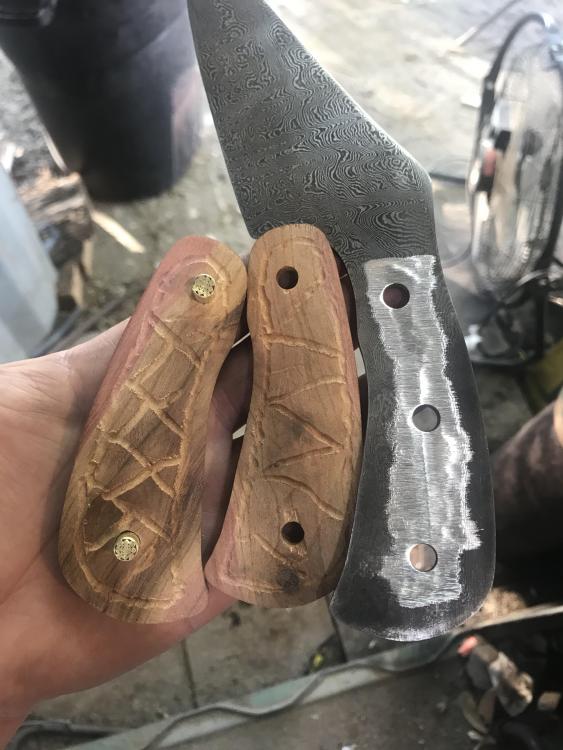
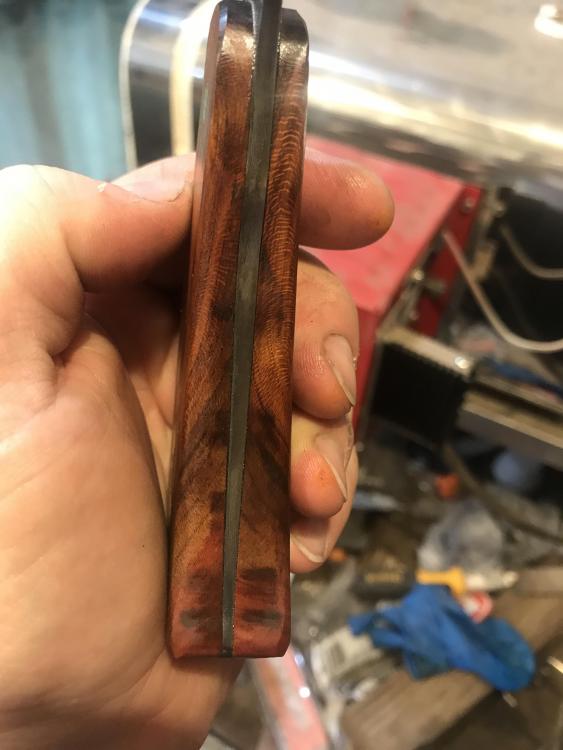
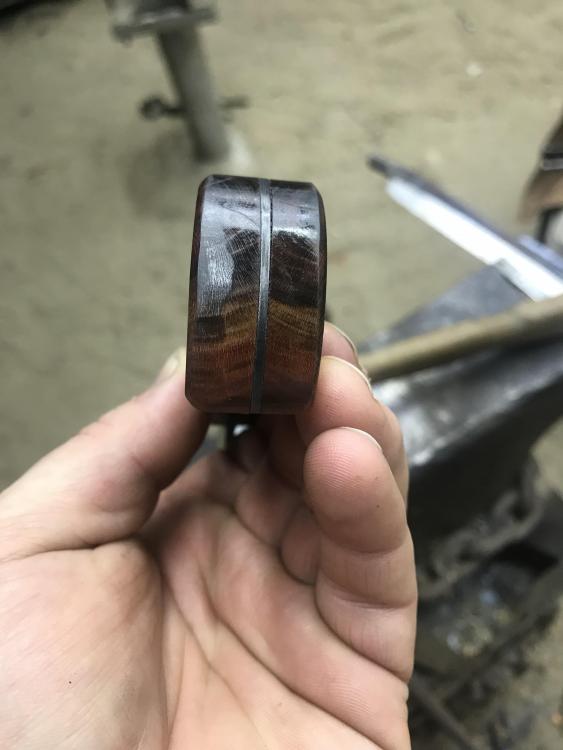
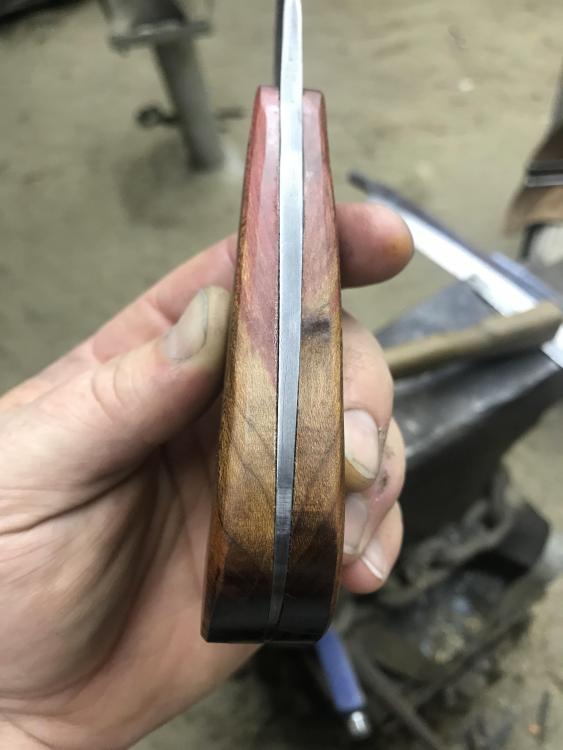
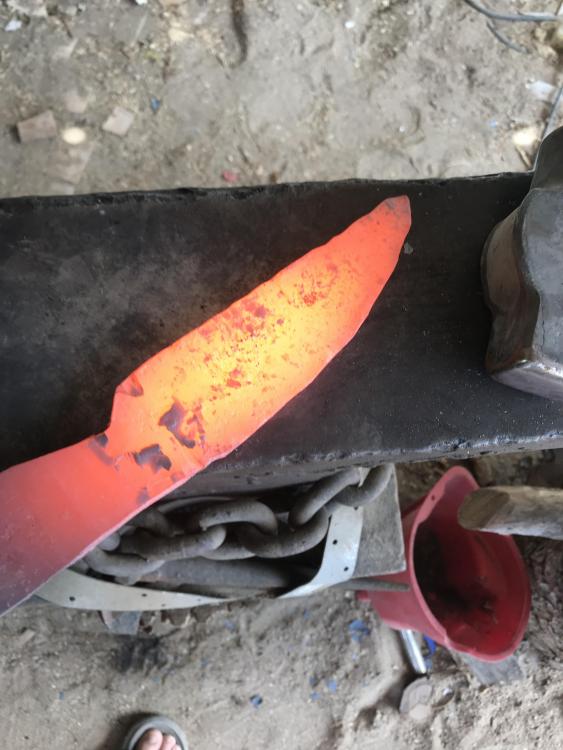
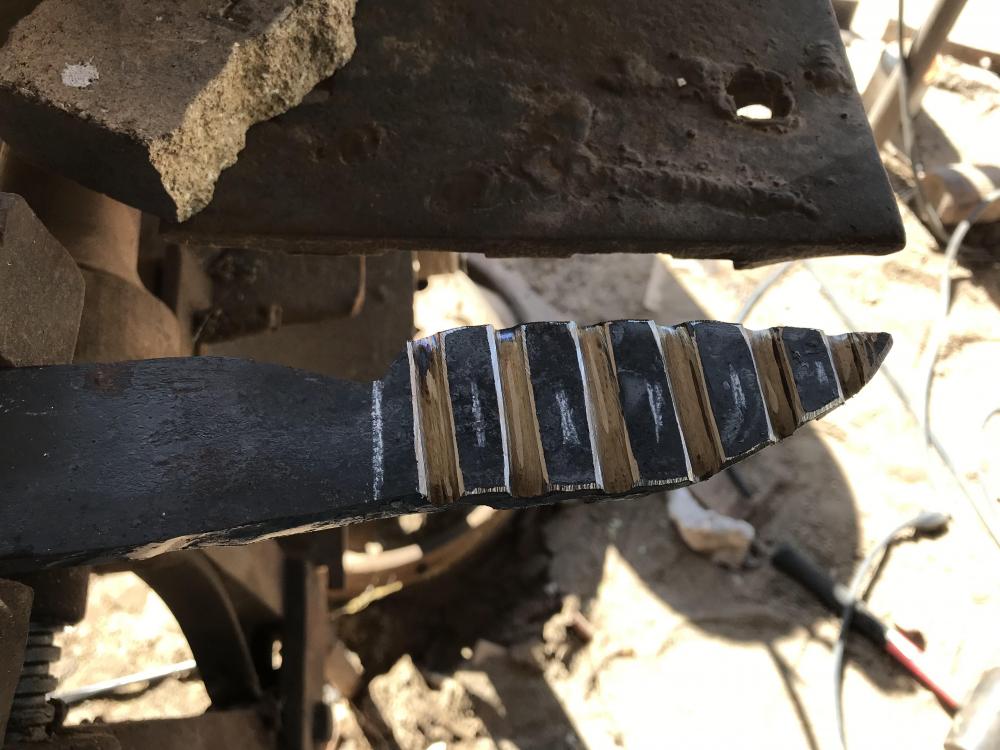
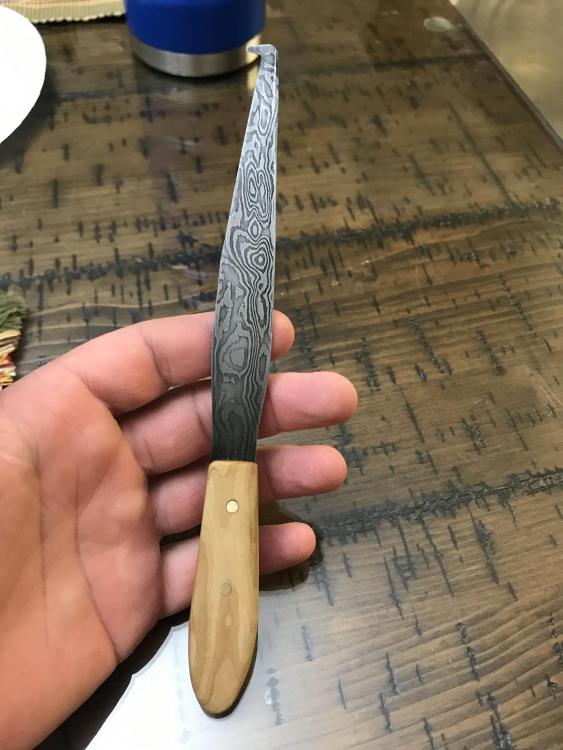
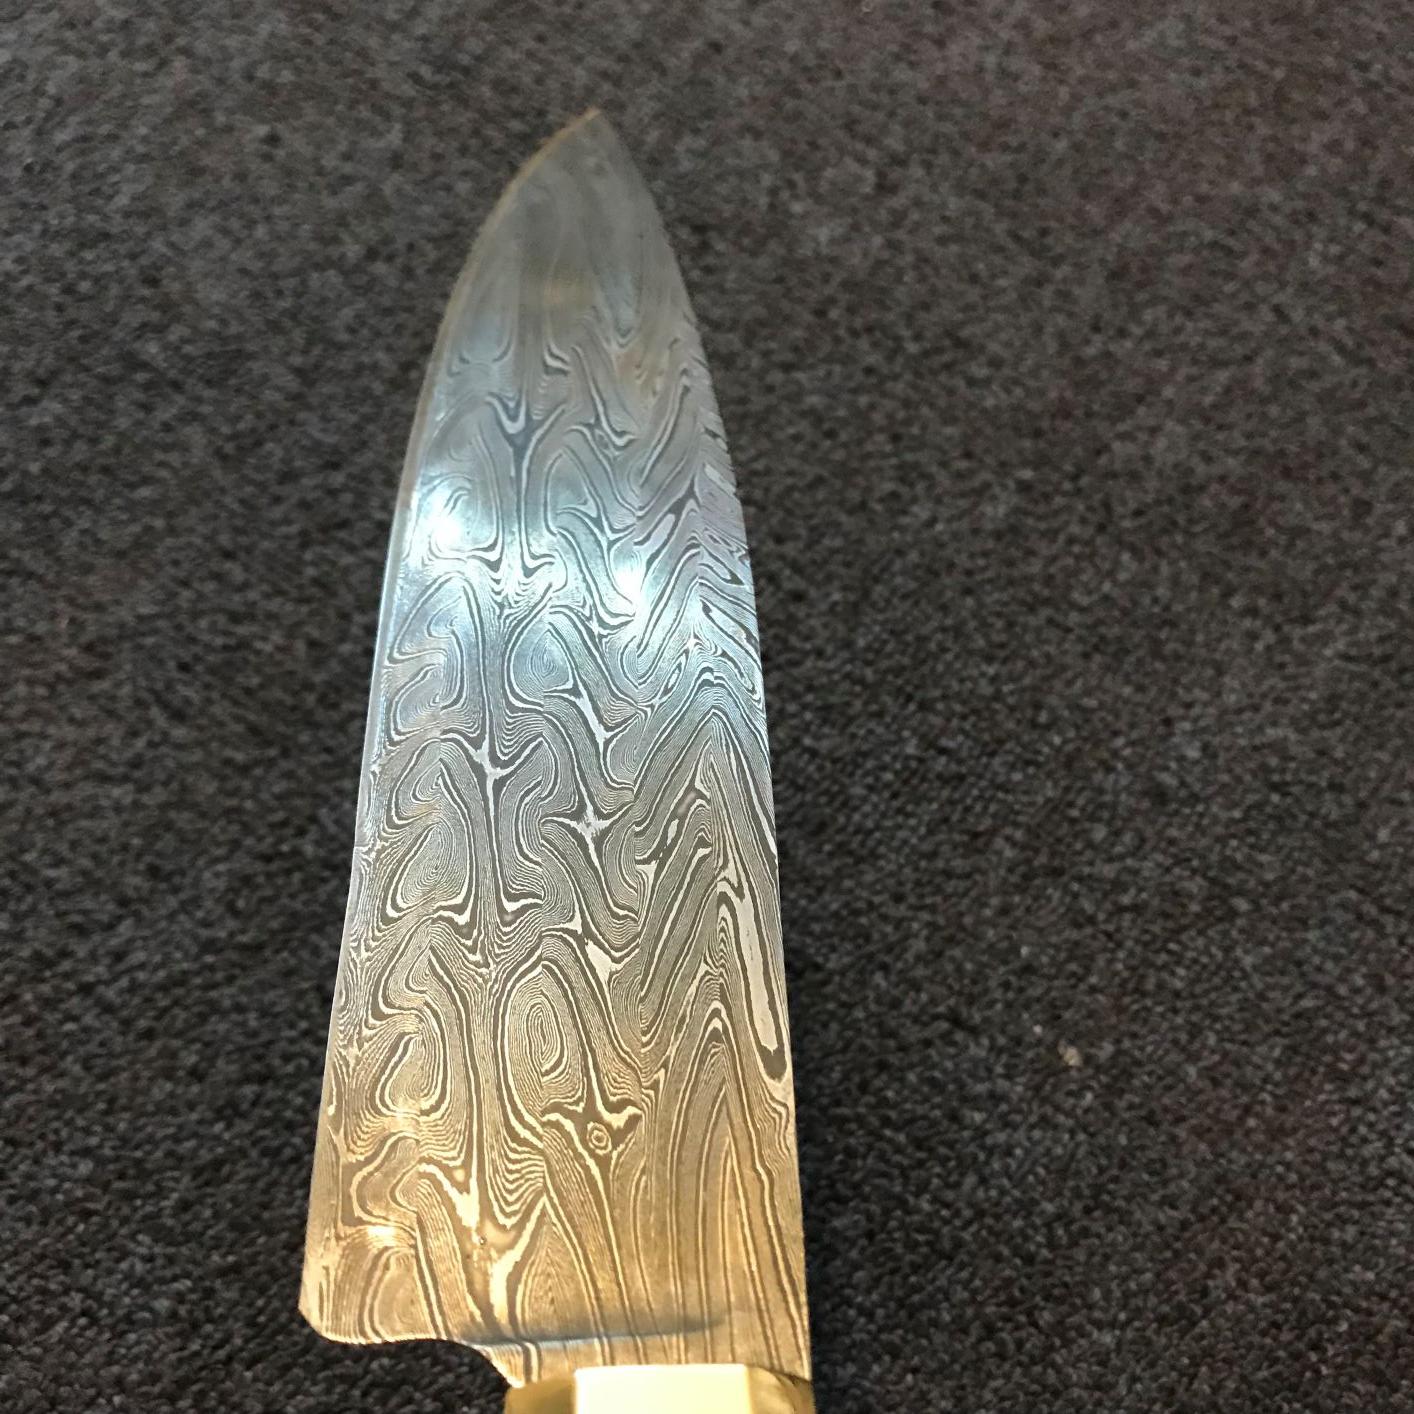
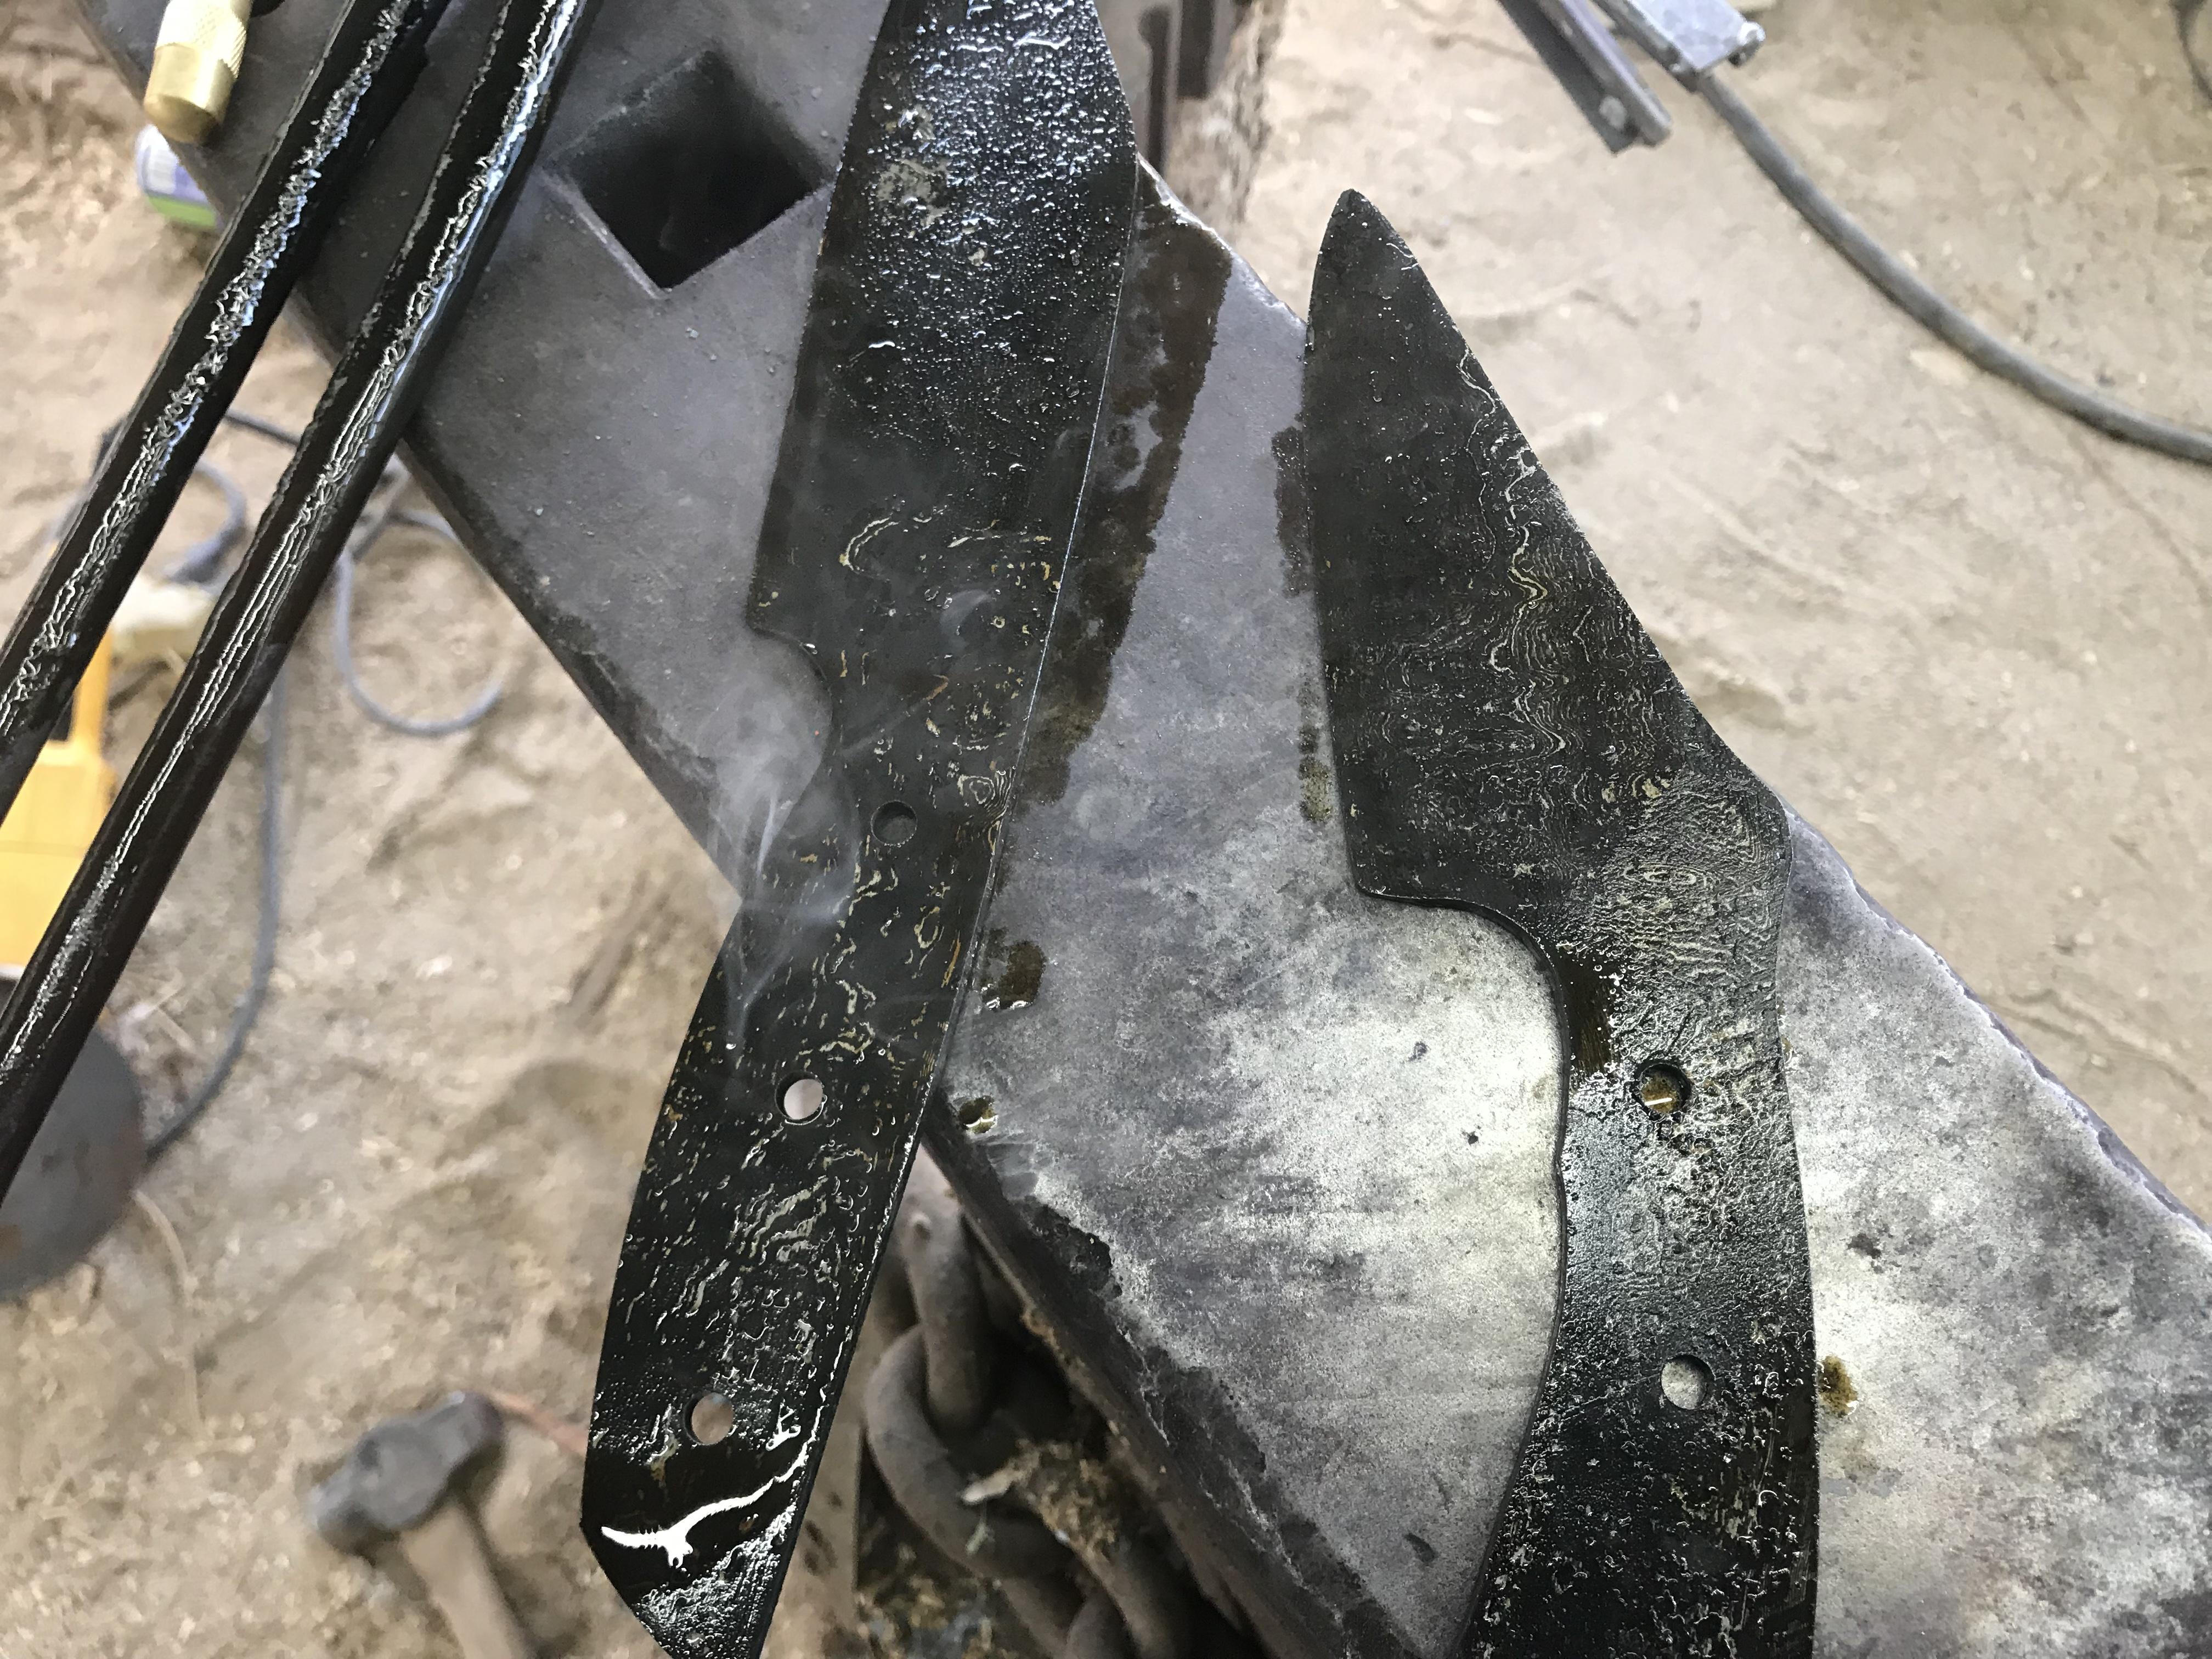
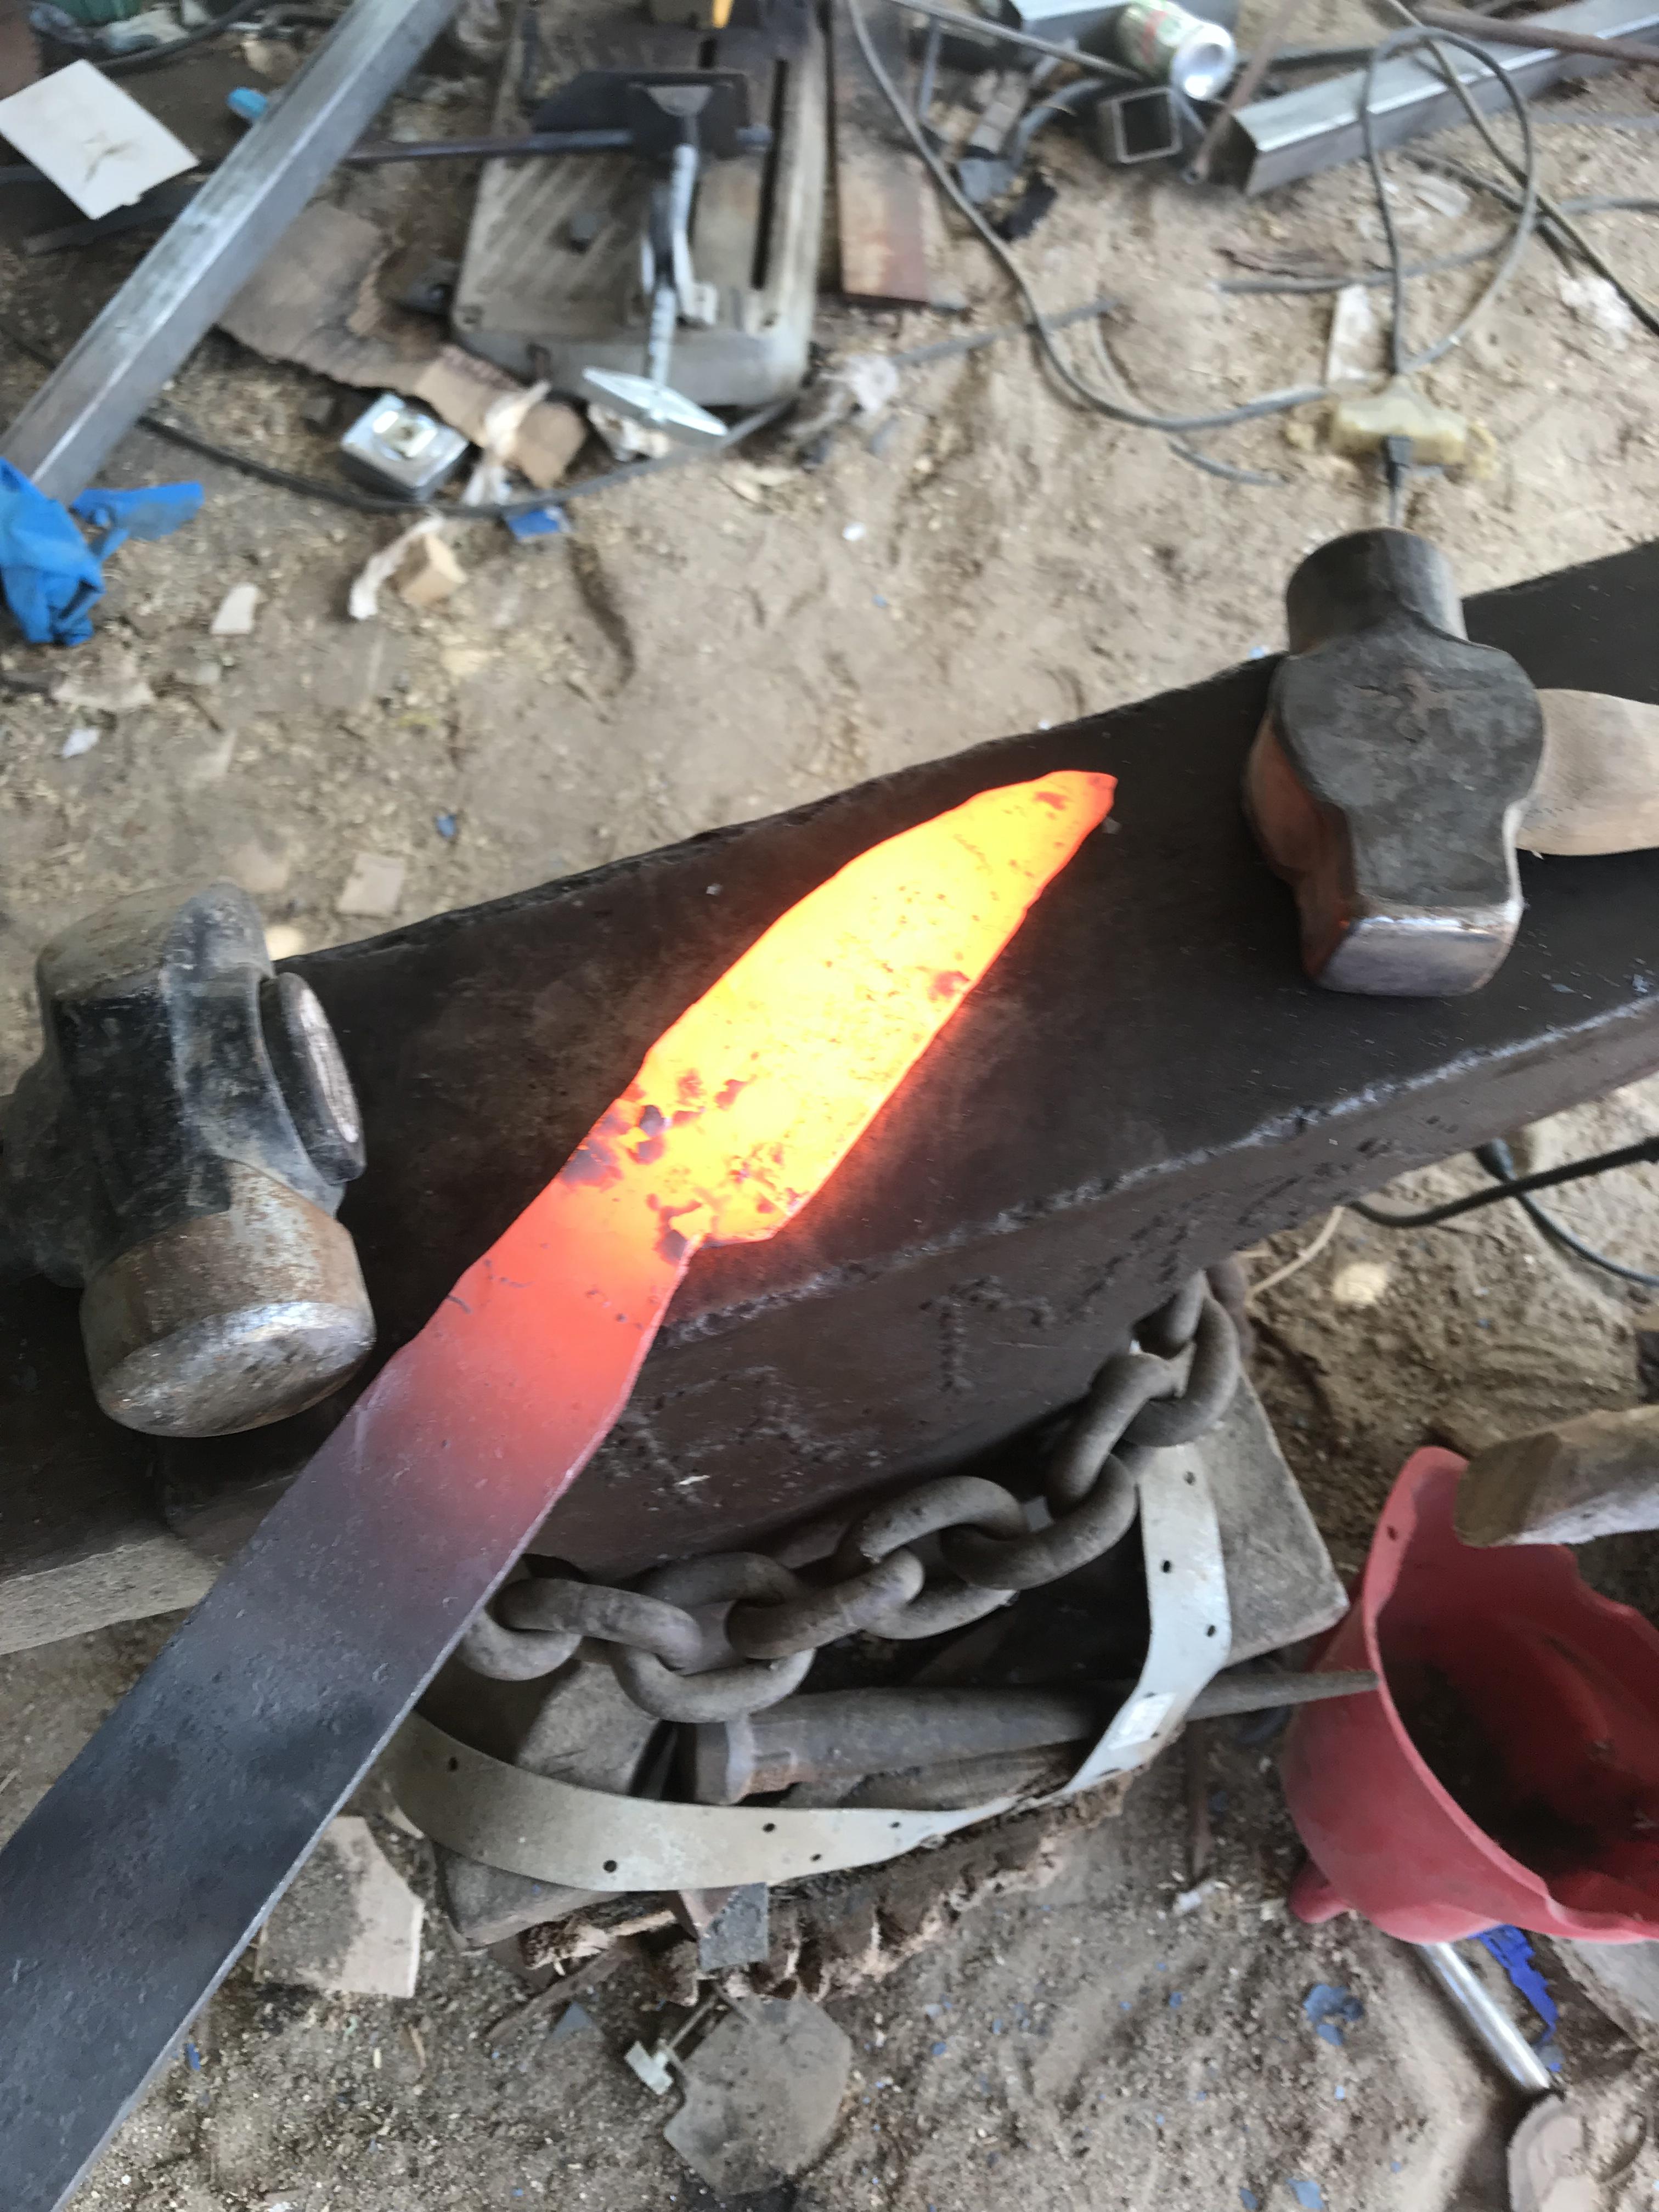
I sent him a slightly warped test blade, low layer damascus just to see what the coating did on topographically different layers, it caoted just fine, I assembled it then tested it to destruction. I was afraid the super hard outer layer would be brittle, but the inner core steel was flexible and after chopping through a 2X4 5 times with a wooden mallet, then a steel hammer, I was convinced it would hold up. Eventually I bent the blade in a vice about 70-90 degrees before it snapped. my Damascus steel blade was at 54-56 rockwell C on their tester, the handle I blued with heat to soften and it measured right at 43.
here are some pictures of the before and assembled after coating.

Anyone, everyone chime in, let me know in brutal honest answers your thoughts on the process, utility, and interest as if it were a service available to you as a maker. Also questions, concerns, or problems you see with it.
thanks for taking any time to read and think about it!
-
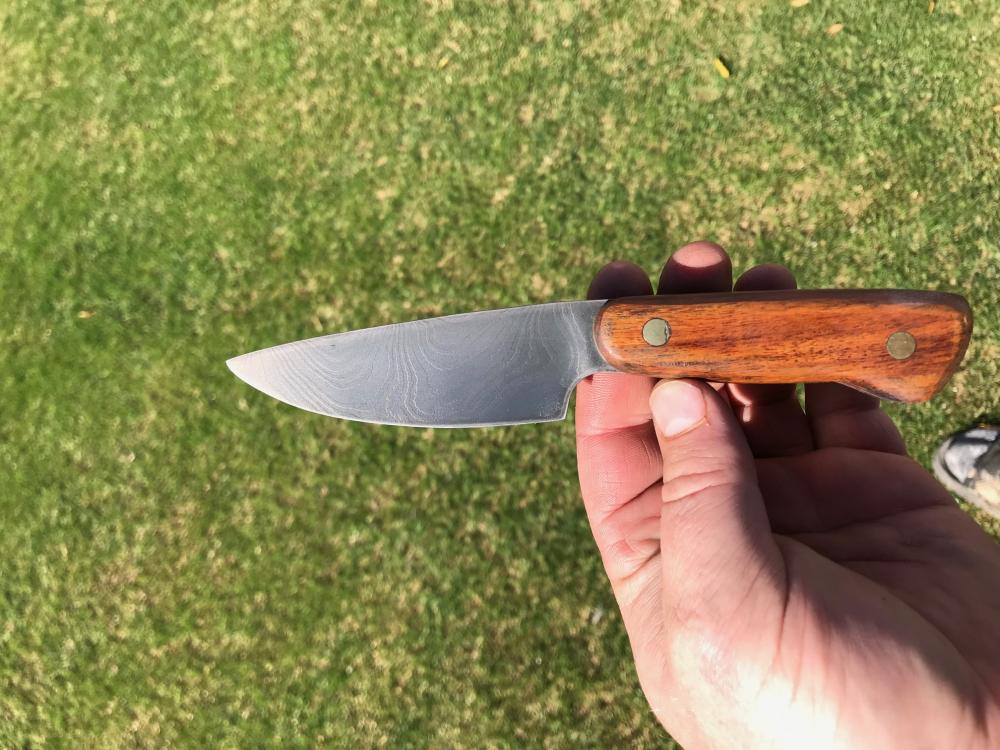
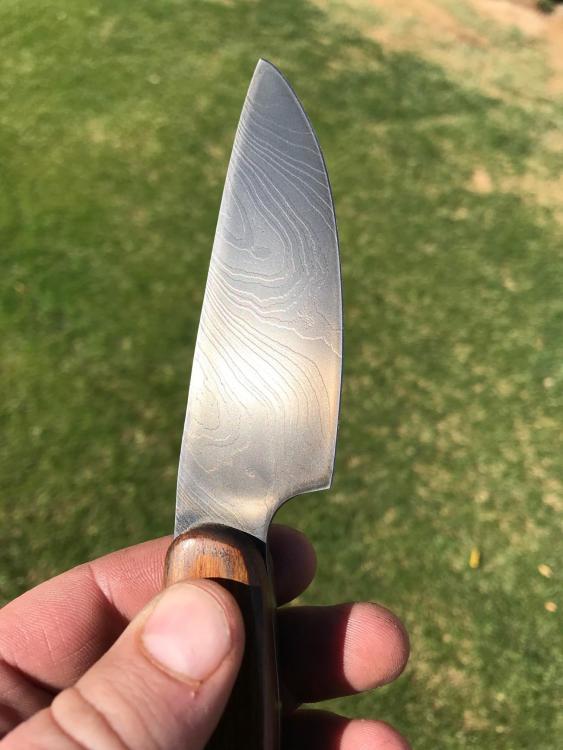
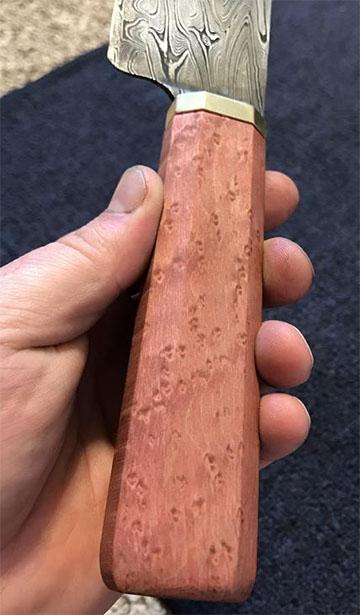
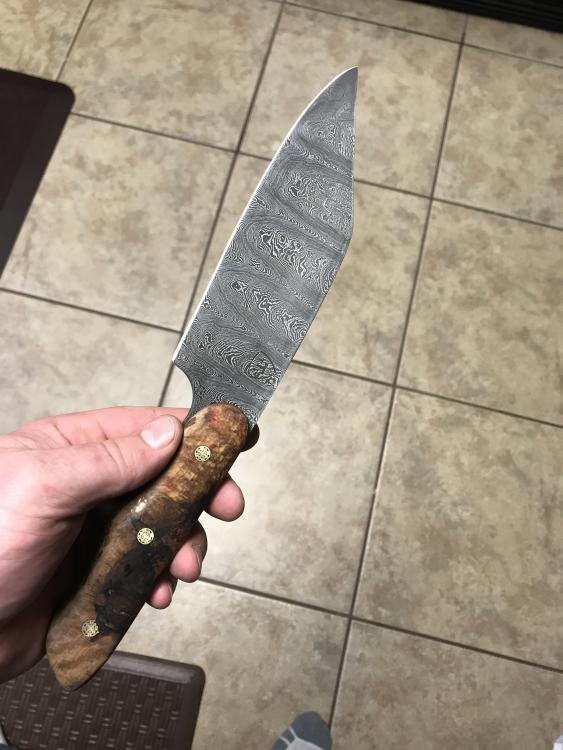
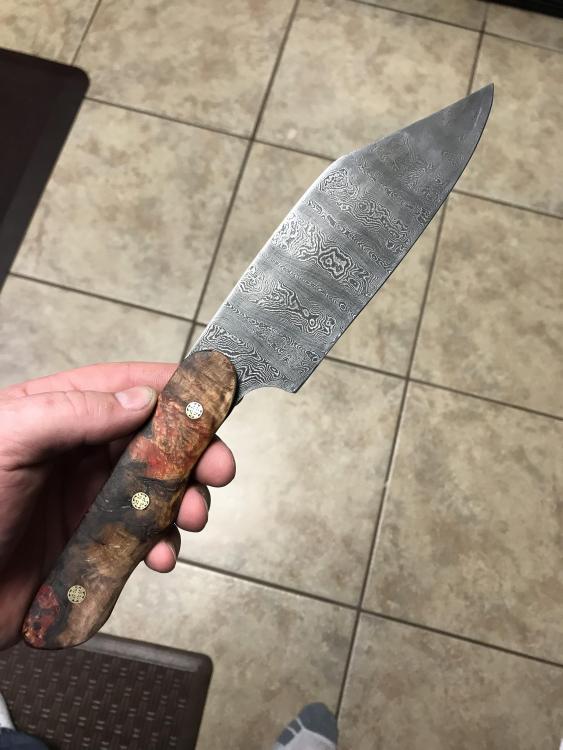
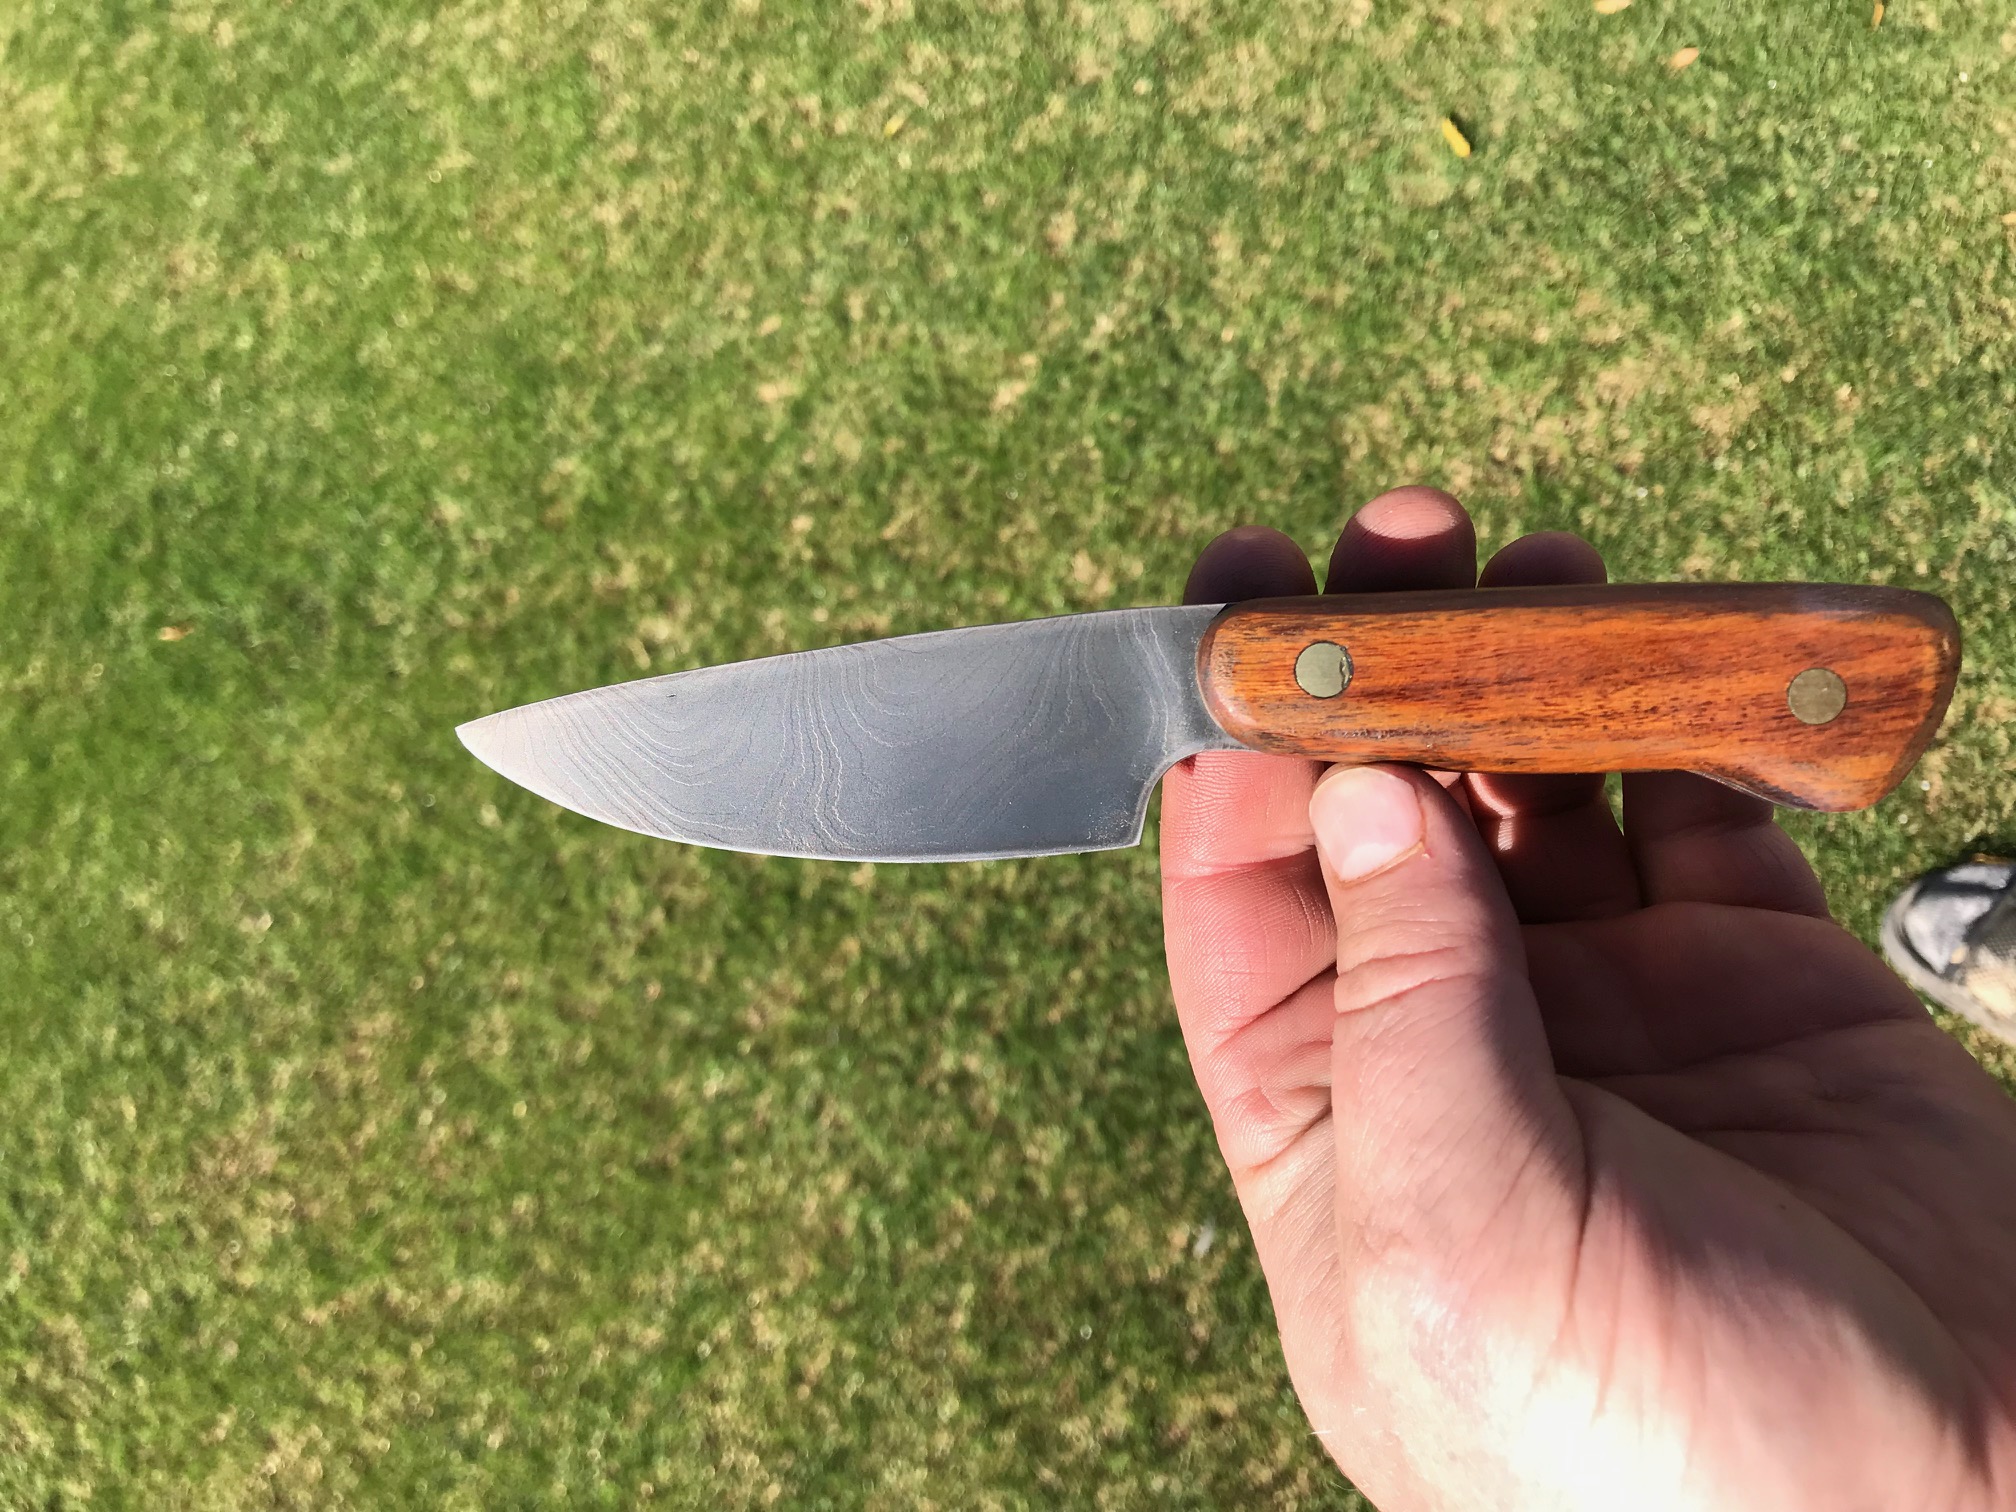
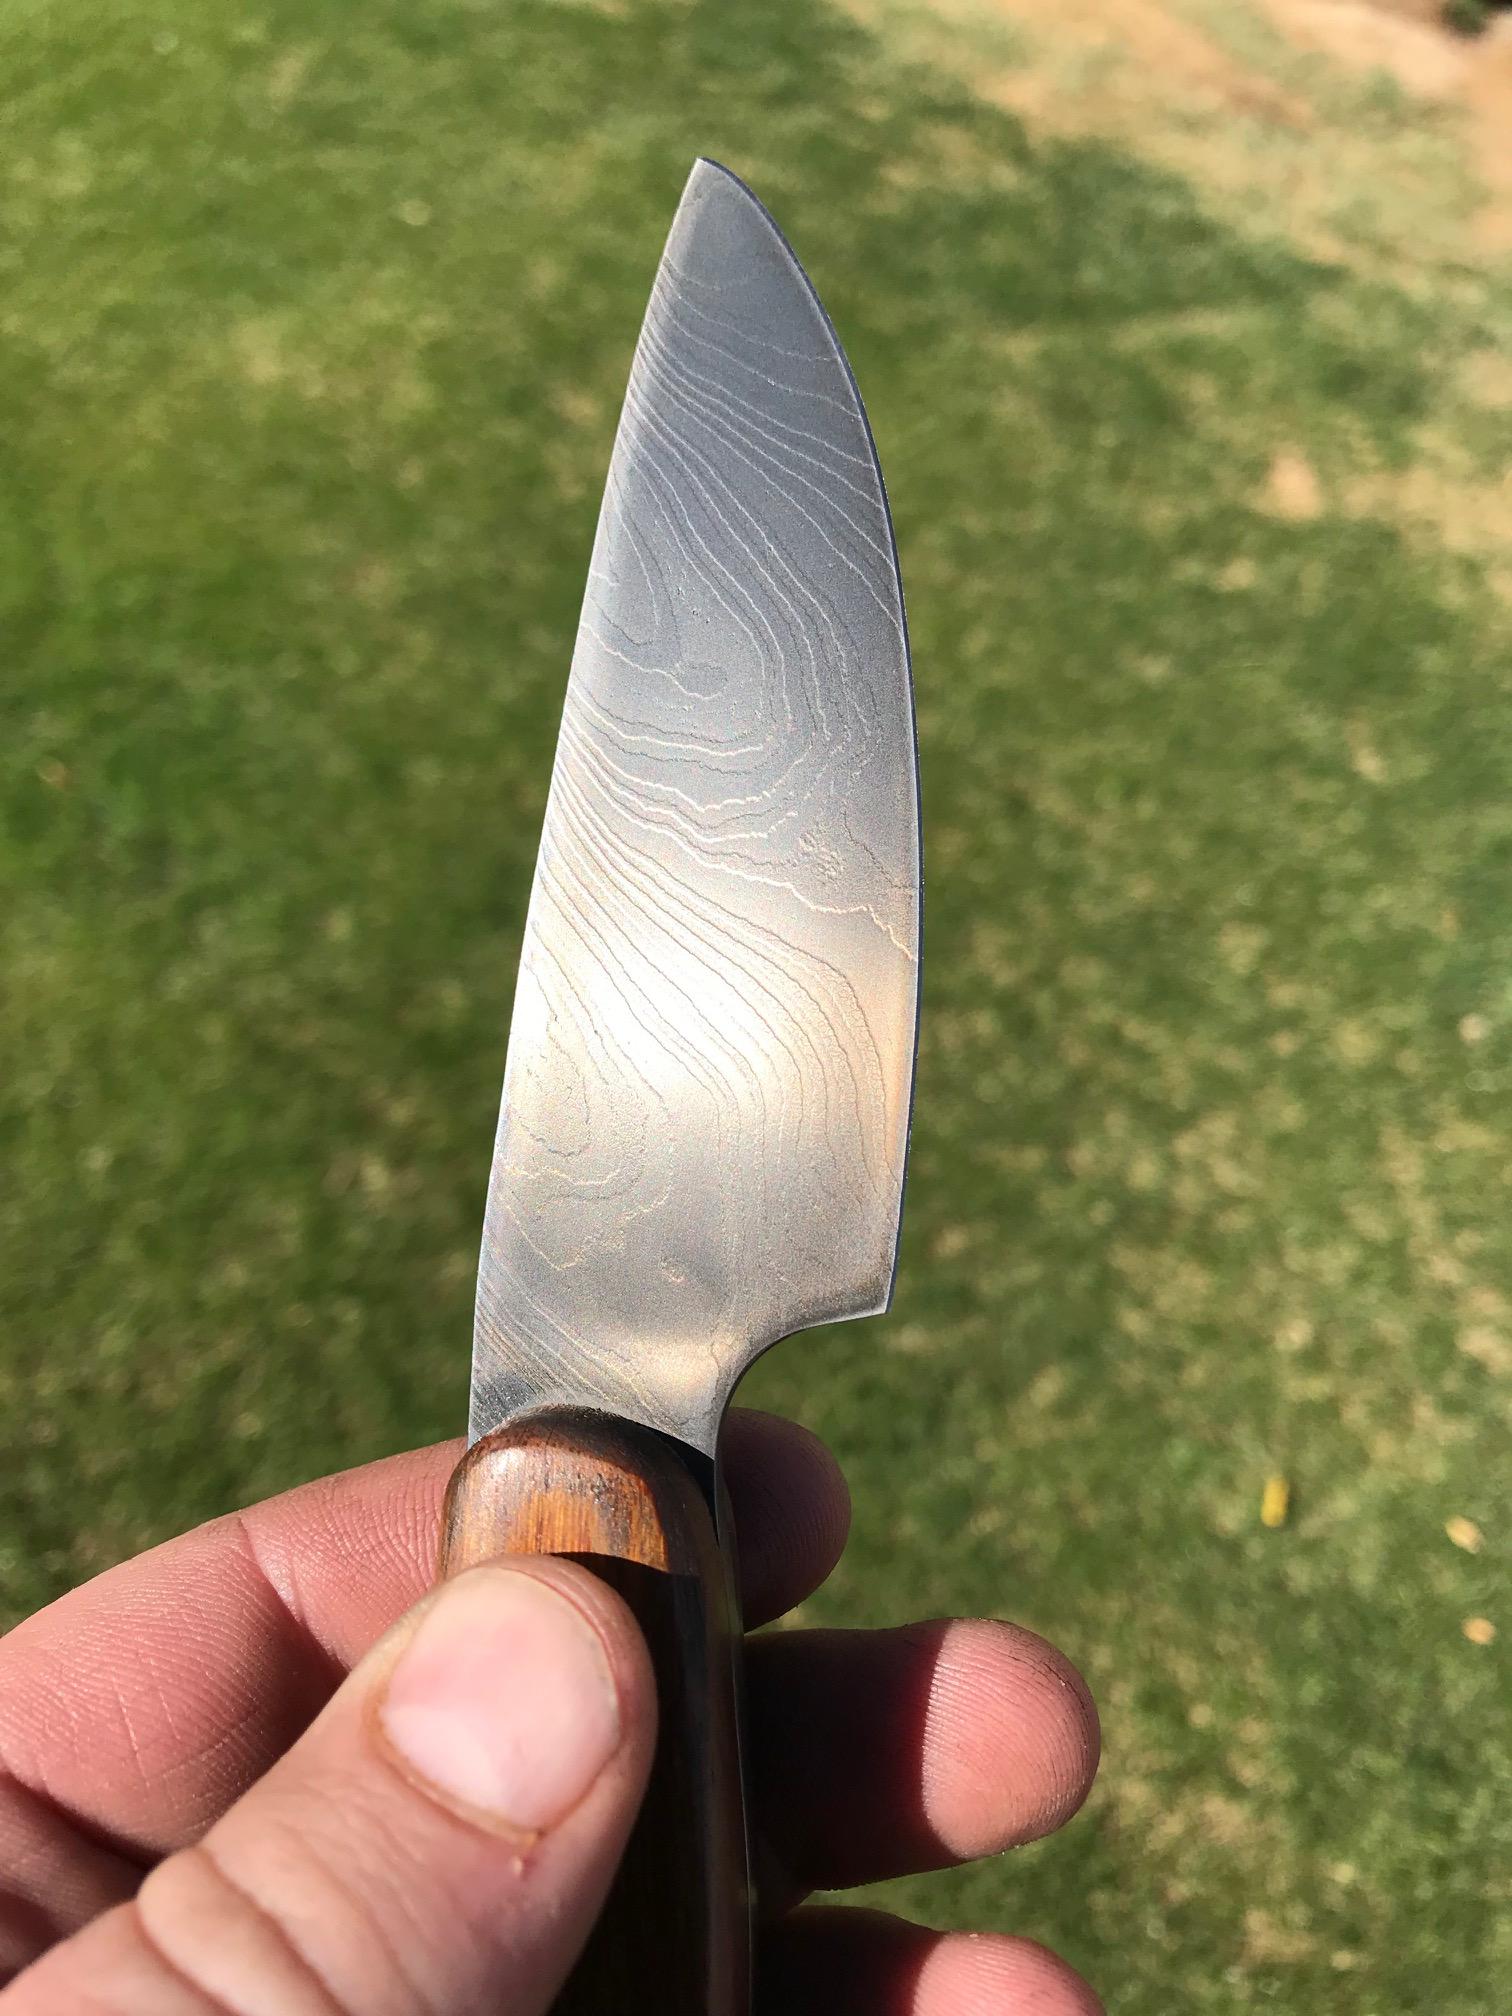
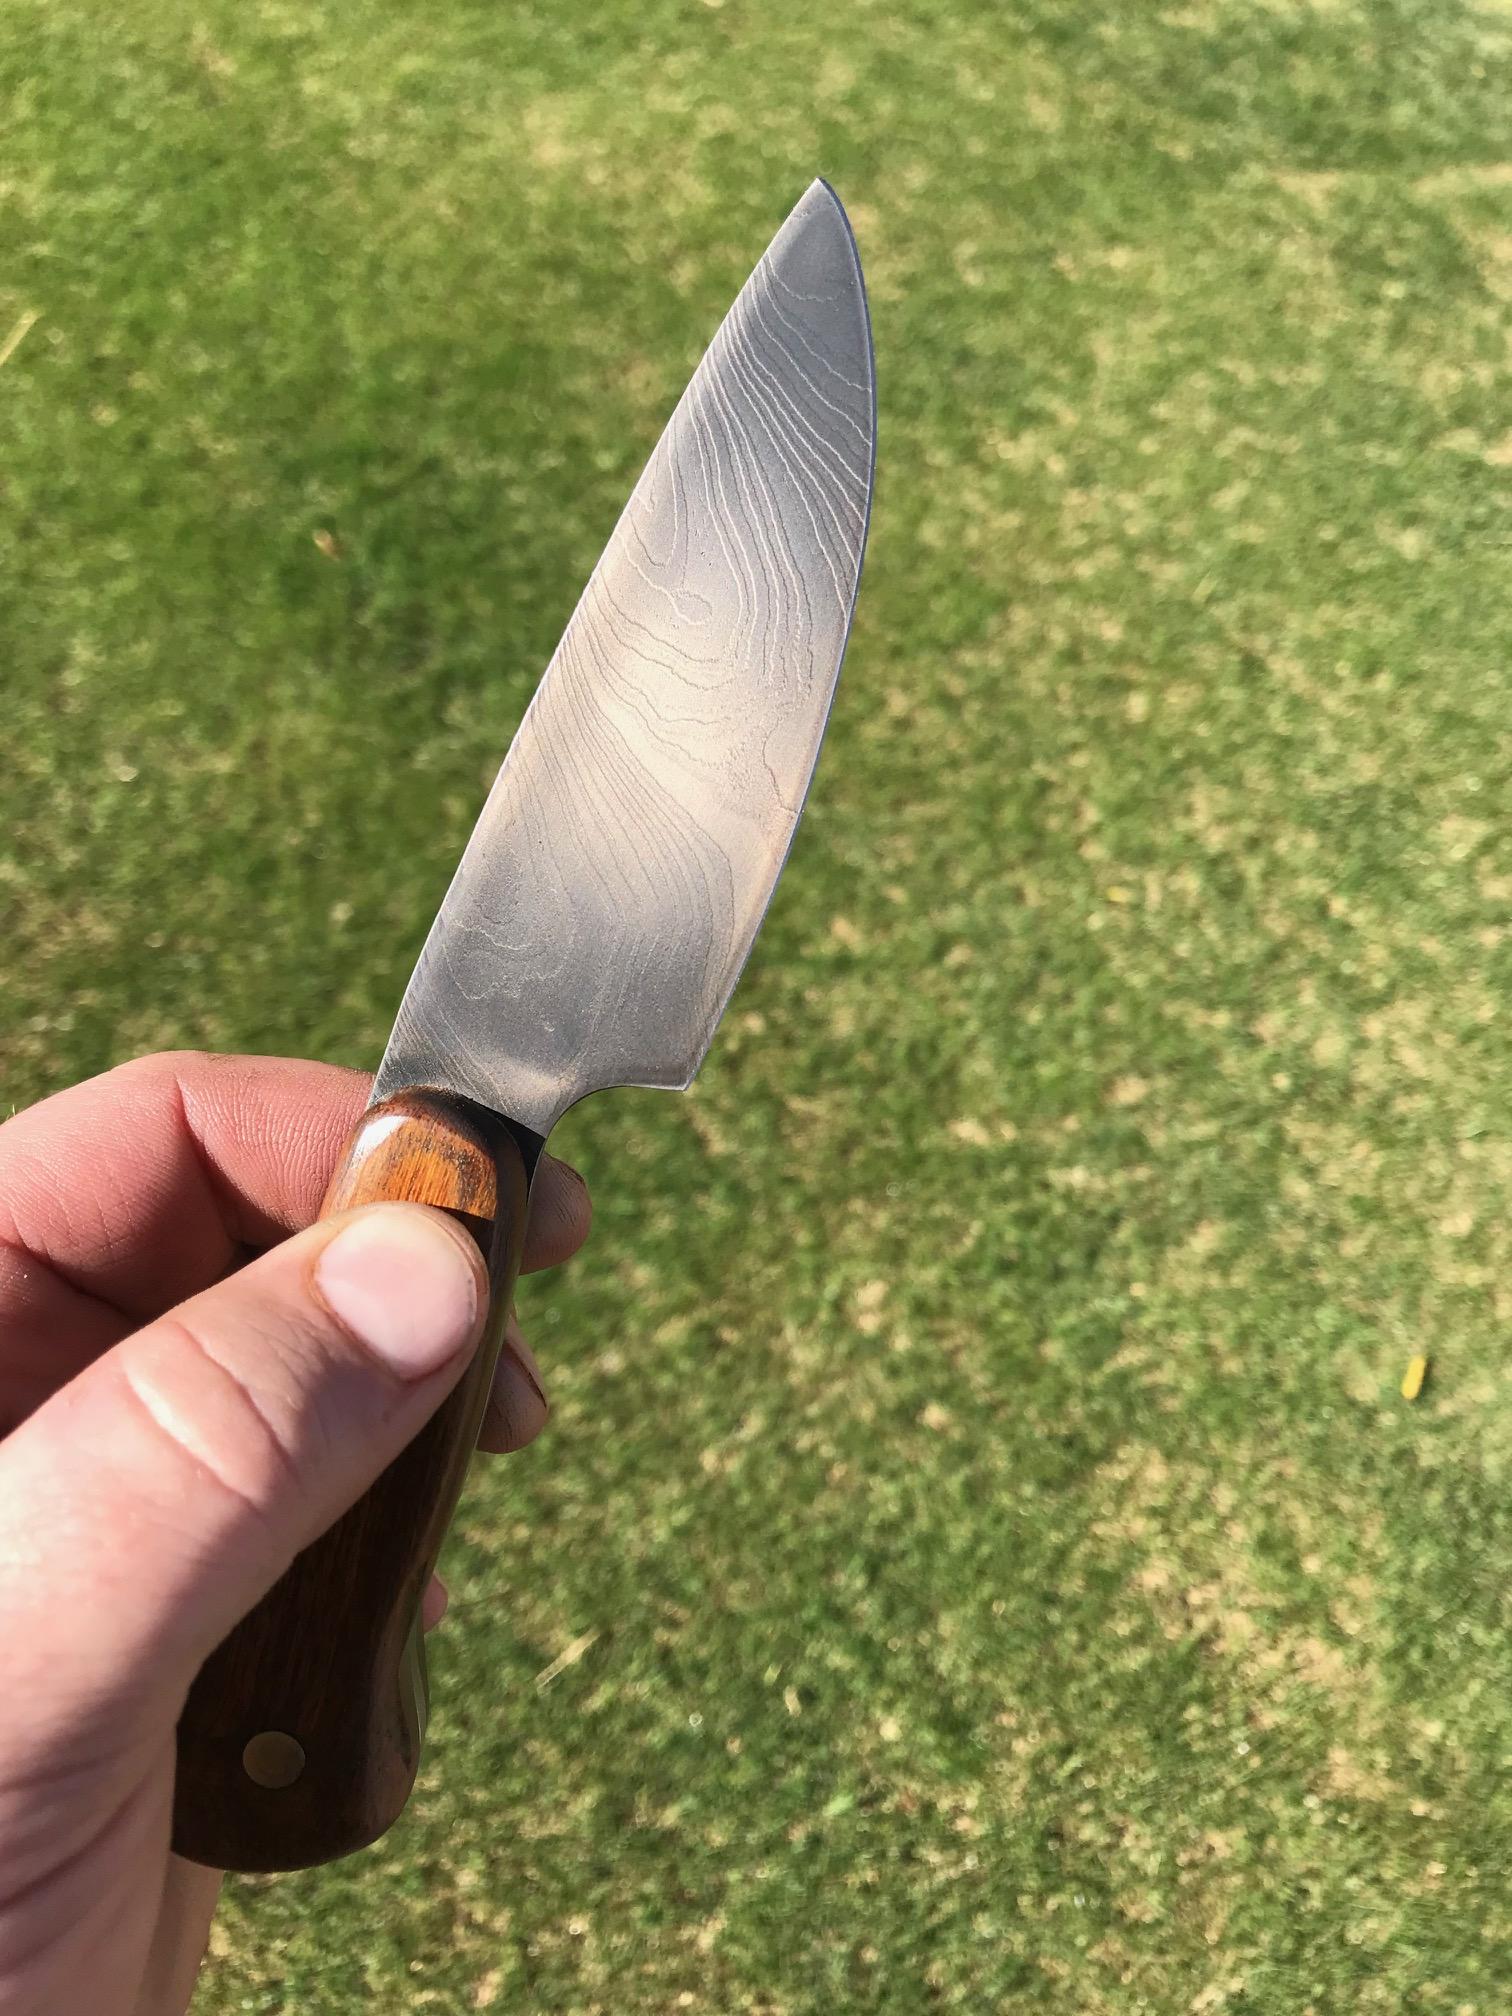
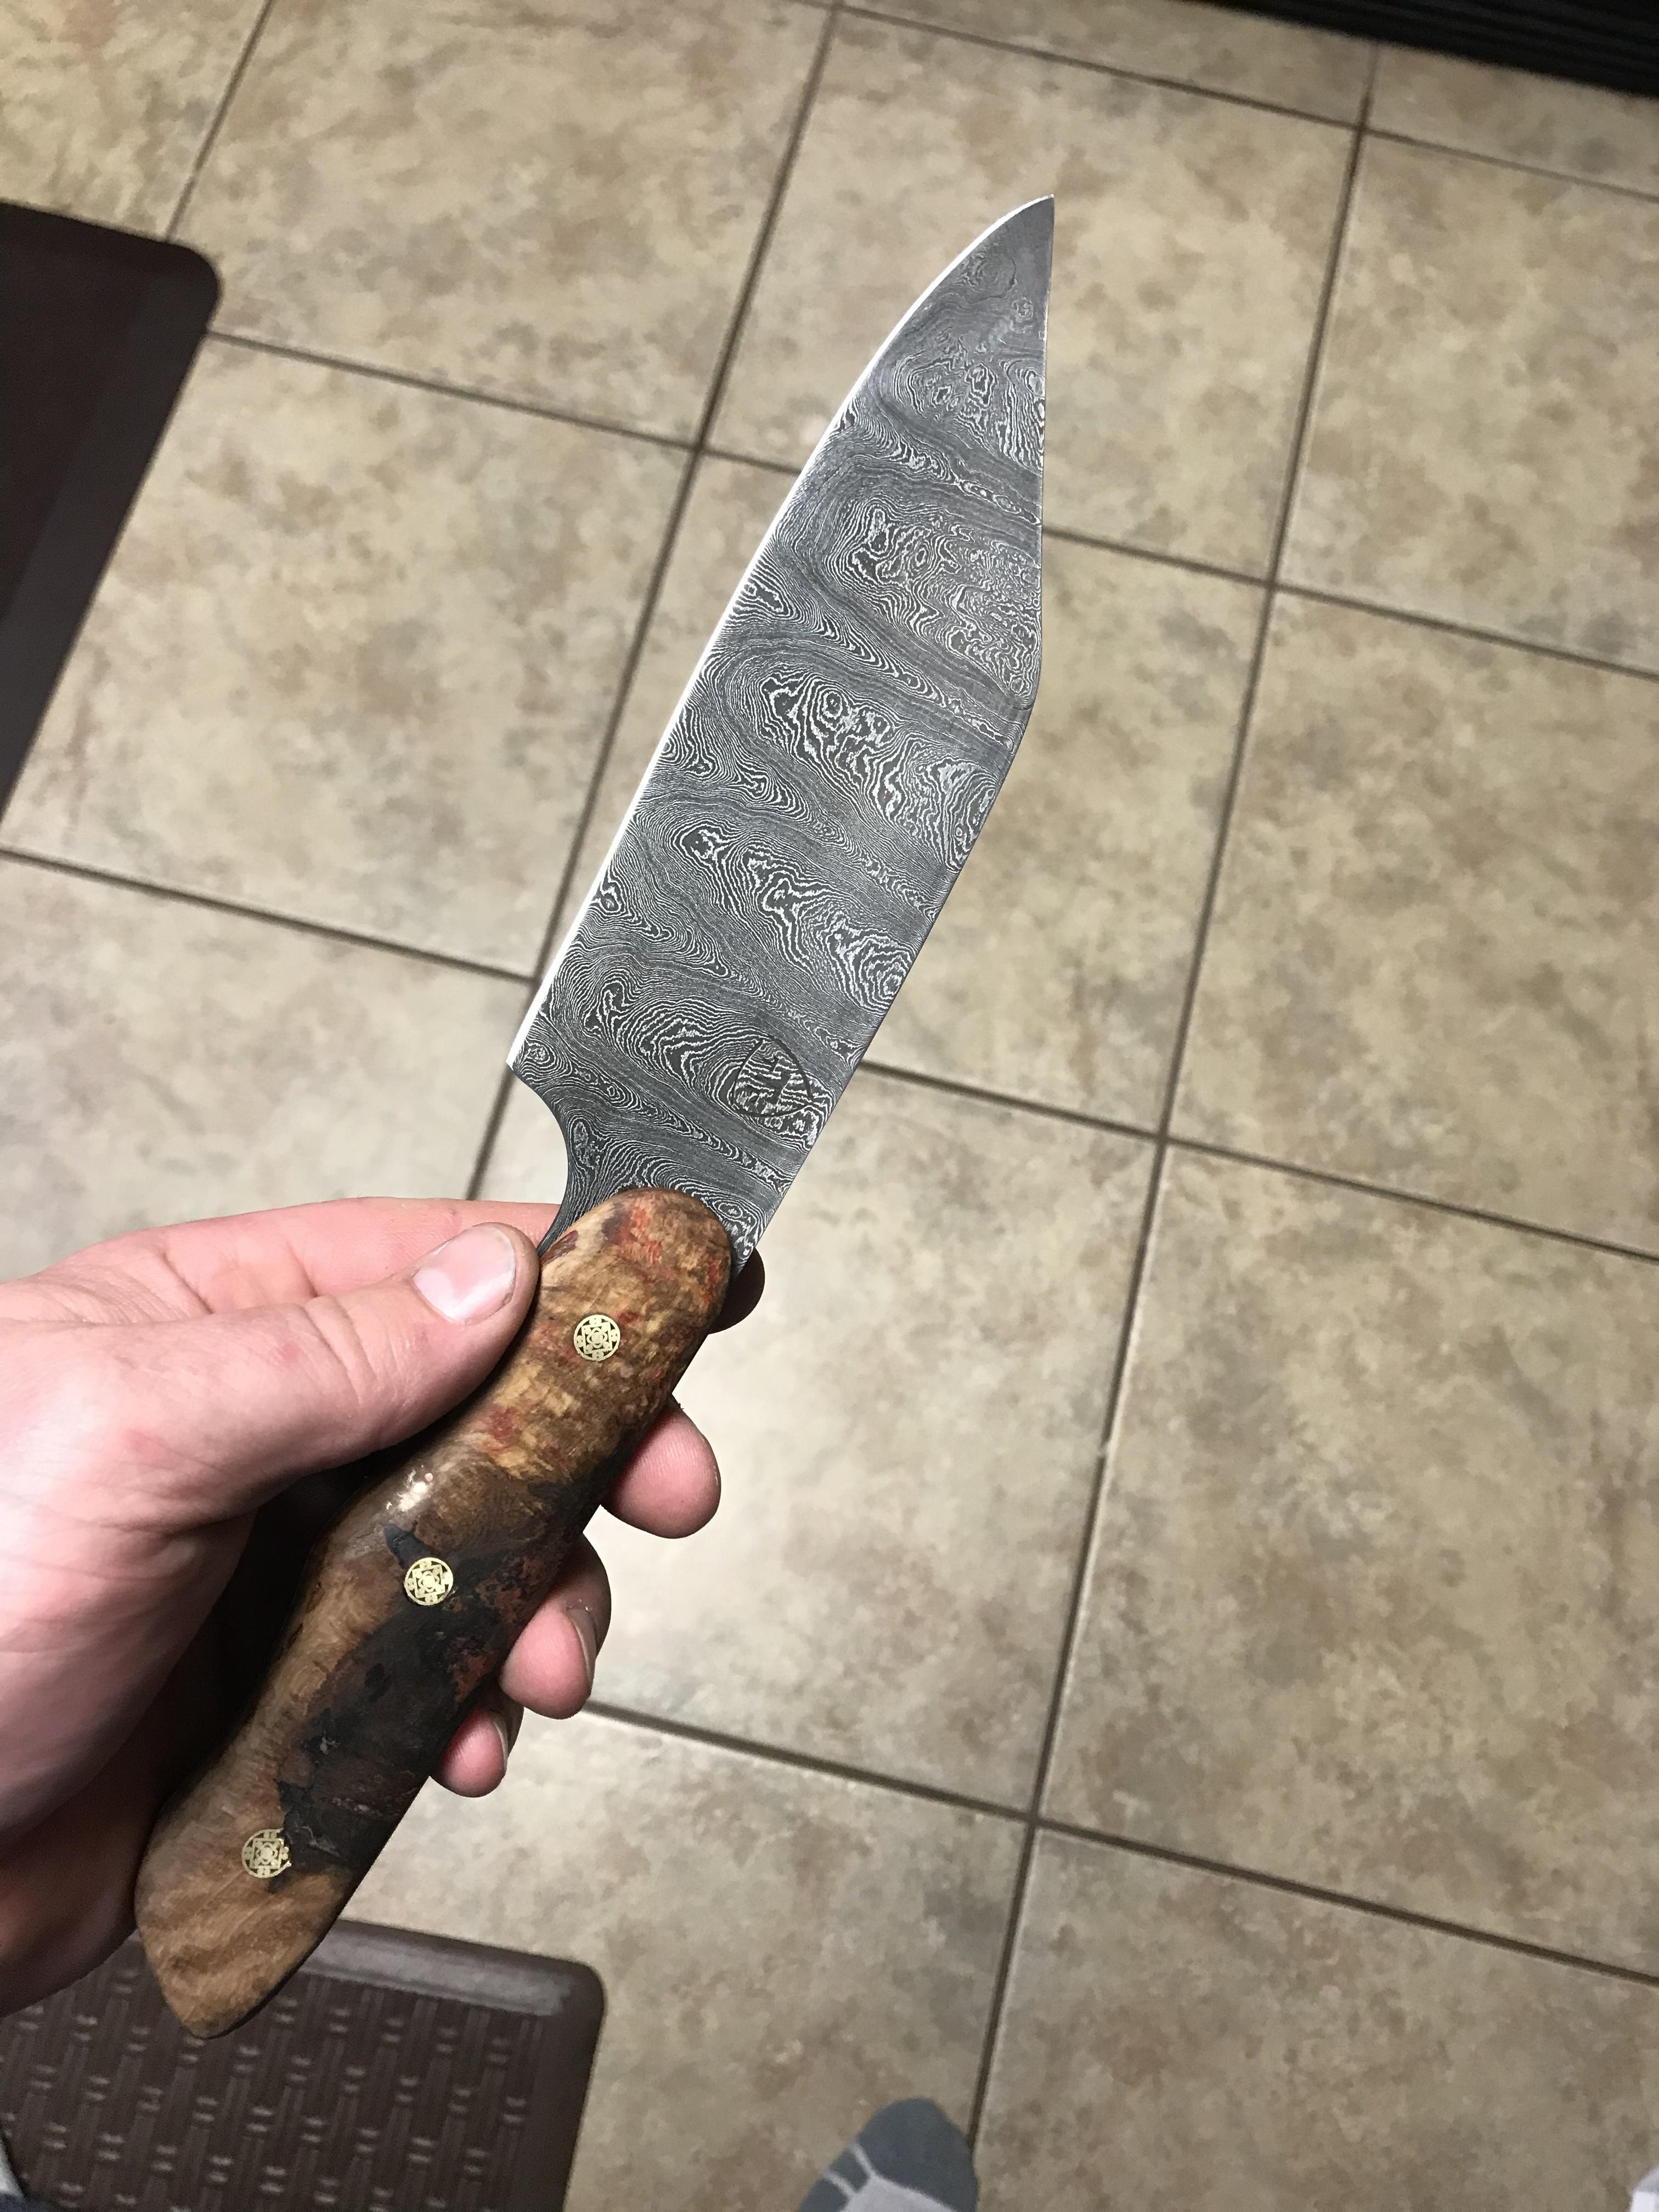
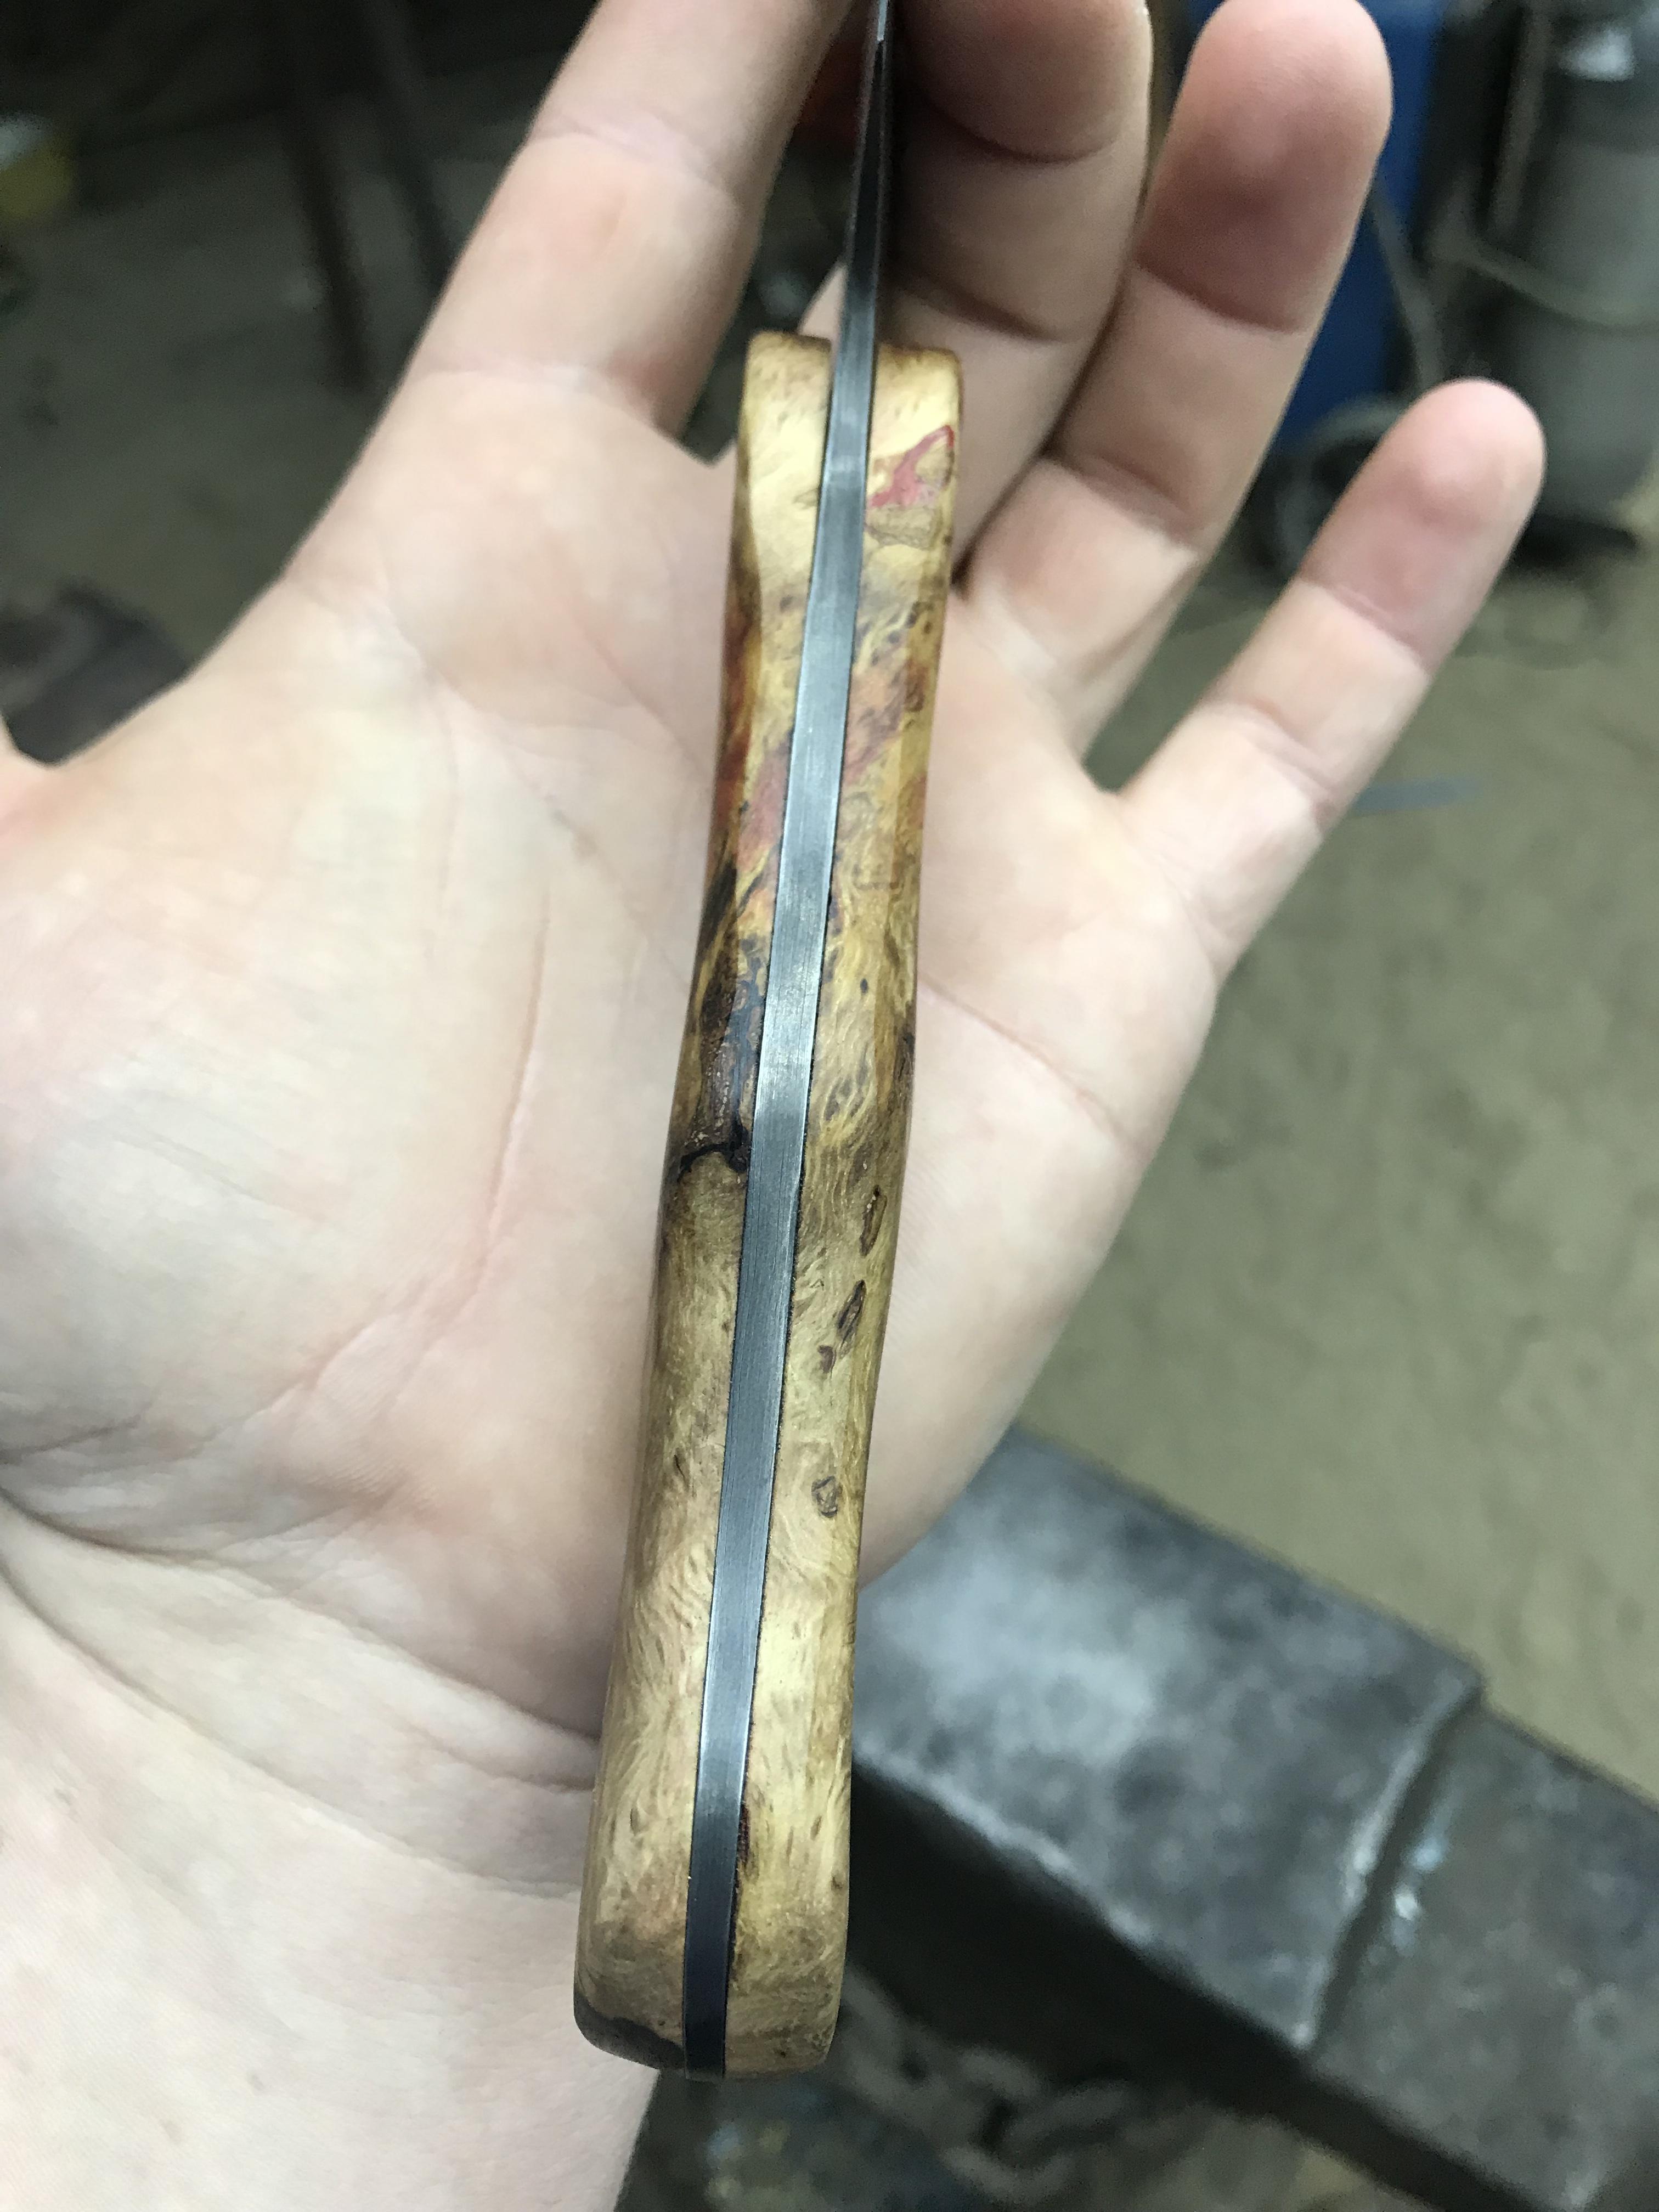
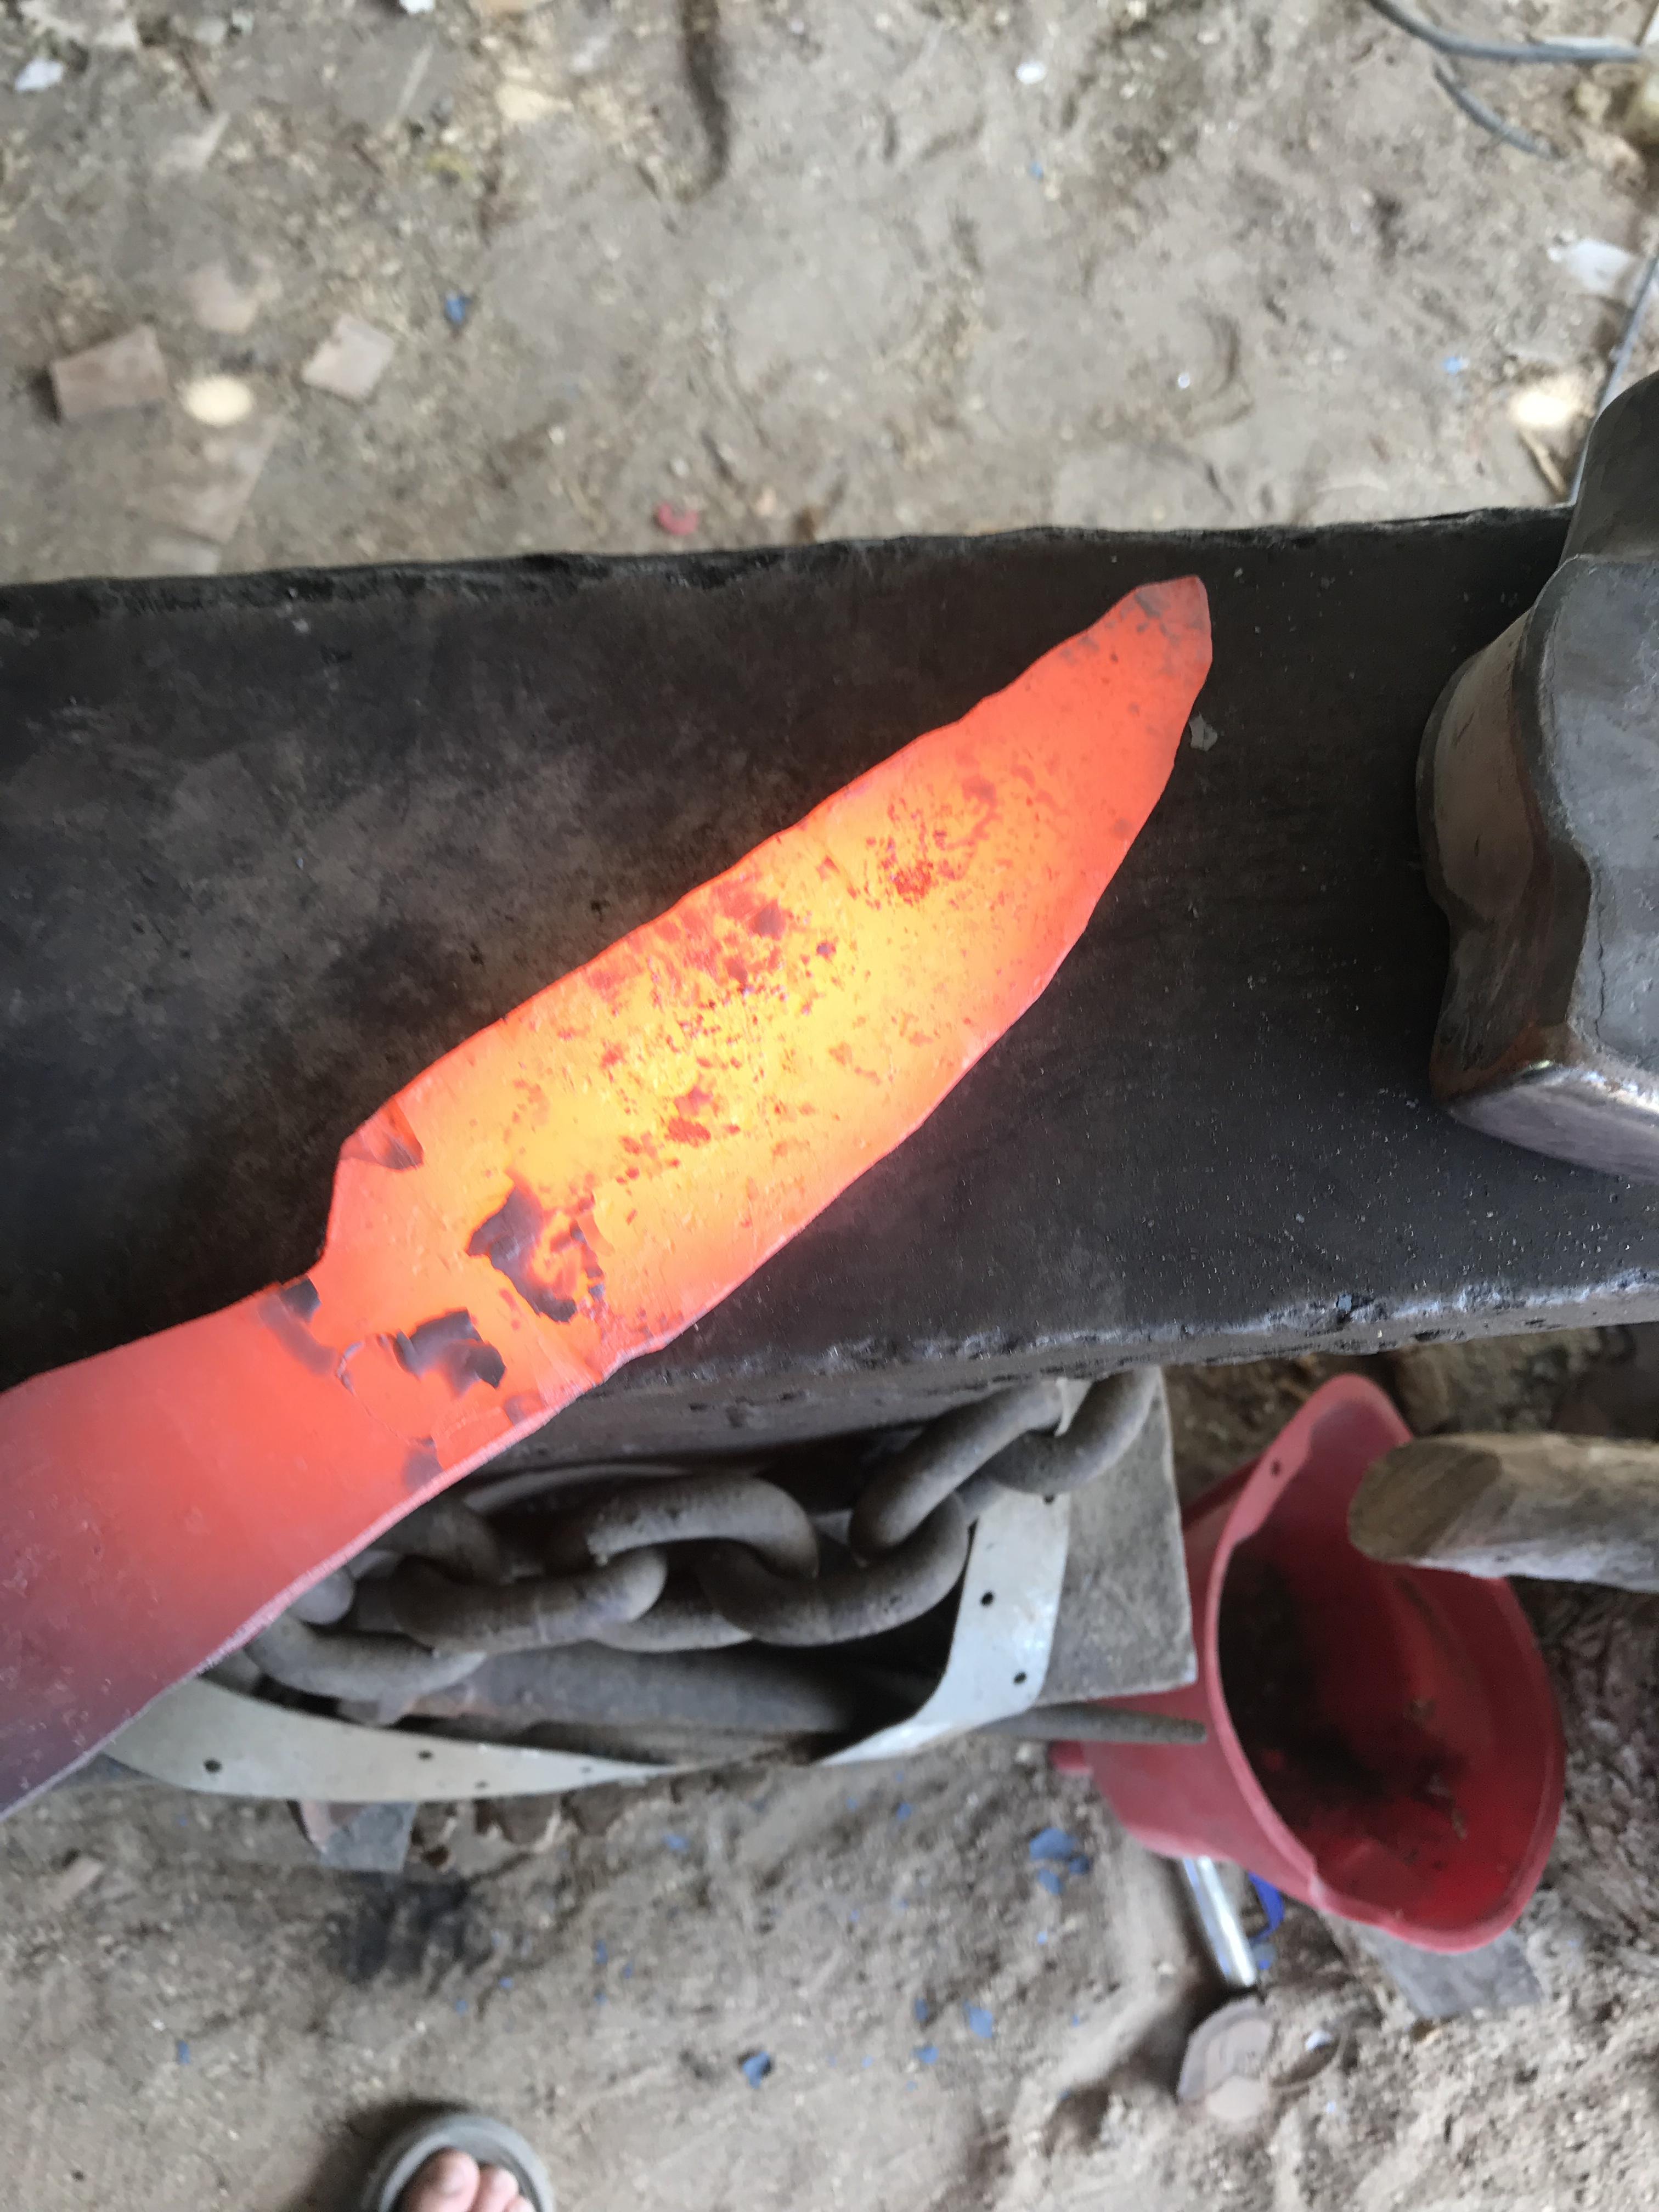
Been a while since I had posted. Made a kitchen knife, was planning to offer as a trade on some 1 1/4" cable, but the guy said I could just have it, all of it, all 120' of it... So the first knife I've made that I'm keeping myself.
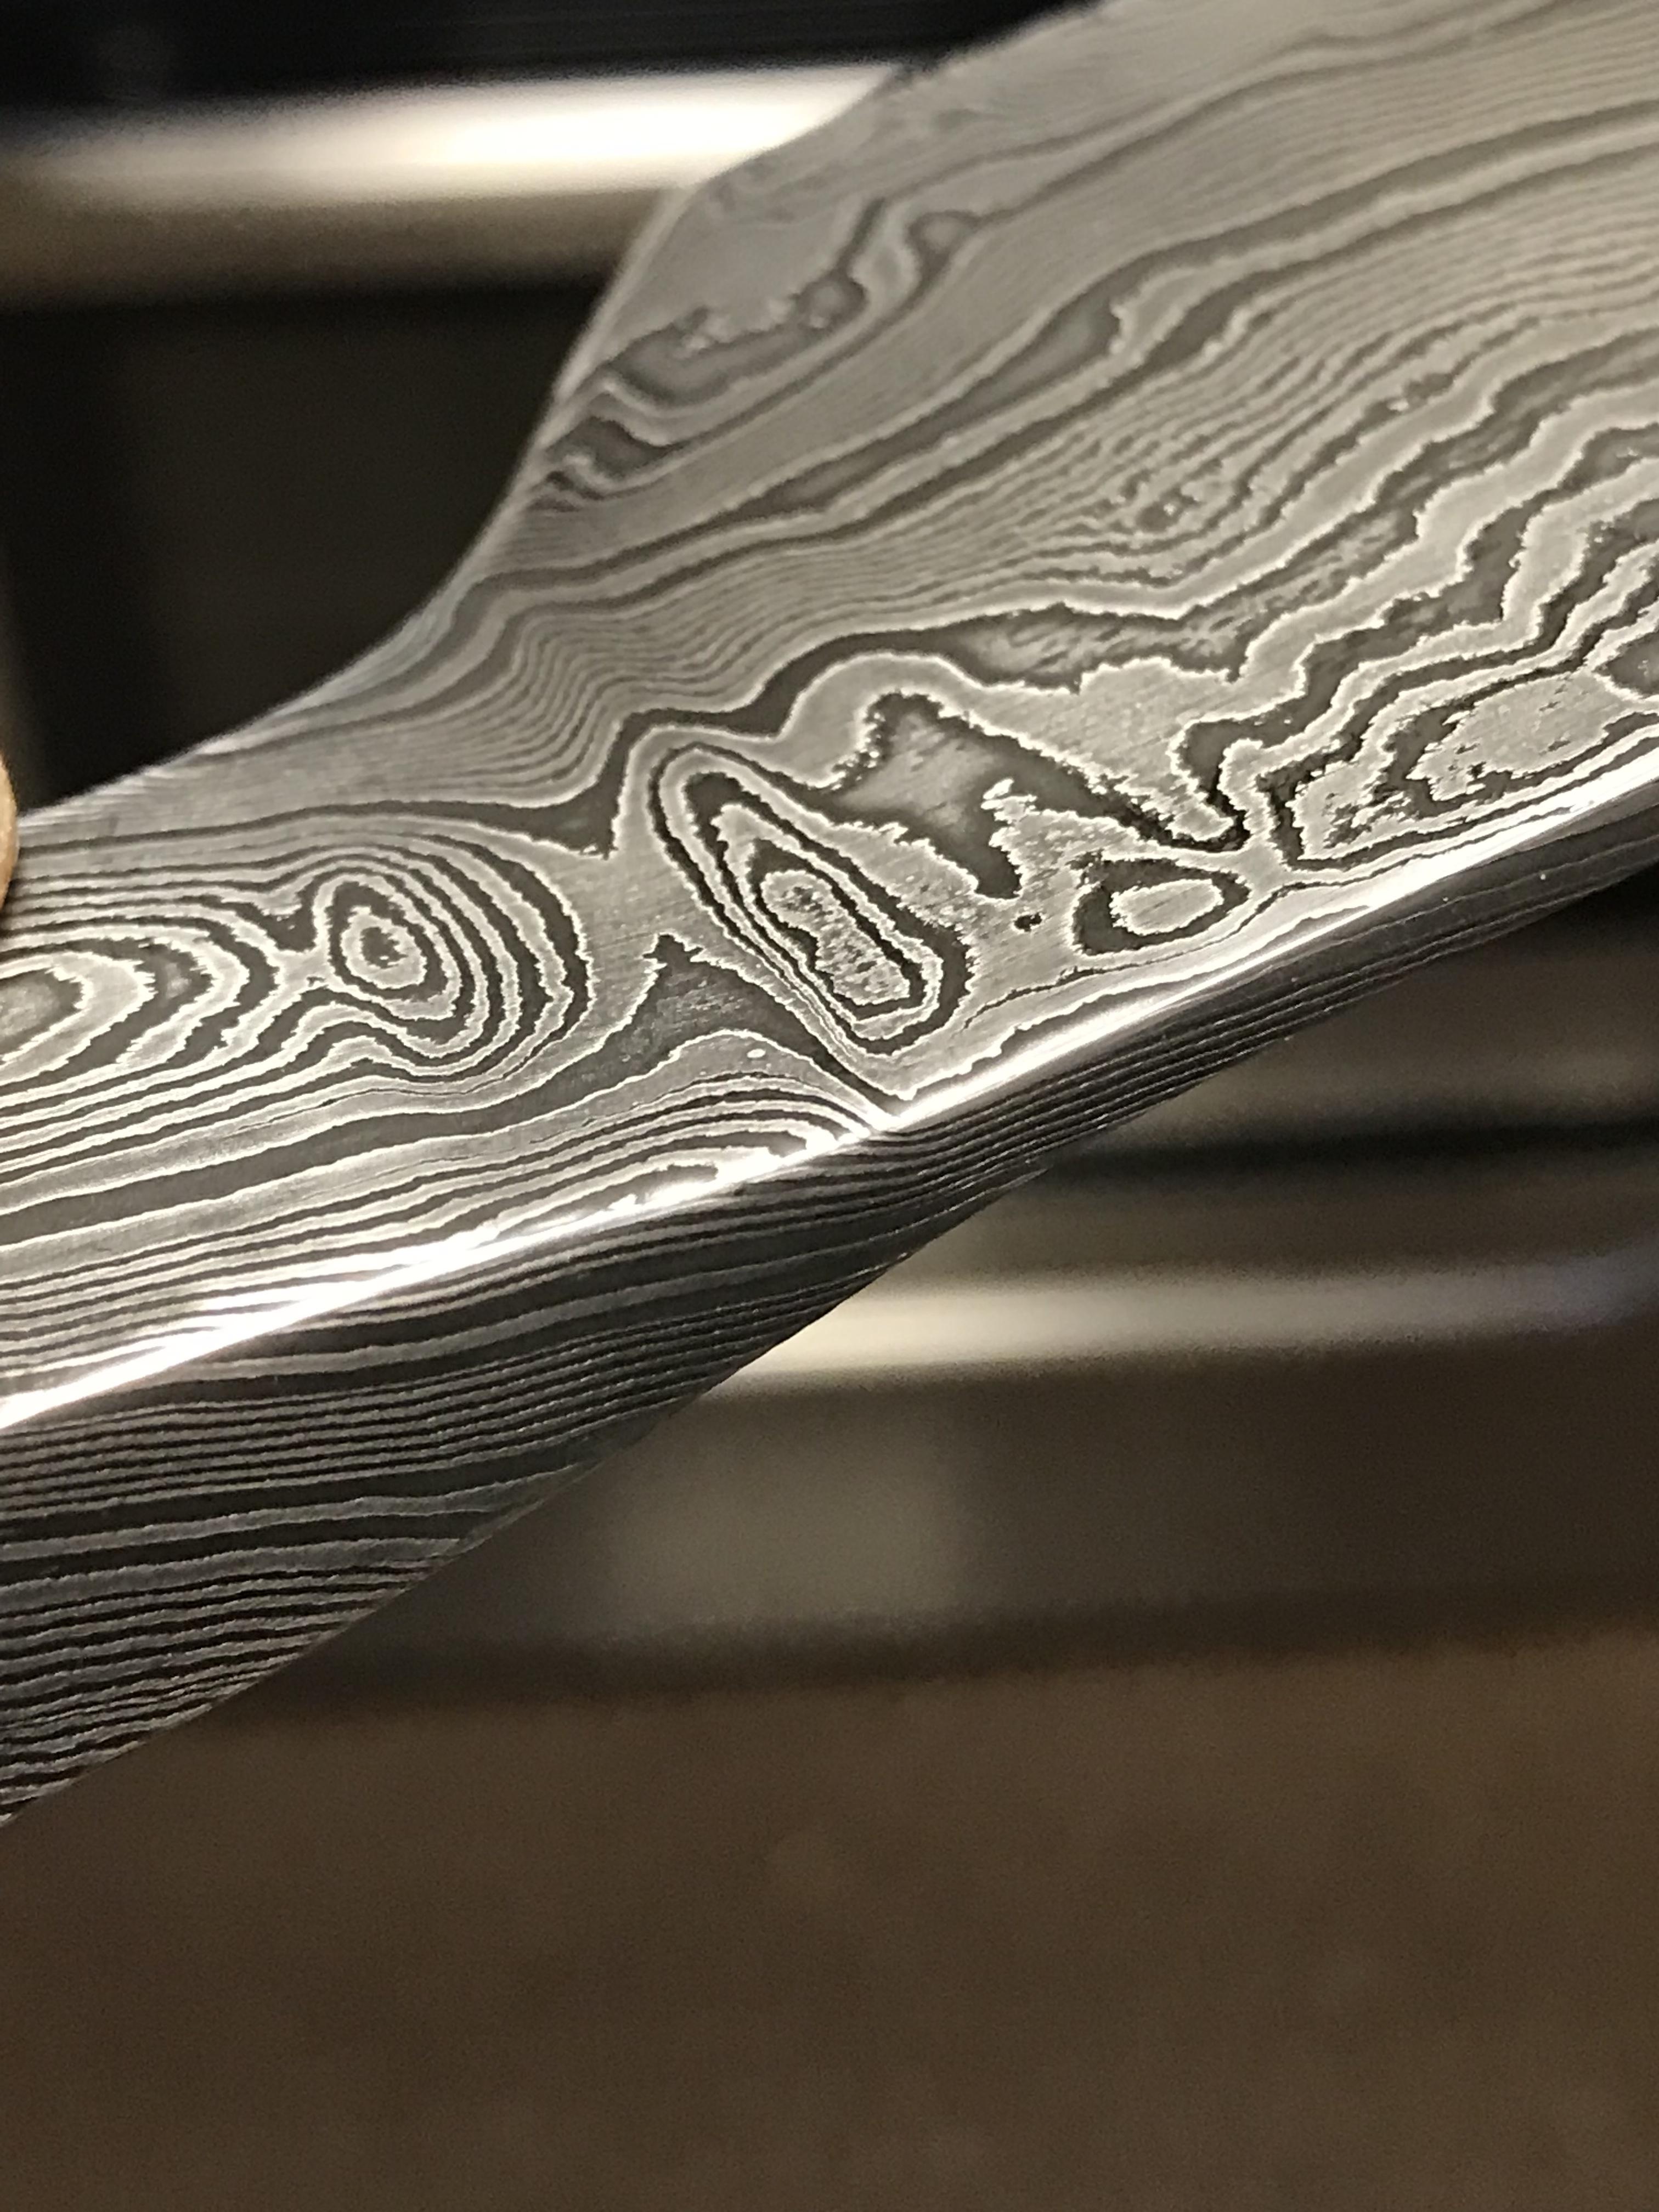
1080 (1084? maybe, cant remember) and 15n20, twist, Stabilized and dyed Cottonwood handle, nice shimmer to it. Deep etched then buffed, has a neat look to the steel.
-
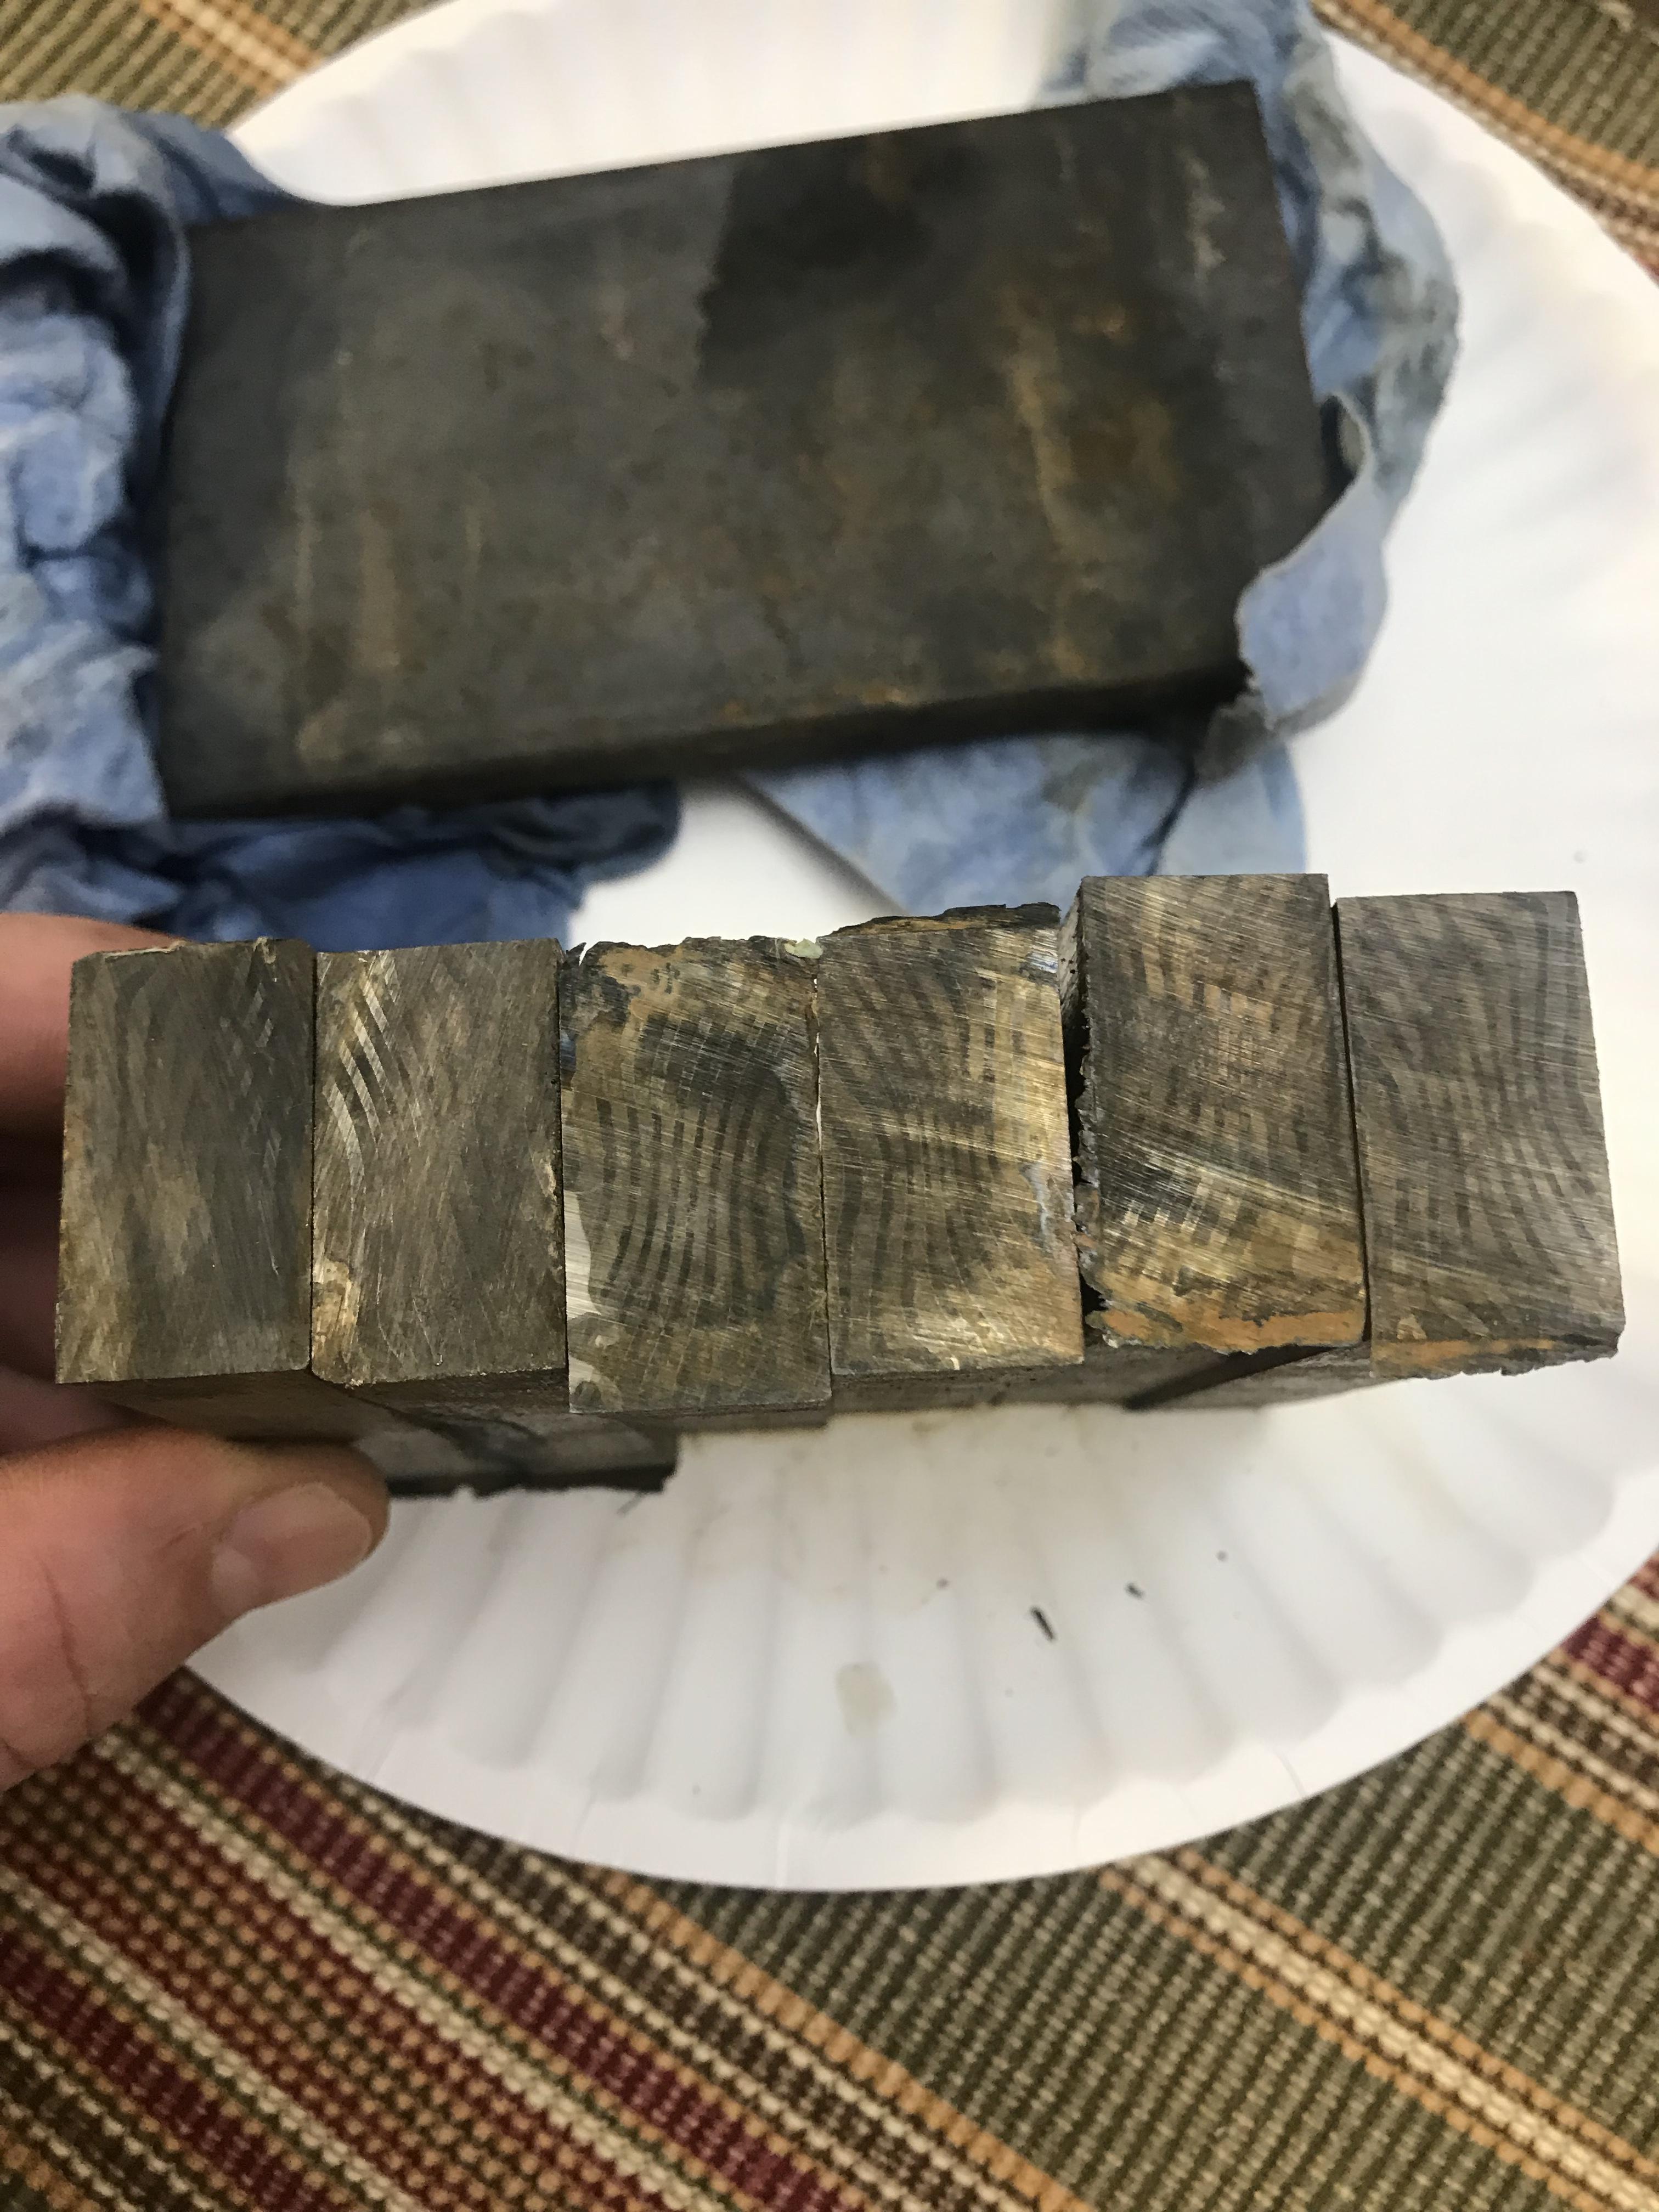
I will post updates as I get the gumption to work in the heat of July in Southern AZ, and as days off permit. Its a good sized billet, after cutting the ends off I have a 20" X 2.5" X 5/8" bar. cutting that into 5 equal parts then forging, as identical as I can, blades from the pieces. I planning on an octagonal, hidden tang, similar to Japanese style kitchen knifes. but not doing the collar. a simple 3/16" stainless plate on the front that matches the handle dimensions.
-
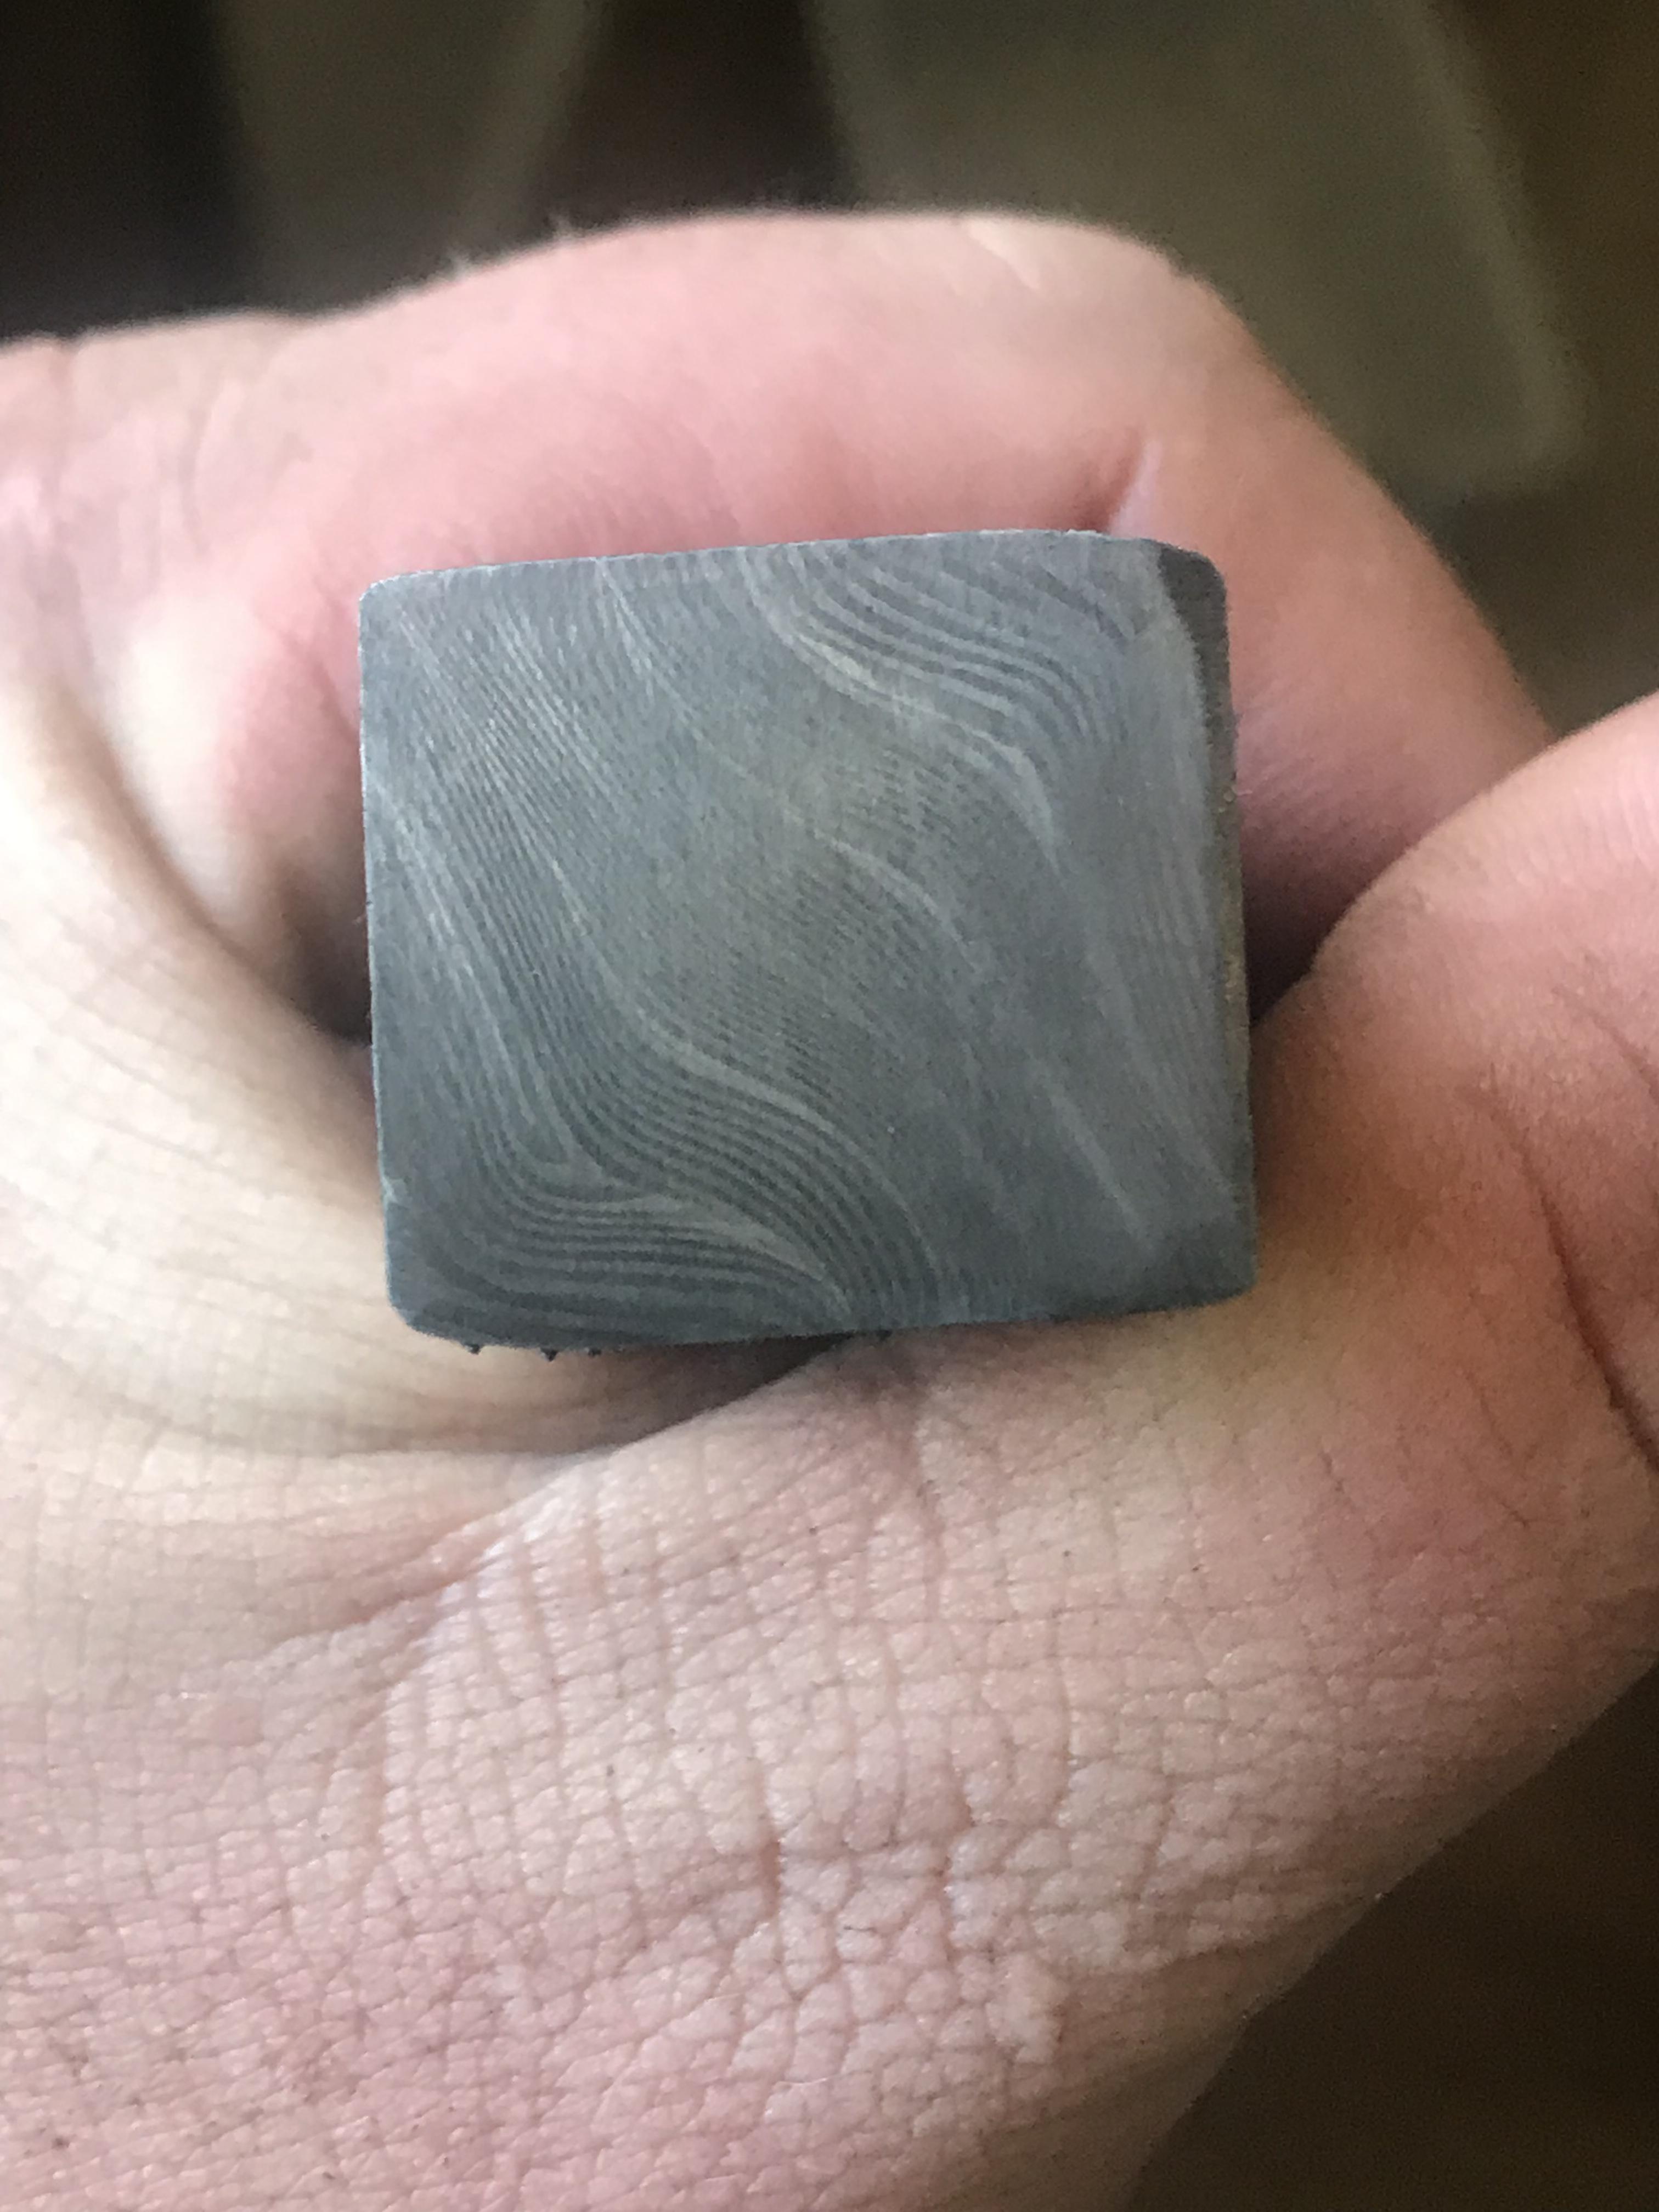
Well I decided to just try it. Had my 25 layer pieces at about 1/2” thick. And the 80CrV2 is 3/8” thick.
I went with 2 center pieces 80CrV2 and 2 cladding pieces at 25 layers each. So 1:0.75:1 ratio. It welded up just fine, consequently its the first forge-welding I've done without borax... just clean surfaces, reducing atmosphere, and a soak in kerosene.
-
I’m making a set of 5 matching kitchen knives for 5 sisters doing 50-layer Damascus on each side, with a 80crv2 core.
I have never done a core, and an looking for some guidance on thickness/ratios of the three layers.
I know it varies depending on how much core you want, just wondering if anyone has any experience or what you had done in the past that worked well.
Hopefully i can forge evenly enough to keep the core centered, and keeping the pattern even-ish from side to side.
-
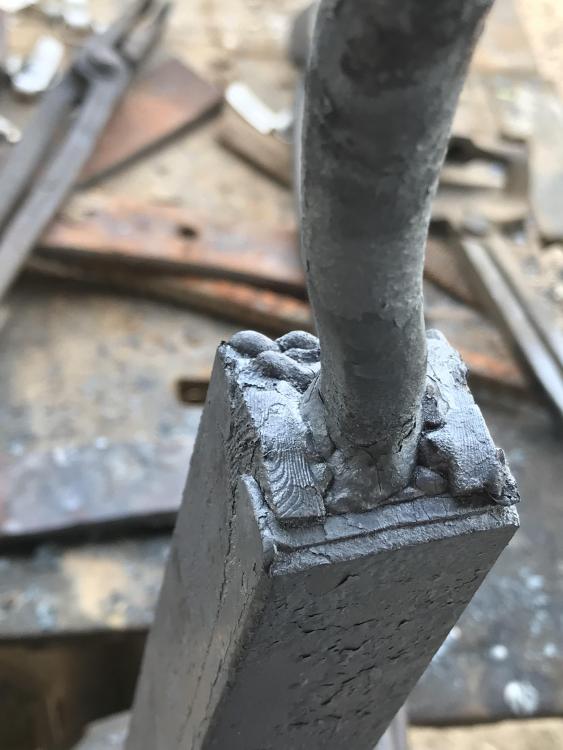
They were about 5/8” square-ish.. and about 5” long. 5 total bars. Mig welded the ends with a handle. At Welding heats forged down to anout 1.75 inches tall.
Generally 5-6 light taps (88# anyang) compressing the stack then one hit on each side to keep it flat.
Forged it to about 1/4 inch wide and generally to length/shape. 1/2 way forged bevels until edge was a bit over 1/8” width. Ground until edge was a touch over 1/16” then did full heat treat.
-
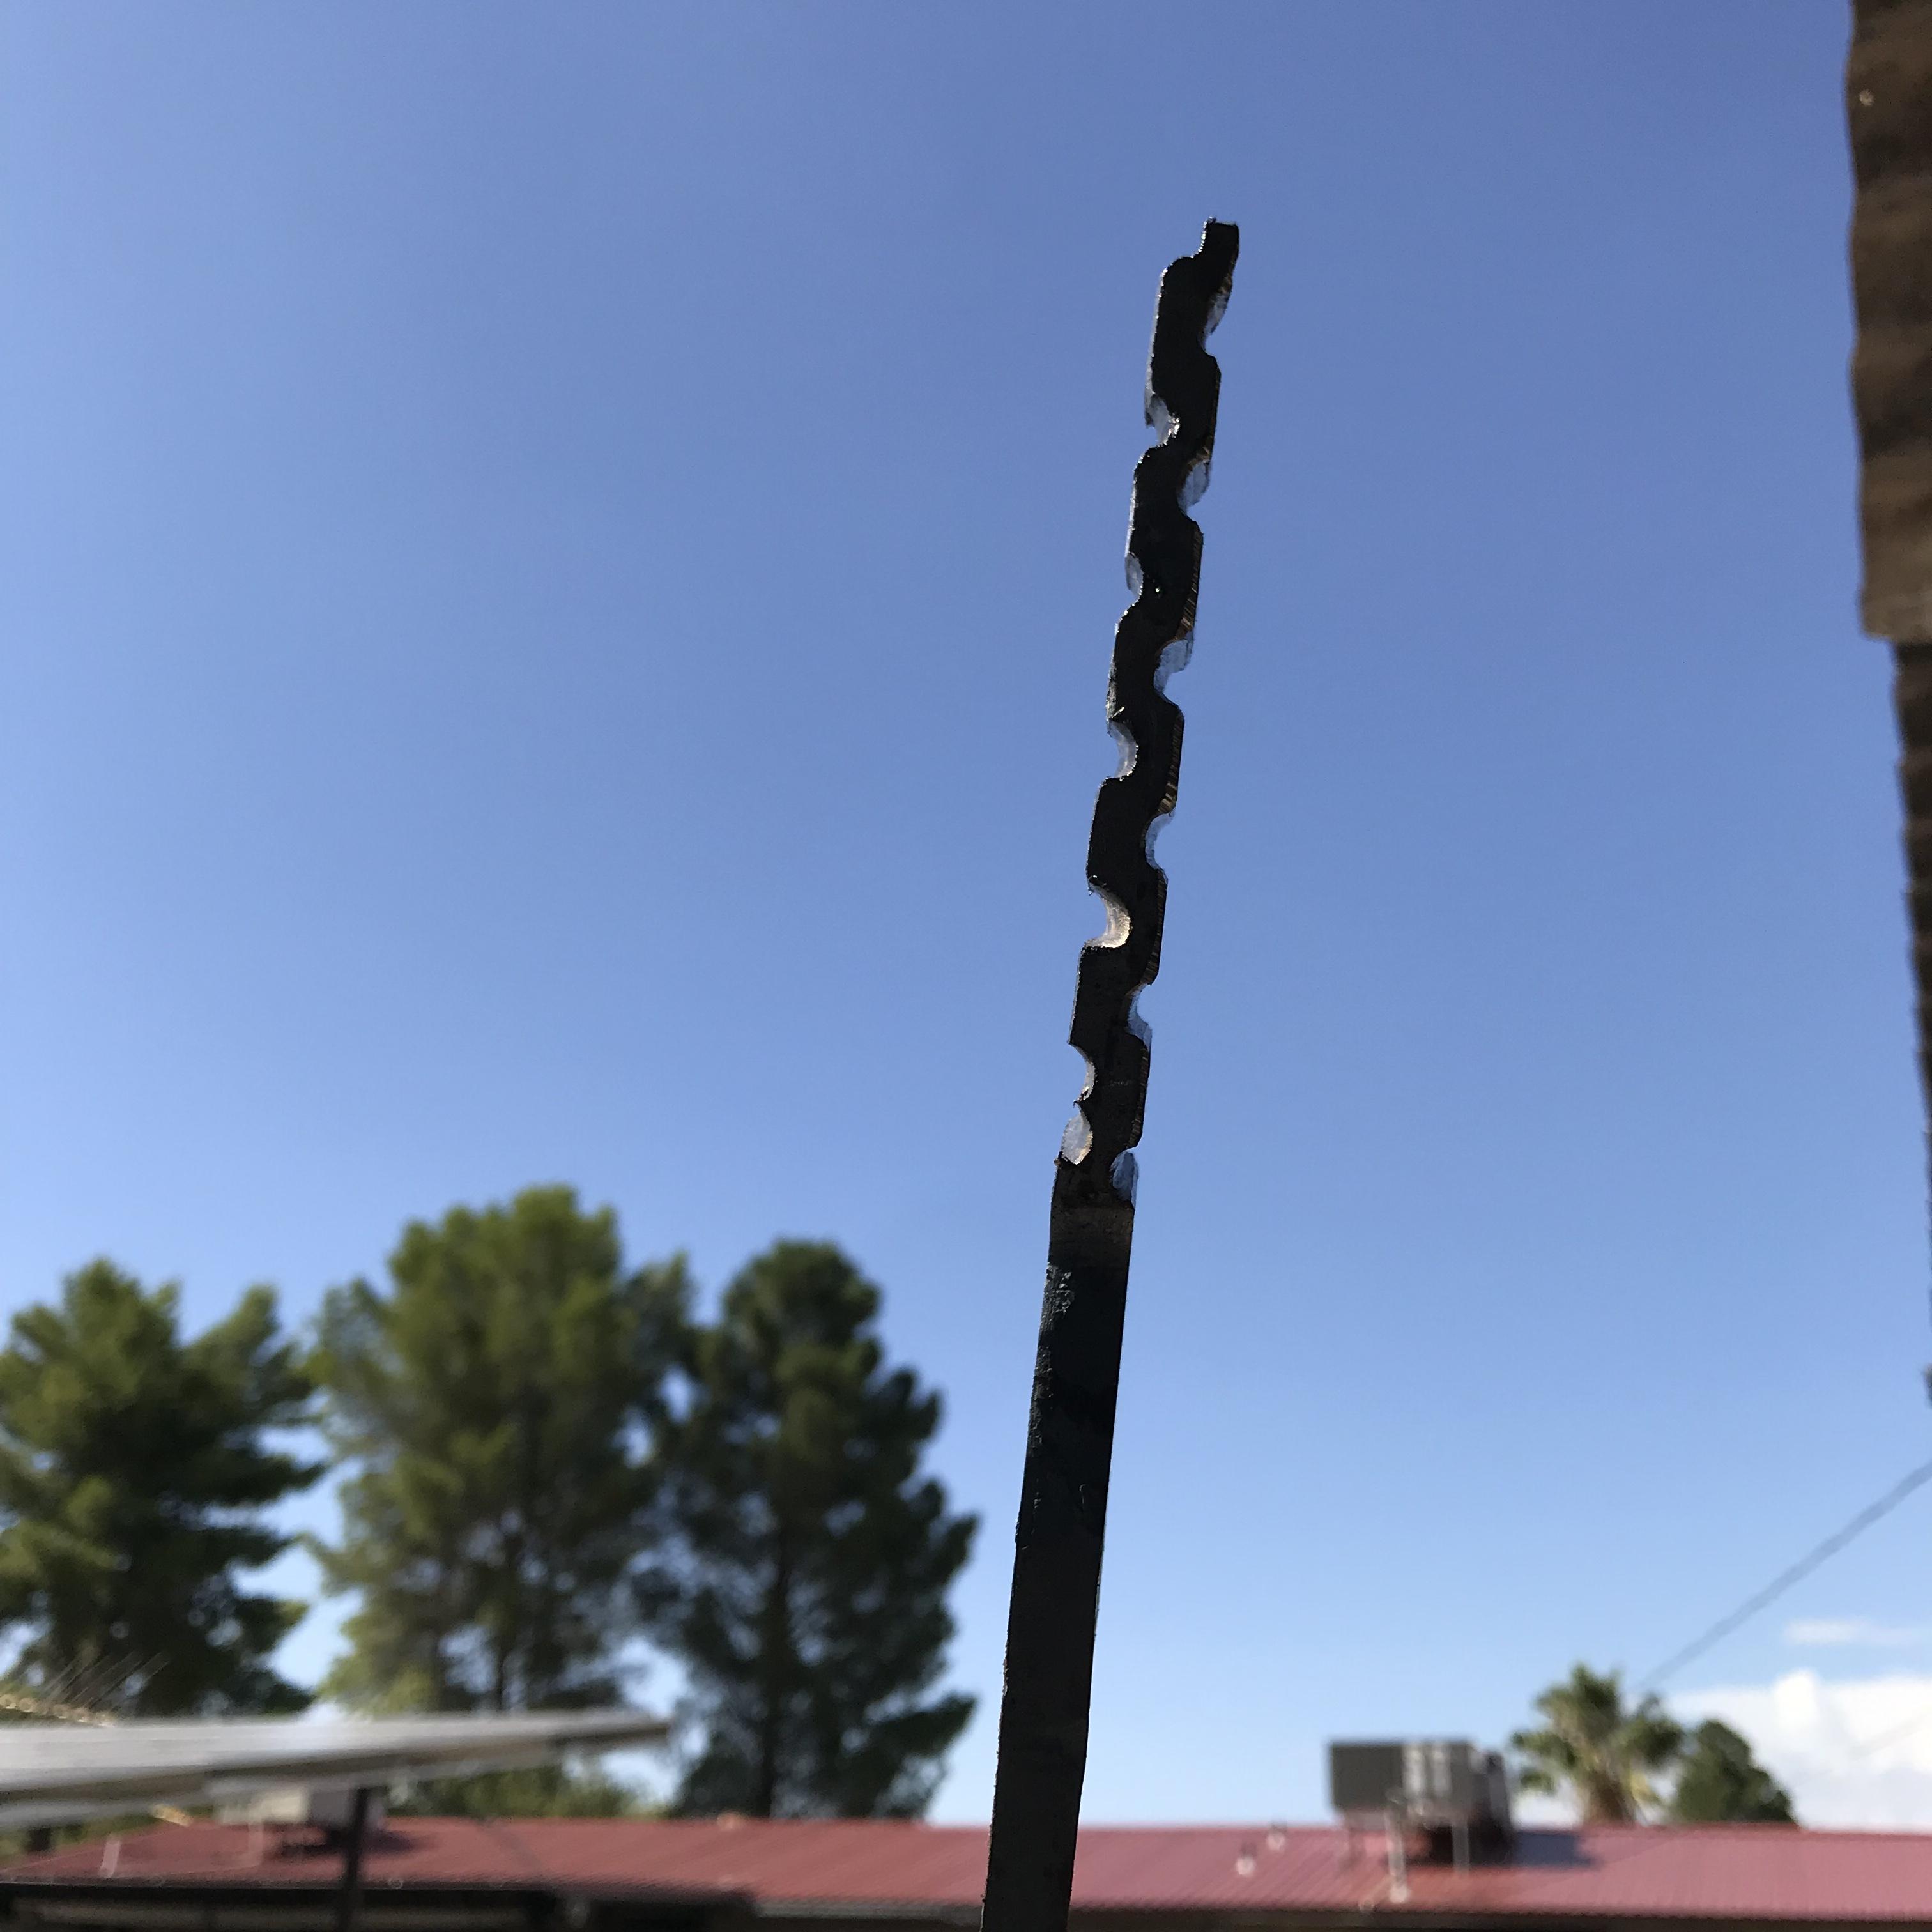
This was my 3rd or 4th piece of Damascus. Worn out band saw blade from the hardware store that cuts metal, and pallet strapping that fell outside the right of way from a railroad track. All hand forged.
-
-
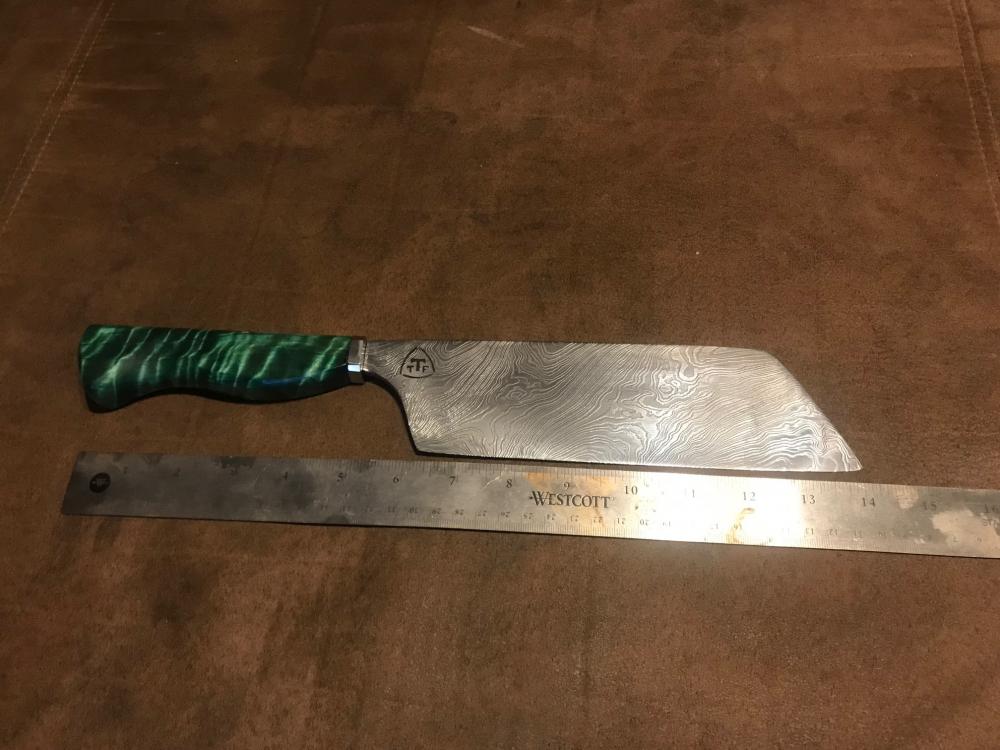
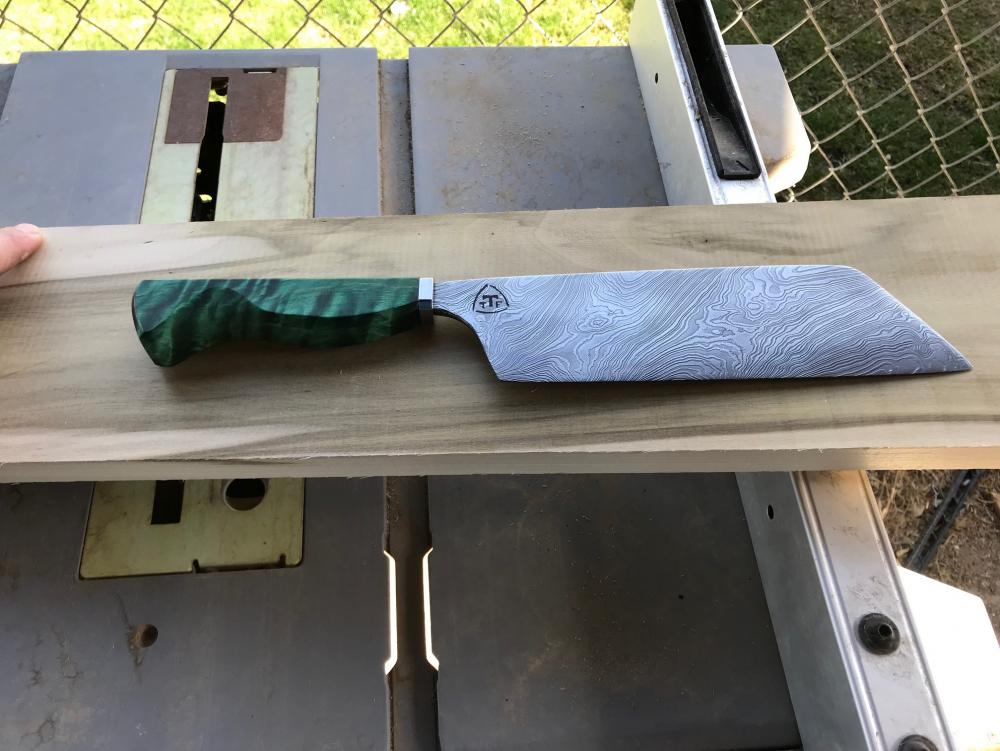
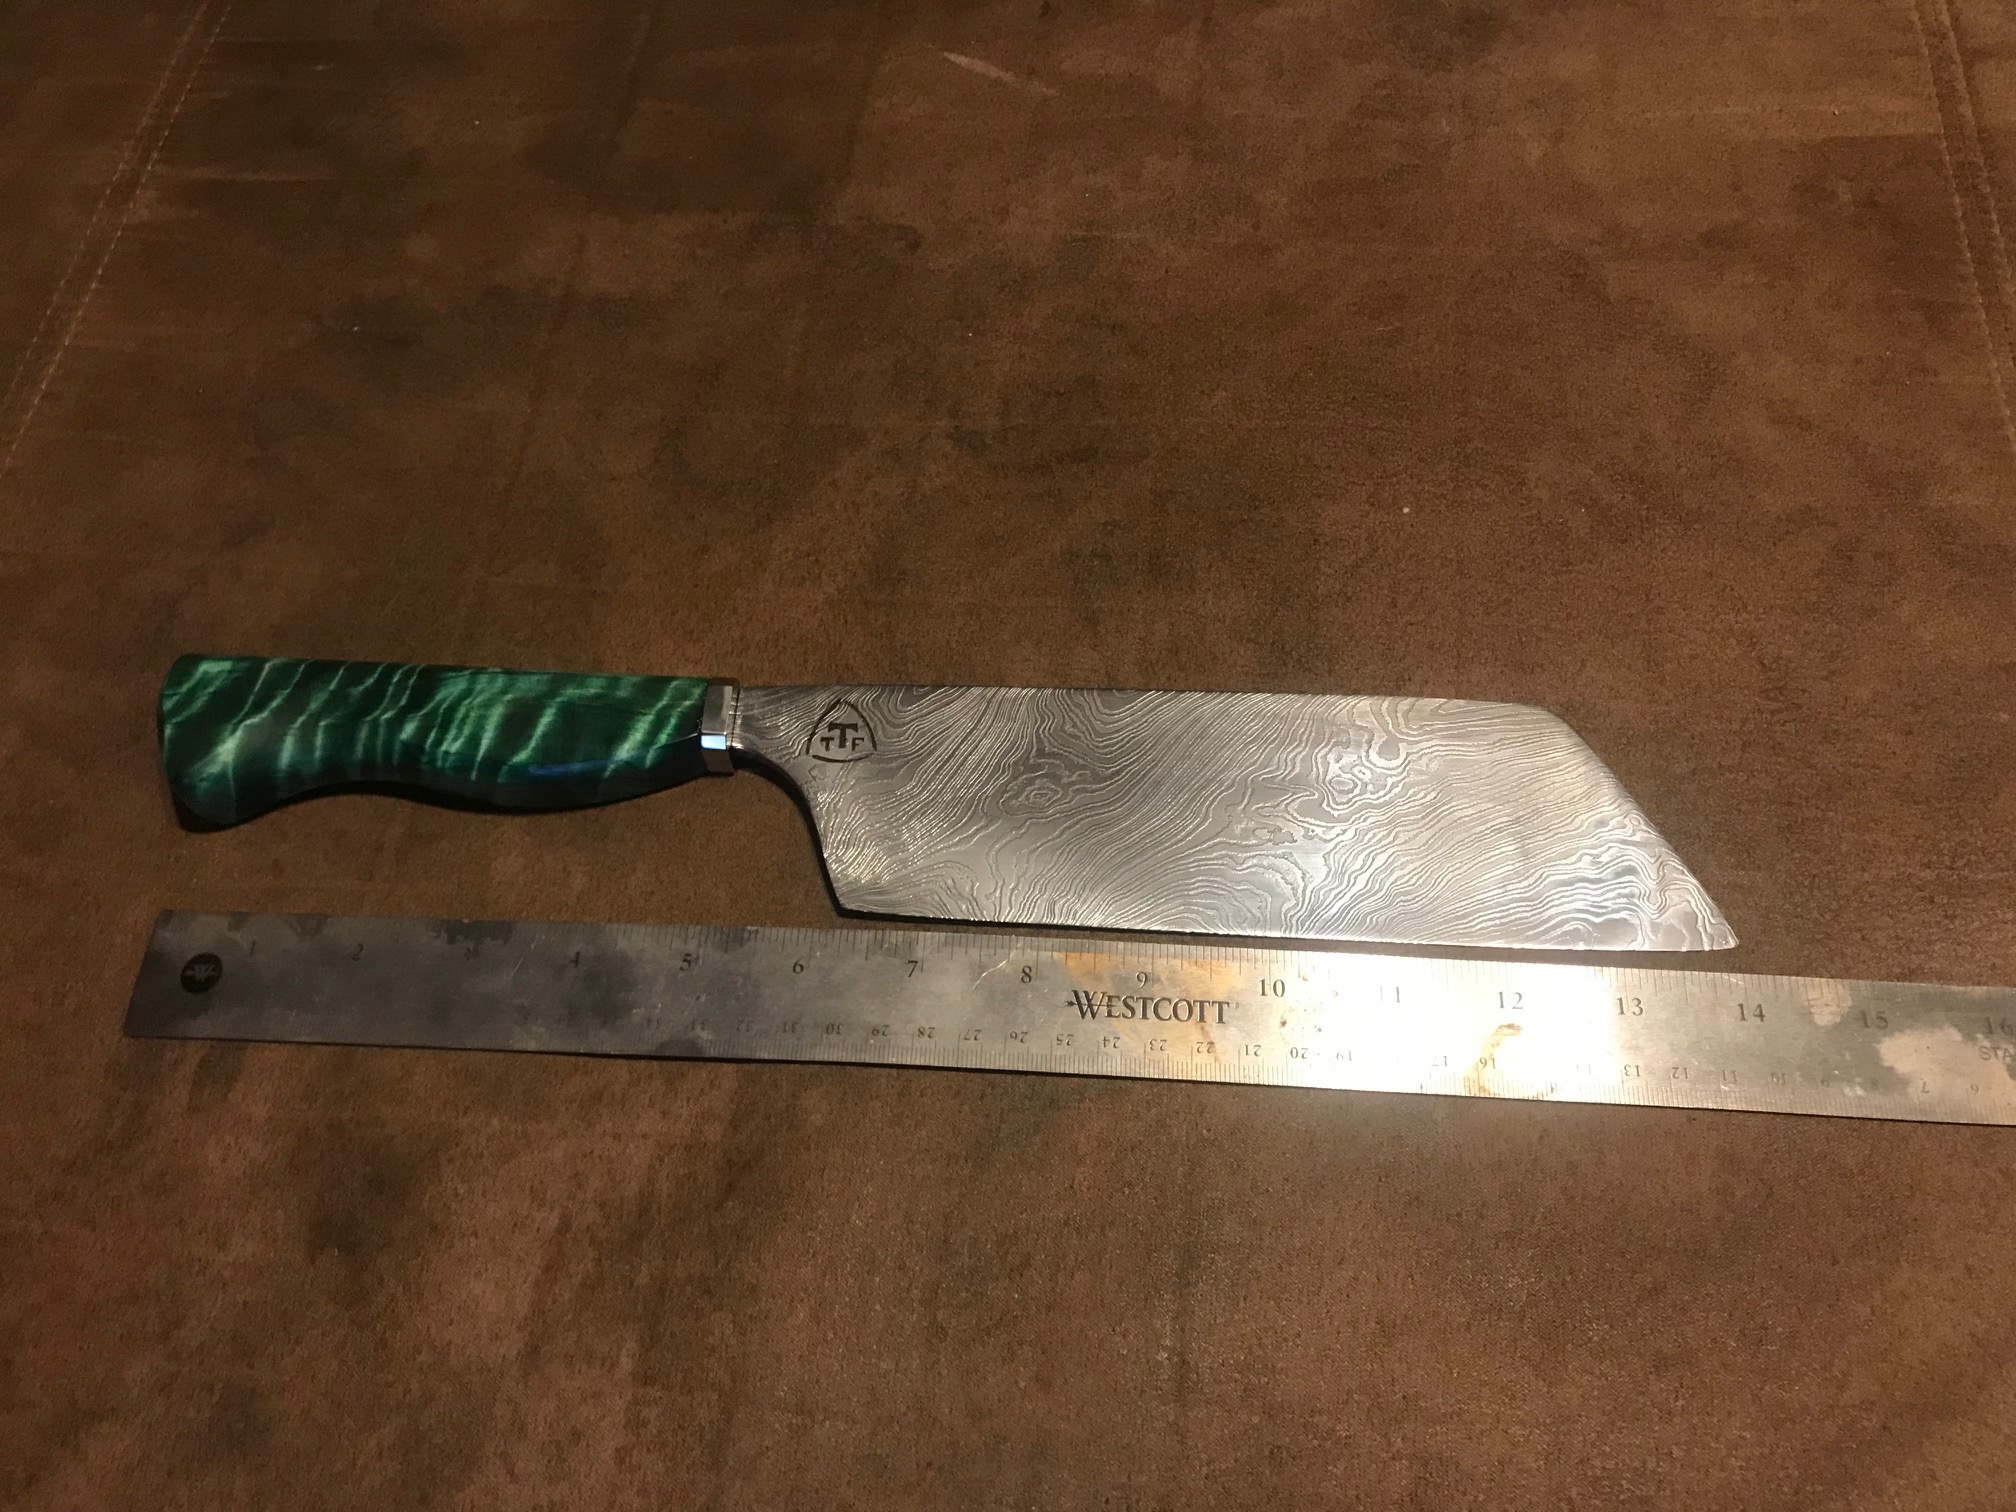
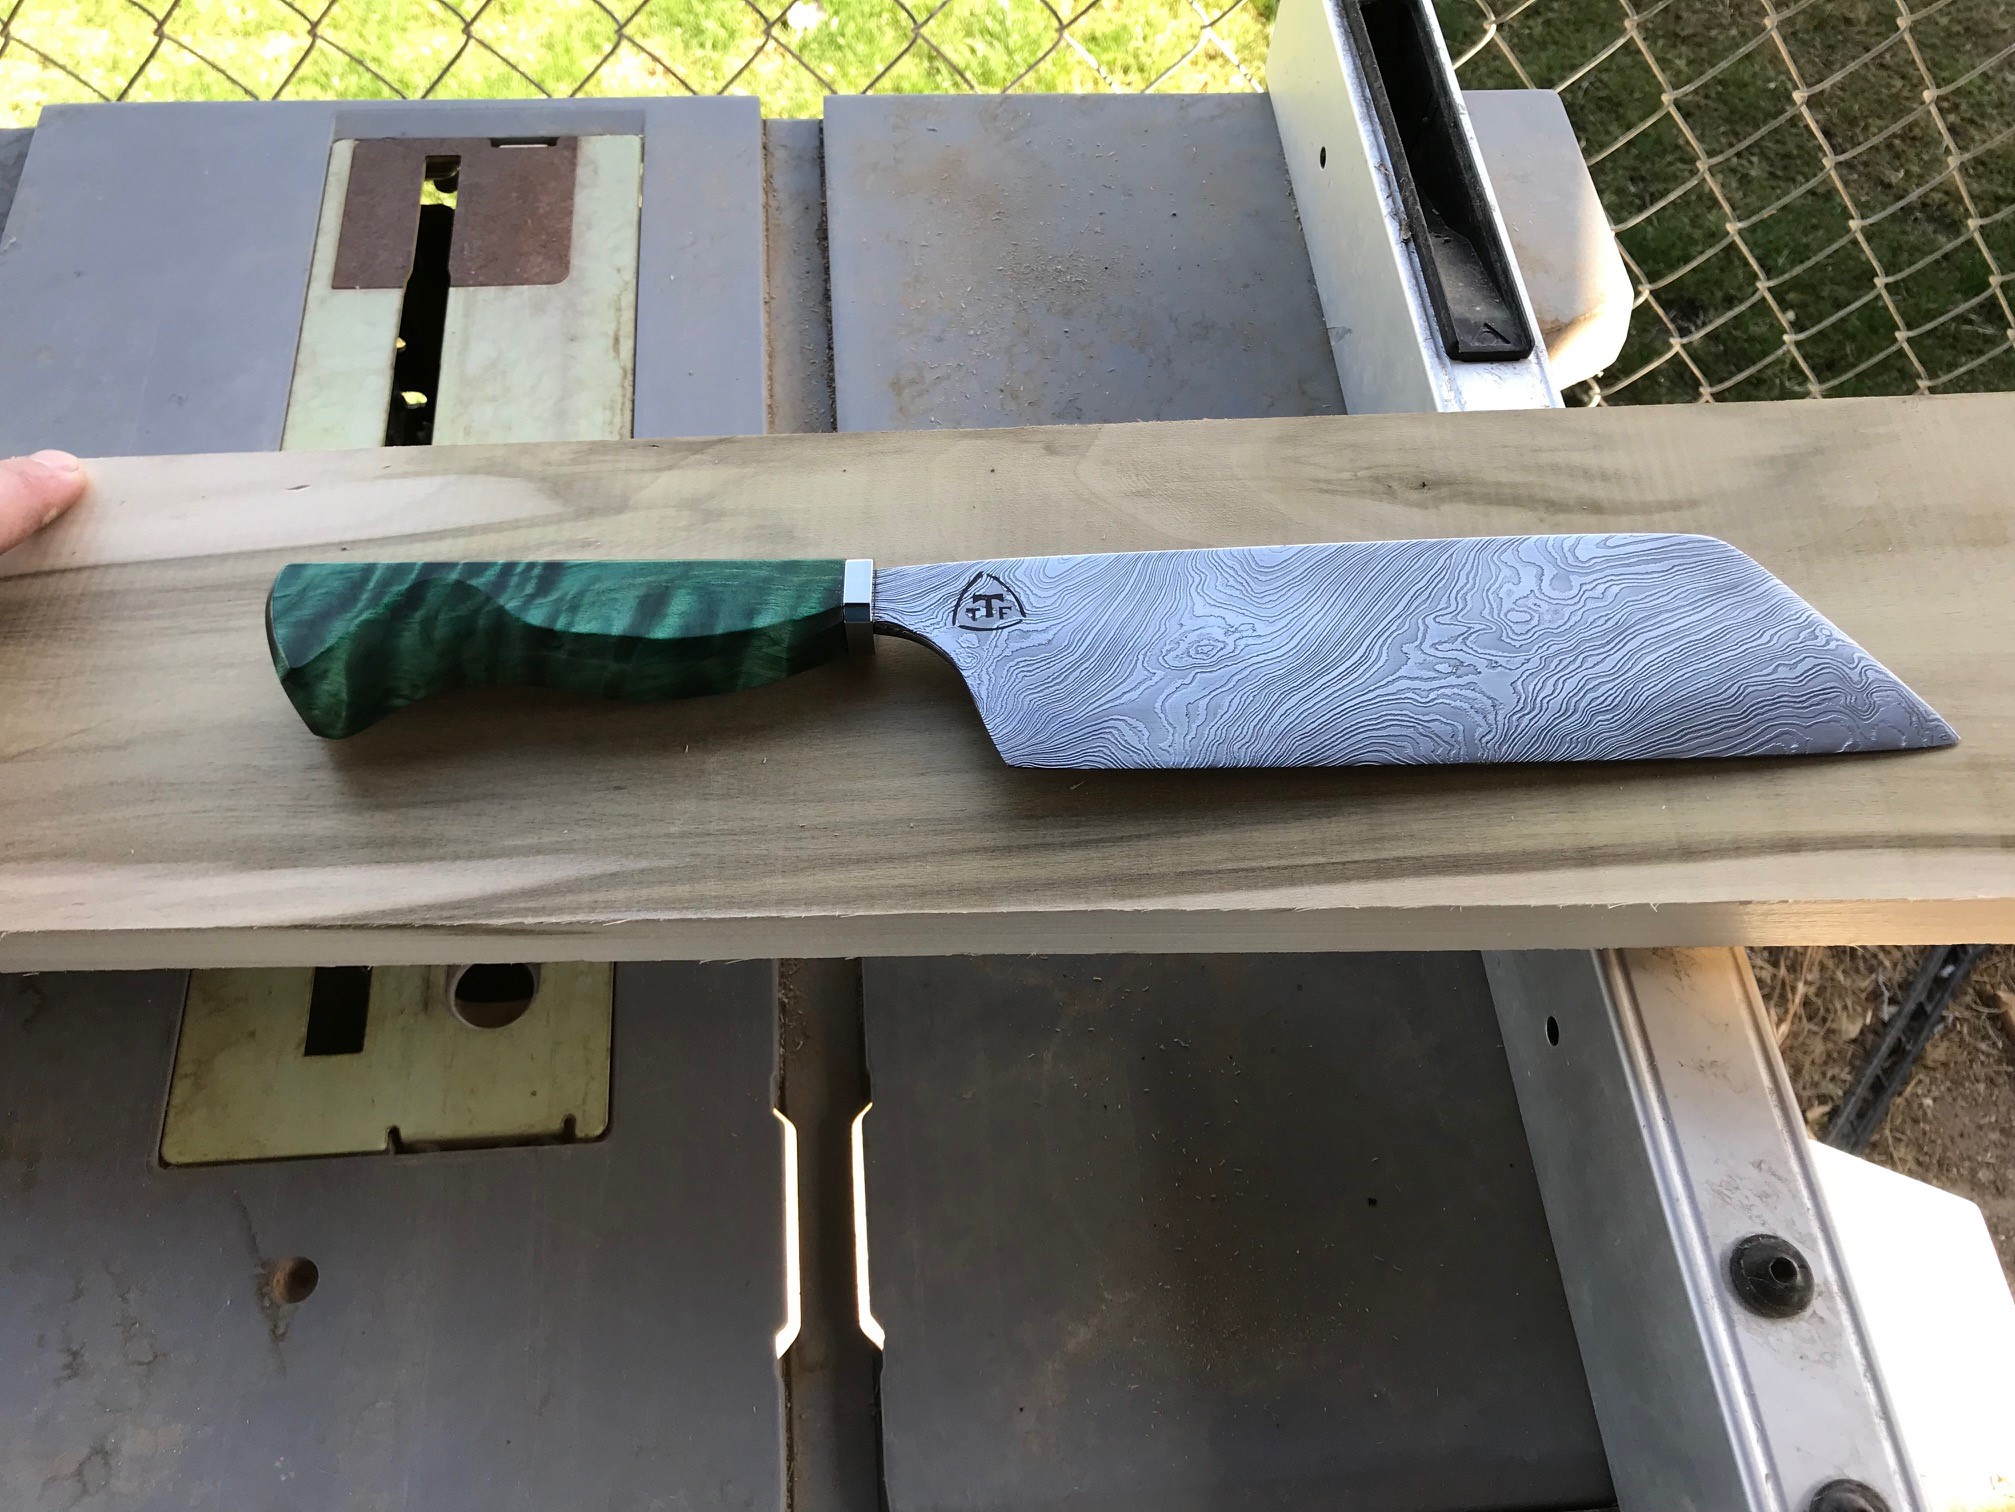
Latest work. Still need to elecrto-etch mark. 26? Layer, 5 bar alternating twist about 10 twists each, some more, some less. Wanted to see how different twist counts played out.
Stabilized (cactus juice) and dyed birdseye maple handle with brass spacer.
1084 and 15n20.
9 inch blade measured as straight line from heel to tip
14.25 overall length
8.2 oz weight.
...
huh it wont let me upload pictures, gives me an error... I put em on imgur... will try again in a reply I guess
The images are 37 inches x 37 inches and 21 megs in size. The reworked images are less than 50 kB in size.
-
I have a bin with the broken pieces from testing like TP says, also damascus billet cutoffs, pieces too small etc...
I plan on trying my hand at canister damascus with all these random scraps and leftovers.. I'm thinking I will soak everythingin vinegar to get any scale off, take to wire wheel, then just give it a shot?
-
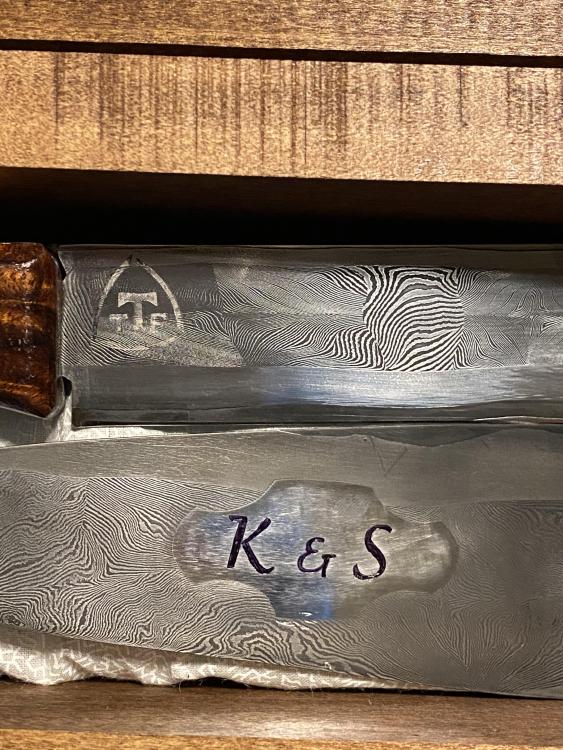
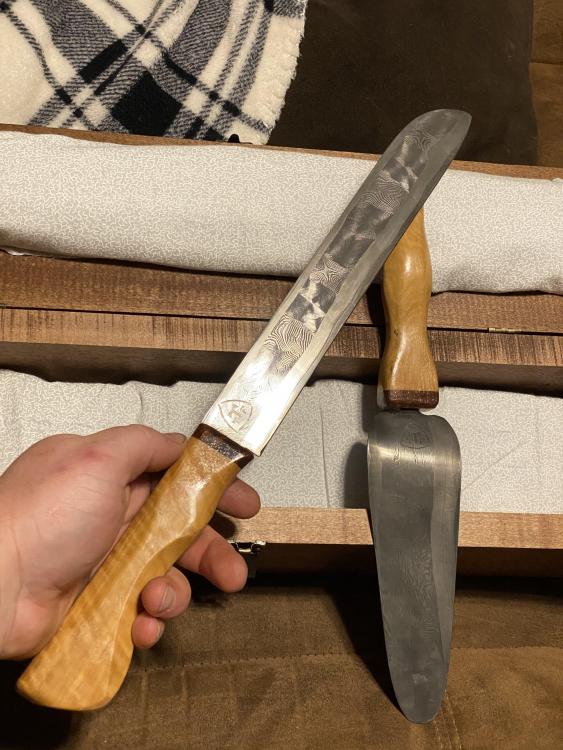
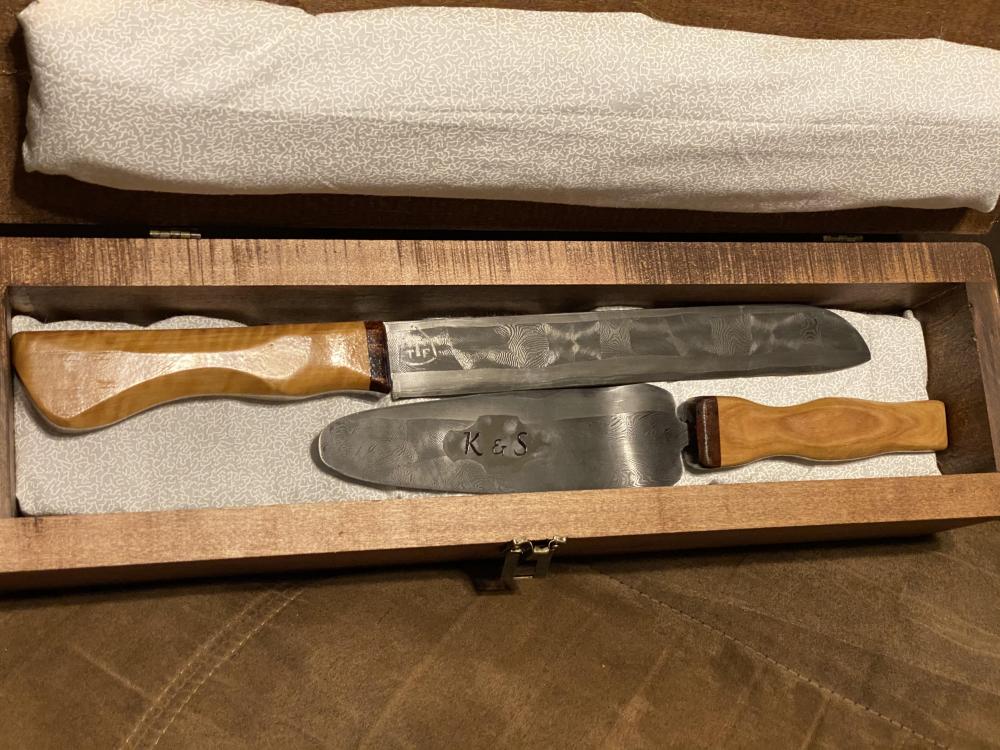
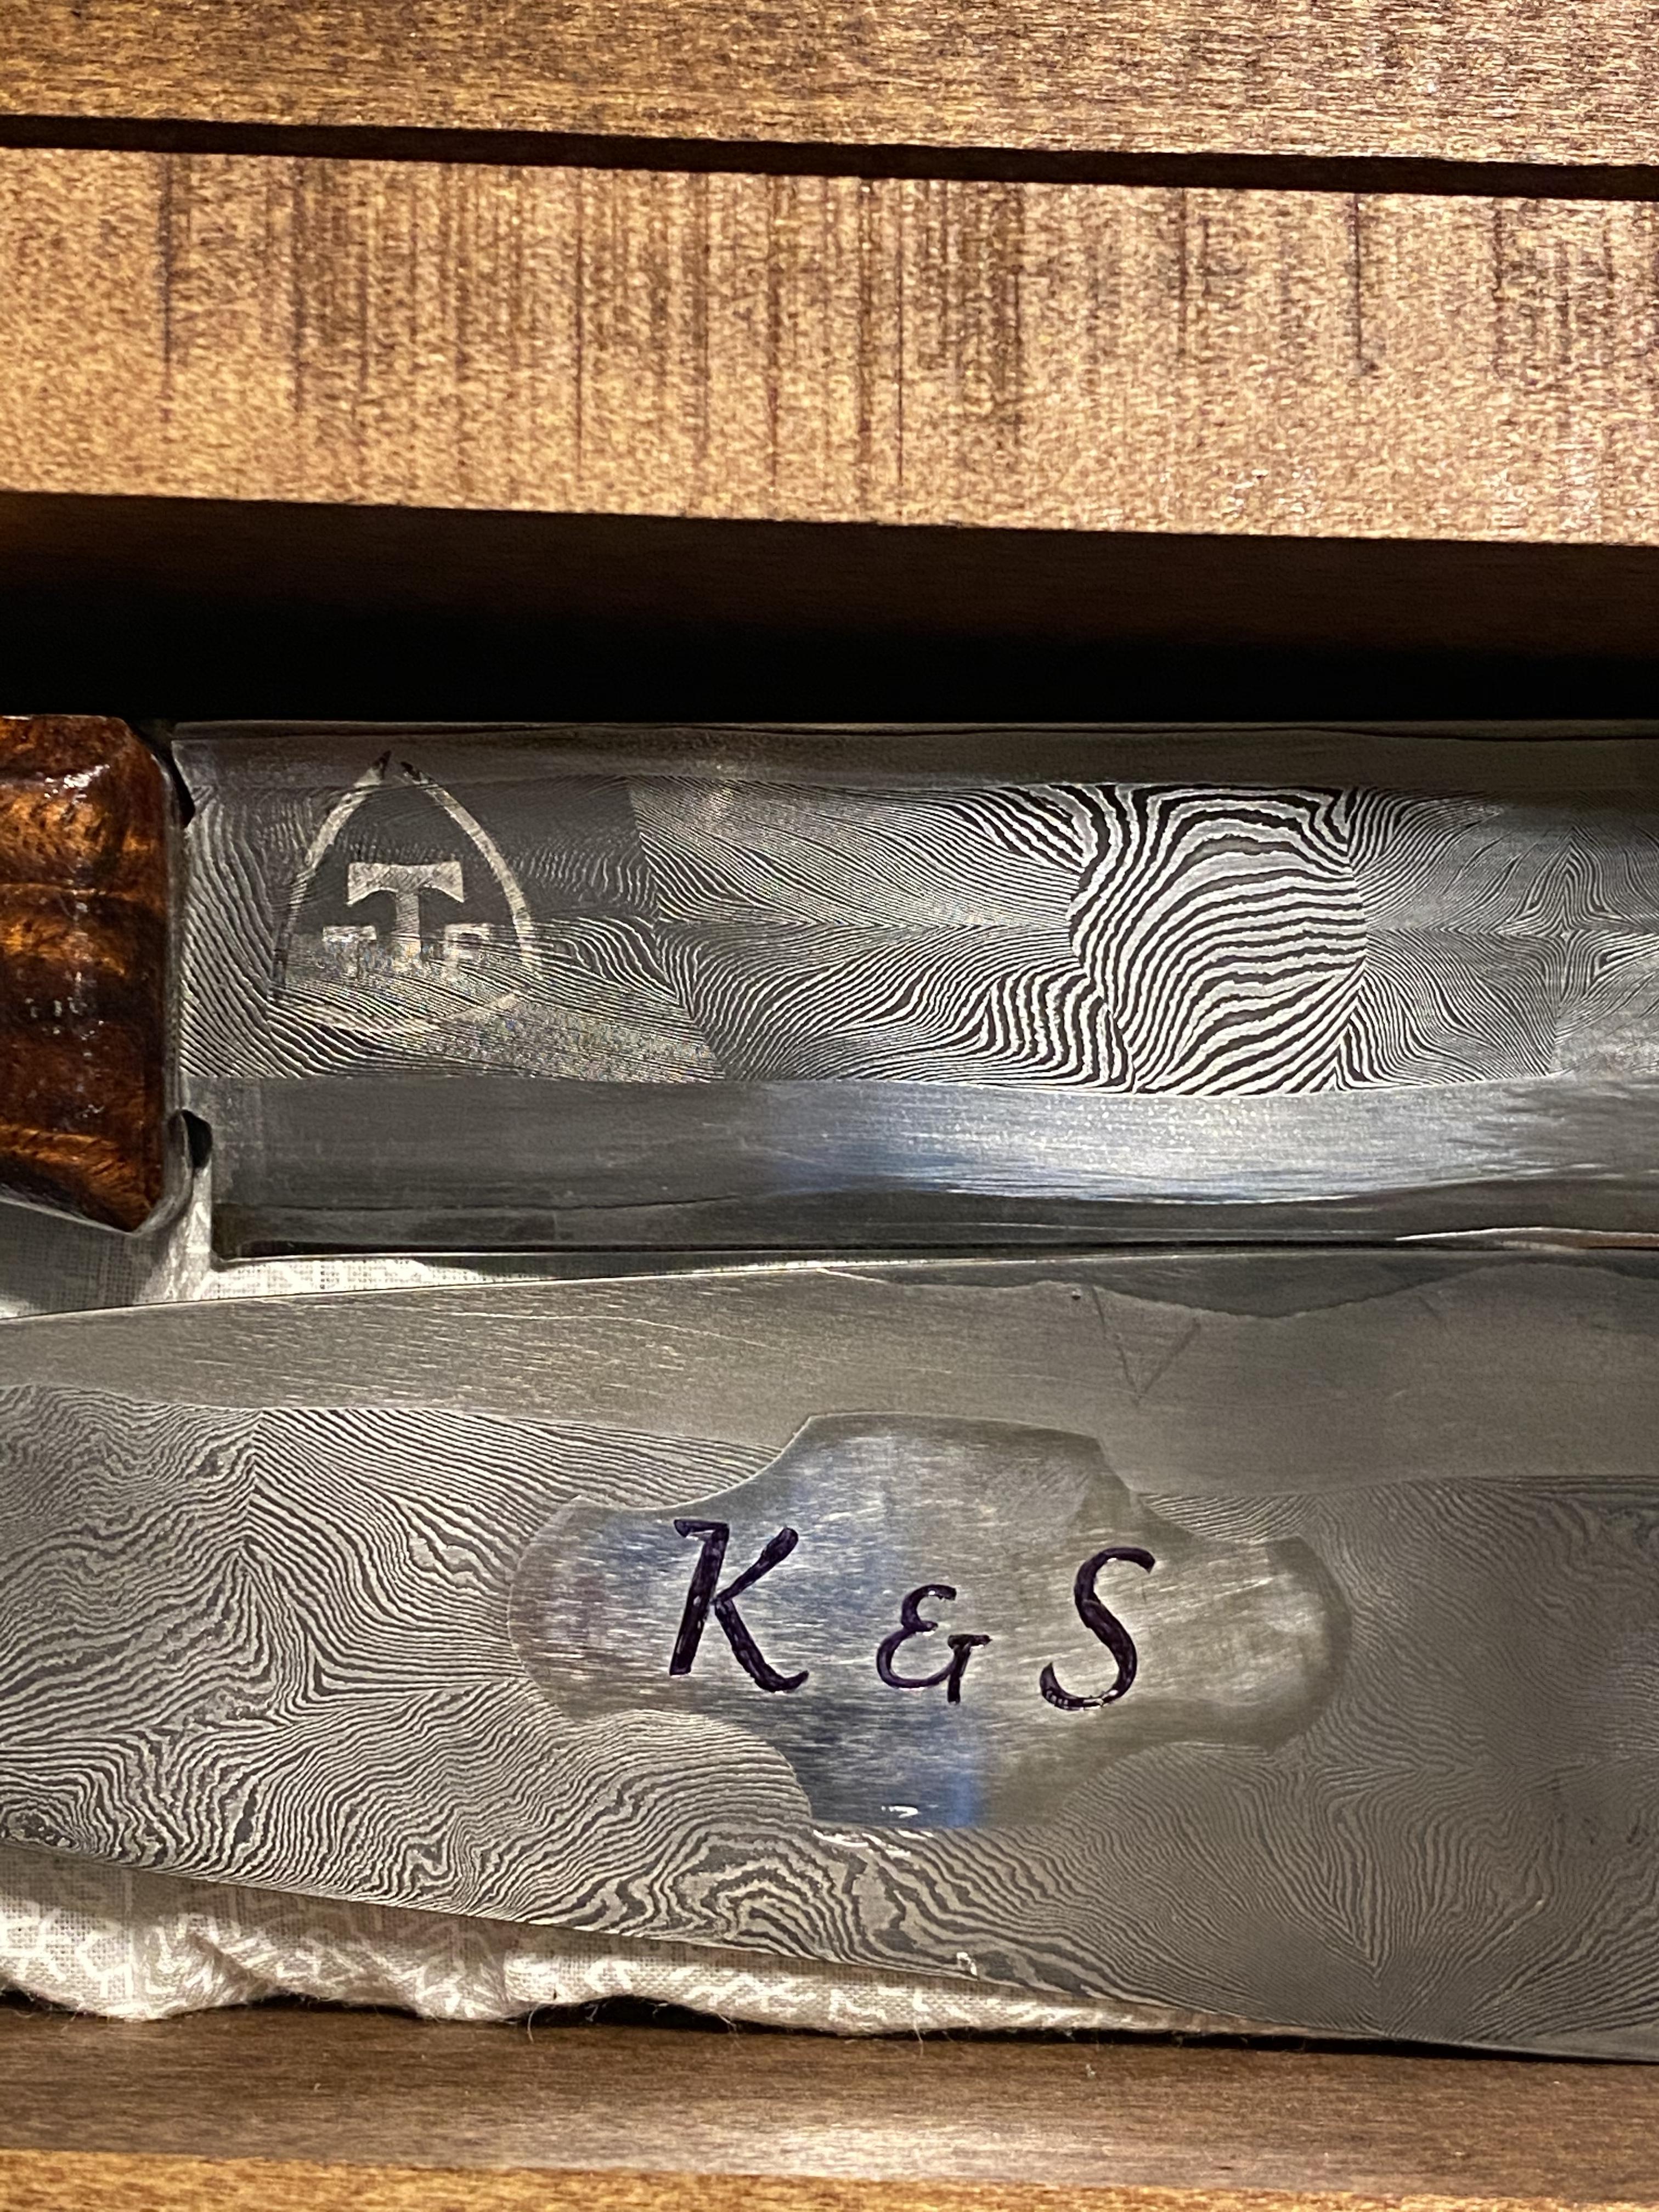
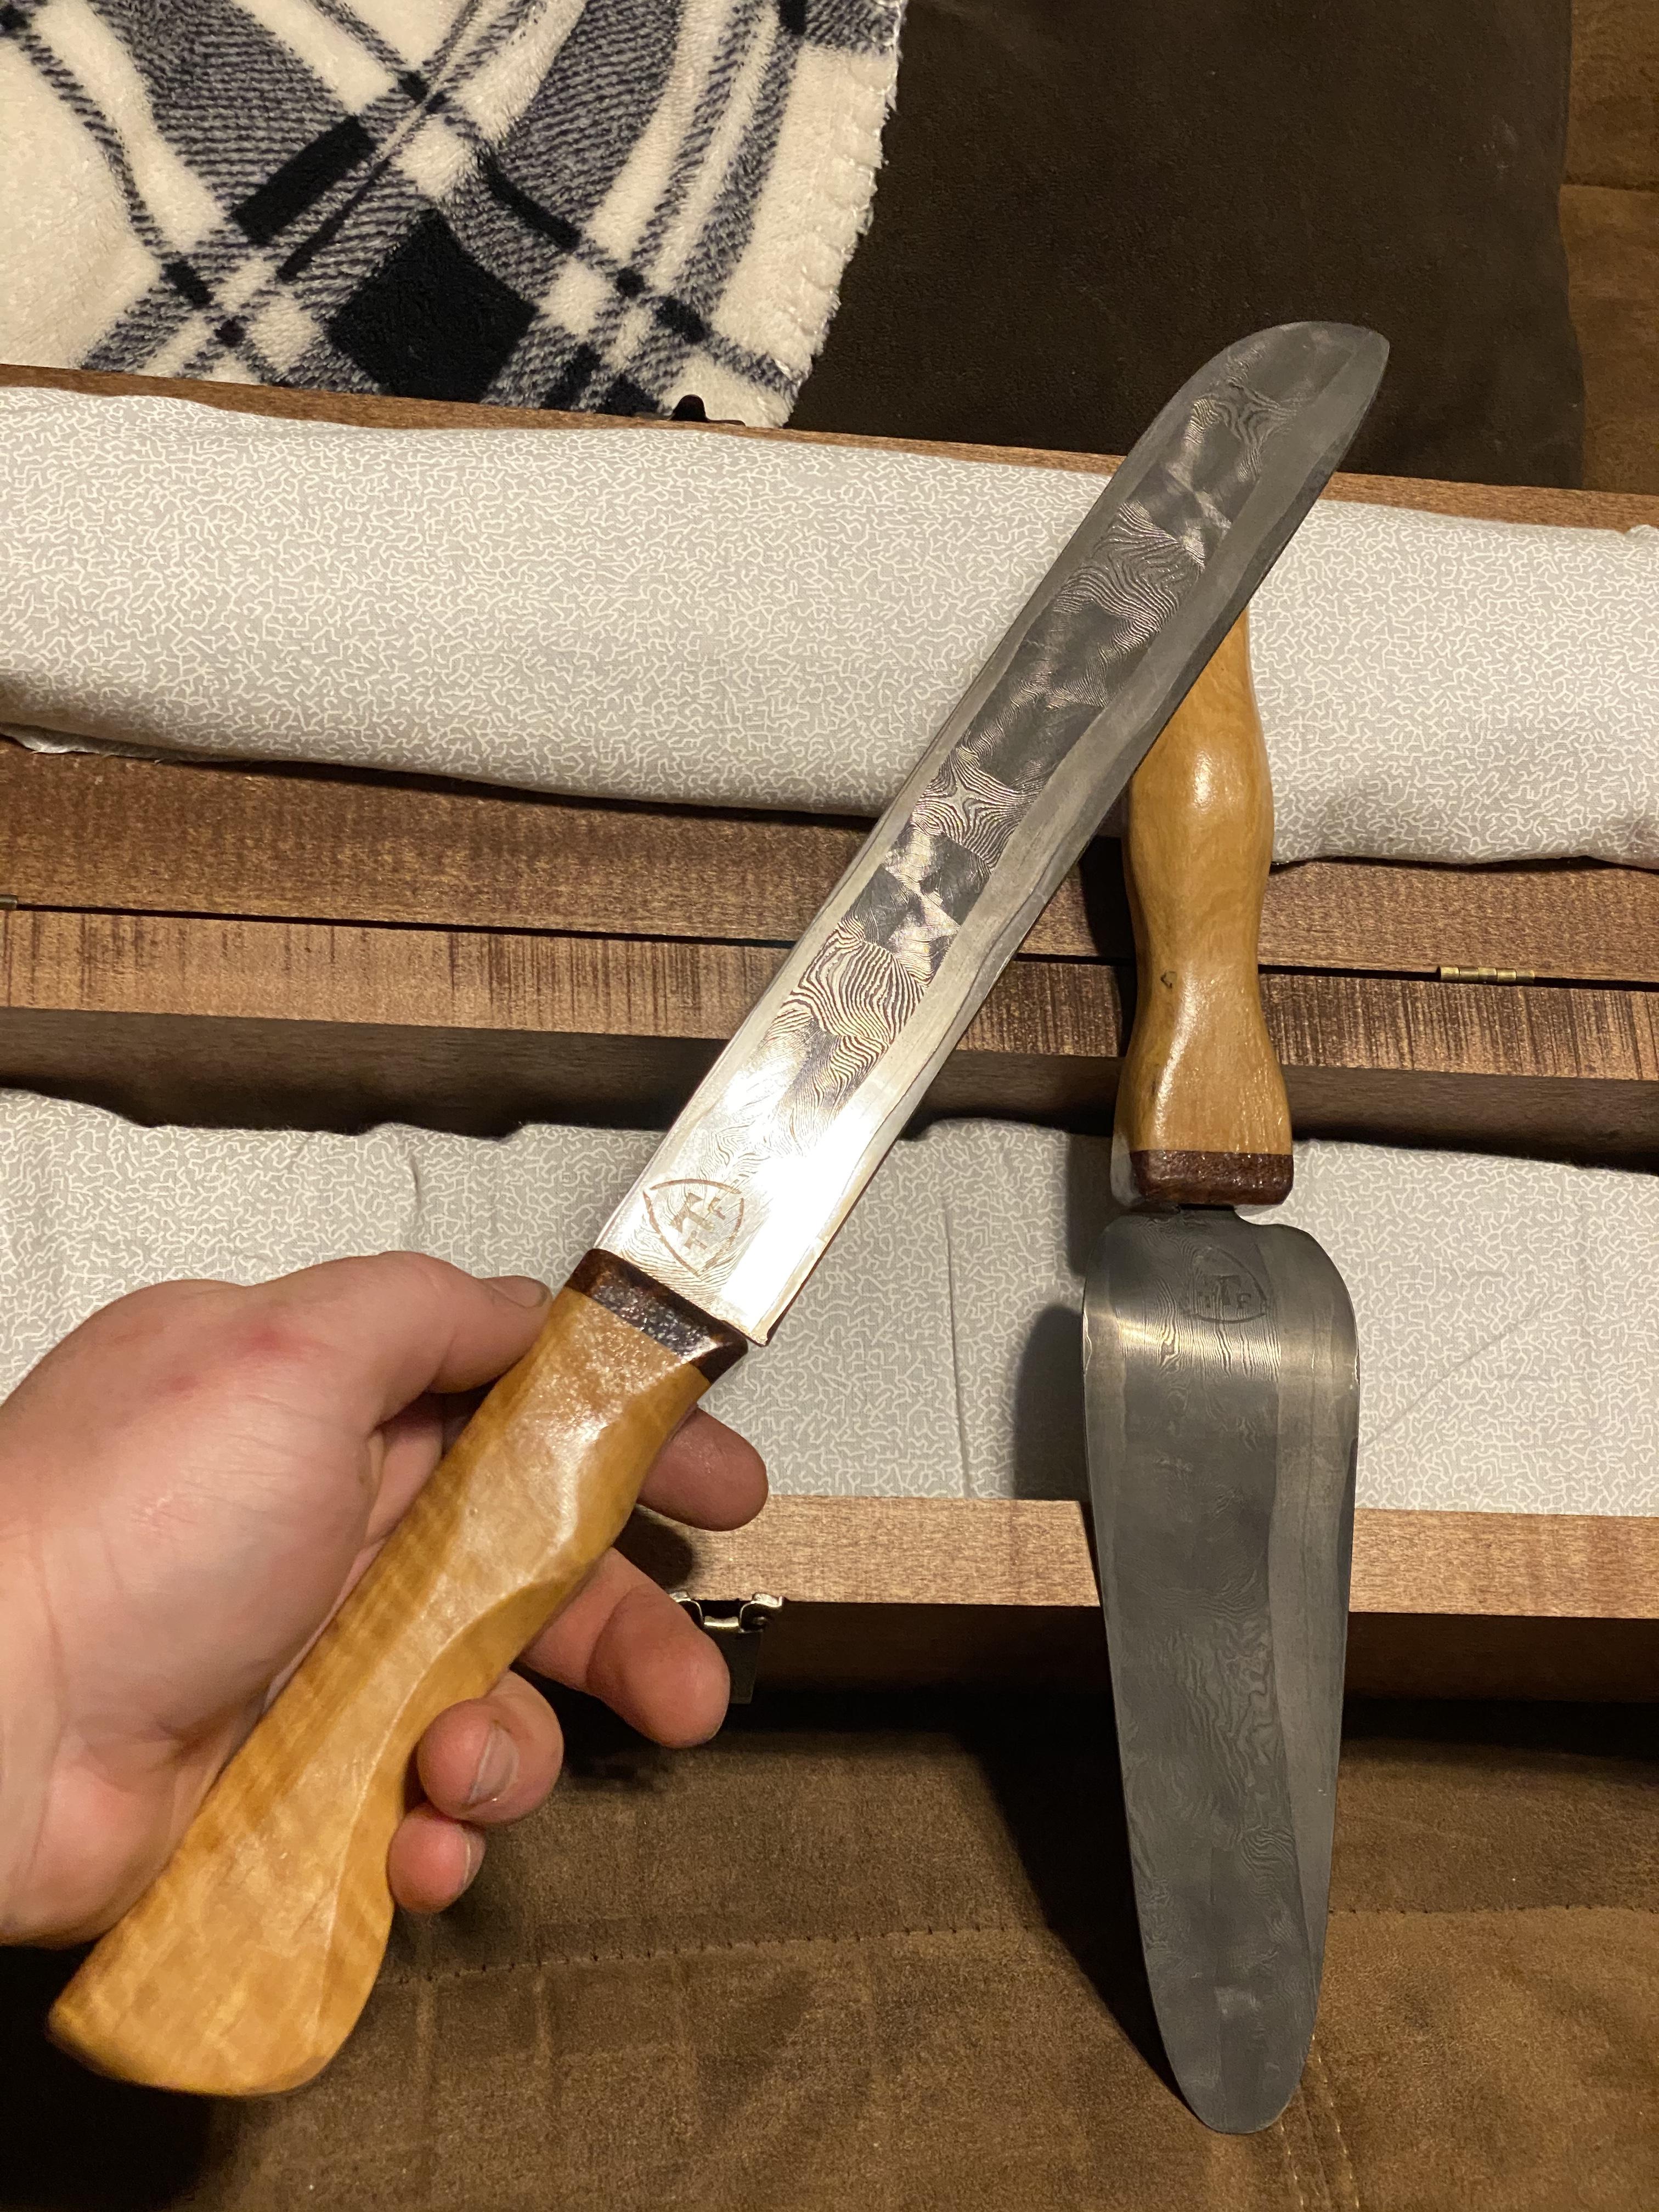
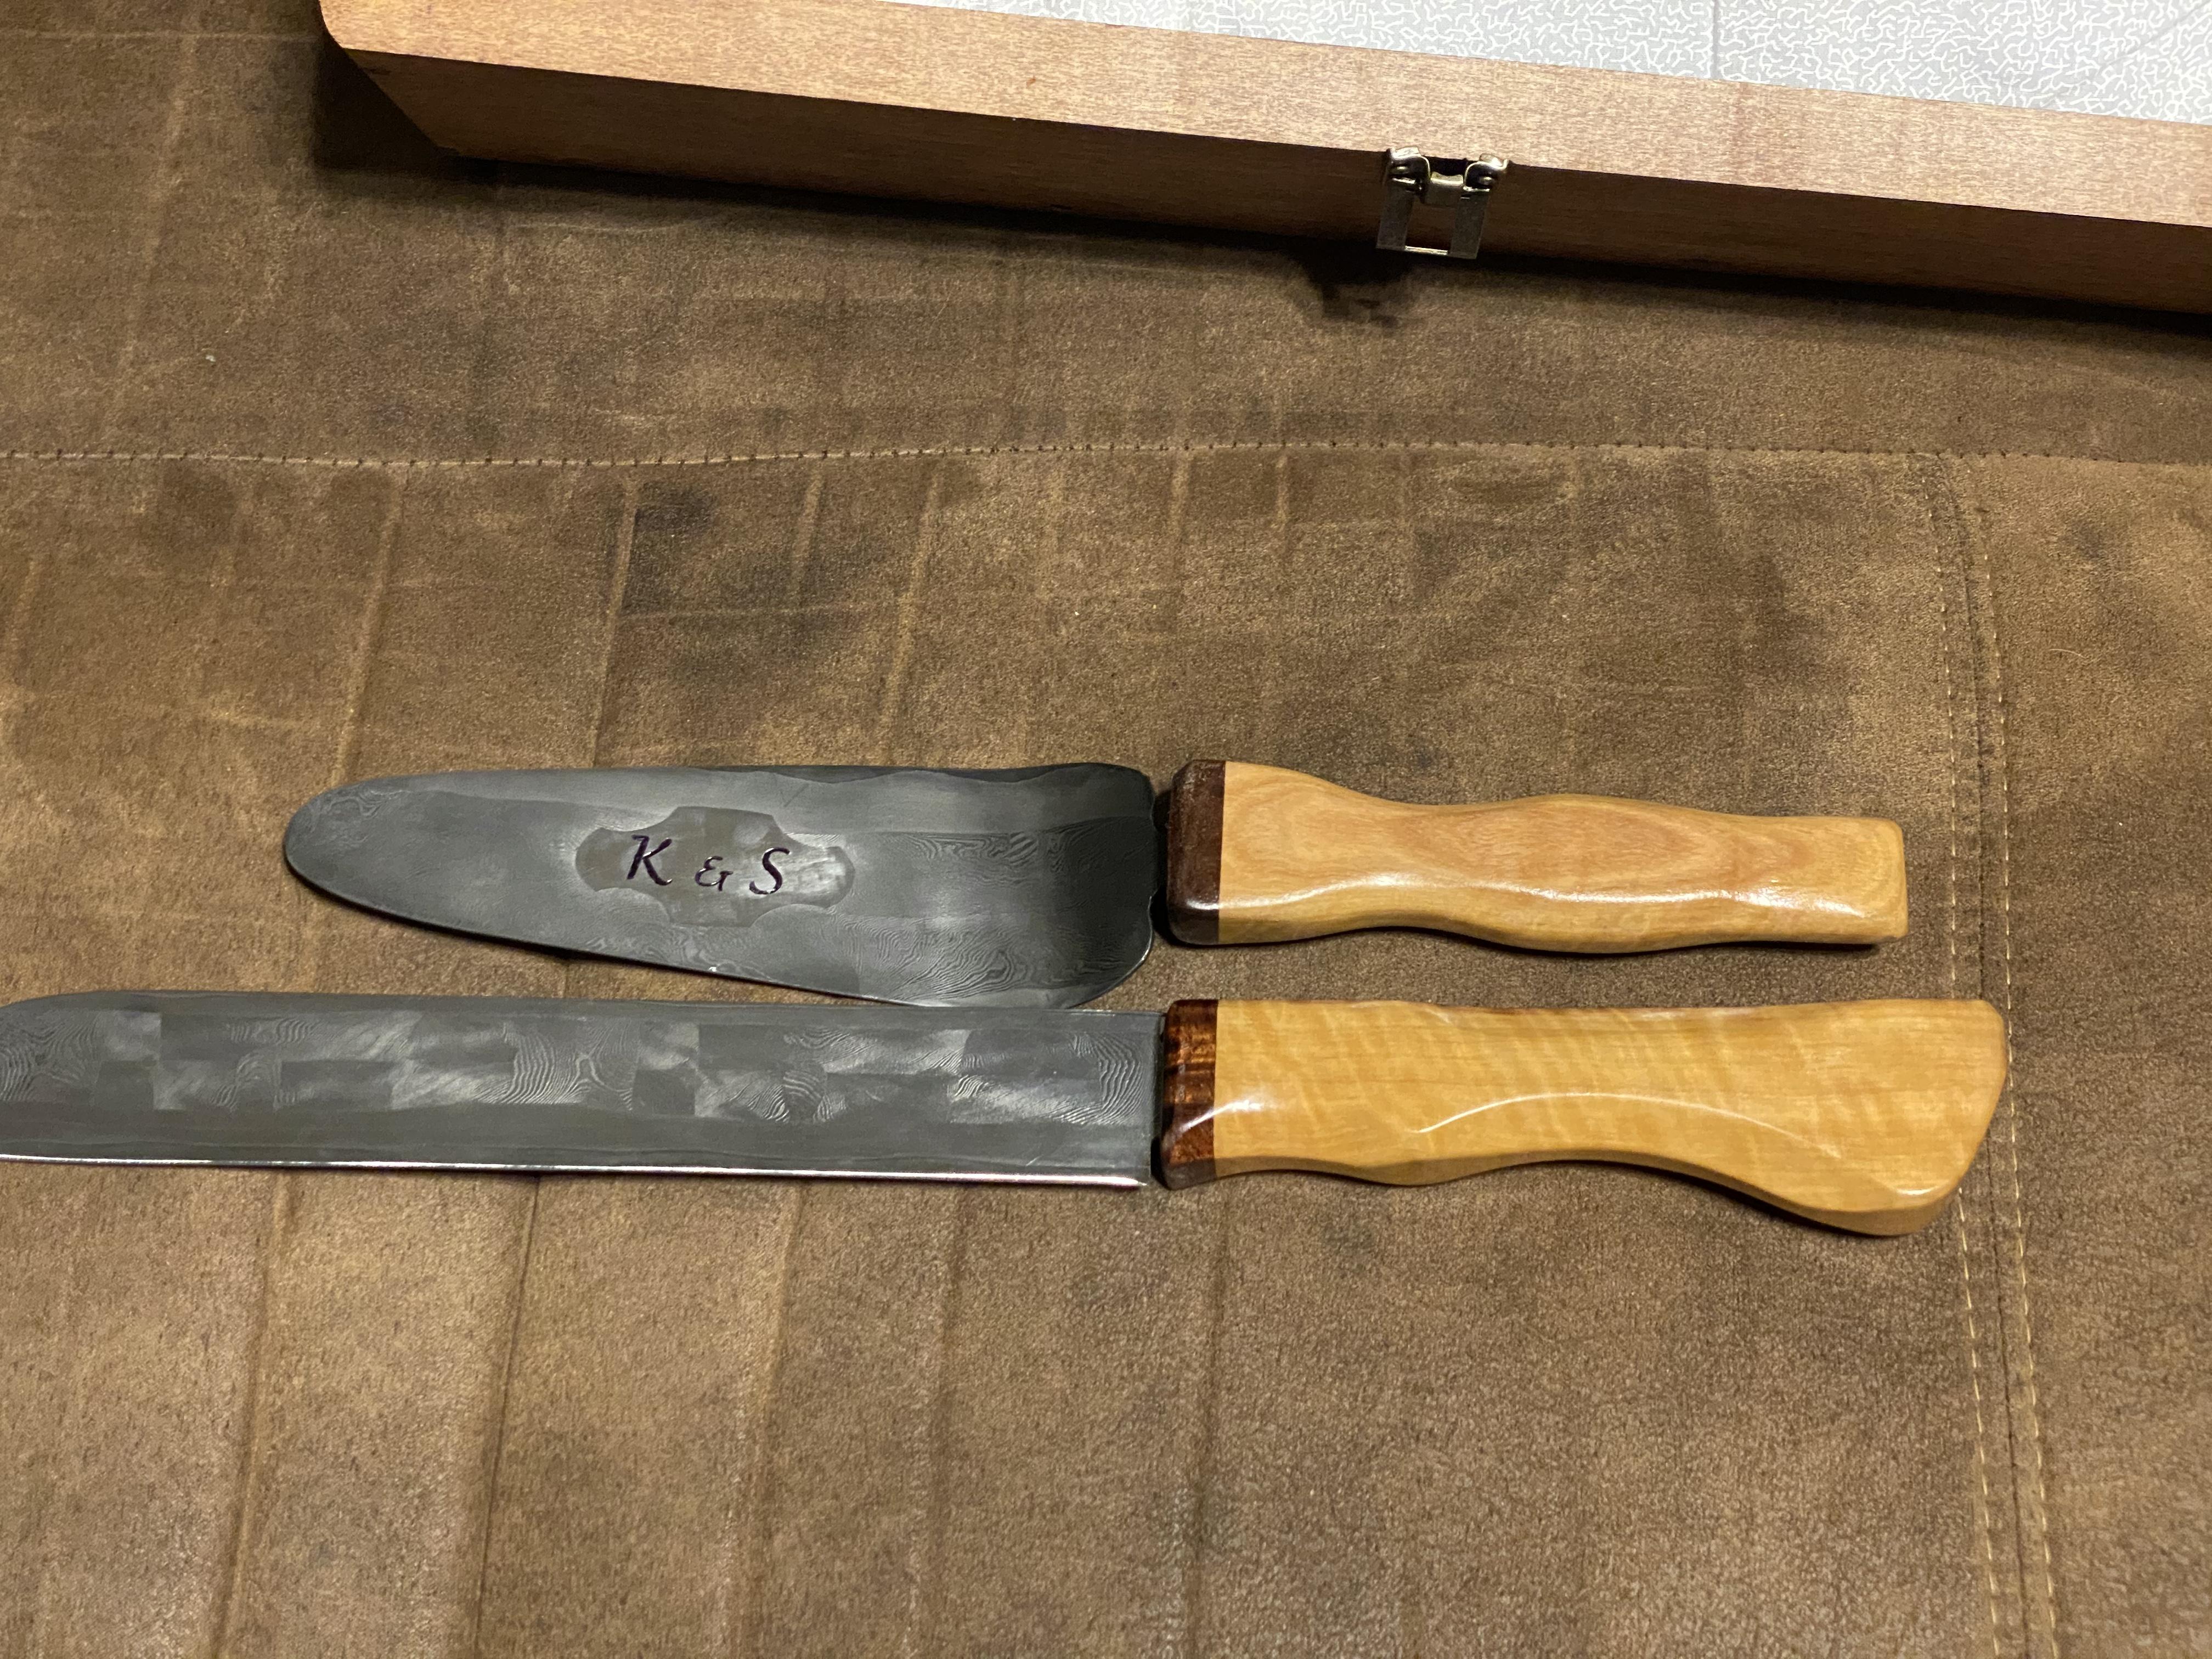
Good friend finally found “the one” in June, got engaged. I thought a neat idea would be make a wedding carving set. And seeing as the wedding was end of December I had a good deal of time to try something new.
Decided on a mosaic pattern, went for explosion, but got somewhat lost when re-squaring and ended up with more of a lazy star. Oh well.
She has Greek heritage so I found some Wild olive wood that came from Greece for the handles
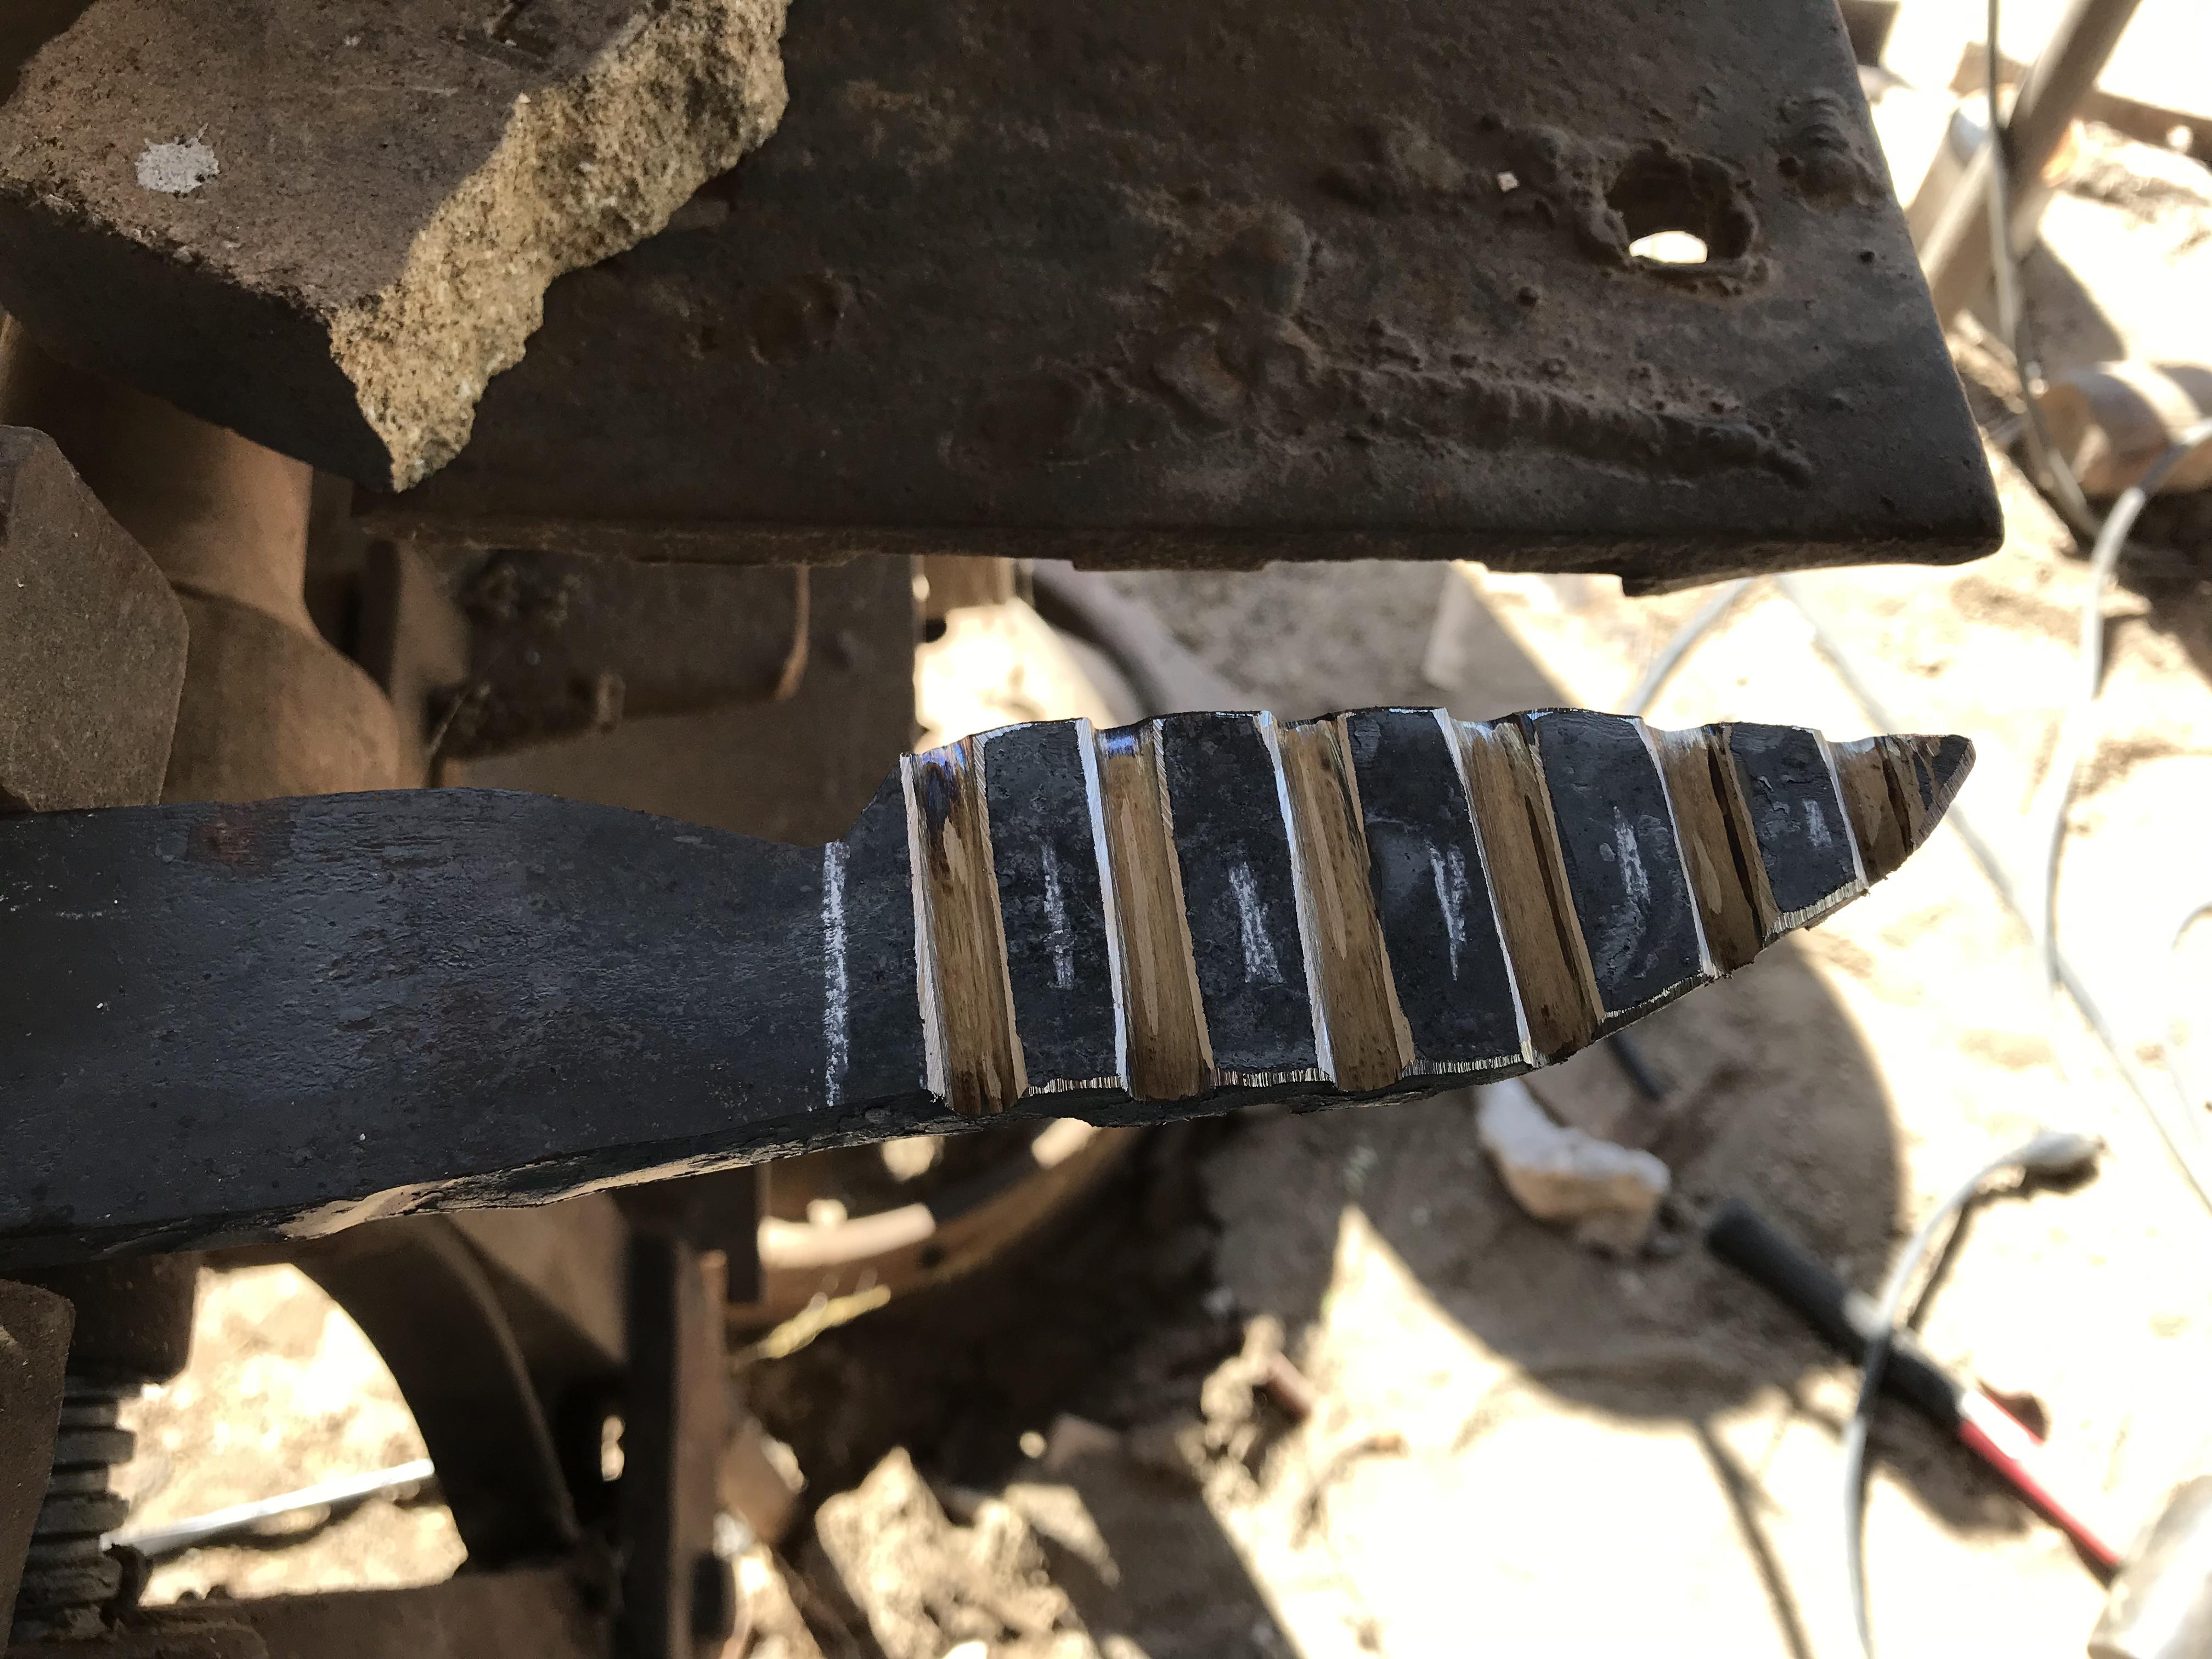
made the “star” then sandwiched that with 2 medium layer twists, then top and bottom with a few alternating thick layers to make a solid spine and cutting edge.
Decided to cut, then round, triangles to make an accordian to expose the end grain, I was shocked that it worked and didn’t tear itself apart


-
The wood is apricot, stabilized.
The pins from Knife and gun, or maybe Amazon. Don’t remember...
-
He was ecstatic... just needs time to go coyote hints now.
-
Sometimes its pure economics. On my damascus i always forge to shape. Cutting can often lead to material waste. Forging to shape, for me, means i keep more of the stock and waste less.
-
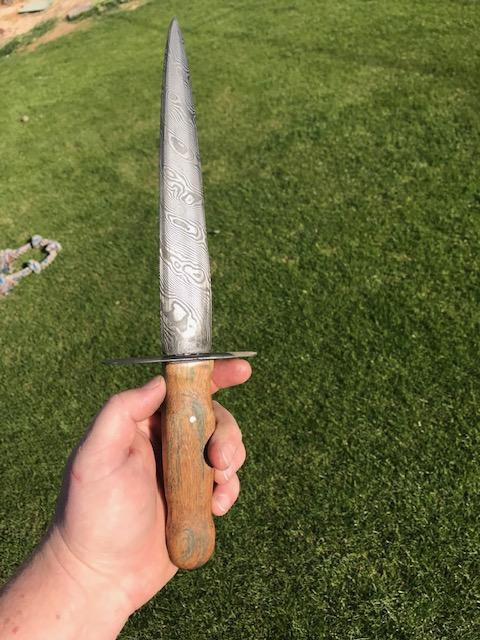
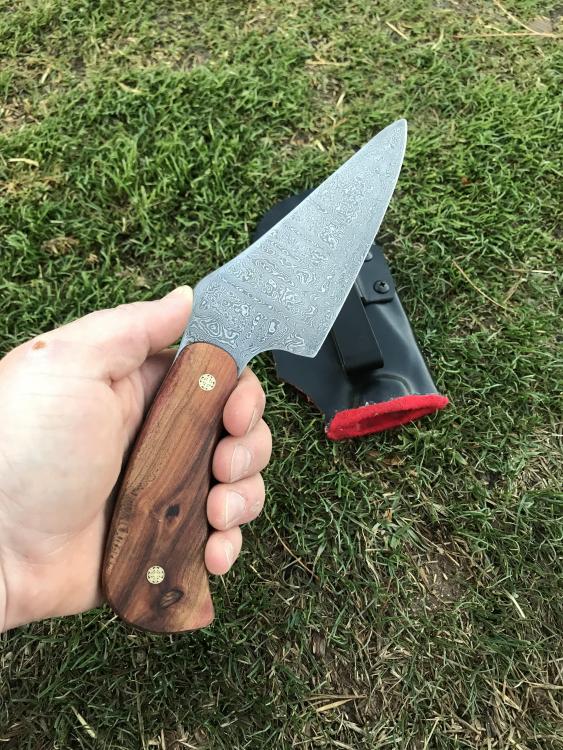
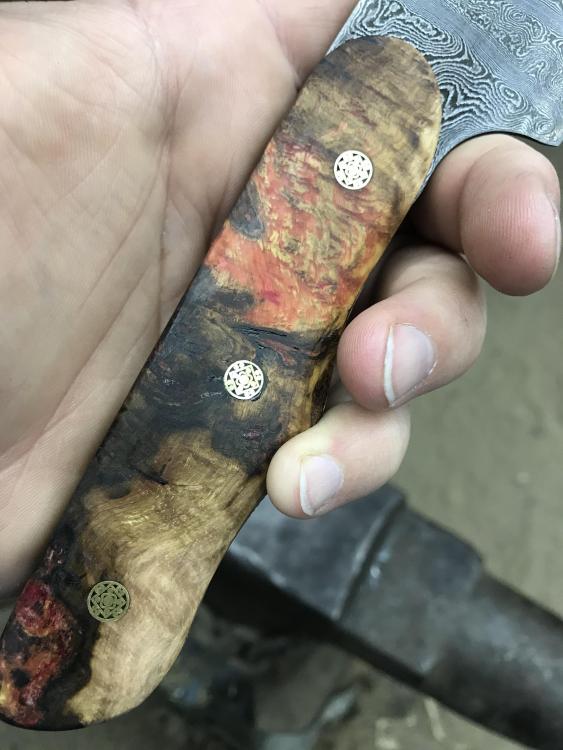
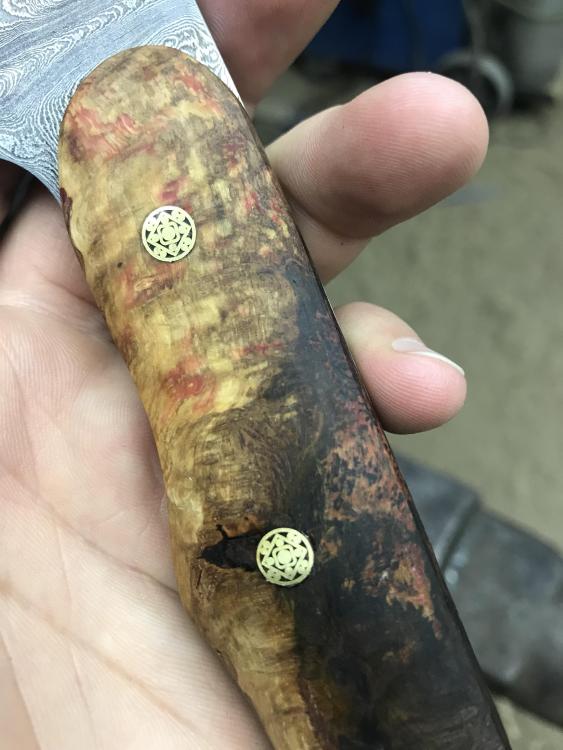
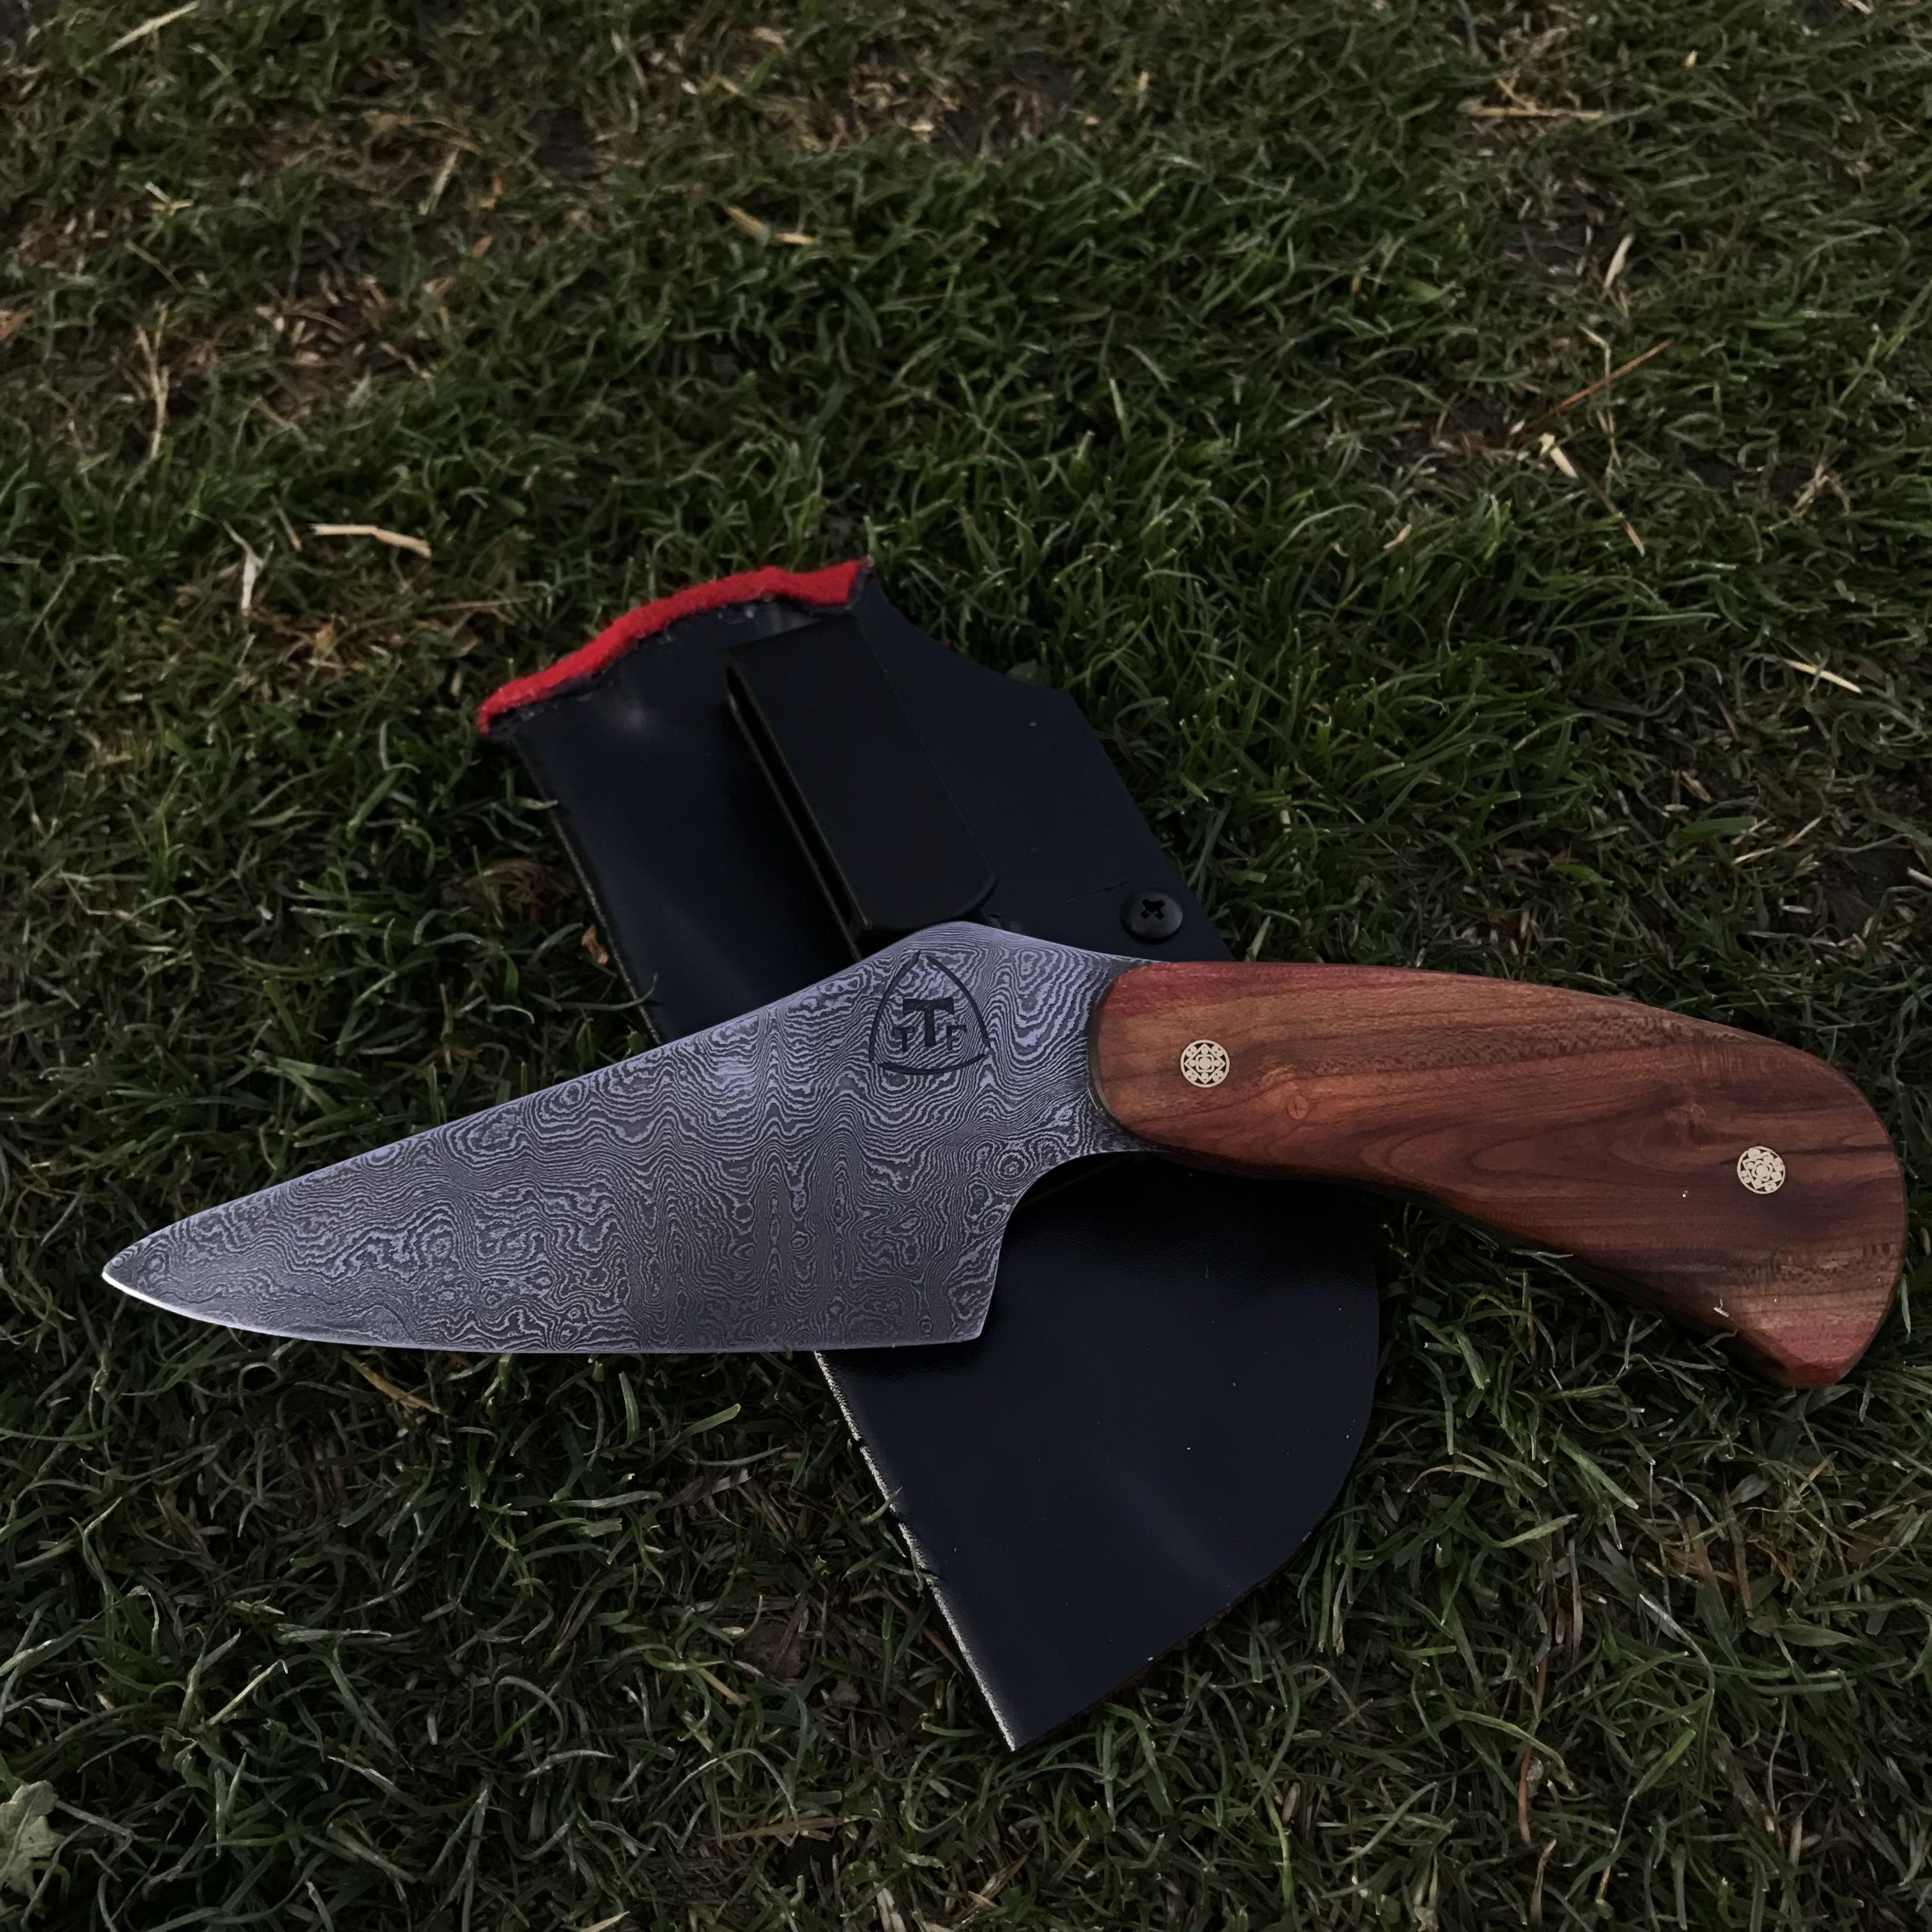
Friend of mine asked for a special project. He and his grandfather planted an apricot tree when he was a little kid. The tree has since died, and he harvested some of the wood. Asked me to make a coyote skinner with that wood as a handle.
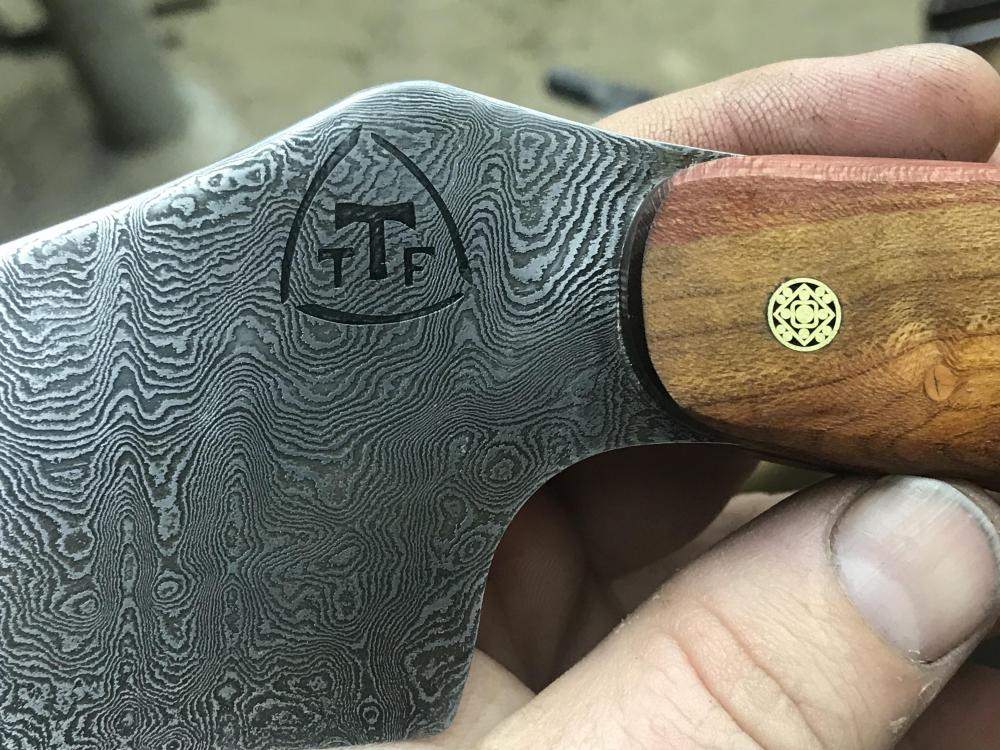
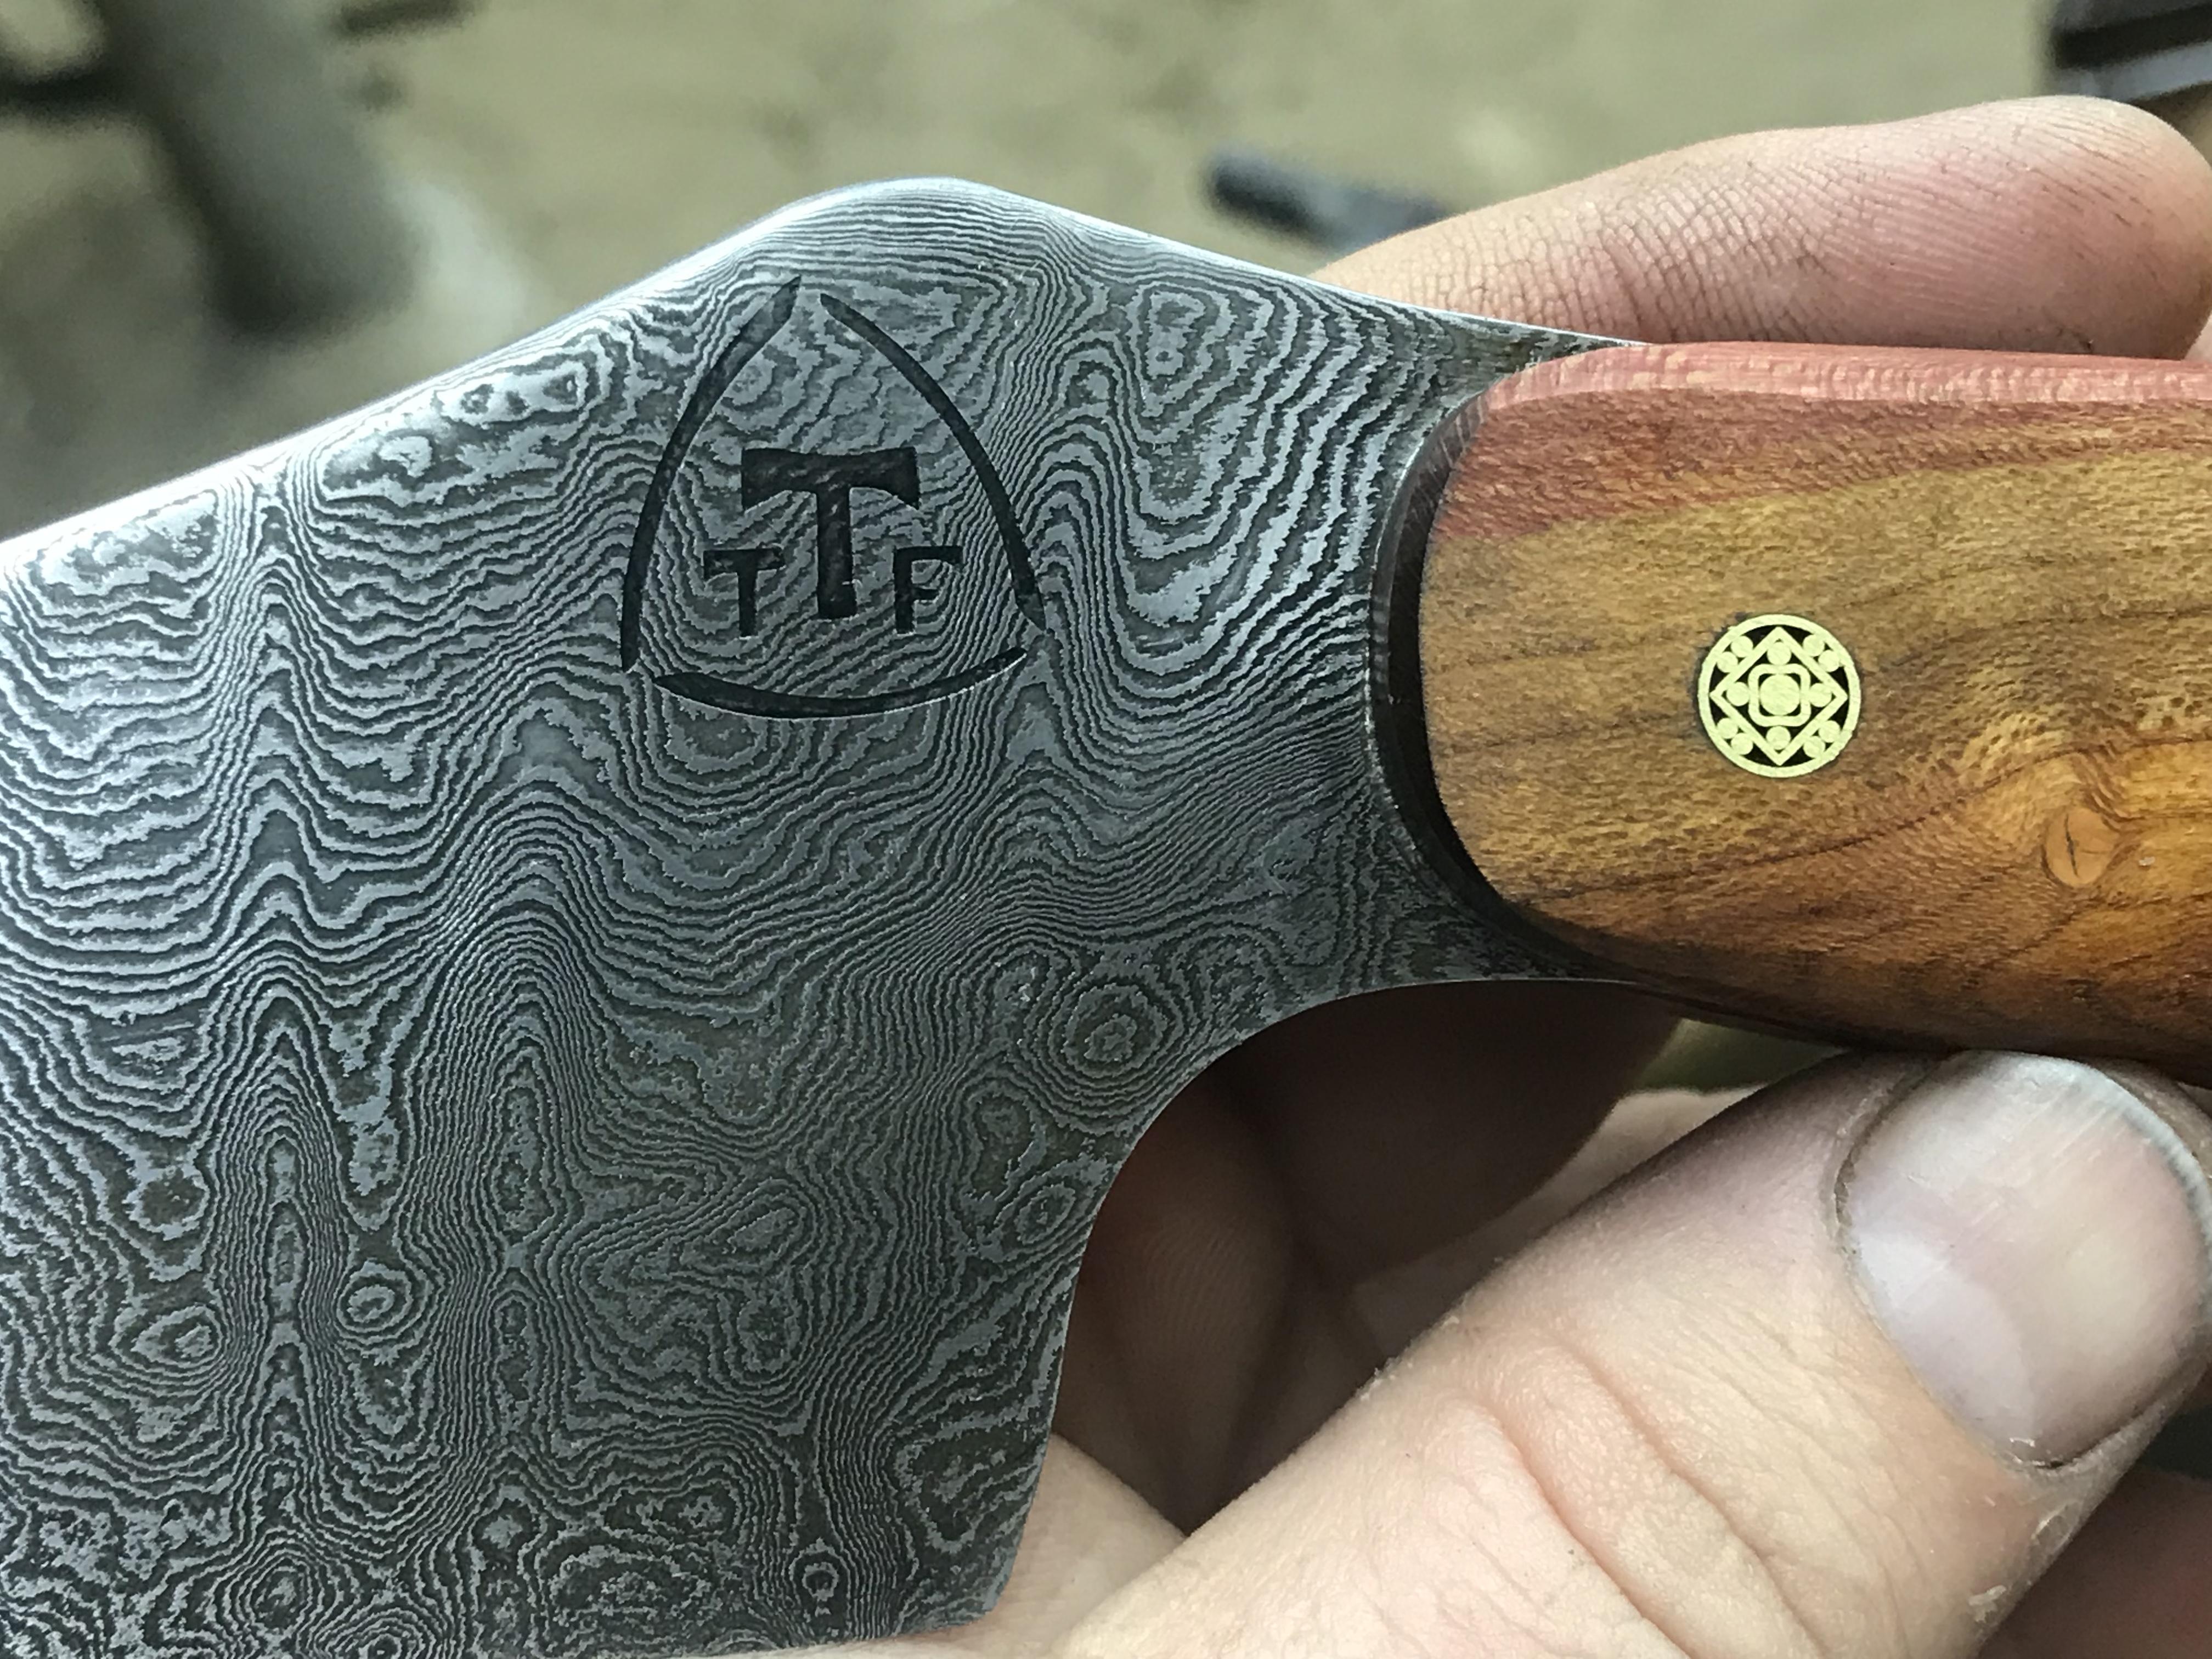
I took the wood, dried it fully, stabilized it twice just for good measure, then set to work on the steel. Made a billet of 320 layers by the math. Probably more like 270 after losses. And made a shape roughly to what he drew on a napkin. With his requested specs: Not a super-sharp point, but one that can get into tight places and be a good slicer as he collects the pelts of coyotes.
1084 and 15N20. Mosaic pins fore and rear, hidden, mechanically locked ( to both wood and steel) pin in the middle. Bedded in epoxy with a ring all the way around the wood to keep it sealed.


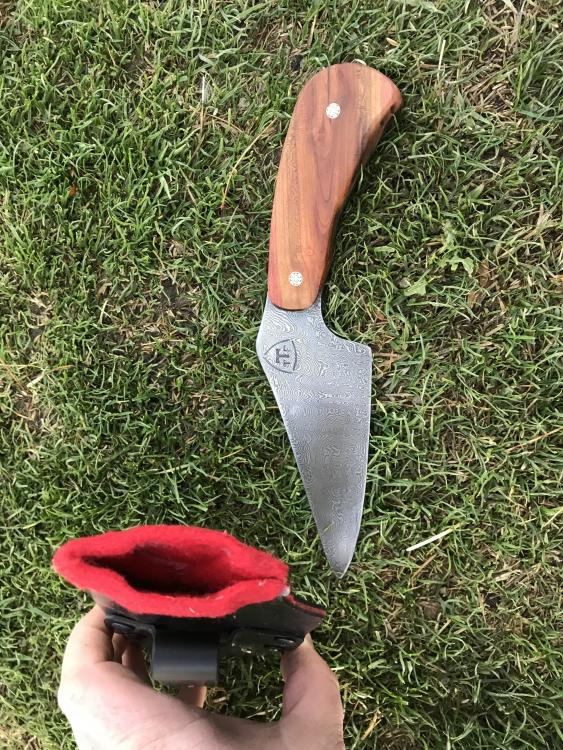


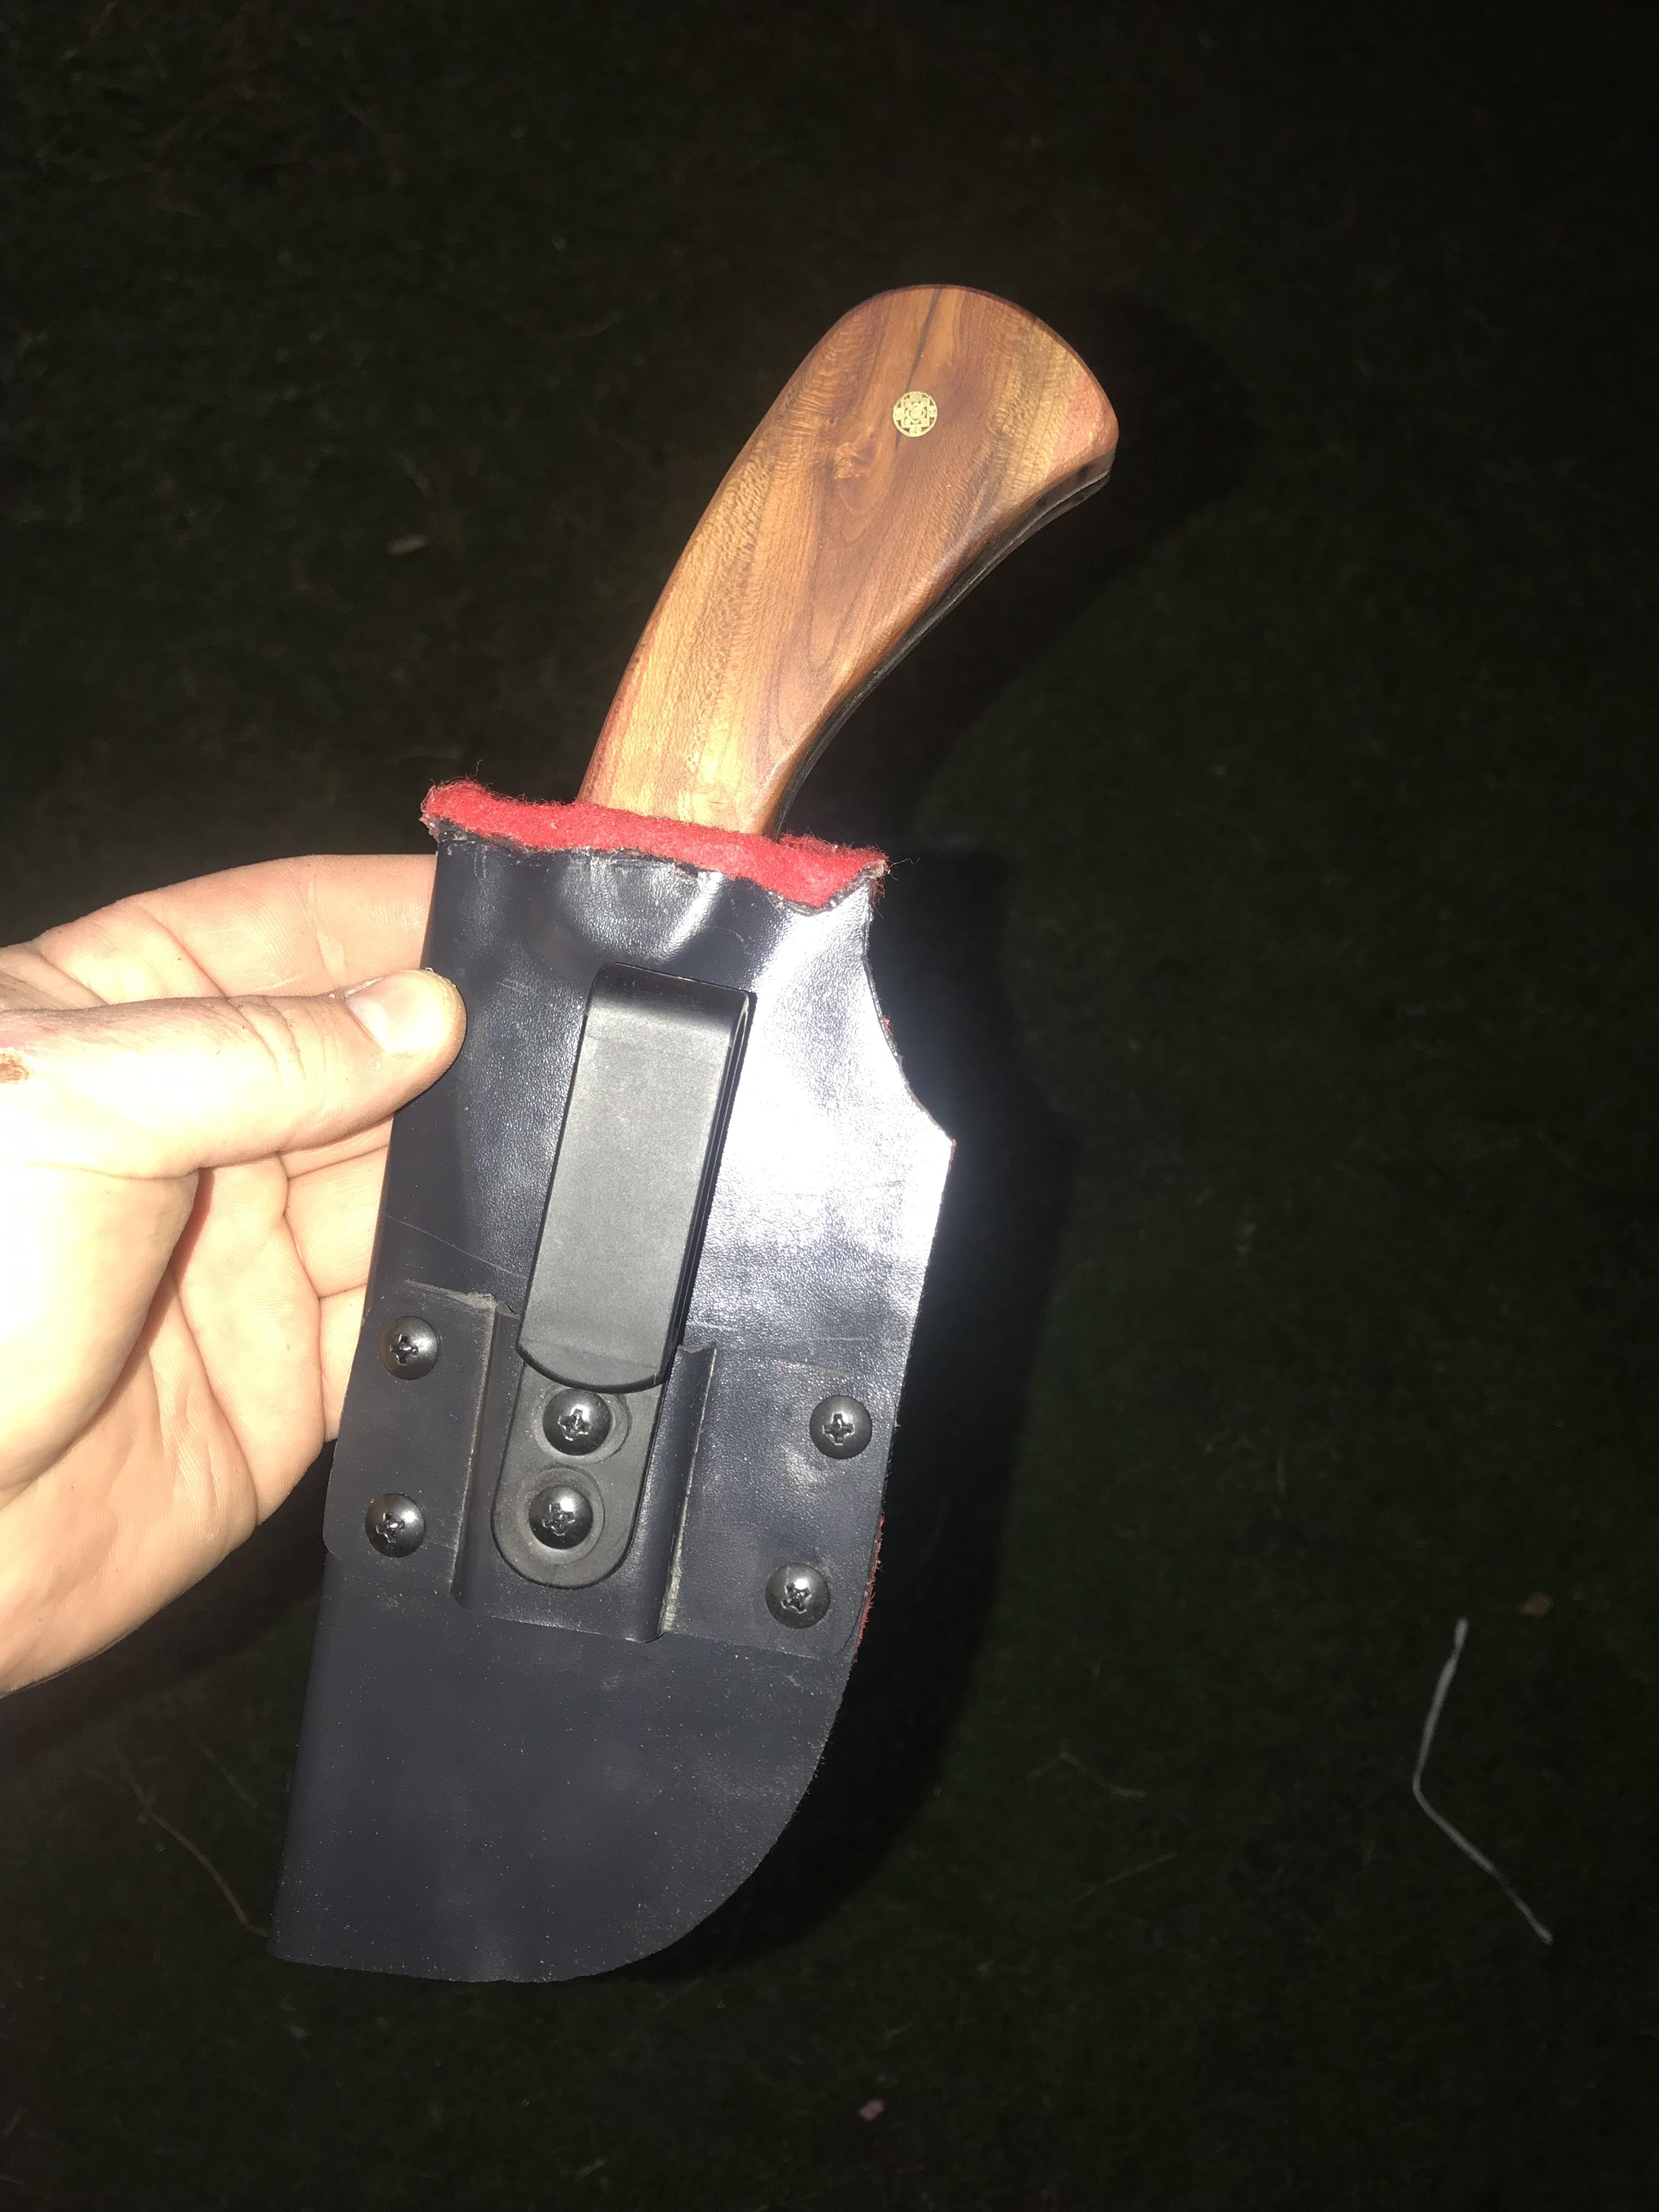
Felt lined kydex sheath. I’m hoping it will hold some oil from the blade. I oiled it up, put it in and out of the sheath a few times then re-oiled the blade.
He is a gunsmith, and will absolutely know how to take care of it.

-
I stabilize with a vacuum chamber and cactus juice. This burl is VERY old, and has a lot of spongy, almost rotting wood in it. So it it a resin similar to plastic-ish.
I have used HCl to etch, but it can be more challenging to get the concentration just right... ive gotten ‘pinholes’ in the nickel layers where it seemed to pick a spot and eat through. I don’t get that with FeCl. Plus the HCl makes more noxious fumes. When diluted correctly it has about the same (to me) topography changes but often leaves the darks a more of a gray color to me.
I do not heat the FeCl, bit if I lived where it was a lot colder I might get it up to 80F if it was just not getting the job done.
Pnut, As for the amazon reference, i was just being funny...
-
Right on!
my buffing wheel seems like 50-75 layers of soft linnen, with concentric rings sewn about 1” apart, its a 7-9” wheel. The last sewn ring is about 1.5” from the outer layer.
Been a while since I posted here, forgot the commercial link rule... lol
But to know which one I use for research purposes, one could search the “South American rainforest’s major river” for “MG Chemicals Ferric Chloride Copper Etchant Solution, 4L Liquid Bottle” and do just fine.
-
Sure thing.
My ferric chloride was originally a 1 part concentrate (exact concentration can vary depending on the source) to 3 parts distilled water.
My ‘concentrate’ is this : [commercial link removed per TOS]
over time and etching many blades it has undoubtedly diluted some, and I have topped it off with a guestimate of additional FeCl and H2O. Temperature counts, its a chemical reaction and as such is rate dependent on temperature. Warmer means faster etch, not always a good thing, sometimes slower is better.
I etch in this for multiple 10-ish minute sessions, usually 40-60 mins total. At the end of each time period I sand, without a ‘hard backing’ just a rubber gloved hand, until most of the black is gone, then back in the acid. I usually use 1500-2000 grit for this light sanding, very little pressure. I do this until I can run my fingernail over it and feel topography changes. Once ‘deep’ enough I rinse and dry it off. Bolder layers I go with a deeper etch, smaller/finer layers not as deep.
Then I EXTREMELY CAREFULLY (I cannot emphasize this enough) run it under a buffing wheel with green compound. I get it ALL mirror finished and shiny. There is NO black at this point.
[Buffing wheels are NO JOKE, they will rip it out of your hand and fling it 100 feet, or worse-into you, before you know you’re not holding it anymore! NEVER feed it a leading edge, always a trailing edge, and always feed the part rotating away from you, never toward you!]
IMPORTANT: the buffing compound is wax based and will inhibit any etching after using it, clean it well.
Last for contrast I use instant coffee... the cheapest gut-rot crap Walmart sells. I don’t measure, just make it strong enough that in a 9X13” baking glassware I cant see the knife through roughly 2” coffee. I soak it in this for usually about an hour until its black enough for me, checking every 15 minutes or so. I Dry off then oil with whatever you prefer, then I like to bake it at like 250 Fahrenheit for about 10 minutes. It seems to get the oil to spread, stick, and coat better, i dunno? The coffee doesn’t really discolor the 2% nickel layer like the FeCl does. Or maybe it just takes a lot longer?
Thats it. I lightly rub with a paper towel after cooling off.
For bold lines, sanding with a hard backing might keep it only hitting the high spots and leaving the darks, well... darker.
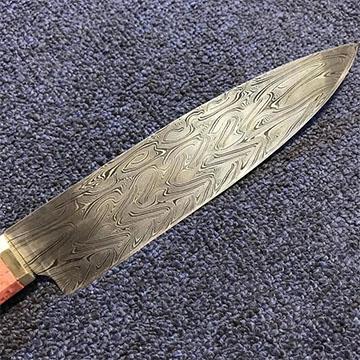
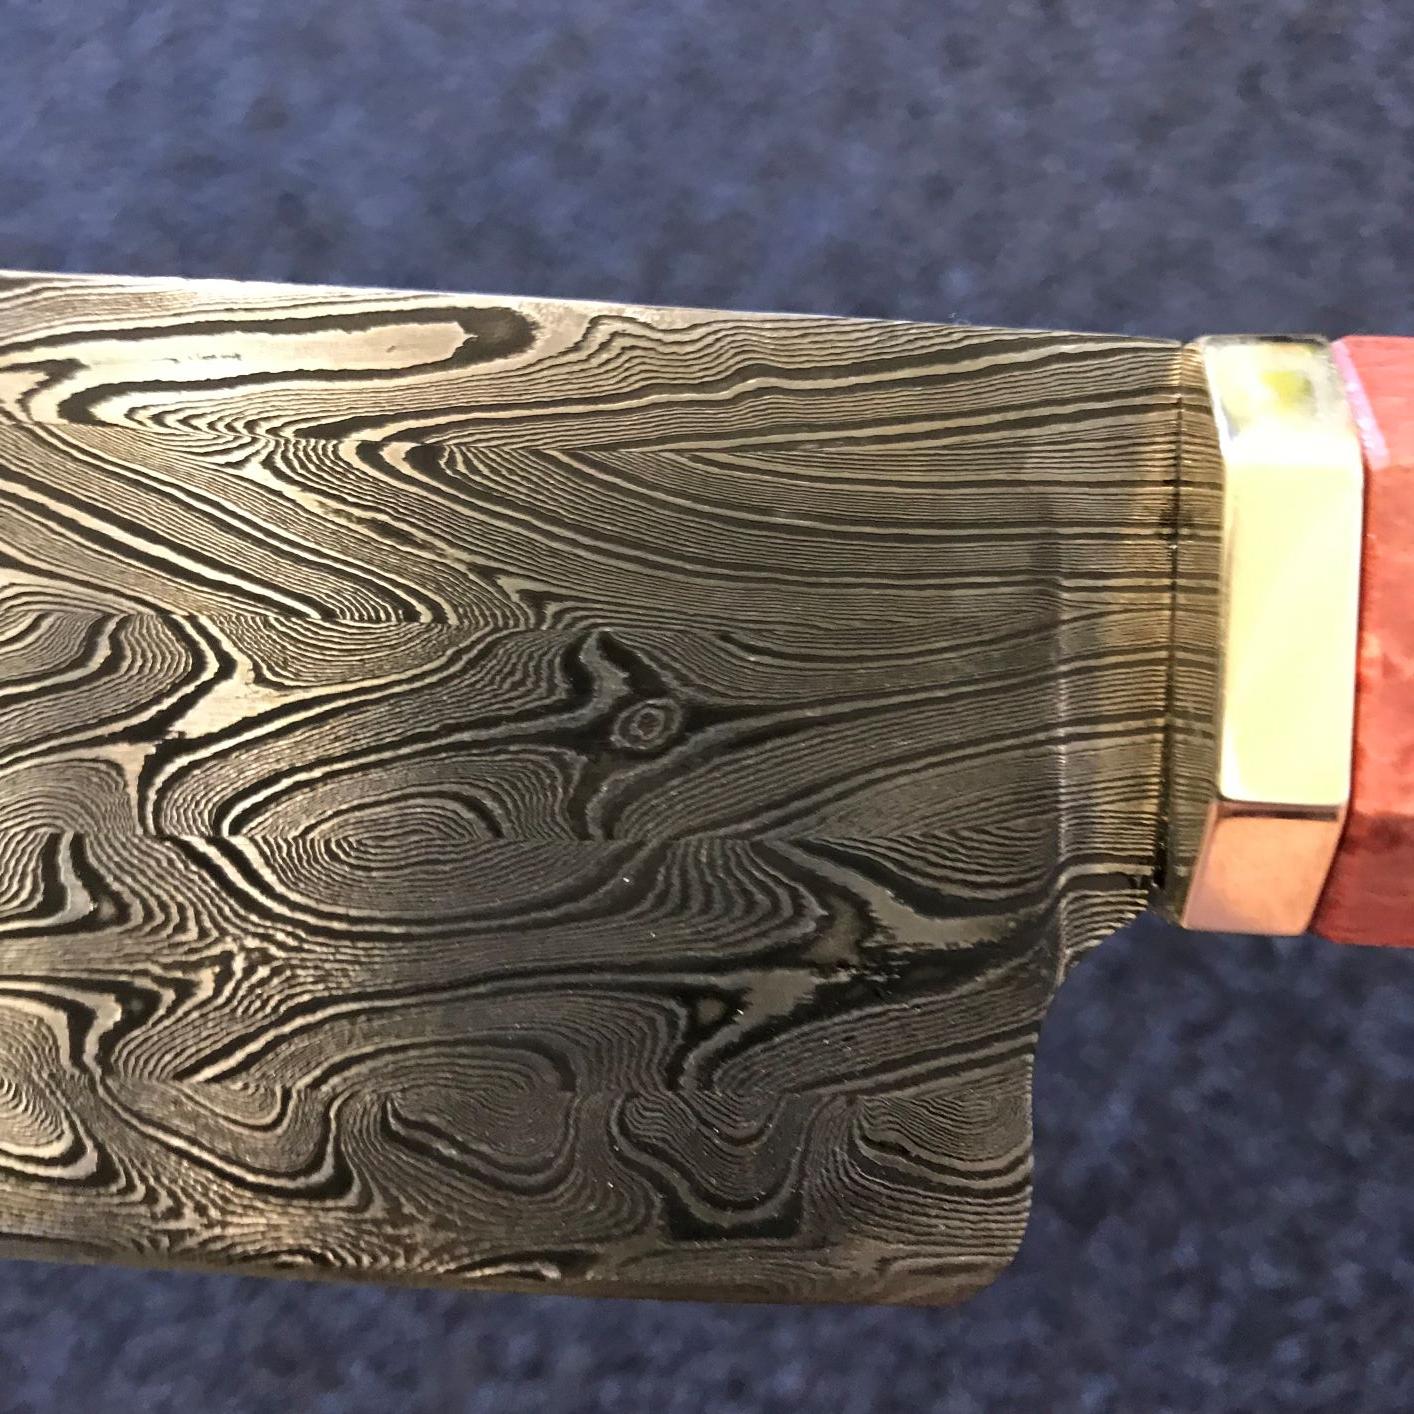
Here is a closeup the bolster area of a lower layer count with the exact same process
-
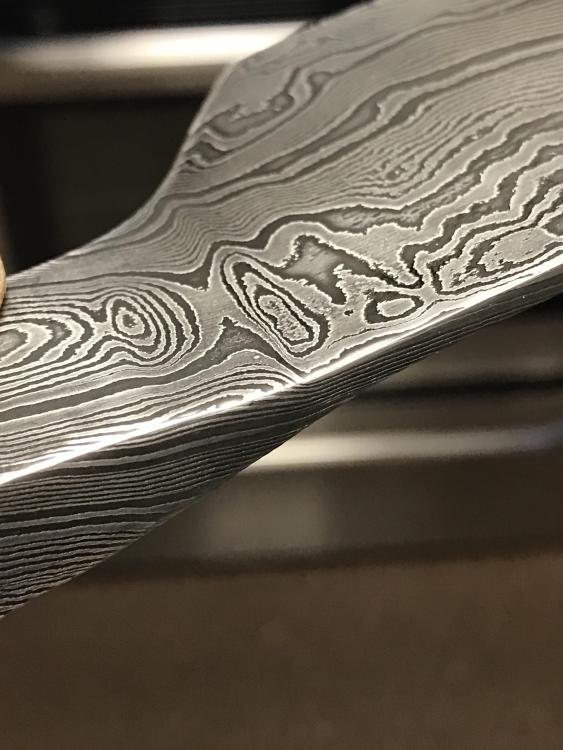
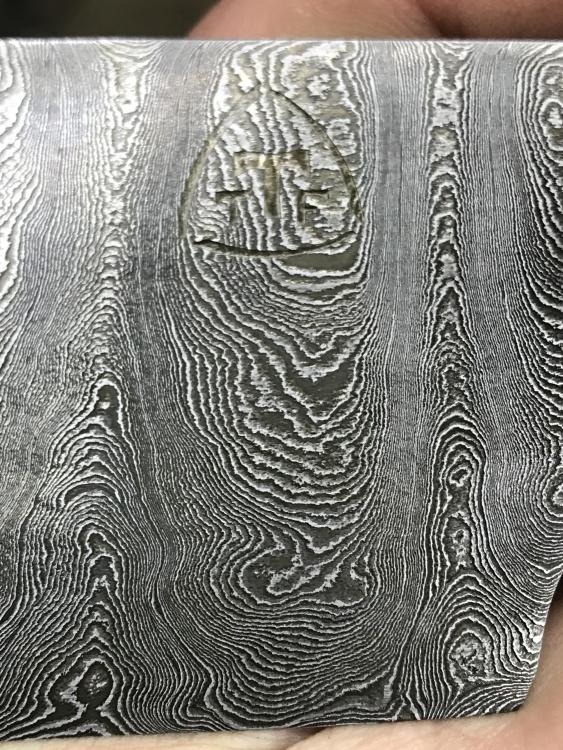
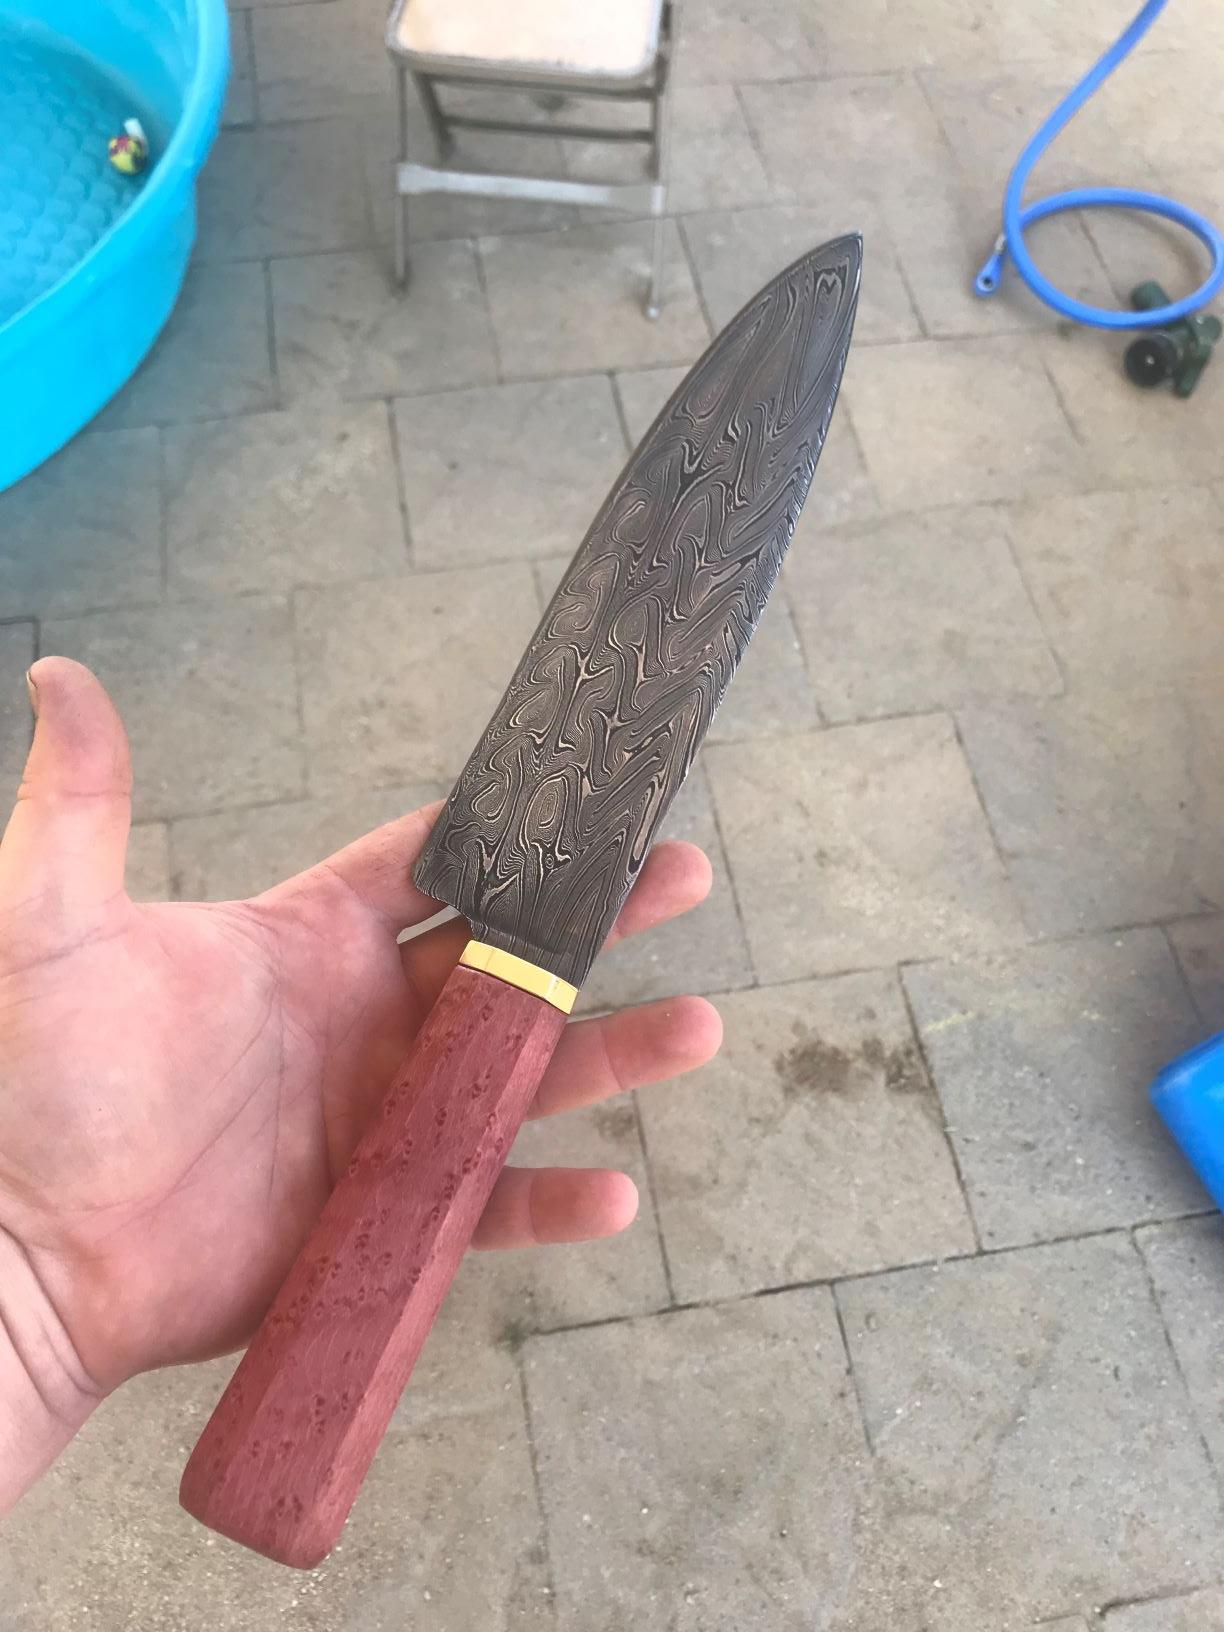
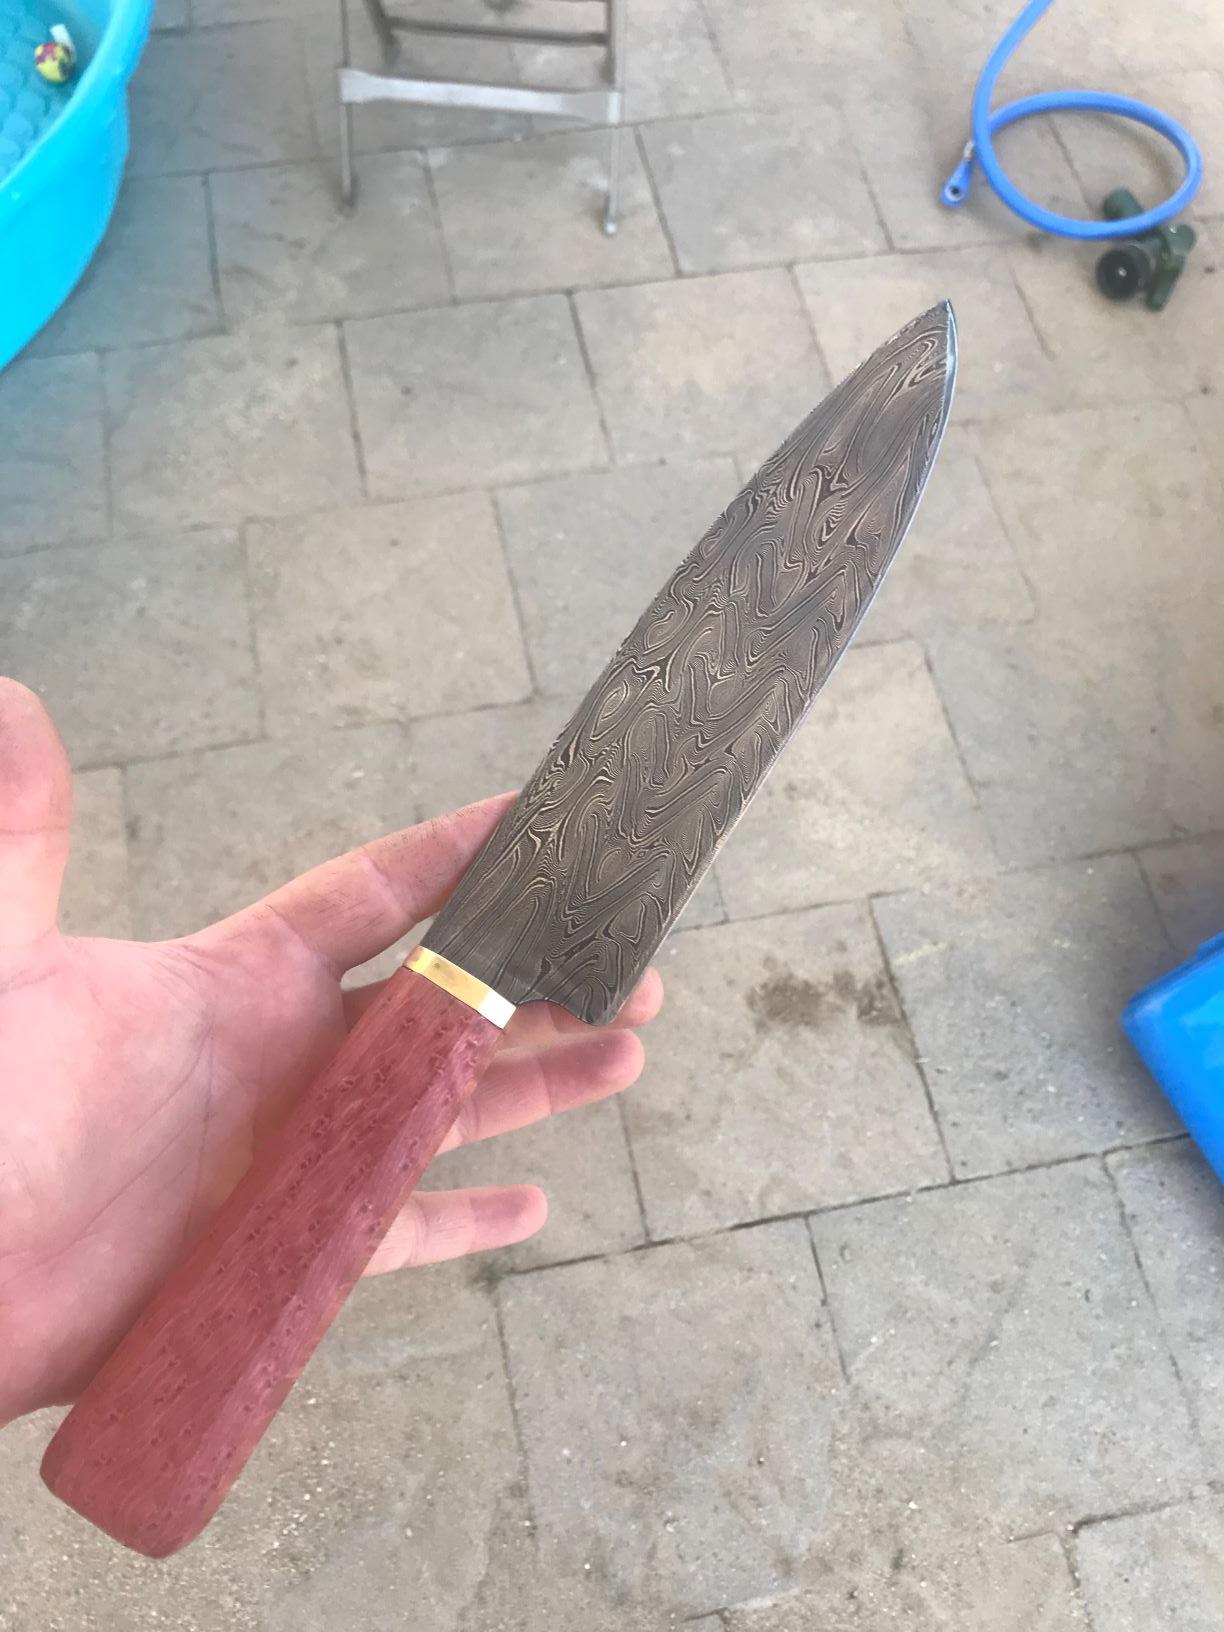
My latest work. 300-ish layer ground then flattened ladder pattern. Was a real joy making this one. 1084 and 15n20
Ive been drying this oak burl for 18 months now, and it is finally dry enough to start stabilizing and using for handles. I LOVE the contrasts I get on it.
Etched in FeCl for topography, then took it to a buffing wheel and got it SUPER SHINY, cleaned off the waxes from the wheel then etched for contrast in instant coffee. Makes the nickel layers really shine.
Pushing the pin through while gluing the handle popped a little chunk out right here :/ filled it with epoxy and just carried on. Smooth to the touch.


-
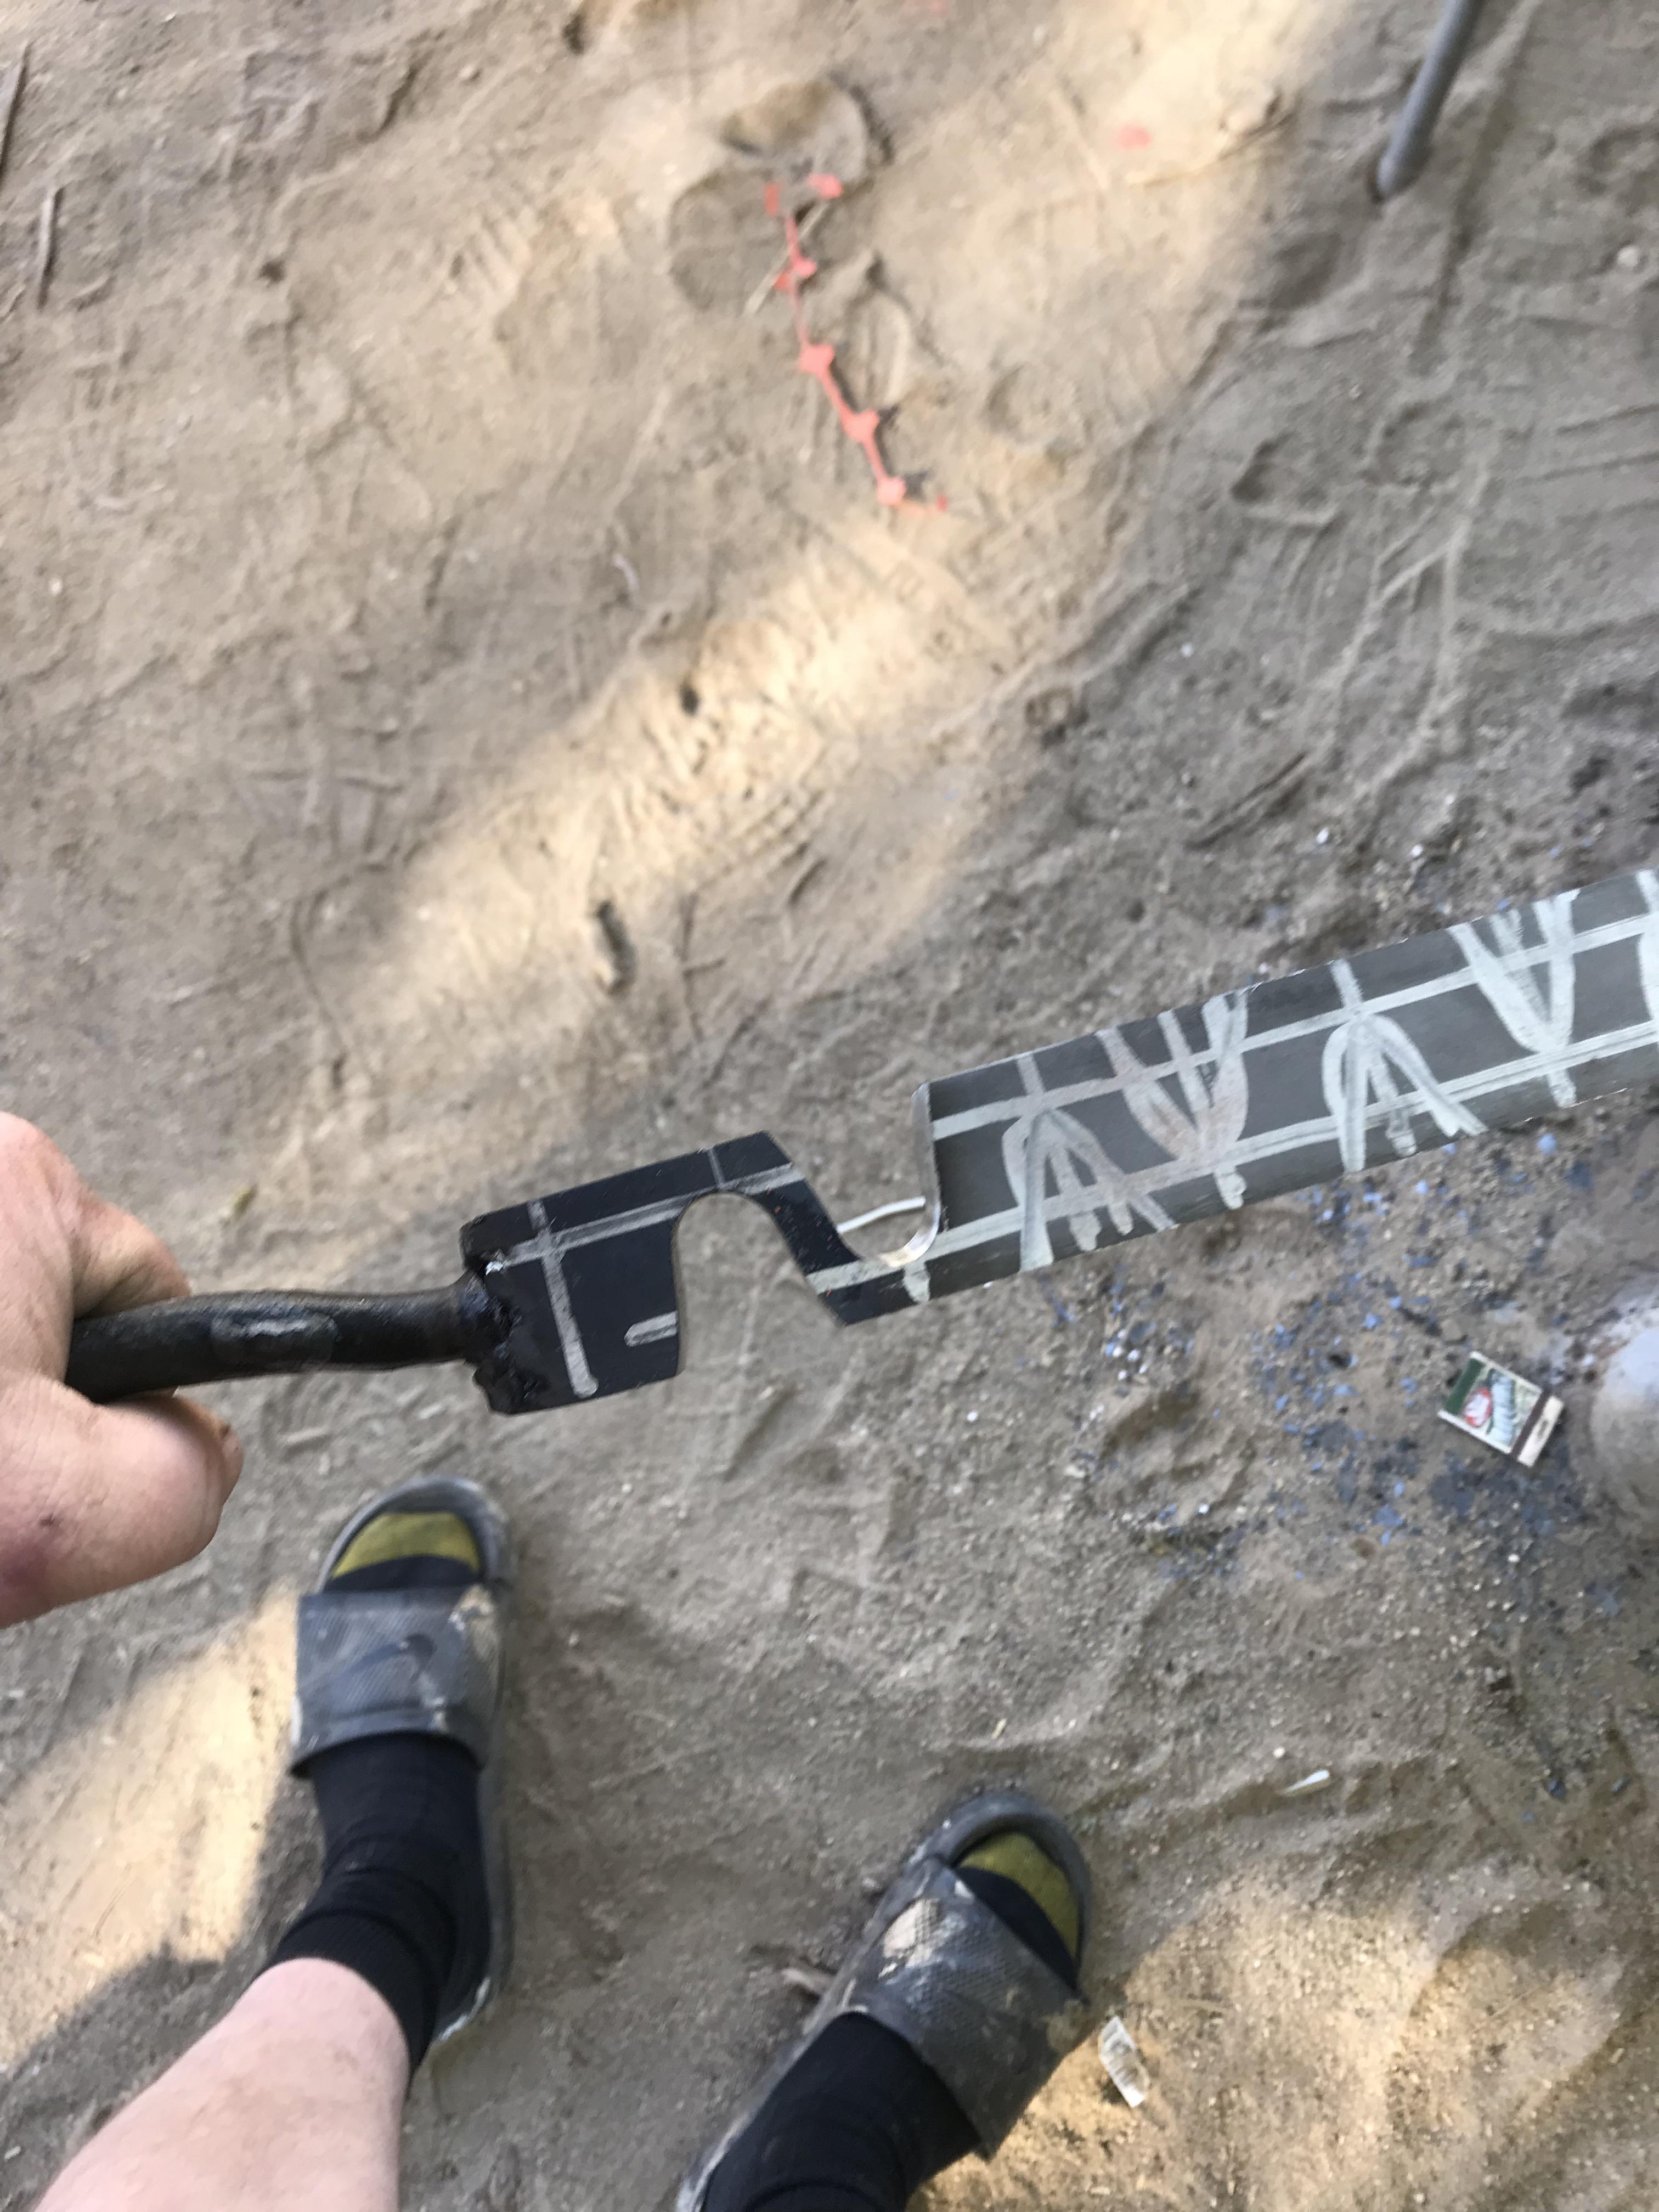
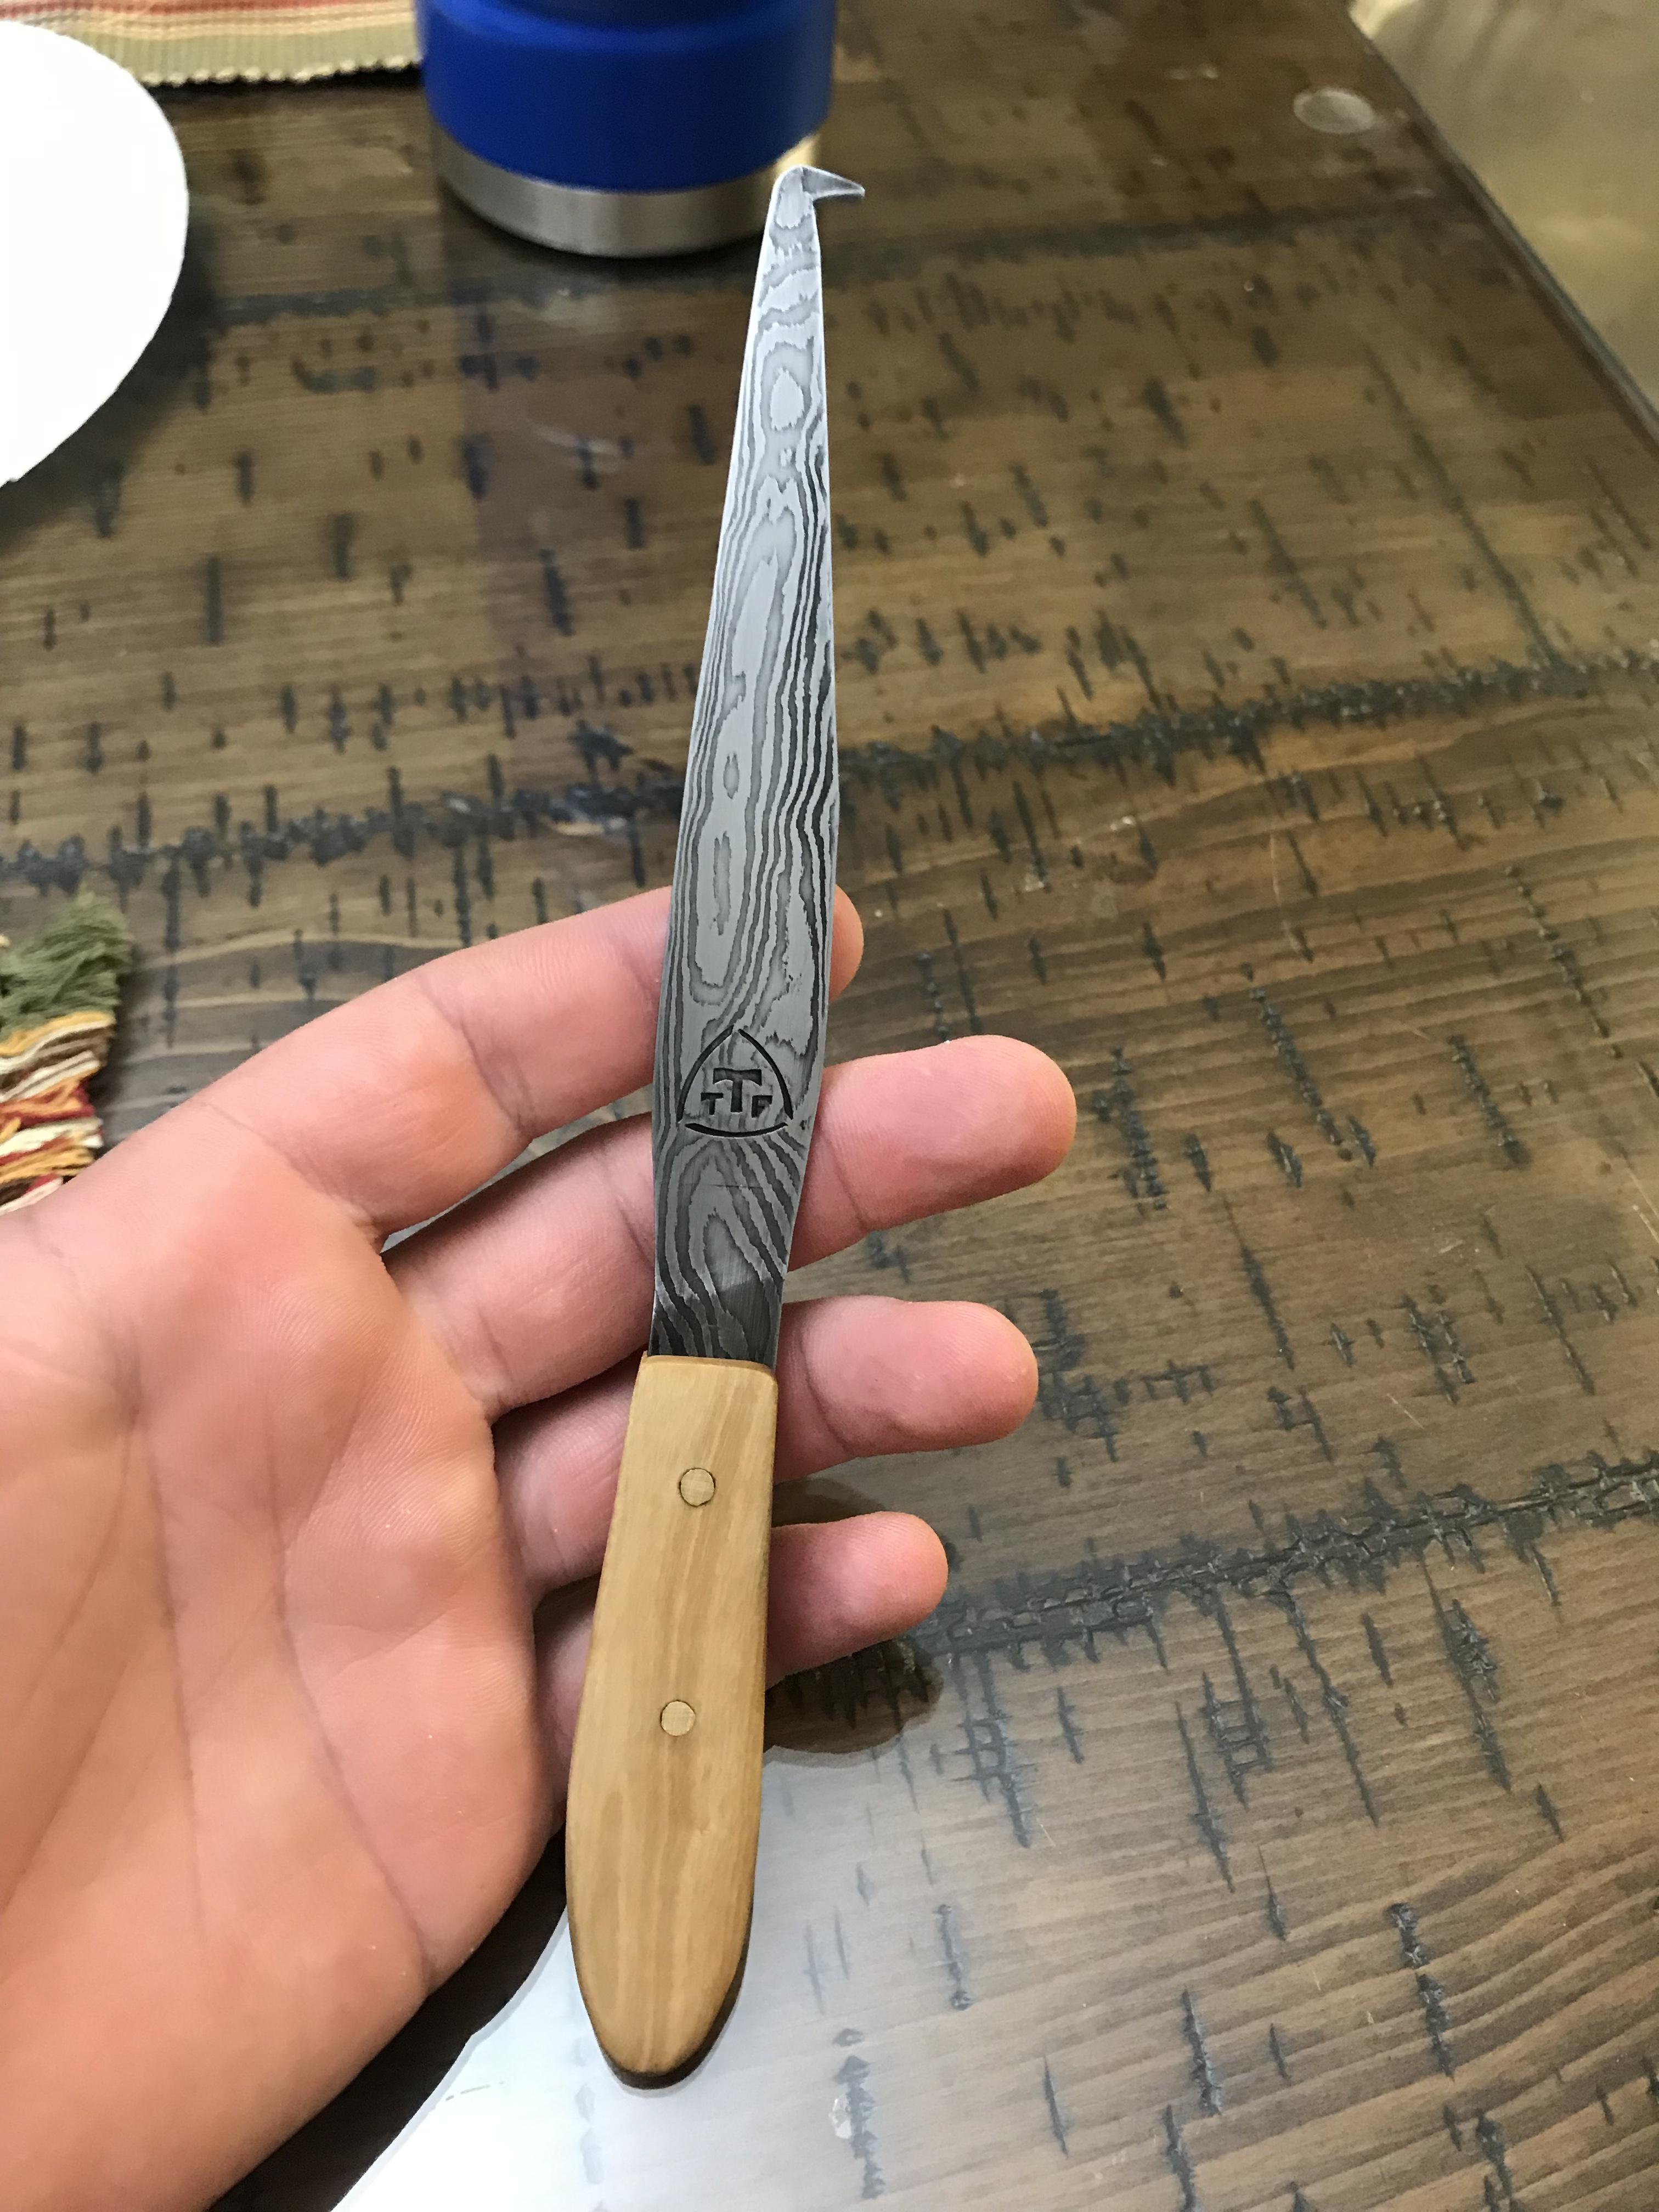
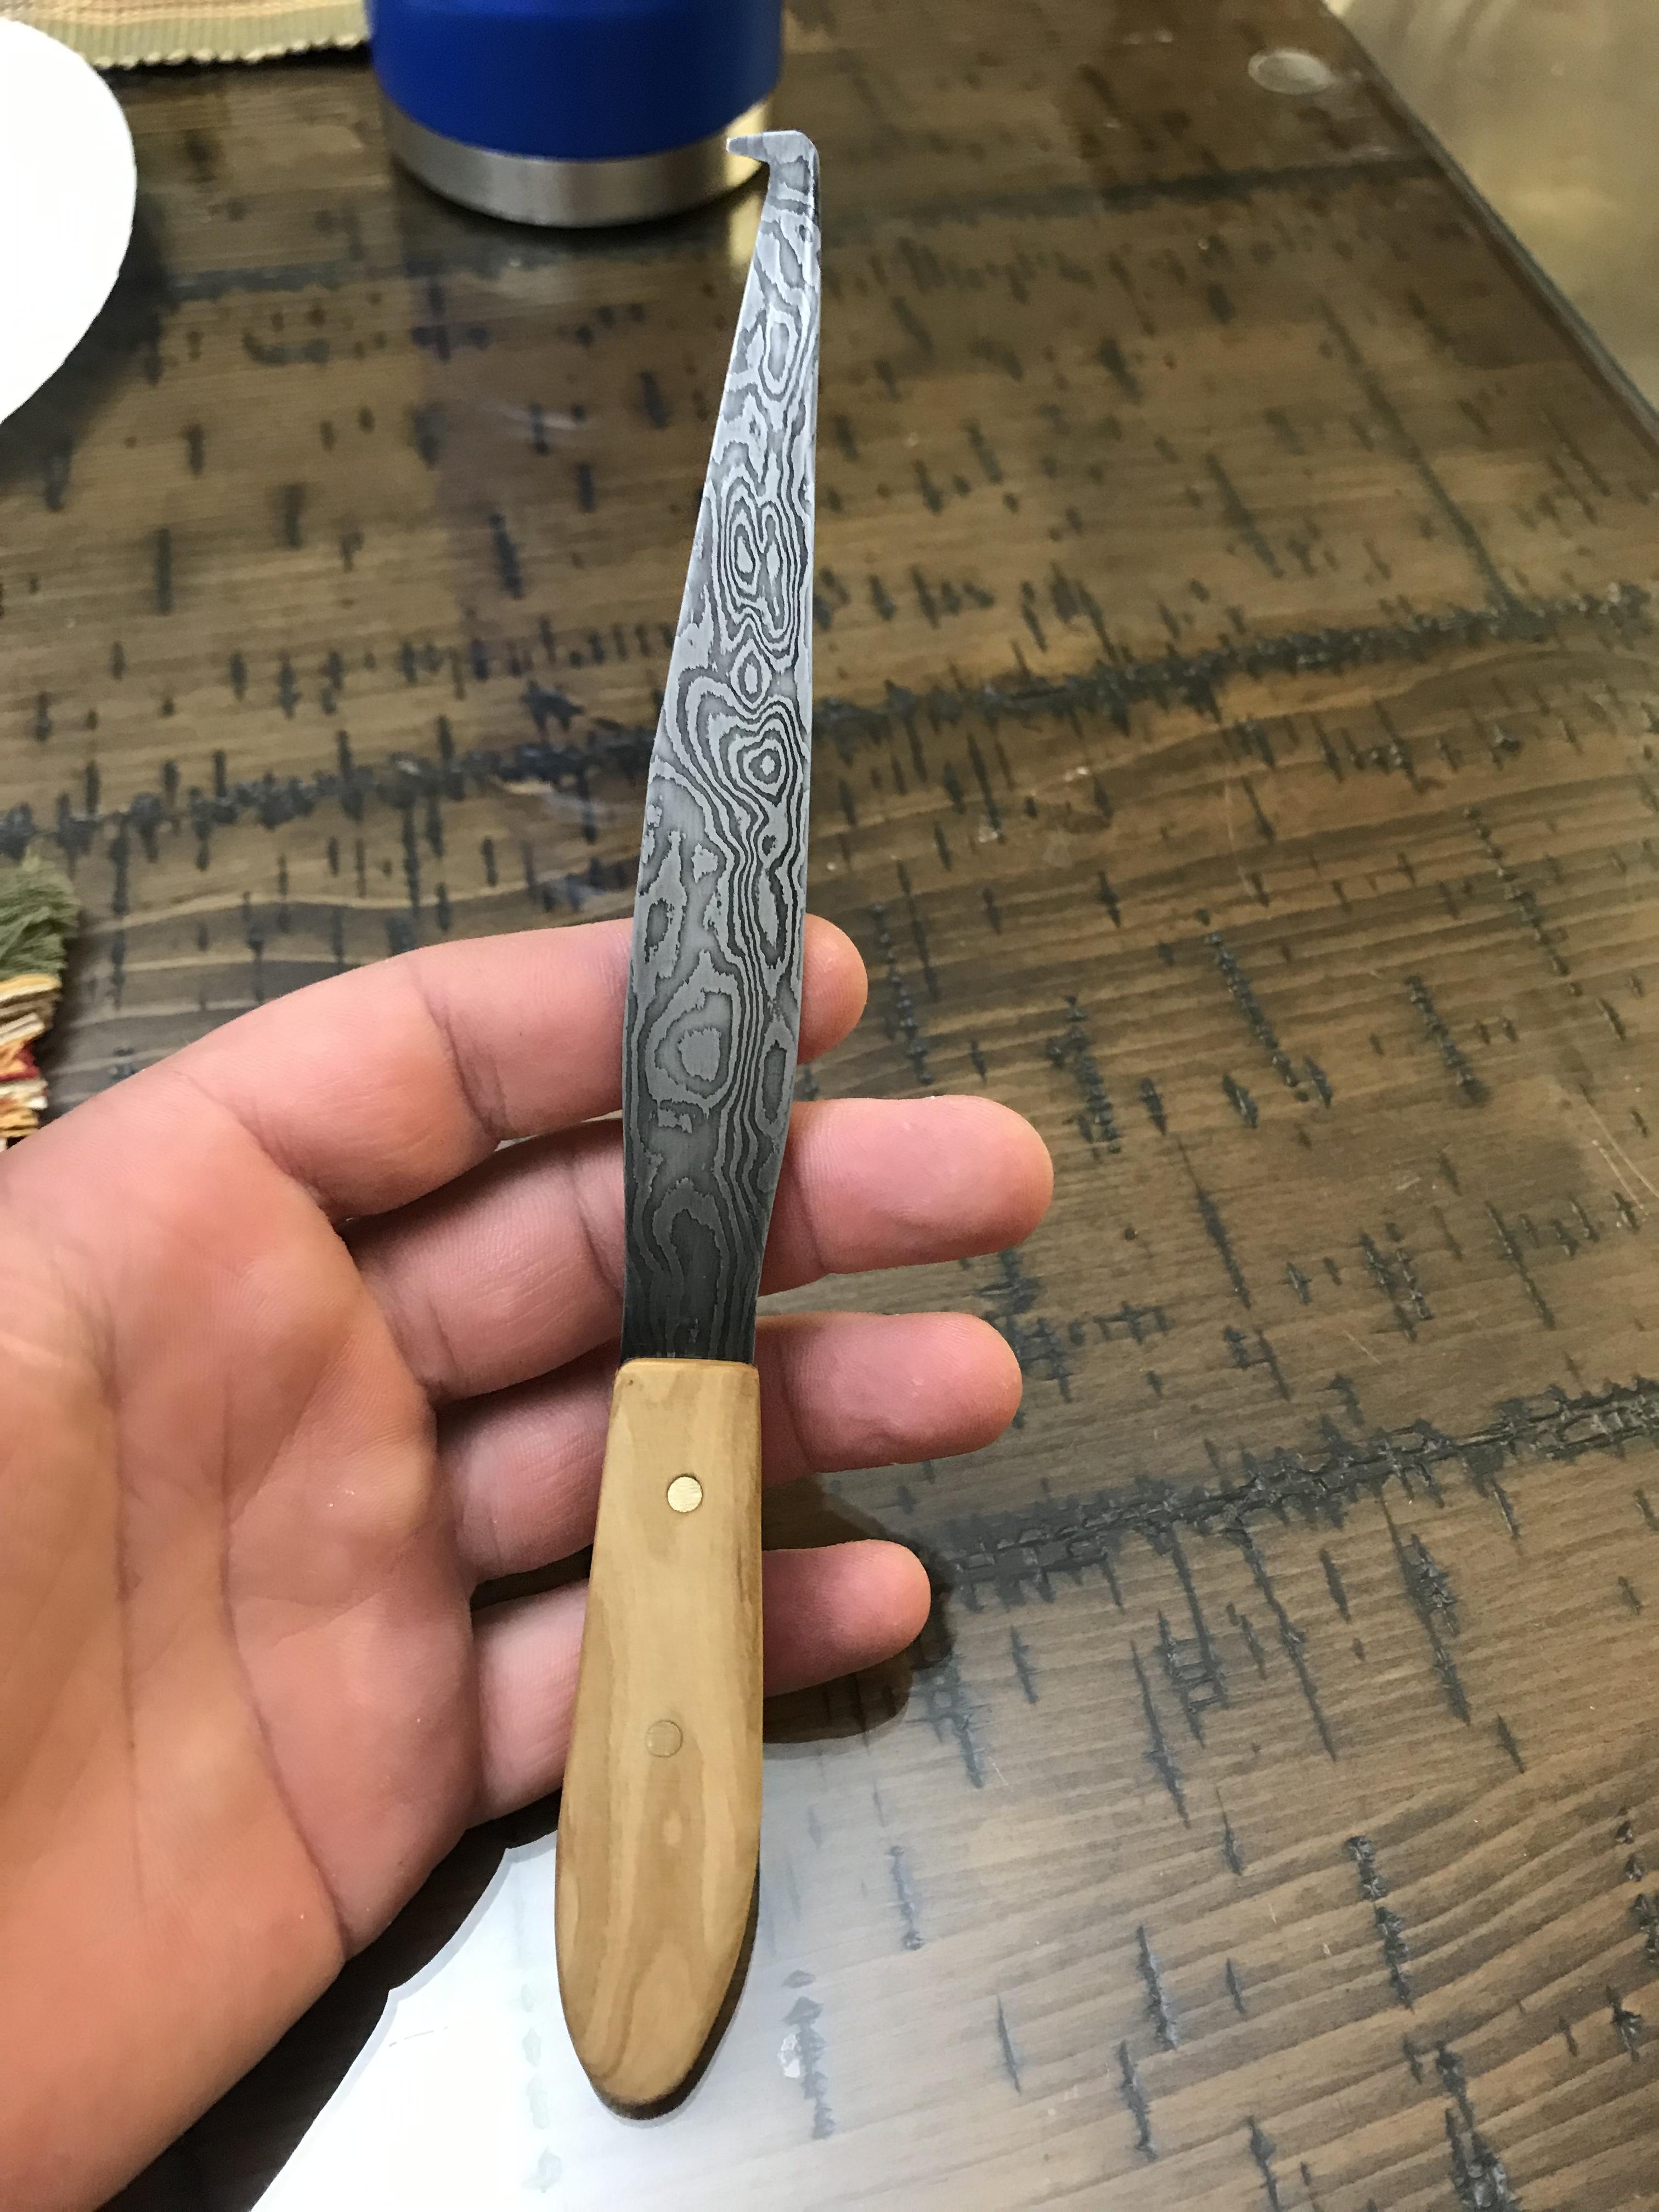
Update: 2019, made another one, specialized for opening seals on powdered antibiotics.. basically a hook and a one sided edge.
Made for a pharm school classmate that was a pretty good friend in school.
Less drastic pattern, more organic. Made from scrap/end cut off from larger billet. I’m a fan of using as much of me steel as I can.
Handle is olive wood.

-
Both my propane forges are ‘plumbed’ with standard ole rubber propane hose. I would like to change it out for a hard metal line, I was showing someone some basics when he inadvertently bumped a gas line with yellow hot steel...
My first thought is automotive brake lines, with appropriate adapters.
Thought Id ask the collective here what you use for hard metal gas lines?
-
Is it possible to get a small trailer? I picked up my Anyang 88 in Decatur Tx, and live in southern AZ, it weighs right around 4000# I used a trailer used to transport scissor lifts. Also, I used chain boomers... made sure the thing was not going ANYWHERE.
-
I really DO recommend the internal pipe sanding, at least a little bit to: A. Clean up any oil or oxidation or crum that might be in there.
B. To clear off chrome oxides then force the HC rod in making good contact.
GOOD LUCK!


.jpeg.4b0e677388fb061249f16bf70e7830bd.jpeg)

.jpeg.73e9ea0180ce5f67ec9fc20ec46fdb6e.jpeg)
.jpeg.93a88d39e99d6ab994f425496258fd24.jpeg)


General question for the community, steel coatings for knives.
in Knife Making
Posted
rhitee93: As far as I could tell, it sharpened pretty normal, I used the belt grinder to get through the coating, then used my DMT stones to do the final cutting edge (note, thats how I do all my blades...). It was a short blade, and I didn't pay much attention as I should have to see if it took longer than normal to get through it. A sharp abrasive belt moving at speed does go through the coating, its only a few thousandths thick...
I want to give him a higher layer count blade, and this time sharpened finer than a fleas whisker when going into the coating machine, the previous one I left the edge at about 40-60 thousandths, then sharpened after. Just see how fragile/brittle that cutting edge would be.
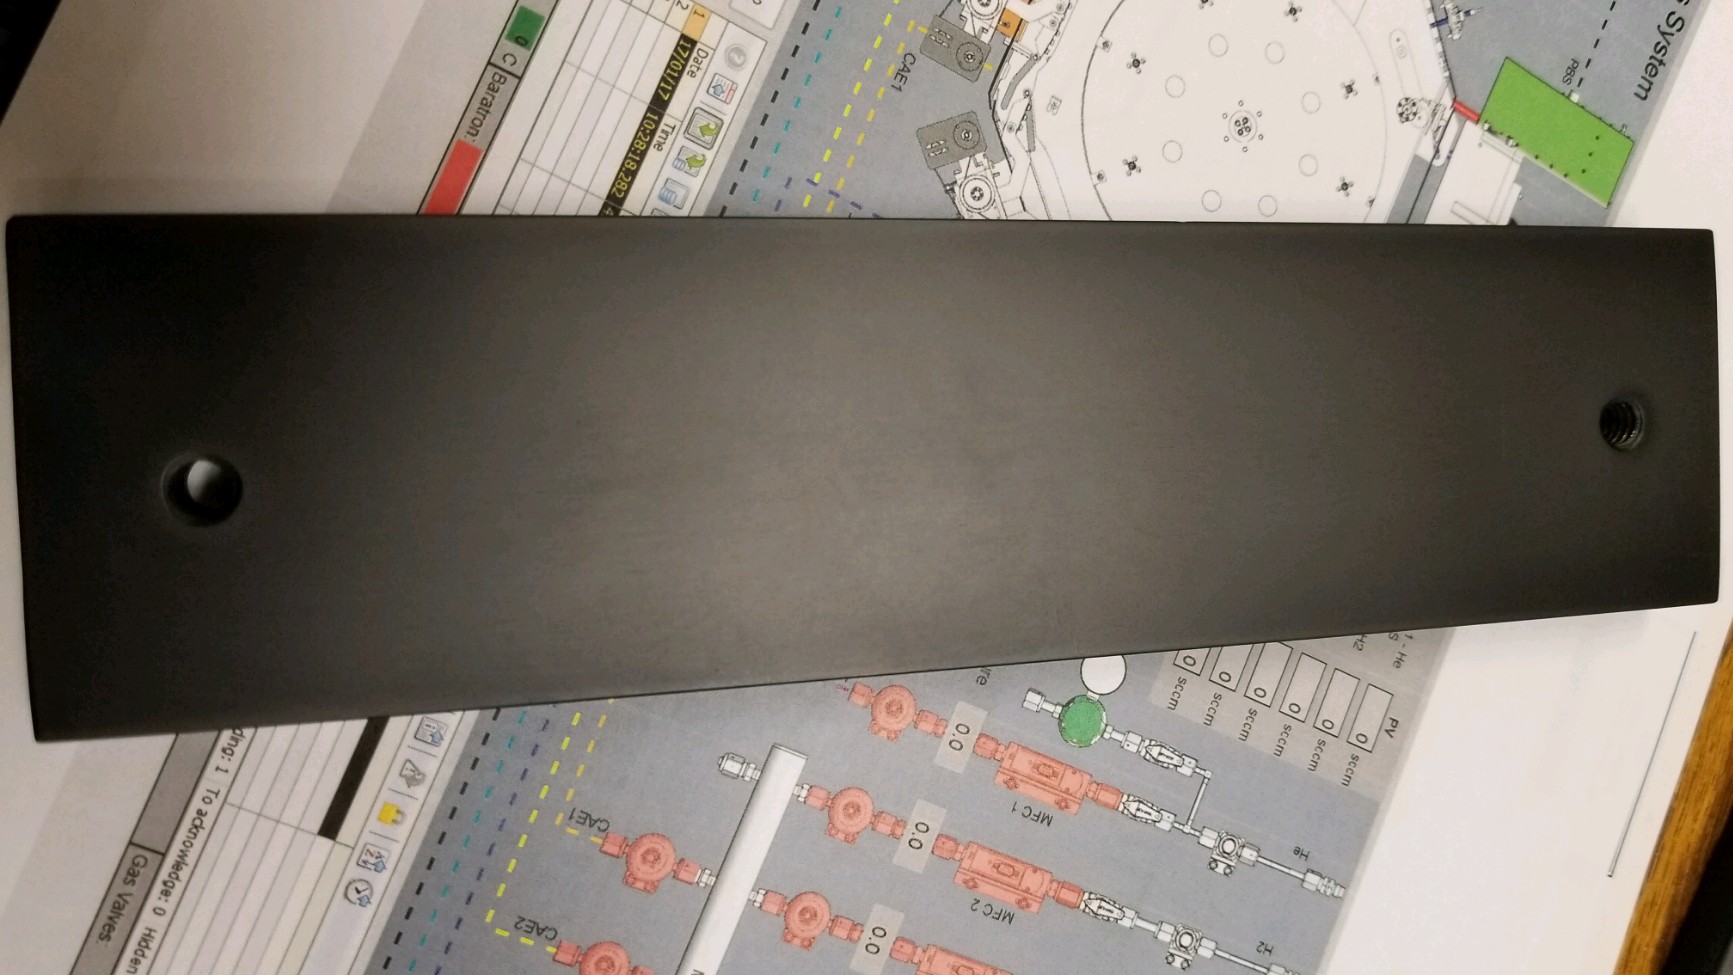
Thomas: I've been running this platen he coated for about 2.5 years and its finally worn through in the really high contact areas. In fact the 1/2" just above level with the table on the flat platen wore through after ~18 hours grinding time, kept track for data purposes. Ceramic abrasive dust does a number pretty much anything apparently. The base steel is also D2 that I cryo treated... so its about the longest lasting platen setup possible. It doesn't have any major ridges on it yet, so still going strong.