

iamjoe
-
Posts
18 -
Joined
-
Last visited
Content Type
Profiles
Forums
Articles
Gallery
Downloads
Events
Posts posted by iamjoe
-
-
Frosty,
Call me Joe.
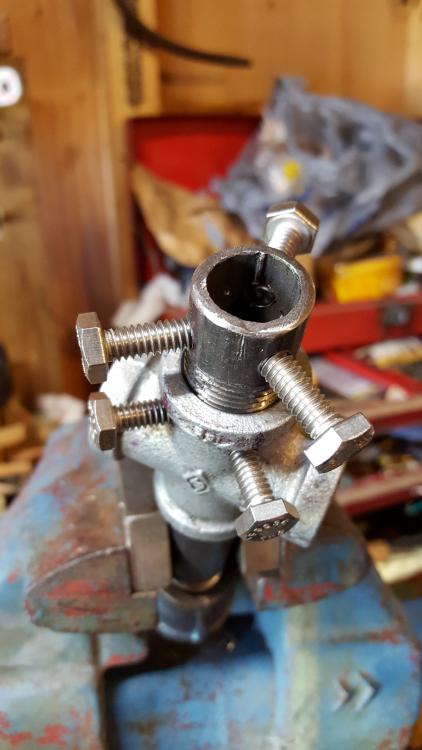
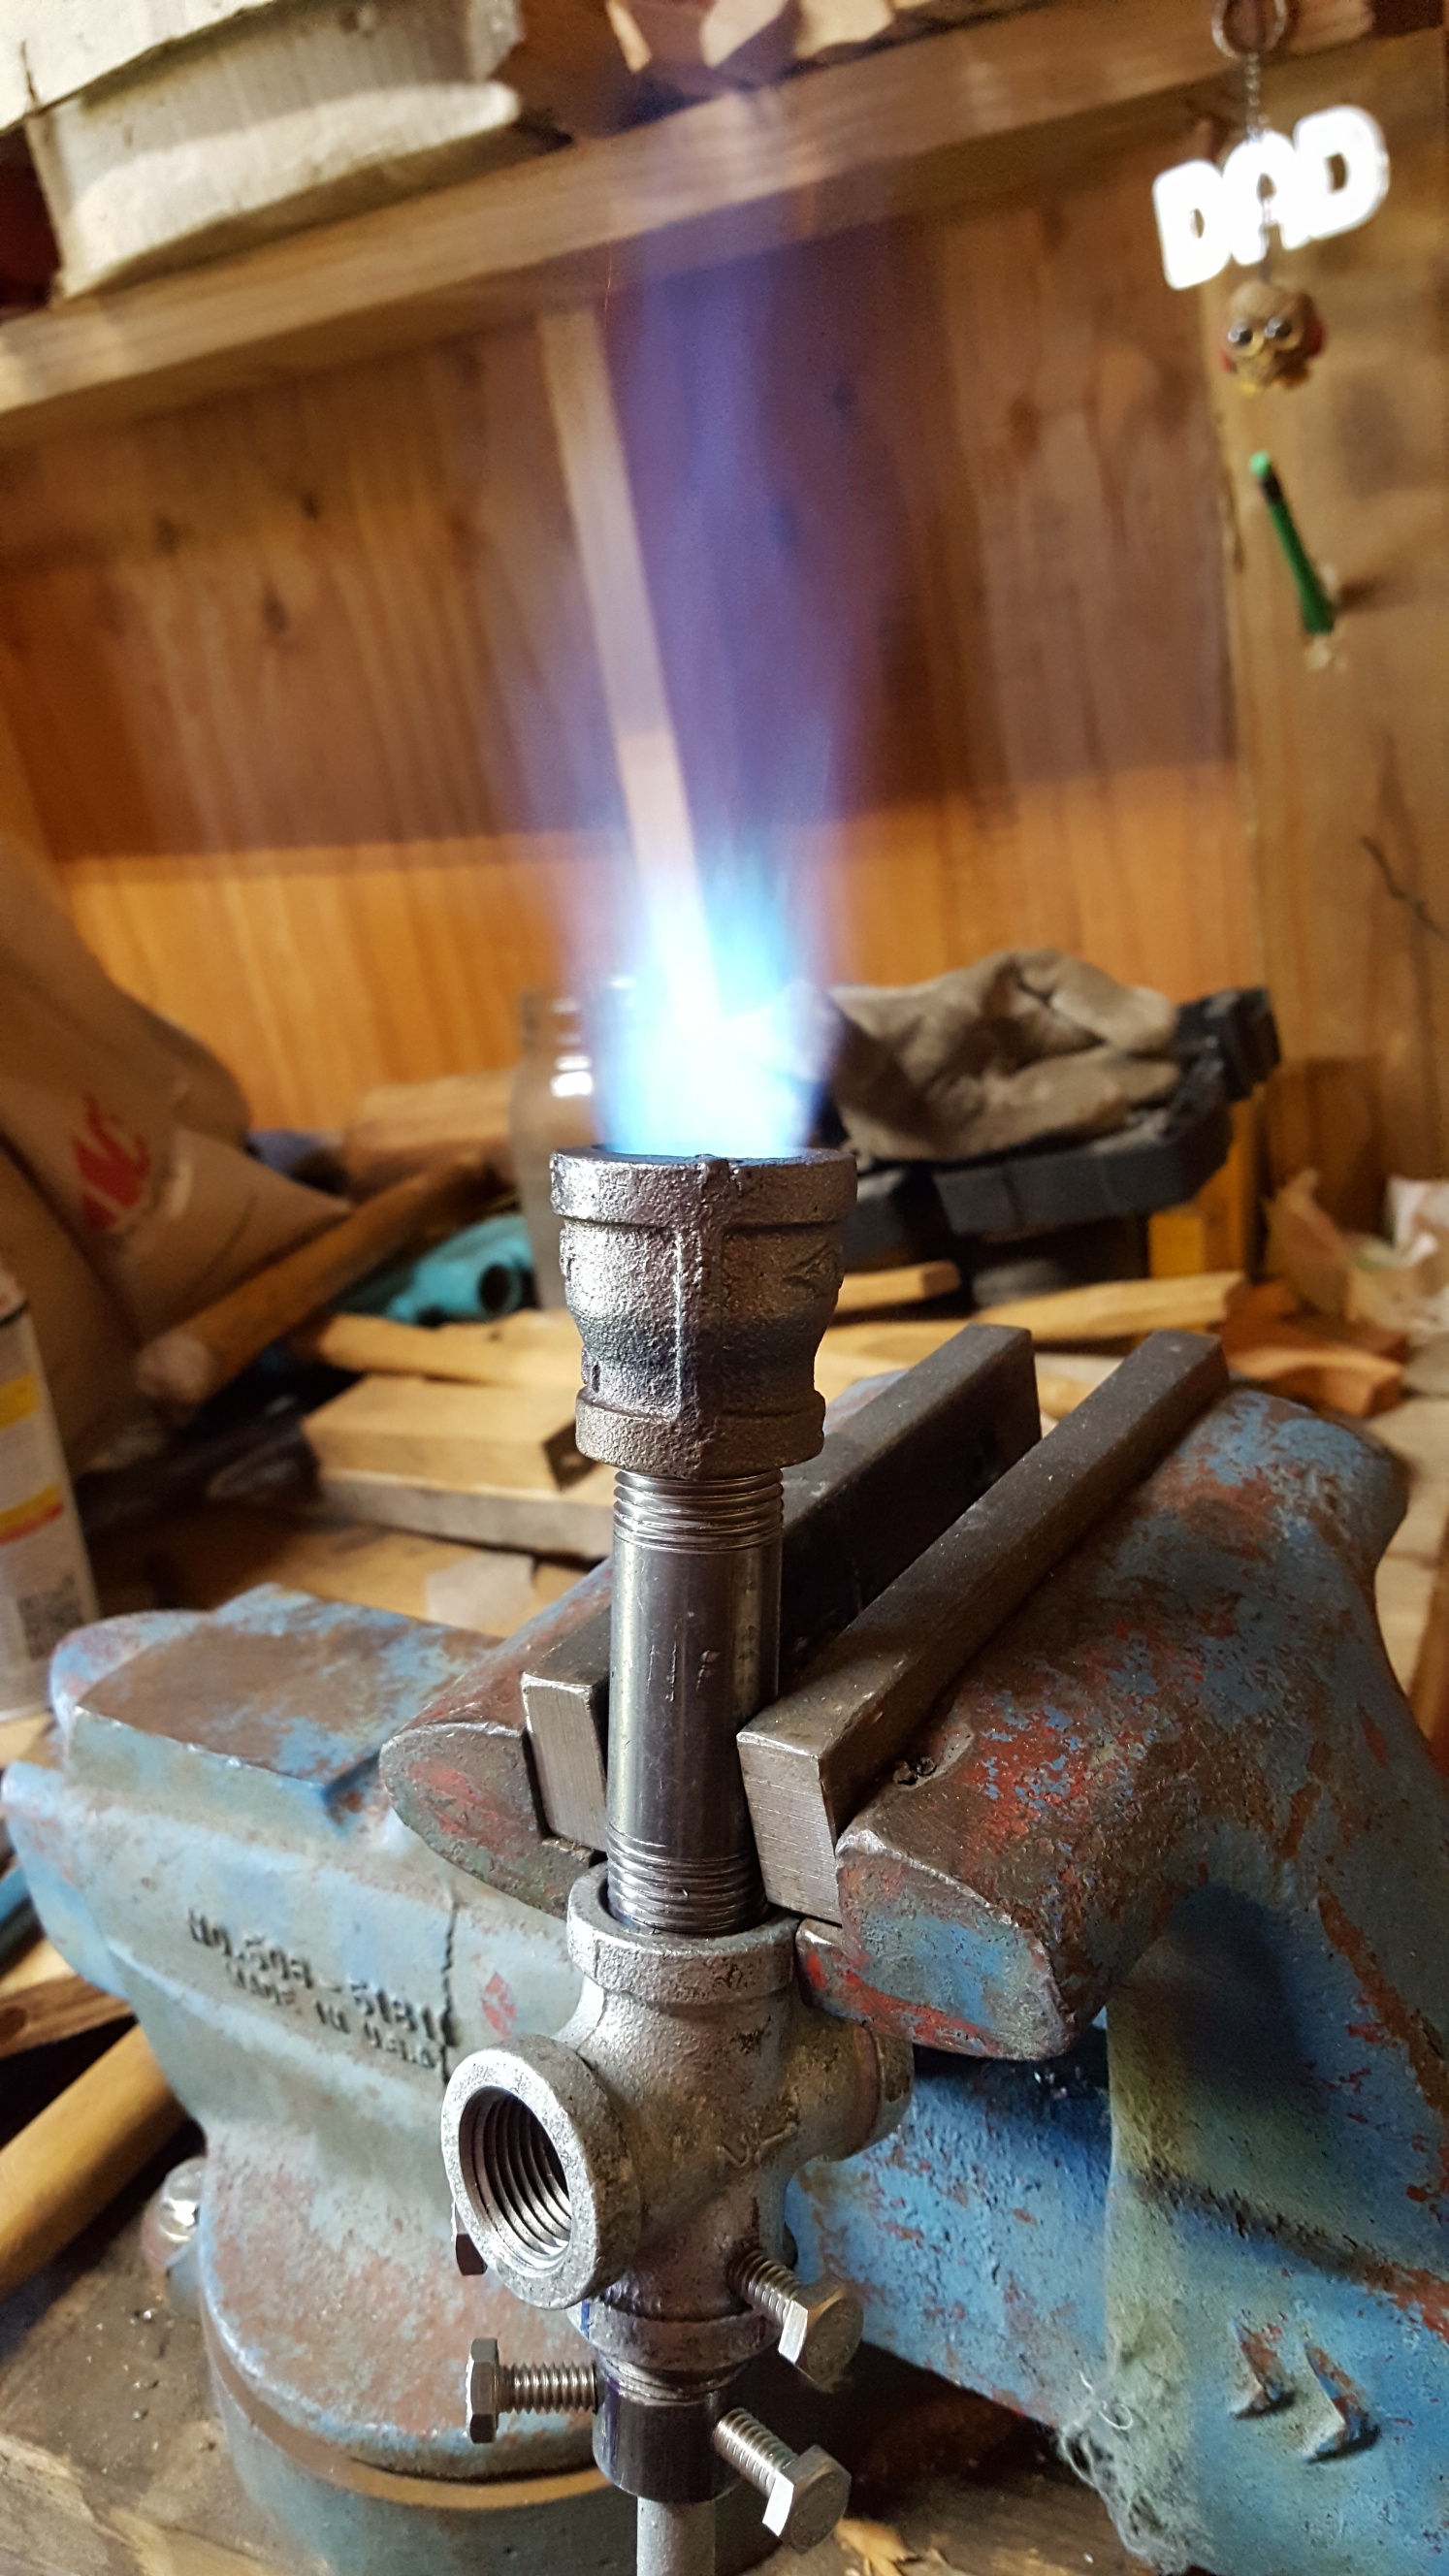
I do have the ability to move the tip. I sanded the fittings to move in and out freely. Sadly the schedule 80 1/8" pipe nipple does not exist in my area; and I can't for the life of me drill a straight hole with a hand drill. So I have to make do.
Hadn't planned to put it in a forge. I was going to try and use like a torch. Possible an edge quench or working with something small on a vice. I know, not the most efficient but I can't afford a torch setup right now.
Picture is a little off center.
-
Frosty,
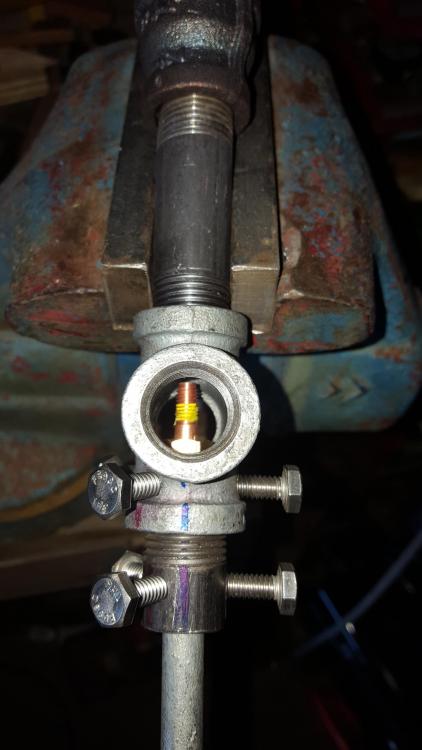
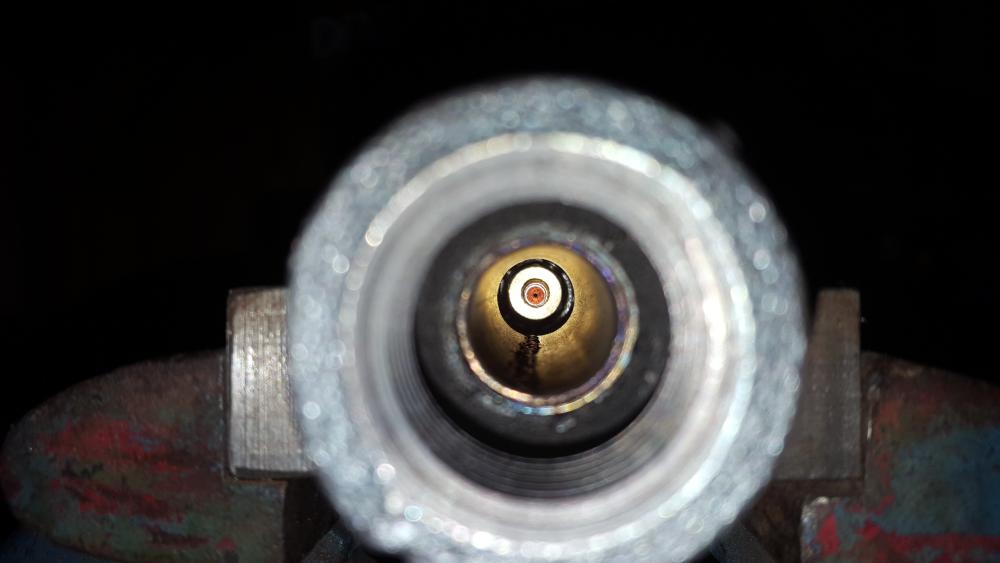
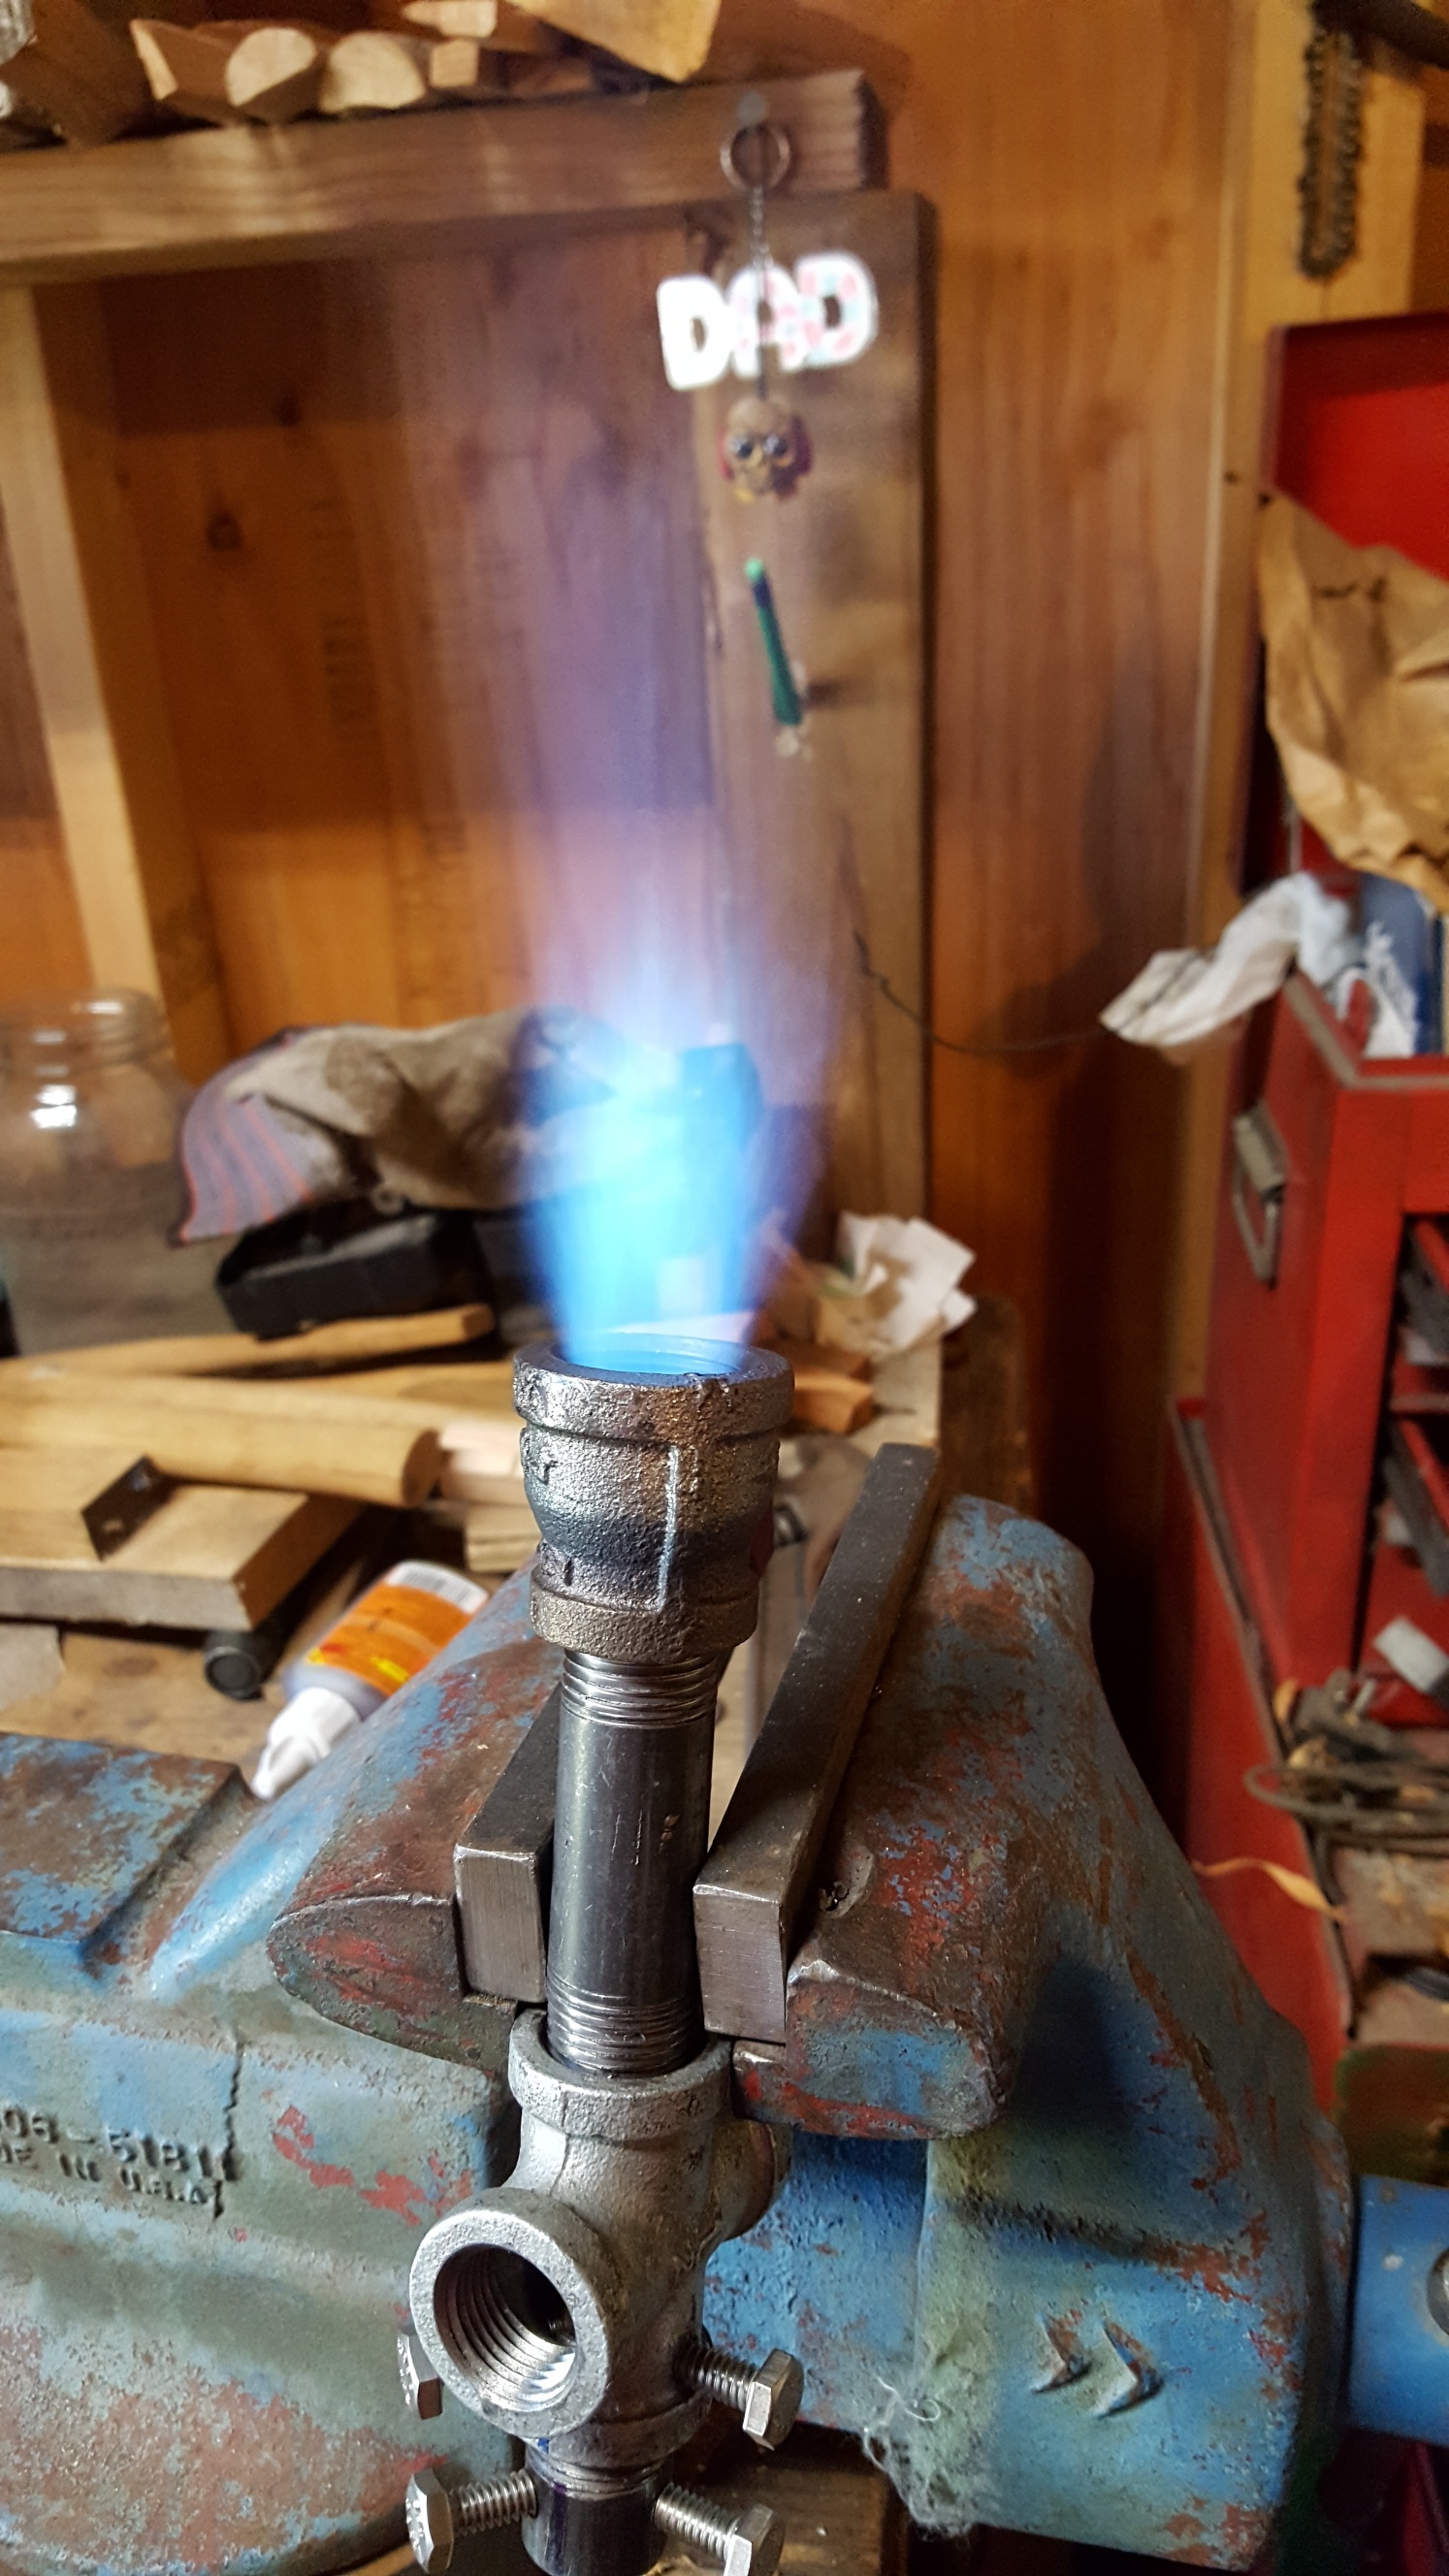
I've made some changes. I went with a shorter burner tube. I tried 4" then 3" with the .035 tip. The 3" seemed better with that setup but still not a good flame.
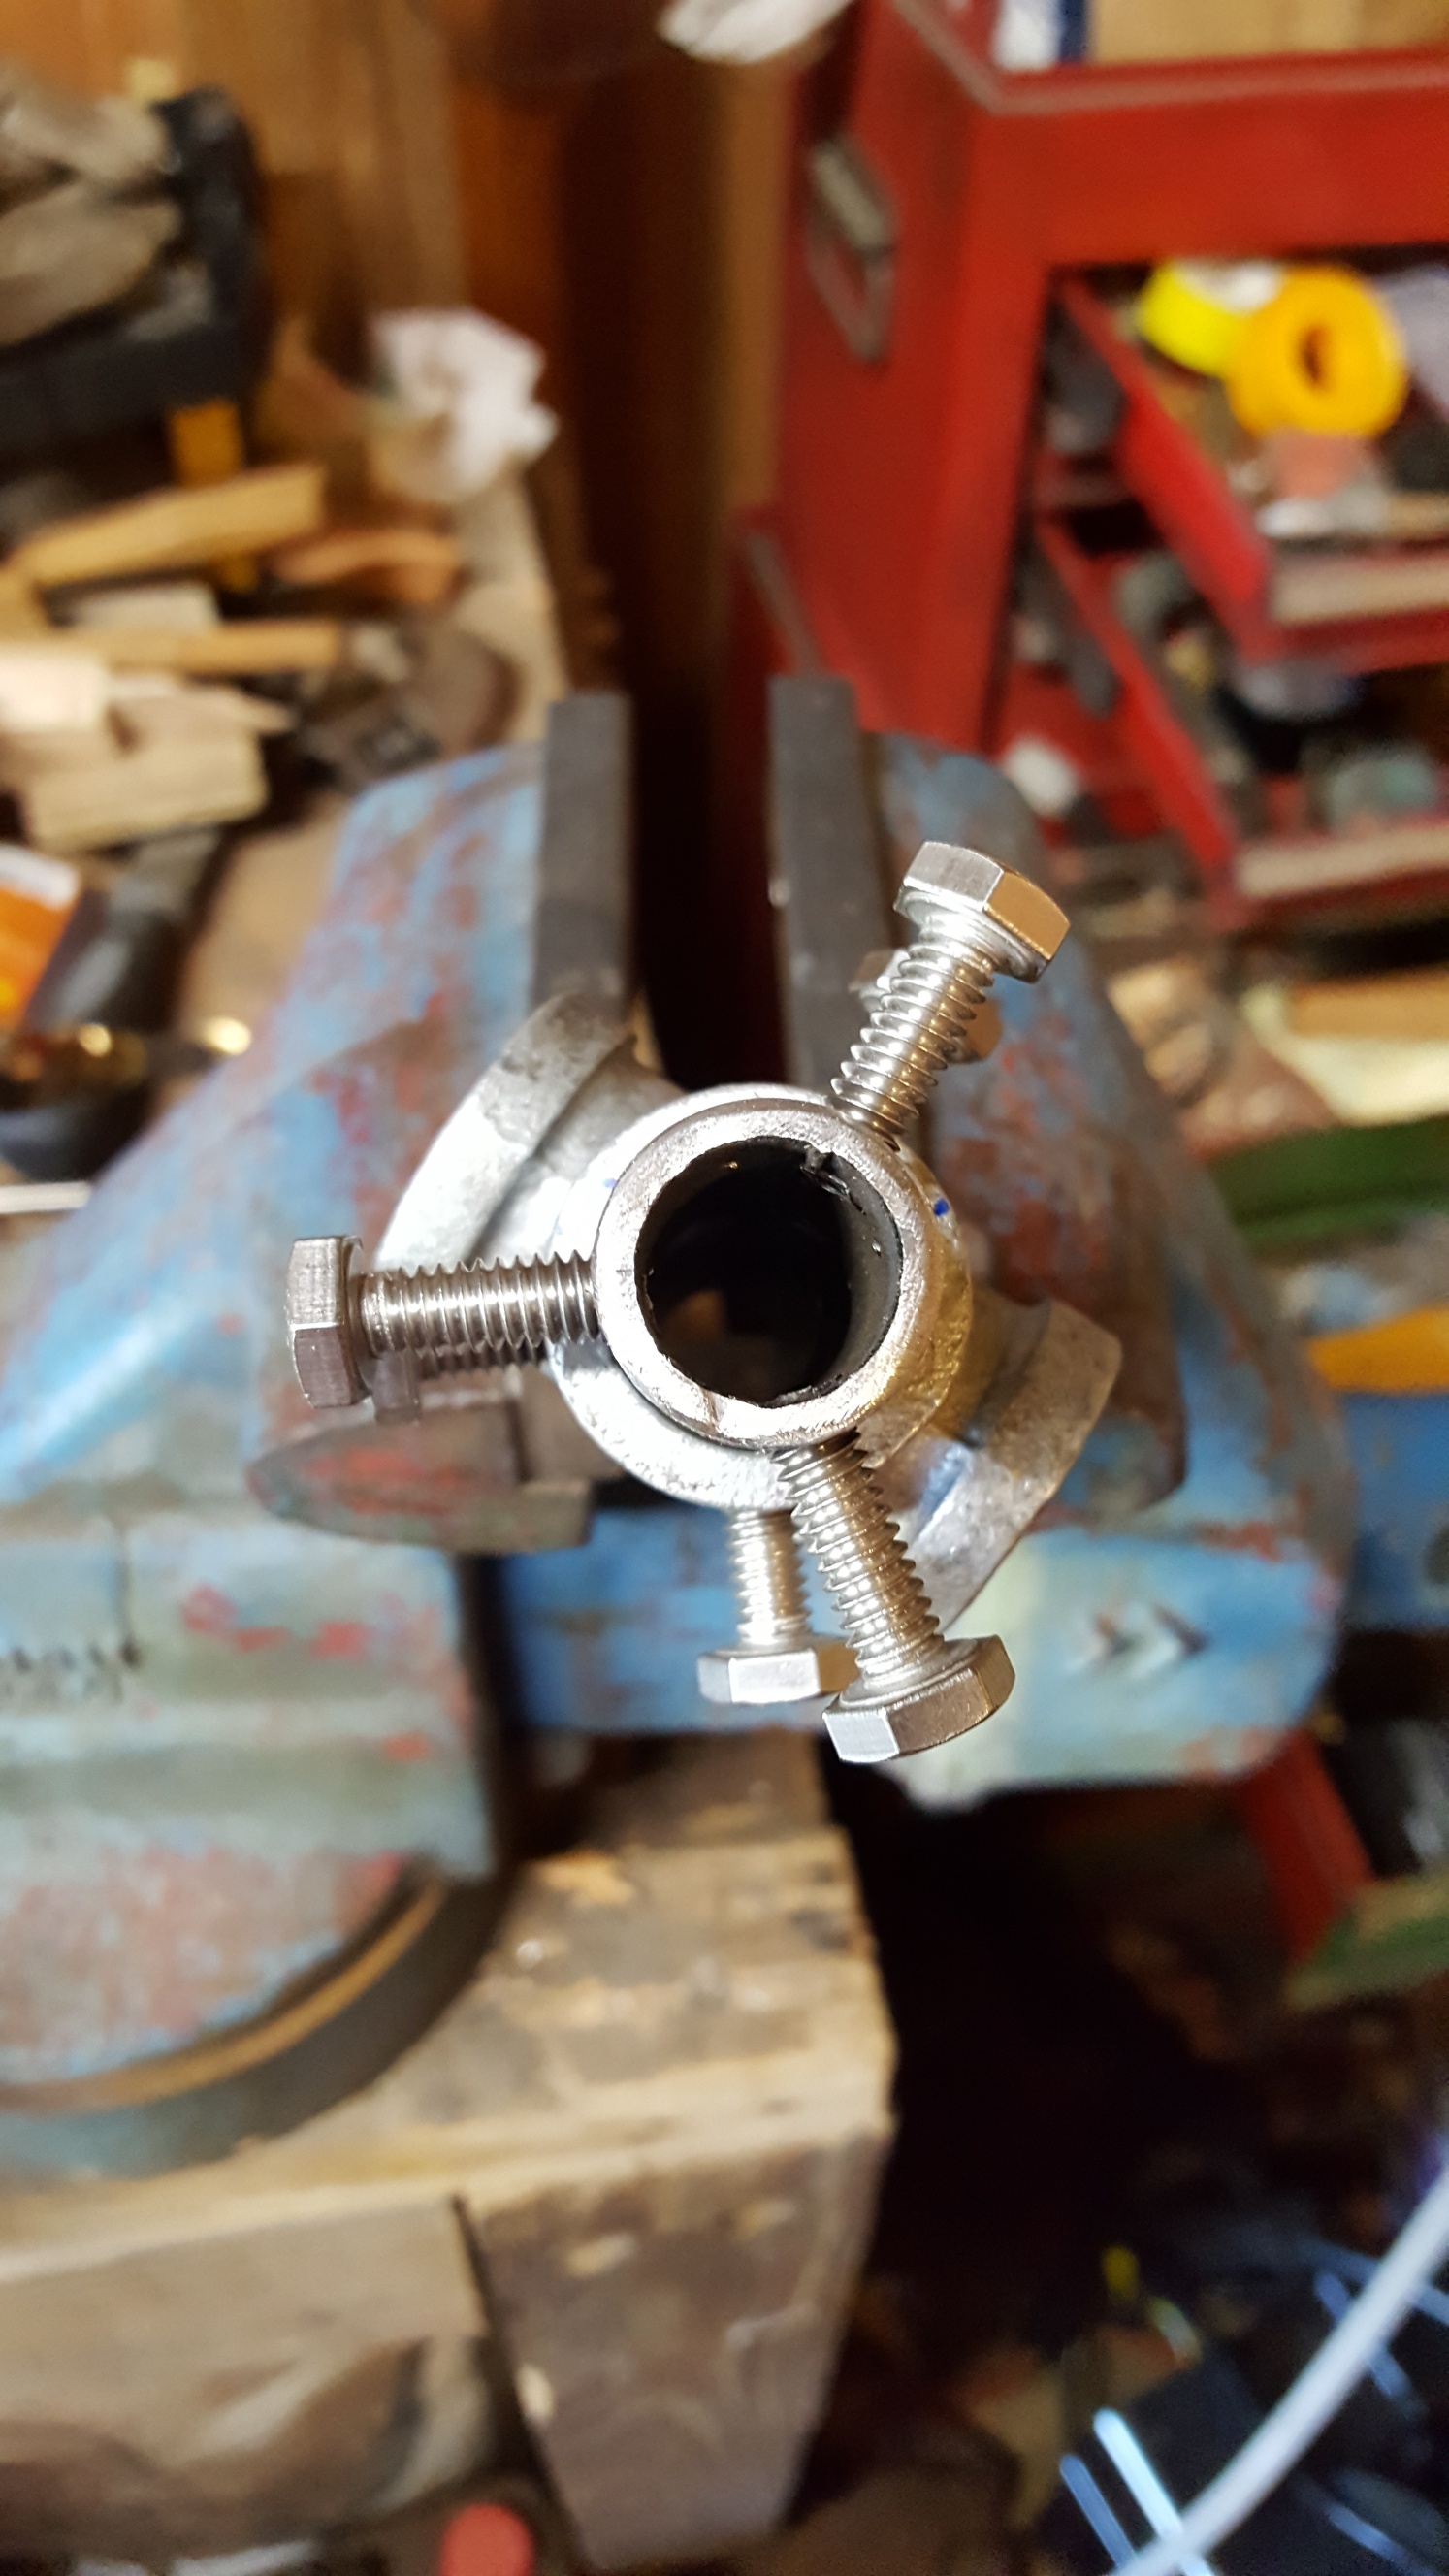
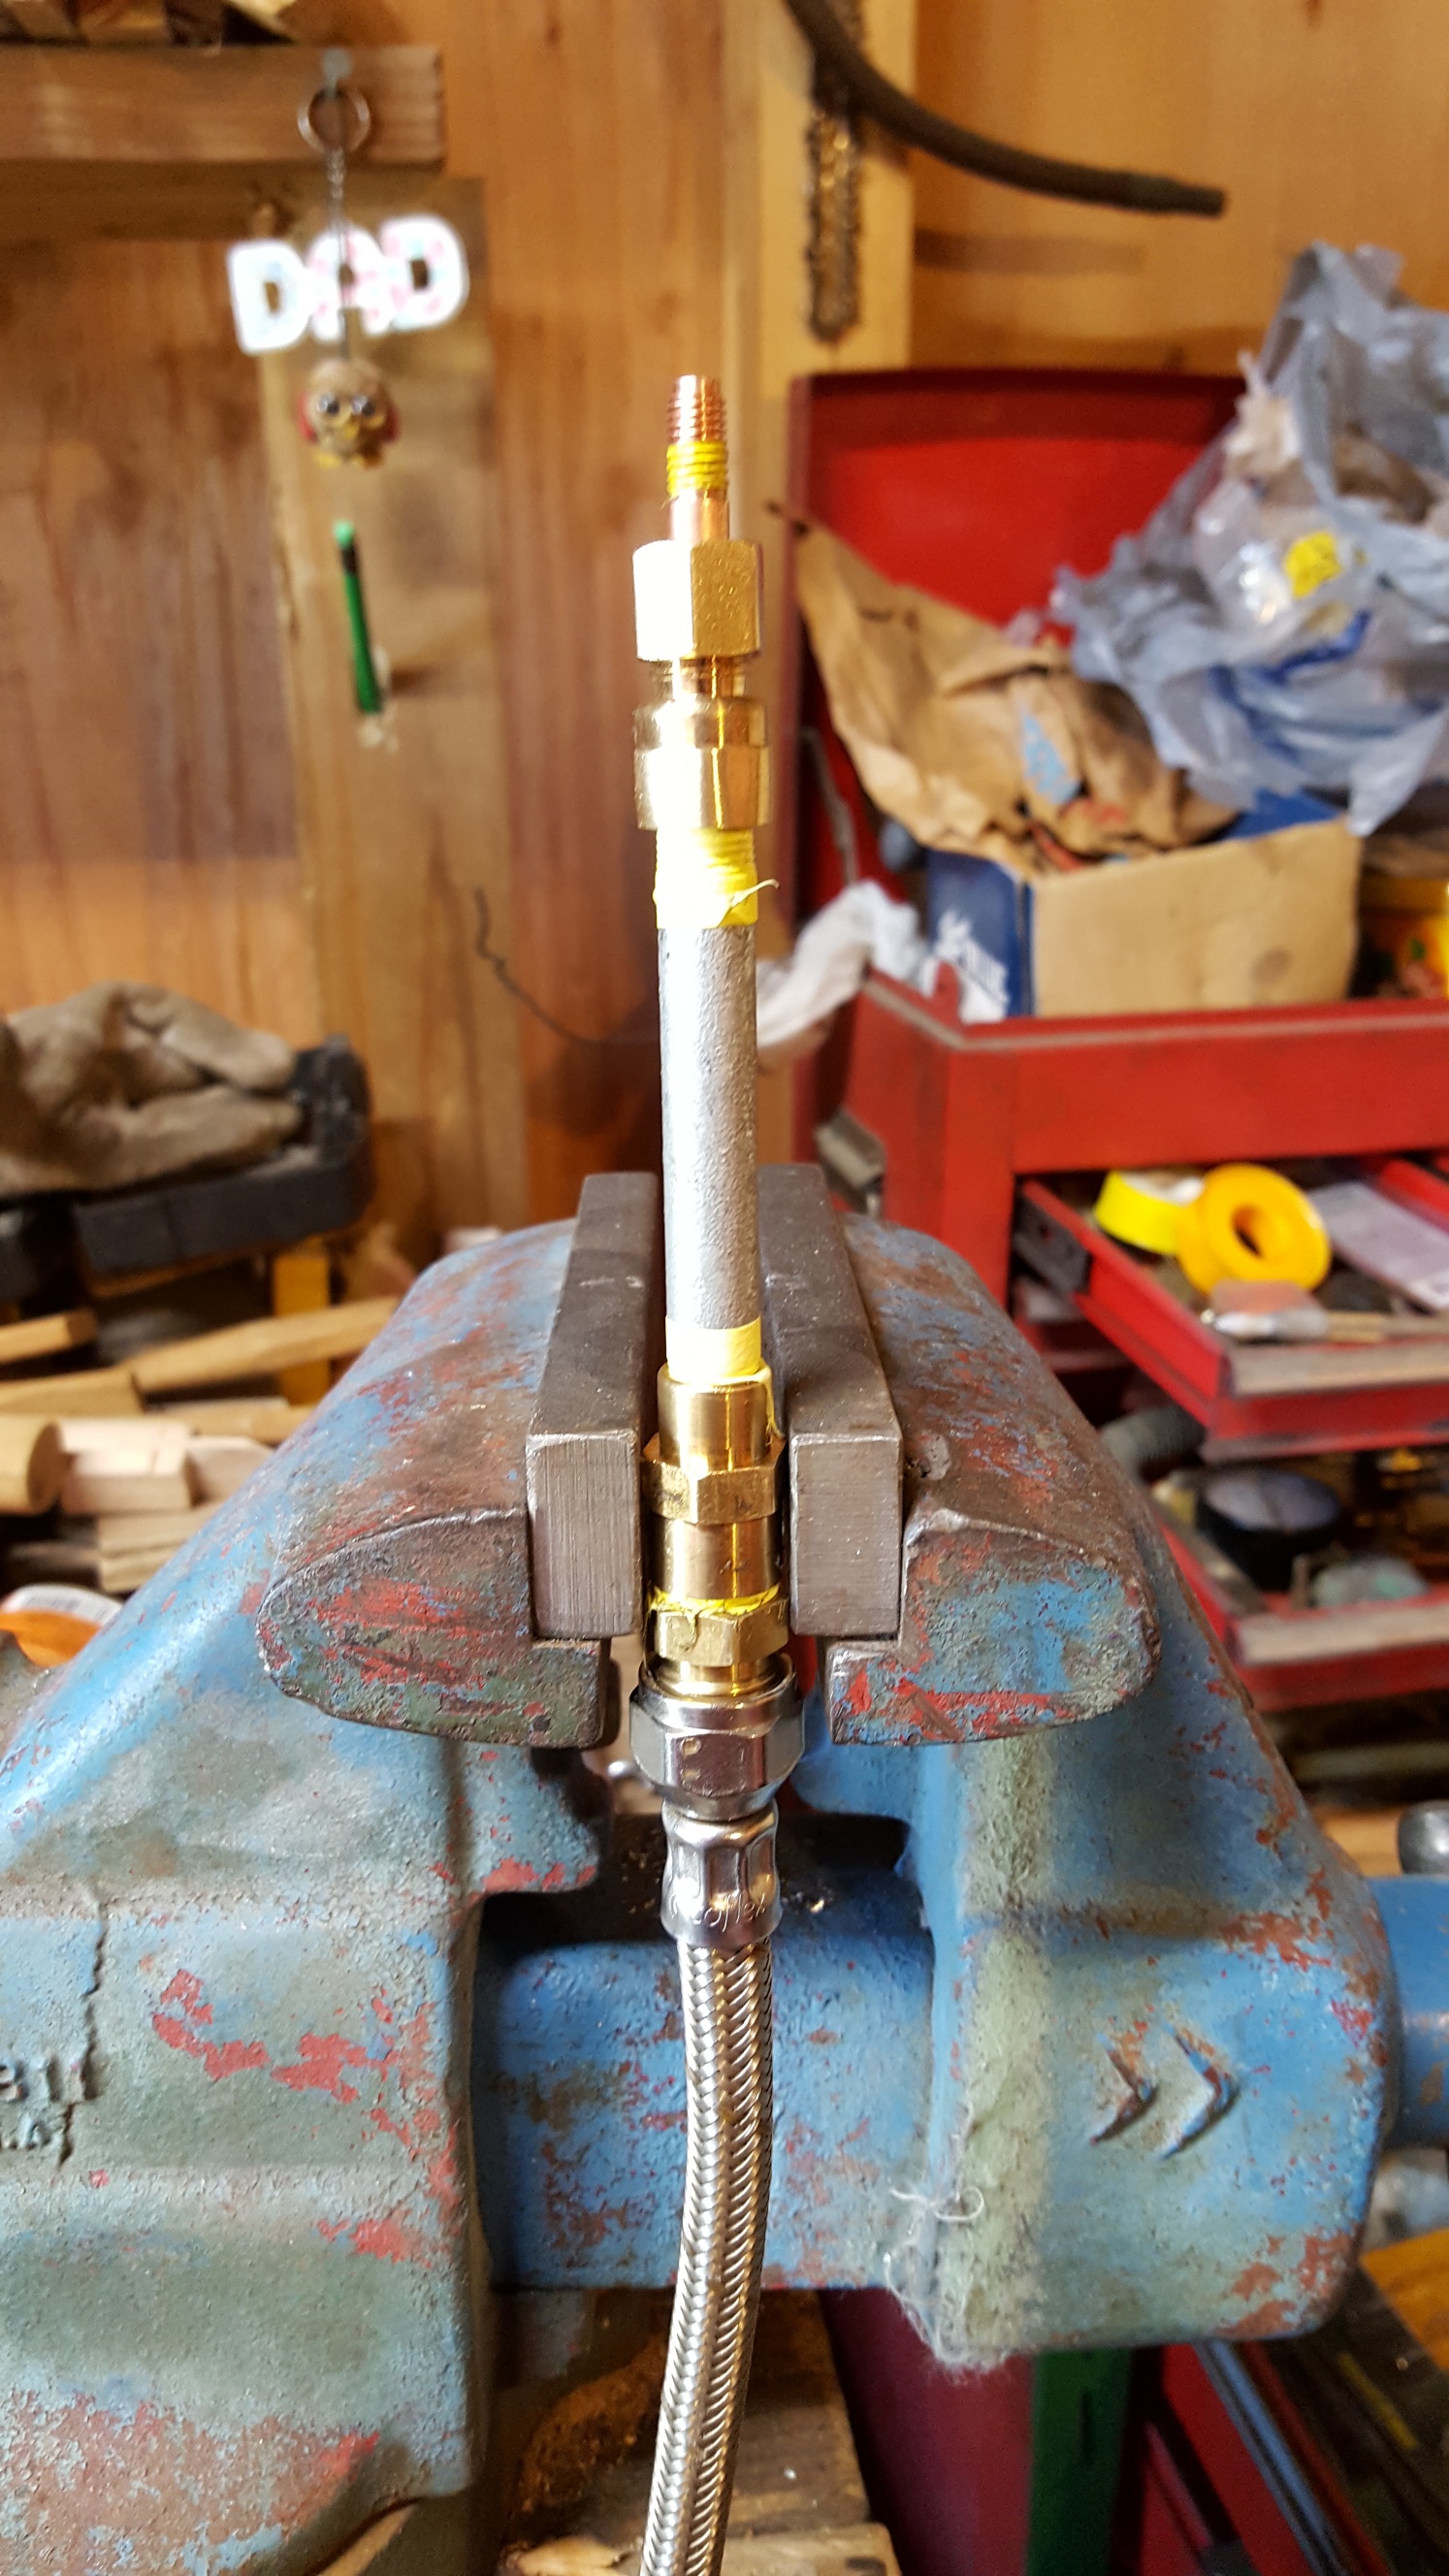
Then I went to a .023 tip still with the 3" tube. I will attach pictures of that flame along wit pics of my jet tube assembly and mounting style.


-
Buzzkill,
Thanks for the feedback. I was thinking it was running rich. Will definitely change the tip and go from there.
-
Folks,
I hope I'm posting this in the right place.
I've built a new burner tonight and could use some of the knowledge from you gents.
I'm using 1/2" burner tube 6". A pipe cross for the air intake and to secure the jet tube. I have a .035 welding tip for the orifice. I can adjust the jet tube in and out and for center. I've moved it all over and this is the best flame I can get. I have a 0-40 psi regulator, no gauge but this is two full turns on the regulator. If that helps.
-
On Friday, April 21, 2017 at 1:18 PM, bengriswold said:
That looks real nice and simple and real hot. I am curious what are the things you want to improve? Great Job.
Thanks. I think I will put doors on it. Don't want to tighten it up too much but some. At some point cast a floor in it if not coat the whole thing. Maybe a reflective coating of sone kind after that.
On Saturday, April 22, 2017 at 2:23 AM, Mikey98118 said:Nice forge Joe.
Thank you Sir.
-
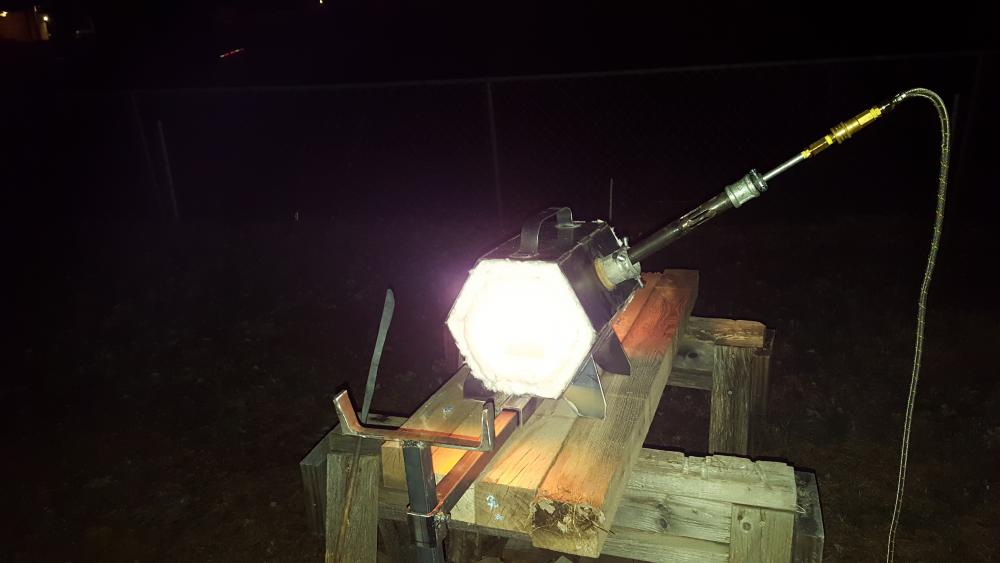
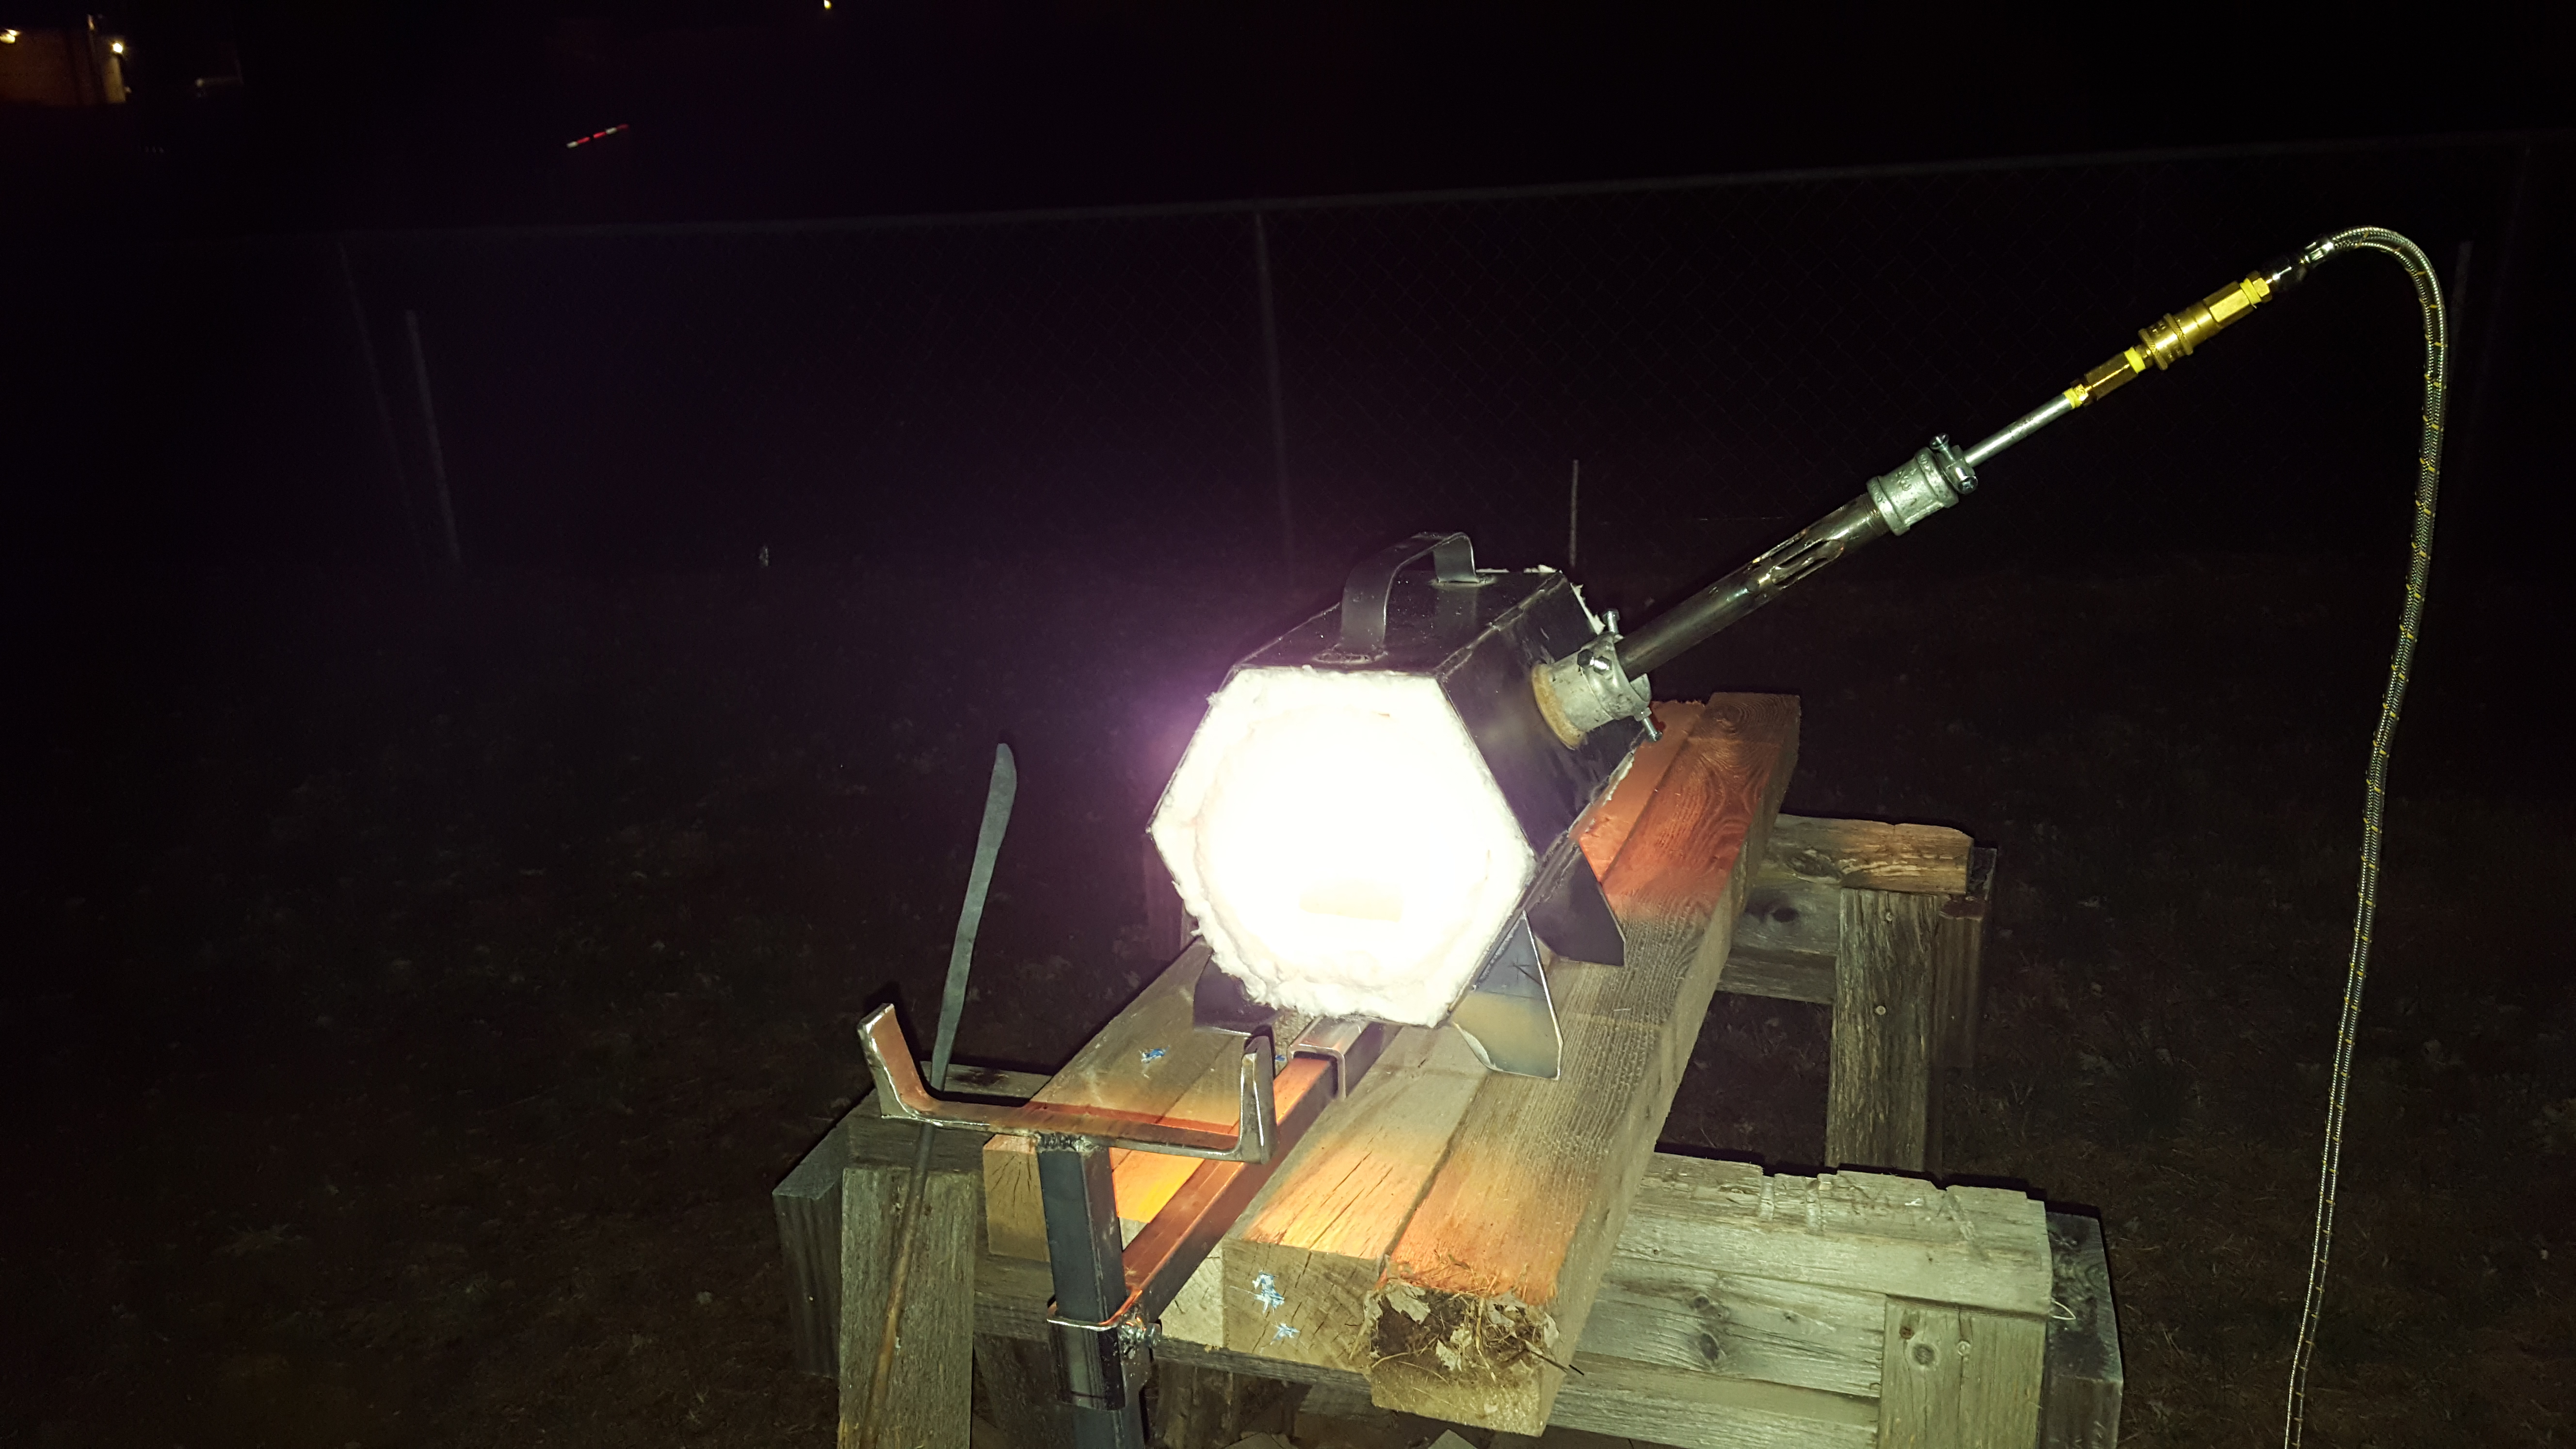
My forge build. It has a lot of room for improvement but it's more than what I had.
-
9 minutes ago, Mikey98118 said:
Here is another positive note: The forge is getting much hotter than I had expected. You will need to make sure your work area has a fan-flown exhaust cleansing the air anytime you are running the forge, because its exhaust looks heavily reducing. I think you are doing well--so far--and hope you keep improving that forge and burner.
Thanks for the advice. I was uncertain about the exhaust so I only run it outside. Don't need to be passing out in my shed. I'll do some research and see if I can improve it.
-
36 minutes ago, Mikey98118 said:
iamjoe,
You took the trouble to post a video of your burner running, and while I would rather not comment on it, it looks like no one else well, so here goes. The flame it produces is rather poor. While it has a vague resemblance to my burner design, its details show it isn't even close. Review the information in the Burners 101 thread, and you can greatly improve it. You really need to improve that flame if you plan to use it in your mini-forge, or the forge will be heavily reducing (lots of carbon monoxide in its exhaust), and won't get very hot. Sorry, but there it is.
It's a learning process. If I expected perfect I'd bought one. Thanks for the truth. I can handle it. Here's a video of it running.
On a positive note, I was able to make this.


-
Here is a video of my 3/4" burner.
-
The fumed silica I ordered should arrive in the next day or two. Most everyone agrees that is a good first step. I probably will put doors on it next. Just sliding bricks. I know I can't close it off completely since it is a venturi burner. Thanks again for all the feedback.
Frosty,
I'll keep all my questions in the forges 101 section from here on. A lot of good info there and it keeps it consolidated.
-
5 hours ago, Mikey98118 said:
Once the rigidizer is set with flame it becomes a physical part of the ceramic blanket; if you mechanical injure the blanket, that is the only change that happens in the rigidizer afterward. Their is no hurry to get to the coating.
Thanks. Just what I needed to know.
Thanks everyone.
-
4 hours ago, Mikey98118 said:
Brands? Most of this stuff is made up at the ceramic supply store you will buy it from. It is cheap and easy to procure this way...unless you have no such source handy. Then, you can buy fumed silica through eBay and mix it with water yourself. Use a cleaner bottle with a built in spritzer top to apply it the easy way. I suggest adding food coloring dye to easily see how deep the rigidizer is progressing into the ceramic blanket. If you mix it too lean add more silica; if it is too thick add more water. All of this is simple, so please don't freeze up and complicated it. Speaking of freezing avoid allowing your mixture to to so.
Thanks for the advice. Will the rigidizer hold up for a while without coating it?
-
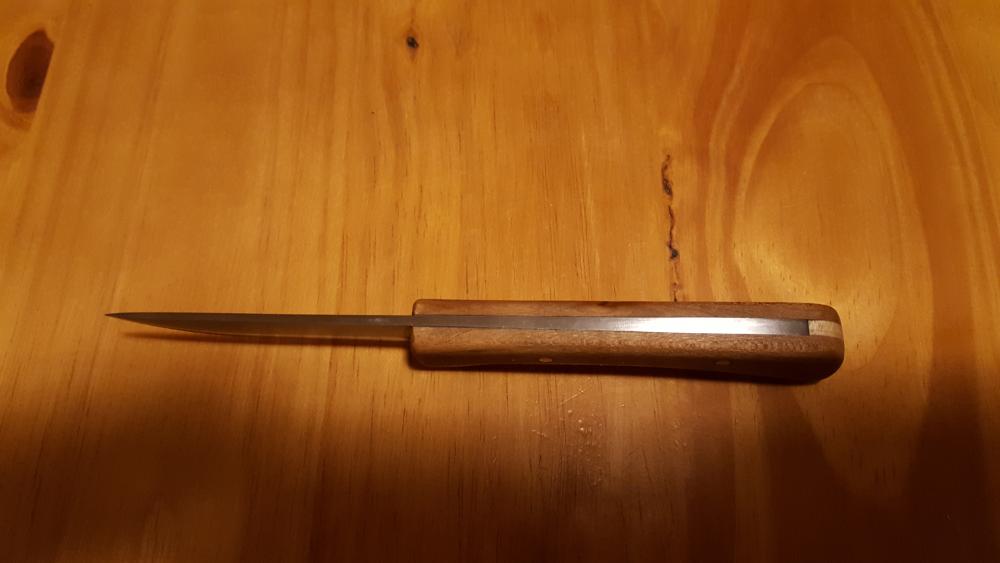
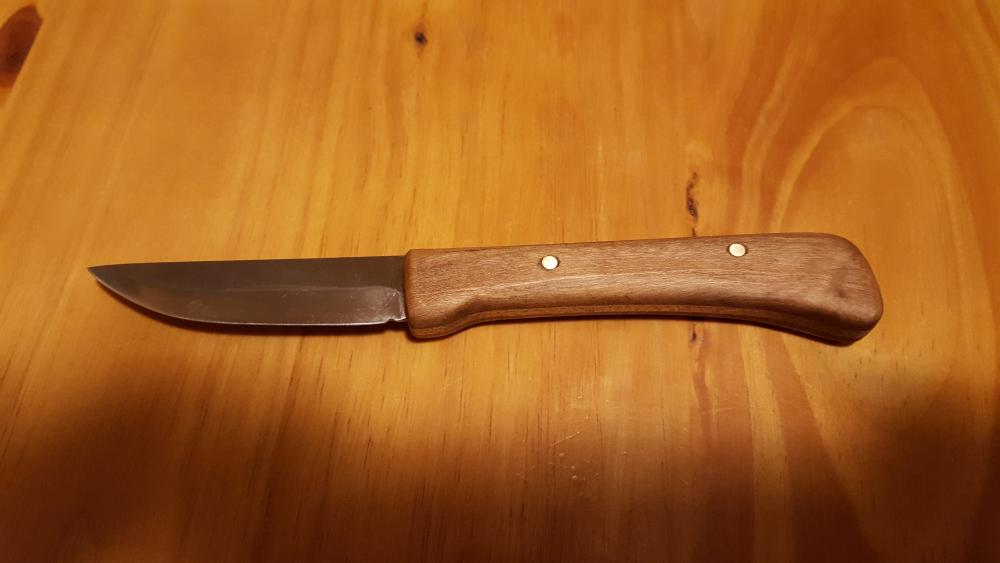
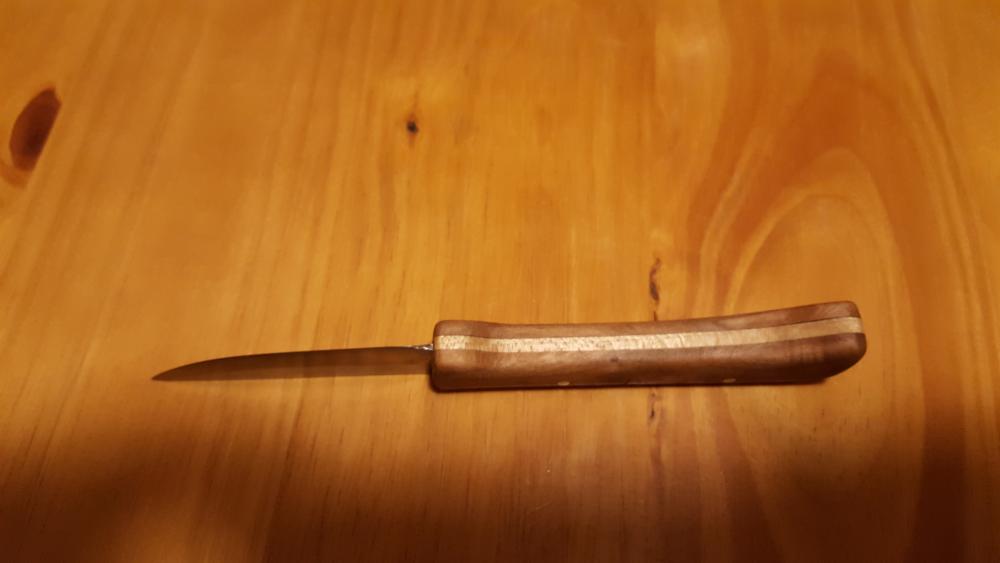
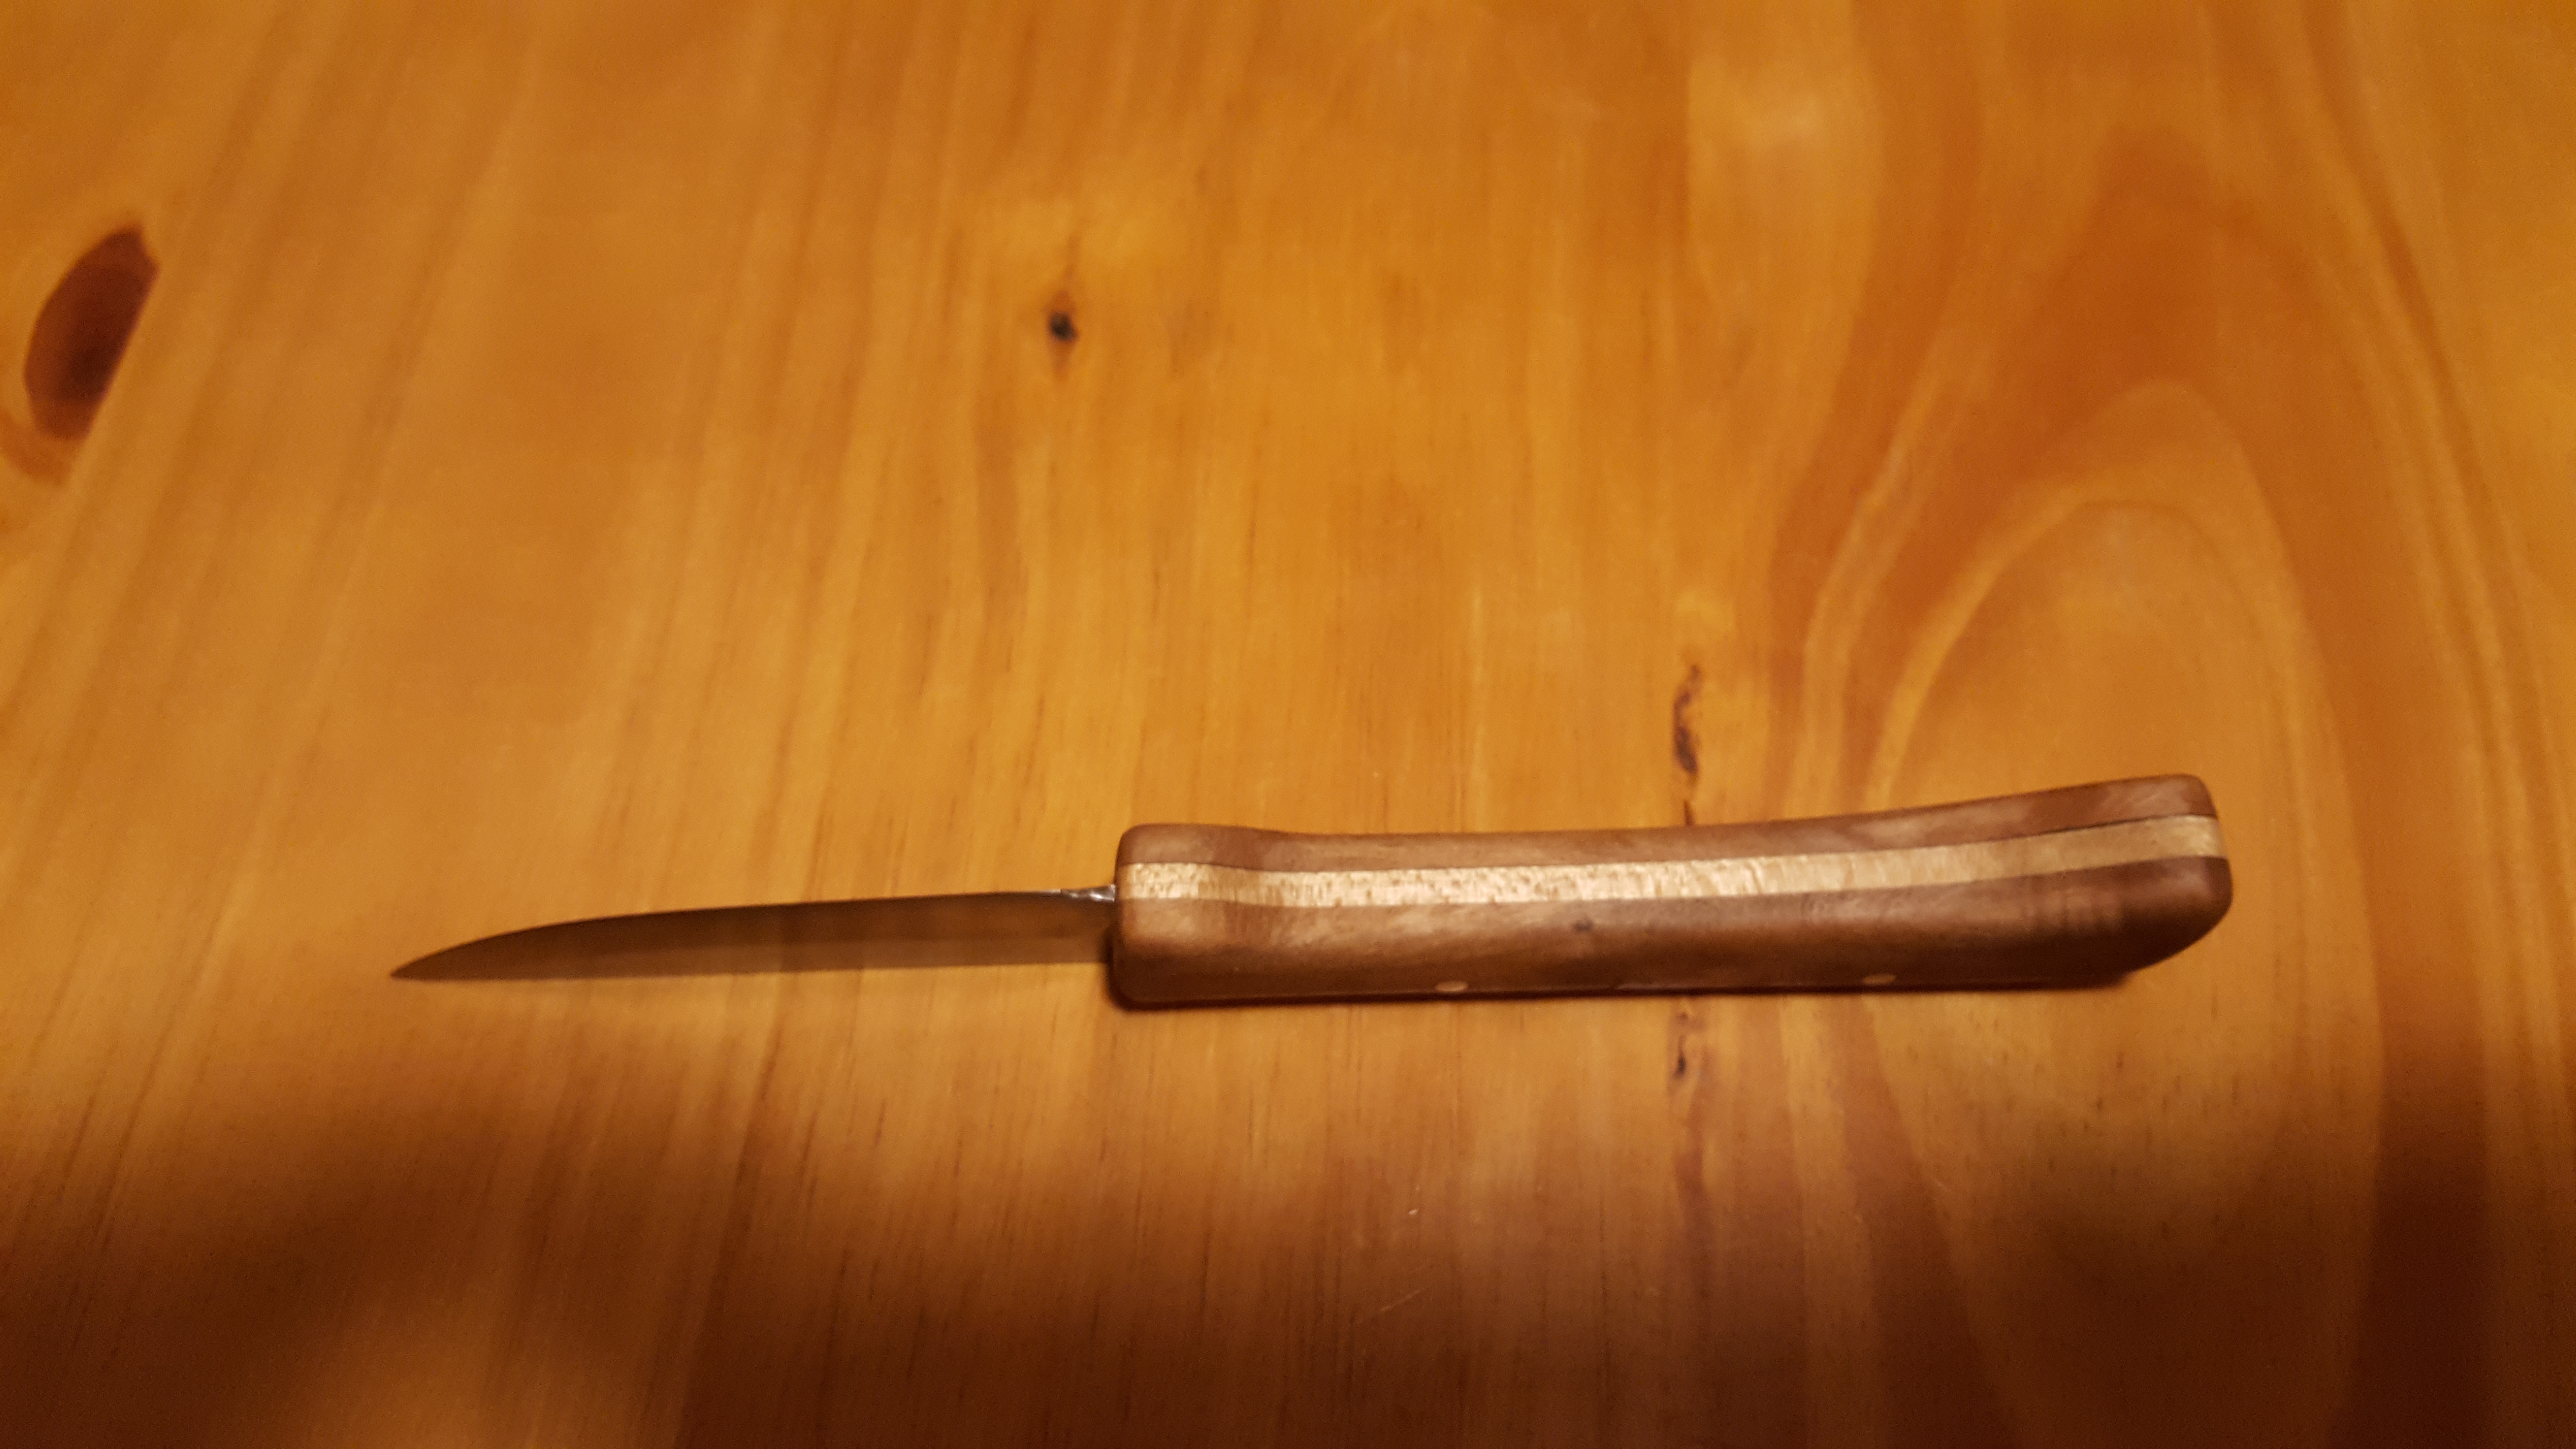
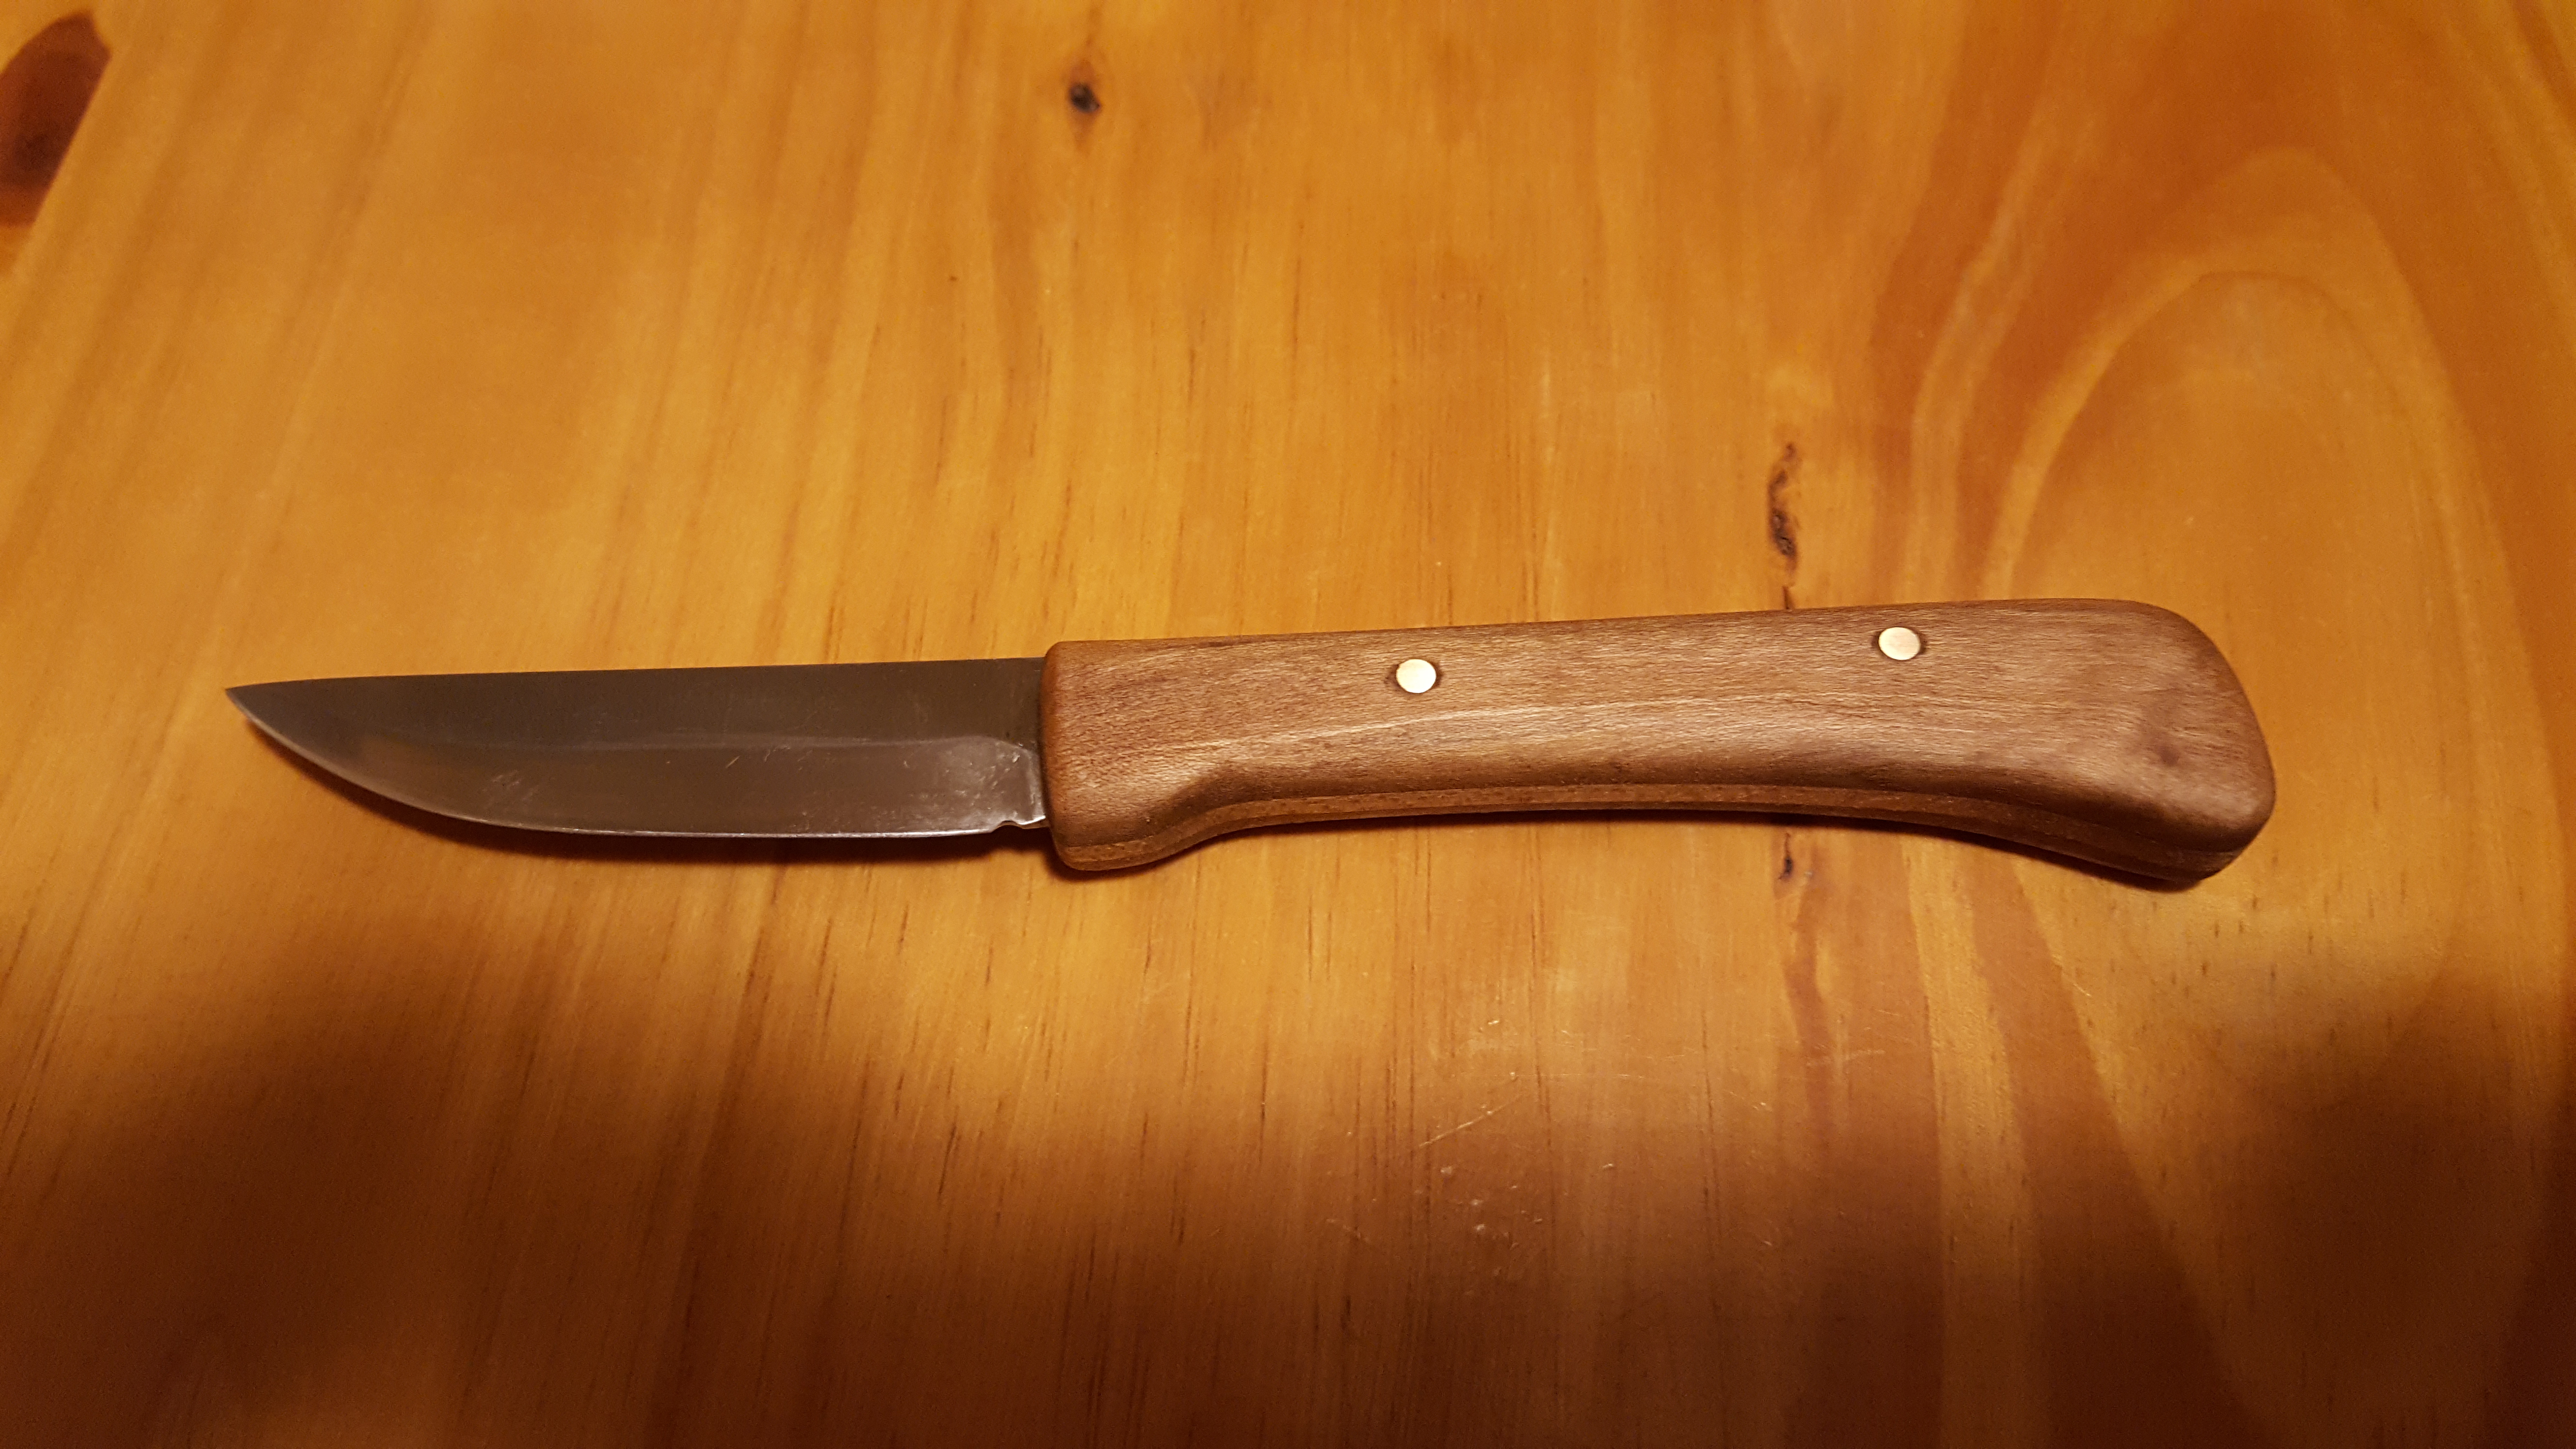
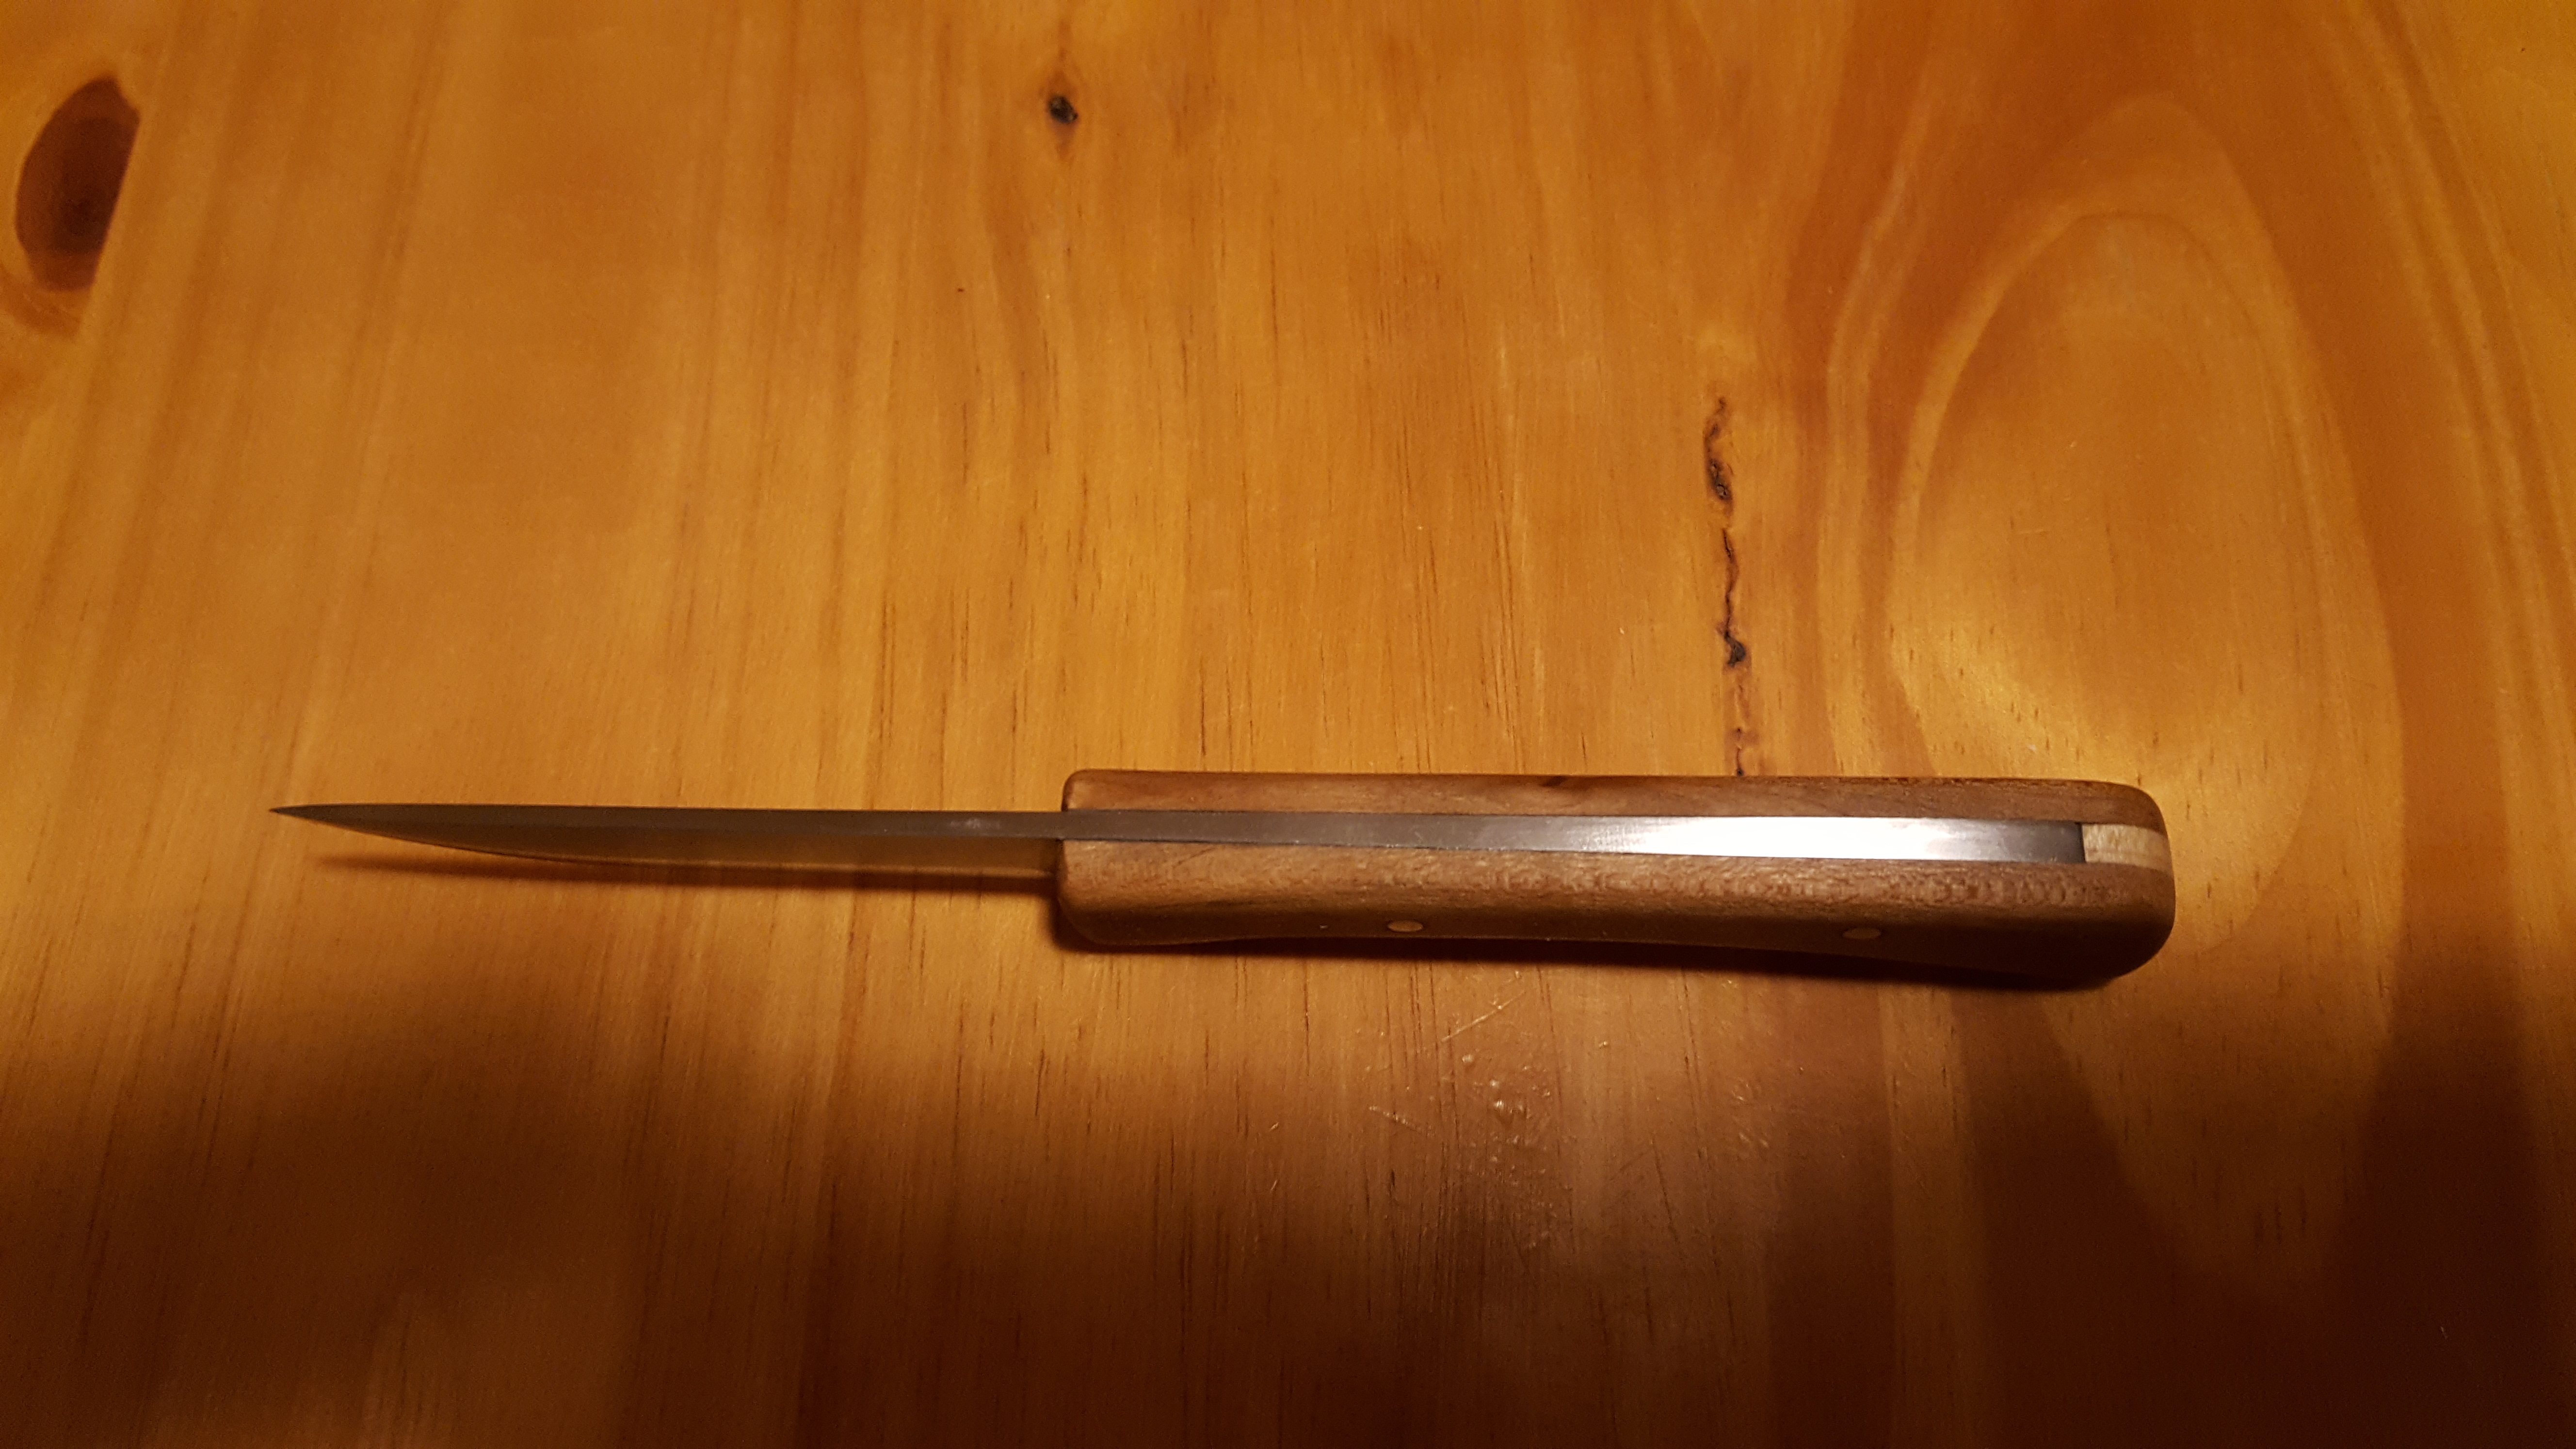
Finished the handel on my first knife and planted a tree and made a baby blanket.

-
"You might have misunderstood the previous replies. I believe the liquid (not gel) Colloidal Silicais the rigidizer itself."
Sorry for not being more specific. I was curious to a specific brand or type for forge application. I know nothing about the product. I was fishing for a direction to research more. My lack of knowledge about it is probably very obvious.
-
First let me say thanks for all the information. I appreciate people who are willing to pass on their experience and knowledge. Also, thanks for your patience. I know this topic must get old. There are almost as many options as opinions out there. Makes it hard to sort through. Especially when my main concern is simply safety and not the hundred other potential considerations.
Any suggestions for rigidizer?
-
Just a quick search for colloidal silica show liquid and a gel. I'm currently at work so I have limited time for research. Which would work? My inside wrap of blanket was approximately 12 x 20 inches. How much would it need?
-
So after a few years of wishing, I finally built one. I used ceramic blanket for lining, 2 inches. I've read a lot of information on forms to get to this point. Thanks everyone.
The more I read, I am under the impression, that for safety reasons I need to coat the ceramic blanket. There are no shortage of discussions, opinions, or options on coatings. My only concern, however, is safety. What is my cheapest option to make my forge safe to use?
Right now I just don't use it enough to be hung up on efficiency. I can be hot enough to forge in just a few minutes.
Thanks in advance.


Burners 101
in Gas Forges
Posted
Frosty,
Thanks for the input. It may be a couple of days before I can get back to it. I will update when I do.