

Riaan
-
Posts
9 -
Joined
-
Last visited
Content Type
Profiles
Forums
Articles
Gallery
Downloads
Events
Posts posted by Riaan
-
-
15 hours ago, ThomasPowers said:
Using one hobby to further another---double plus good!
Thanks alot
13 hours ago, JNewman said:Either clamp the mould closed or put some weight on the top of the mould and you will get much less flash. You have hydraulic pressure from the liquid metal lifting your cope.
Hi JNewman,
Thank you for the advice, I will start weighing my cope down in the future.
-
On 9/13/2016 at 11:08 AM, ThomasPowers said:
Looks like a Melting furnace aka foundry and not a Smelting furnace; smelting is taking ore and making metal from it. So which one is it?
Hi Thomas,
It`s a melting furnace.
I saw I made the mistake after I posted
Regards
Title corrected
-
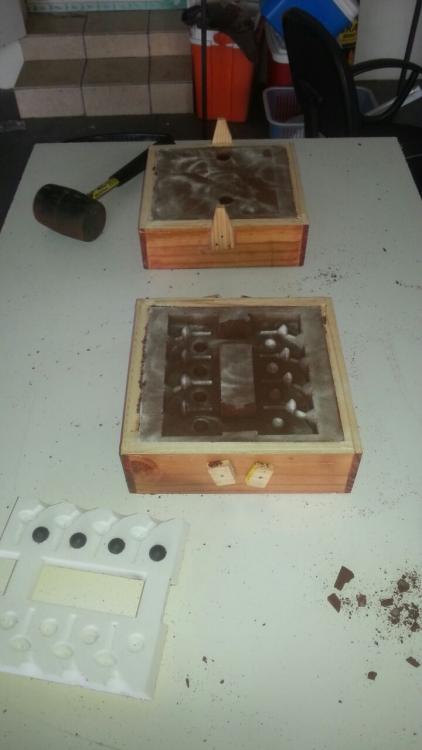
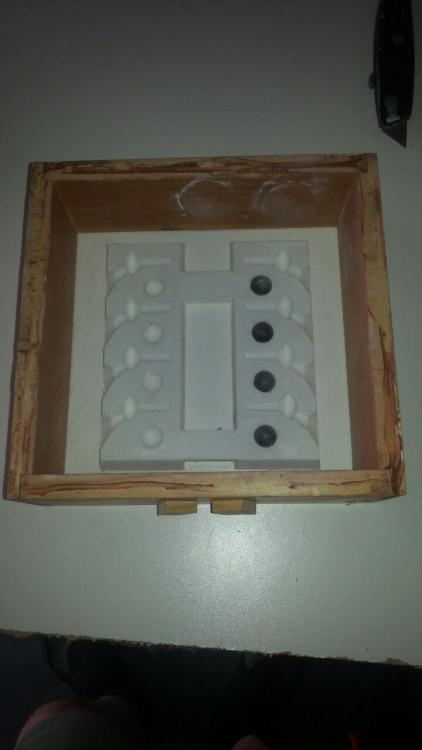
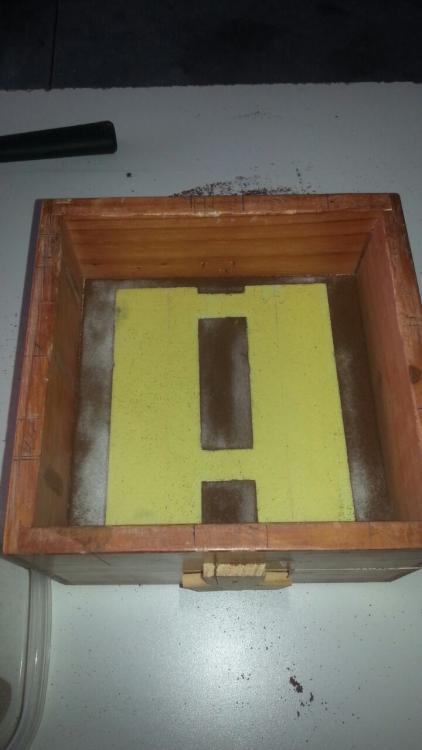
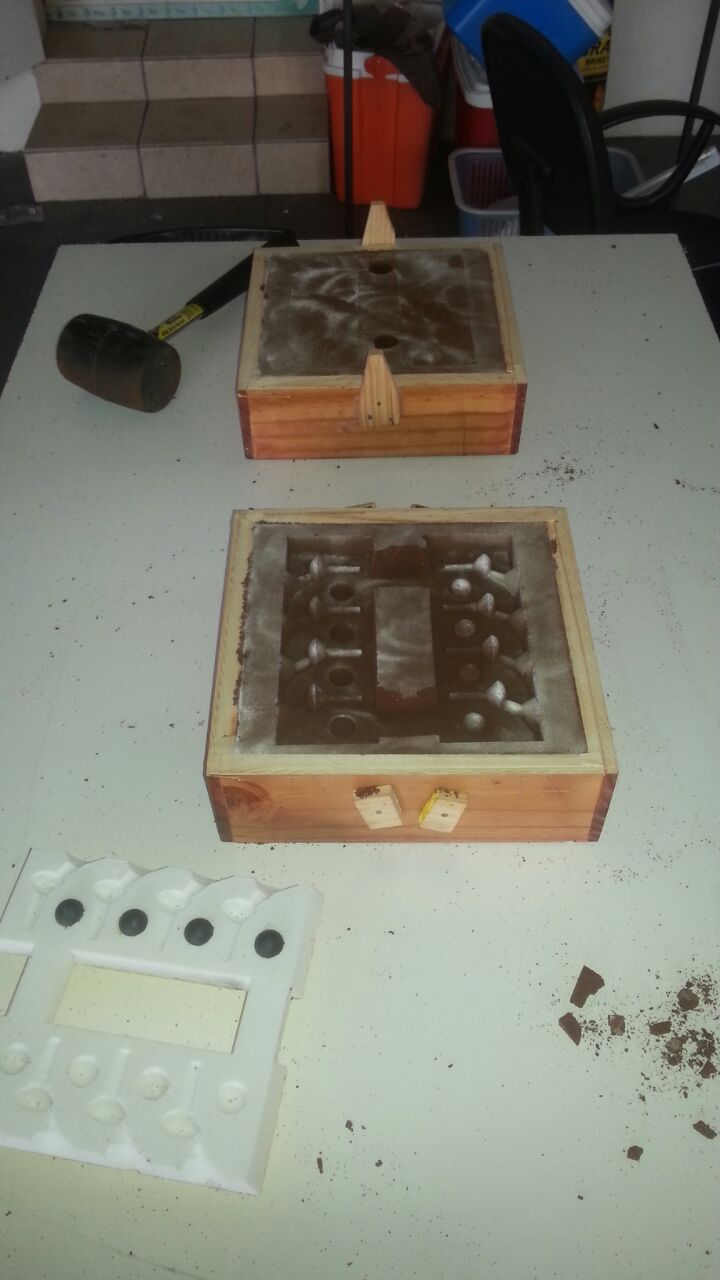
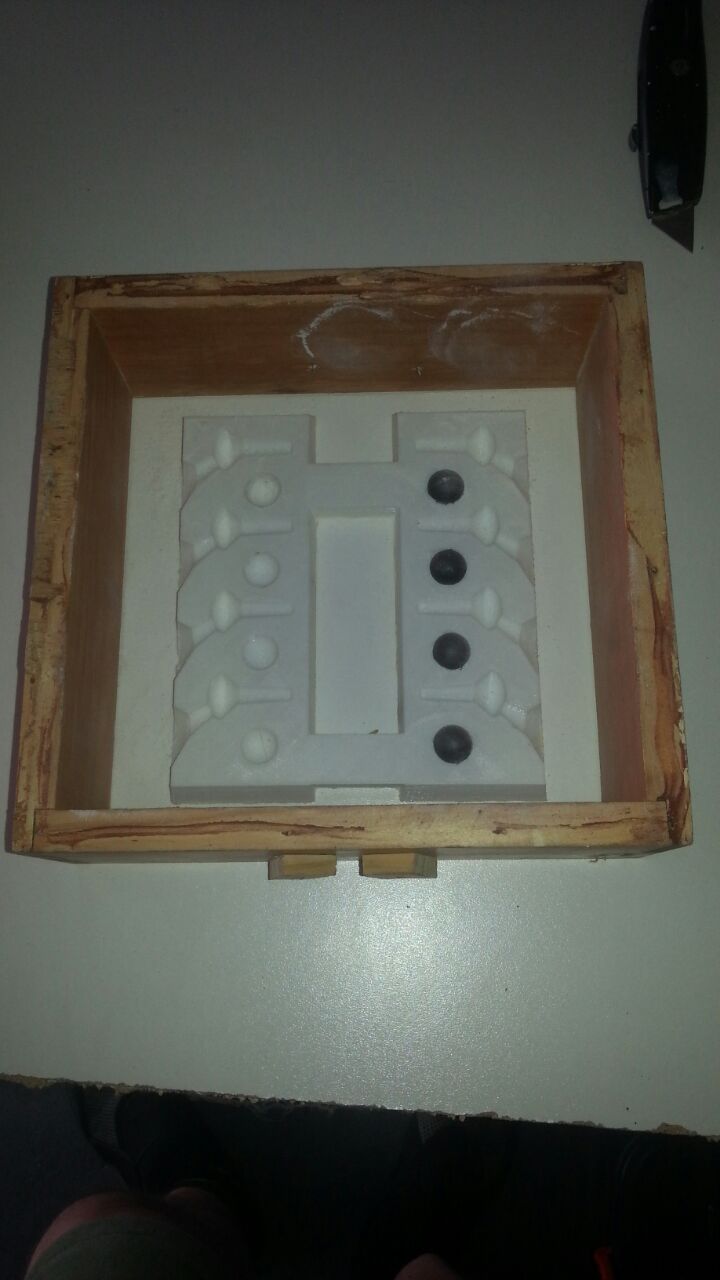
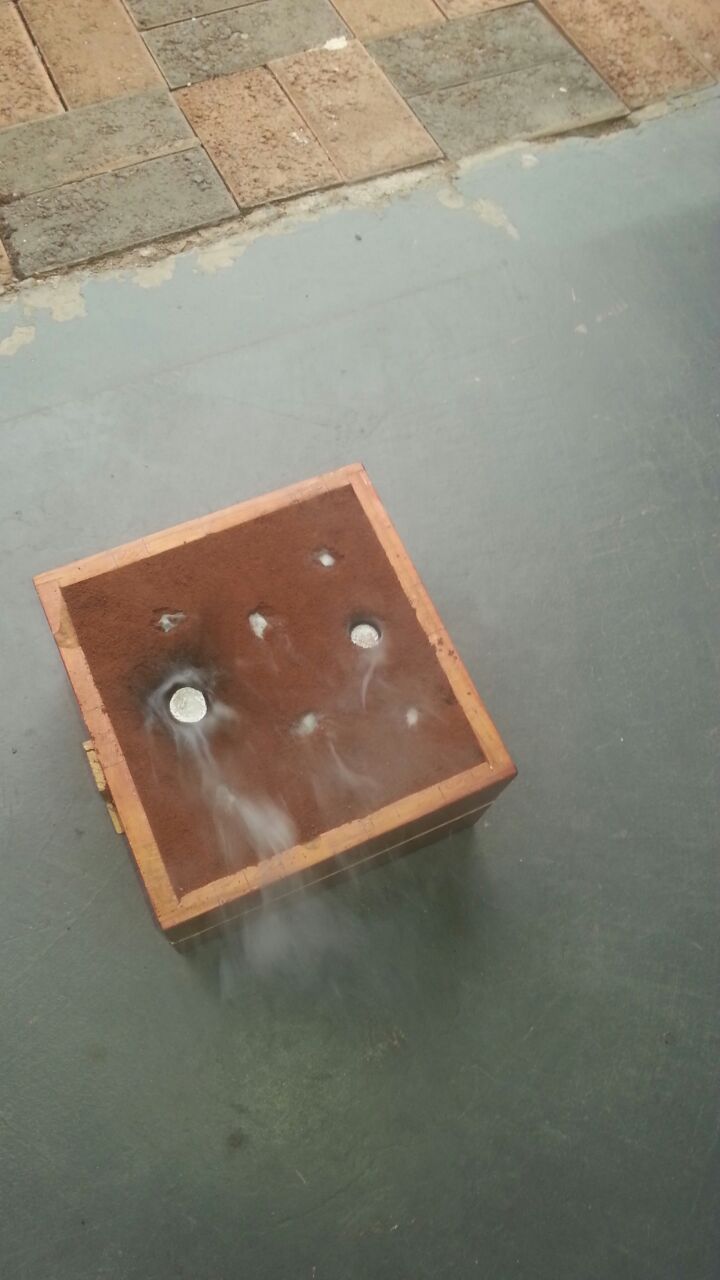
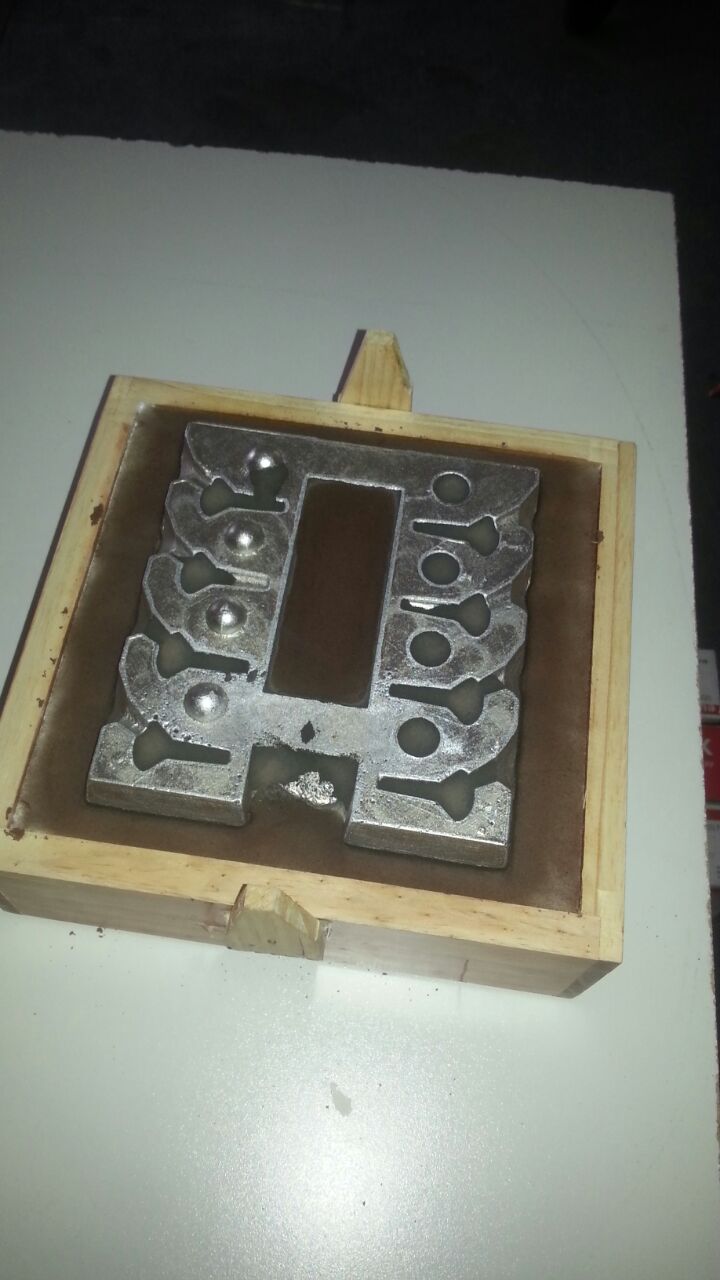
Hi guys,
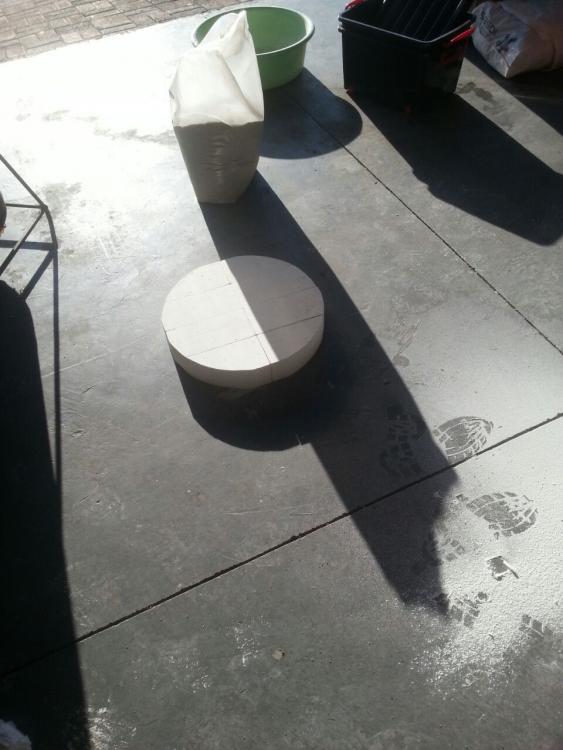
I finally have all the equipment pieces in place to tackle small casting projects.
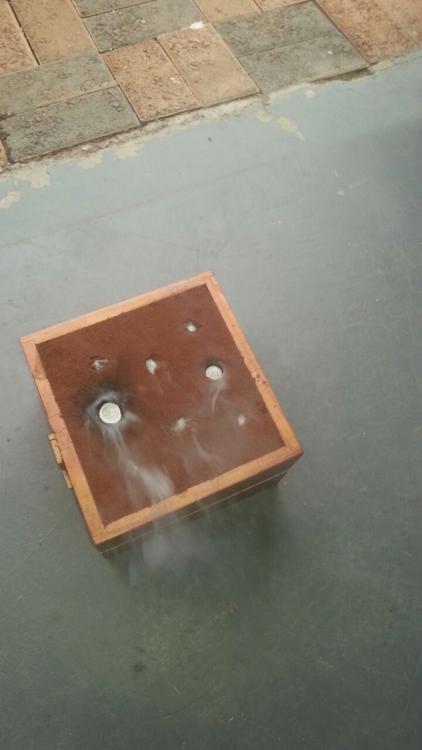
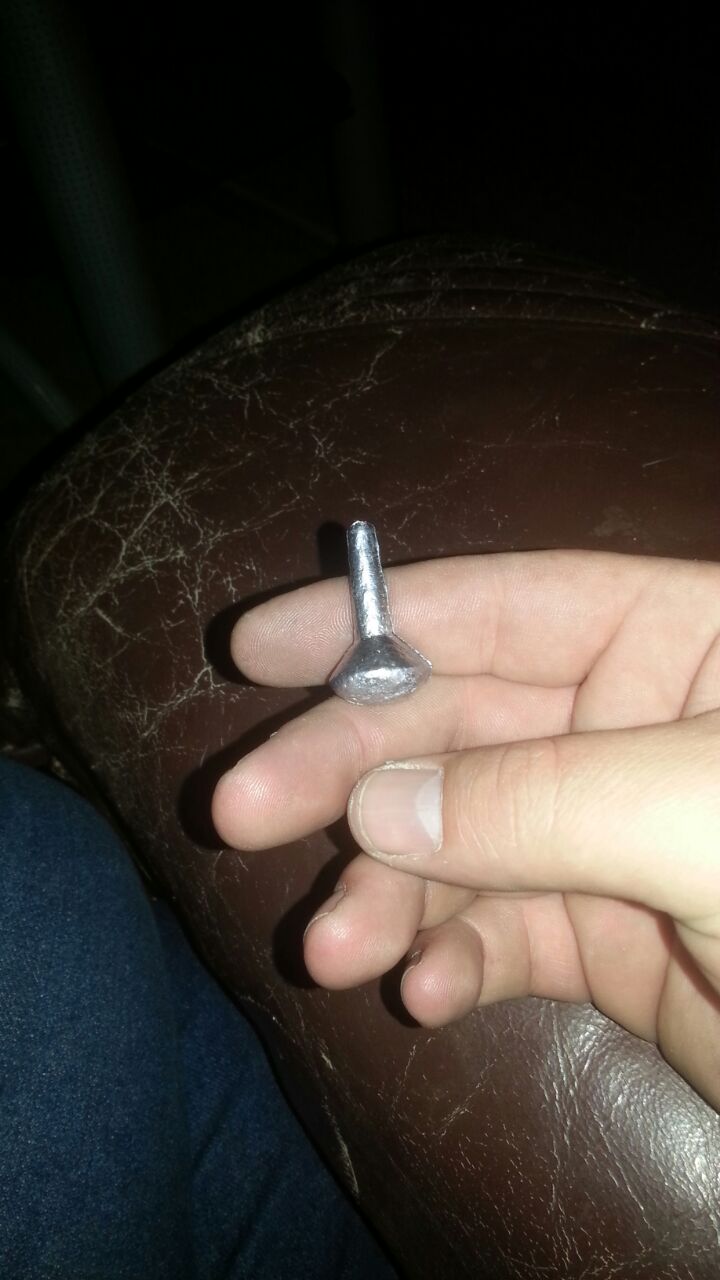
The first one is a mould for my favourite fishing sinker and even with all the power outages I managed to get a decent print (took me 5 tries).
What do you guys think?
Regards


-
Hey guys,
I`m also trying to upload the video I made of my burner for your comments.
Regards
-
46 minutes ago, Buzzkill said:
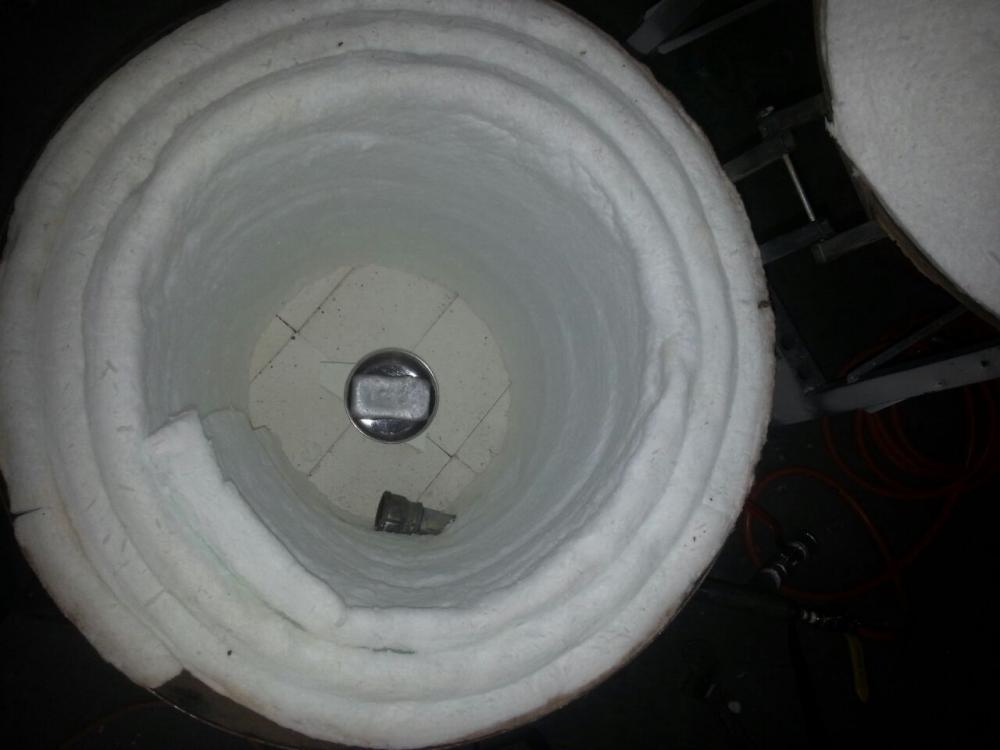
I'm no expert, but your melter seems to be a heck of a lot better than a lot we see on here. You had me nervous with the plaster of paris at the beginning though. A couple suggestions: Put some rigidizer on that ceramic blanket so it doesn't send lung- damaging particles into the air while in use. Also, a drain hole for when (not if) your crucible fails inside. The the whole thing should be over a bed of dry sand to contain that molten metal when the crucible fails. I can't tell if your crucible is sitting on a plinth to get it off the floor, but that's a good idea. Usually you have to make some channels in the floor so the liquid metal can run under the plinth and out the hole. All in all though, it looks like you have the principles down that will allow you to easily melt metal in your foundry.
Hi Buzzkill,
Thank you for the advice.
I hade a discussion with my refractory supplier and he informed me that the ceramic blanket he sold me was a new type (with thinner, longer and more flexible fibres). He said that this new type of blanket should discharge very little if any ceramic particles out the exhaust and that the particles are proven to be relatively harmless. But I ordered the rigidizer as a safe measure and will install as soon as I receive it.
Yes the crucible is sitting on a makeshift plinth (refractory brick off-cut) in that picture but I have installed a permanent refractory plinth in the meantime.
I forgot to install a drain hole and I will do it before my next firing. I will cut and build drainage channels for liquid runoff and it will land in dry sand (Photos will be posted when complete). On that I still have a substantial amount of silica sand left from my build and also fire clay powder. Your thoughts on those to catch the liquid?
Regards
-
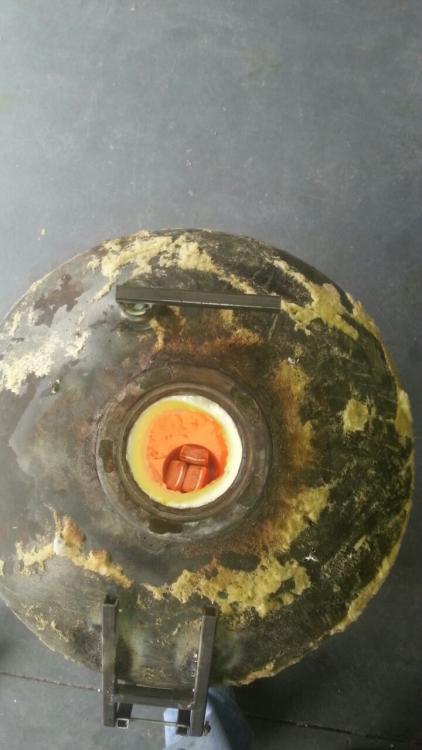
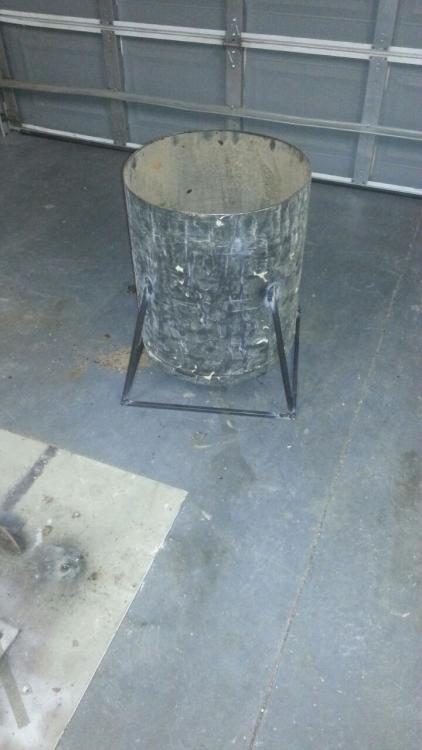
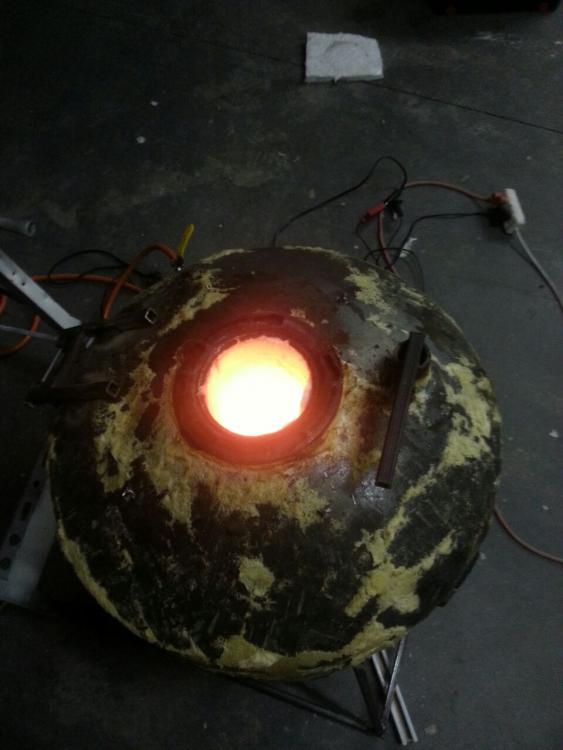
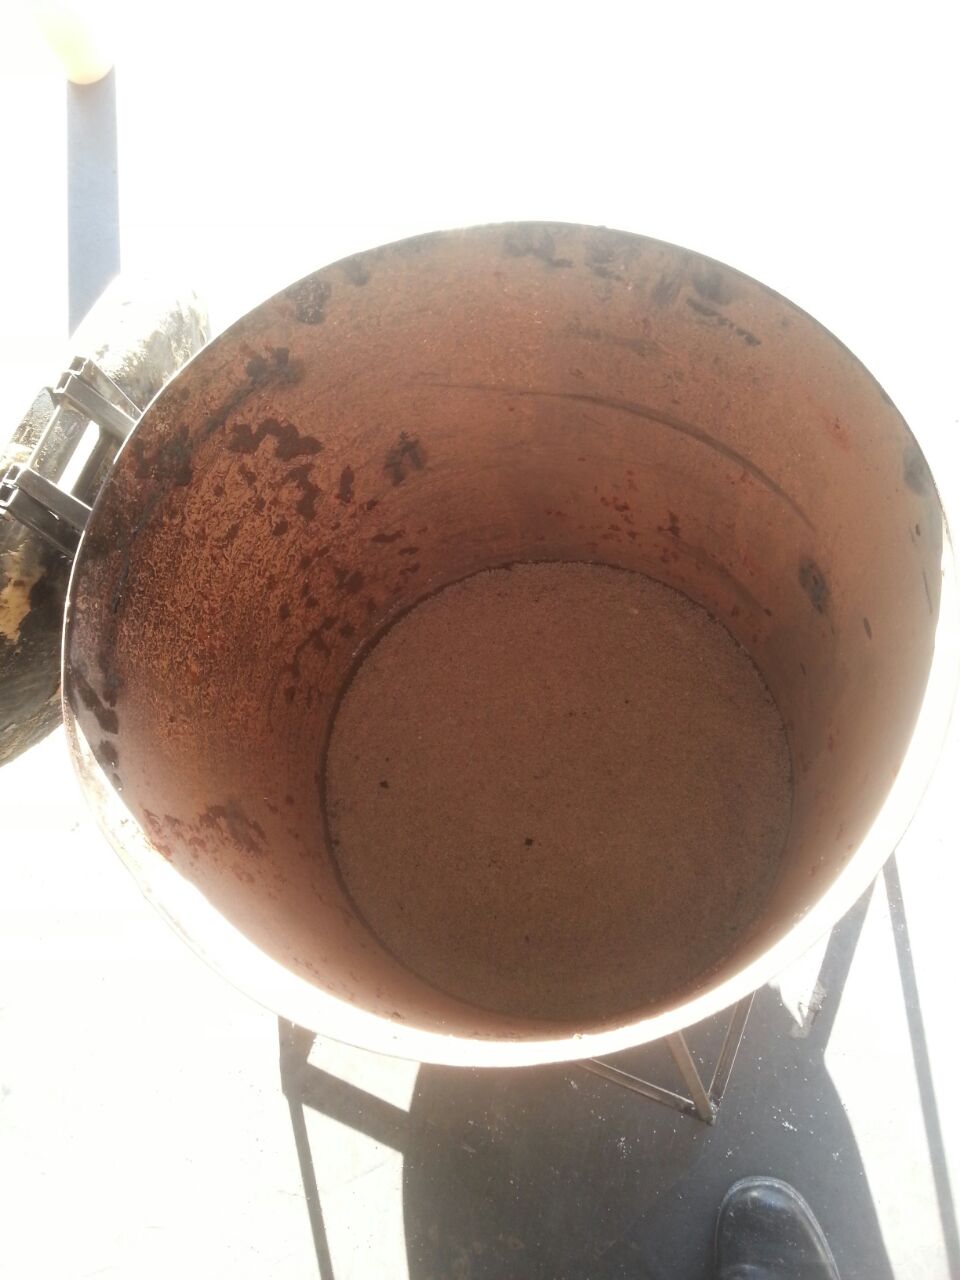
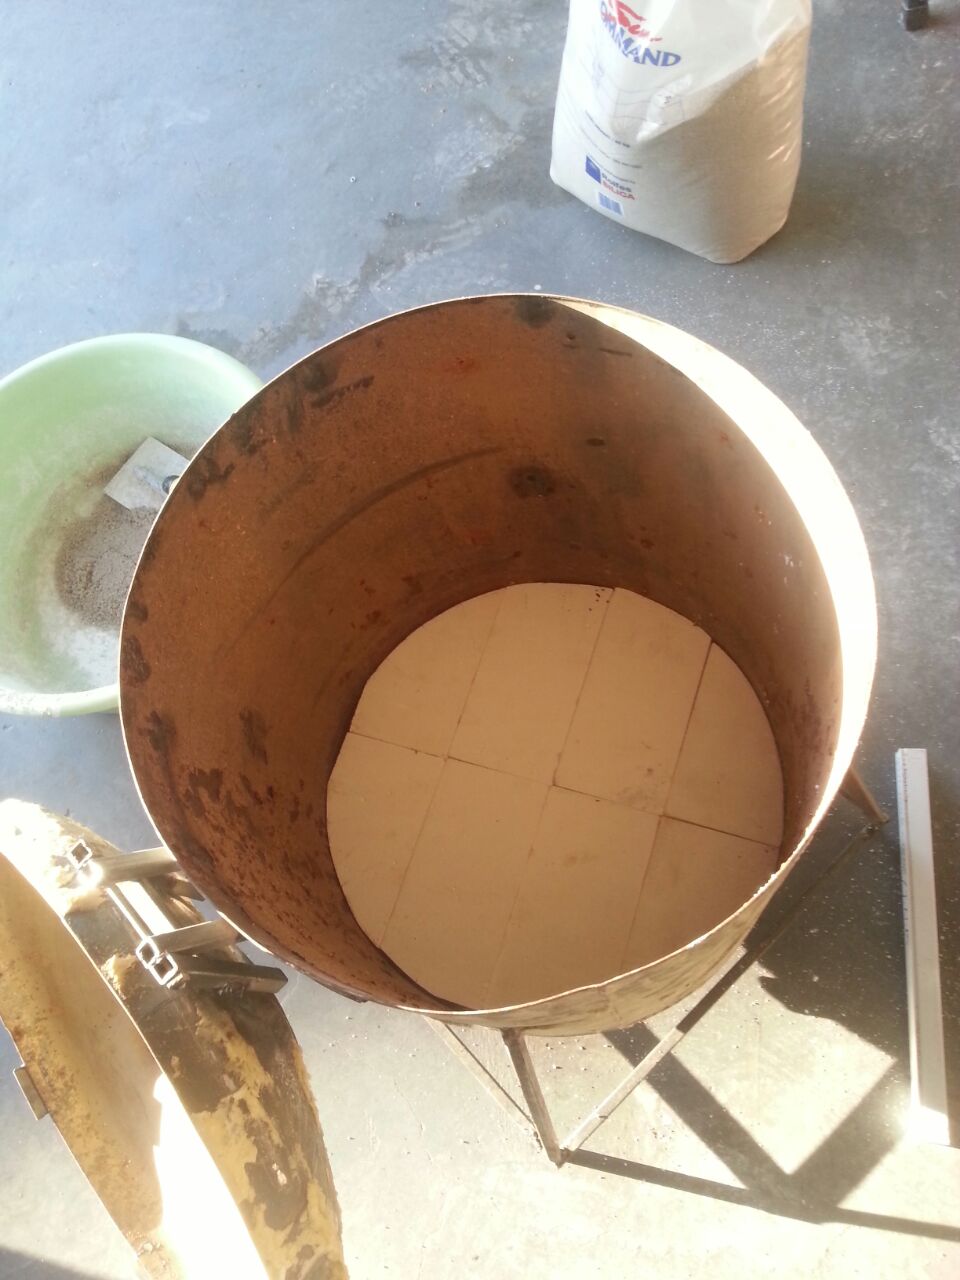
Hi guys,
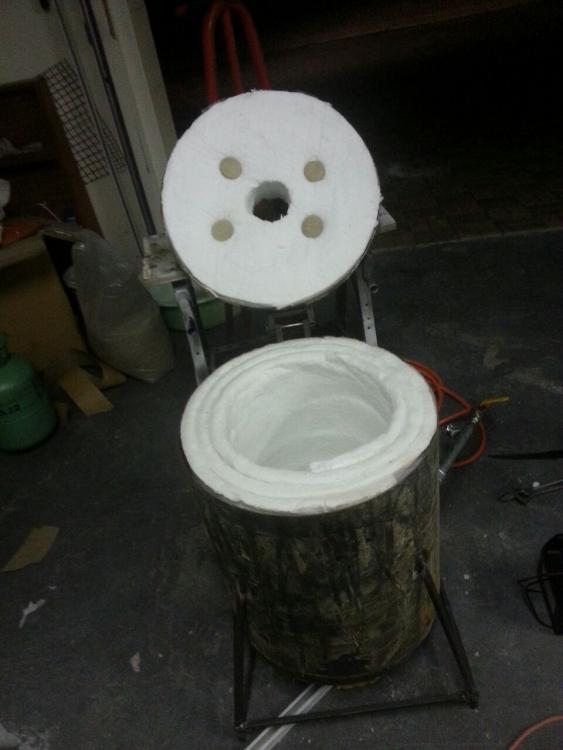
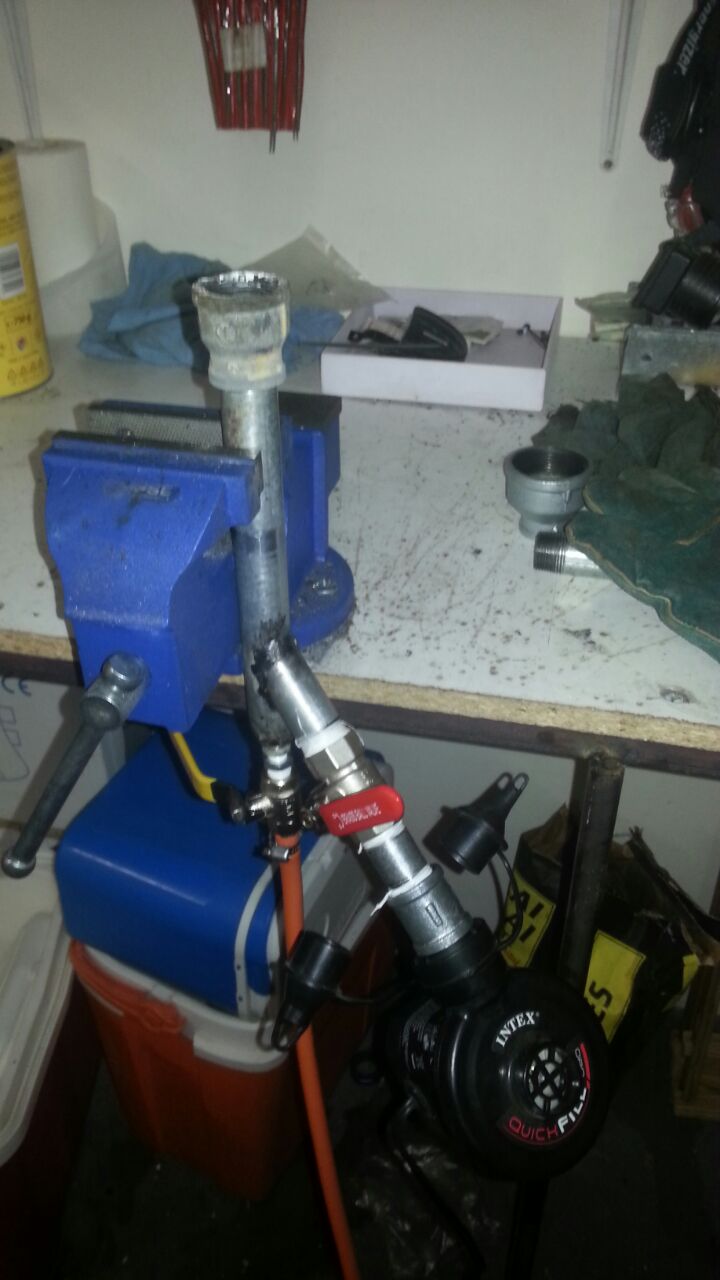
I build a new and improved smelting forge from a old water heater (Giezer in SA).
I stabilised the bottom with a mixture of silica sand and plaster of paris to get a flat working base. There after I placed a layer of refractory bricks. Lined the forge with 3 layers of 25mm rated at 1200 OC ceramic blanket. For the lid I stuffed all the offcuts underneath 2 circular pieces of ceramic blanket. This is kept in place by 4 ceramic buttons and filament wire.
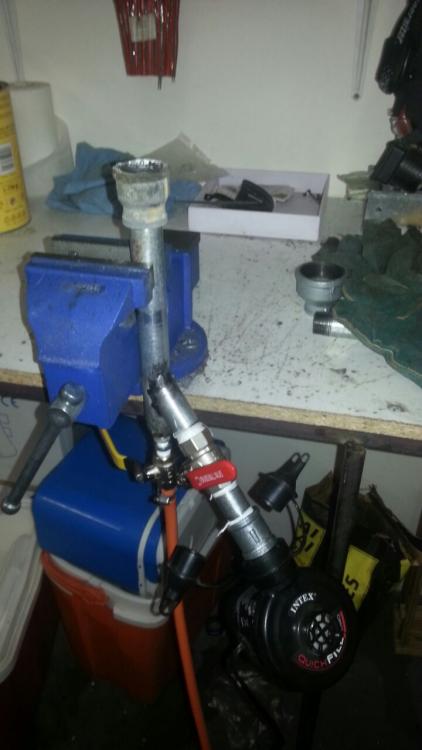
The burner is something of my own design. I only have butane gas readily available here in SA so after a lot of trial and error I finally got it right to control the gas and airflow accurately.
On my initial run I melted an aluminium ingot and realised that my flame is melting my ceramic blanket, therefore I tried installing 2 refractory brick wedges in the path of the direct flame but still keeping my flame in a circular rotation around my crucible (steel in this case) and it worked pretty good.
On my second run I tried a couple of brass fittings an old brass ingot which in the end blew up in my face due to phase lock. Don`t worry I was lucky on that one an had learned my lesson.
Please raise your comments on pictures added below, I would like to know what you guys think.
Regards


-
jmccostomknives,
Not that I was aware of.
Frosty,
Thanx for the advice and my brass collection made it's way to the recyclingbin shortly after I read your post. I will start collecting bronze instead. Luckily I was wearing the correct PPE at the time. I've got brass blobs stuck to my gloves, apron and face mask.
-
Hi guys,
I had a terrible experience last night. I tested my new furnace and tried some brass ( pipe fittings and an ingot). The pipe fittings melted quite easily but the brass ingot did not want to go. After a while I decided to pour out what was pourable and save the rest for later when I figured out why it did not melt. But as soon as I moved the crucible the ingot exploded sending molten brass everywhere. I cannot find reason for this anywhere and would like to prevent this from happening in the future.
Do you guys have any advice?


First project from scratch - mushroom sinker mould - Queenstown/South Africa
in Smelting, Melting, Foundry, and Casting
Posted
Hi Frosty,
I will definitely try ganging up the sinkers to up my productivity since this sinker in particular is a high commodity among anglers in SA and they are quite expensive as well. So naturally I will eventually try to sell them to local fishing shops.
The flashing on the sinker problem started out when my electricity company decided that my printer are not allowed to finish printing. ie. the black spots on the printed mould are actually severed pawn heads from an old chess set I had sitting around. These heads are almost the same as what was needed but this mould still needs some work t ensure a flat contact between the two halves. Meanwhile I printed new hemispheres on the correct size and glued them on. I will try them like this as soon as my melting furnace are complete.(ridgidizer and drainage hole still needed)
I will design a new mould and post it for comment. Thank you for all the advice.
Regards
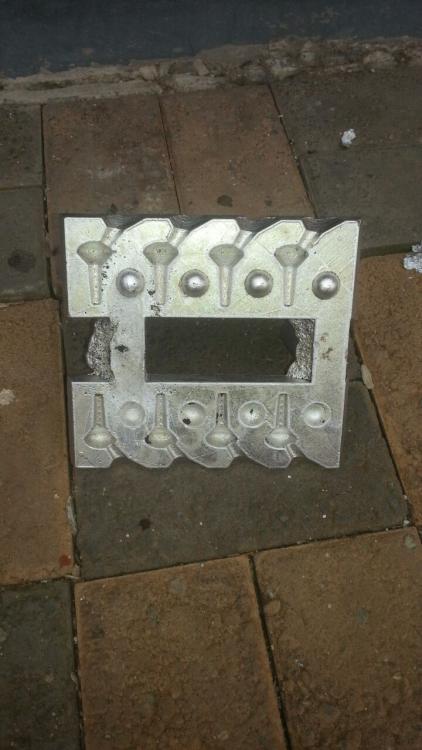
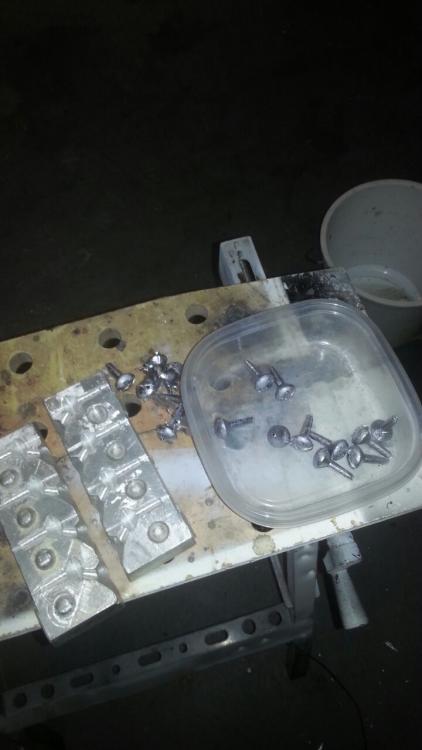
Kozzy,
If I must say, I`m quite chaffed with the flatness of the adjoining surfaces but I will definitely look into making the alignment pins detachable in order to get the surfaces flattened.
If I can ask, I would like to start using sand cores. Any advice?