
.jpg.6ee56b6008eda4a03954b1889f0badfd.jpg)
markknx
-
Posts
33 -
Joined
-
Last visited
Content Type
Profiles
Forums
Articles
Gallery
Downloads
Events
Posts posted by markknx
-
-
Search auto salvage, Some of these have you pull it. but better than that they have a few piles of just scrap metal.
Mark
-
Yes that is what I am talking about. how did you highlight them? that is pretty handy.
-
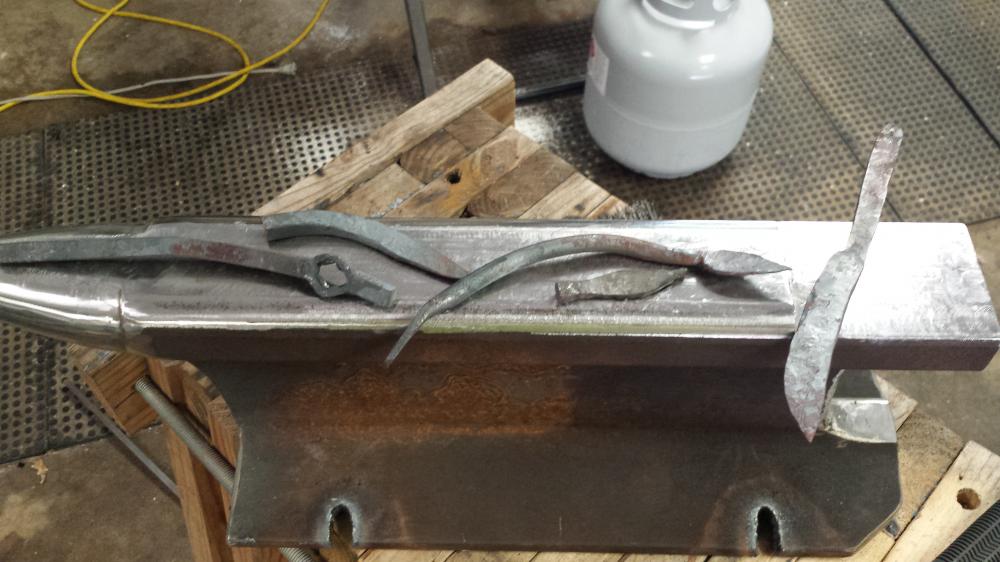
Yes Charles that would be them one more is laying right in front of the anvil base. looks like that boxed in area would hook something to bend or hold it.
Mark
-
Very nice, thanks for sharing. imagine the tips and tricks this guy must have had. Looks like he stock some items, like pliers, hooks and horse shoes.
I have a question about a tool there. There is a set of somewhat scrolled bars on the ground to the right of the anvil, they have a lever coming off the more curled end. Anyone know what they are?
Mark
-
Frosty will do. Yeah I noticed on the leaf I tried to make that I cut just a tad to deep and sharp
Thanks again guys
Mark
-
Charles, yeah I have a habit going a little over board when it comes to setting up equipment. Yes as I saw I could have done those things, but I wanted to go this way.A duel mounting sound like a idea for me to think on. but the next step is to make some tongs. I don't mind the dropping of the part but I can't seem to pick the heat up with it.
I sure butchered my first attempt at a Square hole, lesson learned. seems I made the slit to big.Thinking it should be about the same as the corner to corner of the square. Well I have time to learn. I shall get better a few thousand more swings of the hammer and I may get pointing down.
Mark
-
I think you should spend more time hammering hot steel and less worrying about your anvil.
Well I was under the impression that I might need some thing to hammer on, not being a smith I most have just got that part wrong. I know I could have used a rock but I could not find one big/hard enough.
None the less I did get some time in hammering some hot steel so I get good enough to make some tongs so I stop dropping my work.
Mark
-
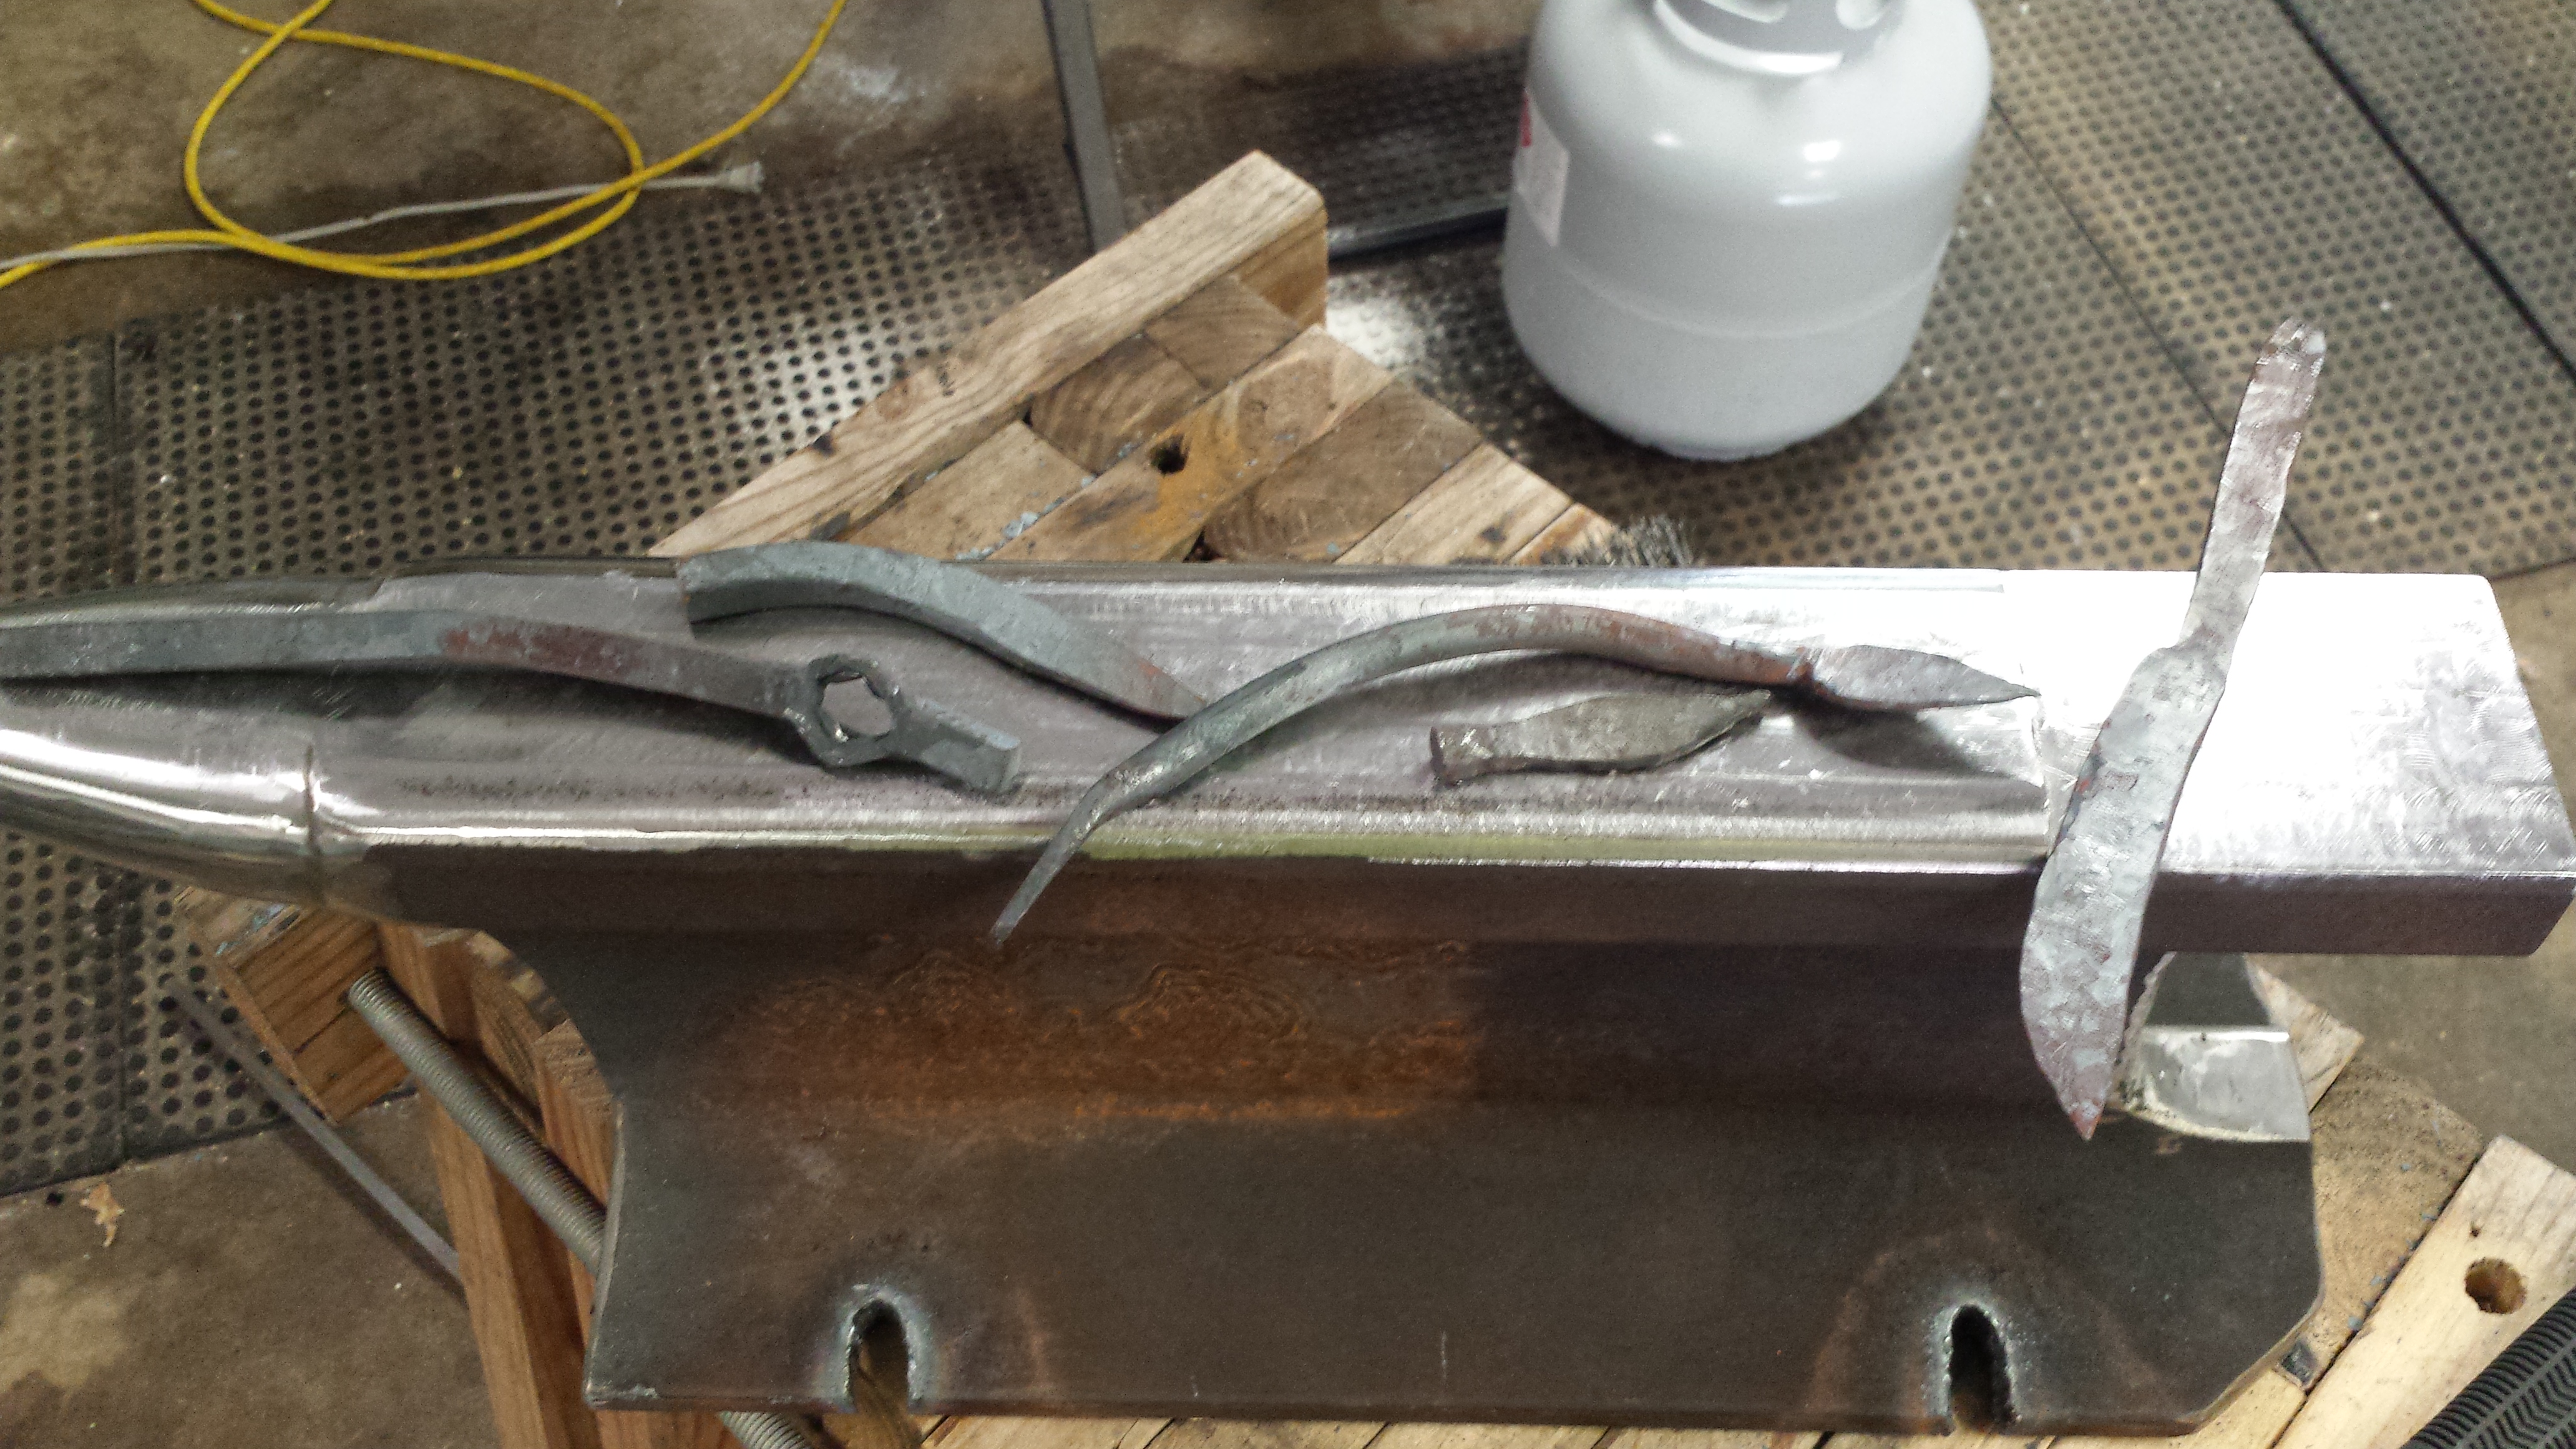
OK so this is what I have too start. I think I can get by with this. What do you guys think?
Mark
-
(Radish juice and worm water anyone?) Add some Rum and that sounds like a sailors drink.
Except those quench designations are based on 1" sq cross sections---is your blade edge 1" thick? For knife thicknesses it often slides them one category up and if you start having problems with cracking or warping it's good to remember this!
BigFootNampa, actually the quenching in a boy's urine comes from Divers Arts written by Theophilus. a German Monk, around 1120 A.D. He also mentions using the urine of a goat fed ferns for 3 days and gives instructions on how to go about getting it. For a number of odd quenchants there is a Renaissance list republished in "Sources for the History of the Science of Steel" C.S.Smith all claimed to make your steel harder and whiter! (Radish juice and worm water anyone?)
-
when you can time the deer roast and blade to be done at the same time.
-
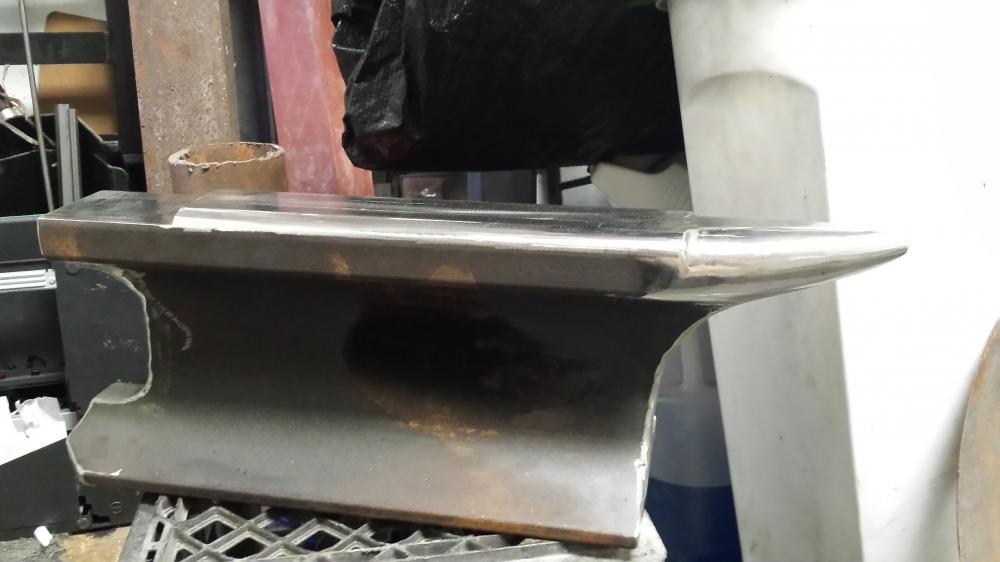
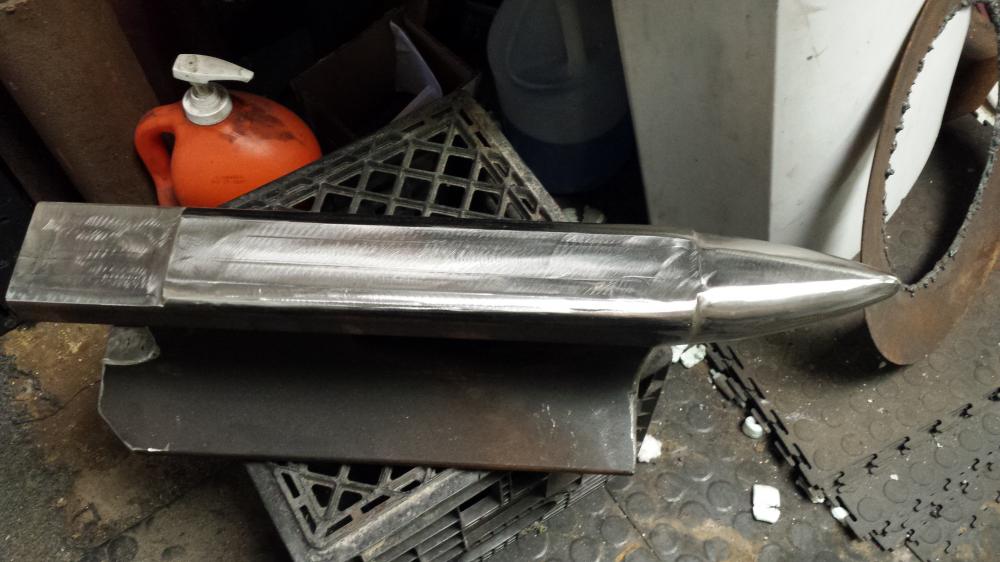
Thanks guys for all the ideas, all were good but I think my tunnel vision on the fact that most anvils have a hardy hole caused me to miss the obvious solution of holding them in a vice. as once I get back to work and money is available yes I may buy a better anvil, I will also be looking for a post vice. Square tube also a great idea. I had thought of a weld in plug. I also am considering adding some plate to the top to create a step at the horn. But all I have is A36 plate (hot rolled low carbon, Think structural Steel) not sure if that will be hard enough to hold up.
Crantius, great Idea in the index tab. And thanks for the link.
Mark
-
I am making my first anvil from a piece of RR track. I want to add a hardy hole and trying to think of the best way to do it. I can drill it to size, could I then heat it and drive a square punch in. or is there a better way? Any Ideas on a good size I have seen them in 3/4 and 1". the round hole should be no issue. I am new to Blacksmithing, but not to metal working. Any help will be appreciated.
mark -
Yeah but did you have you tube, IFI? You sound like you have been at it long enough that the internet was either real new or not at all. Great tool it is. but so many waste it on nothing but games. We should be the most informed and educated generation yet. But I am not seeing it! (end rant)
Thanks again and once I make some parts I will post for critique.
Mark
-
Frosty
Yes it will get a stand outside but in a way that it can be removed and put in out of the weather. No the label was just as vague as the web site. They package this for their use in the mills and other hot industries. I think I just jumped the gun. It blistered but it stayed for the most part. no cracking. many things will change if I make another. Learning curve but with guys like you and others here, also David Hammer, it came out well and useable. Now I just have to figure out how to use it. I called it cement so that was on me.
Thanks for all your advice and time.
Mark
-
Well it burns! I need to tune it just a bit I think. seems a little rich. the flame coming out of the doors is mostly orange. If I recall Frosty said it should be blue with a little orange. Cooling down now I will clean up the burner hole a little seemed I was catching it a bit with the flame once I do that I will see what I have. If not good then, I will try sliding the orifice back a little.
Here is a vid.https://www.youtube.com/watch?v=AZrmVm6m0zU
Mark
-
Frosty,
I used Vesuvius super #3000 Monolithic Refractory. I got it from a friend that does refractory work in a steel mill. Very true about the impatience ruining projects.
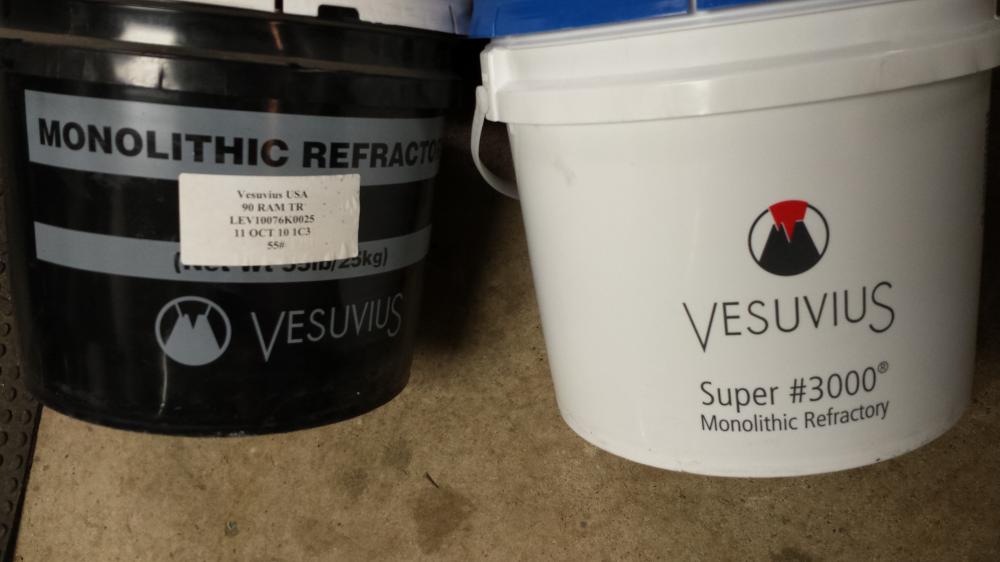
The one in the white bucket.
Mark
-
Very nice forge!
-
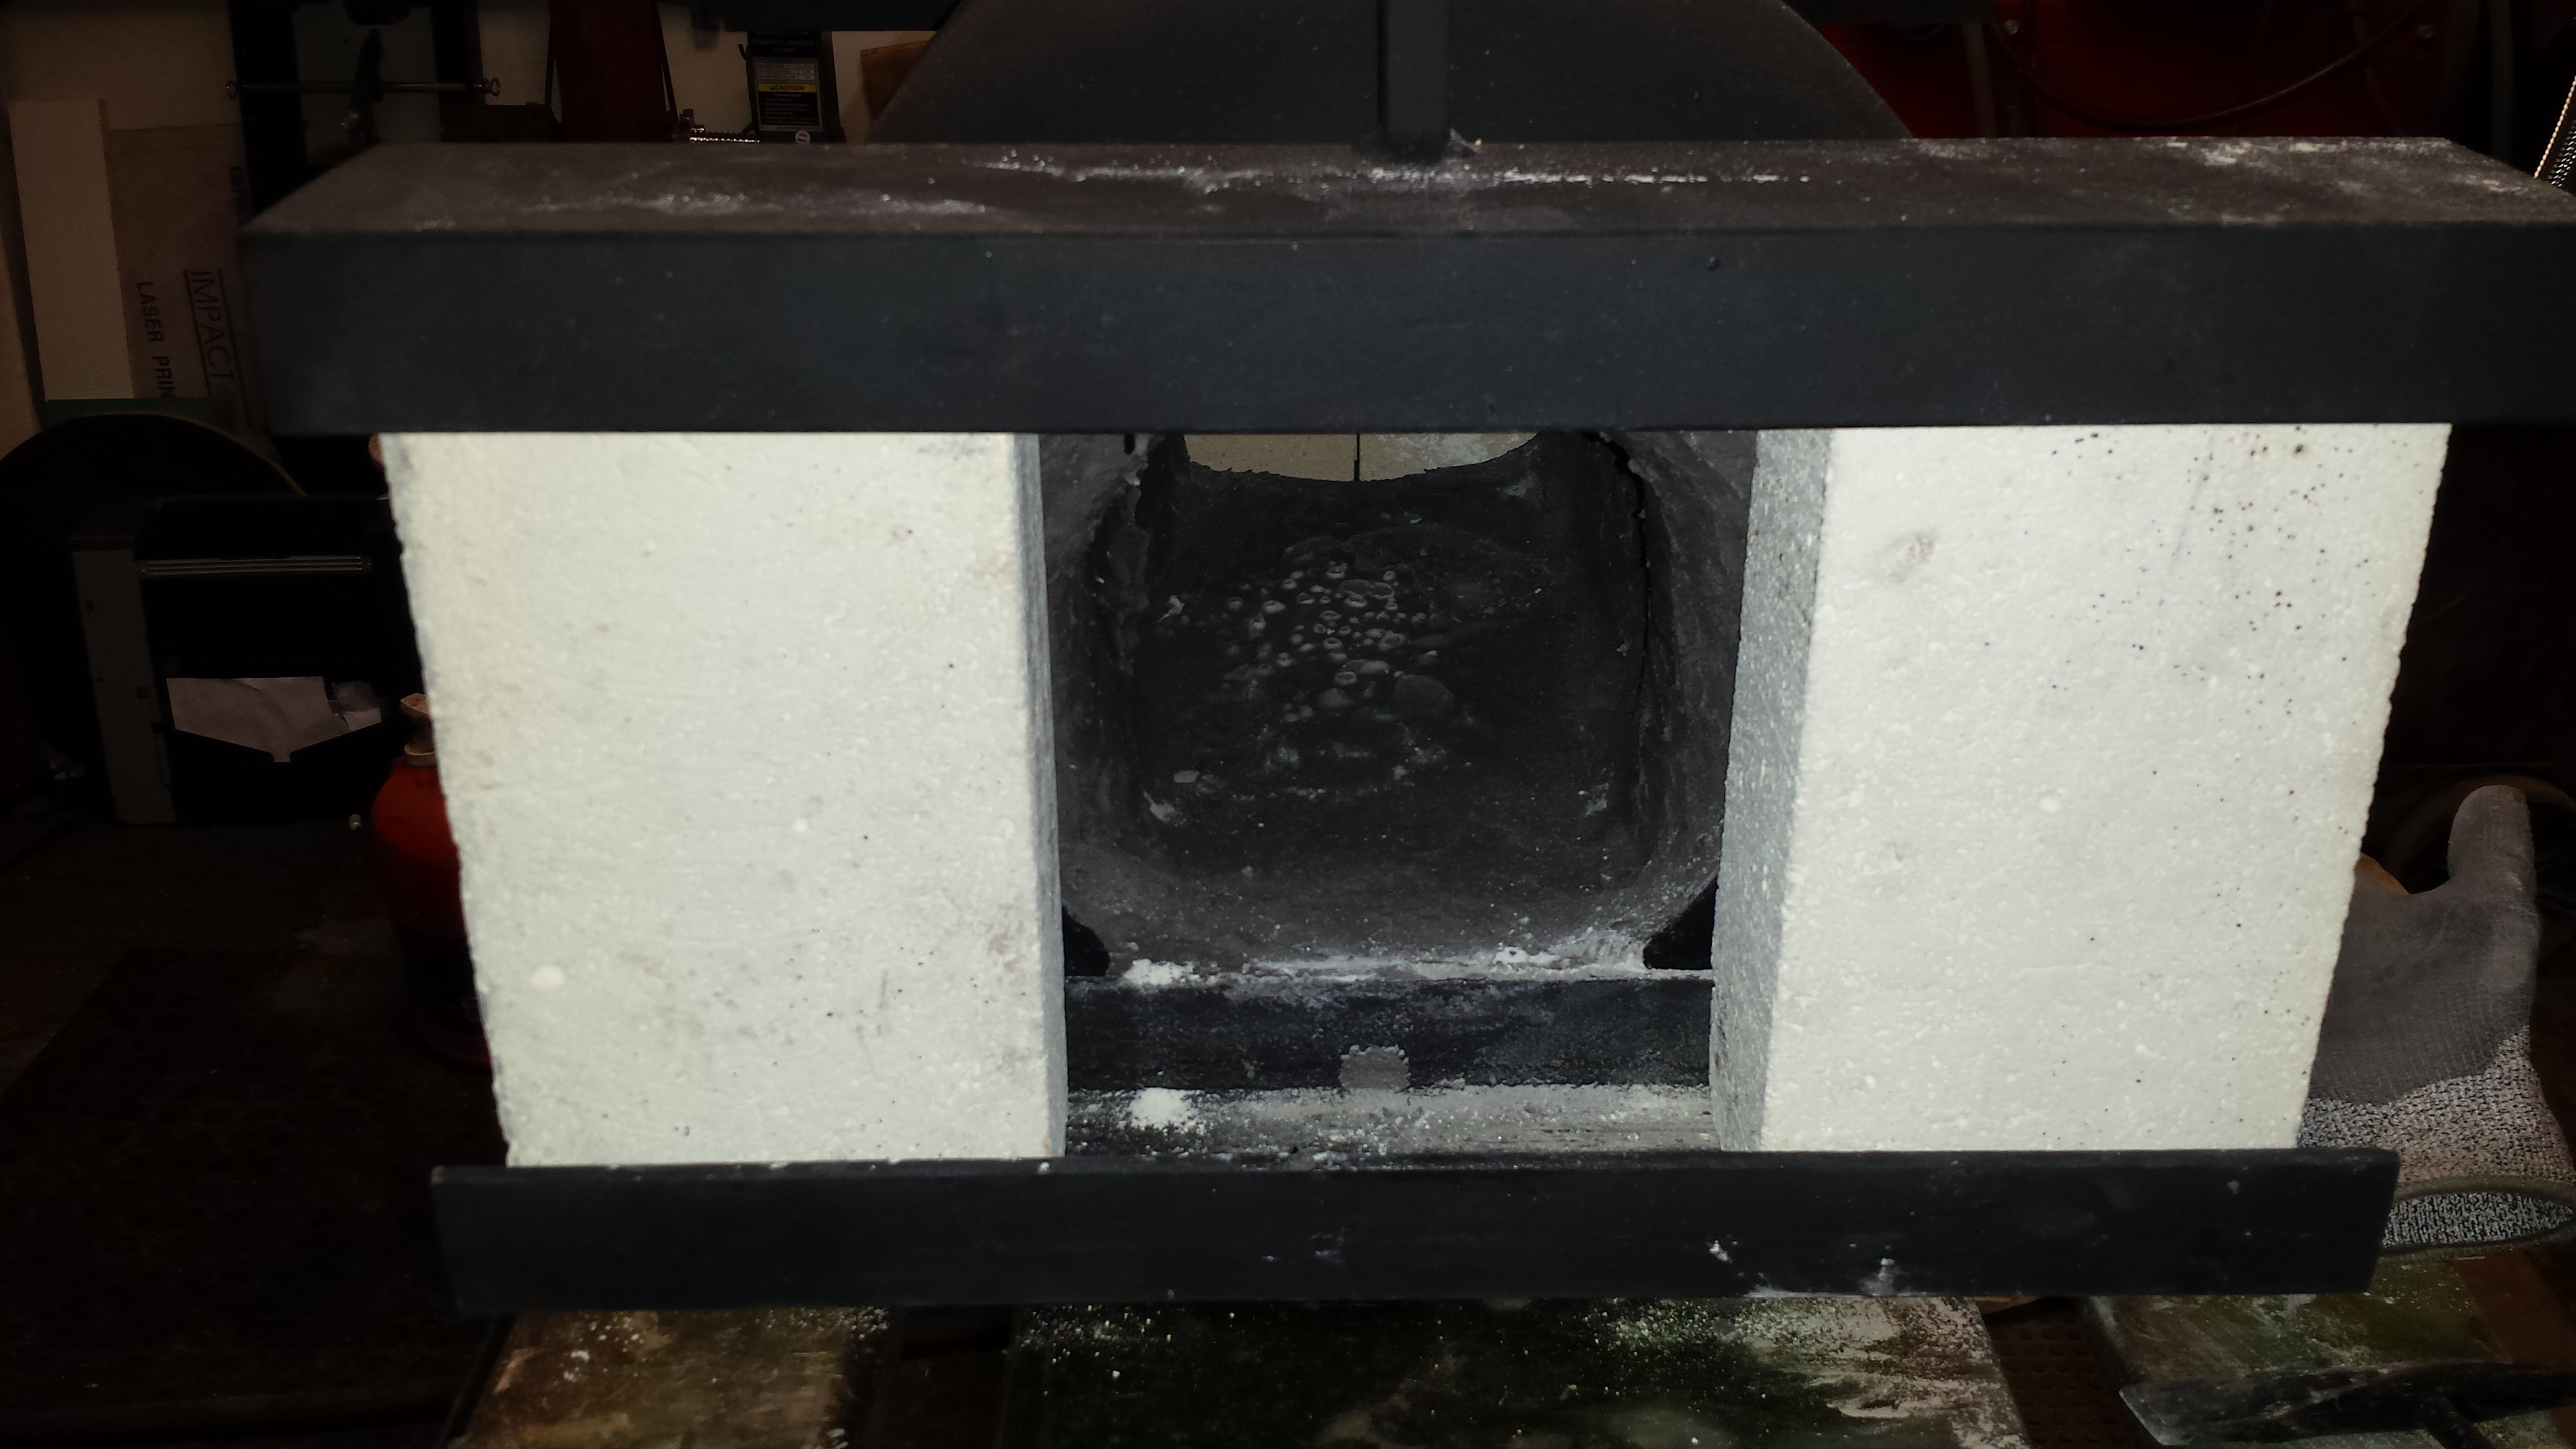
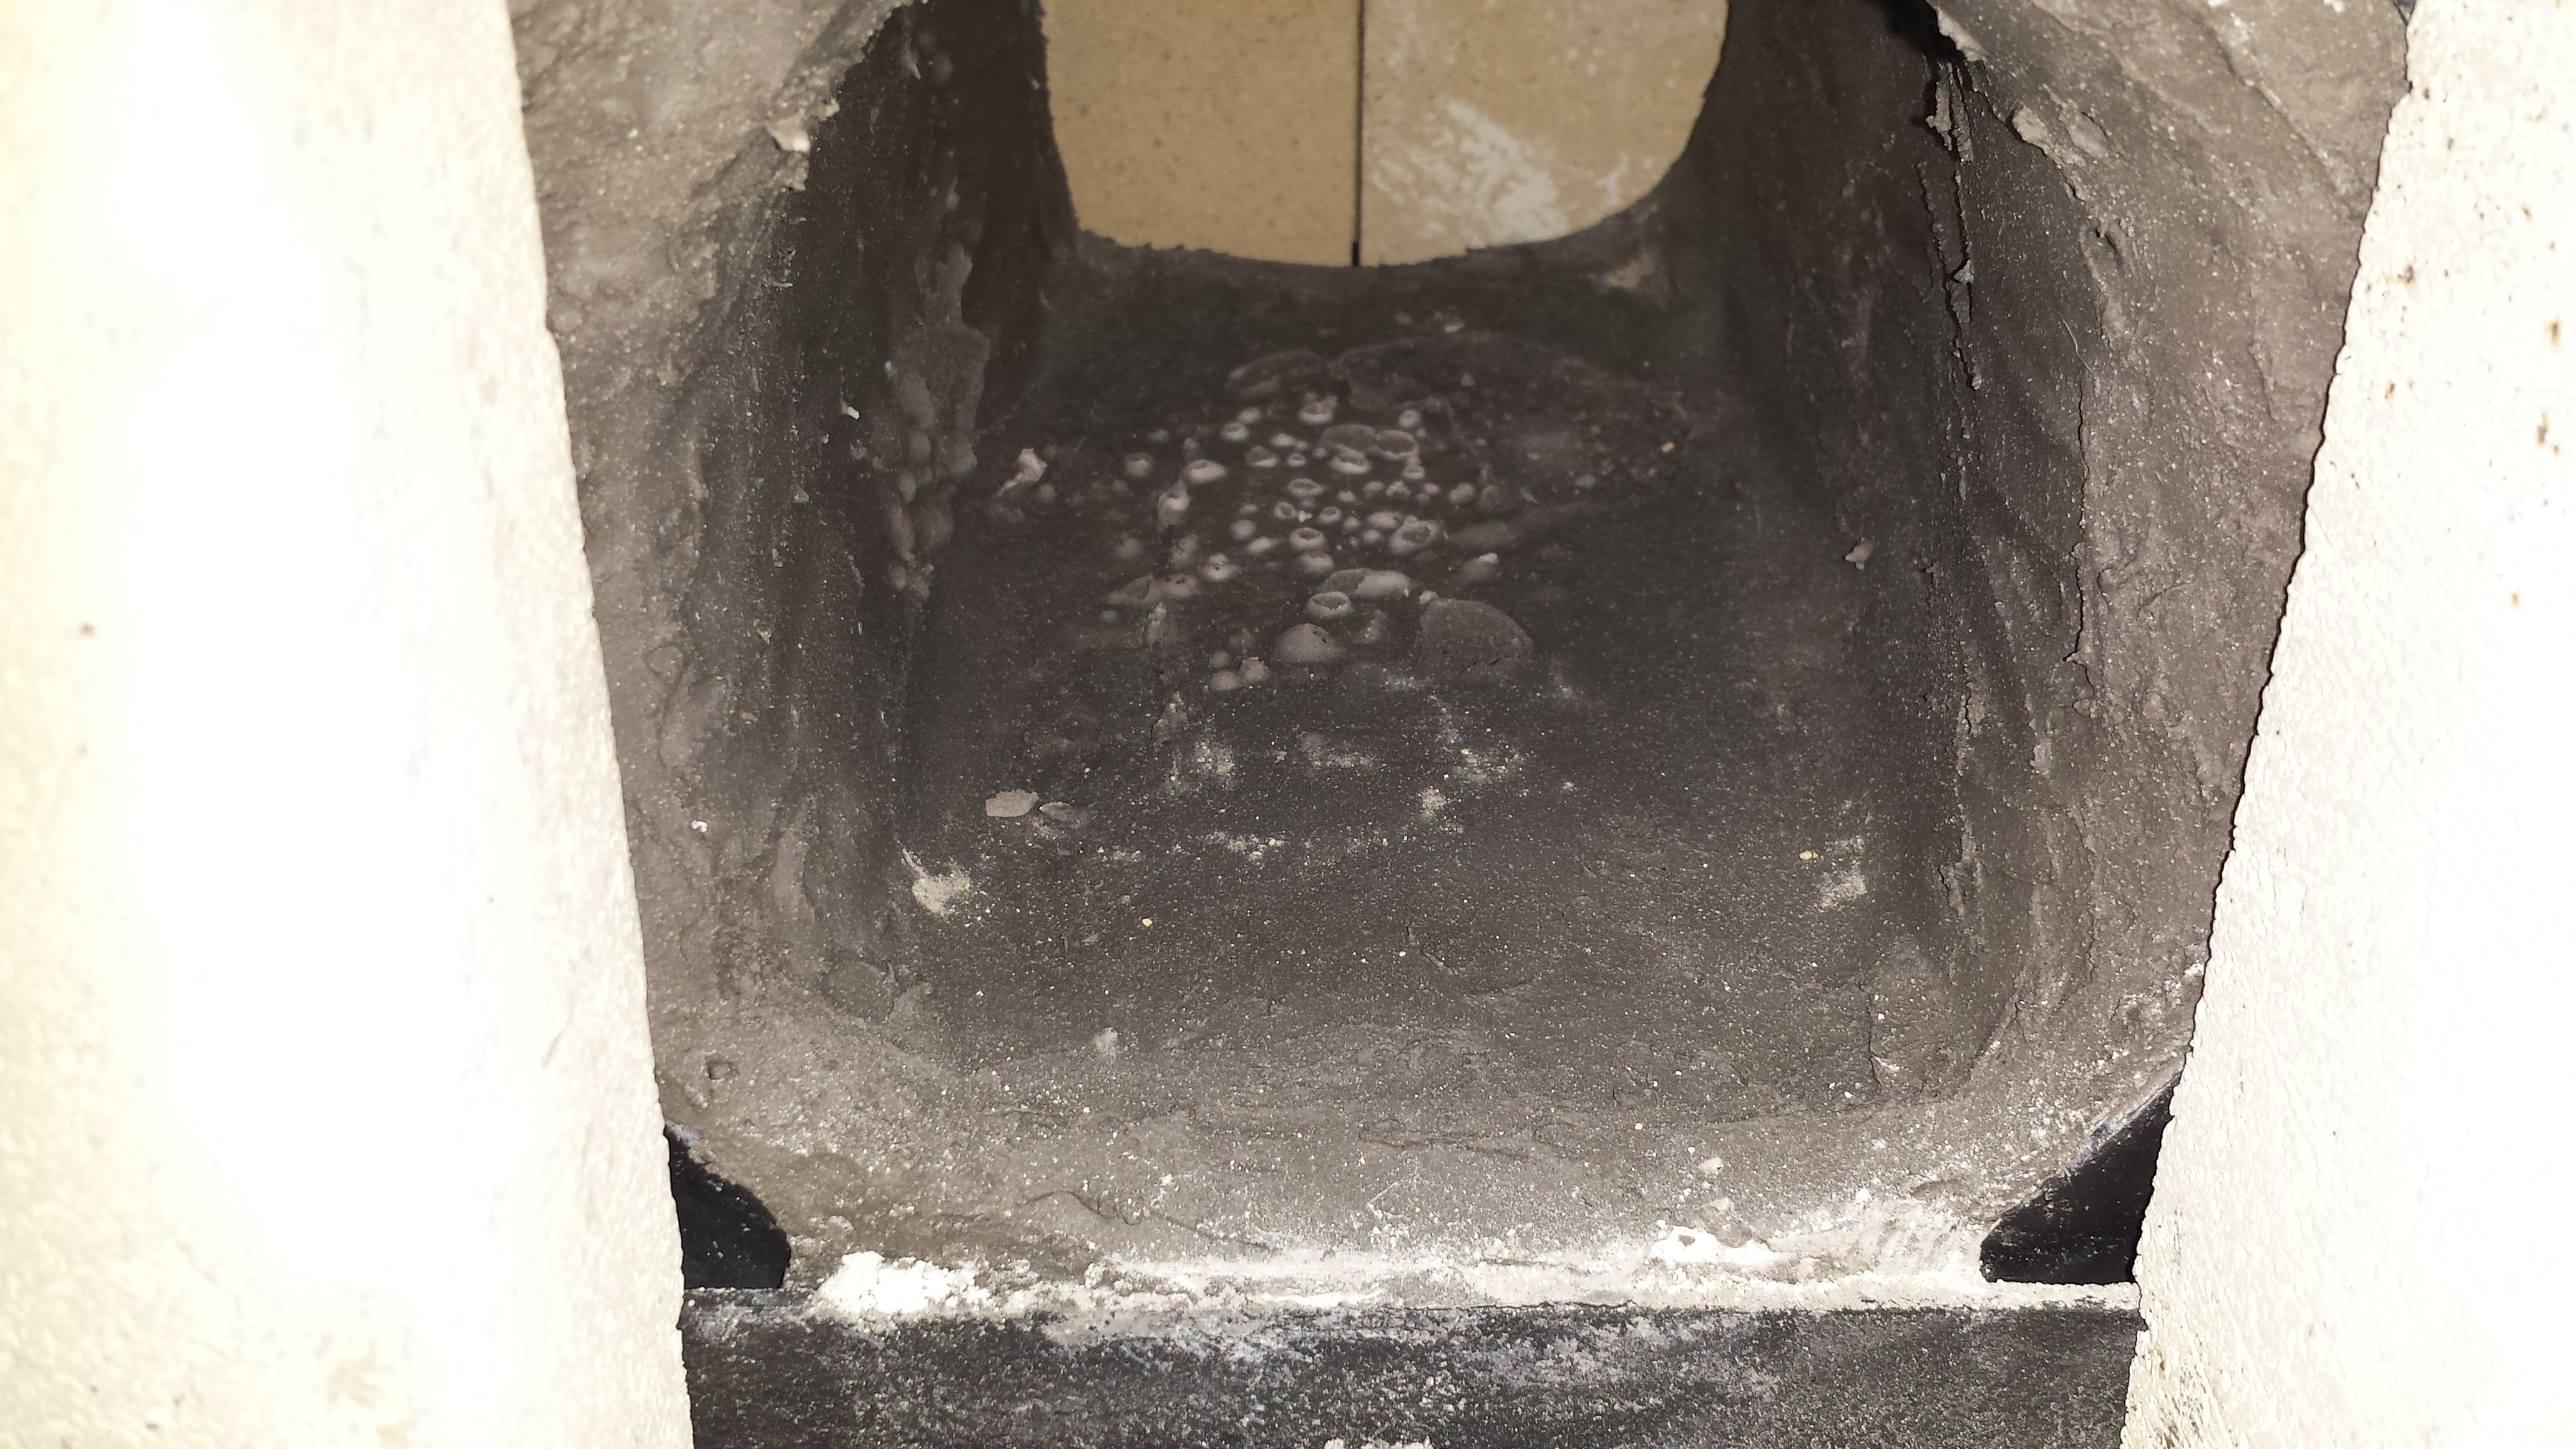
Well guy it has taken me a while to get to this point. the body is built the wool is in and the refractory cement is on. the lining took a few days so things could dry good. However I jumped the gun on firing up the burner. (I though the refractory cement was dry but I was wrong) the refractory bubbled from steam I think. it did not bubble off the wool just split the cement into two layers. so I am giving it more dry time with a heater on it.
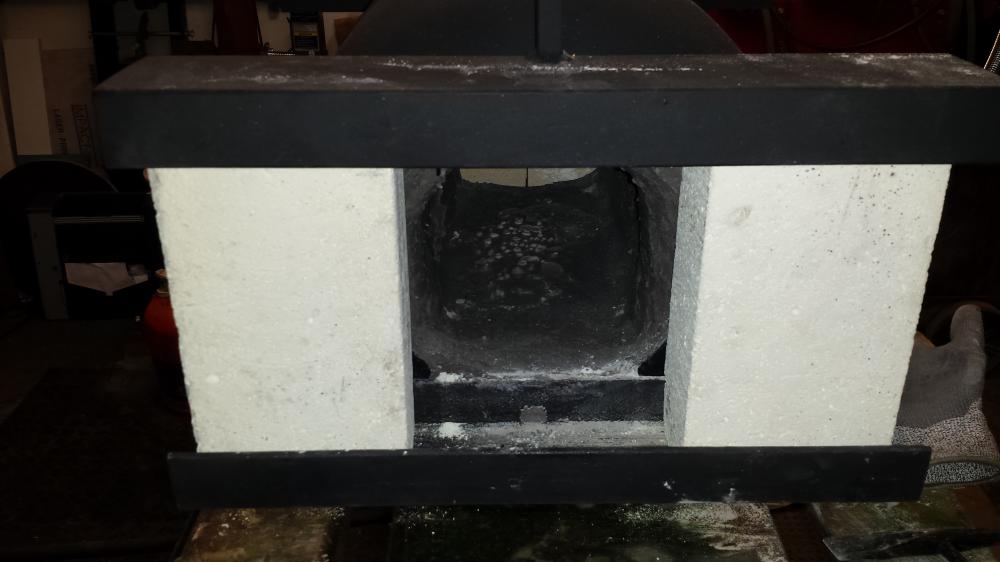
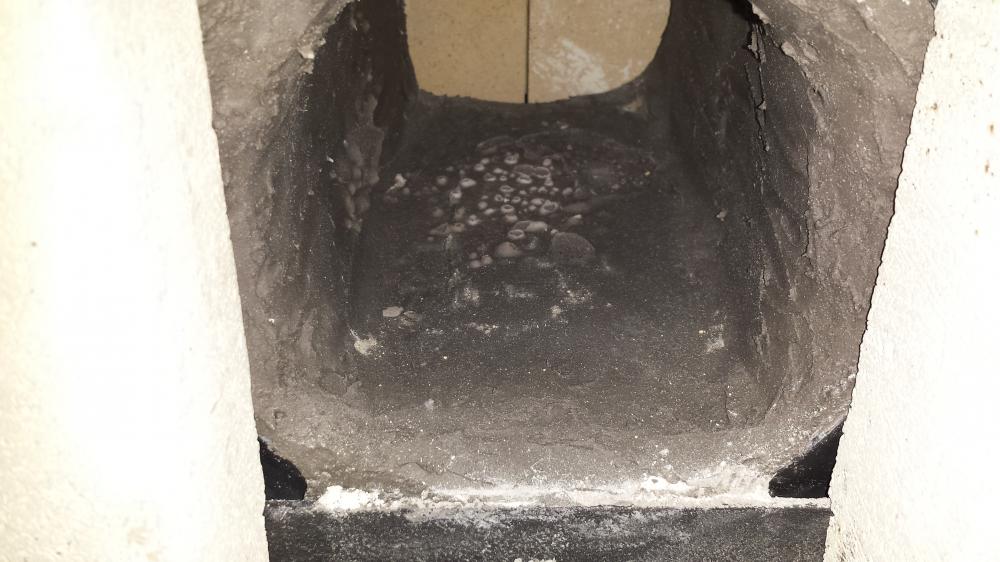
Can I recoat this once I get it all dry and test it out?
Mark
-
Thanks guys, that was a lot of info. now I have to let my brain cool down. All in all it seems I am to lean. So adding fuel would seem the answer. I get that a choke can be used to adjust the A/F ratio. But as far as temperature in the furnace wouldn't turning the regulator up or down to produce a larger or smaller flame take care of this? As I said before, the flame shape and color stayed pretty much the same at 2-20 psi. this leads me to believe that if I add more fuel I should still be able to keep a consistent flame over these ranges. But also as I have stated I am very new to all this so what do I know. But for sure I need to change the ratio to richer.
Frost yes the furnace will go outside should have good ventilation. But thanks for the tip.I will look for these feature in the flame as I tune. tip files are a good idea. my tip holder does slide so I have that also I can tune with.
Keep in mind I am so new to this NASA could build my furnace and I would not get perfect work. So as long as I get the flame, it is hot enough, does not oxidize the steel I will be in good shape to start. from there I am sure the fine tuning will come with time. One more thing to think about I get a full range of weather here in that the air can be so dry you can create an electrical storm pulling a blanket from a sheet, or so humid your close feel wet as soon as you leave the house. A 20%-30% change can happen in hours. so being micro tuned may be an issue. : >).
I will report back after I make some adjustments.
Thanks again guys for your time and info.
Mark
-
Frosty, the burner is 3/4. I have .030 and .035 tips on hand I will try a .030 and see what I get. I am assuming I want to see a bit more orange in the flame with a darker blue. Is this correct? When you say follow the ratios you do mean more or less in this case change the orifice to a size that provides a good flame and let the oxy take care of it's self?
The lining will have a 1/8" coat of refractory cement (super 3000) how will this handle flux?
timgunn, What I am not following from you is that all videos I have seen where a choke is used the choke is tuned and then left alone. Heat is then changed by either a needle valve or the regulator. Choking down for heat control seem like it would also give a carbonizing flame (rich) I am by no means a HVAC guy but this just seems like it would be the case. Also if you are using a thermocoupler to control heat why would you need the choke. the flame would be on or off no adjustment would be needed. Or am I misunderstanding your use of the thermocouple?
I took the pressure down to 1.5 psi and the flame looked pretty much the same just smaller, any thing below that and the flame is not steady. At 1.5 psi choking only made the flame sputter and die with little or no effect at lesser amounts of choke. the above photos were with 10-15 psi.
I really think this is a well designed burner that is keeping the flame consistent at a wide range of pressure. But I know little of these things.
Mark
-
Thanks for the input guys. It dawned on me later that I will lose that Oxy any way when I install the burner and pack ceramic blanket around it. so the shim can go back in. So would you say the top flame would work or richen it up more?
Frosty that is good new about the Blanket because 1" is what I got from my friend so that is perfect news. I did get most of the rest of the stuff for the body of the furnace today, now time is not there. the end holes are cut in the tank and ready I just have to make a base and tool rest. knock a hole in for the burner and line it. Maybe by next weekend I can give it a run.
timgunn, not sure I could add a screwed adjustable choke to this style. You got a plan? a slide choke would be real easy. the orifice is a mig tip(.025) so switching that is also an option. sliding the orifice back also seed to enrich the flame the flame. but not sure what is good bad better worst. Very new to this stuff.
Thanks again guys
Mark
-
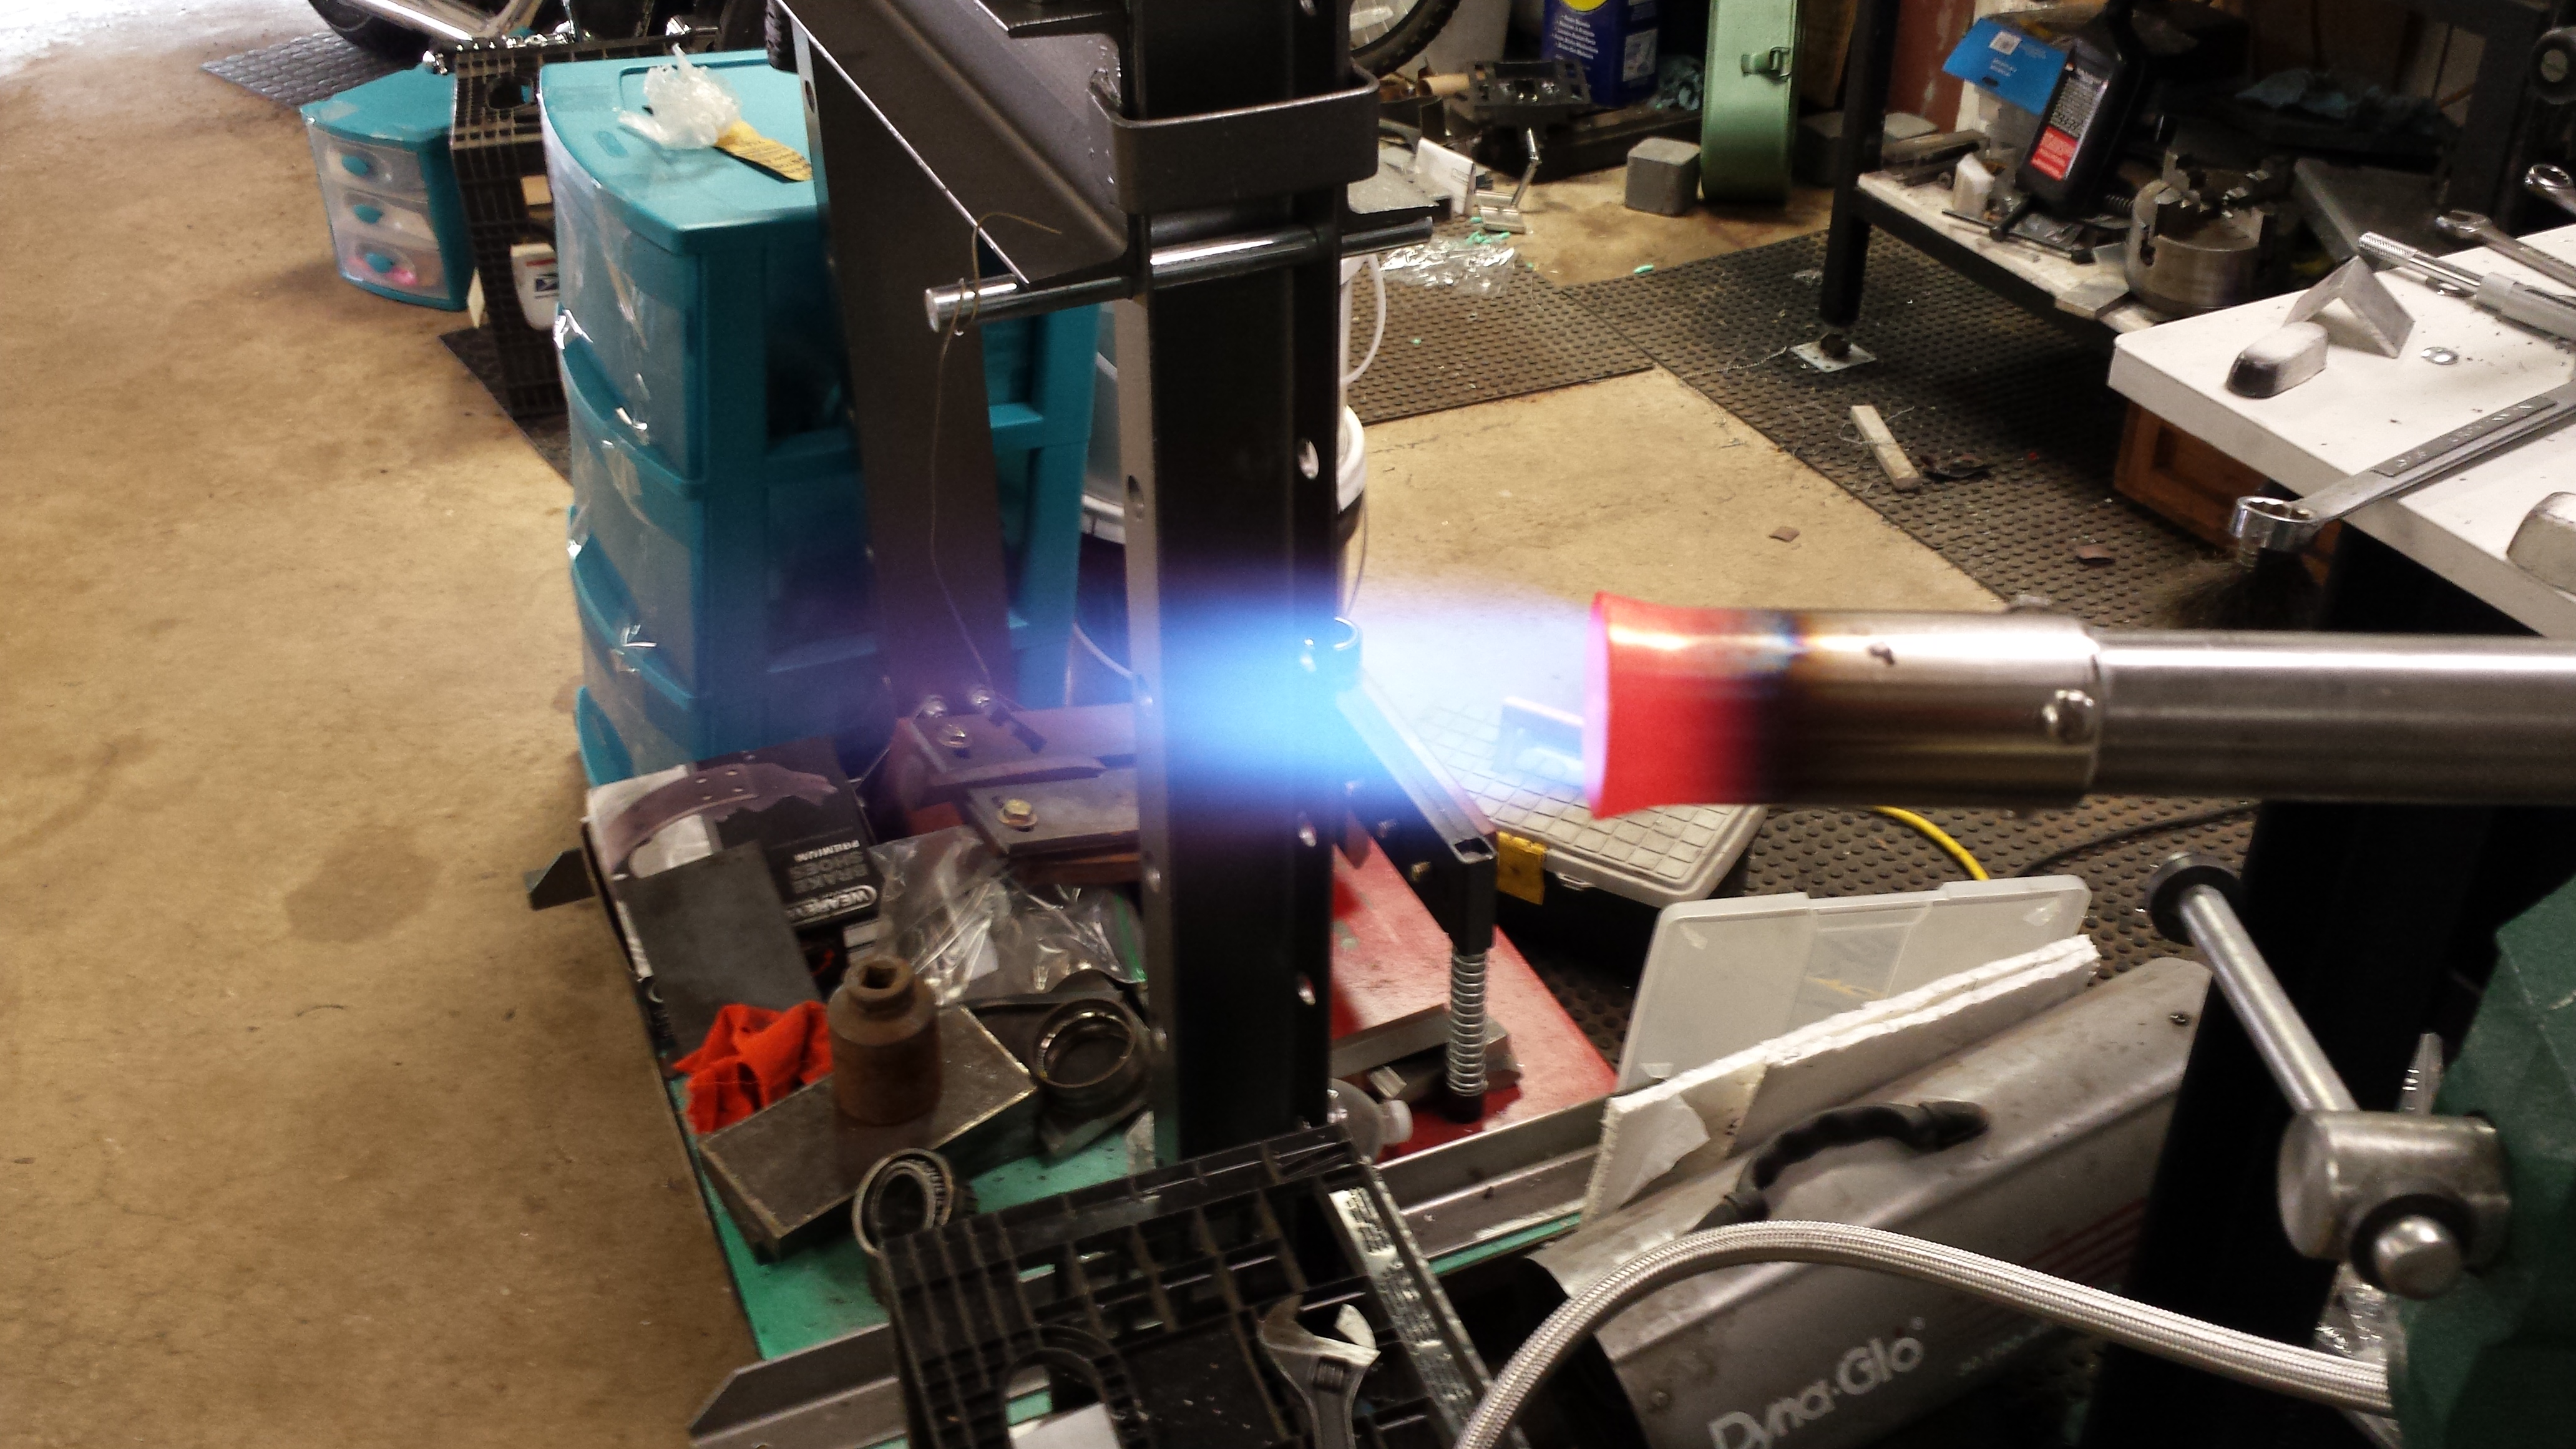
Still waiting on ridgizer, so I can get the body of the forge built. I did get the burner built.

The burner with a shim between the tube and the flare. seemed a bit rich. so I removed it to let more air in.

this is the burner with everything set the same just the shim stock removed. A little lean I think but once in the burner the draw of air around the flare will be reduced.
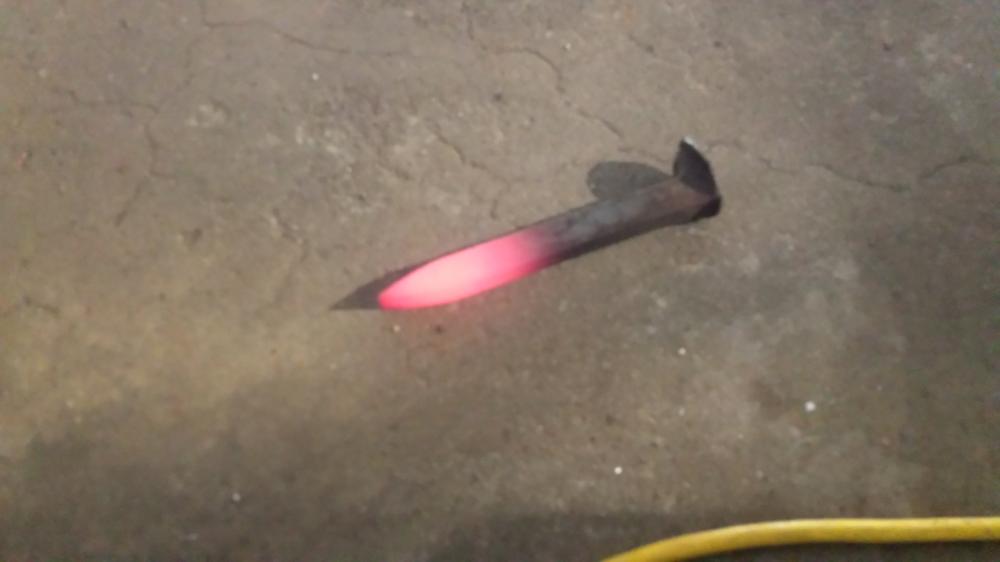
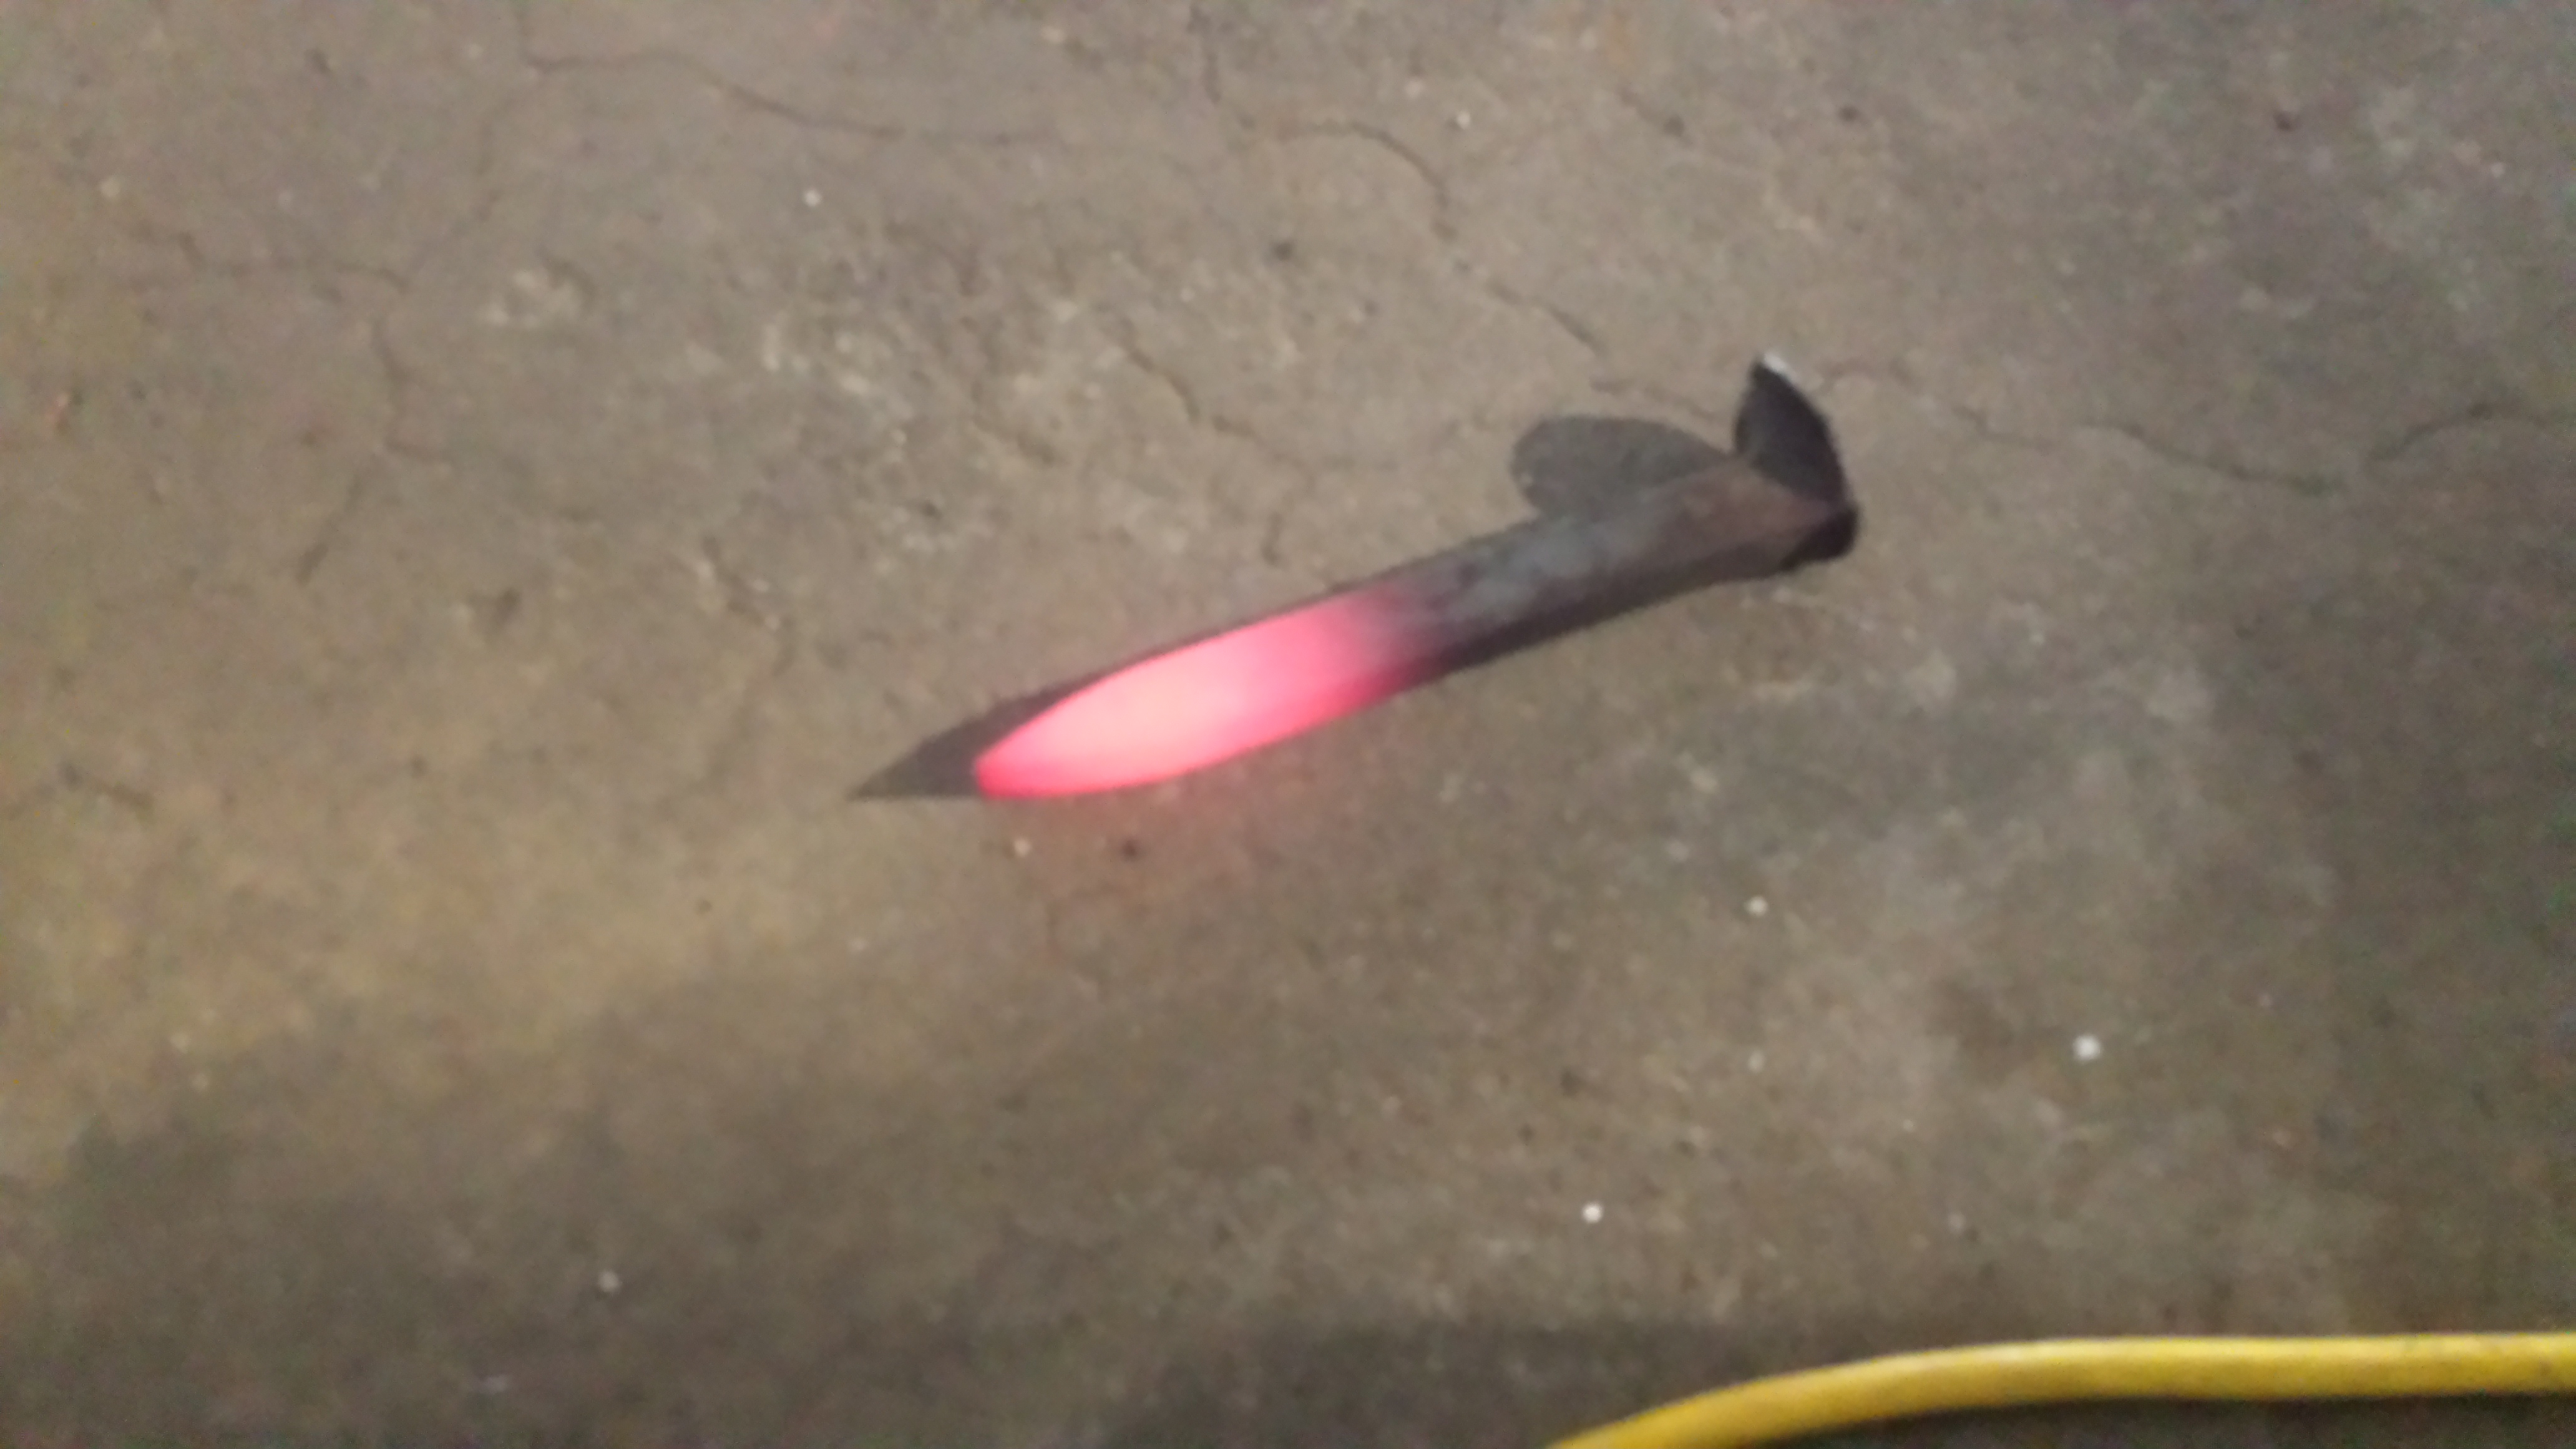
It took about 5min. in open air to heat this spike to red heat. Not sure if all of this is good or bad. But I got fire and I got red metal that's a start.
Mark
-
Dodge,
Yes this helps it will save me a trip to ceramic store for the sodium Silicate. Not sure if I'm getting 1" or 2" wool. I think 2" he said he thought it was 1-1/2. 1" 2" he is getting enough and it is free so I will make it work.
Thanks, Mark
-
Hey all,
I am planning up my first two forges one soil (not going to go into it here) and one propane. My plane on the propane forge is to start with a old propane tank (yes the valve has been pulled the tank rinsed twice with water and will be rinsed a could more times before cutting) I have ceramic wool on the way along with some super 3000( a pre-mixed mortar) from a friend that does refractory work for a steel mill. Should be good stuff. I will build a david Hammer type injector burner https://www.youtube.com/watch?v=VxzdqcPzXj8 I may turn my own orifice instead of using a mig tip.
Just to give more info I will be making the forge from a propane tank. with an Id about 12 " I want about 10" long so with a single burner I will have to put abut 2-1/2" of insulation inside to get the ID down to a max of 7" (384 cubic In.) add a fire brick for the floor and I think 1 burner should be good. (fire brick should take up about 6o more inches).
Does this all seem about right so far?
Questions are should I use sodium silicate to glue the wool to the body of the forge? Should I use a ridgidiser On the wool or will coating it with the super 3000 mortar be good? How thick should I put the mortar on? min? max? If my friend brings 2" wool I would like to put 1/2-3/4 mortar on to bring me to my 7" target would that be to much? should it go on in layers?. I do know I will have to slowly dry it over a day or so with increasing heat.
Hope I was clear enough for you guys to see what my thinking is and if it is good. Thanks for any and all input on this matter.
Thanks, Mark
PS: No galvanized pipe will be used. This may help to I am a Ironworker by trade and have a hobby metal shop at home, Saw Mill/drill Lathe..... Forging steel is just the next logical Step in my love of working with steel.


Coal Breakdrum Forge
in Solid Fuel Forges
Posted
Nice looking build, I like the cost. I say this because if you got a good basic grasp of welding that was worth $50. Most anyone can build with wood (good or bad) Way fewer can build with steel, less can weld. and even less than that have the means to.