
Nobody Special
-
Posts
1,617 -
Joined
-
Last visited
Content Type
Profiles
Forums
Articles
Gallery
Downloads
Events
Posts posted by Nobody Special
-
-
Mine was a pendant made from a copper clad grounding rod. The pendant was ugly, but the swirled copper was a cool effect.
-
Good morning,
Oklahoma and North Texas were a bit of an anvil desert when I was there, excepting farrier anvils, and columbians tend to go a little higher. I would think $4 to $5 might be more likely, even with the mild edge damage. But as above - local market price prevails and should be your basis.
Up here in the Pacific NW, apparently they're rarer then gold plated hens' teeth and worth their weight in diamonds, emeralds, and enthusiastic coeds. At one point I seriously considered funding moving my stuff from Georgia by loading up on $3-4 a lb anvils down there and reselling them here where the low end is usually around $8.
-
I don't know where to buy it in PA, but one of the members one here, WayneCoe used to sell plans for a number of things as well as small batches of rigidizer and refractory and ship it Tennessee. I was in the Alex Bealer Blacksmith group with him years ago. I couldn't find any posts on the net from him in the last two years, so I'm not sure he's still doing it, but his number and email can be found on this site and on google pretty easily.
If I have exceeded what is allowed to be said regarding commercial sales, please remove that portion. I'll send it to him in the chats as well.
-
What George said. It's always tempting to forge things from whatever size you have laying around, but starting with material closer to the desired finish saves a ton of work.
I wholeheartedly agree that it would be easier to use minimal shaping with thinner stock, forge the rein of the tongs and weld them together. 5/16" might be a little light though for general purpose forging. Good luck. Tongs were easy for me to understand, hard for me to learn.
-
3 hours ago, Frosty said:
Congratulations! Did I miss it when you told me you were pouring the mold in that orientation? Or did you try it in the reverse without success?
If you try it again flip it over so the runners, gates and pour cup are on top so the al doesn't have to flow to the bottom and be forced up into the casting like that. The melt cools in the runners, risers, gates, etc. and you want the melt flowing downward in the mold, not upwards from below.
To get it to flow upwards you need to have the greater mass at the lowest point so it doesn't start to solidify before the entire mold is full.
Frosty The Lucky.
Maybe? I probably missed something. I really, really thought about doing the casting inverted, which would have made several things easier, not the least of which was drawing the pattern out cleanly (most of the castings had varying levels of fins on the gated side from edge damage). However, I couldn't figure out how to get the sand cores out clean, invert them, and suspend them in just the right place so they were off the "top" of the pattern.
I don't think I'm good enough to play with chaplets yet. Worse, the cores weren't baked in this one, so they were fairly delicate. At one point I had made some I had treated with molasses water and baked, but something was off - they had expanded a bit and didn't fit into the pattern without forcing them, which of course made them come apart. I might could have shaved them a bit, but by that point they were already broken. They sat overnight, so I suspect maybe they drew water from the air.
Got the same problem with the hollow feet, which is the next step while I wait until I can get to the mainland to get some big enough cold rolled for the ways and as a reference surface to scrape the bed. This island really, really needs a steel supplier.
-
The two shown were just the pretty pretties. I had a long period after an engine rebuild in my 73 Mustang that I had so many tools in leftover Ford Motor Company blue that I almost wanted to buy Mopar!
-
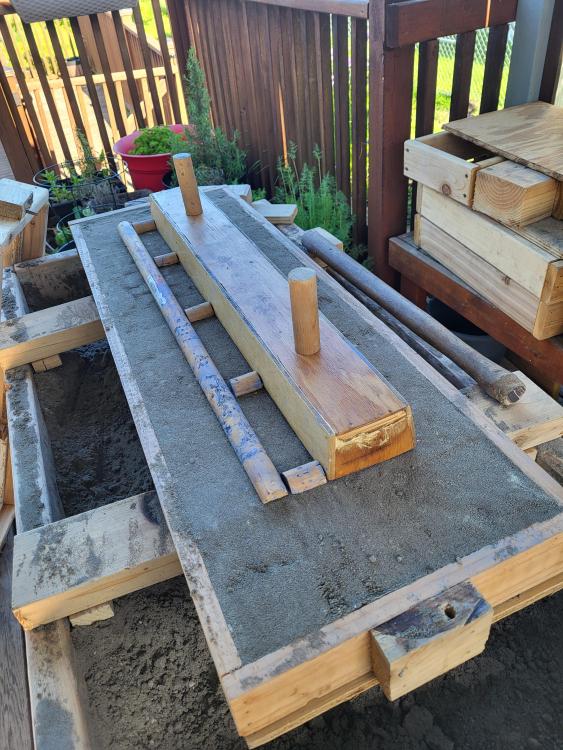
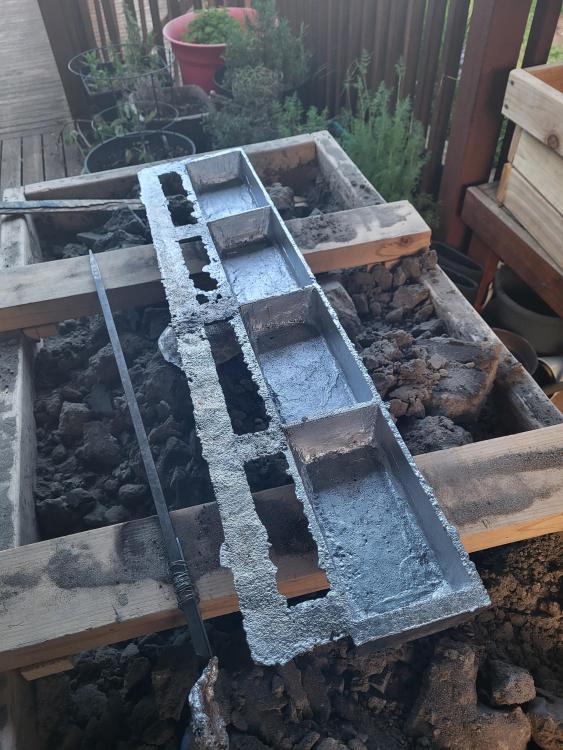
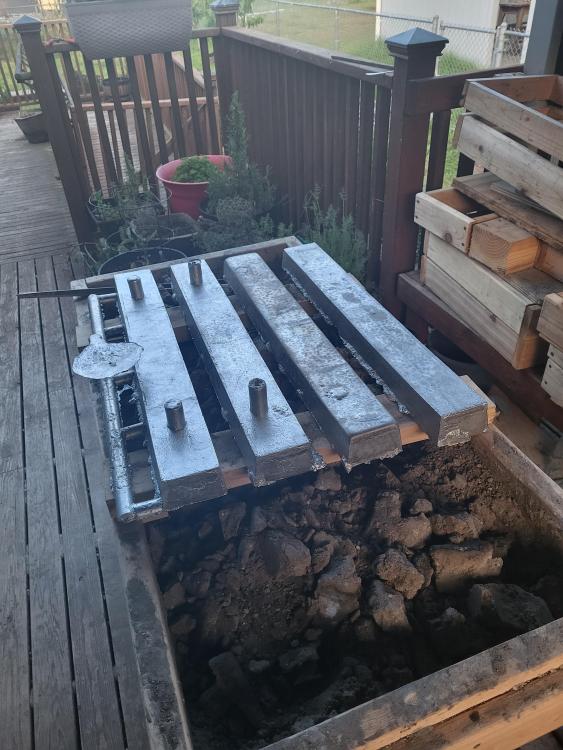
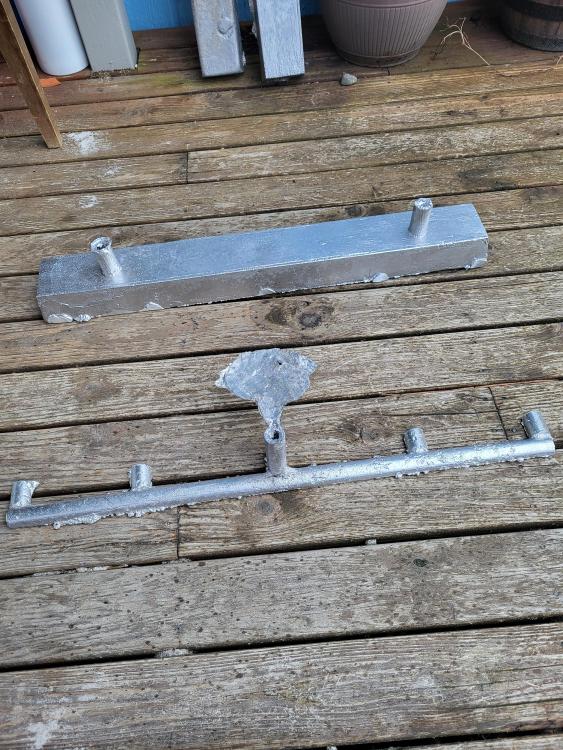
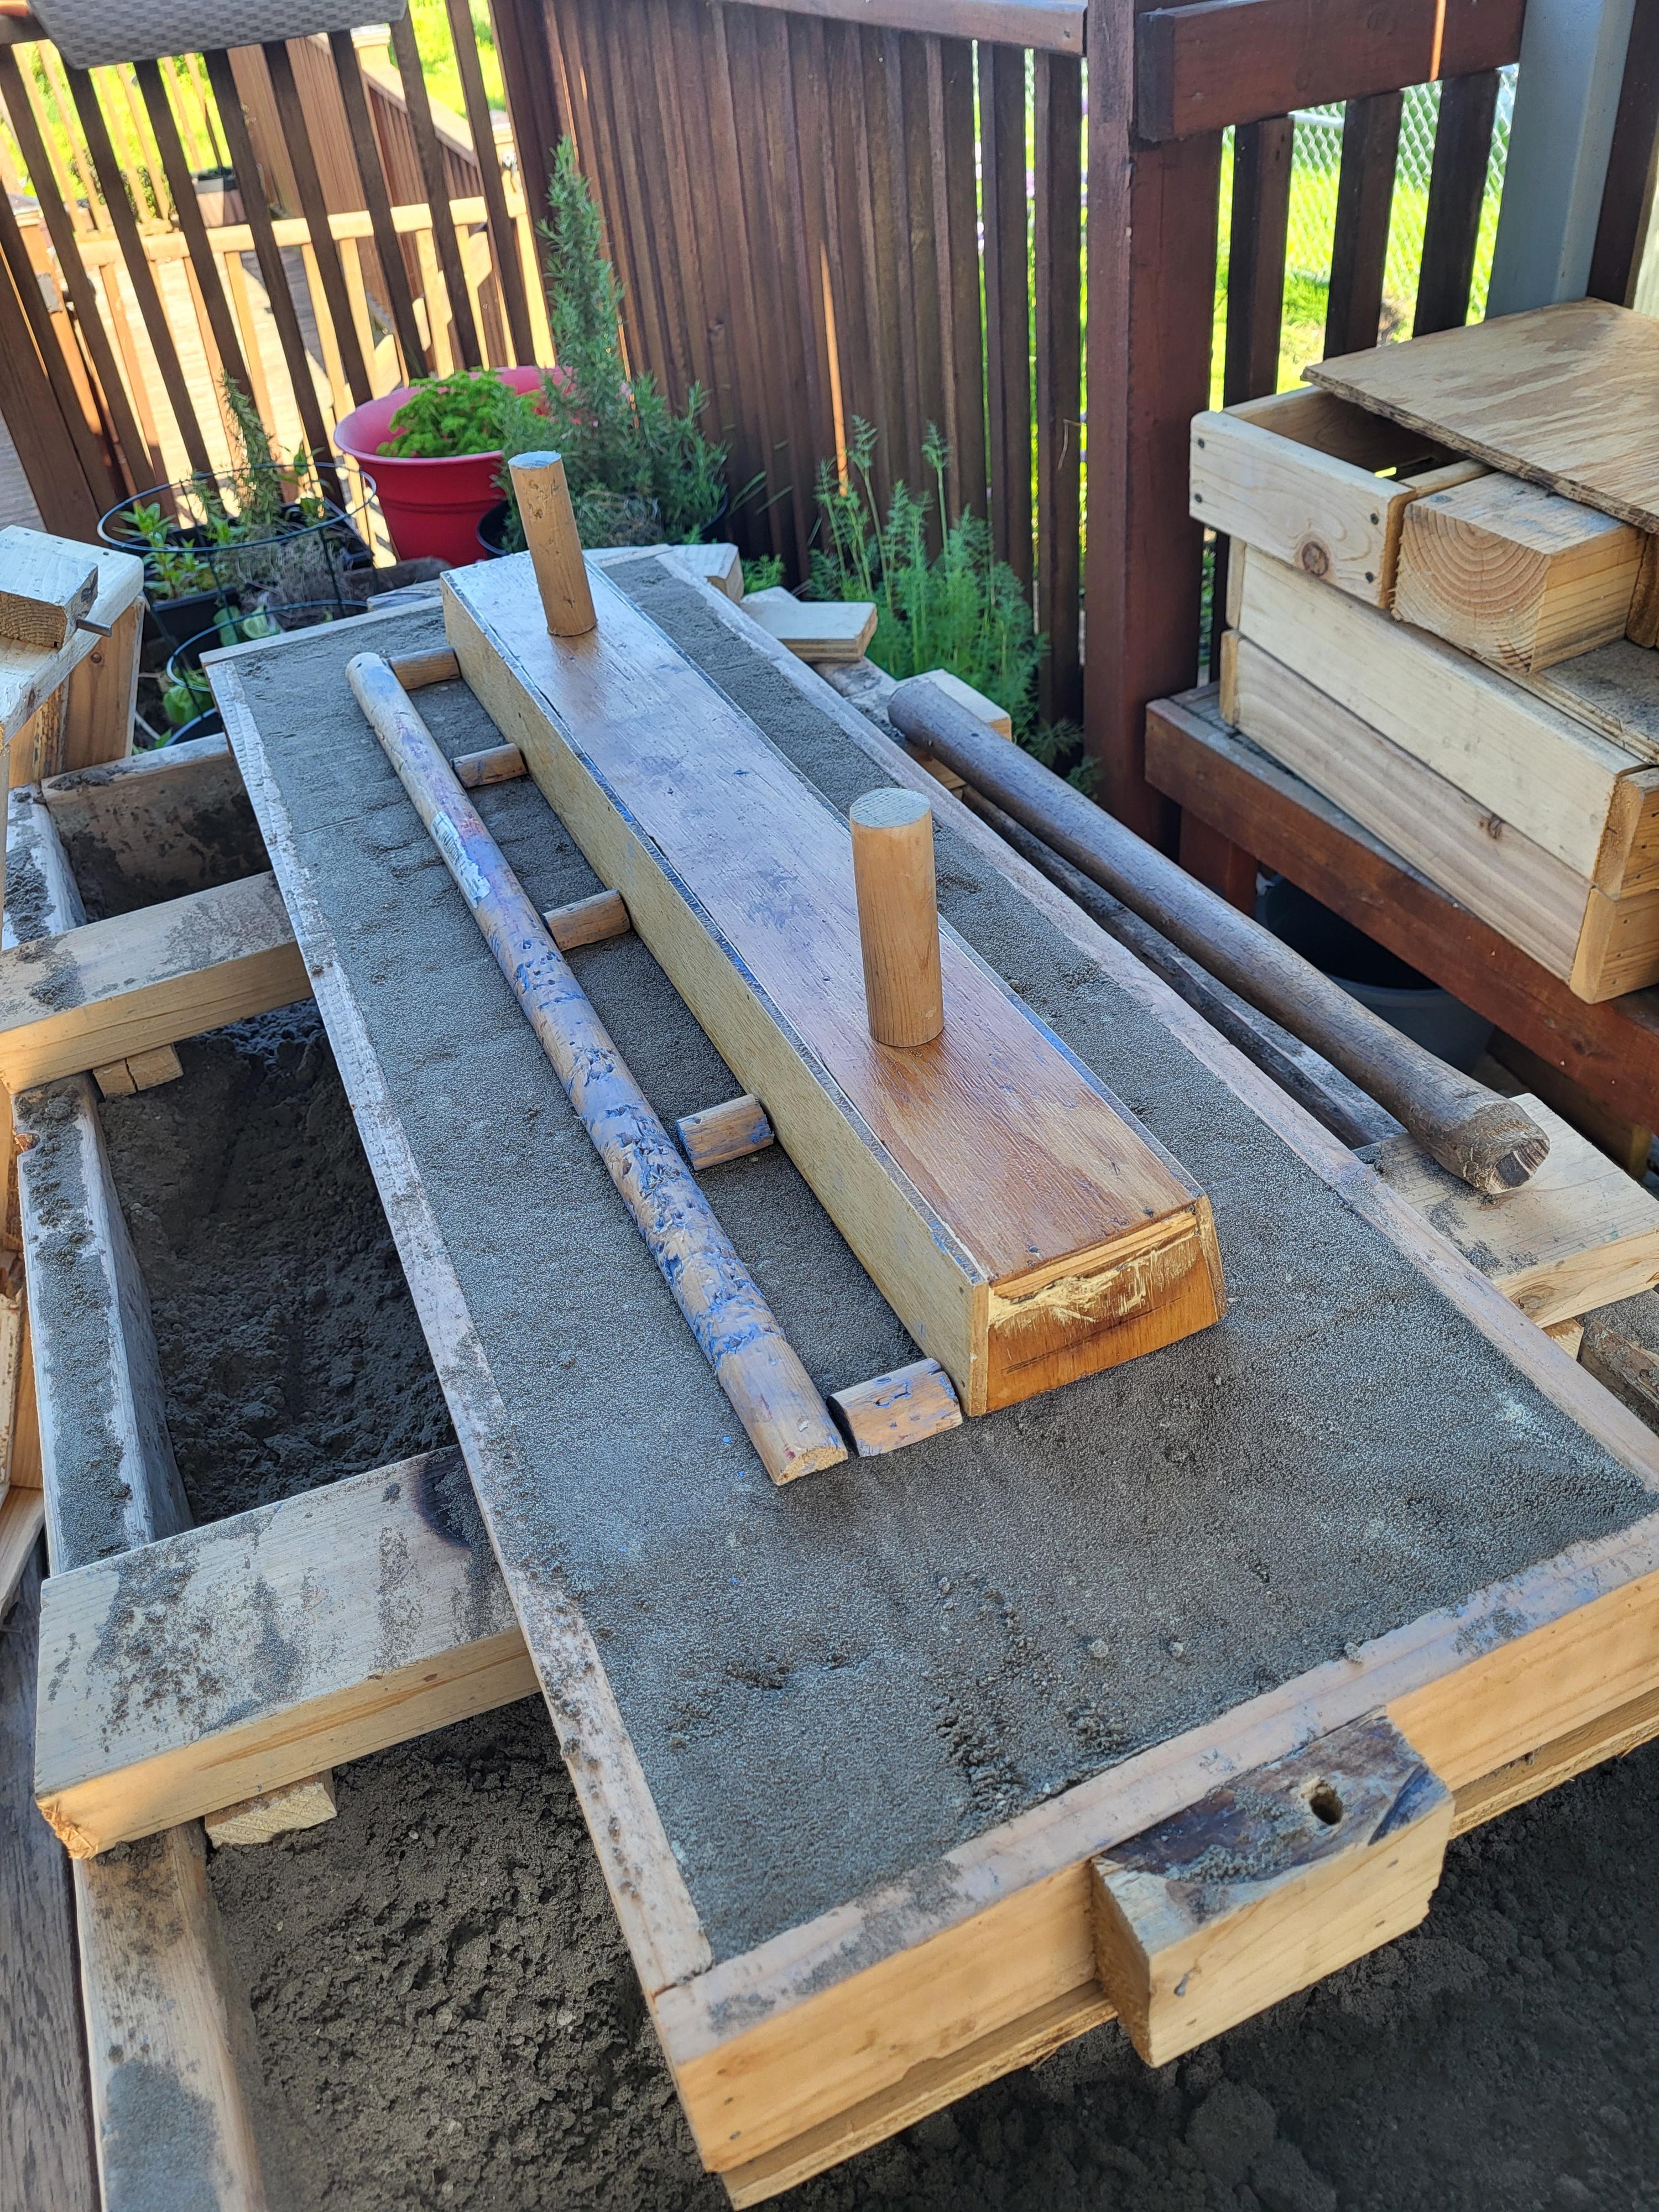
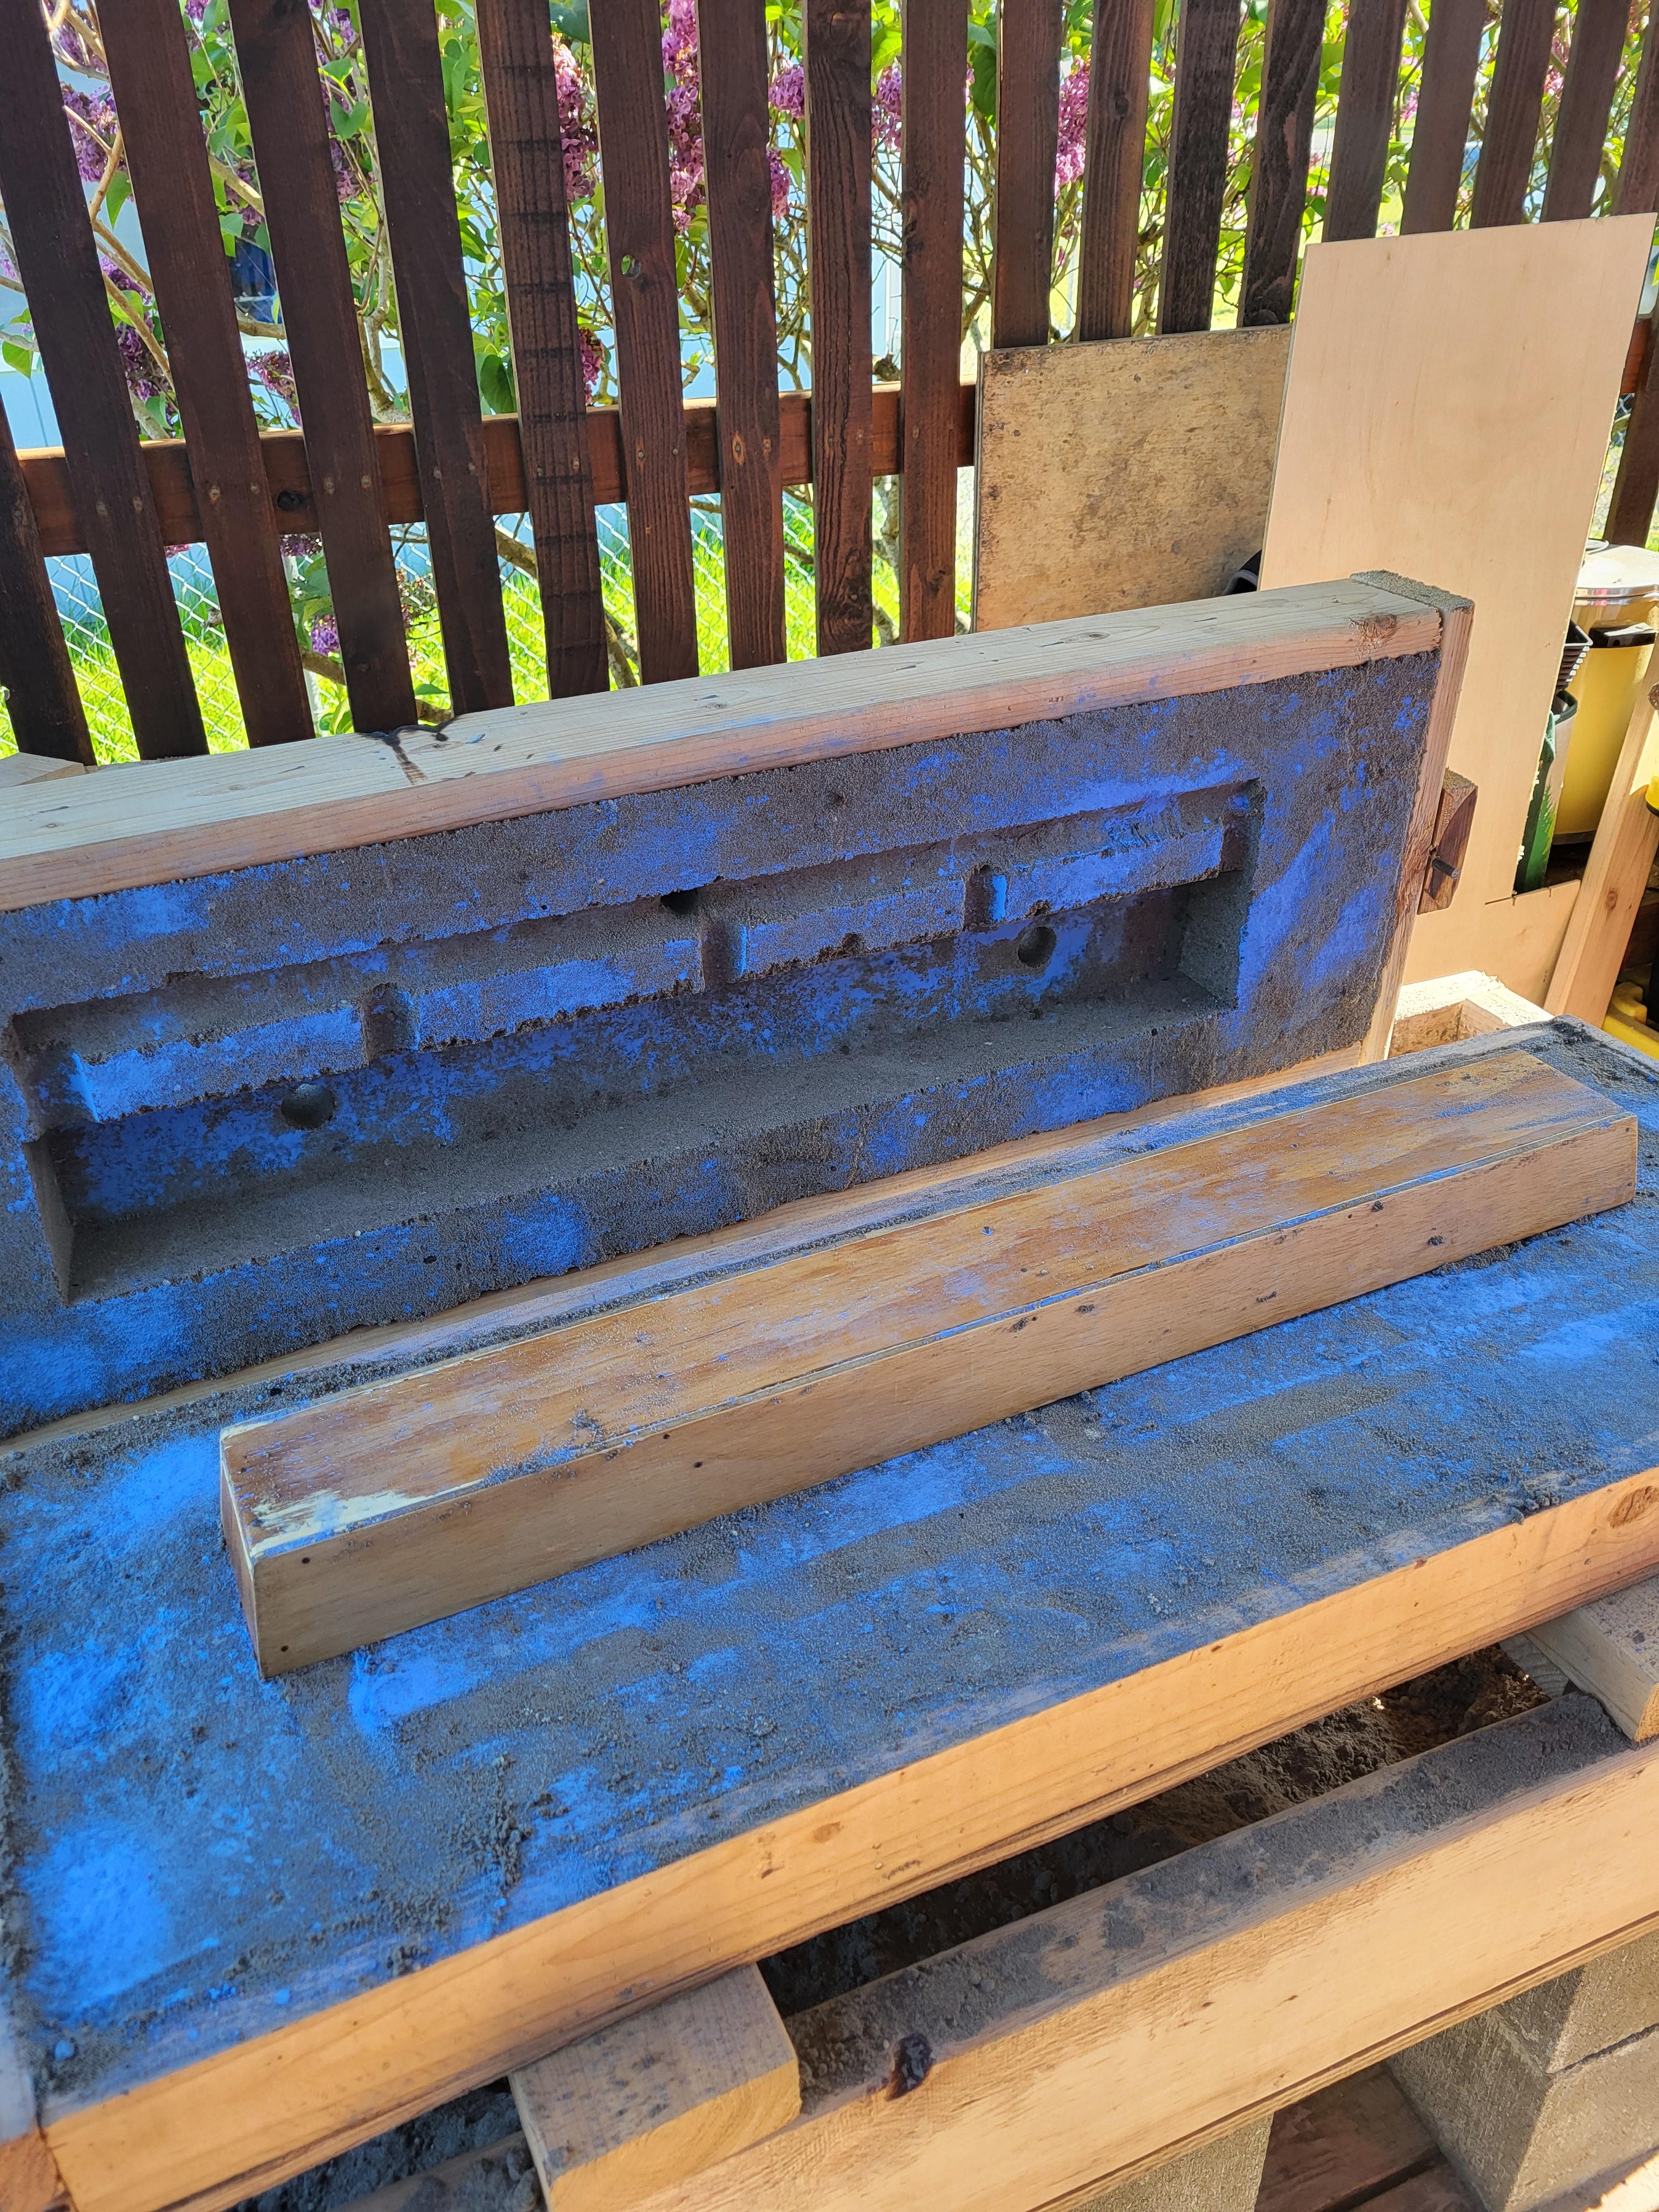
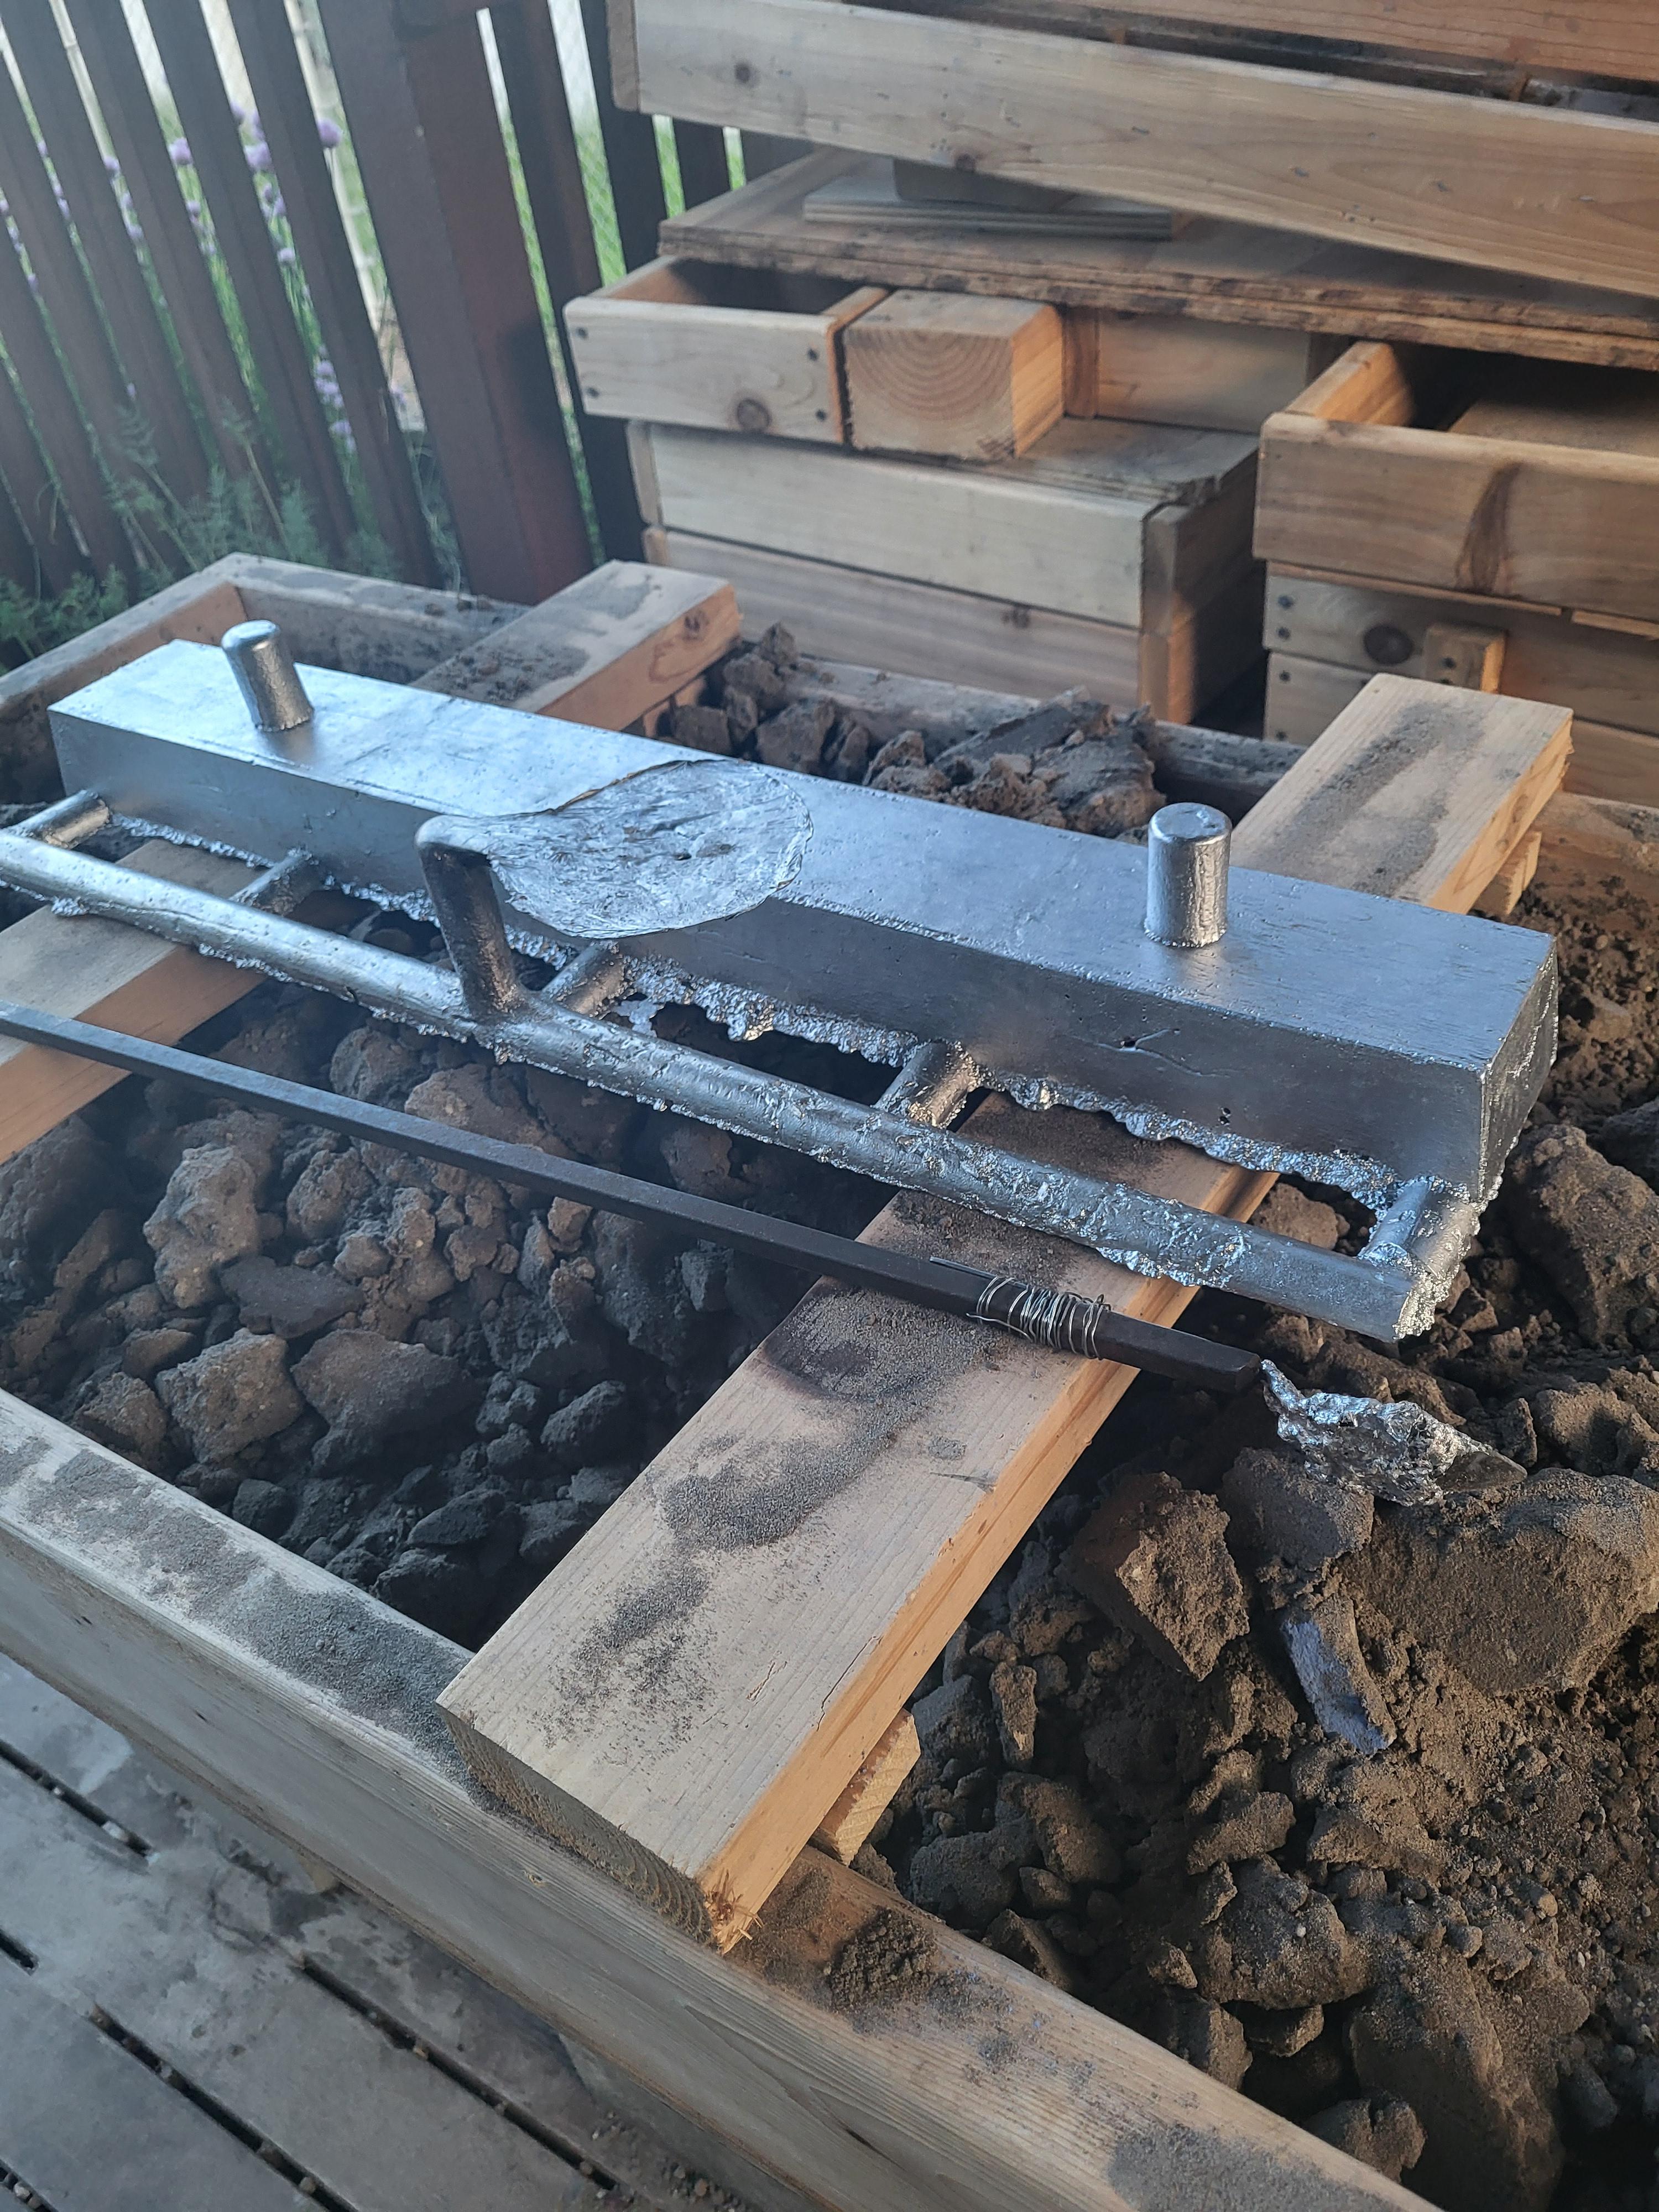
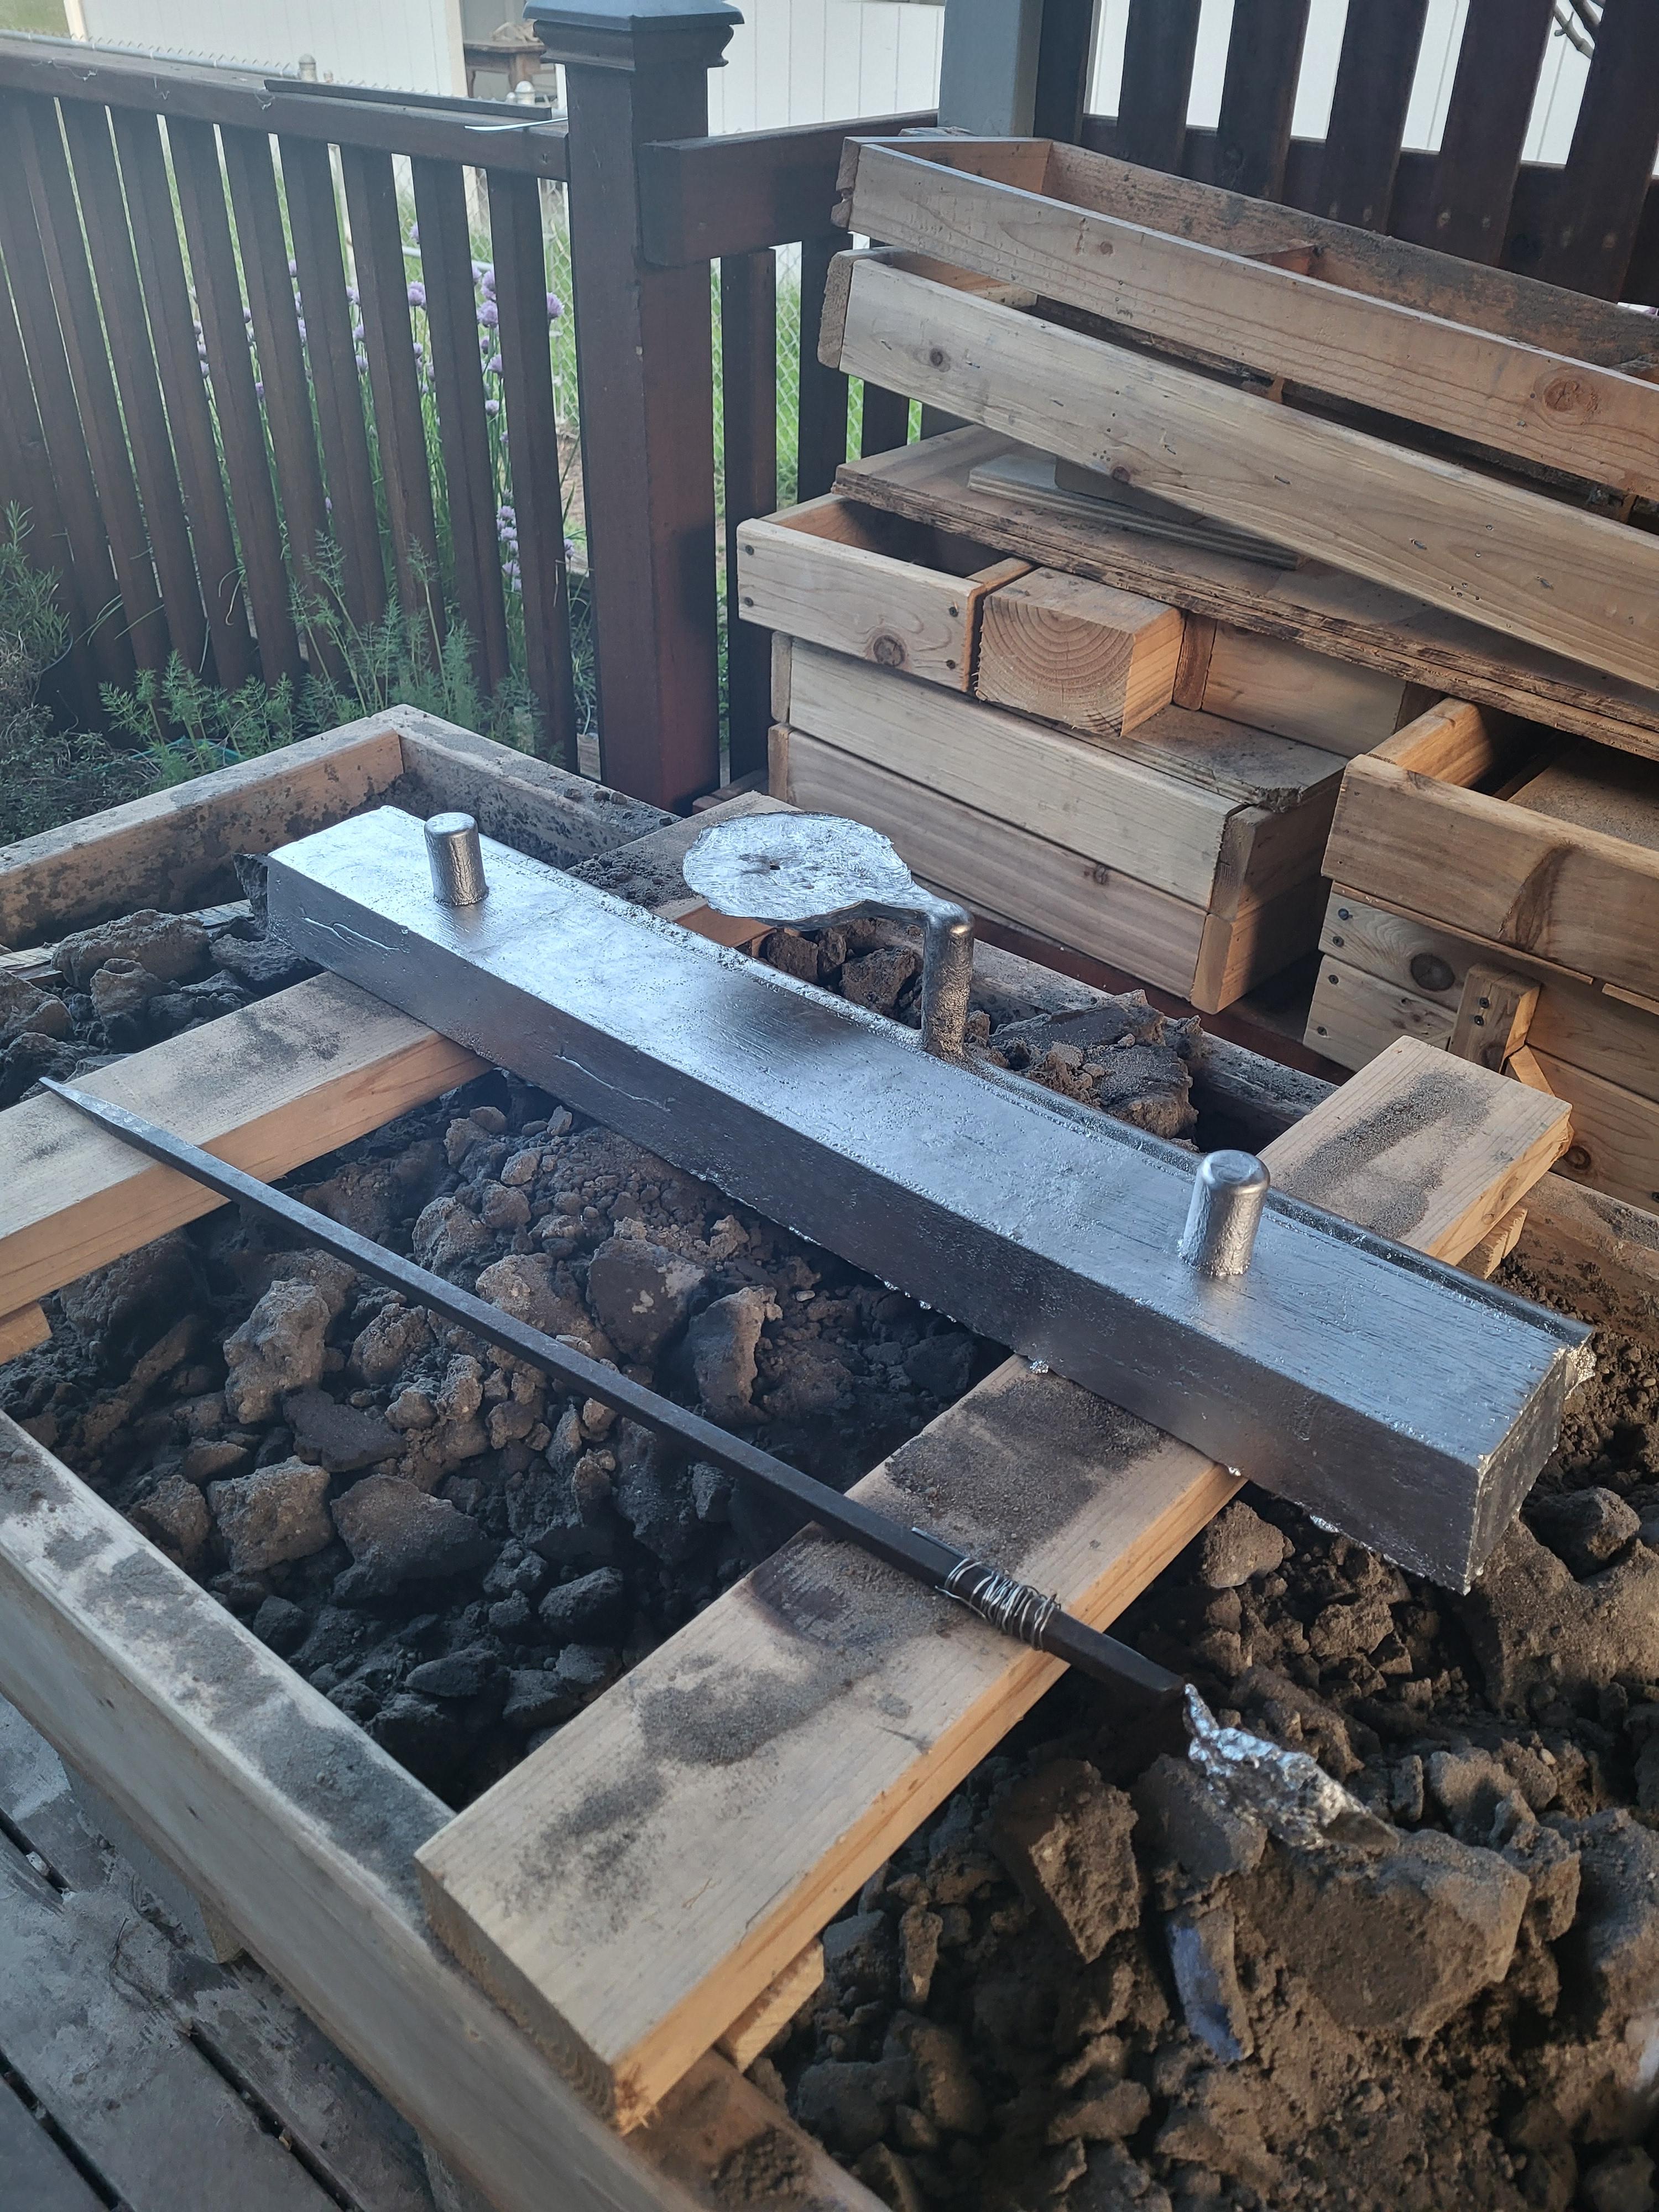
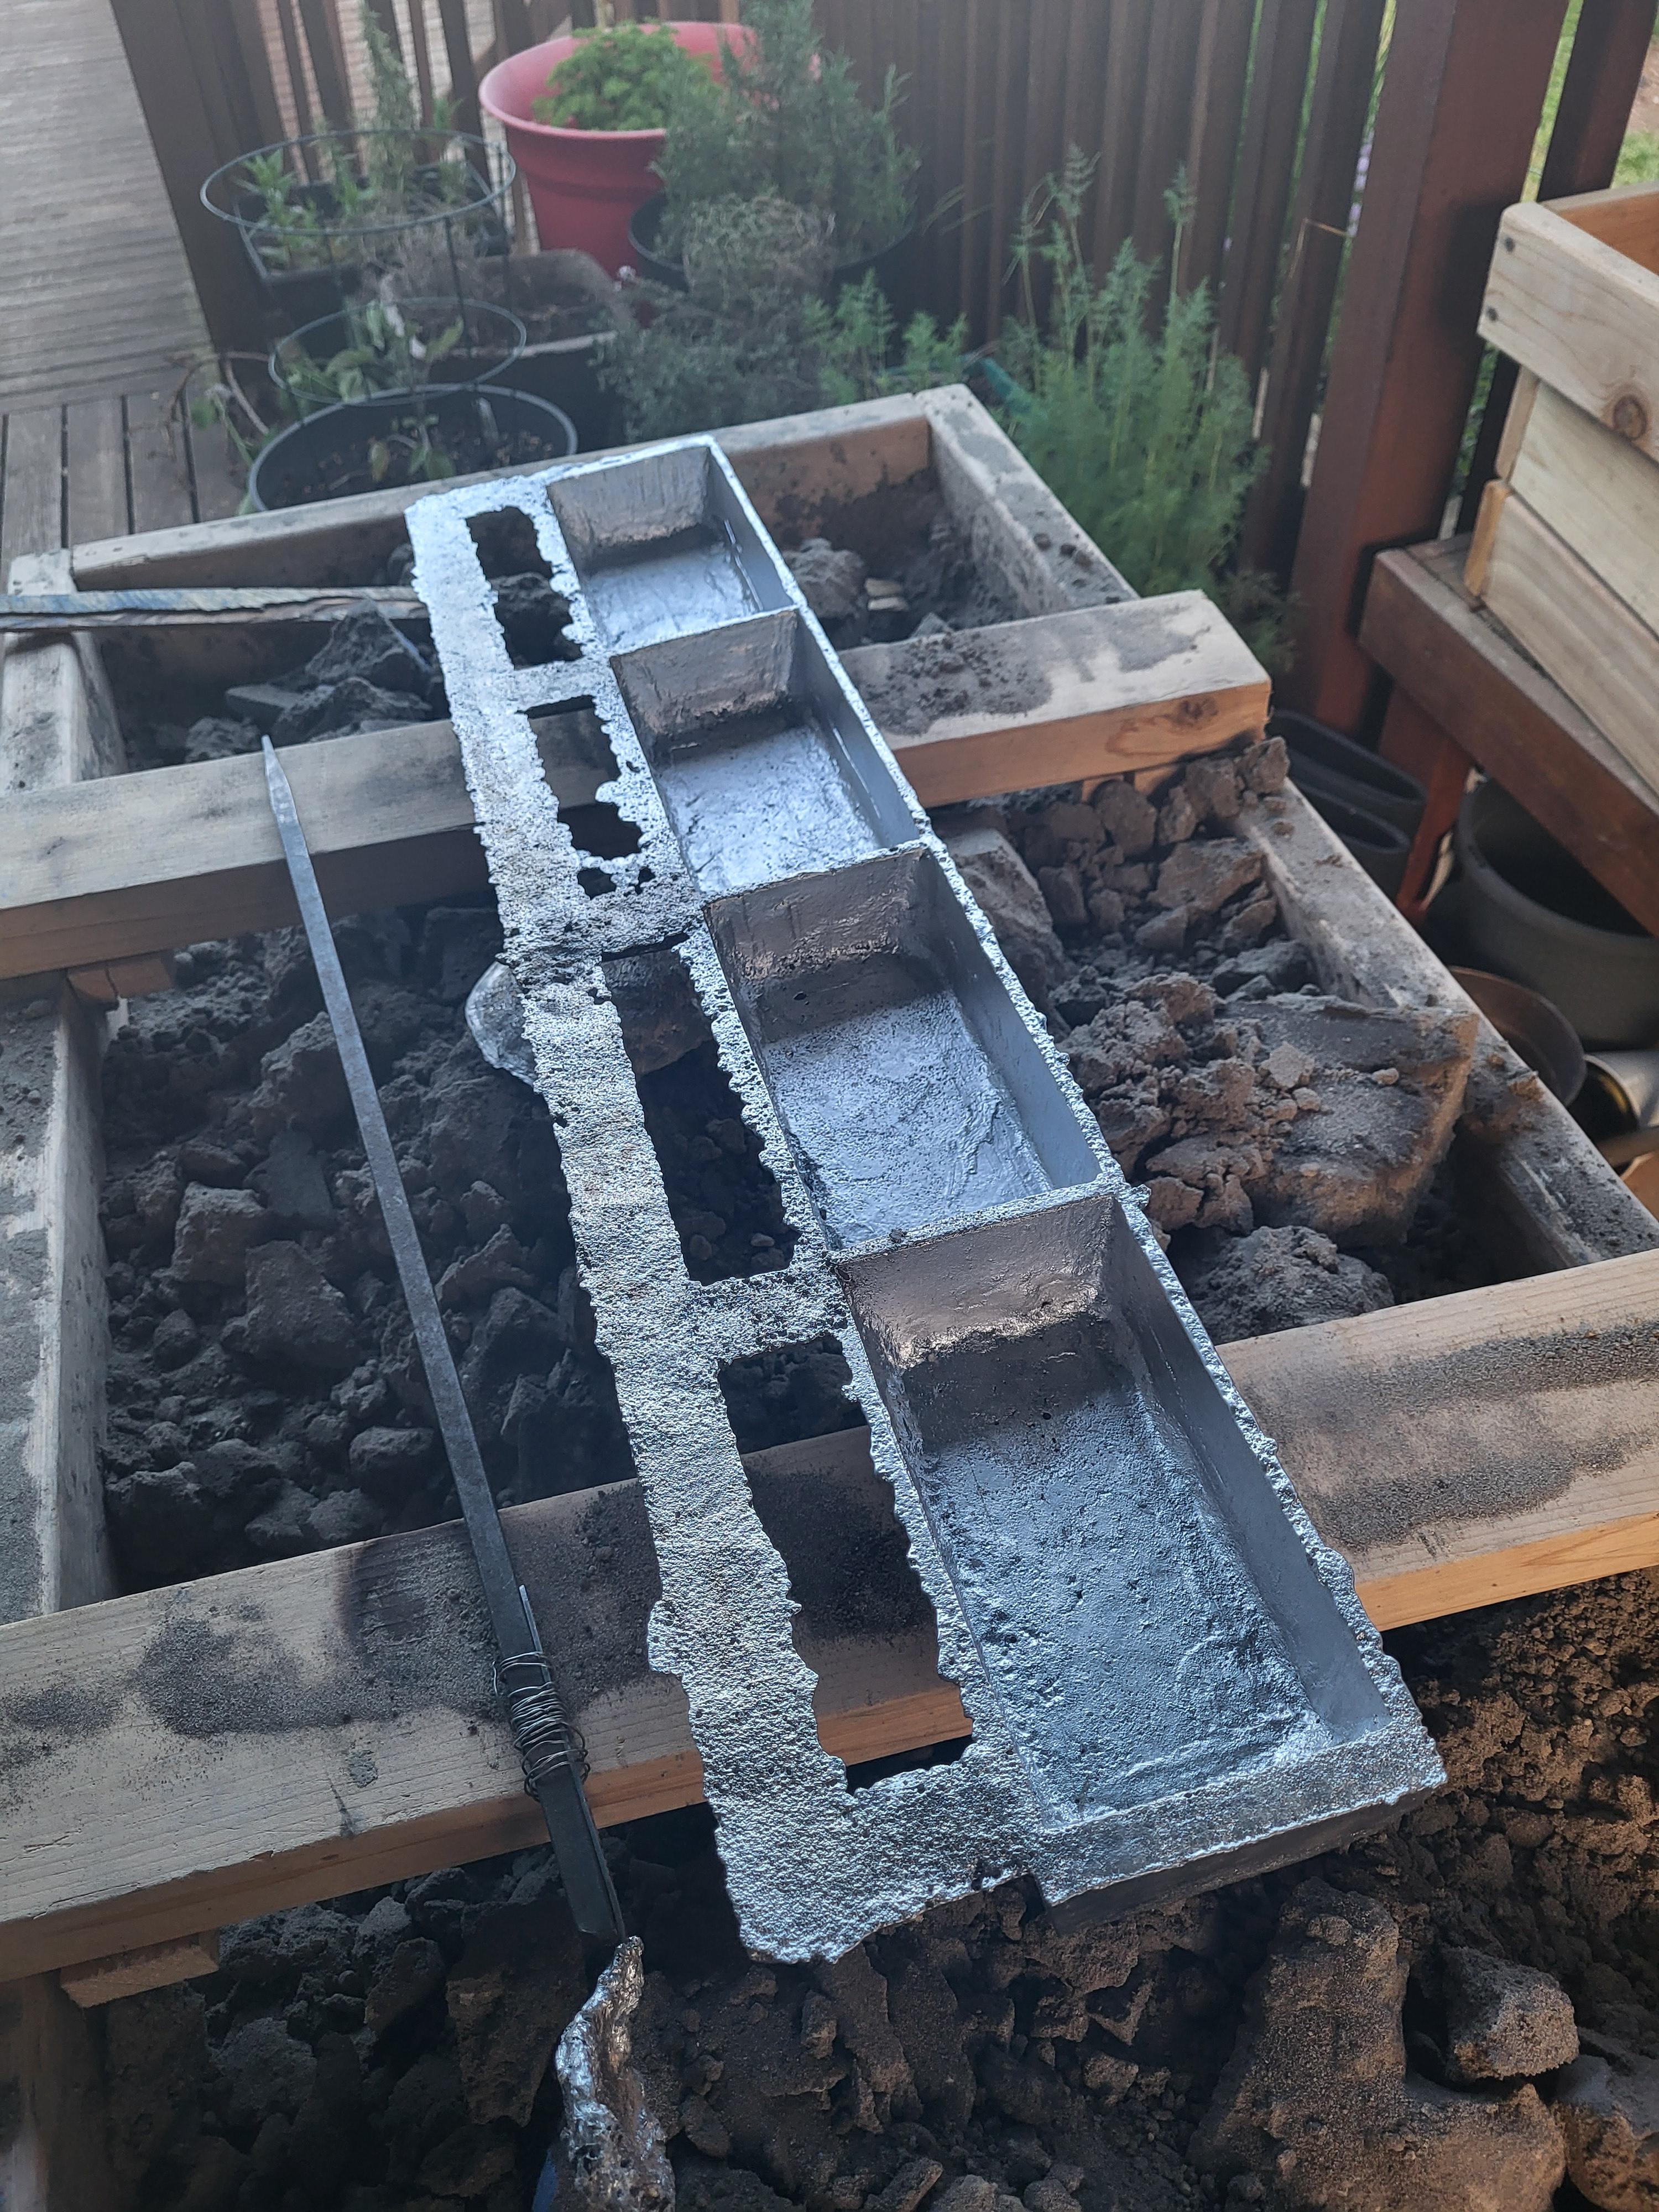
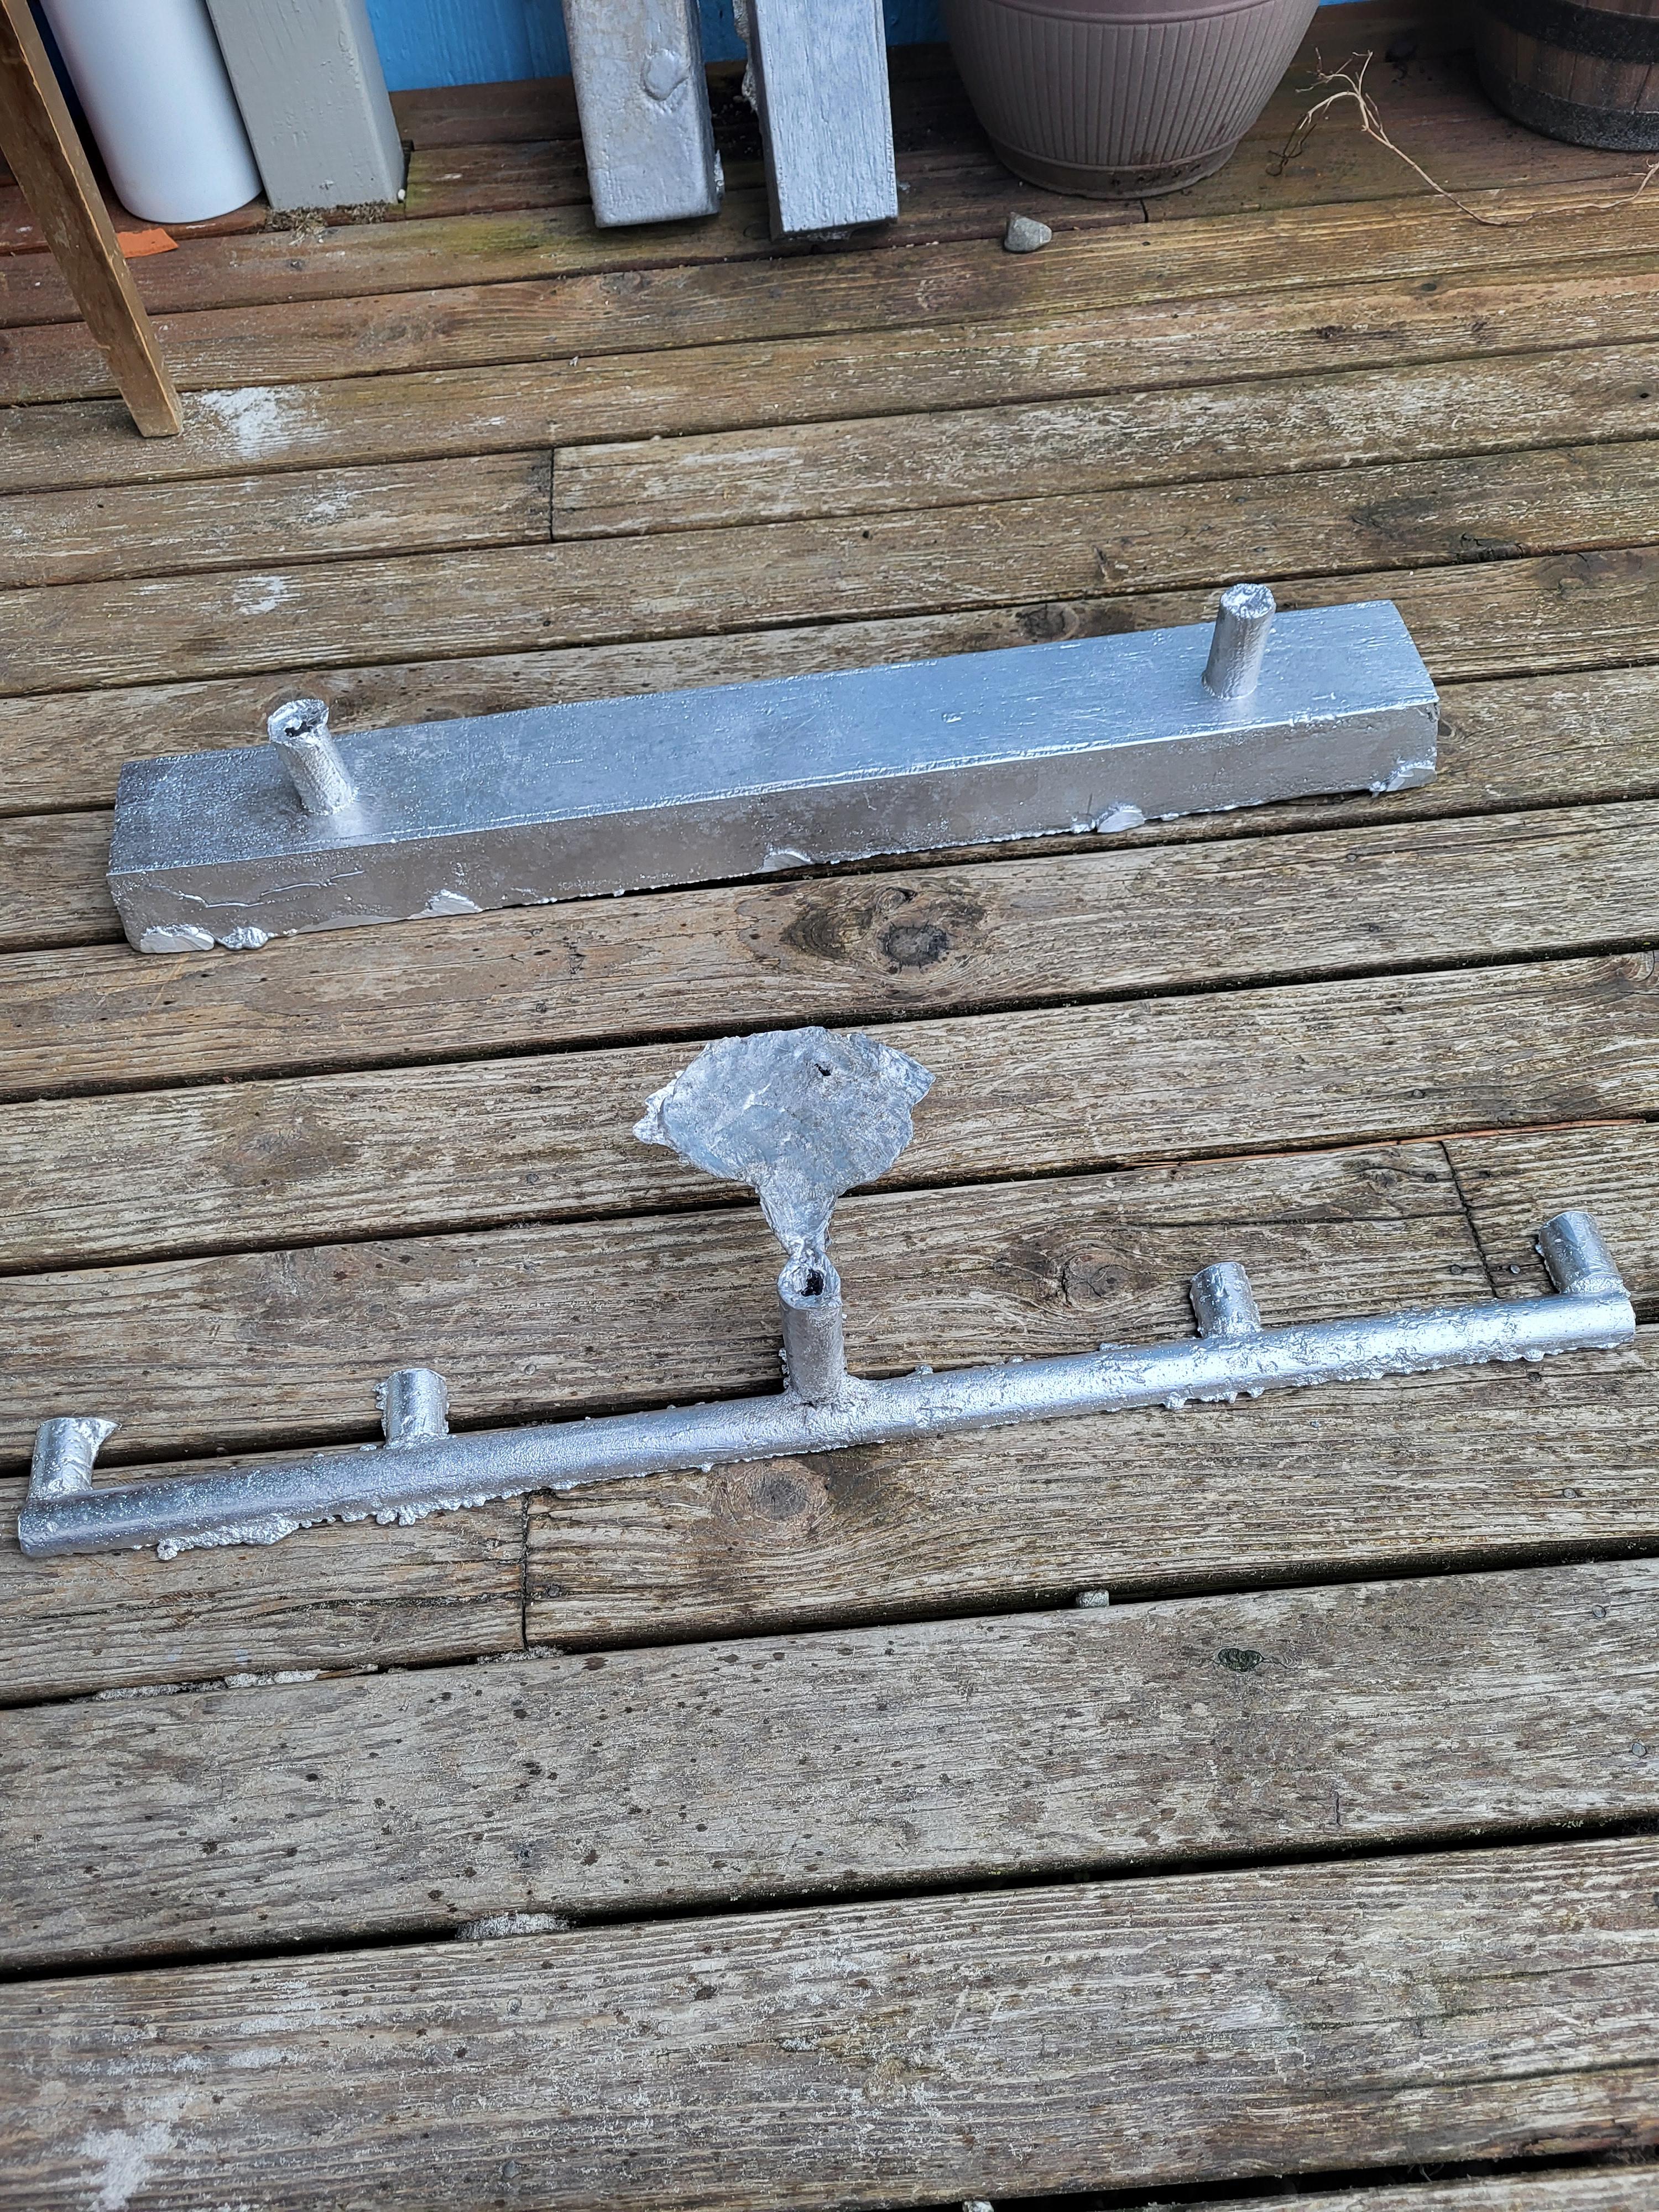
Success at last! Kind of! I think it may be a case of good enough for government work, but I've finally got something I think is maybe not perfect, but functional for the bed, the hardest casting. Call it maybe a C-.
Mild heat tears on one end, but not nearly so bad this time and not bad enough, I think, to make it non-functional. I think it's likely the pattern I'm using, the change in cross-sections is a bit too much. Heck, maybe I'll fill the cracks with JB weld and paint it! Last photo is four of the five attempts together.


-
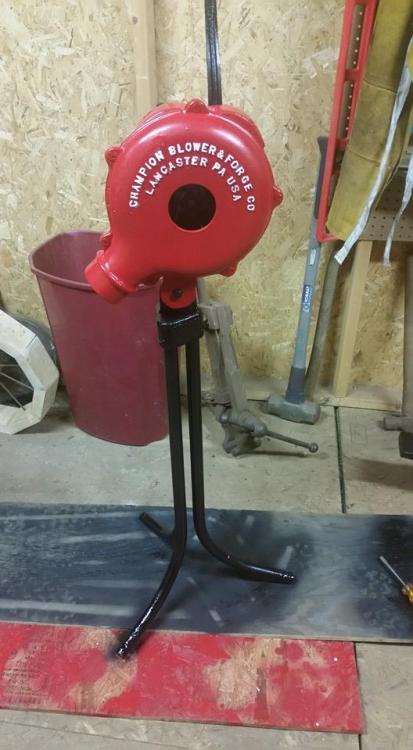
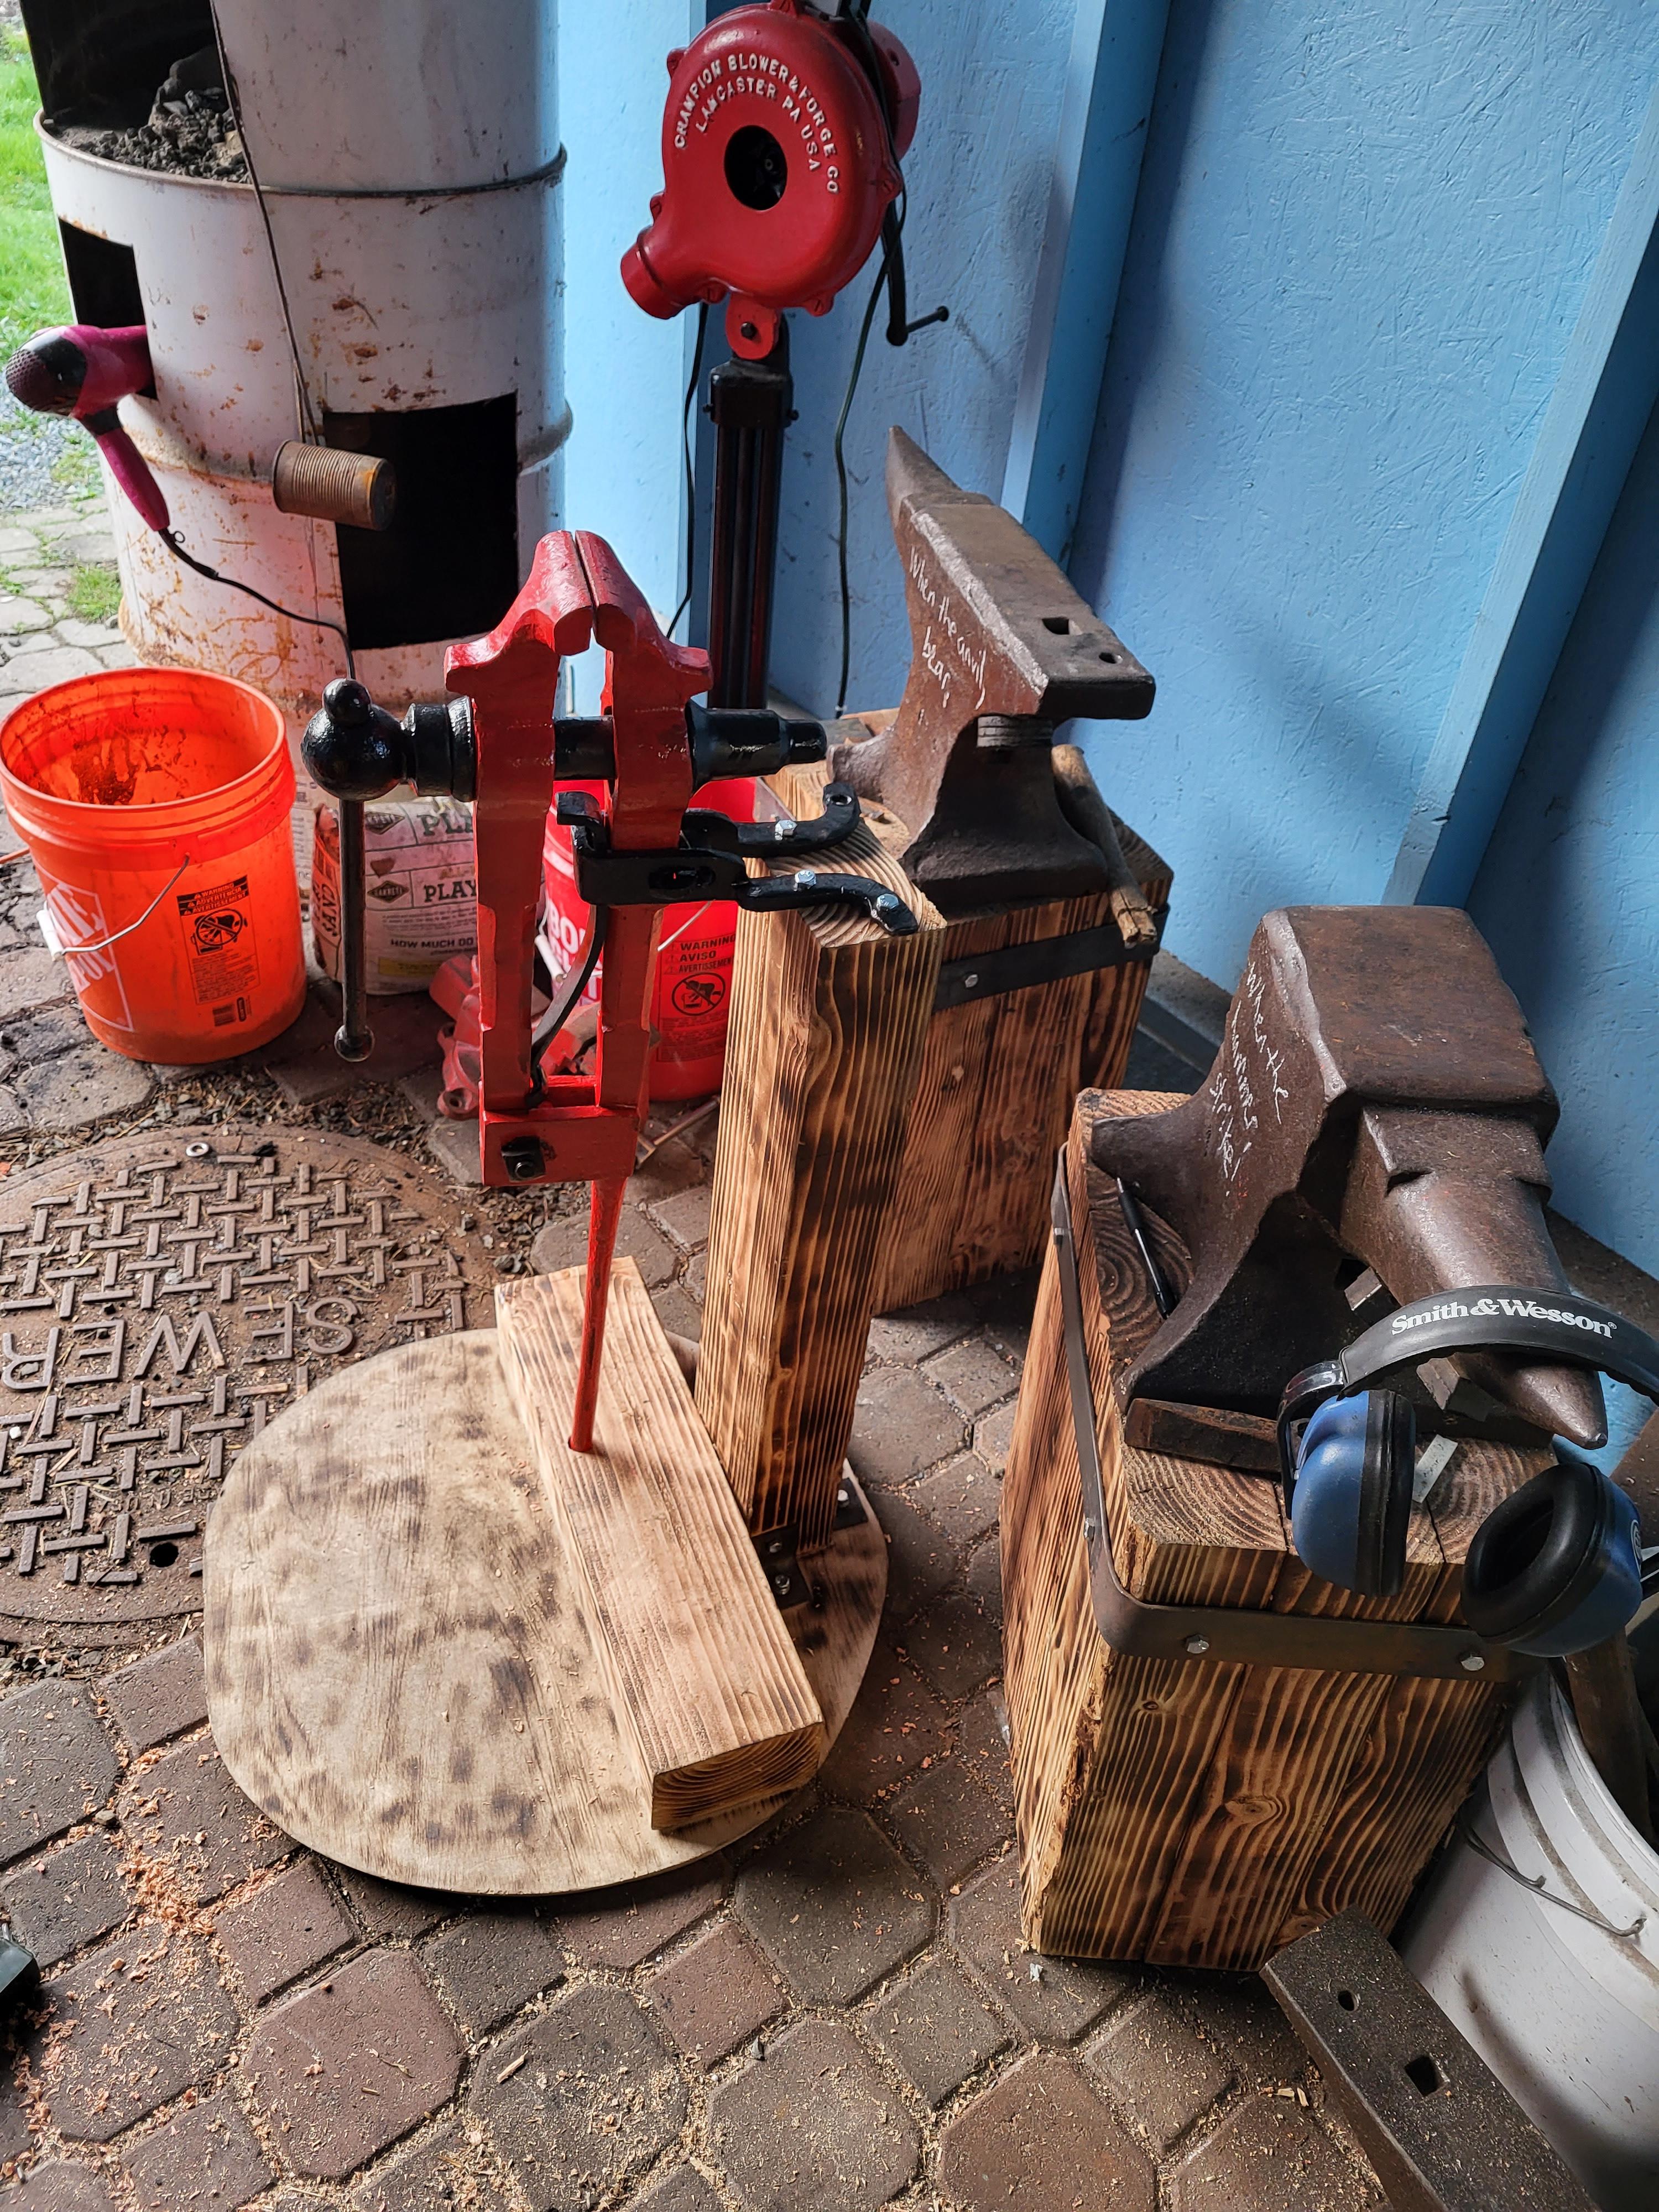
Please move this as needed and forgive me if there is an existing thread. I seem to recall various threads where people talked about painting their tools for various reasons. Over the years, mine have been either to provide visibility (where the heck is that scraper I had five seconds ago???), for decoration, or to stop that debate in advance over whose tool you were holding.
Obviously you can't paint or wouldn't want to paint all your tools flourescent pink or Ford Motor Company blue, but sometimes it's a big help on the ones you can. I think I've just hit that point with my hive tools for my bees - got four or five of the darned things, and doggone if every one hasn't turned invisible and gone on vacation.
At any rate, I thought it would be fun to have a topic where people could post their painted tools. Here's my little post vice and one of my blowers in fire engine red.

-
That stake anvil looks great, JHCC. Very nice work and smart to rivet the tenon. I probably would have tried a forge weld on the tenon and then realized I would never get both clean and to heat at the same time in my forge in a week of Sundays.
-
Western yellowjacket - definitely have them here. They're a right pain the fourth point of contact in the late summer early fall, during "the dearth". It's a period when the pollen and nectar supplies dry up when the nests are at their peaks and they lose their minds. Hard to keep from killing your hives and they will dive bomb you like crazy for a soda or even if they smell fragrance from your toiletry products. I put up traps and place meat baited with flea poison in a closed cat carrier (so it's not eaten by pets).
The cat carrier meat usually kills all of them in a few hundred yards, but I do kind of like the other method of sitting outside my hives with a beer and hitting them with a propane torch a few times a day. That makes for a good afternoon. The other thing with ground dwelling yellowjackets and setting gasoline on fire? They don't always build straight down, especially eastern yellowjackets, and many a person has poured gas in a hole 15 or 20 feet from the side of their house only to have the gas run sideways and the fire spread to their crawlspace.
Boric acid powder squirted into a hive behind a soffit or some similar restricted space works well at reducing numbers and sometimes gets the hive. Forget drowning, it doesn't work and they poke tiny holes in the hose.
In my book, the order of increasingly nasty bug bites/stings goes chigger, flea, mosquito, ant, biting midges, spider bite, sand fleas, bottle fly, honey bee, fire ant, sweat bee, Arizona centipede walking on you, horse fly, scorpion, paper wasp, yellow jacket, and hornet, which is tied with touching those white fuzzy caterpillars they have in GA.
-
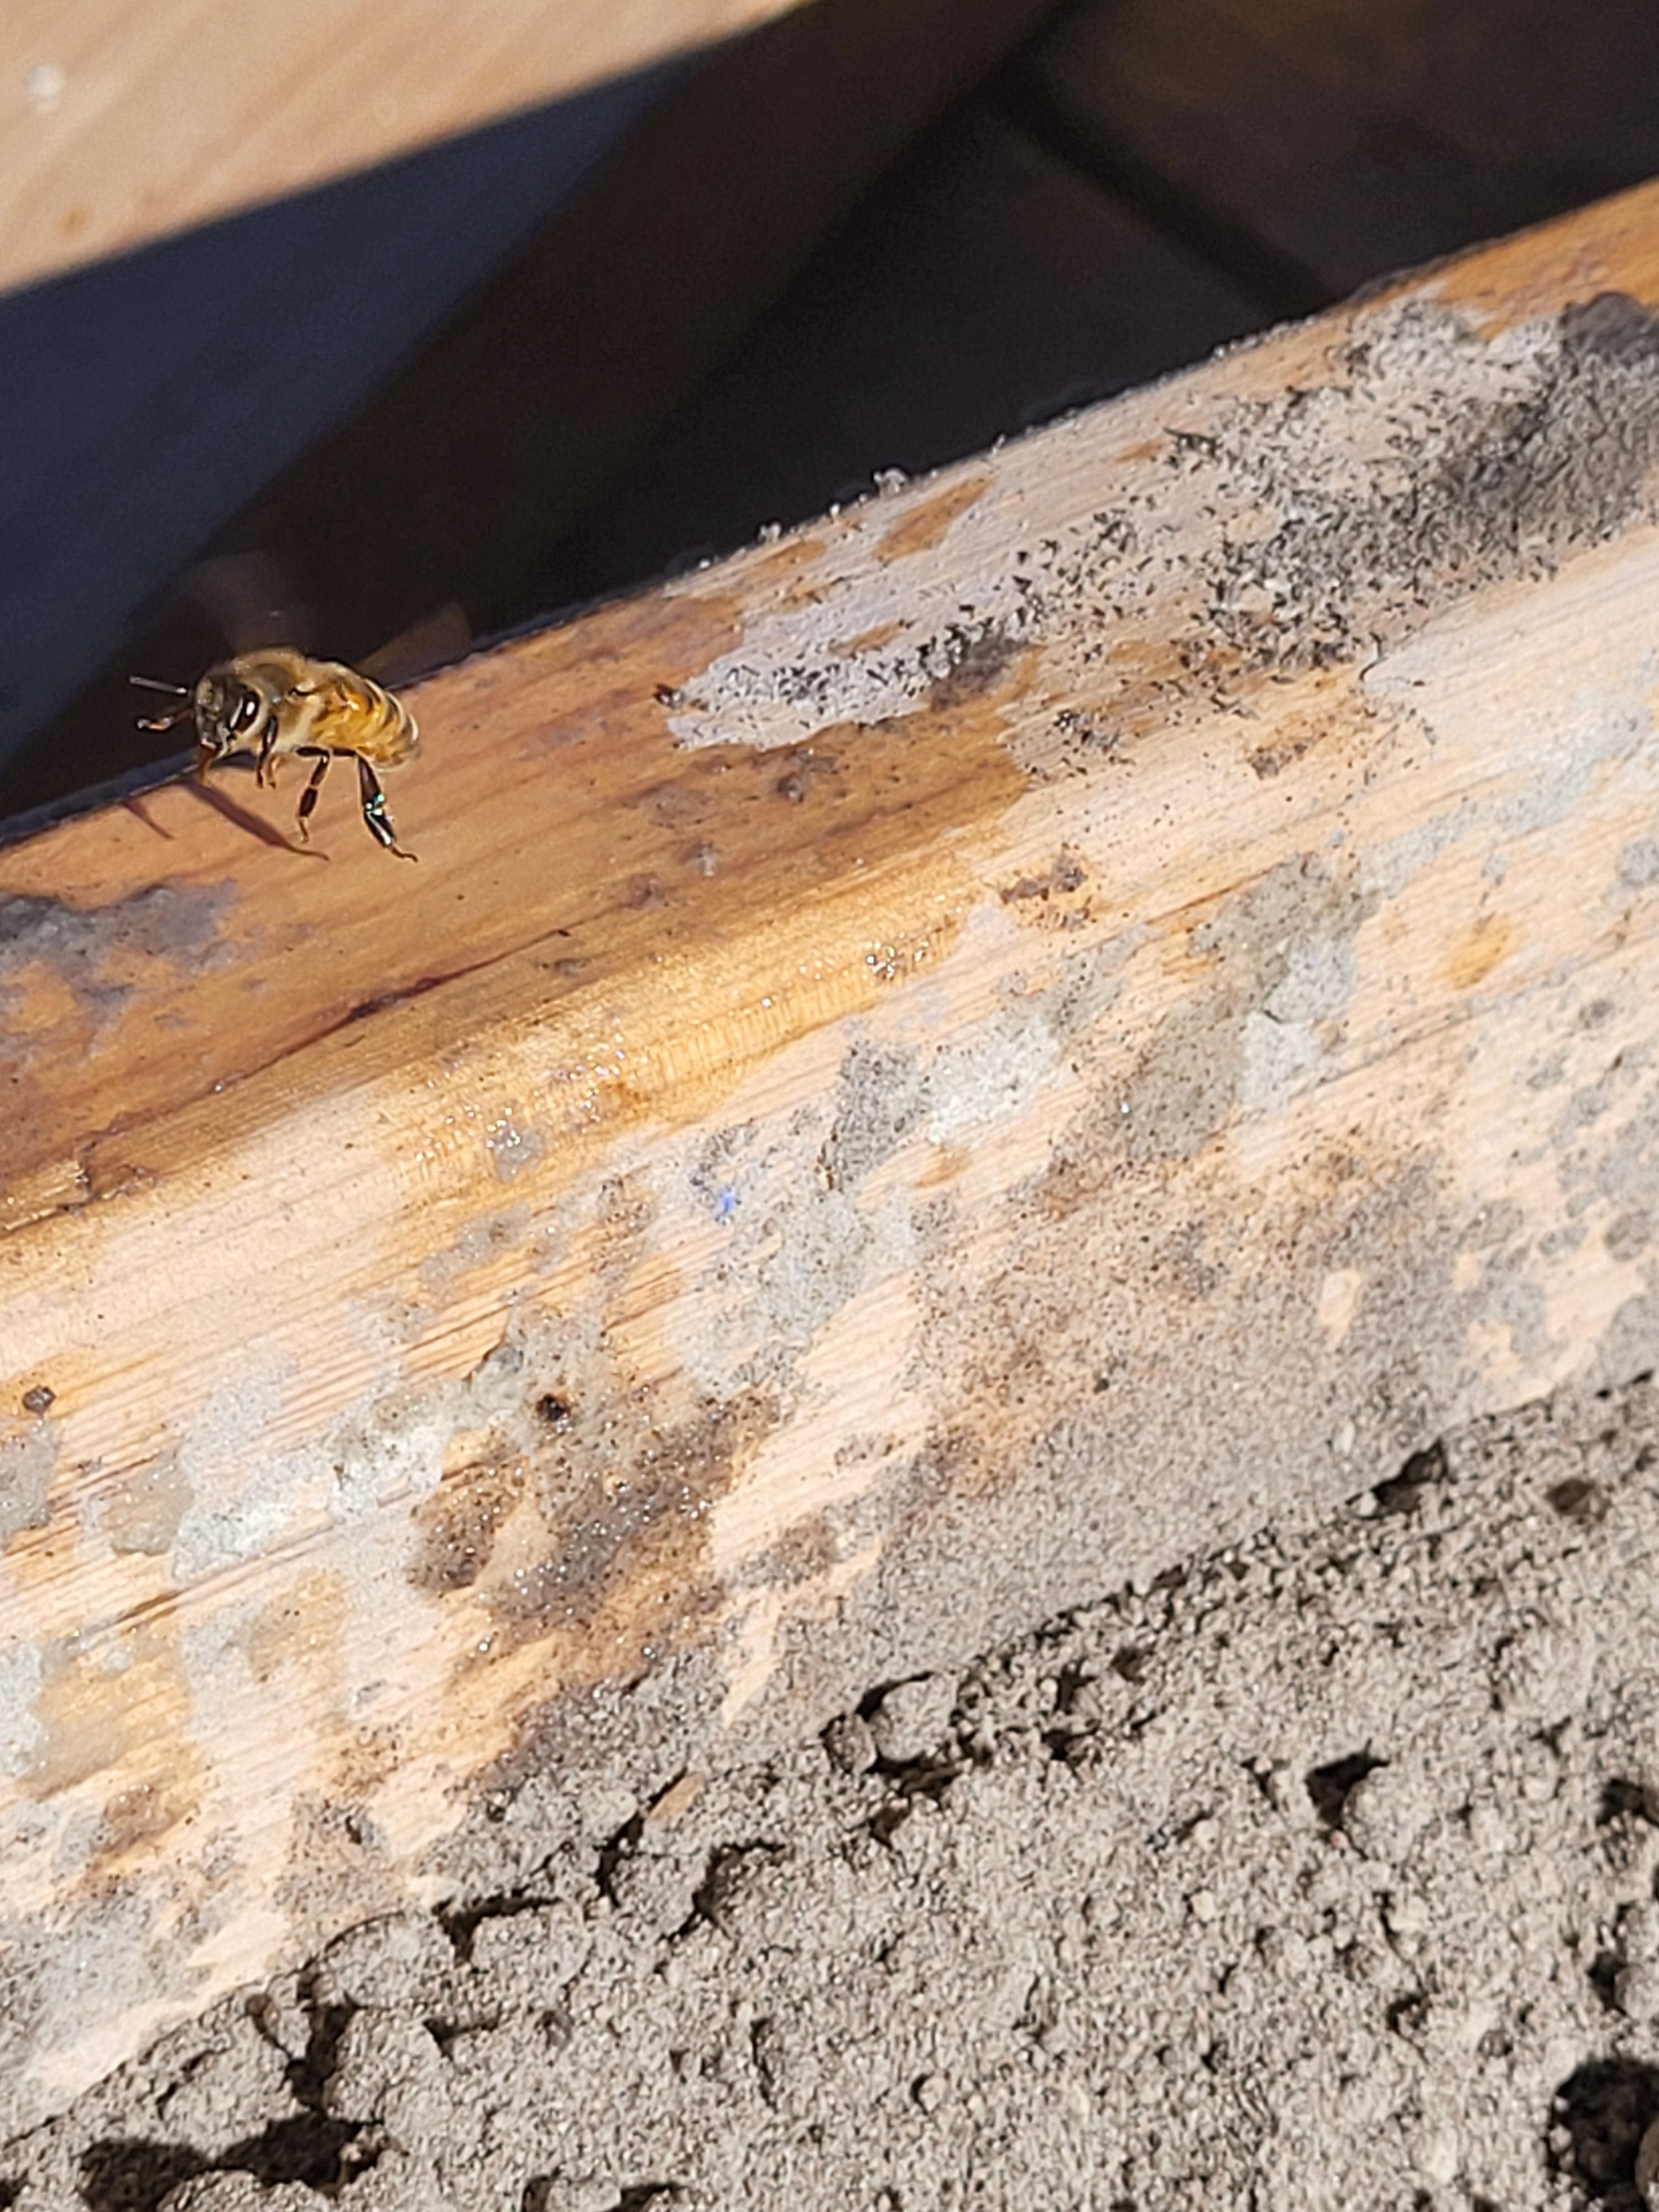
They'll land in the sand occasionally, usually just for a moment or so, but they'll drink off the wood on the edges all day long...then frequently fly right up into your head - do NOT swat them. I can water the wooden porch all around the box though and they won't touch it. They also like garden soil, especially when it's freshly turned.
-
Split a beehive, one that I just split about three weeks ago. I treated for varroa mites too late last year and paid the price by being down to one hive this spring. Had to put a second deep on it by March, and mind you it was still rainy and down in the 30s.
Mid-April it was full to bursting and making queen cells. I split it in thirds, and at around three weeks, just had to do it again. I won't get huge amounts of honey but went back to five hives from one. I may just deliberately keep that hive small one more time so she keeps making queens. "A swarm in May is worth a load of hay, a swarm in June is worth a silver spoon. A swarm in July, ain't worth a fly".
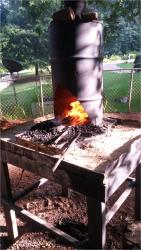
No pics of the split, because they caught me off guard, but to keep it metal related, here's one at the foundry. They frequently come hang out when I temper my greensand. I always put fresh water out for them, but they seem to like the water over there better.

-
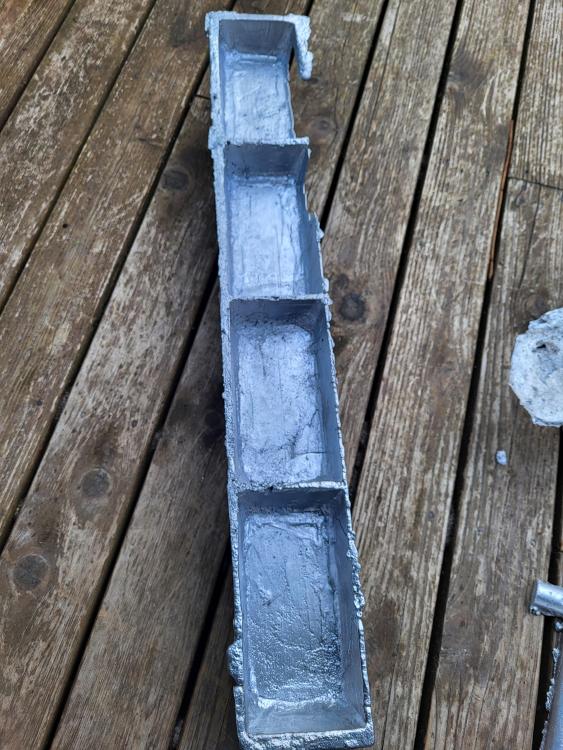
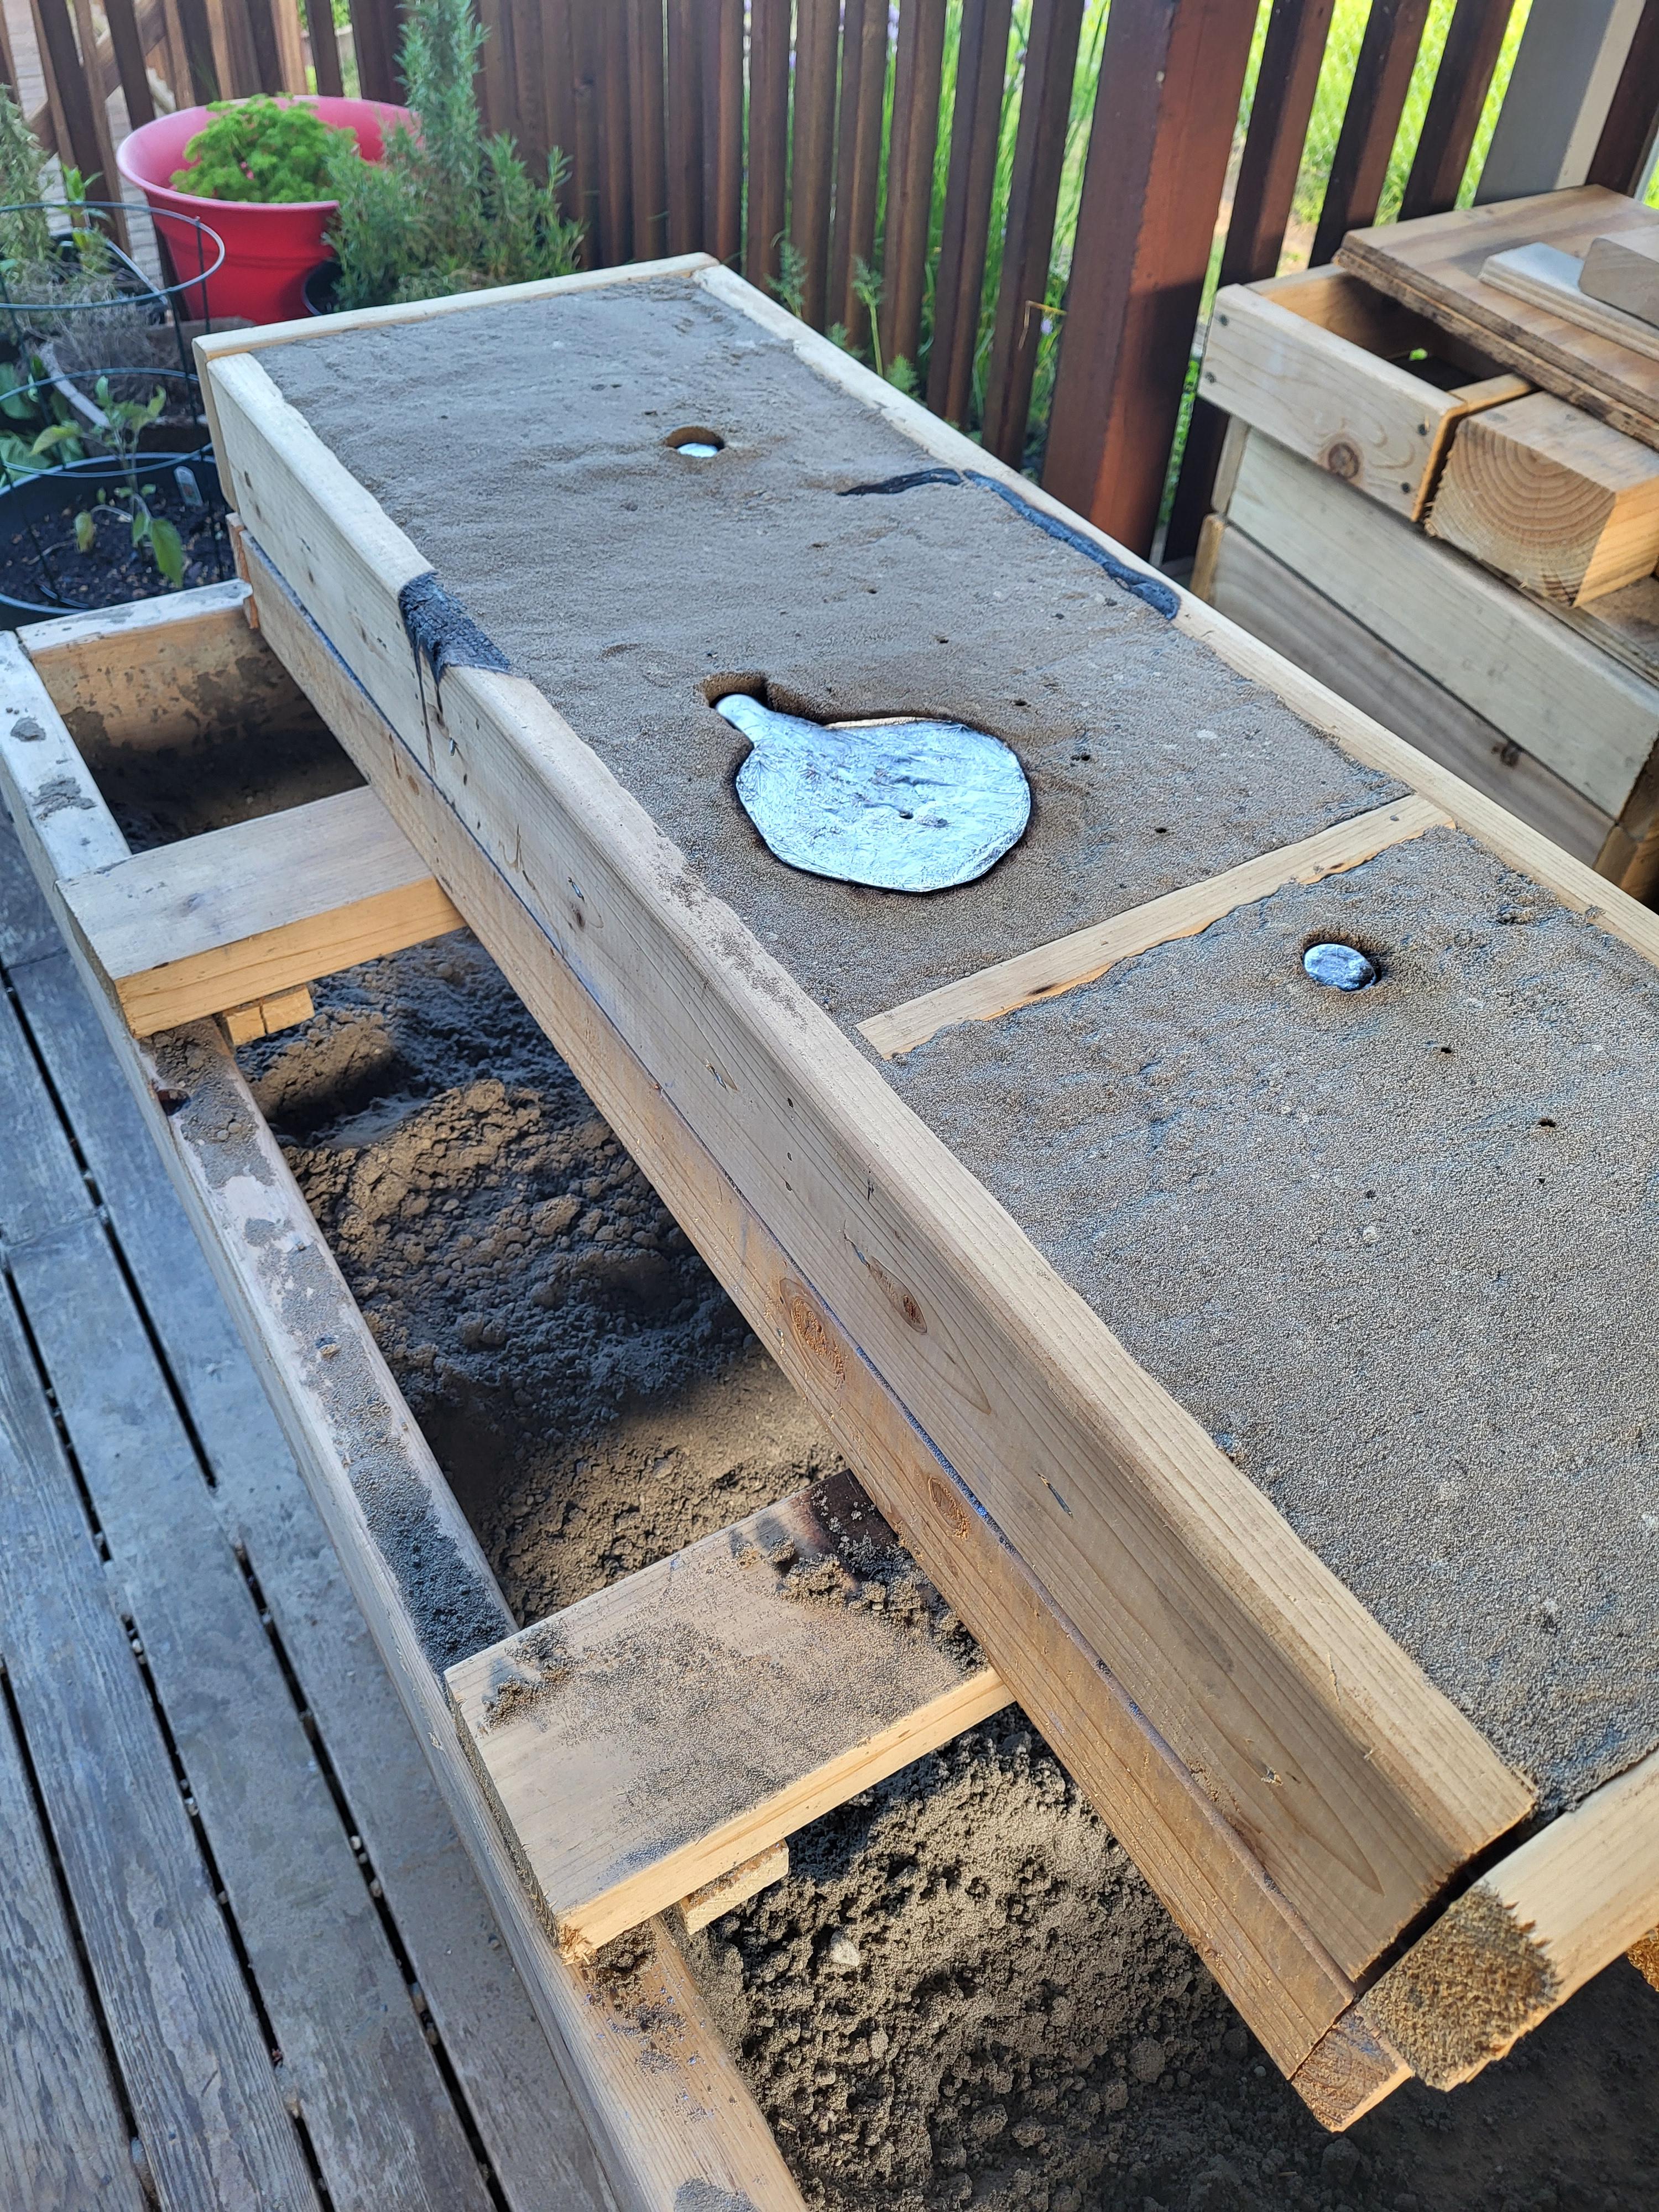
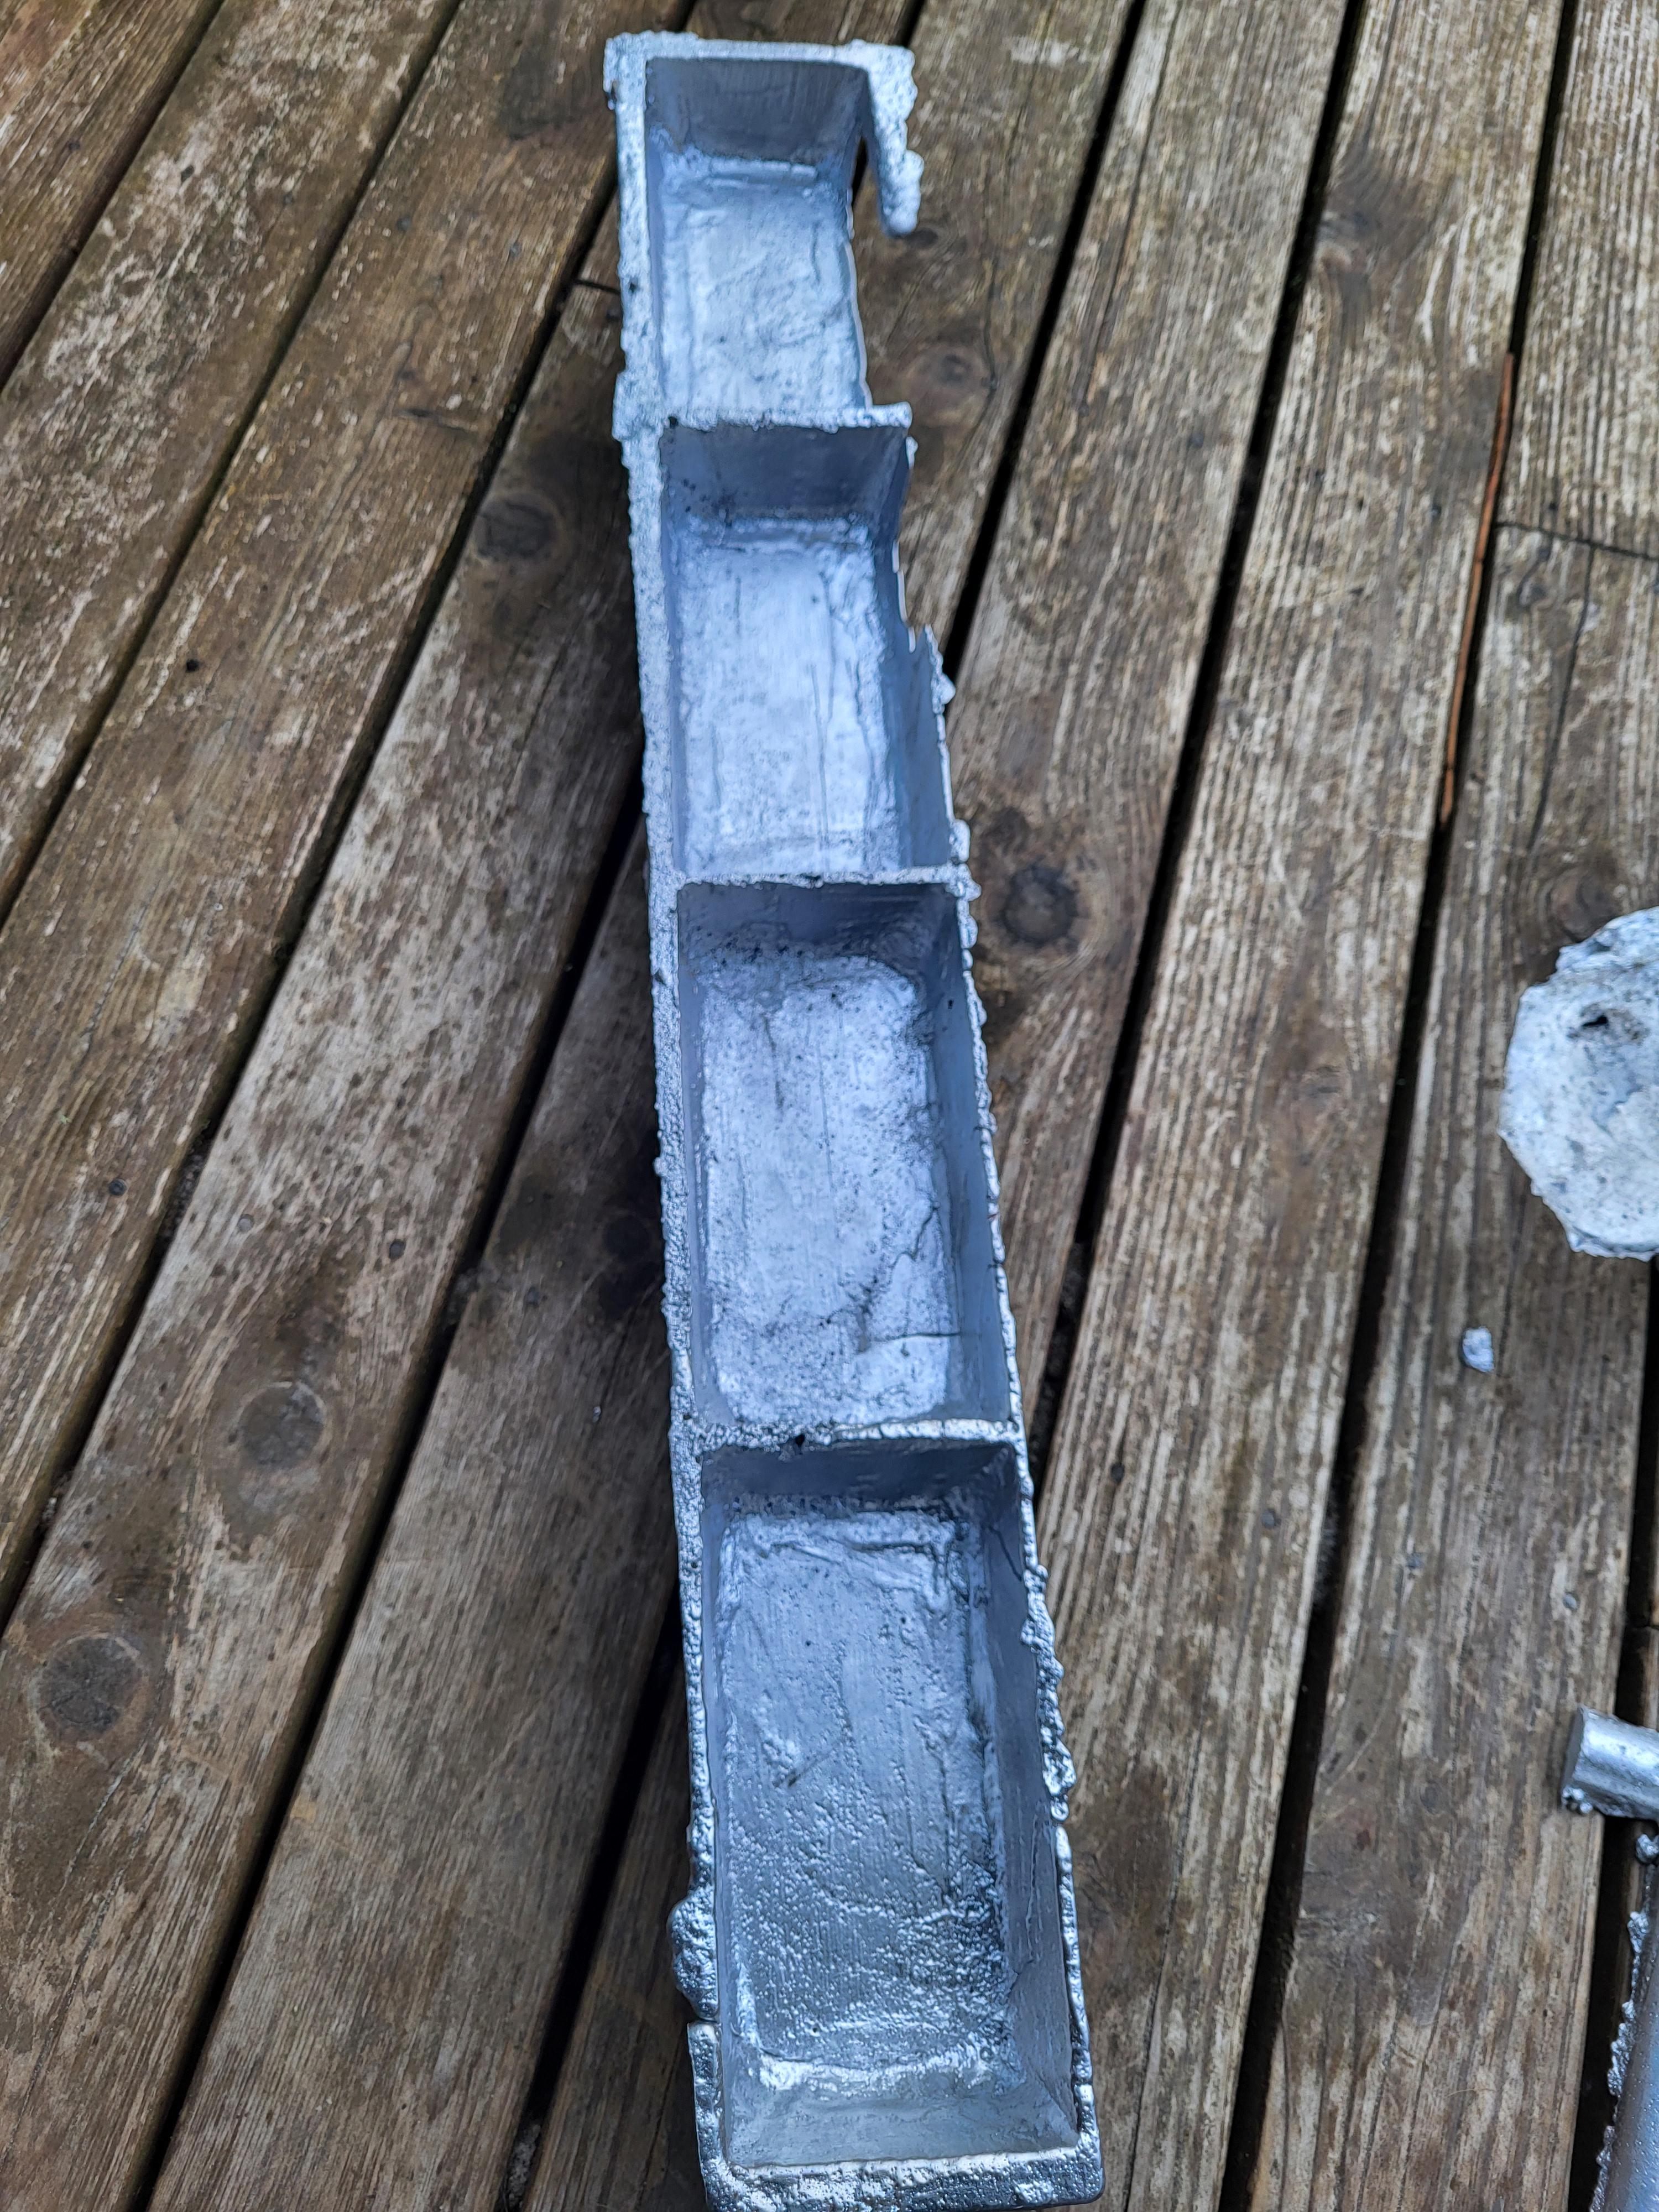
Failure 4.0. So, this time I put parting powder on the drag before adding the pattern and cores...big mistake. When I pulled the pattern after ramming the top, I got it a little bit off to one side, which meant the sand cores (i.e. the negative space) ended up where walls are supposed to go. If I had waited on the parting powder, that would have been immediately obvious and fixable. Whoops.
Also, because where the backside walls existed at all they were maybe 1/8" thick if not less, I got heat tears in them. That said, the rest came out decent - risers worked well, very minor divot on the brace in the middle from shrinkage. Better, but still no cigar. Also, the bloody dogs tore into and were eating my lump charcoal. Sigh...
-
Big pulley that looks like a bobbin? For a wide leather belt? If you don't want to convert to a different set of pulleys, I would tend to wonder if you could convert a wheel rim or fabricate something. Might be able to cast one, depending on the size or skills, especially if you have the old one as a pattern.
-
I would tend to think it would depend on the design a bit. Been a long time since I had a crucible fail inside, and since I switched to using charcoal the bottom is usually covered in regular ash. My furnace has a drain hole that I place a ceramic plinth over to set the crucible on. It's got two channels built into the bottom that run down to the hole so if something happens to the crucible it will go out the hole, plinth or not. Last time I had a problem was a long time ago, but the aluminum just ran out the bottom onto the sand.
I use a variation on the backyard metalcasting refractory recipe in my furnace, in a metal shell, over reinforcing bolts and wire, with fibreglass insulation up against the shell. Portland cement, sand, perlite, and fireclay and secret ingredient X. It's maybe not the way I would go now, but it keeps working, so why not? Worst complaint is that it's heavy.
Built my first forge out of the stuff, wouldn't recommend it for that; it chipped out a bit and widened the firepot. But I only ever had a problem using it in a furnace once; when I was ramming the refractory I left an air pocket in one wall and it blew a hole out on the inside. Patched it and it's been fine since - the one I use now. I would have thought the portland cement would fail and start to slag but it just keeps going without any apparent damage. If I was on firebrick though...
-
Love the mushrooms. For the drink, I prefer a gold rush - basically a whiskey sour but you use a honey syrup. I like gin but it doesn't like me back.
-
Well, found a close match...in a Makita 9556. All the dimensions work except the screw end going to the gear box, which is 6mm to the Bostitch's 8. But the 9556 is designed for 220V, so if I recall correctly, that would draw a bunch of extra current and burn up the windings. No bueno.
And while I'm at it, picked up a caliper to measure all this mess, and it was reading exactly half what it should. Ended up having to pull the batteries and short the terminals to reset it before it worked right. Maybe rewinding is the way to go. It looks simple enough, but knowing how a motor works in theory and rebuilding it are two very different things. Screw up an intake gasket on a 318 and make a hidden vacuum leak say, and your Carter carburetor will never forgive you. I can't imagine it's better with electric motor.
-
Green apples, no. The go-to in my part of Texas was rocks, closely followed by acorns. And if you're strong enough, an osage orange which I don't recommend on the merits. The one we got whupped for was tearing down sugarcane to have sword fights.
-
The ones I found for Dewalt grinders look a bit fatter and shorter. The ones for Makita actually look pretty close, but I'm hesitant to mix and match. Called the service center, and got a wonderfully helpful foreign national, Alejandro, who tried very hard, but didn't have much more to go on that what was on their website and I'm not sure knew an armature from a backhoe.
Is there nothing Gingery didn't do at some point? Yeesh. I'm surprised he hasn't wrote a book on do-it-at-home gene splicing.
-
Took the rest apart, worse than I thought. The windings are burned on the armature, just below the commutator. I'm not good enough to rewind one, and I've been losing my mind for two hours trying to hunt down a replacement. Seems like they sell one for every brand but the Bostitch BTE820. Anyone know if they call it something weird, or just don't carry them anymore? Well used or not, I don't want to throw out a $100 grinder over a $30 part.
-
Yup, I found some books that said rawhide was used or even thin wood in some instances as feathers tended not to be up to it. Got some rawhide strips, boiled them, flattened them, cut to size and it worked well after a little experimentation.
You've got to put the fletching a little further forward than on an arrow; the first ones I made didn't, and due to hitting the nut or cord they had problems with precession (it would come off the bow going forward, but at a slight angle and go through the air in sort of a helix before straightening out).
-
My first one was only stock removal from a small spring and it was still a pain. Cocking was just at the limit of what you could do w a stirrup and pushing with your legs. A goats foot lever works pretty well on small ones.
Natural fibers actually held up pretty well, but you don't use one string, you run a loop or loops then wind around it with a small whip cord to bind it, leaving small loops at the end. You also have to allow for the fact that it will stretch and has to be kept dry. Even w a helper cord (and a people type helper) they're really hard to string and unspring (looking at you, Battle of Crecy).
I didn't have horn, but wood nuts for the trigger mechanism were also a pain. You'll need a hardwood, and reinforced w a steel wedge or plate at the point it contacts the trigger, but it still wants to either throw the wedge, split the nut, or wallow out the center hole for the pin. They all have solutions, but...If you're not shooting for historical accuracy, I'd make the whole thing out of steel.
They get even scarier when you shoot something. A bolt with a bodkin head would go right through a 3/4 piece of plywood except sometimes it would get caught on the rawhide fletching (or tear it off).
-
Would you consider that a clamp, a hold-fast, or more of a pha-lange?
-
On 4/23/2024 at 1:14 AM, BillyBones said:
lI am kind of thinking of using one leaf, the one with the bushings on the ends, and build some sort of ballista. Use the spring for the limbs of a giant crossbow more or less.
Having made them from leaf spring, if you make a crossbow, or an oversized crossbow, get new spring from a spring shop. Don't get me wrong, get it scrap - some companies and local governments have new trucks upgraded when they buy them and they often toss the almost new springs out.
Old springs, and especially ones that have broken once may break again. Steel crossbows have a much, much higher draw over a shorter length than a self-bow, and can run in the hundreds of pounds, so this means that if the prod goes, it tends to fail spectacularly and in a fairly danger manner. Spend a fair amount of time on the nut and the trigger system, as well as the cocking mechanism; they are also common points of failure.
There was a site when I built my first one - https://www. crossbowbook.com which had a very helpful book. I believe it's still there, half buried under all the merchandise they're selling now.
That out of the way, I got a two-foot long monkey wrench today. Always happy to add to my oversized tool collection.


It followed me home
in Blacksmithing, General Discussion
Posted
Got a 1 h.p. single-phase motor for my lathe today for $50. Hooray. Gotta sort out the wiring, but otherwise, hooray!