

BoOnTheGo
-
Posts
33 -
Joined
-
Last visited
Content Type
Profiles
Forums
Articles
Gallery
Downloads
Events
Posts posted by BoOnTheGo
-
-
Frosty, it must be happenstance, or my coffee hasn't kicked in yet.....
-
Wanted to update as I have been using this for a bit. I noticed that my sweet spot seemed to be rather low in my mind. I measured and sure enough it was. I think it must have moved down as I was packing the dirt. Easy fix though. This time I did add some fire brick under to prevent this from happening. I used it a bit after today and there was a big difference. Thanks again for everyone with your guidance and support.
-
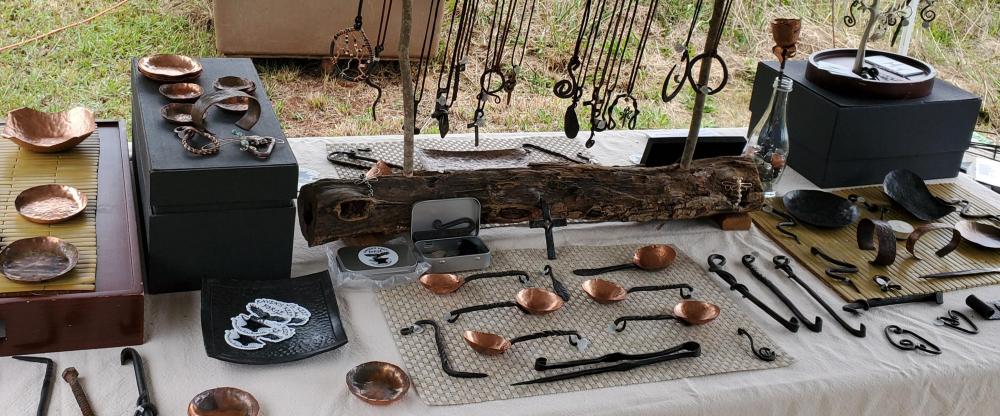
Frosty, now that's hard core. I agree, my home forge is much more comfortable. I would say that 99% of the work that I do is from scrap. I'm surprised by the stuff people give me because they know that I can use it. One man's trash.....
-
Hey Frosty! That's how I get most of the people for my class. I try to teach it as low cost as possible to give a taste. I think of it as Primitive. I am far from proficient in my skills and I am comfortable sharing what I know (as limited as it is)
My first home 'anvil' was a big rock. I had to start somewhere.
 Needless to say, I became great at making smaller rocks......
-
jlpservicesinc, I know there are multiple ways to do it. I would like to see what you come up with. My wash tub worked well for the wood. I share the 'hole in the ground' method with bellows several weekends a year. I'm always up for learning something new. Thanks!
-
pnut, I did just that as I got going. I had saw that somewhere on here. Easy peasy. Very happy with the way it has turned out so far. I am looking forward to a full day of it
Frosty, now that is a neat idea. I have had no issues with using wood. It is a bit more time consuming to get going. And I have to make sure the wind is blowing the right way. I agree about the heat. It's nice in the colder months though.
-
Chris, so far so good! I'm pleased with this set up so far
-
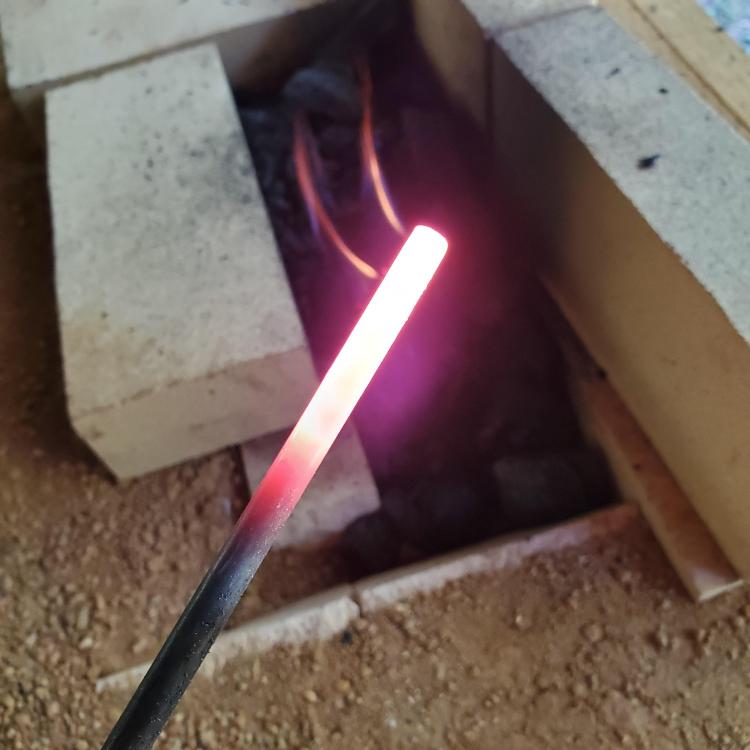
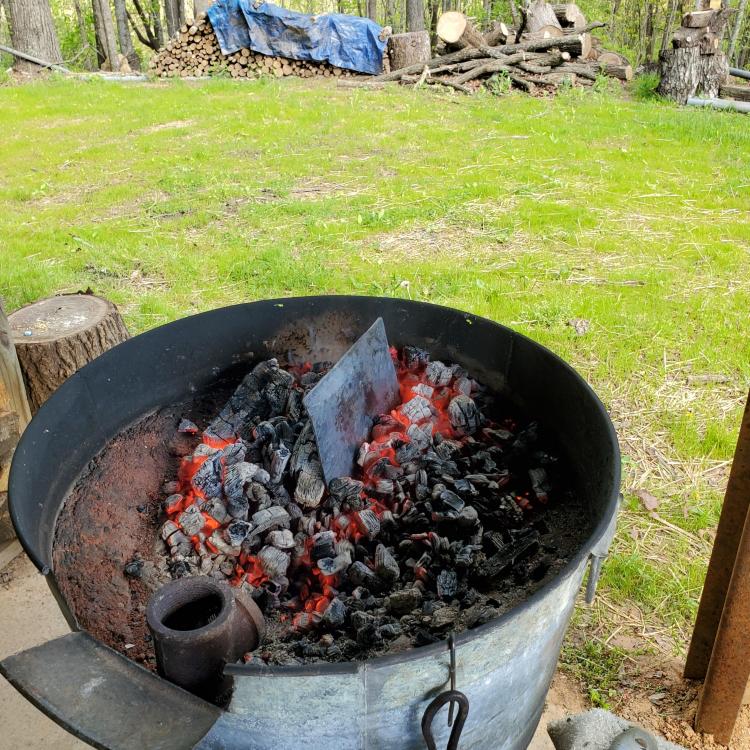
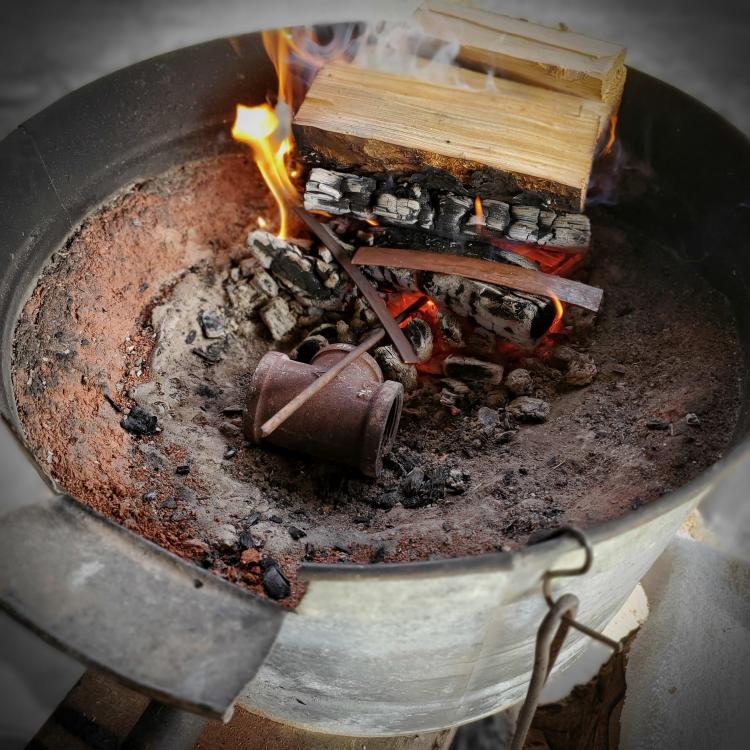
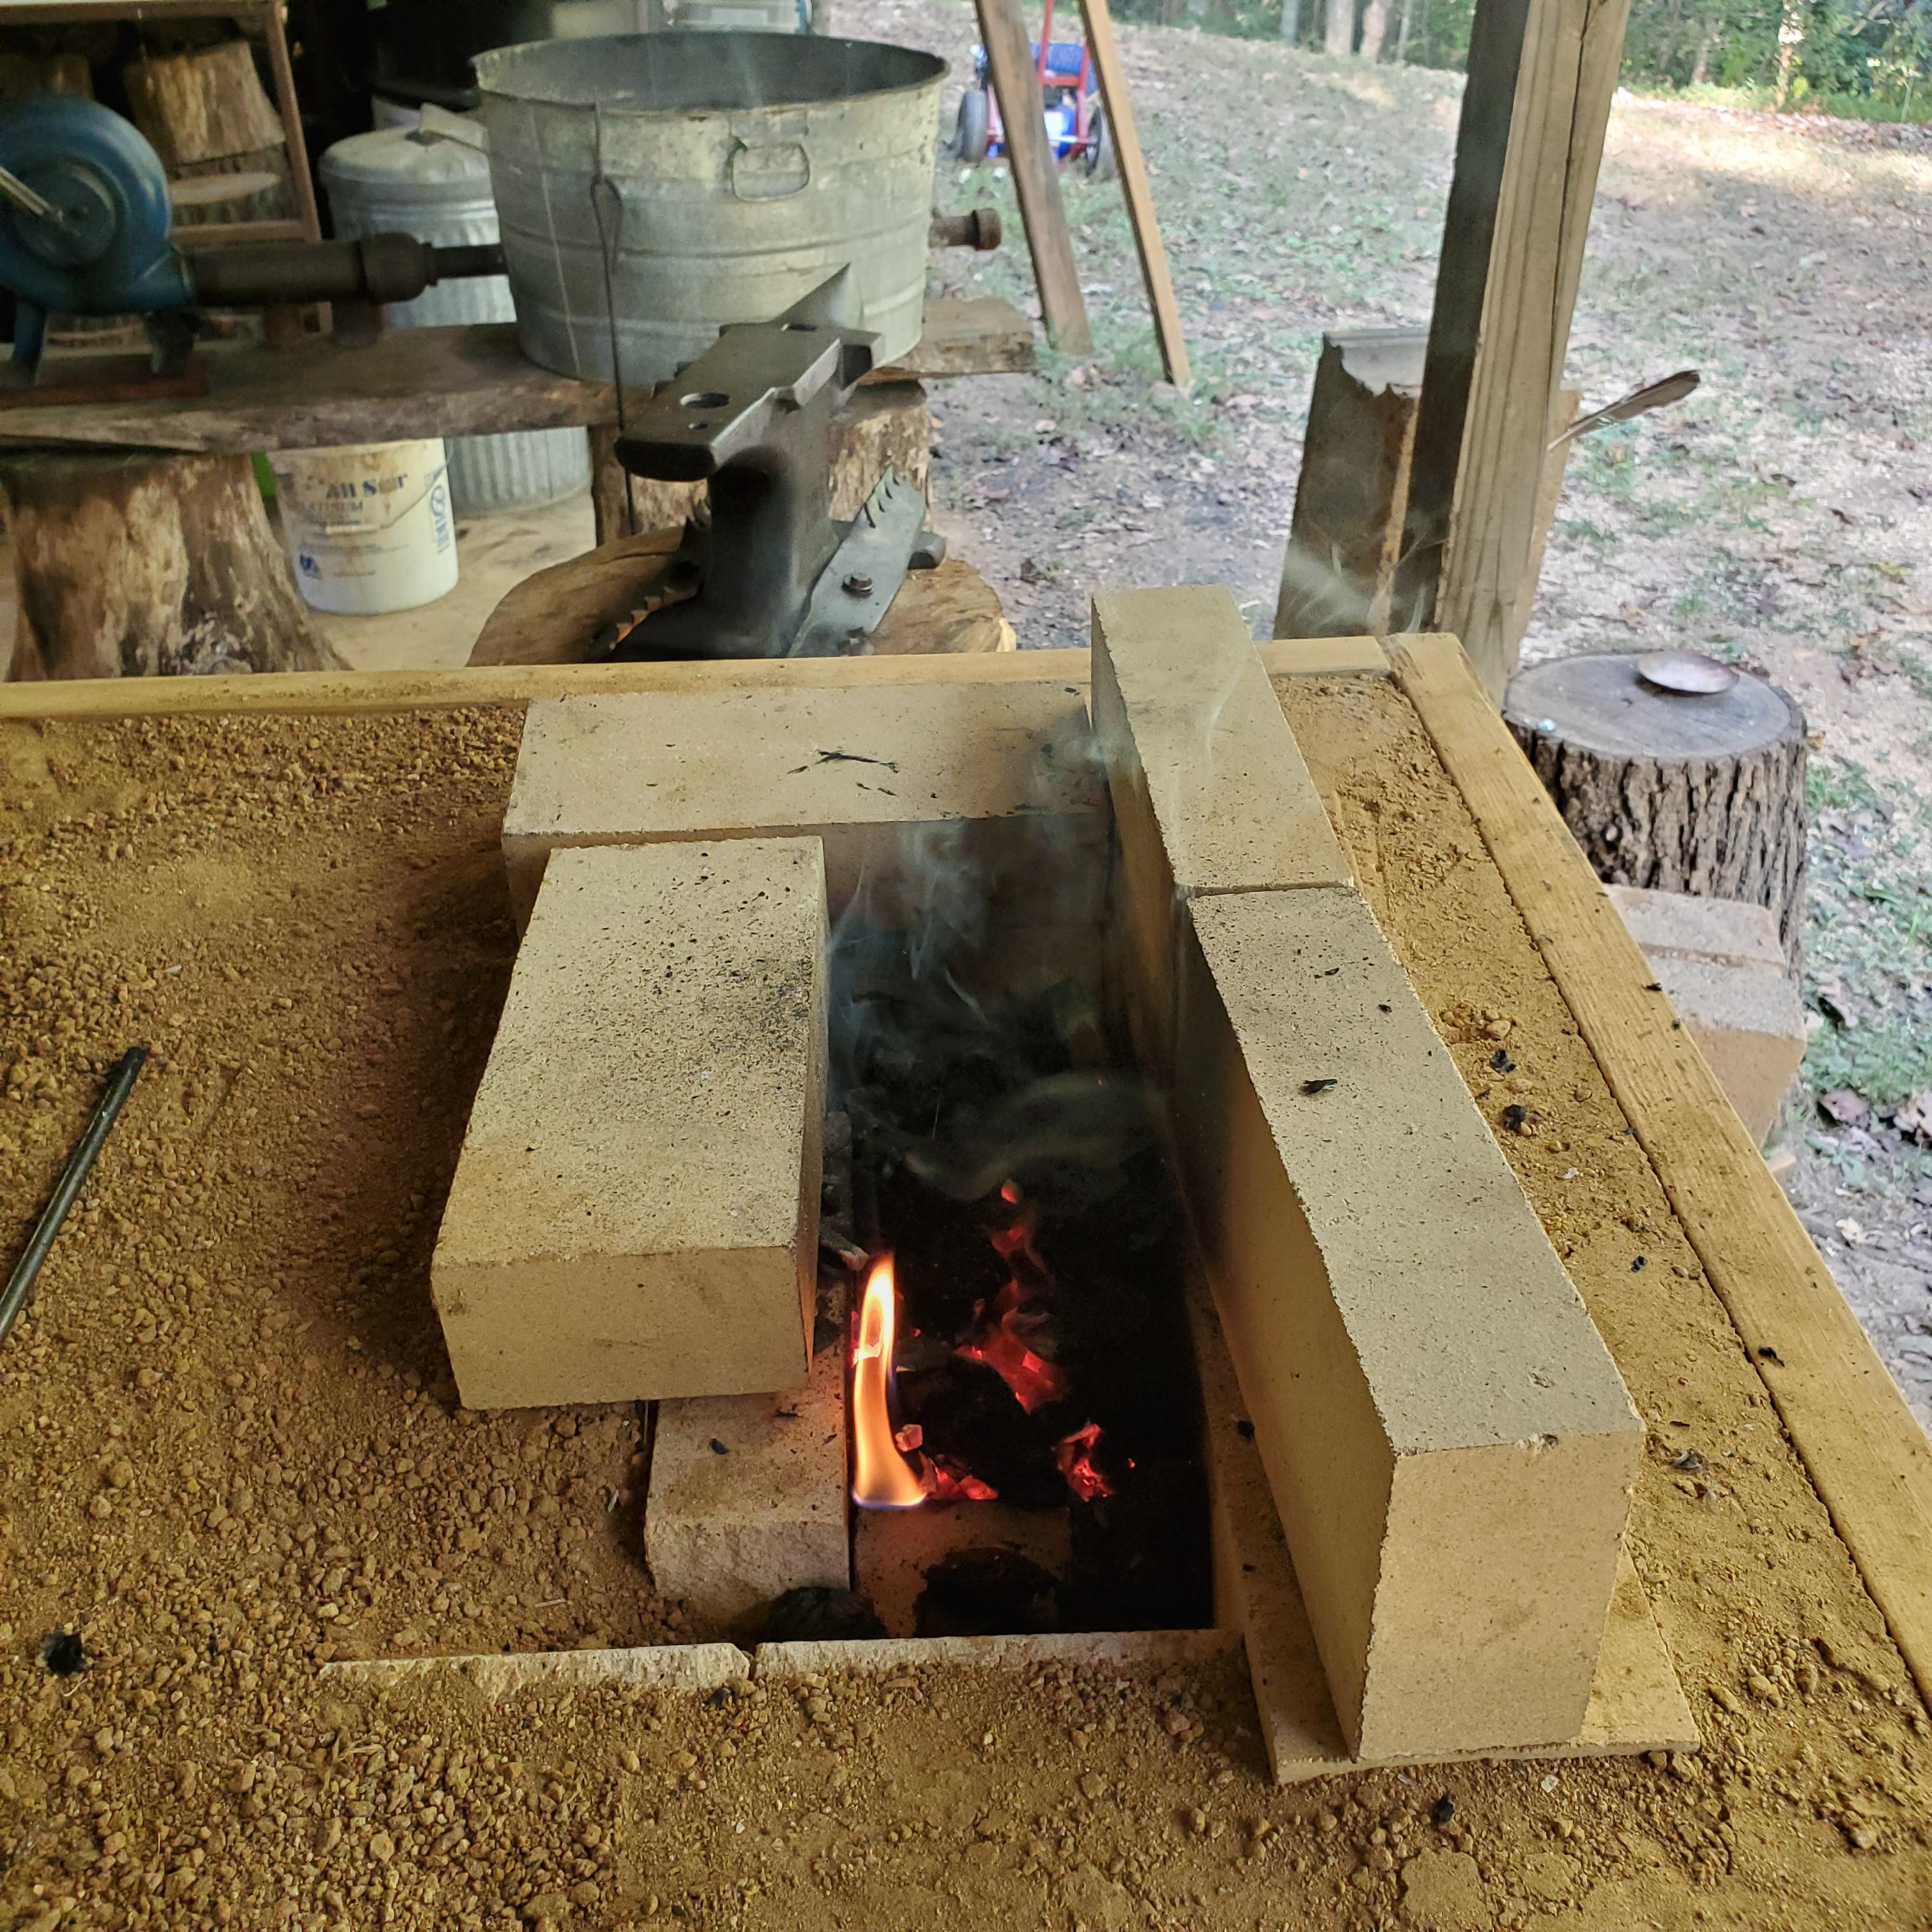
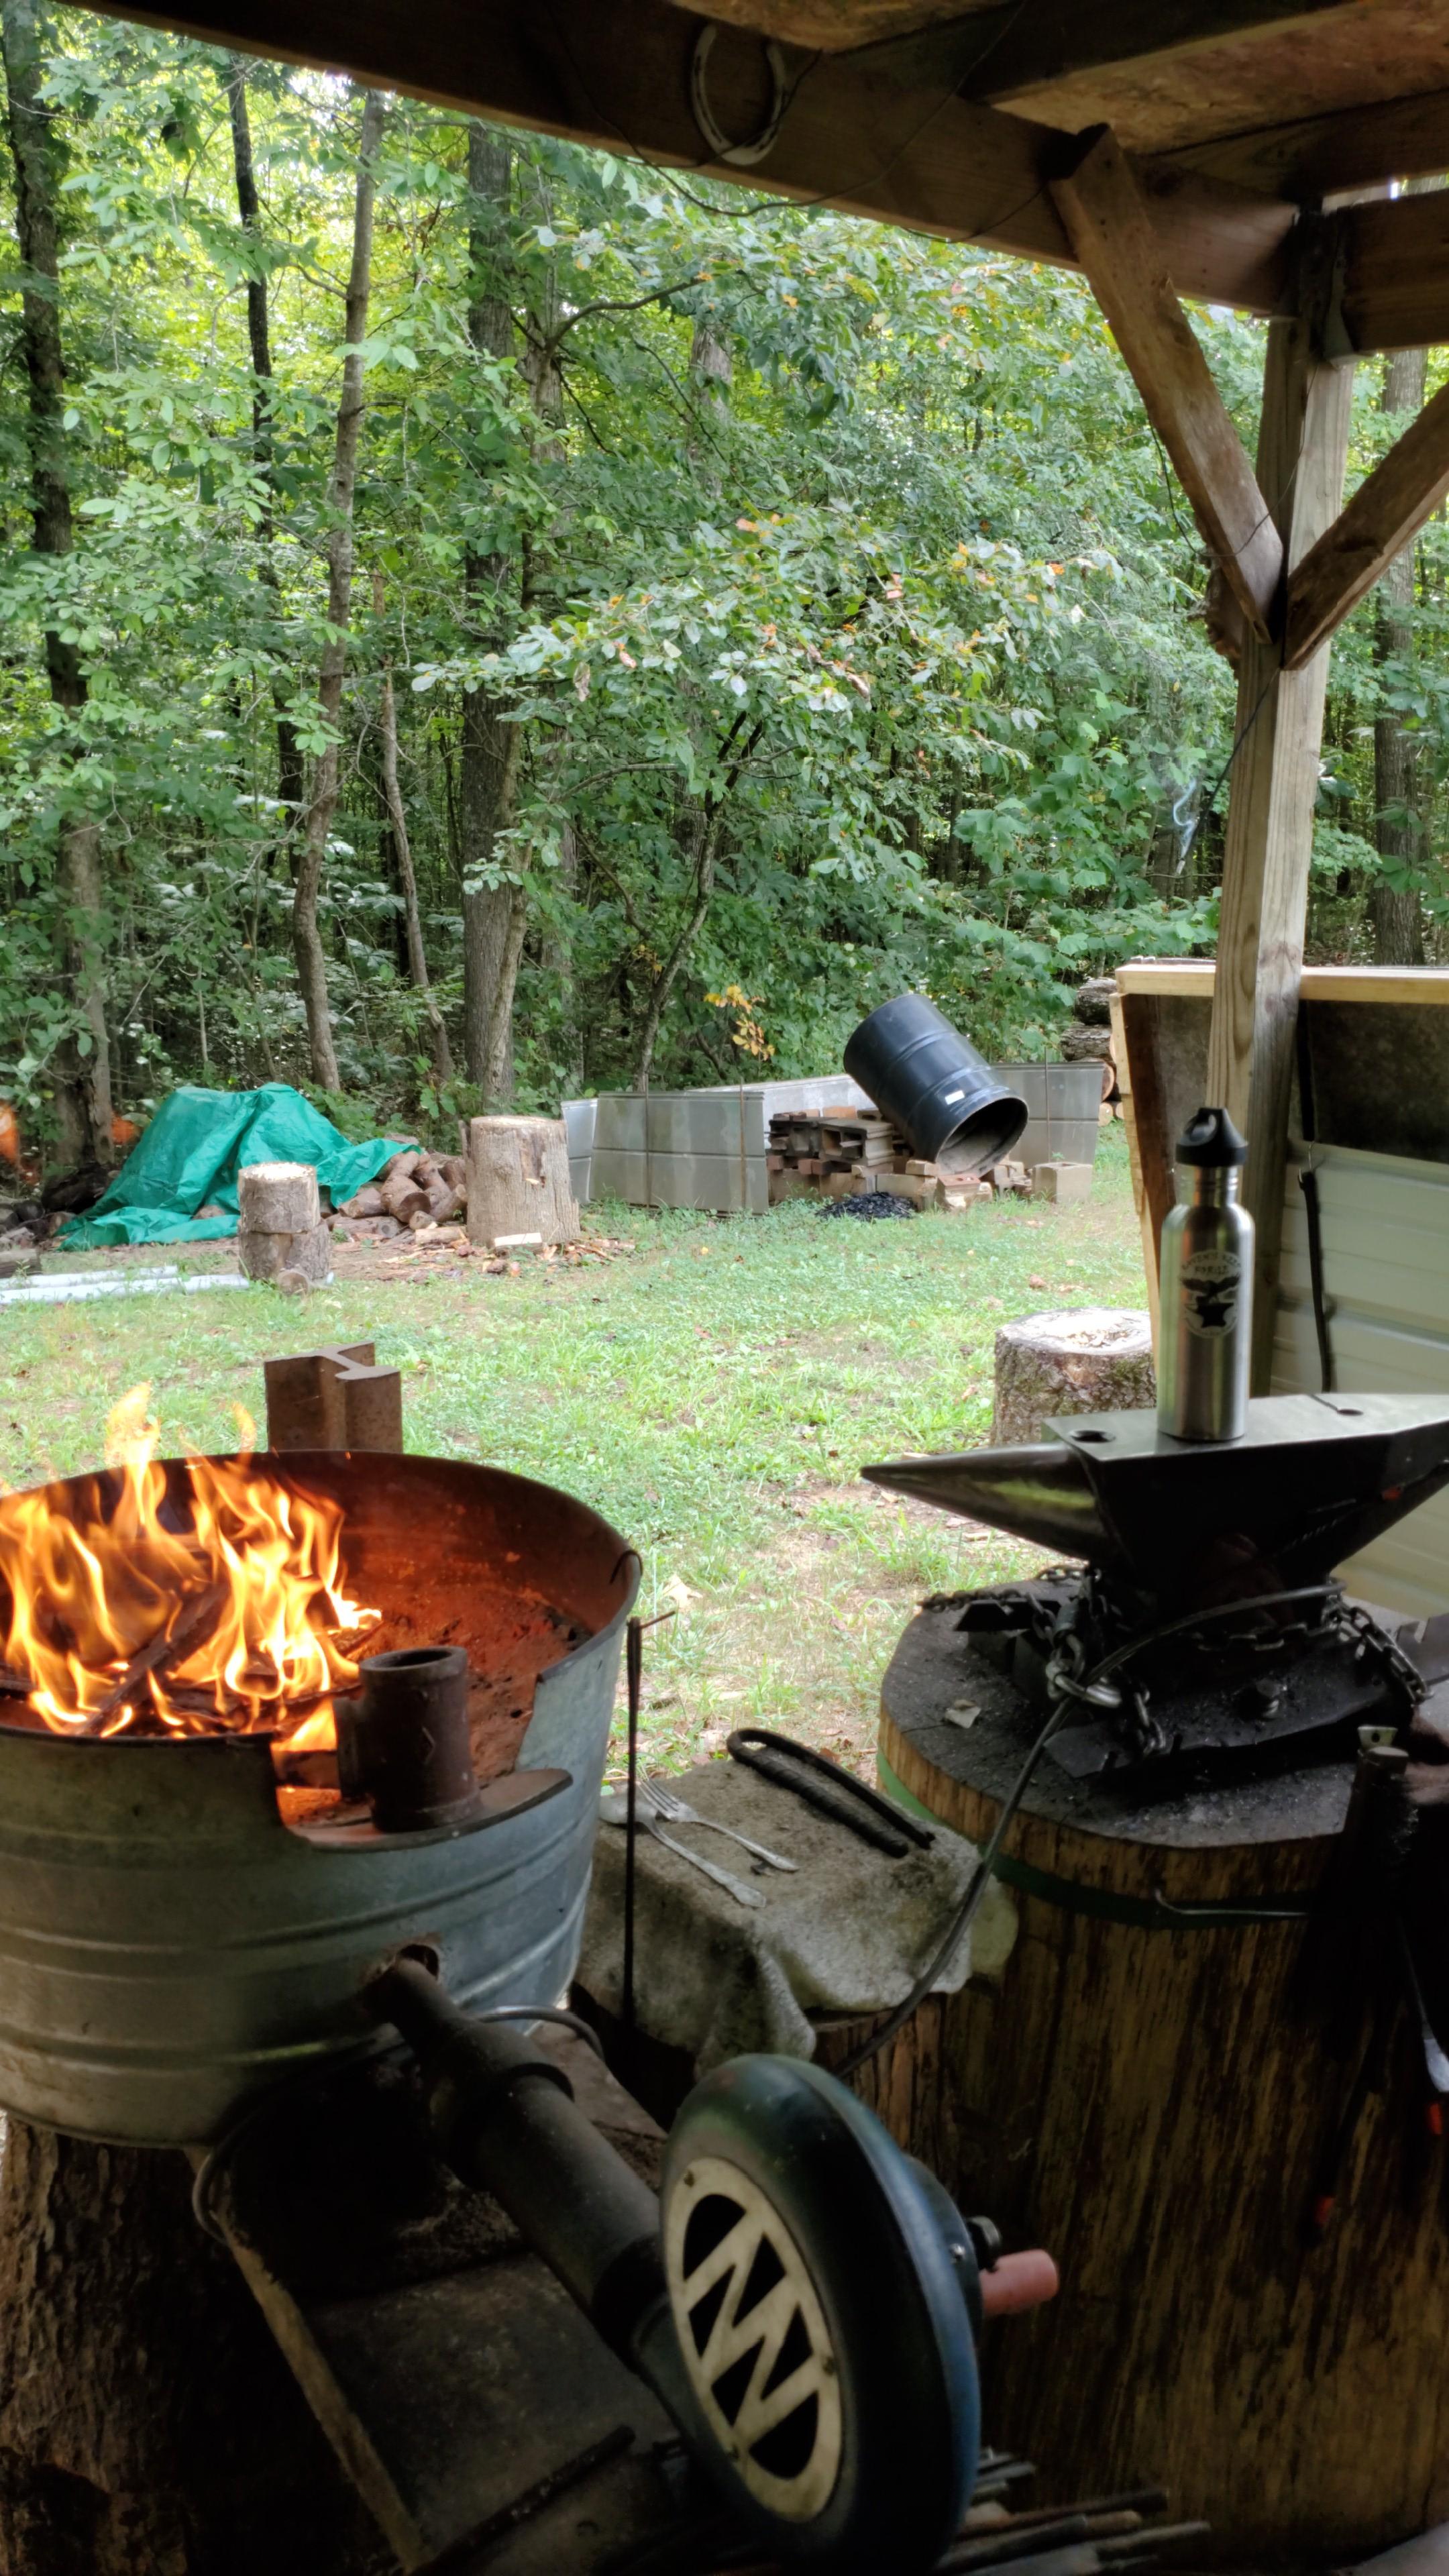
As promised, here are a couple of pics from the first firing. I was only at it for about an hour, all the time I had. I felt the bottom and it was rather warm, not too hot to touch. Thanks for every's help with this. Several observations from today. Air- a little dab will do ya. really doesn't take much compared to what I was used too. Fuel, once again, doesn't use very much. Takes no time to heat up. I'm looking forward to spending a day with it.

-
Chris, Thanks. The little ones love it
-
Thanks Daswulf. My Beloved does an awesome layout. If it was up to me, I'd probably have stuff sitting in buckets...... Yeah, other than the wood, it packs fairly well. I teach classes on this style 2 weekends a year. It's enough to let those that are interested see how to do it and it doesn't cost much at all for them to get set up.
-
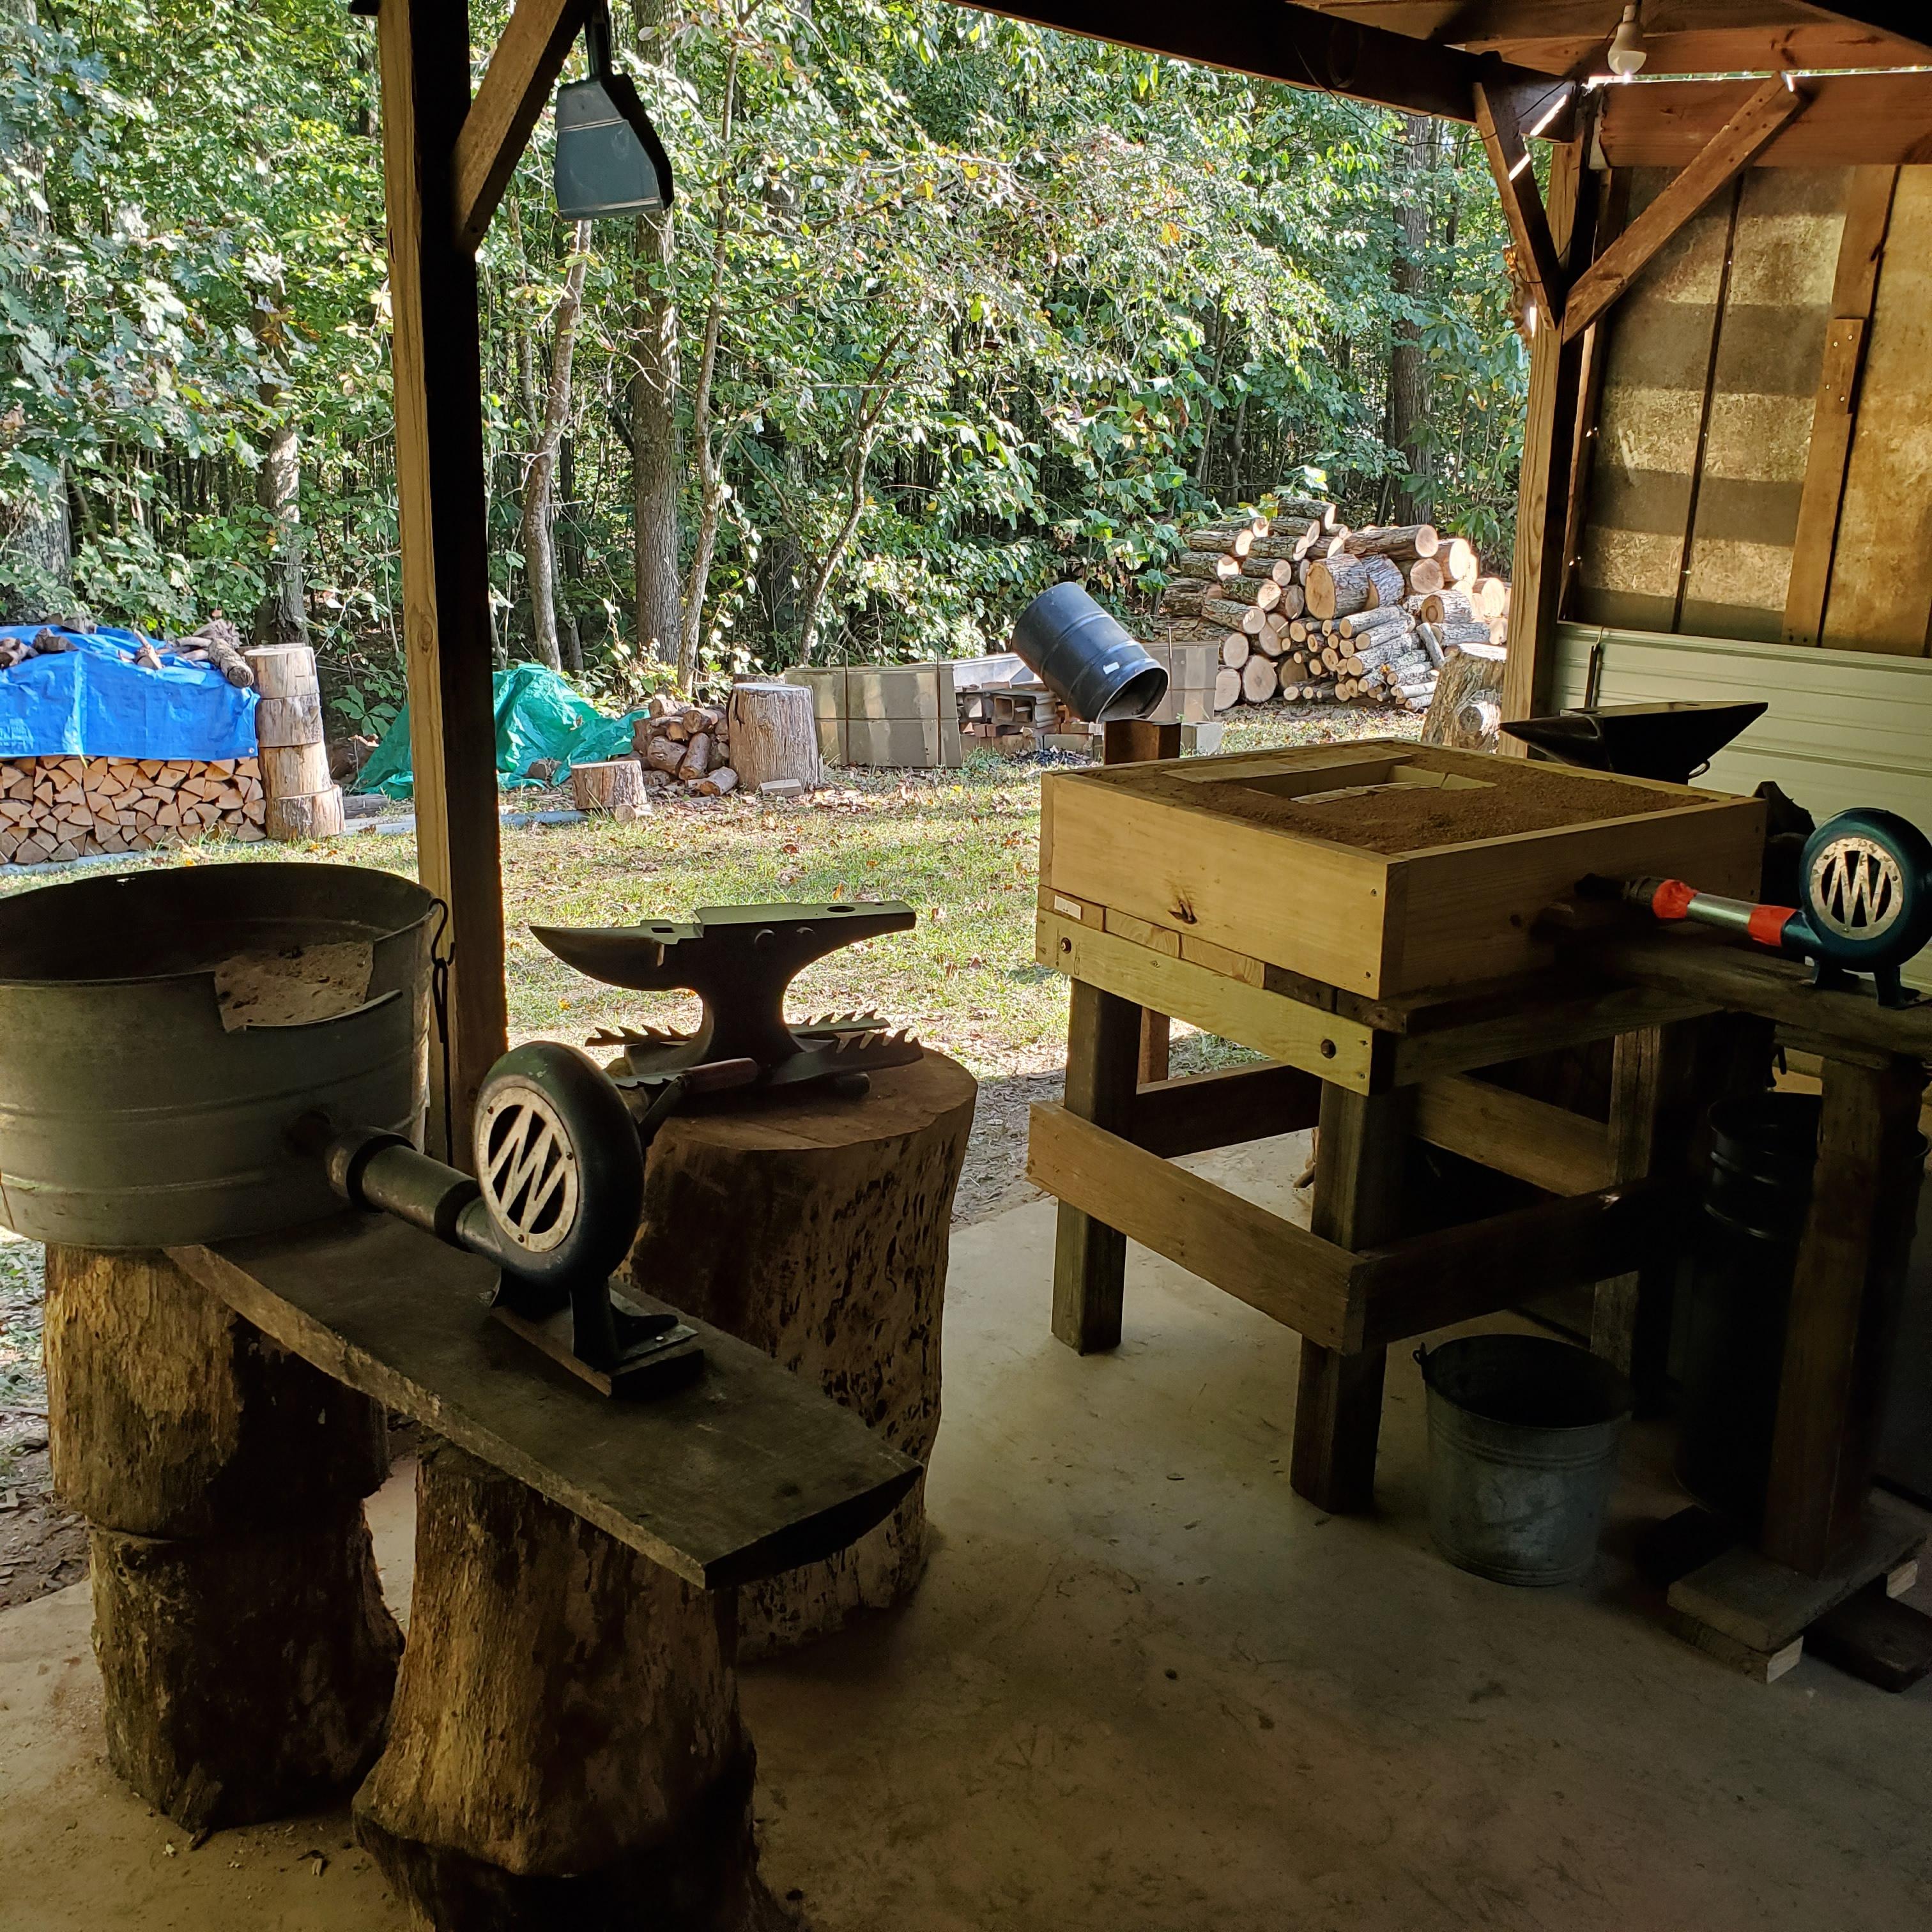
I always have 2 booths. One for product and the other for demo. My Beloved lays out the sales table and looks after it through the event
-
Glenn, I've been using wood for years. Use to and it works well for me. Charcoal has a lot less smoke to it. Easier on my eyes...
pnut, that makes more sense. Thanks for clarifying.
-
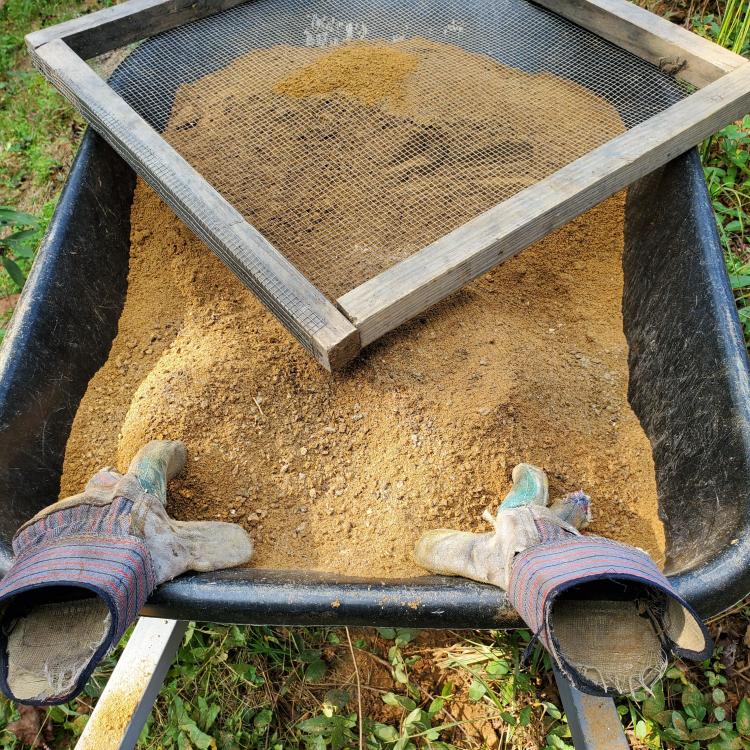
pnut, I've started making charcoal, so hopefully fuel wont be an issue
-
Glenn, sounds like a plan. Thanks!
-
Glenn, Good idea! My washtub is a bottom blast, do you think it would work well for this?
-
Sorry Glenn, I was referring to my current set up which is a washtub type forge (first picture). That is the one that I am limited to heating the ends on. This was a big factor to looking into the JABOD set up. It seems to be much more flexible in configurations. I do plan on keeping the washtub forge. I am going to relocate it to another area with it's own anvil. Plus, I admit that I am kinda attached to it.......
-
That's is where I am trying to get to. Not all the time of course, to have the ability when I want, would be a perk. I think for me also was my current set up only allows me to heat the ends, so I am challenged on certain projects that I wand to do.
I really appreciate all your feed back, as well as others on this subject. I think it has really decreased the learning curve. As you can tell, I don't post a lot. Been a member of this site for 6+ years. It has always been a place for me to get solid information. I'm not a person to just say 'ditto'. For this project however, I though it was important to share what I had gathered so maybe it would be helpful to someone else. -
10 hours ago, Goods said:
what are the depths you have on the setup? Surface to turye(sp?), surface to bottom brick?
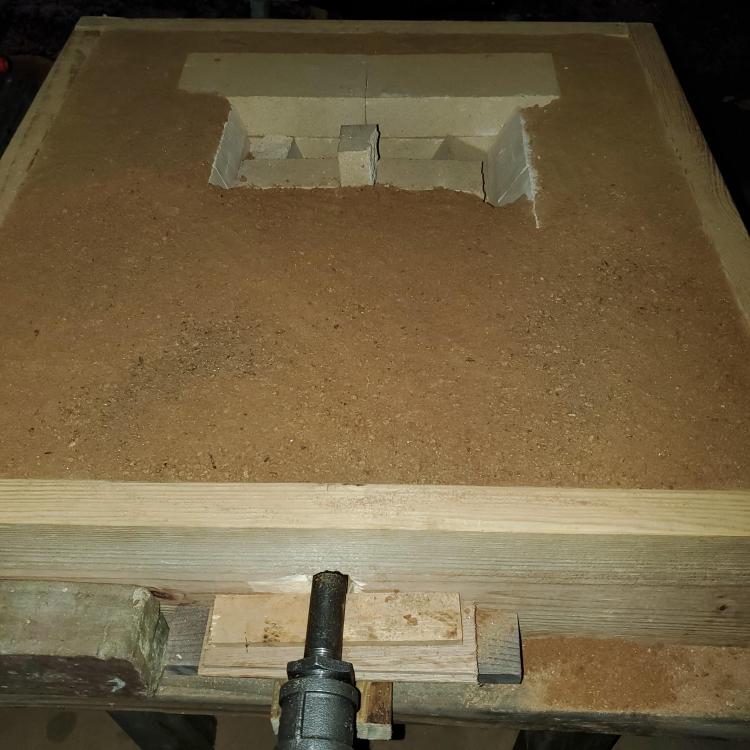
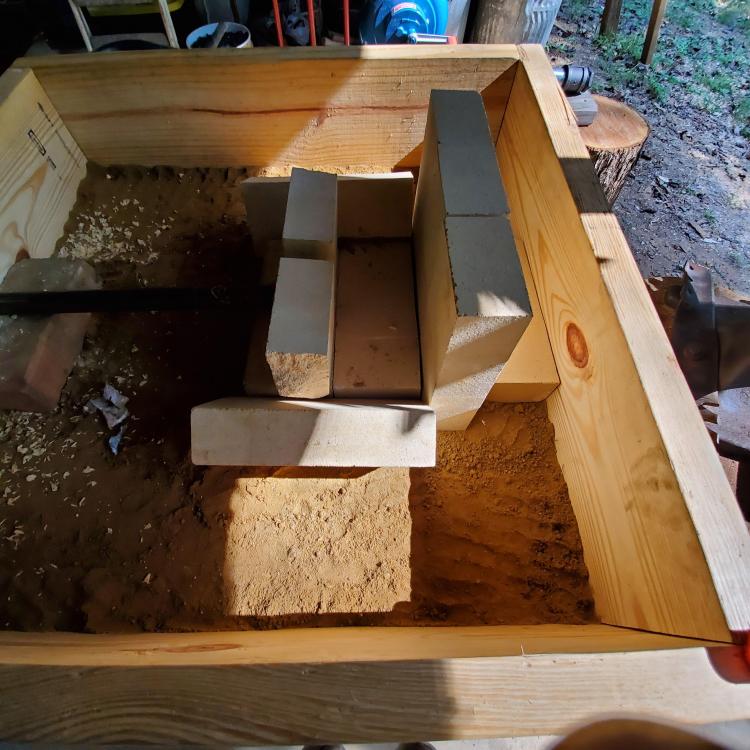
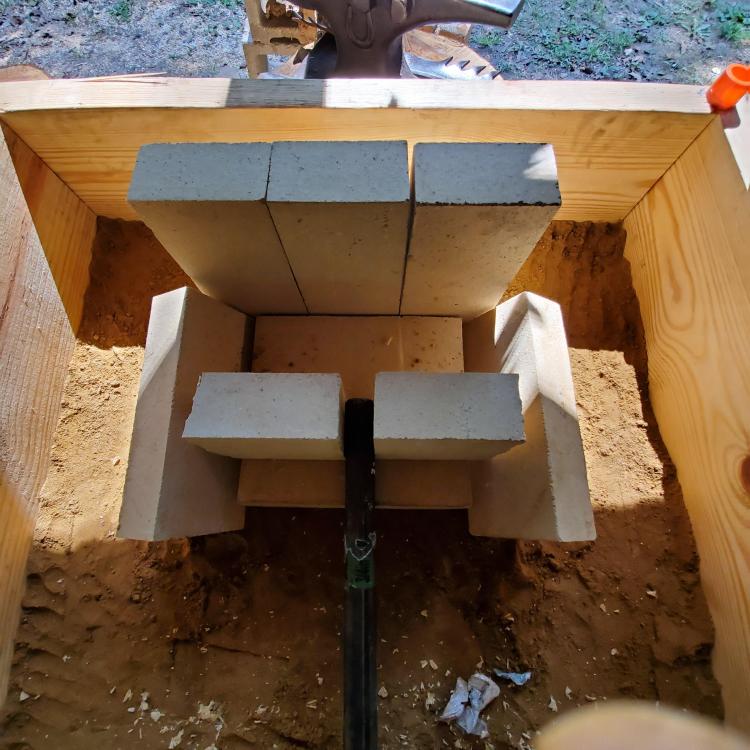
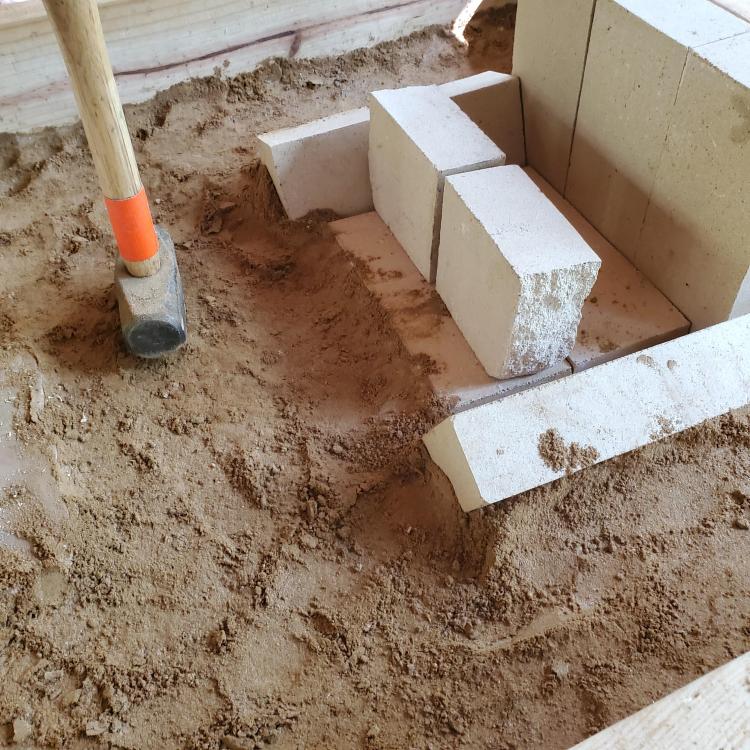
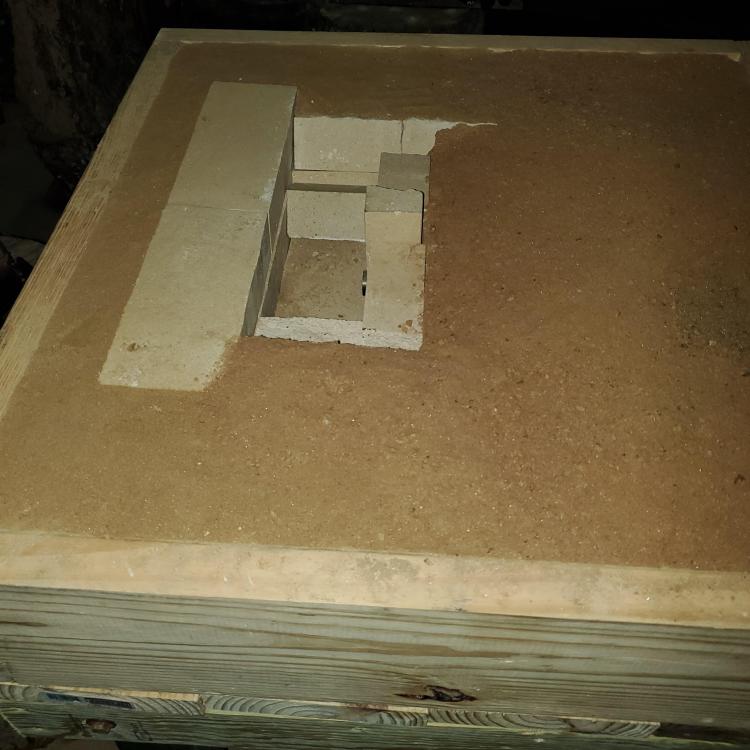
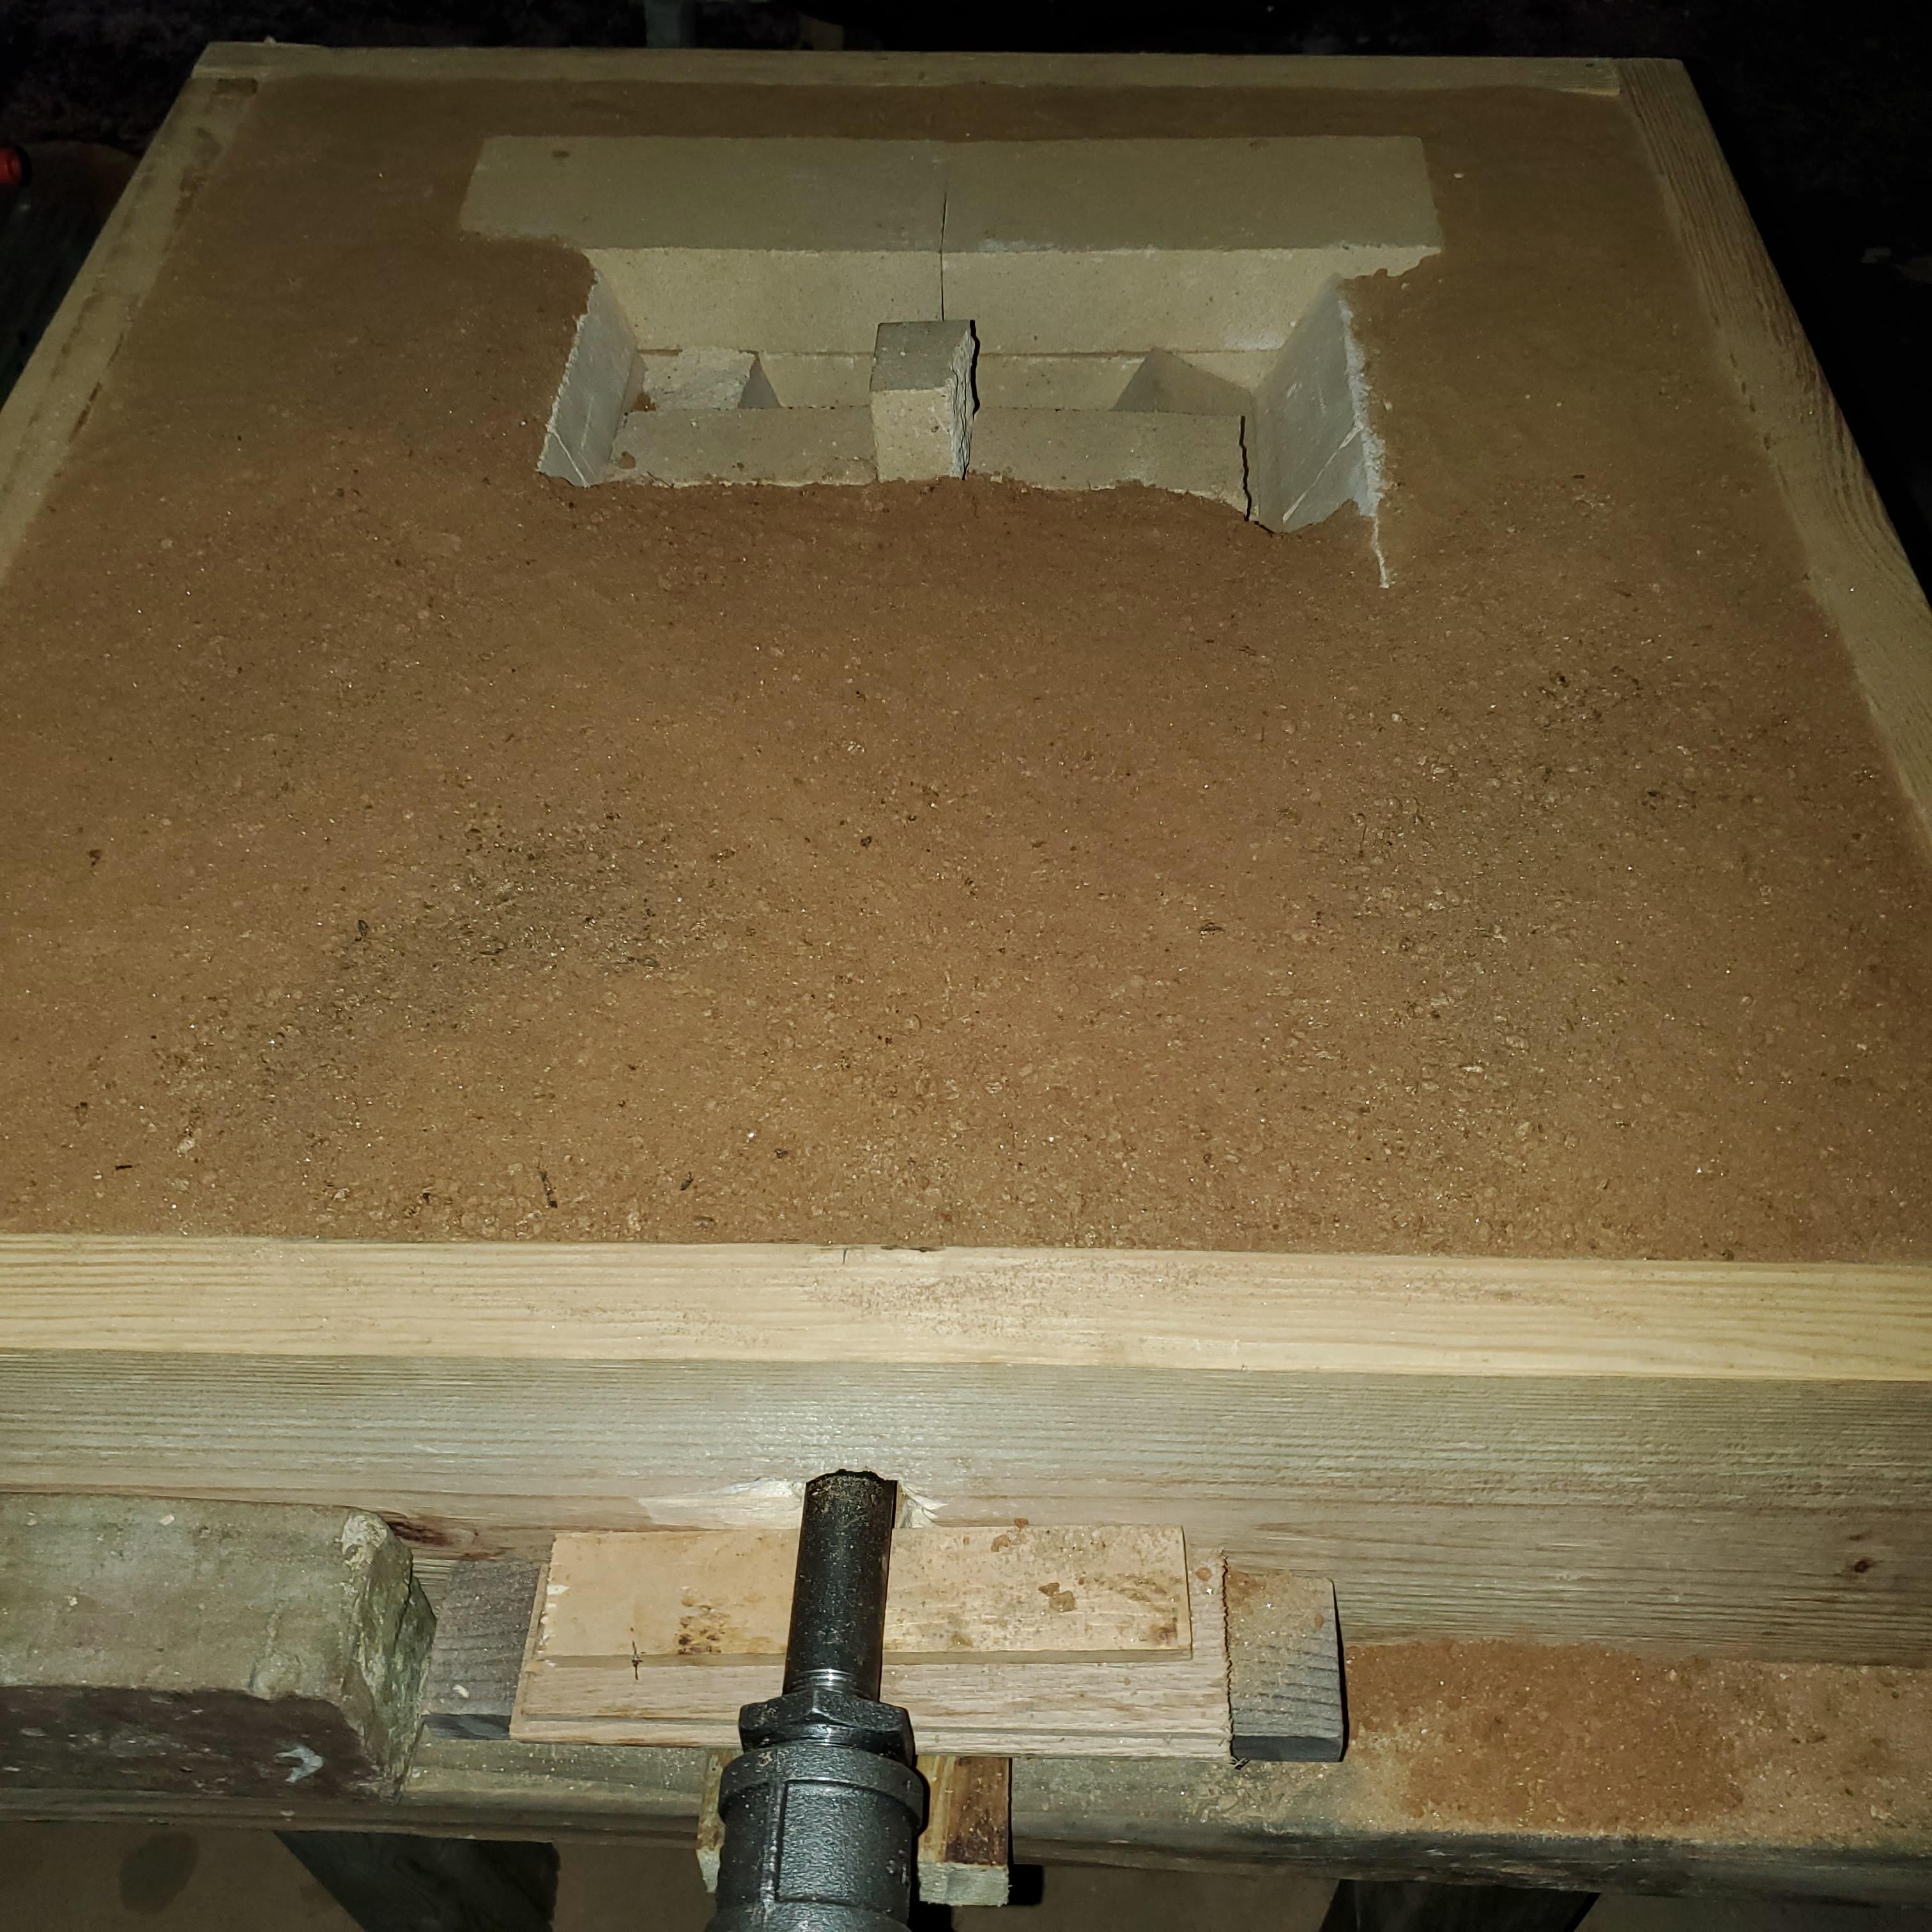
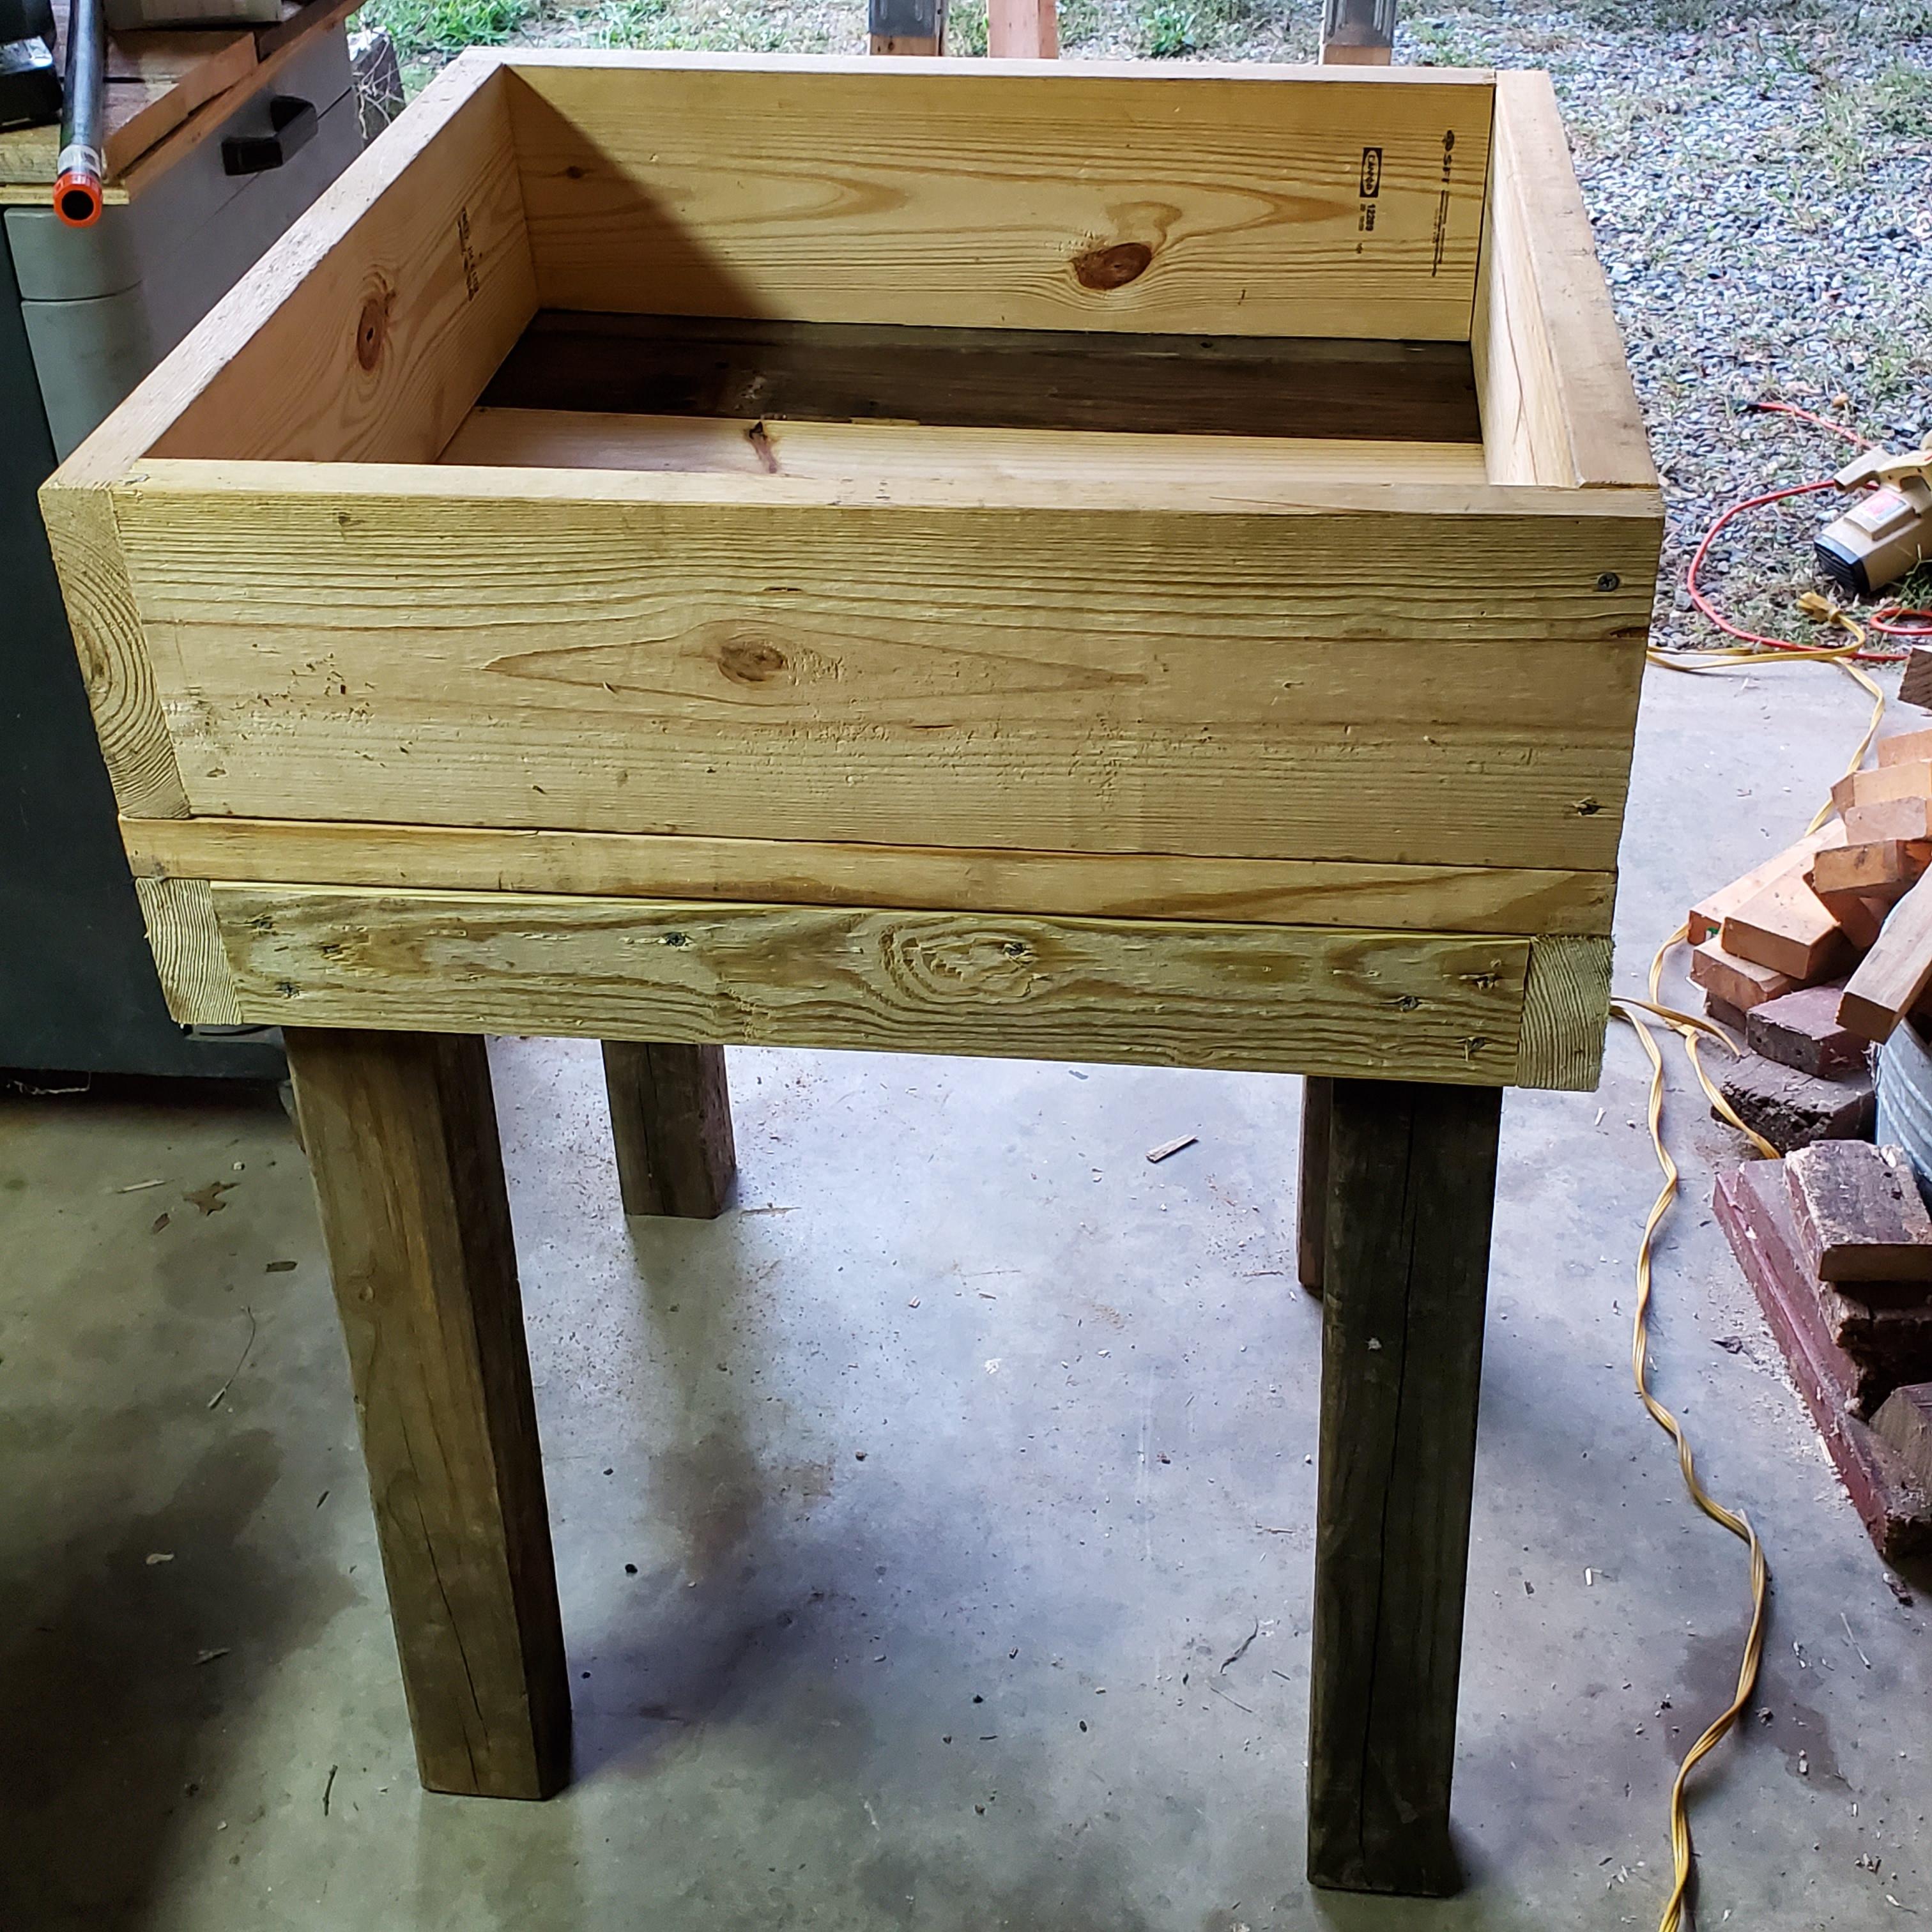
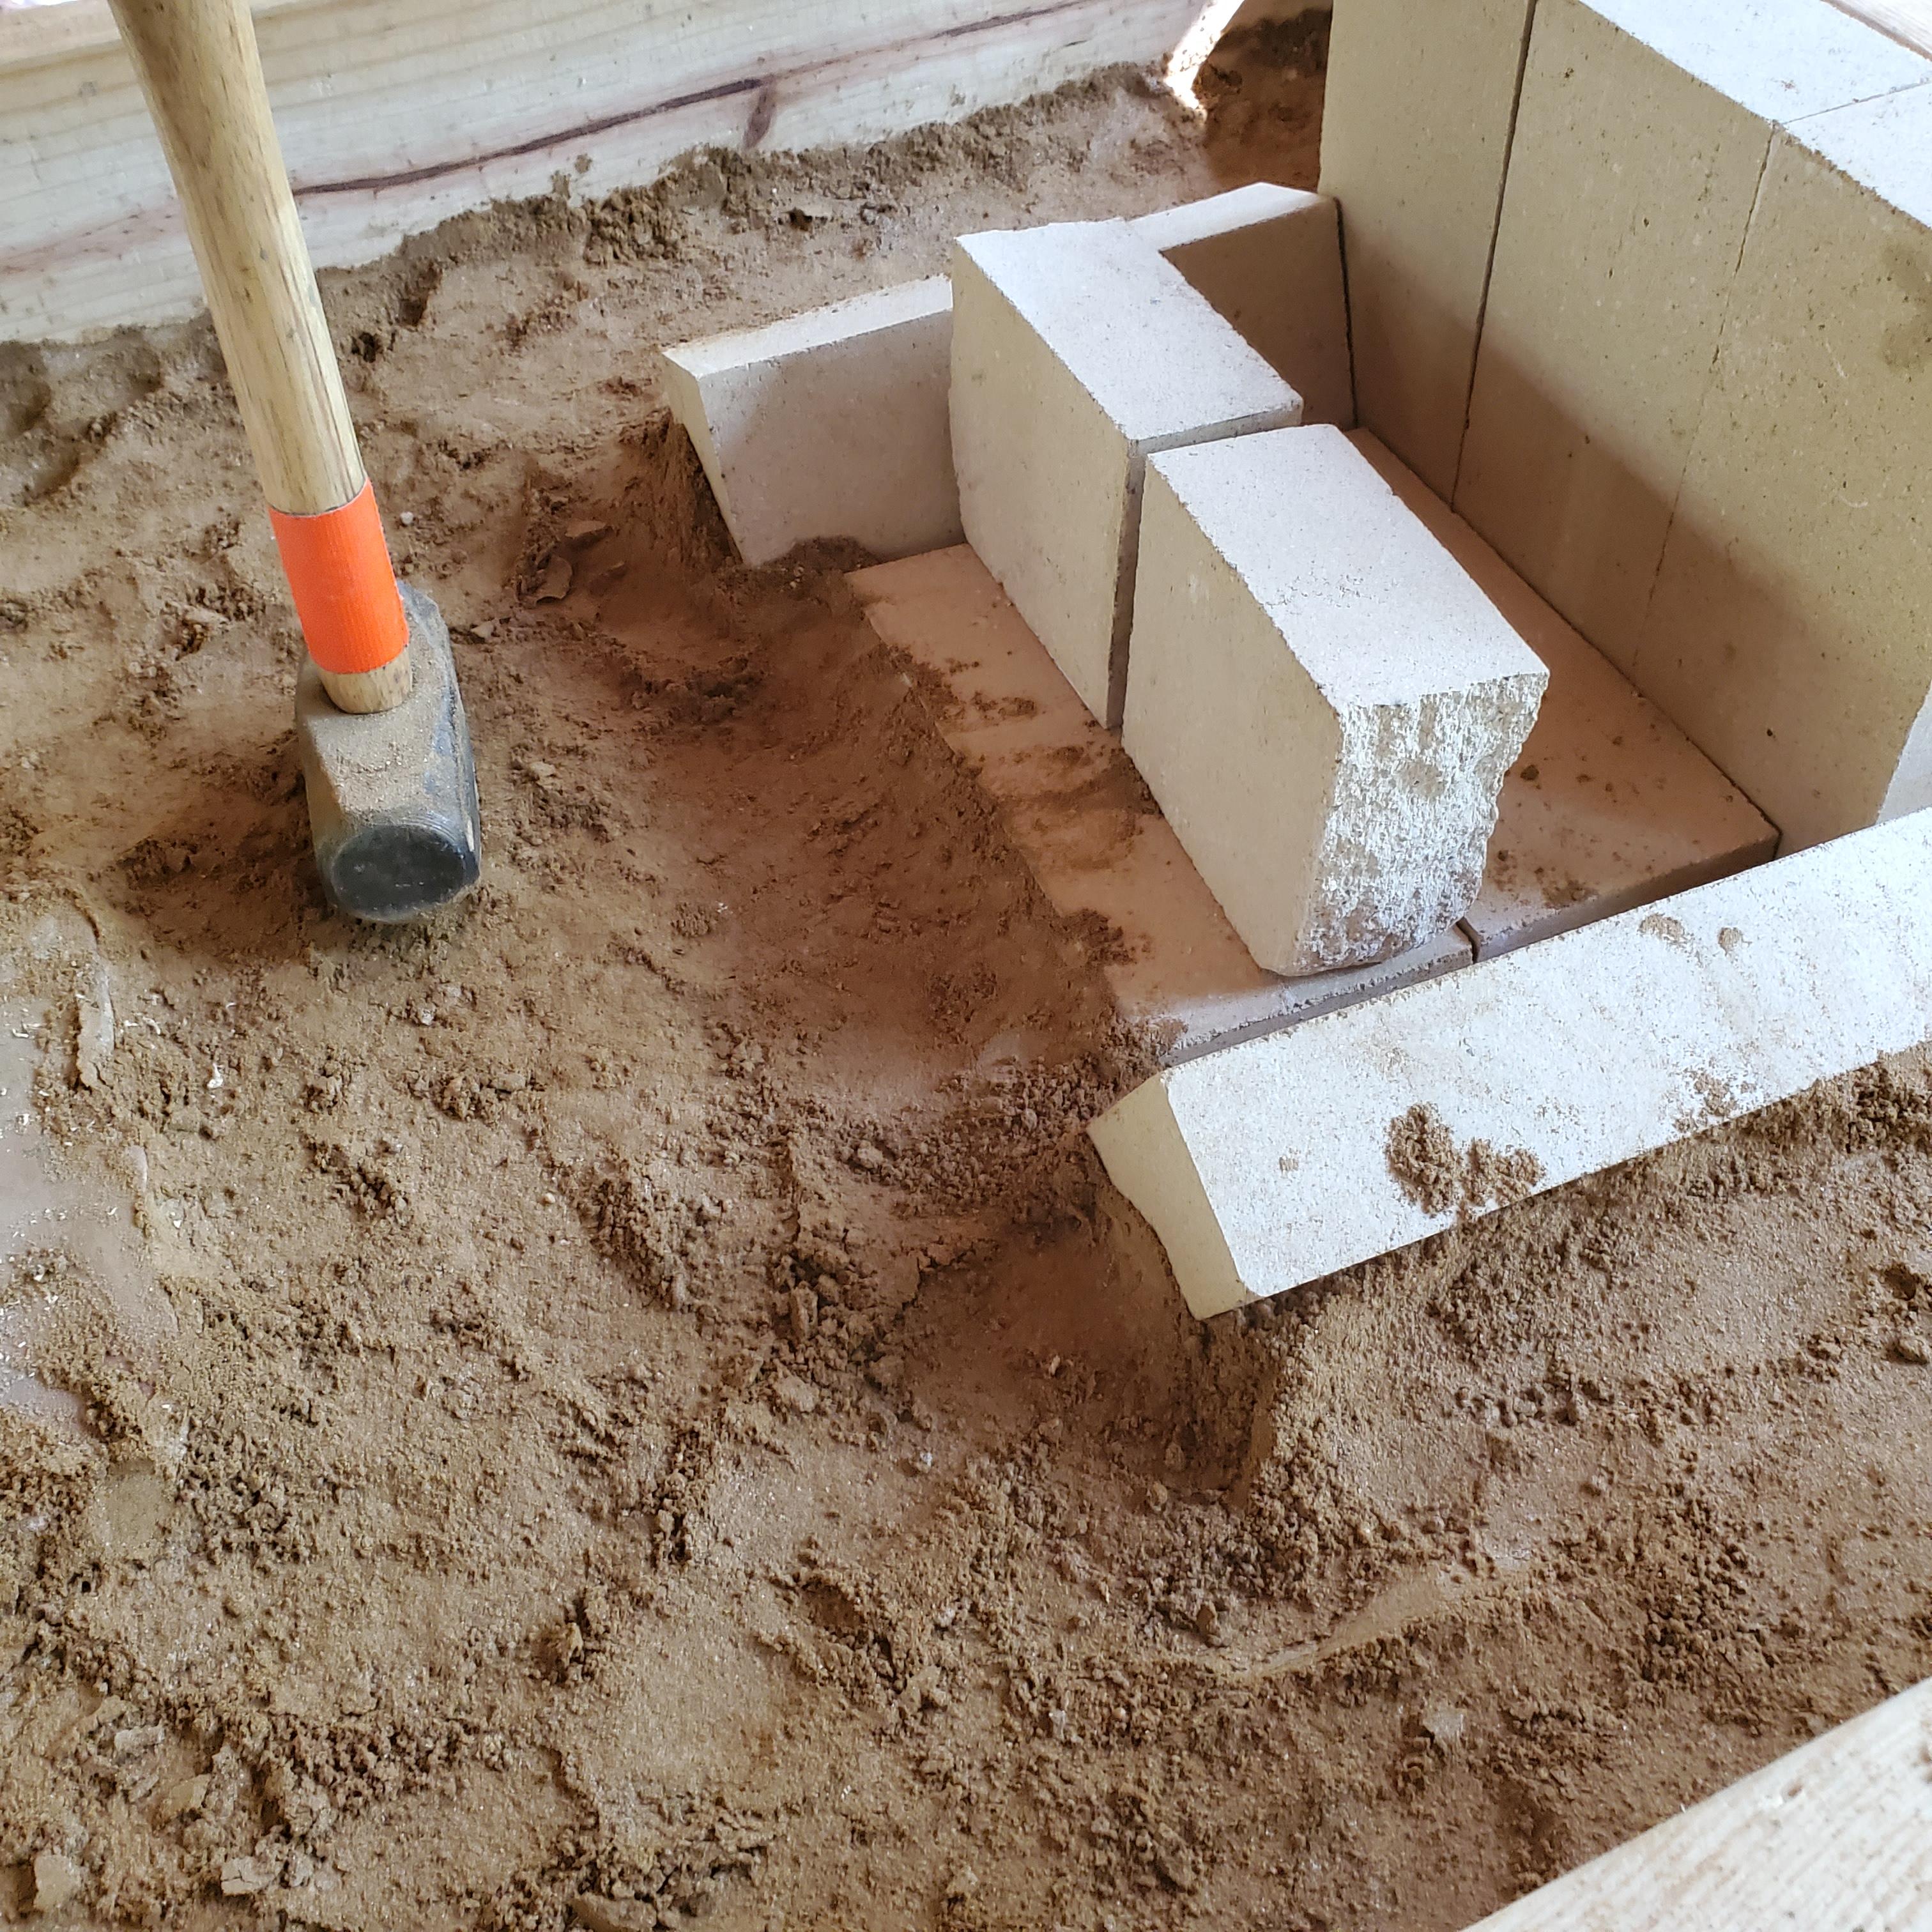
David, I pretty much followed what Mr Stevens laid out. There is about 1/2" under the bottom brick (I was thinking of a tad bit more insulation) and used firebricks as the layout. The wood is 4x8 so that is about 7 1/4" in total height. I have about an inch from the bottom brick to the pipe. There is about 5" in depth from bottom brick to top. I wanted it to be flush, so I cut the brick down along the back. I ended up cutting 2 bricks in half for the back and then laid 2 bricks along the top of them. I figured I could always add some bricks along the top to add depth as needed. I angled the bricks along the side and cut one in half to top it off. I hope this answers your questions.
-
11 hours ago, Chris The Curious said:
I recently found I wasn't allergic to coal smoke like I thought I was. At some point in my blacksmithing journey I want to build a coal forge and you've really done your homework and have built a really nice one.
Chris, thanks for the feedback. I am planning on using charcoal with this one. I am hopeful that within the next few weeks to be able to switch it out and get it going. I have found that this place has an enormous amount of information if taken the time to look.
-
Thanks Laynne. This place is a wealth of information if one takes the time to look. I don't mind experimenting, and I would rather that be on working metal instead of trying to get it hot

-
Pnut, will do!
-
Pnut, It's sitting about an inch up from the bottom. Sorry I don't have a better picture of it
-
Thanks Irondragon. I'm looking forward to putting it to use
-
Let me start by saying that I have really enjoyed this site. Whenever I have a question, can always find it here.
So, on with the story. For the last 6ish years I have been using a washtub bottom blast forge, with a hand crank cheesy blower. I can say it has worked well for me (I only know what I know), I have been able to do for the most part what I wanted. Up to this point I was using mainly wood, pine specifically. Reason, easy to get and plentiful.
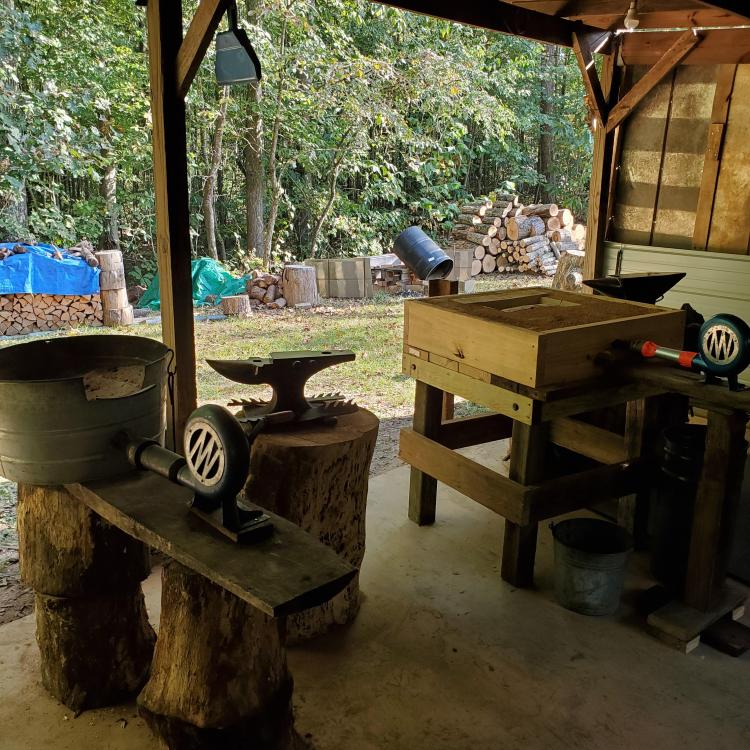
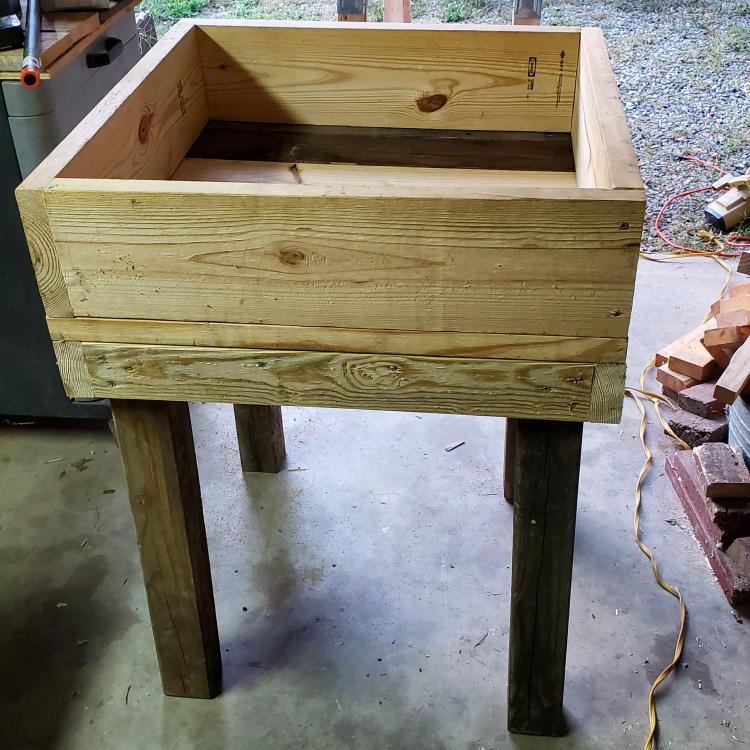
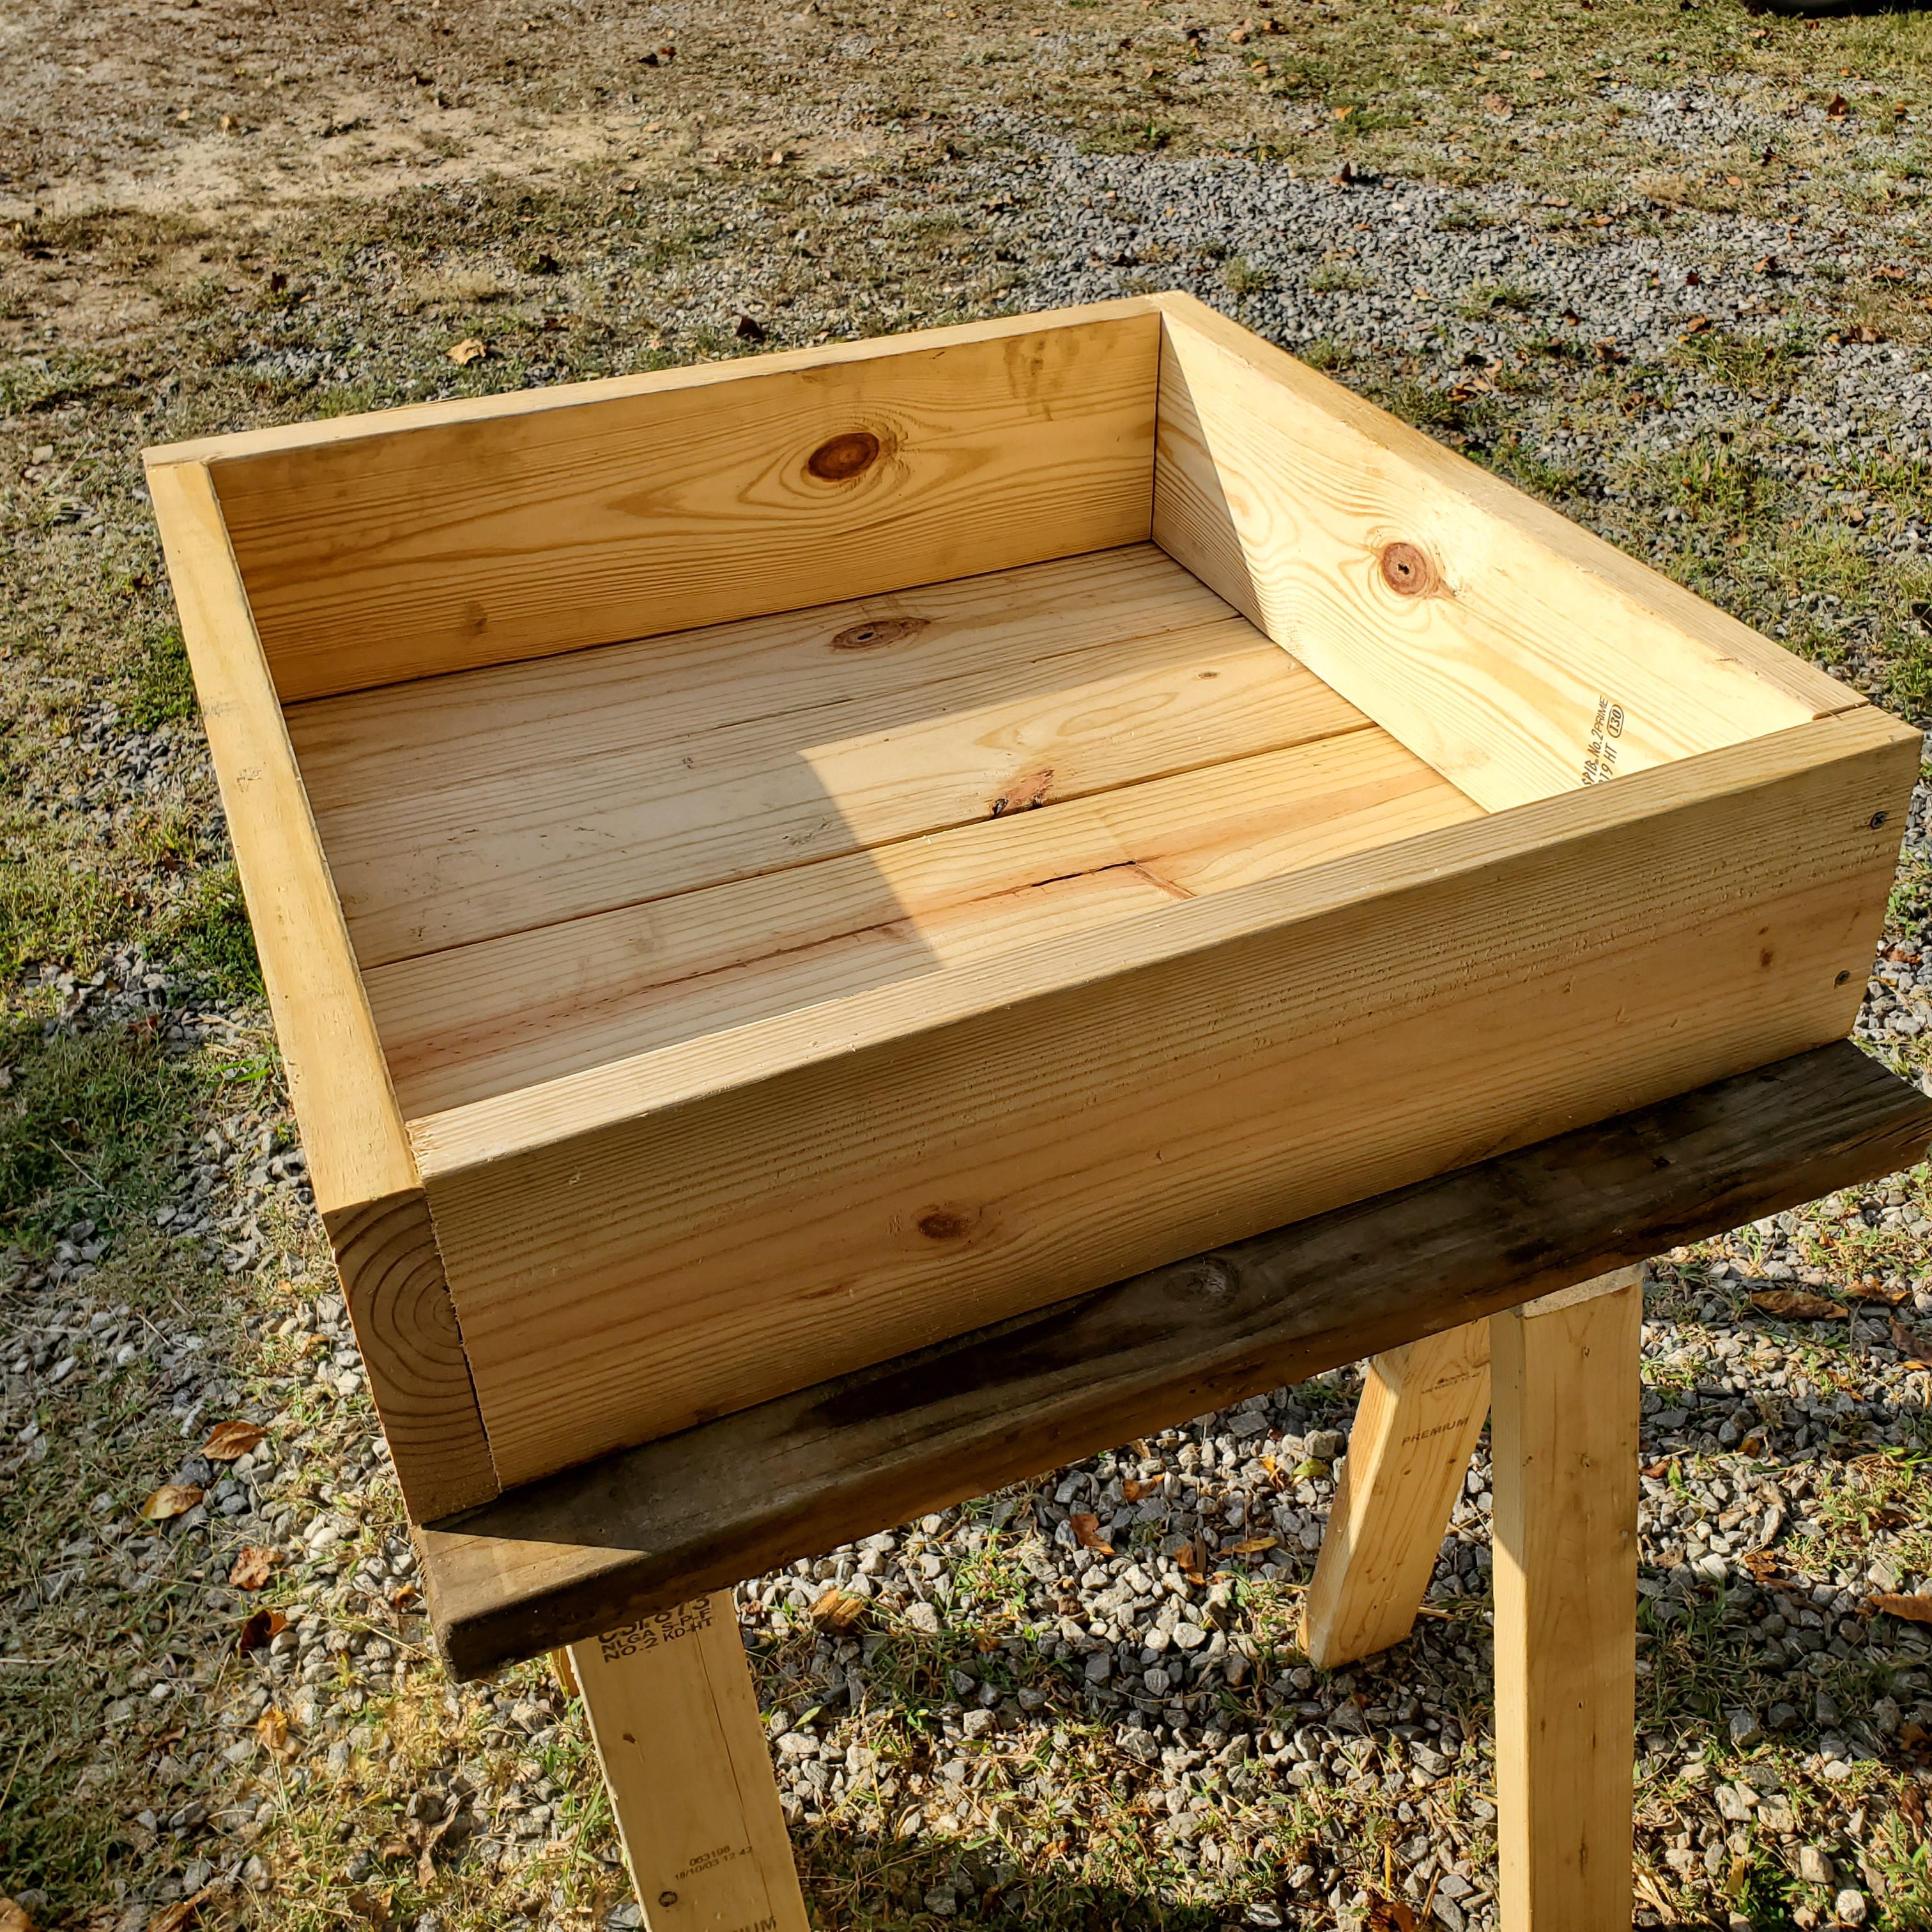
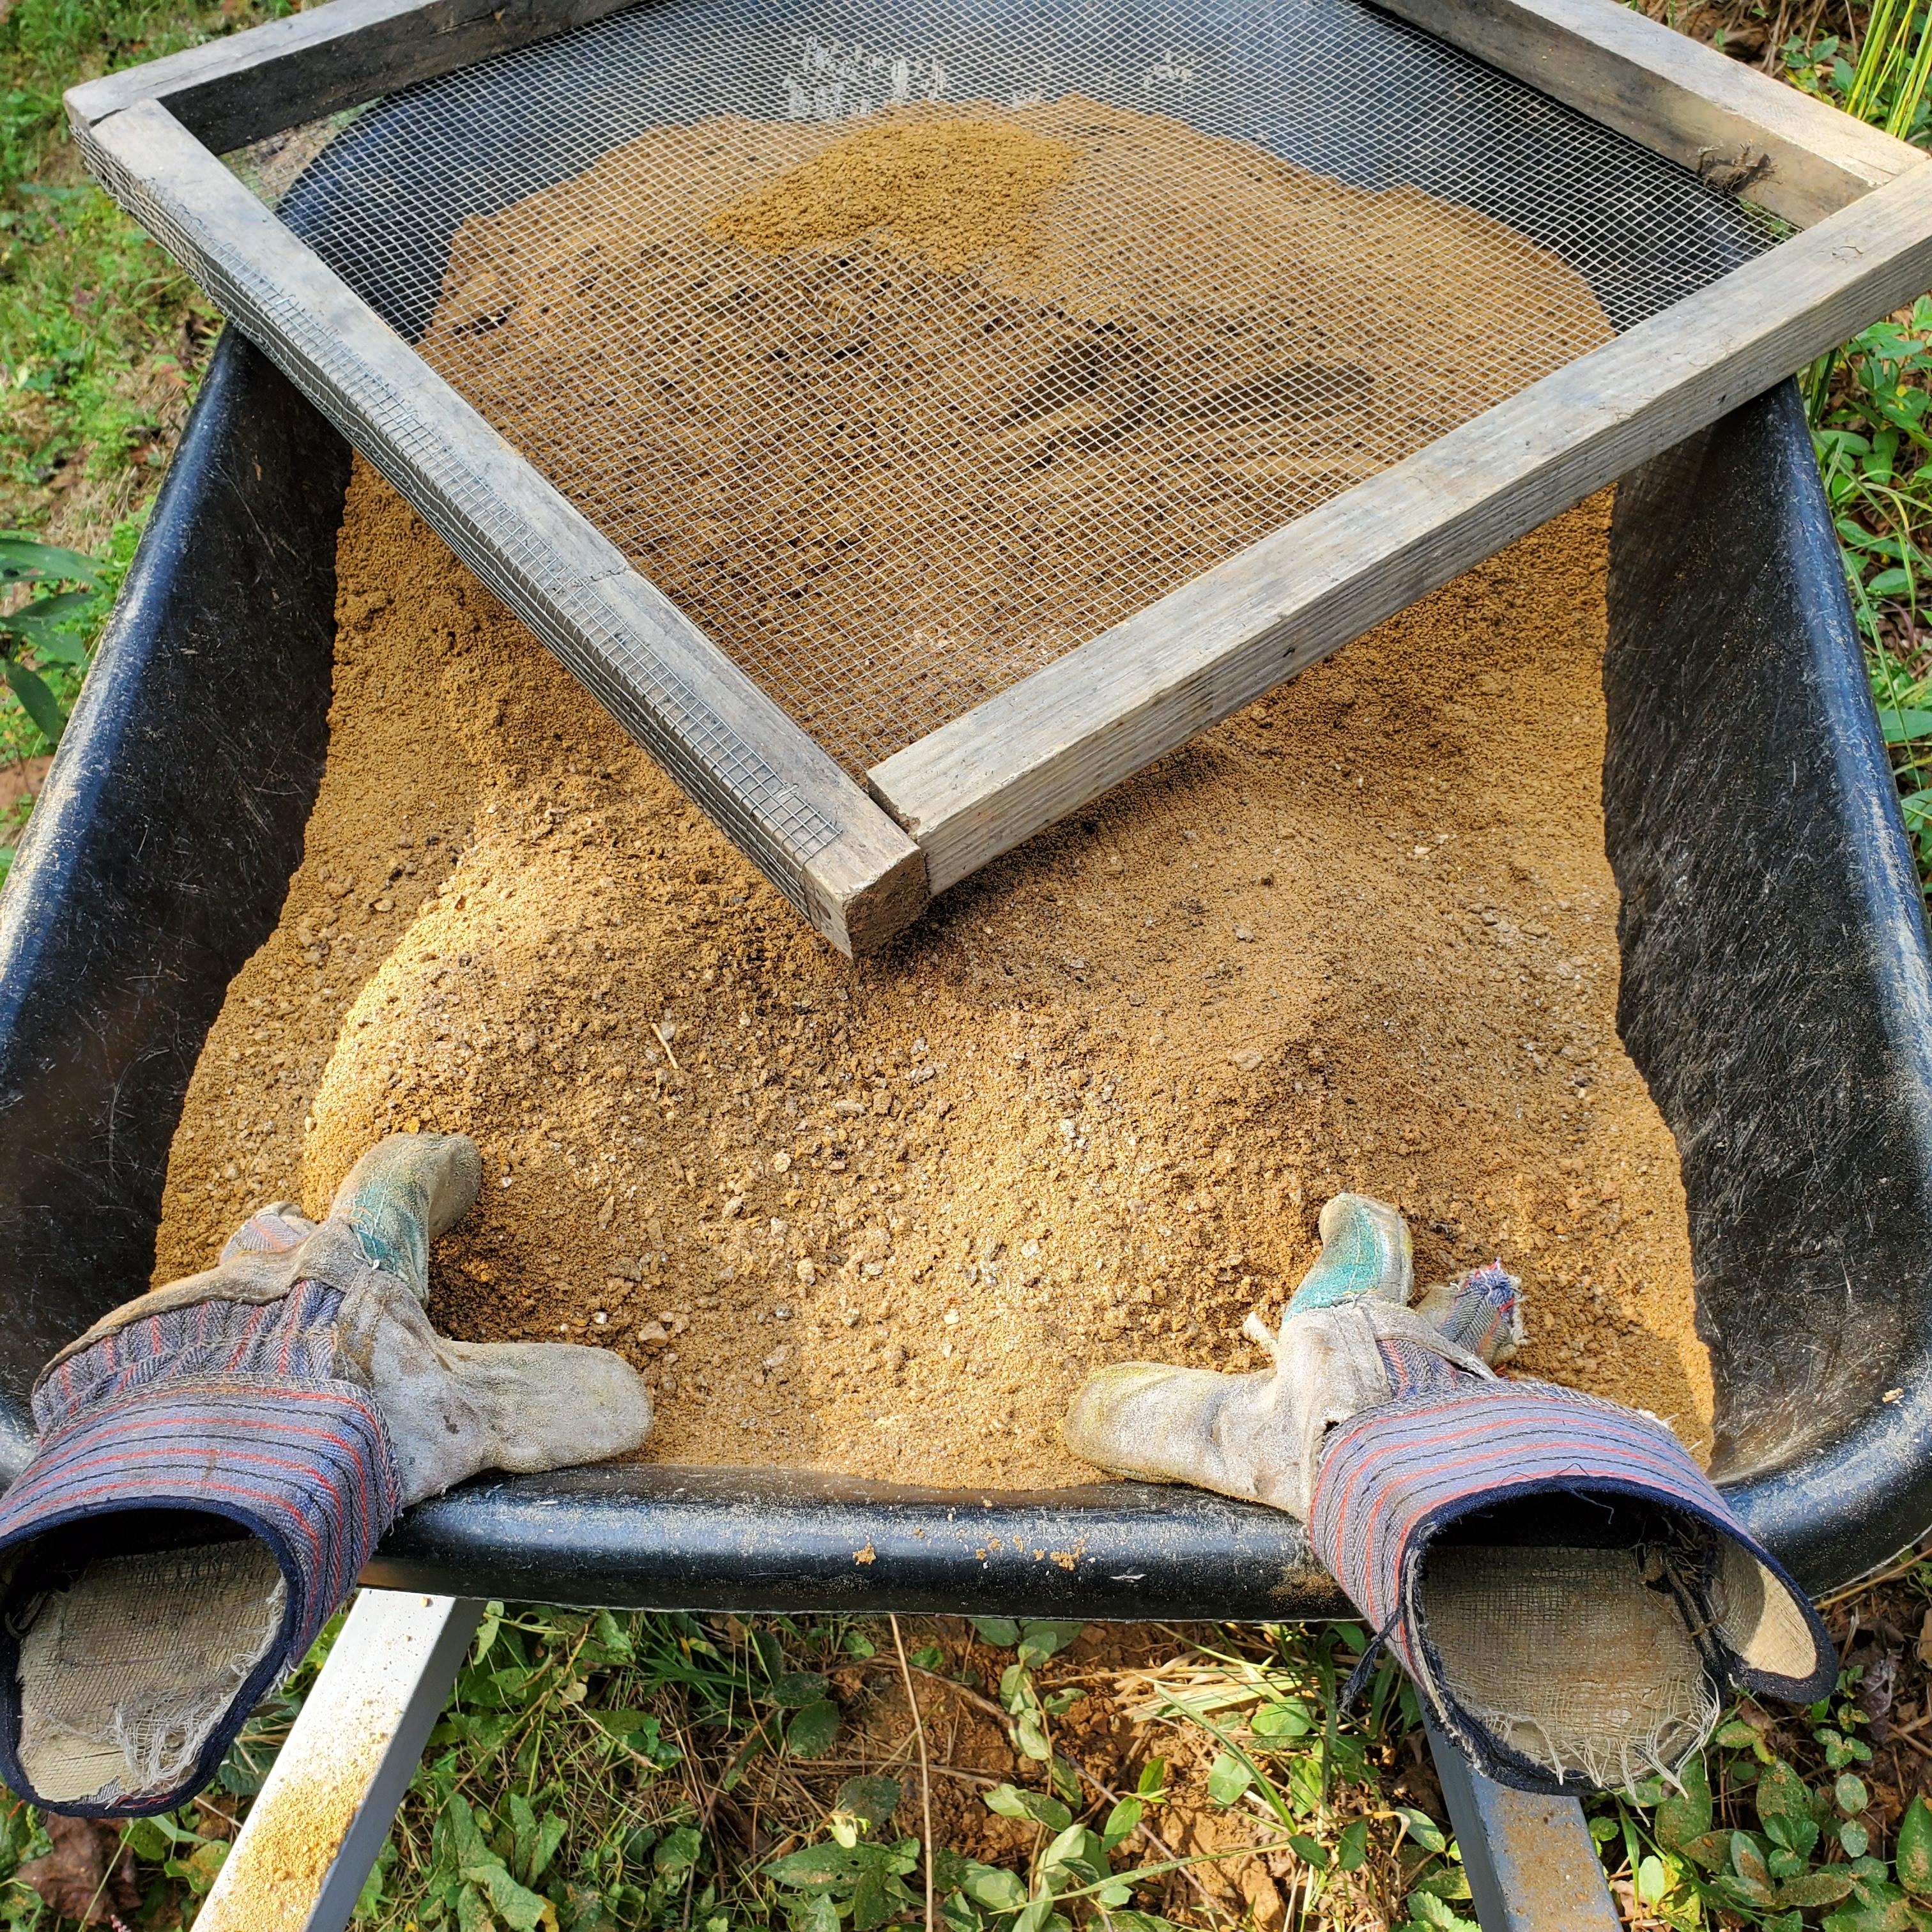
I started making charcoal and found that this set up, for me, doesn't work as well as I would like. So, off to the site i go. Found out about the JOBOD and spent several weeks reading everything I could from everyone's experiences. No need to recreate the wheel. And this is what I came up with. I know how pictures have helped me, so I am attaching what I have done. I needed to modify a bit as I went. I have not used it as of yet. I have a few project that needed to get done before I relocate it. I know there will be a learning curve, and couldn't afford the extra time. I hope this is as helpful to someone else as this place has been for me
I will circle back after the maiden firing and update. The box is 30x30. Total cost for me was about $40. I only had to get firebrick and the pipe. The rest was scrap I had laying around the house.
(not sure if I am doing the picture thing correctly)


Changing to a JABOD (pic heavy)
in JABOD - Just A Box Of Dirt
Posted
I just wanted to give an update to this set up. I have enjoyed it and has worked well for me. I did find that my sweet spot was a tad lower than I would like. So a few days ago I moved the pipe up so the bottom of it was approx 2 1/2 from the floor of the forge. So maybe up about 1/2 inch.It took around an hour to redo. I did it about a week ago and it does make in my mind a significant difference. A little dab will do ya'. Thanks again to all for your help and input. Now I just need to fine tune my charcoal making skills.....