-
Posts
84 -
Joined
-
Last visited
Content Type
Profiles
Forums
Articles
Gallery
Downloads
Events
Posts posted by stromam
-
-
And I finally got to use it!
Here is what I made.
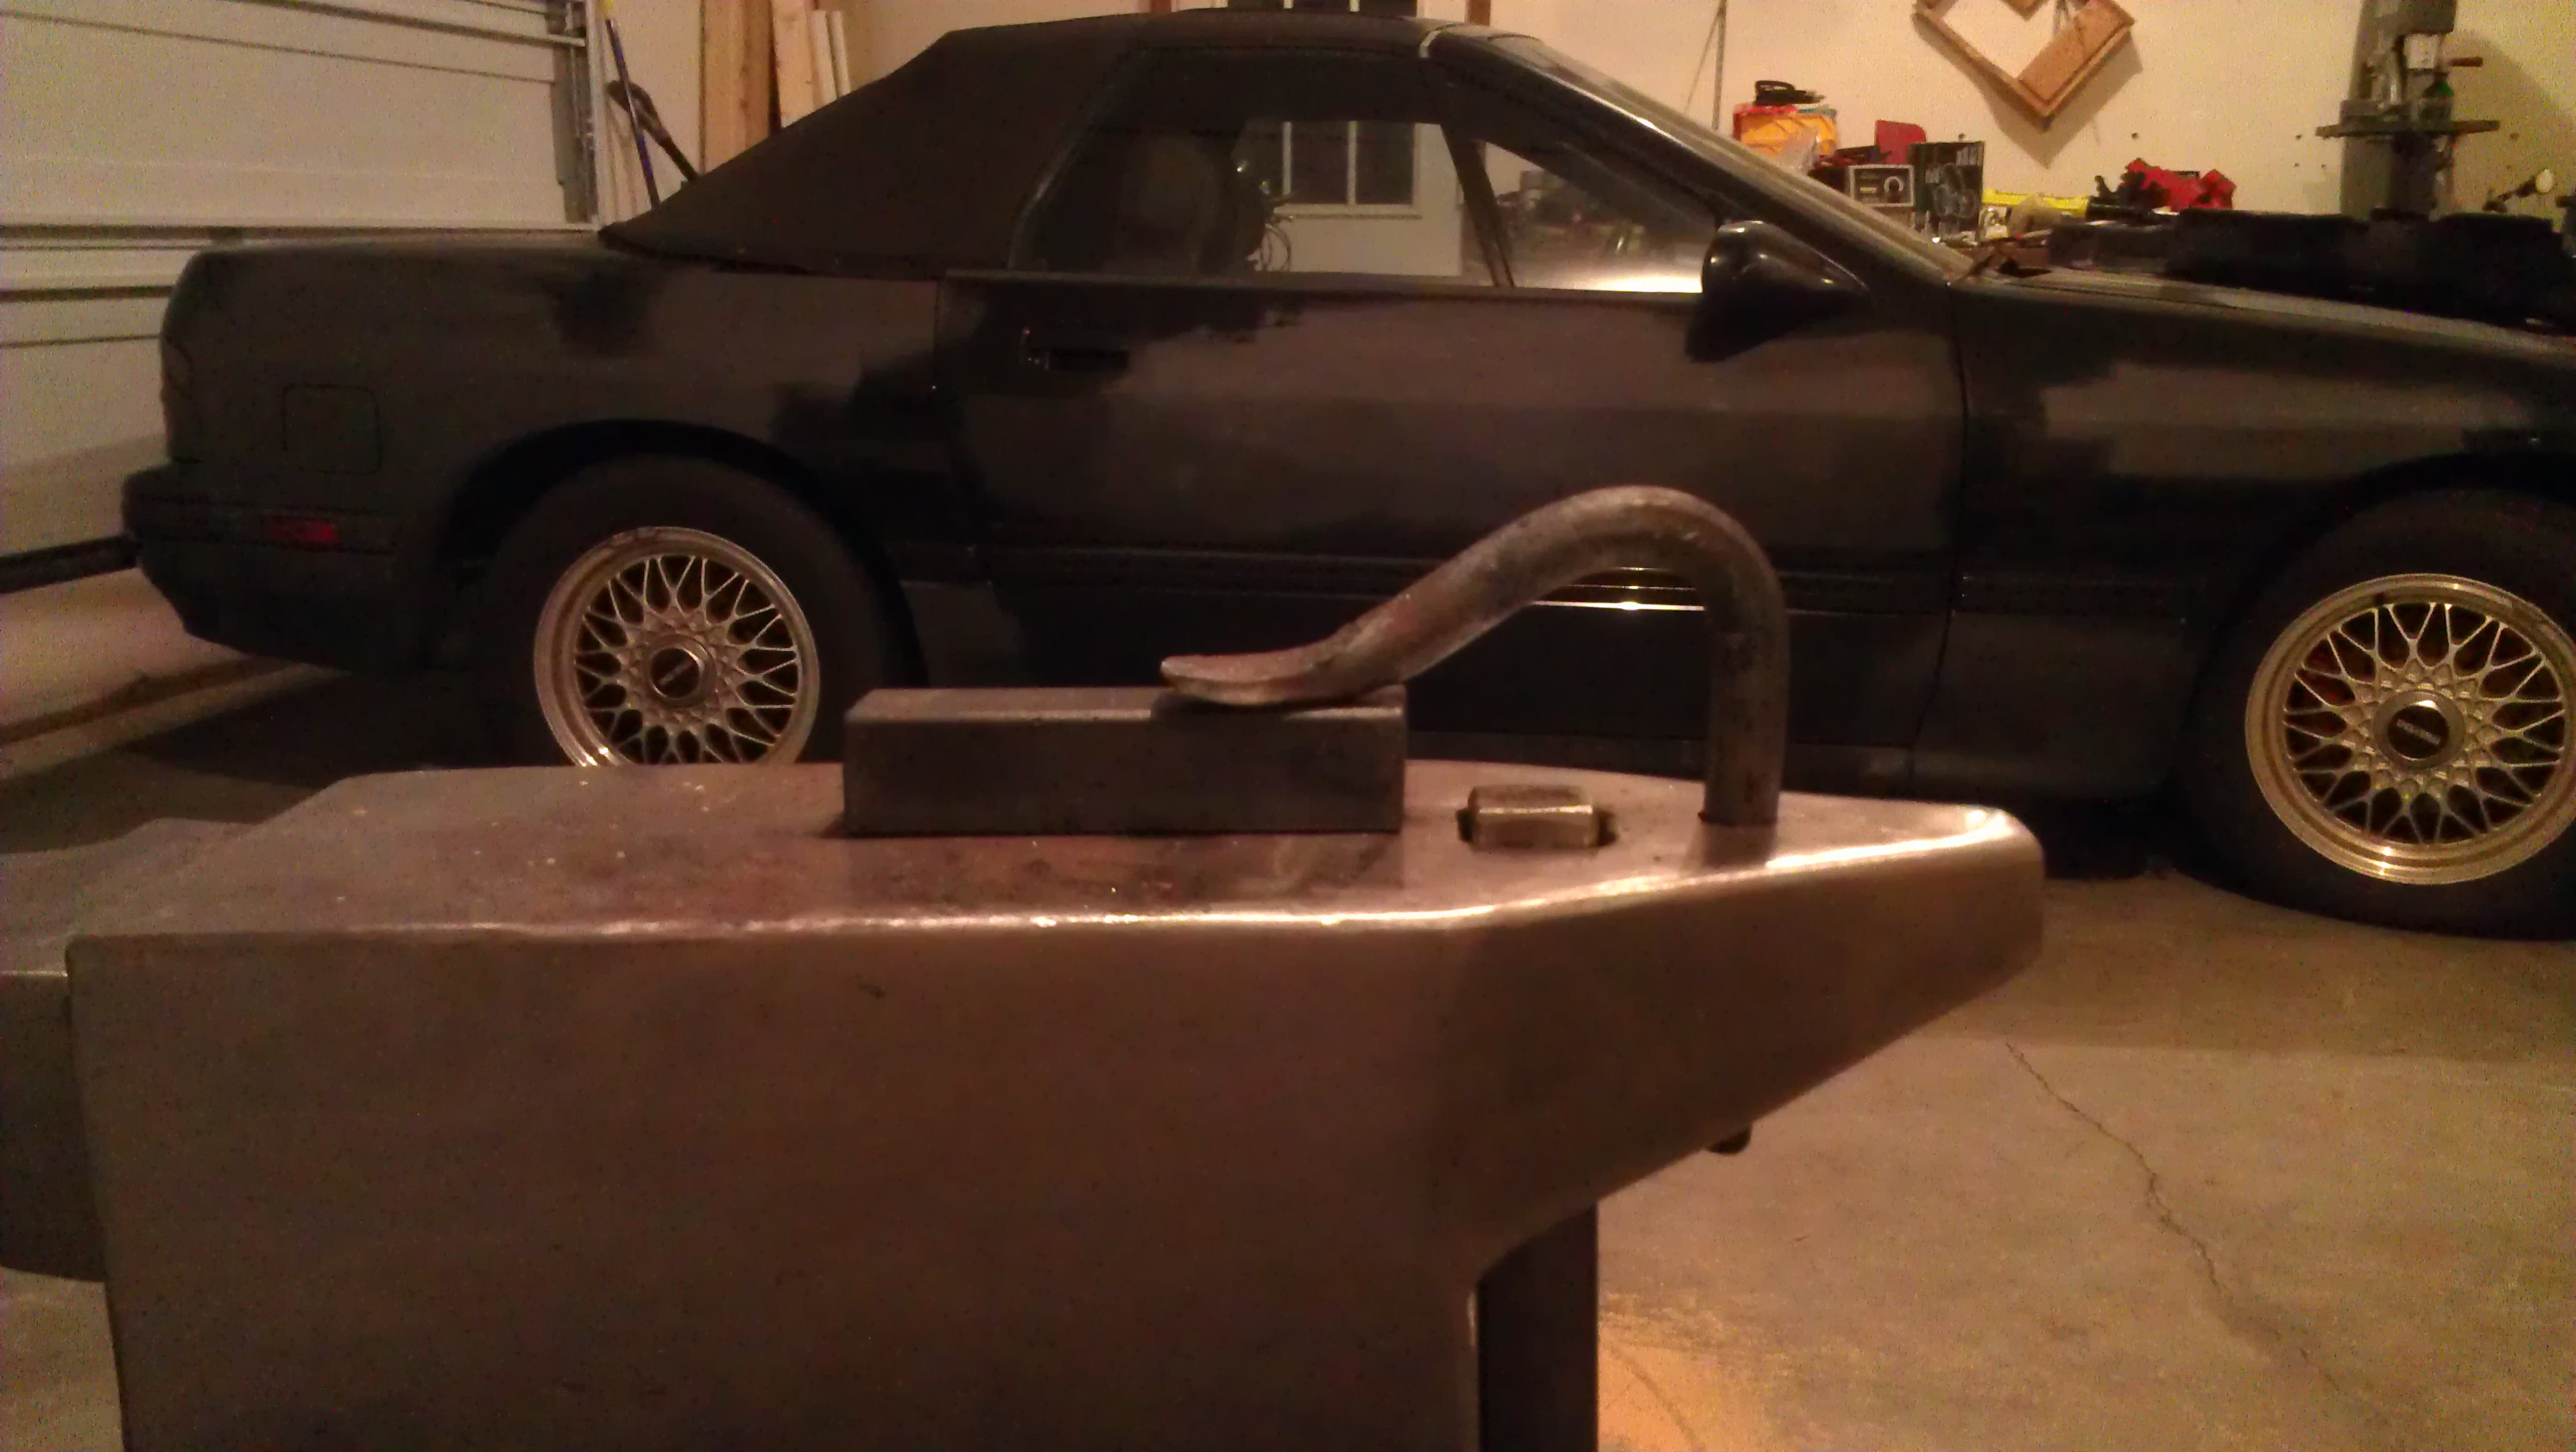
I wasn't setting out to make that, I just started by drawing out some stock, tapering, rounding, upsetting, bending, cutting, etc. Eventually I had a piece that looked perfect for a hold down tool so I just made an extra bend, drawed/drew (past tense of draw?) the 5/8" round stock to fit loose in my 5/8" pritchel and flared the end.
I've also made a round punch and started on a pair of tongs. I hosed the tongs up pretty bad, so no pictures yet. Right now I've got to make some modifications to my forge before I try to do anything else. I made somewhat of a 55 forge, but made the mistake of having the air pipe come up through the middle of the drum lid protruding about 3" into the coal bed with the end capped and holes drilled around the circumference of the 3" protrusion. I thought that may do a better job of diffusing the air... which it does... too good. It burns up TONS of charcoal and has about 4 or 5 hot spots around the perimeter of the pipe. I went through about 10 gallons of pine charcoal in less than 3 hours and I had a tough time getting the metal heated quickly. I'm gonna try a side blast bucket design to give me a nice deep 8" fire pit.
On a side note, anyone interested in a 1988 Mazda RX7 convertible? The engine/transmission are in decent shape, just needs interior/exterior work and could use some new shocks (they still work, just a bit rusted).
On a second side note, anyone want to come help me organize my horribly messy work bench? I'm kind of embarrassed by this photo, but the work bench is really cool. It was my grandfather's and he was a craftsman (wood, metal, engines, boats, you name it!). There are a bunch of cool old tools in it and the bench itself is made out of solid oak, it weighs a TON!
-
Made a stump which can be seen here if you haven't already found it:
http://www.iforgeiron.com/topic/31887-my-first-anvils-stump-build/
Haven't mounted it yet because I'm going to make another stump that's a bit taller. Right now I'm playing with the height by screwing pieces of 2x4 under the feed to raise it up. Once I figure out how tall I want it I'll make another one and mount it firmly.
-
Here is my take on the stump pictured and the general use of a wood stump. Just my .02 mind you.......
The cut-out for the foot is the first I have seen and don't use that. I like a really big stump. Like three times the size of the anvil. It is heavier and I have room to set tools about. I need to act fast as the steel cools. I have no problem working at any of my anvils with a really big stump sticking out from all directions. I don't think I'd want to stand directly over top my anvil, especially when I swing a hammer.
The use of iron is a must. I'm not talking about the pretty painted decorative iron straps with all the home made nails. I'm talking about real steel bands that BOLT together so you can tighten them up really tight and have room to adjust.
Back in the day they used to use American Elm. That stuff splits very very little. I had one. No bands needed. Now it's fire wood as bugs claimed it. I was able to get another, but used to use oak on the other two and they split. Thus the bands.
I am wondering what other people have to say about the undersize/ridiculously oversize anvil stand? I've heard some people say they like to work VERY close to their anvils (maybe it depends on if you are doing heavy striking or delicate work).
What do you mean by "the used of iron is a must". Do you mean in mounting the anvil to the stand or in keeping the stand from splitting. How would you tighten straps further after bolting them down the first time?
-
My anvil ended up about 1-1/2 inch short of reaching my knuckles. I tried it out a bit last night and had a hard time holding my stock level with the face without bending over. I have basically 4 options at this point.
1. I can leave it and learn to use it.
2. I can try to find another stump (maybe bigger diameter too) which would also give me the opportunity to correct some of the mistakes I made on this one.
3. I can make a spacer between the anvil and the stump either out of another stump or 2x4s or a piece of steel or something, then silicone it in place.
4. I can make a platform out of 2x4s to set the anvil/stump on top of. That would allow me to either use it at knuckle height, a couple inches lower for heavy hitting, or I could raise the platform and use it a couple inches higher for more detailed work.
Thoughts/recommendations?
-
What is the rebound test show at this point?
The answer may be relevant to many to exemplify what happens when one uses the hard facing rods on "regular" steel.
There were postings of that information but I would like to read your input and results....probably others too.
Carry on
Finally got around to the rebound test now that it is somewhat firmly seated on the stump. Something very strange happened. The rebound of the hardened face was about the same as the rebound of the unhardened step/upsetting area. I thought for a while that something was very wrong with the manganese steel until i realized there is a coating of shellac on the entire hammer head.
I sanded that coating off and WOW what a difference. The unhardened areas give a light thud and two or three minor bounces. The hardened face gives a high pitch "TING" with a VERY good rebound (as best as I can tell from my zero years of experience). The hammer bounces across the anvil face so many times, if I'm not careful it bounces itself right off the edge. It still has a ways to go on work hardening, because if I don't hit it square with the hammer, it leaves a dent from the corner of the hammer. I also made the mistake of striking a cold bar of square stock laid flat on the face and it left a nice little bar shaped impression, granted probably not more than 0.002" deep, it still showed up on the polished face.
So what was the final weight once you finished?
It weighed out at 205 lbs. Just light enough to pick up by myself (although I probably shouldn't) and when mounted to the stump I can still slide it across the floor. Its heavy enough that a medium swing of a 2-1/2 lb hammer yields ZERO movement of the anvil.
-
Here is the stump build for the anvil I made in another thread:
http://www.iforgeiron.com/topic/31084-my-first-anvil-build-looking-for-advice/
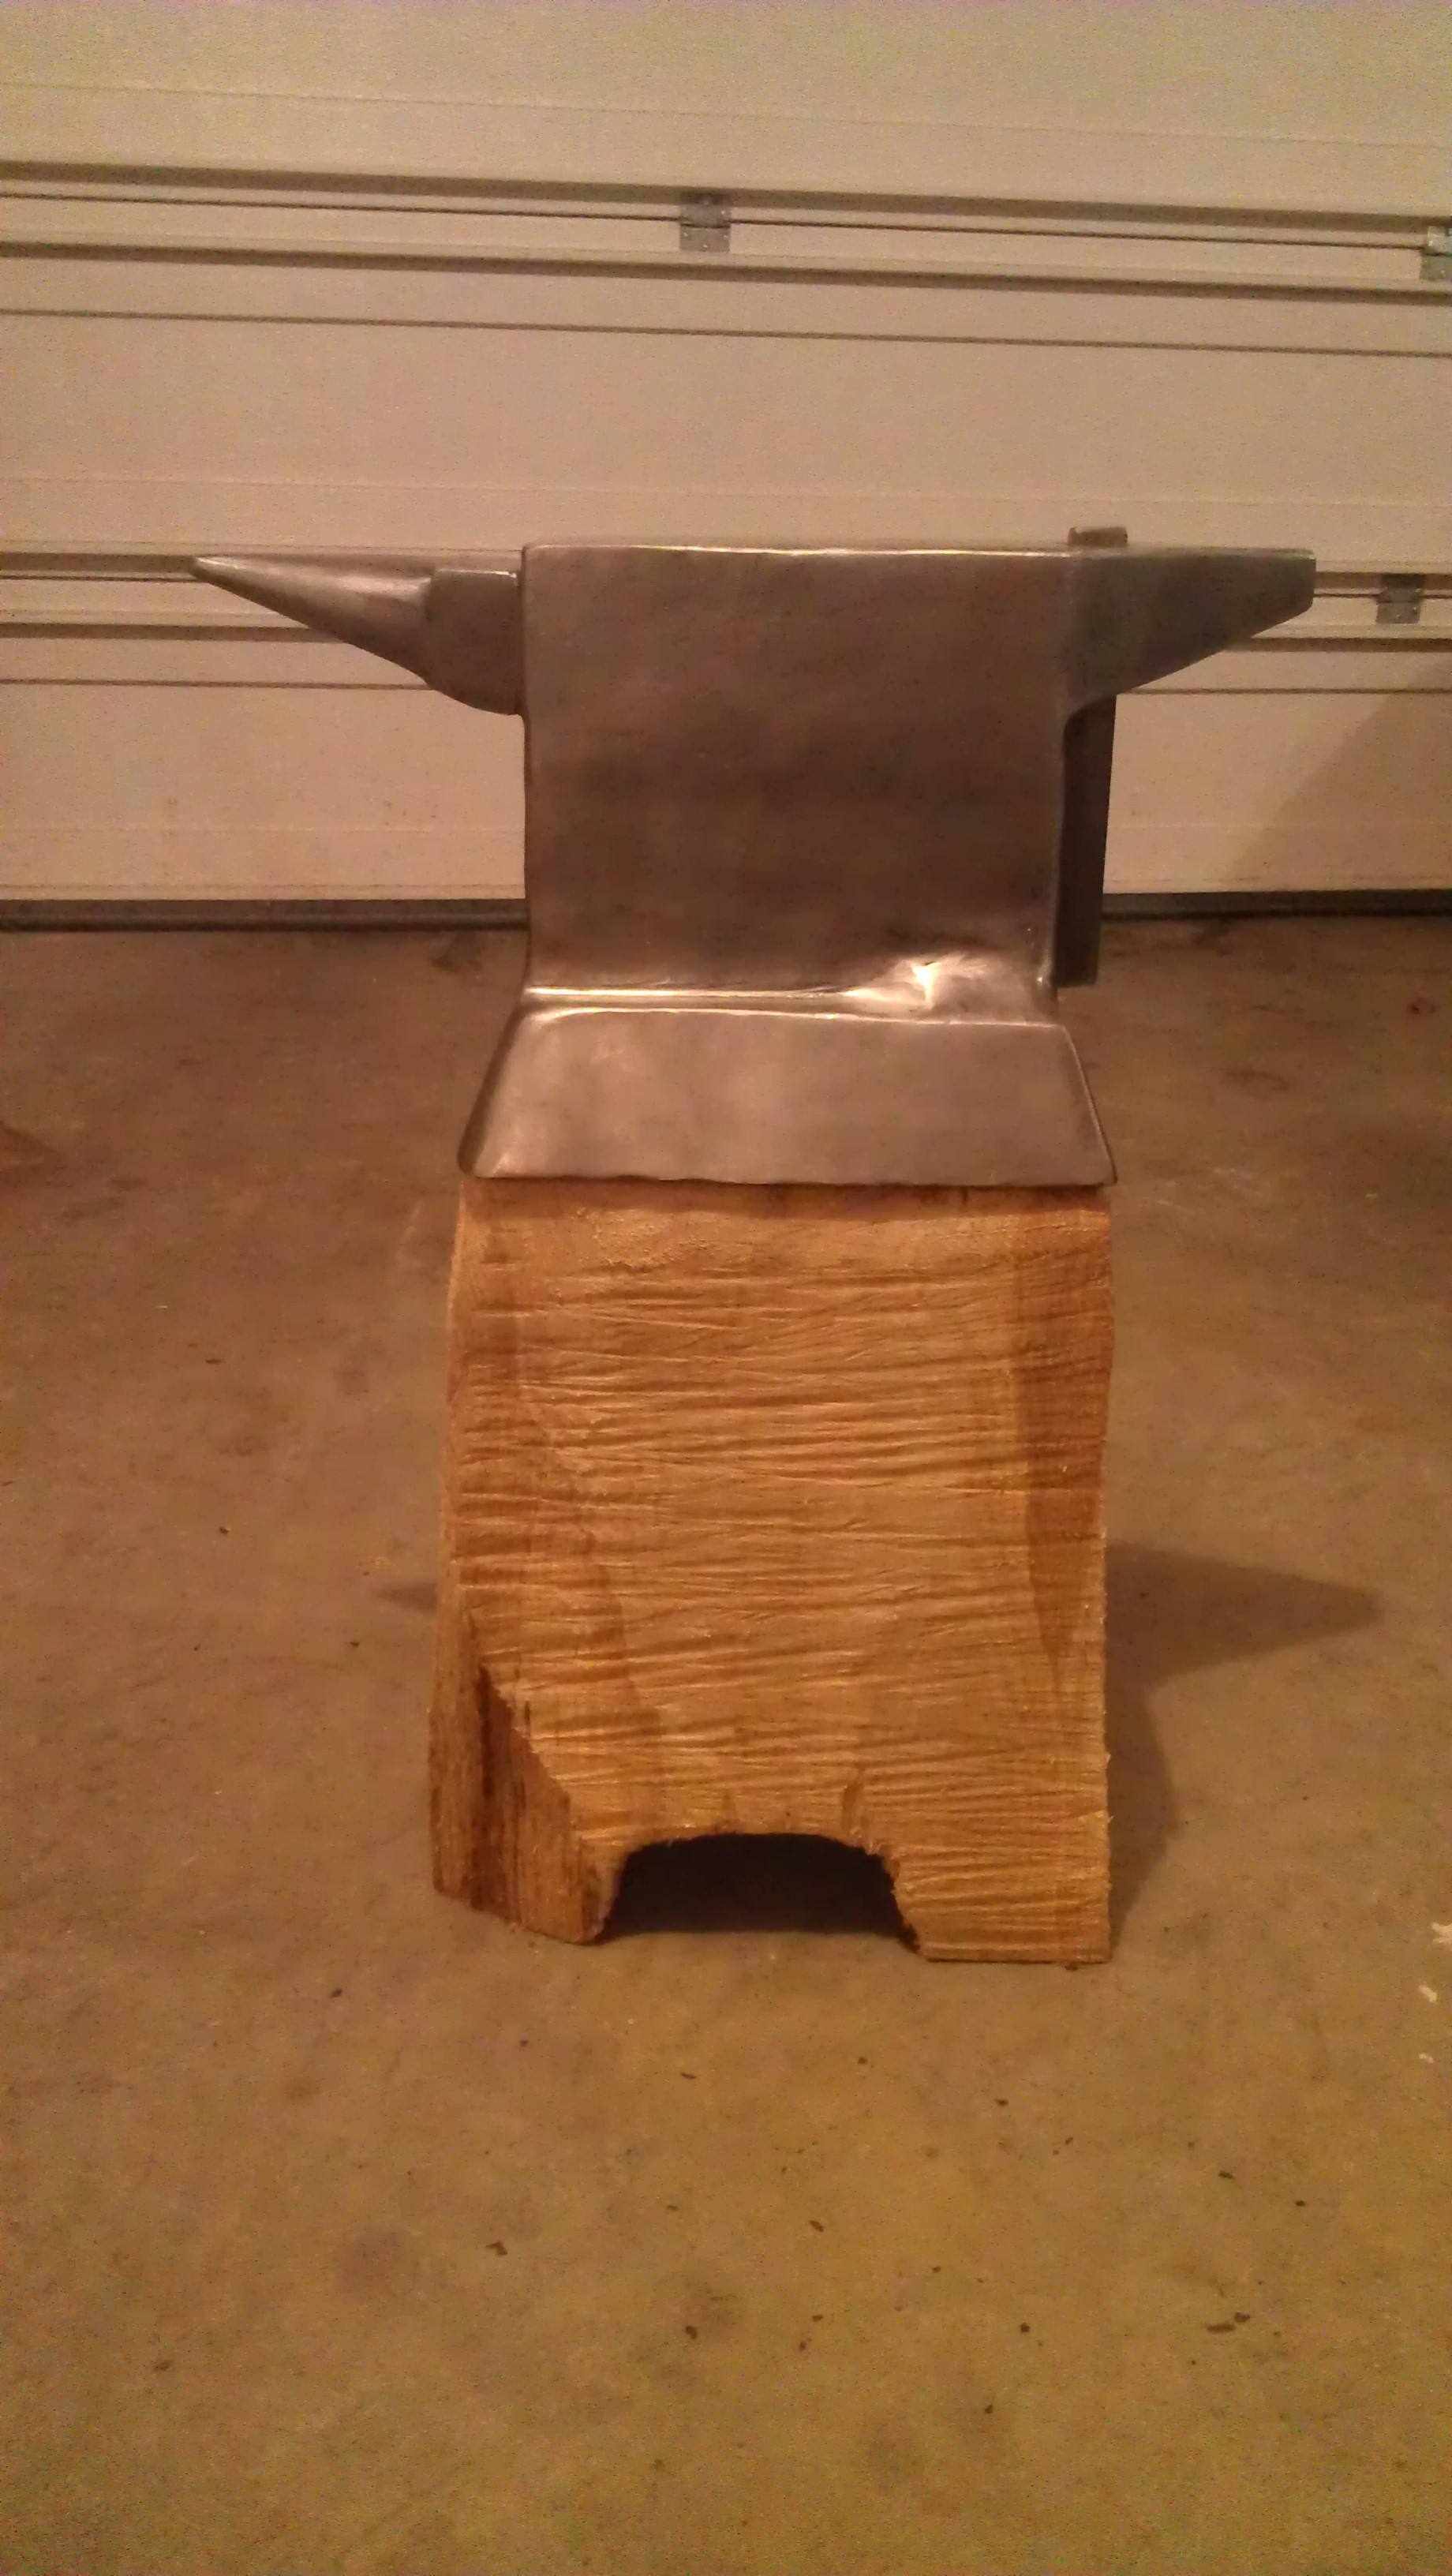
It's not quite done, but I was able to get most of it done in a couple weeknights with the help of some awesome, old chainsaws i inherited from my Grandfather. Here is approximately what it will look like. On the near side I carved a foot hole so I can stand really close and try to save my already bad back.
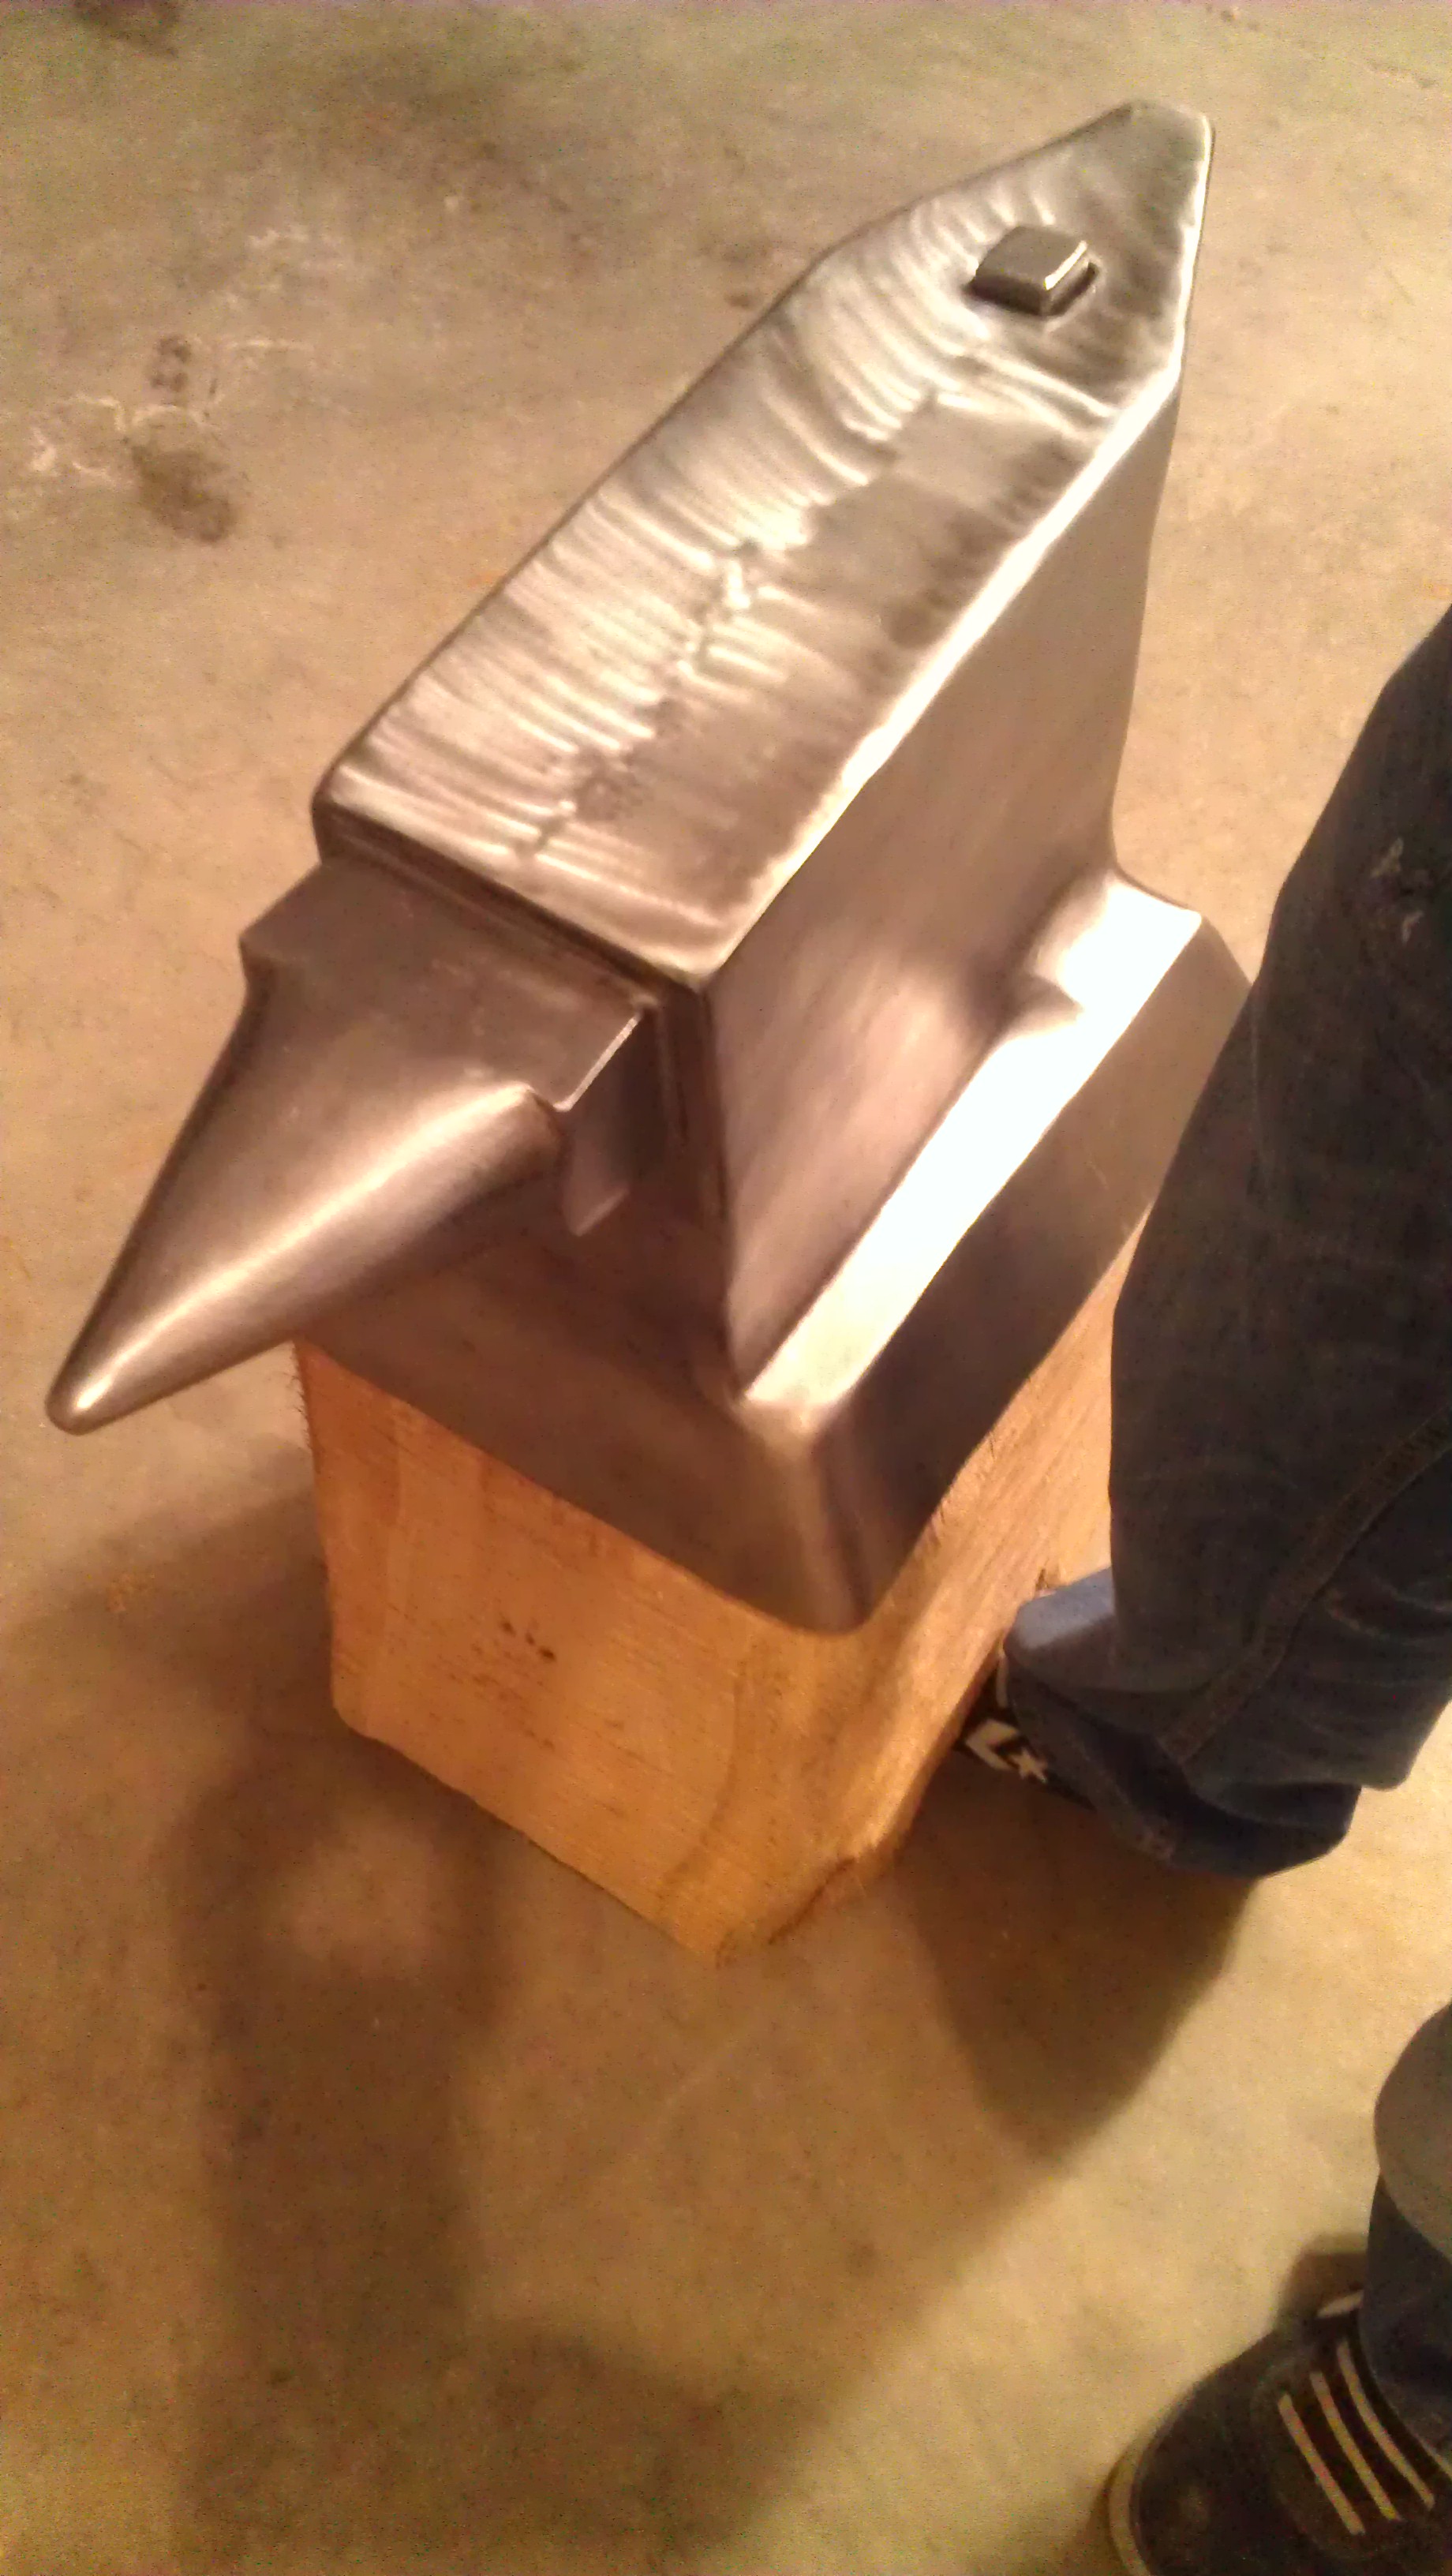
And the far side was left uncut so I can drill some holes for tool holders.
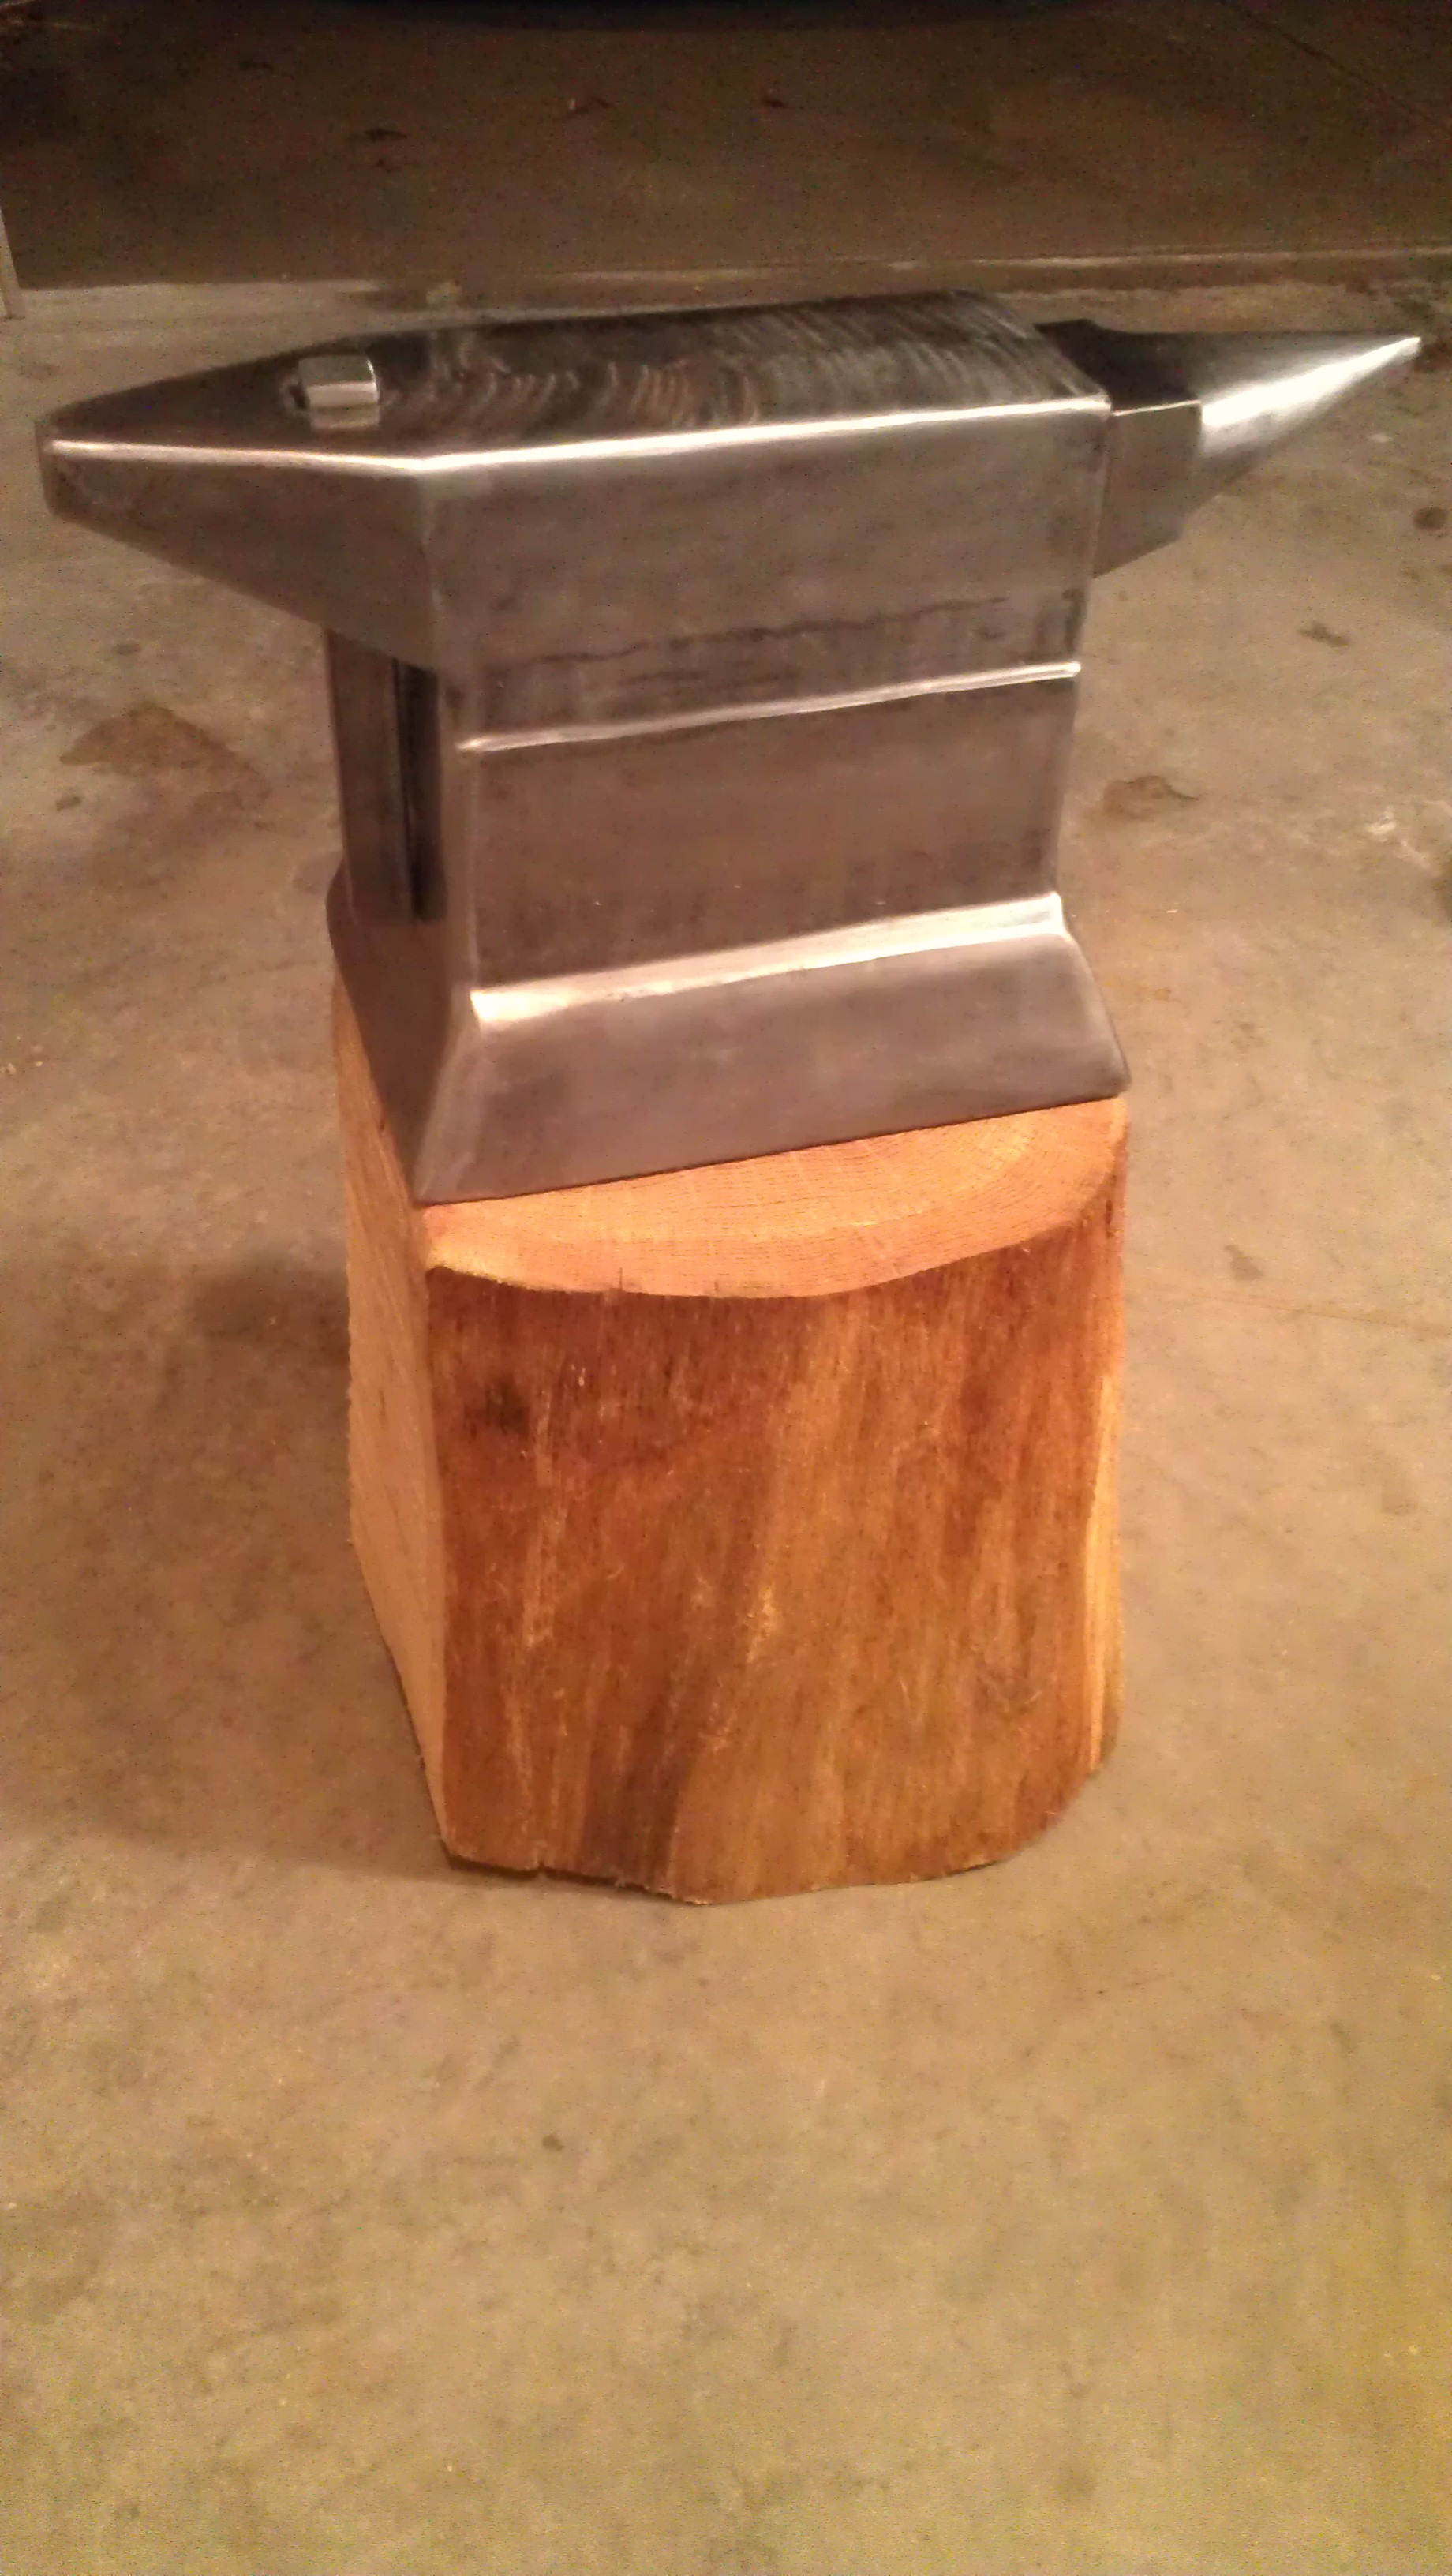
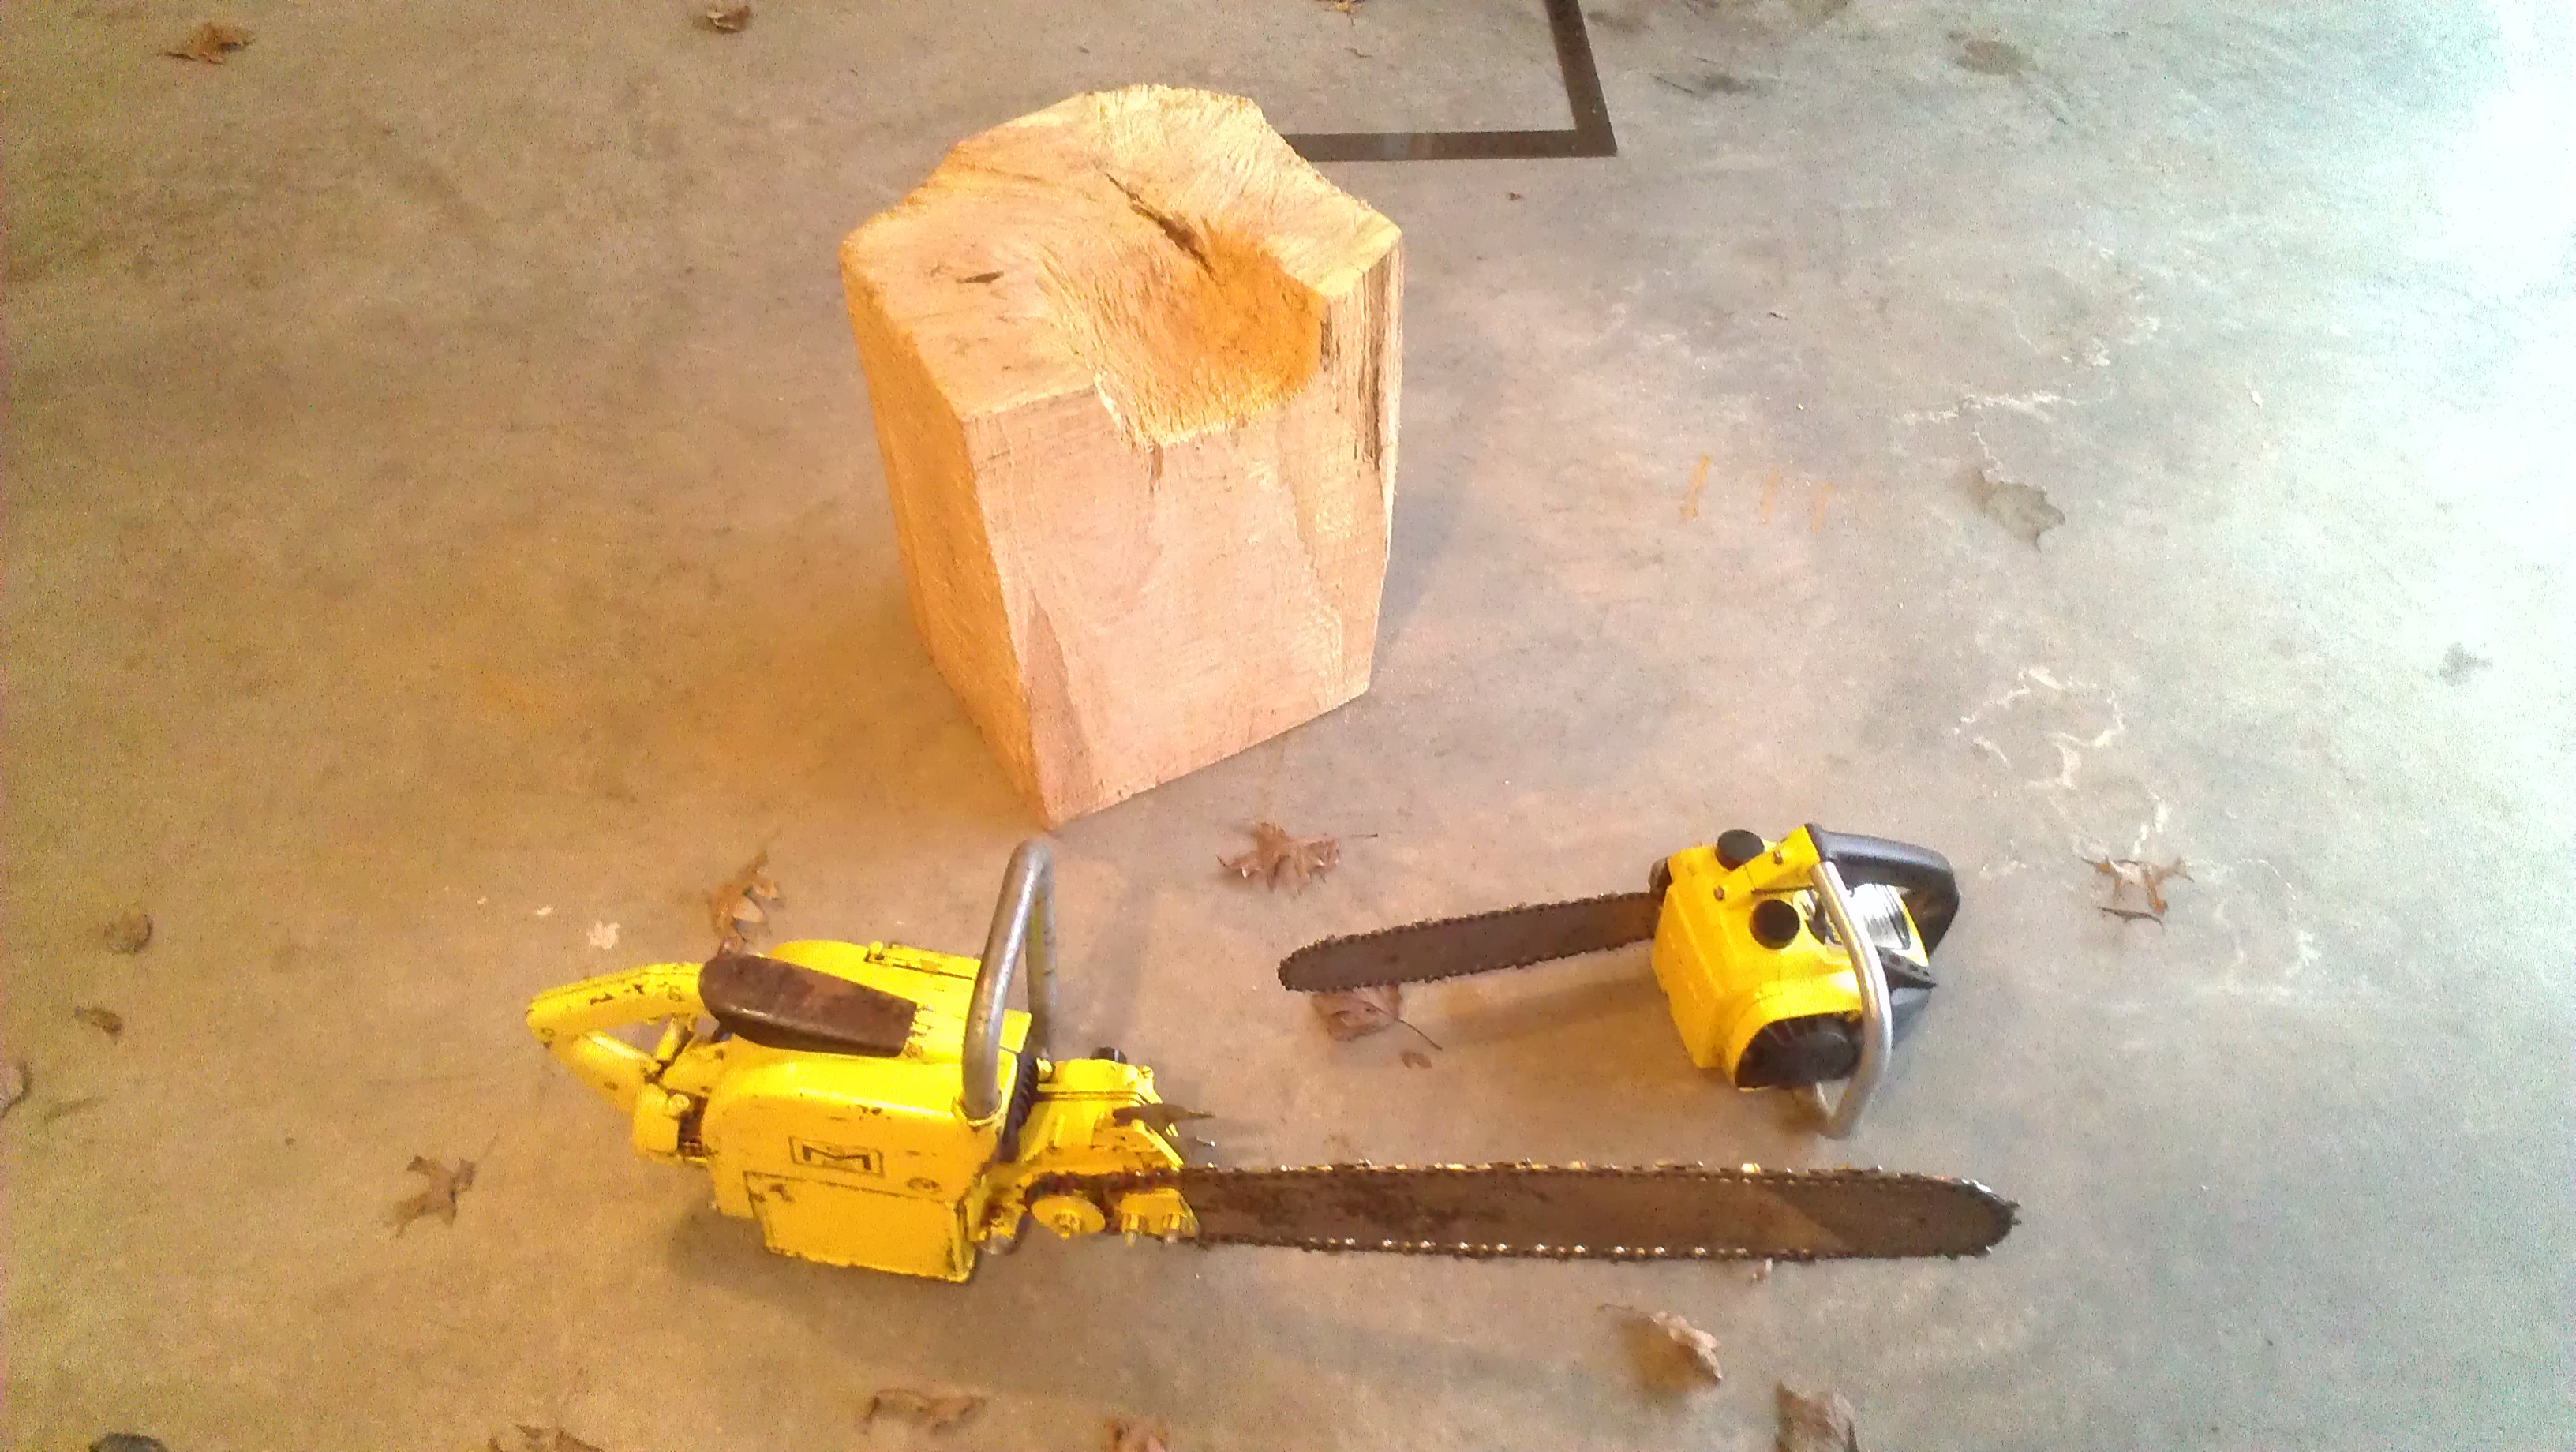
These are the two saws I used and the only two power tools used to make the stump. The big boy is a late 1950s McCulloch 35A, which needed a minor rebuild and was used to chop the three sides. The smaller one is a McCulloch Mini Mac and I used that for all the detail work.
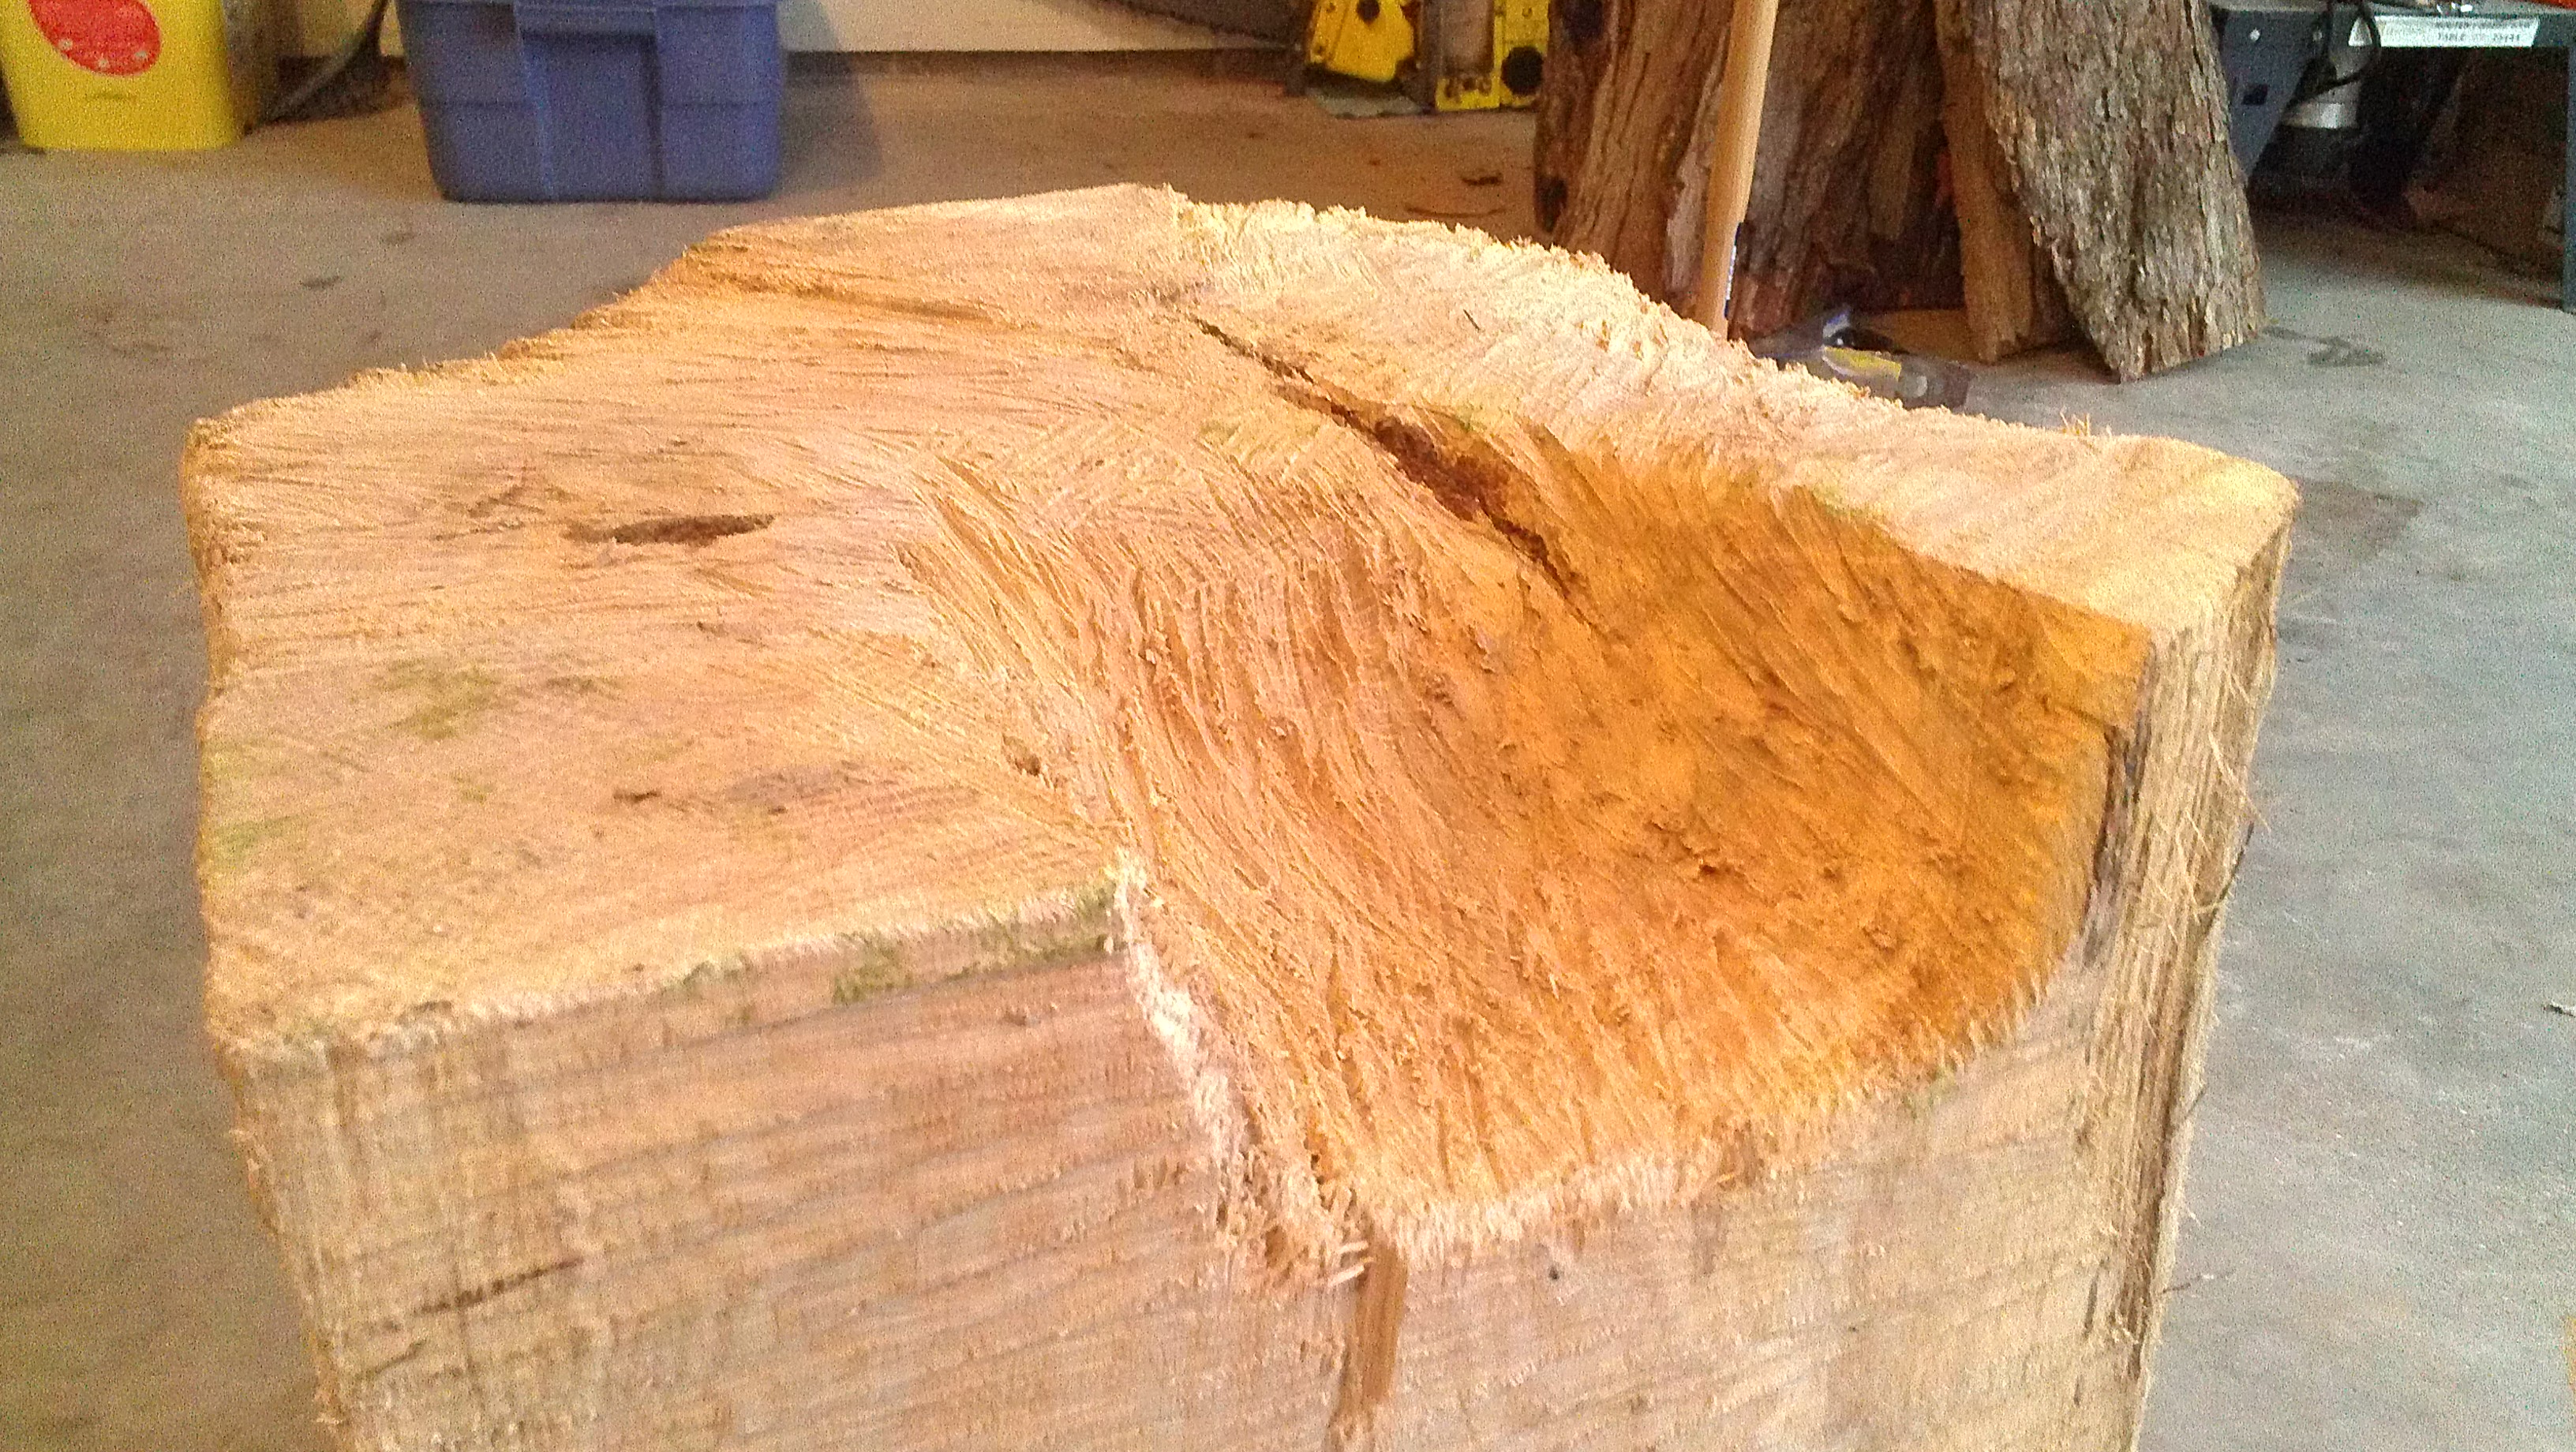
Here is a closeup of my foot hole design, it also shows how I carved three "legs" into the base. With those legs, the stump sits perfectly flat on the ground, no rocking whatsoever. Its pretty stout. Sweet litterbox in the background, huh?
I have seen a few posts of people using routers mounted on sleighs to flatten their anvil stumps, I went with the less sophisticated route, it also only took about 30 minutes start to finish and it is almost perfectly flat. Here is basically how I did it:
First cut the base to a tripod so it sits flat on the ground, make sure it is where you want it because after you level the face, any adjustments to the feet will throw off the level. Next get a straight edge or level and lay it across the face at various places/angles. In each placement mark the pivot point of the straight edge. That is the high spot. I just put a squiggle with a sharpie to mark all the high spots. Knock down all the high spots until the face is flat. Then proceed to leveling (you can do this the same time as the flattening step). I lay the chainsaw down as flat as I can and slide it across the face as depicted below, using very quick passes, maybe 2-3 seconds to skim across the whole thing. This brings down one side or the other, but keeps the whole thing flat. It takes a lot of passes, but at 3 seconds a piece you can do 20 passes in a minute (which is enough to take off probably 1/4-1/2 inch across the whole face).
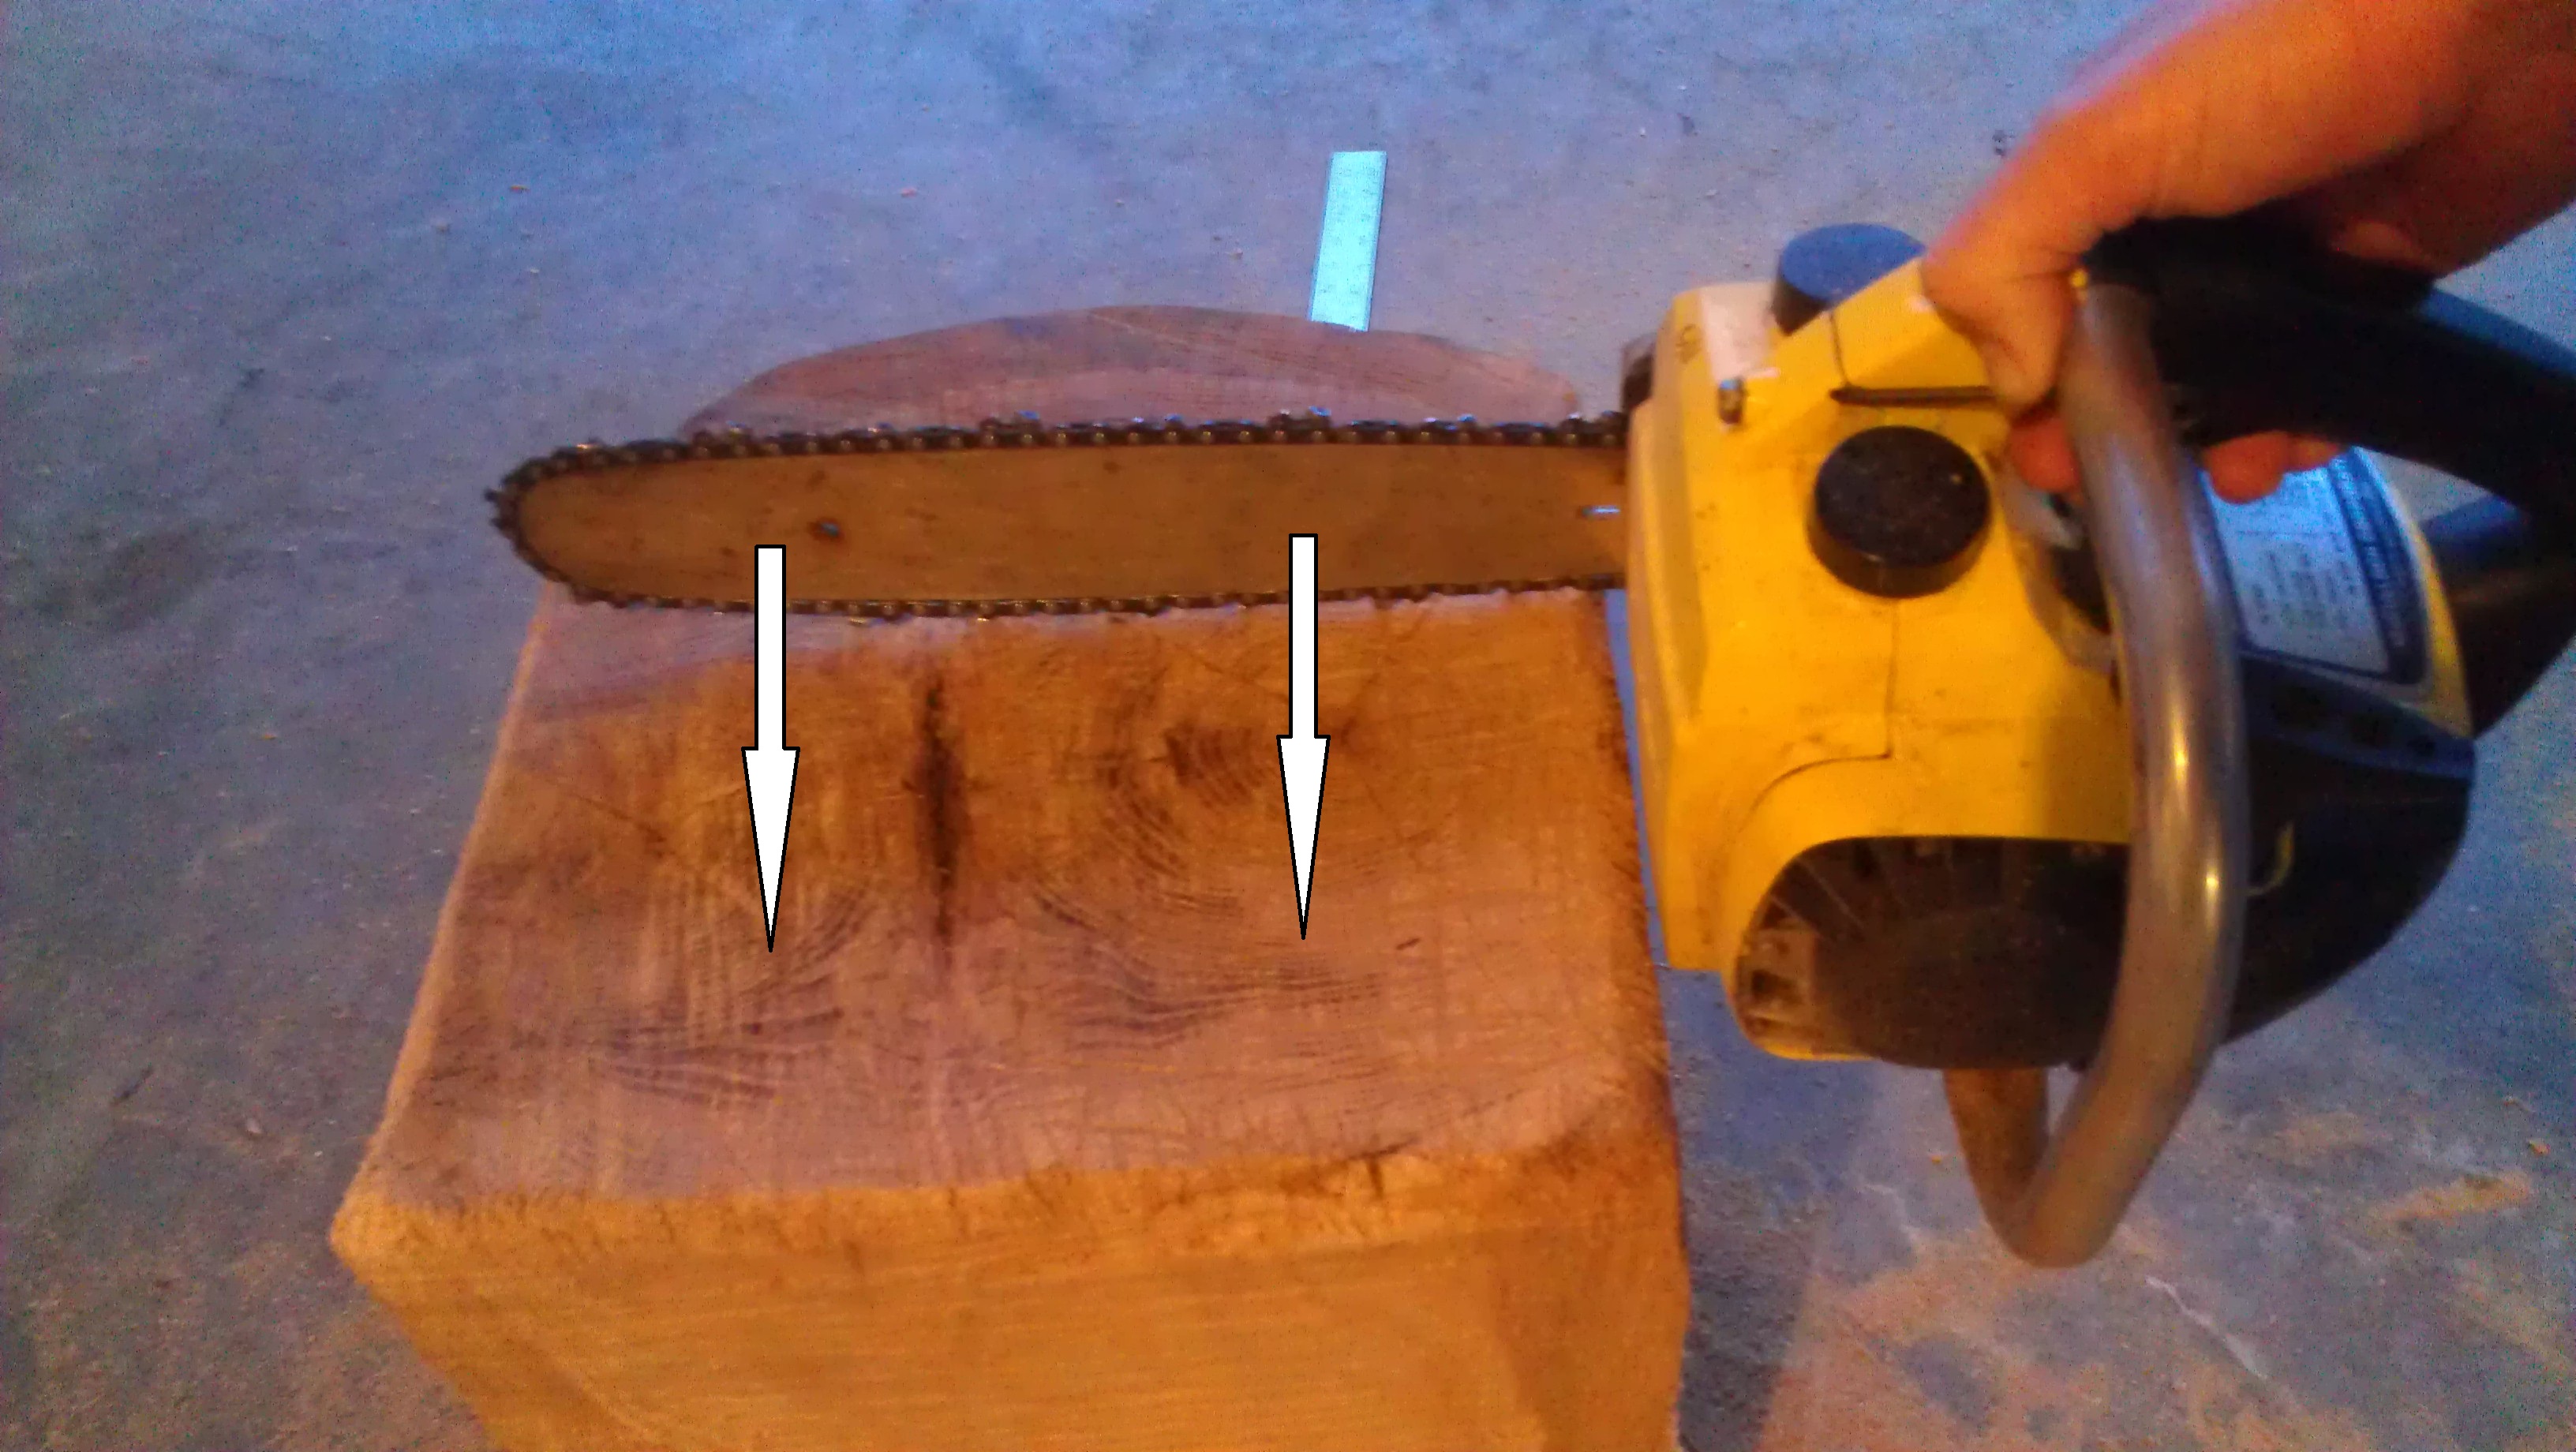
Repeat the whole process until you get it as flat and as level as you want. No building frames, sleds, etc. Just start up the chainsaw and have a straight edge and sharpie on hand. I'll post some more pictures as I finish the last details. The key to working with a chainsaw for shaping, which I'm sure everyone would learn very quickly is never to stop moving the chainsaw, if you do it bites in and cuts a deep slot. Don't even use the weight of the chainsaw, maybe only 1/4-1/2 the weight, it is amazing how quickly it will skim the surface down if you aren't careful.
One question, anyone have recommendations for preserving the wood? It is still pretty wet and I don't want to let it crack too badly. I was thinking about just coating the whole thing with boiled linseed oil or a nice wood stain.
-
So I just found out when trying to level my stump last night that the face of my anvil as well as the base are slightly convex.
I don't care about the base because I'm going to silicone it to the stump, so it doesn't have to be perfectly flat, what I'm worried about is the curvature of the face.
It is flat from one side to the other, but from heel to horn there is about a 3/16" difference from one end to the other. Should I go through all the trouble of taking it back to the shop, re-welding/re-grinding the face to bring it closer to flat? Is it really that big of a deal? I do have a couple relatively flat areas to work on, it is mostly a slight curve about 3" in from the step and at the point the heel meets the body.
-
Consider making a three legged stand. There are many threads on IFI about their properties. Make the leggs from heavy wall 2x2 square tubing...with generous sized feet with holes to mount to ground or concrete. For you anvil the necessity to attach to concrete would not be paramount...however preferred. Simply drill the concrete and insert regular bolt into the hole. Remove them to move the anvil...easy.
Fill the legs of the tripod base with oil and sand to reduce that horrible rebounding sound.
With a good base on the tripod you can step up really close to the anvil when necessary. And there is an easy to add base to create tool holders. An example is hammer holders in the shape of rings, etc.
You project is very attractive. Many would question the true economics but I think you have learned some additional skills. You also own a project that others are jealous of.
Carry on
Just finished rough cutting my anvil stand, I'll post pictures on here tomorrowish. I did do a "3 legged" stump stand, with a little extra meat on the far side for tool holders. I'm also going to do a couple hold downs for the horn/heel to reduce the ring. I'm also planning on just silicon gluing the anvil to the stump to eliminate the need for fasteners. I think the silicone over that much surface area will be very unlikely to release.
I may have missed it somewhere, but did you quench the face of the anvil to harden it?Otherwise wouldn't heating the anvil to temperature you achieved and letting it cool slowly, softening or annealing the anvil as a whole? Otherwise it came out beautiful! Great job.
annealing did soften the whole anvil, but not the hard facing on the top. Well i guess technically it did soften it, but only down to 20-30C, but since it is work-hardening manganese steel it will harden back up to 50ish with use.
Fantastic!
I'm genuinely impressed with your work and can't wait to see you using it. Like others have said, consider making a tripod stand out of metal or build a "stump" out of pressure-treated lumber. Cutting a stump level can be a pain, and then you have to worry about rot and insects.
And, imagine the satisfaction of not only having made the anvil, but also the stand that it sits on!!!
Tell us more about that burner? What brand is it? Looks like it would give off a nice even heat in a small forge, kinda like a ribbon burner.
So far I've had no problem leveling my stump out, and with 3 legs it sits VERY stable on the ground. I am curious how I should protect it from rot/insects. I was just planning on coating the whole thing with boiled linseed oil. Is that enough?
I am going to make an assumption here: You annealed it becuase the face is work hardening welding rod, and you wanted to stress relieve the other welds, which is why you did not harden it. Am I correct?
You are absolutely correct. The work hardening rod is still relatively hard after annealing and will harden further with use.
-
It ended for $21
-
The problem isn't the caulk between the anvil and top of concrete base, it is the caulk between bottom of base and the slab. The slab was new and clean and dead flat, anvil base weighs several hundred lbs, anvil weighs 300 lbs so collectively there has been maybe 700lbs pressing one smooth concrete surface to another smooth concrete surface for two years. Combine that to the surface area of an 18" diameter base and it is really stuck together, thats a lot of stuck surface area to pull apart and the fit is so close the layer of caulk is maybe the thickness of a piece of paper. It just occurred to me that maybe I can take lemons and make lemonade and after fabbing an adapter bracket I can leave the base where it is and use it for one of my swage blocks or another leg vise!! Actually I've been thinking I needed to mount another leg vise for quite some time now so this is the perfect opportunity, now I'm glad I didnt go crazy with the jackhammer yesterday. Thanks to everyone for any and all feedback on this issue, sometimes all one needs is the passage of a little time to get the solution to a perceived problem and turn it into a nonproblem.Bob.
I like this solution the best. Why destroy the best mount you've got? Just re-purpose it!
-
They may even have a big bandsaw that could handle it, if that's the case they may do it for free if you sweet talk them. Just warn them it might be hardened, they may not care and their saw may be able to handle it. You could always take a hacksaw to it to test if it can be cut with metal.
-
Find a fabrication shop that has a laser or water jet, they can probably cut it in about 2 minutes once the get it in the machine. I bet they wouldn't charge more than $20, which you would probably spend in grinder cut off wheels.
-
i LIKE IT! :D
What is the rebound test show at this point?
The answer may be relevant to many to exemplify what happens when one uses the hard facing rods on "regular" steel.
There were postings of that information but I would like to read your input and results....probably others too.
Carry on
A 5/8" pritchel is good for jamming a bent hold-down made from 1/2" round stock. 3/8" is good for supporting the surrounding metal when punching a smaller hole.
Were I you, I'd strongly consider a series of holes in increments up to an inch, if you can. They'll come in handy some time.....
This is a test of the multi quote system. I'm going to try to make a new thread with just the build posts to make it more concise.
-
I let her cool off over the weekend and here it is after removing the pyro block. it was kind of strange, when I rubbed away the dark red rust (bottom half) it turned into the bright orange rust (top half), which didn't rub off further without an abrasive. The layer of scale was very thick and part of me wishes I had left it on. I used a twisted wire cup attachment for the grinder to remove the scale and the other part of me is glad I took it off because...
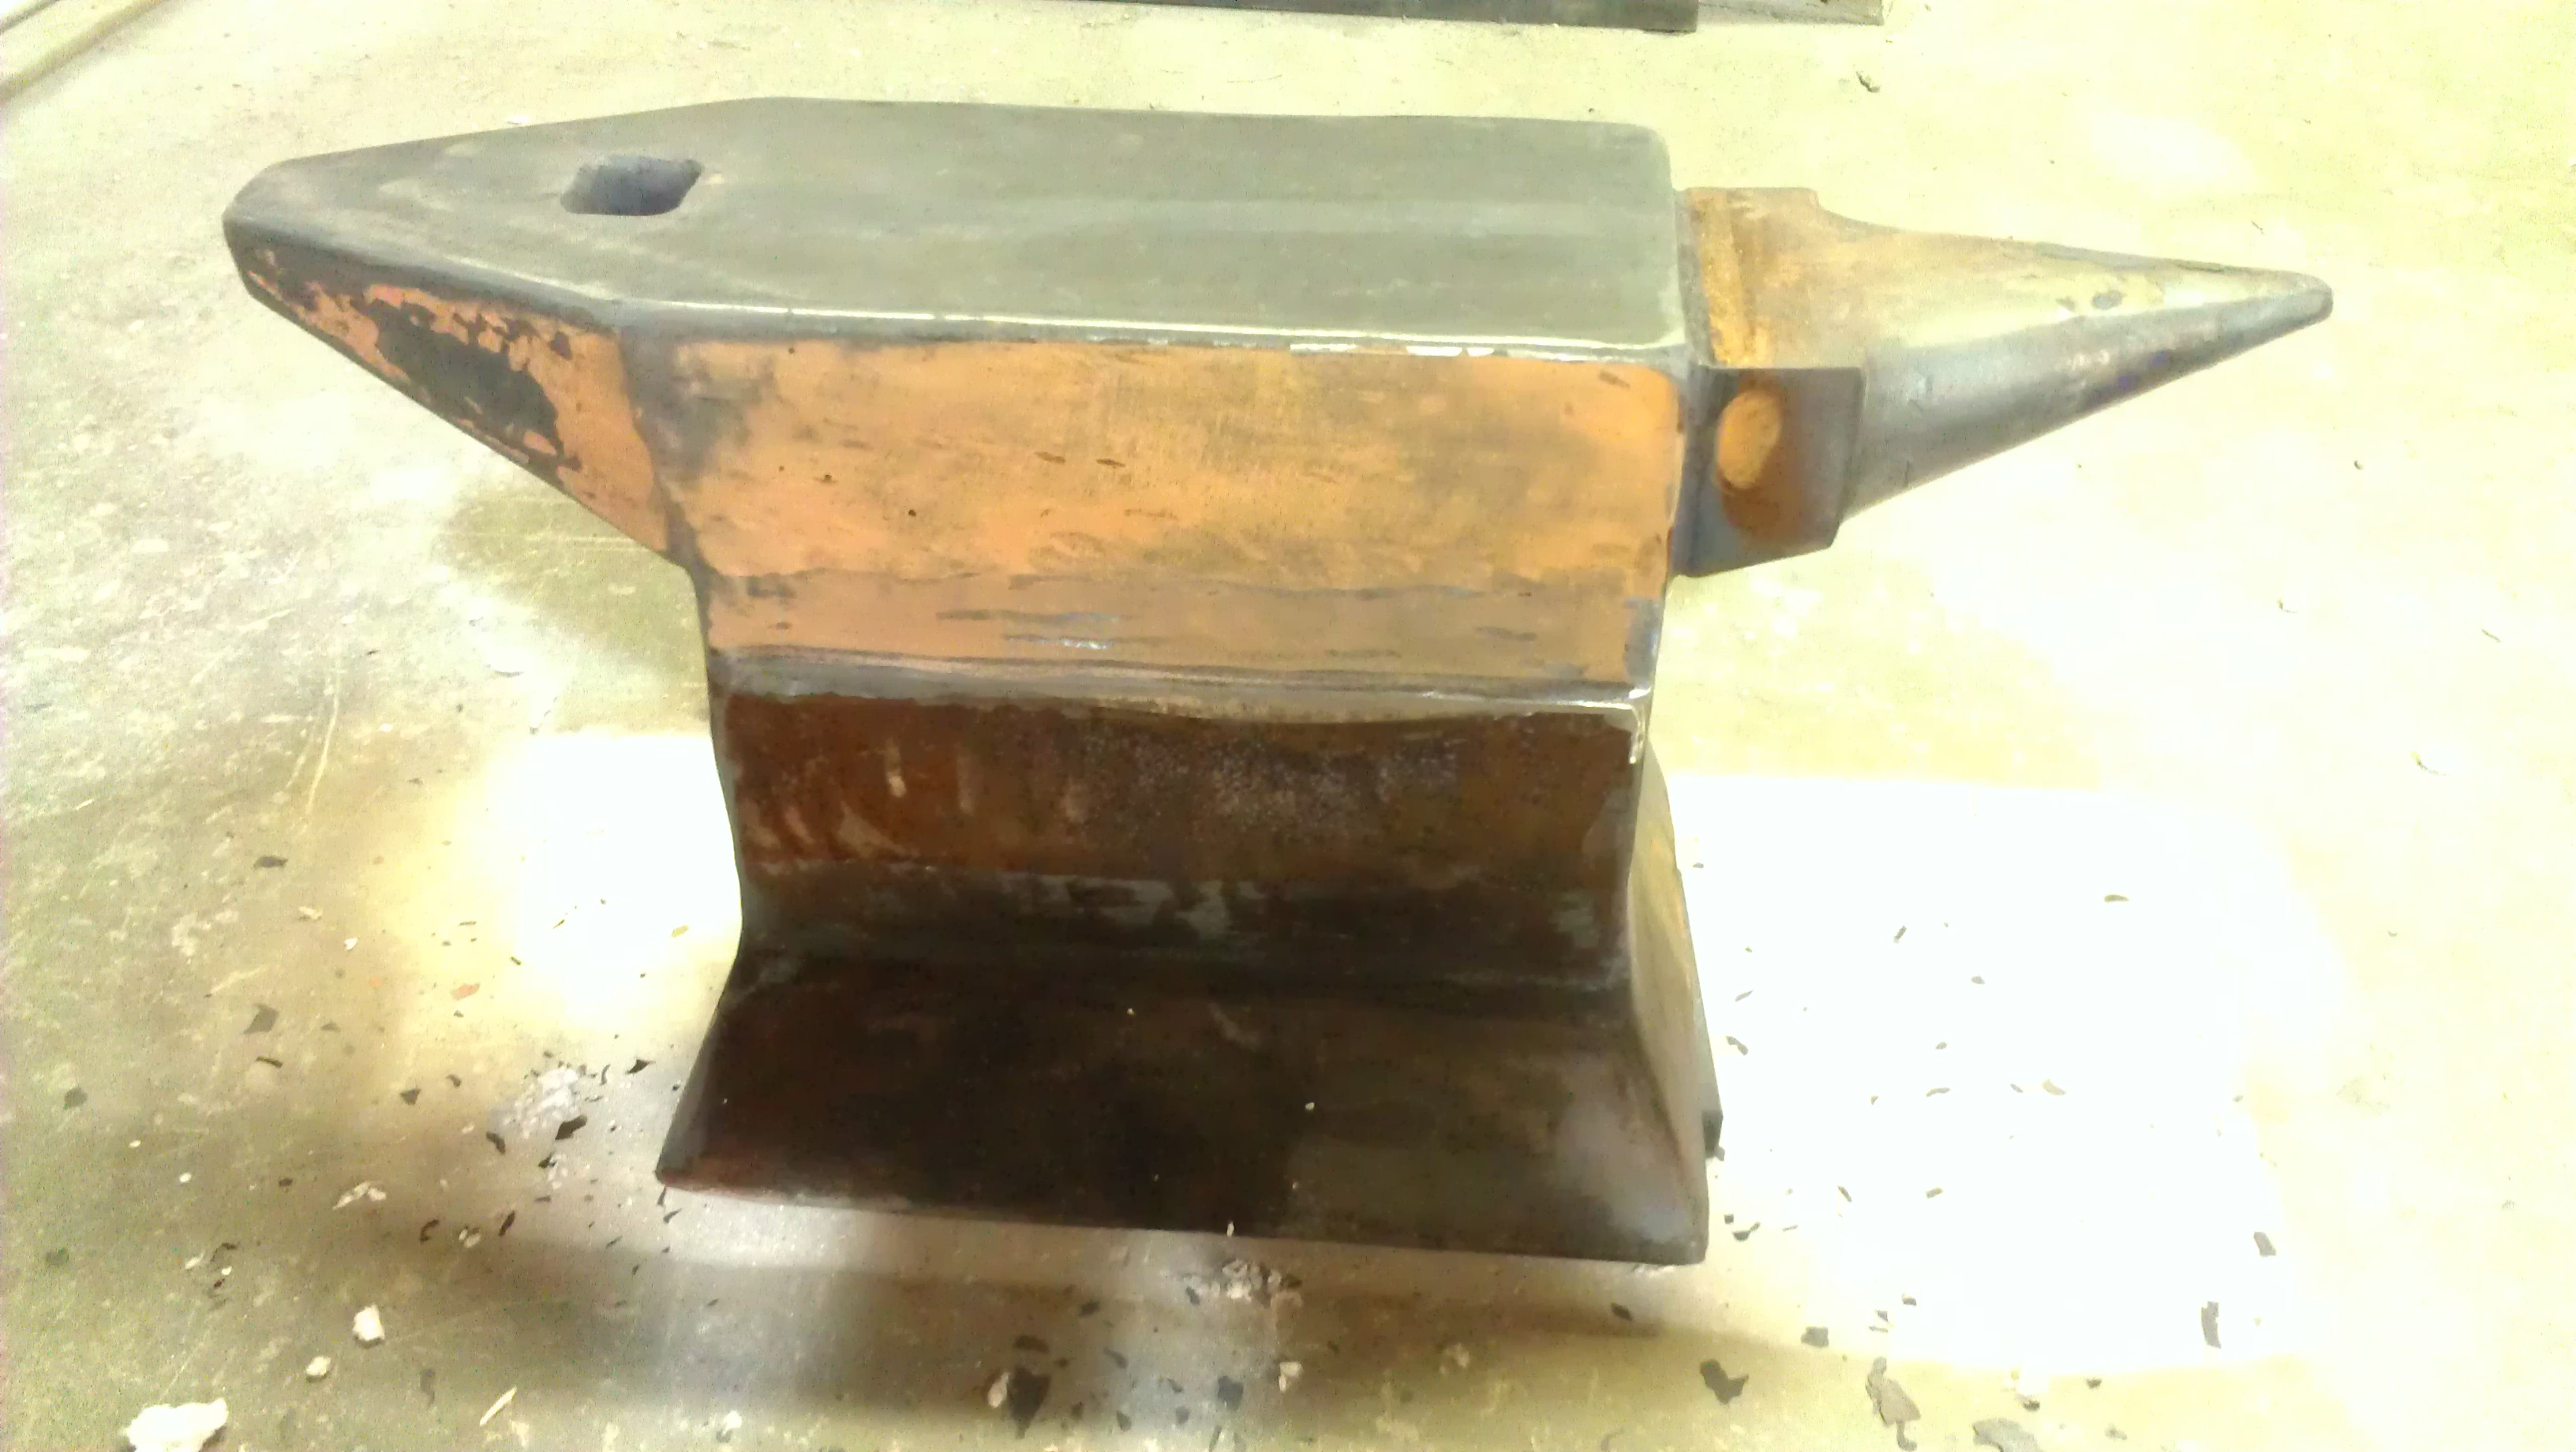
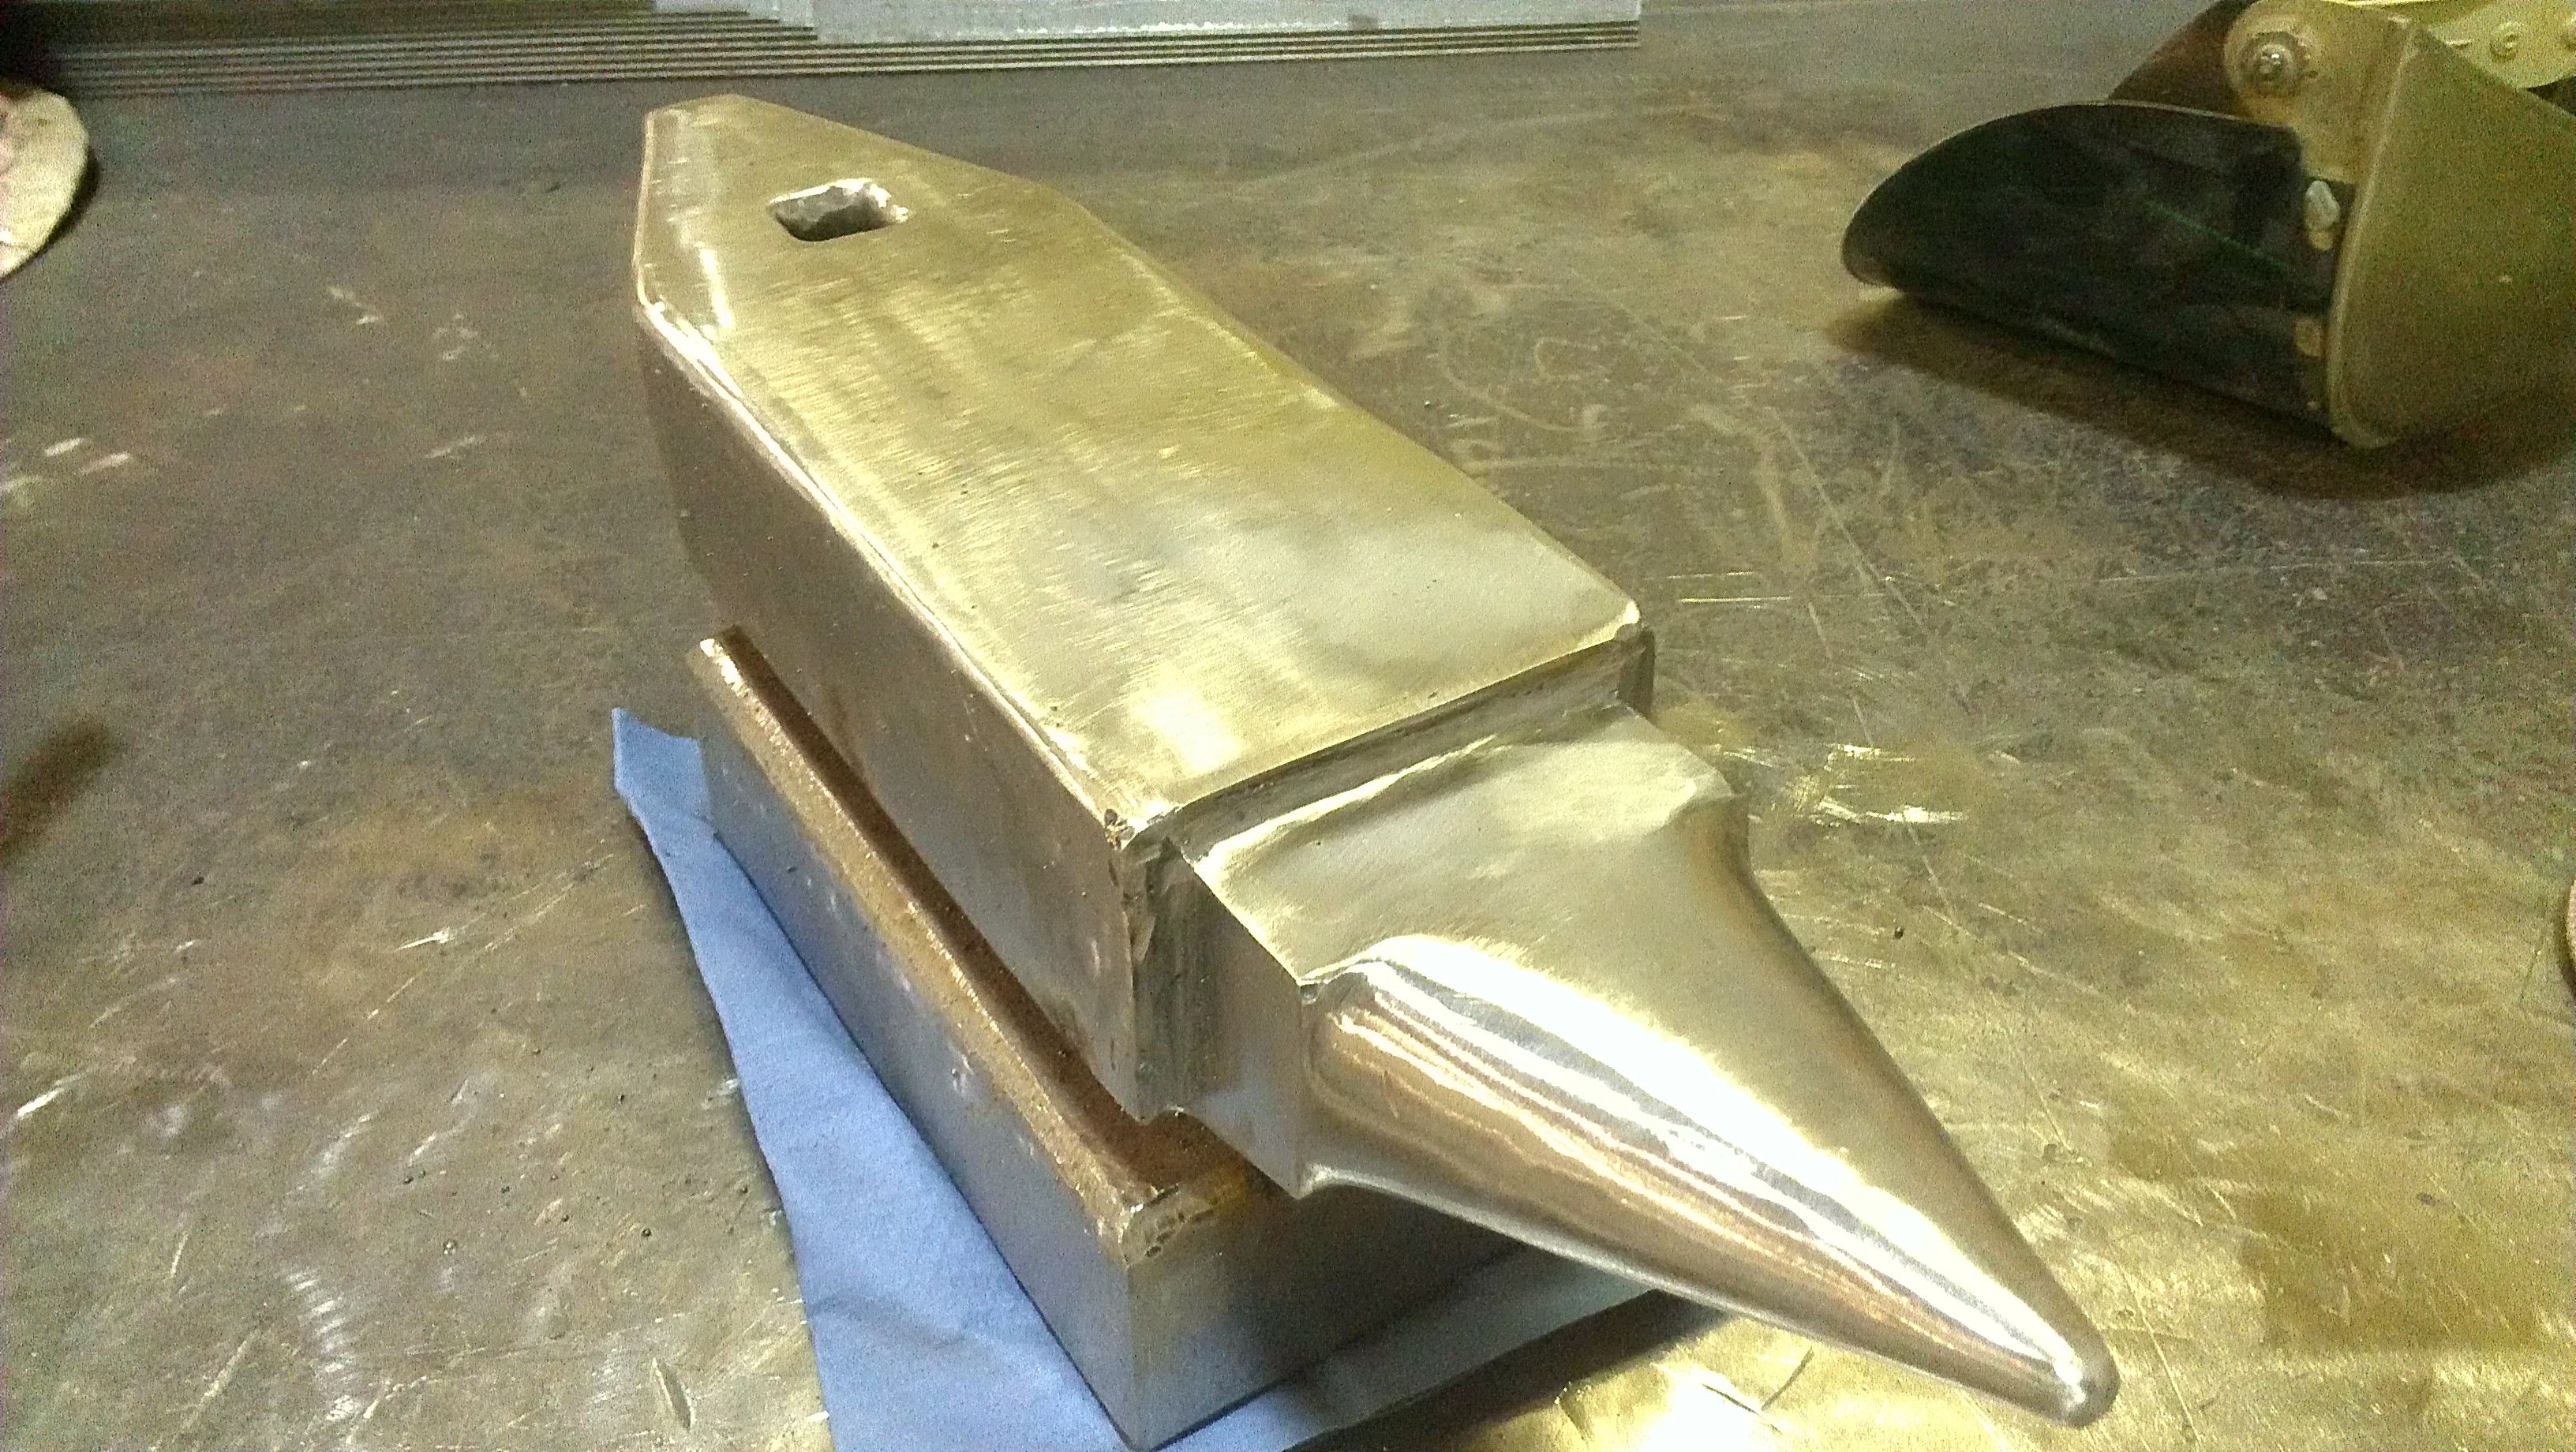
... it looks so good. I went back and forth using the twisted wire or a flap abrasive attachment, the flap would have polished it up to be shiny, but the twisted wire gave it a more grey/aged dull texture which I decided i preferred (also a lot less work than jumping grits to try and polish the whole thing). I did polish the face, the step and the top of the horn. I also put a couple different size radii on the corners of the base, the largest one is on the near left side. This picture shows well the concave radius I made at the right side of the upset block. Not sure what I'll use it for, but I'm sure it will come in handy.
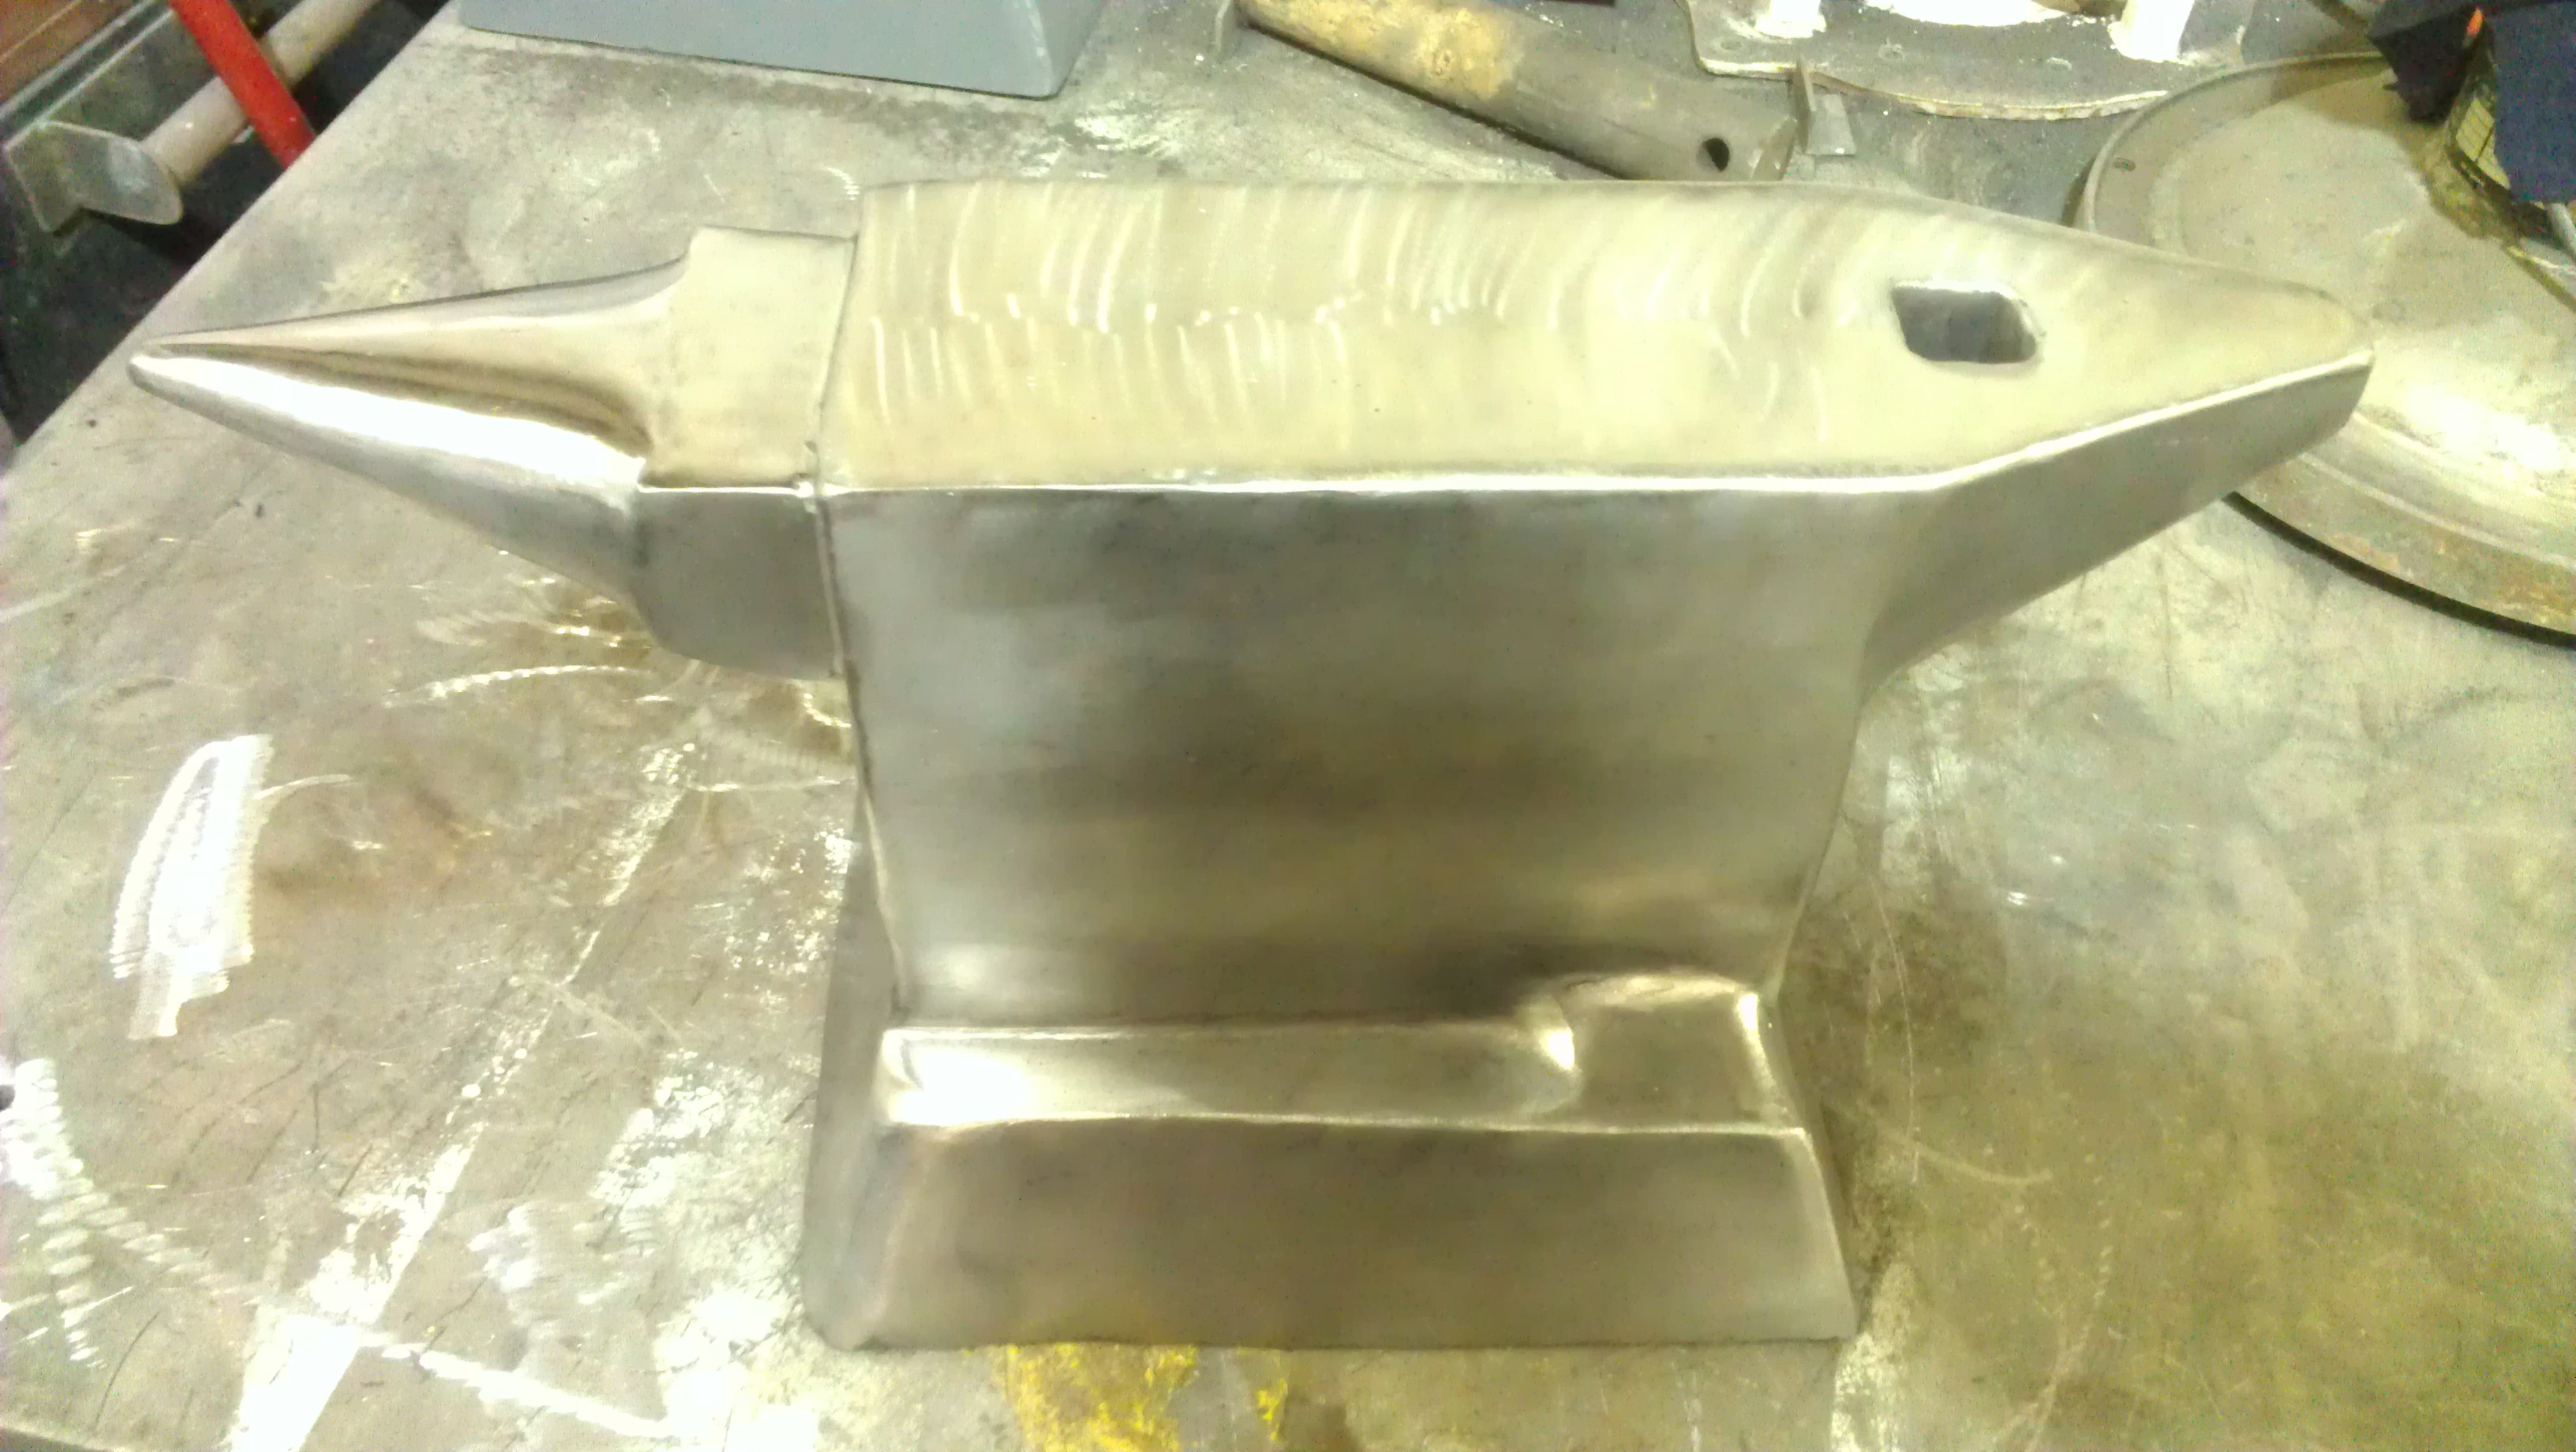
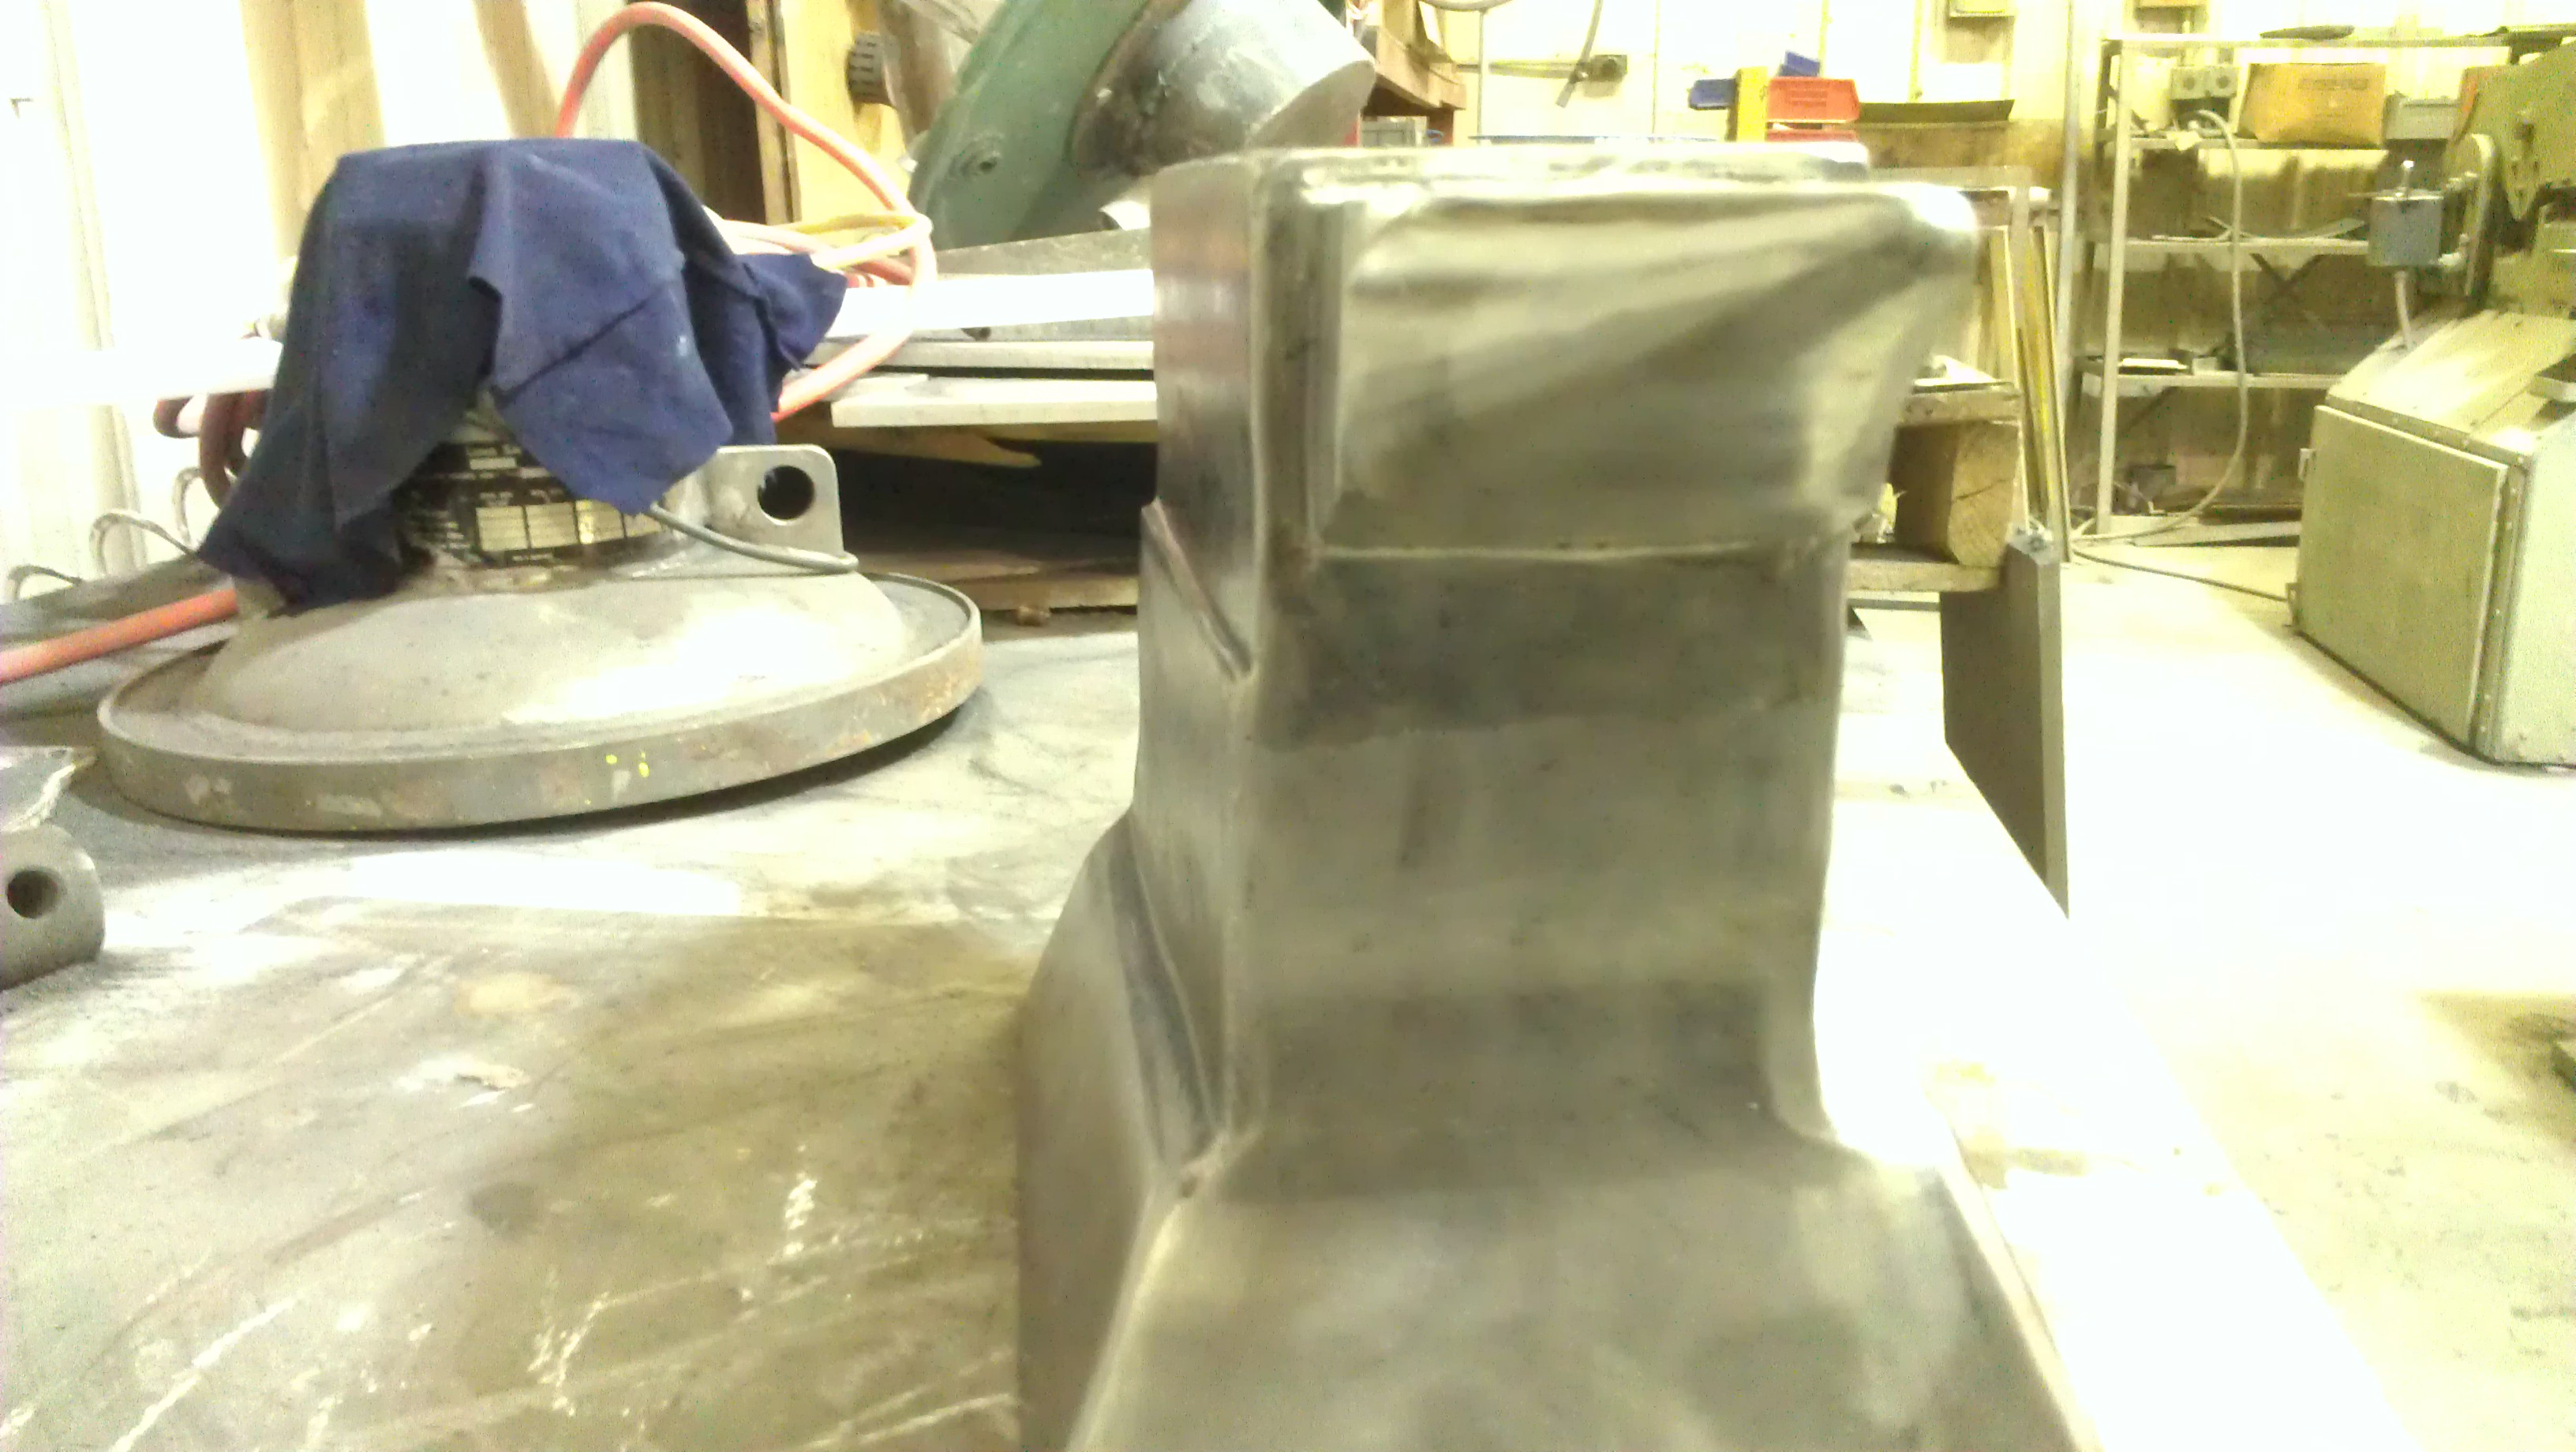
I added a unique feature to the far side of the anvil, a couple small steps which I think would make a good place to do scarfing for forge welding, or just making different textures/bends/features etc.
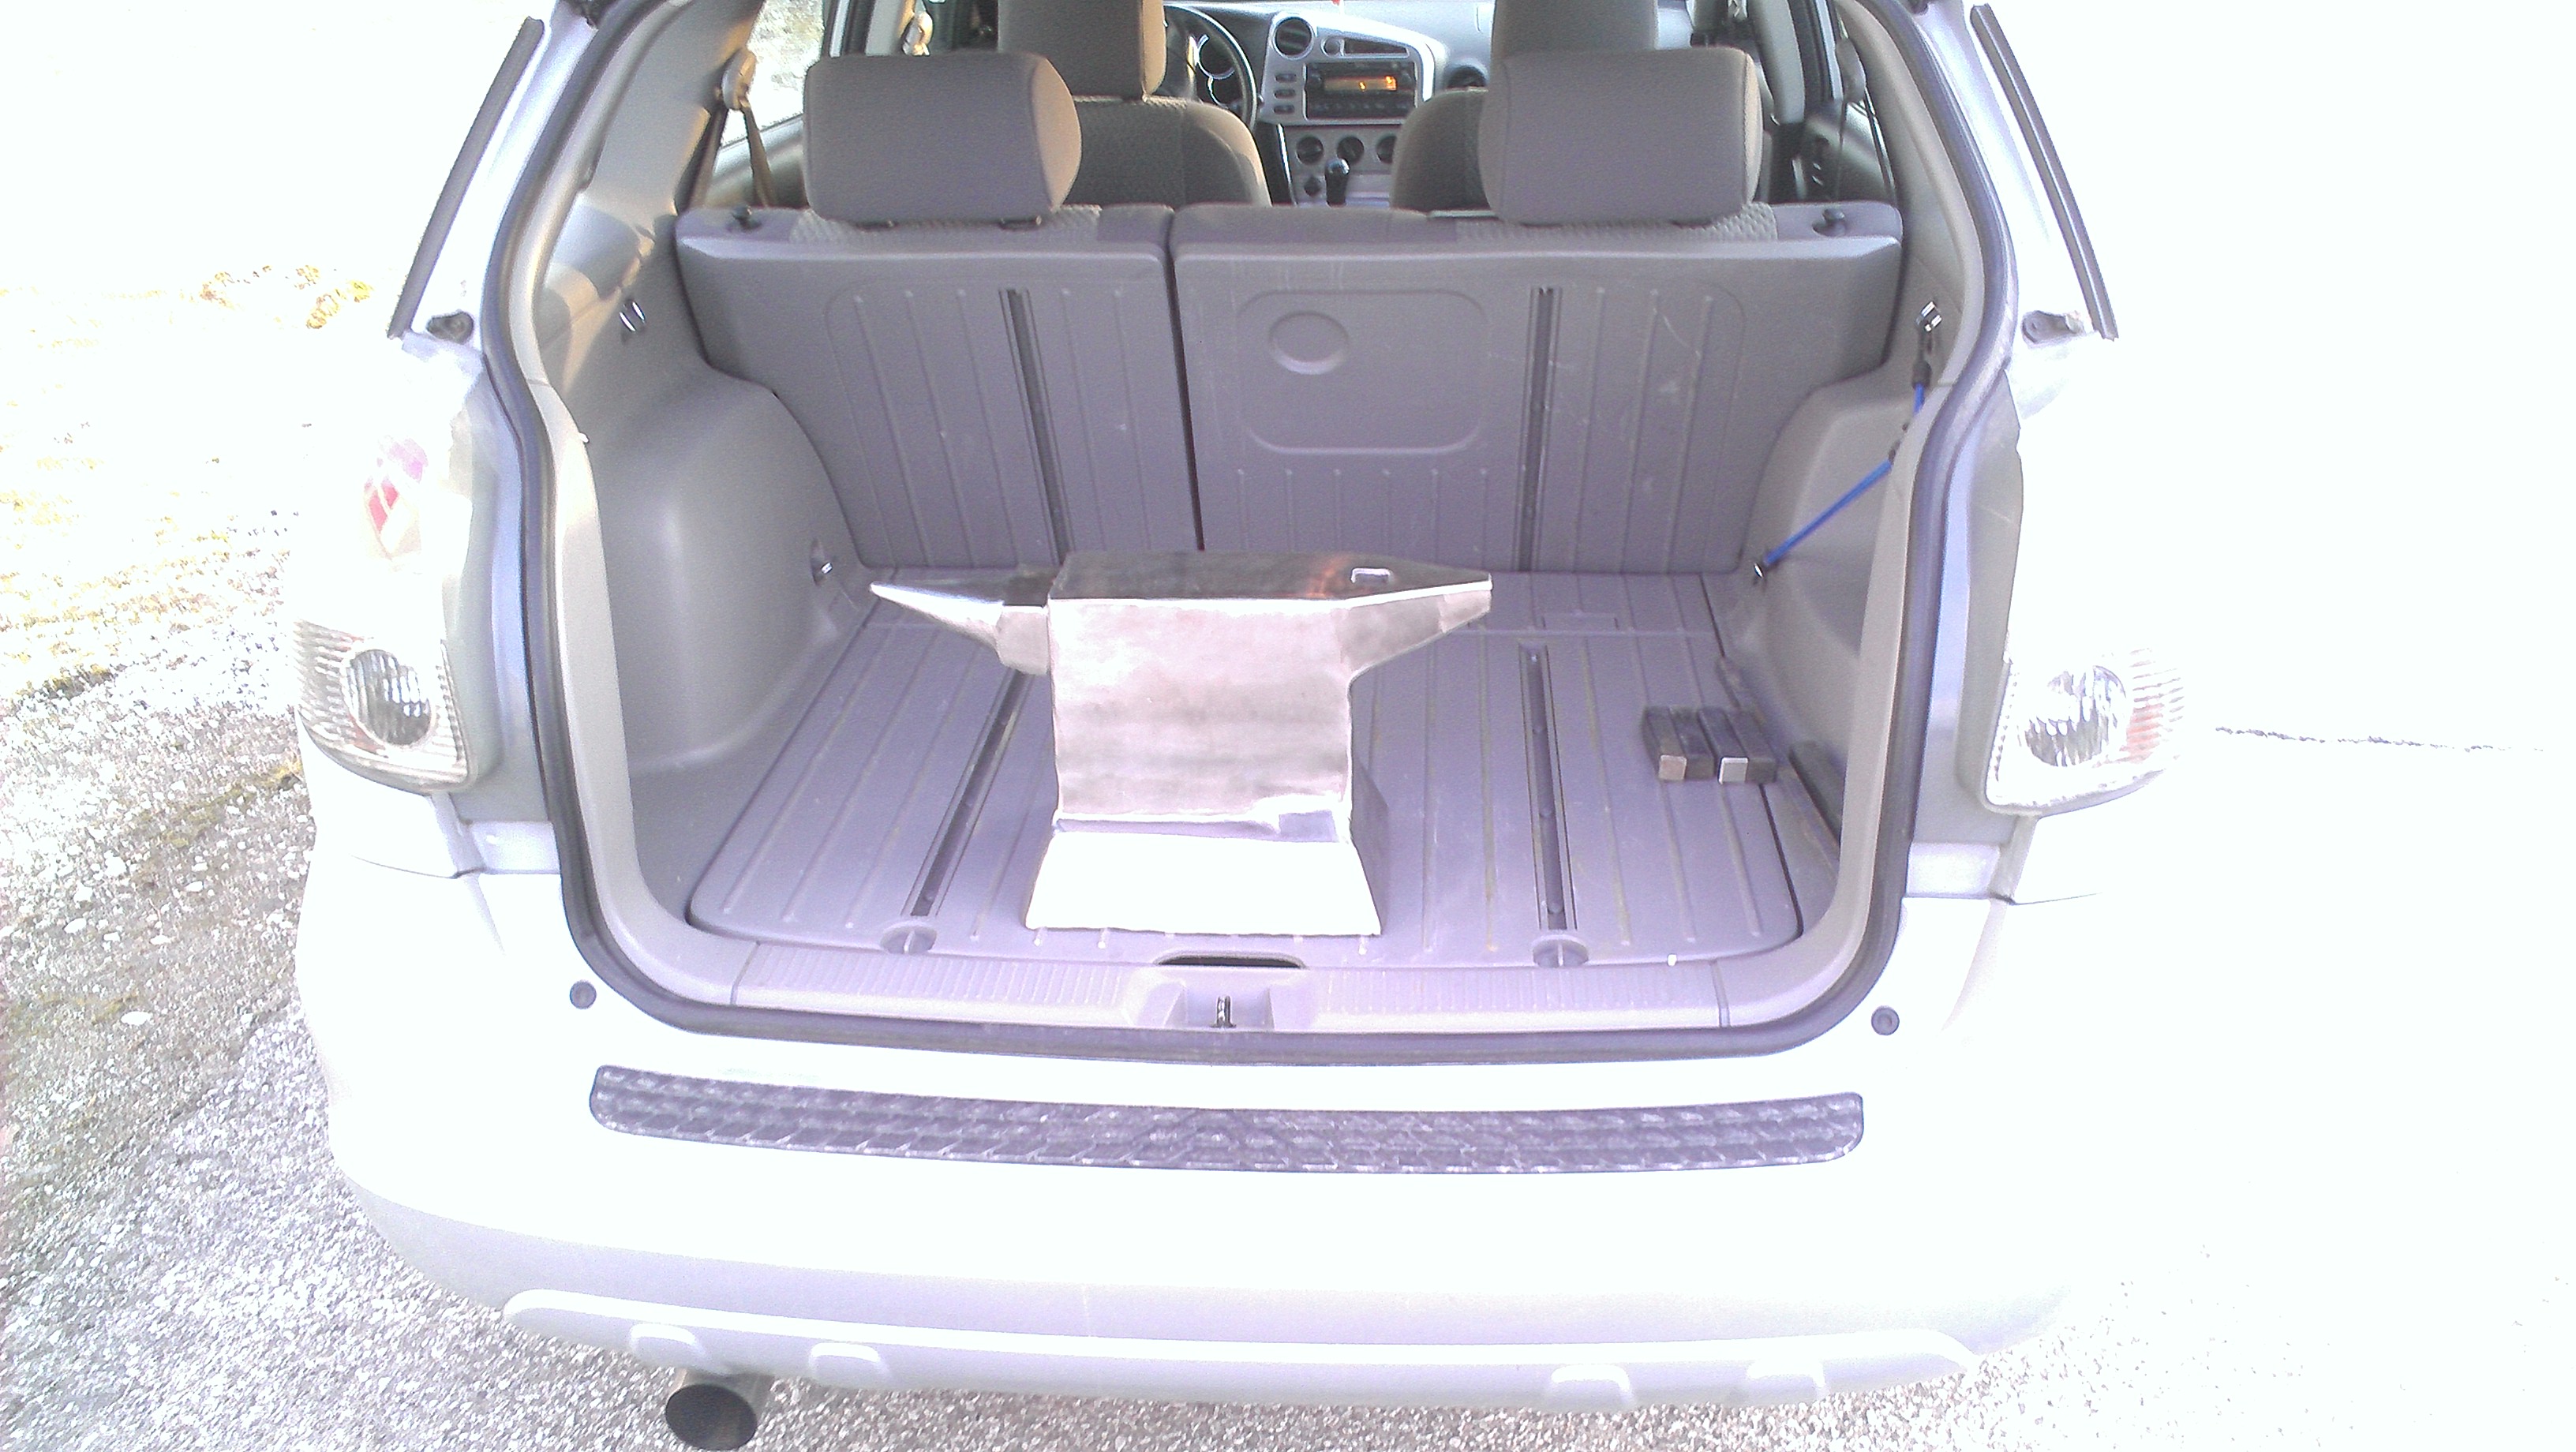
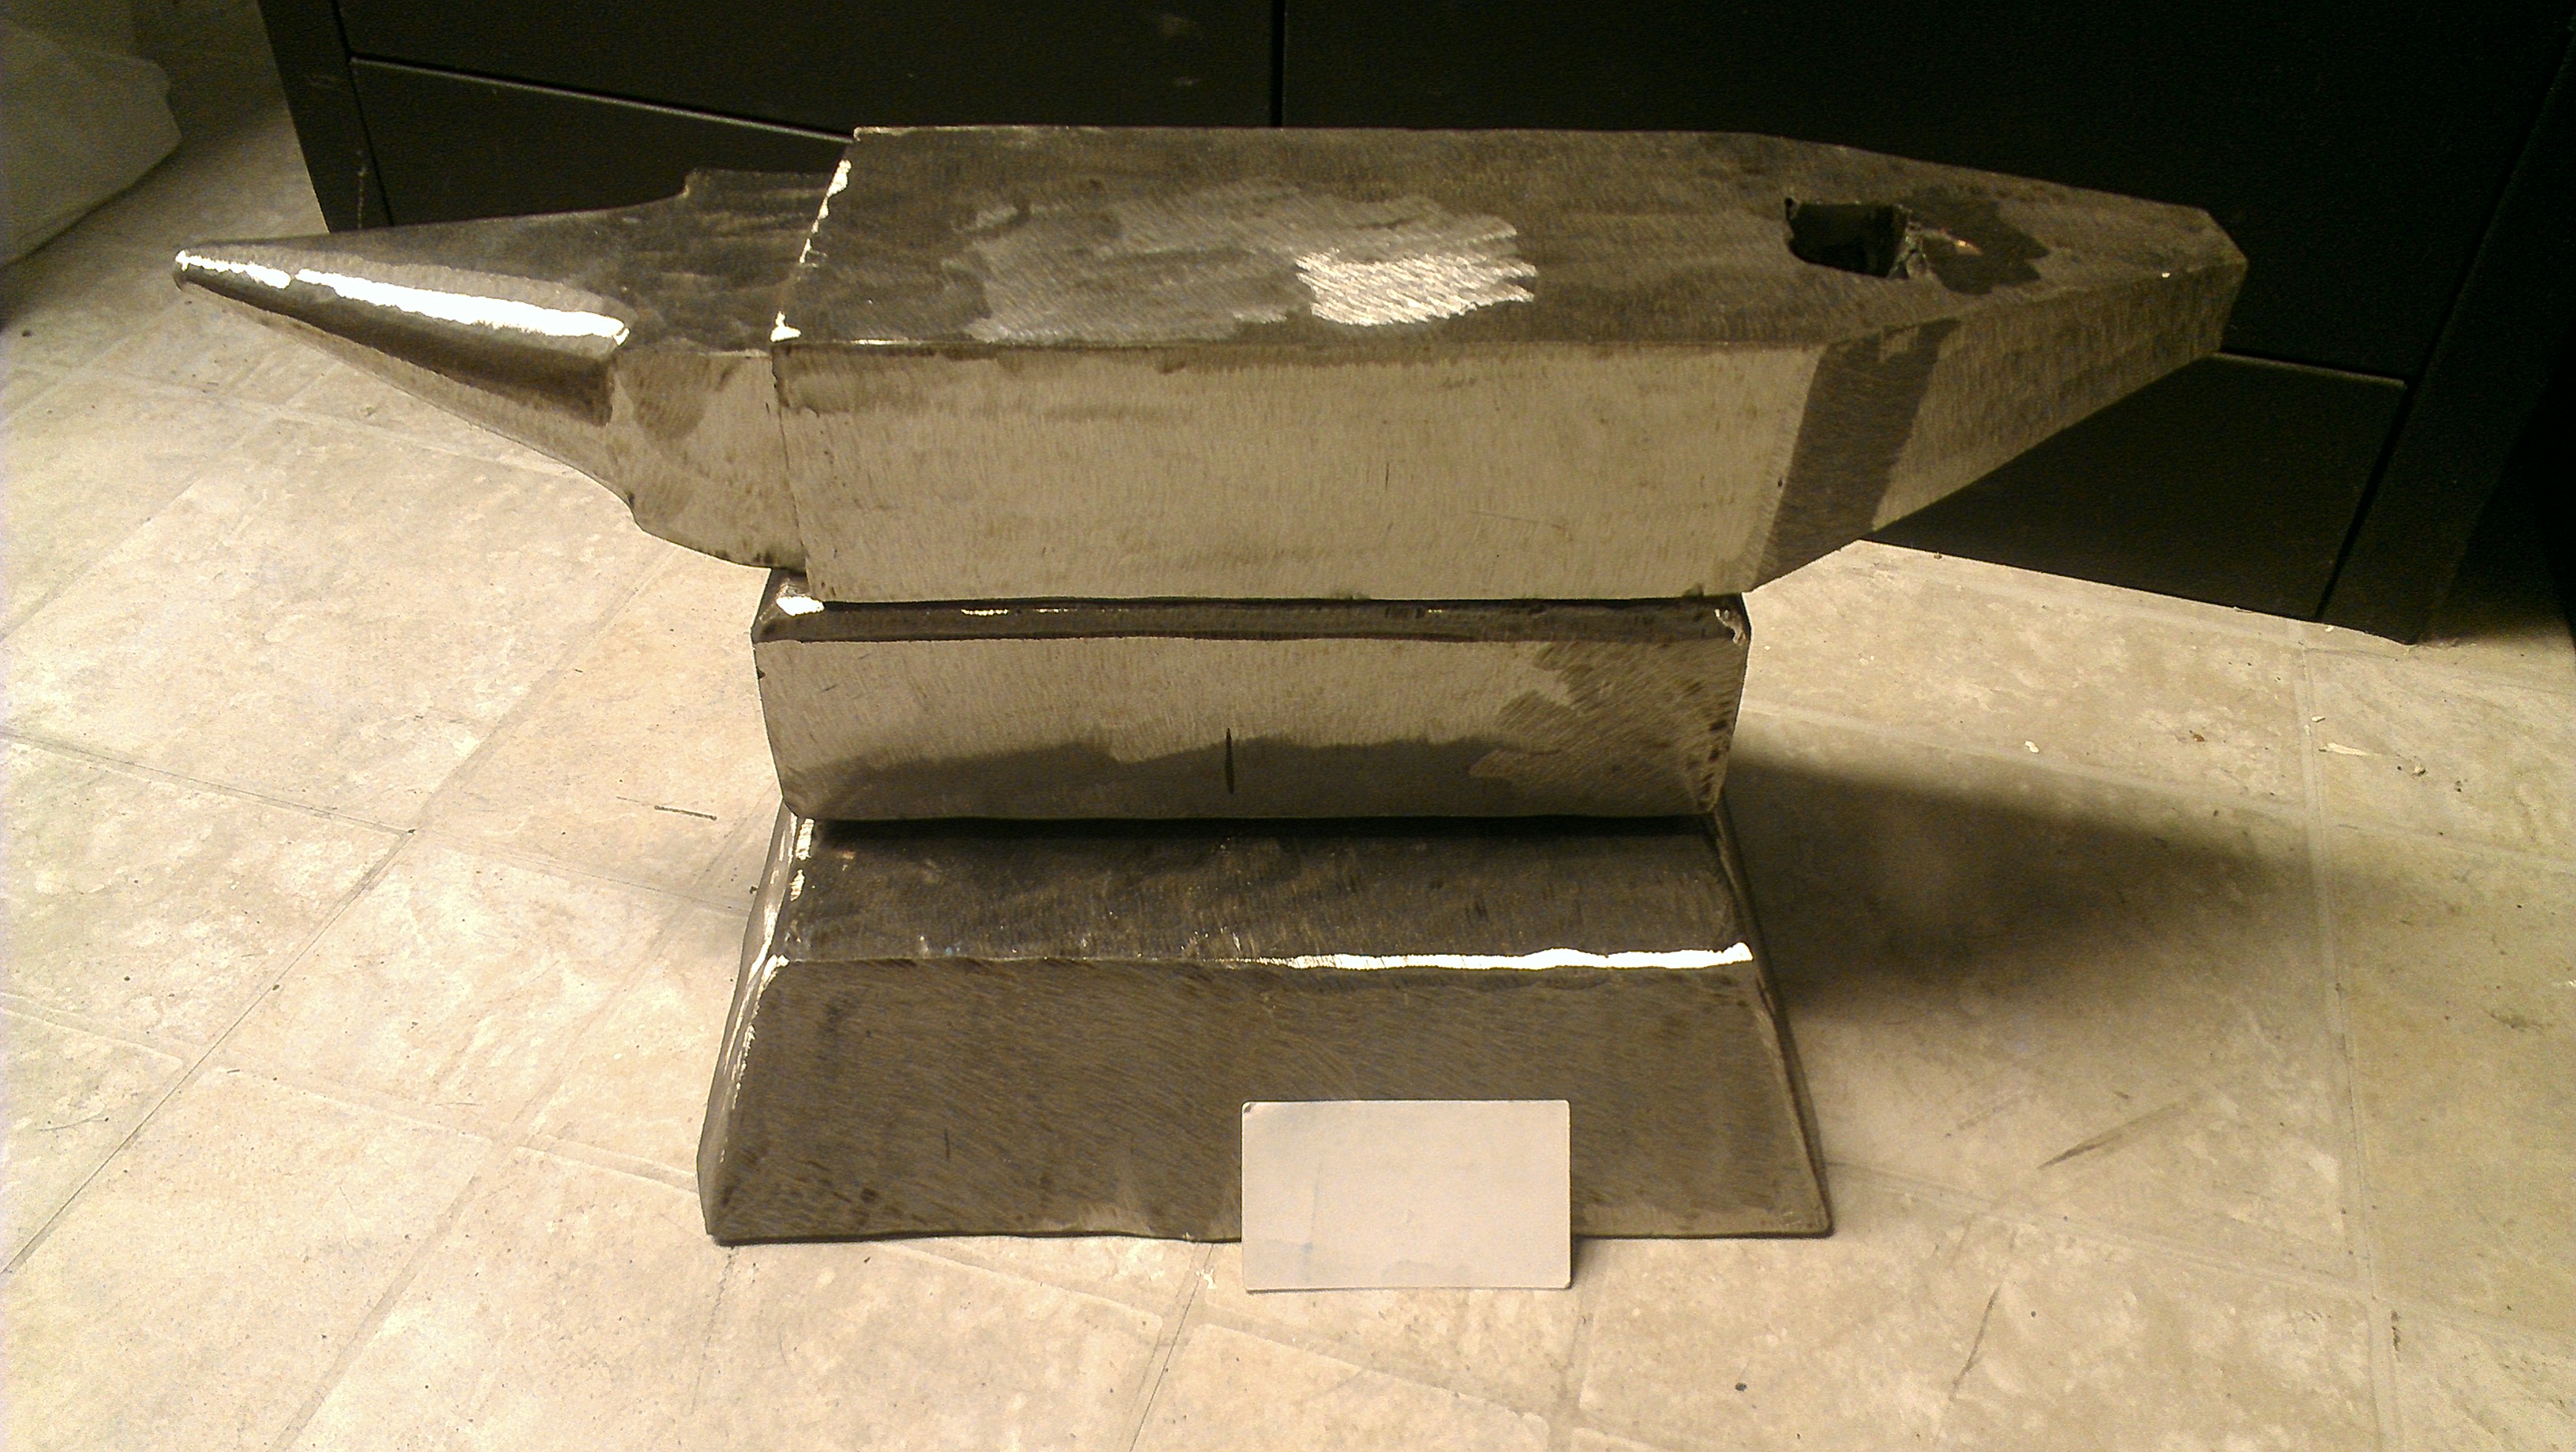
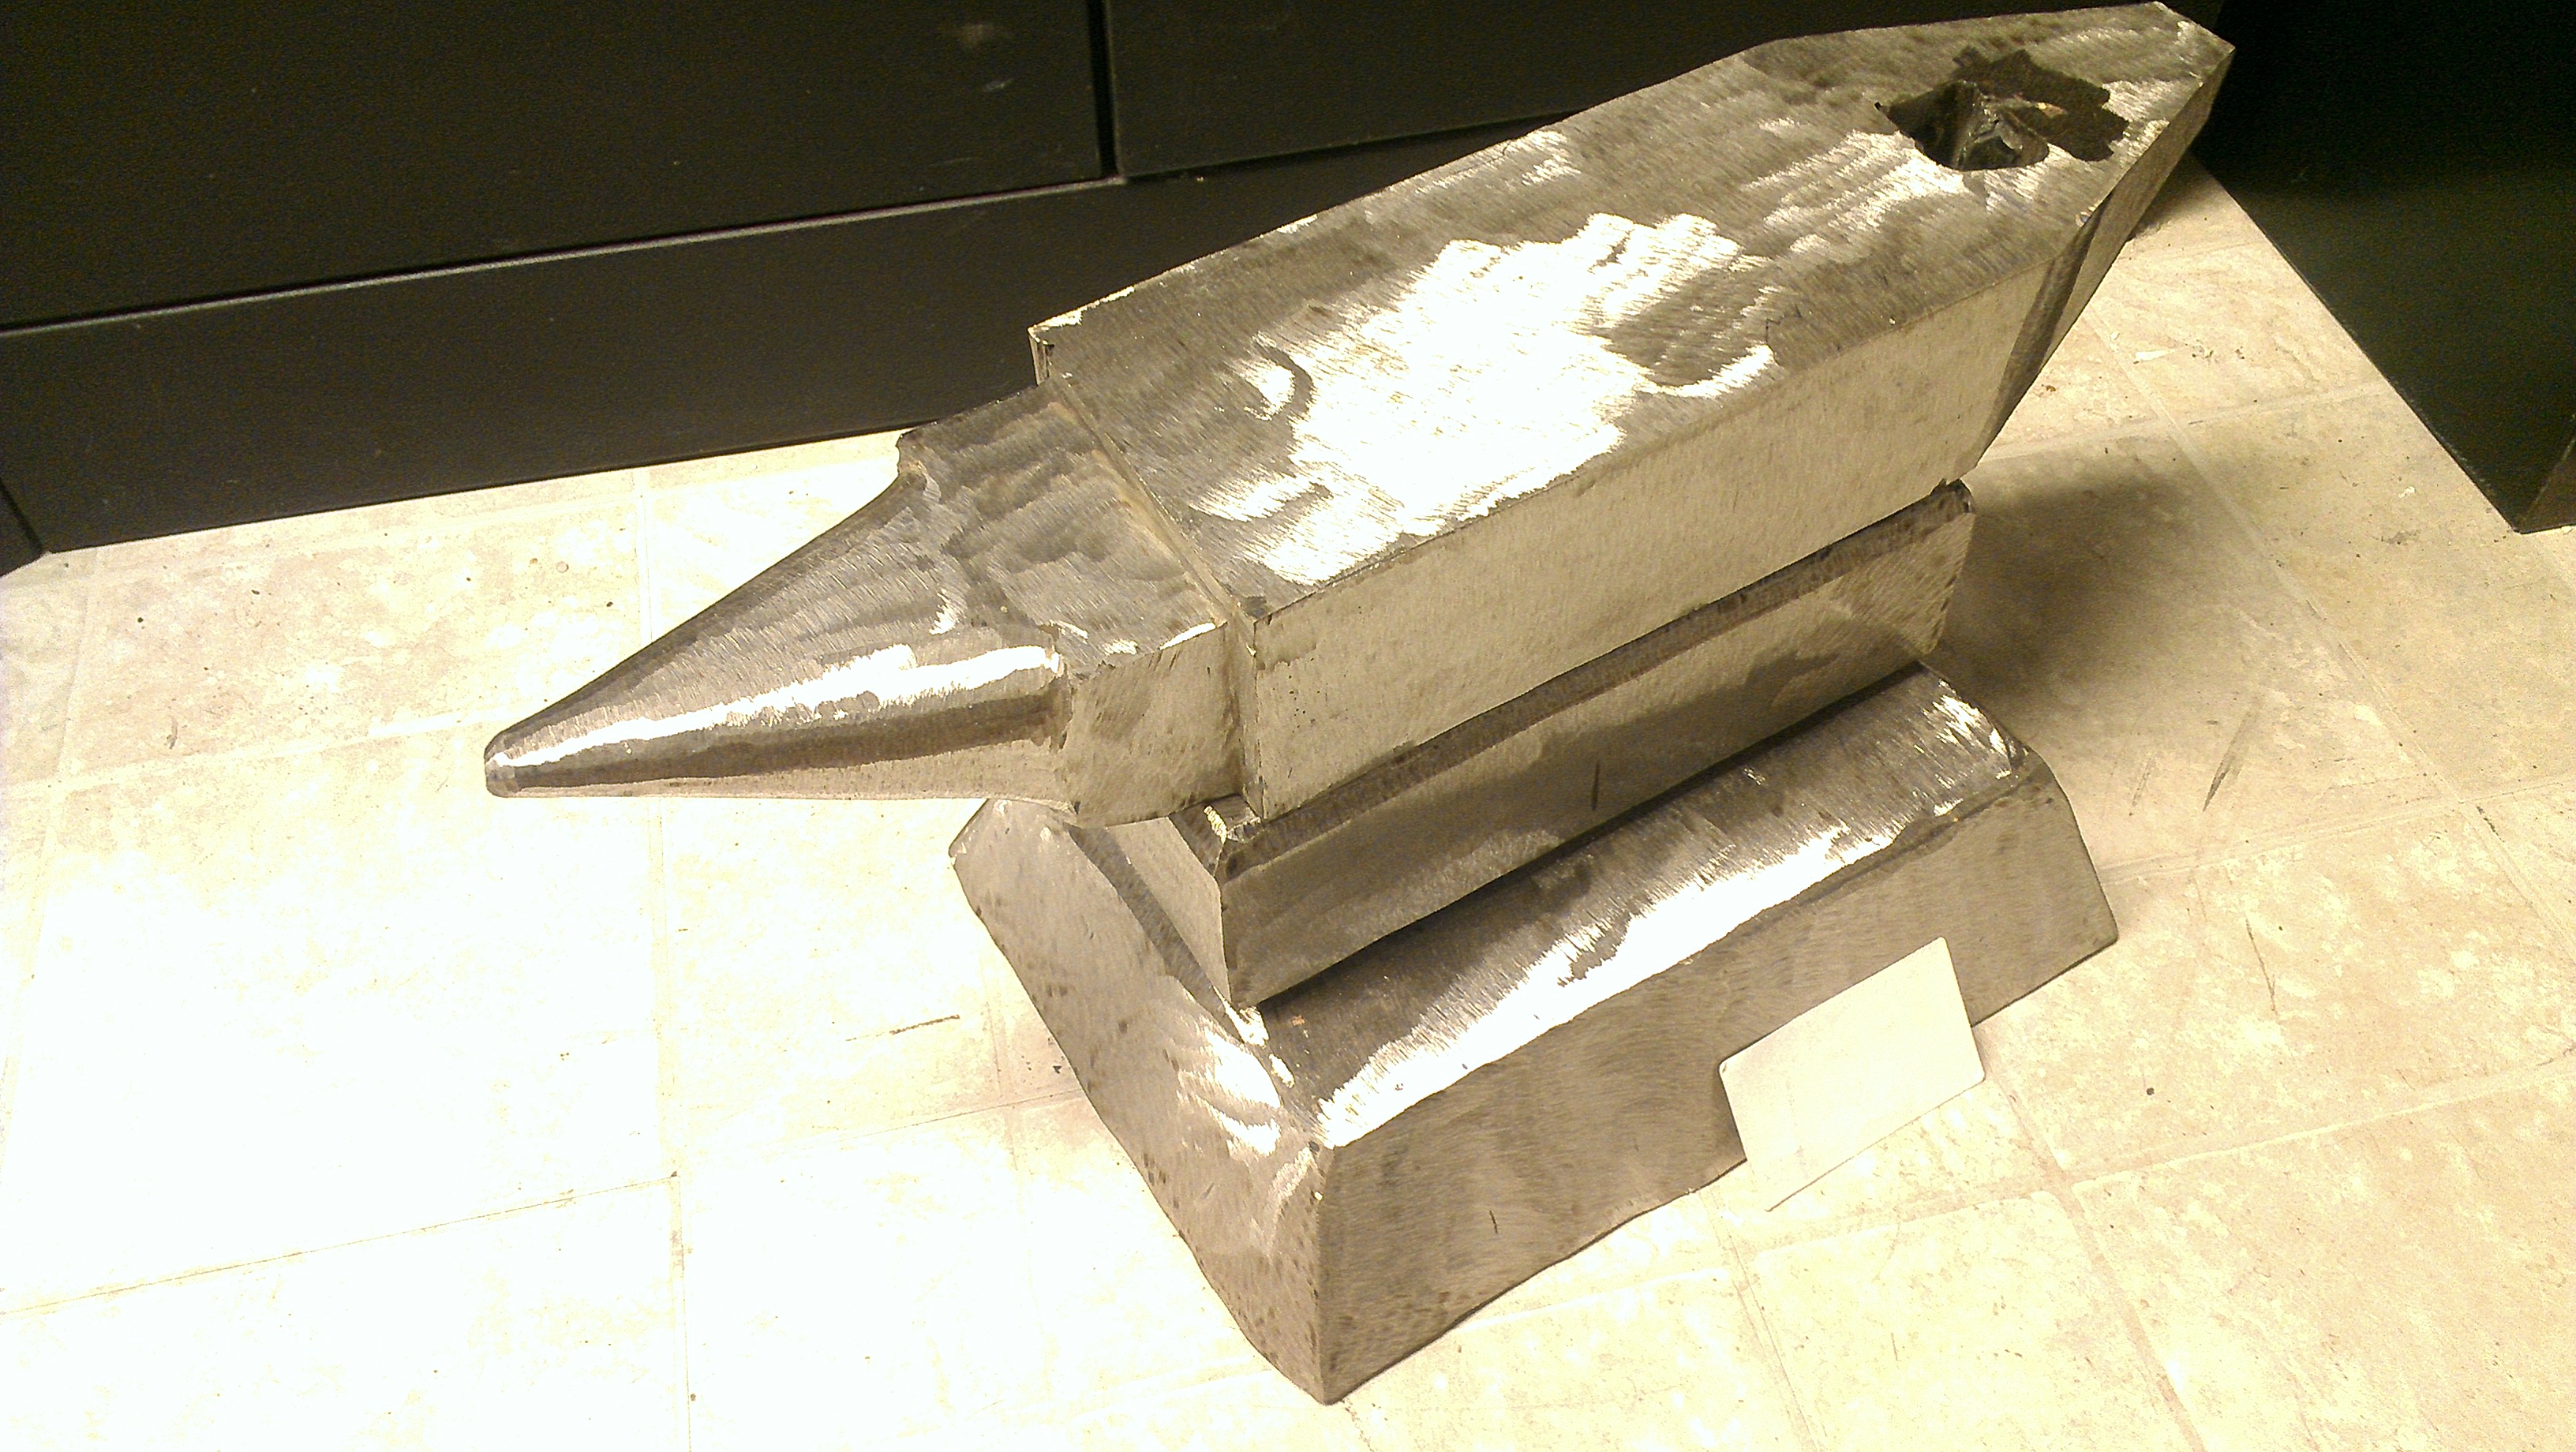
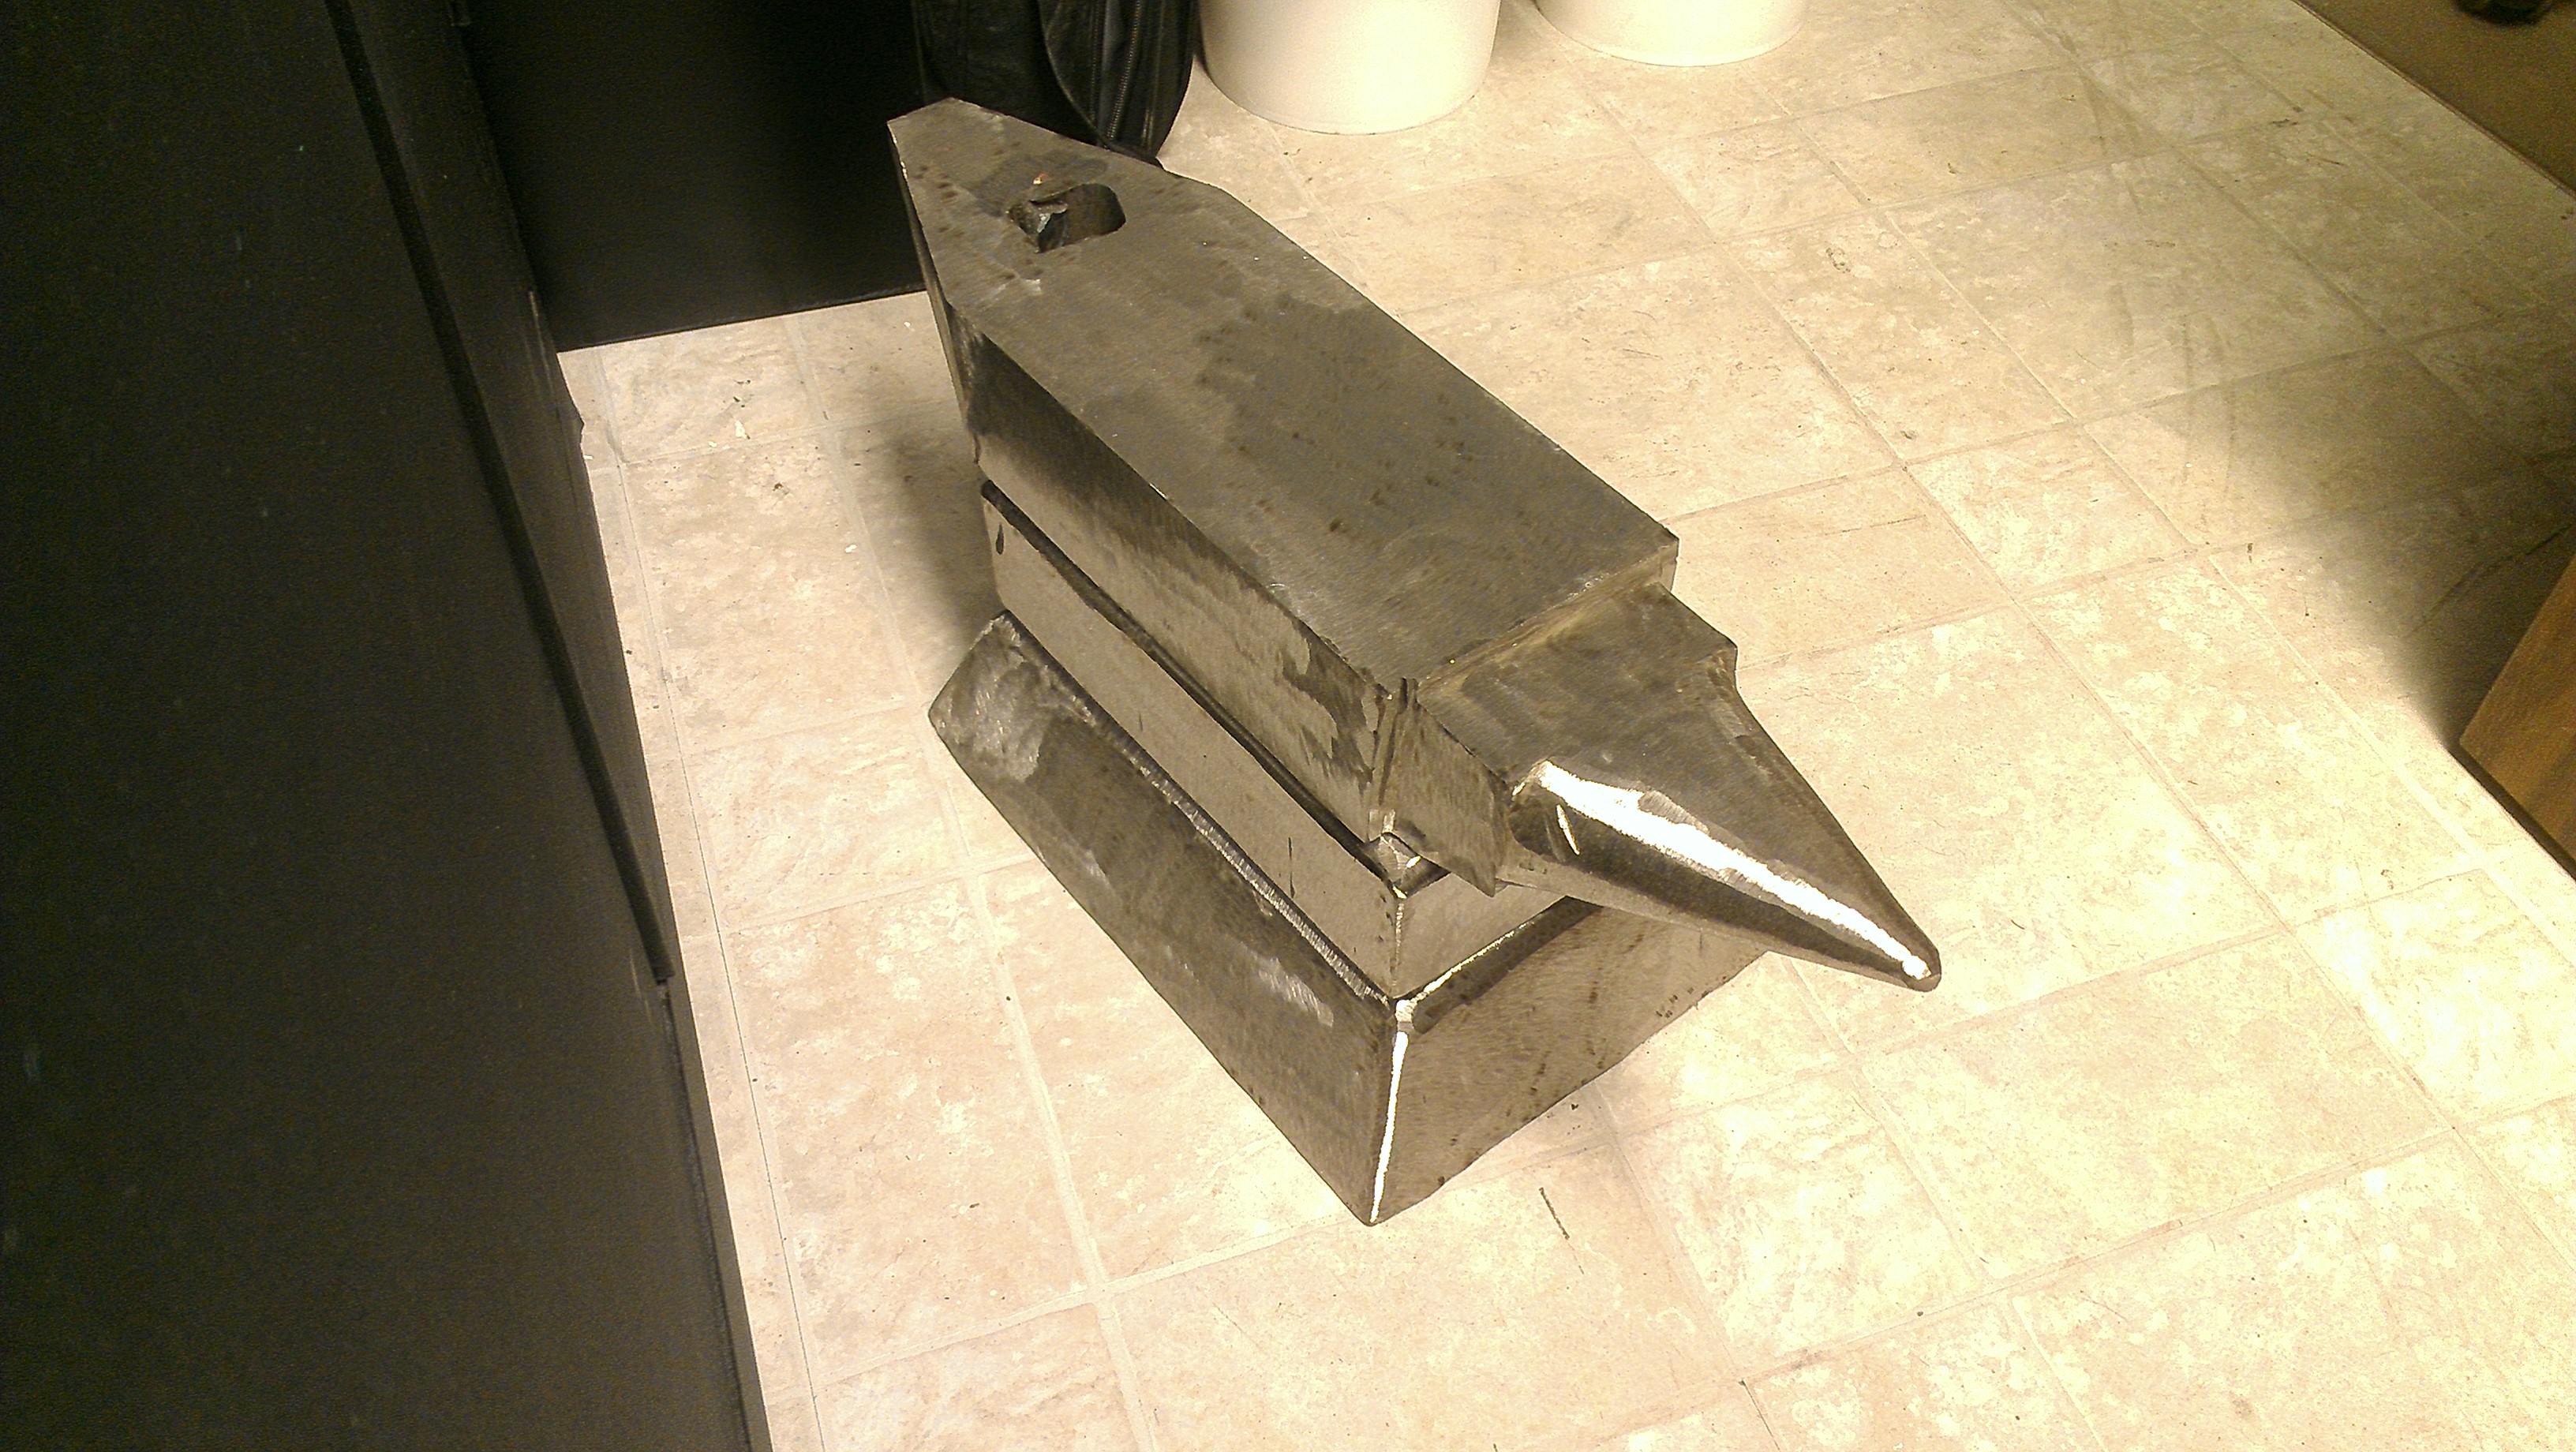
And finally here she is, cleaned and loaded up in the back of my girlfriend's car. Props to her for putting up with me staying late so often to do this project. All together I think I've put in the ballpark of 50 hours to complete this project.
Final weight - 205 lbs.
Now I just need to get my stump stand ready. I've got a couple rough cut stumps in my garage, but to cut them straight I need to get my grandfather's 1950s McCulloch 35A chainsaw rebuilt. Until then I'll just have to admire my work.
Oh, one last thing. Even after heat treating I had trouble drilling the pritchel hole with standard drill bits in a magnetic drill. I'm going to take the anvil to my machinist and he is going to help me drill them with some carbide bits. Lincoln electric said it can be done, it just won't be easy. They recommended cobalt bits, but I looked them up and they are about $100 each. Ouch, make sure to drill any holes first... I just got excited and forgot.
-
Final build pics here we come:
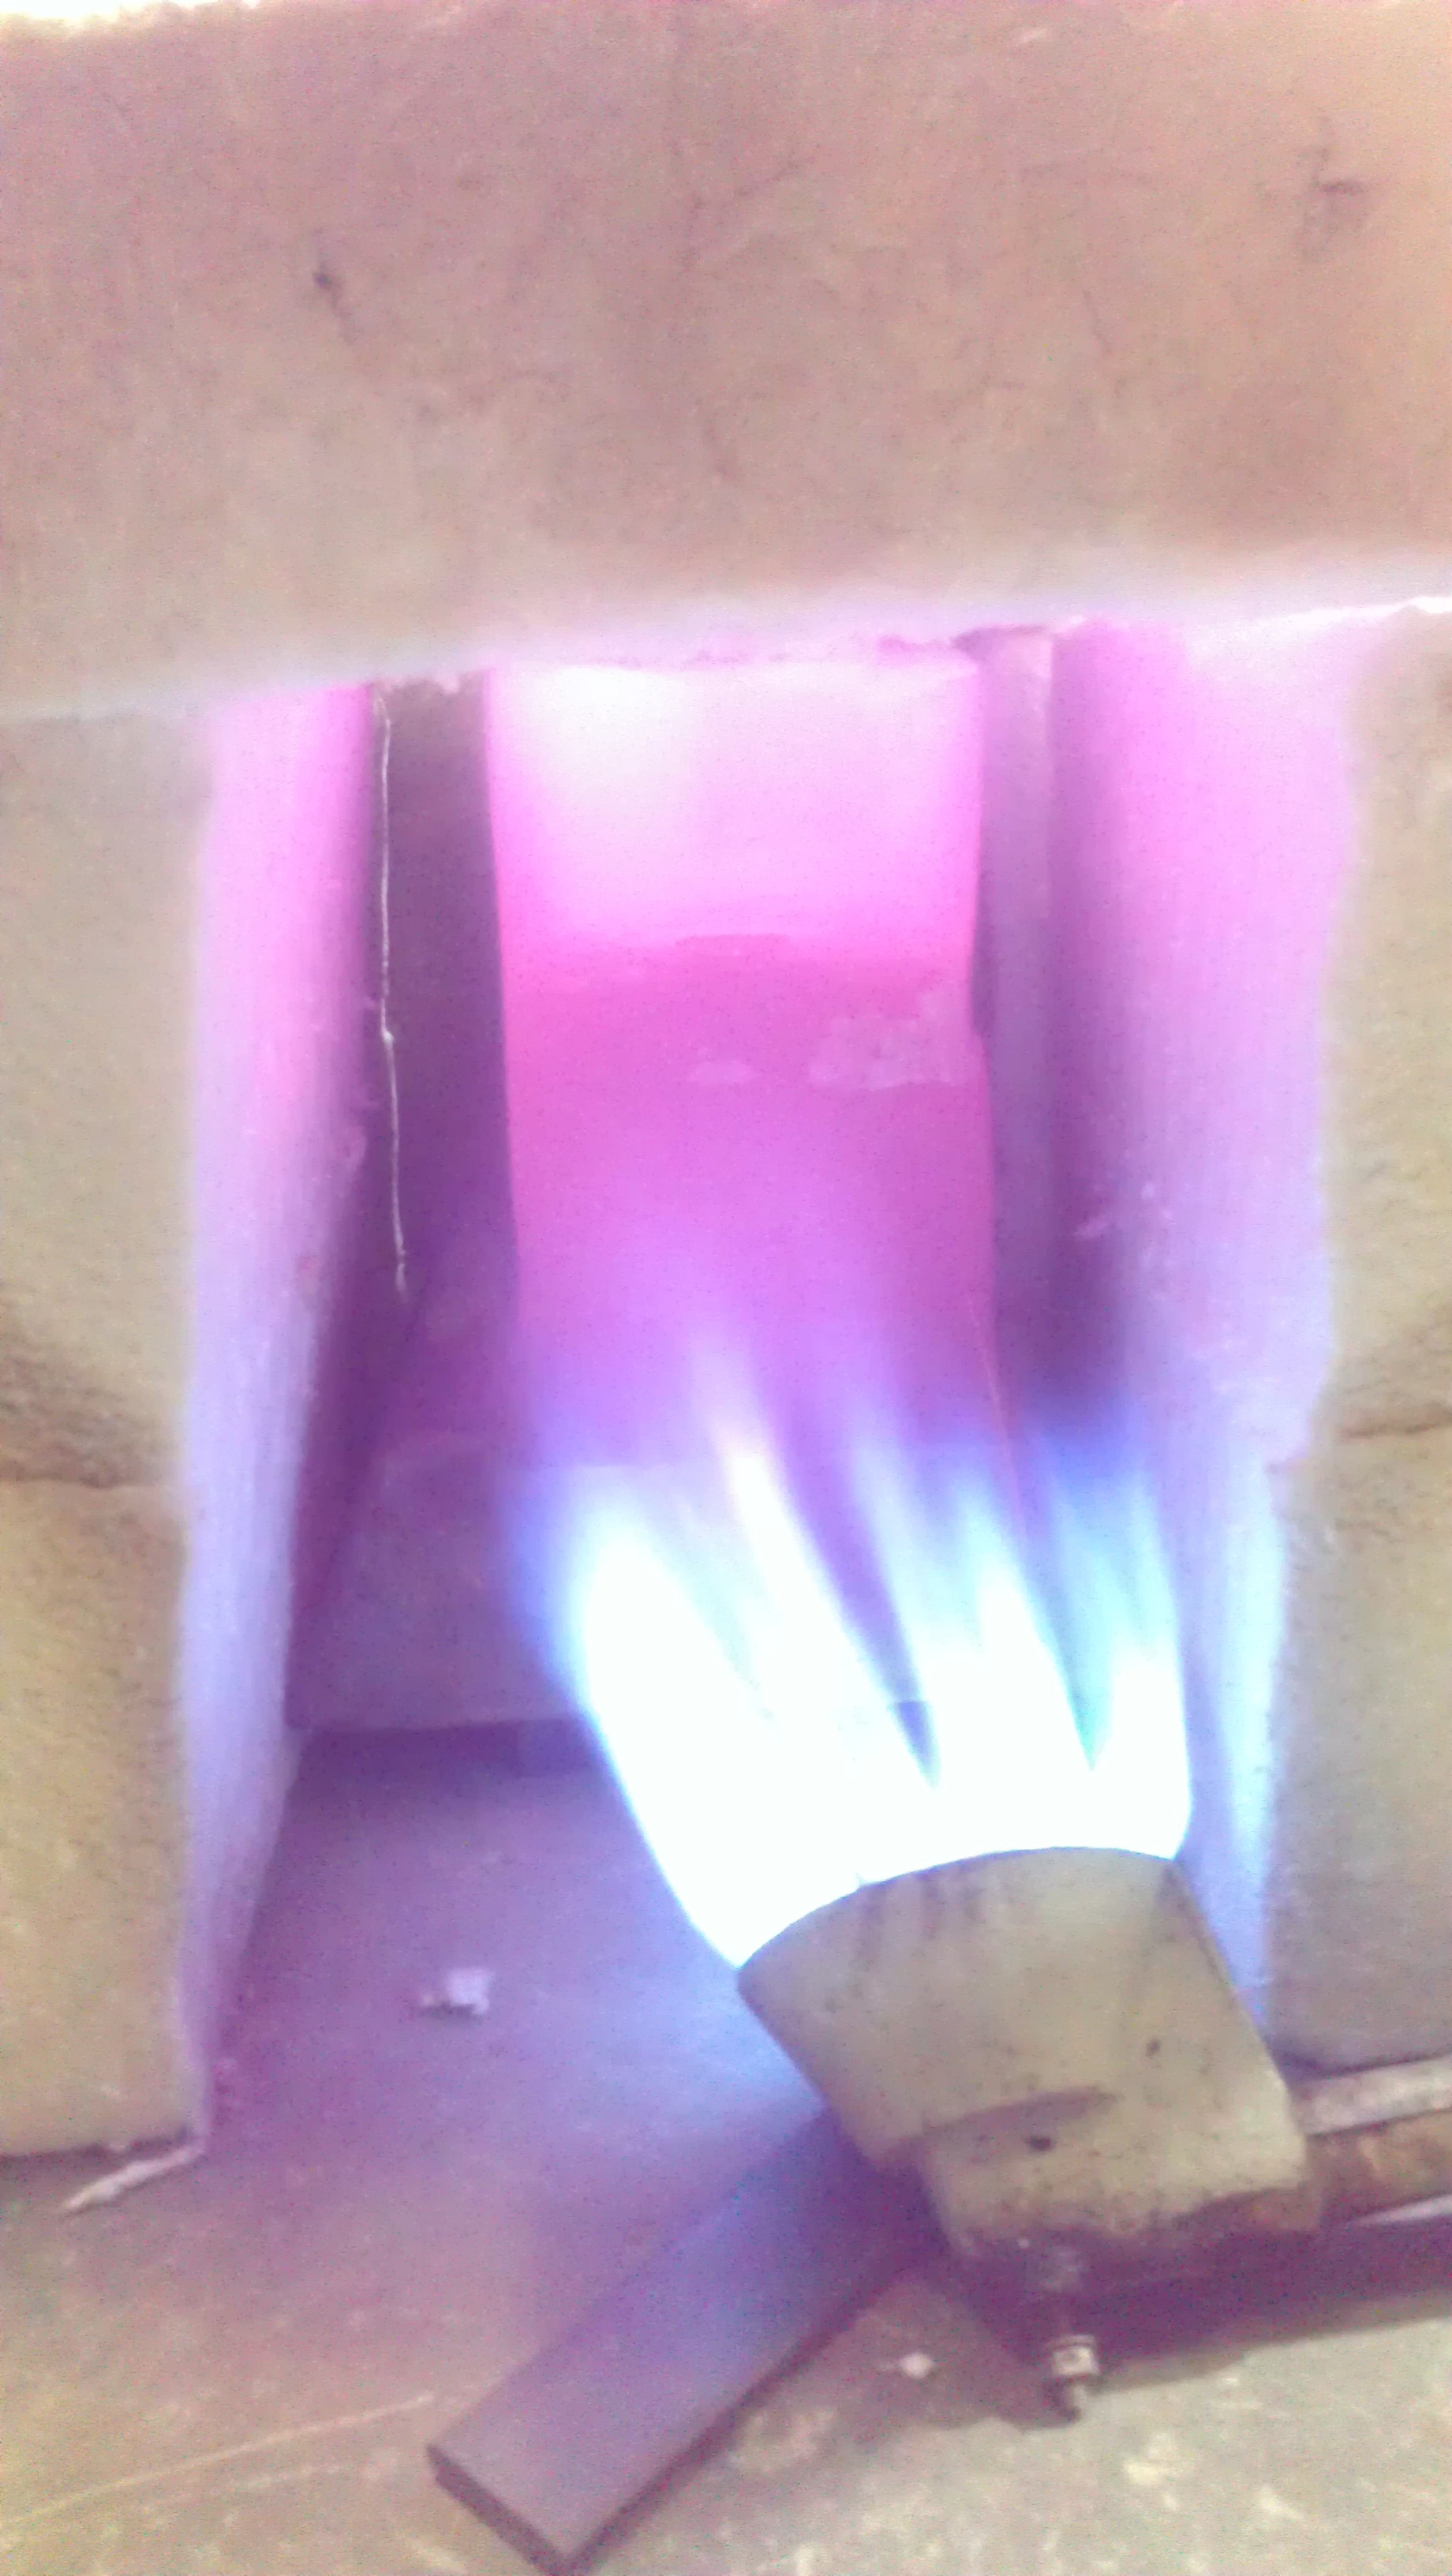
First here are a couple of the temporary oven I built around the anvil. I set it on top of a couple pieces of 1" square stock and put another piece along the length of the top so the top didn't get insulated.
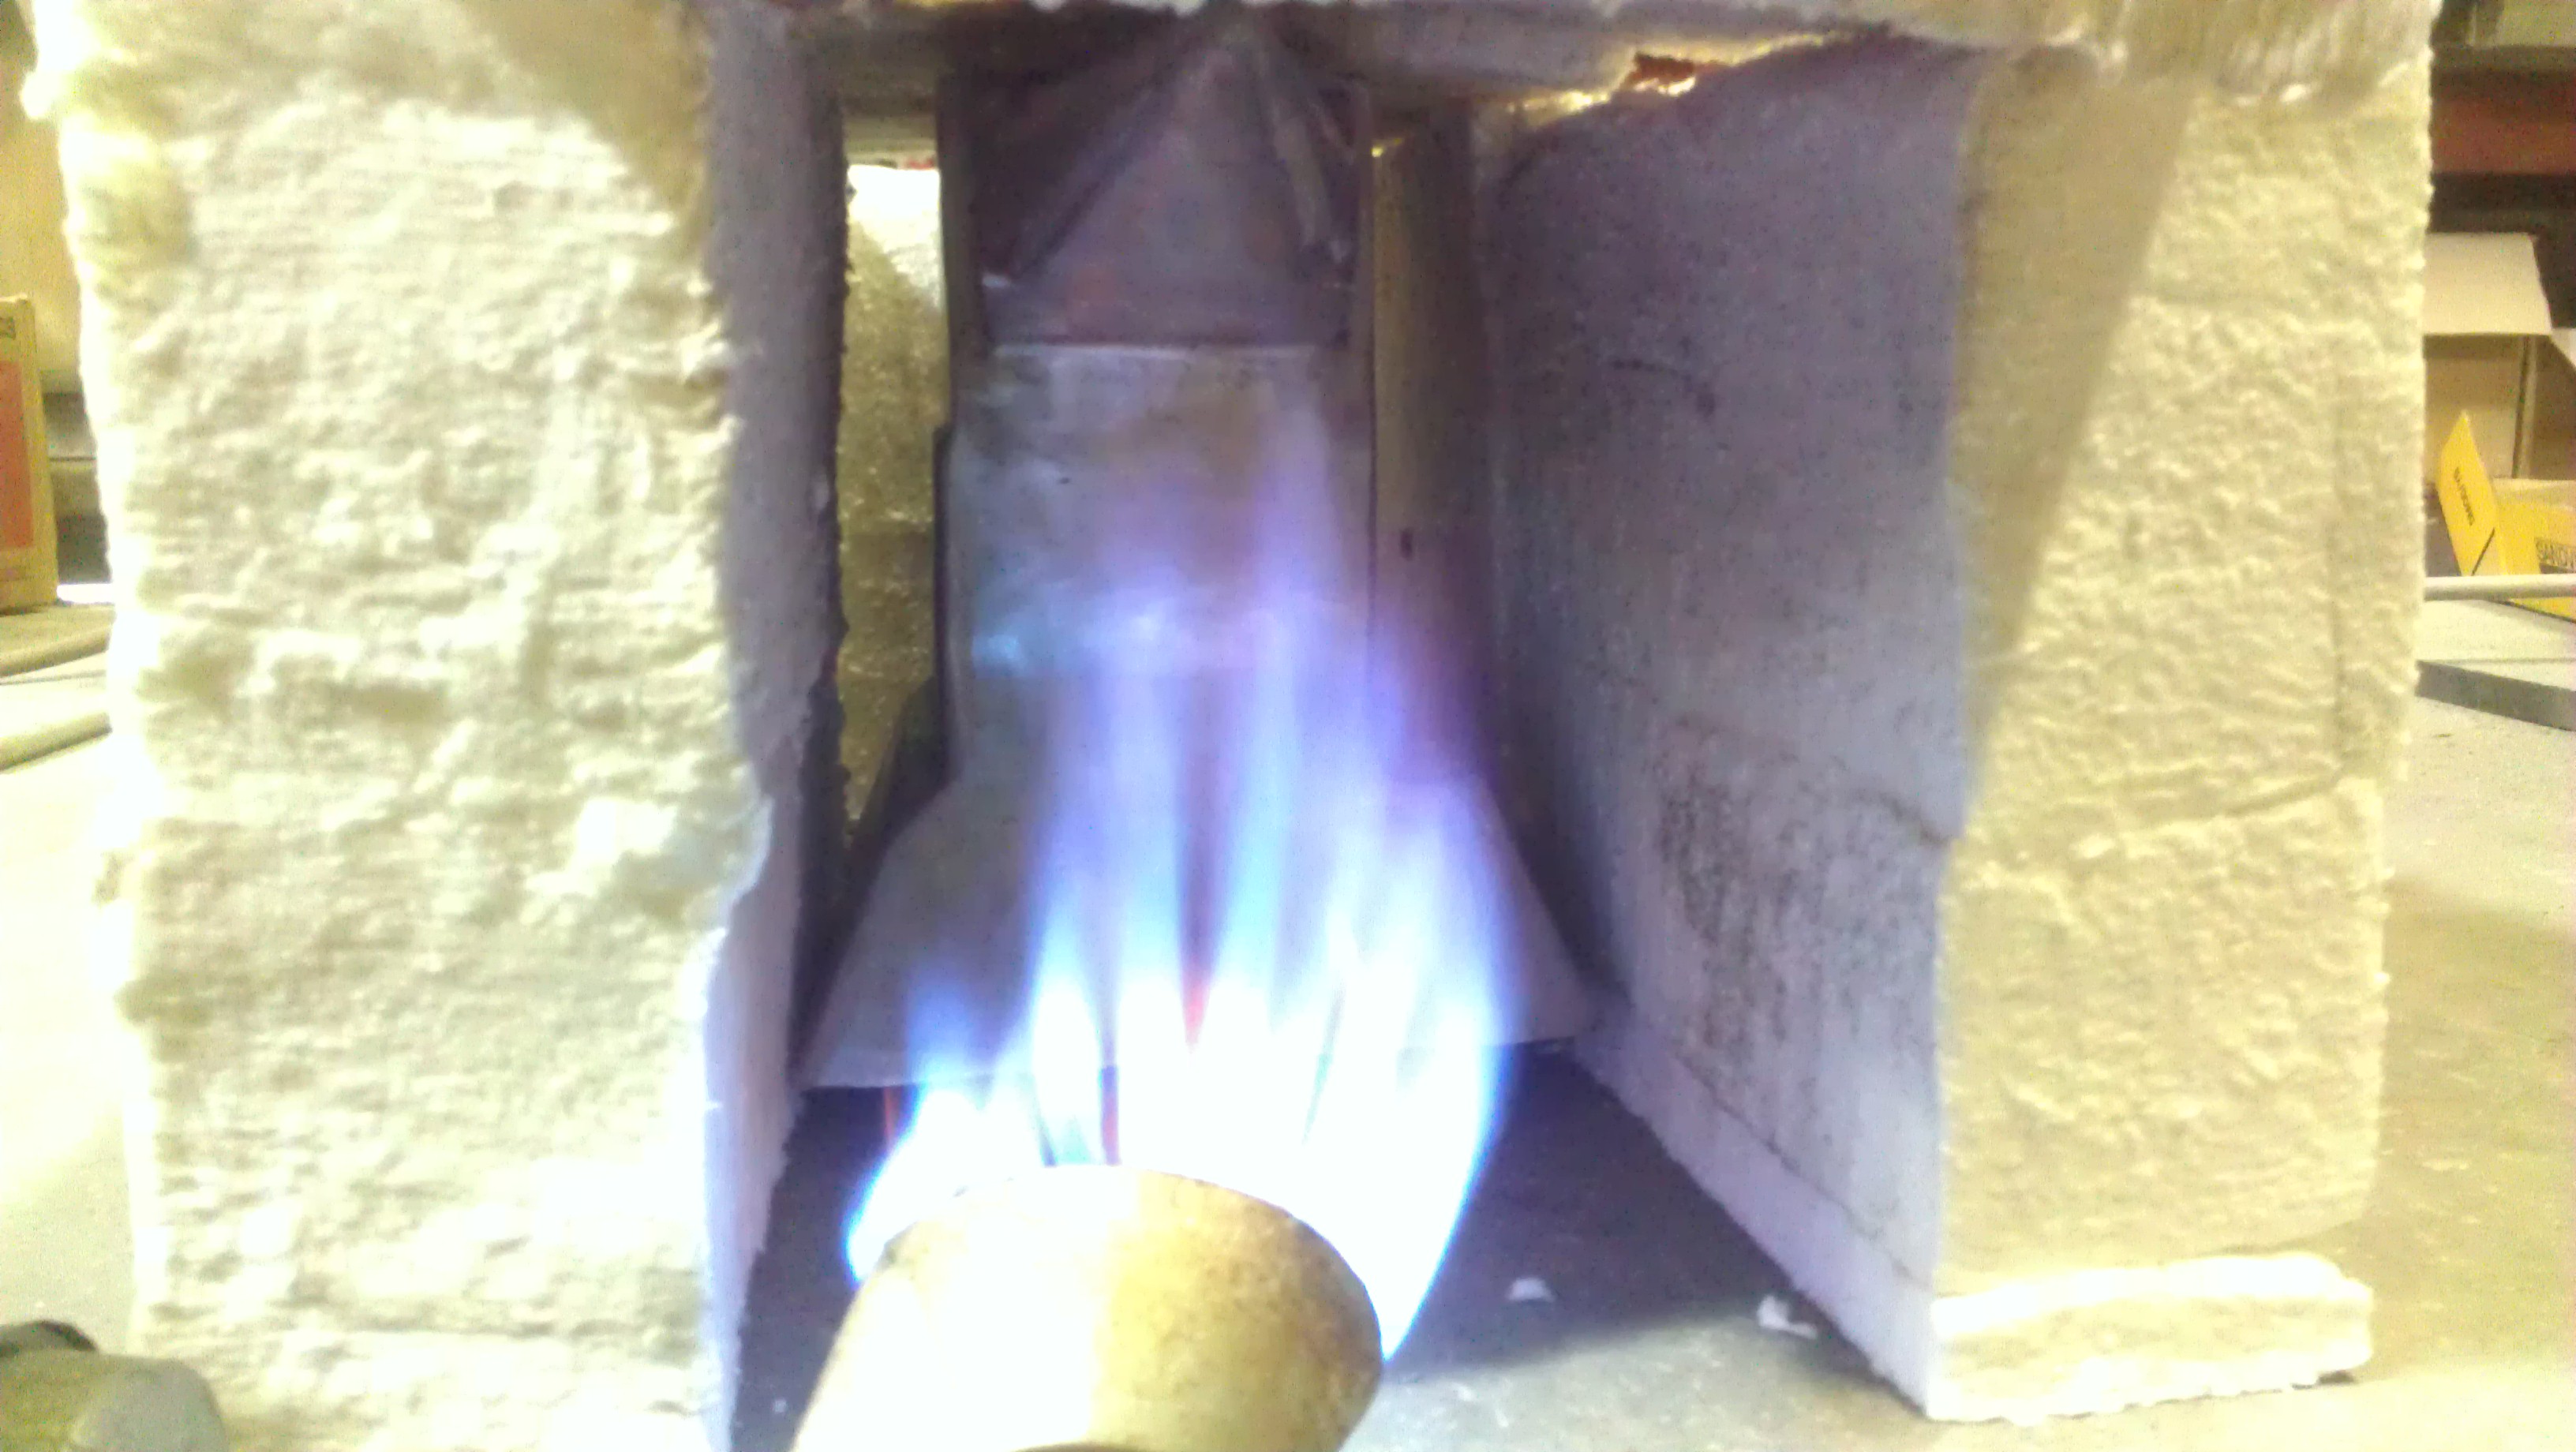
I used the propane burner from my homebrew setup, its a high pressure burner, I believe 30,000 BTU/hr. I built the temporary oven with pyroblock we use to line our furnaces.
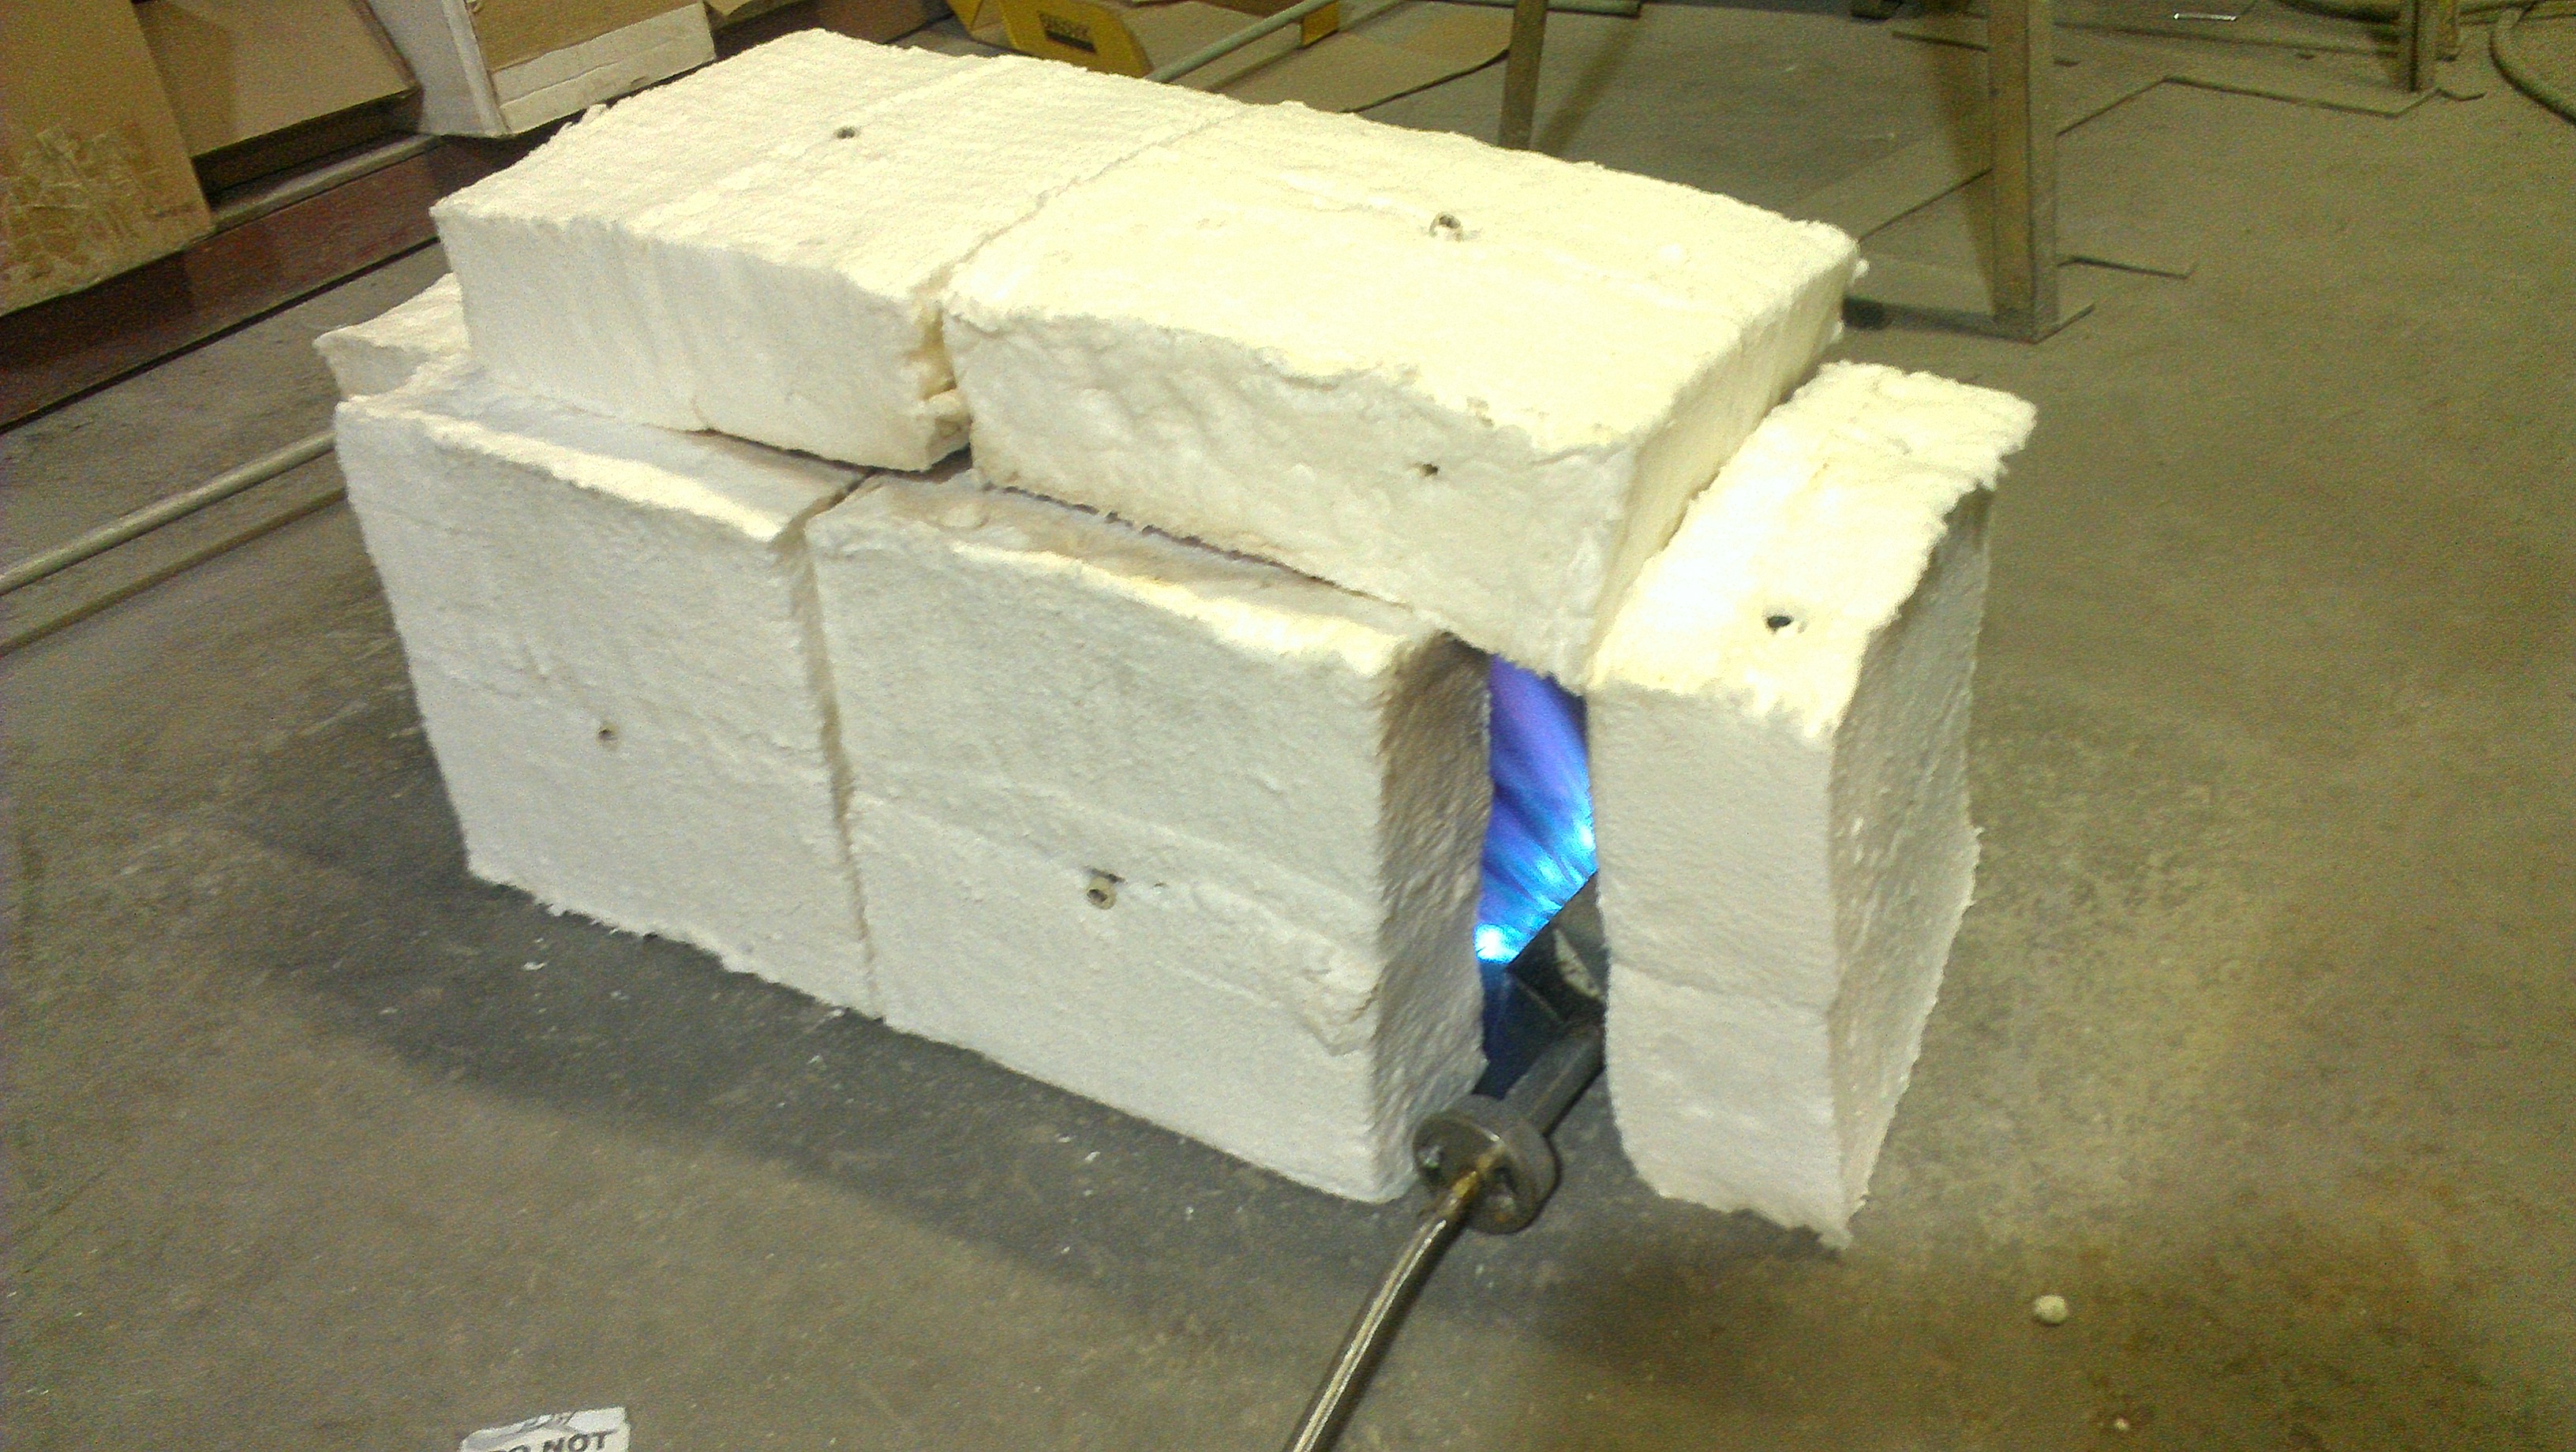
I thought these pictures were cool because you can get a good feel for the colors of steel as it heats from 400-700 F. My camera takes pictures that are pretty true to color so I thought I'd share.
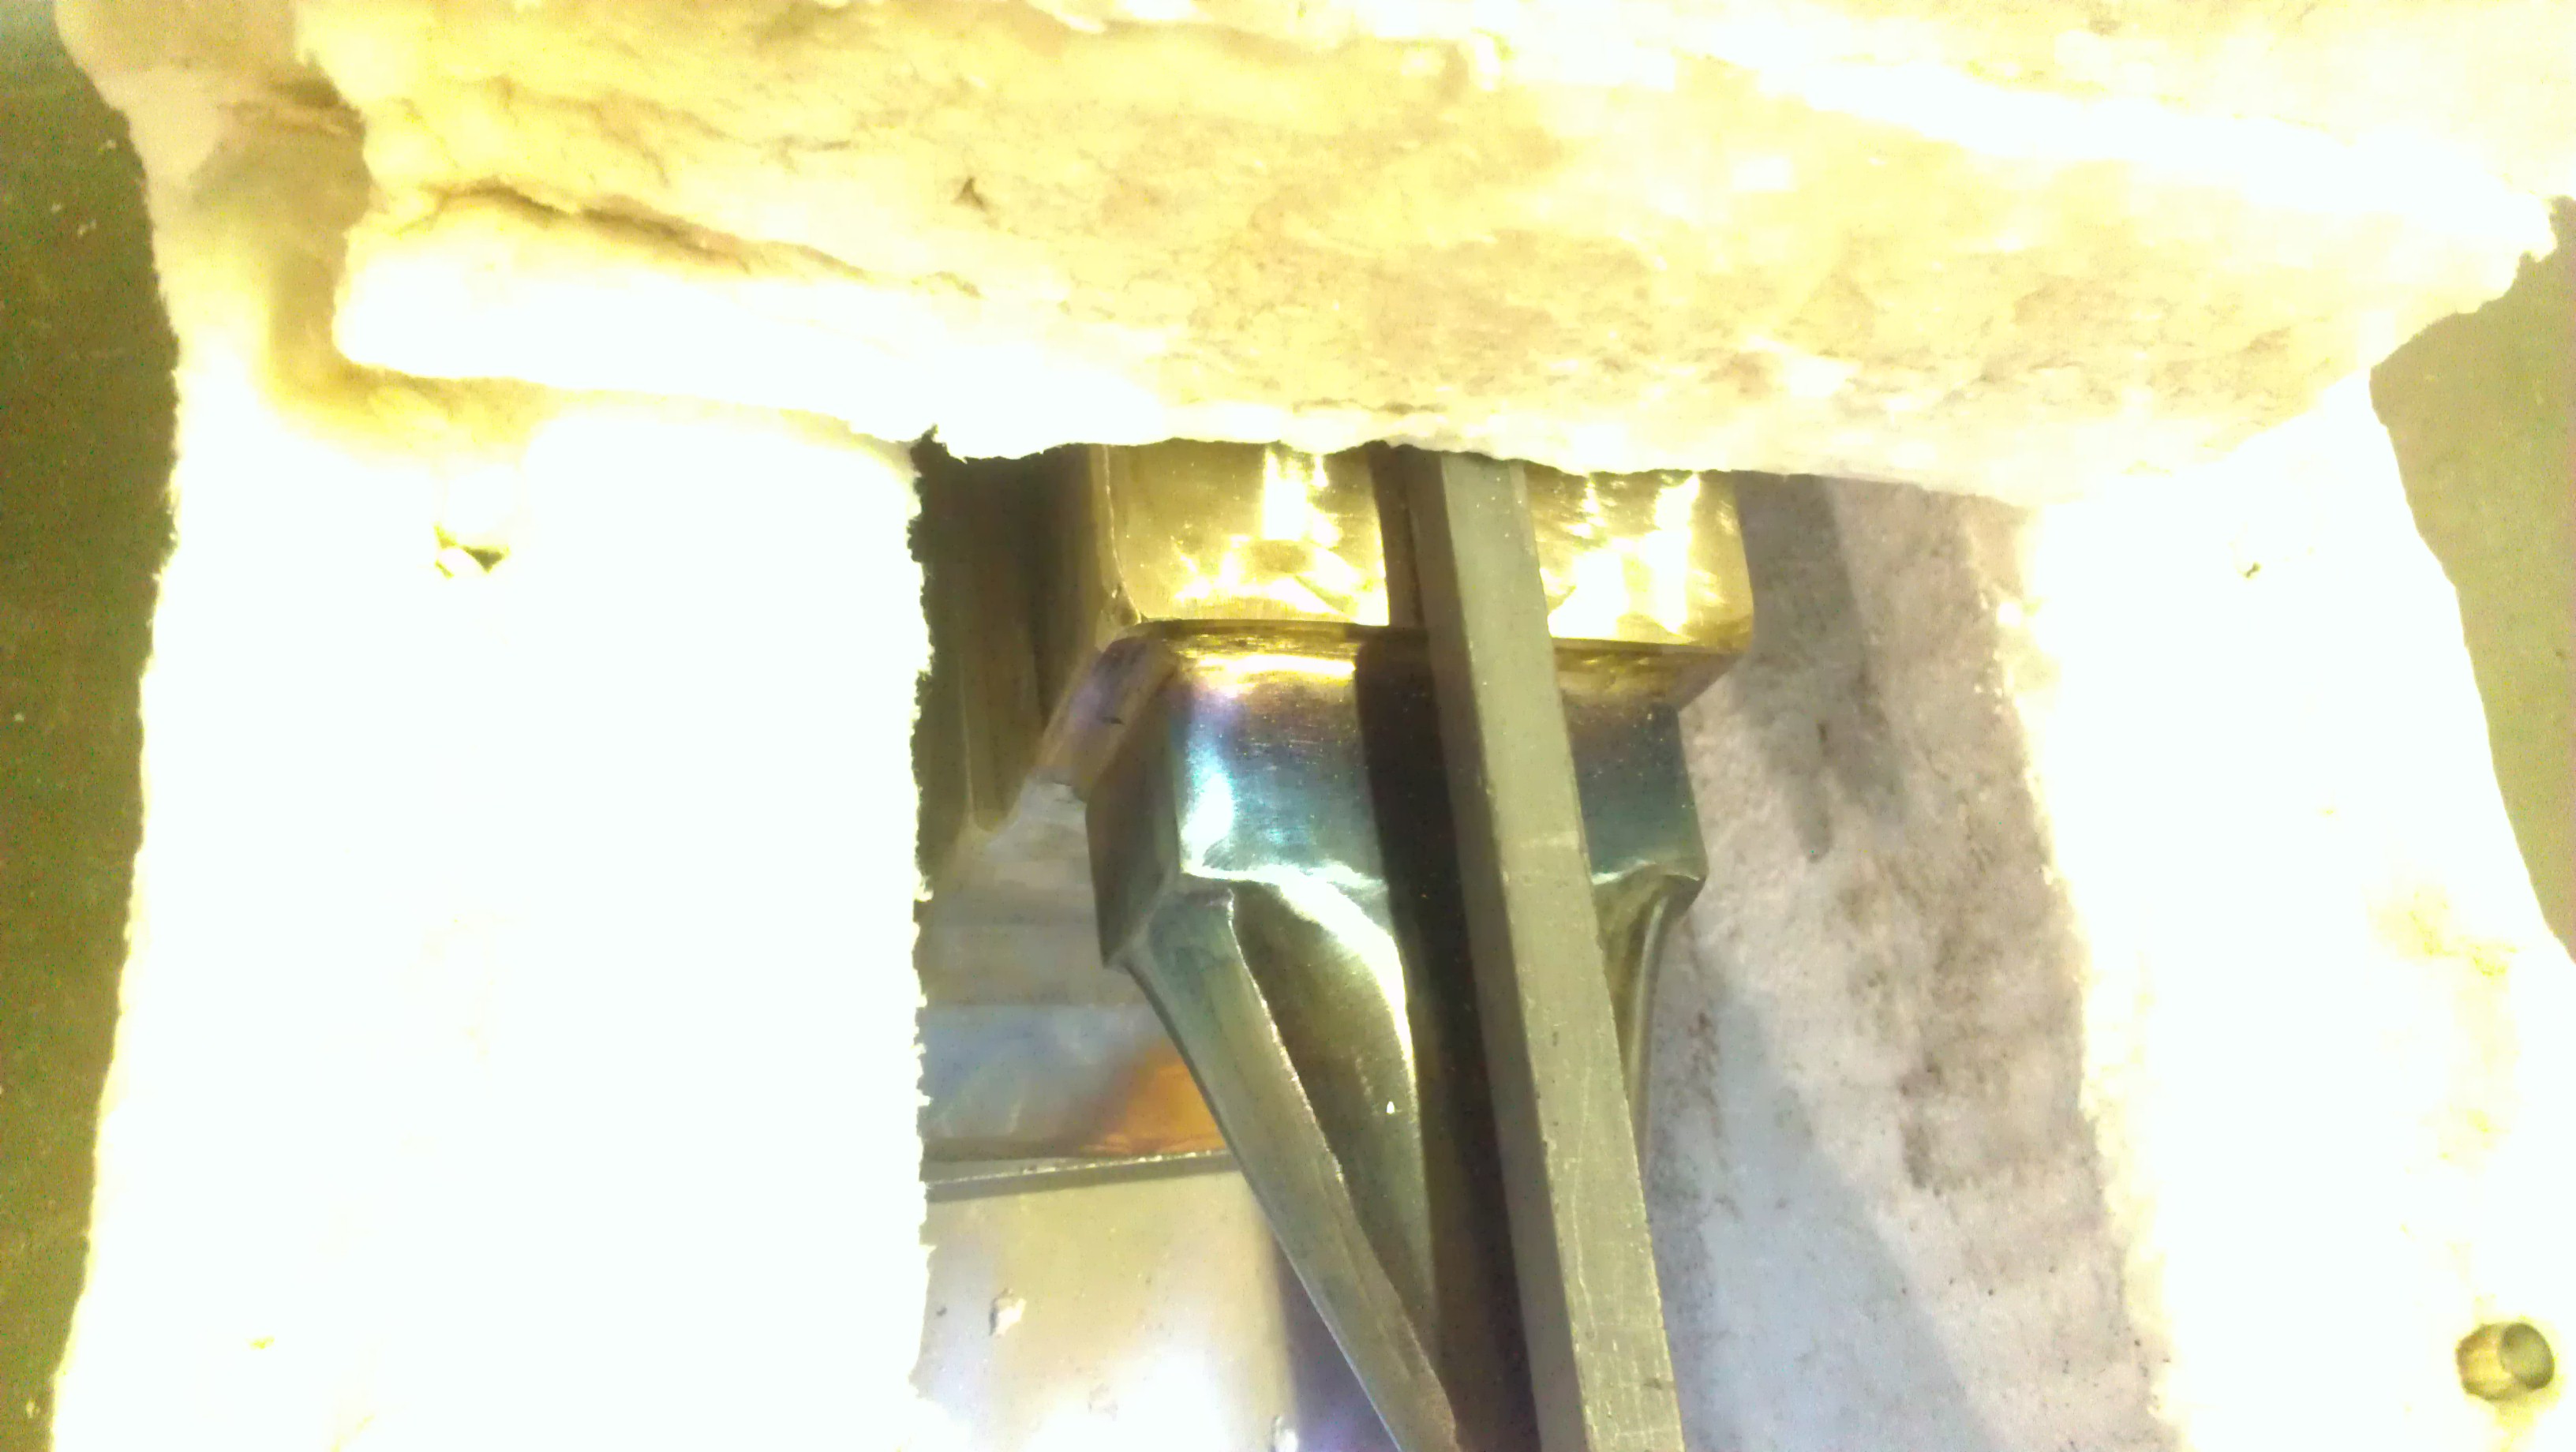
This one is cool because you can see both where I accidentally welded with some stainless rod and you can see the layer of hardfacing on the top.
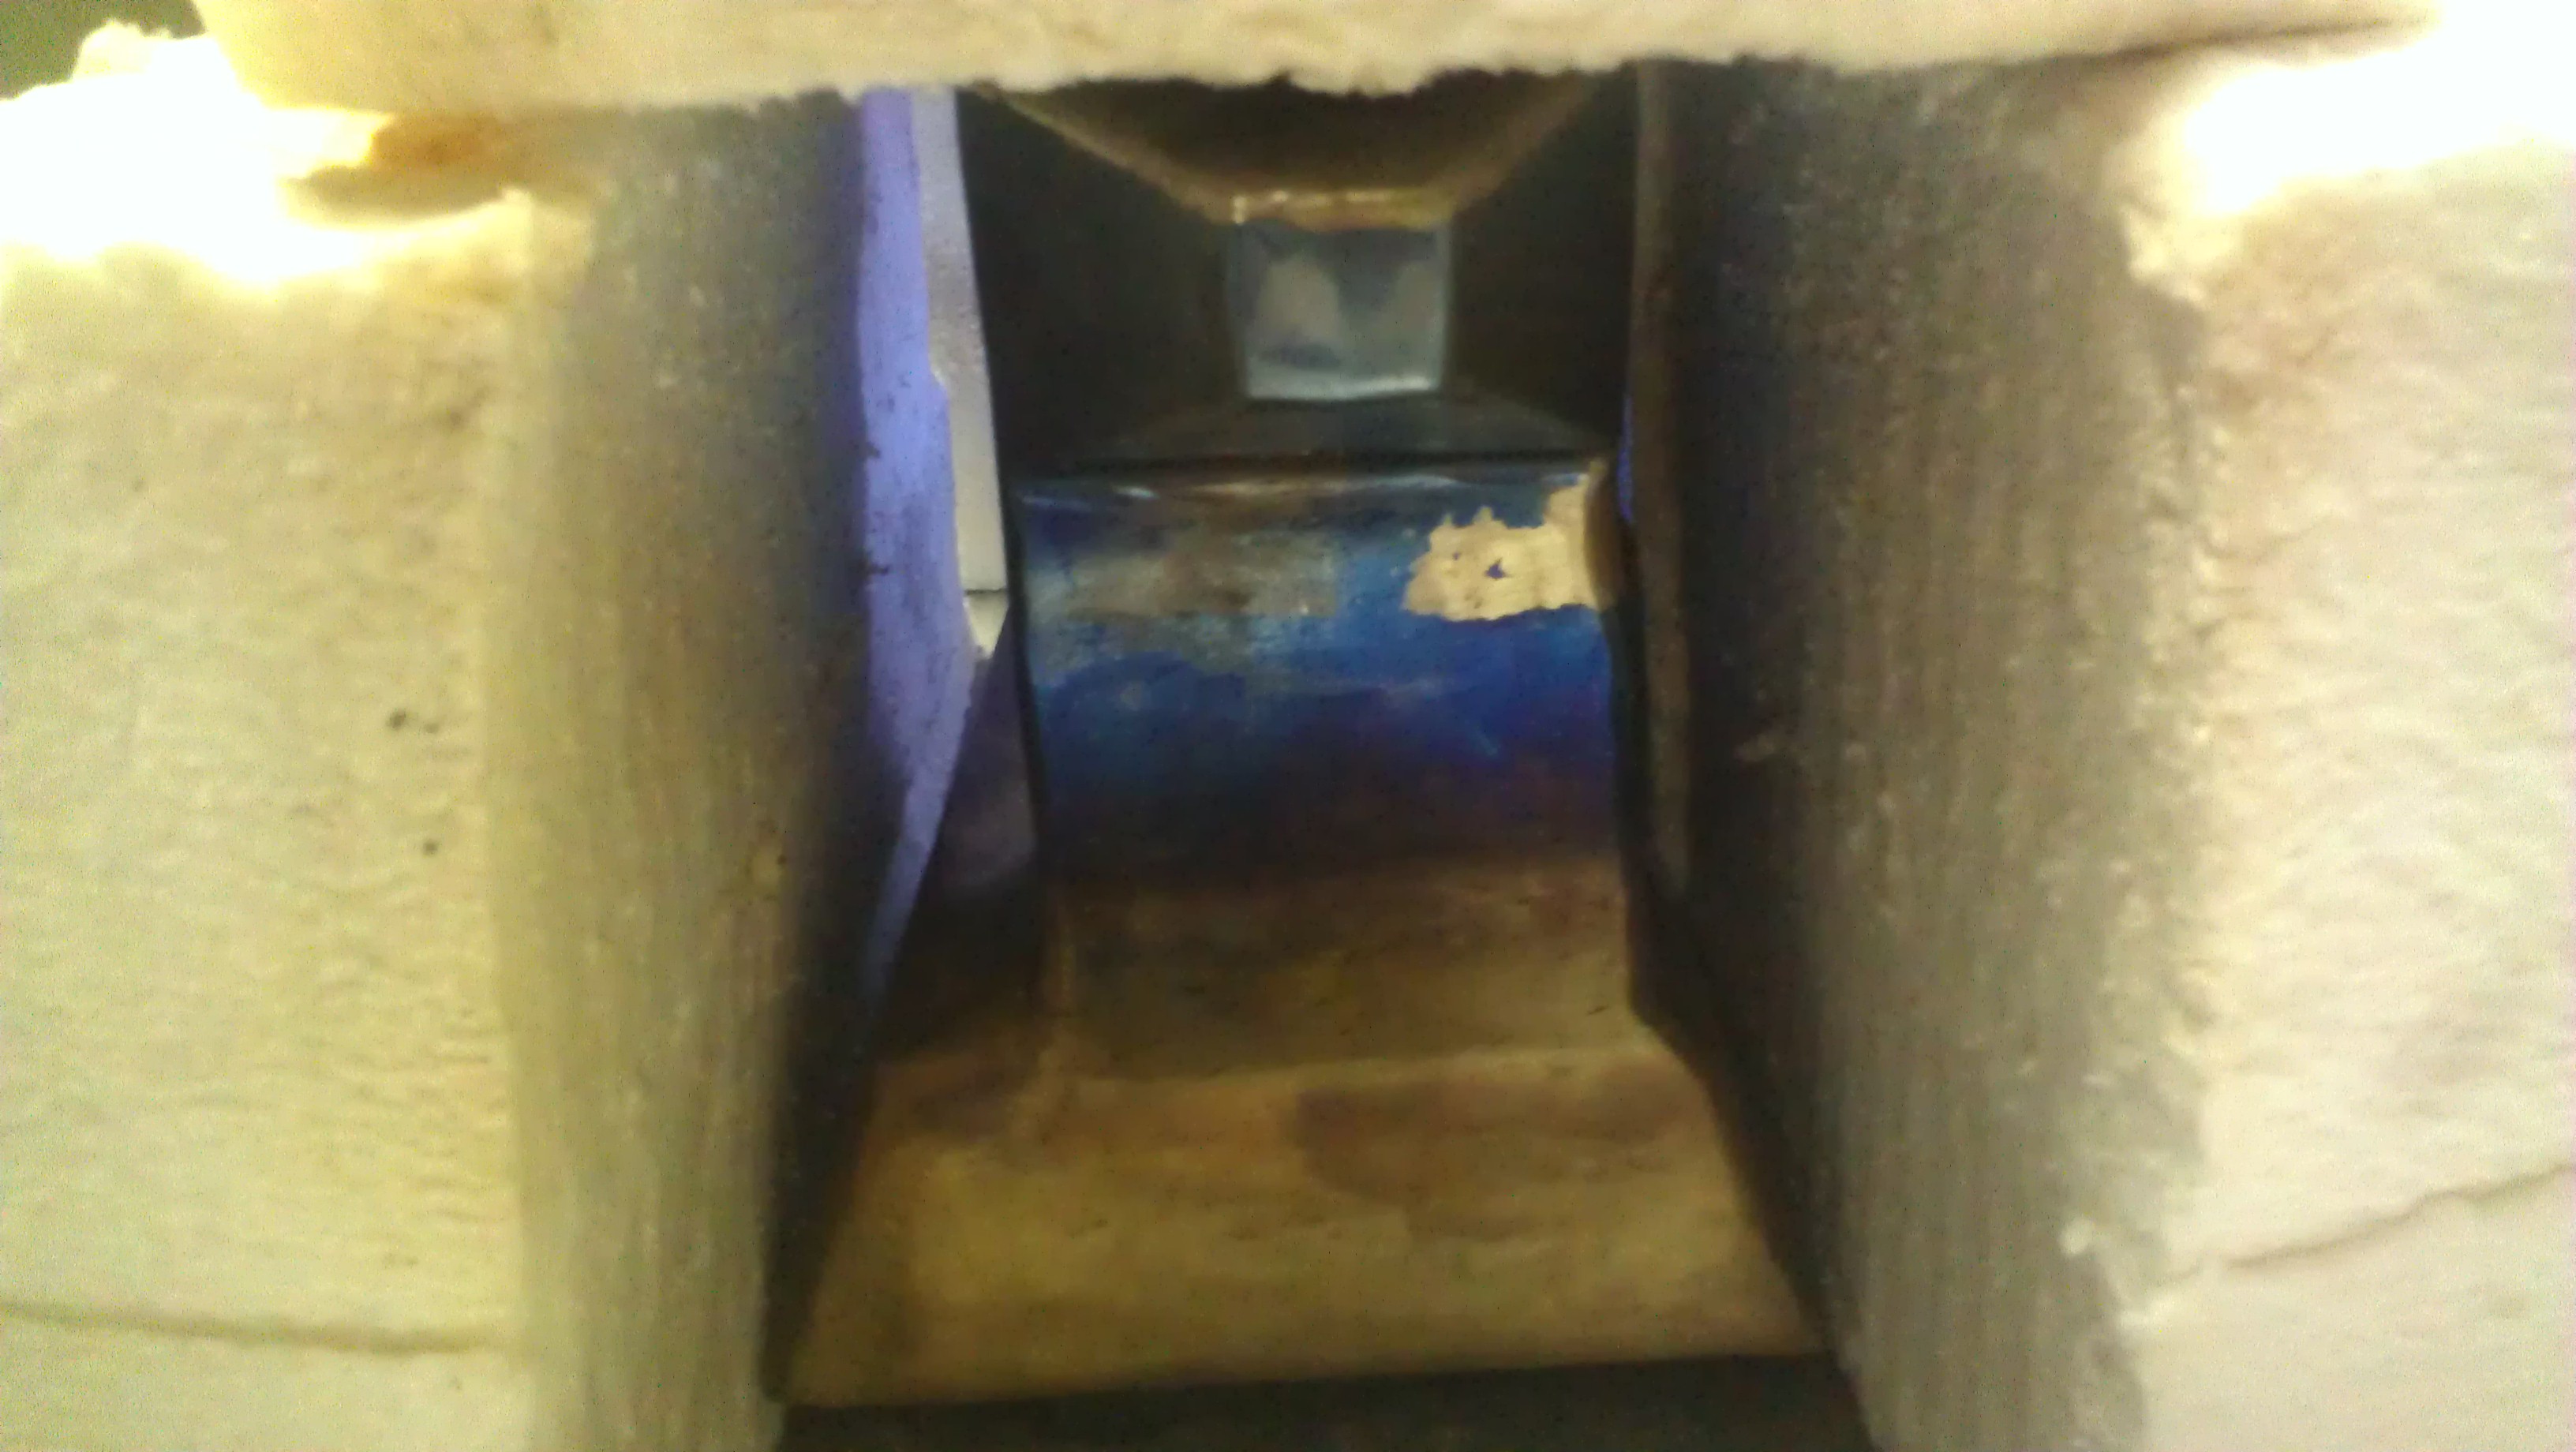
The manganese steel on top also went through the color shift, but I believe it happened at a much higher temperature. The horn is at red heat, granted it heats up a lot quicker, the steel on the main body directly below the hardfacing had already passed the purple/blue phase at 600 F and was at a very light blue/grey (i'm guessing 800-900 F) and theoretically they are in thermal equilibrium.
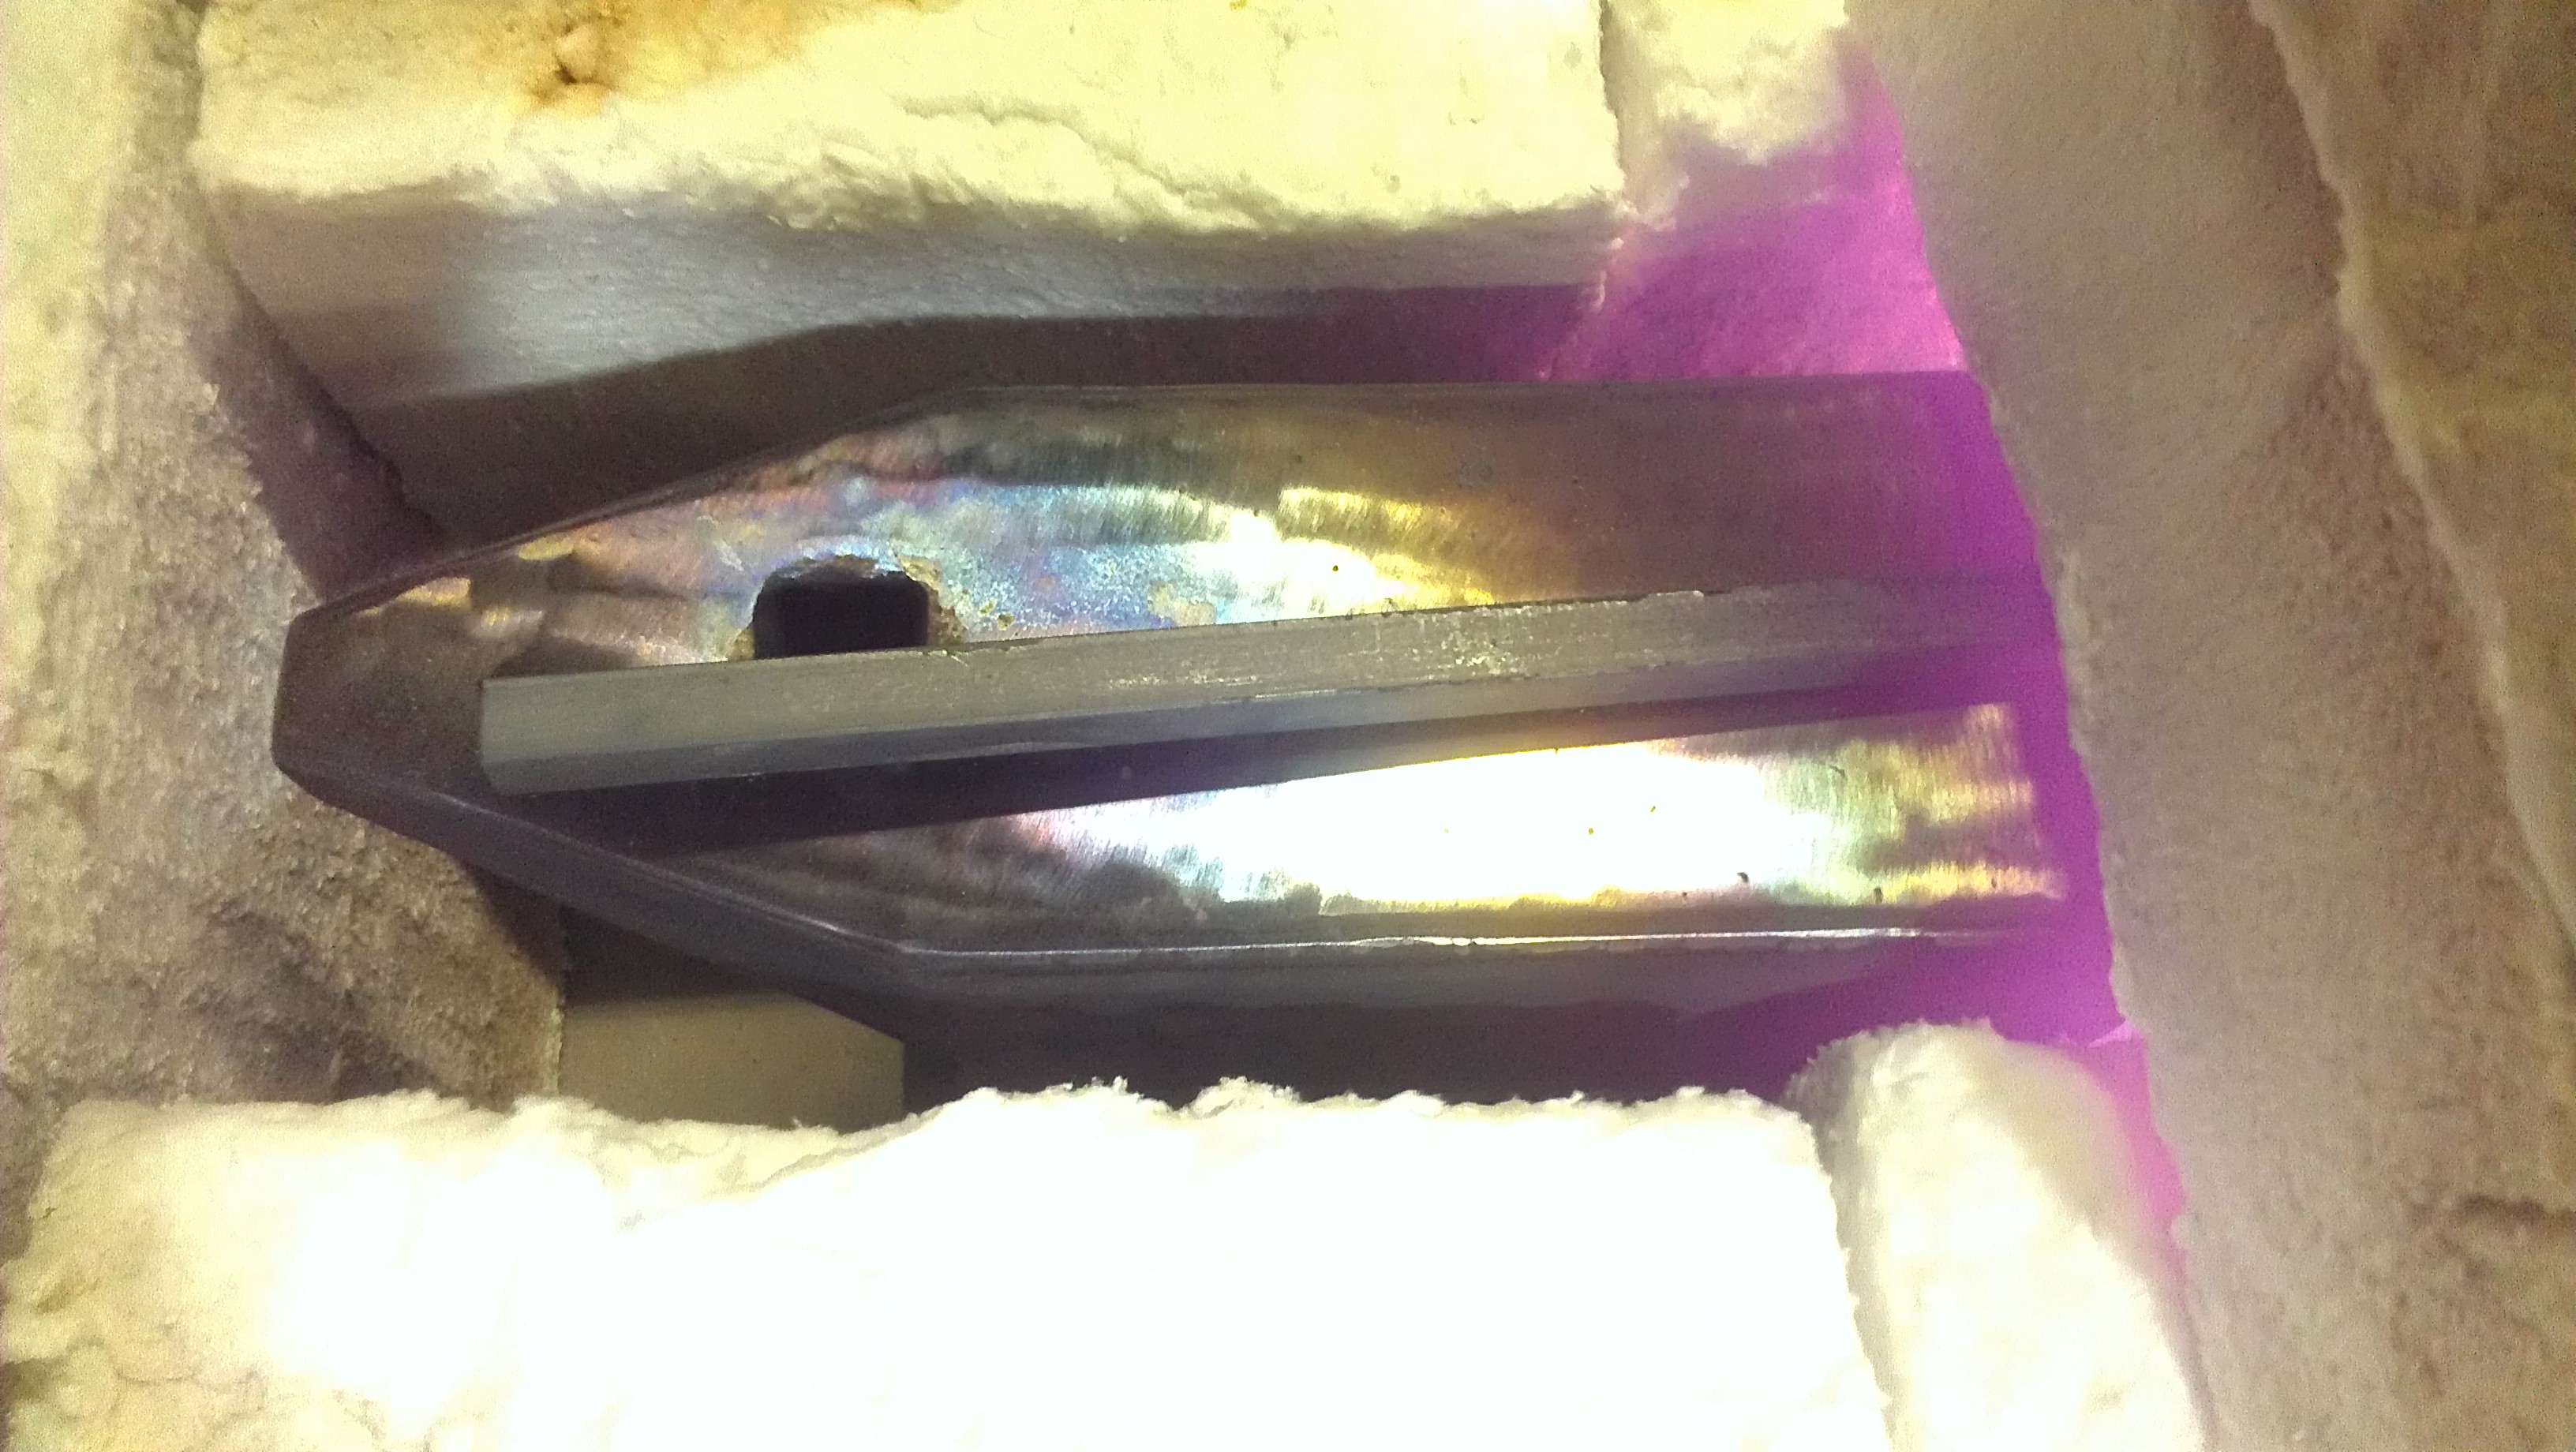
About 4.5 hours into heat treatment, i finally achieved red heat (my camera doesn't do infrared temperatures very true, it was actually bright cherry not yellow) at about 1500 F. I kept it there for about 30 minutes to allow it to heat soak a little more. I am glad I had two propane tanks on hand because the first one got so cold the gas pressure dropped and the flame actually started dying down about 2 hours into it. The same happened with the second tank about 4 hours in.
-
What is the rebound test show at this point?
The answer may be relevant to many to exemplify what happens when one uses the hard facing rods on "regular" steel.
There were postings of that information but I would like to read your input and results....probably others too.
Carry on
I just finished heat treatment (pictures to come) and didn't do a rebound test prior to heat treating, but I can say the surface was VERY hard relative to the mild A-36 steel underneath it. That being said, I could still grind it if I needed to, it just took a lot of work. I had to heat treat it for two reasons. One I wanted to make sure the welds got stress relieved, two I needed to soften the hard face. I was afraid that if I tried to drill my pritchel holes I would have eaten up some expensive magnetic drill bits. Talking to the expert on the manganese wear-hardening steel he said that the only way to un-work-harden the steel (which is what happens when you grind on it excessively) is to heat treat it to austenitization temperatures. Now it should be soft enough to drill.
-
Some more updates, I'm very close to being done now.
Here is the full penetration weld finished on one side.
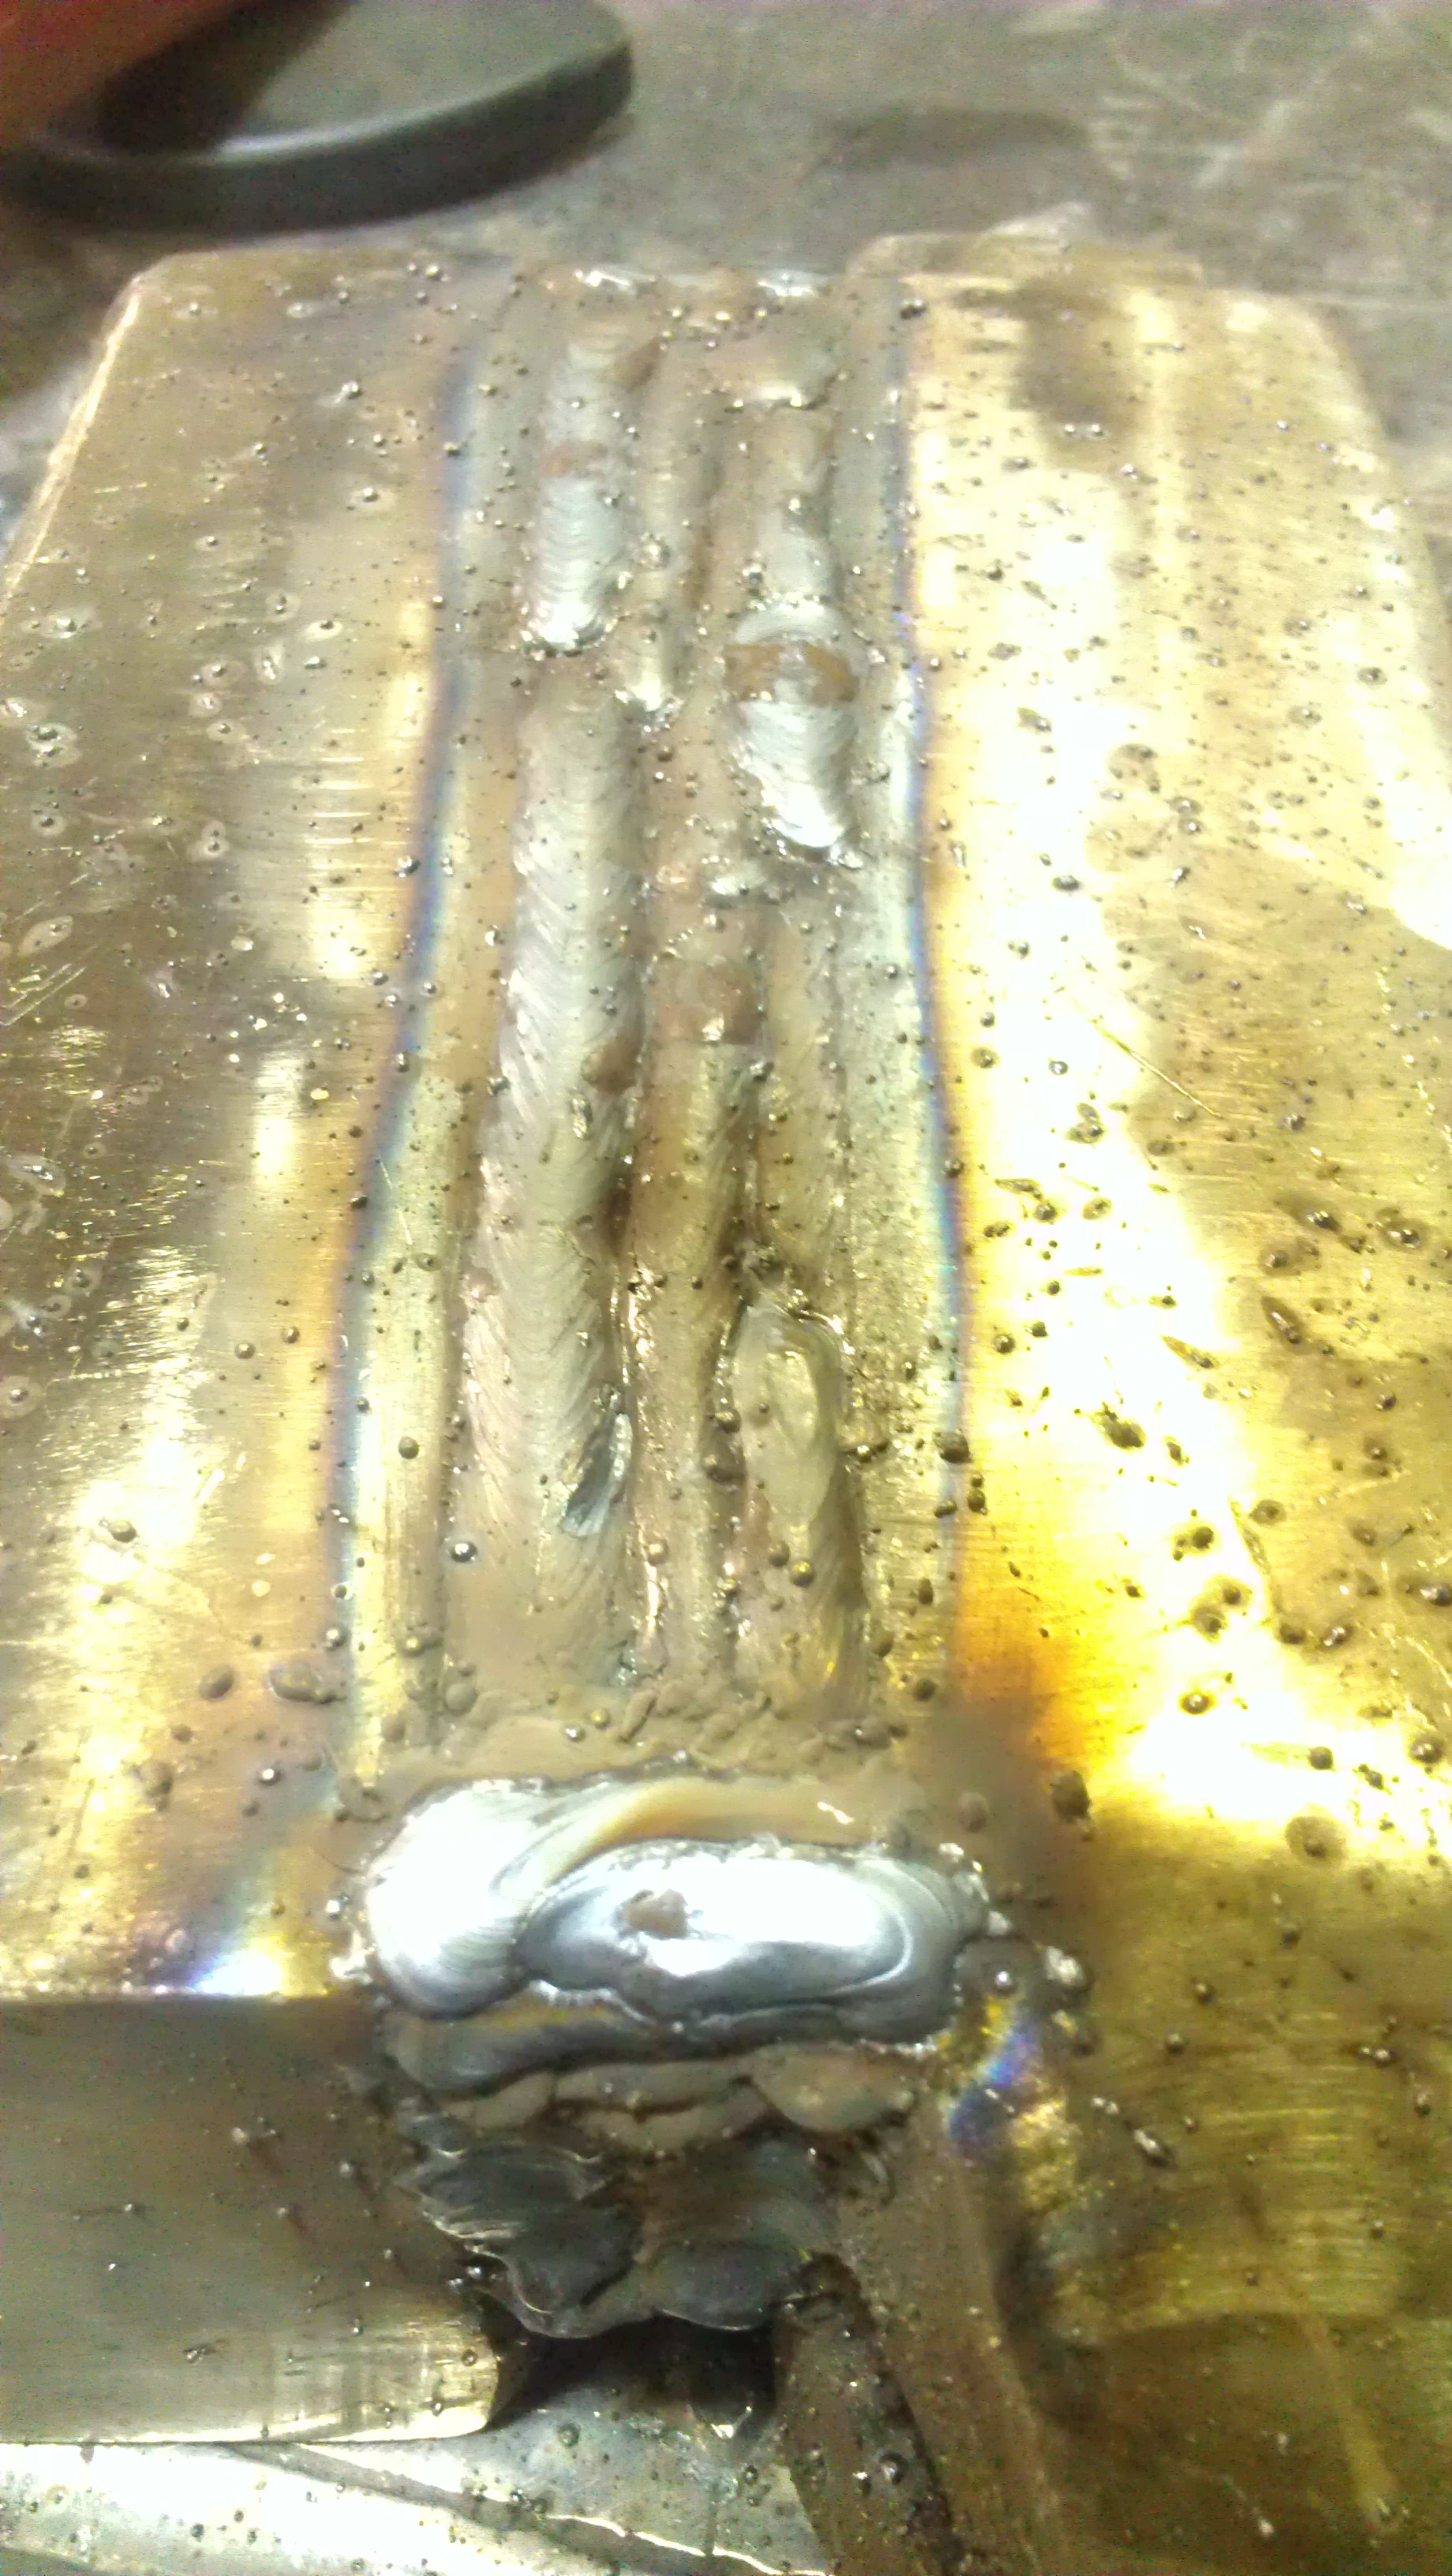
The top pieces ground and lightly polished (I don't know why I keep polishing before I'm finished, I just keep getting weld spatter all over and having to re-grind anyway).
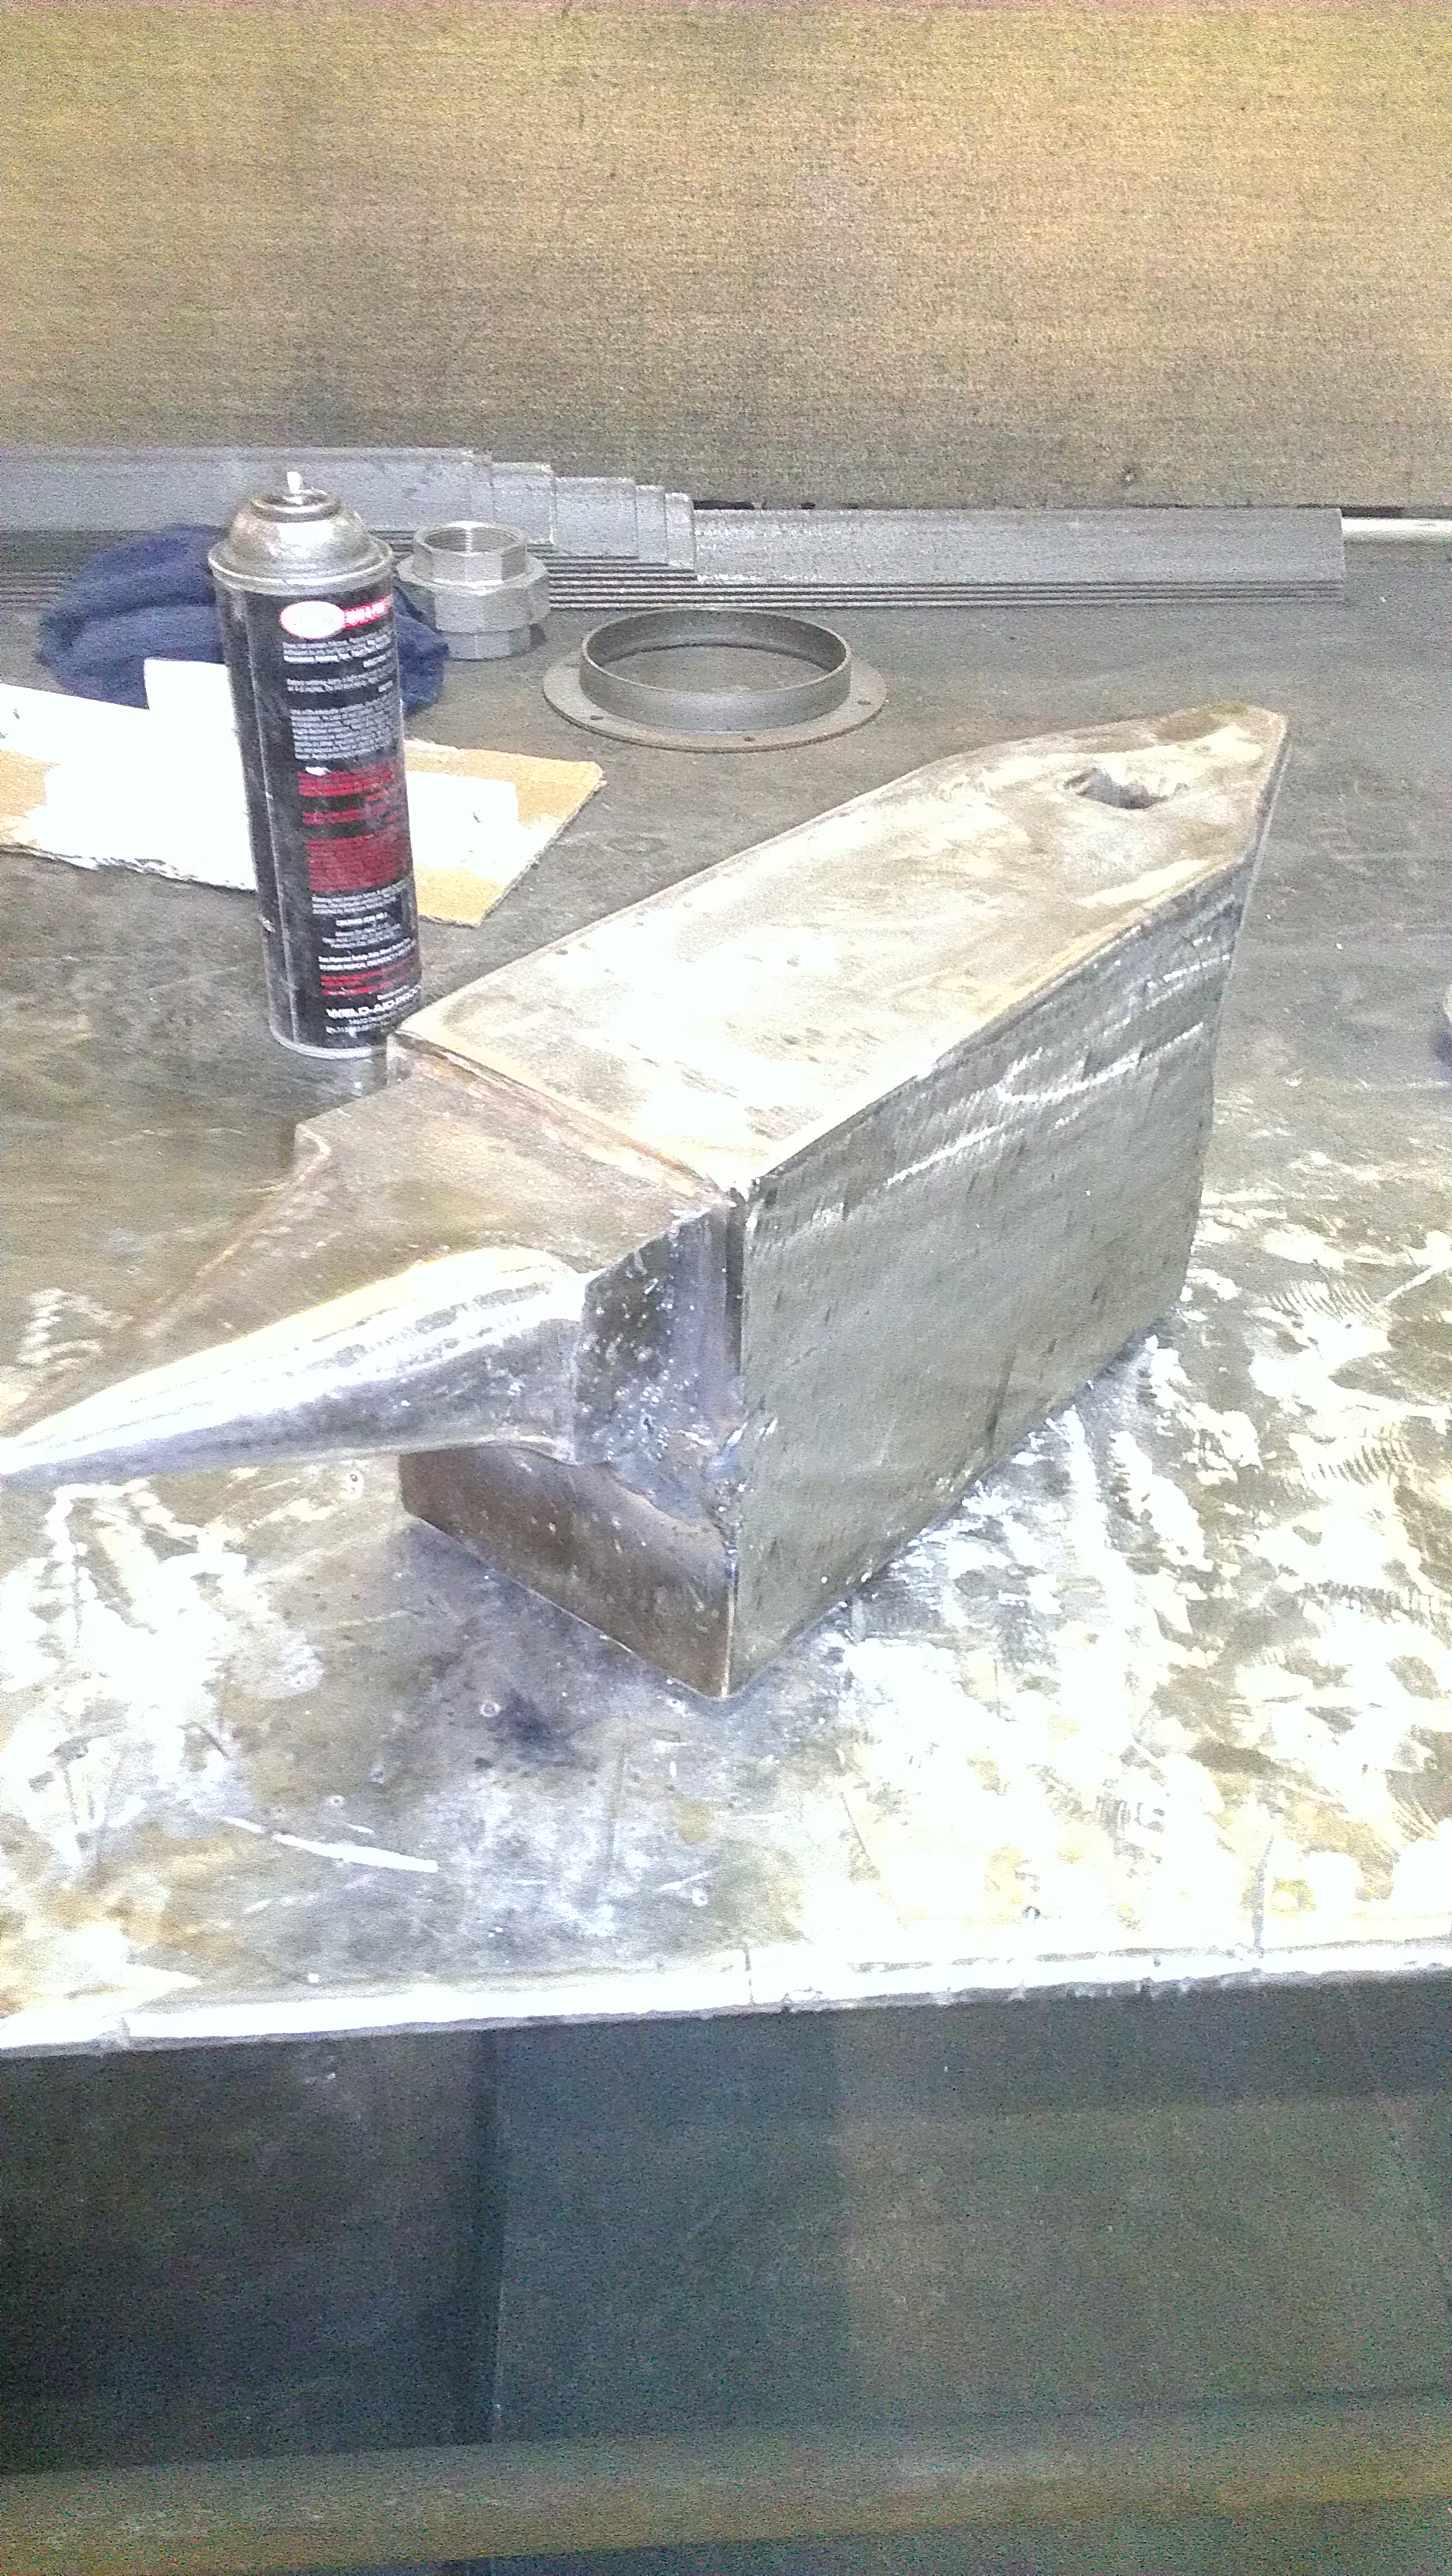
I decided to use 1" bar stock around the base to fill it in instead of doing a full penetration weld. I only did this because I wanted to add a few more pounds and an extra inch of overall height (2" total including the fill penetration weld).
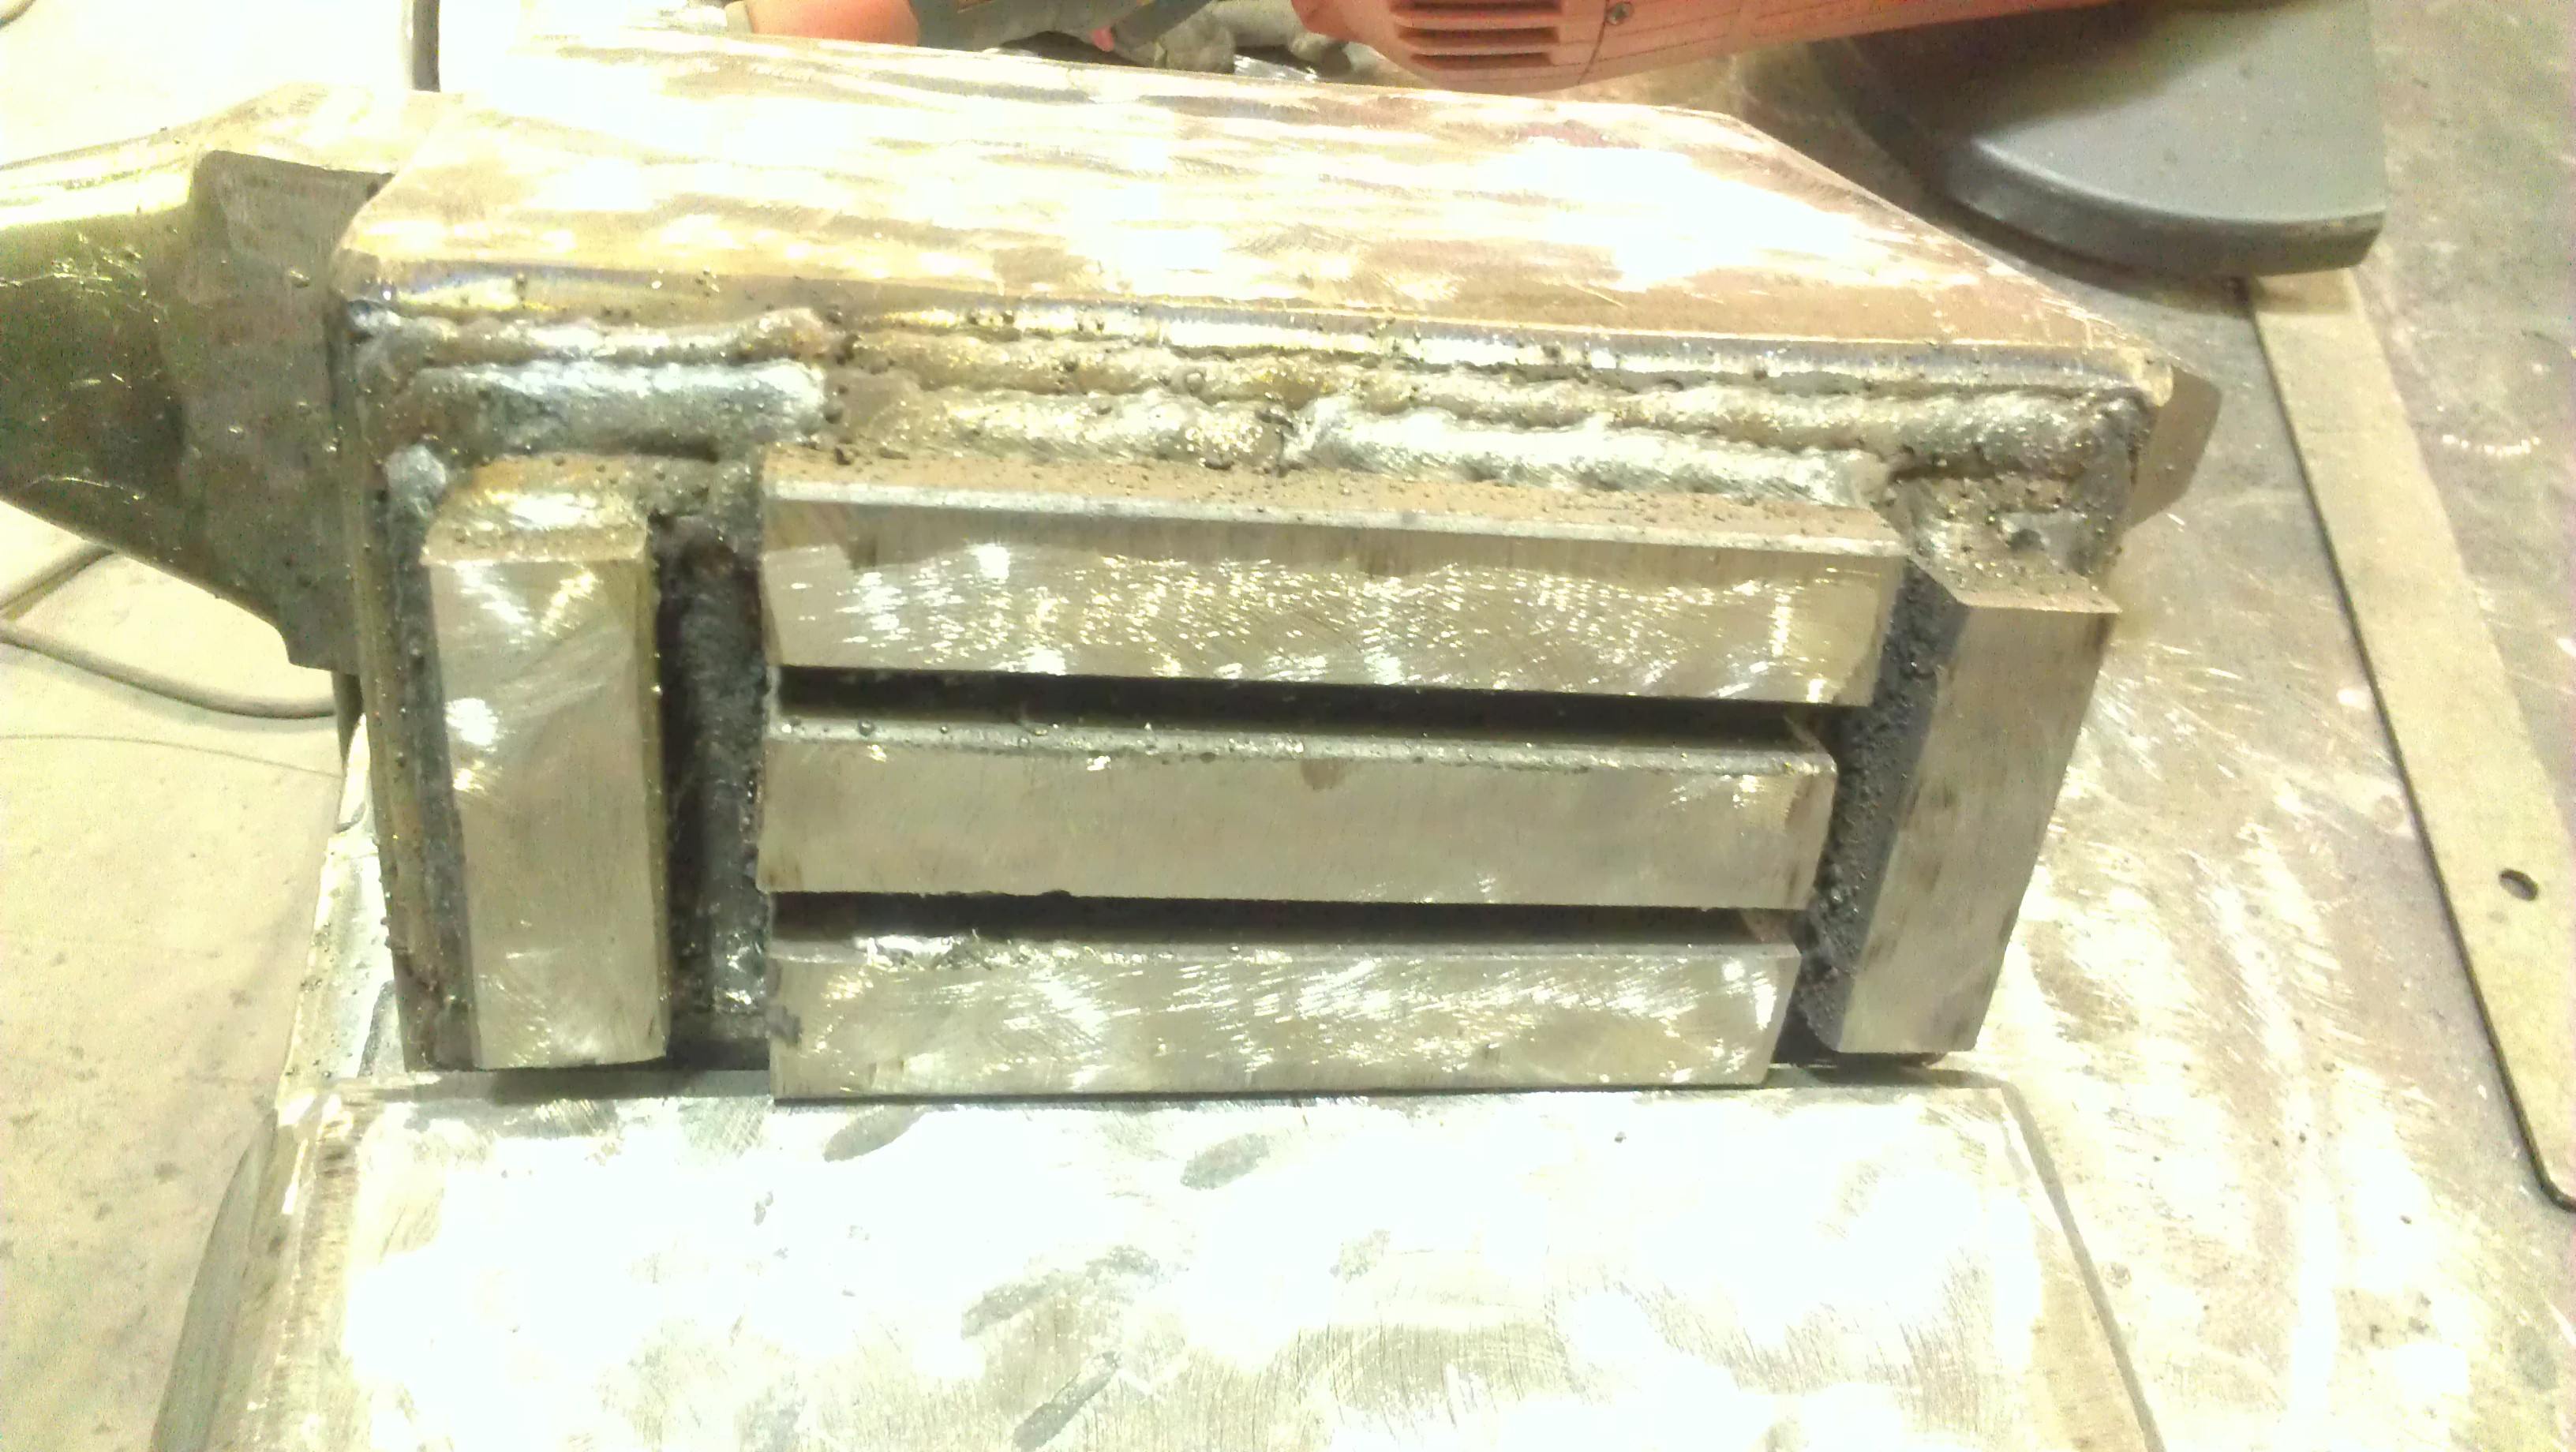
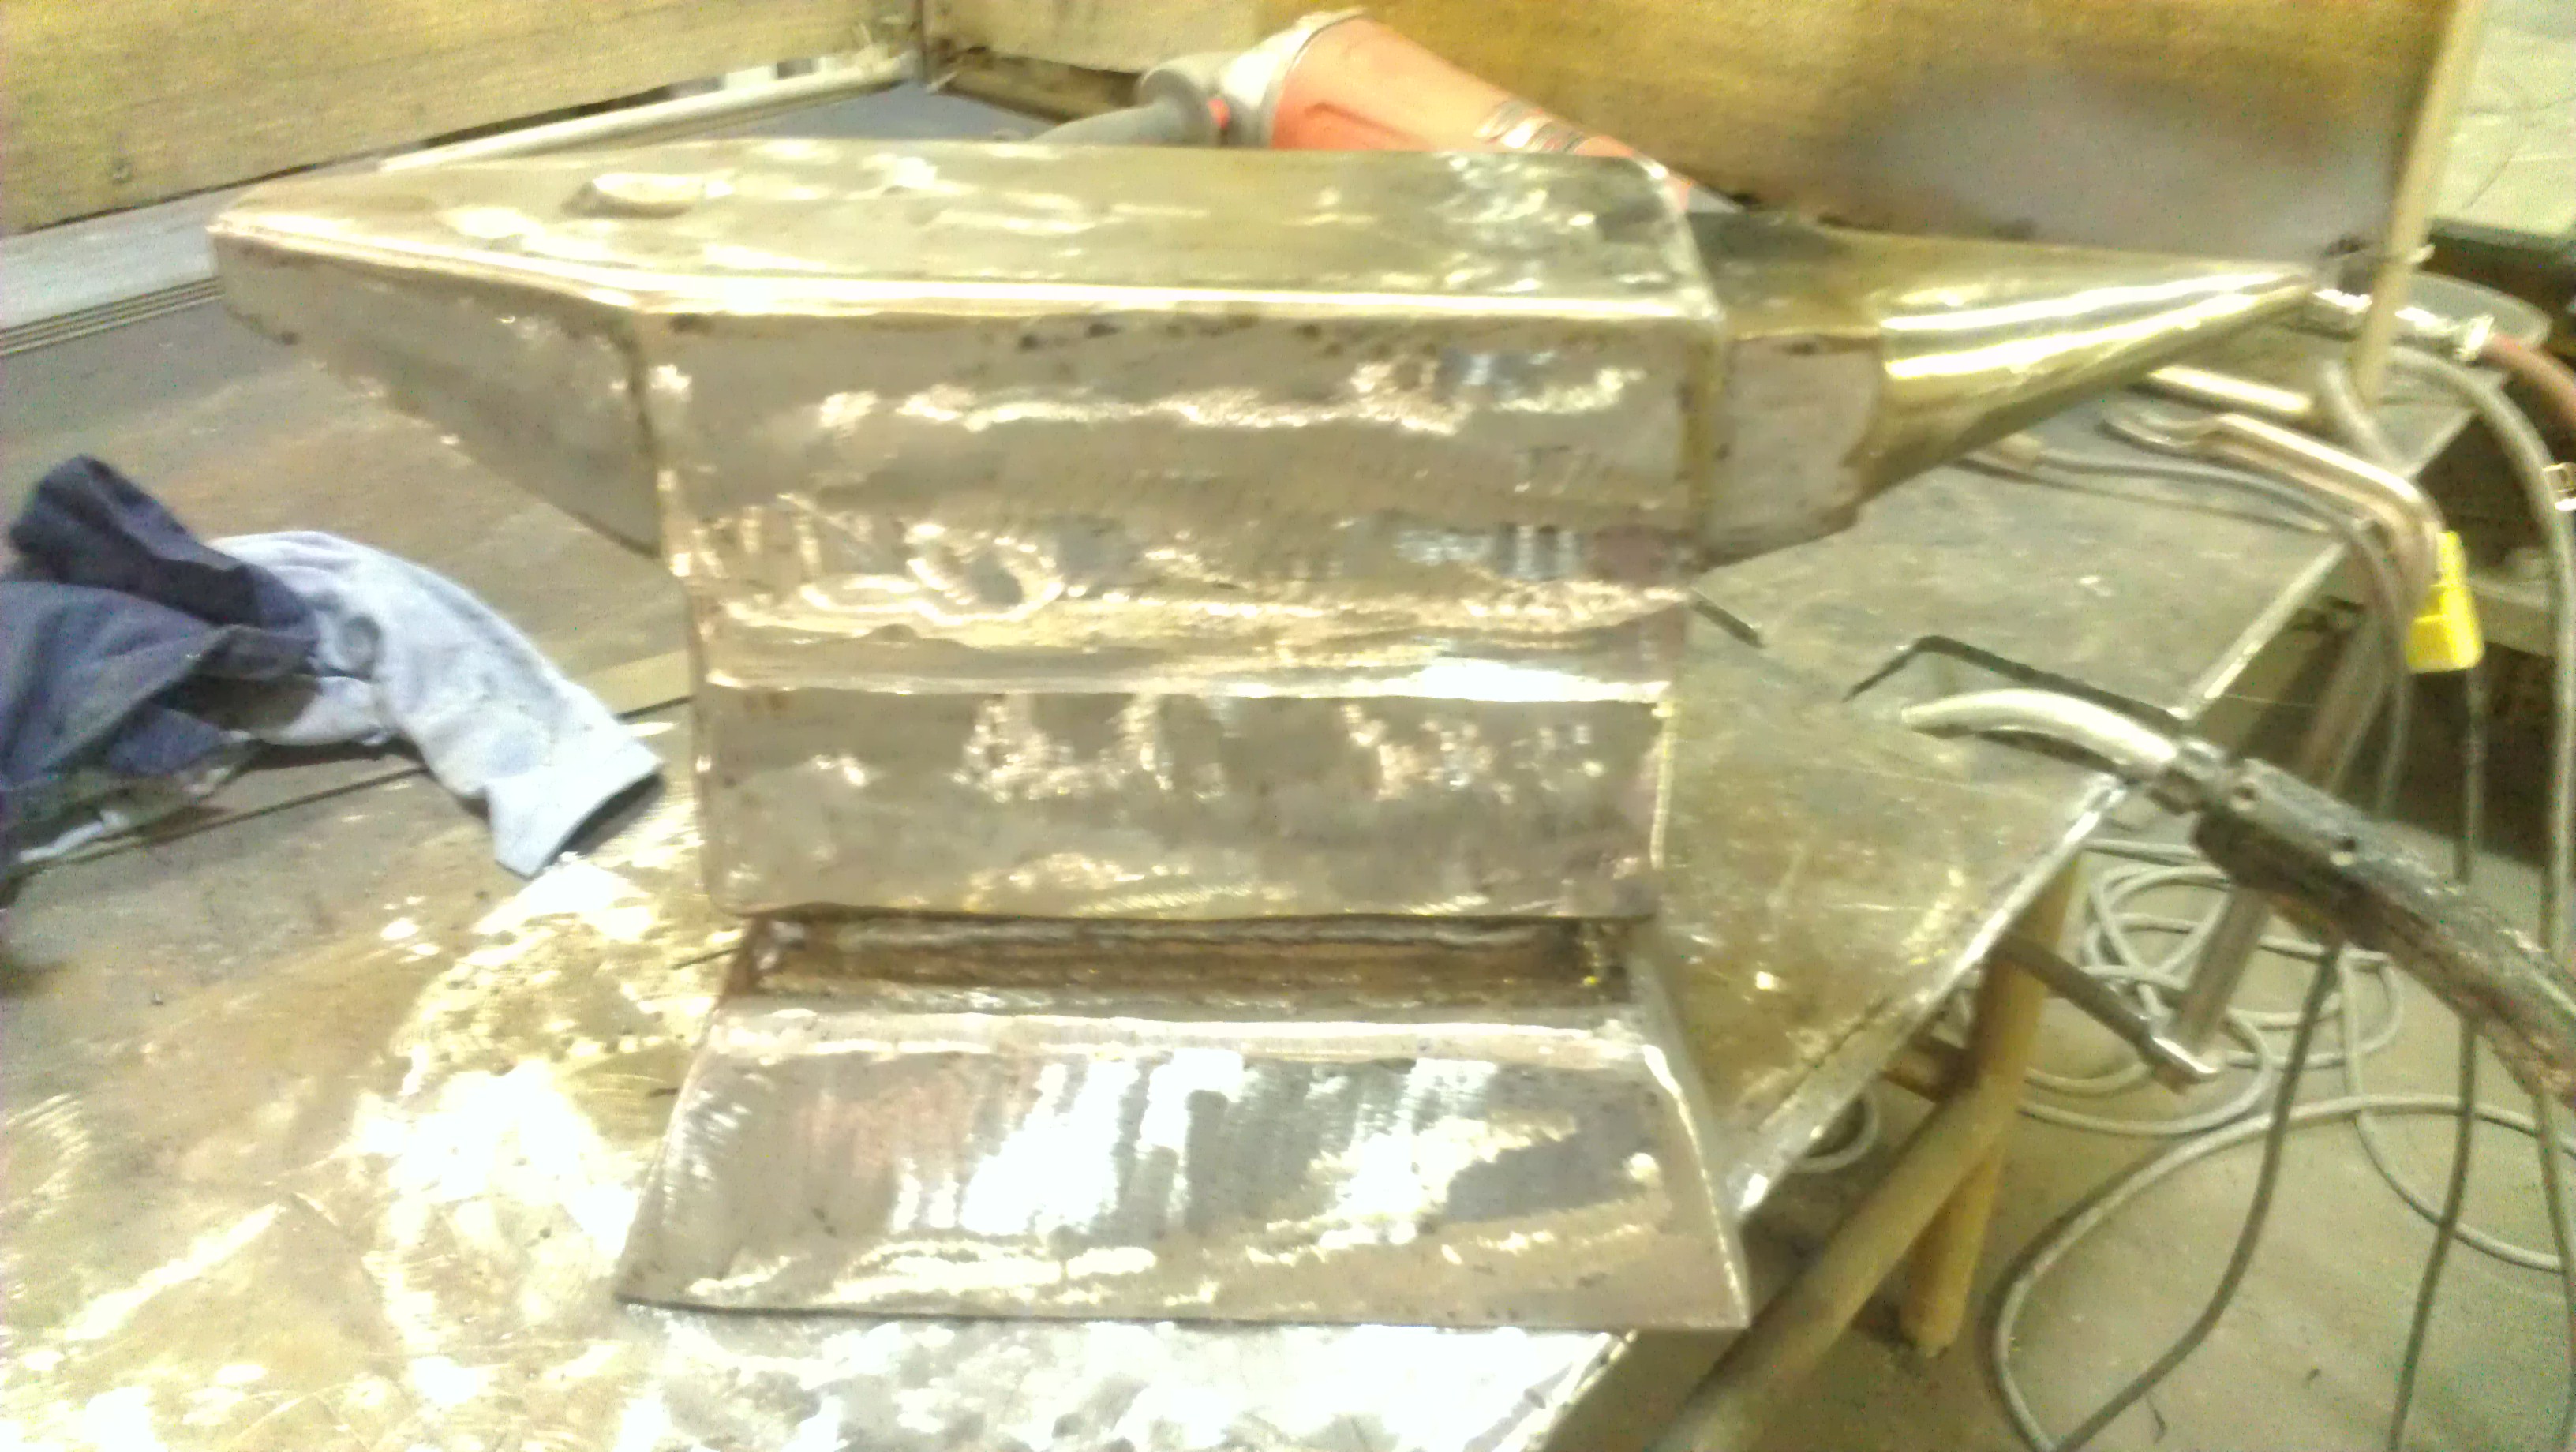
Here is is finally all in one piece.
Finished filling in the bottom weld
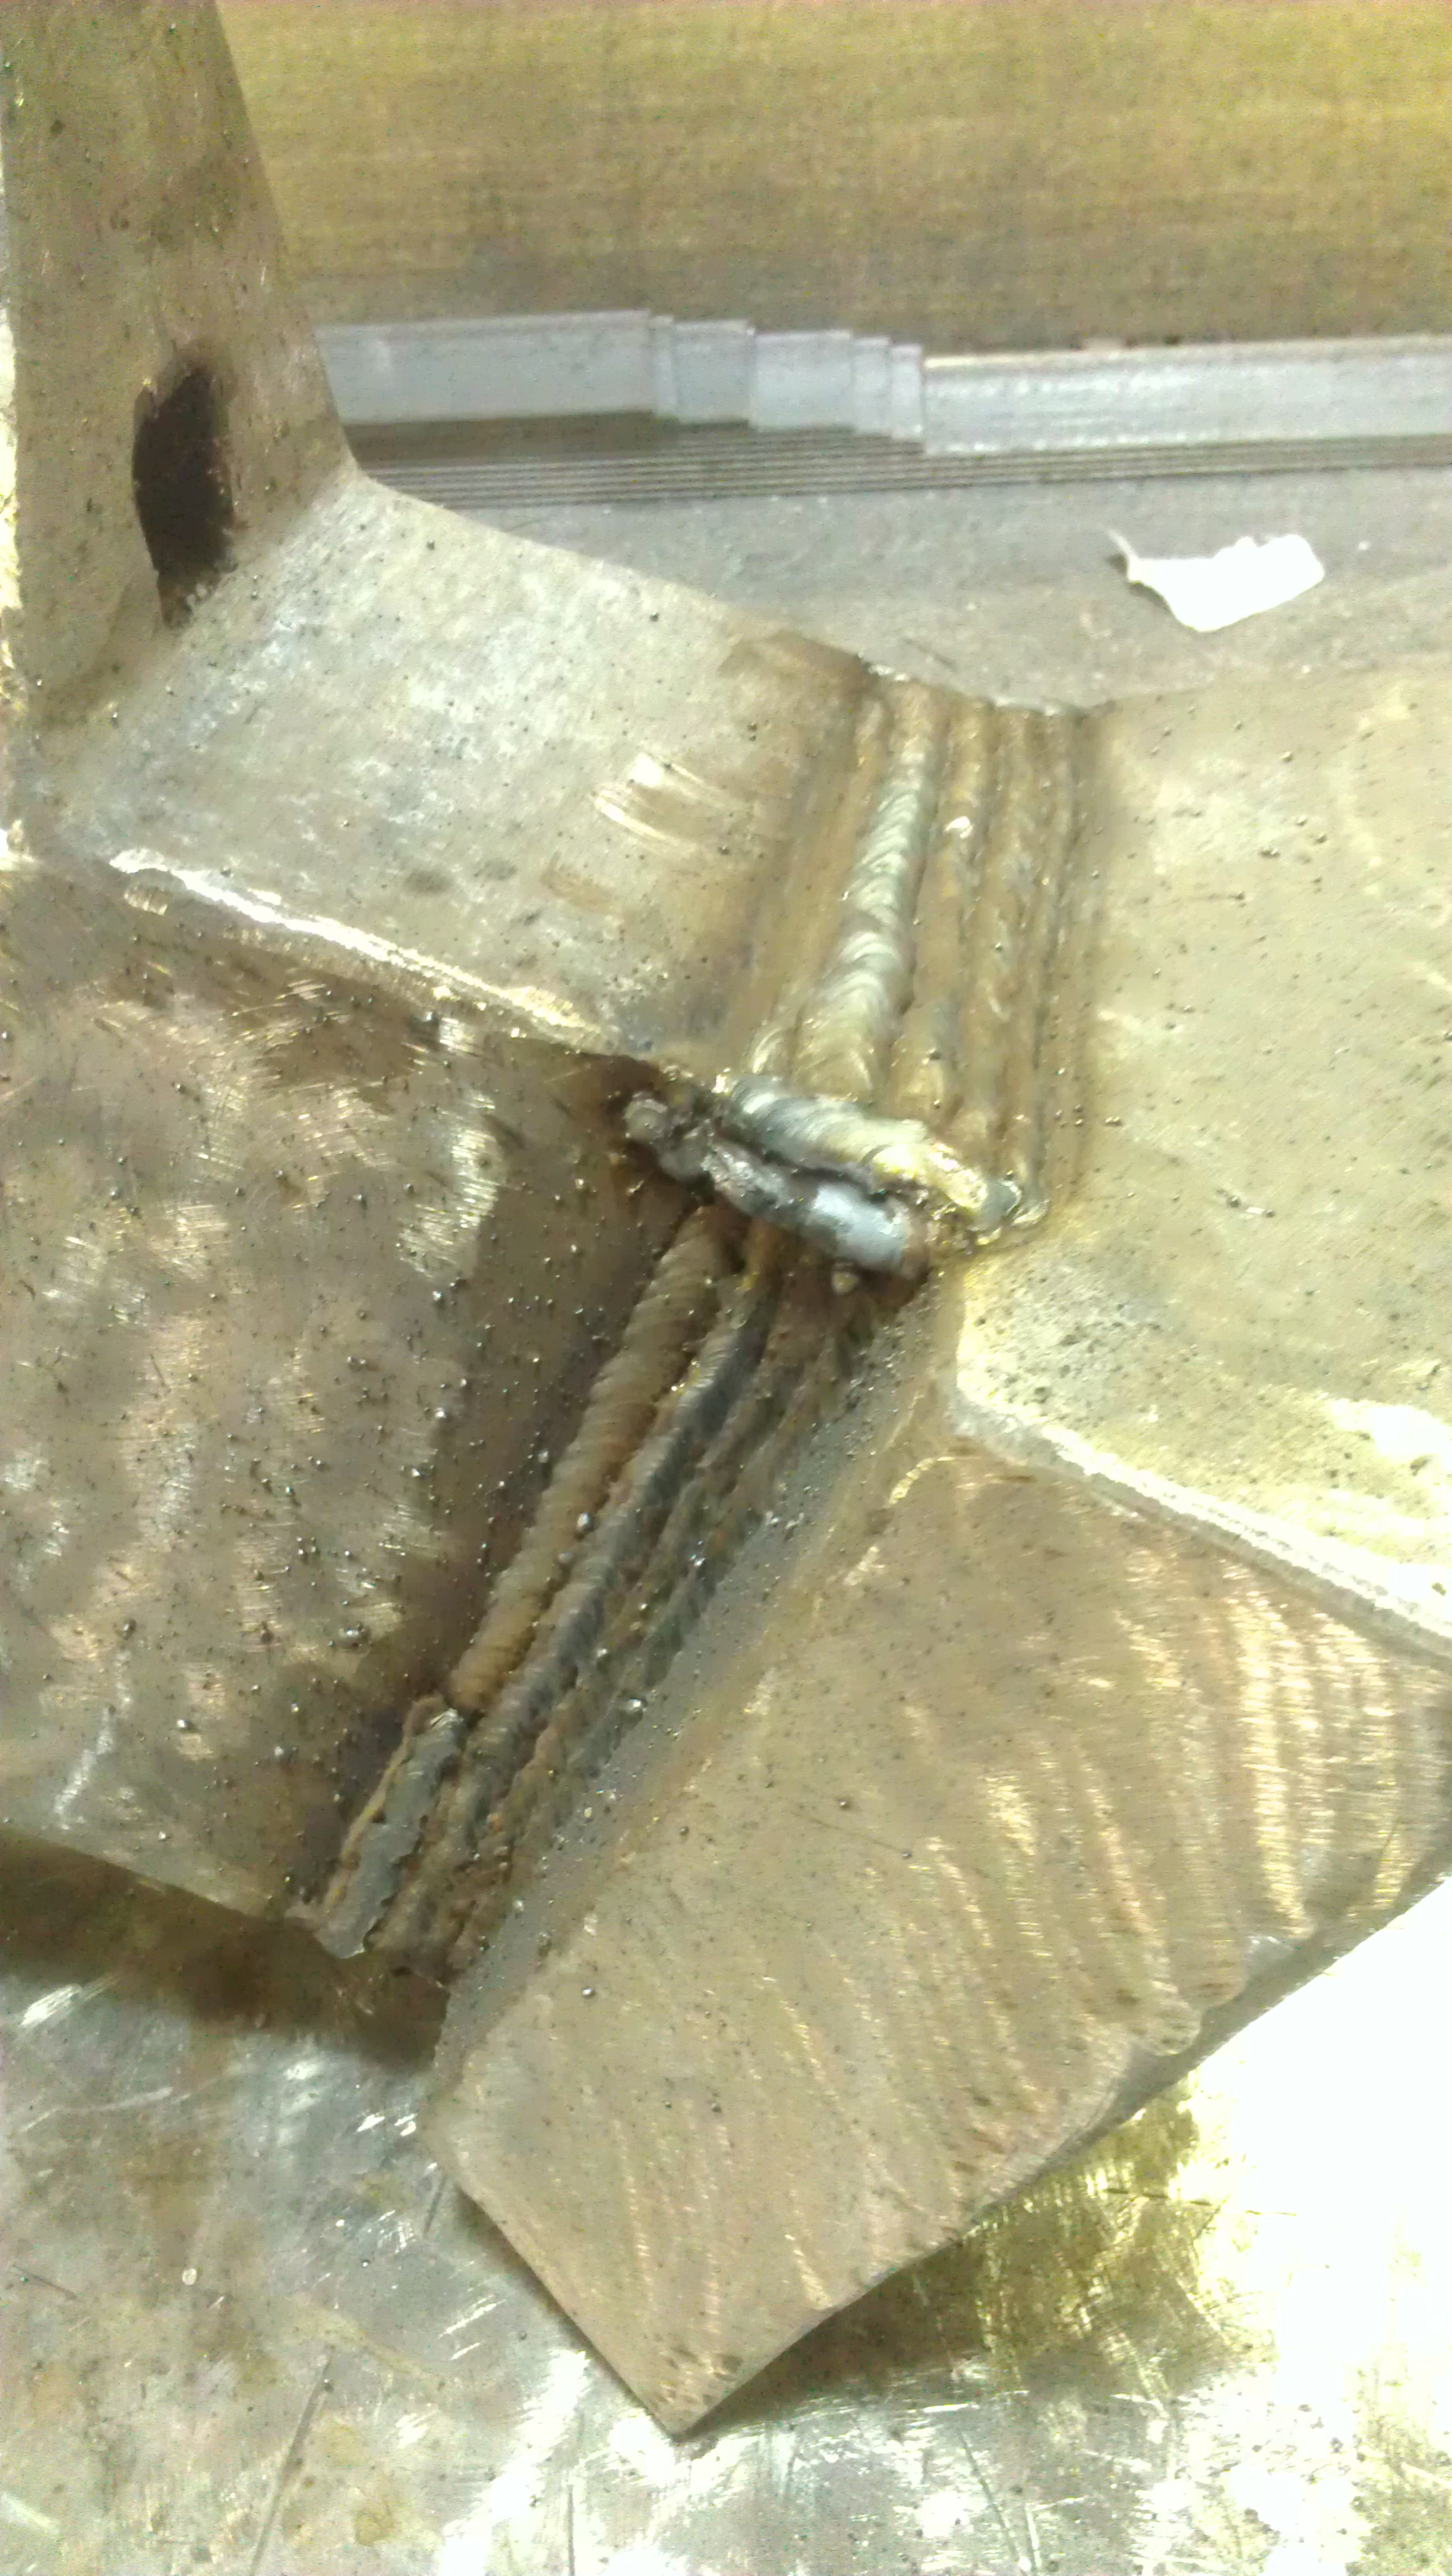
When a great idea struck. I'd do the type of welding I mentioned in an earlier post, then blend it into the upset block at the base to give me some extra curves to use. Here is the basic weld before grinding.
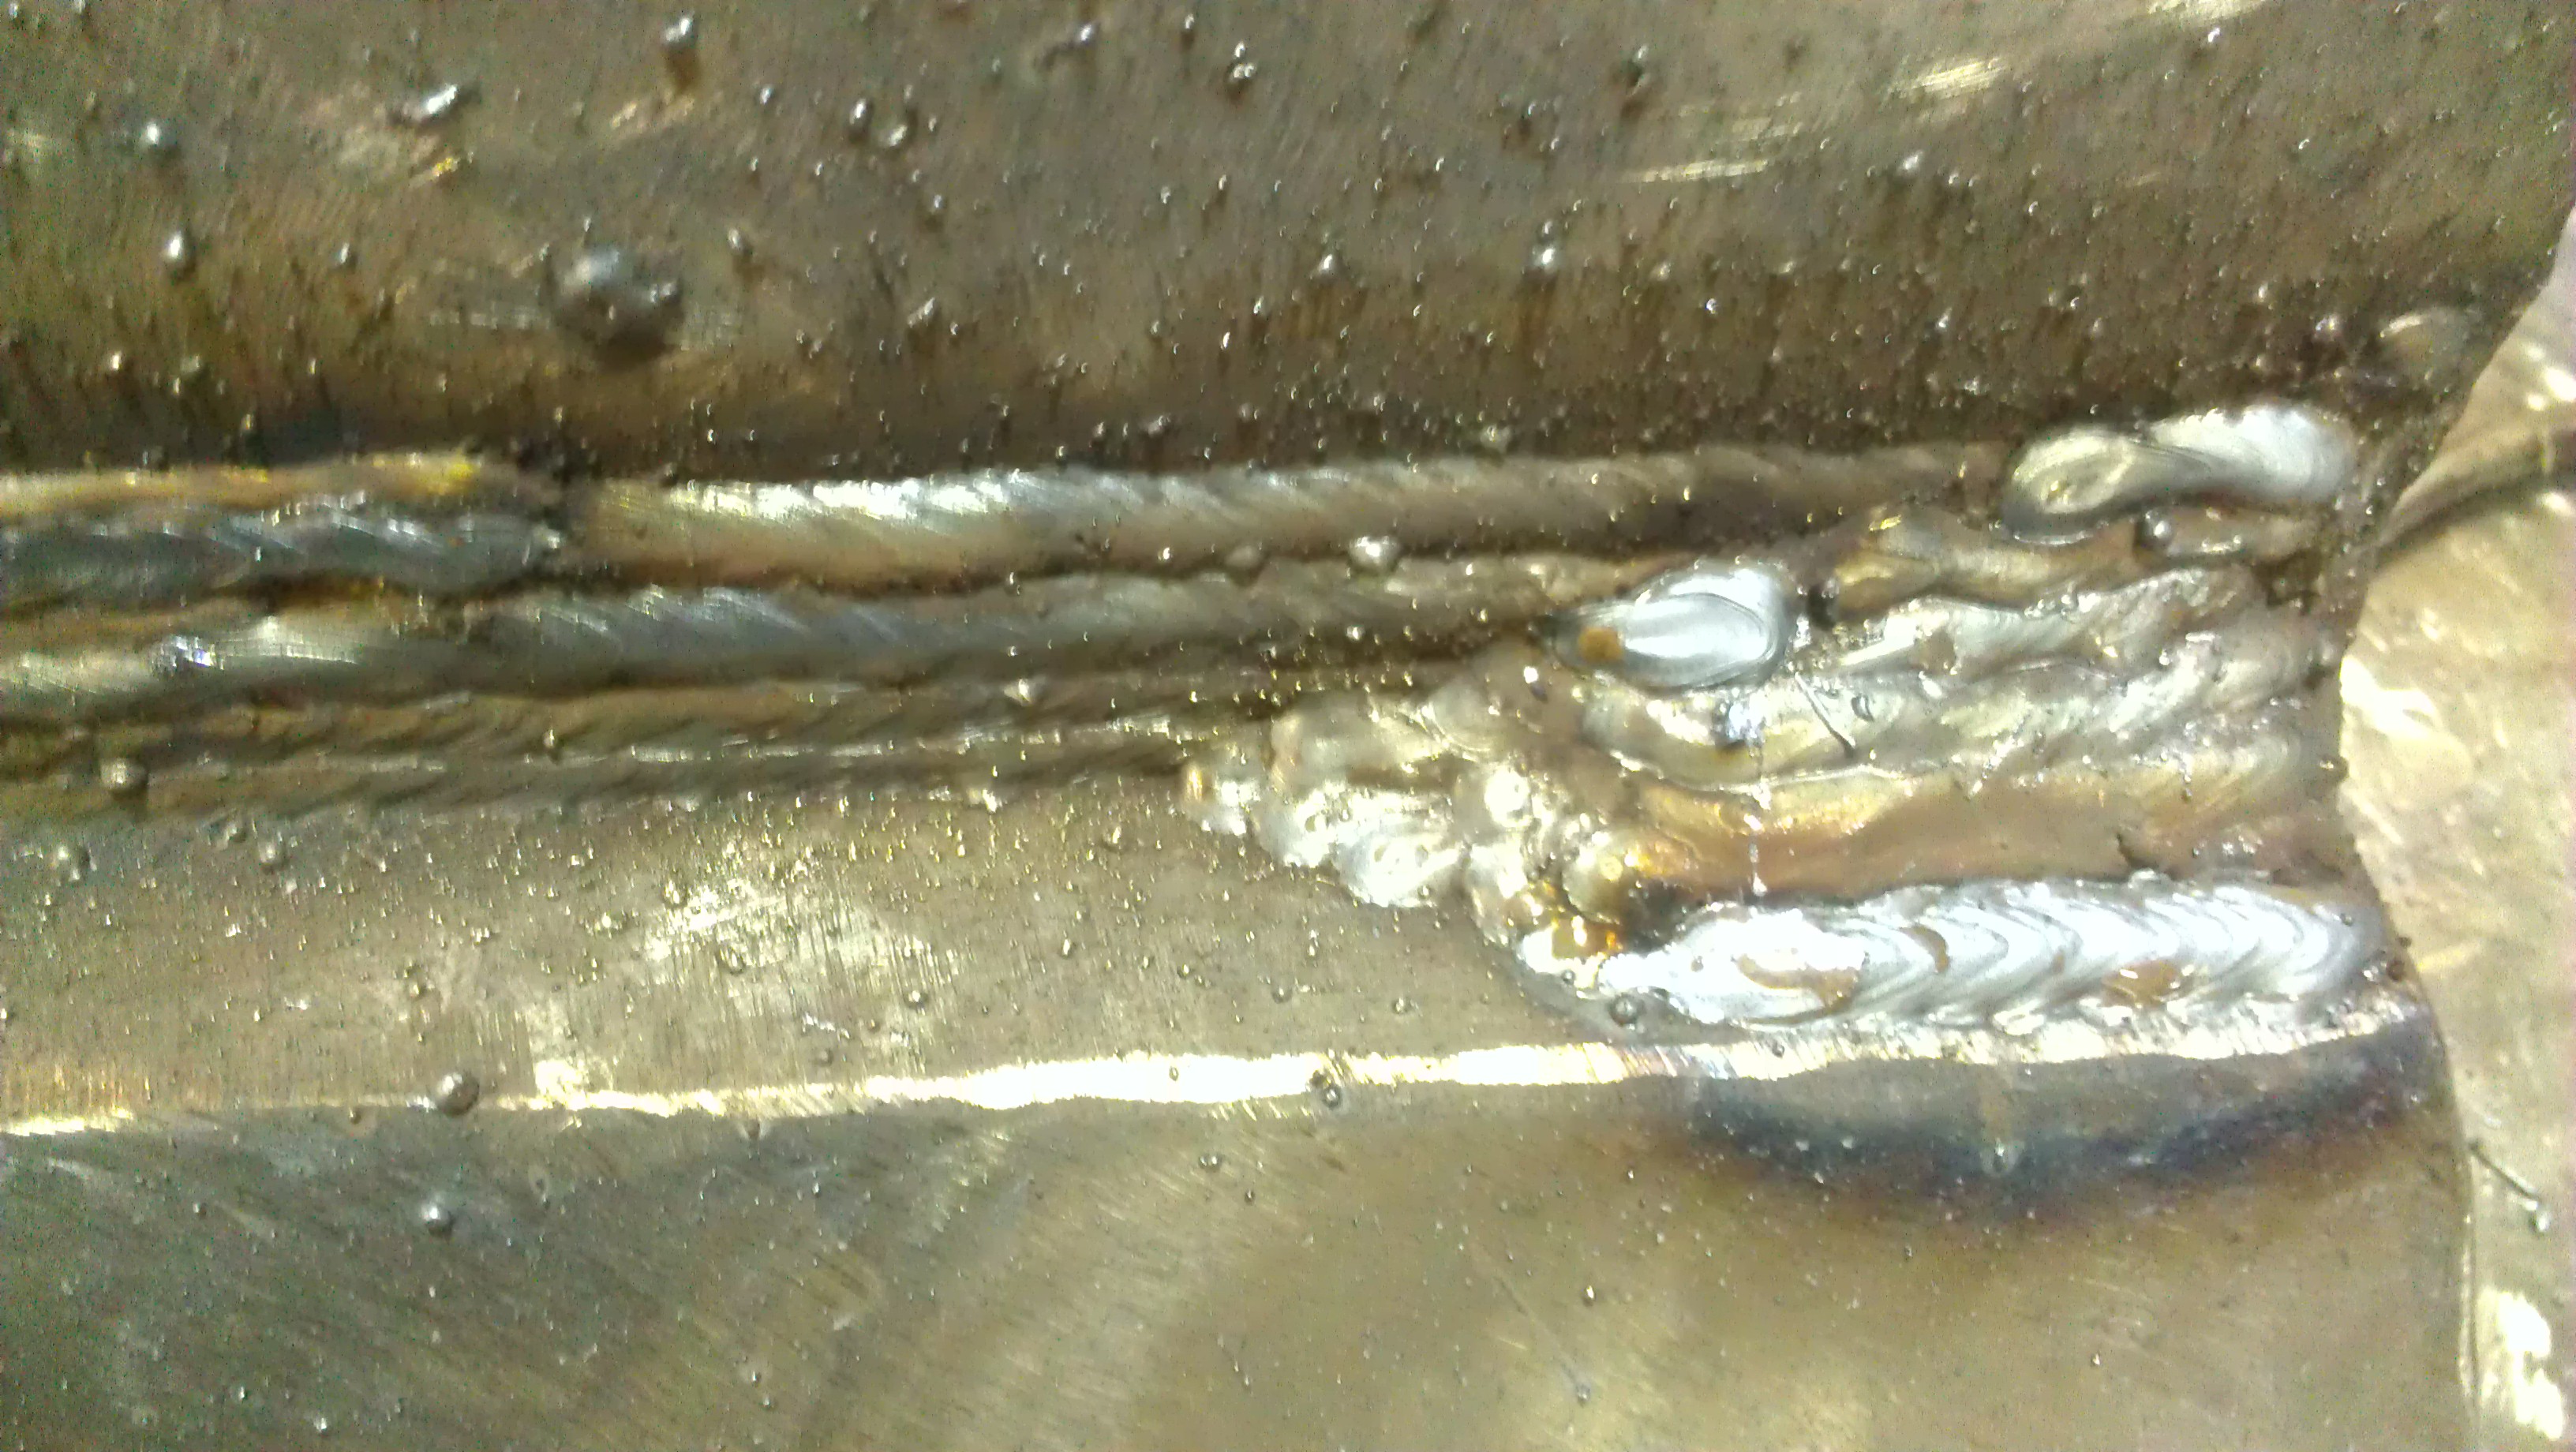
And after grinding. It is kind of hard to tell what it looks like, but the right portion is a smooth fillet which blends in concavely to the right angle of the left 3/4 of the upset block. It makes kind of a spoon shape.
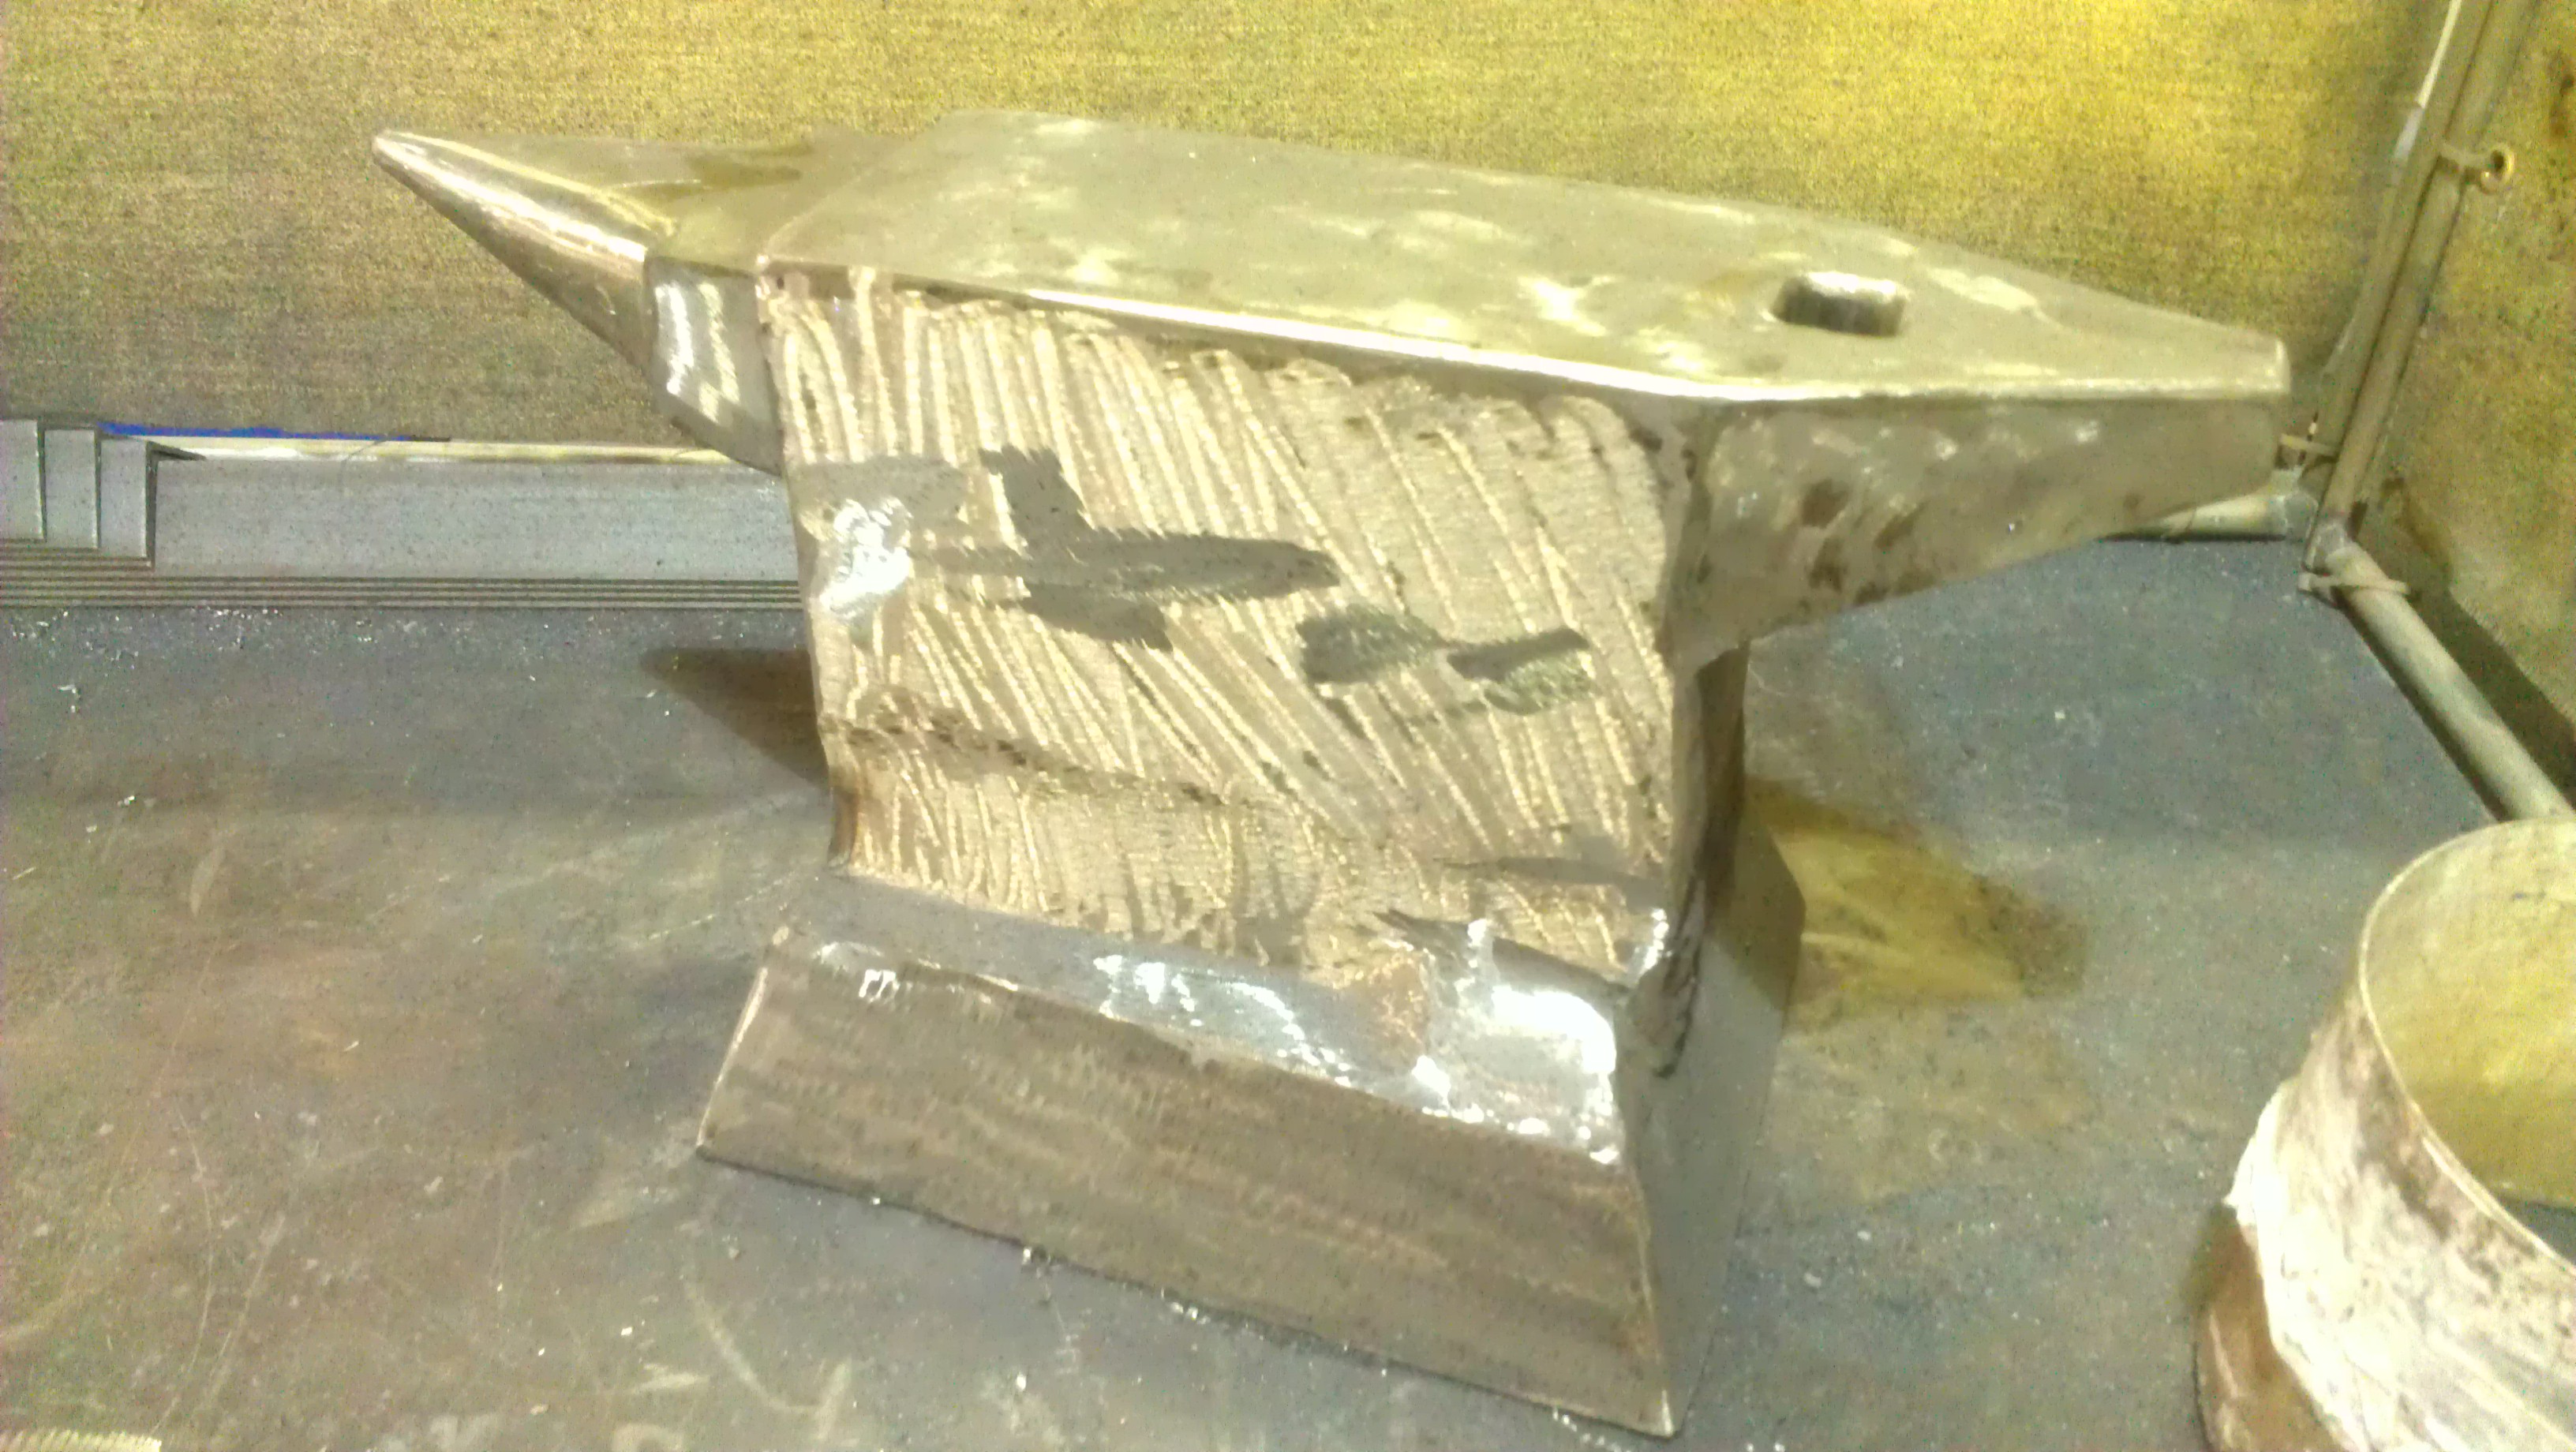
Next I'll finish grinding and polishing, then heat treatment and drill the pritchel hole (I'll explain on that post why I waited til the end). On that note, can anyone recommend one or two sizes of holes to drill if you had to pick?
-
You definitely have a lot of strong fabrication experience stromam. You'll probably find out, like most people do, that creating your own anvil is as expensive, if not more expensive, than buying a real anvil in the same weight category. That said, projects like these can really test and hone your skills. I kind of wonder how the ring is going to be since your first slab isn't very tall and now you have to build up slabs underneath. It's probably ultimately far easier to do a Brazeal style anvil http://www.iforgeiron.com/topic/12883-brazeal-anvil-rising-4-plate-anvil-with-pics/ as you don't have to weld blocks to each other. The steel itself is one large chunk on end. The brazeal anvil linked is 240LB block, but it's through bolted into a cartridge shape that really makes it one massive piece totally 377#. In the end, the brazeal style is probably far less work and if you want you can grind die forms/shapes into your 3" or 4" plate. You can also hardface the top like I did, though it's not terribly necessary. The advantage of the block sitting on end is the enormity of mass you gain directly underneath the face of the hammer. For all intensive purposes, hammering on the brazeal anvil is like hammering on my Nimba Gladiator. They both have the same amount of mass seen underneath each hammer blow.
Welding that hardy hole in.. what an impressive feat. I'm way to lazy for that, I would have just welded it to the outside lol but you sure did a beautiful job on it. Can't wait to see how you like. If your this persistent you'll probably have several anvils, like me. Some you built and some you bought. Some you like more and some you like less. When you get to making a stand, give me a nudge. I've got a few links on here that I think you might really want to see. Basically some of the best ideas from some of the best posters on shape, design, build, etc. of Anvil stands.
I had ZERO fabricating experience before I started this project, but I am surrounded by about 100 years of fabricating experience in our maintenance department. You guys gave me the ideas, they taught me the skills to get it done.
The brazeal would have been much easier, but that wasn't what I was going for. I wanted something that would provide me with lots of experience and give me a "show piece" I guess if you want to call it that.
I am currently planning on mounting it to a stump. I was actually thinking about just trying to liquid nails it. I think it will work since the underside of the base is very rough from grinding and there will be such a large surface area. I think it would make for a very cool look too. If it works I hope to get a lot of "how the heck is that thing attached?" I do plan on planing/routing the top of the stump (something I saw in another stump forum), but I'm gonna add my own twist. I plan on routing 3 "legs" on the stump with one of the holes on the near side of the anvil cut deep enough to get my foot underneath it so I can stand close to my work if I need to.
I'll post pictures of the stump build in another forum thread.
-
That's beautiful work!
Separating the two pieces with the 1" stock to get a full penetration weld is exactly what I was trying to describe when I recommended welding a forklift tine to the face. The only difference would have been to use a thinner separator.
Can't wait to see it finished and getting a workout!
Thanks! I figured it out eventually, the reason I used a 1" square bar was to add some height and weight, I'm going to do the same when I weld it to the base section, which should get me well over the 200 lb mark.
-
This post shows where I stand today. Hope to finish up the welding this week and take a day or so next week to polish everything up.
Here is the second layer of hardfacing (forgot to take a picture of the first). The first layer was done perpendicular to the horn, not sure why i did the second layer at an angle, it just seemed to make sense (but was way more difficult, as you can see the lines are not straight).
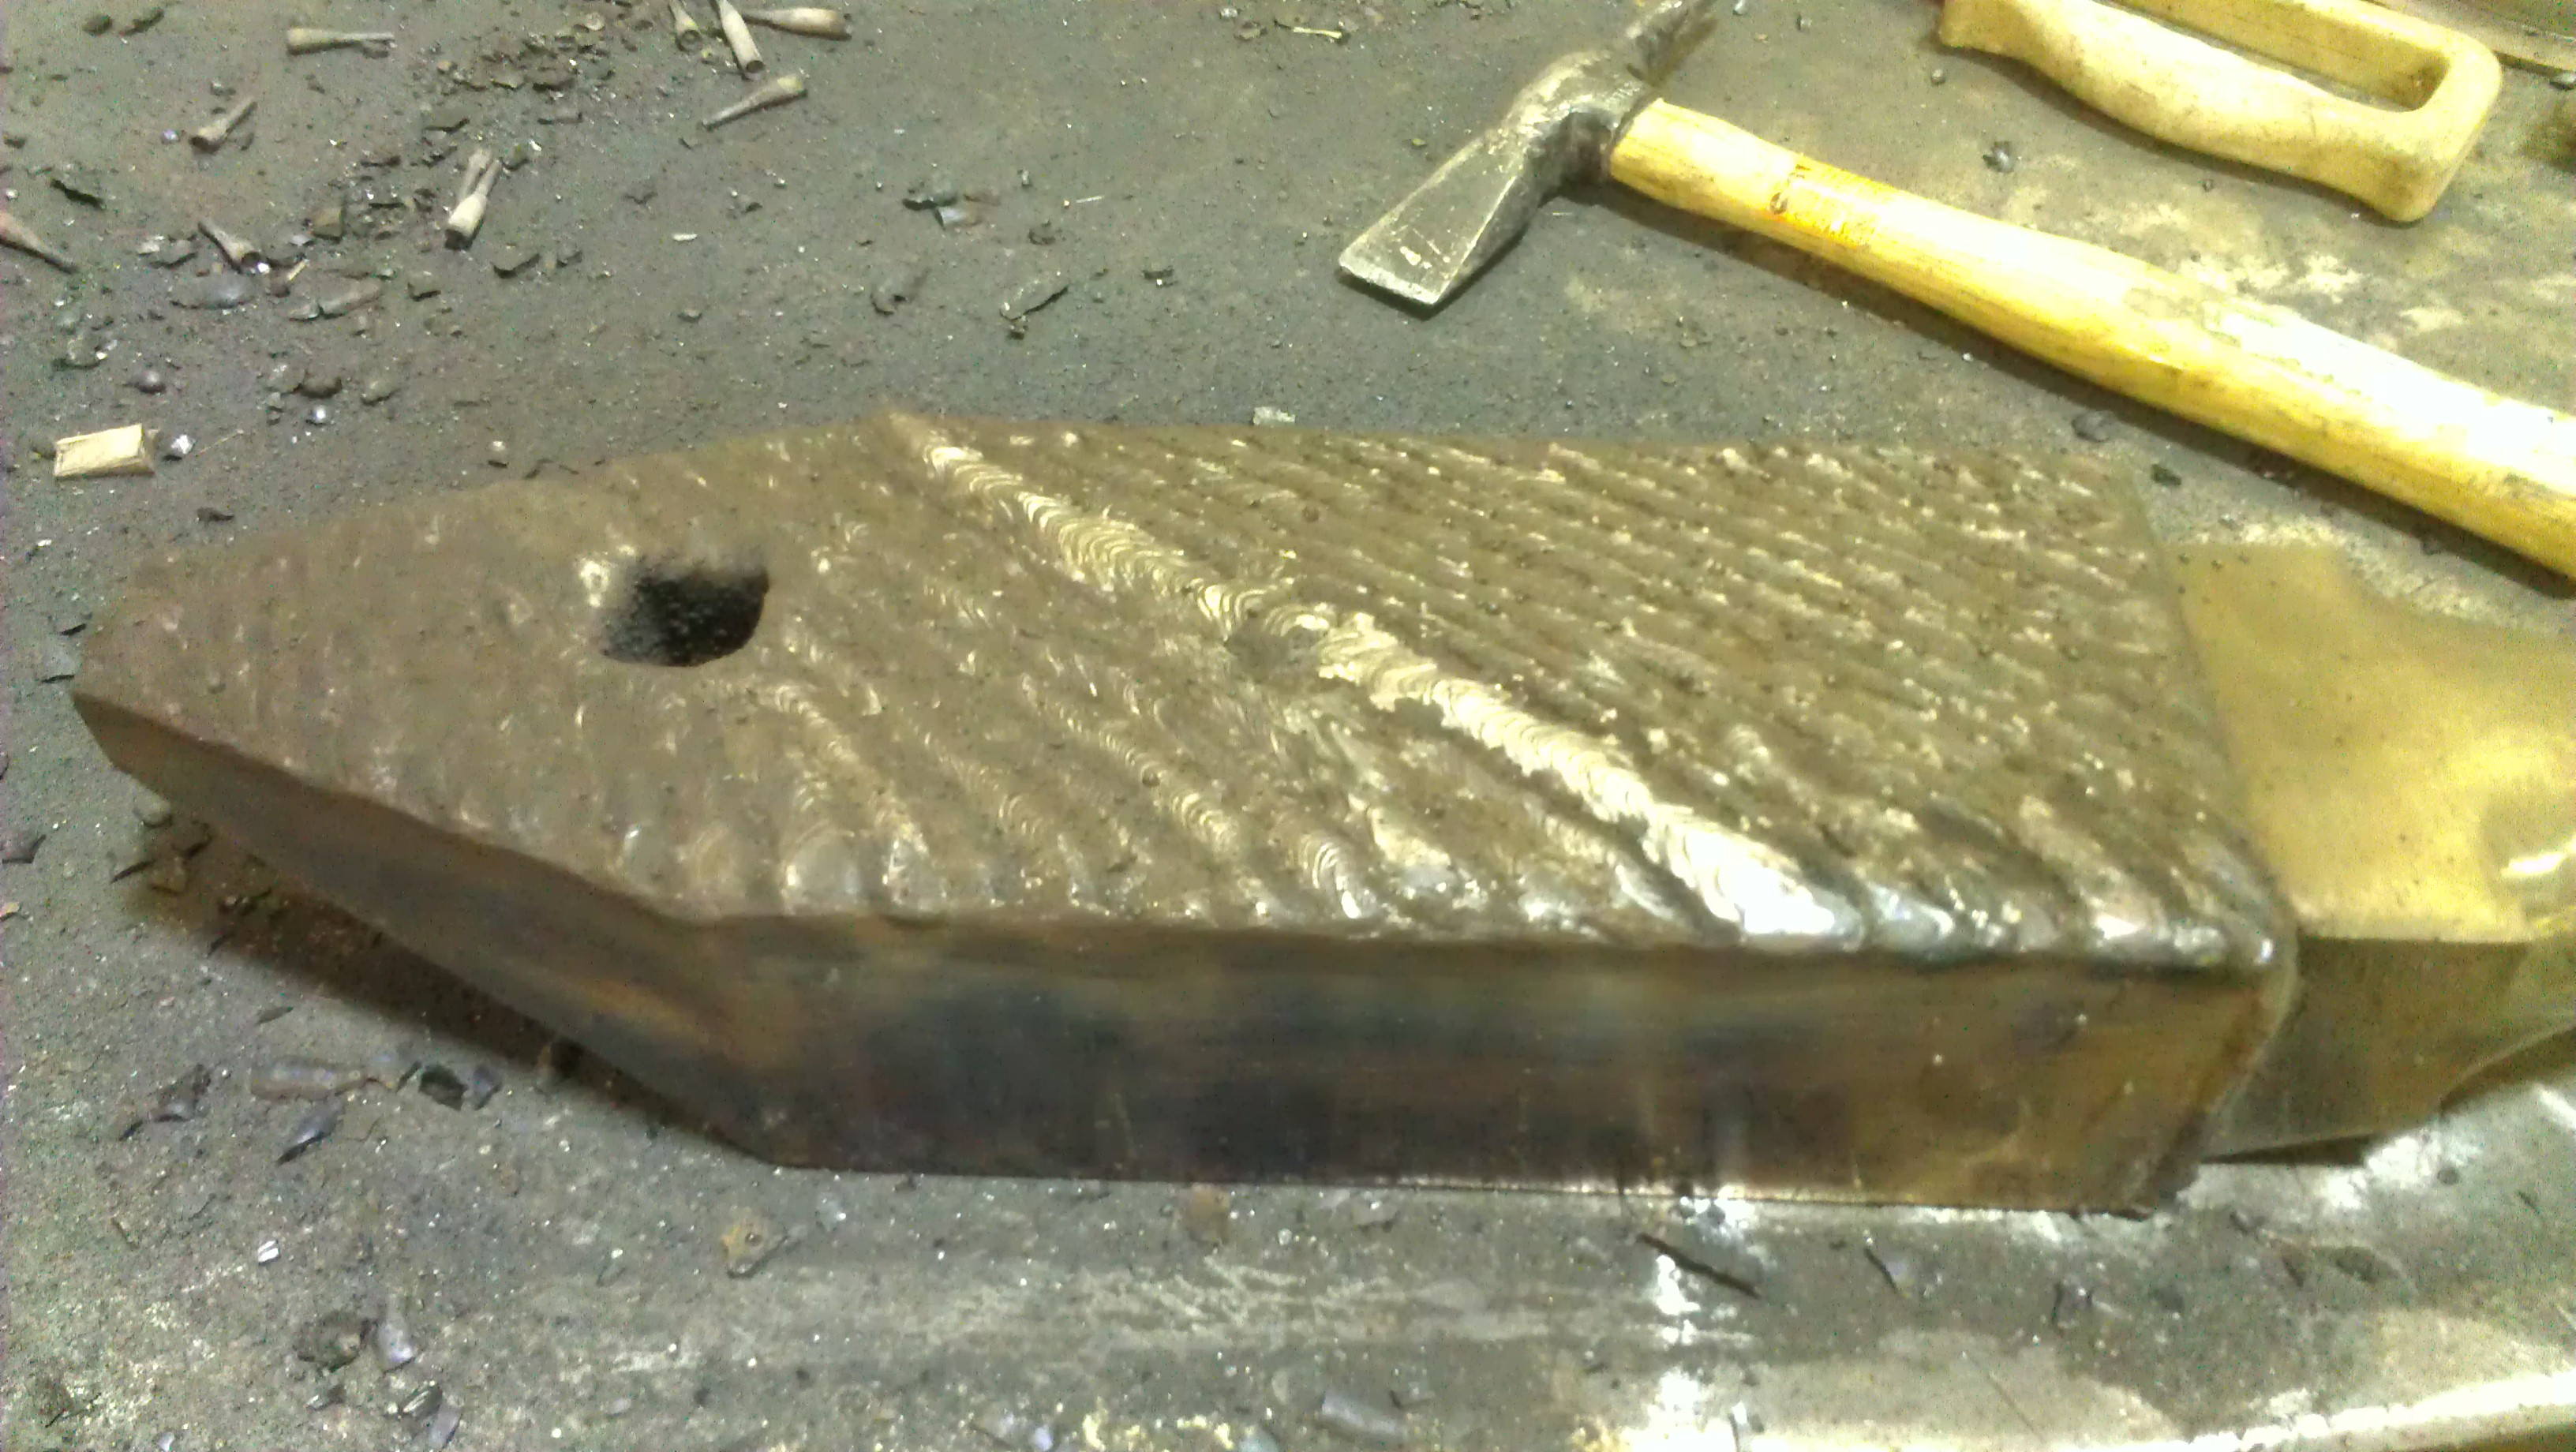
The hardfacing was nasty to weld. I'm glad I was wearing a full NIOSH P100 respirator, because the fumes were absolutely awful. This was the manganese hardfacing, Lincoln Electric 15CrMn for 15% Chromium, 15% Manganese. On the bright side it was very easy to grind down, not much more difficult than mild steel.
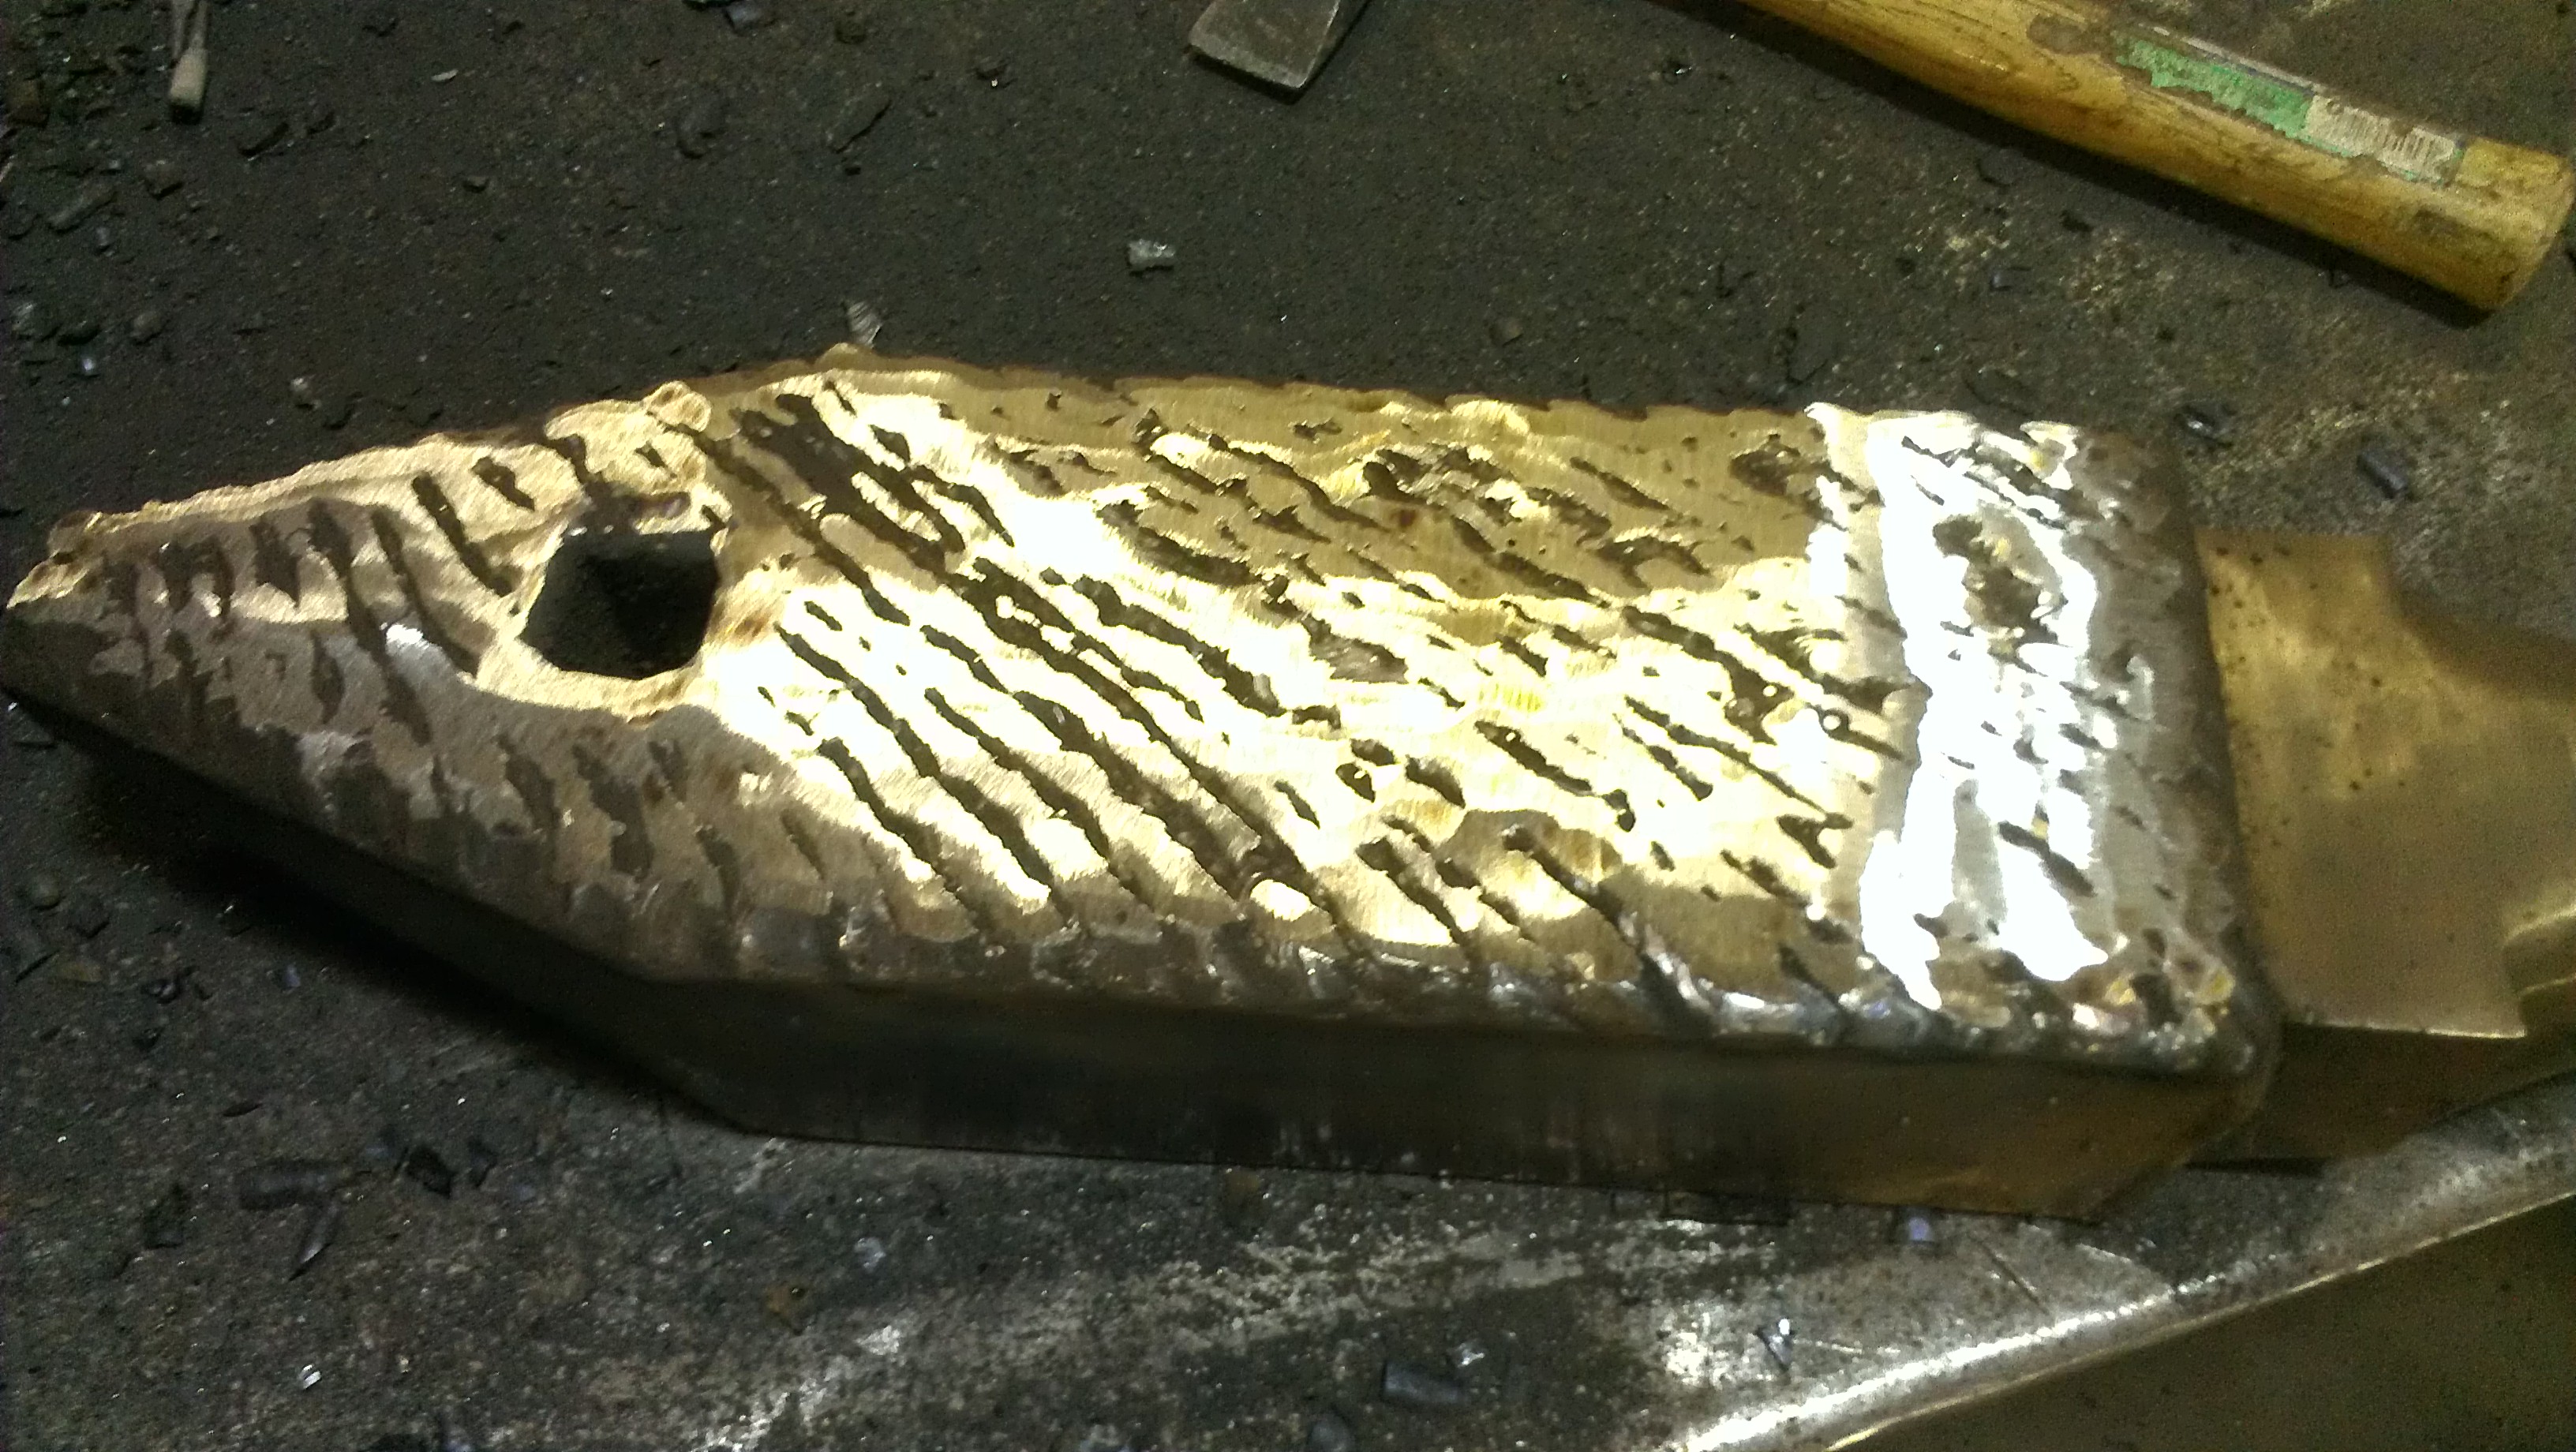
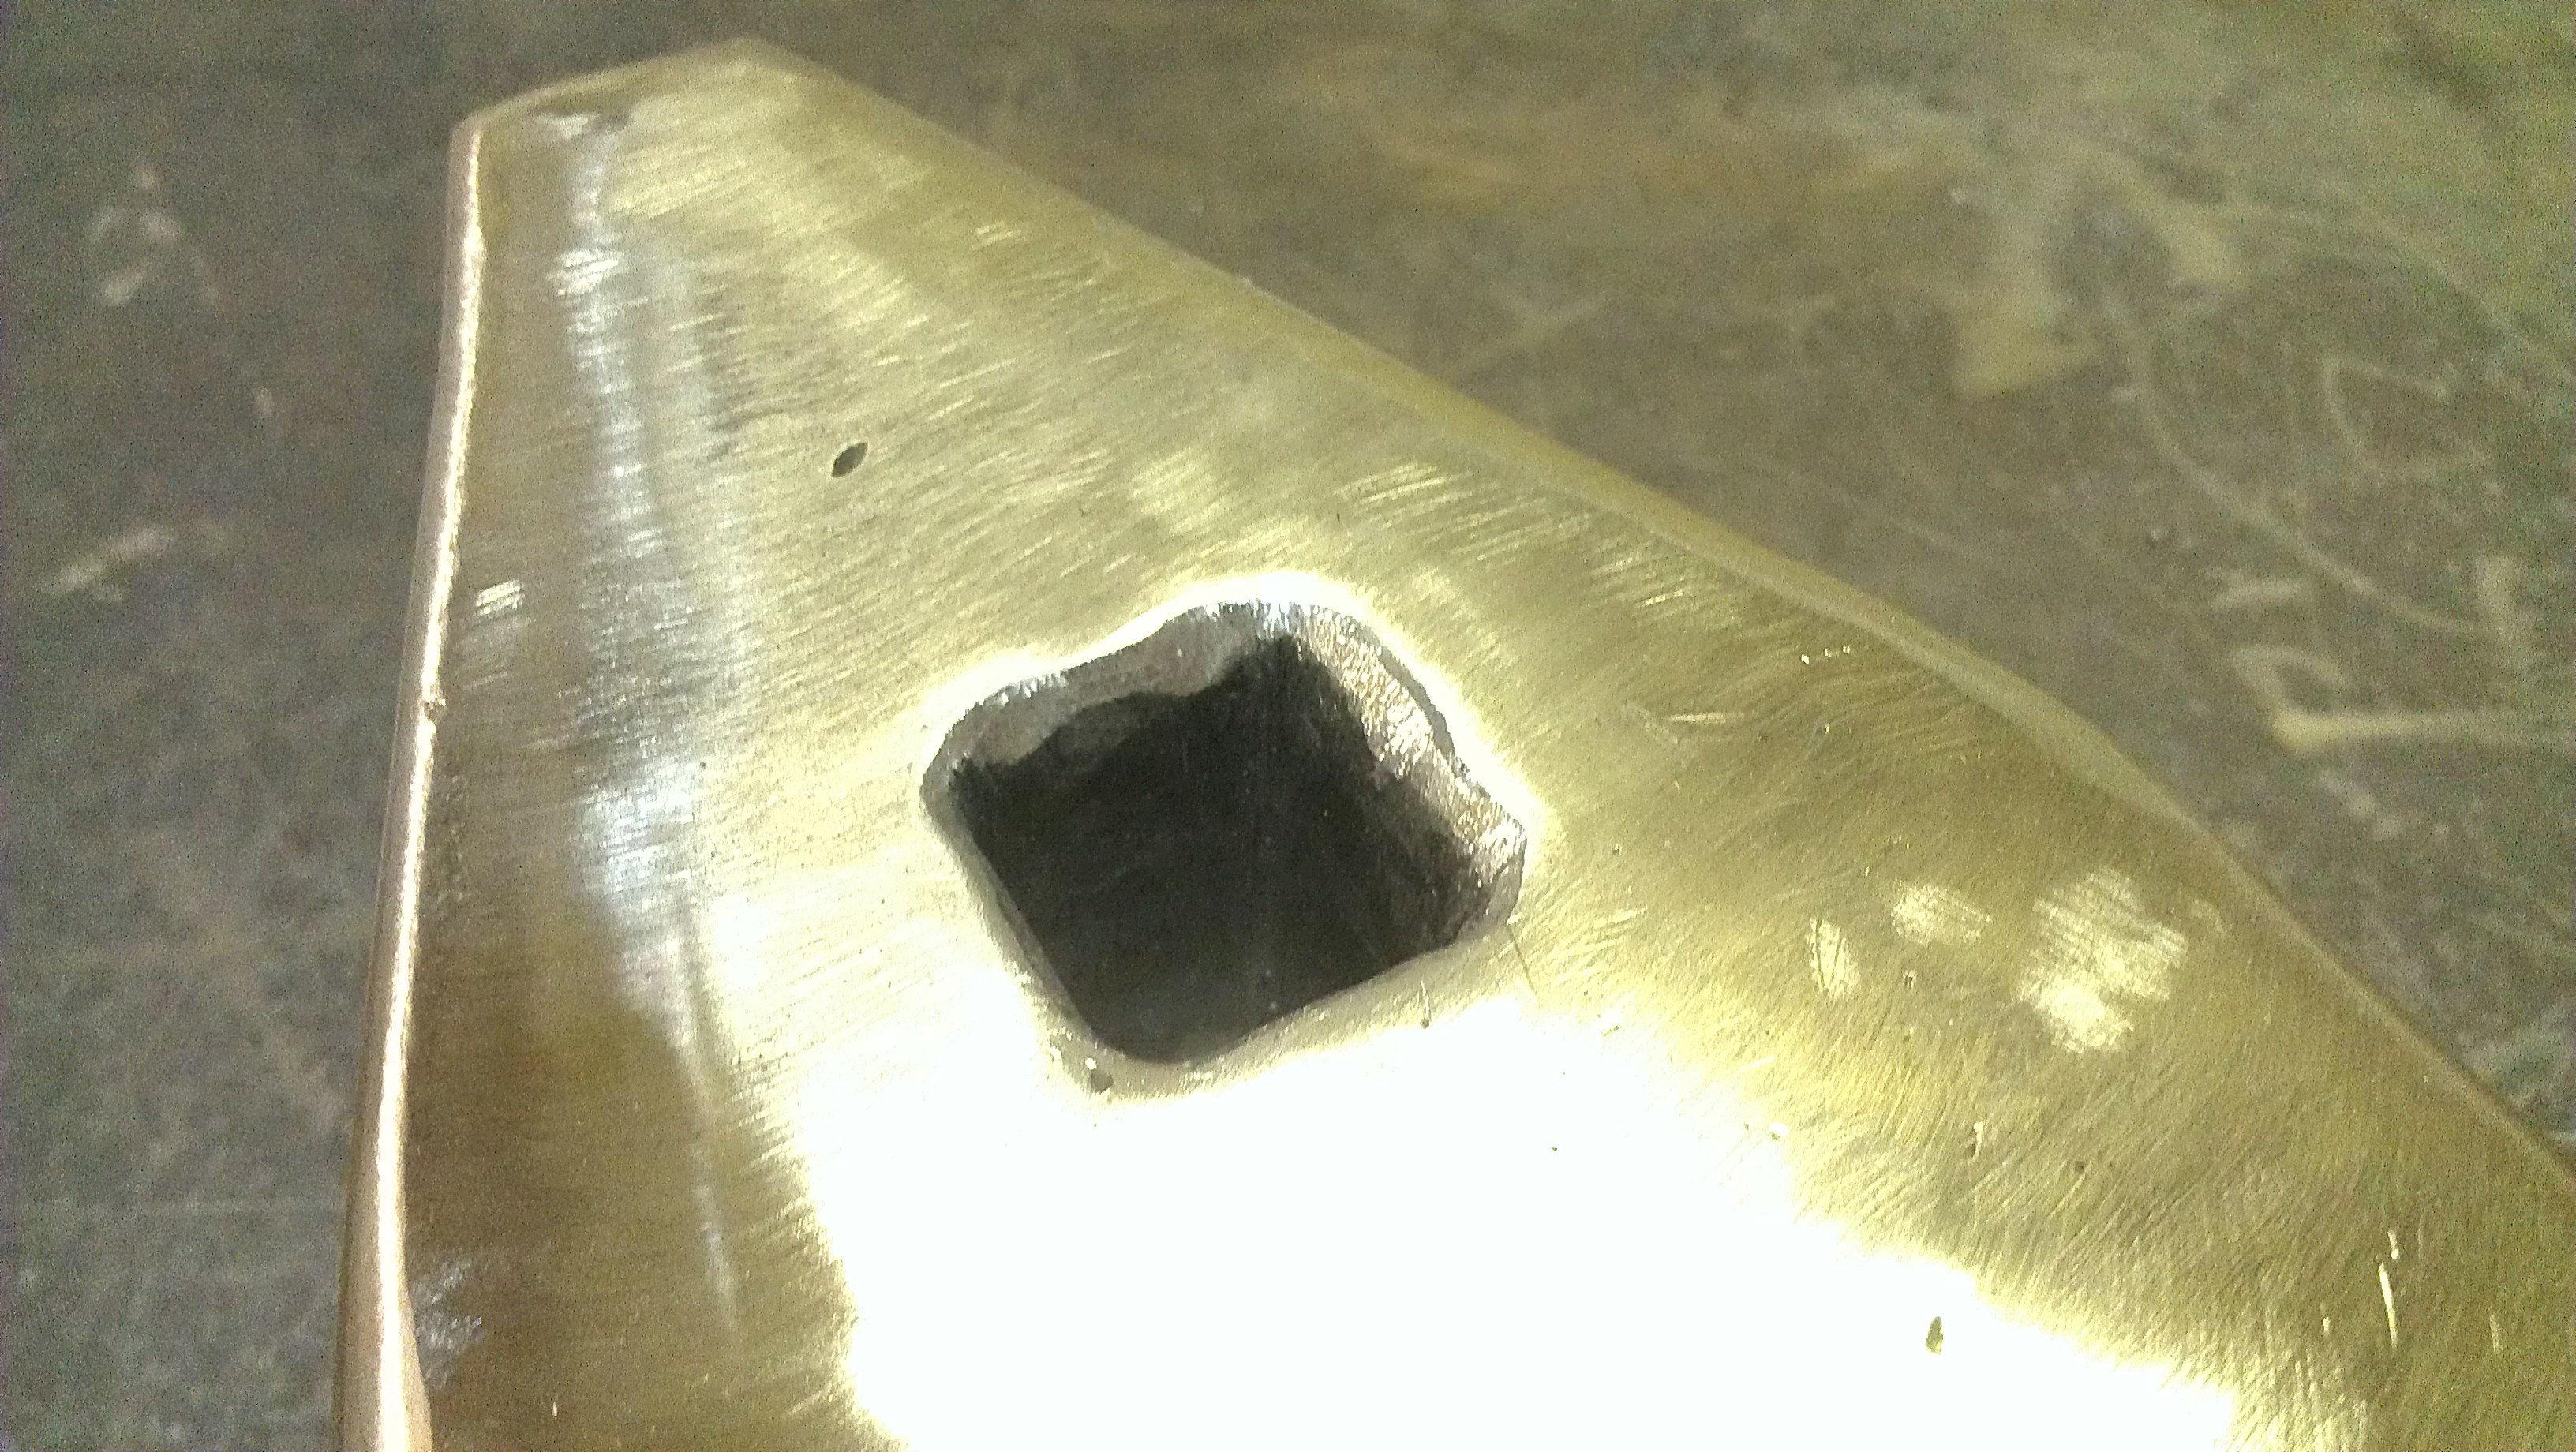
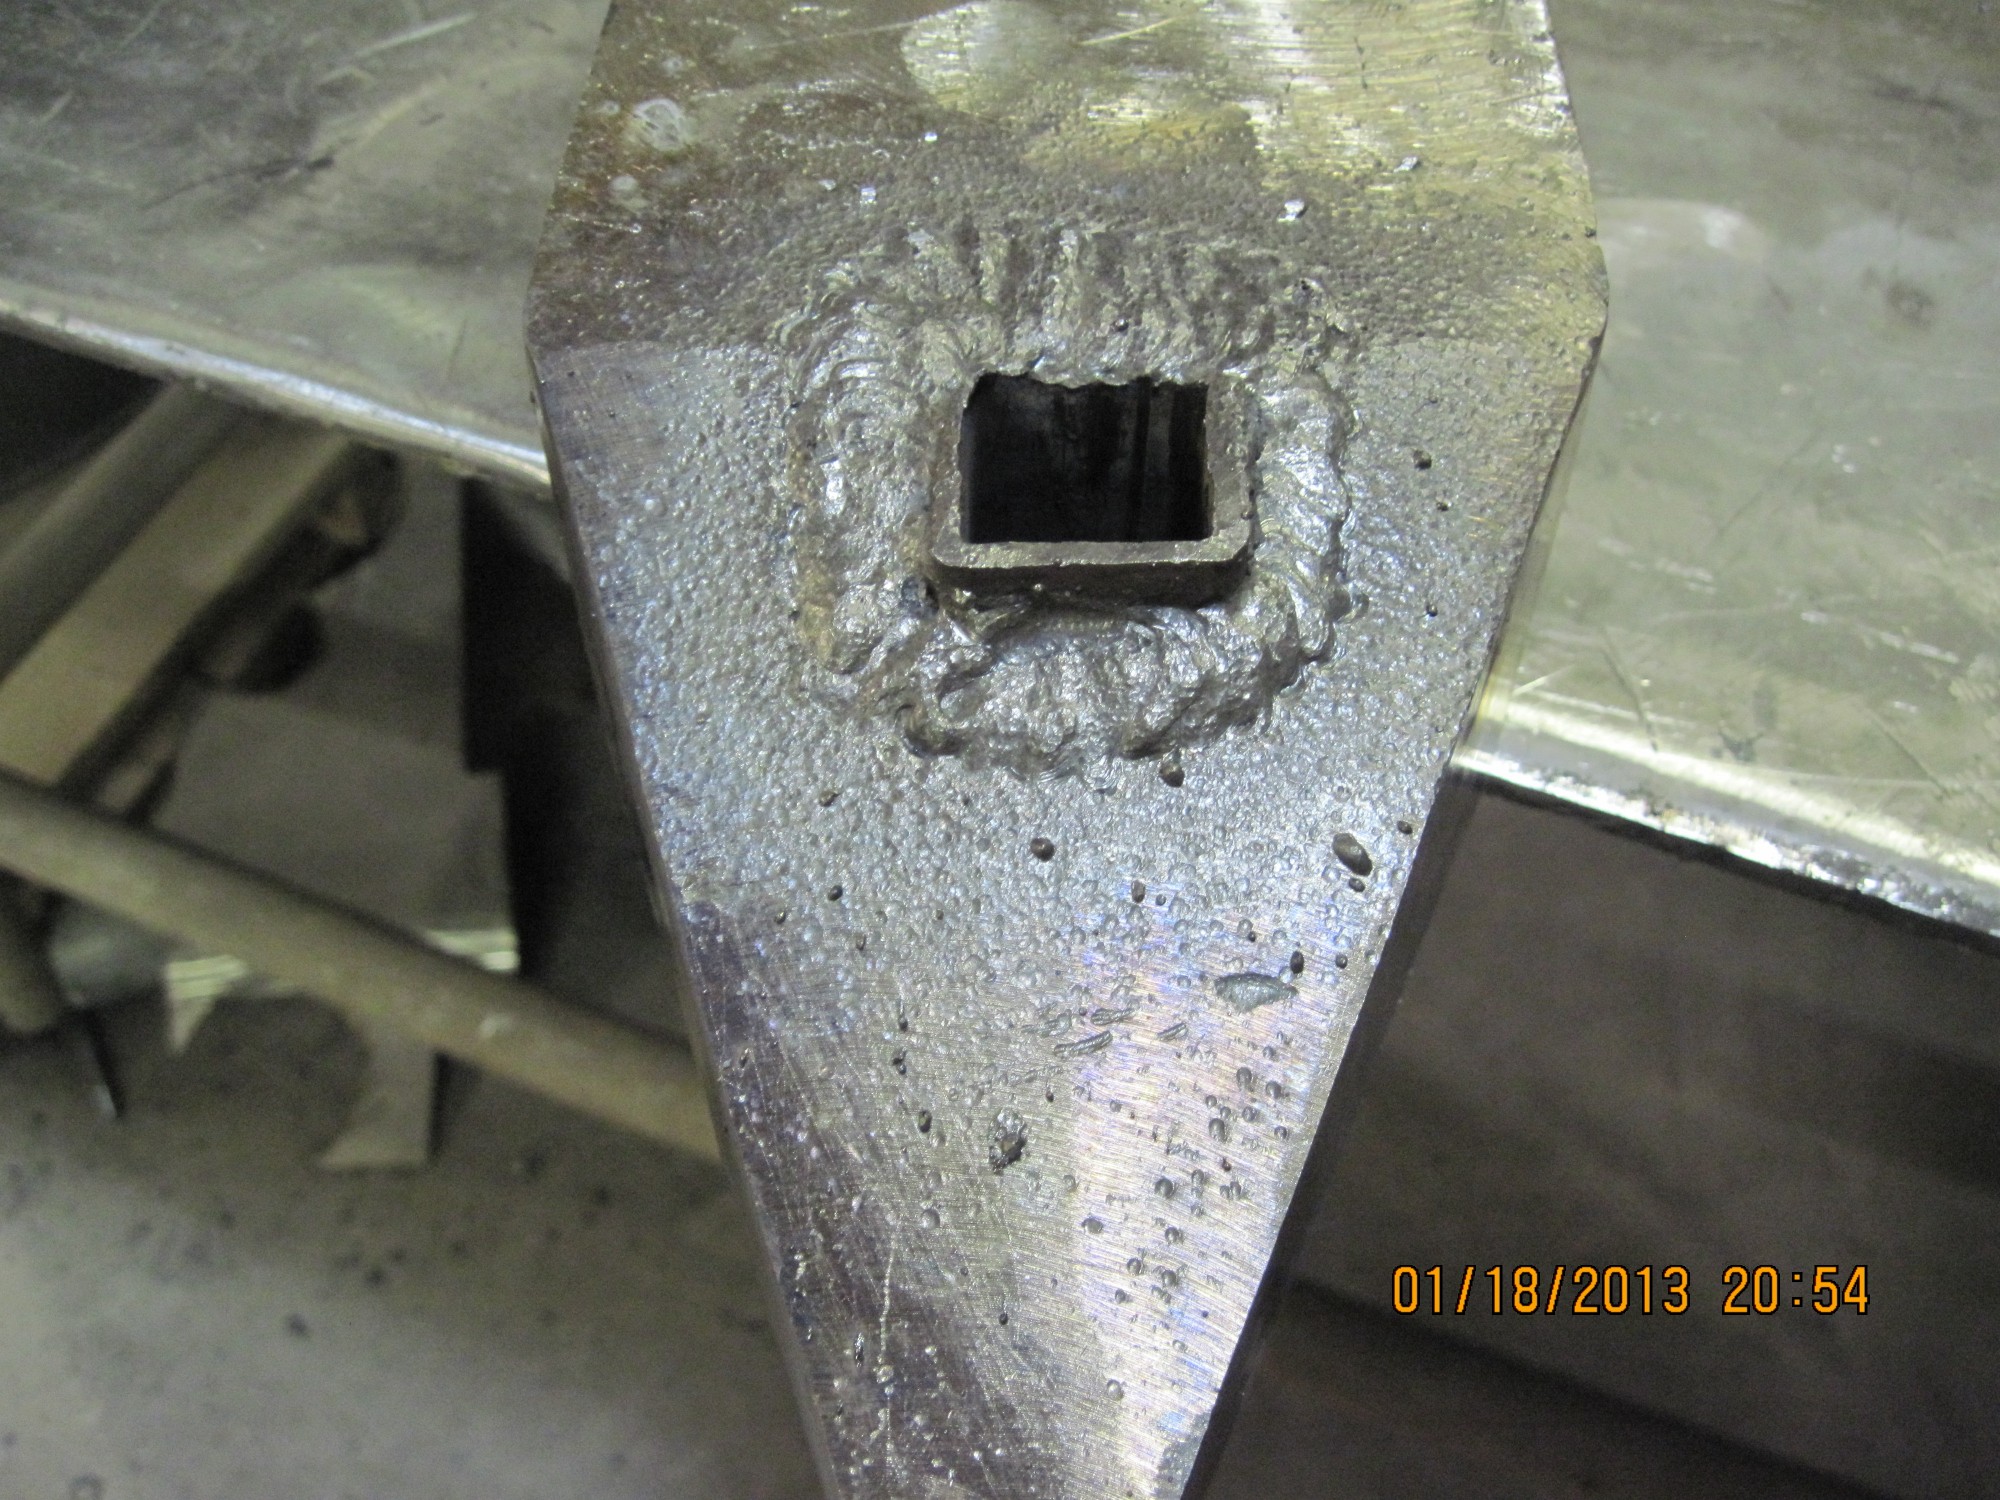
But there was a LOT to remove since my welding skills still needed some improvement. Looking back I think the problem I had was going too fast, the welds build up in little mounds. Here you can see the final polishing revealing the finished hardy hole. I had to clean the inside of the hole out a bit with a hand file and round the corners a bit. A 1" square bar fits inside very nicely.
Here I have it tack welded on the middle section with a 1" square bar running down the length (next picture). You can see there are still some pits in the surface, but by the time I got it ground down this far the face started work hardening quite a bit so I decided to call it good enough.
And finally here you can see how I am doing the full penetration weld. I am glad I decided to do this because it gave me plenty of time to practice my stick welding. Once I get it build up a little closer to the sides, I'm going to switch to MIG to finish it up. I originally tried MIG from the start, but the tip couldn't get close enough and i was getting terrible worm holes.
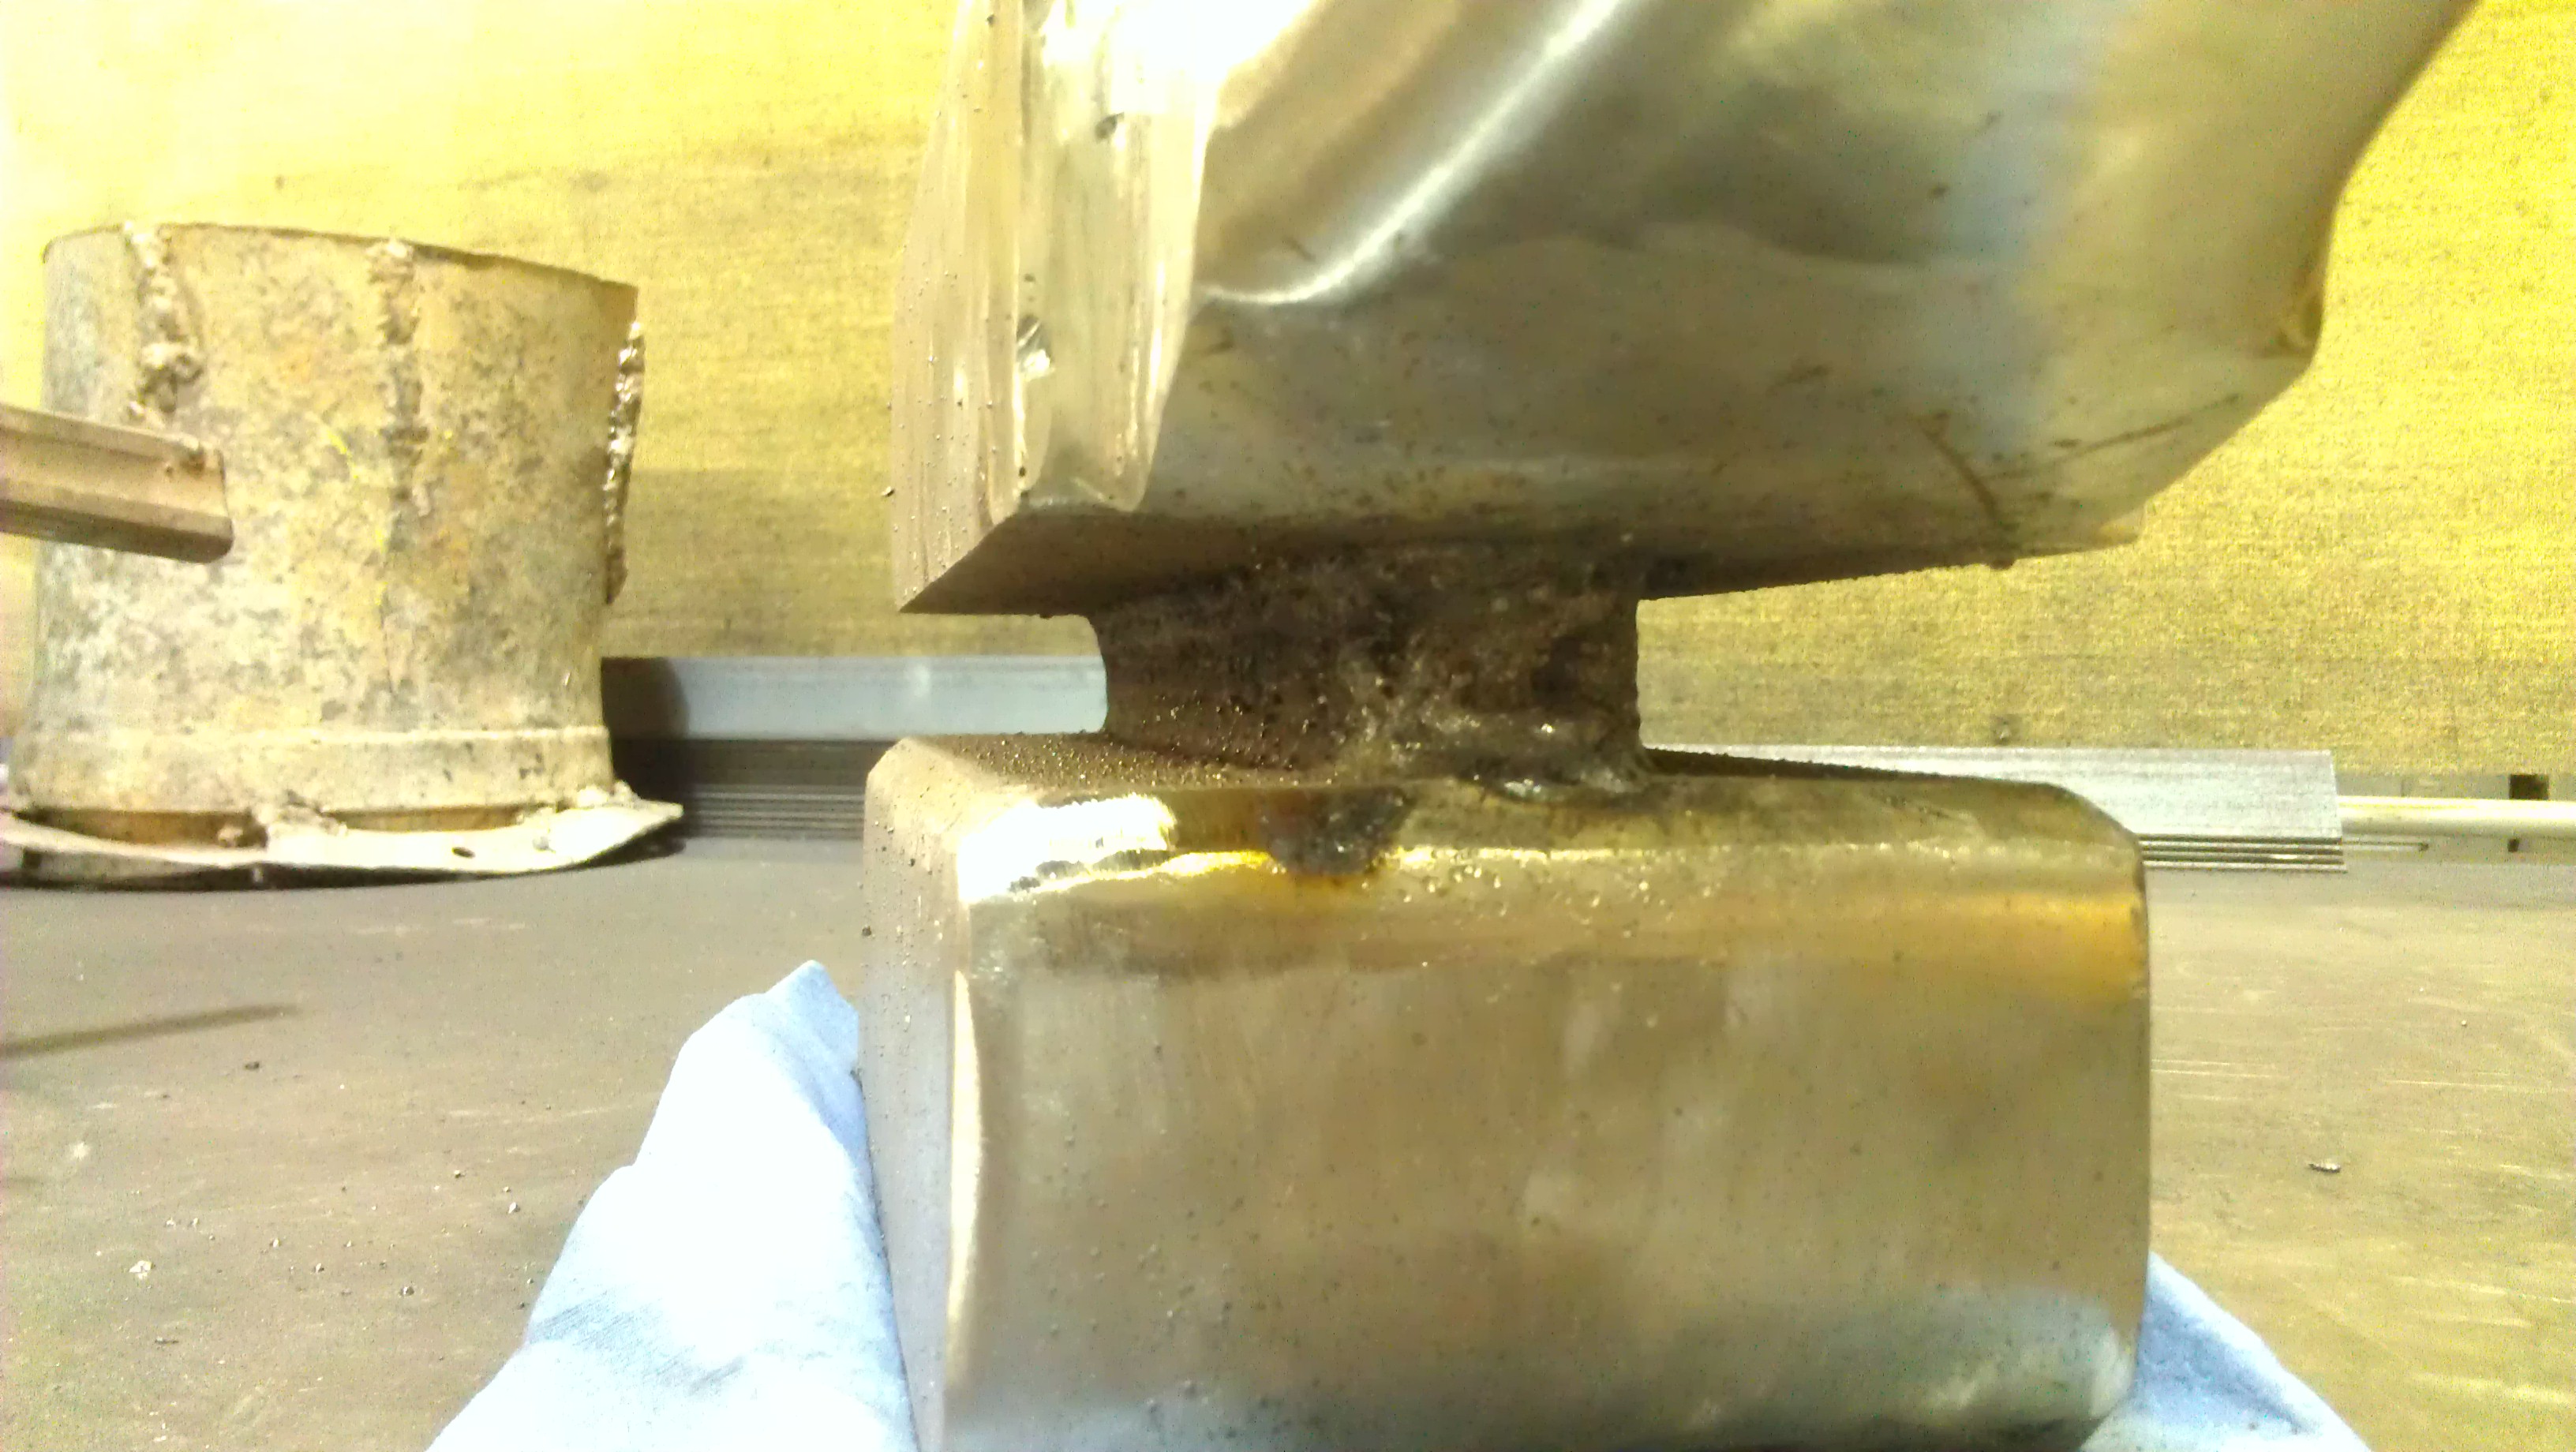
-
Alright finally some updates:
Here is the burnout widened up a bit to make welding easier.
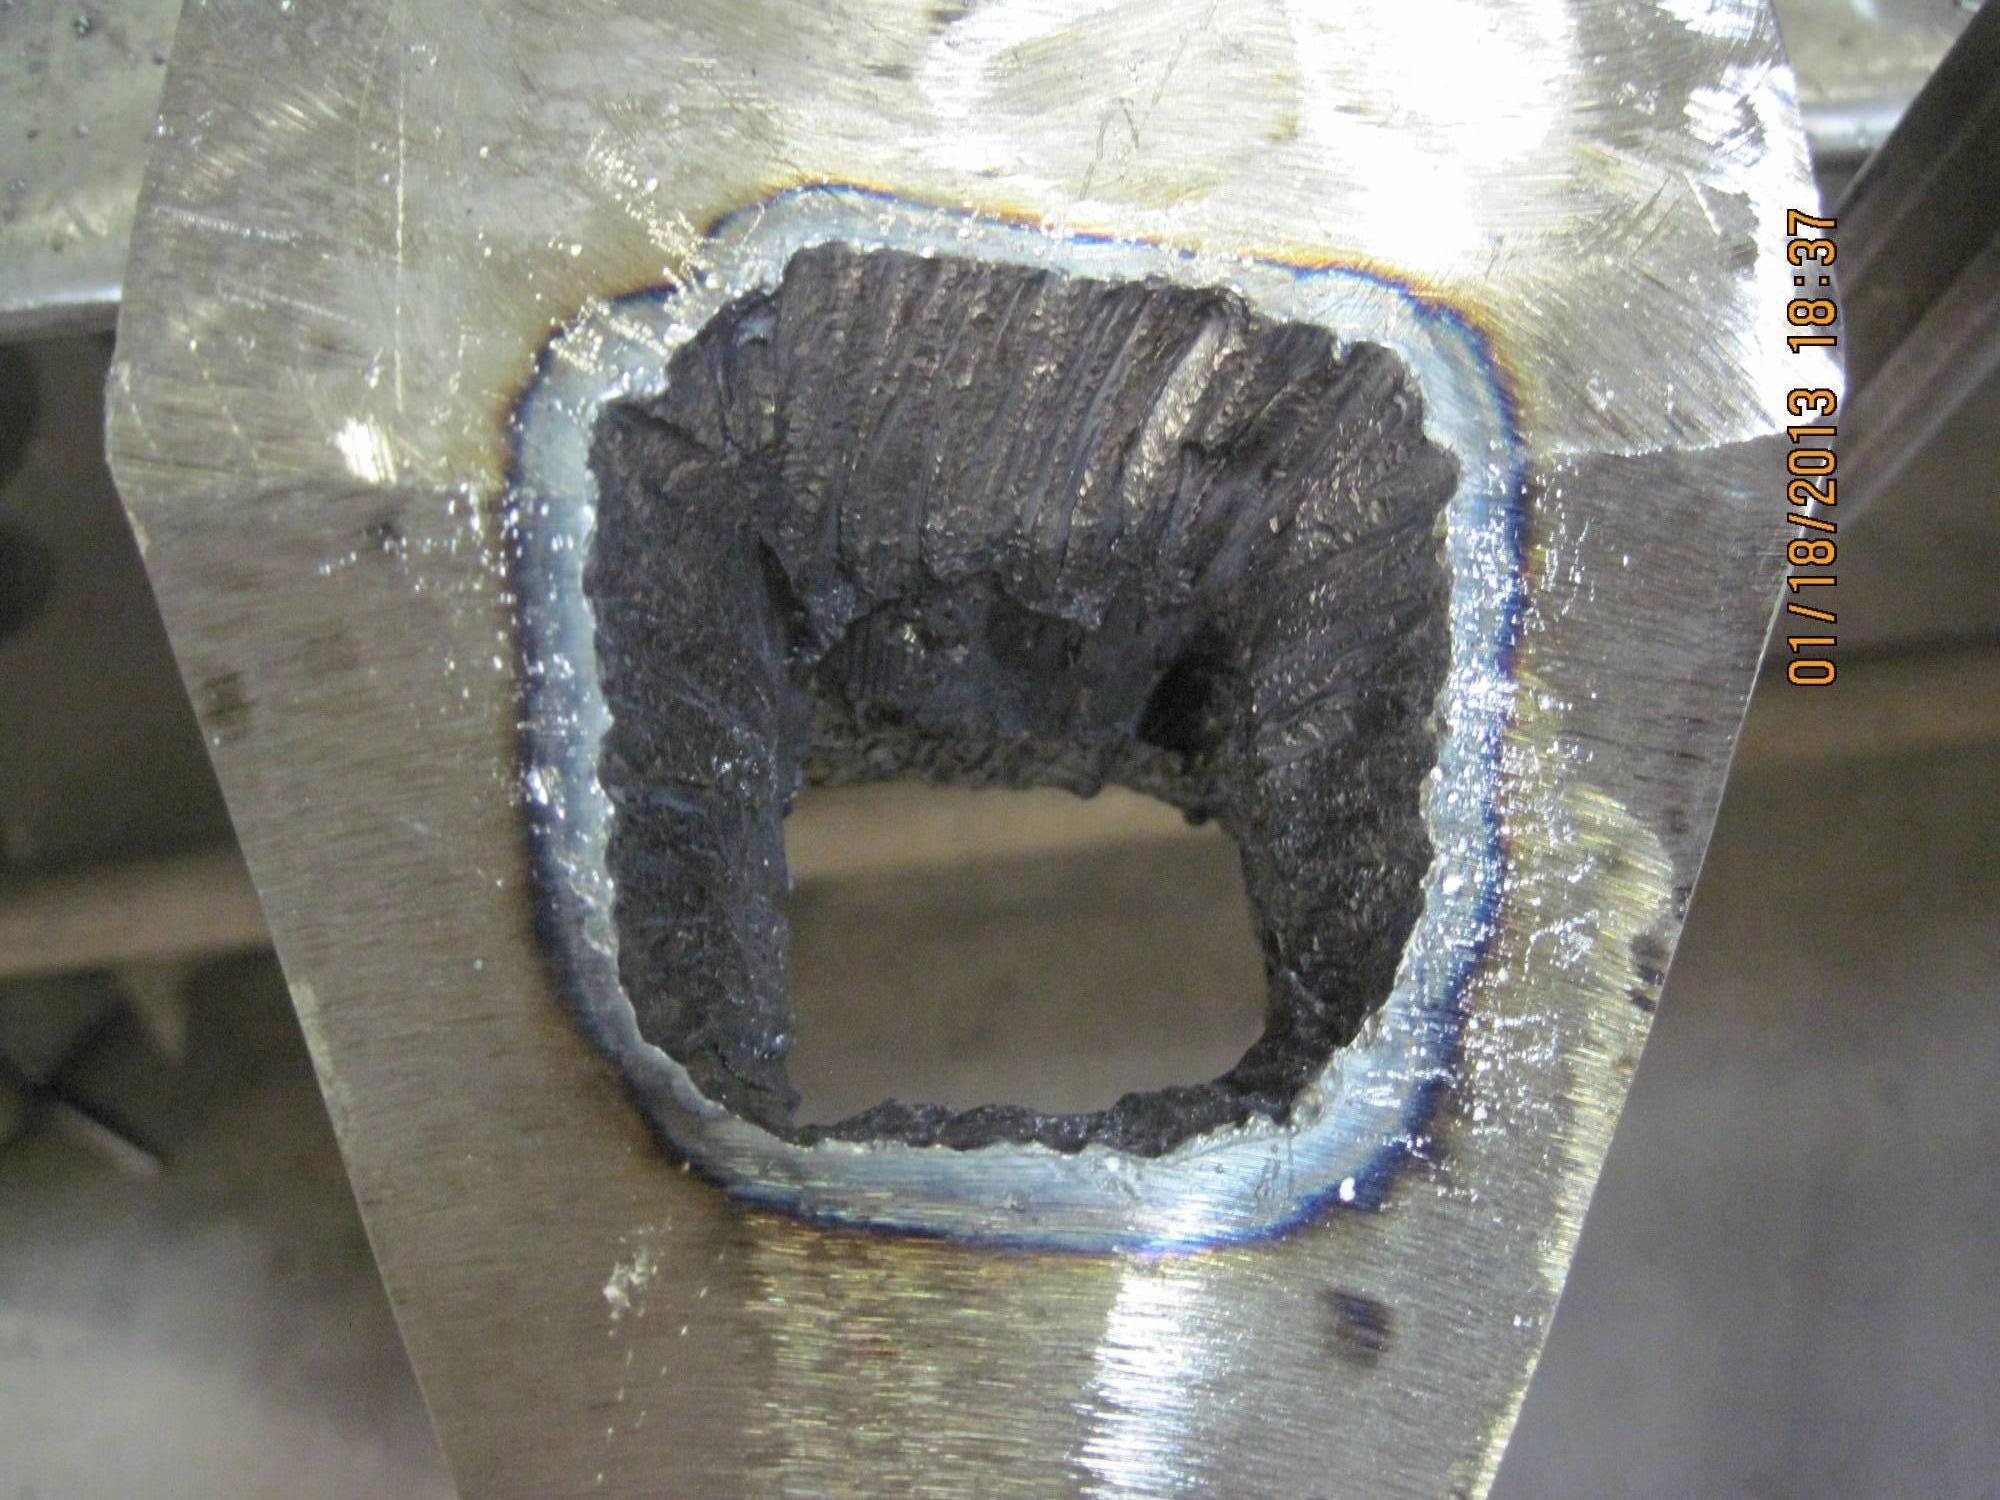
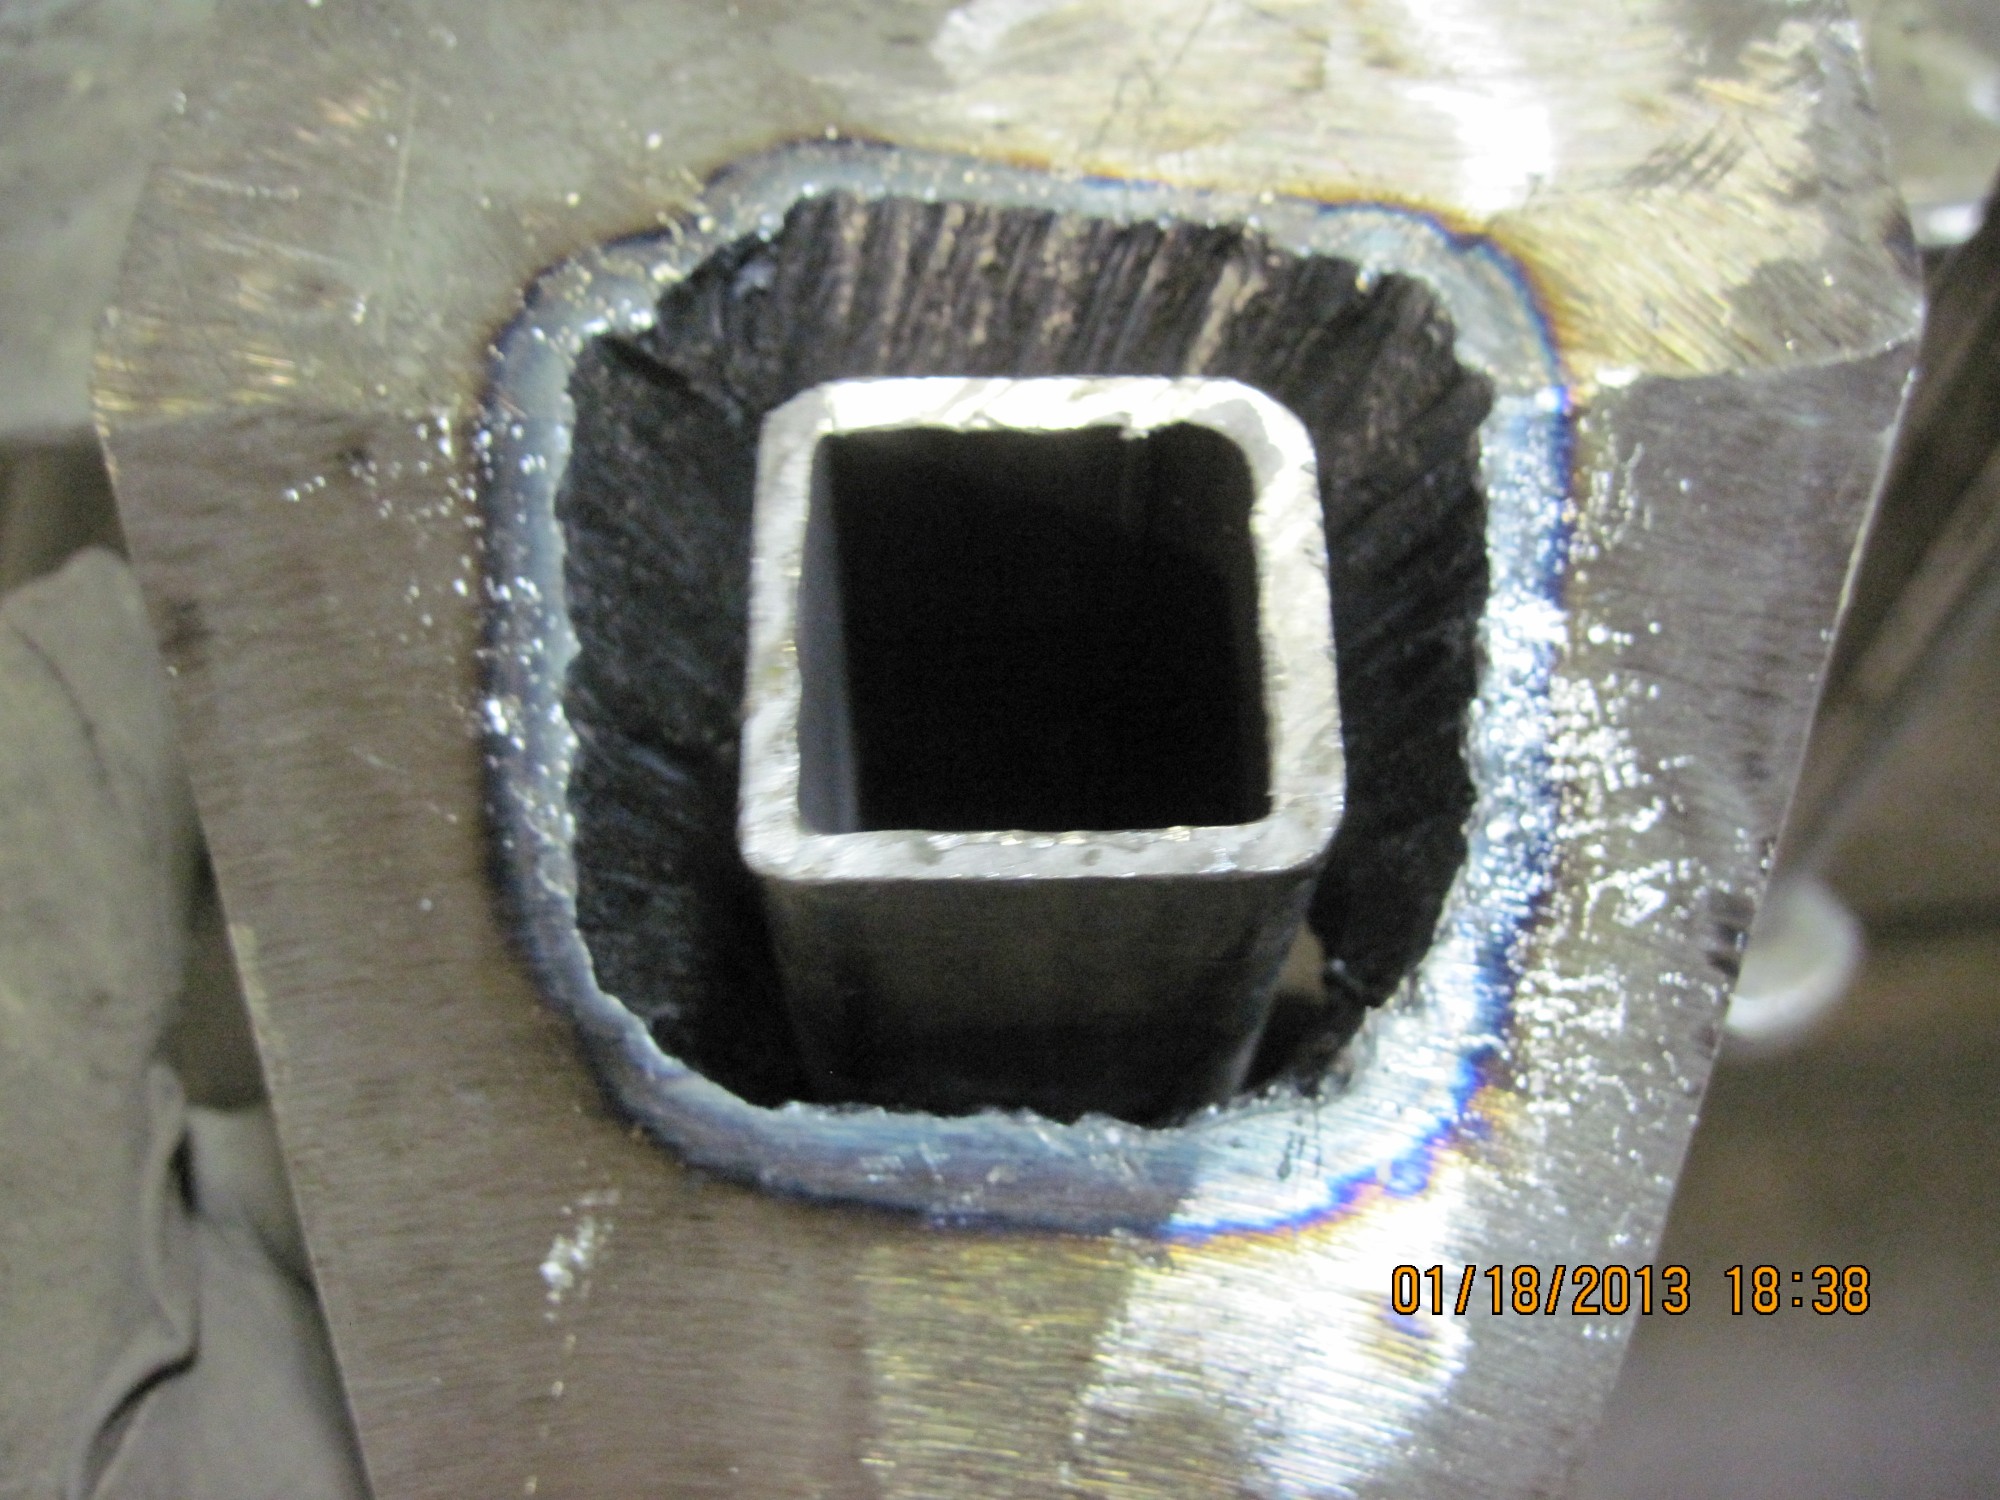
And with the 1-1/4" 1/8" wall square tubing mocked up.
The welding half done (did stick and there was A LOT of slag removal and flipping the piece). The slag removal was made much easier with the use of a pneumatic needle scaler.
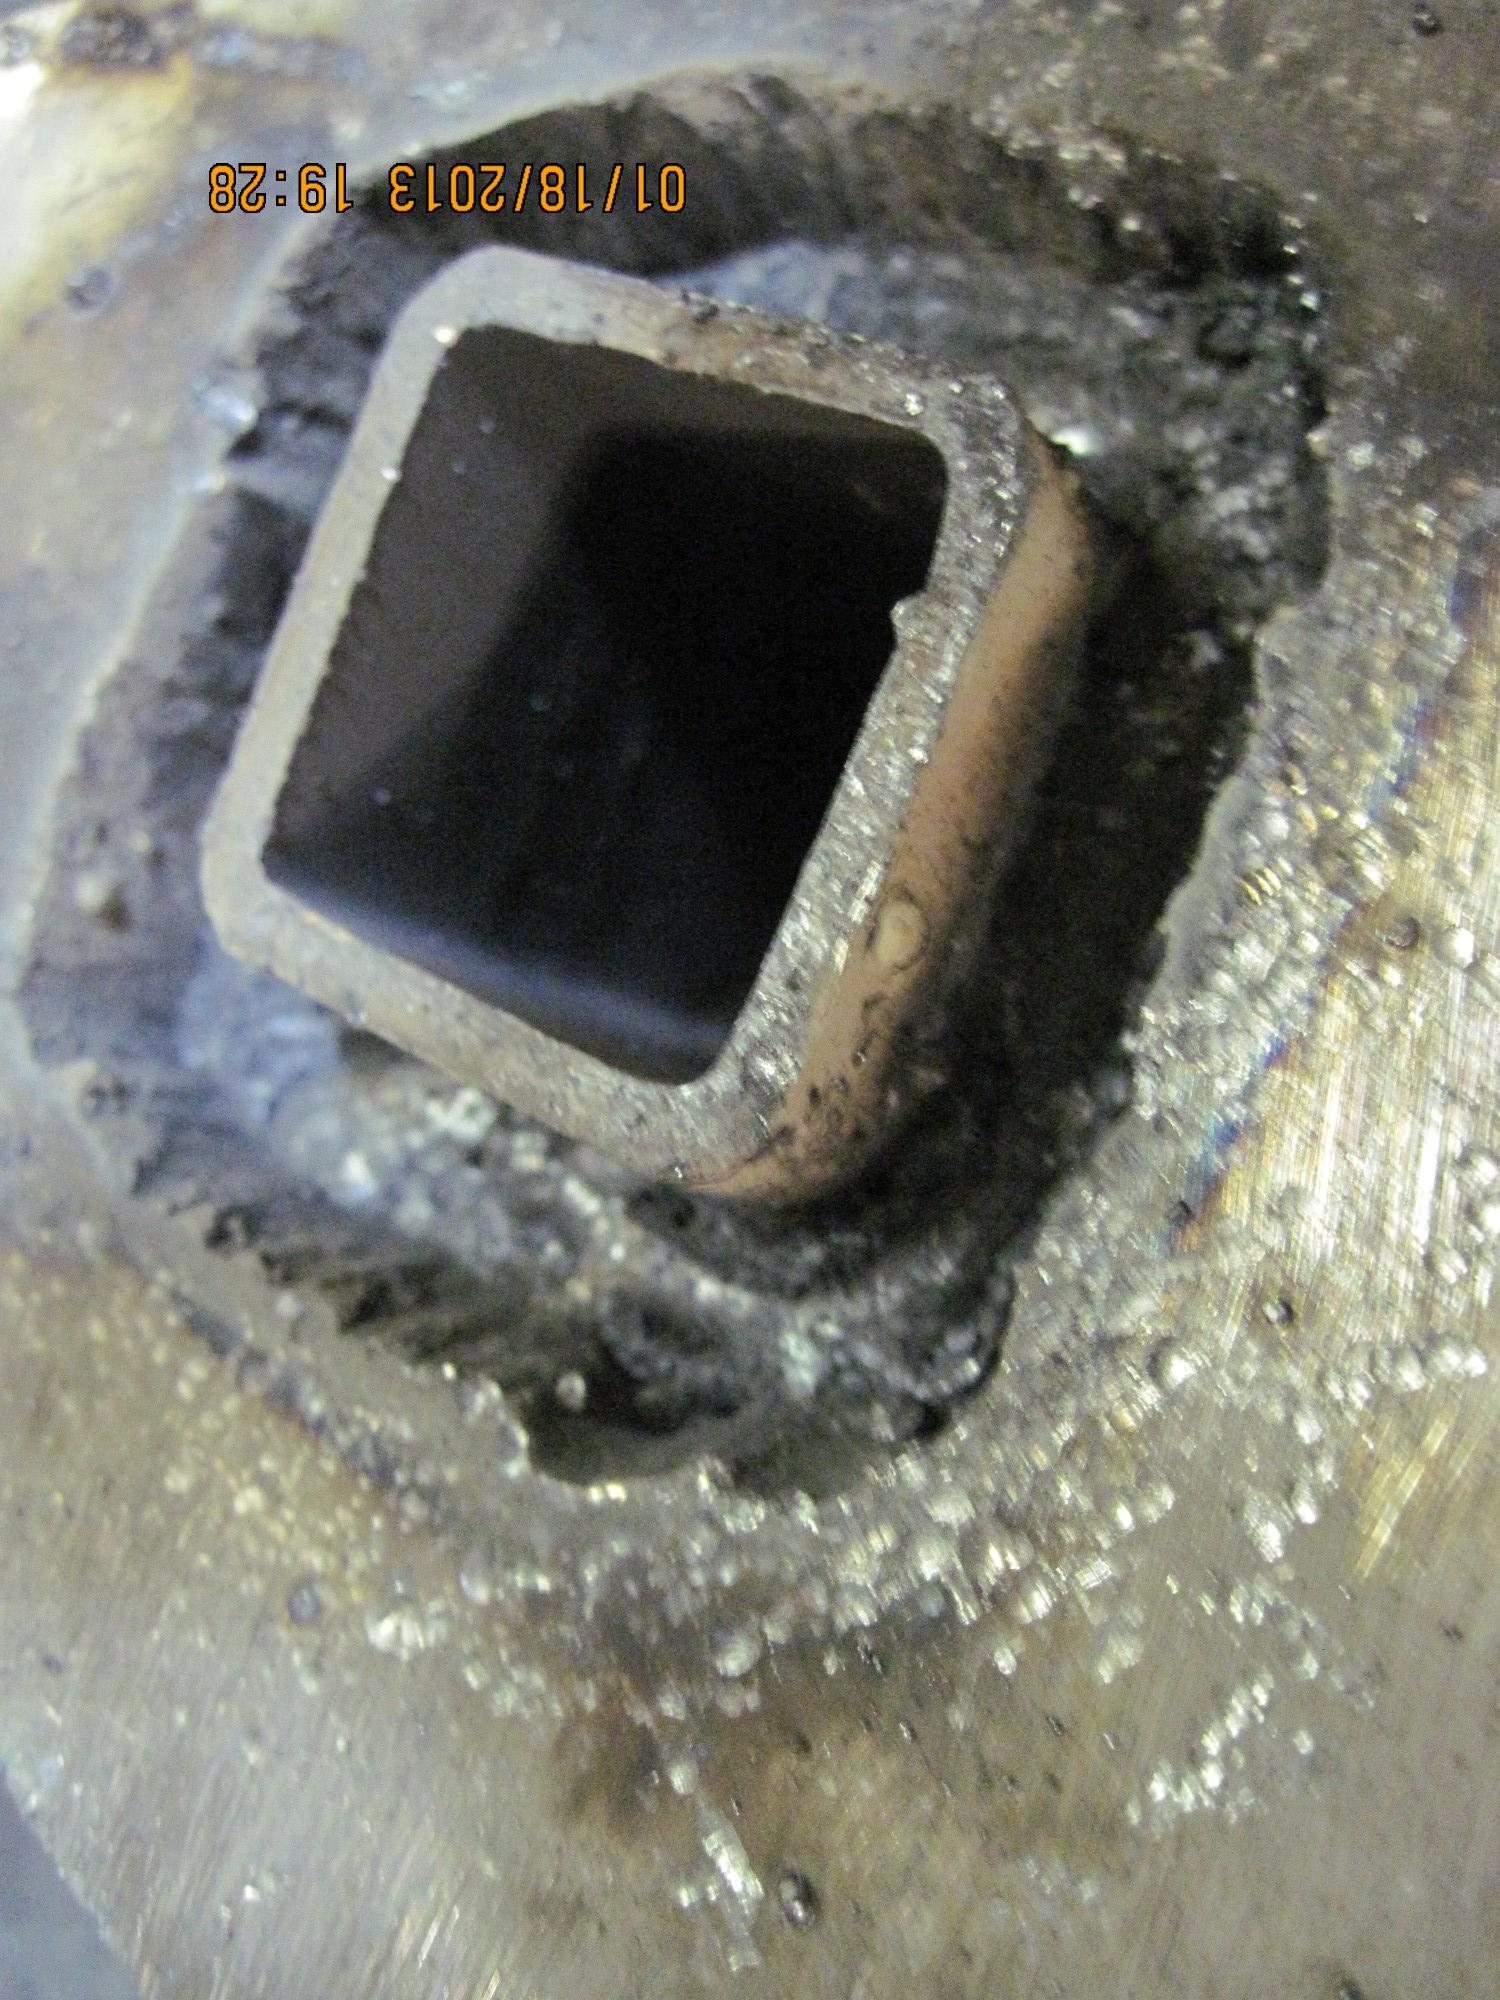
And finally the welding complete. Just needed to grind down the excess weld/tubing to make it flush (didn't take a picture). All the above pictures are from the underside of the anvil. The finished hardy hole will be in a future post.
-
Could anyone post a link to that fork lift anvil face? Did he show how he did the full penetration weld? I think I'd be less hesitant to do it if I could see some pictures.
-
I've got access to both, our maintenance manager is going to teach me and said that you should always learn stick first, then mig is no problem. I only have 10 lbs of 7018 1/8" stick to work with. If i did use the 1/2" square stock and weld fully through, would 10 lbs be enough?
Dodge, I didn't see your link?
-
Here is what I have done this week, and this is basically how I think I'm gonna weld it up. I have a couple questions at the end.
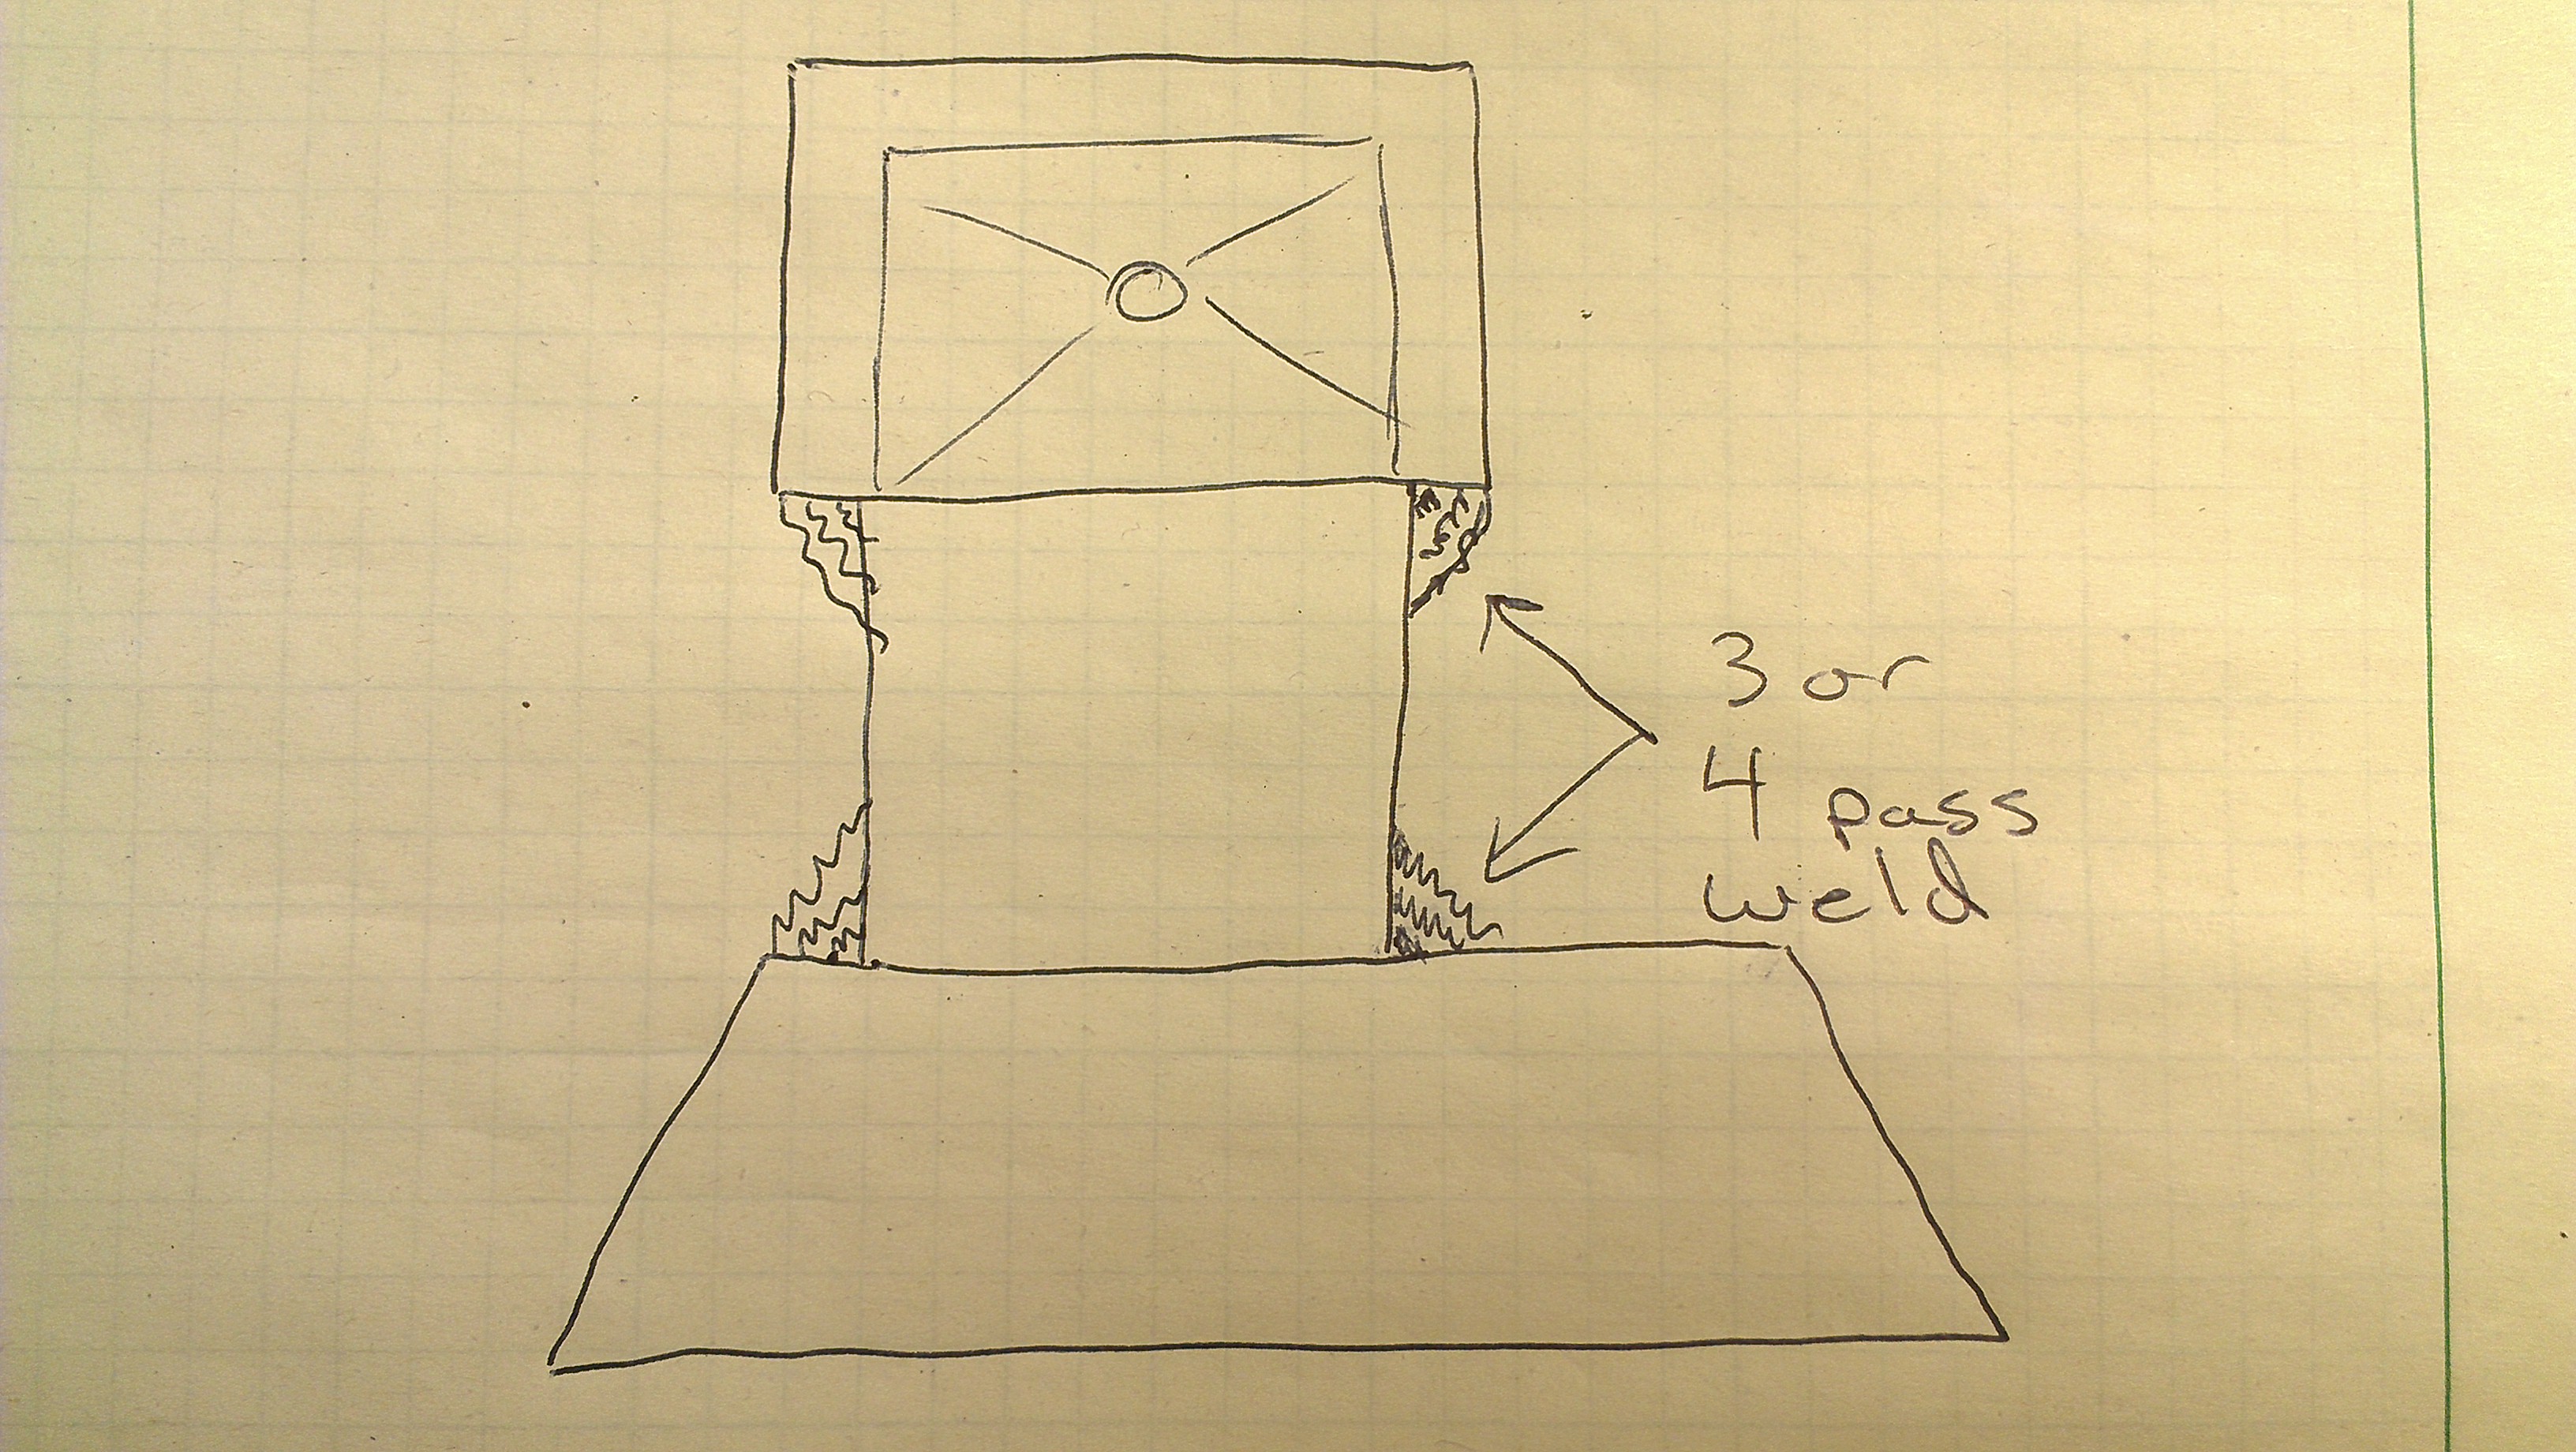
Here is my first question. Looking down through the hardy hole (which I will be fitting with a piece of 1-1/4" square tubing), do I need to be able to see all the way to the floor? In other words should I cut a notch out of the anvil base, or slide the anvil top down a bit?
My second question/thought is on the welding. I made a couple sketches below of my plans for welding. I am planning on cutting another inch or so off the middle piece so that it is narrower than the top (see picture below). Does that look like a good way to weld? I really don't want to do a full weld like described earlier. I dont have (any) welding skills yet and don't want to try to attempt something like that. I would think this would be plenty strong.
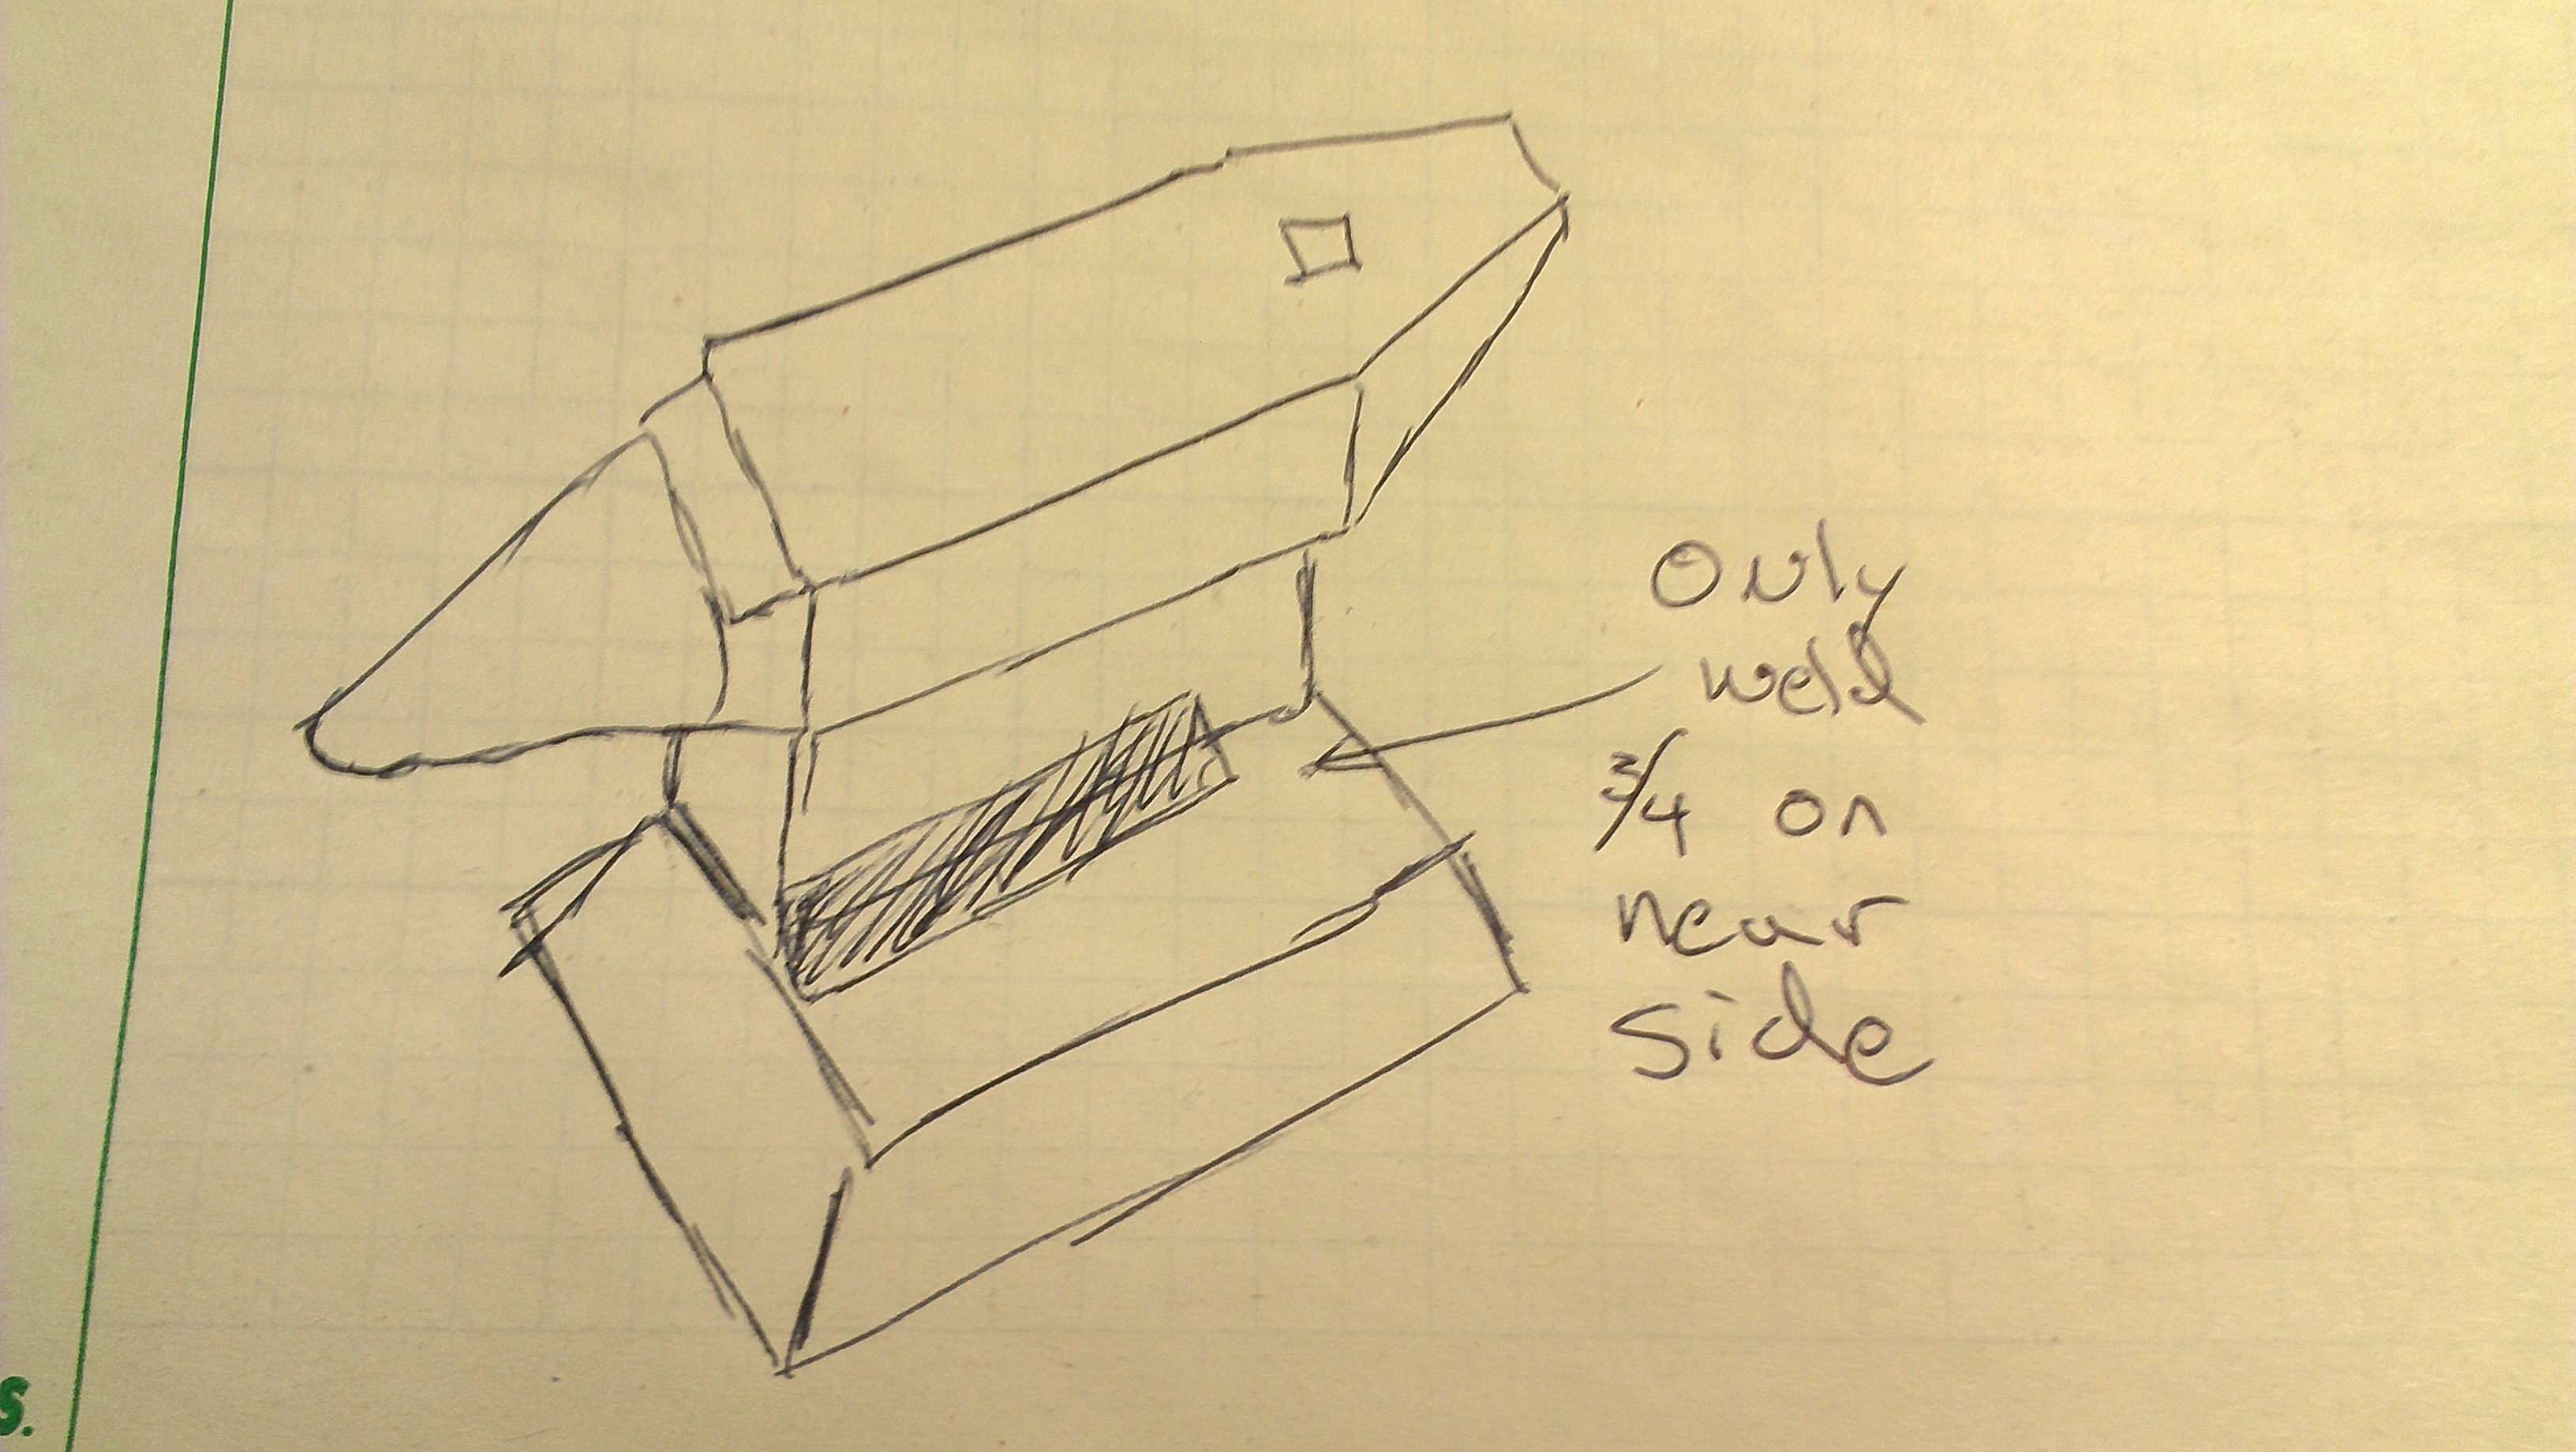
Lastly, I was thinking about leaving part of the near side unwelded (or maybe just one pass) so I can have a nice sharp corner to use for upsetting. Does that seem like a good/bad idea? Does anyone with blacksmithing experience think that would be a nice feature to have on an anvil? See sketch below.
Thanks again guys.


My first anvil build - looking for advice
in Anvils, Swage Blocks, and Mandrels
Posted
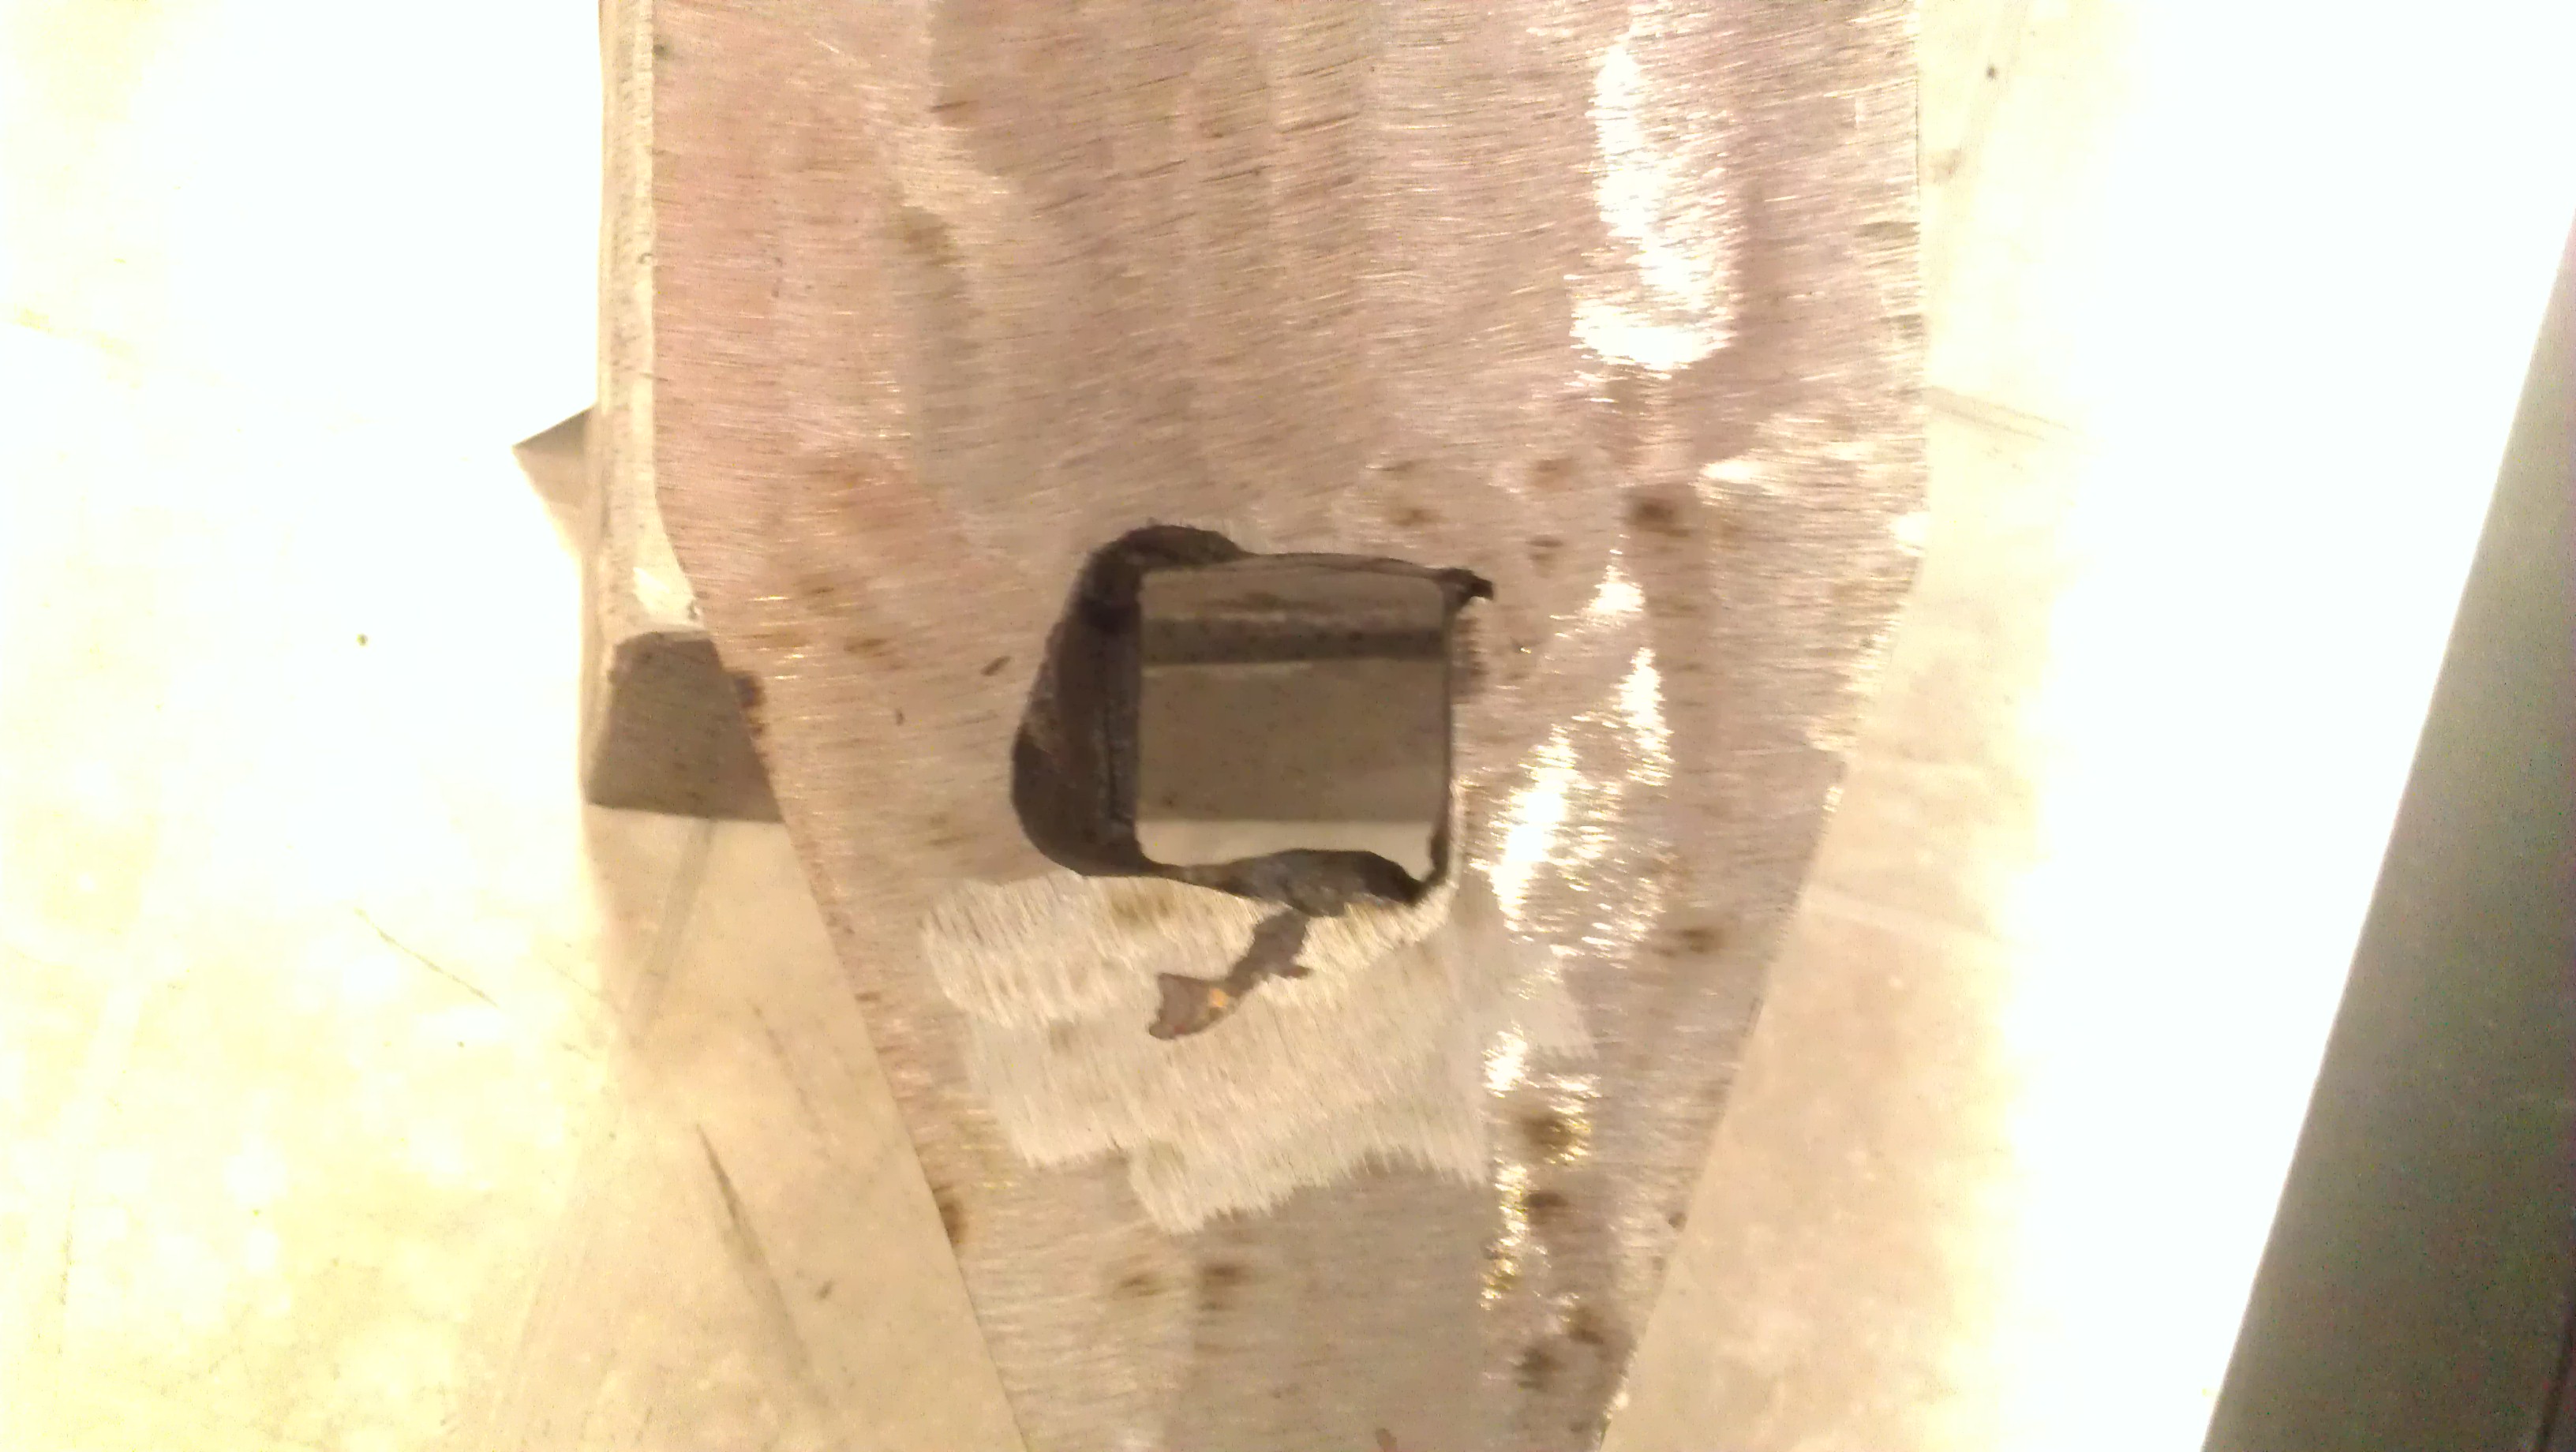
I originally just had it in there because I was using that bar to check the hardy hole fit. After pounding on the anvil a few times with it/without it I noticed that the bar helps deaden the ring. It wedges itself against the tapered base of the anvil and apparently changes the resonant frequency. I did recently grind the edge of the bar down so the bar slides further down the taper of the base and the top of the bar lies below the face of the anvil (so it doesn't get in the way). If I want to use the hardy hole, just a quick tap from the bottom and the bar flies out. You can kind of see it better in this picture:
I have also installed a couple eye-bolts into the stump with springs and turnbuckles. One has a hook that will act as a hardy hold down, one has another eye-bolt that holds onto the end of the horn and further deadens the ring. Even with it not yet fully mounted there is almost no ring. I'll post more pictures in either this or the stump build forum once I finish mounting it.