

EricJergensen
-
Posts
206 -
Joined
-
Last visited
Content Type
Profiles
Forums
Articles
Gallery
Downloads
Events
Posts posted by EricJergensen
-
-
Sure. Been done. Somebody linked to it on ifi a while back. Not terribly practical considering the size.
-
My wife got carpel tunnel from teaching with a chalk board. Her symptoms are contain simply by sleeping with wrist cuffs on (like the ones I use when I rollerblade). Don't know if that will help you, but here's hoping...
-
Yes, the more solid & heavy the base, the better. This is especially true for smaller anvils. (A 120lb anvil on a solid & heavy base is pretty nice for working with a 2.5lb hammer.)
The rebound for a ball bearing dropped on the anvil depends mostly on the surface hardness (1/2" to 1" range). The rebound for a 2.5lb hammer swung by a smith is a different story. A 1" piece of hardened tool-steel plate sitting on a hay bale will bounce a ball bearing nicely. The 2.5lb hammer... not so much ;-). You need a lot of solid mass to avoid moving the whole mess. And, as you can image, hay isn't solid backing even if you have a 500lb bale.
-
Tool steel for at least the cutting edge. Many/most smiths don't heat treat since they'd pretty much lose most of the hardness from the hot stock being cut.
Ideal tool steel is H13 or S7. Junkyard steels that may work include pavement breaker bits, axles, maybe spring steel.
If you want to see a traditional approach to mild + steeled cutting edge, TechnicusJoe has a nifty set of three videos on Youtube.
Video one is:
-
The metal of the horn and heel do not contribute very effectively for work done on the main face of the anvil. So, your "hornless colonial" of the same weight would be somewhat more effective in that kind of work.
-
Go watch Daniel Lea My Forge on youtube:
He's got what you describe (see about 1:38 in the vid). It seems to work.
I'm with Frosty, tho on side-draft. Note: make the opening no bigger than the cross section of your ducting. You've got about 113 sq in to play with. Something about 10"x10" would work well. The reason for this is that you want a high velocity here to "pull in" the smoke.
Eric
-
That's starting to look nice. Make two and send me one!
I like the shift to side cut outs.
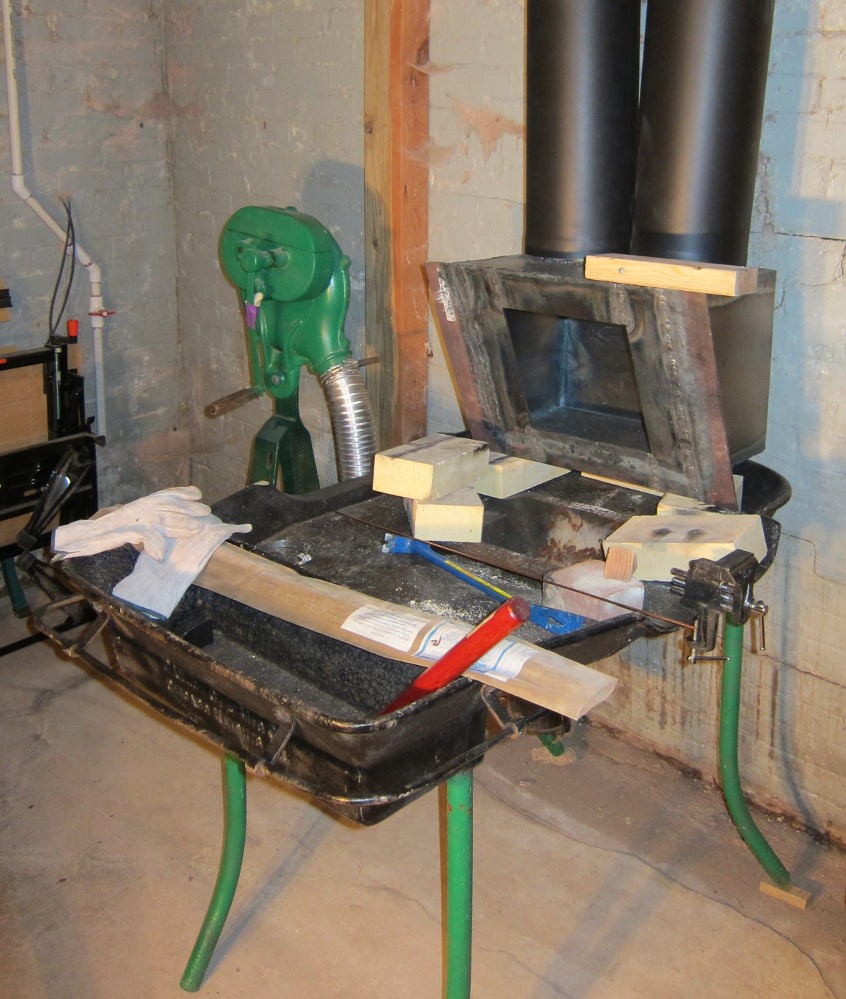
Think about mounts for a hood. I use a "Super Sucker" side-draft hood. (google that, you'll find it). Even if you use this outside, having a hood with a 5' stack will help keep you from breathing nasty stuff. And, it means you don't have to be as concerned about being on the upwind side. Might save your life if you accidentally burn zinc off of something (galvanized stuff can kill).
You'll like the slide out supports. You can always build some stand-alone ones later if you work with long / heavy stuff.
Eric
-
Legs: 2"x2"x1/8" would be plenty (and go with just four legs, if the table needs more support just use the extra angle running along the underside of the table to stiffen it)
cutouts: mine has cutouts on the side so I run long stock from side to side, not front to back. I have a hood at the back which would interfere. Remember that you don't just heat the ends of long stock. So, you need a cutout in the back or go to side cutouts. (Side cutouts are more common, since forges often back up to the wall or have a hood at the back.)
-
Frosty:
Yes, it dawned on me just recently that my inseam is the same as my anvil height because I hold stock between my legs (duh!). So, now I just ask my boy scouts what their inseam is when I want to know what height they will need for the anvil. The only problem is that most boy scouts don't buy their own clothes, so I have to ask their moms ;-).
-
Cdworks: yes, in a long time. You'll likely clean off the oil long before it goes rancid. If you store it a long time (especially with moisture), it'll get a bit stale. You work with this like you would a cast iron dutch oven.
-
Andy,
Not sure about on your side of the pond, but here I can get 20 mule team borax at the grocer's or hardware store as a cleaning supply.
Eric
-
Both. Anything that is, say, 2000° F will emit the same spectrum of IR, light and UV. However, a furnace / forge is going to send a lot more to your eye because it will be a much higher % of your total field of view.
-
So, cold work the rivets to avoid burning off the primer?
-
My main ride:
My once-a-week ride:My former ride (for ten years, before I met a particularly pedantic cop):
My coal hauler (good for about 600lbs):
My minivan, not pictured, can haul more but then I have a coal storage problem ;-). -
Nice!
That looks like a fairly broad / blunt pein. What are the rough dimensions of the square face and the pein?
Did you glue on the handle?
Eric
-
Coatings burning off are probably dangerous. I'm pretty leery of coatings when I forge or weld.
Might be worth clarifying why fire looks like it does: carbon burns blue. Hence the blue flame for your propane torch. However, soot (little pieces of carbon - and other junk - that didn't burn) glows from incandescence. So, that's where the yellow to white colors come in. Carbon burns blue and heats up soot which glows yellow to white.
So, saying you have a blue flame is kinda normal. If you had some vapors well mixed with oxygen you could get a flame much like a torch (which is well mixed O2 and hydrocarbon compounds).
Eric
-
Water loses some of its effectiveness as a quenchant because water vapor bubbles form right by the steel and insulate the steel. The detergent and jet-dry change the behavior of the vapor bubbles in a way that helps keep water against the steel.
-
I think the widened opening of your hood is really cutting down on the ability of your setup to draw the smoke. This is what the draw on mine looks like:
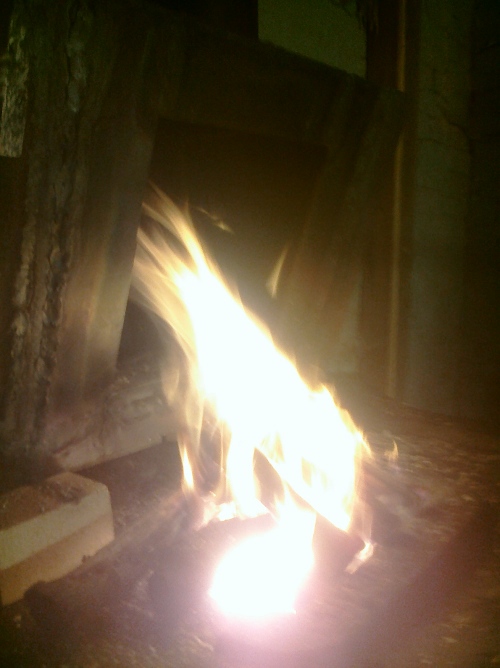
(This is approximately the super sucker hood design.) The flat flange around the edge forces all draw to be from the "front" concentrating the draw over the fire. Your cupped flange does that but it also makes the opening much bigger than the pipe dramatically slowing down the air velocity exactly where you want high velocity. I think you'd get better much better smoke draw if you just had the pipe longer. Unfortunately, that would probably make things too hot for your pipe gauge. The hood (16 ga w/ 3/16" for the flange) allows mixing so the peak temps hitting my pipe aren't too bad. Pipe probably never gets above 300° F in my setup.
Eric
-
It won't harden anything, but you wouldn't want handlebars fully hardened. That would make them brittle (subject to cracking and spectacular failure).
Most of that process sounds like post-welding heat treating. (Without that dip in oil bit.) It would relieve some of the stress left in the metal by welding (if allowed to cool slowly -- no oil dip). Doesn't sound like that is pertinent here. And, 4130 is pretty forgiving on welding. In most cases it will perform admirably without it.
The dip into oil sounds like hardening, but it would only be effective at a much higher temperature. If you heated the metal to its critical temperature (which I think would be about 1480° F) and did an oil quench you'd harden it. Then, if you tempered it by heating it to about 650° F you'd have something useful for suspension springs.
4130 is popular for bicycle frames (and aircraft frames) primarily because it doesn't demand heat treating post-welding. You can also get work hardening stress from bending. This 450-500° heating would relieve some of the bending stress but I'd guess a 7° bend introduced next to no stress. (Again, no fast cooling by dipping in oil. Turn off the oven and leave it in to cool slowly.)
I'm not an expert in this. My knowledge only comes from basic blacksmith metalworking and some very basic welding.
-
Tell us anyway. Negative results are valuable. I've learned quite a bit by failure. We'll be grateful and sympathetic.
(Tho we'd all be delighted to hear it worked.)
-
Trying to teach or coach this is tricky, but here's a mental picture that worked for me: act like you're trying to bounce the hammer off of the work. For me, this picture instantly let me loosen up and take advantage of the hammer rebound. I went from sore every time I worked to being able to hammer for hours.
I think the root error I had was "follow thru", kinda like I would do in golf or baseball. Doing that on an anvil just fights the rebound. At the moment of impact, you shouldn't be pushing the hammer at all. This "follow thru" error is likely a side-effect of your issue as well, so maybe this picture will help you.
Eric
-
Everyone should have an anvil by the pool, you never know when you will need one!
Nice apron.
Probably not a pool, just a really large slack tub...
-
Uhm, how does the bird fit in? ;-) If the bird is squished, the car is "heavy"?
-
Heat it up and go for it. Rust will come right off in the process.
I suspect your "anvil" is flat enough. Most anvils that have been around for a while have surface variations ranging from chips and dents to overall curvature (ex: swaybacked).
Eric
ETD 150 for punches
in Heat Treating, general discussion
Posted
Yes, probably like 4140. And, after you've heated and worked it, it isn't very ETD anymore either.
The composition specs at that URL above are almost exactly the same as 4140 at onlinemetals. Might have a few points more carbon. Range on the ETD is .39% to .48% instead of .38% to .43% but that's splitting hairs as far as blacksmithing goes.