

kcrucible
-
Posts
147 -
Joined
-
Last visited
Content Type
Profiles
Forums
Articles
Gallery
Downloads
Events
Posts posted by kcrucible
-
-
Speaking of flux, I can't seem to get it in my head when to add it. When the metal is in the fire? If you do it before it goes in, it just falls off and I assume that after it's at weld heat it would be too late as the atmospheric contamination would already be occurring. Maybe pull out and flux before welding heat? I always seem to miss that part!
Haven't done any iron forging and/or fluxing yet, but if I remember correctly silversmiths make a borax spray. The water evaporates on hitting the hot item, depositing a coat of fine borax over the surface. Not sure why that wouldn't work here. this technique is called "pripp's flux"
http://users.lmi.net/~drewid/PWR_Pripps.html -
Found a couple places that have all the plumbing supplies needed to make a burner except for the Stainless steel flare.
http://www.mrsupply.com/ has everything to make propane burner.
http://www.drillspot.com/products/670441/anvil_international_inc_0310067202_wye has the Wye connector to make a burner similar to a burner I saw on another web site.
Took forever to dig the parts out that I will need but they are there.
Hi Temp and Ceramicfiber online sell in large quantities only it seems. To much for the small projects I am working at. Maybe in the future when I have more money at my disposal (if that ever happens).
Well, here's what I have listed...
http://kcrucible.wordpress.com/2010/07/28/the-propane-burner/
Regarding Ellis, when I purchased my stuff summer/fall of last year I had decent shipping times. Don't know if yours was before (and things are resolved now) or after.
List
----
http://shop.clay-planet.com/inswool-ceramic-fiber-blanket---by-the-square-foot.aspx
http://stores.ebay.com/hightemprefractorystore
http://budgetcastingsupply.com/
http://elliscustomknifeworks.hightemptools.com/supplies-mainpage.html -
An alternative suggestion to turning down the heat would be to make it tolerate heat better. If you skinned at least that area with the 3000 degree castable it should stand up to it better.
-
I won't claim to be a definitive source, but here's what I made after reading a lot of sites, sorting through the info, and trying to make sense of it all. It wasn't a slam dunk out of the gate, and you can see what I saw, what I did to correct it, etc. A good site if you're interested in theory as much as simply having a burner. Many external links and pictures.
http://kcrucible.wordpress.com/the-kcrucible-furnace/ -
If it puts you at ease, your reduction can be exactly 0 and the burner will still work just fine.
 In my opinion, it's an unneccessary extravagence, primarily designed to "open up" more surface area to bring air in. The propane jet is going to be sprayed into the small shaft either way, creating X bars of suction/pressure in the smaller tube. That will dictate how much air gets pulled in and the same speed as the propane jet, basically.
As far as I can tell the only thing that changes is the velocity of the air at the intakes. That may reduce some friction, and be a good thing, but not something I'd sweat greatly over.
All this is to say, it's pretty much impossible to mess that part up. ;) -
Anyone know if a person can use clay as insulation in a blown forge rather than Kaowool?
Clay, by itself, has virtually no insulative value. Mix in sawdust, cotton fibres, styrafoam beads, etc, that can burn out and leave air pockets, and you'll have rudimentary insulative firebrick. -
Hi bubba.
I've been involved in very small-scale casting for years (mostly jewelry.) At my blog I have some links to some free books, web sites with info, etc, ytou may want to try. here's 3 that will get you started i think.
http://www.scribd.com/doc/33997274/METAL-CASTING-Appropriate-technology-in-the-small-foundry-STEVE-HURST
http://www.rotblattsculpture.com/Articles/lostwaxcastingpr.html
http://www.backyardmetalcasting.com/brasscasting02.html
http://kcrucible.wordpress.com/ -
Based on the video, I don't think you're getting enough air mixed with the propane initially, which is why the flame is predominantly yellow (propane mixing/burning with the air later.) In my experiance, moving the tip much further into the slots helps a lot with this. Somewhere between 1/4" and 1/2" shy of the slot's end. Basically, you'll get better vaccume, which pulls more air into the tube, letting it burn a bit hotter.
In my opinion, the "mixing chamber" is primarily just an air inlet. Mixing happens in the tube proper. As long as you have a surface area of the slots as big as the cross sectional area of the pipe you've got plenty of capacity. A larger diameter mixing chamber, just allows you to grow the slot area, really. I think you're fine as far as that goes.
Push the tip forward 2-3" and see what happens. I think you'll be surprised at the difference. At least, it helped my design signifigantly. -
I put a hole through a rounded end cap by using a dremal first to flatten, then make a concavity. After that, I could clamp the cap in place and drill in.
-
i have run up to 15 psi but i will try more
i guess my question was regarding the orientation of my burner in the chamber it points upwards toward the ceiling. unlike most i have seen which point at the floor.
here is a photo worth more words
Job
Oh, I misunderstood the question. Orientation of the burner really shouldn't matter much. You're just trying to deposit heat into the cavity. Most point down so that nothing can fall into the burner tube I expect. So the answer to the original question would be "just different."
I thought the question was about a lazy flame that just drifted up from end ends of the burner tube (when held horizontally.) -
Helps me , I just got a small single burner. Homemade and second hand . I am doing some tooning. The odd thing about mine is the flame points at the ceiling, is that wrong or just different?
It should be a jet out of the tube. Probably you have insufficient gas pressure. If you're cranked up as far as you can go, then it may be a low pressure gas regulator. You want one that is adjustable between 0 and 20/30 psi (and high pressure hose to match... don't take chances.)
I list my parts with some links here:
http://kcrucible.wordpress.com/2010/08/11/firing-up-the-burner/
Similar kits can be found elsewhere. -
A while back I heard someone mention Trex burner blueprints. I have a friend that agreed to make me a burner in his machine shop at work. He just needs a technical blueprint. I am leaning towards the Trex vent burners or very similar design. Any help would be much appreciated.
I've heard that this "prov" burner is very similar to a T-rex. Go to http://kcrucible.wordpress.com/gallery-of-fire/ and click the pro-v link for a pdf. I think all measurements are in metric units. -
about 275 pounds. Do you think there might be a reason why he chose that size?
....
small enough so you can move it conveniently single handed.
You, my friend, are a powerhouse. -
Neat little RR track anvil. Someone put a lot of work into for sure..
http://cgi.ebay.com/VINTAGE-26-lb-Blacksmith-TRACK-ANVIL-Forge-Iron-/110637821501?pt=LH_DefaultDomain_0&hash=item19c2872e3d
Since when are track anvils "vintage?" -
I recently picked up a copy of Porters "gas burners for forges, furnaces and kilns" and have been reading thru it. I see a lot of parallels between his forge burner designs and the mongo burners on Reil's site. Also some definite similarities to the hybrid burners with regards to the sliding chokes.
That's not a coincidence. Porter, Rex, and Ron basically all collaborated on the fundamentals of the design according to Ron's site. They each had different takes on it as they developed it further.Most of the higher performance ejector burners I've seen like those in the Porter book and the hybrid burners, use a sliding choke over milled slots. I have to wonder if some improvement couldn't be gotten by milling a series of holes in the tube off-center, or using a rotating choke that is flanged in such a manner that it causes a spiraling column of air as it moves through the pipe, intermixing with the gas a bit better before entering the combustion phase. My inspiration comes from seeing burn barrels with triangle-shaped openings bent in on the bottom to cause the air to spiral around the burning trash to ensure a cleaner, hotter burn.
You could try it, but I think you'll kill the top-end performance. The venturi's work by using air velocity from the tip to create a vaccume and suck in air. Anything which makes it harder to pull that air into the mixing chamber is going to screw up the fuel ratio. If you want better mixing you'd probably be better off with something to swirl the gasses at the exit, rather than the input. Porter goes to great lengths to assure the smoothest, fastest, airflow at the intakes as possible (a little overboard in my opinion... a scooped choke?) -
I know I'm late to the show here (and you're probably not reading this...) but I had basically the same design and same initial problem (though I left my pipe at 12".) In fact, the design is so similar I'd guess your build is based on mine.
Ultimately, the burnback rate exceeds the exit gas rate and so it enters the tube and keeps burning down until it hits a turbulance point that can slow down the gas and hold the flame in place (around the air intakes.) The solution is a flare or flame holder. I've found that a 1 1/4" -> 1" pipe coupler with the threads tapered down on the 1 1/4" side work quite nicely. Creates a nice little pocket where the flame sits.
I'd guess that the roughness of the air intake, shorter tube, and not using the tapered tip is causing slower exit velocity, accounting for the performance difference. All of my edges (tapered output, air intakes, etc) are very smooth via Dremel. The air intakes are bevelled-in to reduce drag and make it easier for the air to flow around the tip.
It's possible that the flare isn't needed if I hadn't removed the "lip" from the 12" pipe where it tapered in, initially. I never went back and tried it again with a fresh pipe.
The problem:
http://kcrucible.wordpress.com/2010/08/11/firing-up-the-burner/
The fix after some experimentation: (note that I DID grind down the threads, and it DID improve things)
http://kcrucible.wordpress.com/2010/08/20/burner-modifications/
And then the burning:
http://kcrucible.wordpress.com/2010/08/23/firing-up-the-burner-pt-2/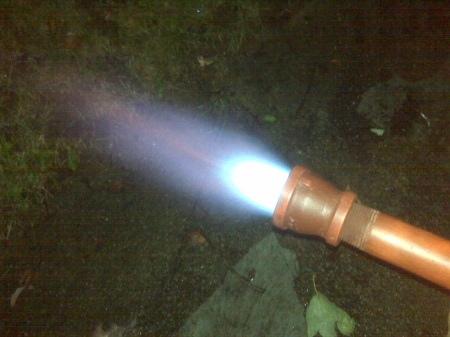
-
I discuss a couple of venturi burners here and detail my own experiments. Need to get back to this soon!
http://kcrucible.wordpress.com/the-kcrucible-furnace/
Good luck! -
Well, I FINALLY got some time to refill my propane, put it all together, and give it a go... bear in mind that this was a first firing/burnout so no ITC-100 yet.
As it was coming up to heat. That's a steel can with some aluminum in it and a graphite rod that accidently snapped and fell inside on the left.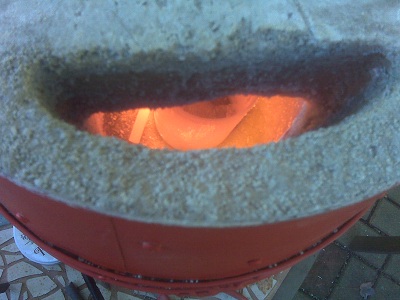
Now I'll try the forge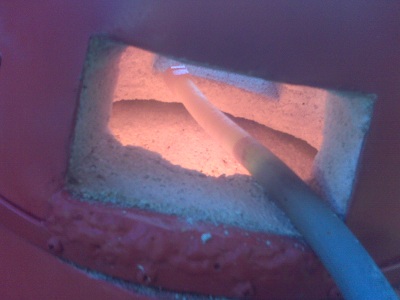
And a couple of whacks on the anvil later...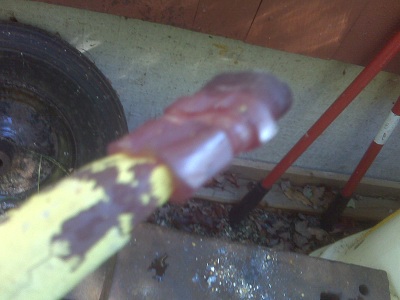
Orange metal deforms much more easily than I thought it would. Hehe! -
You could certainly do it (I did castable over wool... if it can work on wool, it can work on a nice solid brick!)
The big trick is going to be how to get it to adhere. Embedding screws or something MAY work in the short term, but exposing steel to near-welding heat is probably not going to work well in the long term.
One trick I can think of is similar to a trick I did to create a "hook" which is solidly affixed to a chunk of polished rock. You could use a drill to put a couple of holes in the surface of the brick and pivot it around to create a slightly larger cavity inside the brick than the neck. The deeper you make the hole the stronger it's going to be. Maybe a 1" drill bit, with a 1.75" hollow, or something. Put a side mould on the edges to allow you to put 1" - 1.5" of castable on "top" of the brick, where the castable will fill the hole. Allow a lot of time to set and solidify, then do a bake-out in your oven at 550 to strengthen it. -
If still using the perforated air intake, you might consider enlarging a few holes and/or squaring off the forward ends. I discovered major turbulance choking off air intake because of too-narrow and rounded air intakes. When my flame was burning in the tube you could see the flame buffetting happening and it was pretty obvious that the jet was having to work pretty hard to get through the denser air.
Widenning the slots and squaring off the ends (and scooping them into the tube rather than being perpendicular) made a world of difference. I did the detail work with a dremel + orange grinding tip.
Also, I don't recall your tip placement, but when I slide mine forward (about 1/4" back from the forward end of the slots) performance improved greatly also. Pulling works better than pushing.
You may also want to buy some ceramic wool from Ellis. http://elliscustomknifeworks.hightemptools.com/inswool.html
and line the interior of the forge. If the problem is the time it takes to bring the castable up to heat, that would improve things dramatically. After that you could decide whether to leave it "as-is" or add a thin "hotface" of castable over it. The ceramic would act as a thermal break in that case, and you'll have a smaller diameter naturally. -
Quick reply. Been thinking a bit more about this. The Vertical Forge design moves the burner far away from the metal, providing more time to mix and combust. More surface area to absorb/reradiate the heat along the gas path keeps the sides from doing your rubble-melt bit. A rough wall surface introduces additional drag on its way to the metal/exhaust so provides more time too.
-
Im not sure what a "combustion manifold" is, but it sounds like the same idea. Is there a drawing of this kind of setup?
Well, I just came up with the idea in my head. I'm sure that someone else has had the same idea and there are drawings out there.
Have you ever seen a picture of a kiln with embedded electric elements, so that the wire isn't exposed to the interior of the chamber?
Think of the same thing, but instead of nichrome wire, it's actually a coiled hollow tube through which the combustion gasses flow. Around and around, heating the chamber sides without ever actually expelling the gas into the chamber (or if it does, only at the very end after which no more oxygen should be present.) So the time for combustion is huge, and it has a LOT of time to extract the energy into the forge.
I'm thinking you could make it be taking those long skinny balloons and taping it in a coil along the inside of a refractory barrel. Insert an inner form leaving about an inch of gap and pour in non-insulative castable. Wehn it hardens, pop the balloon. Now you have a coiled chamber to pass your gas through that doesn't reach the metal at all. If you want to pop into the chamber at the end instead of outside, you can do that too to extract just a bit more heat and keep the atmosphere non-oxygenated (the normal oxygen-air gets pushed out from the fully combusted air.
Would be a bit challening to make but seems pretty cool to me. Obviously you'd want the castable and wool to be nice and thick on the OUTSIDE of the coil. -
This is the sort of thing I used to do a lot (though I used jeweler's investment rather than sand.) Here's what you do... the fact that the key is basically 2d makes it easier, and the fact that it is decorative makes it even better.
Making a mold
--------------
1) create a model out of wood. leave a little stub off the eye as a metal inlet.
2) get a silicone mold kit. I'd wager that caulking would work just fine though!
3) Grease up the key so that it's not porous and fill a disposable container of some sort with the silicone and embed the key in it. Make sure that the depth of silicone is enough so that the key doesn't poke out. Make sure that one side of the key is exposed.
4) Wait for the silicone to set up and "harden."
5) Remove the silicone from the container
6) Peal the silicone off the key. Now you have a mold for a key!
Making wax keys
---------------
1) Heat up parafin in a double boiler.
2) Ladle parafin into the mold and wait for it to harden.
3) Peel back the mold and release the wax key.
4) Repeat until you have 200 keys
Creating the casting mold
-------------------------
1) in a metal container fill with "greensand" (look it up). A cut-down coffee can, a rectangular cake pan, etc.
2) Place a cylinder on the sand. Lay the keys down on the sand flat, radiating out. The stub on the ring should touch the cylinder.
2b) For really high density casting, you can lay them out in a row, ring-up. You need to take care that the sand fills all of the open spots on the key. Place a bar over the top of the keys.
3) Add another inch of sand and really pack it down. Remove the cylinder/bar.
4) When you're ready to cast, put the pan in the oven and crank the heat up to melt and vaporize the wax, leaving a cavity and pre-heating the mold.
Casting the metal
-----------------
1) Take your chosen metal and melt it. Get it VERY liquid. For an easy and pretty wedding cast, I'd personally recommend lead-free silver solder. It melts at a low temp, is relatively solid after being cast, and has the silverish look moreso than alluminum.
2) Take your mold out of the oven, then pour the metal into the bar/cylinder to fill all of the keys.
3) Let it cool, cut the keys off the bar and finish.
4) Repeat as neccessary to get u to the 200 keys. -
It is pretty much an established fact in the combustion industry that you cant expect to get complete combustion of any gas in a flame front. There isnt time and propane is more difficult than most other fuel gases.
It doesn't have to combust solely in the flame front, just before it leaves the forge (and ideally before the oxygen gets to your metal.)
I dunno.. it just seems to me that adding a blower onto the burner in order to increase the amount of oxygen increases the speed of the gas, which will make it even harder to combust in time.
Hmmm. I wonder if a cast heating-manifold would be a good solution? Instead of the fuel injecting into the gorge cavity, it gets pushed along a cylindrical coiled cavity lining the forge before dumping into the cavity (or even just exhausting at that point if there's not much more heat to be gained.)
In that scenario, the oxygen is static or comsumed within the chamber. You'd need a blower if the coil was long to keep things moving, unless it was a vertical forge and you could rely on chimney action.
Ideally you'd make it out of a very-conductive, but high-heat material
First attempt casting pewter
in Smelting, Melting, Foundry, and Casting
Posted
Yes, you should be bringing the mold up to heat... ideally much higher than the boiling point, so that the pewter doesn't cool down instantly and not fill your mold fully.
A borax glaze on the molten metal will help prevent slag.