

Drainpipe
-
Posts
5 -
Joined
-
Last visited
Content Type
Profiles
Forums
Articles
Gallery
Downloads
Events
Posts posted by Drainpipe
-
-
On 2/20/2022 at 3:53 PM, Frosty said:
I've become convince we don't need 1/2" of Kastolite for the flame face in forges, except MAYBE the floor if you have a heavy handed friend. 3/8" is I believe more than thick enough.
Thank you! I'll give that a shot tomorrow, going to do the refractory in the morning.
Lining the chamber with the kaowool went smoother than I thought, and the rigidizer seems to have set up pretty quickly. Letting it continue to dry overnight just to make sure I get as much moisture out as possible.
-
33 minutes ago, tinkertim said:
You might also want to rotate each T-piece by 90* so that there is less possibility of one burner's intake airflow affecting the other.
Having them in line and close together has affected other peoples setups in the past.
Gotcha, I wondered if that might be an issue. I'll try rotating, see if it changes the flame's pattern, and then try adjusting the mig tips if needed. Thank you!
-
1 hour ago, Mikey98118 said:
I think you'll find that a little bending of the soft copper MIG contact tip, will cure its ills. At present the gas stream isn't aimed parallel the the mixing tube's axis.
I thought as much on that burner. I'll give that a shot, thank you.
-
To start, I just want to thank everyone on here who helps out. It's taken me a while to get here, and I have tried my best to read as much on the forum as I can on Frosty's burners. Tonight was the first night trying them out, and they work!
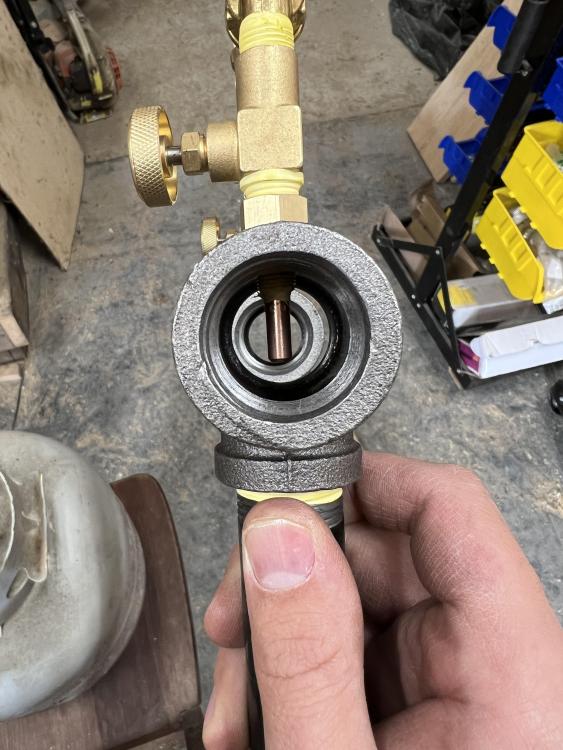
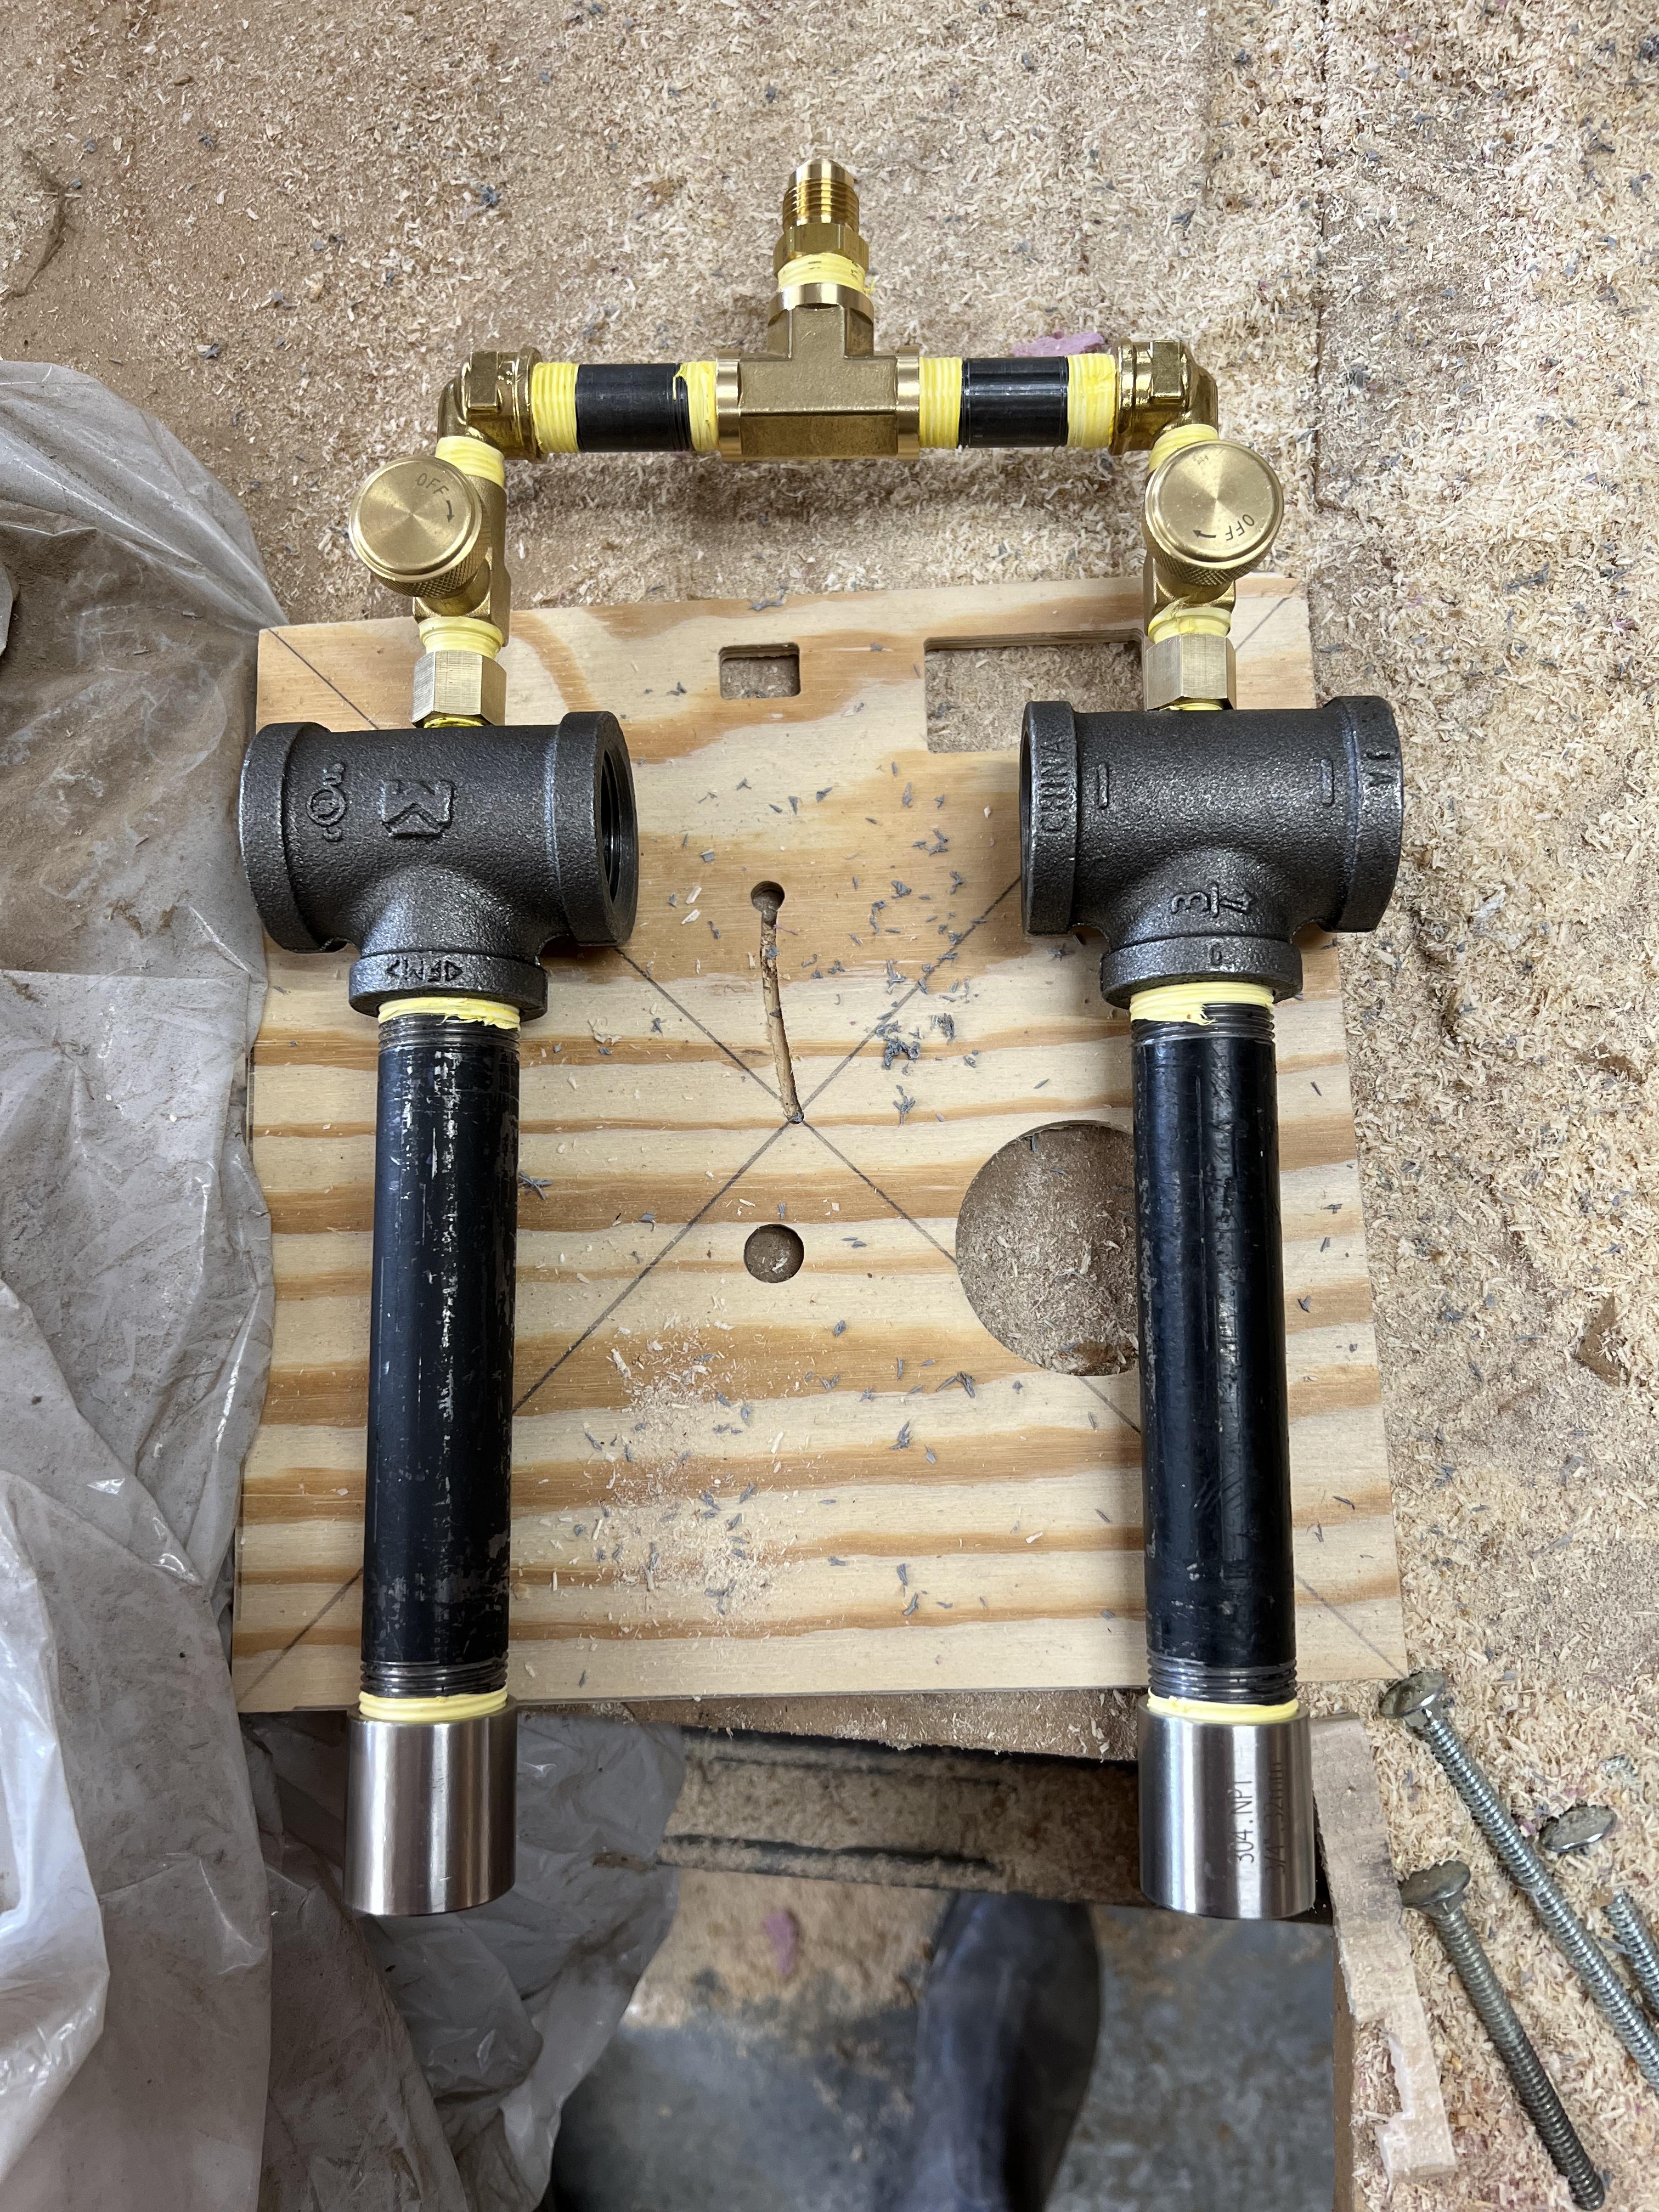
There are a few disclaimers I would like to get out of the way. In the video and photos below, reducers are attached to the burners, but I plan to use stainless couplers on my final product (photo of this attached as well). I was dying to test them out, and accept and understand their behavior outside of a forge is going to be different than when they're inside.

I deviated from the design by adding the needle valves and other associated hardware, but I plan to have a movable wall inside my forge in the event I only want to use one burner, and I wanted to be able to shut one off at a time. In hindsight, I'm thinking I should have copper tubing going from each burner to the needle valves a little further away, so that may change.

Video:
I have not tuned these at all, the mig tips are unfiled.
All of this being said, I have also attached a schematic I believe I stole off of here, mainly to ask if this is a good burner angle. I'm planning to have a flat floor in my forge, which feathers into the walls. I'm going to line the chamber with 2" kaowool, rigidize it, and then cast 1/2" of kast o lite over top. Kiln wash to finish it off.

Let me know if you think there's something I can improve upon in my design. Thank you again to everyone, it has been fun to put this together, and I can't wait to start getting things hot.
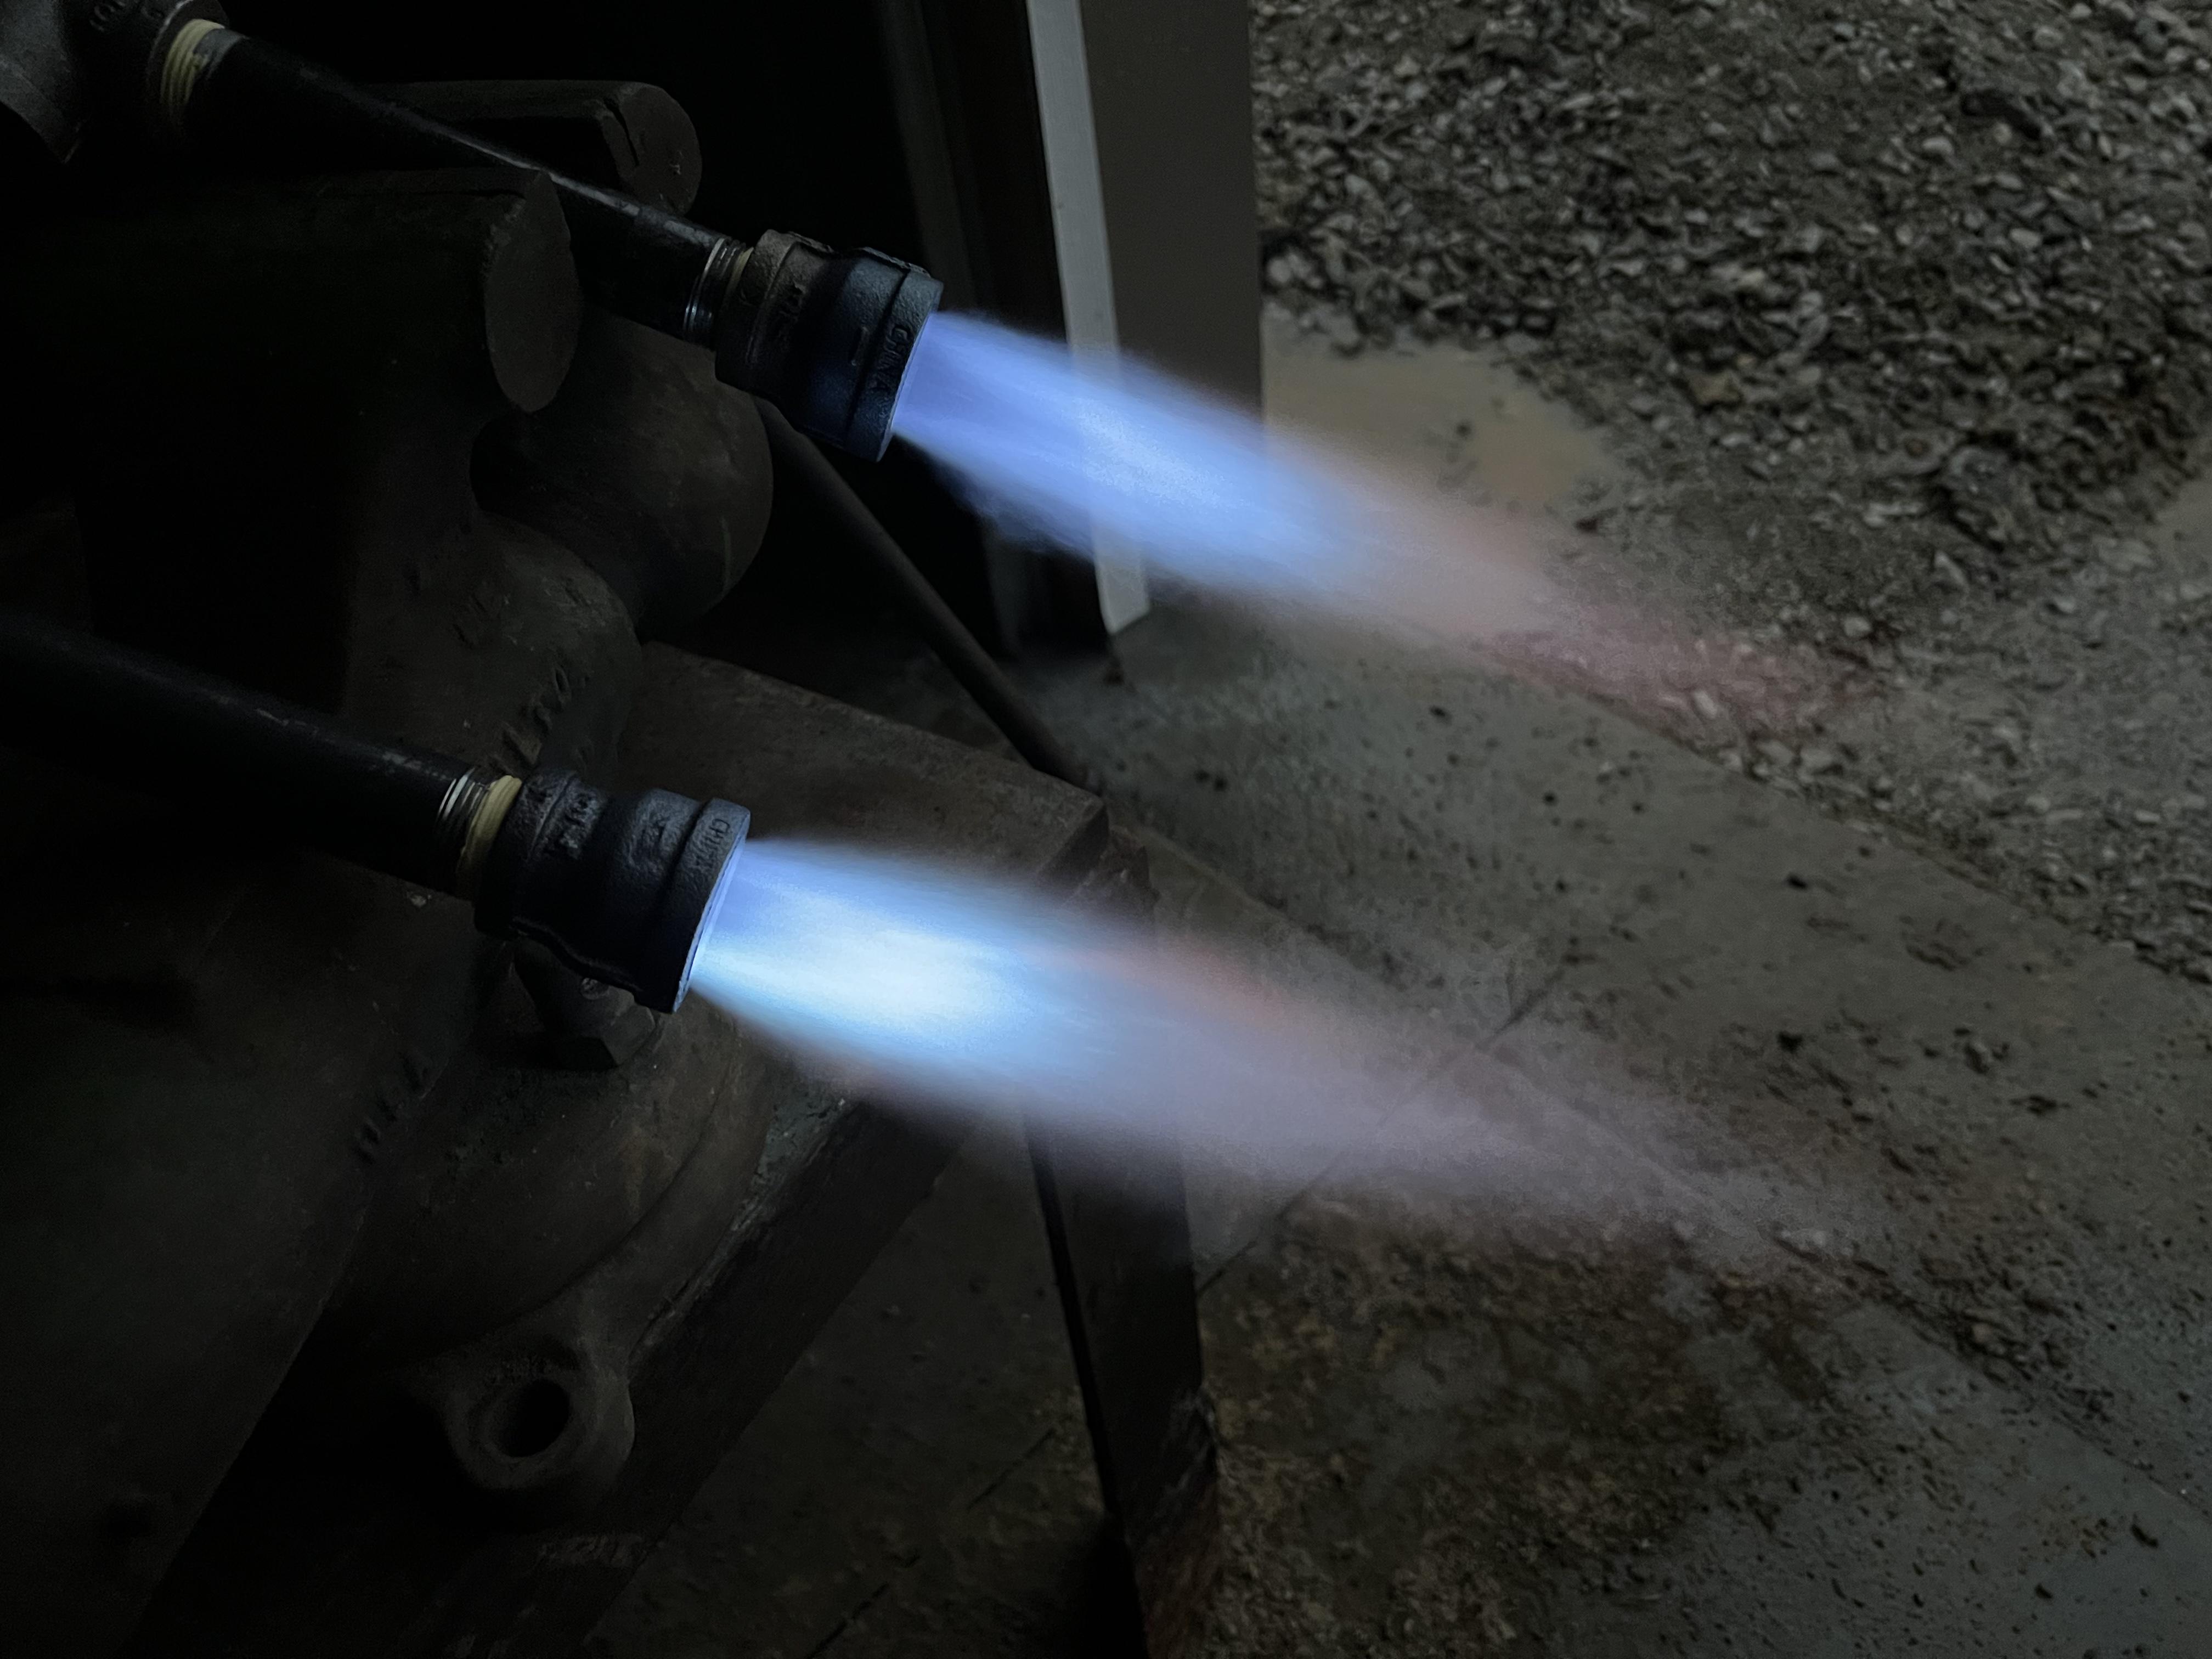

First test of burners!
in Gas Forges
Posted · Edited by Mod30
Remove excessive quote.
Gotcha, I will keep that in mind tomorrow and as it cures. I'll bag it as soon as I'm done. The wet towel is a good idea, thank you for that.