-
Posts
46 -
Joined
-
Last visited
Content Type
Profiles
Forums
Articles
Gallery
Downloads
Events
Posts posted by DSW HandCraft
-
-
I've made myself a new tool... I think it will quickly become my favorite one, you'll see why

-
2 hours ago, angiolino said:
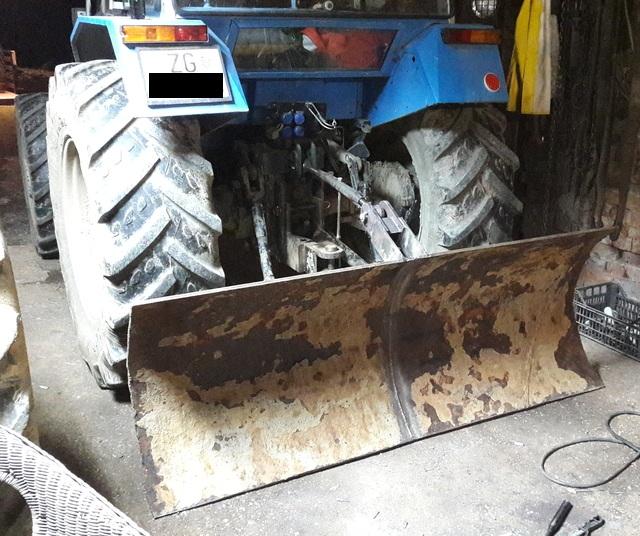
"I've made myself a snowplow for my tractor from a section of gas line pipe (half of the pipe) which had 12mm thick walls, and it works like a charm" ???
Here is the picture, maybe I've misspelled something...
-
As I see it, the roller part of the project is fairly straightforward. You can use a thicker wall gas or liquid tank and fill it with sand. I believe that these bigger tanks can be found in scrap yards. You can also use a section of a bigger pipe form gas pipelines, but you'll have to seal the ends by welding steel plate "lids". I've made myself a snowplow for my tractor from a section of gas line pipe (half of the pipe) which had 12mm thick walls, and it works like a charm.
The main issue that comes to my mind is making a bearing housing on the sides. As there will be axial load on them when you pull the roller, the regular deep grove ball bearing would not suit your need, but they would be the easiest to install. What you would need are tapered roller bearings, and those are more difficult to install.
Maybe you could find axles and hubs form a front wheel of a smaller tractor without the front-wheel-drive and somehow make that work. You have to consider that the bearings must be sealed in the housing in order to prevent dirt from finding its way into them, and you'll have to make it possible to occasionally grease them, and service (replace) them if they start to wear out.
Almost all components can be salvaged from the scrap yard, except the bearings. You'll have to buy them new.
I'm no expert, but I hope my thoughts will help you somewhat. -
Thank you Thomas, much appreciated.
-
In the past few days, I've been doing some maintenance and repair work on agricultural equipment. As I was surrounded by bolts, nuts, wrenches, and screwdrivers, I got the idea to make a screwdriver rack. Here is a video:
-
Very nice job!
Yes, some people really can learn just by watching. I've never seen a blacksmith doing his job in real life, heck, I've never seen an anvil in real life before I started blacksmithing! All skills I have today I've learned by watching youtube videos.
You will get better with practice, for sure. Just keep on hammering!
-
No particular reason... The shape was created "on the fly"
-
In the past two days, I've bitten more than I can chew...
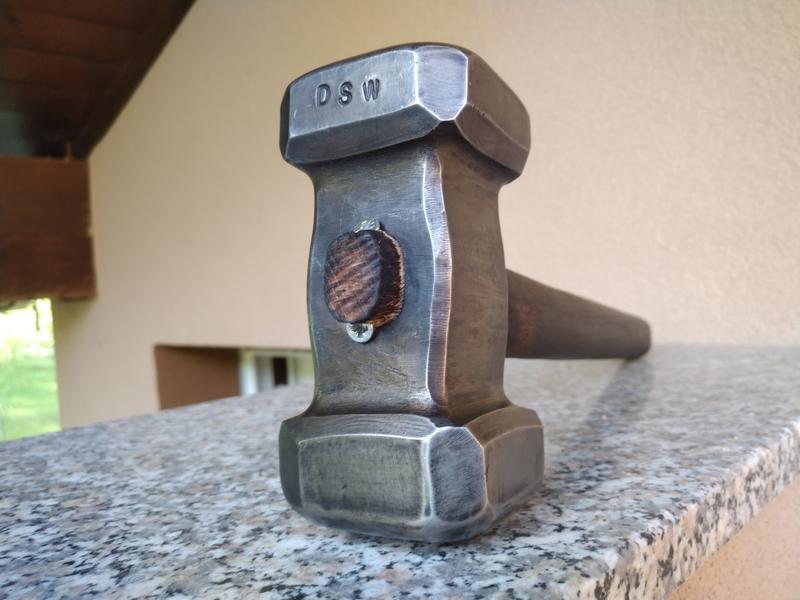
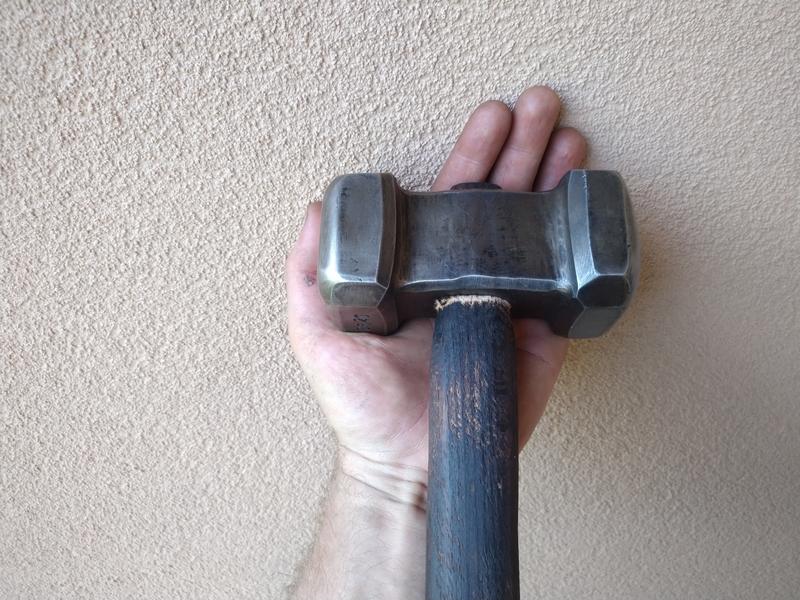
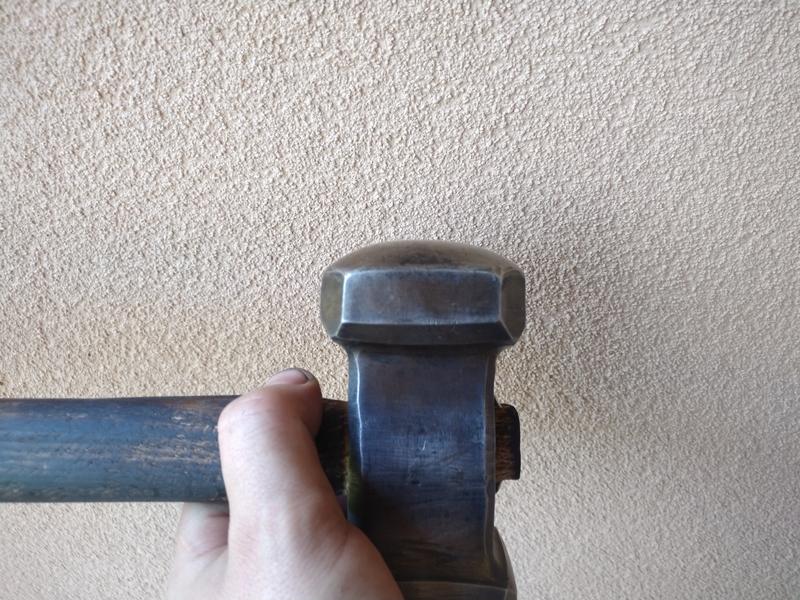
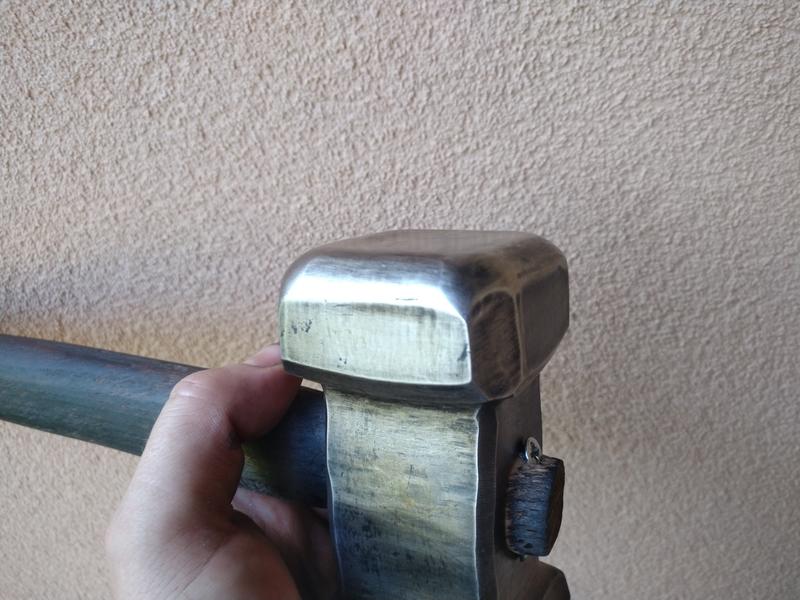
I found some 69mm round pin used on some piece of heavy machinery and decided to make a forging hammer out of it, by hand... Curvatures were all made with an angle grinder. The hammer turned out great, and it's nice to forge with but I can surely say: I will never make another one this big!
The weight of the hammer is 2.2kg (4.85lb) -
It's a nice looking hammer!
The pleasure of using the tool that you've made from scratch outweighs those small flaws. -
On 5/5/2020 at 9:17 AM, Helena said:
There's definitely room for improvement, but I got them together and they work. Pretty happy right now.
As someone already mentioned, the main thing is that they work for you, and your needs.
I strongly believe that the most important thing in blacksmithing is to learn by observing how metal responds to your input (hammering) and build a database of that in your head whenever you are doing a project. Learn right away, not after the project is done. Getting the job done, comes second. In that manner, you will instantly see where you need to improve. Finally, you take the knowledge you've gained and give your best to make a perfect pair of thongs next time, a pair you would be very proud of. My philosophy is to aim for perfection but to be satisfied with reality, especially in blacksmithing. If you give your best next time, you'll be one step closer to perfection. And it goes on and on and on... Soon, you'll be making beautiful things with much less effort.
I really do believe that anything worth doing is worth overdoing.
I hope all I've said makes sense
Keep up the good work! -
6 hours ago, bluerooster said:
DSW, I really enjoyed the video. And a great little paring knife.
Thank you, I'm glad that you found it enjoyable.
8 hours ago, CrazyGoatLady said:Your wife does great work. I would not have known someone is holding a camera in their hands.
Hehehe, I'm will pass on your commendation to her. Thanks
6 hours ago, Frosty said:You might see if she likes forging copper DSW. It's much different than steel but is enjoyable in a lower energy more precise sort of way.
I will present your idea to her. We'll see...
-
I did say I do pay attention to my safety, didn't I?


-
Hehehe, she is a nurse, so steady hands are desirable in her line of work

She loves to spend time with me in the workshop and helps me quite often, but she likes to watch me forge more than she would like to try. She did forge one leaf keychain with my help, and that was that
 .
.
-
-
Thank you VERY much!
Well, everything in my video making is a poor man's resources. All filming credits go to my wife, she is the one behind camera, or should I say, behind the smartphone :). We don't even have a tripod, she is holding the phone in her hands (ocassional shakiness). Every video till present is filmed with the CAT S61 Smartphone. My job is just to edit the video and upload.
-
jlpservice, thank you. Much appreciated
Irondragon Forge, I'm really glad that you've liked my video.
I'm really grateful for your support, by that I mean all of you folks on IFI!
In regards to PPE... I really take care of my protection and think we all should do that and of course, I'm aware of not having a guard on my angle grinder is not safe. I'm guilty as I can be. Problem is that I'm used to using small angle grinders like that, as long as I remember. The guard just gets in my way... I do use full face shield, when I'm operating an angle grinder in that configuration, so I believe it reduces hazards a bit.. -
CrazyGoatLady and Rojo Pedro, thank you very much, I really appreciate your kind words. I'm glad that you like my videos. I'll do my best to make more of them.
-
Bad weather in my parts, which translates: more time for blacksmithing!
Here is a video of me making a peeling knife, as a request from my wife. (I'm not really into making knives, but this is for a good cause; more motivation for her to make me delicious meals :)) -
55 minutes ago, Steve Sells said:
looks great DSW i would buy them

Thank you very much. You are among just a few people that said something like that to me. Unfortunately, I live in a country where this kind of work is totally unappreciated by the majority of people, so selling my work is not an option for my situation. The best I can do is share it with you guys here on IFI, or on my Youtube channel. I guess I was born on the wrong side of the planet

But nevertheless, the main thing is to enjoy my passion for blacksmithing, and maybe have the chance to pass on my knowledge in the future, to someone willing to take up the adventure of manipulating hot steel.Thank you very much, blacksmith-450
58 minutes ago, JHCC said:One good thing to do with twisted jaws is to knock the sharp edges down with hammer and anvil before you make the twist, and then hammer any remaining ridges back into the bar before you proceed.
You've got the point on that... Although I would nevertheless use the welder to fill the gaps, so it would just be less welding to do.
I will try that on a future set of tongs though... -
Thank you very much CrazyGoatLady

-
Thank you JHCC.
CrazyGoatLady, I'm not sure that I understand what do you mean... I'll try to explain how they were made, and I hope there will be an answer to your question.
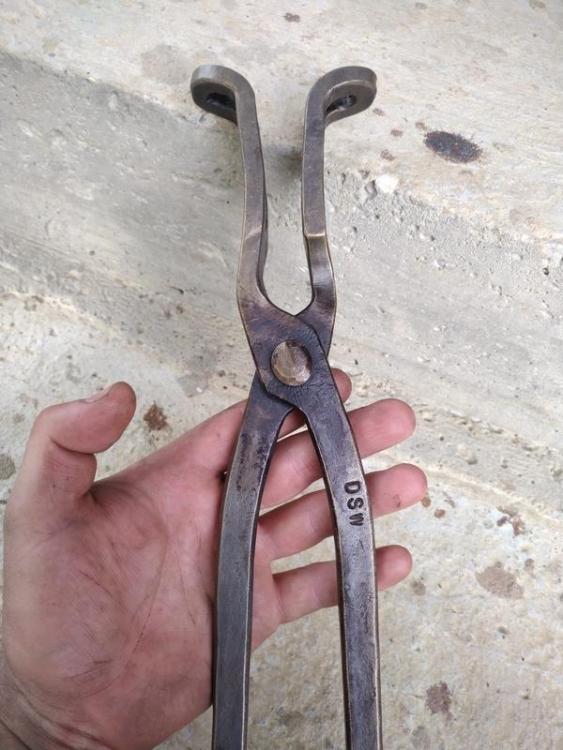
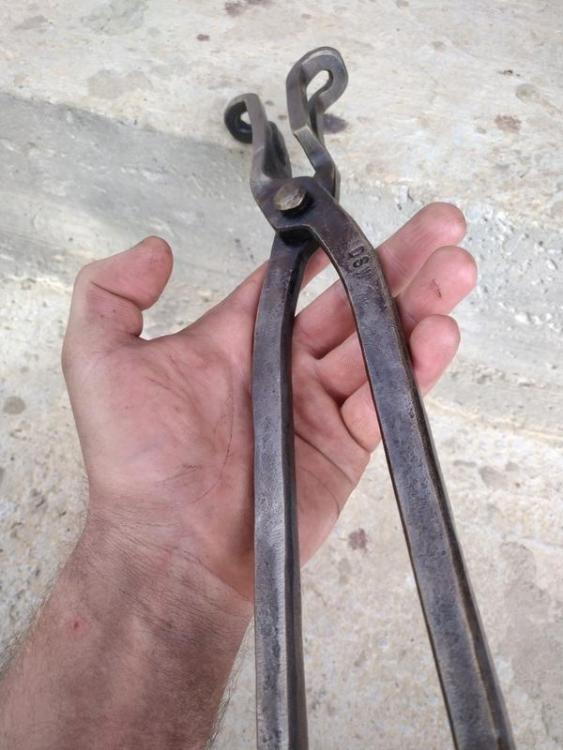
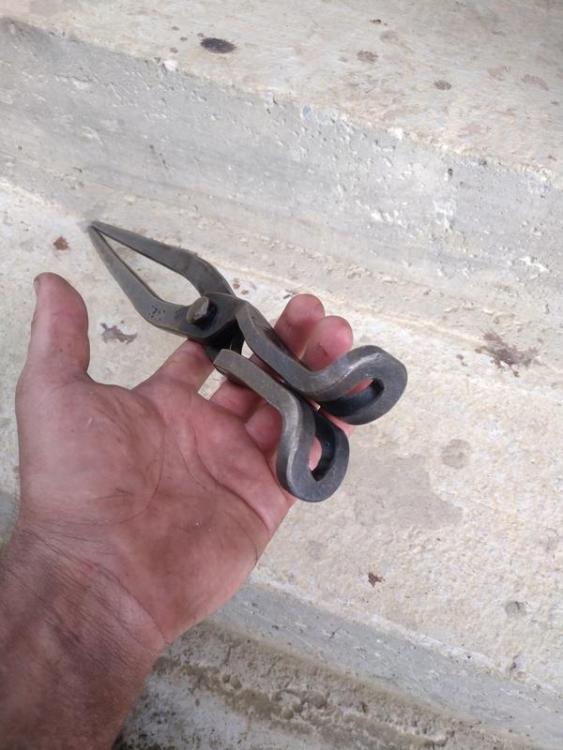
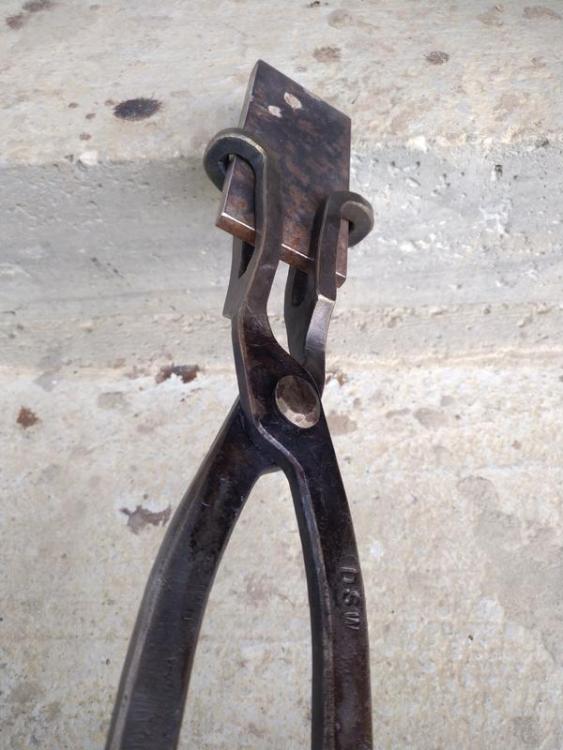
I've started with a piece of 8mm thick steel plate and cut 2 strips out of it (30mm wide and 250mm long). Then I've set 2 opposite notches (40mm apart from each other) on the sharp edge of the anvil, at 45 degrees, to define the boss area. Next, I drew out the reins. After that, I've twisted the jaws 90 degrees counter-clockwise. I wasn't very happy with the way it looked, so I've ground the sharp edges of the twist, and filled the gaps with the welder and ground and filed it so it looks nice. Then I've drilled two 8.5mm holes on the jaw part and cut the slot with the angle grinder. The last thing I did was the bend on the nose part of the jaws. I hope it all makes sense
Thanks jlpservice
-
It's been a long time since I had some spare time to do some blacksmithing... For me, spring comes with many obligations regarding forestry and agricultural work. I've spent some time in the workshop, but no blacksmithing work, just welding and fabrication...
Today, I finally managed to put my hammering hand to work, and it was a fair bit of work.
Here are some pictures of slotted jaw tongs I've made. -
As the weather improves in my parts, it is time to start some forestry work. Today I've made a stump vise to make chainsaw sharpening a little easier.
There is also a tree felling video on my Youtube channel. Everyone interested is invited to take a look
There is also a tree felling video
-
I really like the horseshoe cowboys idea. Good job Les L

What did you do in the shop today?
in Blacksmithing, General Discussion
Posted
Thank you very much! I'm always glad to hear that someone found my videos enjoyable, especially if that someone is from a blacksmithing community. It really gives me a boost to make more videos.