
Erik Mendel
-
Posts
28 -
Joined
-
Last visited
Content Type
Profiles
Forums
Articles
Gallery
Downloads
Events
Posts posted by Erik Mendel
-
-
Yeah I did run them. First couple runs weren't amazing but after some fussing about I ended up running .30 migs at above 6 psi to prevent the back fire issues (5 hours). I found the .35 to let quite a bit of fuel out the doors. I have a fair amount more that I can pull the plenum further back so I might futz with that because I wouldn't mind being able to run it at temps below 2100 without backfire. I'm gonna running it all day tomorrow so I was thinking about blocking one of the nozzles on each burner and see if that helps to bring up the pressure per hole and cool the block a bit. I put 5 layers of hyb-uv on today so its possible that could help keep the burner block from heating up as much.
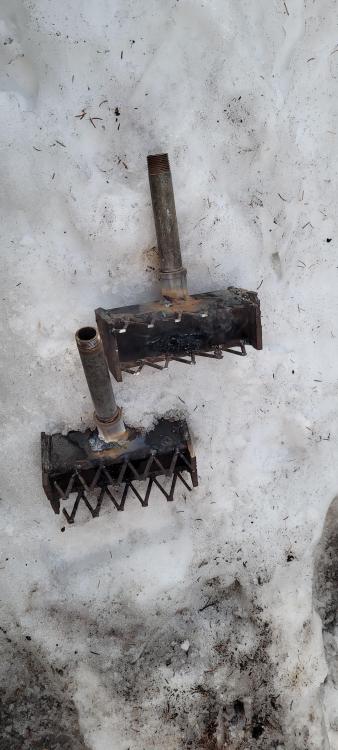
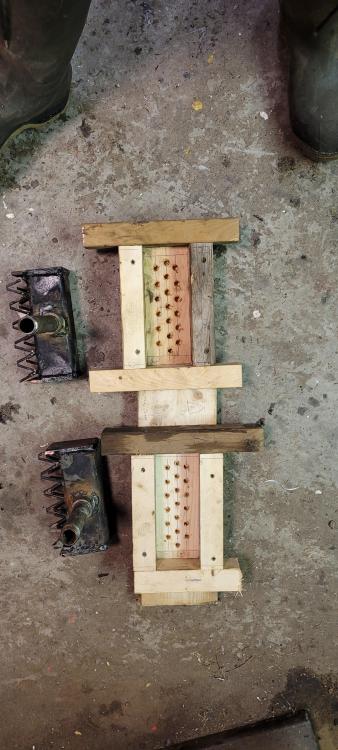
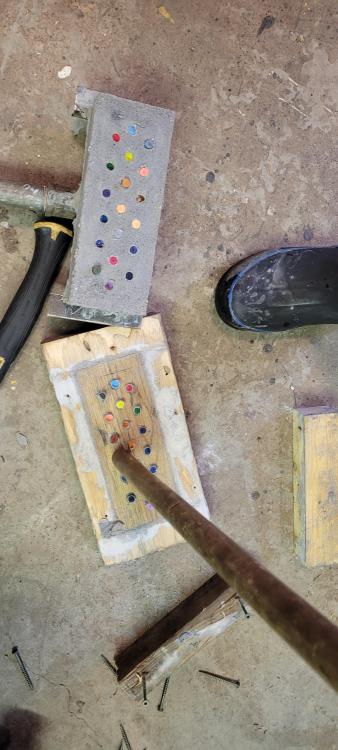
The hole diameters are 5/16 crayons I copied frostys build as close as I could.
-
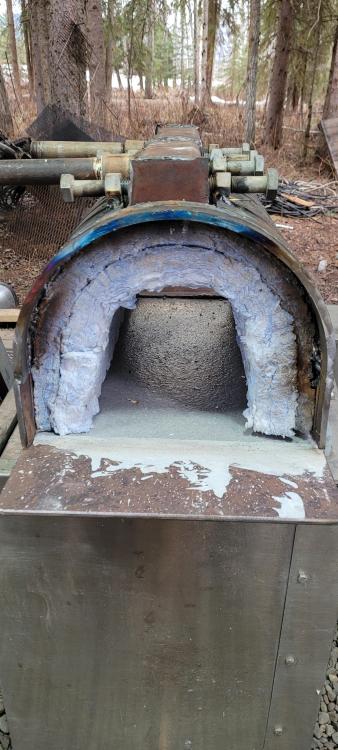
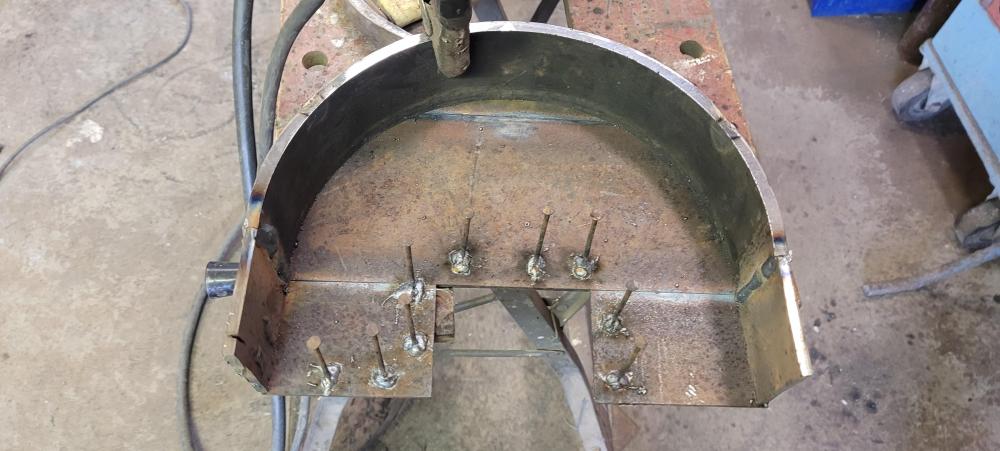
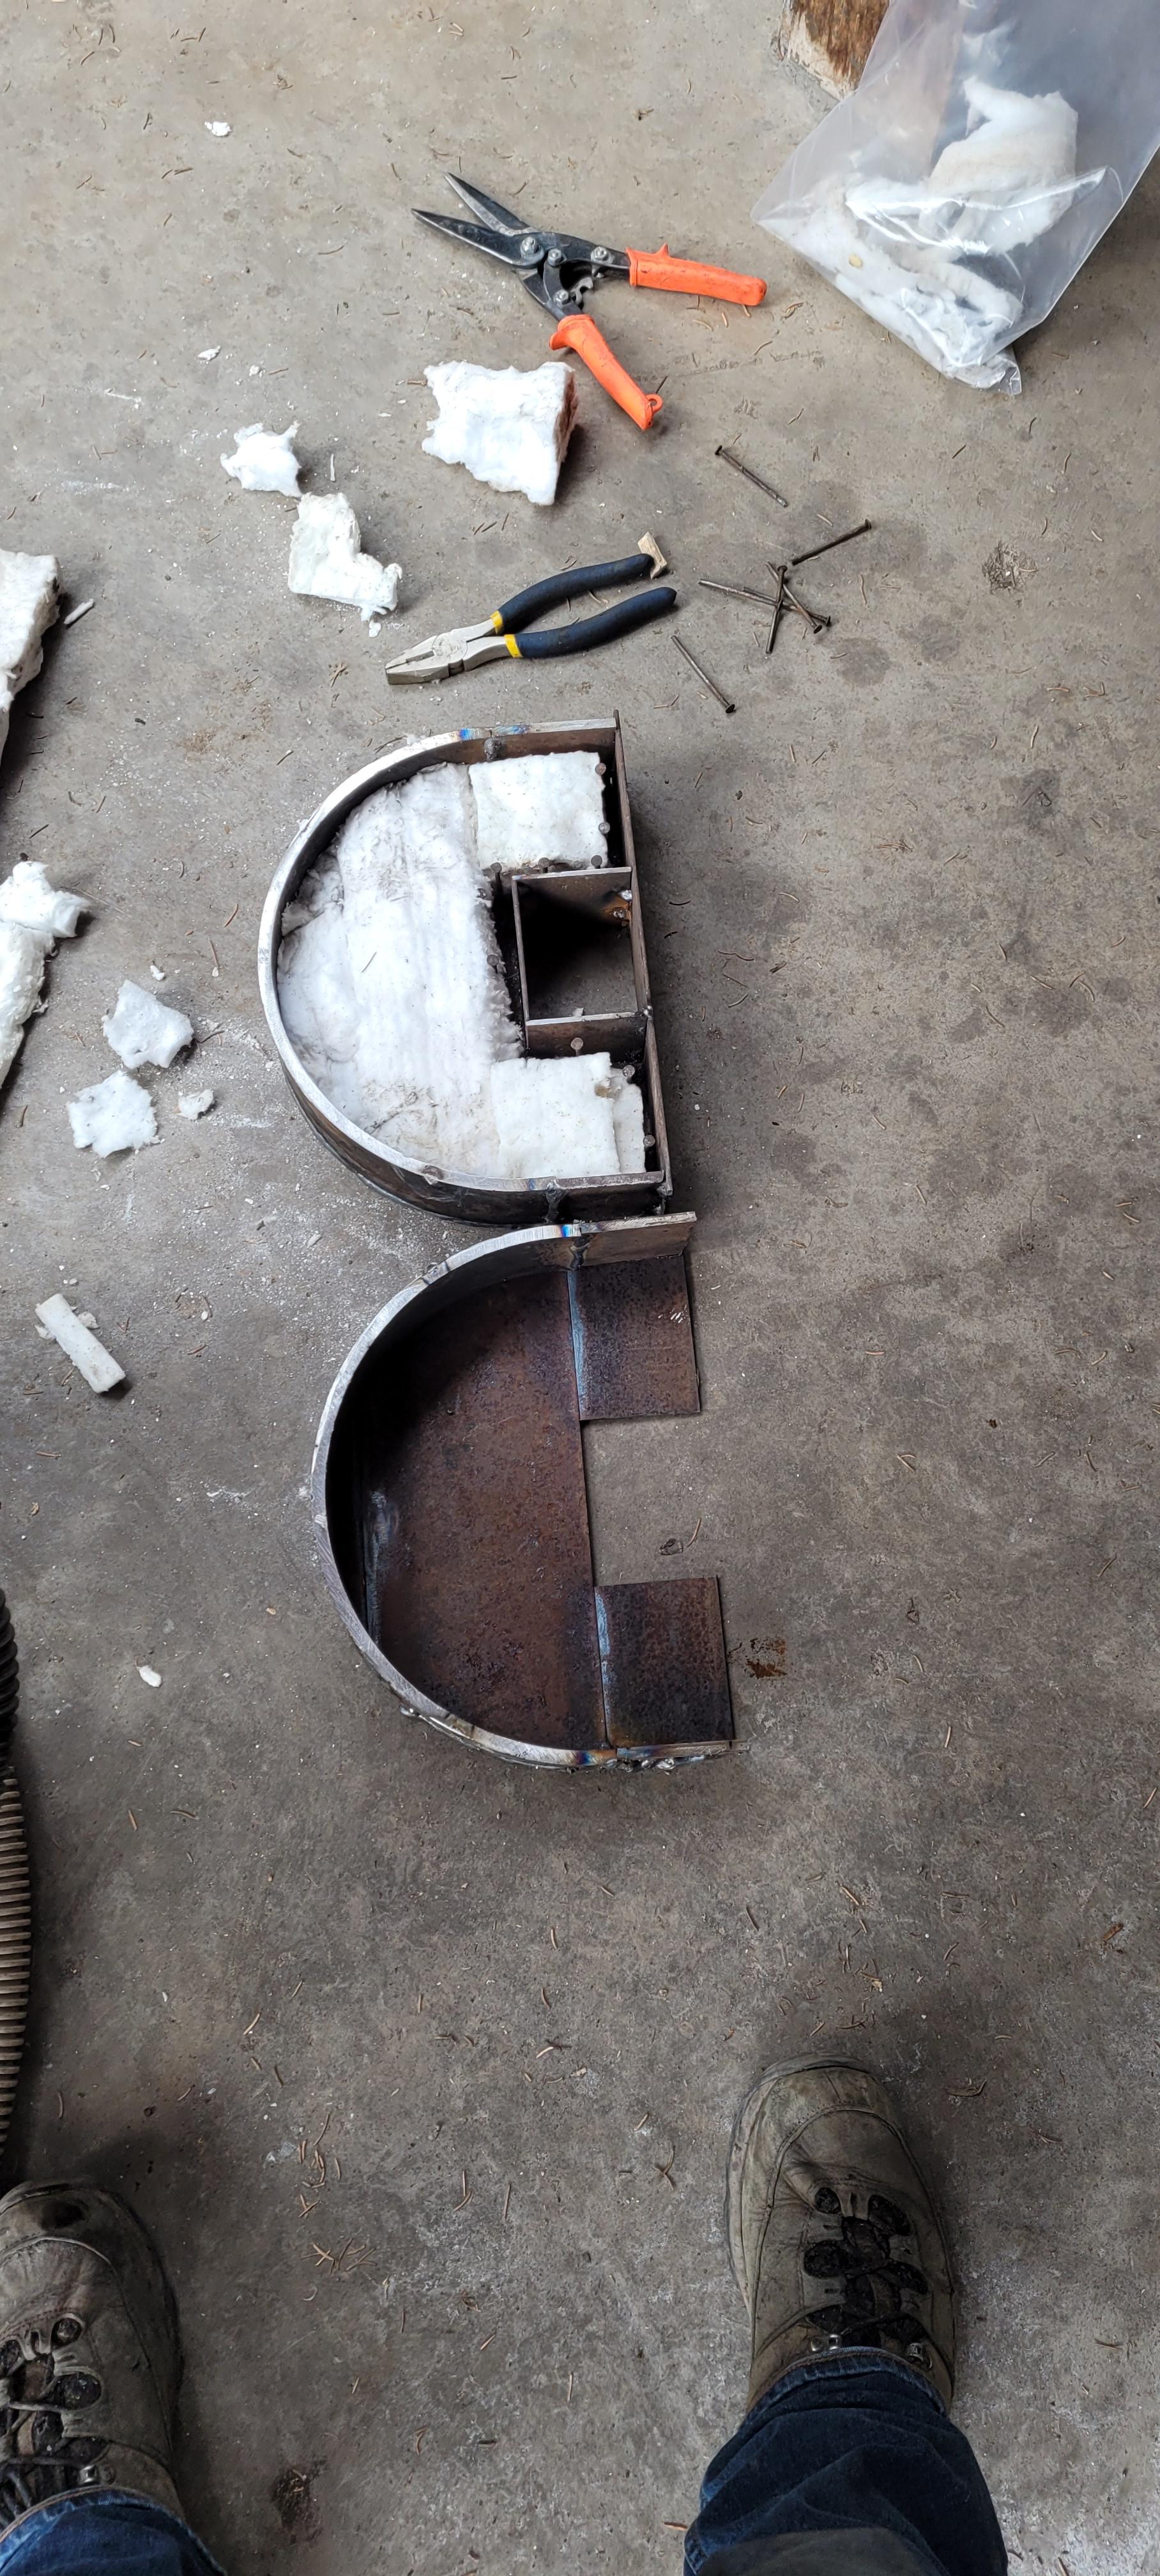
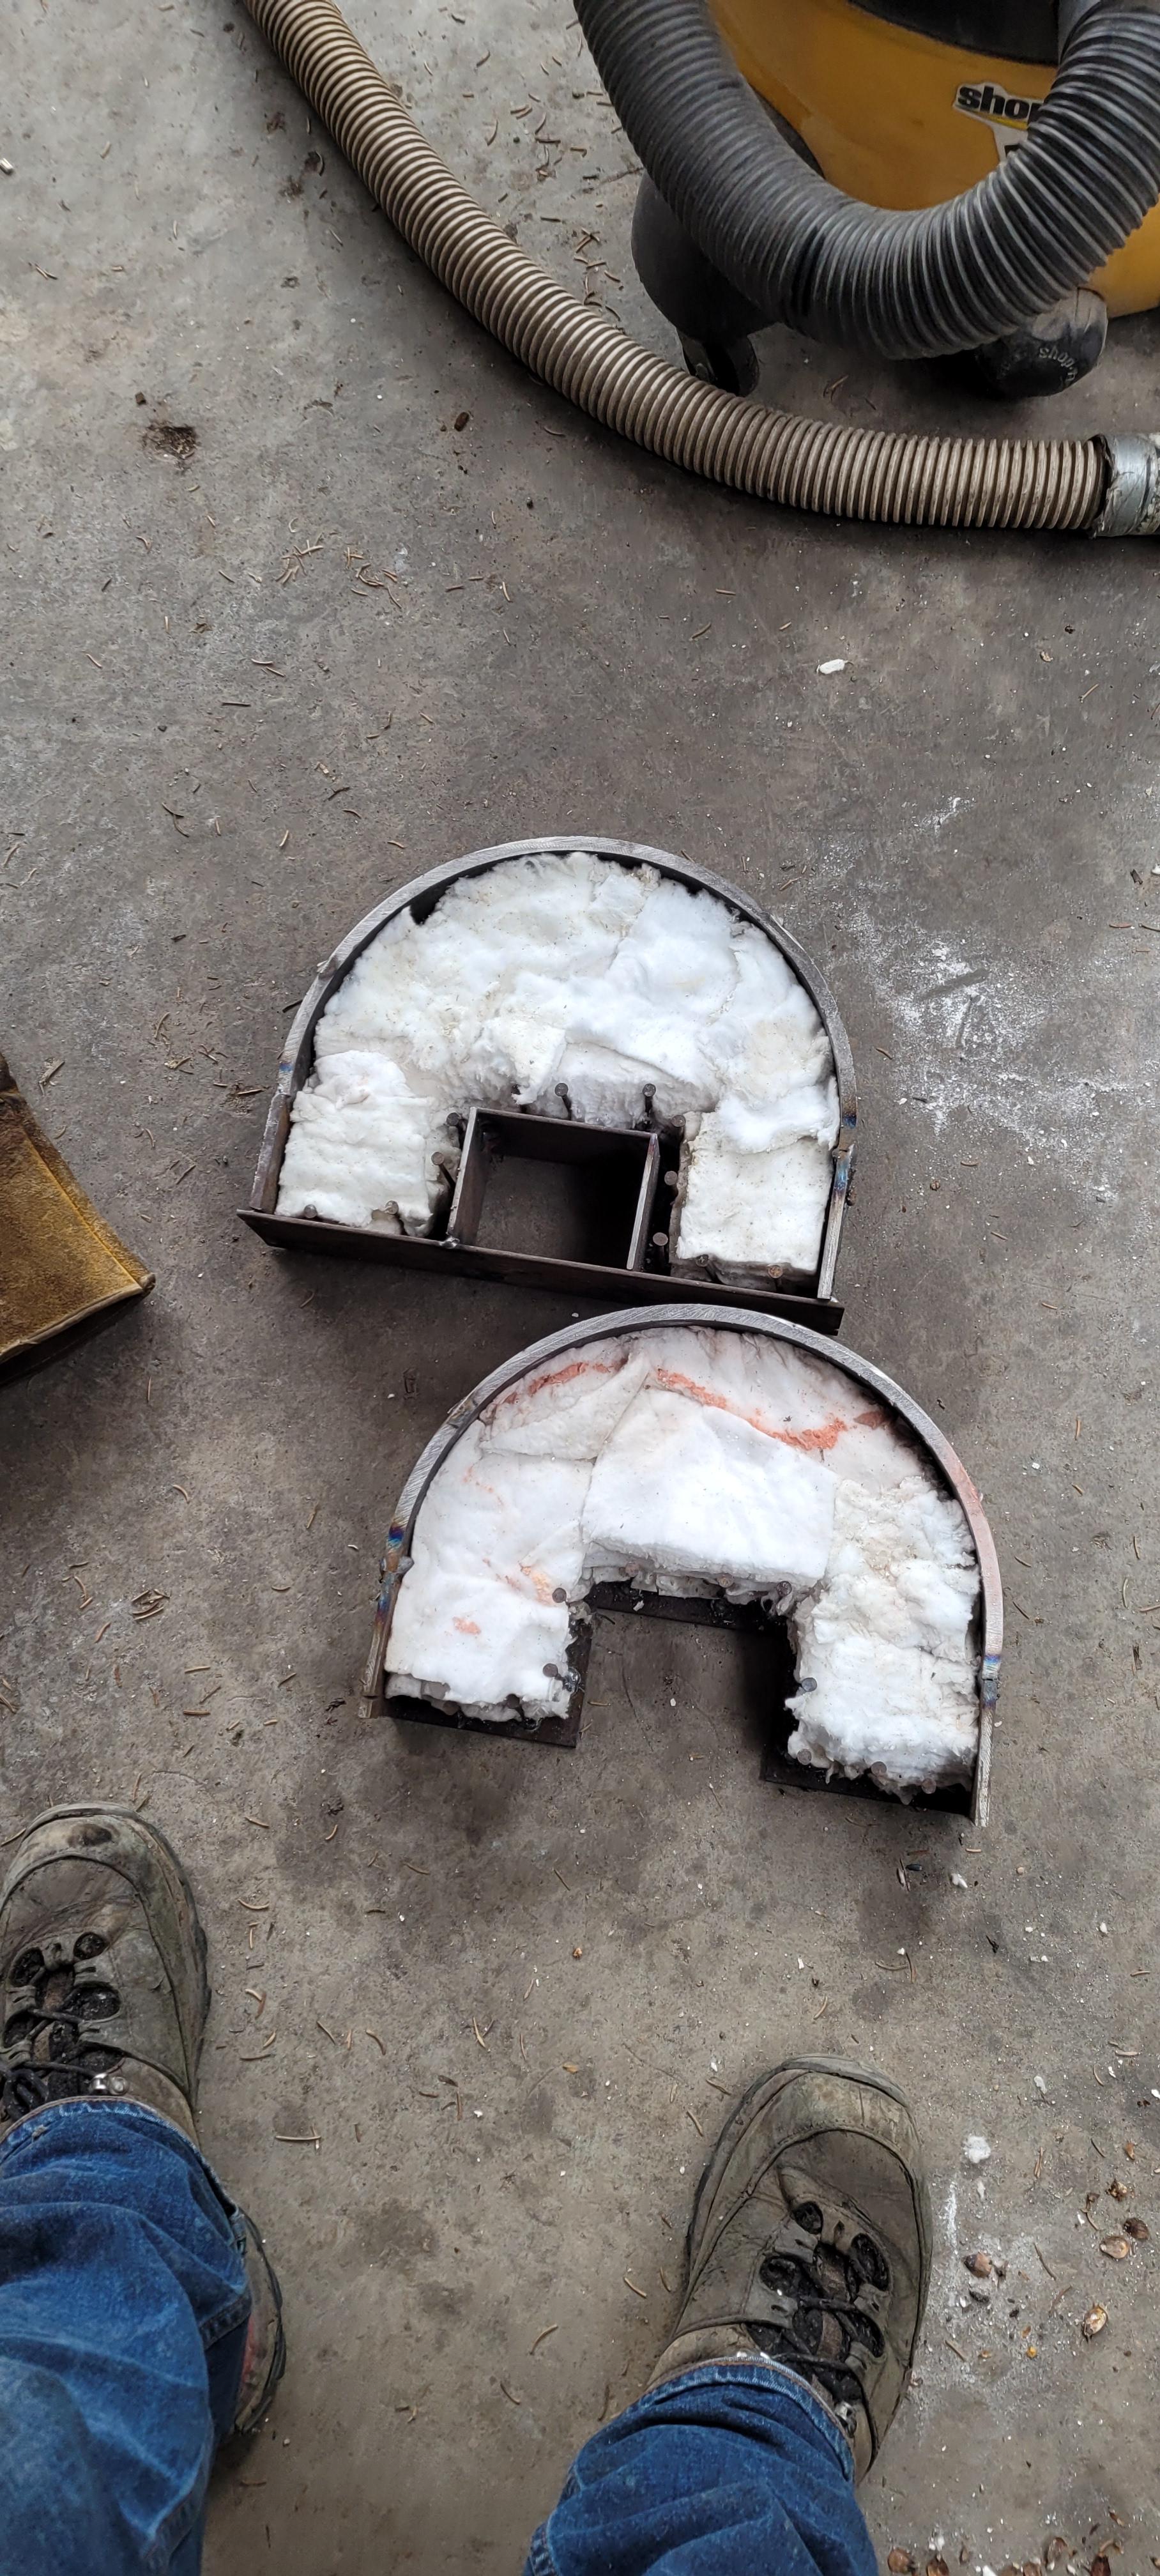
Here's the new forge I made to house 2x3/4 narb burners. Total length is 22.5 inch. The internal chamber is 5.5 inch wide and 6 inch tall. After a couple full burns I'll paint her with some ir reflective.


-
so much good information thank you frosty!
-
oh frosty I take no offence from your candor, this is the reason that ifi has been able to benefit from what you have shared with the community. I feel as though you have pioneered this adventure and have nothing but respect for the time that you took to share with the community and help us to benefit from your experiences.(and how well you laid it out for us- the t burner instructions as well as this thread) I guess I should ask more clear questions sorry 16 hours of work and 8 beer me was clearly excited.
1) is it normal for forges to reliably run at 1400f deg (understanding well enough the standard expectation of surface area 350 per 3/4 burner, 2 inch kao wool, 1/2 inch kast 30 and IR reflective {hyb,matrikote,itc} normal standard for good forge efficiency) if yes then which proven burner has been doing this for you.
2) if people have taken this much further then you (frosty) then whom do you speak of. I recognized the ceramic burner attempt ( I believe Ron on utube?) and thought it was very promising until it failed approaching welding temps.
3) I am very concerned with psi because I have been running 2x3/4 burners for 25/50 hrs a week and propane is getting more expensive. While I was running .23 tips in the side arm I would run 9 psi for 2100 -6 hrs minimum. Today I ran T burners for the first time with .35 and achieved 2000 at 6 psi (unconfirmed which is costing more to run but very interested in finding that answer). I guess the truest test of efficiency would be to run each at a set psi for a set time and weigh the difference in tanks then compare. Side note maybe not important- when I shut of one of the side arms the heat drops back to the side of the burner and only heats maybe 6/8 inches (round forge 6"x 13") of the forge making the working space so small I've never felt the expense is worth the money. I will say this: today when I shut off the frosty with .35 tips it continued to heat almost the whole forge space to reasonable working lengths (almost the whole forge) at 6 psi and still ran 1900 deg. This realization has cut my propane expense in half instantly which makes me extremely happy.
I understand that this whole dialog maybe should be in the burner section; however, my interest is in getting the most efficient and even forge heat I can and I believe that narb is the most likely road to this goal.
I'm sorry frosty!! side arms are also horrible in the wind less than 3psi is not realistic with any gusting wind
-
Mine are all stable stop to stop through my regulator. Stop to stop means turning the adjustment screw all the way in or out.
Burners on their own or with narbs?
I’ve run mine down to about 2 psi.
gottcha, I totally misunderstood then, your running narbs or t-burners/ flares
-
Thank you sir in the forge will be the rest of my experimentation, I do recall reading this advice from your self to many other individuals and feel stupid that you have to continually repeat your self to the new guys. I might be mixing up the difference between the frosty on its own and the frosty with the narb. what I wanted to know was do the t-burners run well at lower psi, I tried today to run the t-burners with some Zoeller flares and found them to be great above 5 psi am I mistaken that they have been having issues below that? as to the narbs with t burners, I recall your pulling them further back and solving the burn back issues after 4-5 hours was around 6 psi? please don`t take these questions in anything other than the light they were intended- my intent is to fully understand where the rest of the group is and hopefully contribute something useful to the community
-
I don`t want to necro post; however, I have some questions and maybe some relevant input to this topic. I have read this thread well over 5 times in my efforts to make a new narb forge. I've watched Ron`s you tube videos and seen every thing I could about the variations which have resulted due to frosty`s initial sharing of this great innovation. I have recently copied frosty`s design`s (more or less) first with t-burners and flares and then put his ribbon burners into the first stages of testing. note- due to some of the reported burners heating and burning back into the plenum when running for longer times I increased the mass slightly in the hopes that the extra refractory would allow the gasses to keep the plenum cool enough to minimize the burn back.
This is the first time that I have built a t-burner (4 actually) when I initially did my research to decide what I wanted from my forge I decided to copy the Ron Reil modified side arm burner. I chose this due to my reading something from frosty stating I think that his burners would start to huff at psi less than 5. I run my burners with an idle circuit for normalizing at next to off. The slightest adjustment would kill the burner and the 1/4 dial is adjusted 1/16 to raise or lower forge temps by 5 or 10f deg. I have used side arms in my main forge for 4 years now and run a thermocouple to help alleviate my inexperience at telling the correct colours. Due to the chokes on the side arm burner I use my main forge with a muffle pipe to hold steady (3deg fluctuation-usually due to wind) down to 1350 for heat treating. The side arms are running .23 tips. This does give a lean burn however I found the price of propane to be prohibitive enough to warrant using the wire wheel to clean more often.
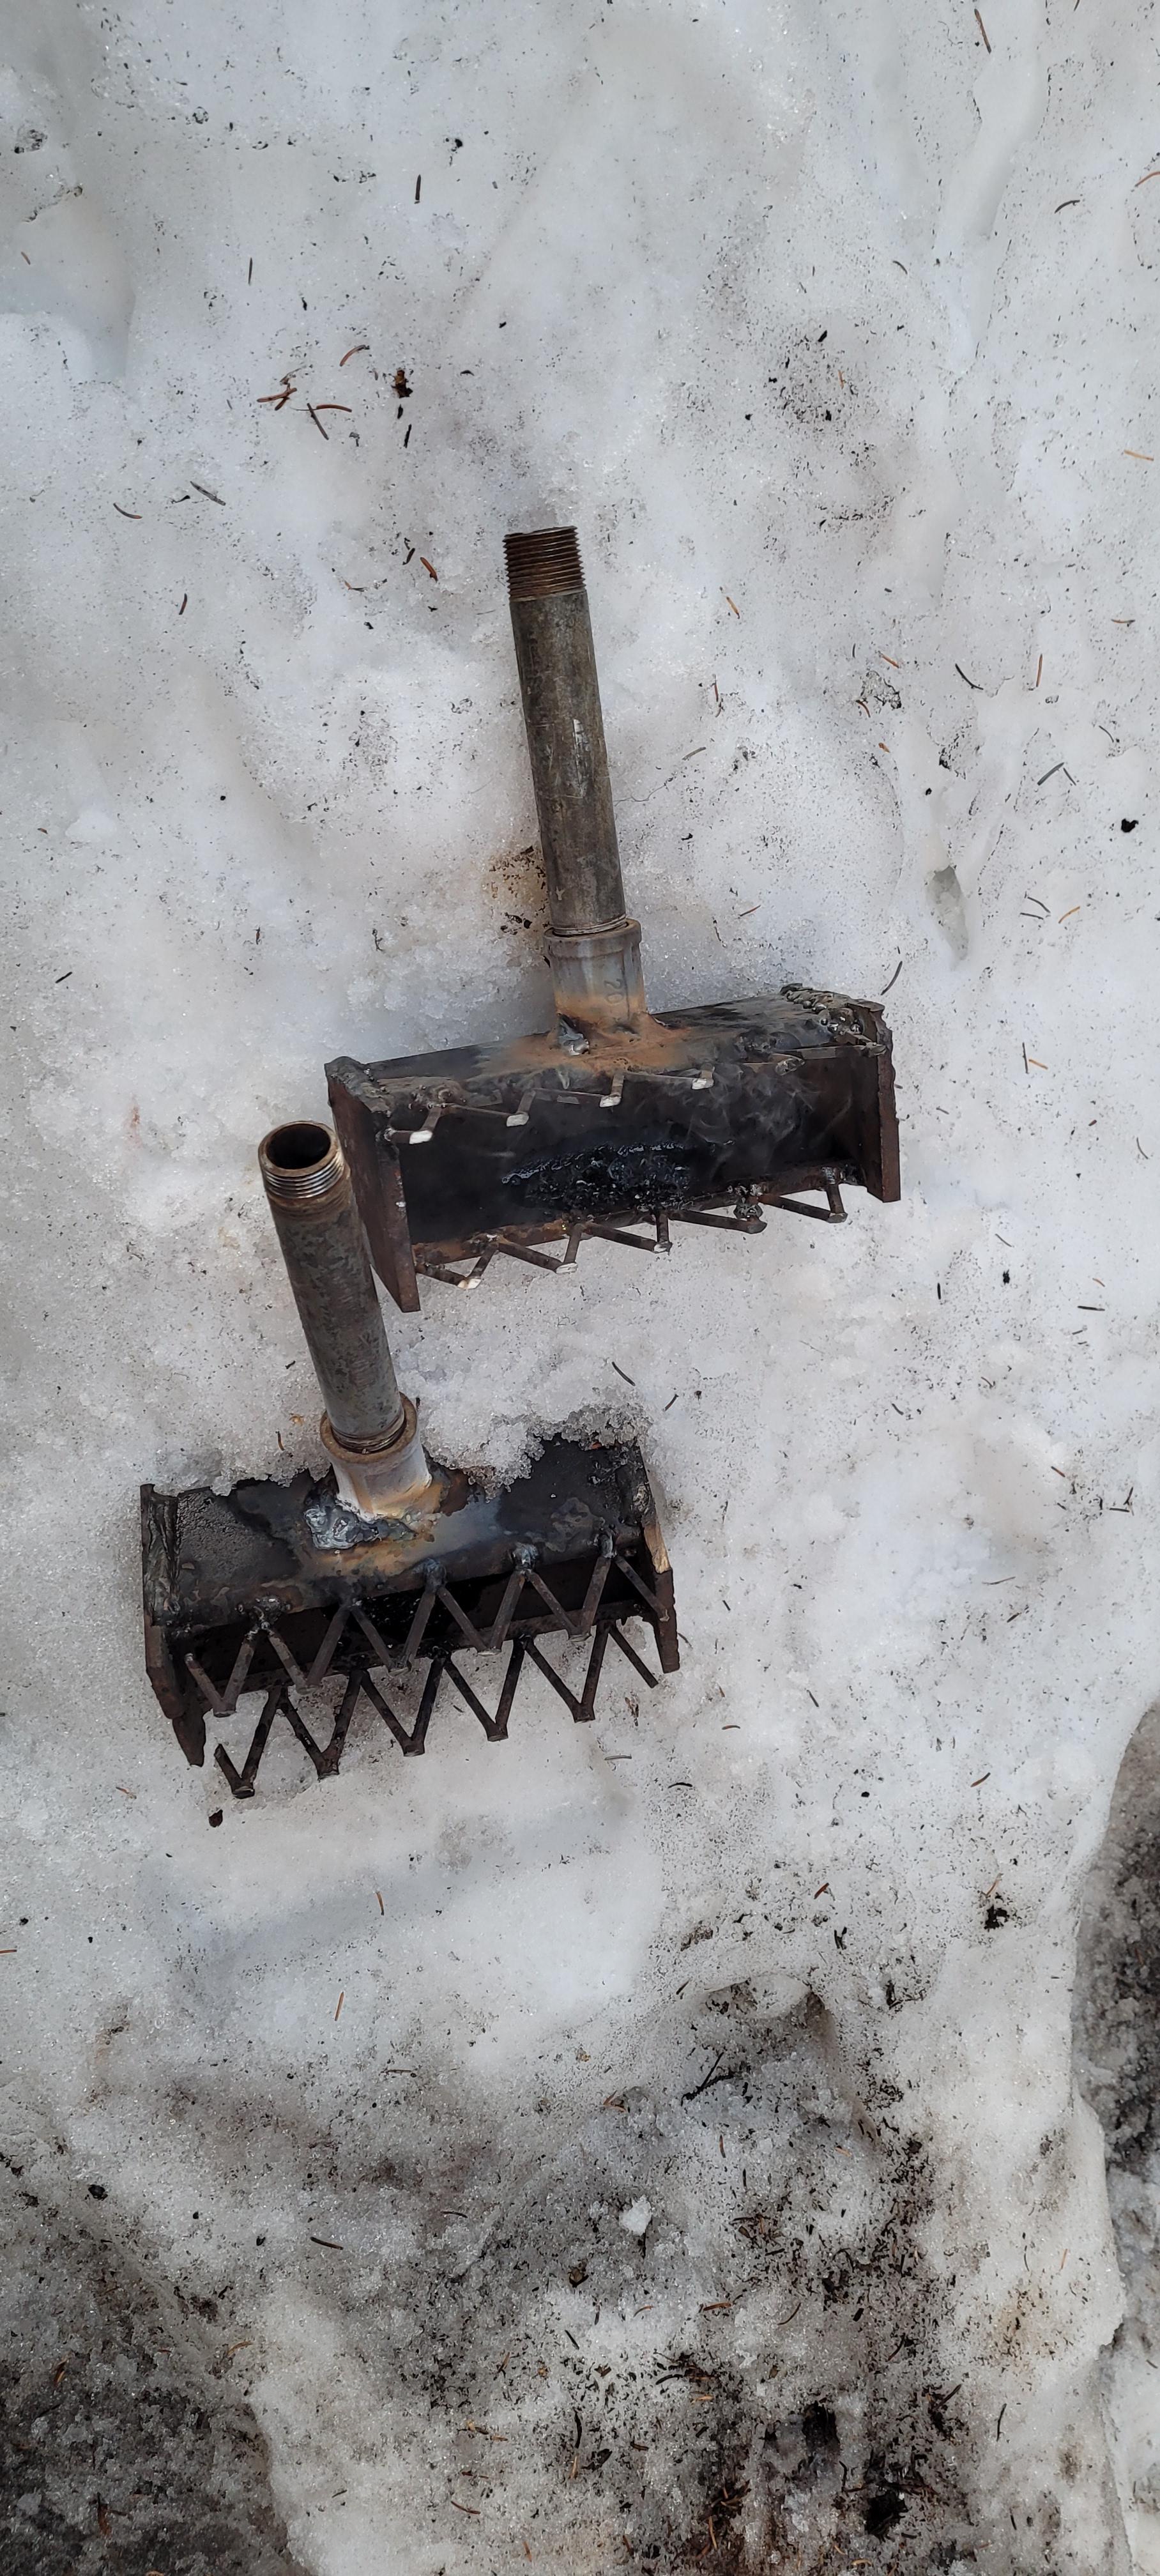
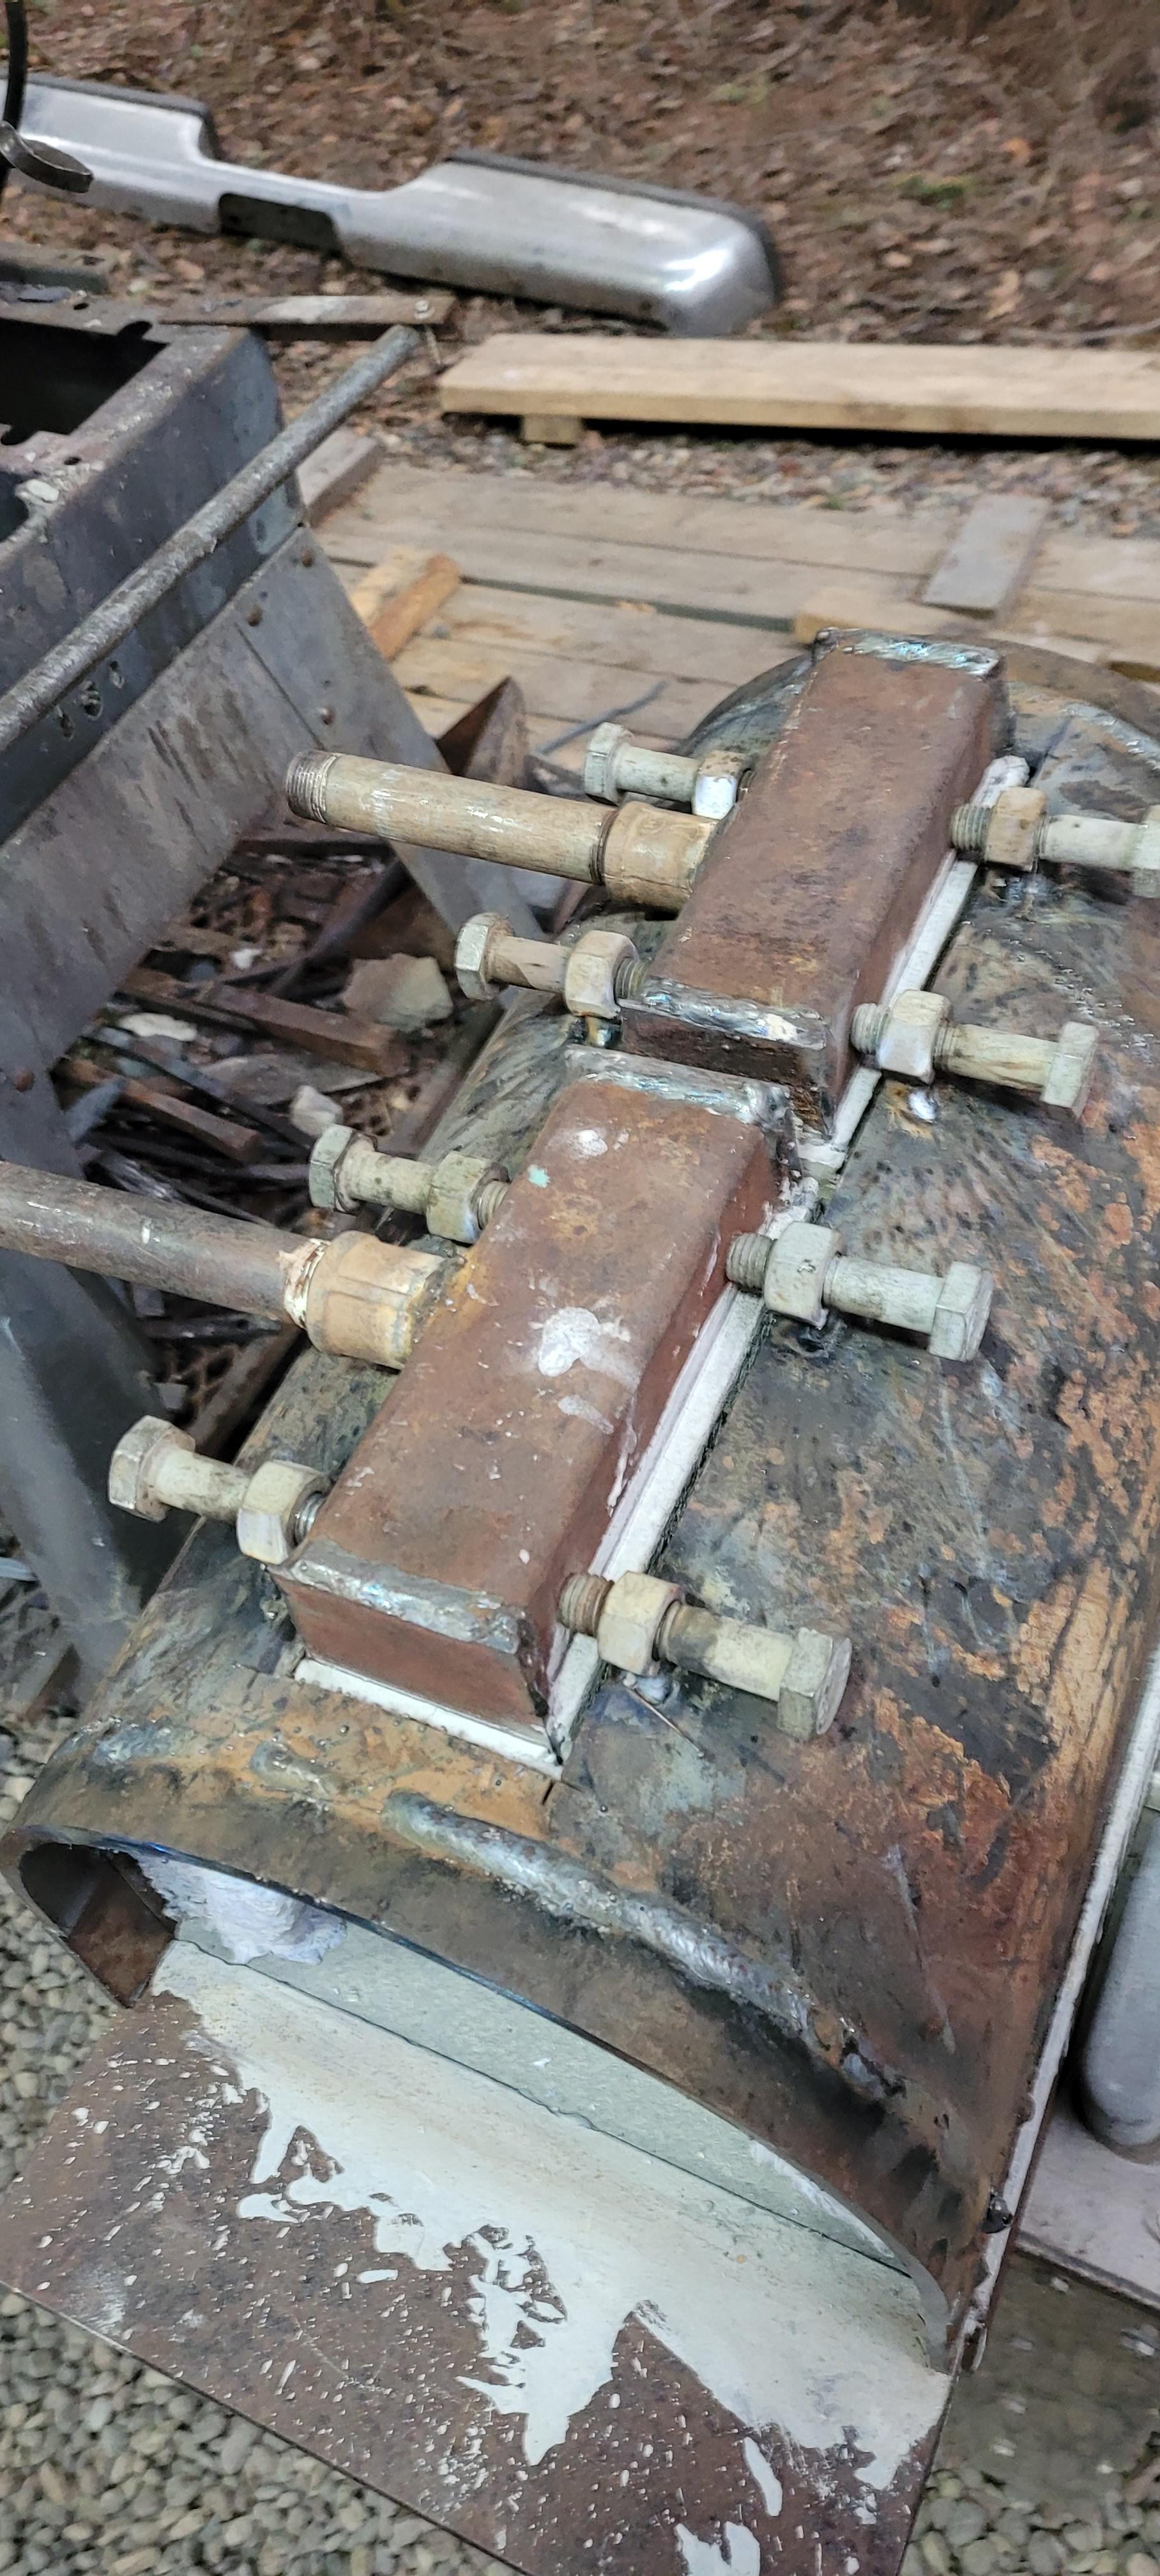
I made the 19 crayon holes in a 3X8 block of mizzou, the internal holes layout I think would be roughly the same as Frosty`s (2x7?) original design but with more castable surrounding the holes, and thicker metal -1/4 inch tube and 3/8 side walls. My intent was to hopefully be able to run the ribbons using the choke on the side arm at much lower than the 5psi without burnback. Today I was able to run the narbs out side the forge at 3.5 psi and adjust the flame quite a bit with the choke, not the t-burners mind you. Im not sure how much the back pressure will change these results but I have some questions of the fore fathers in the hopes to point me in the right direction. I ran 6 different burners today (2 side arm and 4 t-burners changing mig tips .23, .30 and .35) and switched between 6, 8 and 9 inch mixer tubes. I found that the burners which ran on the side of lean would run out side the forge only between 5 and 8 psi above that they would blow off the face and burn unevenly( 5-10 holes only) the same burners with .35 tips would run even further off the flame face and not even run out side the forge unless the setting were exactly within certain parameters. The side arms I started with initially had .23 tips and preformed poorly until I put the .30 tips in, I was able to start the burners at 3.5 psi and adjust the air input to change the ratio in most cases to have all of the burner holes run through out the ranges of lean and rich and 2-15 psi. Is this capable for a properly tuned T-burner ( did i just do a terrible job of centering the hole?) in a narb or is it only because of the side arm? Is this only because I am doing testing outside the forge? based on what I saw today I hope that my initial dreams of having a narb to run 1500 holds reliably without burnback could be successful. I'm interested to hear of any other things I should try in an attempt to assuage weather or not this experiment has actually changed the potential of narb performance.
-
Here's a thought, how close to the original forge internal dimensions did you stick to one of my earlier designs I made my forge a we bit to small for the size burners and they ran poorly at lower pressure after the forge was hot. I couldn't figure out why for the longest time and just assumed that my burners were poorly built. After some time of just running it how it was the furnace cement has sloughed off the back wall after an attempt at forge welding. I ordered some kast-0-lite 30 from Wayne co and replaced the kaowool linning with half inch instead of an inch. This made it run much better at lower temp but I still wasn't happy. After reading a bunch in the burner threads I changed my nozzle from .35 to .30 and it was way better. The first build was huffing at 9ish psi when it was hot the second change would run 6 and the last is about 4. Not perfect but good enough for this red neck.
-
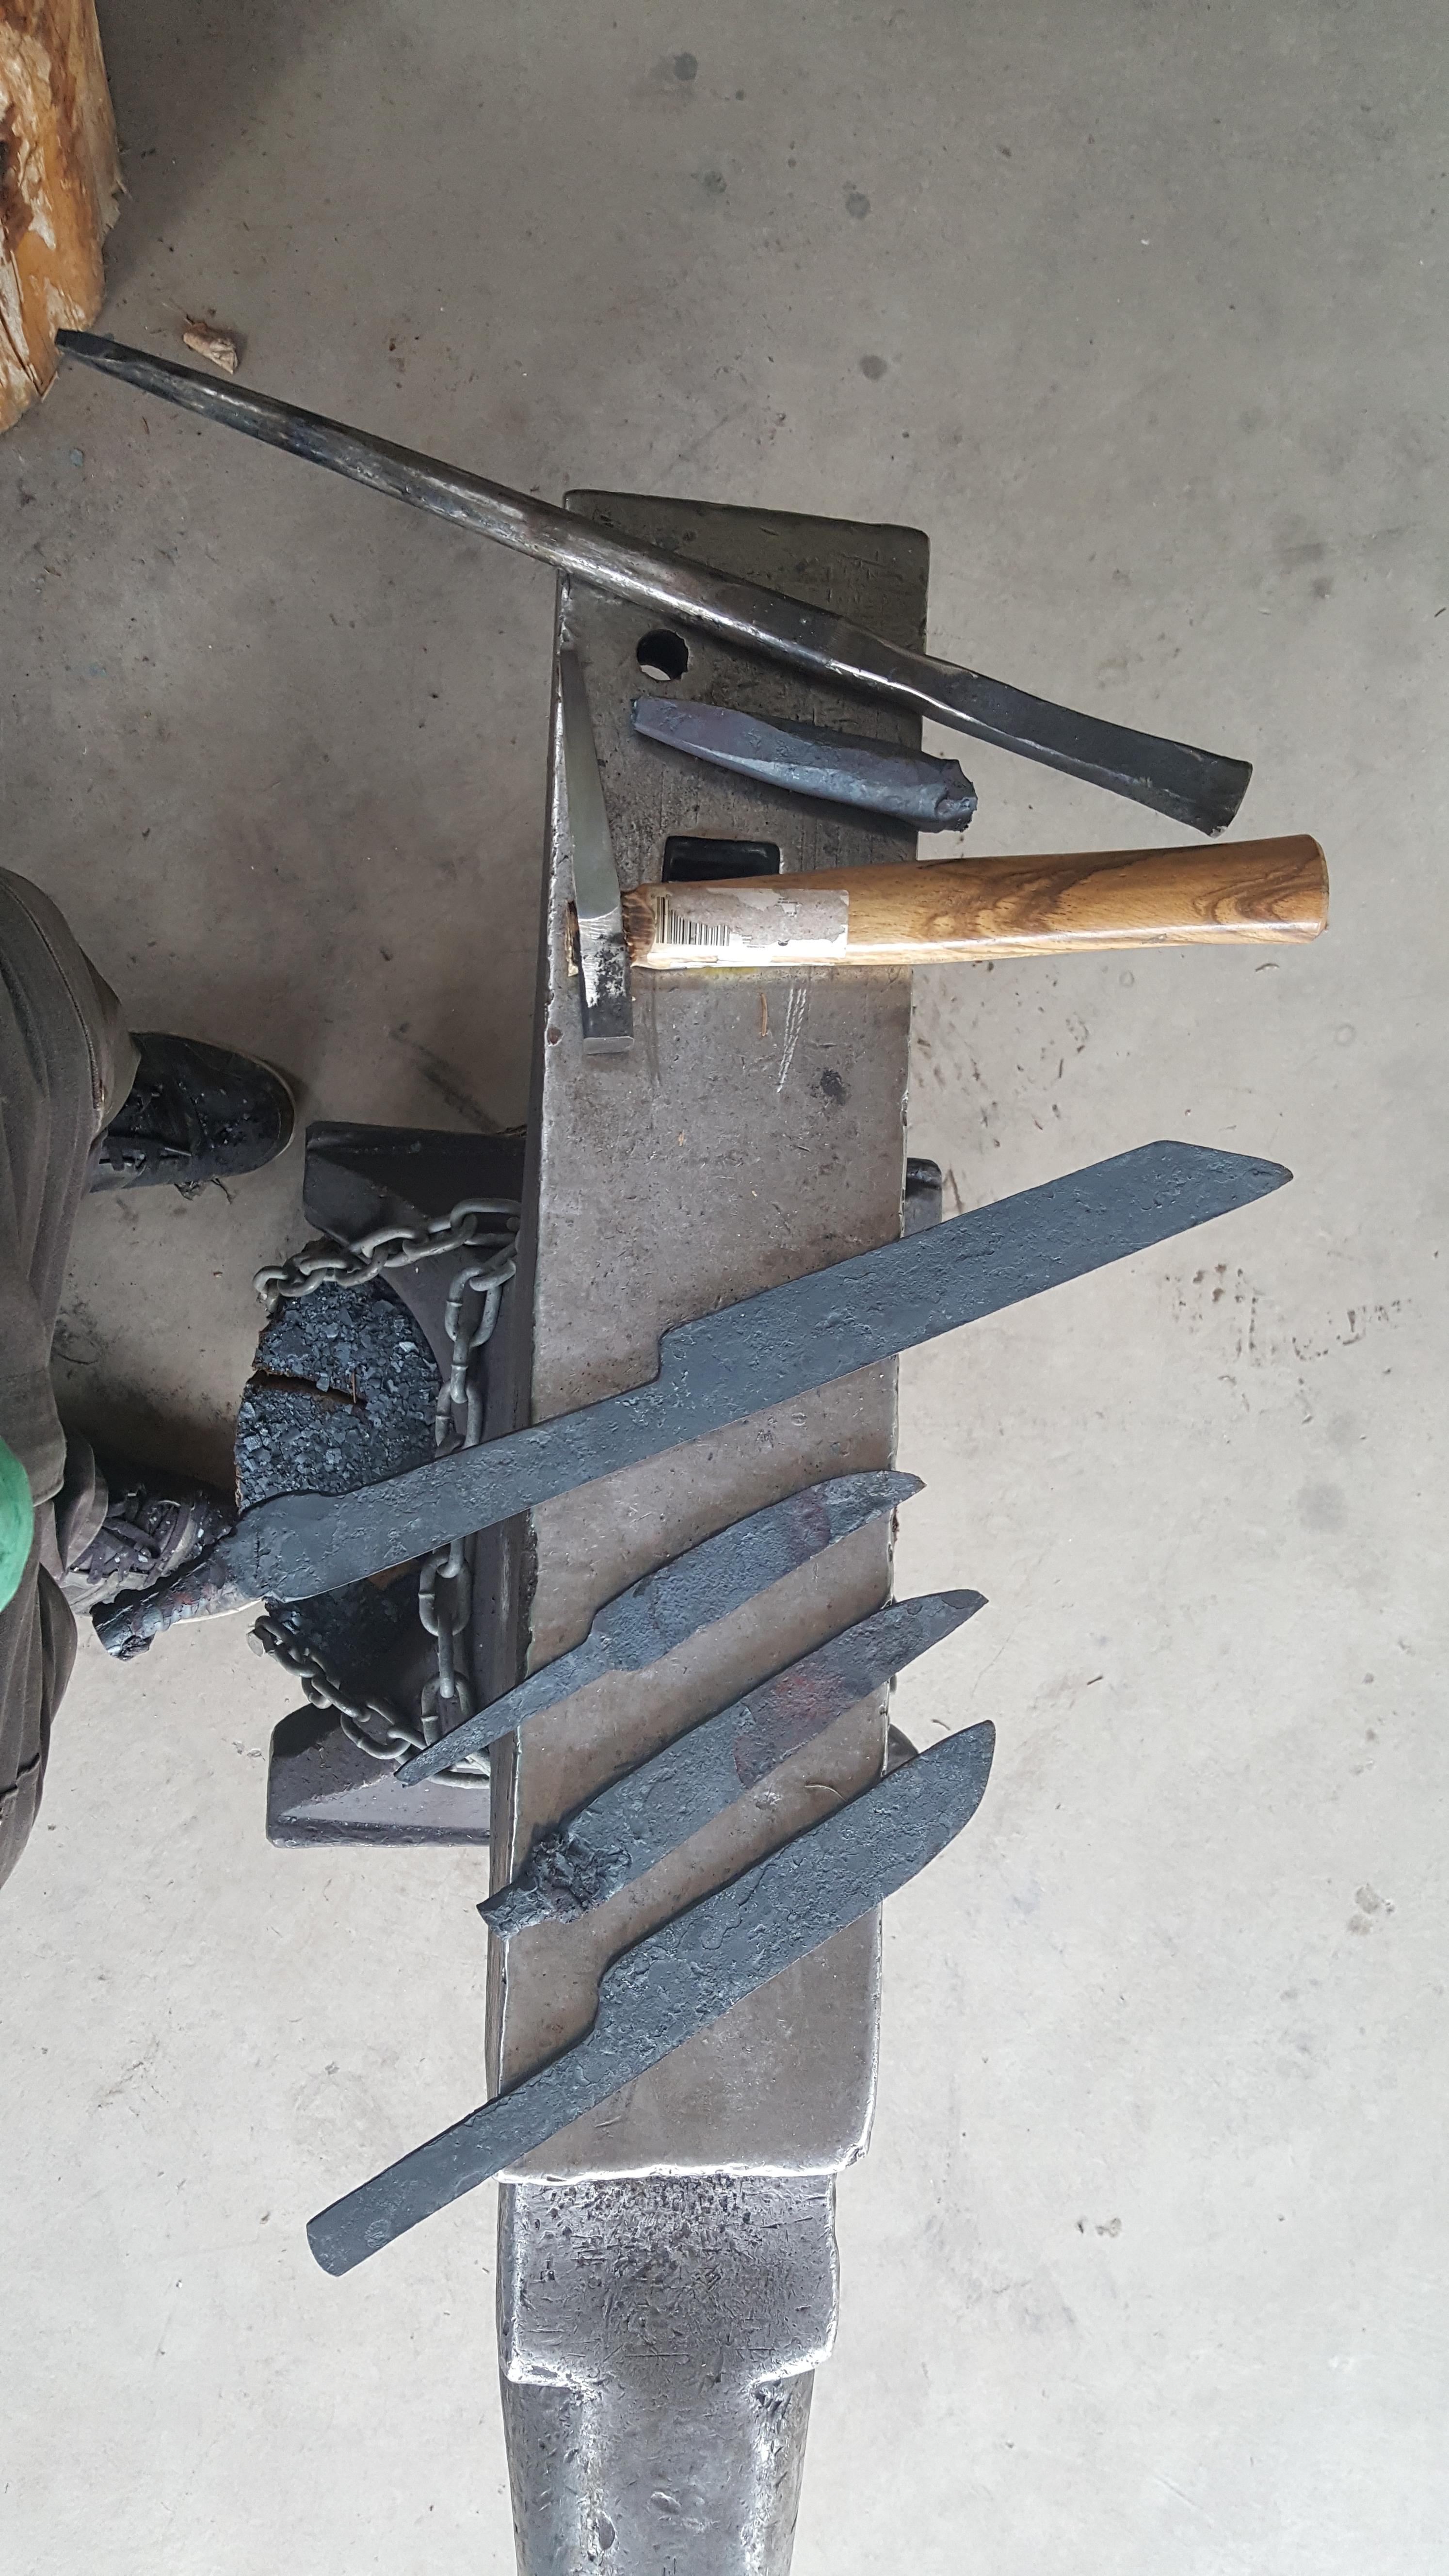
Yeah it seems the better I get at making tongs the more I want to do a better job at it so I find it's a round about circle when I toss the earlier ones and replace then with 2.0
-
Yeah they haven't reached back to me yet and it's been a while. From what I can tell nidec is now in charge of kb electronics. But I thought the drives were made by genesis.
-
I can see the narrative frosty that you've got where you are by lots of research and development. Quite a bit of your information has guided my own development. So let me refraise that I'm going to continue to make knives with the intent to someday make some of quality that my friends will keep as heirlooms. Every day I get closer to things knife shaped. I'm still trying to recover from an unfortunate incident in which my brand new kbac-27d blew up on first run.... does anyone have a contact for a place which might fix the drive for me?
Thanks Erik
-
I've been a knife addict since I was 5. So I'm planing on trying to make them.
-
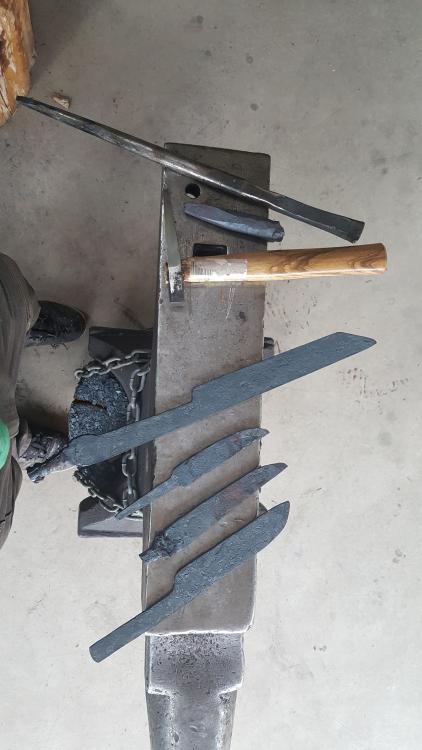
I'm brand new to smithing a couple of years in and ive gotta weigh in. I heard somewhere that if you build every tool you ever need when your done with that you should have the skills to do what you need to. So I did, I built my forge and burners based on what people here were willing to share. sounds like theirs a couple of more experienced smiths here and theyve definitely got their opinions some more accepting of clutter and some less.
but as far as anvilstands go, i started with a beat up old peter wright 256#. i had a nice block of hemlock which it wobbled about upon while i learned how little i knew about my new hobby. After a few days it became chained down with lag bolts, this was mainly done in an attempt to quiet the pain full ring. A few days after that the block was routered down to level on two sides and again chained down. Much more stable but still loud as heck. A couple of months later the anvil was siliconed onto the stump. This was the single most important development in my entire anvil stand evolution. Solid as heck 5 times more silent and that anvil is really on their, my drunk buddy's have tested this in their attempts to help clean up at the end of the night. Much to the shop floors dismay.
I recently acquired a 400# in great condition and in my haste to use it I bolted it onto another less level stump then the first. It was going to only be for the one night. That was months ago and the darn thing has stayed chained to the wobbly stump without me feeling any need to change it. Is it because it's larger and thus more stable or is it because I'm lazy and excited to see how much more metal i can move with cleaner edges. I don't know but what I can tell you is that the thing has done more work in the last couple of months then the one i spent 3 years owning (and at day at least of time perfecting its mounting.) Had I not spent this time messing about with my anvil I would have been further along in my forging experience. I think time managment is really a personal decision and should really be out side out another smiths judgment. I have less time then some and I would currently like to spend my time learning and forging right now.
I started reading this thread because I was thinking about which type of stand I wanted to build to have the best set up for the new anvil and after reading some of the perspectives shared I'm gonna let that beauty sit on the wobbly stump because right now I've seen theirs so many different types of stands and all of them seem functional enough to their makers that they are happy with what they have for now. I guess it's all about what your expectations are and most of us here have changed their set up when they found need to. I could spend today making a three leg metal stand and test it out, but I think I'll silicone her down and keep forging on. Everyone seems happy with what they've got and I guess I'm happy enough with what is that for now I'll let her buck.
Honestly though try the silicone I swear by it.


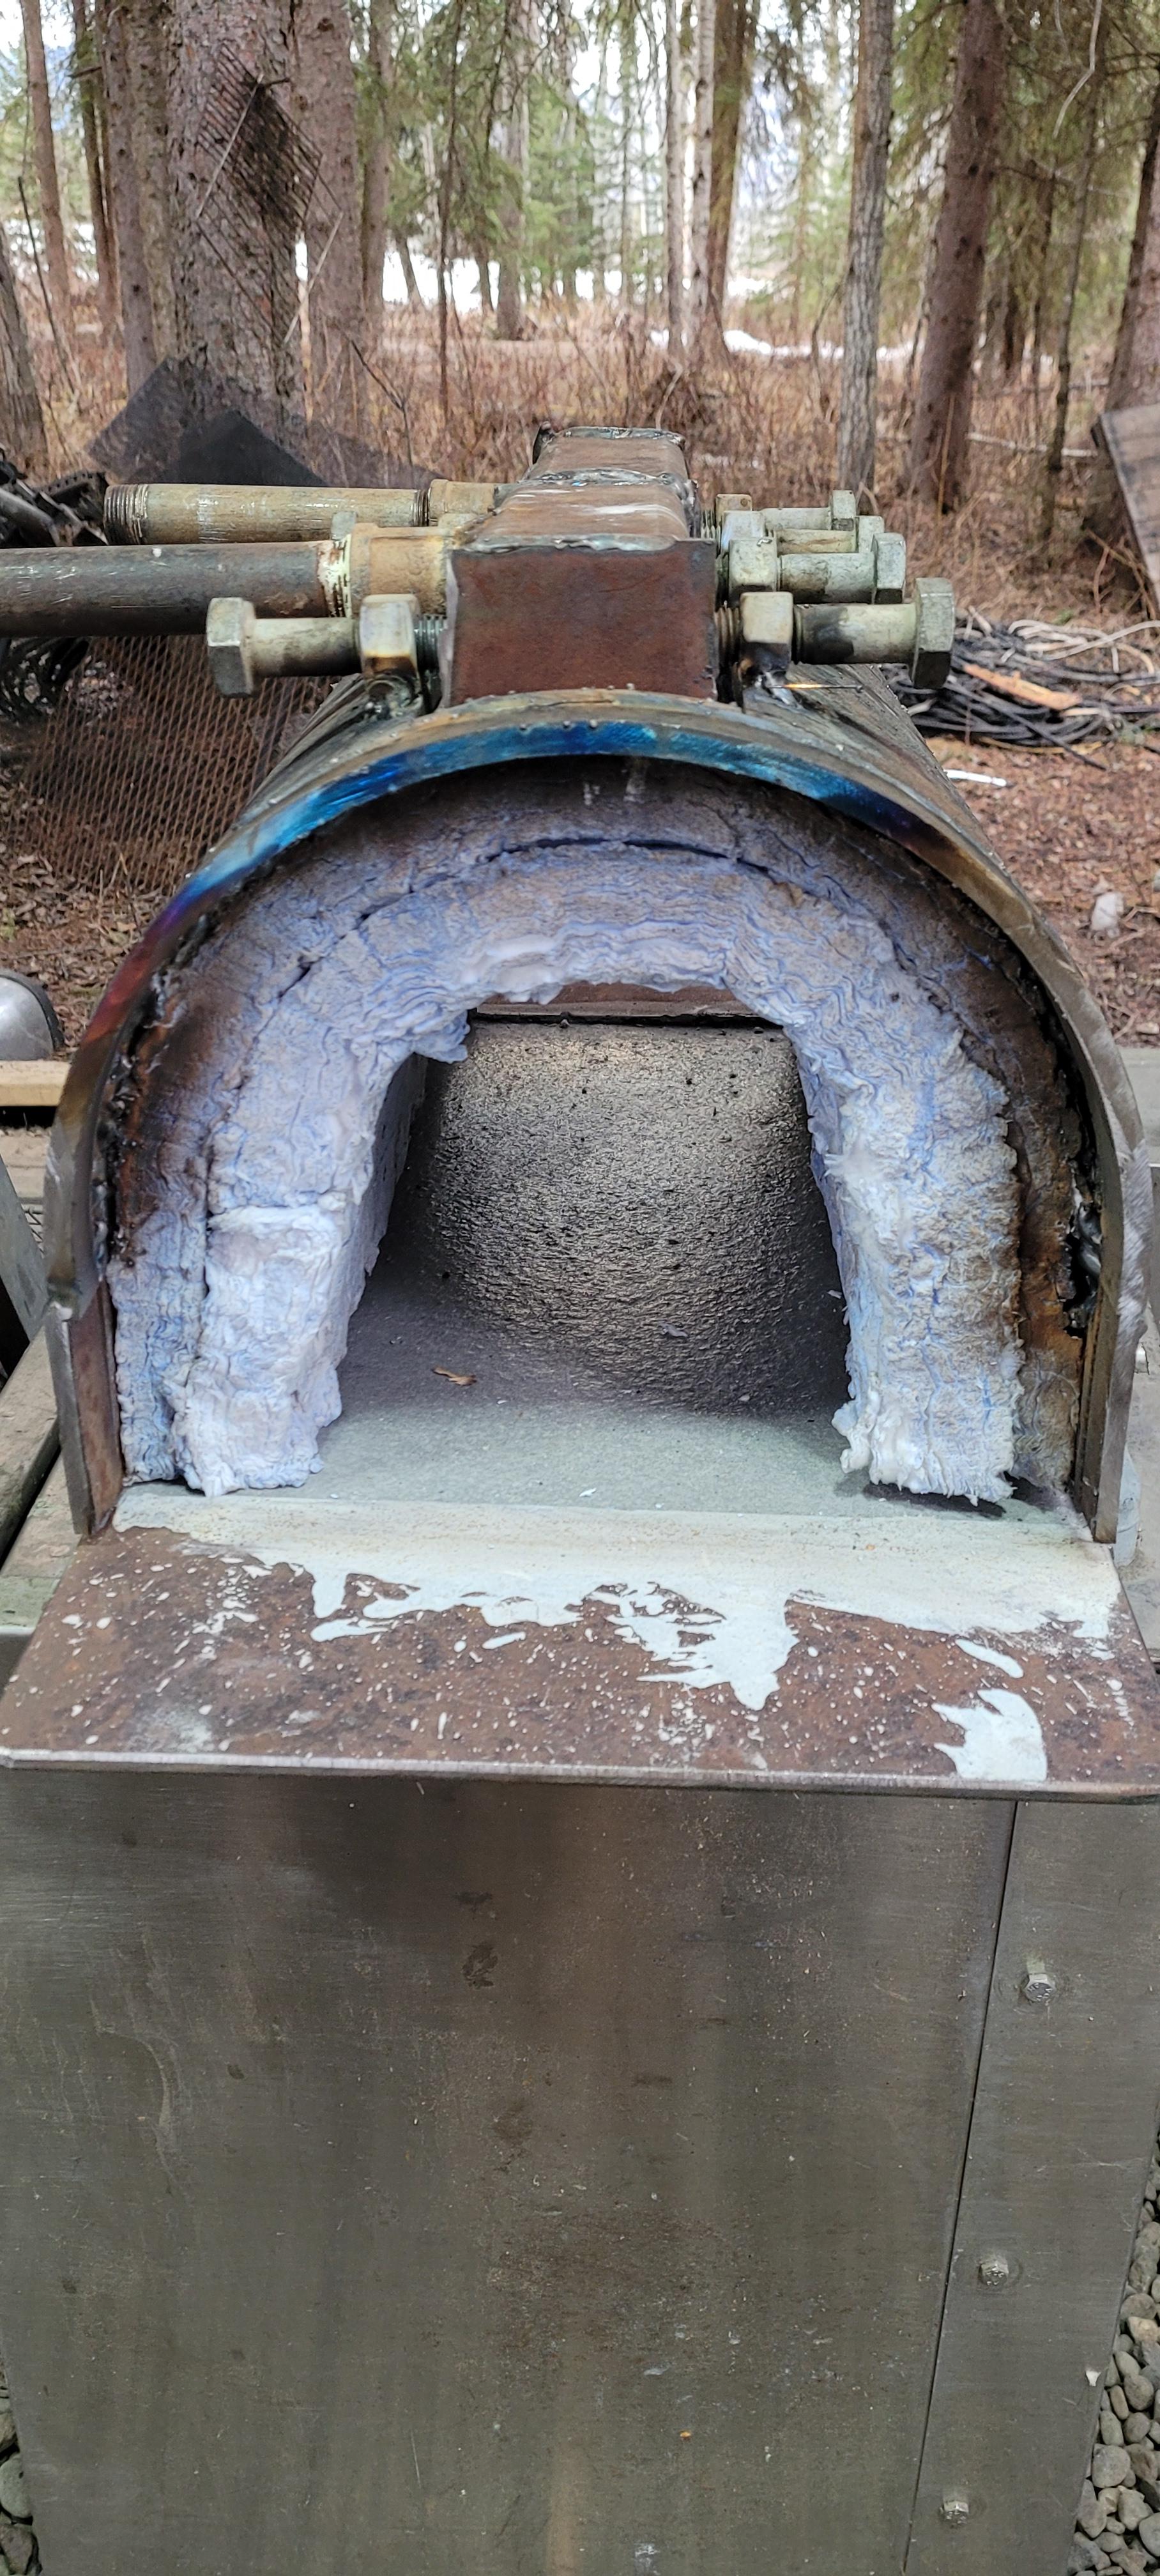


Narb forge build
in Ribbon Burners
Posted
I pulled both burners out until they are even with the end of the kast-o-lite30 and stuffed the stuffins out of it with ceramic blanket . They ran admirably for 3 hours at 6 psi. the same one that always backfires began to at this point and I ran them higher to avoid this and figure out if their was a balance point when it would end and I could run both without the issue. Having some experience with how much one of the burners heats in temp and area I abandoned this experiment when the close burner began to backfire at 8 psi. I suspect the whole forge to be in the 2100 area at this point (my forge design had very little consideration to the placement of the thermocouple and general shape/ growing experience with color leads me to believe that it is quite a bit warmer than the 1900 advertised temps). I have found scale to release much easier above 2100 while 2050 doesn't act the same and these characteristics where present. At this point we were making a hammer and were more focused on this aspect than the testing as any relevant solutions would require total cool down. We ran the forge for 3 more hours running 10 psi on one side and I believe we were getting above 2100 from color, work per hit and based on the pour placement of the thermocouple we judged it to be reading 200 deg low. I am extremely pleased with these results at this point for a couple of reasons. 10 Psi for one burner doesn't freeze the propane tanks nearly as quickly as 2x3/4 .23, the heat is much more even than before desirable for the hammer work and the refresh rate is much quicker obviously due to the higher thermal mass but I feel as though it is cheaper to run and that is where we operate mostly in stock size and temp. I ordered the fireboard don was talking about and will try some new burners with 100 1/8 holes only because I do want the ability to turn it down without backfiring after welding temps. I saw the 3/16 200 plus as well as the 90 -1/8 which has been reported to run well but haven't seen any further clarification of office size/psi or temperature. although I find my self extremely interested in something between the 123 that don has had good results on and pondered a few less holes. I do believe in my original interest that a modified side arm burner might be able to get the most efficiency and adjustment based on the amml burners and the early ron reil burner results. ultimately I find undeniable truth in frostys results that each inducer is not created equally and I figure that it is likely that each casting has a similar potential for differential.